
Overview
The goal here is to serve as a surrogate written strategy guide since everyone seems to be doing videos now instead. It started as a collection of less-obvious tips and tricks gathered from my own playtesting & from the posters on the Somethingawful.com forums, Reddit, and other places around the internet. Spoilers will generally be tagged but some minor ones may slip through. Focus is on gameplay tips, character building, and the like; tips for specific quests are in a separate section at the end.Guide will be expanded, updated, and organized over time; it’s a work in progress so apologies for lack of formatting and fancy graphics etc. I have attempted to verify all information but if an error has slipped through or if there’s something you think should be added or changed, please let me know in the comments.
Tips & tricks
At the very start of the game, it’s probably best to boost “Speech” with both choices, as it’s easier to raise the other prime stats through combat.
You get three auto-saves in the starting village: once at the very start, once when you first talk to your dad, and a third when you help your buds decorate a house.
Get 4 lockpicks from Fritz at the start by talking to Kunesh, losing the fight, then sneaking into his house, finding the locked chest, then talking to Fritz. This locks out some other options for resolving the quest, but gives you four lockpicks in Skallitz, which is enough for a one-Henry crime wave (don’t go to jail, though!)
The trader in the starting town who has her own shop building will purchase stolen goods.
You can choke out Kunesh from behind as many times as you want to raise your stealth skill (C to crouch; approach from behind; F key) without incurring any reputation penalty with anyone or getting the guards after you. Of course, you have to wait for him to wake up to do it again. If you want gear (shield, waffenrock) with Skalitz pattern and colors, you can choke the guards out similarly, but you will be arrested if seen.
While you wait on Kunesh, pick flowers to raise your herbalism; you can sell the herbs to the town merchants for up to a couple hundred Groschen depending on how dedicated you are. Pick 100 Nettles to get a free permanent +2 boost to Vitality, which helps a great deal this early on.
And while you’re picking flowers, run around a lot and hit the Jump key plenty; it’ll help you raise your Vitality.
If you build up too much weight to carry, you can leave extra stuff in the trunk in the kitchen of Henry’s house. It will all still be there after the prologue.
You can save by sleeping in a bed *you own*; this means beds NPCs have told you you can sleep in at plot points, or beds you’ve rented from an Innkeeper. You can sleep in other beds, but it won’t save your game if you do.
Items dropped on the ground will disappear (or be picked up by NPC’s); put things you want to save into permanent containers. Chests near beds you “own,” such as the chest by the bed at the Rattay mill or chests in Inns where you’ve bought a permanent (“for a few days”) bed, are connected and act as a unified stash.
On the haggle interface, the further down you go on the bar the better tfor you, both for selling and buying. Circle at the bottom is the patience meter, which fills up depending on how unreasonable your offer is. Good move is to go low on the bar, let them lower it some, and then back it up to closer to that mark. If you get the Final Offer perk you can be even more audacious.
Get the shovel by the Miller’s wagon outside Rattay. Keep it on you or your horse at all times.
In dialogues, the little open mouth is your “speech” stat, the heart is your “charisma” stat, and the crossed swords run off of Strength. Different groups and different individuals respond differently to each; peasants are generally weaker against Strength, guards weaker against Charisma, and nobles and merchants weaker to speech. In regions where you’re well liked, conversation checks are easier, and vice-versa; dirty clothes, bloody weapons, and the relative severity of your “ask” also play a role — are you a scraggly sneak trying to talk your way out of a murder, or a fine upstanding local hero who was just in the wrong place at the wrong time?
Time passes while you are in the menus; if you want to pause, use the actual pause key.
The best food to carry is “dried” [fruit, mushrooms, meat]: it’ll last waaaay longer than anything else, and is light weight. You have to buy or find the dry stuff, though, you can’t craft it.
If both of your feet are bleeding, sneaking is much faster than walking (and you can’t run anyway). Bleeding nerfs walking speed but not sneaking speed.
Temporary buffs from potions will let you meet thresholds for reading skill books or reducing encumbrance to allow fast travel.
Take care where you walk: stepping in manure or mud may make your clothes dirty much more quickly. [unverified]
If you’re looking for a specific location (armorer, apothecary, etc.) there is an excellent online web map tool here: [link]
Fightin’, Shootin’, and Sneakin’
You can win most 1v1 melee fights, armed and unarmed, by hitting the second mouse button (jab / stab) repeatedly until you run out of stamina, then retreating ibackwards till you regain stamina, then stabbing more.
Clenches are somewhat randomized, but having good stats helps, as does mashing the attack button as much as you can; there’s also a perk under Strength.
Many combat functions (Dodging, “perfect blocks”, ripostes, and “Master Strike” combos) are not unlocked until you are taught them by Captain Bernard, so it’s important to progress the main quest to that point. Once you complete “Ginger in a Pickle,”, Bernard will start hanging out by the Rattay training ring all day; talk to him there and practice till you’re sure you’ve unlocked everything.
The standard blocks Bernard teaches initially are very stamina-draining; it’s better to dodge, if you can. The “perfect” block and riposte he teaches later, however, will not drain stamina, so long as they’re performed correctly. You don’t have to actually wait for the green shield to display in order to “perfect” block — you’ll have slightly more time to react if you keep your eyes on your opponent directly instead, and block when they begin their swing.
If you’re having trouble executing combos:
- try turning down your mouse sensitivity a bit. The game will automatically “set up” the positioning for the next attack in the combo, but slight mouse motions can throw that off, disrupting things. Set it right and you can just click, without mouse motion, to execute the combo.
- Try winning a clinch first to force an opening. Combos can be stopped by “perfect blocks”, dodges, and ripostes, so it helps to throw them around a bit first.
- As above, make sure you’ve trained sufficiently with Bernard to unlock the “Master Strikes.”
Engaging multiple opponents in melee simultaneously could be its own subheading; ideally, it is to be avoided (see Archery and Stealth, below). If you must, though, keep moving, kill weak opponents first to cut their numbers quickly, rush the flanks, and use terrain and choke points to bunch enemies up and block lines of sight so they get in each other’s way and can only attack you one at a time. [www.bookoffiverings.com]
It’s also worth thinking a bit about gear selection. More on this in a separate section (“Weapons and Armor”), below, but briefly:
Roughly speaking, armor can cover four different areas of the body (head, chest, arms, legs) and is made of three kinds of material (cloth, chain, plate). Slashing melee weapons tend to have the highest base damage, followed by piercing attacks, with bludgeons last.
HOWEVER:
- Slashing with your sword works great against enemies in cloth, but is extremely weak against enemies wearing metallic armor.
- Piercing attacks work well against cloth, chain, or weak points, but will bounce off of metal plates.
- It’s not as simple as “I’m wearing plate, therefore I’m immune to slashing”. Enemy models are divided into 30 hitbox zones and the game detects which boxes are protected by which armor layers. Plus, if you swing at the same armor points repeatedly the game will track those points as damaged and let more damage through, so try to focus your attacks on the same weak points (in practice, this usually means try to hit them in the face, over and over again.)
- The combat system takes into consideration the weight of the weapons, and if you have the higher ground than the enemy your attacks will be stronger.
TL,DR version: Use slashing and piercing attacks against cloth, piercing and bludgeoning against chain or weak points in plate, and bludgeoning attacks (maces, warhammers) against plate; conserve your stamina; hit them in the face; and try to attack from high ground.
With the bow, the point of aim is (roughly) the center of the screen.
(See yellow dot, right). 
Remember that you are not supposed to hold the draw. If you don’t adjust the aim, your bow will naturally be back at the original spot exactly when the draw is finished. If you release right then, it flies where you originally aimed. After the draw, as you hold (especially if your skills are low) it will sway left and right, not vertically; keep this in mind and just wait for the sway to hit the center again and release. With archery, patience is a virtue. You can always cancel the shot and reset if you lose your timing or position.
You will also need to account for “drop”, especially on weaker bows — the arrows will drop a bit in flight, more than a real arrow would. This means that (for example) in the initial archery training at Rattay, you want your point of aim to be about where the three legs of the target stand intersect, above the target, in order to hit the target in the center.
Hit “c” to crouch into stealth mode; try to get behind the enemy and gank them by hitting “F.”. Straightforward-ish, right?
The game has much deeper stealth mechanics than it appears to. The guards have moderately long sight cones and can hear sound near them. All your gear has “Visibility,” “Conspicuousness”, and “Noise” stats, which contribute to a general sum number on your character sheet. “Visibility” is how likely you are to be seen; “Conspicuousness” is how likely the AI is to react to seeing you; “Noise” controls how likely they are to hear you. In order to sneak up on someone from behind, you generally have to be pretty quiet; in order to sneak past someone in front of their vision cone, you have to be low-visibility; in order to get away with being seen somewhere you shouldn’t be, you need to be inconspicuous. Clothing denoted as “dark” or “black” is generally less visibile and conspicuous than brighter-colored clothes. Only the top layer of clothing counts for Visibility and Conspicuousness — in proportion to how much each piece shows under other layers — but all armor contributes to Noise.[For more on this, see the Gear section, below].
On the other hand, the guards are typical RPG guards, and not too bright, and will spend a bunch of time going “what’s that?” when they hear a body dropping but don’t actually see their buddy getting ganked. It helps to keep moving: if you shoot from stealth, they may follow where the arrow came from, but they won’t necessarily spread out and look around that spot.
TL, DR version: If you want to sneak around, wear low-visibility, inconspicuous, quiet clothes, take off your jewelry, and don’t let any shiny metal show on your character model. Use terrain and buildings to hide behind, and try to get behind the target quietly. If you’re too noisy, they’ll turn and see you.
You can deal with dogs by dropping fresh (not dried) meat on the ground. If you really want to get sneaky, drug the meat with a Lullaby potion.
When trying to take out camps with stealth, dagger kills will usually wake or alert others nearby; perfect gear and skill can change what “nearby” means, though. You can whittle away lone patrollers, or use long-distance archery sniping and move before you’re spotted; arrows can also distract. If you sneak into the camp and poison their food and wine, the best time is right before they all wake, so they all eat at once and aren’t spooked by the bodies.
Character Building: Stats & “Combat” Skills
Each stat and skill has a different selection of perks and unlocks perk slots at different rates. Some skills have as many perks as there are slots; others have fewer total slots than perks, so make sure you aren’t locking yourself out of anything you really want to get later when you make your choices. Generally, though, it’s more a matter of which order you’re picking the perks in, not which perks you’re picking. I suggest looking for perks that don’t have tradeoffs or downsides, so Henry is good at everything. The trade-off perks tend to be more about roleplaying than anything else.
If you find trainers and have the cash, you can pay to purchase one point of training per “tier” per skill (the tiers being 1-4, 5-9, 10-14, then one last time after 15). There are also scattered skill books, also in tiers per skill. Technically, both training and skill books don’t actually give you a point of experience though — they give you experience equivalent to a point at that tier, so low-tier training when you’re high-skill may not give you enough of a boost for a full point.
The best way to train Strength, Agility, and Vitality is via practice-sword sessions with Bernard at the fighting ring in Rattay, which unlocks after the “Ginger in a Pickle” main quest; do this early and often to unlock some special techniques. Jumping repeatedly will also raise Vitality (seriously), and you can raise Speech by haggling.
As to Perk selection:
Every second level”, so ten slots, to choose between 23 perks; this isn’t as bad as it seems though as most are not worth taking except for roleplaying purposes. The “First Aid” tiers give worthwhile conversation bonuses, and “Insomniac” is a straight upgrade with no downside. “Contemplative” at 12th level may seem underwhelming but is a massive gameplay improvement becuase it lets you wait and read passing time with no penalty or loss of energy.The “Scout” perks are also decent choices as they have limited utility but no downside; they’ll let you start Fast Travel encounters from further away.
Be especially careful taking the “+X to one thing, -X to another” perks; all stats hard cap at 20, so at endgame with maxed stats, all such perks are pure penalties, with no benefit.
ten perk slots, eleven perks. The problem is that most of them are useful so it’s more a matter of deciding which to skip; the answer is probably “Gravedigger.” In terms of priorities, “Stronghold” and “Tight Grip” are good for keeping your stamina up in combat, and the “Mule” buffs are good for carrying more gear and wearing heavier armor. “Boar” and “Clench Master” can be useful for breaking open the defensive guards of more skilled opponents, but are a bit situational. “Heavy Swing” is one to get late, after you’ve raised your Vitality a great deal and can afford the penalty (or to skip if you don’t use Strength-based weapons).
4 perk slots, 5 perks, (plus Dodger, which is free from training with Bernard). Most of these are nothing to write home about anyway. That said, “Fast Striker” is better than it seems if you’re using poisoned weapons or “Chain Strikes” under Warfare. “Lucky Throw” can shift the odds at Farkle dramatically, if that’s a thing you care about.
The “Light Armor” perk doesn’t just prohibit armor that explicitly says “plate” ; the perk will also turn off if you’re wearing gauntlets (leather and hunter’s gloves are ok), brigandine in your arm or leg plate slots, or, despite the icon showing a kettle hat, any armored helm at all. You can, oddly, wear wear “dark” brigandine in your “body plate” slot. See screenshot to right for the heaviest storebought gear you can wear in each slot while preserving the perk.
7 perk slots, 9 perks, so choose two to skip. One option is to skip both balanced diet and dustbin as they’re only marginally useful; Thick Blood, Berserk, Blood Rush, Last Gasp, and Revenant are all very useful, though, so it’s worth saving perk slots until you hit rank 12, so you can grab all the later parts of the tree relatively early. You will want to choose either Marathon or Sprint; generally Sprinter is the better choice, especially if you take “seven mile boots” under Maintenance, but some builds & players may prefer Marathon.
5 perk slots, 7 perks; “Final Offer” and “Empathetic” are both extremely solid choices. I’d suggest skipping “highborn” and “lowborn” and taking the rest.
The best way to raise each of these (except Bow) is also by practicing with Bernard in Rattay.
5 perk slots, 5 perks (“perfect block” is free).
Trainer: Captain Robard in Talmberg, Captain Bernard in Rattay
Bailman and Feint are free with traing, so 5 slots, six perks. Perhaps skip “furious” as it references your *maximum* stamina, i.e., how injured you are! Alternately, skip “rusty edge”, as it relies on maintaining your equipment poorly. The “Bloodletter” (increased bleed chance) and “Sadist” (Strength buff when you Bleed an enemy) have a great interaction with “Serrated Edge” under Maintenance. “Chain Strikes” works well with “Fast Striker” under Agility; the chain will be broken if you take damage.
You can’t train Warfare directly — no books or trainers — but raising weapon skills will raise it also.
Three perks, three slots; they’re all just combo moves with the axe so there’s no clear priority.
Trainer: Andrew at Inn in the Glade, Captain Bernard in Rattay
No perks at all for bow.
Bow skill is hard to raise without getting in some kind of trouble; shooting at static archery targets by itself will not raise your skill much, though you can score minor gains from winning archery contests. The “Chumps” archery game in Ledetchko is one good way to raise skill, since you shoot at moving targets, but it involves a lot of long range shooting so can be challenging without a longbow. Alternatively, you can either sneak up on rabbits — be Vewy Vewy Quiet and take off your armor! — and dab them at close range, which will also raise Hunting and Stealth, or you can shoot at cows or other farm animals for easy skill-ups, but may run into legal problems if you’re caught.
You *can* retrieve missed arrows from the ground if you can find them again (and if they don’t break). The “Colored Arrow” mod from the Nexus is very useful for this.
Trainer: Hunter Berthold in Rattay, Nicholas in Talmberg
like Axe, three perks, three slots; they’re also just combo moves so there’s no clear priority.
Trainer: Captain Robard in Talmberg, Captain Bernard in Rattay
9 perks, 8 slots; they’re all just combo moves, but there is a relevant choice here, because some of the perks are for longsword combo moves, others are for short swords. Most of the highest-stat weapons in the game are Longswords, Longswords are very reliant on combos to break open enemy guards, and longsword combos won’t work if you’re carrying a shield, so this is a real choice. If you prefer to go sword-and-board though, and there is at least one very effective shortsword, you might want to pick the one-handed sword combos.
Alternatively, because stabbing attacks are so much more effective, focus on the combos that involve multiple stabs (left-right-stab-stab and left/down – stab -stab) and just grab those two for both short and long swords.
Trainer: Captain Robard in Talmberg, Captain Bernard in Rattay
has no perks.
Trainer: Fritz at Sasau Inn (or other locations, quest dependent); Punch in Sasau Town (by fighting ring)
Character Building: Non-Combat Skills & Perks
8 perk slots, 9 perks.
The trick to raising alchemy is realizing that you get one free error, and all timing with the heat and the fire counts as “one error,” so for any recipe, you can skip that step and get everything else right, and make a successful potion. So, for example, to make Savior Schnapps, you can just grind the belladonna, throw it in the wine with the nettles, and decant, and you have a successful potion. The “Trial and Error” perk gives you an extra error on top of that, letting you basically throw everything in the cauldron and decant.
New formulae give slightly more experience than stuff you’ve made before.
The “Routine” perks are also well worth it once you have the requisite skill; take them both and you’ll find yourself at max Alchemy skill very, very quickly.
You *can* make potions you have not bought the recipe for, by experimentation or looking up the recipes online. The Marigold potion is extremely useful for healing. NightHawk and Padfoot are essential for stealth play. Don’t forget you can poison weapons, including arrows; “Bane” poison is very quickly lethal, “Dollmaker” will prevent them from running and deplete stamina (I generally use Bane on my arrows and Dollmaker on my sword).
Good sources of recipes: You can learn the “Artemisia” and “Lullaby” potions during the “Hands of God” quest in Sasau (healing the Skalitz refugees). . Herbalist Kunhuta north of Ledetchko sells Padfoot potion, useful for raising lockpicking 5 points to meet the 15-skill threshold for opening merchant shop inventory chests (including her own).
Search for “Woodland Gardens” on the map to find good sources of rare herbs: [link]
Trainers: Rattay Alchemist, Sasau Charlatan, Brother Nicodemus in Sasau
6 perk slots, 9 perks.
This helps a surprising amount as most potions are alcohol based. You can get a pretty heavy skill boost by following the main quest and drinking with the Priest in Uzhitz
Digestive potions help you swallow more. If you try to “grind up” your drinking, be aware that the game models a delay for alcohol hitting your system, so chugging too much too fast is a good way to fall off your horse into the Rattay moat and wake up a day later on top of a compost pile in Talmberg. If you black out, you’ll wake up in a semi-randomized location; most are neutral but some are in otherwise-inaccessible spots.
Drink too much too often and you’ll get a long-term “alcoholism” debuff, which will only go away if you stop drinking for a long time (potions won’t help).
It is unclear exactly how the various perks interact with potions and whether or not the base liquid of the potion (wine, spirits, etc) matters.
Trainer: ___?
4 perks 4 slots, so you can take them all.
Grinding Herbalism early on will give you a free “Resistance” perk for +2 Vitality permanently.
The “Flower Power” perk is quite useful — Charisma is an *average* of your visible gear, so a buff that adds to that average is equivalent to a lot of separate gear improvements (you will need to hold 30 “flower” herbs in inventory). The “Leg Day” perk is marginally useful if you’re grinding Herbalism (going from 10 to 15 Herbalism with the perk enabled will take you from 1 to 4 strength, roughly).
Trainer: “Villager” herbalist woman west of Neuhof; Herbalist Kunhuta north of Ledetchko
Horsemanship: 6 perk slots, 8 perks: choose two to skip.
Trainer: Vashek at Uzhitz Stables
8 perk slots, 9 perks.
Most of these perks are good, especially if you get into poaching (which I recommend as it’s a good way to raise Bow skill while also making money).
“Forester” perk is especially powerful for stealth play and should be taken as soon as it is available.The only one I’d really avoid is the “Steak Tartare” perk — why bother with raw meat?
Best way to raise this is to sneak around Vewy Vewy quietly and hunt rabbits at close range. Once you have higher bow skill and better gear, you can make a large amount of money very quickly hunting deer on horseback.
Trainer: Rattay Huntsman, Talmberg Huntsman
7 perk slots, 8 perks. “Lasting Lockpicks” is essentially a must-pick if you plan on using lockpicks at all; “silent fiddling” is also very useful if you aren’t savescumming. “Luck of the drunk” can significantly boost your skill but is a pain to manage.
Trainer: Black Lukesh in Talmberg, Miller Peshek in Rattay
7 perks, 8 slots. The problem is all of them are great. “Stuffing” is a must pick for stealth builds. The “Serrated Edge” perk (15% increased bleeding chance) interacts well with the “Bloodletter” (increased bleed chance) and “Sadist” (Strength buff when you Bleed an enemy) under Warfare.
“Seven Mile Boots” only works with actual boots or shoes, i.e., items that only go in the boot slot; items like plate chausses that take both the leg plate and boot slots do not benefit from the perk. If you plan on going full plate always, skip it; otherwise, it’s very good.
Alternatively, I’d suggest skipping either “Fragrance” because it’s situational, or “Saville Row” because it functions off of clothes, and most charisma comes from armor. Still, both of those can be great picks depending on your build.
For the grindstone minigame, hold the blade at a 45 degree angle or less; sparks good, smoke bad. Sharpen every bladed weapon you loot to raise the skill and increase sale value. You can even grind swords badly to damage them then regrind new edges on them, over and over again, to literally grind experience in the skill. Carry “small __ kits” and get them out after every fight to keep gear in tiptop shape. You can also damage your boots slightly and repair them slightly over and over again by jumping from a slight height.
Trainer: Rattay Armorer, Master Ota in Sausau (the Armorer)
10 perks, 11 perk slots. The initial number is buying time to search, then you have to move over, select the items you’re taking, move the cursor back to the exit, and exit, within that initial countdown you established before.
Best way to practice is on sleeping or drunk NPCs, probably just after you’ve saved the game. Padfoot potions help.
There are lots of little side quests you can do that give increased pickpocket skill as a reward — the old ♥♥♥♥♥ at the inn in the glade, the vagabond in rattay, etc.
Trainer: Rattay Miller, Sasau Charlatan, Black Lukesh in Talmberg
10 perks, 9 slots.
You want to unlock this as early as you can so that you can read skill books. Always sit down to read, as it gives a skill bonus, and read non-skill books first (doing so will raise your Reading skill, which will make skill books read faster).
As to perks, the question is which to skip? The answer –probably Swot because you can always sit down and Cushion is better.
Trainer: Scribe in Uzhitz (initial only), ___ ?
8 perk slots, 8 perks (plus free Takedown).
Raise this by lockpicking and performing takedowns from behind without being seen. The ‘Stealth Kill” perk is useful, but make sure to keep your dagger on your person! (You retain the option of a knockout, but knockouts don’t last very long).
Trainer: Matthew (post prologue) at Uzhitz Inn or other locations (quest dependent); Miller Simon east of Sasau & Southeast of Samopesh
Weapons & Armor
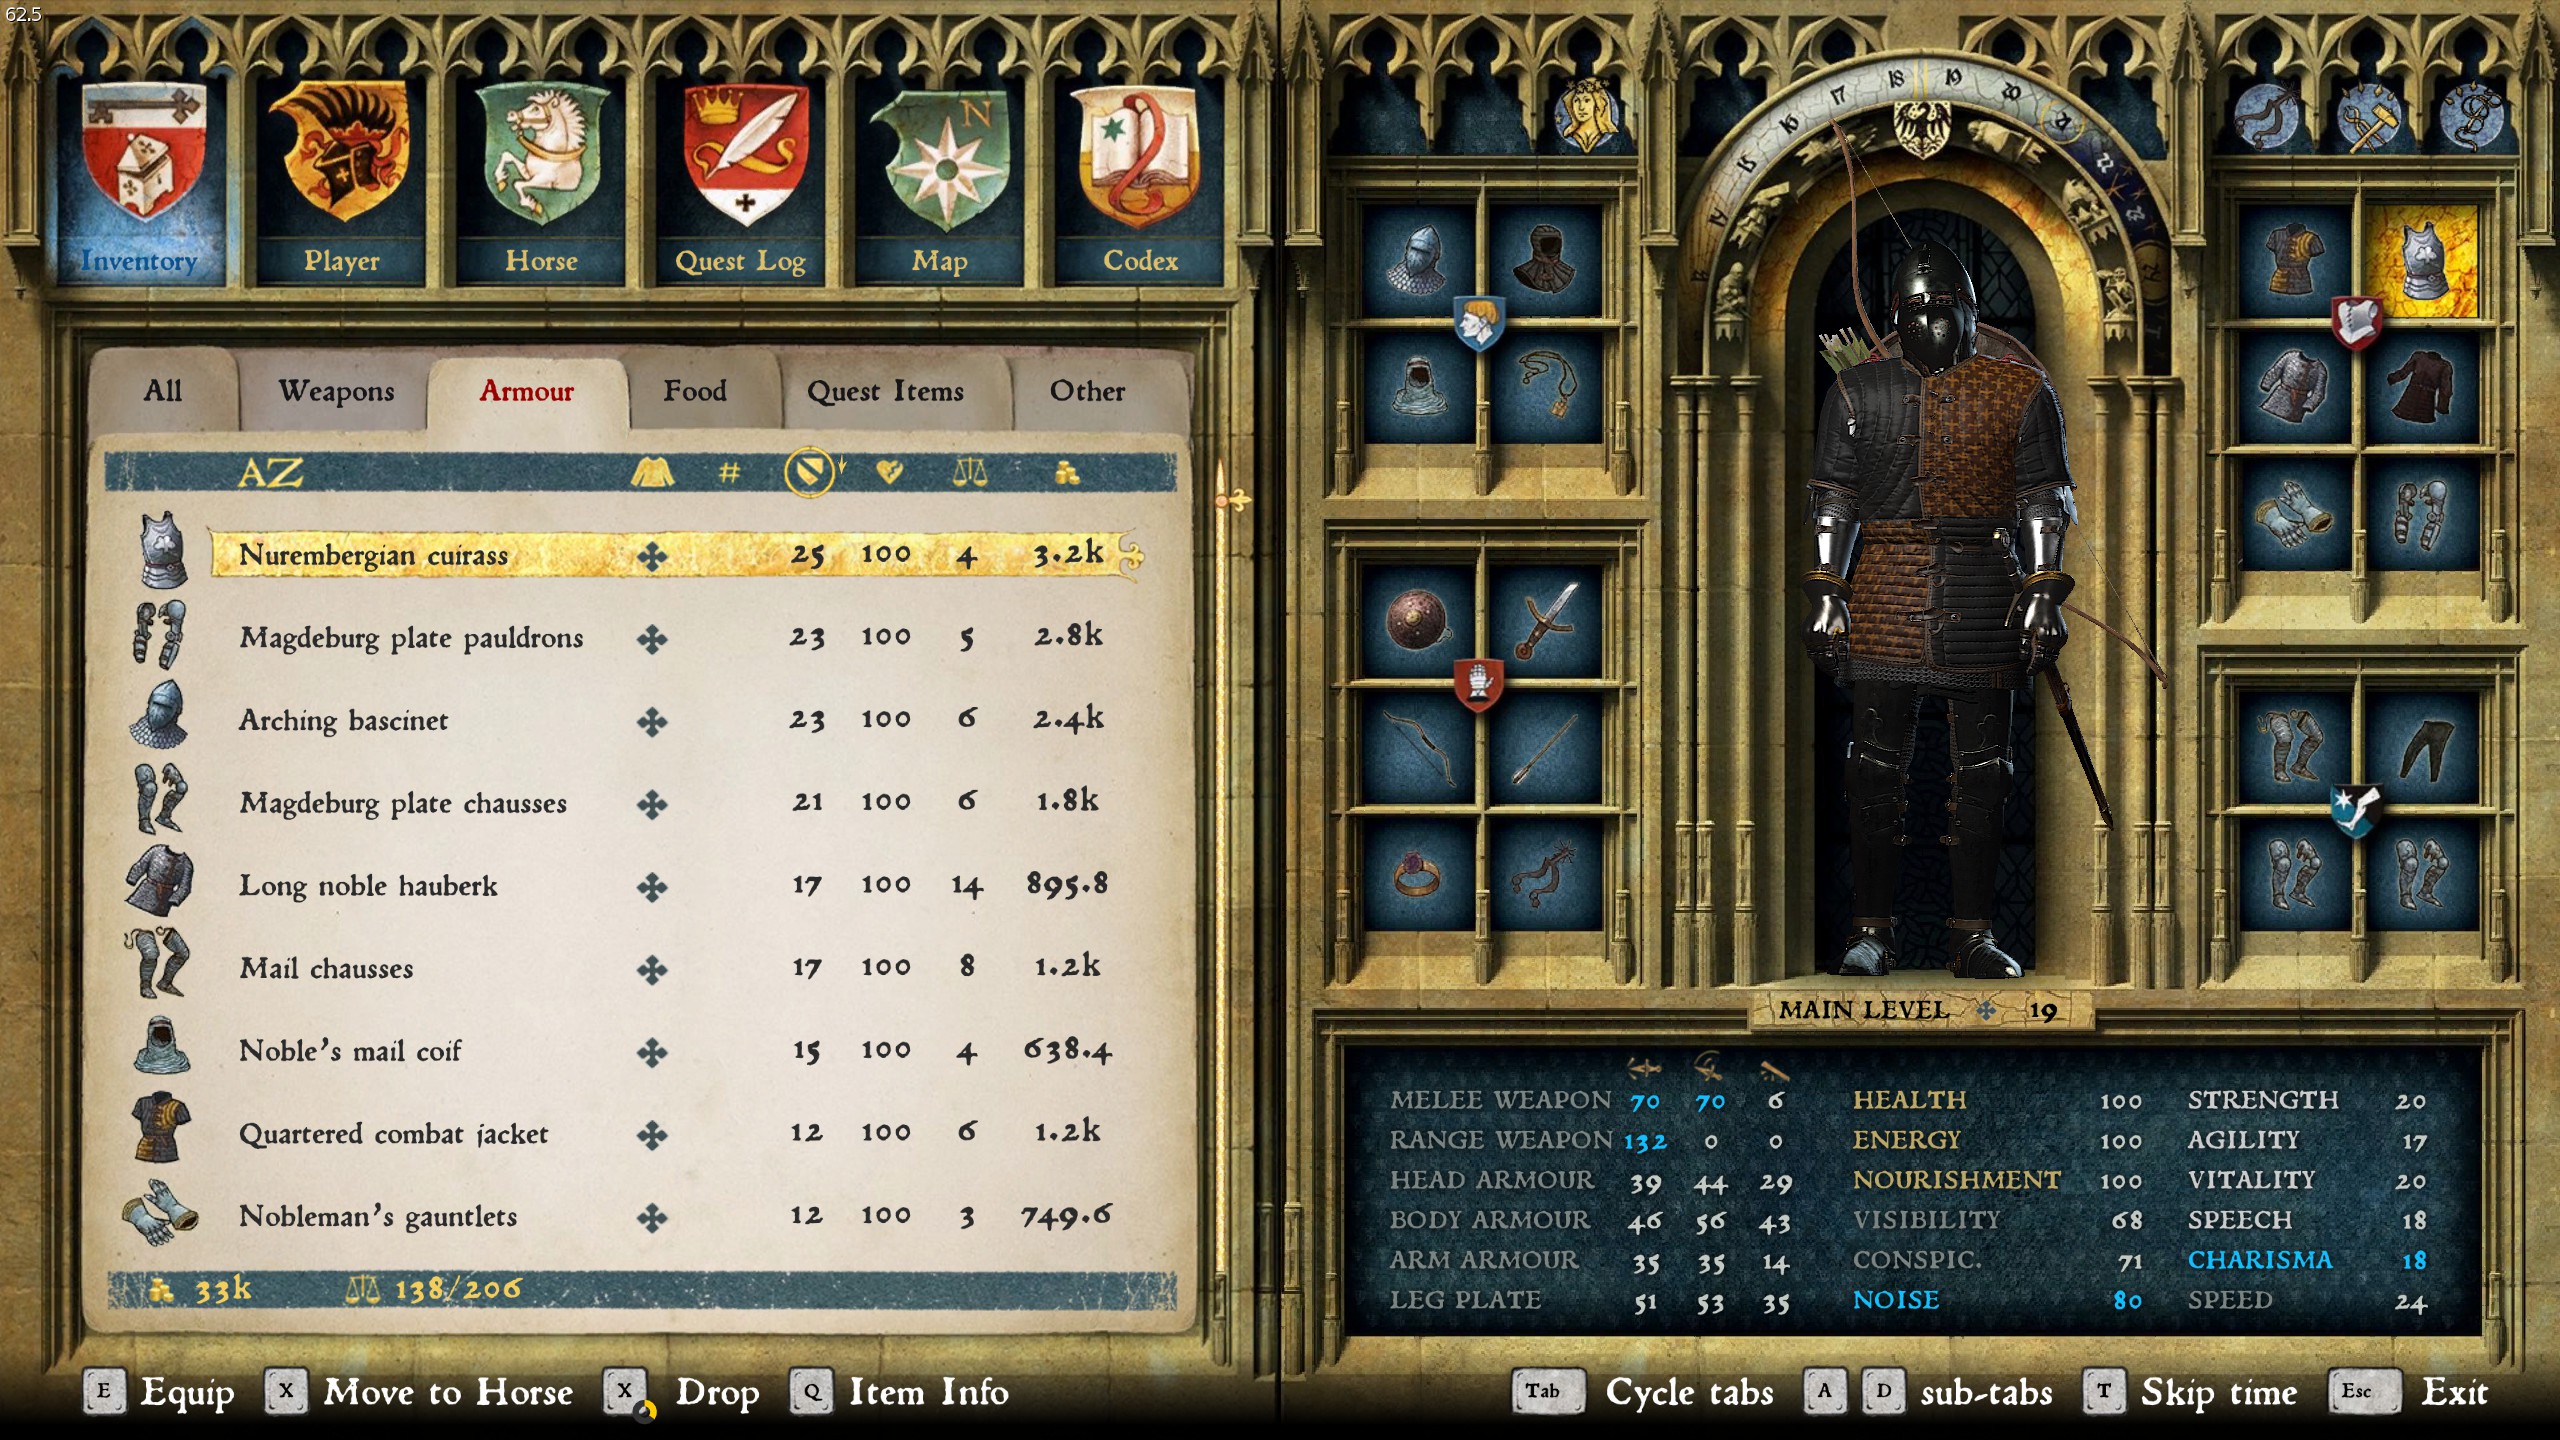
You can rotate the view of your character in the Inventory screen with the K and L buttons.
Also in the inventory screen, you can compare found gear against what you’re currently wearing by clicking on it once in the equipment list; then look at the numbers in the box on the bottom right, if the relevant stats (i.e., defense, damage, etc.) are in red, the item is worse than your current; if in blue, item is better than your currently equipped.
Using a long sword with a shield will prevent you from using long sword combos; unlike other weapons, long sword combo moves require two hands.
For more detailed information on weapons and armor, sorted by slot and type, there is a decent wiki here: [link]
Melee weapon choice is a matter of playstyle and personal preference more than anything else; Longswords are for combos and power moves, maces and bludgeons for button-mashing through enemy defenses, shortswords a versatile compromise option.
A few suggested options from the Rattay and Sasau Weaponsmith shops:
- The “Piercer” longsword and “Needle” shortsword are both very strong early and midgame choices due to their very high stabbing damage, which is what you need to get through tough enemy armor. The “Razor” shortsword is higher priced, but is almost as effective a stabbing weapon as “Needle,” while also having extremely high slashing damage — better than almost all longswords!
- For bludgeons, get the “Captain’s” mace as soon as you can use it, then upgrade to the “bailiff’s” and then finally the “Ceremonial” mace; although they have similar damage values, the “Ceremonial” mace is [at least allegedly] more effective than the “Bailiff’s” due to the greater weight of the weapon (hence the higher cost and strength requirement).
- With axes it’s a harder call; you may want to just use whatever you find. The “Metal plated battle axe” is the highest-damage axe you can purchase in the shop, but there are two separate axe types with that same name, with different graphics; one has a metal spike and can do moderate piercing damage also, while the other has no spike and cannot pierce but has a slightly stronger slash and bludgeon.
Theoretically, polearms are also an option, and a thrusting polearm can be murderous, but (perhaps for balance reasons) they cannot be stored and must be carried in your hands at all times. [Technically, the game does track a “polearm” skill, but it’s kept hidden from the player].
There are some weapons superior to anything you’ll find in the shops — for the most part these are either found by chasing treasure maps or as quest rewards. (See “Endgame Gear [Spoilers]”, below.)
Longbows are better than Hunting are better than Villager’s;
For Longbows, Yew beats Ash beats Elm;
For Villager bows, Yew beats Elm beats Hazel beats Dogwood beats Ash.
That’s damage per shot, not per second, though. Yew bows also have
What I’ve learned about archery (tips and data) from kingdomcome
so in damage-per-second terms an Elm longbow is superior, especially if you’re using poison.Use “better hunting” arrows for hunting; for combat, the best arrows are generally either “better piercing” or “better long distance” arrows, depending on the target(s).
You can purchase longbows and “better” quality arrows from the Rattay and Talmberg huntsmen.
Cuman bows vary a bit but if you can find one with damage equivalent to a longbow (72+) it may be a superior choice; some players report faster draw times.
The game tracks more hit locations than there are armor slots, and takes account of layering in each of those locations. A “long” hauberk that covers your arms and chest gives protection in more places than one that just covers your torso (and thus is also more visible and conspicuous). Stacking a breastplate on top gives more protection over the torso, but you’re adding another layer, not covering a different slot.
When picking armor, prioritize protecting the torso; enemies using most weapons rarely strike the legs unless below you (such as while you’re on a horse), and rarely strike the head unless significantly above you. Polearms and longswords have longer reach and will hit you all over, though.
If your armor is too heavy (by weight) it will lower your Speed. This has a few counterintuitive implications:
- Most quests don’t involve that much unexpected fighting, and many clothing items have high Charisma values. Not only will you get around faster in lighter clothing, but it may often be more effective;
- If you need to catch someone, it may help to strip down; and
- High-end plate is lighter than a lot of midgame armors, and thus may allow for faster movement.
When it’s time to throw down, though, armor up. High-end plate armor will make you nigh-invulnerable until you are worn down. With quality plate, at least initially, you don’t need to bother with parrying or dodging, you can just take the hits and the worst thing that happens will be a cool “thunk” noise as enemy weapons bounce off your head. Work on your “Maintenance” skill if you go that route, though, because armor only works when it’s maintained; if you don’t repair the holes, they stay there.
In any situation where you need to wear plate armor, you will generally want a helmet with a faceplate of some kind; there’s a tradeoff here though as the most protective ones really limit your field of view. The “Italian Bascinet” is the best protection you can buy, and the “Grande Bascinet” the second best, but they heavily restrict your visition. The “Bascinet with Klappvisor” and “Bascinet with Bretache” give less protection, but only minimally restrict your view,which some may find preferable.
(For exact gear locations, and help finding armor better than what you can buy, again see “Endgame Gear [Spoilers]”, below.)
Stealth Gear
If you want stealth, you have to compromise something else — usually protection, and sometimes also charisma. Henry’s naked base Conspicuousness and Visibility are both 50, so anything below that is an improvement in stealth terms, but most metallic armors significantly raise Noise, so it’s very hard to put together a decent stealth suit that keeps all three low and still retains significant protection. Plus, most stealth gear is much less charismatic than full shining plate, so wearing a full stealth outfit will drop your Charisma significantly — especially since the first thing you’ll want to to do increase stealth is to remove your ring, necklace, and spurs!


The more important set of choices is the outer layer, because the rest of your gear will layer under it; the stealthier the outer layer, the more armor you can get away with under it. Depending on what you can find, the “black hood” or “brown hood” and long or short “dark waffenrock” are good choices (and perhaps also the hard-to find “black combat jacket,” which gives less pure stealth than the best “Black Hood,” but adds significantly more protection).


In the end, a little flexibility may be best; as in the two screenshots to the right, a moderately strong stealth armor setup can quickly become almost supernaturally stealthy just by removing the hauberk, spurs, and jewelry.
Horsey Knowledge:
You probably want to upgrade your horses’ gear before upgrading your horse; the Noble saddle with 4 saddlebags will make Pebbles run as fast as Pegasus, just from the lighter-weight saddle, plus you’ll carry more.
Drive carefully: you actually *can* damage and in some cases even kill NPCs just by running over them with your horse; the guards will respond as if you’d stabbed them.
Best horse choices:
Warhorse Jenda from Merhojed — 34 speed, 321 capacity, 17 courage, 450 Stamina; (Overall best horse stats); (minor penalty to “mounted stealth”; possibly [unverified] makes you need a bath more quickly); (easter egg: see
This is my last and very sad selfie with Jenda the #WarhorseDog who is no more. Good bye buddy. RIP. pic.twitter.com/nNTtdlEzTA
— Daniel Vávra ⚔ (@DanielVavra) May 18, 2016
)
Pegasus from Uzhitz – 35 speed, 216 capacity, 15 courage, 310 stamina; (Fastest Horse)
Al-Buraq from Neuhof — Speed 33, 302 capacity, Courage 15, Stamina 410; (2nd Best overall; no penalties)
Each horse has slightly different stats so there are lots of different choices based on exactly what you want. Generally speaking, though:
- Speed is the most important statistic; gotta go fast !
- Carrying capacity is convenient but ultimately just a matter of inventory management; you can always load yourself up as much as you want, then ride the horse;
- Courage helps but can be adjusted for (bridles, various perks, horsemanship, etc) and caps at 20;
- You want a baseline of good stamina but most of the top-end horses have far more than you’ll ever need — even Sleipnir, with a relatively modest 250 Stamina, can gallop almost the entire way from Uzhitz to Rattay without stopping, and you will become exhausted long before Jenda or Al-Buraq does no matter where you’re going.
The in game “inspect horse” comparison tool won’t always give you good info, though, because it compares the horse you’re inspecting against your current horse including all of your current horse gear, which will throw off the comparison.
links to a google docs chart [docs.google.com] ranking the top twenty different horse options mathematically in comparison with Pebbles (who honestly isn’t that bad all things considered).
If you decide to switch horses later (maybe Jenda was just too stinky), your old horse returns to the original stable you bought them from, so you can return there to repurchase it if you change your mind. (You cannot repurchase Pebbles; presumably, she goes to live on a farm, in the country).
The top-end horse gear is all sold at Neuhof.
Spurs give a Horsemanship skill buff in proportion to their teir (the cheapest gives +1; Gold gives +5, in addition to the other bonuses). This bonus won’t allow you to unlock early perks, but will allow you to read higher-tier Horsemanship skill books.
The “Noble” saddle is the lightest sold at any stable, so will reduce your horse travel speed the least. “Military” horseshoes will give a speed bonus when galloping. “Golden” spurs give the highest Charisma bonus.
Caparisons look cool and give some minor body armor protection to your horse, but also have a very small impact on speed (small enough that you may not even notice it on Pebbles). Different caparisons have different stats; generally speaking, with higher protection comes higher weight and thus more reduced speed.
There is some barding (i.e., horse armor for your horse to wear) on a dead horse in a difficult to reach spot at the bottom of a cliff east of Ledetchko; it looks very cool, and gives some protection, but will also reduce your horse’s speed, so stacking this armor with a heavy caparison can add up to a non-trivial speed penalty.
If you want that fancy caparison that’s on Hans Capon’s horse, run the quest to find Pie at the Uzhitz stables..; If you want a free Noble Saddle / 4 Saddlebags, Talk to Zora after the main quest at Neuhof is resolved and run the quest she gives you.
You can find screenshots of what all the different caparisons look like in my public screenshots, here: [link]
It is possible, and quite effective once you get the hang of it, to fight and hunt from horseback.
Saddles can be repaired at the Cobbler or with a Cobbler’s Kit; (same for the You can repair the “Chanfron and Criniere”).
Caparison is fixed with Tailor Kit or at Tailors.
Blacksmith kit or Blacksmith will fix horseshoes.
Makin’ Money (Work in Progress)
This section could easily expand to include most of the game, so it’s more brief outline than anything else.
You can make a ton of money in a few ways but most (apart from questing) aren’t “legal”; it’s a hard knock life for a peasant in 1403 Bohemia.
that isn’t locked down and watched.
You’ll need to buy lockpicks and raise your lockpicking skill to really be an efficient robber, as most valuable goods are behind locks. You’ll also need stealth and a certain degree of situational awareness — unlike other stealth games, there’s no radar showing you when that guard is going to turn the corner and spot you fiddling with that lock. If you are seen — and it will not always be immediately obvious that you were, as unarmed NPCs may run away as soon as they see a crime happening — you can face major reputation hits, which will hurt shop prices and NPC reactions..
Once you’ve got some loot, you’ll need to sell it; you’ll need to find a “fence” who will buy stolen goods, such as the “Trader” with an indoor shop in the starting village, or the Miller in Rattay. Ordinary merchants will sometimes accept stolen goods too — the further away from where it was stolen, the more likely (horse traders often make reliable fences for this reason) — but usually at a discount.
If you , , , find . . . something you want to keep long term, you’ll want to remove the “stolen” flag from it. You can launder stolen goods by selling them to a trader that will accept them and then buying them back, but you will lose money on the transaction (so steal extra stuff to make up the difference). Alternatively, store items in a chest for a few days and the red “stolen” flag will often disappear, especially for lower value items.
All merchants have a locked chest containing their shop inventory, usually in the back of the shop, which requires a minimum Lockpicking skil of 15 to open — but a Padfoot potion will raise your skill by five!
Traders that reliably accept stolen goods are vulnerable to a few tricks. You can sell their own inventories back to them for a money loop, or buy everything they have then steal your money back (avoiding the “Stolen” tag, as Groschen are never tagged “stolen.”).
Alternatively, once you can reliably crack merchant chests, you can have them sell for you on consignment, and get around the limitations of their groschen limit. (This trick works especially well with the Millers, who will sell everything). Just take everything you want to sell, open the merchant’s shop inventory chest, dump it all in there. Then wait at least a day of game time and come back later. The merchant will have sold all of it off — and you can just loot the total Groschen right out of their shop inventory. (Credit for this idea
How to make Groschen when you have high lockpicking. from kingdomcome
.)
Poaching is harder than robbing but a good source of cash overall. You have to get out into the forest with a bow and arrow (well, technically, any weapon works, but it’s a lot easier with a bow). Like robbing, you’ll need a certain amount of stealth to creep close to animals, and the more accurate you are with a bow, the better. Once you have meat, it will spoil quickly, so you’ll need to sell it all back to merchants as soon as you can.
“____ hunting spots” on the map will have higher chances to see that kind of game; you can bow-hunt fish at “fishing spots.”
Some innkeepers and tanners have Activities to pay you for X number of Y meat/skins and so forth; see “Activities” below.
If you can’t find a merchant who will accept your poached and stolen raw meats, you can “launder” your meat by cooking it; approach a fire with a cookpot, highlight it until you get the “hit E to cook” option, remove the “stolen” tag, and transform your meats from hot to legal.
Most taverns have someone willing to throw dice. Farkle is a real world game and you can find some surprisingly in depth[www.mattbusche.org] strategy guides for it[www.mattbusche.org]; suffice to say, the NPCs are not perfect strategists and make some consistent mistakes, so it’s usually possible to beat them.
Unfortunately, the gambler NPCs also usually have limited pockets, so as fun as the dice game is, it’s of limited utility when you’re trying to break into the Bohemian 1%. If you have access to cheap saving (either through a mod or via alchemy) it’s often easiest to just save beforehand then reload until you win everything.
You can find various loaded dice throughout the game. The most clearly superior ones are labelled “Odd Die” as they will be biased towards 1, 3, and 5, i.e., the higher scoring pips. “Strip Die” tends to roll ones; the “Lu” “Ci” and “Fer” dies tend to roll sixes. (
Kingdom Come’s Weighted / Loaded / Special Dice Catalogue! from kingdomcome
).
Couple the right dice with the Agility perk for good throws, and your dice cup will turn into a money tree you can shake whenever convenient.
— look out for “Treasure Maps.” There are thirty or so of these (counting the “Ancient Maps” you get as part of the preorder DLC).
This excellent Steam guide gives the locations of the maps, the locations of the sites, and their contents. [link]
Most of these treasure locations are unguarded so it’s a very easy way to kit yourself out with top-end gear very early in the game. Be careful with this though because going too whole-hog on high-quality treasure gear, especially the “Ancient Map” gear, can basically turn the game into Easy Mode.
Items from standard “Treasure maps” can generally be found elsewhere in the game as well, often as quest rewards; the “Warhorse” gear from Ancient Maps is only available in those locations, however.
For help finding treasure and nest locations, there is an excellent interactive map here: [link]
Which can be used to find treasure locations, nests, fish traps, and “interesting sites”, all of which often contain unusual valuables.
For more specific locations of specific “endgame” gear options, see “Endgame Gear Locations [SPOILERS]”, below.
— Highway Robbery of wayfarers in the wilderness can be surprisingly profitable (who knew?) but carries a higher-than-you’d-expect risk of getting discovered by other wayfarers, who tend to show up randomly and immediately run away when they spot you; this can lead to reputation losses and various and sundry legal difficulties.
–One bandit camp can set you up real pretty, but it’s harder to do without gear. Stealth and poison work really effectively at amplifying your lethality when you’re under-geared.
— The “House of God” quest from Divish in Tamberg (post-prologue) can be completed without combat and gives a reward of around 3k Groschen.
This is covered in more detail in the non-combat skills section, above, but generally speaking:
- You can make decent cash at the start with Herbalism by picking flowers and selling them to the merchants
- Alchemy can make a lot of cash but it takes a while to get to the point where you can Autobrew and until then it’s a bit of a slog
- Repair weapons at grindstones to improve their sale value.
Reputation
Much like the Stealth system, the game’s Reputation system is more complex than it first appears, and somewhat deliberately opaque to the player; there’s a lot more going on under the hood than the game tells you about.
Reputation also matters in a granular way that isn’t immediately obvious: it’s not just about crime and getting arrested. All the various speech, charisma, and intimidation checks are also influenced by your popularity with that NPC’s faction. This includes haggling checks, so you’ll be able to get much better pricing with good local rep than with bad.
If your Reputation gets low enough, or if there have been a lot of recent crimes in the area, or if you just look suspicious, the guards may start subjecting you to stop-and-frisk.
Run quests or “activities” for local questgivers (look for stars or exclamation points on the map)
Overpay shopkeepers
Give alms to roadside beggars
Drop apples into food pots (folks love apples)
If your rep is very low (naughty!), sometimes getting arrested for a small crime and serving a short jail sentence can earn you a little forgiveness.
Be seen committing crimes. This is a big one, especially since players don’t always realize they’ve been seen — often NPCs will run away for a guard rather than confronting you.
Commit crimes that are then later detected (these have a smaller chance of reputation loss — sometimes, they’ll just assume that weird Henry kid did it)
Haggle failures with merchants — if you select “haggle” but then don’t work out a deal, there will be a reputation hit with the merchant’s faction.
Eat too often from those communal pots without ever dropping apples back into the mix.
Run into people with your horse and hurt them. Galloping through town at high speed is actually a pretty good way to kill NPCs if you hit them square on, and the injuries can result in reputation loss or in some cases even arrest.
There may also be a certain amount of “natural” reputation loss over time, especially if you’re at peak values (see: description of the “Local Hero” perk). You can only stay so popular for so long.
Settings, Config, Mods, & Console
KC:D is really poorly optimized on the default settings, and tweaking it a bit can dramatically improve things.
A good general guide to the standard graphics settings for this game can be found here[www.game-debate.com]. The general takeaway is that, depending on your particular compy, you’ll probably improve performance by turning ” Object Quality”, “Postprocess quality,” “Shadows”, and “Shader Quality” down, and turning “Particles”, “Textures”, and “Object Distance” up.
Past those basics, if you’re having graphical performance issues, some users have reported this helps:
Create a user.cfg text file in your main folder, using Notepad. Add the following commands to it:
r_BatchType = 1
r_vsync = 0
r_ssdo = 0
r_antialiasingmode = 3
r_sharpening = 0
e_shadowsmaxtexres = 1024
r_supersampling = 0
sys_MaxFPS = 300
wh_pl_showfirecursor = 1
This will shift processing burdens from your CPU to your graphics card, and otherwise optimize graphics settings. (The final line adds the archery cursor back in). Once you’ve done this, you will need to also right click the game name in your Steam Library, select Properties, Launch Options, and then add the launch parameter “+exec user” (without quotes) after whatever other launch options you have (usually heapsize).
If these options do not load (you can tell by whether or not the cursor remains when you pull out your bow) it’s probably because your user.cfg file has a hidden “.txt” extension on it, so make sure to remove that (in Windows 10, that’s control panel > file explorer > view tab > uncheck “hide extensions for known file types” , then manually remove the “.txt” in the user.cfg file name so it’s just and only “user.cfg”.
(Thanks to
and others for discovering these tweaks)
For more hardware-specific settings (such as optimizing your video card memory, configuring for a SSD drive, and so forth) there is a good list of additional user.cfg commands in this mod:
[link]
Past that, since this game is based on the Cryengine, general Cryengine tweaks can work for this game, too; see [link] and https://twitter.com/EmpyreanFlaw/status/970745888980324352 for further examples.
You can also enter any of those command lines via the “console” (“~” key) or execute them all by bringing up the console then typing “Exec user” to run your .cfg file manually. For example, if you just want the archery reticle, just hit ~ then type or copy paste
wh_pl_showfirecursor = 1
and hit “enter” to add the archery reticle.
You can use that functionality to test various graphics commands at the game title menu screen — just bring up the console, enter any of the above commands into the console, and see if it improves or detracts from performance.
Unlimited save-anywhere mod (may cause some issues if you go over 300 saves):
[link]
Easy Lockpicking (removes the lockpicking minigame; bugs out some quests that involve lockpicking, so disable mod for those quests):
[link]
Alternatively, try Sectorial Lockpicking, which just adds a graphic that divides the lockpick area into sections, making it much easier without breaking game mechanics: [link]
Colored Arrow Feathers. Makes it much easier to find and retrieve missed arrows:
[link]
Known Bugs and Exploits:
As a general rule, if you find a quest item for a quest you aren’t currently running, don’t pick it up, you might bug something.
Don’t read a treasure map while riding on a horse; you’ll bug out your game and have to reload.
Hitting the edge of the map while riding your horse can sometimes reduce your horse’s speed to 1 and bug the poor horse out. A save and reload will fix this issue.
There’s a cap on the total number of saves, at 300. However, you can work around this by moving saves out of your save directory into another folder (save directory is at C:Users**user**Saved Gameskingdomcomesaves*playline*)
As of patch 1.3.3, characters who go through Bernard’s training since the patch will not learn ripostes and combos (“master strikes”) correctly and will be unable to perform them. There is a cheatengine fix for this: [link]
You cannot repair horse armor or caparisons once damaged.
Your horse can only carry so much weight, and you can only carry so much weight, but the horse can carry you and everything you’re carrying without issue, always.
Some plot central NPCs can be punched infinitely without killing them, for infinite skill-ups; this normally requires careful positioning of the body, often in water.
Know how you can’t carry a polearm in your pack, dramatically reducing their usefulness? Take it to a blacksmith and repair it; it will be automatically stored in your pack, waiting for you to whip it out at an opportune moment.
General Quest Tips
This section is a general list of hints and tips for various quests. It is not intended as a detailed guide — other websites have already done that better — but as something closer to a “hint book”, with general advice for each quest and then tagged spoilers pointing out missable details or optimal approaches that you might otherwise miss.
You can manage which markers it shows for quests from the journal page.
You can only have a maximum of three quests highlighted up at a time but you can switch which quests are “active” and have markers or not by pressing E on them in the journal; the ones with markers get a red, blue, or green shield with a letter A B or C on them.
Don’t spend too much time just following the quest markers; most major quests have alternative solutions or extra steps that will make sense if you think about the quest and put the pieces together, but which are not specifically marked on the HUD. If all you do is follow the markers, you usually won’t fail the quest, but you won’t get the best results either; those come from thinking in a little more depth.
So much for the general advice.
The rest of this guide will be hint-book style tips for the various quests in the game. I’ll try to use spoiler tags to prevent too much overt spoiling, but some spoilers will be inevitable.
If you do want a full-spoiler walkthrough, this is the best I’ve seen so far: [link]
It is not complete though — like the game’s quest markers, it will lead you reliably to the orthodox solutions, but not always to the best solutions.
Act 1 Main Storyline Quests (SPOILERS)
While you have a certain amount of freedom in how you approach this content, the “optimal” path is probably to prioritize the main quest through “On the Scent,” and then branch out during or after “My Friend Timmy.”
See the first section of this guide, “Starting Town,” above, for detailed tips and tricks on optimally approaching the starting village.
If you don’t save Theresa, you will almost certainly regret it.
It is totally possible to kill a Cuman here, or possibly even more than one, just very difficult; try stealth kills, or looted guard gear from Skalitz. .
Once you have reached Talmberg, it will be beneficial to immediately upon waking, sneak and nab a suit of guard armor and weapons, before the guards start patrolling carefully.. You can’t be jailed at this time — they will let you go “as a guest”.
You can buy lockpicks from the peasant vendor. You can also escape without stealing anything at all by jumping off the bridge but you will find yourself undergeared in the next mission (not that it matters too much).
Anything you steal during this mission will have its “stolen’ flag vanish at the end of the next mission.
This quest is mostly on rails; there’s not much choice involved. Two unique items are easy to miss: Look near the body of the town bailiff for a decent starting short sword (“Shard”), and check Bianca’s body for a unique ring. There’s also a small buried treasure left of the Skalitz entrance, underneath the ruined dovecote; save for a later side activity in Rattay.
Watch out for the armored bandits in the old mill; they’re very well geared and lethal at this stage unless you really know what you’re doing.
You’ve got some time at the start of this quest to explore and make choices without a clock running, so it’s a good time to sell off any accumulated loot, do any backtracking or exploration you want to, and run up side quests and activities etc. Once you talk to Sir Radzig, Plot will start Happening again and timers will start running, so do your housecleaning first. A lot of stuff won’t unlock until you progress the plot, though, so I wouldn’t suggest delaying too long here on a first playthrough.
See “Archery,” above, for tips on winning the bow contest: the simplest way is to use the console to turn your bow reticle on, and then aim at the intersection point of the target stands, above the target, rather than the target itself; let your bow draw fully and release the arrow when the reticle drifts back over the original aim point.
The next bit is harder, but ideally you’re still wearing all that chain armor you looted from Talmberg. Use the tricks Bernard taught you and winning is possible: 1) stab repeatedly at his face until you get tired, then 2) retreat until your stamina returns, then 3) GOTO 1.
Again, mostly on rails here. Listen to what Nightingale has to say as there’s more to it all than is initially apparent, and he’ll suggest a couple of potential side quests.
For general tips, see “Hunting” and “Stealth” above, under “skills.” Bringing a horse of your own will unlock a cutscene.
Take some extra food and arrows with you on this, and to the extent you have different gear choices, wear lighter, darker armor — you’ll want to be sneaking around a bit — and if you have the “stealth kill” perk, bring your dagger too, just in case.
After the boar and what ensues, be sure to loot the bodies and the camp first — there’s decent loot here and doing the obvious will trigger a cutscene. Don’t worry about gear weight — just carry it all, you’ll be able to dump it after the next quest starts.
To get the optimal resolution to the quest, don’t just follow the quest flag markers: be sure to also go report back to Captain Bernard regularly and keep him updated. .
Once you find Ginger, mark his map location to make it easier to find him again.
To get the optimal resolution to this quest, be sure to take Father Godwin up on his invitation to go drinking at the Tavern.
It is technically possible to save Reeky but it depends on how long you’ve taken to find him after the initial Neuhof attack. If you move quickly enough, you can catch the bandits hunting Reeky chatting in the local tavern; start a fight with them and the town guards will help.
After the end of this quest, a lot of side content will open up, and there aren’t any more running clocks, so it’s a good time to put the main quest on hold and explore the rest of the game world.
After you find out Timmy’s location, you will be surrounded by a group of bandits. Intimidation speech option often works well against them; alternatively, just tell them where Timmy is, then follow them. As they leave, you can stealth-kill them from behind one by one fairly easily.
There are a few different ways to resolve this one and a few different sub-goals.
Subgoals:
You want to poison all the pots of food — there is poison lying around conveniently, but you can bring your own; you’ll need 4 — and burn the arrow barrels.
There are also a few different “entry points” into the camp that you want to spy out; the two main bridges, the southwest part of the camp (Henry will say it is a good spot for a suprise attack), a smaller northern camp, and a bigger western camp (where you will see a cutscene). [/spoilers]
You’ll want to meet as many of these subgoals as possible to set things up optimally for the next quest.
Strategies:
A few ways to approach this.
The “standard” way is to wear a full set of Cuman gear including a facemask (you can bring this from elsewhere, kill a guard, or loot it from an “easy” locked chest on the northern edge of the camp) and then talk your way into the camp. Try to stay away from other Cuman groups, who will realize you don’t speak Hungarian fairly quickly.
The second way is to try to stealth through the camp at night. Theoretically possible but you’re going to run into real problems.
Third way is to just slaughter the entire camp singlehanded. Surprisingly doable if you bring enough poisoned arrows and can position yourself so you aren’t surrounded. Carrying all the loot away afterwards can be prohibitive, but if you store excess in one of the nearby chests, it should remain when you return later.
Go into this battle as light as you can, with your horse empty too; there will be a lot of chances to quickly snag very good loot, but you won’t have time for more than a “take all” and “move to horse”.
The general strategy you want is “let your allies move in first, swoop in from the side, kill enemies engaged with your front line.”
When it comes time to kill Runt , you won’t go wrong aiming for the head, especially with an arrow or a mace; dude is too vain to wear a helmet.
After the quest is complete, it is possible to return to the battle site and loot Runt’s corpse.
Act 1 Side Quests (SPOILERS, WIP)
Sorted by questgiver’s origin.
If you don’t see a questgiver on the map in that area to give that quest, you probably need to advance the main quest further (for Act 1 quests, at least through “My Friend Timmy” in the main storyline sequence).
Don’t kill anyone at the executioner’s house if you can avoid it; doing so will lock out other quests.
Be sure to pressure everyone for a kickback; they are all extremely useful and one (the sword fragment) is essential for completing a different quest)
This quest is a good chance to gather as much Belladonna as you can — it’s plentiful in the quest area and very useful for grinding up Alchemy skill.
When joining Hans Capon at the baths, and he strips down, you have a chance to nick his gear.
You’ll need to talk to Hans a day or more after the conclusion of Next to Godliness to start this. Take a bath first; have your high-Charisma gear handy.
Immediately after Clothes Make the Man. You’re helping Bernard deal with a large bandit camp.
TO find the camp, talk to the northern or southern farms. If you have good Speech, Northern is easiest; housewife there will take you to a great spot to bow-snipe the whole camp.
Most of the stealth tricks won’t work as the camp never sleeps. You can fight them or parley (after reporting back to Bernard). The leader has a Heavy Shield with a unique graphic. Hanush will give you a Magdeburg Cuirass if you resolve it peacefully.
This quest has a time limit of about a week.
After the prologue, return and speak to Divish to start the “House of God” quest; it can be completed without combat and carries a heft cash reward of about 3k groschen.
This quest has a time clock, but it doesn’t start running when you get the quest, it starts when you get close to a solution — specifically, when you discover the skull.
When it comes time to meet atop the scaffolding, you may want to look around in the Mill instead.
(starts in Neuhof)
There are
Foolproof method for winning the Sport of King’s quest race… from kingdomcome
to win the Talmberg horse race. For example, try killing their horses, if you can do it without getting caught.
To win “legit,” stick on the road for the first leg, then go offroad and follow the quest markers. Be ready to jump hedges and fences and rivers without slowing down.
There are a few ways to resolve this.
The “legit” way: You can try to puzzle out the heretic’s testimony — it’s an allegorical description of the countryside — but it won’t get you all the way to the right spot, which is in a stand of trees north and west of the lake at the NE corner of the map. After that, take what you find there to Father Godwin. When you find the heretic’s hut, they have a loft you can hide in — ladder outside — there’s a treasure map lying in it; wait till dusk and hear their prayers. Once you’ve got confirmation, you can talk to them, persuade them to leave (a Bard potion may be a good idea) , or turn them in to the vicar. If you don’t do as the Vicar asks, don’t tell Hanush that!.
You can also just get violent. One of the Vicar’s guards wears the black combat jacket, which is one of the best stealth outer garments in the game; the Vicar usually carries a skillbook. (With care, these can be taken without lethality).
Lord Hanush will reward you with a St. Michael’s Longsword[kingdom-come-deliverance.vidyawiki.com] for completing the quest to his satisfaction.
Talk to the groom in the Uzhitz stables; follow the poop; reward is a caparison identical to the one on Hans Capon’s horse.
To take down the topping-out, shoot it near the top
THis quest has a time limit; take too long and refugees start dying. The clock starts running when you start the quest. It is therefore helpful to have already gathered a lullaby potion, the herb comfrey, bandages, and First Aid skill before starting the quest. After you heal three refugees, you will have an opportunity for a very challenging Rank 15 Speech check; a Bard potion helps, as does high local reputation.
There are multiple ways to solve this quest, but the simplest and most bug-free is to talk to the Charlatan.
Turn in the quest right away after completing it; if weeds re-grow after your work, you’ll get penalized.
Make really sure you do *not* use a unique book for this quest turnin; you can end up failing other quests, some of which require some unique books.
Act 1 Activities (WIP)
“Activities” are low-stakes side content that for some reason the game classifies differently from “quests,” generally because there’s not much story to them. Still, some have decent rewards, and they’re often repeatable..
Unlocks after main quest “Prey.” Talk to Andrew (one of the Skalitz refugees) and he will task you with bringing boar, rabbit, and roe deer meat, in sequence.
Miller Peshek will teach you how to pick pockets. Repeat this a few times till you get multiple skill points — pickpocketing is hard to raise without a base level of skill.
Series of three minor theft quests. Don’t kill anybody (some of the targets in these quests help in other quests). A good source of early-game cash, you can do these before even talking with Radzig.
Punchin’ man quests in Rattay.
The “Vagabond” in the refugee starts this series of three fetch theft quests. Generally the hard part isn’t the theft, it’s getting back to the Vagabond without getting searched by a guard in the process. In the final quest, the Vagabond will be in the pillory, so returning the item without getting caught will be tricky — move away as soon as conversation is initiated.
The first of the “kill bandit camps” quests, given by Bernard after you’ve advanced the main quest through Ginger in a Pickle.
There seems to be a higher probability of getting ears from stealth kills rather than weapons (perhaps the ears get damaged?); if you save ears and turn them in later, during the their “tier” of kill-bandit-camp quets, you’ll get a higher reward per ear.
Series of pickpocketing quests that will give pickpocketing skill as a reward (even if you just choke out and strip the targets). When you rob the ornamental dagger, do not pickpocketing everything off of his wife; it would save a step, but there’s a bug. You may not want to complete the chain, however, as the final quest has a fairly dark result; talk to the Innkeeper at the end.
Talk to Andrew, the Innkeeper at the Inn in the Glade NW of Neuhof, and he will task you to deliver game meat to him. This quest is repeatable 3 times but you’ll get a different type of game each time; the meat must still be edible. Do all three and you’ll get a small reward to Hunting skill and some cash.
Best way to practice archery in the game. Bring a Yew bow, ideally a longbow, as those have the best range / trajectory. Don’t be afraid to walk out into the water — there are places where you can get extremely close to the floating logs. If you have problems, make sure you’re pulling the bow all the way back; try drinking a Bowman’s Brew potion; and consider turning on the archery reticle. Beyond that, See Archery, above.
Talk to the Butcher and he’ll ask you to deliver first deer livers, then hare offal, then a large quantity of red deer, hare, and boar meat. Livers and offal will require the “butcher” perk under hunting.
A series of thief fetch quests which gives Pickpocket skill as a reward and that, like “A Woman Scorned,” has a bit of a dark result if you follow it all the way.
This is the series of punchin’ man quests in Uzhitz. To unlock them you need to have won the fights in Rattay and progressed the main quest far enough, then talk to the fisherman northeast of town. Reward for winning these is an Agility skill book.
3 rabbit, 3 boar skins; reward is some hunting skill
Bring hides to the Talmberg Tanner.
Stat & Skill Book Locations [SPOILERS]
You must, of course, first learn to read to use these books.
Higher tier books require higher skill to read; if you’re short a few points, try finding a buff to raise your skill temporarily and unlock the book (for example, a padfoot potion will let you read higher-tier Lockpicking books).
Rattay Armorer
Rattay
Sasau
and Other Myths
Rattay
Sasau
Random Encounter
Sasau Monastery
Basement (on a barrel)
Samopesh Innkeeper
Bianka (Prologue)
Hut North of Neuhof
West of Neuhof
North of Talmberg
Merjohed
Uzhitz
Neuhof Stables
Talmberg
Rattay
Money for Old Rope
Samopesh
Sasau
Rattay Mill
East of Sasau
If you spot one of the missing book locations, please let me know in a comment!
“Endgame” Gear Locations [SPOILERS]
Here’s a quick-reference chart of various top-end gear options and some locations where you can obtain them. A lot of this stuff is extremely powerful.
Unless you want to play the game on “easy mode,” I would recommend against using many of the items in this section, especially those which only come from specific locations.
“Treasure Map” treasures are denoted by roman numeral.
Items obtainable during quests have the quest name noted in italics.
(Stealth)
(Stealth)
( 5/12/12 variant)
Much, but not all, of this section drawn from https://kingdom-come-deliverance.vidyawiki.com/Kingdom+Come+Deliverance+Wiki
For numbered “Treasure” locations, see this excellent guide:
[link]
While not “endgame” gear, “Skalitz” pattern shields and waffenrocks may be obtained by choking out Skalitz guards (either in the prologue or in the Merjohed camp), off of fallen compatriots in the Baptism of Fire quest, or (rarely) from chests in Upper Ratay castle.
Thanks & Conclusion
Thanks to all who contributed tips or who helped me figure things out for this guide. Where I’ve seen good advice elsewhere I’ve copied it, but I’ve at least tried to give consistent linkbacks so folks get the credit they deserve. Many of the tips here came originally from the https://www.reddit.com/r/kingdomcome/ or the Kingdom Come thread on the Somethingawful.com forums[forums.somethingawful.com].
If this guide was helpful to you, please give it an upvote so it climbs the rankings and more folks see it. If there’s something you think should be added, expanded, or changed, please let me know in the comments. This remains a work in progress, so even if you don’t see an answer to your question right now, if you check back later I may have added something that will help you out. Thanks!