Overview
Hello, and welcome to my guide for the TLD mod for Mount and Blade Warband (The Last Days of the third Age). Here I will discuss my experience and list many helpful tips and tricks about the gameplay in this single player mod. Seeing as this is a mod for Warband some of the included information will also apply to other mods or just the Native game.
Introduction
The Last Days of the Third Age is a full conversion mod for Mount and Blade Warband that brings the player into the world of Middle Earth. In this mod you must select a faction that you fight for and defeat all your enemies to win the war. There are some interesting side quests you can get from listening to rumours or from various commanders but the main goal is still to crush all your enemies and attain victory!
You can download the mod from steam workshop
The War of the Ring
The main objective is to win this war against all your enemies. The war starts after you reach level 8 (this can be tweaked). If some of your allied faction die, or even your own faction, it’s not too bad as long as you can still take the battle to the enemy and win in the end. The War of the Ring has only two teams: good and evil.
Good Factions: Gondor, Rohan, Lothlorien, Imladris, Woodland Realm, Vale of Anduin, Dale, and Erebor (8)
Evil Factions: Mordor, Harad, Khand, Umbar, Isengard, Dunland, Moria, Dol Guldor, Gundabad, and Rhun (10)
The War of the Two Towers
If you’re playing for evil after you win the War of the Ring a new war starts and you have to win it too! This is the war between Saruman and Sauron so you will have to kill your old friends to achieve victory. If you actually play all the way to total destruction as for the forces of good the War of the Two Towers will likewise start.
Sauron’s Factions: Mordor, Harad, Khand, Umbar, Dol Guldor, Rhun (6)
Saruman’s Factions: Isengard, Dunland, Moria, Gundabad (4)

New Features
Faction Points and Strength
Every faction has a certain faction strength (from crushed to unmatched) which is measured in faction points. This indicates how strong the faction is. The bigger the faction strength the more caravans, scouting parties, and warbands the factions can send out. Strong factions also send out fully reinforced lords more often after they revive and act bolder on the map.
By inflicting defeats on their enemies factions gain faction points and by suffering defeats they lose them. The larger the defeat, especially of a lord, the bigger the faction point loss. If the faction points reach 0 or lower (crushed) the faction is defeated and losses all its lords and towns.
Rank and Influence
Every faction has it’s own rank and influence points that the player can gain (or lose). Rank is increased by gaining rank points which are given for completing quests, helping the faction in battle or just defeating enemies nearby faction troops or lords. Rank benefit the player by expanding his army (2 extra army points for your own faction and 1 extra army point for an allied faction) and by giving you a daily allowance. With high rank you get lots of resource every day! Other things also require certain rank status like recruiting followers or commanding allied commanders.
Influence points are similar but they are more like a resource as they are expendable. You spend influence to get special rewards, to command allied forces and generals, and to recruit followers.
The fastest way of gaining rank and influence points is by defeating armies. Helping allies even if they greatly outnumber their enemy always gives you a lot of points and doesn’t cost you anything. Defeating armies that greatly outnumber you can give much more points. E.g. if you defeat an army of 600 with your 70 men you will get about 100 rank points! Some quests also a give good amounts of rank and influence: capture commander, train troops for a lord, stop rampaging troll, capture troll for Saruman, defeat ents in fangorn.
Resources
In this mod every faction (except Dol Guldor) has its own resources. To buy gear from towns you need their own faction resources. Resources can be moved from faction to faction once a week by going to the faction leader and asking him to send gifts to an allied faction. Troops also use the resources of their specific faction and if you run out they begin to leave your party (this applies to followers too). If a faction is destroyed you no longer gain a daily allowance of resources for your respective faction rank.
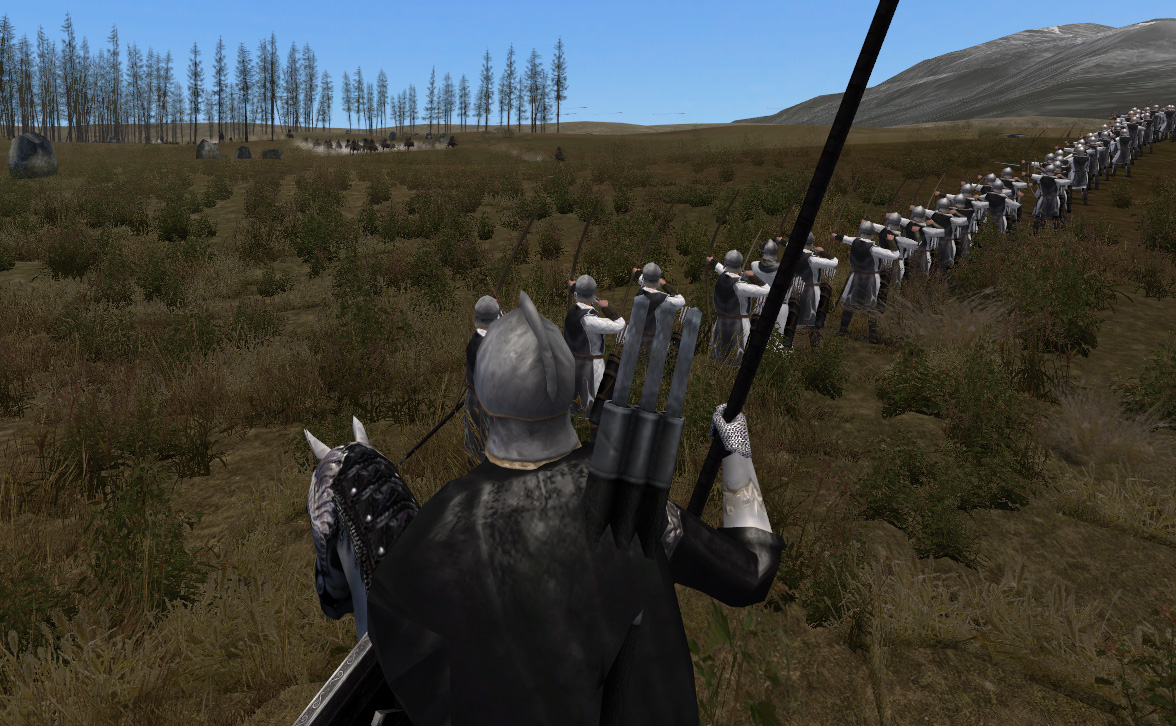
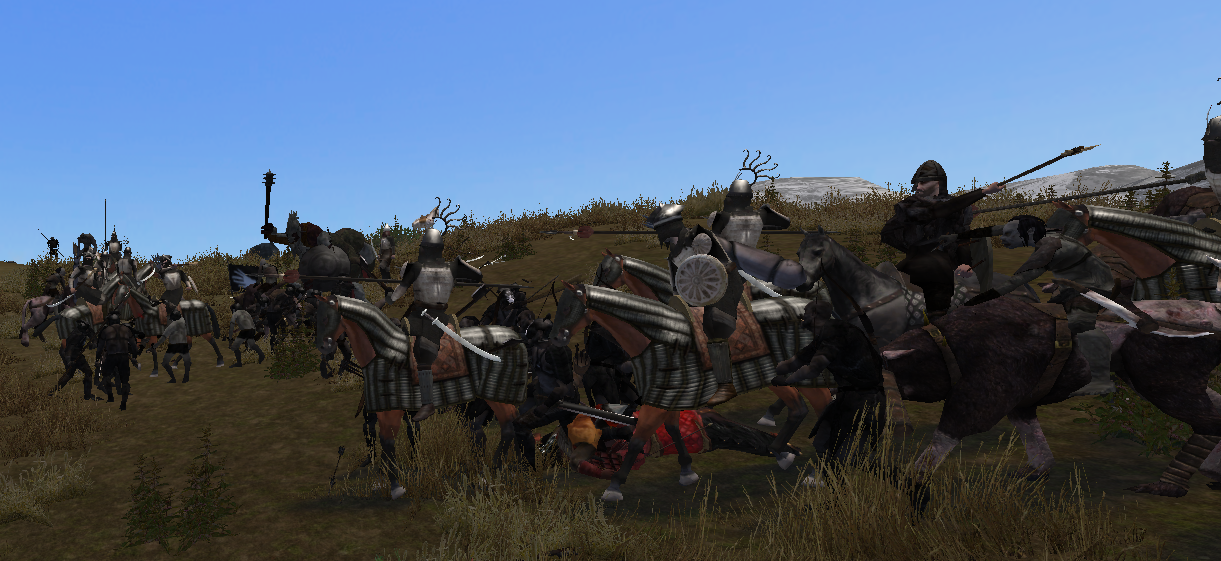
Battle Morale and Formations
In battle you may notice that troops line up in certain formation. You can change them up using various hotkeys and you can even order your troops to use different weapons. Sometimes horse archers will even have their own formation and they circle around the enemy shooting them from the side.
Morale on the battlefield makes your or enemy troops run away in fear. By losing troops or by being outnumbered your will lose morale and some troops may just run away and the same goes for the enemy. When bands of bandits are outnumbered you may see half of them begin to run before a single one dies! A good way to keep morale up is by personally slaying enemies.
Sieges
Normally a player cannot initiate a siege in this mod. However, if he jumps through some hoops and spends resources you can unlock the option do it. Otherwise you just have to join the sieges of your allies or try to spend influence points and order them to siege a settlement for you.

To get a lord to siege a settlement for you you need rank 8. Talk to the faction marshal and order him, for the cost of 35 influence points, to attack a specific town. Note that this only rallies the army of the faction against that town once and you don’t get your influence points back if the lord bugs out and refuses your orders!
To gain the ability to initiate sieges you need to talk to the marshal of your faction and ask him about the war and then about sieging towns. You need rank 8, 100000 resources, and 35 influence to unlock the ability to siege.
Sieges initiated by the player are a bit different. They involve all surrounding parties including nearby lords (this can be exploited by ordering lords to follow you) and if you die and then retreat you automatically lose (even if the enemy pretty much lost but you can’t finish the fight because of their troops is stuck). If you lose this way you lose 250 rank points, 30 influence points, and lose the ability to siege so be careful! If you just retreat without dying, however, this doesn’t happen.
Traits
Traits are special abilities or bonuses than are gained through doing some things. These can be quite useful or just small improvements. More information on the traits and on how to get them will be mentioned in the trait section.

Races
Races
Men: generic humans that can be played by both good and evil
Elves: they are similar to men but ents in fangorn don’t attack them
Dwarves: dwarves are shorter than men, have their armour limited, and can’t ride horses
Orcs: orcs are very short, they get stronger at night, and can only ride wargs
Uruks: uruks are larger variants of orcs and can only ride giant wargs
Uruk-Hai: these are half-orcs similar to uruks but they have different armour limitations
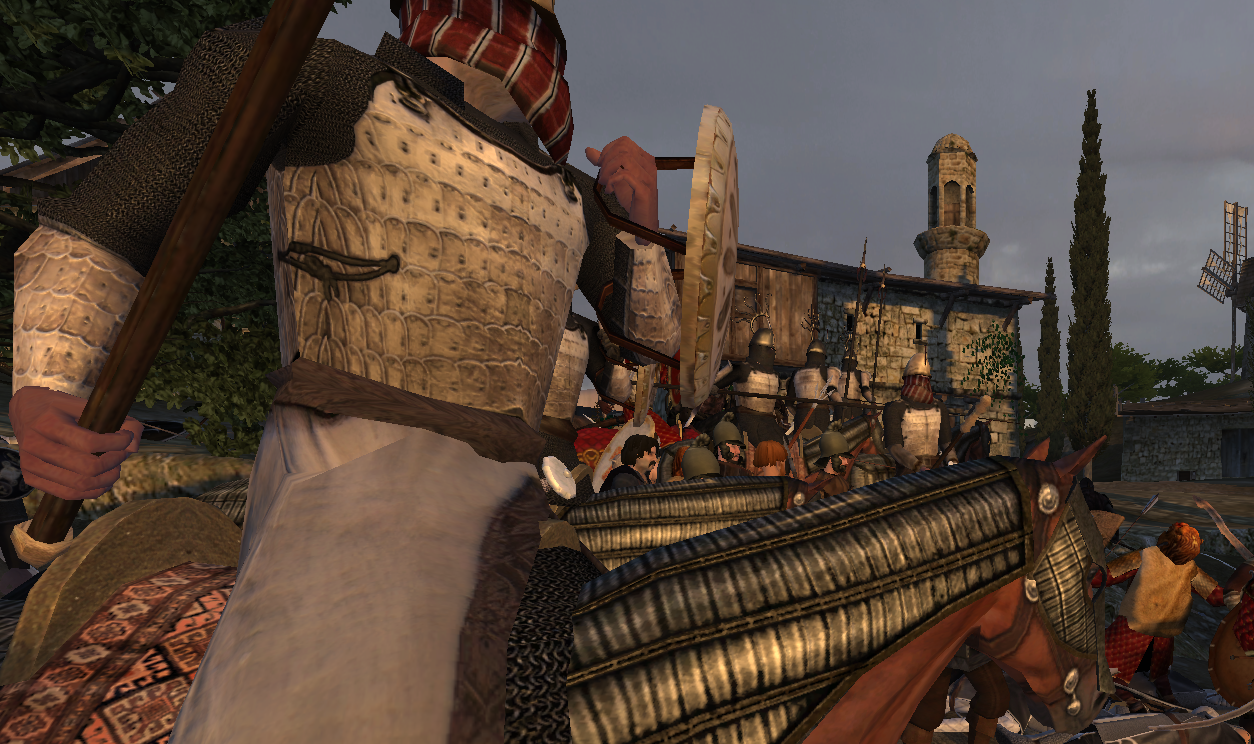
Good Factions
Gondor
+Well armored troops
+Easily leveled fiefdom troops
+Lots of recruiting locations
+Peerless cavalry
+Overall strong and dependable roster
-Lots of strong starting enemies
-Fighting is made harder by nearby nazguls
-Standard troops are hard to level
-Fiefdom troops inaccessible if their towns are razed
Gondor is the biggest faction with a huge realm in the south. They have the most commanders too and a giant host of troops to use. Their standard troops are slow to upgrade but have strong armor and weapons making them very useful. They can also upgrade to strong tower guard troops with exceptional armor and weapons. Fiefdom troops are overall stronger and easier to upgrade but they need to be recruited from certain locations which if destroyed by the enemy become inaccessible. Gondor has very many enemies and it can be hard fighting them all.
Fighting Gondor is not hard as you have many allies to rely on. Their army is not too strong but their archers are deadly (especially the sneaky rangers). Some of their castles are also very well defended and Minas Tirith is hard to destroy due to all the Tower Guards defending it.
Rohan
+Strong and plentiful horse archers
+Powerful lancers
+Lots of recruiting locations
-Annoying pike-loving starting enemies
-Troops are hard to level
-Infantry is not very impressive
Rohan is the realm of the horse lords. They also have many towns and commanders but fewer than Gondor. Their troops are slightly weaker than Gondor because of their flimsier armor but they have very fast cavalry and uniquely skilled horse archers. All their troops can be upgraded into cavalry so it’s easy to get giant cavalry armies. Rohan has Isengard and Dunland nearby but their forces are more or less evenly matched.
Fighting Rohan can be quite easy if you get the hang of it. Using heavy cavalry against them is not effective due to their powerful horse archers but an infantry and archer line can decimate the Rohan forces which is often poorly armored. Mounted skirmishers of Khand and Dunland are very effective against Rohan horse archers as they block their arrows with their shields while killing them or their mounts with their javelins.
Lothlorien
+Unmatched archers and heavy infantry
+Access to the finest warriors of Middle Earth
+Several recruiting locations
+Easy starting enemies
-No cavalry (cavalry was removed from Lorien in a recent update)
-Troops are hard to level
The elves of Lorien are some of the strongest warriors of Middle Earth. Their archers and infantry are supremely skilled and use very light but effective armor turning them into killing machines. They have three towns so it’s easy enough to build an army. Lorien only has Moria and Dol Guldor to fight and in has all the tools to win against them.
Fighting Lothlorien can be a real pain because of how strong their troops are. Even the weakest troops have great skill with both blade and bow. The lightning fast attacks of their swords and the unmatched power of their bows can bring death to even the strongest warriors of shadow. Fighting them at night and trying to outnumber them is an effective way to combat them. Their weaker armies are also vulnerable to being run-down by heavy cavalry charges.
Imladris
+Uber elite well-rounded roster of total epicness
+Access to the finest warriors of Middle Earth
+Easy starting enemies
-Only one recruiting location
-Troops are hard to level
The elves of Rivendell have a single camp to recruit from. They also have the aid of the Dunedain who are the mightiest soldiers of men. Imladris is very strong but has few soldiers. Unlike other elves their cavalry is easily accessible and exceptionally powerful. Like Lorien it has Moria and Dol Guldor nearby which it can defeat if it strikes in the right places.
Fighting Imladris can be very challenging. Their Dunedain patrols should be engaged with great caution as even a handful of them can massacre hundreds of orcs. Their scouting parties are also dangerous due to their use of heavy cavalry. Trying to hunker down with heavy infantry with shields and avoiding using poorly defended archers is a way to try and deal with them.
More Good Factions
Woodrealm Realm
+Unmatched archers and heavy infantry
+Access to the finest warriors of Middle Earth
+Several recruiting locations
-No cavalry
-Troops are very hard to level
-Annoying wargs as starting enemies
The wood elves of Mirkwood used to be a lot weaker than they are since they got buffed in recent updates and now they’re about as strong as Lothlorien. Their archers now wield spears and axes in melee and their infantry are hardy. They have three recruiting location which are far spread and threatened by many enemies. They have to deal with Gundabad which is very aggressive but also have Rhun and Dol Guldor nearby which can threaten some of their towns.
Fighting Mirkwood elves is still easier than other elves though the armies of their lords can be very tough. The Mirkwood battle map was updated and is now much larger. Still it’s not an ideal place for archers and rushing them down with infantry can work against their caravan parties. In the open field facing them with heavy cavalry rushes is also effective.
Vale of Anduin
+Badass looking troops who fight with axes
+They can summon bears
-No cavalry
-Limited recruitment for archers
-Overall lackluster troops
-Troops are hard to level
-Weak armor
Known before as the Beornings the people of Anduin are the weaker faction among the Free Peoples. They are slow to upgrade and have three recruiting locations. Their archers are unskilled and can only be recruited from the Woodmen Village. They have decent shock infantry and shield-infantry though and can even summon a bear to help you out at higher levels to make up for their lack of cavalry. They fight mostly Gundabad and Dol Guldor which can be quite tough with their weak troops.
Fighting the Beornings is easy as their archers are not very threatening and their axemen are poorly armored. They are a faction that can be “out-gunned” by evil bowmen or can be simply run down by cavalry due to their poor defense. Beware their bears though since they can attack unpredictably and dismount cavalry with their roar.
Dale
+Skilled archers
+Nearby dwarves to recruit from
+Roster effective against weaker nearby foes
-Overall lackluster troops
-Troops are hard to level
-No heavy cavalry
The northmen of Dale have only two recruiting locations which are very close and an average army. They upgrade slowly but have good archers and dependable infantry. They start mainly fighting Rhun which are an easy opponent giving Dale a smooth start in the war.
Fighting Dale can be tough due to their hardy shield walls and skilled archers. Their cavalry is easier to deal with due to their proximity to Mirkwood and their weak horses but most of their army is made up of foot soldiers. Trying to meet their forces on the open field and running them down with cavalry and horse archers is a way to play against their weaknesses. Though if you have stronger troops than them from Khand or Umbar you could meet them toe to toe and simply outclass them.
Erebor
+Very well armored troops
+Hardy elite heavy infantry
+Nearby men of Dale of recruit from
+Weak starting enemies
-No cavalry
-Relatively poor archers
-Troops are hard to level
-Slow moving troops
The only dwarven faction in the mod the dwarves are similar to Dale just without the cavalry. They have good and diverse infantry choices and archers who aren’t the best but who can hold their own in melee due to their good armour and fast weapons. With only two recruiting locations Erebor still has an easy time dealing with Rhun who is its main enemy. Gundabad is also nearby but the strong infantry line of dwarves can counter their warg rushes.
Playing against dwarves is similar to fighting Dale. Their strong infantry is hard to deal with but it can be done if they are outnumbered. Using horse archers to abuse their lack of cavalry and mediocre archers is also quite effective but against their weaker caravan parties rushing them with melee cavalry is a faster way to cut them down.

Sauron’s Factions
Mordor
+Lots of recruiting locations
+Strong black numenoreans
+Nazgul sweep can help you
+Troops are very easy to level
-Very weak troops
-Uruks aren’t as strong as men but don’t give the orc horde bonus
-Black numenorean elites are very rare and level up slowly
The forces of Mordor are the main forces of Sauron. They have many recruiting locations which can expand if you capture Gondor river settlements. Morannon always has a lot of recruits available and is a very safe fortress with hundreds of defenders. The orcs of Mordor are the weakest orcs with weaker weapons and bows than other orcs. They compensate by having many Uruks which are quite strong with good armor and deadly weapons. Their black numenoreans are the strongest troops available to the evil factions but are very rare and can only be hired in Morannon and Cair Andros. Playing with Mordor is easy due to the aid of all your allies.
Fighting Mordor is easy as most of their armies are weak orcs. Their caravans and prisoner trains are especially weak. Their warbands and commanders are stronger with Uruks and even deadly Olog-Hai which very hard to kill. Among armies of dangerous evil men Mordor targets can be viewed as particularly vulnerable.
Harad
+Colorful and vibrant army
+Diverse roster with units of all types
+Massive impenetrable shields
+Troops are easy to level
-Only one recruiting location
-Overall lackluster troops
-Harad music can get annoying very fast
The Haradrim are men of the south who came from far away. They have only one camp but can capture river settlements from Gondor. Though it’s hard to get their troops they are effective compared to orcs, easy to level, and have reliable archers which is rare for evil factions. Harad has an easy time fighting Gondor because of all its allies helping it and its strong army.
Fighting Harad can be challenging if you don’t have strong enough troops. Their tough infantry makes them to shoot down with arrow barrages. If faced in fair battle with strong infantry they can be beaten, however. Their caravans and prisoner trains are quite vulnerable and have very weak defenders.
Khand
+Finest cavalry available to evil factions
+Well armored troops
+Troops are easy to level
-Only one recruiting location
-Poor infantry options
-No archers
Khand is a land to the south-east of Mordor and the Variags that live there have been an enemy of Gondor for centuries. In this mod they are a strong evil men faction that excel at mounted combat and have good shock infantry options. Their cavalry can easily run down enemy archers and light infantry. Their troops are easy to train and can be recruited from their camp and from the river cities if they are captured. Unfortunately Khand has no archers at all and only use javelins. Playing with Khand is easy because of their strong cavalry and the help from their allies.
Playing against Khand can be tricky as a lot of them use armor piercing javelins in combination with fearsome frontal charges. Their giant axes also penetrate the toughest armor. Using archer lines on open planes and shooting them down is effective if you have strong archers since overall their shield game is lacking.
Umbar
+Strong armor piercing archers
+Relatively dependable infantry
+Troops are easy to level
-Only one recruiting location
-Weak armor
-No cavalry
Umbar is an evil men faction fighting Gondor in the south. They have no cavalry and are lightly armored. To compensate they have dangerous weapons and some the best archers evil factions have to offer. Getting armies of Umbar archers ravaging the Gondor countryside is an easy way to get rich and hit the enemy where it hurts. Though trying to out-shoot the elves later on may not be very effective because of their amazing shields and superior archers. Like the other southern factions Umbar is easy to play with because of their allies helping them fight Gondor.
Fighting against Umbar is not too hard due to the weak armor and small shields. You can out-shoot them, run them down with cavalry or just face them in melee if you have stronger infantry. Sieging their town however is not so easy because of all the ships and the great firing positions their archers have on them.
Dol Guldor
+Troops are very easy to level
+Shared resources with Mordor
-Very weak troops
-Dangerous and deadly starting enemies
The Mordor orcs of Dol Guldor are a separate faction but they also use Mordor resources and some of the same orcs that Mordor use. The also have stronger archers with better bows, arrows, and axes. They don’t have many recruiting locations but Dol Guldor players can travel south easily to use Mordor Uruks or black numenoreans. Unlike Mordor though it’s not so easy fighting with them due to the elves being nearby.
Fighting Dol Guldor is similar to Mordor but harder because of their stronger archers. Guldor warbands likewise have Uruk soldiers and Olog-Hai of Mordor. Most of their troops are archers so running them down with heavy cavalry is a very effective tactic against them. Since they are still orc archers though most good factions can also easily out-shoot them.
Rhun
+Exceptional horse archers
+Skilled mounted elites
+Lots of recruiting locations
+Troops are easy to level
-Poor infantry options
-Elites troops are rare and hard to level
-Weak armor
The men of Rhun are the evil men of the north that mainly fight Dale, Erebor, and Mirkwood. Rhun’s troops are easy to upgrade and pack a punch with their giant axes and swords though they are poorly armored. Their nobles have moderate armor but are rare while their lancers are poorly armored but can kill some of the hardiest enemies with swift couched attacks. When upgraded Rhun soldiers are competent, deadly, and replaceable due to having three recruiting locations and potentially the city of Dale. Their horse archers are the best among evil factions and even give Rohan skirmishers a run for their money.
Fighting against Rhun is very easy because of their lightly armored unupgraded armies that die easily to almost anything. Another big weakness of theirs is their dependence on light cavalry which is almost useless when fighting in the woods of Mirkwood which is conveniently near their camps. Their bull warriors can be dangerous and sometimes can crush through blocks so be careful!

Saruman’s Factions
Isengard
+Troops are easy to level
+Lots of recruiting locations
+Deadly archers
+Armor piercing specialists
-Weak warg riders for cavalry
-Limited availability of shields
-Unimpressive orc units
The main forces of Saruman have a strong troupe of fighting Uruk-Hai and some angry orcs to support them. Their orcs can be very useful to knock people out instead of killing them or penetrating enemy armor and their Uruk-Hai are relatively well armored killing machines. They also have some good archers which have piercing damage. Isengard gets more camps after the war starts so you can get plenty of orcs and Uruk-Hai for your army. Isengard has only Rohan to fight and it’s not very hard because Rohan troops aren’t very strong. Dunland is also nearby to help you out. If you’re an Uruk-Hai you can also get a giant warg from saruman – it’s a very strong mount!
Fighting Isengard can be tough because of their strong archers and hard-hitting infantry. They don’t use their shields too much and many of their orcs are shield-less despoilers. If you have foot archers you can try shooting them down but otherwise it’s best to face them head on with heavy infantry with shields to cancel out the effectiveness of their archers.
Dunland
+Troops are easy to level
+Deadly infantry
+Wolves
+Great javelin throwing troops
-No archers
-Weak armor
-No heavy cavalry
-Only one recruiting location
Dunland is past the river Isen but the dunladers built a camp near Isengard to help Saruman win the war. They don’t like Rohan because Helm Hammerhand of Rohan killed their noble called Freca a long time ago so they want revenge. Dunland is similar to Khand as it has no archers and great javelin units but it instead uses infantry as its main force. Dunnish infantry is very formidable and have some of the strongest weapons evil factions have to offer. They aren’t very well armored though but have amazing shields to compensate. Playing with Dunland is similar to playing as Isengard as you have to fight Rohan. Dunnish cavalry counter Rohan horse archers very well so fighting them is not hard.
Combating the forces of Dunland is not easy because of their deadly javelins and melee weapons. Shooting them down is hard due to their shields and running them down with cavalry is hampered by their pikes. Bringing a lot of shields and tough archers capable of a melee scuffle is effective because fighting is bound to get up close and you need the protection against the javelin barrage. If you get a strong heavy cavalry army though not even their pikes will save them from being run down.
Moria
+Strong orc troops
+Versatile and deadly warg riders
+Troops are very easy to level
-Weak orc archers
-Only one recruiting location
-Hard start with dangerous elves as starting enemies
The orcs of Moria are some of the strongest orcs in Middle Earth. They have brutal warg riders and terrifying high tier orcs which are easy to upgrade and which can defeat stronger enemies using their large numbers. They have few recruiting location but the Gates of Moria always have a huge number of orcs ready for hiring. Early on in the game they can be very hard to play with because of the elves nearby. It may be better to migrate early on to Isengard or Gundabad because fighting Lorien or the Dunedain is just impossible without your troops being upgraded early on.
Fighting Moria can be a bit harder because some of their orcs can easily pierce armor and have wide shields to protect them from arrows. A lot of their warg riders have spears too and perform couch attacks. Shooting them down is still effective if you have a full army of strong archers but otherwise fighting them in melee with shield infantry may have to do. Rushing them down with cavalry is hindered by their use of cave trolls which are best taken out with armor piercing archers.
Gundabad
+Strong melee warg riders
+Troops are very easy to level
+Lots of recruiting locations
-Warg rider archers are weak against well armored troops
-Lackluster orc infantry
-Weak armor
Similar to Moria the armies of Gundabad have formidable orc infantry and strong warg riders. They have a huge amount of camps to recruit though most of them appear only after the war starts. They also get a second chance in case their capital gets destroyed and they get to live on operating from Goblin Town. Playing with Gundabad is easy though because of how aggressive their commanders are. You have lots of safe areas around the Misty Mountains where they can run away to recover. They also excel at fighting in Mirkwood where they can abuse the small map size overrun enemies with masses of orc infantry.
Fighting against Gundabad can be very frustrating because of how many wargs they field. Their warg riders are tough and use bows to pellet your soldiers with arrows. Bringing a tough infantry line is the best option to fight them because of how the wargs can dismount your riders and because of how their riders can crush your archers.

Tips and Tricks
Building an Army
To get a large and powerful army it is important to level up your Trainer and Surgery skills. Trainer allows you to quickly upgrade recruits into powerful troops while Surgery allows you to retain these soldiers after battles. Without these skills building an army becomes very hard.
Charisma and leadership are also important but they can be replaced by grinding lots of rank for the extra army point or getting special items which boost your leadership. Besides, you can boost your troop amount by ordering patrols or lords to follow you so getting stronger troops is more important.
If you use orcs in your army you may notice that your party size greatly increases when you take them. Every orc gives you an orc horde bonus which allows you get even more orcs for every orc you get. This allows you to gather huge orc armies. Be careful, though, orcs need good morale and lots of food or else they start rebelling, they try killing you, and they start eating each other! You can execute prisoners to get man-flesh from them to feed your orcs. Orcs can also eat rotten beef.
Winning the War
If you’re good the War of the Ring is harder and it can be hard to win if you mess around. Try to knock enemies out quickly if you’re fighting in the North. If you’re Rohan beware of the Southern evil factions that will come for you if Gondor falls. Gondor will be destroyed if no aid arrives. Either destroy Moria and Dol Guldor to get the elves to come down to aid you or try destroying Dunland and Isengard to get Rohan to come to Gondor before it collapses.
Destroying the evil men factions first is a good strategy because they only have 1 camp each and they are poorly defended without walls or towers. The evil men also have the strongest armies so destroying them first will make the war much easier.
Getting the ability to siege towns yourself is vital if your allies are losing and are fighting on the defensive. You can gather massive hosts by ordering generals to follow you or ordering scout parties to follow you and reinforcing them with troops stored in your capital/advanced camp and personally lead successful sieges against enemy bases.
If you’re evil remember that the War of the Two Towers is coming. It could be a good tactic to prepare for the war and try having as many of Sauron’s/Saruman’s factions destroyed or crippled by the Free Peoples instead of focusing on working together. You can even sabotage the defenses of your ‘allies’ by abusing friendly fire and killing their troops when their towns are being attacked!
Recruitment
Your main army will come from all the recruits that you can hire from any allied town. However, if you want to build an army of specific troops like an Uruk-Hai army or an army of Dale cavalrymen you should keep in mind the mechanics behind the recruit spawns in the towns.
A full set of fresh recruits appears in a town every morning. This, however, only occurs if there are no recruits left in the town at all. If there are recruits left a few extra ones spawn but not the complete amount. This means that if you only buy Uruk-Hai from Isengard the orcs in Isengard will continuously grow in numbers from day to day making the amount of Uruk-Hai recruits diminish. After a few weeks of this and Uruk-Hai recruits will not spawn in Isengard at all as the “recruit-pool” will be “overflooded” with orcs.
To get the most of these rarer recruits (or the more common ones too) just hire all the recruits from the town and leave nobody behind. This way the next day you will be guaranteed with a good amount of fresh Uruk-Hai or gondor nobles or black numenoreans or whatever other alternative recruit unit in the game you want to get. You then can get rid of the purchased recruits you don’t need by storing them in the town, selling them to the town or just disbanding them.
Weapons and Armour
You can get some very strong weapons and armor from faction rewards. However, those are not always easy to get but you can still buy some very good items from shops. Here are some of the best weapons and armor pieces you can buy from shops.
Good Factions
One Handed:
Gondor Citadel Sword – Minas Tirith – strong and overall well-rounded sword
Dol Amroth Knight Sword – Dol Amroth – another good sword
Dwarven Battle Axe – Erebor – a low-reach but very hard hitting axe
Polearm:
Gondor Lance – Minas Tirith/Dol Amroth – the finest lance you’ll find
Gondor Tower Spear – Minas Tirith – not good for mounted combat but it hits like a truck
Northmen Longaxe – Beorn’s House – a very heavy long-reaching axe that crushes most blocks
Beorning War Axe – Beorn’s House – not so long-reaching but much faster than the other axe
Two Handed:
Dwarven Great Axe – Erebor – an exceptionally powerful axe
Rohan War Sword – Edoras/Hornburg – a versatile and well balanced weapon
Arnor Bastard Sword – Imladris Camp – another versatile and well balanced weapon
Rivendell Bastard Sword – Imladris Camp – and another versatile and well balanced weapon
Bows:
Galadhrim Bow – Caras Galadhon – a very powerful bow with piercing damage
Rivendell Bow – Imladris Camp – another very powerful bow with piercing damage
Dwarf Horn Bow Erebor – a powerful bow you can use on horseback
Gondor Bow – Minas Tirith/Heneth Anun – the best cutting damage bow you’ll be able to find
Armor:
Gondor Leader Armour – Minas Tirith – very hardy and stylish black armor
Rivendell Leader Armour – Imladris Camp – tough and elegant blue armor
Arnorian High Armour – Imladris Camp – shiny armor from the north with a sleek coat of blue
Dol Amroth Very Heavy Mail – Dol Amroth – another strong blue colored armor
Evil Factions
One Handed:
Sword of Mordor – Morannon/Dol Guldor – strong and overall well-rounded sword
Dunnish War Axe – Dunlander Camp – a low reach but very hard hitting axe
Far Harad Mace – Haradrim Camp – a strong blunt weapon good for taking prisoners
Kraken Cutlass – Umbar Camp – a lightning fast but not very strong sword
Polearms:
Khand Lance – Khand Camp – the finest lance you’ll find as a servant of darkness
Isengard Mallet – Isengard – a very hard-hitting weapon capable of breaking blocks
Umbar Short Spear – Umbar Camp – a very fast but short spear good for close combat
Mordor Spear – Morannon/Dol Guldor – a solid and well-rounded spear
Two Handed:
Rhun Great Axe – Rhun Main Camp – a powerful axe capable of breaking lighter blocks
Khand Tulwar – Khand Camp – a versatile and long reaching sword
Bastard Sword of Mordor – Morannon/Dol Guldor – another versatile and long reaching sword
Bows:
Corsair Bow – Umbar Camp – the best armor piercing bow
Eagle Guard Bow – Haradrim Camp – the best cutting damage bow you’ll be able to find
Balcoth Bow – Rhun Main Camp – the best bow that can be used on horseback
Armor:
Black Numenorean Armour – Morannon/Dol Guldor – very hardy armor that’s shiny and black
Mordor Captain Armour – Morannon/Dol Guldor – less shiny, more black, and very strong armor
Khand Heavy Lamellar- Khand Camp – a sleek white set of strong armor
How to gather a huge force and personally siege and destroy the enemy
Creatures of War
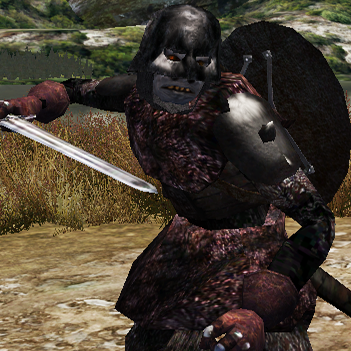
The TLD mod adds in several new creatures of war from Tolkien’s universe into Mount and Blade. These creatures are mostly available to evil factions and some are neutral pests than randomly attack you in certain areas.
Wargs
Wargs are mounts that are ridden by orc warg riders. All orc factions have warg riders available to them and wargs turn hostile to enemies when their rider is killed. Unlike harmless horses these wargs run around and harass you and can be more dangerous than they were when mounted by an orc.
Wargs have the same speed as they used to when they were normal mounts and knock you about in the same way. They also have several special attacks. They have an unpredictable bite attack which they will perform if you’re too close for too long and a leaping dismounting attack which can throw you out of the saddle.
In the updated version of the mod the wargs are less problematic as they no longer fight on forever. After a certain period of time wargs can relent and revert to being mounts or just run away. They are still dangerous and when fighting them you may want to aim for the warg first and then the rider. Strangely enough when wargs turn “feral” they have an armor boost and it’s visible harder to damage them especially with weaker weapons.
Wolves
Wolves are controlled by the forces of Dunland. When you or an army wields high-end Dunland troops there is a chance that a wolf or several wolves automatically spawn with them. Wolves don’t spawn in siege battles.
Wolves are similar to wargs – they bite and they knock you around. However, unlike wargs they are as fast as lightning and if left unchecked can speed very quickly into the fray and become separated from the main fighting force.
Werewolves
A larger and meaner version of the wolf werewolves are special creatures only available to the player. One of the followers is capable of turning a strong enemy prisoner into a werewolf. Unlike wolves they who appear automatically werewolves take up a slot in your army and are permanent so if they die they won’t just appear again out of thin air as long as their master lives on.
In combat they operate very much like wolves do and rush head using their lightning speed into the fray if not controlled. They are faster than the fastest Rohirrim horse!
Bears
Bears operate using the same spawning mechanic that wolves do. Higher tier Beorning warriors will cause bears to automatically spawn in battles alongside you. Dimborn the Beorning companion likewise causes a bear to spawn.

Bears are much more fearsome than wolves and have an area of effect attack that causes enemies to fly back and take damage. They also have an area of effect roar that causes enemies to get dismounted. They have high armor and can wreck havoc especially against weaker enemies like orcs who have a hard time hurting it.
Bears can get bugged and “dismounted”. When this happens the bear turns into a harmless mount and you can even ride it or sometimes see another dismounted knight mount the bear and ride it to battle.
Trolls
All factions that feature orcs likewise feature trolls. Trolls appear like giant soldiers that trundle slowly into battle with oversized weapons and massive shields. Though they can also run and sometimes accelerate at tremendous speeds! They have both normal and special attacks and can be recruited for influence points from the barracks if you’re playing for evil.
Their normal attacks are deceptive a their massive club doesn’t actually have a very long reach. It can crush through blocks so most blocks you make against overhead attacks from trolls will be futile. Left or right swing attacks, however, can still be blocked. The troll also has a special knockback attack and a charge which scatters enemies all around him. This doesn’t deal too much damage but can kill unarmored targets in groups very quickly. The knockback caused by these attacks is not genuine and causes the victims to slide back to avoid them falling off walls or bridges; trolls can’t knock entire armies into the abyss even when fighting on narrow bridges in places like Goblin Town.
Trolls have natural armor and armored trolls are even more armored. They also can use shields which although very sturdy can be broken. The easiest way of dealing with trolls is shooting them down with piercing arrows but they can be overwhelmed in melee with enough strong-hitting infantry going up against them. Though if they’re overwhelmed by weaker units they can be very dangerous and end up killing them all.
Because of this trolls are very effective against orc factions as orcs have weaker soldiers overall. While elves can make short work of them with a couple of arrow volleys mordor orc archers don’t damage them at all. Using hard hitting orcs like gundabad orc berserkers works well but even high level orcs that don’t hit as hard are going to collapse when facing up against trolls. When fighting the war of the two towers participating in ally sieges can be cheesy as the allied trolls often destroy enemy orcs at a simply unfair pace!
Ents
Ents are similar to trolls but without shields. They have most of the same attacks and even sound the same. Ents can be found in the fangorn Forest. Saruman can give you a quest to investigate the forest and lead you to fight these ents. This quest is useful because killing the ents will result in a helpful permanent stat boost once you drink their ent water.
Killing ents early on can be challenging since when fighting them you aren’t allowed to bring your whole army. Using a long pike with several points into power strike can be effective.

Good Rewards
Gondor
Rank 0 Commoner of Gondor
Rank 1 Soldier of Gondor
Rank 2 Sergeant of Gondor: Cooking Cauldron +20 to Party Morale
Rank 3 Knight of Gondor: Middle Earth Herbarium +1 to Wound Treatment
Rank 4 Tower Guard of Gondor: Gondor Citadel Shield 480 HP, 16 Resistance, 180 Size, 92 Speed, 2.5 Weight
Rank 5 Citadel Knight of Gondor: Silmarillion +1 Leadership
Rank 6 Steward’s Guard of Gondor: Gondor Tower Knight Armour 45 Body Armour, 14 Leg Armour, 35 Weight
Rank 7 Captain of Gondor: Tower Guard Helm 46 Head Armour, 4 Weight
Rank 8 Champion of Gondor: Sword of Westernesse 1H, 38P Swing, 45P Thrust, 117 Speed, 77 Reach, 1.3 Weight, Requires 15 Strength
Rank 9 Hero of Gondor: Horn of Gondor +1 Leadership, +1 Charisma, +3 Rallies in Battles
Rohan
Rank 0 Ceorl, Commoner of Rohan
Rank 1 Thain, Servant of Rohan
Rank 2 Léod, Freeman of Rohan: Cooking Cauldron +20 to Party Morale
Rank 3 Rohir, Rider of Rohan: Maps of Middle Earth +1 to Pathfinding
Rank 4 Scyldbora, Shieldbearer of Rohan: Rohirrim Armoured Courser 31 Armour, 42 Speed, 40 Maneuver, 28 Charge, 120 HP, Requires 3 Riding
Rank 5 Swéordbora, Swordbearer of Rohan: Rohan Lance With Horse Banner Polearm, 33P Thrust, 93 Speed, 217 Reach, 3 Weight
Rank 6 Frumgar, First Spear of Rohan: Rohan Royal Armour 43 Body Armour, 15 Leg Armour, 35 Weight, Requires 15 Strength
Rank 7 Bealdoraed, Master Adviser of Rohan: Saddle of Thengel +1 to Riding Skill During Battles
Rank 8 Eorl, Nobleman of Rohan: Sword of Eorl 1H, 55C Swing, 22P Thrust, 97 Speed, 105 Reach, 1.3 Weight, Requires 15 Strength, Bonus Against Shields
Rank 9 Haleth, Hero of Rohan: Mearh Stallion 60 Armour, 45 Speed, 40 Maneuver, 40 Charge, 180 HP, Requires 5 Riding
Lothlorien
Rank 0 Sador, Faithful to Lorien
Rank 1 Tauron, Forester of Lorien
Rank 2 Mifaron, Grey Hunter of Lorien: Lembas +30 to Party Morale, 100 Food Units
Rank 3 Thindirith, Grey Guard of Lorien: Athelas Plant +1 to First Aid
Rank 4 Thangyl, Shieldbearer of Lorien: Elven Amulet +1 to Power Draw During Battles
Rank 5 Maglagyl, Swordbearer of Lorien: Elven Cloak +1 to Wildcraft
Rank 6 Tiribrannon, Warden of Lorien: Silmarillion +1 Leadership
Rank 7 Glaurchir, Grandmaster of Lorien: Lorien Royal Armour 51 Body Armour, 23 Leg Armour, 26 Weight, Requires 15 Strength
Rank 8 Galadhîr, Radiant Lord of Lorien: Noldorin Bow 24P Damage, 93 Accuracy, 99 Speed, 54 Missile Speed, 1.5 Weight, Requires 5 Power Draw
Rank 9 Thalion, Hero of Lorien: Light of Galadriel +1 to Wildcraft, +1 to Leadership, +1 Intelligence
Imladris
Rank 0 Háno, Brother of Imladris
Rank 1 Macar, Warrior of Imladris
Rank 2 Macar, Warrior of Imladris: Lembas +30 to Party Morale, 100 Food Units
Rank 3 Luinëcollo, Blue Cloak of Imladris: Athelas Plant +1 to First Aid
Rank 4 Turmacolindo, Shieldbearer of Imladris: On the Fall of Gondolin +1 to Tactics
Rank 5 Langocolindo, Swordbearer of Imladris: Miruvor Flask +1 to First Aid
Rank 6 Aráto, Champion of Imladris: Imladris Steed 36 Armour, 42 Speed, 38 Maneuver, 28 Charge, 135 HP, Requires 6 Riding
Rank 7 Hesto, Captain of Imladris: Sword of Westernesse 2H/1H, 50C Swing, 45P Thrust, 110 Speed, 110 Reach, 3 Weight, Requires 18 Strength
Rank 8 Runando, Redeemer of Imladris: Shield of Tuor 930 HP, 22 Resistance,192 Size, 77 Speed, 4 Weight
Rank 9 Callo, Hero of Imladris: Rivendell Decorated Armor 2 Head Armour, 45 Body Armour, 22 Leg Armour, 24 Weight, Requires 15 Strength
Woodland Realm
Rank 0 Sador, Faithful to Greenwood
Rank 1 Tauron, Forester of Greenwood
Rank 2 Hirfaron, Master Hunter of Greenwood: Lembas +30 to Party Morale, 100 Food Units
Rank 3 Calendirith, Green Guard of Greenwood: Athelas Plant +1 to First Aid
Rank 4 Thangyl, Shieldbearer of Greenwood: Elven Amulet +1 to Power Draw During Battles
Rank 5 Maglagyl, Swordbearer of Greenwood: Mirkwood Bow 24P Damage, 93 Accuracy, 98 Speed, 65 Missile Speed, 1.5 Weight, Requires 4 Power Draw, Cannot be Used on Horseback
Rank 6 Tiribrannon, Warden of Greenwood: Woodelf Axe 1H, 35C Swing, 116 Speed, 51 Reach, 1 Weight, Bonus Against Shields
Rank 7 Pengherdir, Bowmaster of Greenwood: Finwarisil +1 to Agility During Battles
Rank 8 Armagor, Royal Swordsman of Greenwood: Woodelf Arrows +9 Damage, 29 Ammo, 3 Weight
Rank 9 Thalion, Hero of Greenwood: Greenwood Relic Sword 1H, 42P Swing, 45P Thrust, 110 Speed, 90 Reach, 3 Weight, Requires 12 Strength, Bonus Against Shields
Vale of Anduin
Rank 0 Forest Cub
Rank 1 Forest Tracker
Rank 2 Forest Hunter: Cooking Cauldron +20 to Party Morale
Rank 3 Forest Ranger: Athelas Plant +1 to First Aid
Rank 4 Forest Shieldbearer: Hunter Boots 22 Leg Armour, 1 Weight, +2 Athletics when Equipped
Rank 5 Forest Axebearer: Woodmen Staff 25B Swing, 25B Thrust, 115 Speed, 104 Reach, 2 Weight
Rank 6 Forest Bear: Middle Earth Herbarium +1 to Wound Treatment
Rank 7 Forest Great Bear: Bear Club 1H, 37B Swing, 94 Speed, 67 Reach, 4.5 Weight, Requires 12 Strength, Can Crush Through Blocks
Rank 8 Forest Giant: Beorning Chieftain’s Tunic 39 Body Armour, 21 Leg Armour, 18 Weight, Light Armour
Rank 9 Hero of the Forests: Beorning Shield 773 HP, 13 Resistance, 140 Size, 95 Speed, 4.5 Weight, Turns Nature to Your Side (scales with Wildcraft)
Dale
Rank 0 Commoner of Dale
Rank 1 Freeman of Dale
Rank 2 Soldier of Dale: Cooking Cauldron +20 to Party Morale
Rank 3 Boatman of Dale: Maps of Middle Earth +1 to Pathfinding
Rank 4 Shieldbearer of Dale: Archer Gloves 3 Body Armour, 3 Weight 0, +1 to Power Draw when Equipped
Rank 5 Swordbearer of Dale: Thrush +1 Tactics, +1 Spotting
Rank 6 Barding, Archer of Dale: Nobleman Mail 4 Head Armour, 38 Body Armour, 15 Leg Armour, 25 Weight
Rank 7 Captain of Dale: Dale Royal Sword 1H, 53C Swing, 35P Thrust, 98 Speed, 110 Reach, 1.3 Weight, Requires 16 Strength
Rank 8 Lake Master of Dale: Black Arrows +8 Damage, 25 Ammo, 3 Weight, Can Crush Through Blocks
Rank 9 Hero of Dale: Bow of Bard 28P Damage, 100 Accuracy, 90 Speed, 69 Missile Speed, 1.5 Weight, Requires 5 Power Draw, Cannot be Used on Horseback
Erebor
Rank 0 Dwarven Greenbeard
Rank 1 Dwarven Miner
Rank 2 Dwarven Warrior: Cooking Cauldron +20 to Party Morale
Rank 3 Dwarven Longbeard: Smith’s Hammer +1 to Weapon Mastery
Rank 4 Dwarven Axe: Dwarf Throwing Axes 68C Damage, 4 Ammo, 102 Speed, 20 Missile Speed, 5 Weight, Bonus against Shields
Rank 5 Dwarven Master Axe: Shield of Kheled-Zaram 800 HP, 28 Resistance, 140 Size, 82 Speed, 3 Weight
Rank 6 Dwarven Greybeard: Tulcarisil +1 to Strength
Rank 7 Dwarven Captain: Erebor Scale Mail 8 Head Armour, 49 Body Armour, 19 Leg Armour, 23 Weight, Requires 18 Strength
Rank 8 Dwarven Chief: Dwarf Sharp Axe 2H, 55P Swing, 90 Speed, 110 Reach, 6 Weight, Requires 18 Strength, Bonus Against Shields, Cannot be Used on Horseback, Can Crush Through Blocks
Rank 9 Hero of the Halls: Dwarf King Helm 56 Head Armour, 2 Weight
Sauron’s Rewards
Mordor
Rank 0 Worm
Rank 1 Snaga
Rank 2 Backstabber of Gorgoroth: Cooking Cauldron +20 to Party Morale
Rank 3 Sentry of Cirit Ungol: Orc Brew +1 to Athletics (consumable)
Rank 4 Slavedriver of Udun: Evil Mace 1H, 30B Swing, 93 Speed, 59 Reach, 3.5 Weight, Can’t Be Used to Block
Rank 5 Despoiler of Durthang: Huge Warg 45 Armour, 35 Speed, 62 Maneuver, 62 Charge, 180 HP, Requires 5 Riding
Rank 6 Watchman of Morannon: Master’s Whip +1 to Trainer, Can Recruit Tribal Orcs
Rank 7 Captain of Minas Morgul: Mordor Captain Armour 46 Body Armour, 22 Leg Armour, 30 Weight
Rank 8 Commander of Barad-Dur: Mordor Sinister Warhorse 63 Amour, 33 Speed, 30 Maneuver, 54 Charge, 160 HP, Requires 4 Riding
Rank 9 Scourge of Mankind: Wicked Helm 45 Head Armour, 2.5 Weight, Requires 12 Strength, +1 to Ironflesh, +1 to Prisoner Management, +1 to Charisma when Equipped
Dol Guldor
Rank 0 Worm
Rank 1 Snaga
Rank 2 Backstabber of Gorgoroth: Cooking Cauldron +20 to Party Morale
Rank 3 Sentry of Cirit Ungol: Orc Brew +1 to Athletics (consumable)
Rank 4 Slavedriver of Udun: Middle Earth Herbarium +1 to Wound Treatment
Rank 5 Despoiler of Durthang
Rank 6 Watchman of Morannon: Master’s Whip +1 to Trainer, Recruits Tribal Orcs
Rank 7 Captain of Minas Morgul: Spider 30 Armour, 50 Speed, 75 Maneuver, 25 Charge, 60 HP
Rank 8 Commander of Barad-Dur: Black Arrows +3 Damage, 25 Ammo, 3 Weight, Can Crush Through Blocks
Rank 9 Scourge of Mankind: Wicked Sword 2H, 50P Swing, 45P Thrust, 103 Speed, 112 Reach, 4.5 Weight, Requires 18 Strength, Bonus Against Shields, Can Crush Through Blocks
Harad
Rank 0 Initiate of the Tribe
Rank 1 Adult of the Tribe
Rank 2 Warrior of the Tribe: Cooking Cauldron +20 to Party Morale
Rank 3 Lionslayer: Maps of Middle Earth +1 to Pathfinding
Rank 4 Snakecharmer: Eagle Guard Bow 31P Damage, 93 Accuracy, 93 Speed, 56 Missile Speed, 1.3 Weight, Requires 4 Power Draw, Cannot be Used on Horseback
Rank 5 Mumakil Handler: Evil Torque +1 to Power Strike
Rank 6 Black Snake Guard: Tulcarisil +1 to Strength
Rank 7 Captain of Harondor: Harasjala Polearm Polearm, 41C Swing, 31P Thrust, 87 Speed, 149 Reach, 3 Weight, Cannot be Used on Horseback
Rank 8 General of the Great Desert: Harad Noble Armour 41 Body Armour, 16 Leg Armour, 30 Weight, Requires 18 Strength
Rank 9 The Golden Serpent: Harad Totem +1 to First Aid, +1 to Surgery
Khand
Rank 0 Plainsman of Khand
Rank 1 Serf of Khand
Rank 2 Warrior of Khand: Cooking Cauldron +20 to Party Morale
Rank 3 Hawk Warrior of Khand: Smith’s Hammer +1 to Weapon Mastery
Rank 4 Shieldbearer of Khand: Khand Lance Polearm, 29P Thrust, 91 Speed, 218 Reach, 2.5 Weight
Rank 5 Swordbearer of Khand: Evil Torque +1 to Power Strike
Rank 6 Horsemaster of Khand: Tulcarisil +1 to Strength
Rank 7 Warlord of the Variags: Easterling Warhorse 48 Armour, 39 Speed, 33 Maneuver, 42 Charge, 135 HP, Requires 6 Riding
Rank 8 Chief of the Variag Clans: Khand Ram Mace Polearm, 38B Swing, 85 Speed, 102 Reach, 6 Weight, Can Crush Through Blocks
Rank 9 Legendary Conqueror: Khand Sacrificial Knife +1 to Leadership, +1 to Charisma
Umbar
Rank 0 Landlubber
Rank 1 Deck Hand
Rank 2 Sailor: Cooking Cauldron +20 to Party Morale
Rank 3 Harpooner: Maps of Middle Earth +1 to Pathfinding
Rank 4 Throatcutter: Poisoned Throwing Daggers 50C Damage, 10 Ammo, 110 Speed, 24 Missile Speed, 3.5 Weight
Rank 5 Plunderer: Archer Gloves 3 Body Armour, 3 Weight 0, +1 to Power Draw when Equipped
Rank 6 Sailmaster: Finwarisil +1 to Agility During Battles
Rank 7 Captain of Umbar: Corsair Bow 23P Damage, 87 Accuracy, 83 Speed, 58 Missile Speed, 1.5 Weight, Requires 4 Power Draw, Cannot be Used on Horseback
Rank 8 Commander of the Fleet: Corsair Noble Armour 30 Body Armour, 14 Leg Armour, 24 Weight
Rank 9 Grand Admiral of the Seas: Trident of Sea Fury Polearm (NS), 35P Thrust, 94 Speed, 166 Reach, 4.5 Weight, Requires 12 Strength, Cannot be Used on Horseback
Rhun
Rank 0 Plainsman of Rhun
Rank 1 Serf of Rhun
Rank 2 Warrior of Rhun: Cooking Cauldron +20 to Party Morale
Rank 3 Bull Warrior of Rhun: Garlic +1 to Wound Treatment
Rank 4 Shieldbearer of Rhun: Rhun Horse 13 Armour, 38 Speed, 39 Maneuver, 14 Charge, 80 HP, Requires 2 Riding
Rank 5 Swordbearer of Rhun: Savage Sword 1H, 35C Swing, 95 Speed, 89 Reach, 2.8 Weight
Rank 6 Horsemaster of Rhun: Middle Earth Herbarium +1 to Wound Treatment
Rank 7 Warlord of Rhun: Rhun Heavy Horse 35 Armour, 40 Speed, 38 Maneuver, 30 Charge, 160 HP, Requires 6 Riding
Rank 8 Chief of the Steppe Clans: Balcoth Bow 29C Damage, 85 Accuracy, 99 Speed, 52 Missile Speed, 1.3 Weight, Requires 3 Power Draw
Rank 9 Khamûl’s Right Hand: Helm of Khamûl 50 Head Armour, 4 Weight, Requires 15 Strength, +1 to Riding when Equipped, +1 to Mounted Archery when Equipped
Saruman’s Rewards
Isengard
Rank 0 Rat
Rank 1 Snaga
Rank 2 Crankturner: Cooking Cauldron +20 to Party Morale
Rank 3 Treeburner: Orc Brew +1 to Athletics (consumable)
Rank 4 Wargfeeder: Iron Fists 6 Body Armour, 2 Weight, +1 Power Strike when Equipped
Rank 5 Ironsmelter: Huge Warg 45 Armour, 35 Speed, 62 Maneuver, 62 Charge, 180 HP, Requires 5 Riding
Rank 6 Forgemaster: Evil Torque +1 to Power Strike
Rank 7 Captain of Orthanc: Silmarillion +1 Leadership
Rank 8 Commander of Legions: Uruk-Hai General Armour 44 Body Armour, 23 Leg Armour, 40 Weight, +1 to Charisma when Equipped, +1 Trainer when Equipped
Rank 9 White Right Hand of the Wizard: Isengard Mine +2 to Tactics
Dunland
Rank 0 Pup
Rank 1 Dog
Rank 2 Wardog: Cooking Cauldron +20 to Party Morale
Rank 3 Wolf: Garlic +1 to Wound Treatment
Rank 4 Strong Wolf: Crebain +1-4 to Spotting (scales with Wildcraft)
Rank 5 Dire Wolf: Wilderness Amulet +1 to Wildcraft
Rank 6 Great Wolf: Dunnish Pike Polearm, 29P Thrust, 88 Speed, 205 Reach, 3 Weight, Cannot be Used on Horseback
Rank 7 Wolfpack Leader: Hunter Boots 22 Leg Armour, 1 Weight, +2 Athletics when Equipped
Rank 8 Chief of the Clans: Dun Chief Armour 8 Head Armour, 31 Body Armour, 19 Leg Armour, 26 Weight
Rank 9 Freca’s Avenger: Dunland Chieftain Sword 1H, 43C Swing, 37P Thrust, 106 Speed, 98 Reach, 1.3 Weight, Requires 16 Strength, Can Crush Through Blocks, Less Dunnish Upkeep when Equipped
Moria
Rank 0 Maggot
Rank 1 Snaga
Rank 2 Tunnel Rat: Cooking Cauldron +20 to Party Morale
Rank 3 Cave Forager: Orc Brew +1 to Athletics (consumable)
Rank 4 Plunderer of the Mines: Moria Orc Shield 423 HP, 12 Resistance, 79 Size, 96 Speed, 3 Weight
Rank 5 Despoiler of the Halls: Huge Warg 45 Armour, 35 Speed, 62 Maneuver, 62 Charge, 180 HP, Requires 5 Riding
Rank 6 Dwarfbane: Finwarisil +1 to Agility
Rank 7 Goblin Warlord: Dwarf Great Pick 2H, 30P Swing, 94 Speed, 93 Reach, 3 Weight, Bonus Against Shields, Cannot be Used on Horseback, Unbalanced, Can Crush Through Blocks
Rank 8 Goblin Chief: Moria Orc Heavy Mail 29 Body Armour, 17 Leg Armour, 30 Weight
Rank 9 Terror from the Deep: Moria Poisoned Arrows +11 Damage, 40 Ammo, 3 Weight
Gundabad
Rank 0 Turd
Rank 1 Snaga
Rank 2 Tunnel Rat: Cooking Cauldron +20 to Party Morale
Rank 3 Cave Forager: Orc Brew +1 to Athletics (consumable)
Rank 4 Plunderer of the Hills: Gundabad Flying Axes 46C Damage, 6 Ammo, 103 Speed, 30 Missile Speed, 4 Weight, Bonus against Shields
Rank 5 Despoiler of the Mountains: Huge Warg 45 Armour, 35 Speed, 62 Maneuver, 62 Charge, 180 HP, Requires 5 Riding
Rank 6 Dwarfbane: Master’s Whip +1 to Trainer, Can Recruit Tribal Orcs
Rank 7 Wargrider Warlord: Wargrider Helm 31 Head Armour, 1.5 Weight, Less Wargs Upkeep when Equipped
Rank 8 Great Goblin: Gundabad Orc Heavy Armour 26 Body Armour, 14 Leg Armour, 15 Weight
Rank 9 Pillager of the North: Angmar Shield 1683 HP, 24 Resistance, 79 Size, 96 Speed, 4 Weight
Followers
Good Followers
Luevanna – Mirkwood Elf Archer, lvl 1, Rank needed 0, found in Thranduil’s Halls
Cirdil – Gondorian Watchman, lvl 1, Rank needed 0, found in Minas Tirith
Faniul – Healer from Dale, lvl 1, Rank needed 0, found in Dale
Kili Goldfinder – Dwarven Warrior, lvl 7, Rank needed 1, found in Erebor
Dimborn – Beorning Forester, lvl 8, Rank needed 0, found in Woodmen Village
Ulfas – Rider of Rohan, lvl 10, Rank needed 1, found in Hornburg
Mablung – Ranger of Ithilien, lvl 20, Rank needed 3, found in Henneth Annun
Galmyne – Maiden of Rohan, lvl 24, Rank needed 4, found in Edoras
Glorfindel – Ancient Elven Hero, lvl 55, Rank needed 7, found in Caras Galadhon
Evil Followers
Ufthak – Mordor Orc Tracker, lvl 1, Rank needed 0, found in Orc Patrol Camp
Durgash – Isengard Orc Warg Rider, lvl 10, Rank needed 1, found in Isengard
Bolzog – Moria Orc Healer, lvl 7, Rank needed 1, found in Gates of Moria
Gorbag – Mordor Uruk from Cirith Ungol, lvl 20, Rank needed 3, found in Minas Morgul
Gulm – Uruk-Hai Berserker, lvl 25, Rank needed 4, found in Uruk-Hai Hunting Camp
Fuldimir – Corsair of Umbar, lvl 5, Rank needed 0, found in Corsair Camp
Varfang – Horseman of Rhun, lvl 10, Rank needed 2, found in Rhun Main Camp
Heidrek – Pretender of Dunland, lvl 5, Rank needed 3, found in Dunlander Camp
Turmbathu – Gladiator of Khand, lvl 9, Rank needed 4, found in Khand Camp
Zigurphel – Witch of Dol Guldur, lvl 18, Rank needed 5, found in Dol Guldur
Lykyada – Haradrim Horse Archer, lvl 40, Rank needed 5, found in Haradrim Camp
Traits
Traits are bonuses that are gained randomly when you do certain things. Some of them are much easier to get than others and they can be very useful or even game-changing.
Elf Friend
You have become highly esteemed by the Elves and they now regard you as a trusted ally. The cost to recruit elves has been reduced and you may now attempt to give orders to elven armies.
You get this trait by doing lots of quests for elven leaders and gaining high rank with the elves.
Steward’s Blessing
You have become highly esteemed by the Steward Denethor and your status has risen among the men of Gondor as a result. The cost to recruit Gondorians has been reduced and you may now attempt to give orders to Gondorian armies.
You get this trait by doing lots of quests for Steward Denethor and gaining a high relation with him.
King’s Man
You have become highly esteemed by King Theoden of Rohan and your status has risen among the men of Rohan as a result. The cost to recruit Rohirrim men has been reduced and you may now attempt to give orders to the armies of the Riddermark.
You get this trait by doing lots of quests for King Theoden and gaining a high relation with him.
Reverent
You have acquired a reputation for reverence and wisdom. Men and Elves are more likely to listen to your counsel.
This trait gives 2 bonus influence weekly for your faction. You can get it randomly when paying respects at a fallen allied lord’s tomb.
Bravery
You have acquired a reputation for bravery in the face of great danger. Your courage is spoken of in both quiet taverns and the halls of the wise. Your deeds inspire your men and they receive a weekly morale bonus.
You get this trait randomly by fighting and defeating armies many times your size. This trait gives you 20 extra morale per week.
Oathkeeper
You have sworn grim oaths and lived to see them fulfilled. Subsequently you have acquired a reputation as a man of his word. You receive a weekly influence bonus.
This trait gives 2 bonus influence weekly for your faction. You get this trait by swearing an oath of vengeance at an allied lord’s tombstone and killing enough enemies. Around 200 enemies killed should be enough (you have to kill them personally though). Alternatively if the faction is destroyed after the oath is made you also succeed and get the trait.
Oathbreaker
You have sworn grim oaths and failed to see them through to their conclusion. Subsequently you have acquired a reputation as a man whose passion outstrips his prowess. You receive a weekly influence penalty.
This trait reduces your influence by 2 for your faction every week. You get it if you don’t kill enough enemies after swearing an oath of vengeance. If you get this trait you lose the oathkeeper trait and if you get the oathkeeper trait you lose the oathbreaker trait.
Despoiler
You have acquired a reputation for leaving behind wanton destruction wherever you travel. Such behavior is valued by the dark powers you serve and your receive a weekly influence bonus.
This trait gives 2 bonus influence weekly for your faction. You can get it randomly when defiling the tombstone of a fallen enemy lord.
Accursed
You sense that you have drawn the ire of powers beyond the sea. Your followers sense this doom as well and fear being around you. They receive a weekly morale penalty.
You can get it randomly when defiling the tombstone of a fallen enemy lord.
Berserker
After many battles where you eschewed the use of armor your ferocious will has become like iron. In battles you gain health with every kill you make.
You can get this trait if you fight a lot of battles naked while having an Ironskin skill value of 6 or above. This trait give you the ability to heal when you kill enemies in melee. The healing only works when you are wearing no armour or light armour.
Infantry/Archery/Cavalry Captain
You have developed uncanny skill in the command of infantry/missile/mounted troops. Due to rigorous and specialized training such troops will receive a small health boost, once per battle.
You get this trait by randomly commanding lots of infantry, archer or cavalry units. To get the heal you must press H while in battle.
Command Voice
Your experience with commanding men in the field has lent you an air of authority. The influence cost to give orders to armies in the field has been reduced.
You get this trait by giving out a lot of orders to either allied lords, scouting parties or patrols. This trait halves (rounding up) your influence point cost for giving orders.
Foe Hammer
Having slain many of the great captains of the enemy you find that you have earned a reputation as a fearsome warrior. Troops under your command now receive a weekly morale bonus. Your experiences have also honed your skill in battle.
You get this trait from personally defeating many enemies on the battlefield. This trait gives you 20 extra morale per week, increases your tactics by 1, and increases your weapon skills by 10.
Butcher
Experience has honed your skill in extracting more meat from the flesh of your enemies. You gain an extra pound of flesh every time you slaughter one of your prisoners for meat. You also get more human meat after every battle.
You get this trait randomly by slaughtering prisoners. The effect only works if you slaughter prisoners by talking to them and ordering them to be slaughtered.
There are some other traits out there in this mod but I haven’t ever gotten them and I am not sure how they work.
Exploits
As a single player mod TLD is not subjected to any real restrictions in terms of gameplay and the player can choose to play however he likes. Using cheats can make the game very easy but you don’t need to cheats for that either. The mod has many bugs, exploits, and unbalanced “cheese” that can make the game quite simple once you nail down the formula. To what extent the player chooses to use cheats, exploits or even simple features of the game really changes the experience and can only be regulated by the player himself.
Likewise instead of trying to find bugs or exploits the player can instead put restrictions on himself which can add to the immersion of the experience. For example, while playing with a dwarf character only recruit dwarven soldiers or try playing as man but refrain from using horses. These sort of restrictions obviously make the game more challenging but can be make the experience of beating the odds more rewarding too.
Market Rolling
TLD uses a prefix system to standard items sold in town shops that can greatly increase or decrease their effectiveness. When it comes to armor the best kinds are Masterwork and Reinforced which greatly boost the armor’s protection rating. These upgraded version of armor can be bought from towns if the player is lucky enough to find them. Likewise if you find Tempered or Balanced versions of weapons you are in luck as they are superior in every way to the normal variants.
Market rolling is an exploit where the player makes “market roll” by waiting until the market has its inventory refreshed in an attempt to find the items he’s looking for. In a normal game the player would have the market update naturally as he goes around doing quests or waiting to heal up but this practice involves either purposefully waiting while going between different towns to get the item he wants or simply saving right before the market refresh occurs and constantly loading the game to get the right items.
All town markets have their inventory refreshed in the morning however the time is visibly off-set as the game progresses. At around 300 days into the game the markets will have their refresh off-set all the way to noon.
Some items have a far better percentage of being rolled than others. For example, the Bastard Sword of Mordor, is quite common and getting a roll a Heavy Bastard Sword of Mordor is much easier to find than on something like a Kraken Cutlass. Gondor Ithlien Arrows or Lossonarch Two-Handed axes are likewise very common while Citadel Guard Swords are rare. Don’t be surprised if it’s much harder to roll out the items you need. Relationship with the town plays a role in the odds of a good market roll occurring.
Stage Rolling
This is a simple exploit which changes the random stage you fight on. When the battle starts and you don’t like the stage that’s randomly given to you based on the terrain you’re standing on you can press tab to retreat. Since no enemies are nearby the retreat is “free” costing no casualties and re-entering the fray will roll another stage for you. Note: some locations such as the one next to Erebor have only one stage available so re-rolling it would be pointless.
The Ammo Box
When you start a battle you may notice a peculiar looking box behind. This is the infamous ammo box which you can access to change-up your inventory mid combat. What it also does is simply refreshes your inventory so that if you’re using arrows and you take a peek in the box for a second all your arrows will be reset to full capacity. This exploit can be used to permanently ride around and shoot enemies who lack ranged capabilities or kill harder enemies like ents or trolls. Note: not all stages have the ammo box but most of them do. Sieges never have ammo boxes.
Press F to Retreat
In some battles when you reach the end the up you will have the float up on your screen offering you to press F to retreat. This method of retreating never gives you extra casualties and puts the whole battle on halt. The screen at the end of the battle will be bugged and show no enemy or allied casualties however in reality all casualties will still stay without any extra from the retreat. Note: some stages do not have this option available and nothing appears at the edge of the map.
Unlike pressing tab to retreat this method always retains your army in the same state as it was once the retreat occurs even if there’s 100 angry orcs right next to their faces about to chop them. This can be exploited by archer armies that shoot enemies and just when they get close retreat to force the enemy back to their starting location in the next round all the while refreshing their arrow supply.
Prisoner Farming
When you capture enemies and make them prisoners you can look at them and give them a smack by setting up camp and reviewing your troops. If you are dismounted they will be behind you army and if you are mounted they will be on the opposite side of the map. This is the part where you can simply kill them and train up your weapon skill while you’re at it. Once a prisoner is dead – he’s gone. Dead prisoners also give you man flesh to feed your orcs.
You can simply avoid killing prisoners by using a blunt weapon. On the screen messages appear that experience points gained from killing prisoners are ‘refunded’ after every batch of prisoners you kill or knock out. This message is not accurate and you actually keep all the experience as well as the weapon skill gains from the bullied prisoners.
Thus, experience can be farmed this way by knocking out prisoners over and over again. This is best done with high level prisoners such as King’s Guard or any of the Tower Guard variants for faster results. It still takes a while to advance in level but is much faster than normal gameplay… yet still slower than simply using cheats.
