
Overview
Following my previous guide (playthrough), I decided to make one here for The Secret tombs, the guide consists of videos with [Arabic] Commentary with [English] Subtitles if needed.More Details:1- 8 Videos in 1080HD, describing the map location for each tomb, and walk you through it step by step.2- also there is a commentary to help you understand the idea of each tomb. [Arabic] Commentary with [English] Subtitles.3- Very short (as possible videos, with no failures during compeleting the tomb), so it won’t waste your time.4- I included short discription of each tomb and a mini-text walkthrough, providing the video at the end of each section.5- The DLC tomb is included.If you have ideas to improve our guides, please don’t hesitate to communicate with us, also rate our guide if it gets your liking. thanks and happy Tomb Raiding.
Introduction
Hi there,

and welcome in a new guide, we hope that you would like what we have in the following sections, this is how we are going to operate….
- We chat a bit about the surroundings of the tomb, let it be a location, a game progress, story chat – Contain spoilers -, or how I feel about that particular tomb.
- We see a couple of detailed screenshots, one shows you the map location, the other shows you the entrance marked.
- We talk about special equipment that you might need or require to raid that tomb.
- We might talk about the tomb idea, or alternative ways to do it.
- The video is ready to be watched by you tomb raider, however it’s in Arabic commentary, but we added well written subtitles to the video. so you won’t feel awkward hearing my voice. not by much thought.
here is the names of each tomb ordered by location during the game progress, and their location area name as a reference:
- Tomb Of The Lost Adventurer (DLC Tomb), Forest Ruins.
- Tomb Of The Unworthy, Mountain Village.
- Hall Of Ascension, Mountain Village.
- Well Of Tears, Shanty Town.
- Chamber Of Judgment, Shanty Town.
- Stormguard Sanctum, Summit Forest.
- Flooded Vault, Shipwreck Beach.
- Temple Of Handmaidens, Shipwreck Beach.
- They are voiced in [Arabic] Commentary, but they have subtitles.
- They are 8 Videos, one for each tomb, to consider low speed gamer, and to save your time.
- The Total Length of all videos is 35 Minutes.
- Each Video describes briefly how to find it, and explains the steps and the idea of each map, even though they are not rocket science.
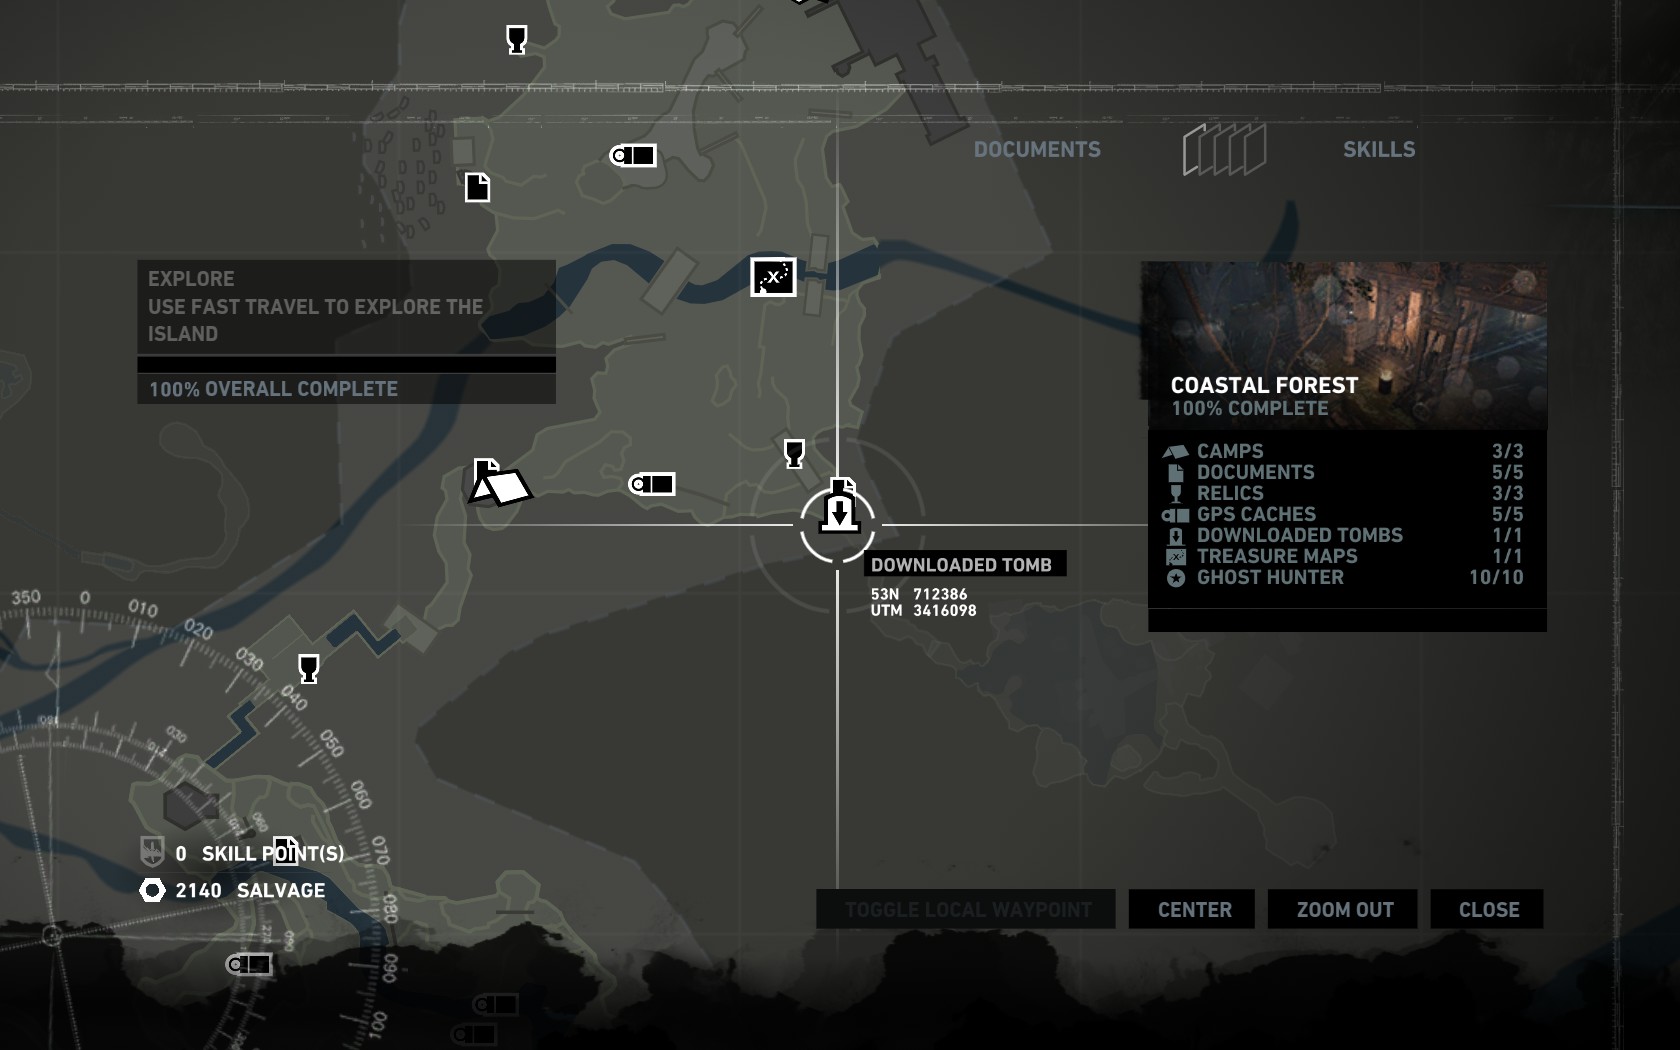
I have provided here in this section the master map for the game, might help you check stuff, but not by much, because I wasn’t free to zoom in a suitable degree.
and here is the YouTube playlist to check the videos freely

Tomb Of The Unworthy
First of all, hello to our humble guide, I will walk with you through these tombs, first let’s check this one over here…..
Such a dreadful name, anyways this tomb is considered the first -minus the DLC Tomb- tomb that you will encounter or discover if you were paying attention while roaming the island, anyhow here is the map location.
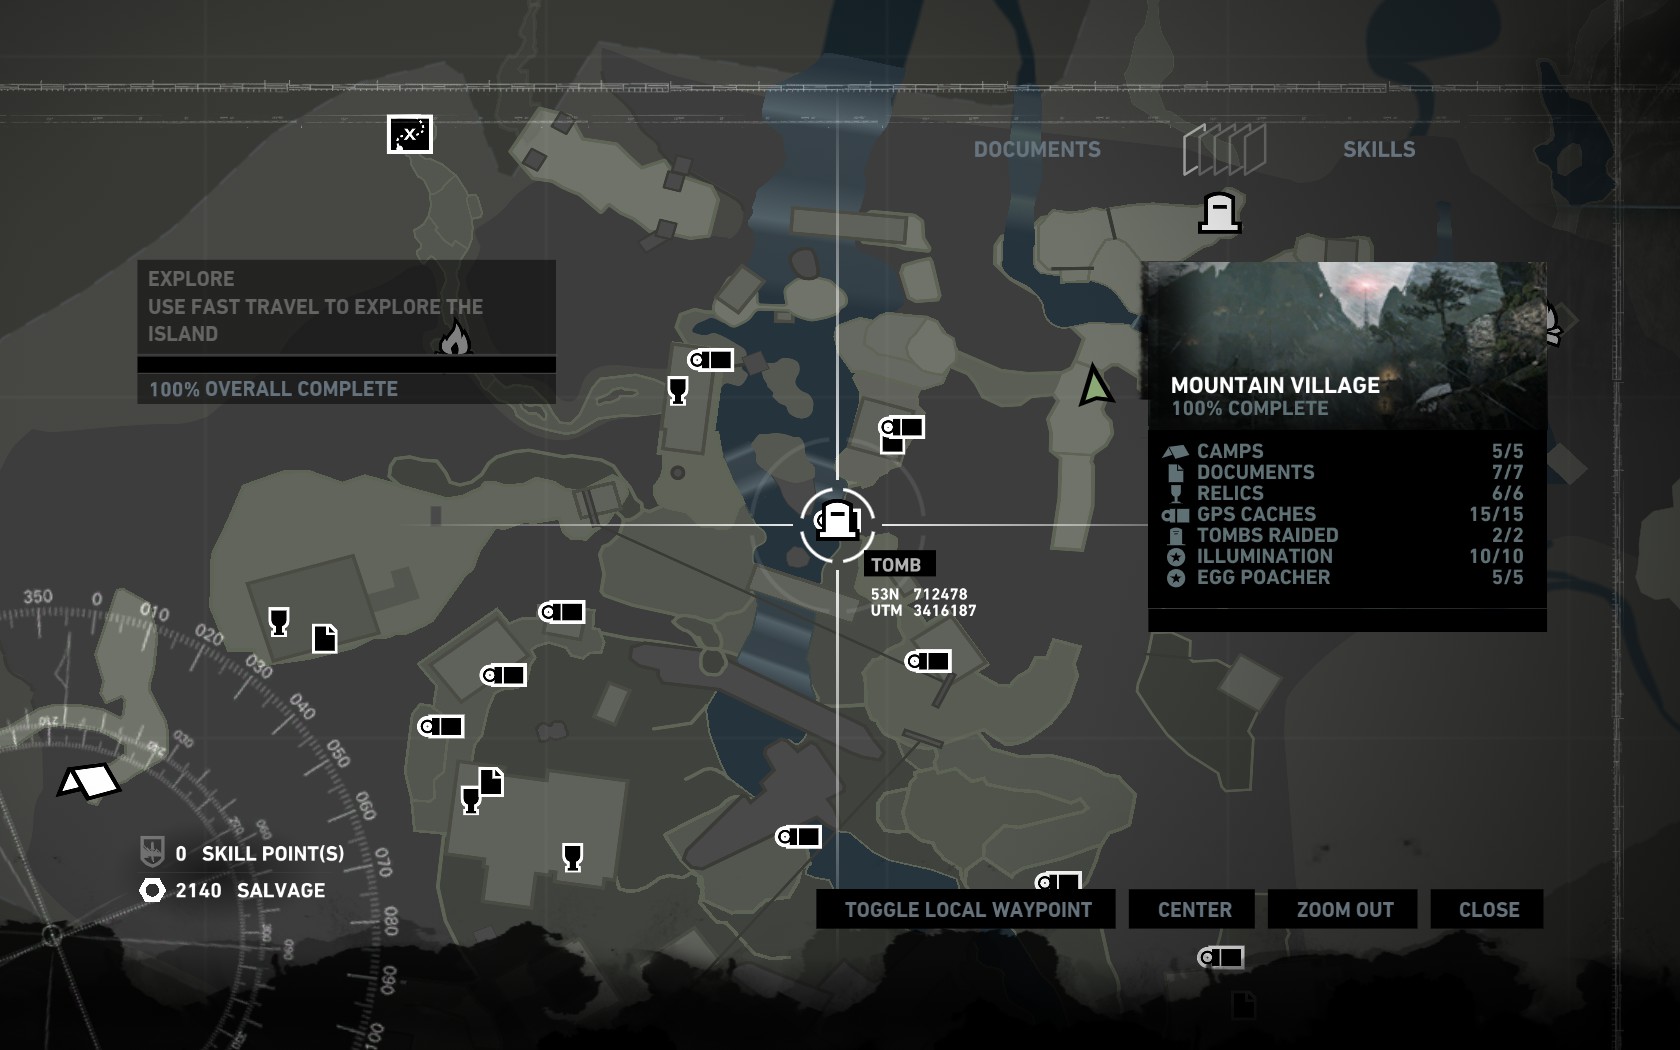
map location:
it is located in the mountain village area.
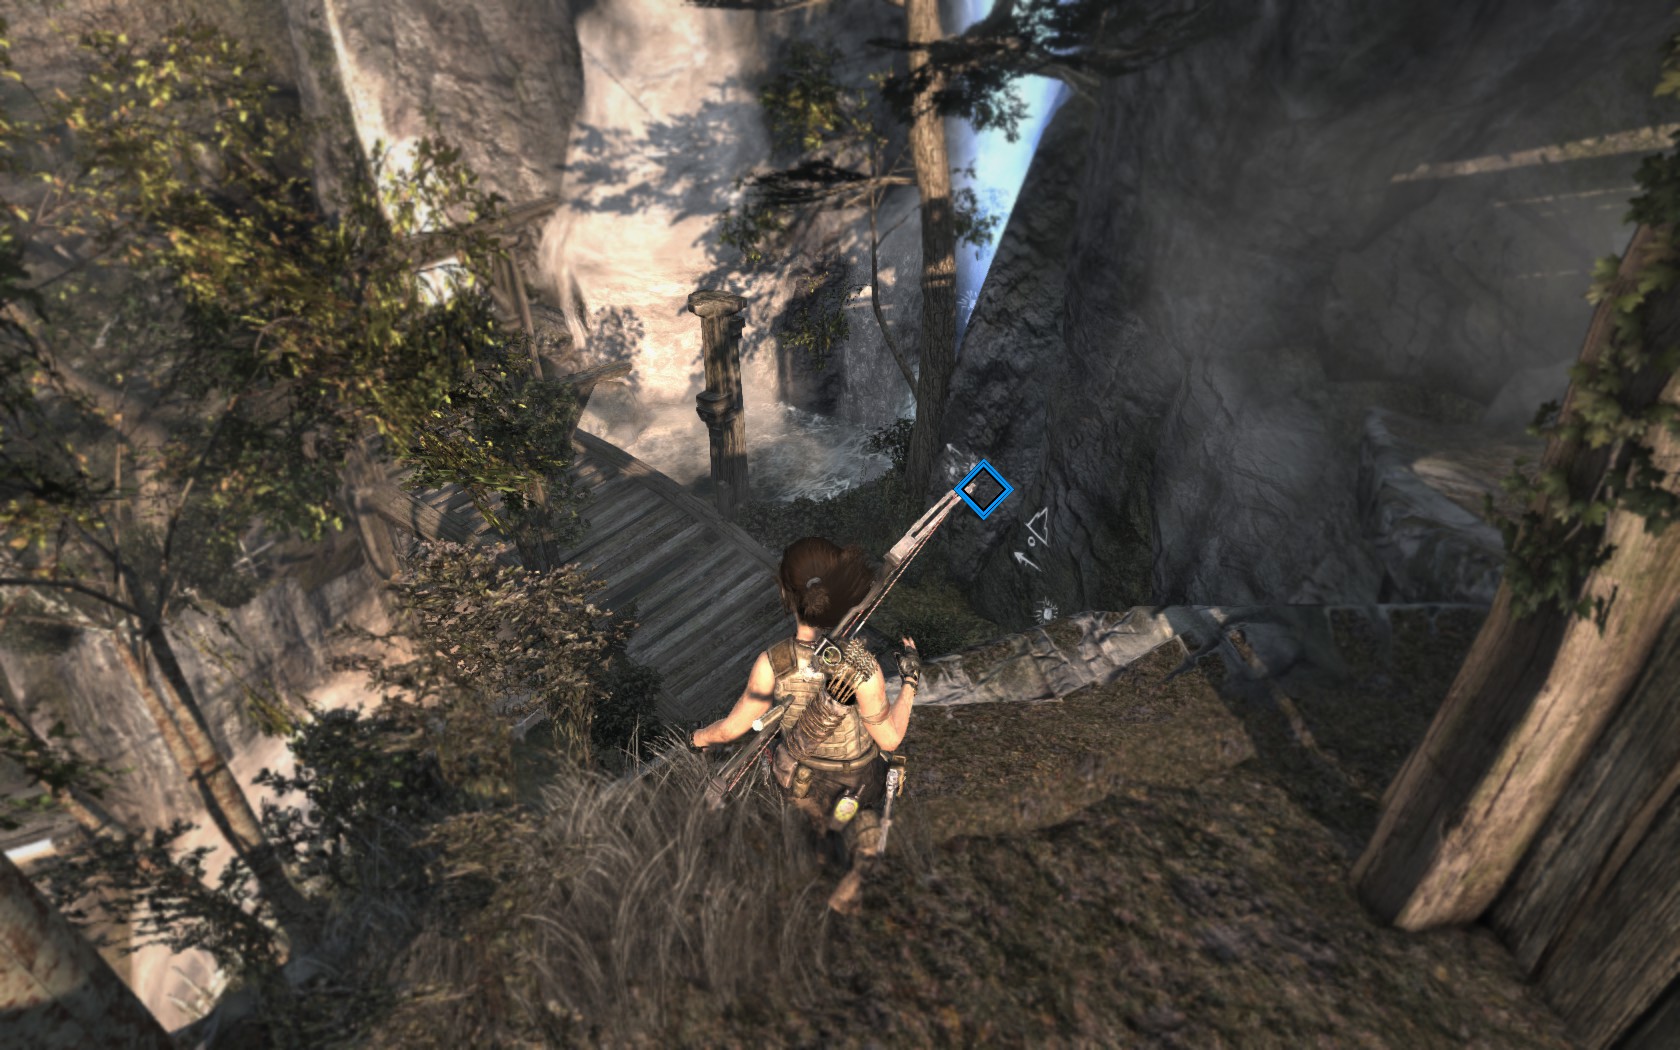
here is a screenshot of the entrance
note that I took that screenshot in a higher spot to give you a better idea of where it is.
- Climbing Axe
(Obtained by giving Roth the medkit).
(not required but it would be harder not to have it) :
- Firestarter.
OR
- Fire Arrows (Lighter).
now that you have found it, got your equipment ready, it’s time to watch the video for the solution of the Tomb, (mind the weird language [Arabic] BUT hey there is glorious subtitles for you ! …..
okay that’s one down, or should I say “Raided”, the Next one is not too far.
Hall Of Ascention
when I said not so far, I meant by physical Location, however for the story to carry you there, you have to invest a small amount of time.
we are still in the mountain village area

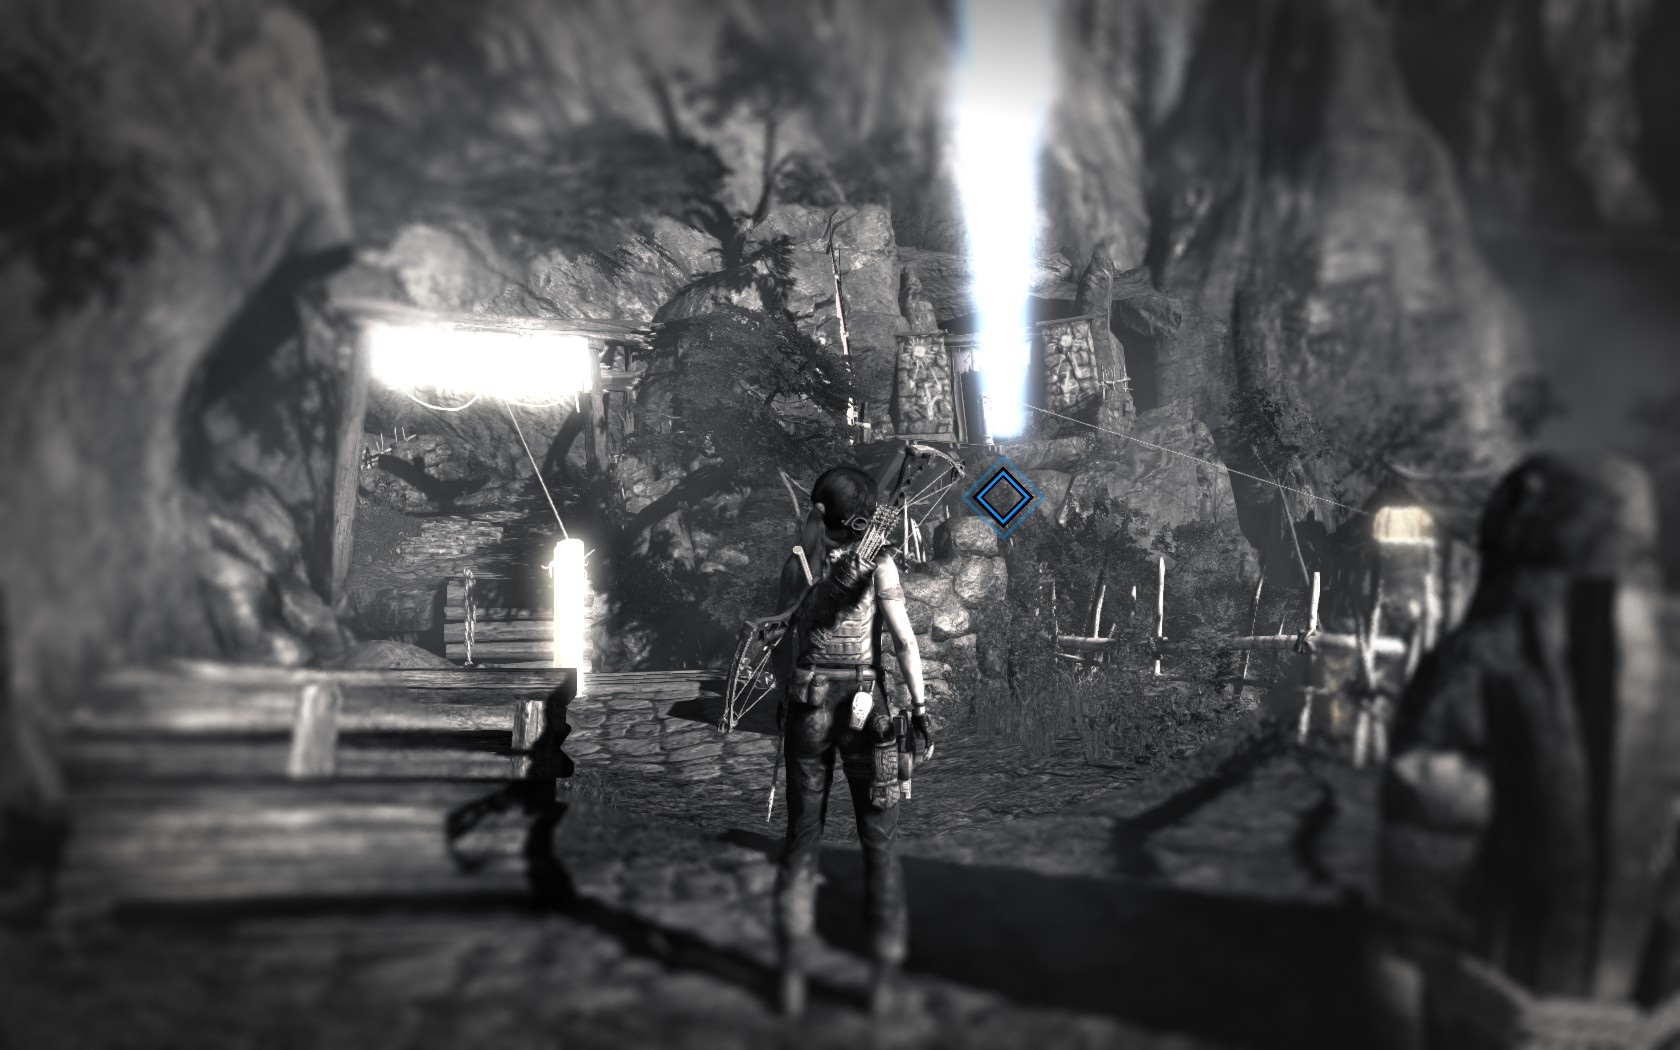
an entrance screenshot
thought about using in-game markers ! pretty smart right ? instead of marking it with ugly red markers.
- An upgraded pickaxe.
(You should have the Climbing axe by then, which makes this note pointless).
(*Whispers* Turn the subtitles on)
okay now that’s two tombs raided !
Well Of Tears
We are now in shanty town, yes that’s correct, it’s the town full of lunitics with unlimited supply of weapons, ammo, lunitics, and no women, that’s you in-game :D.
Such a sad name, too bad we are going in and out with a smile, upon discovery you will fall in a trap, you will be hanging upside down with a classic robe trap, you will fend off a lot of enemies, A LOT, then you would be free to roam the room un-interrupted
map location
enterance screenshot
okay now we’ve found it let’s check the equipment list.
- Arrow and Robes.
(to pull the enterance)
Okay it’s VIDEO TIME !
(Subtitles is required for you)
now we got 3 tombs raided, it’s time for a well earned rest, until you check the next section……
Chamber Of Judgment
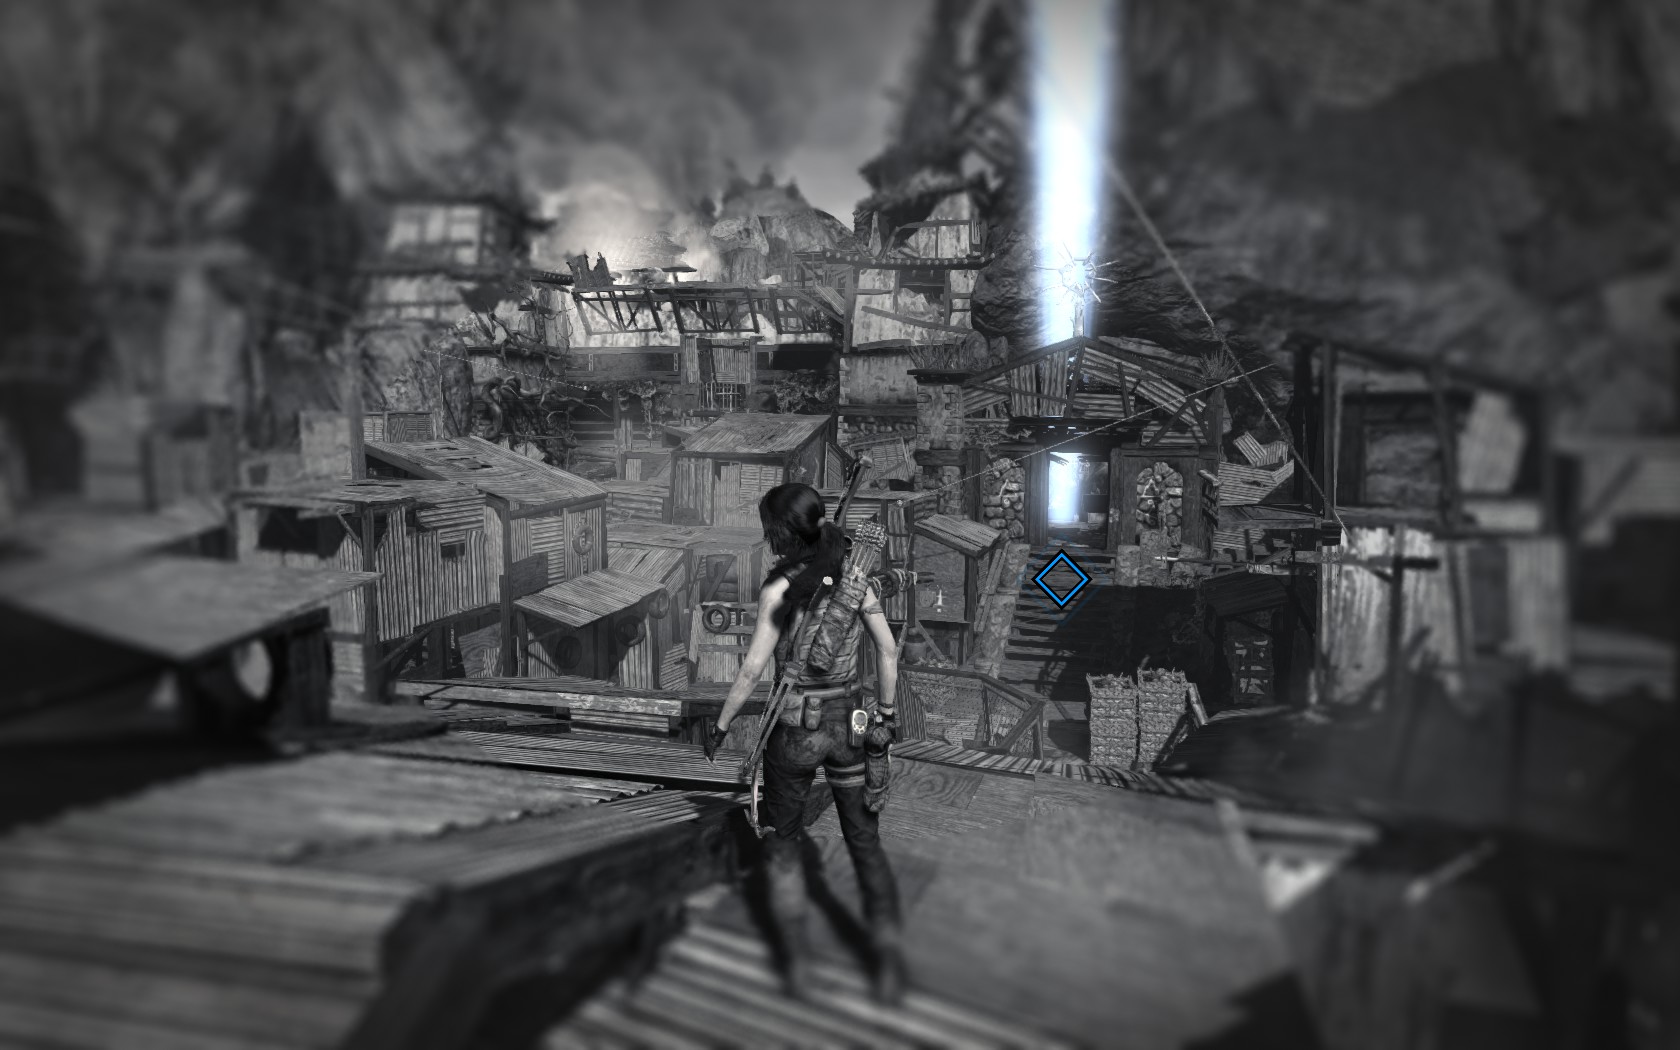
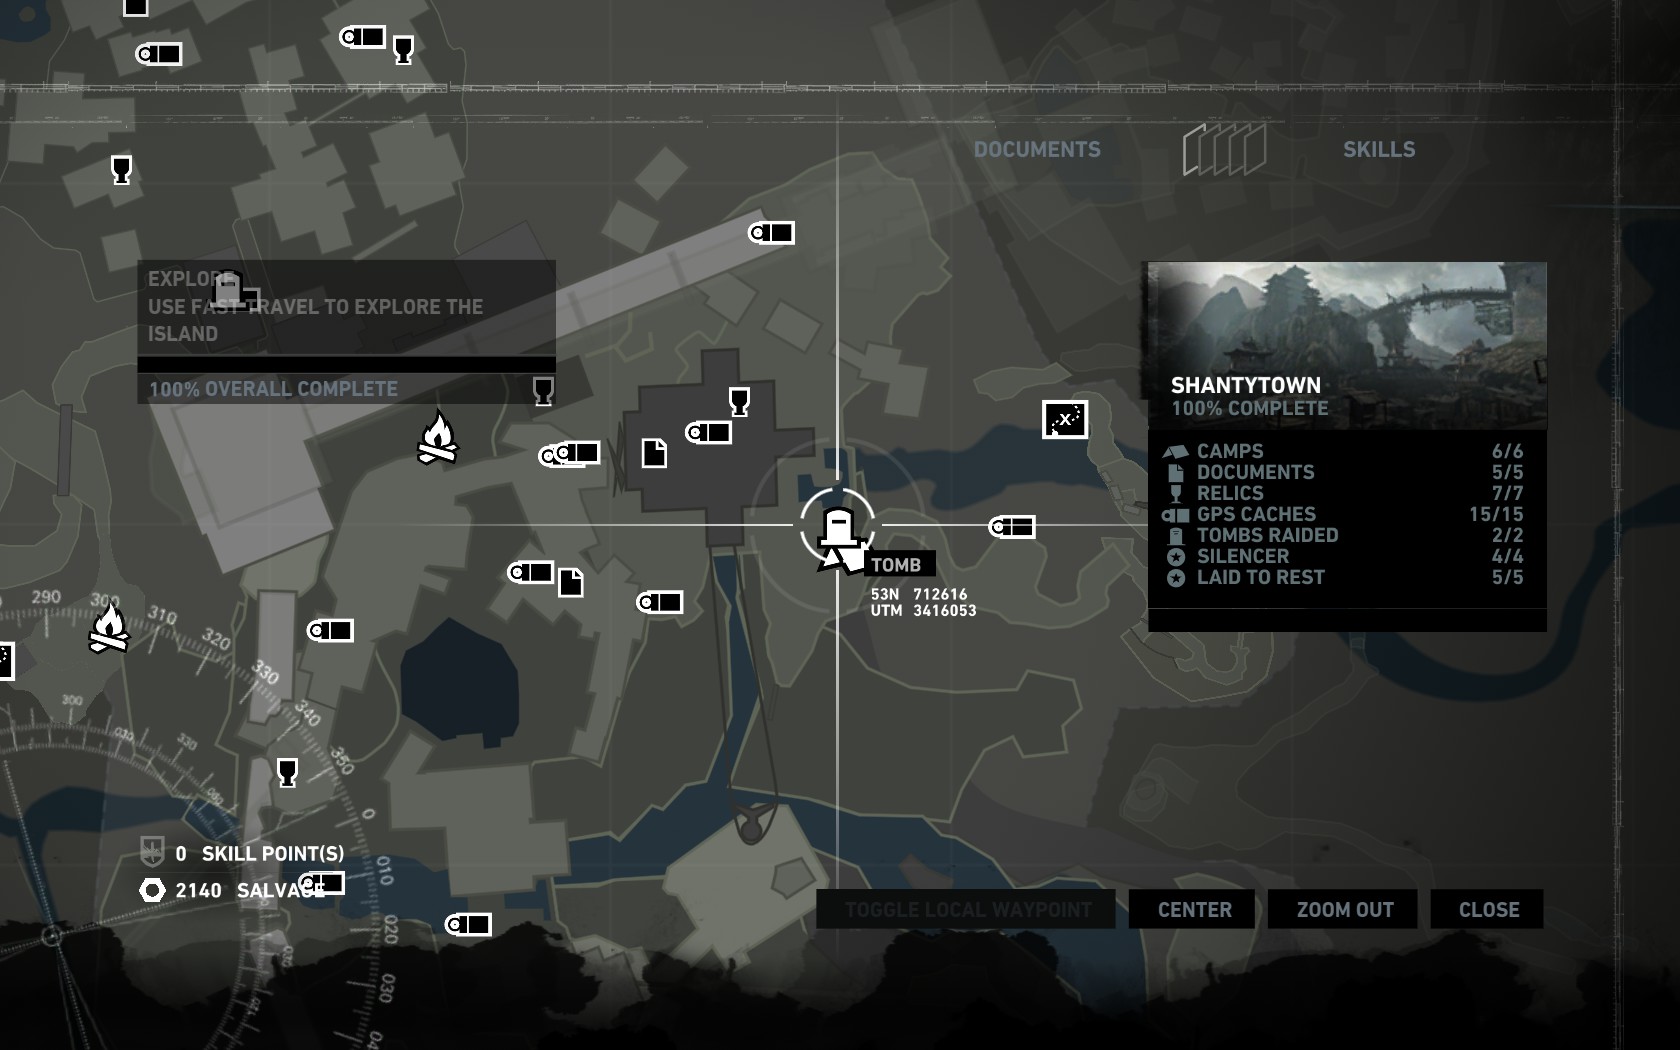
Okay that’s the second tomb in shanty town area, however reaching it might be tricky, it’s located right near the Fast travel camp, which means if you discovered the camp, you will reach it effortlessly.
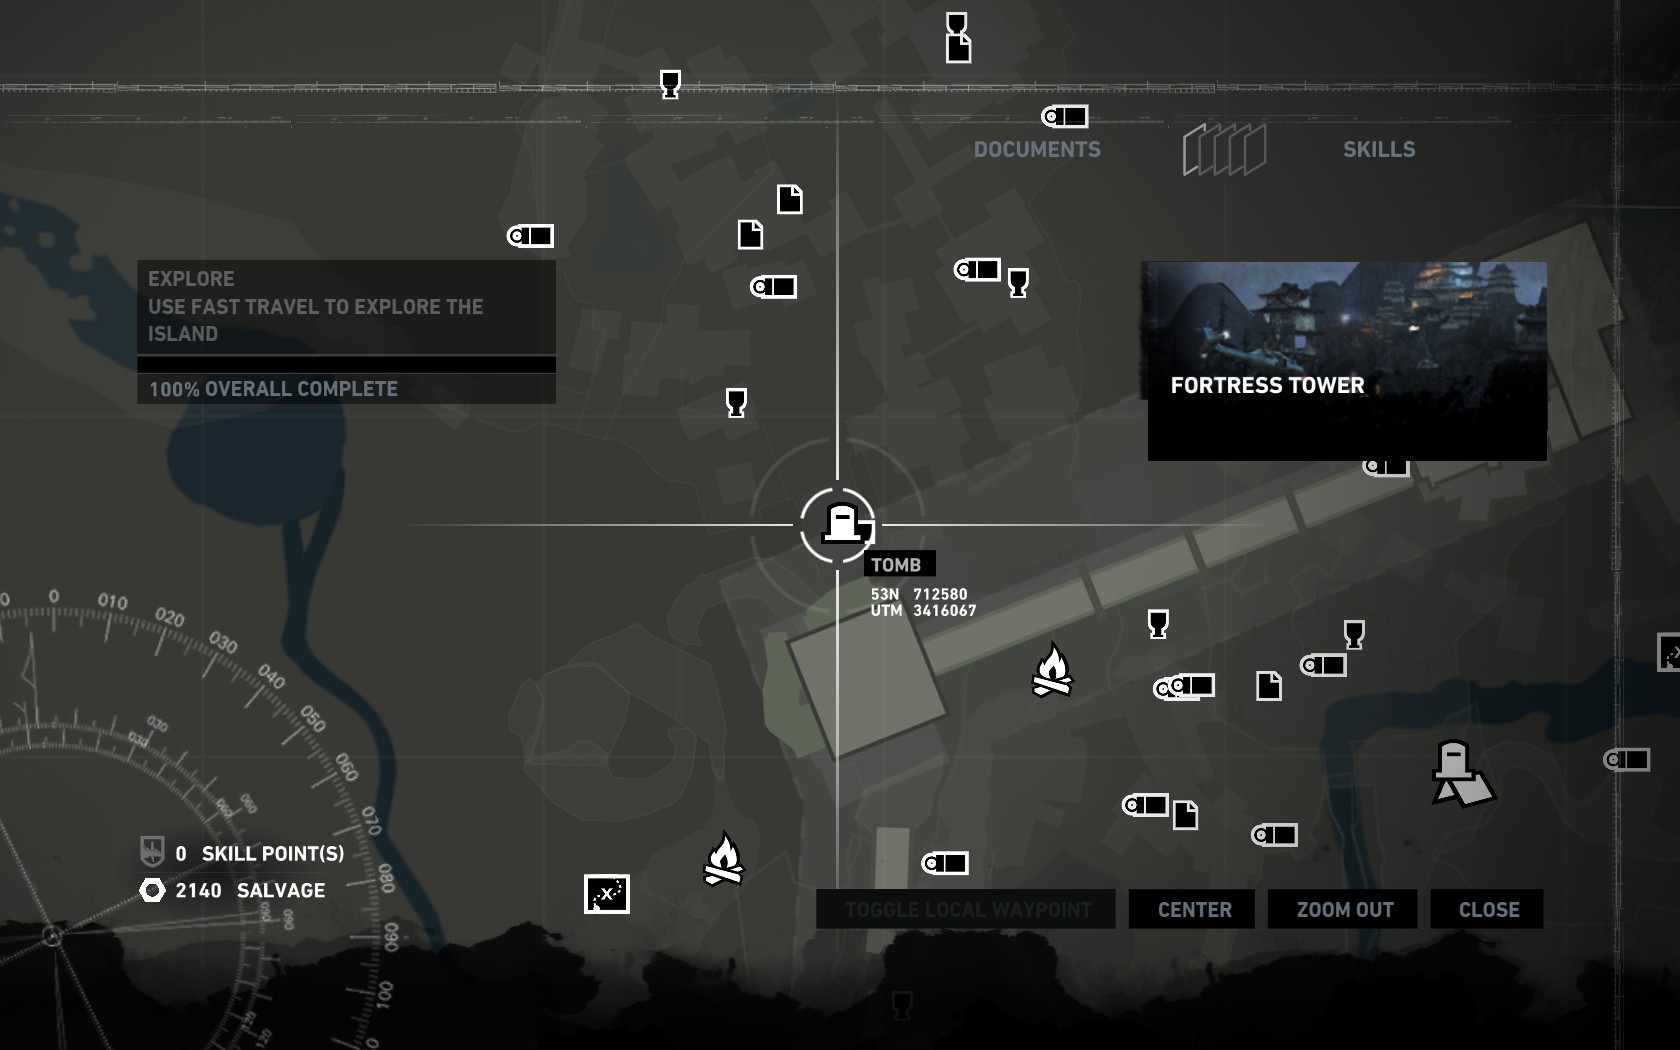
Again a name that should be impressive, but it’s really easy one, all your equipment should be already with you (due to how the story goes), here is -however- the location.
map location
entrance location
okay now that we have it locked in our eyesight, let’s check the equipment.
- Arrow and Robes
- Climbing Axe
(both are obtained by the game’s progress, you don’t have to do anything besides playing the game, hint: check our playthrough).
So, location check, equipment check, let’s watch the video, the subtitles are your friend.
I doubted myself for a second back there, but nevertheless we did it, and exited it with style (the sliding thing).
Stormguard Sanctum
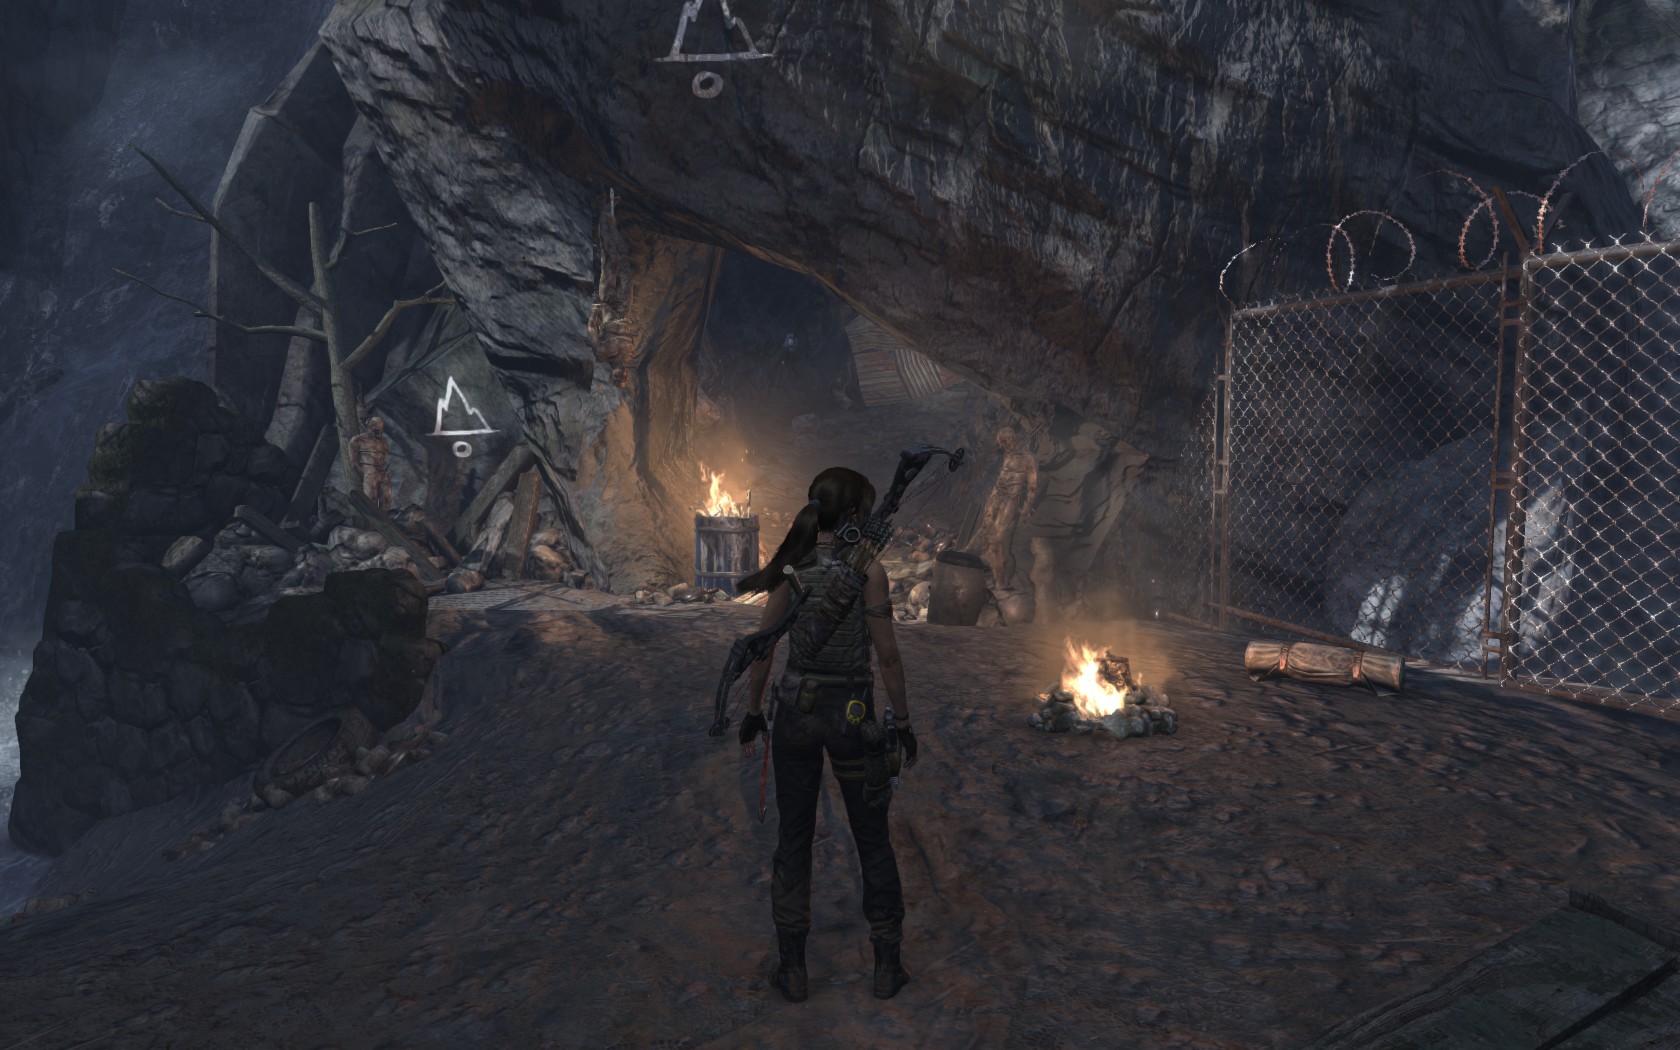
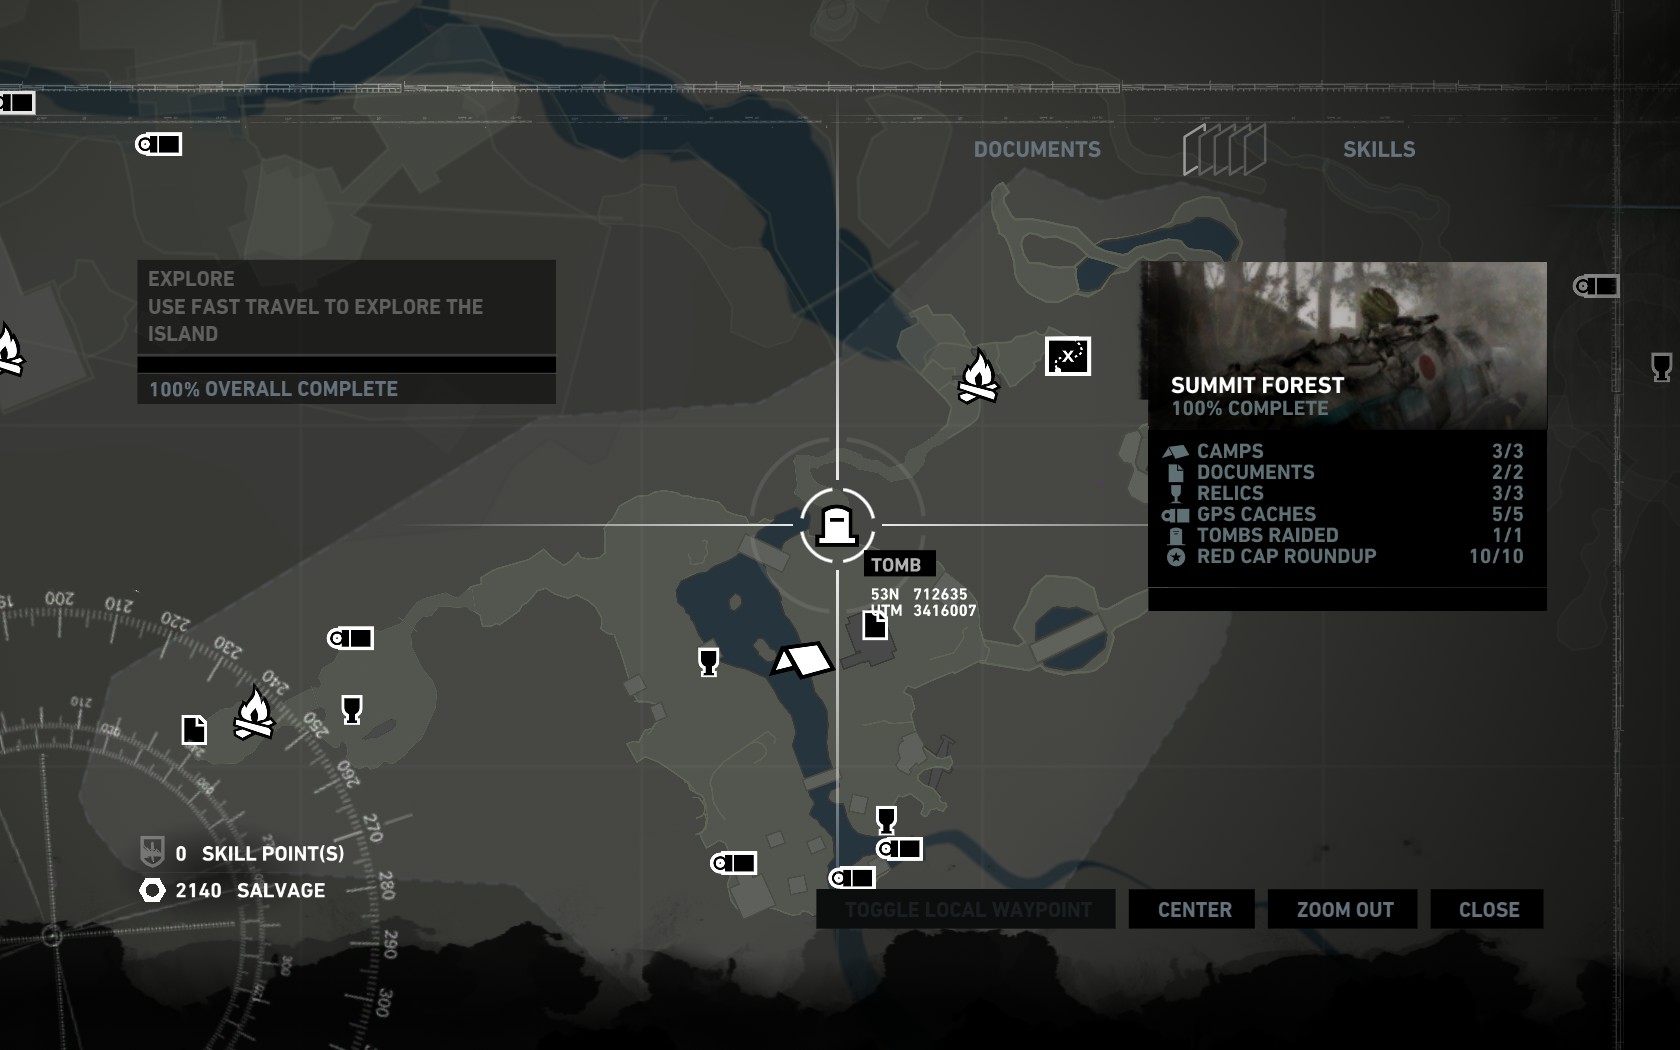
okay we left that crazy town, and moved on to the next camp, in the summit forest area, we crashed our helicopter there, our second trial out of this island, and our third successful attempt in killing all pilots (I Feel sad for them).
we are in the summit forest area, right after the helicopter crash site, and near the hunting hut.
in your first visit it should be dark with a lot of enemies using flashlights to locate you, you can take almost all of them out silently, making your task way easier of securing the area.
map location
entrance screenshot(pretty bad, but shiny)
now it’s been discovered by us, so let’s head to equipment list.
Required Equipment:
- Firearrows
(you should have it by then, you know, how the story goes).
1 Problem, it’s too dark, even they put torches in there to help you see without making yourself a flying-burned-body-of-lara.
Anyways here is the video, and please turn the subtitles on.
okay now we are half way through raiding tombs, killing bad guys and getting awesome upgrade parts.
Temple of The Handmaidens
Now that we’ve reached the beach, got a tan, done some favors for survivors, and saw Alex die, we are ready to raid those tombs, ‘those’ because there is 2 tombs in this area.
Let’s not talk about the name here, but anyways this tomb is some kind of a fishery, but we are not going to get some fishes, we are fishing the treasure that it holds, if you want to fish for fishes go ahead but we are not doing that in the video.
It’s around the Survivors camp area in the shipwreck beach, the survivors’ beach, or just the beach area whatever suits you.
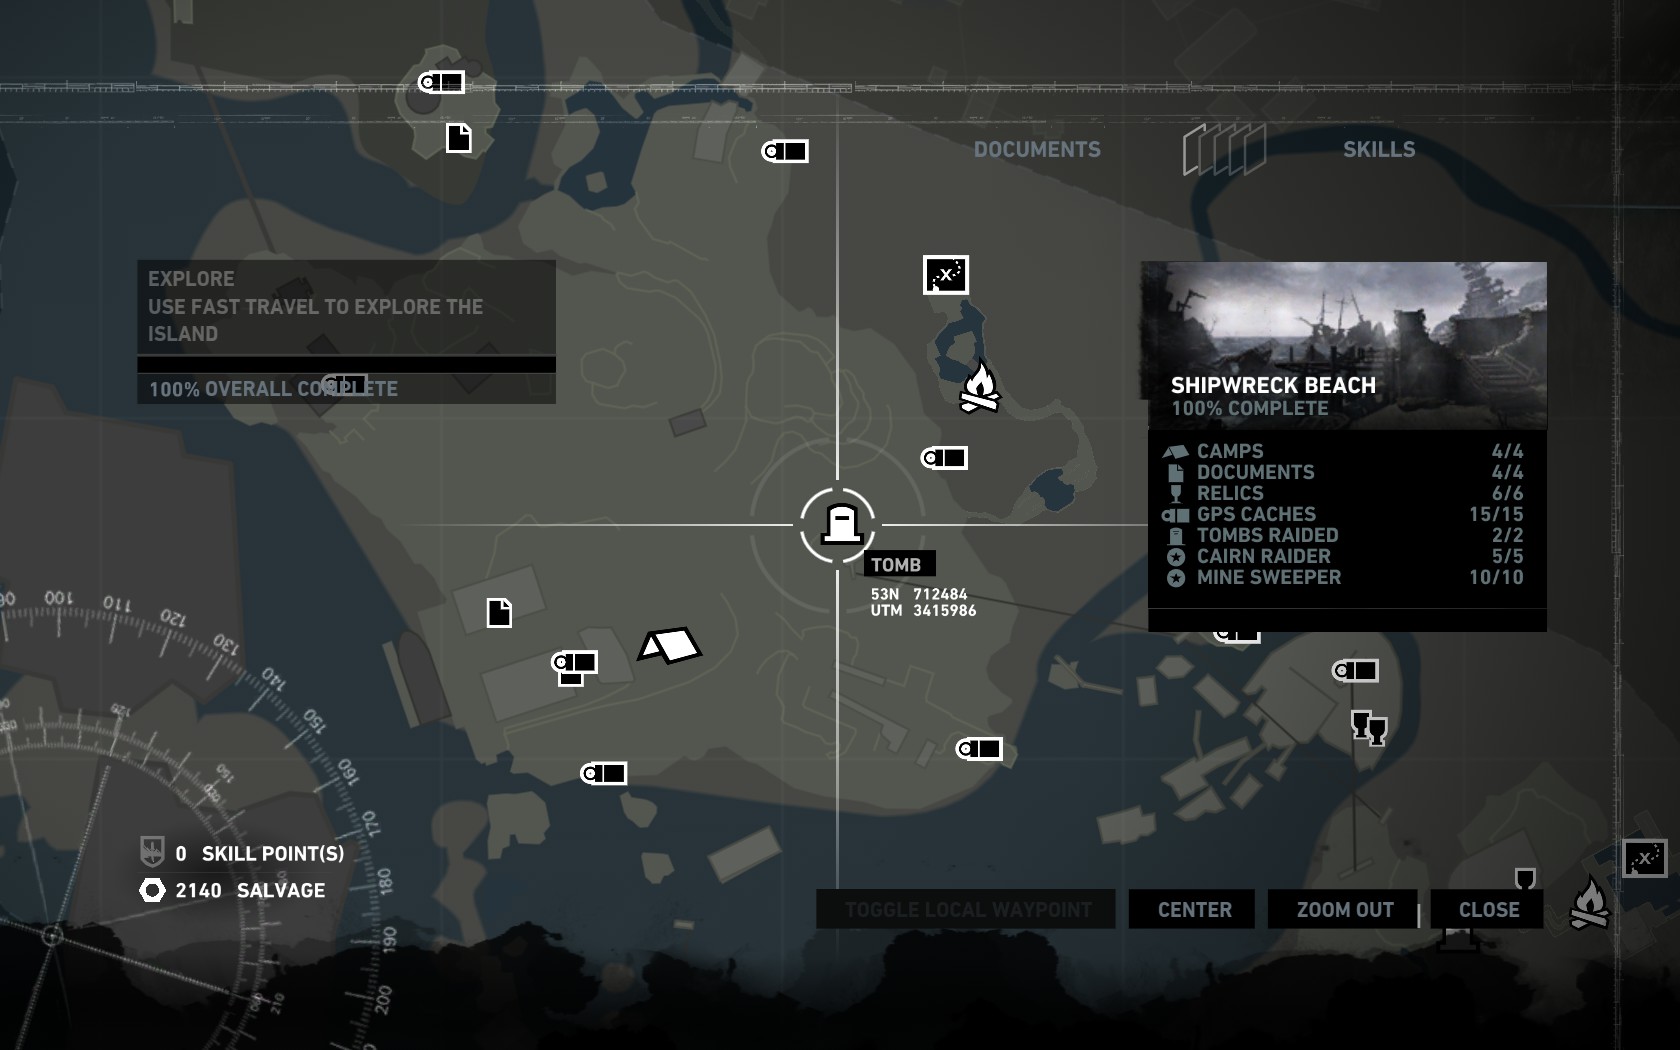
map location
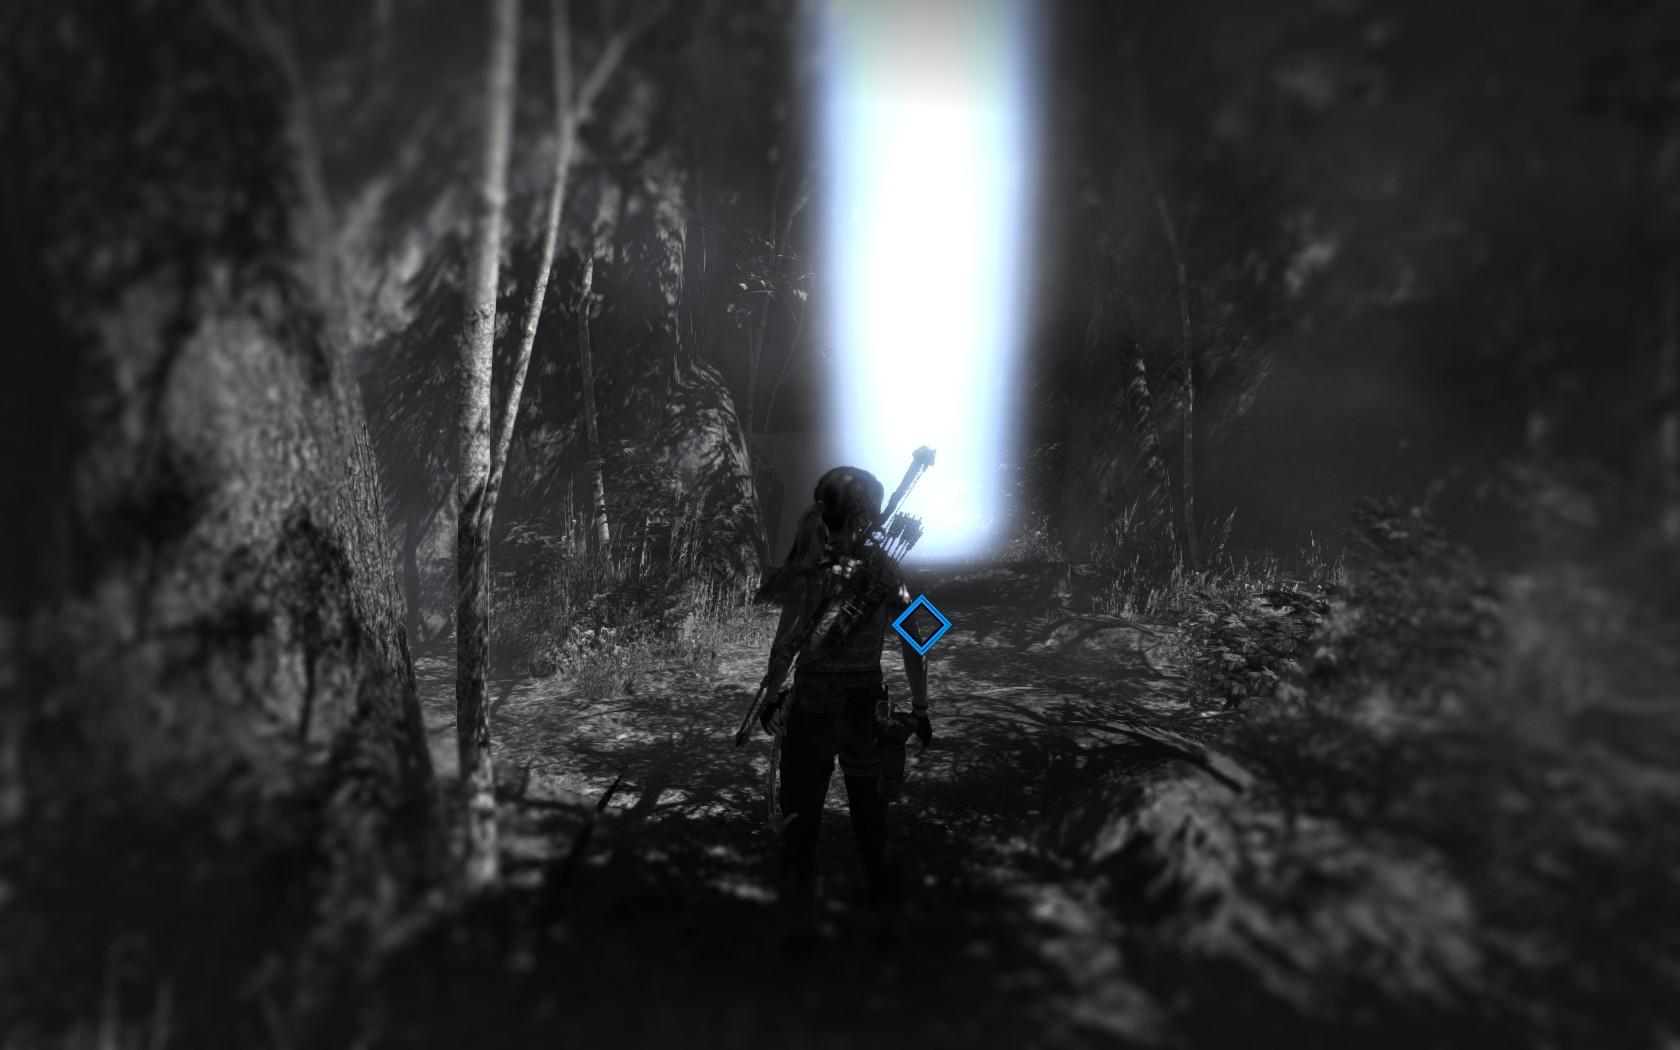
entrance screenshot
it was a bit hidden, you will note some kind of a barrier that can’t be removed by normal robes, you need a special equipment, that’s why we encourage you to go watch Alex die and get that equipment from there.
- Ascender
- Climbing Axe
okay everything checked, now focus because it’s the most tricky tomb, not due to the idea itself, but because you have to time you reactions perfectly or you will fail, you might fail a lot during attempting it, but we got that covered in the video, and luckily we did it in the first trial, making your time spent invested watching this video, significantly less.
alright, we have one last tomb to finish (minus the DLC), luckily it’s in the same area and not very far from there.
Flooded Vault
This is the second tomb in the same area as the one before it, it’s really an easy one, but it’s kind of a long one, so the video is longer than other tombs.
it’s flooded alright, and it has a “shocking” problem if you catch my meaning, okay I will stop wasting time, let’s check the location.
we are still again in the shipwreck beach area.
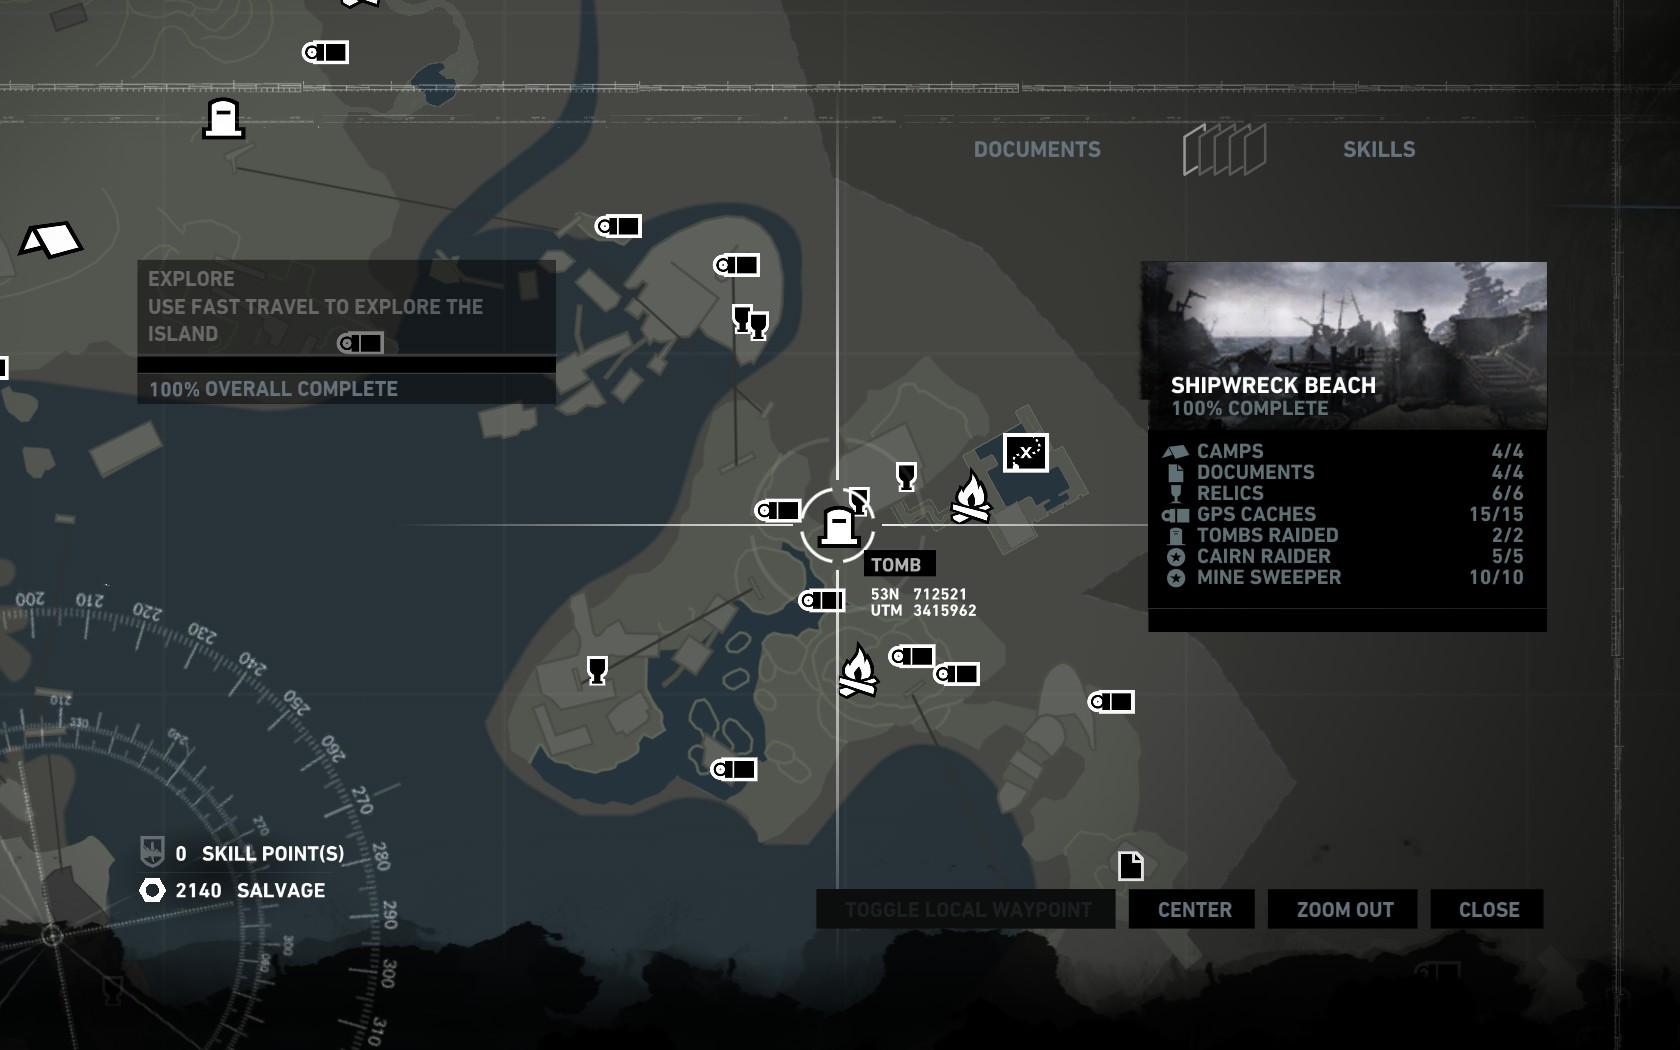
map location
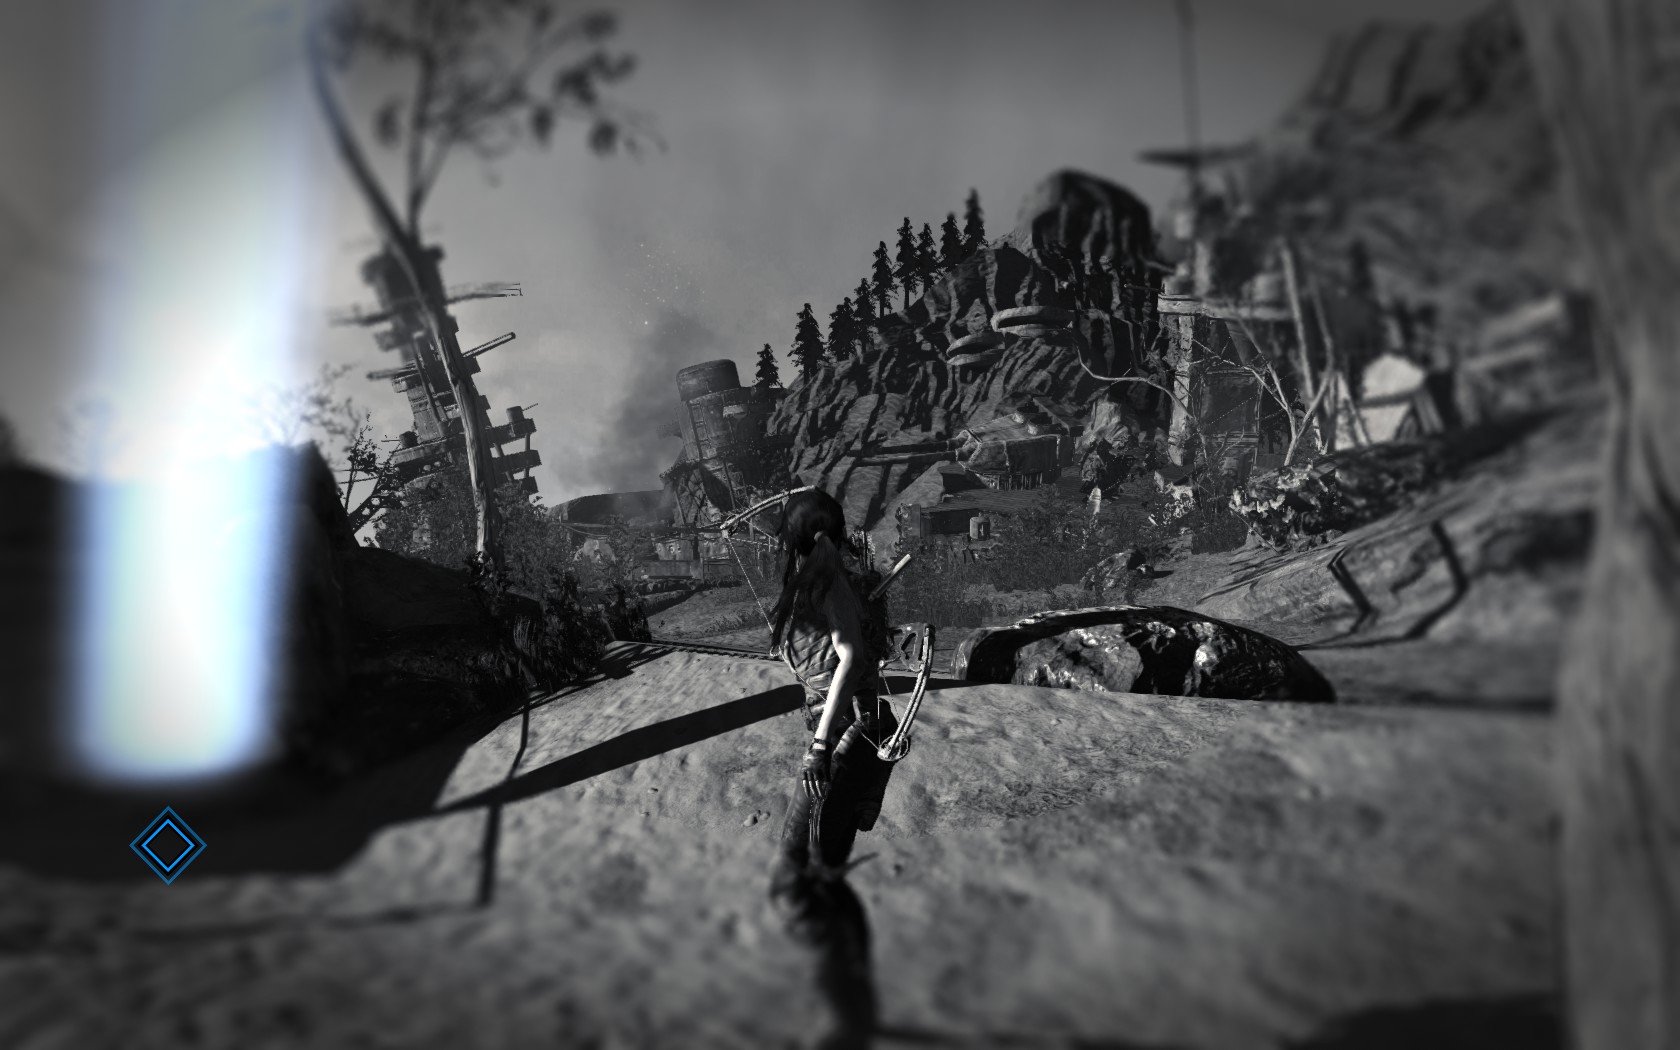
entrance screenshot
okay awesome, let’s check the equipment.
- Firearrows.
- Arrows and Robe.
- Compound Bow.
( the compound bow is not required for the tomb, but for reaching it, the story will get you there, just do the first favor the survivors ask of you, and you will get it).
we got our stuff sorted out, and ready to raid this tomb, and you will notice our shocking problem…..
Okay congratulations, you have watched every I assume, finished and raided every tomb as we go along, well there is one actually, and it’s the DLC one, so if you only have the base game, you are done, rate us and happy doing other things, for those who have the DLC Tomb, it’s only one more section, let’s raid it !
Tomb Of The Lost Adventurer (DLC)
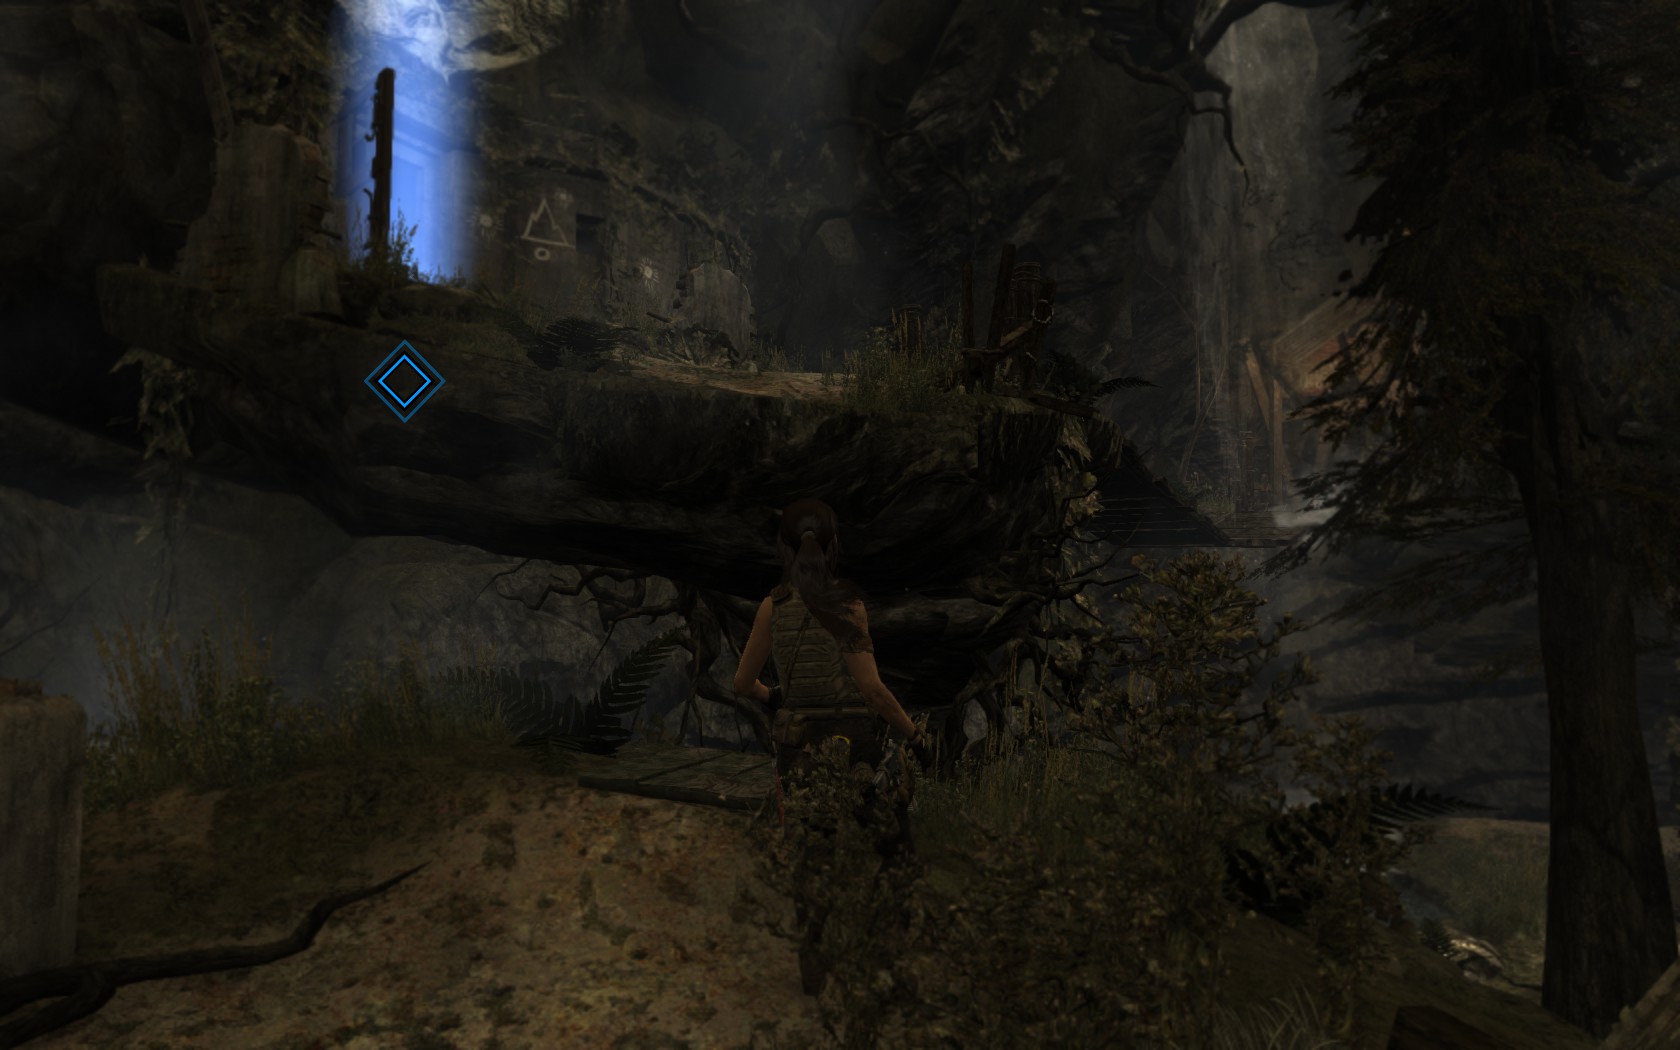
Okay if you did each tomb by our order, you will be slightly mad with us, because this one is located in the very beginning of the game, but it’s okay mate, you can fast travel anyway.
I would say this tomb is the richest one, I won’t burn the details just yet, all in the video.
but let’s do our routine…
map location
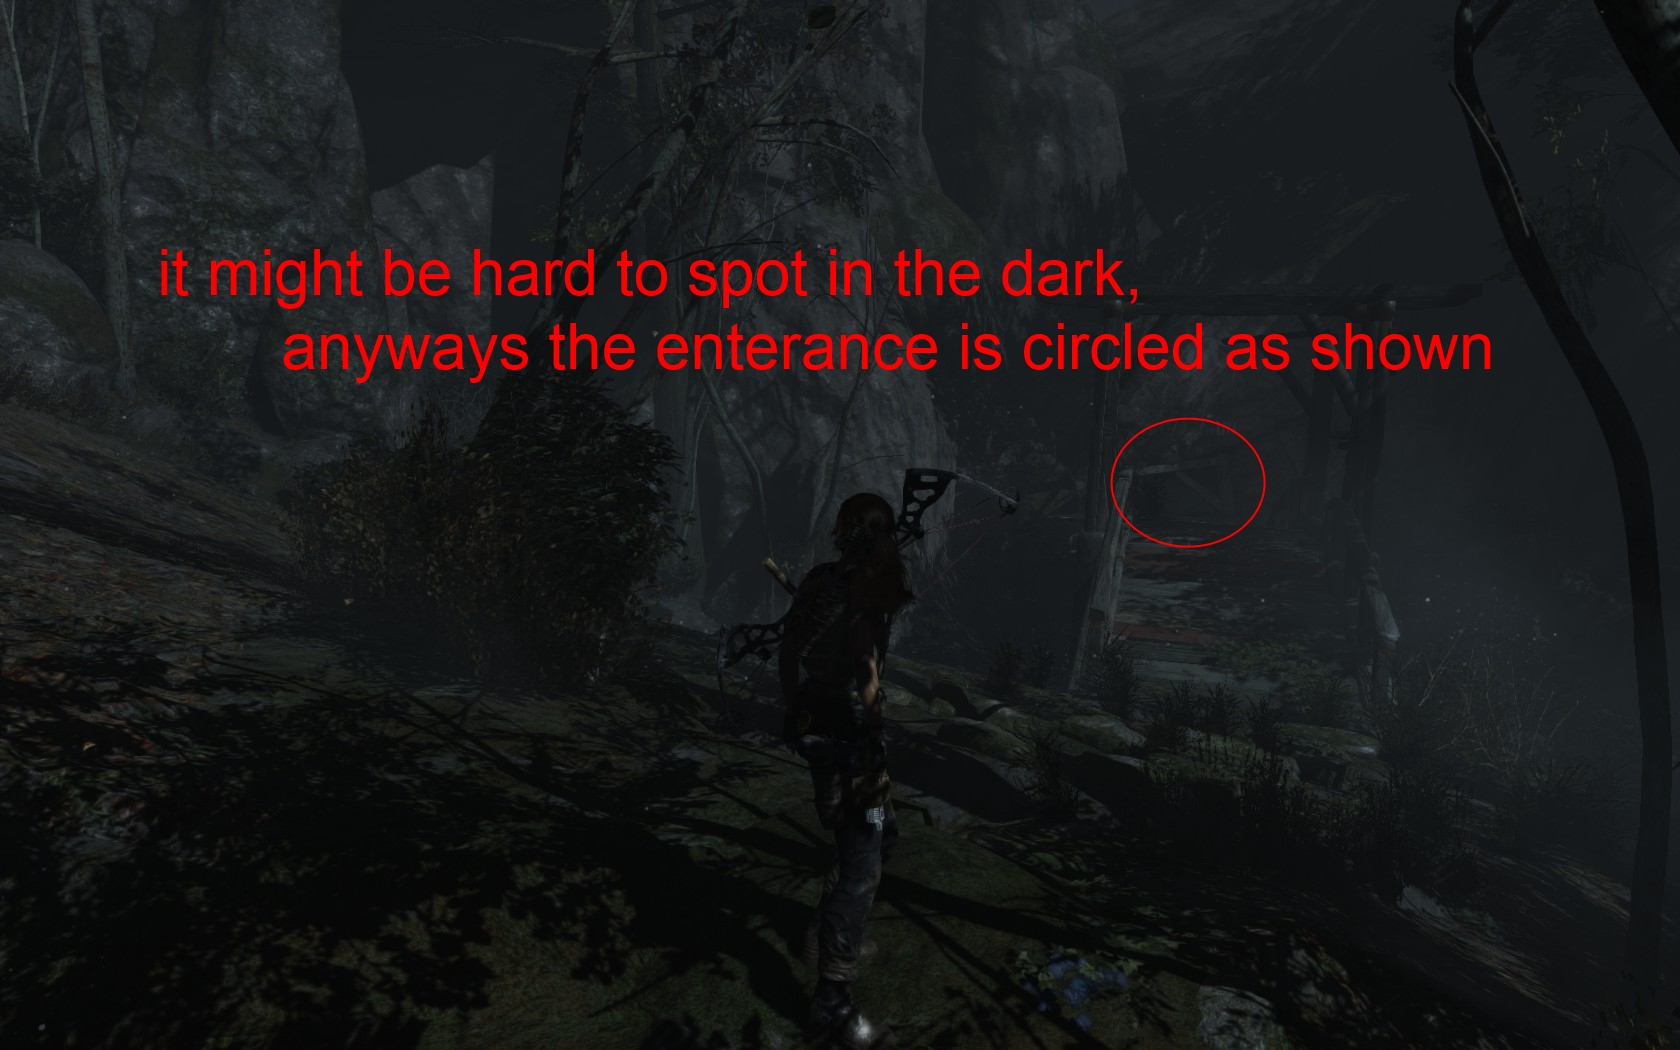
entrance screenshot
(I had to use the ugly red markers, because the game won’t mark it for me, sorry)
okay we found it, let’s check our equipment.
- None
(Surprise !)
(not needed but will prove valuable)
- Grenade Launcher
( found later – with respect to location – within the game progress).
Okay it’s turning subtitles on time !!!
YAY, WE are done now, for real, thanks so much for checking this guide out, hope to see you in other guides, rate it up if it meets your expectations.