
Overview
This guide is a walk through on how to tune a vehicle, with either a carburetor or an ECU. The solution to tune either is the same, even though ECU’s have four bars to tune. If you’re looking for the painless way to tune a vehicle, this is it.
Introduction
Chances are if you’re reading this, you’ve tried to tune a car in the dyno room. You’ve probably realized that tuning the carburetor(s) or ECU can seem like you have to worship the car gods and hopefully you’ll get the magic combo. The maximum increase in performance from tuning is 18%, when the proper ratio has all the bars at the top of the chart. There is a method to get 18% every single time. Below is the easiest way to reach it.
Initial Tune
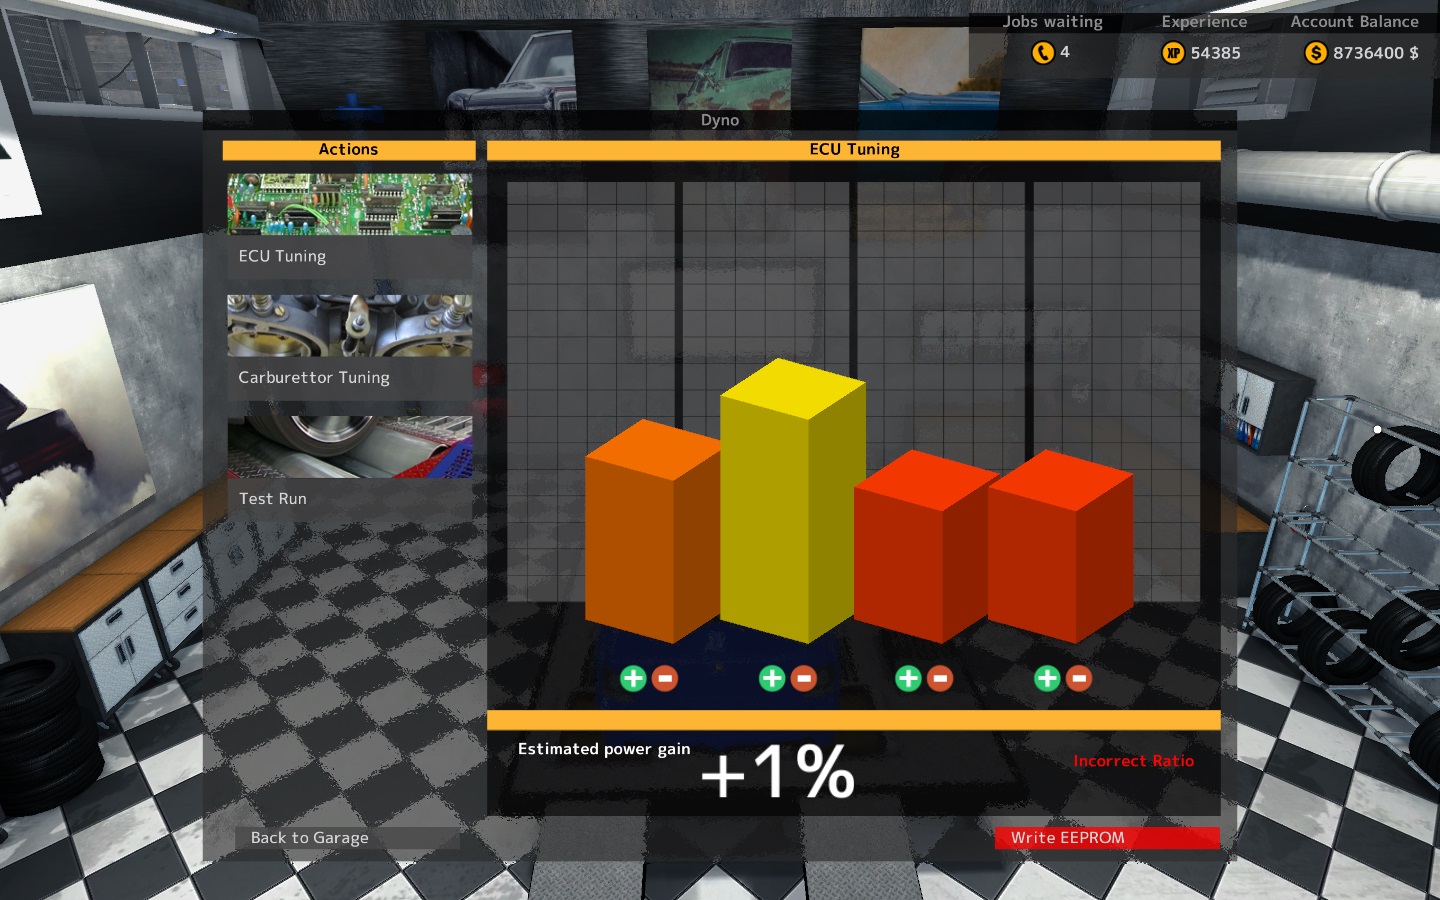
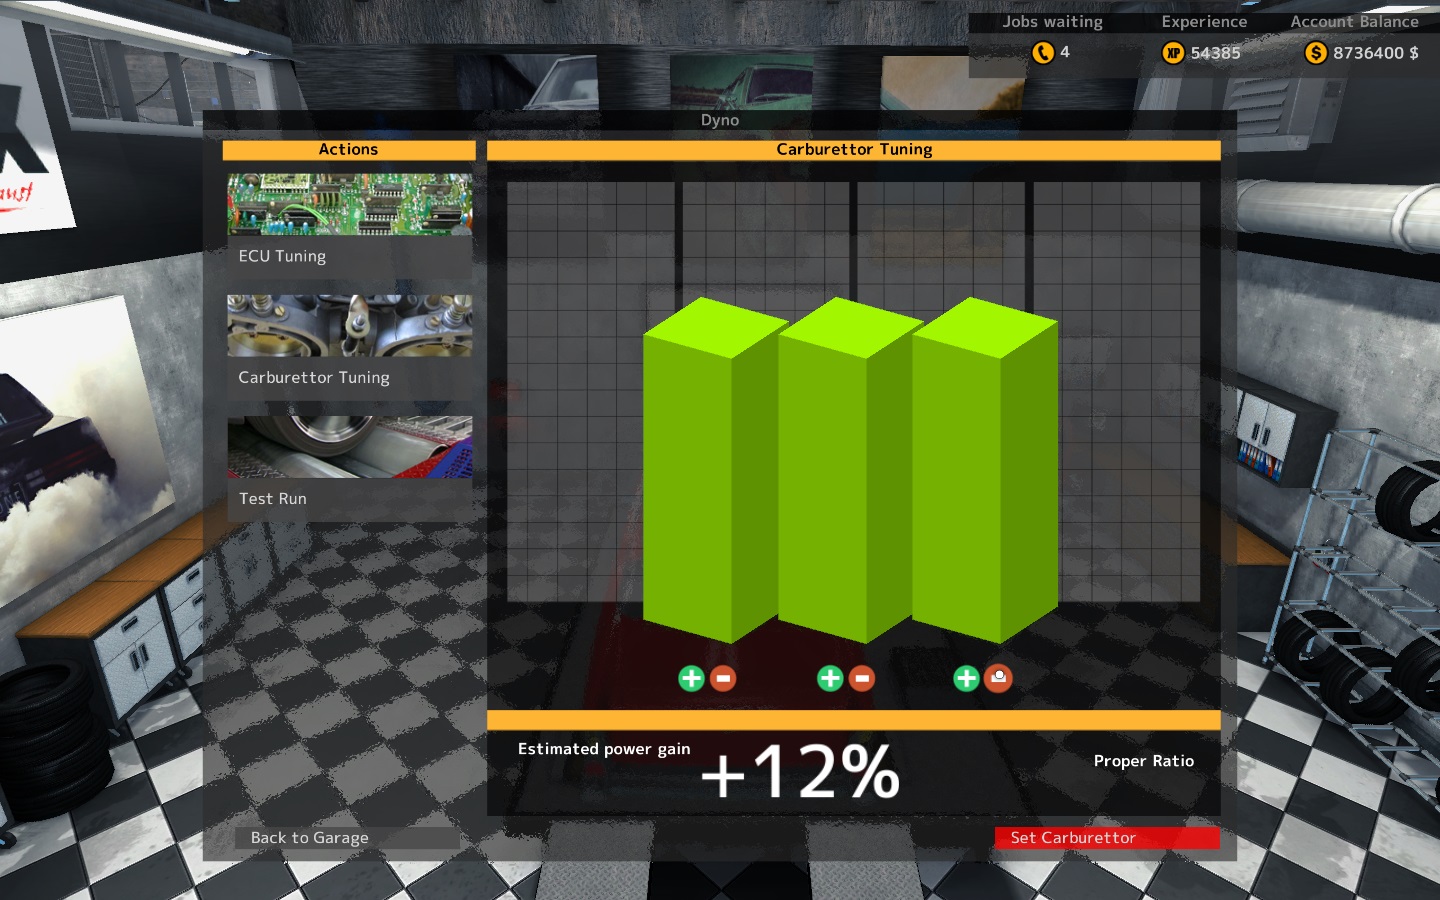
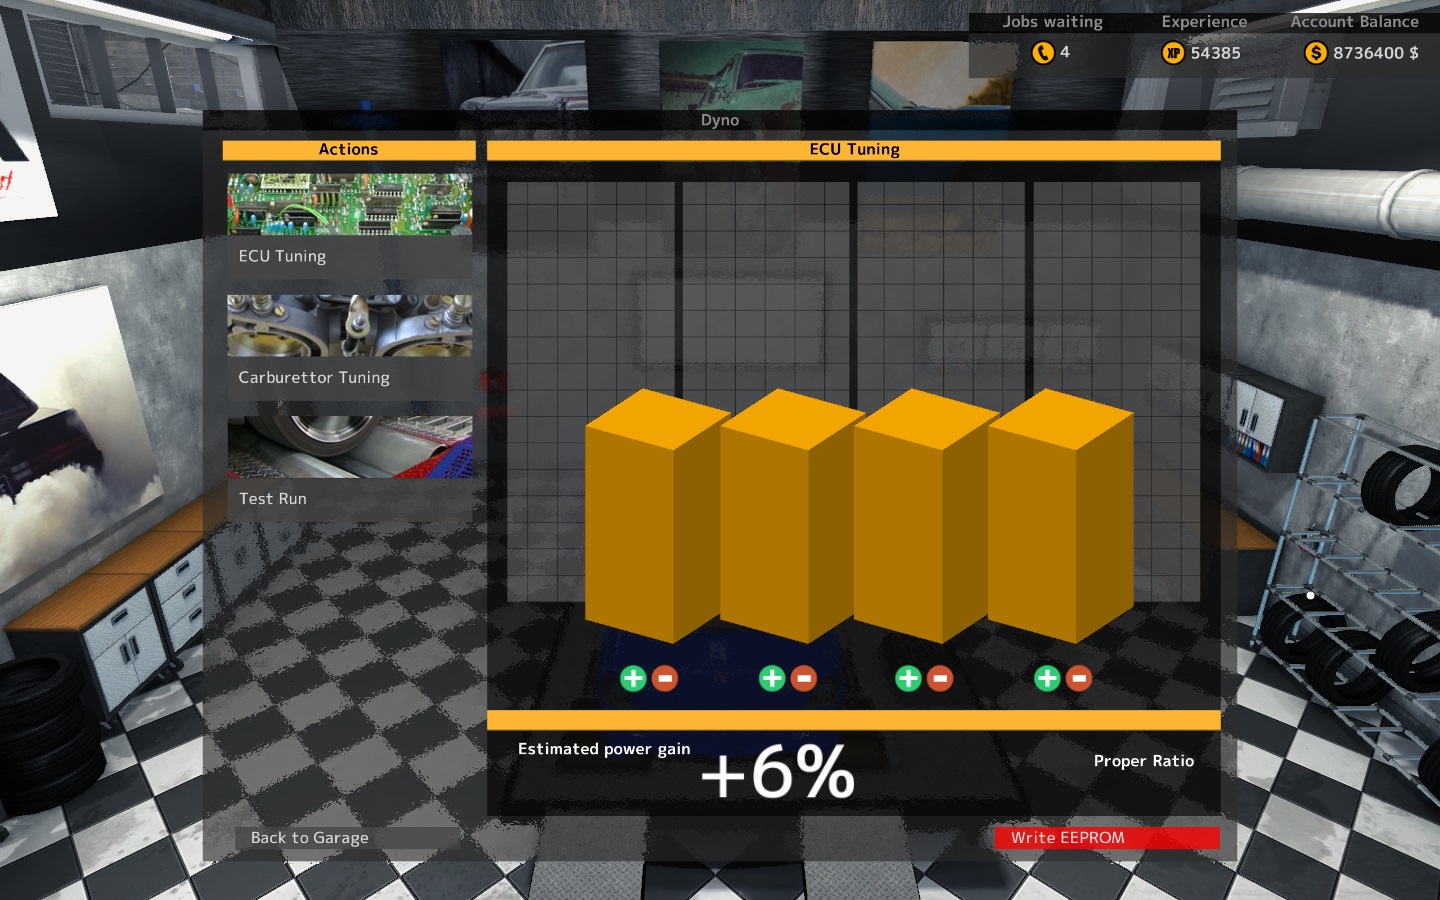
Depending on the vehicle, it will need to have the carburetor(s) or the ECU tuned in the appropriate mini-game. The carburetor tuning tool has three bars that have to be balanced and the ECU tuning tool has four bars that have to be balanced. When you reach a potential balanced point with the tune, the tool will say proper ratio in the lower right corner. Below is an example of an initial tune for each tuning tool…
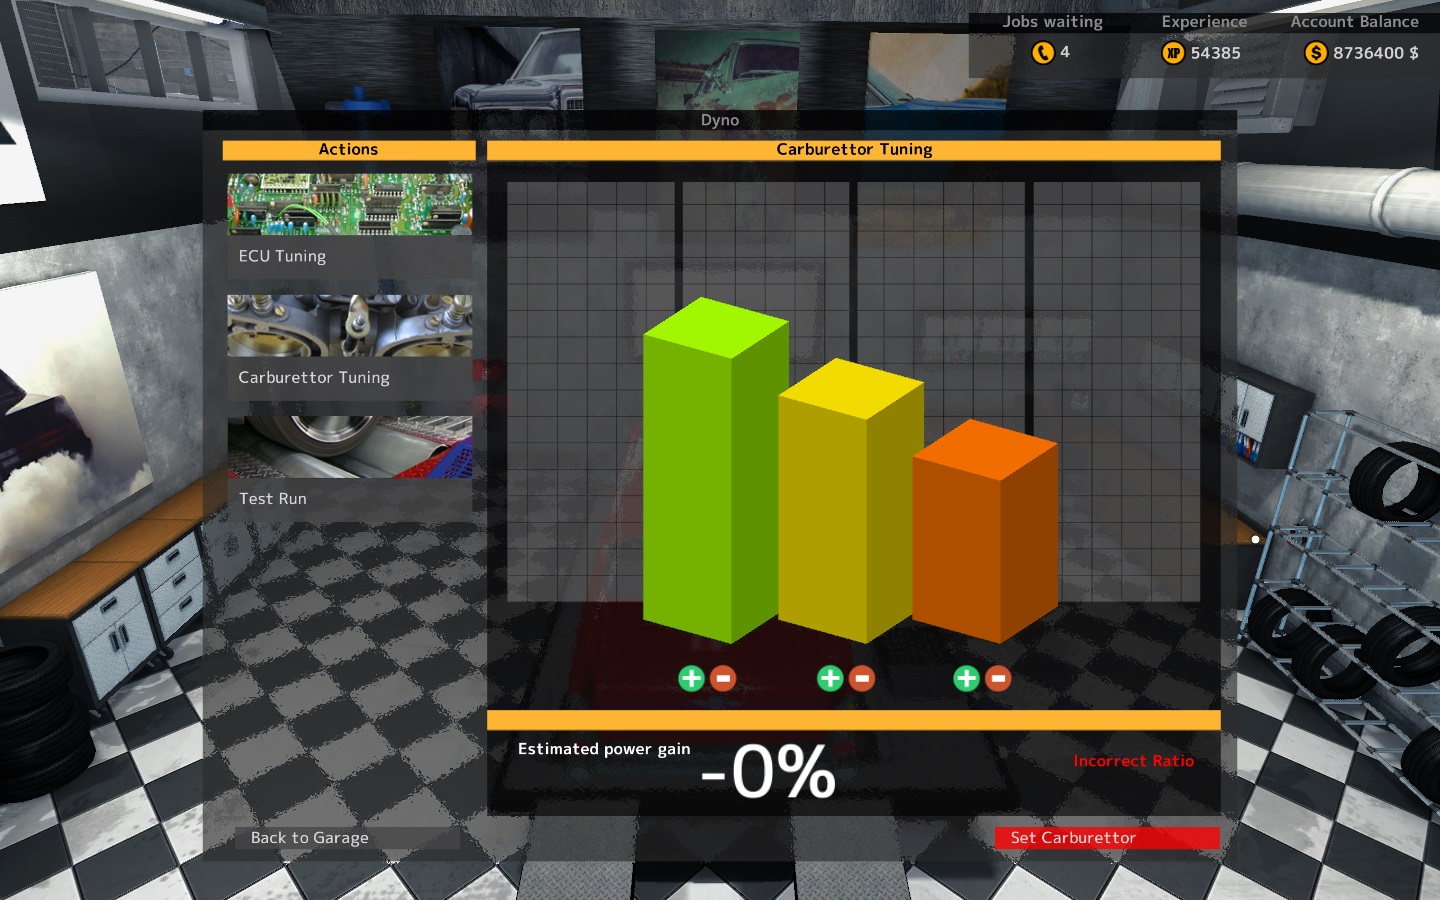
In order to reach the optimum tune using the solution in this guide, the tune has to reach a proper ratio of any percentage. This will require adding (+) or subtracting (-) randomly to each of the bars in order to get to a balanced state.
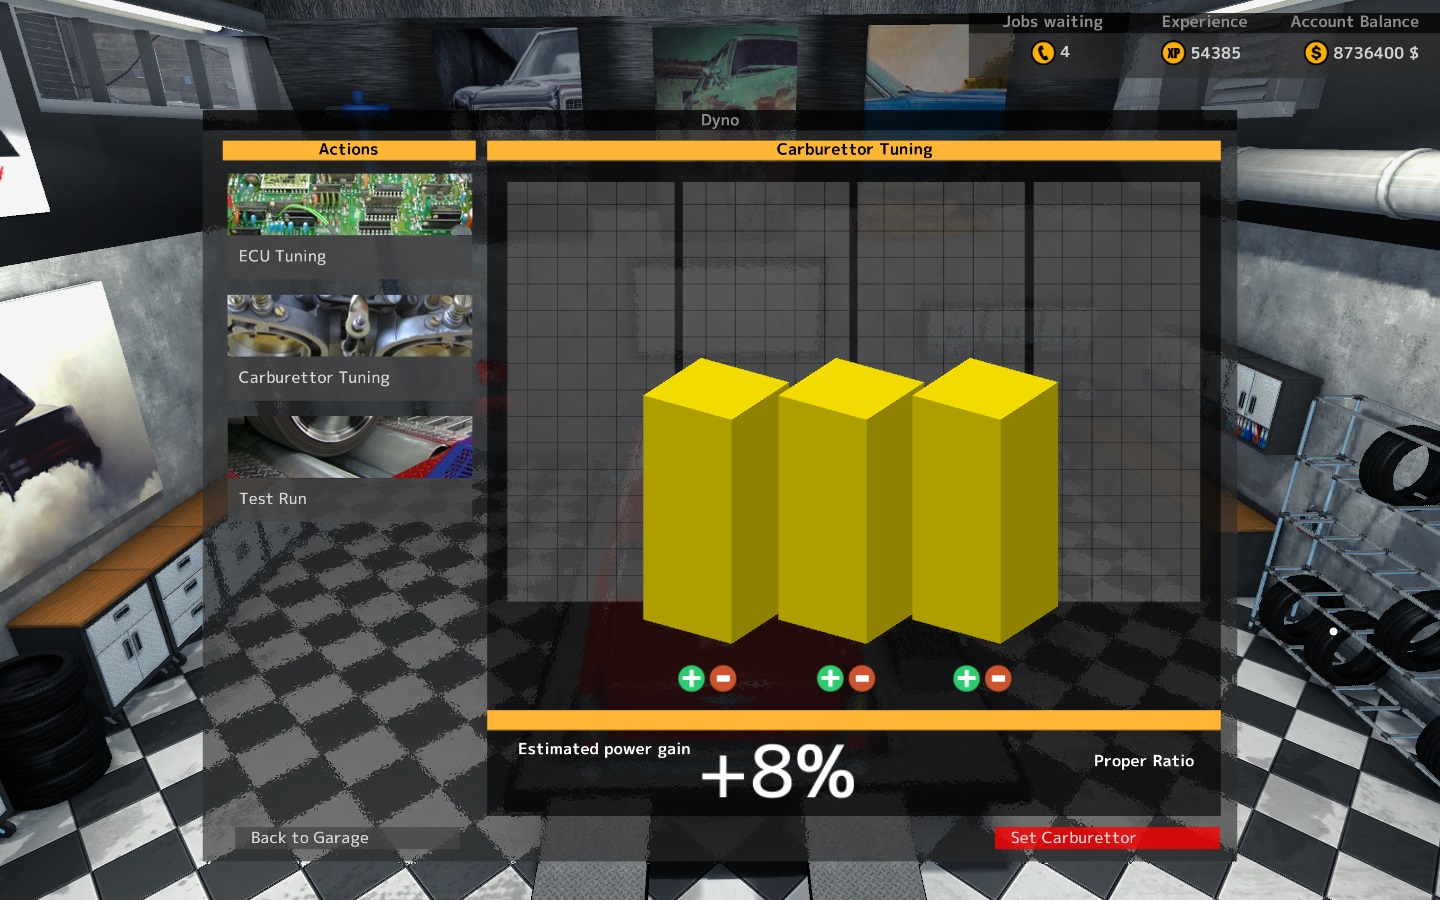
For Carburetors, you should be able to balance out the three bars with three or four operations. From the initial tune, I added (+) to the right column and then subtracted (-) to the left column and reached a balanced point of 8%. My initial tuning was done and I could now focus on the optimum tune.
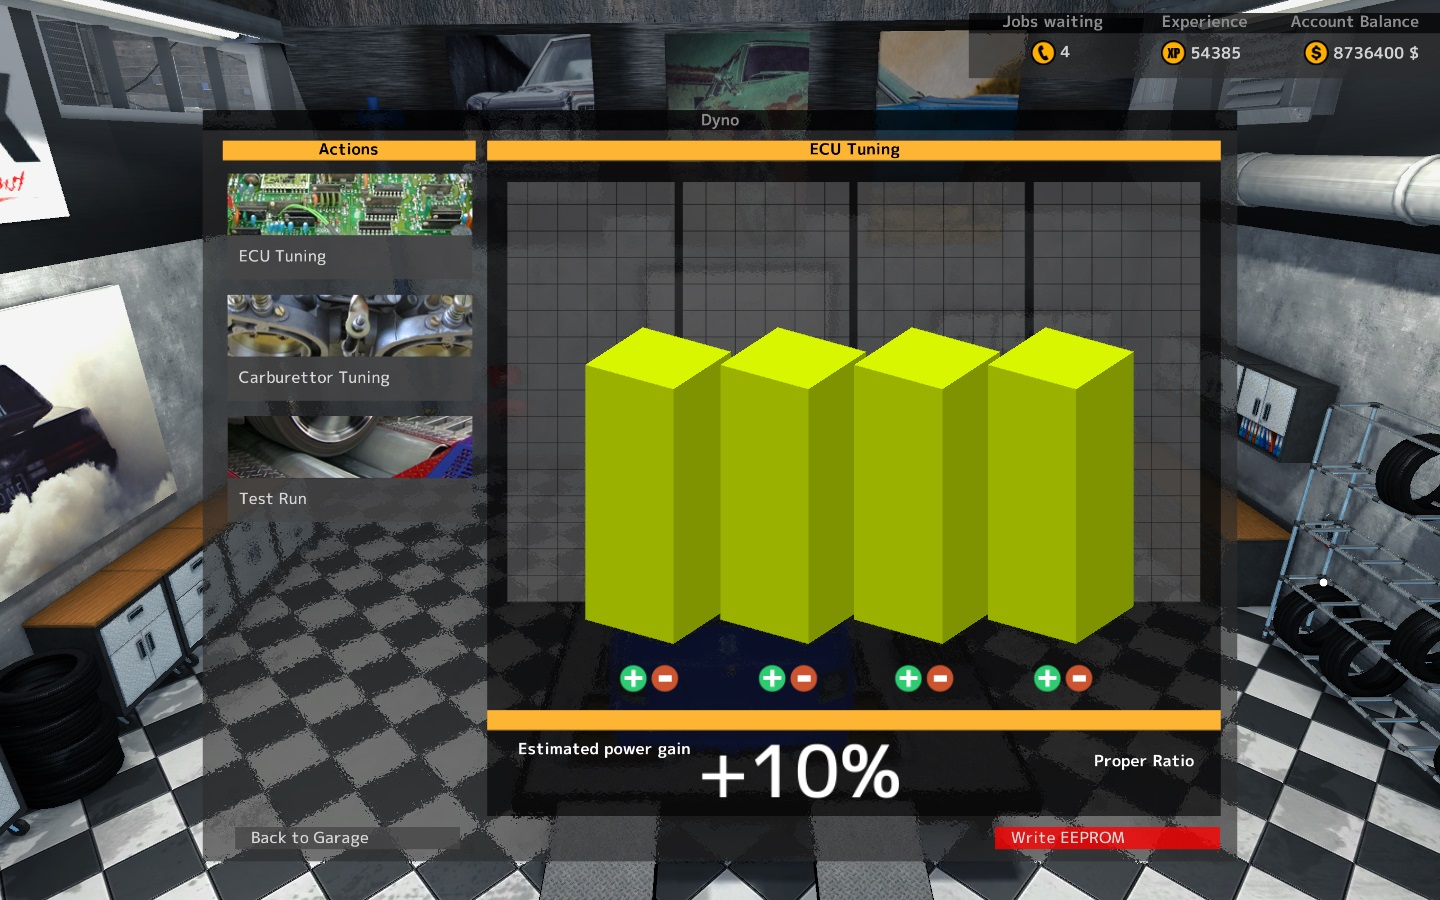
For ECU’s, due to having four bars it can take longer to reach a balanced state. It’s important to understand that when you add (+) or subtract (-) to one bar, the exact opposite happens to all the rest. Within a few clicks, I had balanced three of the four bars.
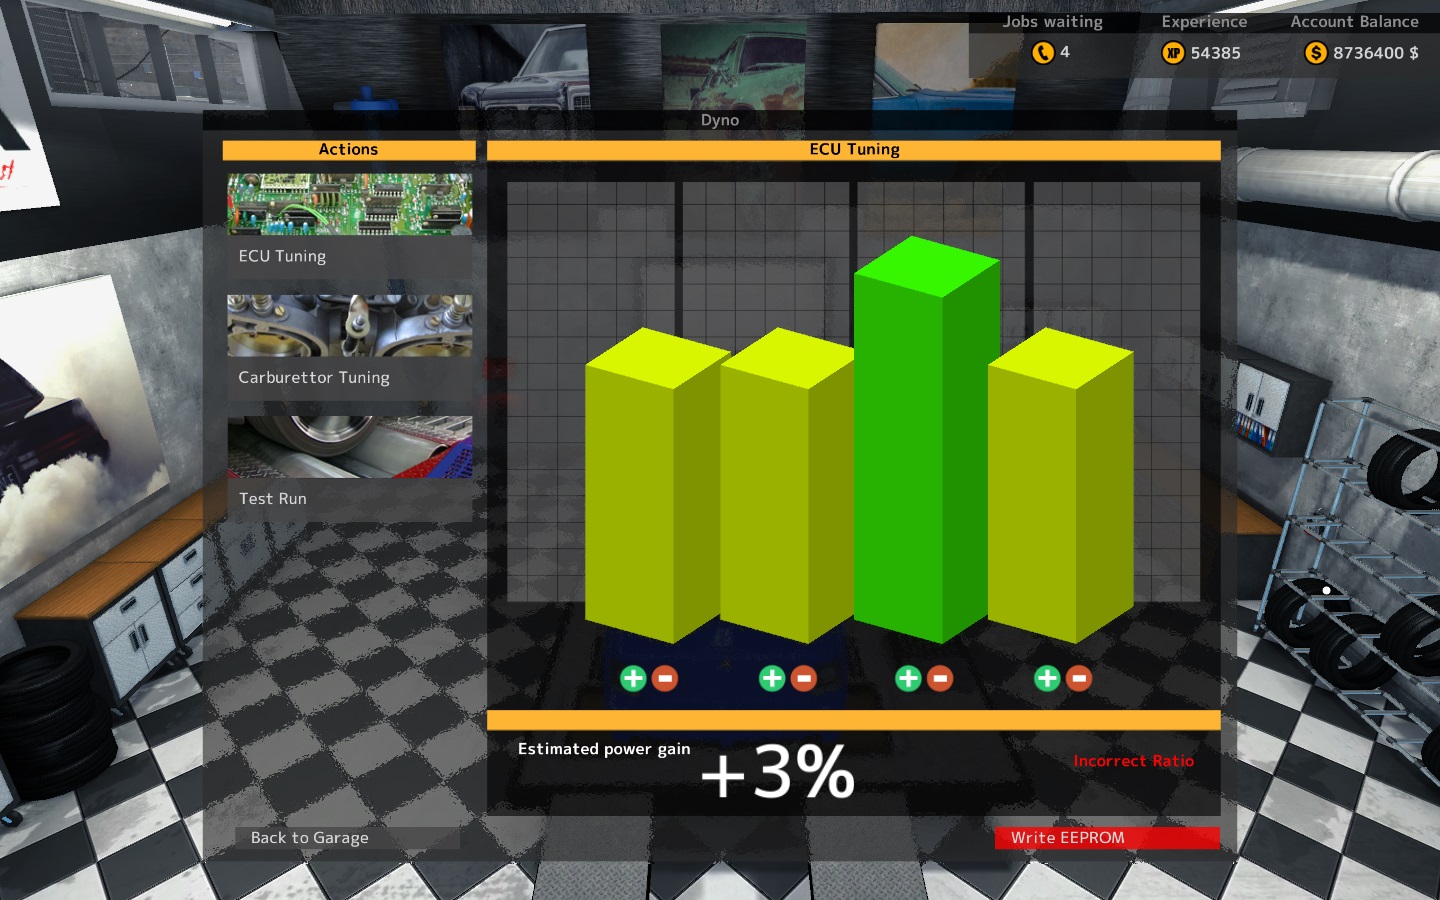
From here, I subtracted (-) once from each of the three balanced bars and then added (+) twice to the unbalanced bar. This leveled all four bars out to the same point. If this doesn’t happen, either keep adding (+) to the unbalanced bar or do another set of subtractions (-) for the three balanced bars. Always keep the three balanced bars together until you have all four bars balanced, like below.

Optimum Tune – Carburetors
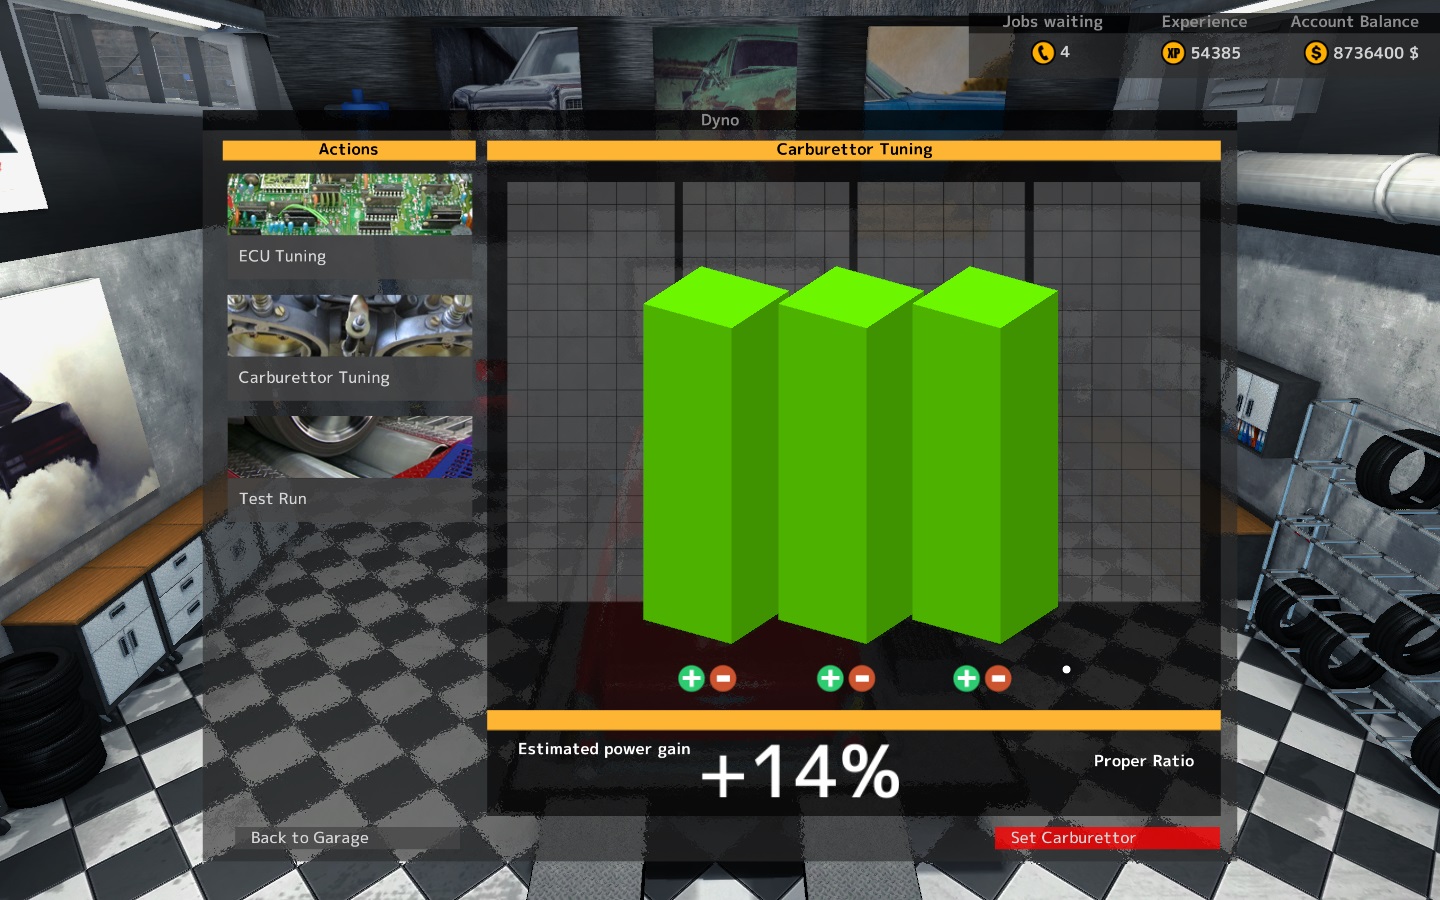
Now that I have balanced the bar graph and reached a proper ratio, getting to the optimum tune is easy. The guess work is now done and all I have to do is level upwards with the tune. You level upwards by either adding (+) OR subtracting (-) to each bar going from left to right or right to left. Do not add and subtract at this point, so pick one and stick with it. This will allow you to move from say 2% all the way to 18%.
A quick note about adding (+) or subtracting (-). By adding (+) to each bar in a row, you’ll end up decreasing the percentage for the proper ratio. By subtracting (-) to each bar in a row, you’ll end up increasing the percentage for the proper ratio. This is due to either going up in one bar (adding) and down in two bars or going down in one bar (subtracting) and up in two bars. Remember, what you do to one bar the exact opposite happens to the rest. If you go past the minimum or the maximum, the bar will go to the other side of the chart. Past 18% becomes 2% and past 2% becomes 18%. This may sound confusing but once you’re experimenting with the tuner, it will make sense.
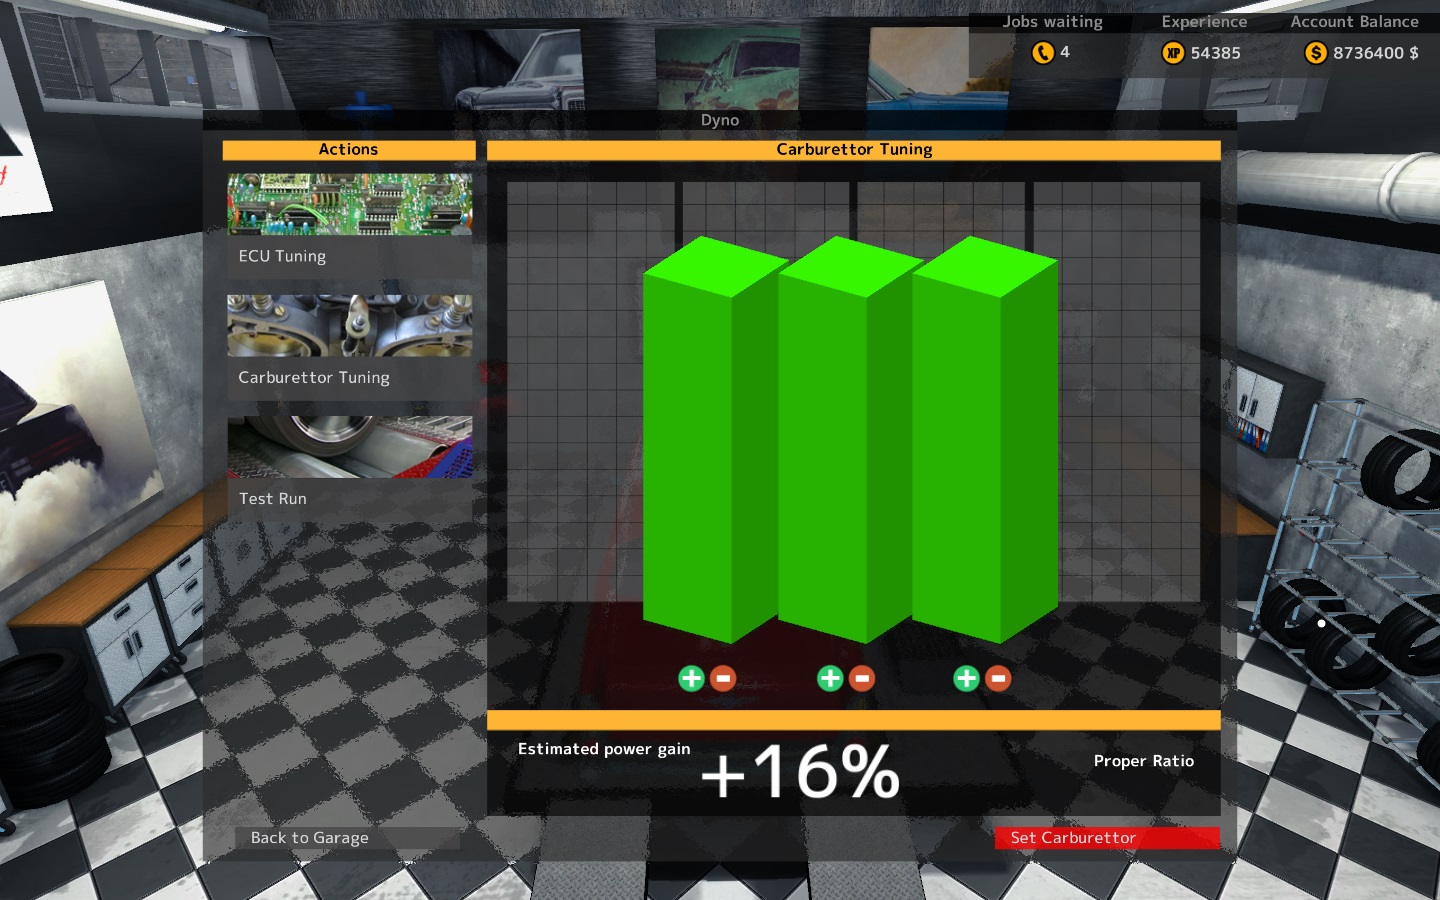
For carburetors, you level up by 2% each time, as seen below. Because it levels by 2% each time, you will not miss 18%, which is possible with the ECU tuning tool.
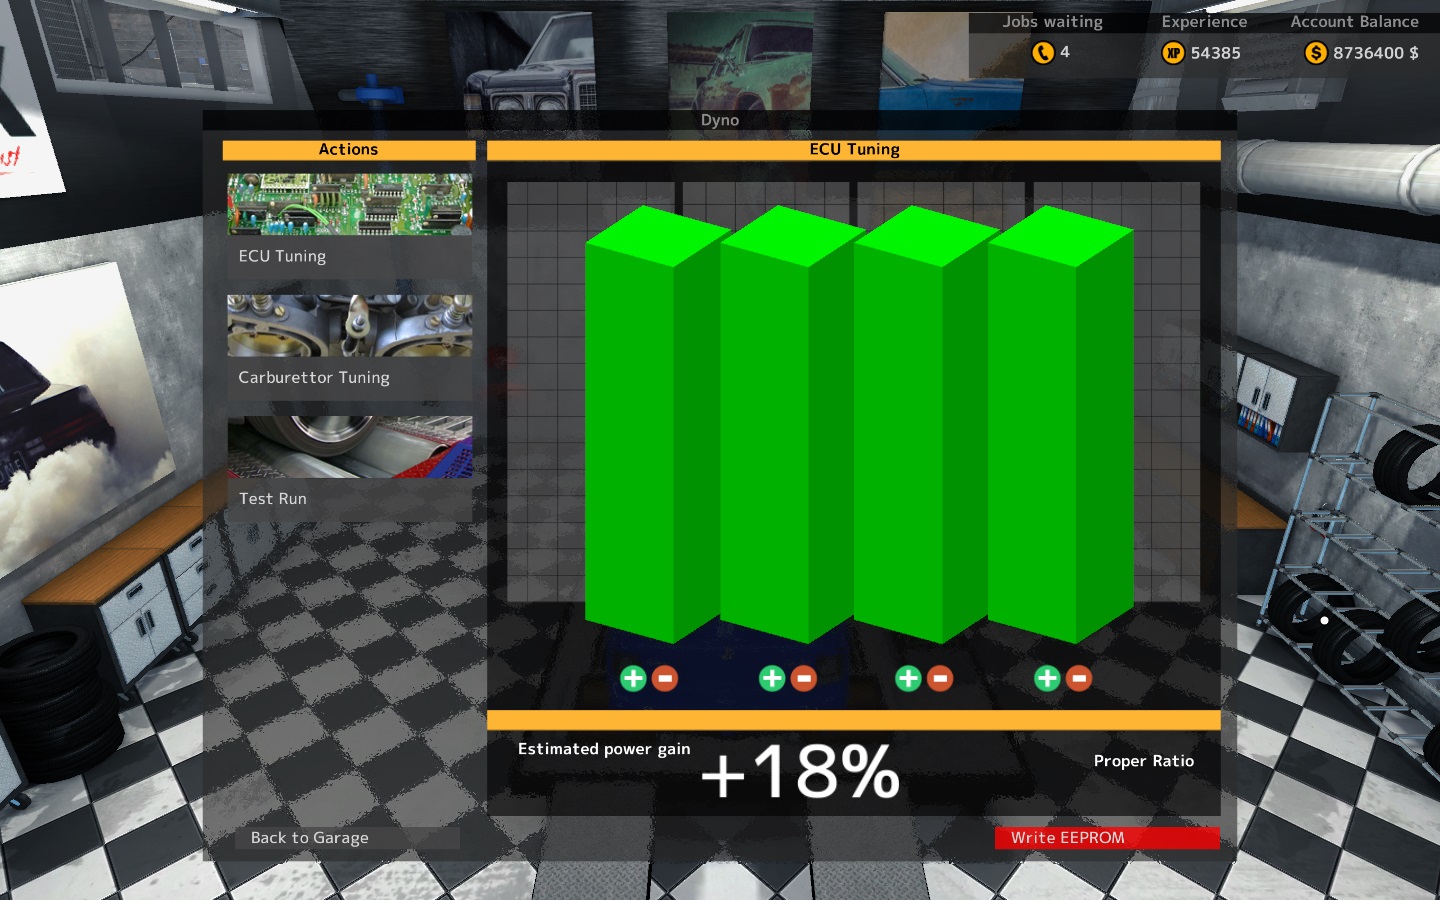
and finally, the maximum gain possible of 18%.


Optimum Tune – ECUs
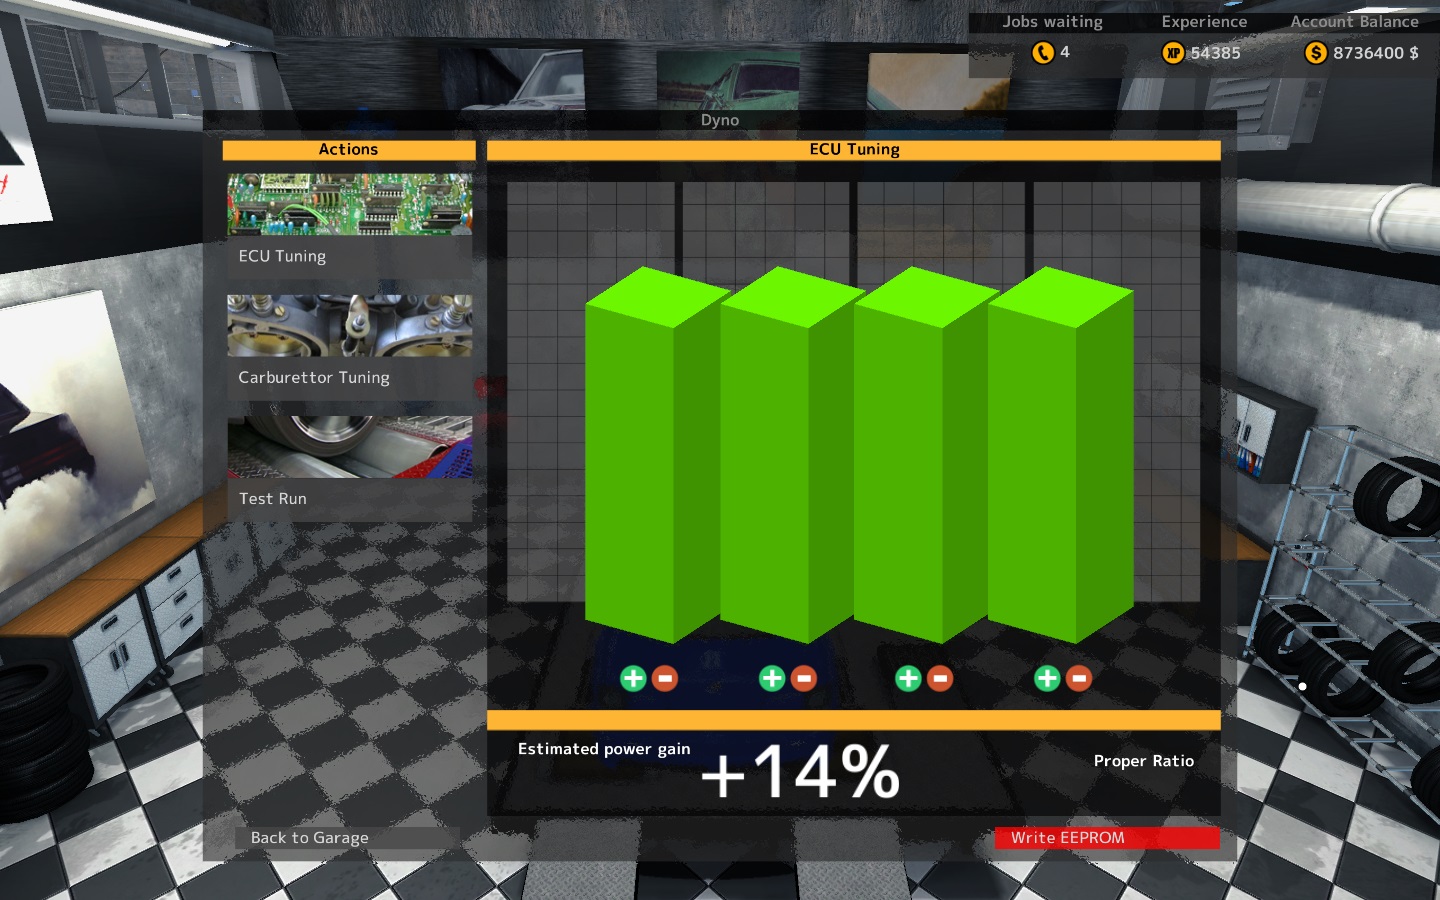
Remember that once you have reached a proper ratio, you either add (+) or subtract (-) but not both, to each of the bars. Doing both with result in a mess again.
For ECUs, you level up by 4% each time. This means if you hit 16%, you’ll miss 18% and go back down to 2%. This is fine, just keep leveling upwards and 18% will be reached this time around. The reason why this happens is due to 18 not being divisible by 4 (the number of bars). This is not a problem for carburetors because 18 is divisible by 3 (the number of bars). Below is the leveling upwards that started at 2%. As you can see (if you click on the picture), it increases by 4%.
Conclusion
I hope this was easy enough to follow, if you have any questions feel free to ask them in the comments. Originally this guide was written by looking for a more elaborate pattern to solve the tuning mini-game. Then I paid more attention to the fact that what you do to one bar, the exact opposite will happen to the rest. This is what makes it possible to level upwards with a tune as you eventually do the exact same thing to each bar. This should get rid of the headache of getting the peak tune of 18% each and every time you put a vehicle on the dyno.
If you want more power and you’ve already installed every possible performance part and have a gain of 18% with a tune, the only way to increase the power for a specific engine / vehicle combo would be to edit the text files. You can edit the engine text file to alter the amount of power that engine would have, as a base line for power. You can edit the power multiplier (pm) line in a vehicle text file, under engine, to change how much power just that vehicle makes. The power multiplier line multiplies the power in the engine file by whatever is listed. Below 1 will decrease the power and above 1 will increase the power for a vehicle. If you want more help in understanding text files and how to edit them, please read my guide on modding.
[link]