
Overview
If you are wondering how to change the color of Dante’s coat, V’s EX coat, or the hair on Nero, this tutorial will walk you through the process of making the mod yourself. Note that this relies on tools available in March 2019, and may not be applicable years down the road. If you’re looking for already pre-made modded texture changes, follow the install instructions that come with the mod (I recommend nexusmods.com/devilmaycry5 as a source).
Overview
I wrote a lot here to be thorough. Here’s the basic idea:
1. Extract the packed textures from the game.
2. Load up a texture you wish to change in Neosis, and export that texture to a workable .dds format
3. Load that .dds in Photoshop, make your changes!
4. Save the file as a .dds
5. Edit the file’s hex data header to read as a .tex file
6. Rename the .dds file to a .tex.11 file
7. Put that renamed file into a new mod directory in ModManager
8. Activate the mod in ModManager, launch the game.
Tools required
Note that the tools required here are available as of March 2019, and may not be available in years gone by, or updated versions of the program have been released. Please use MicroKnightmare’s Everything You Need to Know About Modding DMC5 guide for further information on some of these.
- REtool[www.fluffyquack.com] by FluffyQuack OR QuickBMS[aluigi.altervista.org] by Aluigi
- (If using QuickBMS) the RE Engine .bms script[zenhax.com] by Ekey
- Most recent Devil May Cry 5 pak names list[forum.xentax.com] – Requires looking for the most recent list (as of this writing, bottom of page 9 links to a mediafire one)
- Noesis[richwhitehouse.com]
- Noesis texture reader plugin for Devil May Cry 5[forum.xentax.com] by sydie – Requires Forum Registration!
- Adobe Photoshop[www.adobe.com]
- Intel Texture Works Plugin for Photoshop[software.intel.com]
- A hex editor such as HxD Hex Editor[mh-nexus.de]
- ModManager [residentevilmodding.boards.net]for Devil May Cry 5 by FluffyQuack
Extract the pak
Special thanks to MicroKnightmare’s guide for getting me started on this.
Here are the steps using FluffyQuack’s REtool.
1. Extract the REtool, I prefer to extract it to the Devil May Cry 5 directory.
2. Open extract-pak.bat with a text editor, I recommend Notepad++
3. Change re2_pak_names_release.list to dmc5_pak_names_release.list
4. Drag re_chunk_000.pak in the Devil May Cry 5 directory on to extract-pak.bat
The extraction took me about 5 minutes, but your experience will vary.
After the extraction is done, you should have a new folder in your Devil May Cry 5 directory named re_chunk_000. You may move this folder to another drive or location if you wish, and you may also delete items/folders/textures you will not be using. For changing player items such as coat, I kept character, streaming, and ui in the re_chunk_000/natives/x64/ folder. I removed the rest.
Finding the texture you wish to edit
The folders in re_chunk_000 are pretty self-explanatory. You may use this[residentevilmodding.boards.net] list by JTeghius Kittius as a resource if you wish as well.
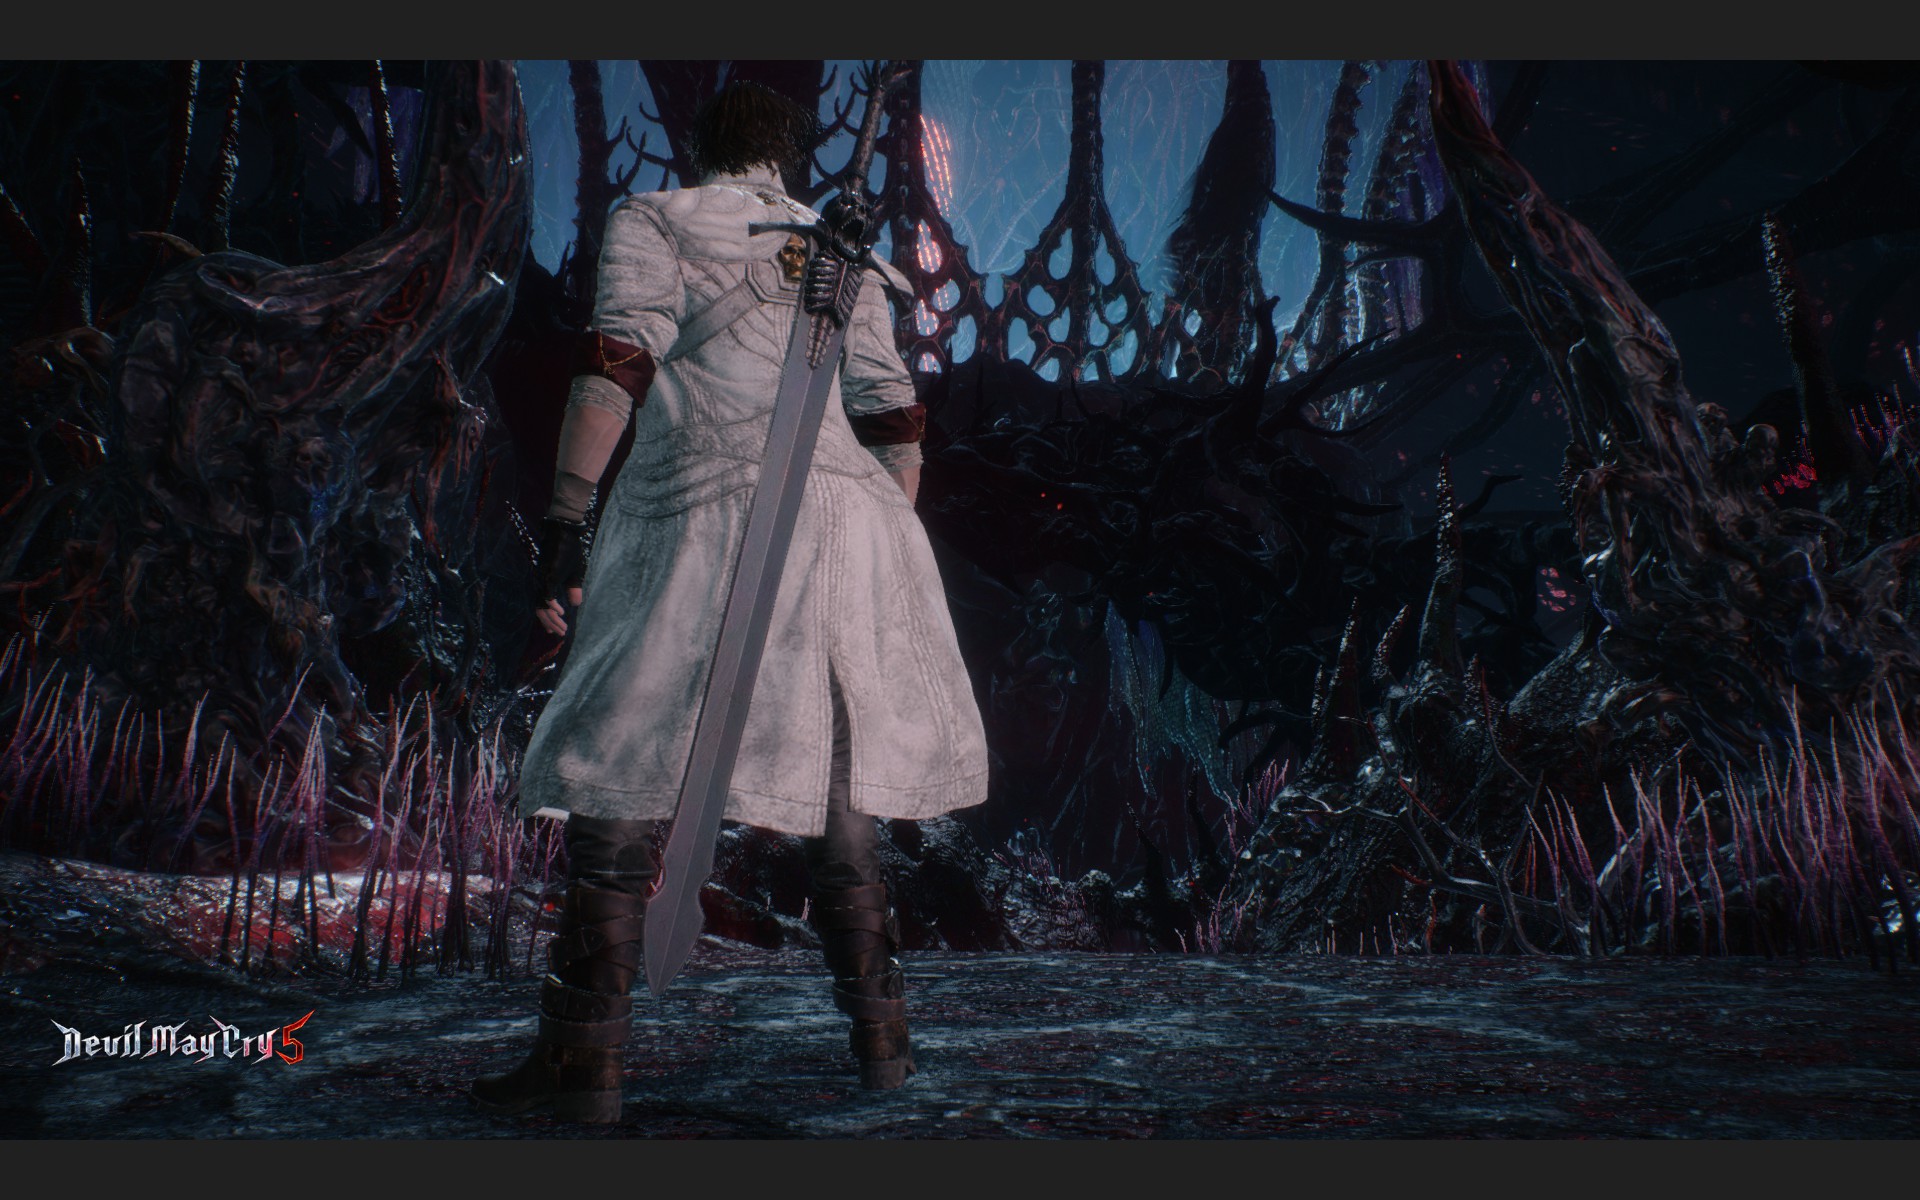
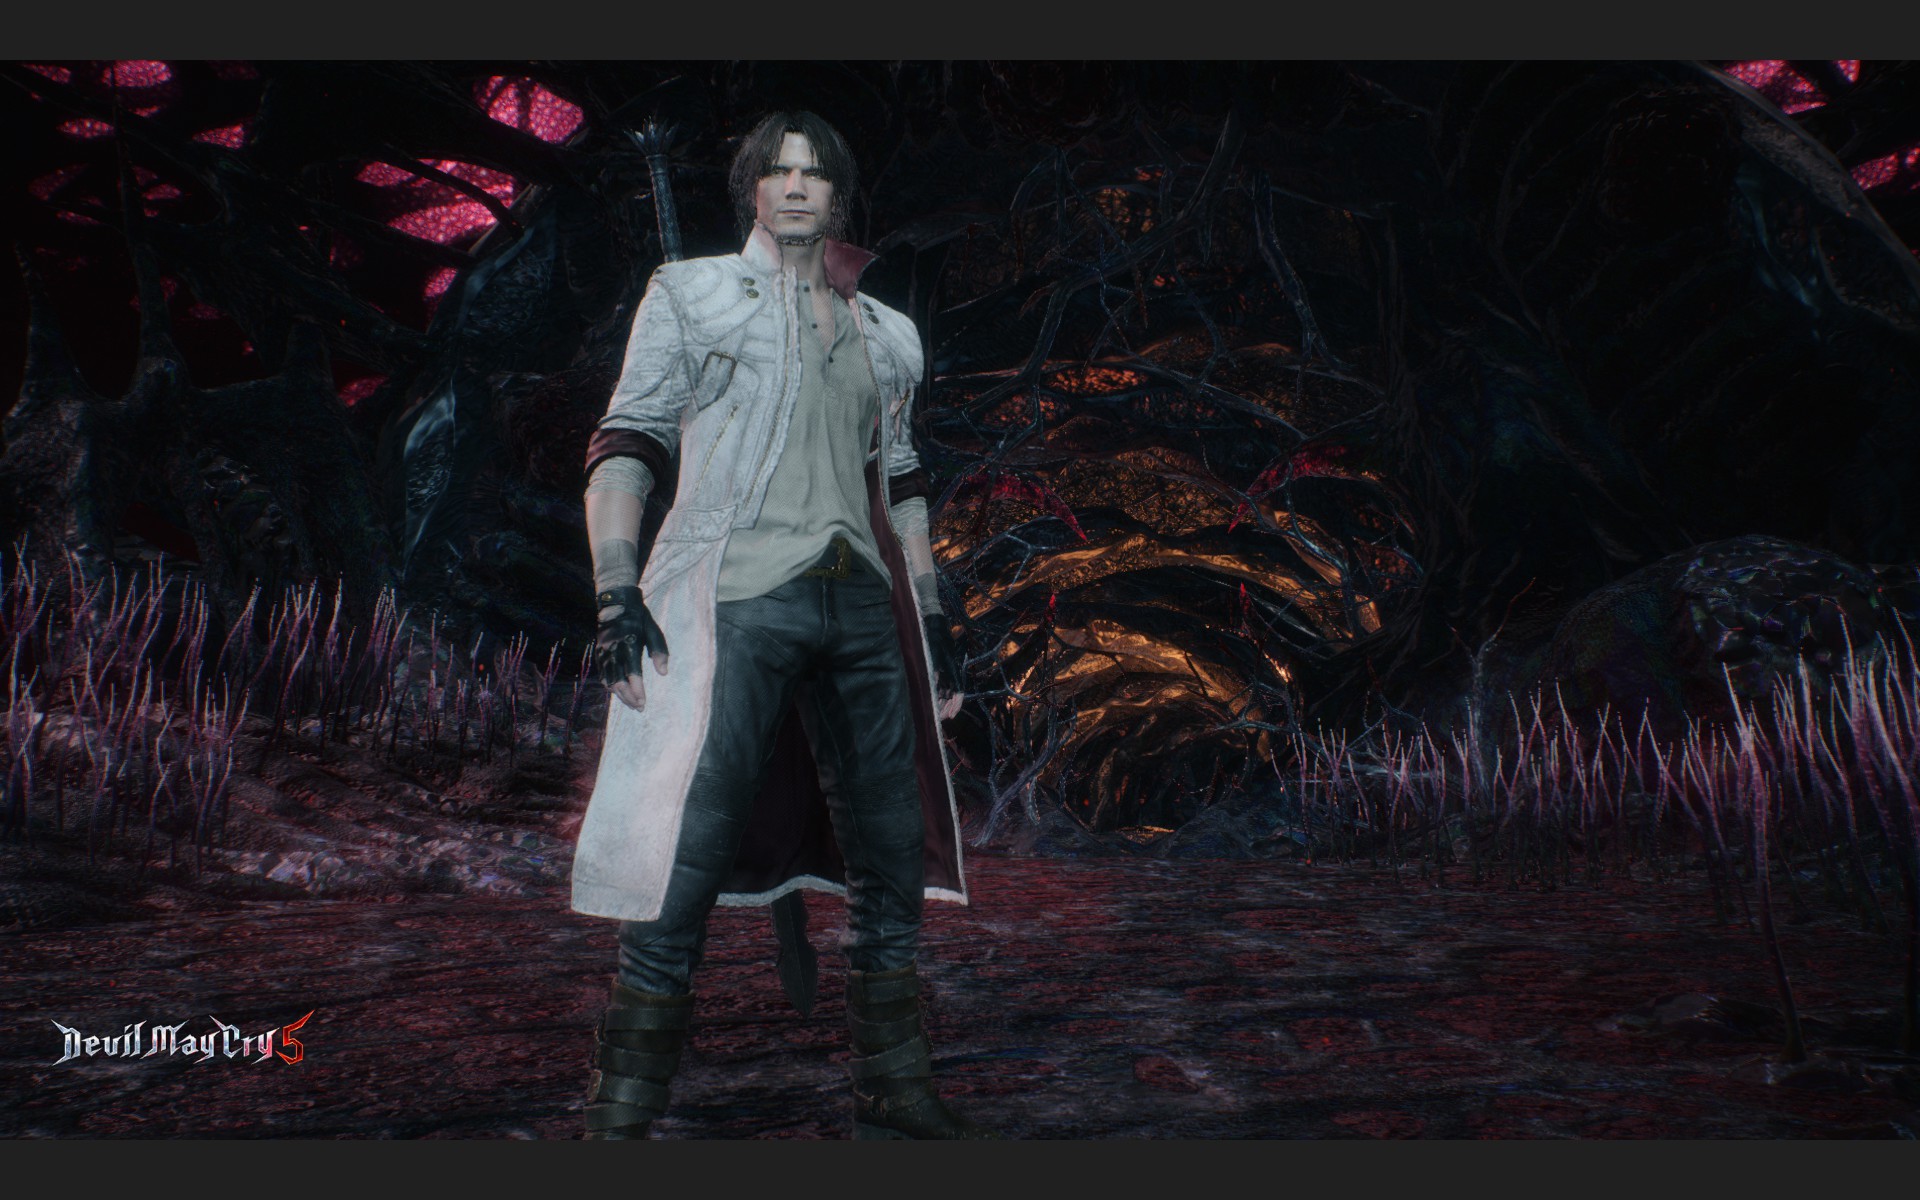
As an example, I will be editing Dante’s EX costume (you unlock this with pre-ordering the game or I think they allow you to purchase it as DLC for some reason) from a black coat to a white one inspired by Nero’s EX Costume (which, in turn, was inspired by Nero’s time with the Order).
EX costumes are named with a _c00_ in the directory name, for example, pl0000_c00_nero, pl0030_c00_nero_dirt, pl0031_c00_nero_middirt, pl0100_c00_dante, and so on. If you want to edit the normal costumes, you will easily spot them (they’re the ones without _c00_).
Let’s open up the first directory to edit, re_chunk_000nativesx64characterplayerpl0100_c00_dantepl0100_c00_body. In here you’ll find self-explanatory texture files.
Click on pl0100_c00_coat_albm.tex.11 and drag it to the viewer window of Neosis. Note you may need to click on the viewer after you drop it in and press F11 a few times to cycle through the viewing modes to really check if it’s the right file you are looking for.
It is (Dante’s EX Costume is primarily black), so let’s right click on the pl0100_c00_coat_albm.tex.11 in Neosis and click on Export. We’ll want to export it as a .dds file in Main output type. All other default options are fine. It should create a Photoshop-openable .dds file in the same directory it was sourced from.

Edit the texture how you like in Photoshop
I recommend using the numerous guides out there on YouTube an the Internet to find a way to change what you want about the texture. I mostly do color changes. In this tutorial, we’ll make the coat white, so let’s get to that.
The .dds file you open will ask you if you want to load transparency as alpha channel. Make sure this is checked (you do), and click OK.
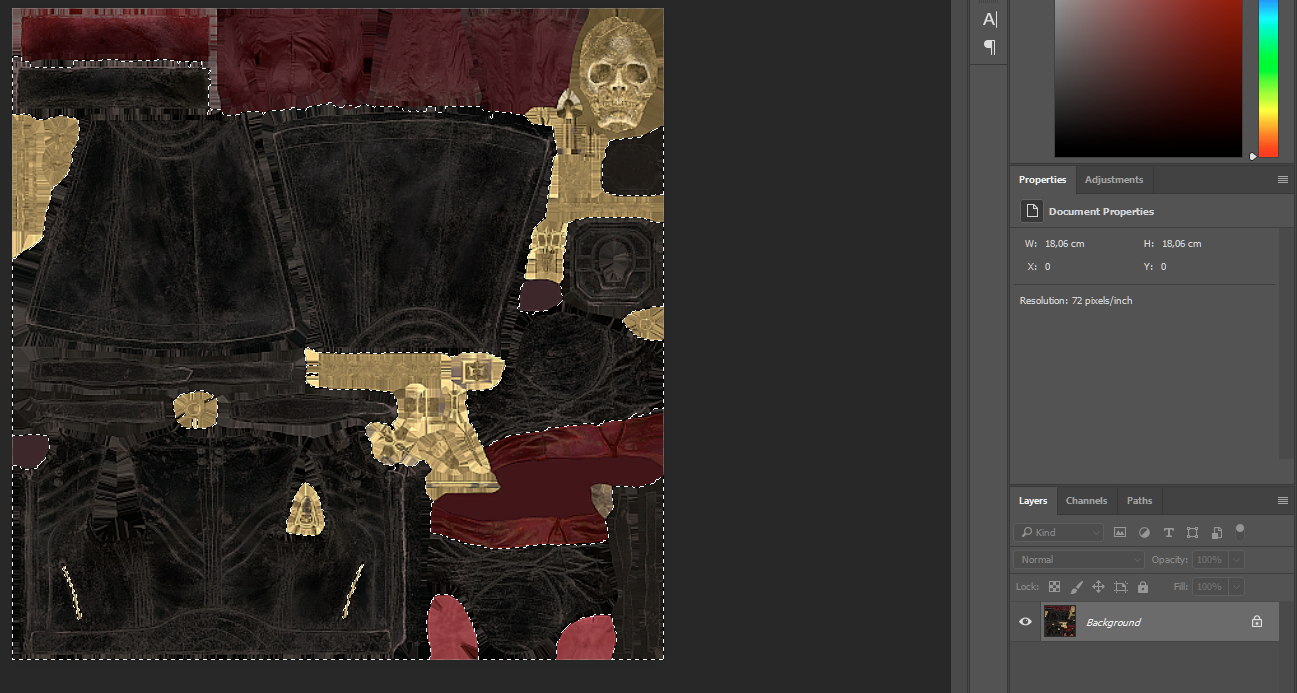
Now I’ll use Quick Select tools to select only the black parts of Dante’s coat, being careful to not include the golden zippers.
After I selected what I want to change color-wise, I made a new layer by pressing CTRL + J (CMD + J on Mac I think). Then, I inverted the colors by pressing CTRL + I. It’s a bit too white with little contrast, so I will adjust the curves down to something reasonable, and add a yellowish-orangeish hue/saturation adjustment. These are done with the adjustment layers and creating clipping masks for each adjustment.
I loaded up Nero’s EX Costume in Neosis as a reference to get the whites similar.
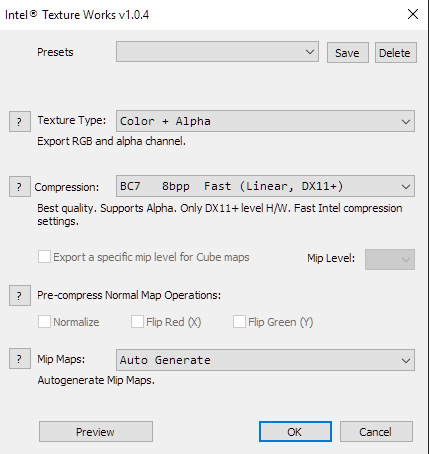
Now that you have made your own color changes, save the file. A prompt will come up. These are the options you want:

Note that any in the BC7 line should be fine, but the one selected works for me, so I just choose that.
We’re almost done editing this for the game, just a few more steps!
Putting the newly modded texture back into the game, pt. 1
NOTE: Some parts, like Dante’s Coat, require you to edit multiple versions and textures. For example, Dante’s coat comes in three textures: normal (unmarked), dirt, and middirt. This is true for other characters as well.
In addition, Dante’s coat also has another texture attached to it: pl0100_c00_coatparts_albm.tex.11 (we only edited pl0100_c00_coat_albm.tex.11). We’ll need to do all steps in this tutorial for each piece, so it could be advantageous to make all your changes for all three versions now in Photoshop for consistency.
If not, that’s fine, we will continue to focus on just one texture for now.
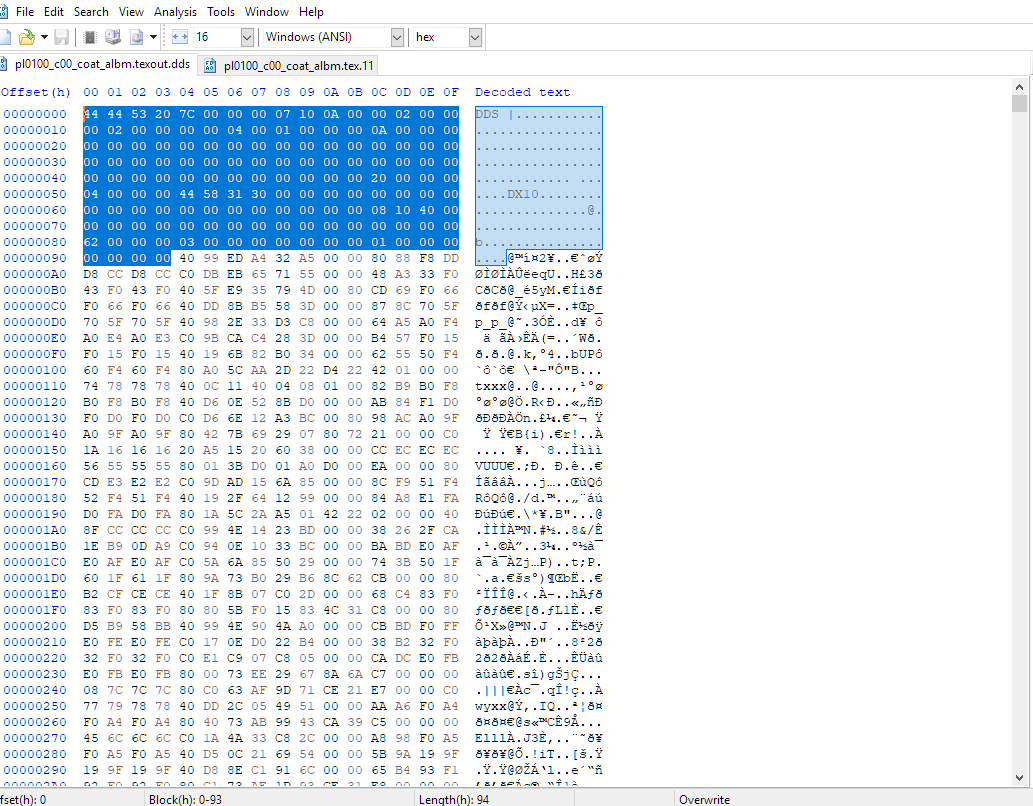
Your Photoshop saved a new file, pl0100_c00_coat_albm.texout.dds. The engine still sees this as a .dds file, even if we simply renamed it. We have to change the header in a hex editing program for it to read as a .tex file.
Simply drag and drop the .dds file into HxD (or any other hex editing software). Now, do the same for pl0100_c00_coat_albm.tex.11 (this is the original unmodified texture, it will open in a new tab). Notice the header has a different pattern in each of them, with the .dds file starting with DDS and the .tex file starting with TEX.
We want to copy the header from the original unmodified .tex file to the .dds file.
The highlighted portion (highlight the 00 at the bottom right of the selected area in the screenshot above to the beginning) is what we want to copy.

Now paste it to the .dds file’s header, notice the selection includes only a bit on the last row, a series of four 00s.
The prompt will tell you the file size will change. Confirm, then save the file.
Delete the created files that end in .bak, then rename the original texture files to .bak. In our case, we’ll delete pl0100_c00_coat_albm.texout.dds.bak, change pl0100_c00_coat_albm.tex.11 to pl0100_c00_coat_albm.tex.11.bak, then rename pl0100_c00_coat_albm.texout.dds to pl0100_c00_coat_albm.tex.11 (notice it is not texout.11).
Putting the newly modded texture back into the game, pt. 2
We have one last process to go through. We need to put this into FluffyQuack’s ModManager for Devil May Cry 5 (and other Capcom games).
Luckily, an example mod comes with it for Resident Evil that you could use to mimic the file structures involved. Study it, but I’ll let you know what we’ll do for our mod here.
Navigate creating the necessary folders as you go, to [your ModManager directory]GamesDMC5Mods[your mod name]nativesx64
In here, we’ll have three folders to create: character, streaming, and ui. The structures will be like this:
- ModManagerGamesDMC5ModsEX Dante White Coatnativesx64characterplayerpl0100_c00_dantepl0100_c00_body
- ModManagerGamesDMC5ModsEX Dante White Coatnativesx64streamingcharacterplayerpl0100_c00_dantepl0100_c00_body
- ModManagerGamesDMC5ModsEX Dante White Coatnativesx64uiguiui2100tex
- ModManagerGamesDMC5ModsEX Dante White Coat\nativesx64uiguiui5000texmovie
The ui folder is not necessary at this time if you wish to just see how the textures look in game.
In here, we’ll place the newly renamed/modded texture(s) in ModManagerGamesDMC5ModsEX Dante White Coatnativesx64characterplayerpl0100_c00_dantepl0100_c00_body. We can then copy and paste the character folder to the streaming folder, located at ModManagerGamesDMC5ModsEX Dante White Coatnativesx64streaming.
Create a modinfo.ini folder in your mods directory, our case ModManagerGamesDMC5ModsEX Dante White Coat. Put in your information like so:
name=EX Dante White Coat
version=v1.0
description=Replaces the secret EX Dante costume with a white coat alternate version.
screenshot=screenshotNotRequiredButHelpful.png
author=[your name]
Now, load up ModManager.exe. Navigate to Devil May Cry, and click on your mod. Then, launch your game. You should be able to test out your new modded texture! What a process.
Troubleshooting and other resources
I probably will not maintain this guide or read comments. I’ll try to be as helpful when I can, though. I recommend the other resources, especially the Discord linked below, to get faster responses.
Instead, I refer you to this video that shares a lot of similarities between modding Devil May Cry 5 and Resident Evil as a reference.
Things to look out for:
- After checking online for orbs and DLC content, the game will show a loading screen, then a black screen. If nothing normal happens (Nero’s Devil Breaker flexing as part of the normal opening sequence) and instead it’s a black screen, then the texture didn’t load properly. Try following the steps in the guide again to find out where something went wrong.
- Make sure you really rename the .dds file to tex.11!
Other resources:
The Resident Evil/Devil May Cry 5 Modding Discord[discord.gg]
[link]
[link]
[link]
[link]
[link]
Author’s note:
You may publish, republish, make changes to the guide to publish, or use parts of this guide at your own free will without crediting. Have at it, I welcome it to keep people up to date!