Ueljun's Awesomenauts Ultimate Concepts!
Introduction:
Welcome to my Awesomenauts Ultimate Concepts! This is a list of ideas I had about one thing that probably every player of this game has thought at some point: "What if Awesomenauts had ultimates?" I know that some threads about this topic may have already been made, and I liked them, but I wanted to do something more “complete,” so to speak. And I really want to see what you guys think about it!
First, I need to explain some things about Awesomenauts that influenced some of the choices I made for balance purposes (this is, of course, just my opinion):
First, I need to explain some things about Awesomenauts that influenced some of the choices I made for balance purposes (this is, of course, just my opinion):
My PHILOSOPHY:
Contrary to most MOBAs that are 5v5 or even 6v6, Awesomenauts is only a 3v3 game. This fact alone forces you to tone down a lot of things, since killing just one naut represents more than 33% of an entire team composition, and THAT'S A LOT! This is the main reason you won't be seeing many "activate and get easy kills" types of ultimates here. Even if there are some that cause very high damage, they are usually balanced by other factors such as activation time, meter management, and other conditions. I also tried to diversify things, so you'll see a lot of different types of uses here, but always respecting the characters' traits and uniqueness, both gameplay-wise and lore-wise. This means you won't see a Clunk jumping from one side of the screen to the other, or a Froggy G healing your entire team. Also, balancing was my main priority all the time (goodbye my imaginary full-screen Megazord Sentry, you'll always be remembered lol!), and because of that you'll notice that most ultimates also have weaknesses to counterbalance them.
About DATA:
About the values described here (damage and such), I tried to use the exact numbers for things that already exist in game, according to the current version whenever available (I mostly used the Awesomenauts Wiki[awesomenauts.fandom.com] for reference, which covers the last version by Ronimo, v4.7.1. As far as I know, the values haven't changed so far). For ultimates, I sometimes improvised a little to make things more understandable, such as with "distance" values for example. You might see descriptions like "this ultimate has a range equivalent to Raelynn's Snipe", or "3 meters away". Also, to give a better idea of how much something "hurts", the lowest HP character currently in the game is Commander Rocket with 1150 HP at level 1 (remember, it scales with levels, and so would the ultimates). I apologize in advance for any errors, since I didn't test all the values in-game to see if they match the wiki exactly, but you'll still be able to understand the ultimates regardless. And one last thing just for clarification: if I say something like "a regular Clunk explosion deals 500 damage", I'm referring to its level 1 value (as mentioned above, it scales with levels). Of course, for ultimates, you'll never be able to use them at level 1, but I'll still use the base level 1 values for easier understanding. Let's use this Clunk example to explain: his ultimate reduces incoming damage by 30%, and in its description you'll see I mention this 500-damage explosion just to demonstrate some calculations. But of course, in a real match, by the time you get the ultimate you would already be at much higher levels, meaning the explosion would deal more damage. I just used the base values here to make the explanations easier to understand. As for the damage values of the ultimates themselves, they should be considered as-is, representing the earliest possible stage at which you could unlock them.
STRUCTURE:
I explained each ultimate in 7 topics for better understanding:
_Activation: What happens when you press the ultimate key (or sometimes the skill key). In general, it might have an initial prep animation, which is a required animation before the ultimate effect itself happens. Or it might be instant, with no prep animation, or passive, which will most of the time happen the next time you use a specific skill. Sometimes an ultimate can be interrupted (normally by stun), meaning the effect is cancelled, but it'll be explained in its description. Also, this section includes any conditions required for activation (like "must be on the ground").
_Duration: Well, how long it lasts. Sometimes the same ultimate might have different durations depending on specific conditions.
_Effects: A brief explanation of what the ultimate does (some may have more than one effect). Specific details will always be explained in the next topic.
_Details: This is generally the biggest part of the description, explaining every effect the ultimate has. I tried to be as simple as possible while still covering interesting interactions it might have in different situations. Some ultimates really required a more complex explanation, with specific data and such.
_Upgrade Interactions: If there are any upgrades bought previously that might improve the ultimate in any way, or the skill the ultimate is attached to, if that is the case.
_When to Use: Here I give some practical examples of optimal usage (of course, this is just my opinion). I tried to demonstrate not just the obvious uses, but also some more specific ones.
_Final Notes: A more general summary of all the things explained in the topics above, and sometimes personal inputs and thoughts (and maybe a "catchphrase" here and there lol!).
_Activation: What happens when you press the ultimate key (or sometimes the skill key). In general, it might have an initial prep animation, which is a required animation before the ultimate effect itself happens. Or it might be instant, with no prep animation, or passive, which will most of the time happen the next time you use a specific skill. Sometimes an ultimate can be interrupted (normally by stun), meaning the effect is cancelled, but it'll be explained in its description. Also, this section includes any conditions required for activation (like "must be on the ground").
_Duration: Well, how long it lasts. Sometimes the same ultimate might have different durations depending on specific conditions.
_Effects: A brief explanation of what the ultimate does (some may have more than one effect). Specific details will always be explained in the next topic.
_Details: This is generally the biggest part of the description, explaining every effect the ultimate has. I tried to be as simple as possible while still covering interesting interactions it might have in different situations. Some ultimates really required a more complex explanation, with specific data and such.
_Upgrade Interactions: If there are any upgrades bought previously that might improve the ultimate in any way, or the skill the ultimate is attached to, if that is the case.
_When to Use: Here I give some practical examples of optimal usage (of course, this is just my opinion). I tried to demonstrate not just the obvious uses, but also some more specific ones.
_Final Notes: A more general summary of all the things explained in the topics above, and sometimes personal inputs and thoughts (and maybe a "catchphrase" here and there lol!).
EVALUATION system:
Next, I gave the ultimates an evaluation system, like "grades", to demonstrate if the ultimate is powerful, easy to use, etc. It is composed of 3 topics that go from 1 (very weak/slow) to 5 (very strong/fast), plus some "pros" and "cons" of the ultimate. See below:
EVALUATION:
EVALUATION:
- Power: How strong the ultimate is, not necessarily only in terms of damage, but also how useful it is for your team and how it compares to other ultimates in the game;
- Ease of Use: How easy it is for you to use the ultimate in the context of what it is supposed to do. For example, for a damage-type ultimate, how easy it is to set up, hit enemies, deal with vulnerabilities while using it, and such things. Generally this category has a comment attached to the grade for more clarification.
- Charge Rate: There is a meter in-game that you have to fill before using an ultimate, and this represents how fast characters fill it (yes, different characters have different meter fill rates). You fill it slowly naturally, but things like kills, assists, healing, farming, and other actions help fill it faster (so collaborating with your team is key here). These are the estimated numbers for how many times you'll probably see an ultimate in an average 15-minute match:
1 - Very Slow: Probably only once;
2 - Slow: Generally still once, but sometimes twice;
3 - Medium: Mostly 2 times, but sometimes with a rare third;
4 - Fast: Generally 3 times;
5 - Very Fast: Still 3, but with some chance of a fourth use.
Of course, this is just speculation. If you are good at farming, if a lot of team interactions (fights and such) happen, and if you're always being helpful to your team, you might get like 2 ultimates in a 15-minute match even if your character has a very slow fill rate. And on a side note, things like a solar boss give bonus meter! - Pros: Well, this is self-explanatory, just some benefits the ultimate has;
- Cons: Same as above, but with bad things instead.
ULTIMATES - How do they work?
As said above, just like in other games, there is a meter you must fill to gain access to ultimates. Once filled, it stays available until you use the ultimate. (I actually considered making them expire because of the 3v3 nature of the game — for example, giving players 5 minutes to use them before they disappear — but I’m still not sure about that idea. For now, I’ll leave them permanent until used.)
To activate an ultimate, you press the ultimate key (or the regular skill key the ultimate is attached to, if that is the case). By default, this would probably be “Q” on keyboard or something like R3 / a button combination on controllers (everything would of course be fully configurable. I actually play with a controller layout I created on Steam that lets me move in one direction while aiming in another using only the left analog stick instead of dual-stick mode, but that’s a topic for another time).
You can use ultimates at almost any moment as long as you are not currently in the middle of another skill animation (unless specifically stated otherwise). For example, you can't use the ultimate in the middle of a Frog's dash, but with Clunk, you can activate it while he's charging his explosion (you’ll understand better when reading the descriptions, but generally speaking, if you are committed to an animation, you have to wait for the animation to end before using the ultimate). And of course, you must meet the requirements required by some of them, like "must be in the ground" or things like that.
Some ultimates, such as Nibbs’s, even require a short delay after using another skill before they can be activated, purely for balancing reasons. Others can only be used while a specific skill is available, sharing the same cooldown entirely.
Anyway, all of that is explained individually in each description when needed.
And that's it for understanding what I did, and now let's go to the main event!
PS: Please don’t mind the awful pictures! These are just poorly made AI-edited images meant to represent the ultimate concepts (the original images are from the Wiki itself. If that’s somehow not allowed, please let me know and I’ll remove them immediately).
To activate an ultimate, you press the ultimate key (or the regular skill key the ultimate is attached to, if that is the case). By default, this would probably be “Q” on keyboard or something like R3 / a button combination on controllers (everything would of course be fully configurable. I actually play with a controller layout I created on Steam that lets me move in one direction while aiming in another using only the left analog stick instead of dual-stick mode, but that’s a topic for another time).
You can use ultimates at almost any moment as long as you are not currently in the middle of another skill animation (unless specifically stated otherwise). For example, you can't use the ultimate in the middle of a Frog's dash, but with Clunk, you can activate it while he's charging his explosion (you’ll understand better when reading the descriptions, but generally speaking, if you are committed to an animation, you have to wait for the animation to end before using the ultimate). And of course, you must meet the requirements required by some of them, like "must be in the ground" or things like that.
Some ultimates, such as Nibbs’s, even require a short delay after using another skill before they can be activated, purely for balancing reasons. Others can only be used while a specific skill is available, sharing the same cooldown entirely.
Anyway, all of that is explained individually in each description when needed.
And that's it for understanding what I did, and now let's go to the main event!
PS: Please don’t mind the awful pictures! These are just poorly made AI-edited images meant to represent the ultimate concepts (the original images are from the Wiki itself. If that’s somehow not allowed, please let me know and I’ll remove them immediately).
Ayla
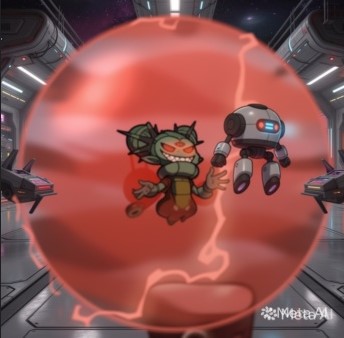
“Why Do I Have to Do Everything!”
_Activation: 0.5-second prep animation. Ayla points both hands in the aimed direction, instantly enters Rage state, and the effect begins.
_Duration: Lasts as long as Ayla has health remaining or until Rage is interrupted.
_Effect: Ayla telekinetically lifts everything considered friendly within a 45° angle in the aimed direction, up to a few meters away (the range is equivalent to Raelynn’s Snipe skill), while automatically entering Rage mode and receiving 3× more base self-damage than normal Rage. Everything inside the angle is affected simultaneously, including friendly nauts, droids, Super Droids, hummingbirds, and even objects that are normally immovable, such as Derpl Zork in siege mode and Genji’s Cocoon containing teammates (you do not remove the naut from inside the cocoon — all cocoon properties remain the same — but you can move the cocoon itself)! To balance this, there is a "weight" system that determines how much she can carry (see details below).
_Details: Ayla can lift virtually anything friendly and freely manipulate it in space while moving normally herself, just like regular Rage. Once allies or units are grabbed, your aiming direction determines where they move. You can reposition them left, right, upward, downward, or diagonally (limited by walls, floors, and ceilings, since units cannot pass through terrain). The lifted targets become “linked” to Ayla, meaning that if Ayla moves upward, the affected units float upward with her as if attached. At any point, stopping Rage immediately releases everything. While suspended, affected nauts completely lose movement control and simply “run in place.” Even movement abilities such as Frog’s dash will occur in place, similar to being ensnared. This can also pull trapped allies out of traps, such as those from Derpl or Clunk with ensnare. And then, while she can levitate almost everything, there is a weight system to balance this, as below:
[UNIT : WEIGHT]
Droids/Hummingbirds: 1
Super Droid: 2
Nauts: 3
Nauts in immovable situations: 6
As you can see, each unit has a weight value, and Ayla can lift up to 8 in total. The ultimate will always prioritize units with the highest weight values first and also the closest to her. So, situations like lifting 3 nauts plus droids, or the example above with Derpl’s Nuke while also lifting the whole team together will never happen. At most, it would be Derpl + a Super Droid, for example.
_Upgrade interactions: The ultimate version of Rage behaves almost exactly like the normal version, except Ayla takes 3× more self-damage (her outgoing damage is not tripled — it remains identical to regular Rage). Defensive Rage upgrades become especially valuable here, since reducing self-damage gives Ayla more time to maintain the levitation effect. The levitation effect itself is not influenced by upgrades.
_When to use: In most situations, you probably will not use this version of Rage purely for damage. The main strength is the telekinetic repositioning effect, which opens up many unusual plays. Examples include:
During fights on Starstorm, if teammates are about to fall into the lower pit or are trapped in a hopeless position, Ayla can lift them back to safety on the middle section.
A friendly Derpl preparing a Nuke behind your team can suddenly be repositioned directly in front of the enemy team for a surprise attack, then pulled back afterward. The movement is not instant (moving from far left to far right takes about 1.5 seconds, not counting the initial 0.5s activate animation), but still fast enough to create dangerous repositioning plays.
On AI Station, after your team releases a Super Droid, Ayla can lift allied droids, hummingbirds, and the Super Droid itself above the enemy wave and reposition them directly toward the next turret, potentially creating enormous pressure before enemies can respond.
_Final notes: This is an extremely unconventional ultimate that intentionally “breaks” the normal rules of the game. Ayla’s design has always revolved around high-risk, high-reward aggression rather than support or healing, so instead of giving her even more raw damage, this ultimate focuses on her telekinetic abilities from her lore. Because the effect is potentially game-changing, the downside is severe: Ayla takes triple self-damage while using it, meaning the effect will usually last only a few seconds under pressure. Saving teammates may leave Ayla herself near death and force her to retreat afterward. Communication also helps, since careless use can accidentally disrupt your own team’s positioning or attacks. Move it!
Evaluation:
- Power: 5 – Very Strong
- Ease of Use: 1 – Very Hard (extremely risky and mechanically demanding, with huge potential for mistakes)
- Charge Rate: 2 – Slow
- Pros: Completely changes normal gameplay rules / enables unique saves and repositioning plays / can heavily surprise enemies
- Cons: Ayla’s high-risk nature becomes even more extreme / can accidentally disrupt teammates / requires excellent awareness and coordination
Chucho Krokk
“Ramonaaaa!”
_Activation: Prep animation of 0.3s while riding his bike.
_Duration: After the 0.3-second activation, the effect lasts for 3 seconds or until Chucho leaves the bike. The smoke trail itself remains on the screen for 3 seconds also.
_Effect: Ramona (his bike) begins malfunctioning while being ridden, causing it to release a transparent poisonous smoke from the exhaust. The smoke forms a continuous trail wherever Chucho rides, allowing you to essentially “draw” shapes across the battlefield for 3 seconds. The bike’s turbo can still be used normally, letting you cover even more space if desired. Enemies who touch the smoke take 300 damage over the course of 5 seconds. If Chucho leaves the bike manually or the duration expires, he performs a backflip off the bike while Ramona continues forward and crashes at an angle based on your speed and aiming direction. The falling bike explodes upon colliding with enemy nauts, droids, turrets, totems, walls, floors, or similar obstacles, dealing 300 area damage.
_Details: The initial 0.3-second animation slows the bike’s movement slightly, after which it immediately returns to normal speed. During the next 3 seconds, the bike behaves exactly like the regular skill, except with the added ultimate effect. This means upgrades such as Neon Nitro Muffler still apply normally, allowing the flame trail and poisonous smoke to overlap for even more area denial. The smoke damage does not stack if multiple trails overlap in the same spot — the damage remains constant regardless of smoke density. The crashing bike cannot be reflected and deals half damage to turrets. While falling, the bike is treated as an enemy unit, meaning turrets will target it. However, it has no HP and cannot actually be destroyed by attacks (only turrets interact with it, enemy projectiles will simply pass through it). Also, the falling bike is treated like a high-priority enemy, meaning the turret will always prioritize it, even if there is a enemy naut closer to the turret! As soon the crashing bike enters shooting range, the turret will shoot it, and since the turret shots slows down the falling bike speed, this can be useful as a temporary distraction, potentially saving a teammate (although turret shots slow down the falling speed, they do not affect the bike’s trajectory in any way). Finally, while falling, the bike continues leaving a smoke trail until it explodes. Afterward, the regular skill enters its normal cooldown before it can be used again.
_Upgrade interactions: All upgrades that affect the bike while riding it apply normally here, including speed bonuses, knockback effects, and trail upgrades.
_When to use: Since the damage is not extremely high, this ultimate is usually better for disrupting fights rather than initiating them. The poison damage alone may be enough to finish weakened enemies, especially when combined with the additional explosion damage from the crashing bike. It is also effective for zoning enemies, controlling territory, escaping danger, or even saving teammates by distracting turrets. One particularly strong use is "trapping" enemies inside your team’s territory by covering their escape route with smoke.
_Final notes: A disruptive, area-control-focused ultimate that can fill large portions of the screen with poisonous smoke, discouraging enemies from approaching or repositioning freely. Keep in mind that Chucho remains just as vulnerable as he normally is while riding the bike, so recklessly diving into enemies without team support can still be very dangerous.
Evaluation:
- Power: 3 – Medium
- Ease of Use: 3 – Medium (requires planning and good trail placement)
- Charge Rate: 3 – Medium
- Pros: Can cover huge portions of the map / strong area denial / can trap enemies or “block” escape routes
- Cons: Damage is moderate / difficult to use optimally in chaotic fights
Clunk
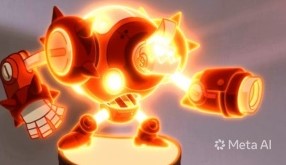
"Heavy Metal"
_Activation: 0.2s charge time; after this, Clunk glows for 3 seconds, during which the ultimate effects take place. The "heavy" aspect becomes instant if Clunk is affected by CC.
_Duration: 3 seconds after activation.
_Effects: While glowing, Clunk gains 30% damage reduction, reflects all reflectable projectiles in the game, and becomes "heavy." Being heavy means he can no longer stand on glass platforms—he will fall straight through them—and his falling speed is increased by 10%. He can also recover from gravity and knockback effects (see details below).
_Details: Clunk “charges” for 0.2 seconds (you still control him normally; he just begins to glow). Then, for 3 seconds, he gains the first two effects, which are self-explanatory (30% damage reduction and projectile reflection). He also gains a third effect: becoming "heavy". As explained above, he can no longer stand on glass platforms; he ignores them completely as if they were not there. This helps Clunk overcome one of his biggest flaws in my opinion: attacking from above without worrying about glass platforms. I’ve lost count of how many times I’ve seen a low-health enemy below me, initiated an explosion certain to secure the kill, only to be blocked by a glass platform because Clunk has to land on it first before falling! Now, he will go straight down without obstacles, making it easier to land explosions.
He will also fall straight down when affected by knockback. Take Penny with the increased knockback upgrade for example: if Clunk is hit by Penny’s Pounce and then activates the ultimate, the moment it takes effect he will fall straight down instead of being pushed all the way. In other words, if he would normally be knocked back like 5 meters horizontally and activates the ultimate after traveling 3 meters, he will instead drop straight down and ignore the remaining 2-meter distance. The same applies to abilities like Skølldir’s Mighty Throw and even Sentry’s Black Hole Sun—he will fall out of the gravity effect.
This only works if you are already affected by these effects before your ultimate triggers. So, if you use the ultimate first and then get pounced by Penny, you'll still suffer the knockback effect normally. But if she pounces you first and then you activate the ultimate, you'll fall out of the effect instead (think of it like a safety measure, like airbags in cars: they are useful after a crash, not before). To help with this, you can activate the ultimate even while stunned, and the "heavy" aspect (and heavy aspect only) will become instant if you are suffering from CC! If you press the ultimate key during a stun effect for example, Clunk will automatically activate the full ultimate as soon as the stun ends, BUT the "heavy" part will happen immediately, no matter if you are stunned at the moment or not.
Complicated? Lets take Penny's Pounce skill again as a example:
Pounce causes 0.4s stun duration by default, and knockback. That means if you activate the ultimate while at half of this time, you'll fall at 0.2s even if you are still suffering from the stun (you won't get rid of the stun effect itself, you'll just fall down from the knockback effect, still stunned until you complete the whole 0.4s duration). Then, after the 0.4s passes, the ultimate will start normally for the other effects, respecting the 0.2s of charge time that will still happen. The same thing would happen to Skølldir’s Might Throw for example.
This only applies to knockback and gravity-like effects (abilities that force you to move from one direction to another or lock you in place), but not to “physical” traps like Derpl’s traps. Also, Clunk remains fully controllable while falling (of course if he is not stunned), so he doesn’t need to land on the ground before jumping or moving sideways after escaping something like a black hole. Finally, his falling speed is increased by 10%, and this is the only change to his movement—everything else, including vertical jump height and movement speed, remains the same.
Note: this ultimate can be used at any time, even during skills (during a explosion for example).
_Upgrade interactions: None directly, but there are some important notes to mention here since Clunk has two upgrades that may overlap with this ultimate. The first is Blueprint Container, which reduces incoming damage by 50% while charging an explosion. Since the ultimate provides 30% damage reduction overall, combining both results in 80% damage reduction while charging explosions.
As for Titanium Hard Hat, which has two stages that reduce self-damage from the explosions themselves by 50% and 100%: if you have the first stage and use the ultimate, then trigger an explosion (that deals 500 damage to enemies), you would normally take 150 self-damage (instead of 300 without the upgrade). With the ultimate active, this is further reduced by 30%, resulting in only 105 damage taken (150 - 30% = 105). If both stages are purchased, self-damage from explosions is already completely negated, so the ultimate provides no additional benefit in this regard.
_When to use: Team fights are the optimal scenario. You can bait enemies into thinking they can finish you when you are at around 50% health or less, only to suddenly become extremely hard to kill (especially with Blueprint Container) and absorb massive damage while exploding. Even without that upgrade, 30% damage reduction is not nothing. Also, remember that you will reflect projectiles for 3 seconds, which can easily turn fights in your team’s favor. Finally, it can also be used defensively in critical moments to escape gravity or knockback effects.
_Final notes: This is a very straightforward ultimate—you simply become very difficult to kill for 3 seconds. Since Clunk glows, enemies may stop attacking, which is why using it too early is probably a bad idea (unless you need to reflect something urgently, such as saving a teammate). Use it during team fights when enemies don’t expect it, increasing your chances of reflecting attacks. It is powerful but short in duration. And besides the visual glow effect, it would be nice to have an accompanying sound, like a mechanical piston activating. In short, you become the ultimate tank for a brief moment, so tank those attacks!
Evaluation:
- Power: 4 – Strong
- Ease of Use: 5 – Very easy (just activate it and become hard to kill)
- Charge Rate: 2 – Slow
- Pros: can turn the tide of battles when used unexpectedly / reflects projectiles
- Cons: can be somewhat obvious and avoided
Coco Nebulon
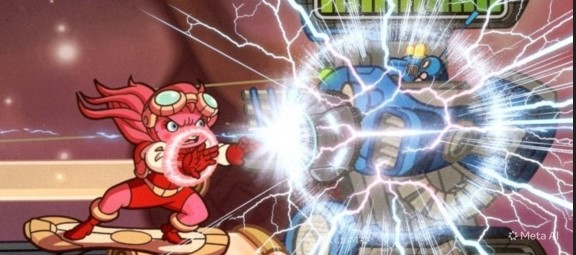
"Shockingly Cool!"
_Activation: Passive; it is used automatically when you auto-attack (AA) an enemy turret for a specified amount of time, while having at least one full ultimate meter ready.
_Duration: Maximum of 10 seconds after the effect starts.
_Effect: Coco can store up to 3 ultimate levels, as long as you don't trigger the ultimate while having any full ultimate levels ready. The effect’s stats vary depending on the level, as follows:
- Level 1 – After AAing an enemy turret for 3 consecutive seconds, it has a chance to cause a circuit break (remember, her attacks are shock-based, so it makes sense) and completely shut down the turret for 3 seconds. The chance is 0,7% per hit, but it doubles for every consecutive second you continue attacking. You also deal 3% more damage to turrets only.
- Level 2 – Same, but now you only need 2 consecutive seconds before the chances start happening. The shutdown duration (if it happens) increases to 4 seconds, and you deal 5% more damage to turrets.
- Level 3 – Same, but now it only takes 1 consecutive second before the chances start. The shutdown duration (if it happens) increases to 5 seconds, and you deal 7% more damage to turrets.
_Details: Once you start hitting a turret while having an ultimate meter ready for the required amount of time, your ultimate levels begin depleting over the course of 10 seconds until they reach 0 and the ultimate ends (regardless of the level, it always lasts 10 seconds and consumes all available full levels). During that time, the effects start happening as described above.
You cannot use only one level and save another for later. For example, if you have two ultimate levels, activating the effect will consume both levels.
The chance values are as follows, if you're interested:
--- Level 1 – Chances start after 3 consecutive seconds attacking the enemy turret: 3s (0,7% chance per hit) > 4s (1,4%) > 5s (2,8%) > 6s (5,6%) > 7s (11,2%) > 8s (22,4%) > 9s (44,8%) > 10s (end);
--- Level 2 – Chances start after 2 consecutive seconds attacking the enemy turret: 2s (0,7% chance per hit) > 3s (1,4%) > 4s (2,8%) > 5s (5,6%) > 6s (11,2%) > 7s (22,4%) > 8s (44,8%) > 9s (89,6%) > 10s (end);
--- Level 3 – Chances start after 1 consecutive seconds attacking the enemy turret: 1s (0.7% chance per hit) > 2s (1,4%) > 3s (2,8%) > 4s (5,6%) > 5s (11,2%) > 6s (22,4%) > 7s (44,8%) > 8s (89,6%) > 9s (100%) > 10s (end);
Remember, for the effects to start happening, you must attack continuously without stopping. So at Level 1 (which requires 3 seconds before activation), if you attack for 2 seconds and then stop for any reason, you will need to attack again for another 3 consecutive seconds before the chances begin. Also, after the effect begins, your full ultimate meters start draining even if you stop attacking the turret, meaning the ultimate can actually be wasted.
Another thing: if you have one and a half meters, for example, it will be considered a Level 1 ultimate and consume only the one full level — the remaining half meter will not be consumed. Also, as long as you are hitting a turret, you cannot gain any ultimate meter, even if you are also hitting droids or enemy nauts behind the turret.
Bonus effect!: if you manage to hit the base with the ultimate ready, this will also have a chance to apply the circuit break to it (the chances are the same as explained above), causing the base to stop the spawning of droids by 3, 4 or 5 seconds respectively depending on the level you are (these seconds are added to the base spawn time of the next droids batch coming)! Thanks @kitten for the idea!
_Upgrade interactions: The effect chances are calculated per hit, not per second. So the attack speed upgrade (Flexible Heat Sinks) might be a good idea (the more hits per second, the more chances you'll have), but it is not mandatory.
_When to use: This is an ultimate you get relatively often, so you should use it whenever you have the chance, regardless of your current level. The chances are low (as they should be, since shutting down a turret is very strong), especially at low levels, but at least you'll benefit from the damage bonus.
Realistically, if you manage to attack a turret continuously for that many seconds (7, 8...), chances are the enemy team is already dead and you probably won’t even need the shutdown effect to destroy the turret anyway. Still, you never know when the shutdown might happen, so keep that in mind.
_Final notes: A utility ultimate. It can be hard to pull off since enemies won’t just sit there while you destroy their turrets, but it can be absolutely brutal during wipeouts. Overall, a weak tool that can become very strong in specific scenarios.
(As a fun fact, Coco already had an AA upgrade that dealt more damage to turrets in her early days — I used that as inspiration for this ultimate).
Evaluation:
- Power: 2 – Weak
- Ease of Use: 5 – Very Easy (just AA an enemy turret)
- Charge Rate: 5 – Very Fast (remember, it has 3 levels, so to reach full power you need to fill the ultimate meter 3 times)
- Pros: great for destroying turrets / you will at least benefit from the damage bonus
- Cons: totally useless in team fights / you cannot choose partial usage of ultimate levels when attacking a turret / very situational
Commander Rocket
"Bon Voyage!"
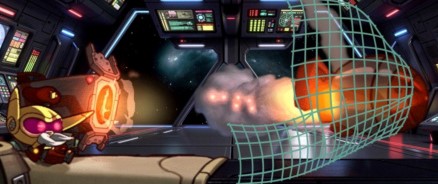
_Activation: 0.5s prep animation (he is vulnerable while doing it and can be interrupted). Commander Rocket press a button on his weapon to activate a 3-piece net trap shot mode to his next Rocket Launch skill use.
_Duration: 5 seconds to fire the ultimate after activation; otherwise, it returns to normal.
_Effect: With the skill available, fires the rocket as usual, but instead of exploding on contact, enemy nauts get caught in the nets attached to the rocket and are carried along with the projectile (the hitbox is exactly the same as the regular skill — you must hit with the rocket itself; it simply adds the net animation when it makes contact with enemy nauts so they get trapped). This forces them to travel the maximum distance (if nothing blocks the rocket along the way), receiving the maximum damage the rocket can deal when it explodes.
_Details: Nauts caught by the rocket are carried on its sides, trapped inside the nets but still able to use abilities (similar to being ensnared). Once grabbed, there is nothing they can do to escape — even skills that normally break ensnare won’t work here, as they remain locked inside the nets.
All 3 enemy nauts can be grabbed/trapped (one in each piece of the net trap) if they are in the projectile’s path. The rocket WILL explode earlier than its maximum travel distance if it hits anything other than enemy nauts (minions, creeps, walls, floors, etc.), just like the regular ability. It is also affected by CC, such as slow from Raelynn’s Rift (again, exactly like the regular rocket).
_Upgrade interactions: Damage, recoil, the flare/fireworks trail upgrade (Zurian Bomb Wrangler), and travel speed all behave exactly like the regular Rocket Launch skill. You do not gain any additional damage here just because it is an ultimate. However, since it will usually travel the maximum distance (except in the situations explained above), it will still deal a respectable amount of damage even without damage upgrades (of course, it will hurt even more if those are purchased beforehand). For reference, at level 1, the rocket deals a minimum of 200 and a maximum of 400 base damage.
Note: since the nauts are carried on the sides of the rocket, they do not take damage from the flare trail upgrade, as that effect originates from the bottom of the rocket.
_When to use: The most obvious use is to deal significant damage, especially during team fights, since it can hit the entire enemy team with enough skill and some luck. Another major use is dragging enemies into teammate traps or your own turrets, since the rocket no longer explodes on contact. They will be pushed, take damage from your turret for example, and end up in a very disadvantageous position. (Note: normally the missile passes through your own turrets, but not when enemies are caught — in these cases, it behaves as if it had hit an enemy turret.)
It can also be used defensively by pushing enemies away. For example, imagine a Clunk dropping from above into the middle section of AI Station trying to explode on you — he would be pushed all the way back, exploding himself while also taking damage from the Rocket!
Other uses are similar to the regular rocket, such as fleeing from an enemy naut (it may be a bad idea to chase a Commander Rocket with an ultimate ready) or pursuing enemies by shooting in the opposite direction due to recoil.
Just a note regarding teammate traps: they WILL WORK, and some can even force enemies out of the nets, such as Derpl’s traps, Genji’s cocoons, and even Leon’s tongue. However, abilities like Froggy G’s dashes, Penny’s Pounces, or Clunk’s Bite (without ensnare) will not pull them out of the nets.
_Final notes: This is a very versatile ultimate. It can be used for damage, repositioning enemies into your towers/traps, or even hurting enemies while fleeing. At the same time, it can also be wasted very easily. It is definitely an ultimate that rewards skill and positioning, as you still need to calculate your distance from enemies, projectile speed, and the right moment to escape without wasting the ability (shooting point-blank can actually be a good option here). It can be extremely strong or very weak depending on execution — it’s entirely up to you. Enemies can also defend themselves by placing objects in the projectile’s path, such as Raelynn’s Rift birds, Chucho’s bike in tower mode, Skree’s totems, etc., so that must be considered when firing. Aim smart and you will be rewarded!
Evaluation:
- Power: 5 – Very Strong
- Ease of Use: 3 – Medium (different situations of use; match awareness required for optimal results)
- Charge Rate: 2 – Slow
- Pros: very versatile / considerable damage / strong team synergy / can put enemies in very dangerous situations
- Cons: can be easily wasted
Deadlift
"Unstoppable Force"
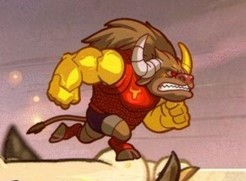
_Activation: Startup time ranges from 0.7 seconds to a maximum of 3.5 seconds, during which he stops and scratches the floor (like a real-life bull) while preparing to charge at enemies. He must be on the ground and is vulnerable during this time, and if he gets stunned while scratching the floor, the ultimate is interrupted.
_Duration: Lasts until he collides with something during the charge.
_Effect: After scratching the floor for at least 0.7 seconds (while he’s scratching, all players can hear furious breathing and the sound of the floor being scratched), he charges forward in a straight line with his horns until he collides with something (nauts, droids, turrets, totems, walls, etc.). Upon impact, the collision affects an area up to the size of Clunk's explosion, dealing damage and applying stun. The values depend on how long you scratched at the startup (by holding the ultimate button) and the distance traveled before impact (see below).
_Details: First, once the charge begins, he cannot be stopped or controlled, regardless of how long you held the key. He moves in a straight line until hitting something or falling into a pit, Sorona worm, or similar hazard.
He also cannot be stunned, trapped, ensnared, or otherwise interrupted while charging foward (slow effects still apply). For example, a Derpl trap would simply be ignored, and he would smash through it while destroying the trap at the same time! Anything that is not a true physical obstacle (such as Skree's Totem) will be ignored.
He takes half damage from all sources while charging. He also moves faster the longer you hold the key before releasing.
The damage, speed, and stun values depend on how long he scratched the floor before charging, as follows (minimum and maximum values also depend on how far he traveled before impact. The speed values here are just references, since I do not have exact numbers. Think of Speed 1 as roughly a version of Power Lunge moving in a straight line at half the normal speed; then Speed 2 is 30% faster than Speed 1, Speed 3 is 60% faster, and so on). Also, in the same way, the area of effect increases the more he scratches, equivalent to Clunk's explosion divided in 5 partes from the center to the edges:
- 0.7 seconds – Damage: Min: 440 / Max: 590 | Stun: 0.8s | Speed: 1 | Area of effect: 1;
- 1.4 seconds – Damage: Min: 480 / Max: 630 | Stun: 1.0s | Speed: 2 | Area of effect: 2;
- 2.1 seconds – Damage: Min: 520 / Max: 670 | Stun: 1.2s | Speed: 3 | Area of effect: 3;
- 2.8 seconds – Damage: Min: 560 / Max: 710 | Stun: 1.4s | Speed: 4 | Area of effect: 4;
- 3.5 seconds – Damage: Min: 600 / Max: 750 | Stun: 1.6s | Speed: 5 | Area of effect: 5.
Note: this can only be used while Power Lunge is available, though it remains its own separate ability (they share the same cooldown. If you use the ultimate, you must wait until the skill becomes available again). Also, as a safety measure, if he hits a jump pad he will still jump normally, but the ultimate immediately ends and he becomes controllable again.
And one last thing: this does not have a knockback effect. Deadlift simply hops backward a little from the impact and then gets right back at the enemy! This helps him take advantage of the stun effect.
_Upgrade interactions: None directly, but your shield (Protective Pose skill) can be very useful here. You can activate it beforehand and then use the ultimate to gain even more defense on top of the base 50% damage reduction the ultimate already provides. Also, all regular upgrades for the shield continue working normally (upgrades related to Power Lunge do not, since this ultimate is its own thing).
_When to use: You can use it offensively or defensively (to escape). Offensively, it is best used when you know you can secure a kill (keep in mind it hits in an area). You may want to save the ultimate if a regular Power Lunge would already be enough, but remember that the normal skill does not go through traps or obstacles, so battlefield awareness is important.
Be careful: once charging, you cannot steer it. If you miss, you may run straight into the enemy turret (it also damages turrets for half damage, so it can be used offensively against them as well). Also, things like a Cocooned enemy can help you charge for longer, so keep that in mind.
Defensively, the same logic applies — sometimes it may be better to use a normal Power Lunge instead, depending on what is in front of you. And do not forget that you are vulnerable for at least one second during startup. And just like Commander Rocket’s ultimate, enemies can place obstacles in your path to stop you.
_Final notes: Mainly a high damage-focused ultimate that fits the character perfectly: an unstoppable force that passes through almost everything until it finally hits something.
Evaluation:
- Power: 4 – Strong
- Ease of Use: 3 – Medium (vulnerable during startup, uncontrollable while charging, requires battlefield awareness)
- Charge Rate: 3 – Medium
- Pros: high damage / can pass through almost everything until impact
- Cons: can be suicidal if used poorly / can be interrupted by stuns during startup
Derpl Zork
"Ball of Yarn"
_Activation: With the ultimate available, you can use it whenever you are able to use the regular Nuke skill.
_Duration: 10 seconds after the ball stops, or until the ball’s HP reaches zero.
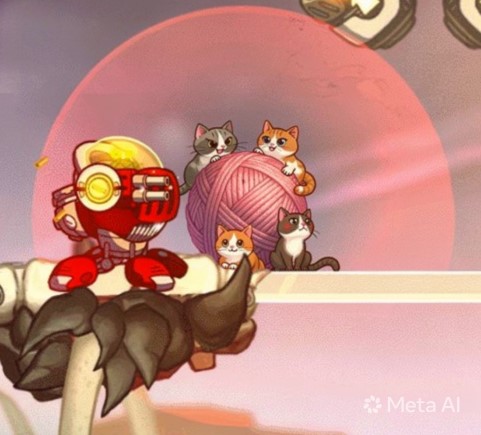
_Effect: You begin charging a Nuke normally, but it fails, releasing a large ball of yarn (the size of the Nuke’s core) up to the same distance a regular nuke can travel, with a few cats from his AA scratching and playing on it. A strand of yarn stretches between the ball and the place where you used the ultimate. The ball has 2000 HP and can be damaged, ending the ultimate if its HP reaches 0.
The cats have a chance to start fighting among themselves, dealing damage to anyone around the ball except turrets, while also causing blindness in the area (the ball cannot be damaged while a cat fight is happening). You can shoot more cats into the ball, and the more cats it contains, the higher the chance of triggering a fight and therefore the effects described above. Cat fights also apply a brief stun (see details below).
If you shoot a cat from a distance, even if it would not normally reach the ball, touching the strand on the ground causes the cat to automatically follow it until it reaches the ball (losing its hitbox once it enters the strand).
_Details: The ball simply "stands" wherever you throw it (menacingly!), with cats playing and making cute noises… and then suddenly BAM! A fight breaks out, scratching everyone in the area.
The cat-fight area is the size of a regular Nuke explosion, where you only see smoke and claw effects (think of old cartoons when characters fight inside a dust cloud, or if you know Vampire Survivors, when the cat weapon starts fighting). Damage is dealt in small chunks to every enemy unit inside the area, but it can become significant if enemies do not leave quickly.
Since the area is filled with smoke, it also causes blindness for as long as enemies remain inside (similar to old Vinnie & Spike smoke before the change, but as soon as you leave the smoke, the blindness ends). Additionally, the first hit on an enemy during each cat fight causes a 0.5-second stun. Subsequent hits during the same fight do not stun — only the first successful hit per enemy.
The ball itself cannot interact physically with units, but it can be damaged by the enemy team. It simply flashes red like an old-school game boss when hit. Enemies may AA it or use abilities, but it has no solid “body” — it cannot be thrown, blocked by, or collided with. Both allies and enemies can walk through it as if it were not there.
Each cat fight lasts 3 seconds, then the ball resets to its normal state with the base number of cats inside, repeating the cycle. There is at least a 2-second cooldown between possible cat fights. When the duration ends or its HP reaches zero, the ball unravels and the cats disappear. Therefore, in the best-case scenario, you'll never get more than two cat fights from a single use.
Enemy turrets do not consider the ball an enemy and will not attack it.
The ability also uses the normal Nuke cooldown — after throwing the ball, you must wait for the regular cooldown before using Nuke again.
The chances/damage values are as follows:
--- Each cat has a 3% chance of triggering a fight, and the ball starts with 3 cats, so it has a 9% chance by default;
--- When a cat fight happens, each cat deals 25 damage per second, therefore 75 DPS with all 3 cats. That means a maximum of 225 damage if an enemy stays inside the area for the full 3-second duration;
--- The chances are calculated every 2 seconds, with an initial cooldown of 2 seconds. So you use the ultimate, and after the first 2 seconds a fight may happen. If it does not happen, another calculation is made after another 2 seconds, and so on. This means you have 5 total chances to trigger a fight during the 10-second duration;
--- If a fight happens, there is a 2-second cooldown after it finishes, then another calculation is made and the process repeats;
--- As you can see, the chances and damage scale progressively with the number of cats you throw into the ball. If you throw 2 more cats into it (making 5 total), you get a 15% chance of triggering a fight dealing 125 DPS. If you manage to reach 10 cats, you get a whopping 250 DPS with a 30% chance every 2 seconds. So the sky is the limit (just kidding — for balance purposes, the limit is 15 cats, meaning a 45% chance every 2 seconds for 375 DPS)!
_Upgrade interactions: No direct interactions, but since the effect becomes stronger with more cats inside the ball, the fire-rate upgrade is valuable here. Derpl also has an upgrade that makes a cat split into two when it hits an enemy, which can be exploited to increase the number of cats faster. And no — you cannot increase the size of the ball with the Nuke size upgrade.
_When to use: This is not a highly damaging ultimate (at least not by default), and it relies on random chance, so it is not even guaranteed to trigger. Ideally, use it before a battle begins and feed it with cats in advance. In the middle of a fight, your AA attacks may not even reach the ball or the strand (the split-cat upgrade helps a lot here).
It may not be something you can fully rely on during team fights, but if a cat fight triggers, it can be extremely annoying for enemies. Remember: it also causes stun and blindness, and with a character who has a Nuke ability, enemies may not even see the next blast coming!
_Final notes: This ultimate may be more about intimidation than direct power. As mentioned before, it simply sits there, and if you are unable to fill it with cats, the effect may rarely happen (the default chances are intentionally low).
One thing to note: the ball always exists on a “secondary layer,” so it does not function as a shield against incoming attacks. Enemy hits pass through it naturally while still damaging it. For example, with Sheriff Lonestar, if a droid stands in front of the ball, his AA will hit both the droid and the ball, while the ball simply flashes red. In short: if the projectile visually touches the ball, it damages it, even if the ball exists on a second plane.
This is a niche ultimate that creates fear of a potential “Nuke with cats” on the enemy team — so take advantage of that fear!
Evaluation:
- Power: 2 – Weak
- Ease of Use: 3 – Medium (you need to be able to fill the ball with cats)
- Charge Rate: 3 – Medium
- Pros: great for psychological intimidation / can be annoying to deal with if the effect triggers
- Cons: low random trigger chances unless you can fill the ball with cats
Dizzy
"Graffiti"
_Activation: 0.8-second prep animation of Dizzy shaking two graffiti spray cans. She is vulnerable during the animation, it can be interrupted, and it can only be activated while on the ground.
_Duration: 8 seconds after activation to paint targets, followed by 8 additional seconds of effect on painted enemies.
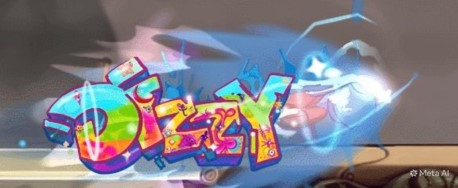
_Effect: After activating the ultimate, every time Dizzy uses her Multi Dash skill, she sprays any enemy units she passes through, repainting them into her own team’s colors. Painted enemies are then treated as hostile by their own team, causing allied units and structures to mistakenly attack them.
_Details: Whenever Dizzy passes through enemy nauts or droids with Multi Dash, they become painted in her team’s colors. For example, if Dizzy is on the red team, painted enemies also become red. This creates several unique interactions:
- Droids will attack painted allied droids because they now appear to belong to the opposing team. The painted droid itself will not retaliate, since it still “knows” it belongs to the same team;
- Nauts painted by Dizzy are also treated as enemies by their own allied units, such as droids, turrets, summons, and deployables. But unlike Skree’s conversion-style mechanics, painted nauts do not lose control of their characters. Instead, they are simply recognized as hostile by their own side.
- Teammates are capable of damaging painted allies, but the painted one cannot damage allied teammates back during the effect. In practice, players will obviously recognize their teammate and try to avoid attacking them, but during chaotic fights this becomes much harder to manage;
The painted effect lasts for 8 seconds before fading away and has the additional effect of running down the body, so two Yuris, for example (one on each team), will have the same color, but you’ll still be able to tell who is who.
Also, for balancing reasons, the damage done by teammates is reduced by 50%.
And while holding the spray cans, Dizzy temporarily loses access to all her attacks (other than Multi Dash of course);
_Upgrade interactions: None directly, but having more dashes will make it easier to paint enemies, so "Ribbit Ribbit Real Good" upgrade might be a good idea to have here.
_When to use: This ultimate is strongest during chaotic team fights, where abilities and attacks overlap in crowded areas. If multiple enemy nauts are painted at once, they may accidentally damage each other during the confusion — or at the very least hesitate to attack out of fear of hitting their own teammates.
It can also be used to restrain enemies from running to a safe zone, since their turrets will attack "thinking" they are intruders (although they can still walk through them normally, and turrets can't attack behind themselves).
_Final notes: This ultimate shares similarities with Skree’s team-conversion mechanics, but with a major difference: players remain fully in control of their characters. Instead of mind-controlling opponents, Dizzy essentially “confuses” the battlefield itself, turning enemy defenses and allied units against their own side.
It is less about raw damage and more about creating panic, hesitation, and chaos during fights. If used correctly, Dizzy can completely disrupt enemy coordination and even make enemy territory feel unsafe!
Evaluation:
- Power: 4 – Strong
- Ease of Use: 3 – Medium (Multi Dash is fast and difficult to avoid, but she is still vulnerable the whole time)
- Charge Rate: 3 – Medium
- Pros: Creates chaos during team fights / forces enemies to hesitate before attacking / can make enemy territory unsafe
- Cons: Requires good timing to maximize the confusion effect / enemy nauts will not automatically damage each other without pressure from combat situations
Froggy G
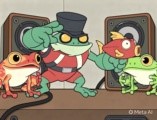
"The O'G' "
_Activation: 5s prep animation. Froggy G performs a virtual mini-show for these 5 seconds, complete with a virtual crowd, virtual stage, and of course, a cool song! He is completely vulnerable during the concert — if he is hit, the show fails, the ultimate is canceled, the crowd boos him and disappears, and nothing else happens. If he is not hit, the crowd goes wild and Frog gets “pumped up,” receiving the bonuses described below.
_Duration: Lasts for 25 seconds after a successful activation, or until he dies.
_Effect: Froggy reverts to his (broken) former version from 2012 and beyond. In other words, his “OG” form from when the game first launched on PS3 and Xbox 360 (good times…).
_Details: This means he becomes the “stun master” all over again with his Ice Cubes upgrades, can turn into “shotgun Frog” with his two-layer auto attack, and “Right Back at Ya!” (the reflect upgrade) lasts for the entire duration of Tornado (yes, I know it was broken, but I miss it!). He also gets shorter dash cooldowns and everything else that made him strong back then.
This is all on top of his current kit, meaning some upgrades will have two effects while the ultimate is active (for example, Ice Cubes will apply both the current slow effect and the OG increased stun on dashes).
Even in this overpowered state, you still need to land your attacks — so it’s not an automatic win. He is not so overwhelmingly strong that enemies can do nothing but watch; he remains vulnerable to everything he currently is. The duration is long (25 seconds is a lifetime in a MOBA), but the activation time is also significant, meaning you often need to predict when a fight is about to happen for optimal use.
Just the threat of facing him in this state can pressure the enemy team and help yours push some turrets. Some upgrade combinations can become extremely strong — for example, Clock Necklace reducing dash cooldowns while also healing over time, and combined with Golden Watch, dash cooldowns become extremely short. Any upgrade that has changed throughout the years will apply both its OG and current effects simultaneously.
For skills that have not changed in nature (such as damage or movement speed in Tornado), the stronger OG values take precedence. For example, the current Tornado deals 427 damage. If the OG version dealt 500 (hypothetical number for illustration only — at that time the damage wasn’t even calculated in hundreds, but in tens), then the OG value would be used.
I believe all aspects of his kit were stronger at some point in the past (not talking about just the launch period here), so Frog can effectively return to full OG stats, getting the strongest historical version of each upgrade/attack.
_Upgrade interactions: As described above, if an upgrade had a different function in the past, it gains that effect in addition to its current one.
_When to use: This is the most challenging aspect of the ultimate due to the long activation time. If a fight is already happening, you must decide whether it’s worth risking the activation before entering or helping your teammates immediately. Five seconds can be too long — by the time you arrive, the fight may already be over and your teammates defeated. Also, keep in mind your HP at the moment you activate the ultimate, 'cause Froggy does not get any heals, if you are already dying without any source of healing nearby, it might be too risky.
The best scenario is when you correctly predict an upcoming fight, allowing you to be fully prepared from the start. If you misjudge, you may pressure the enemy team but waste part of the ultimate’s potential.
Never use it right in the middle of a fight — you will likely get hit and cancel the ultimate. Plan ahead!
_Final notes: This is a very powerful ultimate with a long duration, but it also requires significant setup. You still need to execute properly, so skill remains essential even with stronger abilities. It can be tempting to immediately dash in with powerful stuns, but that can lead to bad positioning and put you at risk, so be patient — 25 seconds is a long time, and you can wait for the right opportunity if it doesn’t appear immediately.
Evaluation:
- Power: 5 – Very Strong
- Ease of Use: 2 – Hard (requires skill and match awareness for maximum efficiency)
- Charge Rate: 1 – Very Slow
- Pros: becomes very powerful for a relatively long time / can pressure enemies and help push lanes
- Cons: very long activation time during which he is completely vulnerable / requires predicting fights for best results
Genji
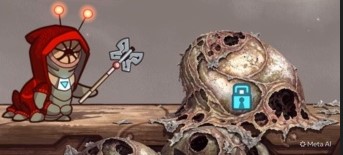
"Rotten Cocoon"
_Activation: With the ultimate available, your next Cocoon skill will also gain the effect of the ultimate.
_Duration: 10 seconds after a naut leaves a cocoon.
_Effect: Causes an enemy naut to damage their own teammates by releasing poisonous pollen around themselves after exiting a cocoon.
_Details: This can only be used when the Cocoon skill is available. After being cocooned and breaking free, the affected naut releases poisonous pollen in a circular area around himself/herself (the size of Derpl’s Nuke with the size upgrade). This pollen damages their teammates while they remain in touch with the area.
It does not damage the cocooned naut — only their teammates. The main purpose is to isolate them from their team.
--- Damage values: 150 damage per second while inside the ultimate area. If you leave the area, the effect ceases immediately; it is not like regular poison.
_Upgrade interactions: The ultimate effect is applied on top of the regular Cocoon, so all upgrades you had beforehand (damage, explosion, nectar, etc.) will still apply.
_When to use: Very effective for disrupting an enemy team push, since it forces them to split up. It is also useful during team fights, as enemies now have to keep some distance from their own teammate.
_Final notes: This is not a highly damaging ultimate (although prolonged exposure to the pollen can melt enemies). Its strength lies in splitting the enemy team into weaker groups, allowing your team to take advantage. Divide and conquer!
Evaluation:
- Power: 2 – Weak
- Ease of Use: 3 – Medium (you need to land the Cocoon)
- Charge Rate: 3 – Medium
- Pros: splits the enemy team / very disruptive
- Cons: does not deal damage to the affected naut
Gnaw
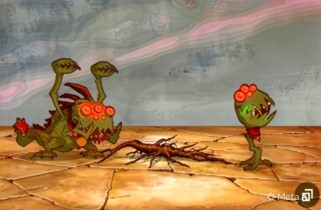
“Gnaw Likes to Dig!”
_Activation: 0.3s prep animation where Gnaw places his head on the ground, then begins placing roots.
_Duration: 0.3s prep animation, then up to 5 seconds to place roots, followed by another 0.3s animation where Gnaw lifts his head from the ground (Gnaw is vulnerable the entire time). The roots themselves last for 20 seconds.
_Effect: Creates underground roots that travel forward, allowing Weedlings to be spawned wherever the roots reach.
_Details: Hold the ultimate key to make Gnaw dig into the ground with his mouth, creating roots that travel in a straight line until you release the key, forming an exit hole at the end. You do not need to hold it for the full duration (5s), but the longer you hold, the farther the roots will travel (maximum distance is similar to Max Focus’s Scene Illumination range). Releasing the key triggers a 0.3s animation where Gnaw lifts his head from the ground. He will always dig for at least 1 second after pressing the ultimate key, even if you do not hold it.
While holding the ultimate key, pressing the Weedling skill key will plant a Weedling that emerges at the furthest point the root has reached at that moment. For example, if you hold for 3 seconds and then press the skill key, the Weedling will spawn where the root reached at the 3-second mark. You can continue holding the ultimate after planting a Weedling (which will stay stationary), extending the root further until reaching the maximum distance at 5 seconds.
Once the maximum distance is reached or the key is released, the roots will have two endpoints, and planting a Weedling in one will cause it to emerge from the other. Weedlings behave exactly like those from the regular skill — they simply appear farther away. They also benefit from Acid Spit, which can be applied ANYWHERE along the root path (not just at the exits) to affect the Weedlings.
The roots travel through anything as long as there is valid ground beneath the surface (glass platforms and territory shields do not count as “ground”). They can also follow terrain by making turns or going upside down when placed on solid platforms (such as the lower ones in the Starstorm Station pit). Since they travel just beneath the surface, they can pass below enemy turrets, allowing Weedlings to emerge behind them, spawning in enemy territory!
_Upgrade interactions: All upgrades that affect the regular Weedling skill apply here (damage, health, etc.). This includes interactions like Fertilizer and Overgrowth. Also, remember that applying acid anywhere along the root will affect any Weedlings touching it.
_When to use: Best used when enemies believe they are safe, such as hiding behind turrets after a fight, or when forcing enemies out of hidden areas you cannot directly reach (like the center area in Sorona). In intense team fights, it may be better to use the regular skill instead.
_Final notes: A “surprise” ultimate with strong range that enemies may not expect. Use it to catch them off guard when they feel safe.
Evaluation:
- Power: 3 – Medium
- Ease of Use: 3 – Medium (requires good positioning while vulnerable)
- Charge Rate: 3 – Medium
- Pros: can catch enemies by surprise / makes enemies feel unsafe even behind turrets
- Cons: completely vulnerable while digging
Ix the Interloper
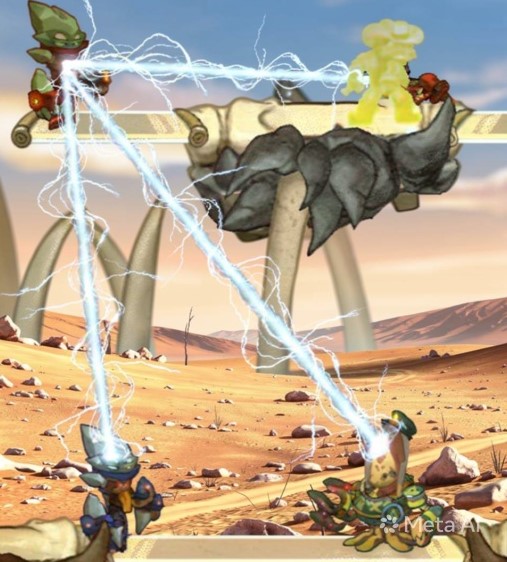
"Don't Waste Energy!"
_Activation: 0.5s animation of Ix contracting himself (vulnerable and can be interrupted), then releasing the Psionic Bond skill on all nauts around him. Can only be used when the skill is available but it is its own thing, sharing the same cooldown.
_Duration: Until the affected enemy nauts die, attempt to teleport back to base, or fully recover at their healing pod. On friendly nauts, until their next teleport, or they die.
_Effect: Pressing the ultimate key causes Ix to use a charged version of Psionic Bond, linking all nauts around him (instead of just one). The ultimate behaves like the normal skill in terms of range and mechanics, but when pressing the ultimate key again (the skill key also works after nauts are already linked), instead of swapping places with Ix, he overcharges them (the overcharge itself does not deal damage), causing a 0.3-second stun on enemies or transferring energy to friends. The next time enemies attempt to teleport, just before completing it, they take 500 damage and the teleport is interrupted. On friendly nauts, it cuts by half their next teleportation time.
_Details: First of all, for balancing purposes, all the properties like slow and damage from the ultimate version of Psionic Bond are reduced by 50% of the regular skill values per link. For example, if the normal skill deals 160 initial damage + 65 per second, the ultimate would deal 80 initial damage + 32.5 per second to each linked naut. The same applies to friends, all the benefits such as healing and speed bonus are cut in half.
No aiming is required — simply being within the area is enough to get linked (the range is exactly the same as the regular skill in all directions around Ix). This can only be used when the skill is available, but it does not replace it, so you can still choose to use the regular version by pressing the skill key.
As mentioned, the ability behaves exactly like the standard skill, so interactions such as Frog’s dash (which causes stun) will still interrupt it. Also, if nauts move far enough away, the link will break just like the regular skill, so be careful!
Once an enemy naut is overcharged, the effect lasts indefinitely until they die or attempt to teleport. There is no persistent visual indicator for overcharged targets aside from an initial effect when they are affected, so enemies may forget and accidentally trigger it later! However, if the naut goes back to base manually and stands on the healing pod, the effect will wear off after they fully heal, accompanied by a visual indicator, meaning he/she will be able to teleport normally again.
As a bonus, this does affect friendly nauts — friendly nauts affected by the overcharge do not receive the stun effect. Instead, they receive an energy transfer that cuts the duration of their next teleport in half.
_Upgrade interactions: Any upgrades that affect Psionic Bond will apply normally. So you can increase the damage if you want, but it will still be affected by the 50% damage reduction (but if you want the damage, why not just use the regular skill? Unless there are 2 or 3 dying enemies around you, maybe...)
_When to use: Best used during team fights, but keep in mind it removes the swap effect you might need (although the stun can partially compensate for it). The true value comes after fights — if enemies are low on health, they cannot safely teleport without risking death. In many cases, they will be forced to return to base on foot, giving your team time to push lanes or objectives.
_Final notes: A “make you waste time” type of ultimate. It will rarely secure kills directly, but can greatly benefit your team by applying long-lasting pressure and forcing enemies into difficult decisions. Save the planets!
Evaluation:
- Power: 3 – Medium
- Ease of Use: 4 – Easy (no aiming required, just be close enough)
- Charge Rate: 3 – Medium
- Pros: forces enemies to waste time
- Cons: removes the swap effect of Psionic Bond
Jimmy And The Lux5000
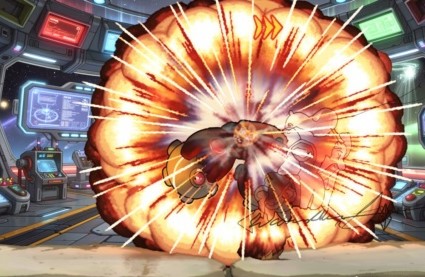
"Me-Destruct"
_Activation: Instant.
_Duration: 3.5 seconds until the explosion triggers / instant for controlling baby Jimmy/Amy.
_Effect: Activating the ultimate makes the baby leave the cockpit of the Lux5000 and become controllable (more on that below). The robot enters self-destruct mode, charging for 3.5 seconds before exploding in an area (the explosion size is the same as Derpl’s Nuke with the "Combustion Lava Lamp" size upgrade).
_Details: Yes, this is basically D.Va’s ultimate from Overwatch in Awesomenauts. The difference is that Jimmy cannot fly, but you can use Lux Charge before activating the ultimate to take advantage of its momentum and “place” the robot near your enemies. And just like D.Va’s, the damage is directly proportional to how close targets are to the center of the explosion. At very close range, it is essentially a near-death situation, and the damage decreases the farther away you are.
Meanwhile, you control Jimmy/Amy. They attack with two rattles as their AA, dealing very little damage, and they have very low health. Pressing the Missile Barrage skill key causes Jimmy/Amy to use a remote that emits a pulse around them, pushing enemies away (one use only). Pressing the Lux Charge key makes them throw one of their rattles at enemies, dealing slightly more damage than their AA (2 uses, with a 1-second cooldown between throws). If you run out of rattles, you can no longer attack. If you die in this state, you are actually eliminated, so it is very risky to remain on the battlefield as the baby.
To recover Lux, use the normal teleport after the explosion. At the end of it, instead of returning to base, Lux will appear and you will automatically re-enter it, returning to your normal form with full health.
Note: The explosion goes through walls, and the robot is still affected by anything that affects the regular Lux Charge skill.
Here are the numbers:
--- The explosion: first, the area is divided into 6 proportional circular zones from the center to the outer edge (remember, the total area is equivalent to Derpl’s Nuke with the size upgrade). The first zone is the “core,” which deals the most damage, followed by progressively weaker outer zones:
- Zone 1 – 900 damage
- Zone 2 – 800 damage
- Zone 3 – 650 damage
- Zone 4 – 500 damage
- Zone 5 – 350 damage
- Zone 6 – 200 damage
--- The babies: They have 500 HP. Each rattle deals 50 damage, so they start with 100 AA damage total. The throw ability deals 70 damage per rattle (remember, if you throw one, your AA will now only deal 50 damage. If you throw both, you lose the ability to AA entirely).
_Upgrade interactions: None.
_When to use: Best used during team fights for intimidation, when you are in a tight situation, or when you can predict enemy positioning (for example, during a fight in the middle area of AI Station while enemies are retreating toward their turret).
_Final notes: One of the most damaging ultimates, but realistically it is difficult to hit enemies at the center of the explosion (unless they are immobilized, such as inside a Cocoon. But even then, 3.5 seconds before detonation is a long time!). Also, you become very vulnerable afterward, so be aware of that. Go full D.Va on them!
Evaluation:
- Power: 5 – Very Strong
- Ease of Use: 3 – Medium (easy to activate, but requires care afterward)
- Charge Rate: 1 – Very Slow
- Pros: forces enemies to respect a large-area burst threat / can reach enemies from far away
- Cons: hard to land maximum damage without CC / leaves you very vulnerable afterward
Ksenia
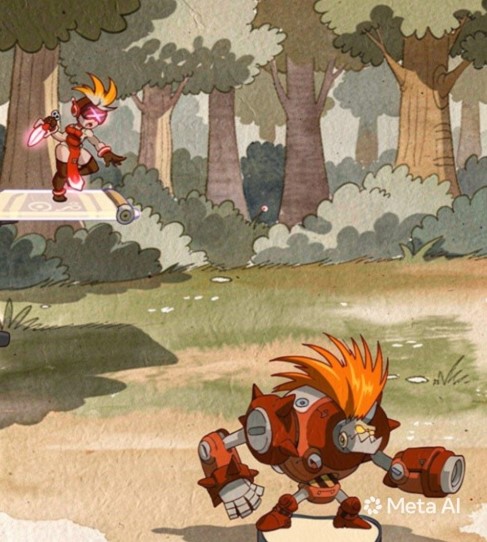
"Stylist"
_Activation: Passive. When your ultimate meter is ready, the next Scissors Throw that hits an enemy naut will also trigger the ultimate effect.
_Duration: 4 scissors uses / the effect lasts for 8 seconds after hitting an enemy naut.
_Effect: Using the Scissors Throw skill on an enemy naut while the ultimate meter is ready will change their hairstyle (or give them one if they do not have any) into a large style (such as a punk hairstyle or an afro), extending their hurtbox for 8 seconds. This effect is applied on top of the regular skill effects.
_Details: This makes enemy nauts more vulnerable by adding a second hurtbox on the head, making them easier to hit. If you spend all your scissors (4), they return to normal. Only one scissor per enemy can apply the effect — hitting a naut that is already affected will not change the hair again, but will restart the duration of the effect.
There is not much more to it — a unique ultimate that makes enemies vertically “larger” and easier to hit for 8 seconds!
_Upgrade interactions: The effect is applied on top of the regular skill, so any upgrades you have will also work.
_When to use: Since Ksenia can become invisible, activating this as you come out of stealth is a strong option. In team fights, you can spread the scissors across multiple enemies, making the entire enemy team easier to land hits.
_Final notes: This is inspired by the character Faust from the Guilty Gear Strive game, who has a move that gives enemies an afro, increasing their hurtbox. It is a unique and humorous ultimate (Clunk with a giant colorful punk hairstyle for the win! lol), but not as impactful as others.
Evaluation:
- Power: 1 – Very Weak
- Ease of Use: 5 – Very Easy (just hit enemies with the scissors)
- Charge Rate: 5 – Very Fast
- Pros: makes enemies easier to hit / hard to avoid / long duration
- Cons: no immediate damage
Leon

"Kamereon Bunshin no Jutsu!"
_Activation: 1.5 seconds animation (must be on the ground; he is vulnerable while performing it), during which he executes a “ninjutsu” style movement. After that, the effect activates.
_Duration: 45 seconds after a successful activation, or until the clones die.
_Effect: After activation, Leon summons 3 clones. One is a regular clone just like the normal skill, while the other two are fully AI-controlled CPU opponents. For a moment, your team will have 5 members instead of 3!
_Details: This can only be used when his Cloaking Skin skill is available. You summon the regular clone normally, with all upgrades affecting it exactly like the standard skill. On top of that, you also summon 2 CPU-controlled Leons to help your team for 45 seconds. They function as regular Leon characters with all the upgrades you had at the moment they were summoned (if you buy upgrades afterward, they will not receive them). However, they cannot use the clone skill themselves, though they can still use Tongue Snatch.
You, the real Leon, continue playing normally, including being able to use your clone ability again even while the summoned clones are still alive.
The clones have full HP and can retreat when low on health, including returning to base (but they cannot buy items). They are essentially standard Leon CPUs added to your team, except they cannot create clones themselves. After the 45 seconds, they disappear (or explode if you have the Blow Up Doll upgrade).
_Upgrade interactions: Everything that would normally affect Leon also affects the CPU clones, such as more damage, more range, silence, blindness, boots, pills, and other upgrades. Naturally, upgrades tied specifically to Cloaking Skin will not affect them, since they cannot use that skill. The exception is Blow Up Doll, since they are clones themselves and will explode on death.
Just a note here: Extra Battery Pack, the upgrade that increases the lifespan and health of regular clones will not work here. Despite being clones, their HP will always be equal to Leon's at the time of activation.
_When to use: Great for pushing lanes or creating distractions, because your enemies suddenly have two extra units to deal with. Remember that you can still use your own clone ability again after the cooldown, so even when enemies think they got rid of the Leons, you can appear and surprise them again!
This can be strong, but also very unreliable, since you have no control over what the AI clones will do (and CPU Leon is not exactly the brightest...). Maybe we’ll finally see the forbidden triple Tongue combo in a real match, lol!
_Final notes: Strength in numbers. Distracting for enemies and potentially brutal for pushing, depending on the situation. Unpredictable, but useful, probably....
Evaluation:
- Power: 3 – Medium
- Ease of Use: 5 – Very Easy (just do not die during the 1.5-second activation animation!)
- Charge Rate: 2 – Slow
- Pros: very distracting / long duration
- Cons: totally unpredictable
Sheriff Lonestar
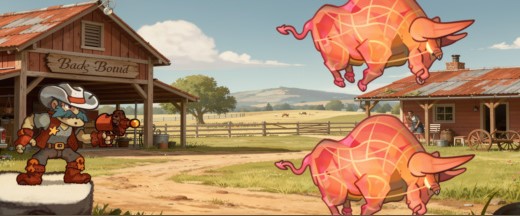
"Bulls Heaven"
_Activation: 0.7-second animation to place the device. LoneStar is vulnerable during the animation, and it can be interrupted. Can only be done when Summon Hyper Bull skill is available, but it is its own thing.
_Duration: Same as the regular Summon Hyper Bull skill for each bull.
_Effect: After “accumulating” bulls (see details below), LoneStar releases a stampede of holo-bulls from the device placed in the air based on the number accumulated. Each bull has 25% of the properties of your regular Summon Hyper Bull skill, except for duration, which always remains unchanged.
_Details: Every time you use the Summon Hyper Bull skill and the bull “dies,” one counter is added to LoneStar’s ultimate meter, up to a maximum of 10. Once the meter is full, you can activate the ultimate to summon the same number of holo-bulls in succession, one behind another, in a “three-layer” formation. The first bull always appears directly in front of you, just like the regular skill. The following bulls can appear above, below, or directly behind the previous one, as long as there is enough room for them.
For example, if you activate it while standing on the ground, there will only be layers above the first bull, since bulls obviously cannot appear inside the floor. If activated in the air, LoneStar floats in place during the 0.7-second startup animation so the bulls always align properly with the activation point.
The pattern of the following bulls is completely random. For example, if you have 3 counters while airborne, the first bull always appears in front of you, while the second and third may appear in any available layer. This means you are not guaranteed to fully cover all three layers — you could get unlucky and have several bulls appear in the same lane, for example.
Each bull inherits 25% of the properties of your normal Summon Hyper Bull skill. For example: if you own the Techno Viking Helmet upgrade, each bull deals 25% of its bonus damage. Ribbit Snail Slime health packs heal for 25% effectiveness, while Super Breed 2.0 grants 25% of its size increase and knockback effect, allowing intermediate-sized bulls.
LoneStar takes 0.7 seconds to place the device and activate the ultimate, so if he is stunned or killed during the animation, the ultimate fails and the meter is lost normally. This ultimate does not replace the regular skill — you may still choose between using the normal Summon Hyper Bull or the ultimate version whenever you want.
Note: if LoneStar dies, the count resets, so be careful! Also, there should be a indicator to show everyone how many bulls Lone have (but only the quantity, should not show if the ultimate is available or not).
And as a bonus: it would be cool if each bull had a little halo above its head!
_Upgrade interactions: Health, knockback, explosion damage, and all other Hyper Bull upgrades apply at 25% effectiveness. For example, if Bull Charger normally causes bulls to explode for 210 damage, each ultimate bull would explode for 52,5 damage instead.
_When to use: The primary use is obviously pushing enemies into your turrets, making it extremely powerful in team fights. Imagine summoning 7 bulls and knocking the entire enemy team toward your defenses while dealing repeated chunks of damage from upgrades on top of your team’s attacks.
It can also be used defensively — for example, saving teammates when enemies are approaching from multiple angles and a single regular bull would not be enough. The healing pack upgrades can also help support your team if needed. Just remember the downside: during the 0.7-second startup animation, you are completely vulnerable.
_Final notes: A not-so-strong ultimate at first, but one that can become devastating over time (though even with only 2 weaker bulls, it can still get the job done). The key is knowing when to use the regular skill and when to unleash the stampede. All bulls go to heaven!
Evaluation:
- Power: 4 – Strong
- Ease of Use: 3 – Medium (requires positioning and alignment with enemies)
- Charge Rate: 3 – Medium
- Pros: Can be used offensively or defensively / may be difficult to avoid / scales very well with upgrades
- Cons: Takes time to reach full potential / requires positioning / activation not instant / the bull count resets if he dies
Max Focus
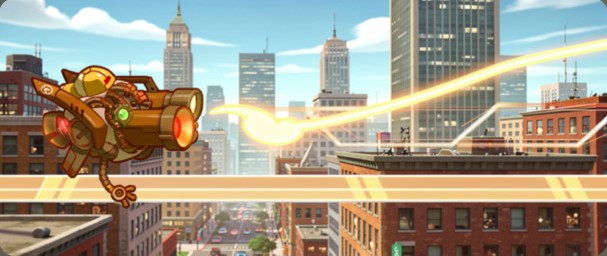
"I Want to Believe"
_Activation: Can only be used when the Scene Illumination skill is available by holding the skill key. He charges it for 1 second, then releases it like the normal skill, but with the added ultimate effect.
_Duration: Same as the normal Scene Illumination skill.
_Effect: Adds a homing property to the Scene Illumination projectiles within a 30° angle in front of Max.
_Details: This is similar to his old "UFO Spotted At Starstorm Station!" upgrade effect. The difference is that he now charges for 1 second before firing, but the angle is slightly wider than before (I think). This helps you avoid missing projectiles.
It can only be used when Scene Illumination is available, but if you do not hold the skill key for 1 second, it will fire as the regular version, and you will not lose the ultimate meter until you actually use it.
_Upgrade interactions: The ultimate only adds the homing property to the skill, which still benefits from all upgrades affecting it. So you will deal more damage, have more range, etc., if you already have those upgrades.
_When to use: Since the projectiles home in on the closest naut within a 30° angle in front of you, this is useful in both team fights and 1v1 situations. Keep in mind that it can be reflected, and you are still vulnerable to CC effects (getting stunned will immediately interrupt it). It is best saved for situations where landing your shots would otherwise be difficult.
_Final notes: I loved this effect before, so I had to bring it back. You still need to be reasonably aligned with the enemy naut for it to work, so it is not a guaranteed hit. Stay calm and make the most of it!
Evaluation:
- Power: 3 – Medium
- Ease of Use: 4 – Easy (just stay aligned with the enemy)
- Charge Rate: 3 – Medium
- Pros: helps land the skill more reliably
- Cons: not instant like the normal version
Nibbs
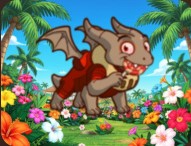
“My Candies!”
_Activation: Prep animation of 0.7s where Nibbs sits and prepares to eat candy (if she is in the air, she'll quickly fall straight down to the ground, then the prep animation starts). She is vulnerable and can be interrupted during this time. After that, she starts eating the candy for 3 seconds. If she is hit while eating, the ultimate effect takes place. This can only be activated at least 1 second after the last skill use.
_Duration: 0.7s prep animation + 3 seconds to trigger the effect / 3.5 seconds after triggering the effect + 0.7 s recovering after impact or 0.5s recovery animation if the effect is not triggered.
_Effect: Nibbs starts eating candy (in a cute way of course, humming a song and everything!). If Nibbs is hit while eating the candy, she gets really mad and flies extremely fast straight upward off-screen, then comes back down like a meteor, causing damage in an aimable area.
_Details: First, until she actually starts eating, she is totally vulnerable, and effects like stuns will interrupt the ultimate. She falls very quickly if activating in the air, so despite being vulnerable, this animation can also dodge certain attacks. After she starts eating, if she takes any kind of damage, the candy breaks (like a popsicle snapping in half or something similar) and falls to the ground, causing Nibbs to become furious. This “breaking” animation plus her anger reaction lasts 1 second.
After that, she flies like a bullet into the sky, leaving the screen in 0.5 seconds (it doesn’t matter if there is a ceiling above). Then, an aiming reticle appears on the ground, which you can control freely. After another 2 seconds, she crashes down in rage like a flaming meteor, causing 800 damage on impact in an area similar to Derpl’s Nuke with increased explosion size upgrade (this explosion can hit through terrain).
Using up or down determines which lane the aim will target, while your aiming controls determine the exact position of the reticle within that lane. The camera zooms out (only on your screen) to help you aim more precisely.
Nibbs takes half damage from the moment she starts eating the candy until hit by one single damage source from an enemy. Then, after getting hit, she becomes totally invincible until she lands again plus more 0.7s animation of recovering from the impact (she can't be interacted with during this animation). This means she must survive a single attack to trigger the ultimate, causing the candy to break. If she is not hit during the eating animation, she instead performs a 0.5-second recovery from eating animation after finishing the candy and returns to normal. During this recovery animation, she is vulnerable again.
One final detail: this ultimate has a built-in pre-cooldown. You cannot activate it if you used a skill less than 1 second ago. This is for balancing reasons and to avoid strange situations after using abilities like Fire Breath or teleporting with Orb of Omicron into enemies (where it would be very hard for players to avoid hitting her, so Nibbs players could exploit this). Once the ultimate begins, Nibbs cannot perform any other actions until it fully ends, although her cooldowns continue refreshing normally during it.
Extra note!: Stage hazards are considered neutral, so they do not trigger the ultimate! Nibbs will take half damage from any number of hits from these sources, without trigering the ultimate.
_When to use: Team fights are the obvious situation, especially when you are about to die. Remember: activating in the air can also dodge long-range attacks because she falls very quickly. Even if enemies refuse to hit you, the 3s duration may buy enough time for teammates to come help. In chaotic fights, you can even act as a pseudo “shield” for allies, such as protecting a friend from a Raelynn charging a Snipe shot because of the fear of triggering the meteor.
_Upgrade interactions: None.
_Final notes: A counterattack-style ultimate that can also function as a defensive shield for teammates. A bit slow and maybe not the most fitting gameplay-wise design, but very lore-friendly. Don’t mess with Nibbs’ candies!
Evaluation:
- Power: 3 – Medium
- Ease of Use: 2 – Hard (requires positioning and then aiming)
- Charge Rate: 2 – Slow
- Pros: High damage / can save teammates
- Cons: Very slow / can depend on enemy mistakes for full value / cannot hit enemies in the air directly since she must impact the ground first / you can die before triggering the ultimate
Penny Fox
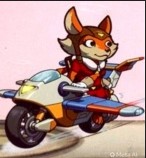
"Let's Rock and Roll!"
_Activation: 4 seconds to reach her hovering scooter/bike. If she reaches it, there is a 0.5-second animation of Penny entering it (she and the bike are completely invincible during this animation).
_Duration: 12 seconds after reaching the bike, or until the bike’s HP reaches zero.
_Effect: Penny jumps onto her scooter and controls it, gaining access to several different attacks described below. She also recovers all her charges.
_Details: Her scooter flies above her from left to right and vice versa for 4 seconds (it can already be attacked here, so it is possible to lose the ultimate without even getting in!). If she reaches it, she enters the bike (which behaves like a starship) and gains access to several attacks. While she is inside the bike, Penny herself is completely invincible, but the bike can still be destroyed and has 1500 HP. She controls the bike similarly to how Chucho controls his, with some features described below. Also, the bike is treated like a fourth naut, so it is vulnerable to all CC effects even before Penny enters it (can be ensnared or slowed for example). If it gets knockbacked before Penny enters, it will try to come back to where Penny is automatically.
- AA key (free): Becomes an auto attack similar to Chucho’s bike attack, but with slightly more range. You cannot hold the attack key here — you must keep pressing it to shoot lasers, because holding it triggers the next feature. The Damage is 65 for each shot;
- Hold the AA key for 1 second (costs two charges): Fires a stronger homing energy ball that deals 330 damage to a single enemy naut. You must be within a certain distance to lock on (around 3/5 of the screen between you and the nearest enemy), and the enemy naut will also see a lock-on HUD forming on their screen, giving them a chance to escape the range if they want. This attack has a 1-second cooldown before it can be used again after the projectile hits an enemy or disappears;
- Pounce skill key (costs one charge): Penny performs a “barrel roll” with her ship (rotating around its own axis), generating a momentary shield similar to the one in Star Fox that reflects projectiles;
- Energy Pulse key (costs three charges): After charging for 1.5 seconds, releases a bomb that deals 630 damage in an area. This bomb can be detonated early by pressing the same key again, and has the same size as Derpl’s Nuke with the size upgrade. It explodes automatically if it hits nauts, droids, floors, walls, or any other physical object, or after a short amount of time.
_Upgrade interactions: None directly, but if you have the Grey Man Group Badge upgrade, you’ll have 5 charges instead of 4, granting you the possibility of using more attacks.
_When to use: Team fights are the obvious choice here, but it can also be useful in situations where you need the scooter’s bonus movement speed (it is slightly faster than walking with “The Nine Tails Badge” upgrade at 5 charges). Note that you can bluff by calling the scooter without actually boarding it (if you touch it, you’ll automatically enter it, so be careful) and instead use Pounce on an opponent, so evaluate the situation carefully. In very extreme situations, remember that Penny and the bike are invulnerable for half a second while she is entering it. Once inside, you must decide how to spend your charges — use Barrel Rolls to survive longer or bombs to maximize damage (or anything in between), depending on the situation. After the 12 seconds expire, Penny simply hops off the scooter (also invincible while leaving it) with a 0.5s animation.
_Final notes: Yes, this is a direct homage to Star Fox 64 — even the name is a reference to what Fox McCloud says during the intro of the first stage in the game! Penny already has some lines referencing Star Fox (“Do a Barrel Roll!”), so I thought: why not make a fully themed ultimate? I also wanted to include her charge mechanic somehow, which made this a very difficult ultimate to design. I hope it fits!
Evaluation:
- Power: 5 – Very Strong
- Ease of Use: 3 – Medium (since the bike is vulnerable and can be focused down by the enemy team, you must stay aware of incoming attacks or the ultimate may end earlier than intended. Barrel Roll helps with that.)
- Charge Rate: 2 – Slow
- Pros: versatile / lasts relatively long / can deal massive damage
- Cons: can end quickly if you are not careful
Qi'Tara
"Beautiful Ecdysis"
_Activation: Passive. When she is killed while having the ultimate meter ready, instead of dying she sheds her skin. The transformation lasts for a 1-second animation.
_Duration: 1s startup + 10 seconds of effect + 1s of recovery.
_Effect: She comes back to life after emerging from her old skin and gains the ability to fly around with her wings while being able to auto-attack (AA) in any direction. Also, the "Seven Star Strike" skill hits in 360° in all directions at once. After the 10 seconds expire, she must rest for 1 second. She starts weaker but gets stronger as time passes.
_Details: First, she is completely untargetable and non-interactable while the skin-shedding animation takes place. After that, she returns with full HP, but, just like real insects that shed their skin, she is more fragile at first and stronger after a while. In this case, she takes 20% more damage and deals 20% less damage in the beginning, but every consecutive second afterward these debuffs are reduced by 5%. If she survives more than 5 seconds, she begins taking less damage and dealing more damage instead, as shown below:
_1s: takes 20% more damage and deals 20% less damage;
_2s: takes 15% more damage and deals 15% less damage;
_3s: takes 10% more damage and deals 10% less damage;
_4s: takes 5% more damage and deals 5% less damage;
_5s: takes and deals normal damage;
_6s: takes 5% less damage and deals 5% more damage;
_7s: takes 10% less damage and deals 10% more damage;
_8s: takes 15% less damage and deals 15% more damage;
_9s: takes 20% less damage and deals 20% more damage;
_10s: the ultimate ends.
Also, she gets refreshed cooldowns, and her movement changes to flight (similar to Max Focus, but in a more grasshopper-like style).
While flying, she can use her regular attack (AA) in any direction, and her Seven Star Strike hits in all directions around her at once, rather than only straight ahead, so it's good when you are surrounded. Her flying speed is slightly faster than her normal walking speed with boots (boots upgrade do not affect this).
After the 10-second duration ends, she drops straight downward from wherever she is, so be careful of pits! Once she hits the ground, she must recover for 1 second, during which she is completely vulnerable.
Note: if she dies in a mini-game from Yoolip's ultimate, she dies for real, even if she has her ultimate ready.
And one final thing: there is a timer on your HUD visible only to you, showing when the ultimate will end, so you can better decide whether to pursue an enemy or not, because of the 1-second recovery animation.
_Upgrade interactions: No direct interactions, but remember that her attack stats remain exactly the same as normal. So if you have upgrades that increase damage, those still apply. Increased lifesteal upgrades like "Baby Plumbmin Oil" can also be very useful here, since she takes more damage at the beginning but is more resilient at the end. Her freedom of movement and attack direction are not influenced by upgrades.
_When to use: Well… you do not choose. Maybe if you are only a few hits away from dying, you might intentionally take that last bit of damage to trigger the ultimate sooner and make use of its benefits… but then again, it still takes 1 second to activate and you start weaker, so I’ll leave those decisions to the higher-IQ players out there!
_Final notes: A second-chance ultimate that lets you play a stronger version of the character for a short time if you manage to survive long enough. Attack or run, your choice!
Evaluation:
- Power: 5 – Very Strong
- Ease of Use: 3 – Medium (very easy to activate, but using it effectively and surviving requires skill)
- Charge Rate: 1 – Very Slow
- Pros: you get a second chance with a more fragile character that gets improved over time / even if you do not fully use the buffs, you still benefit from the extra life
- Cons: very vulnerable at the beginning and at the very end.
Raelynn
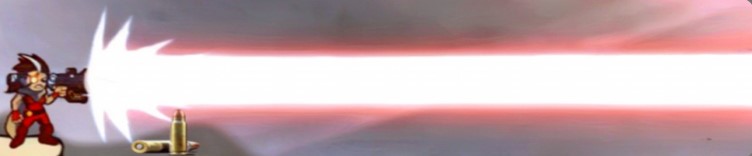
"Reload"
_Activation: At any time after using the Snipe skill, you can spend your ultimate meter to reset its cooldown. This triggers a 1-second reload animation (must be on the ground while also being vulnerable and interruptible). If you are stunned during this animation, the ultimate is interrupted and you lose the meter.
_Duration: 1 second.
_Effect: Self-explanatory — you reload your weapon after a Snipe shot, resetting its cooldown and allowing you to use it again immediately. For balancing reasons, this ultimate expires — you have 1 minute to use it once the meter is full; otherwise, it resets. Also, the second shot deals 30% less damage than normal.
_Details: Not much to explain: use Snipe, reload, then use it again. The main drawback (besides the fact it expires) is that you are vulnerable during the animation. Also, if your cooldown has less than 1 second remaining, it is not worth using the ultimate, since the full reload animation will still play regardless.
_Upgrade interactions: None.
_When to use: Use it whenever you believe you can land a second Snipe shot after the first one (keeping the 1-second animation in mind). Even with the 30% damage reduction of the second shot, this can result in massive damage in total, but enemies will not just stand still waiting to be hit, so be aware of any crowd control your team can provide.
You can also use it preemptively if a fight is about to start and your Snipe skill is still on cooldown and you want it available immediately.
Finally, there is the intimidation factor — enemies may hesitate, thinking, “Does she still have her ultimate?”, which can prevent them from peeking or pushing from behind cover (hence why this ultimate expires).
_Final notes: Very high damage potential, but difficult to execute if enemies know what they are doing. Still, the intimidation factor alone can make it worthwhile.
Evaluation:
- Power: 4 – Strong
- Ease of Use: 2 – Hard (finding the right opportunity for optimal results can be tricky, and good aiming is crucial)
- Charge Rate: 3 – Medium
- Pros: high damage potential / strong intimidation factor
- Cons: can be hard to land shots / very vulnerable during activation / the ultimate meter expires
Rocco
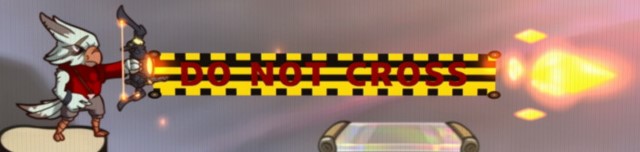
"Crime Scene"
_Activation: Your next fully charged Precision Shot skill will also gain the effect of the ultimate if you activate it beforehand.
_Duration: You have 5 seconds to use the skill after pressing the ultimate key, then the effect lasts for 2 seconds once used.
_Effect: With the ultimate meter ready, pressing the ultimate key will make Rocco say something like "I have to isolate this area!" or "Have to preserve the evidence," and his eyes will glow for 5 seconds. During this time, if you use a fully charged Precision Shot skill, it will also have a holographic police tape attached behind it (the kind that says "Crime Scene – Do Not Cross" in real life/movies). This tape stretches behind the shot, lasts for 2 seconds, and blocks EVERYONE's path with the exception of Rocco himself (yes, even teammates are affected!).
_Details: Keep in mind that attacks will not be blocked, only the nauts themselves (also droids and such), so a Raelynn's Snipe, Derpl's cats, and similar attacks will cross the line normally (and even melee attacks if they have enough range). This is not a "shield" skill like Skree's Totem, for example, but rather a path-blocking skill (like a... Skree's Totem also is, lol!). Also, the tape does not have HP — it simply disappears after 2 seconds, with the part of the tape that appeared first disappearing first, and so on.
If you do not use the fully charged shot, it will just behave like the regular skill without the ultimate effect, but you will still lose the ultimate meter, so do not press the ultimate key if you do not plan to actually use it. (Of course, you can "bluff" if that somehow helps your team, since enemies close enough will also hear Rocco's lines when you press the key.)
One more note: the tape will only extend as far as the arrow travels, so it can cover just a few meters if the arrow hits something on the way. But even if the arrow don't hit anything and goes all the way to the end of stage, there is a limit of a 2-second distant for the tape to stretch; after this, the arrow will continue it's way but there will be no more tape.
Also, the arrow itself can be reflected normally, but the ultimate effect cannot, so the tape will behave exactly as if the arrow had hit something if the Precision Shot is reflected.
_Upgrade Interactions: Like other ultimates here, the effect happens on top of the regular skill, so all upgrades will still be useful, but they do not affect the ultimate effect itself.
_When to Use: Match awareness is key here, since you can harm your own team with this. It might be better to position yourself above or below where you want to trap enemies, for example, so the line created by the tape is more vertical than horizontal and acts more like a true path barrier. Because yes, if it is horizontal, it can be used as a platform (meaning you can even create a temporary platform to save a teammate from falling into a pit! Just be careful not to save enemies too!).
In short, it is not easy to use optimally, so be careful! And due to the nature of the tape, most of the time you'll want to avoid directly hitting your enemies so the tape can cover enough terrain to block them effectively.
_Final Notes: A very good (or very bad) ultimate depending on how it is used (I can already see friendships being destroyed here, lol!). This one is for the smart birds out there!
Evaluation:
- Power: 3 – Medium
- Ease of Use: 3 – Medium (using it at the right moment, in the right place, in the right direction, and in an optimal way may not be easy)
- Charge Rate: 3 – Medium
- Pros: if used correctly, it can be devastating
- Cons: can negatively affect your own team too / depending on the situation, it can be very hard to use properly
Scoop of Justice
"Help Your Hero!"
_Activation: Varies. Scoop calls the name of one of his Royal House members to help him. You can choose which member will appear by pressing the ultimate key one, two, or three times in a rapid succession. There are 3 levels that can be accumulated, and each one can summon a different member of the Royal House (see details below). It can be activated at any time — there is no prep animation, Scoop simply yells the name of the Royal member — but the time each member takes to appear varies.
_Duration: Depends on the level used (see details below).
_Effect: Scoop summons a member of his Royal House to help him.
_Details: The summons work like this: you accumulate ultimate levels, and the number of times you press the ultimate key determines which Royal House member is summoned. When you are at Level 1, you can only summon the Level 1 corresponding member, so you press the ultimate key once. When you are at Level 2, you can summon either the Level 1 or Level 2 member (by pressing the key twice in a row for the Level 2). At Level 3, the same logic applies — you can summon the Level 1, 2, or 3 member (by pressing the key three times in rapid succession for the Level 3).
So, you cannot choose the Level 2 member while at Level 1, but you can summon either the Level 1 or Level 2 member while at Level 2, and so on. Once you choose a member, all accumulated ultimate levels are consumed, regardless of which one you selected. For example, if you are at Level 3 and summon the Level 1 member, all 3 levels are still spent.
The effects are as follows:
--- Level 1 – The Freezing Pan of Resilience: A dwarf-stature member of the Royal Family jumps from off screen in 0.5s, wielding a giant “reverse-effect” frying pan that freezes things instead of heating them. He will always try to be in front of Scoop but has a slow walk speed, so changing the direction Scoop is facing will make him walk until being in front of Scoop again (and he's completely vulnerable in the back). He uses the pan as a shield to protect him.
Any damage source (up to 1500) that hits the pan will be absorbed (the pan itself has a hurtbox) and converted into an ice ball that can be thrown at enemies by pressing the ultimate key again. The damage of the ice ball is equal to 1/3 of the total damage absorbed. So, if the pan blocked 900 damage, the ice ball will deal 300 damage in an area. He'll not defend with his pan anymore after the max damage is reached, being only useful to thrown the ball of ice at enemies. That means he'll start getting damaged if attacks hit him, even from the front.
The size of the ice ball also increases as more damage is absorbed, from half the size of a Coco's ball up to roughly the size of a Nuke's core. The projectile deals aoe damage, though naturally it cannot pass through terrain or turrets.
This Royal member stays on the battlefield for 7 seconds, then leaves. However, if enemies manage to hit him from behind, he has 1200 HP and can be defeated before the duration expires.
--- Level 2 – The Chubby Swords of Annoyance: A small igloo appears, forming itself in a 1.5s animation like being built from inside, then Scoop’s loyal penguin servants begin emerging from it every 2 seconds, wielding oversized swords they can barely carry (lol)! They immediately attack the first enemy they see.
The penguins have different attack patterns: normal attacks, jumping attacks, sliding thrusts, and special group attacks. If there is nothing nearby to attack (like half a screen distance), they simply wander around and naturally gather together. When grouped, they can perform coordinated special attacks complete with dramatic poses and everything! And during these special group attacks, they are totally invincible!
However, outside of those special attacks, they are extremely fragile and have only 1 HP each, meaning they die in a single hit. Individually they do not deal much damage, but if enemies allow them to gather in large groups, they can become a serious threat. Since the igloo remains active for 20 seconds, you may end up with as many as 10 penguins on the battlefield simultaneously, assuming none are killed.
The igloo itself has 1000 HP and can be destroyed (even in its 1.5 build animation), stopping additional penguins from spawning. The penguins attack all enemy units except turrets, which they actively try to avoid. Also, they tend to not go too far away from the igloo (unless they see an enemy nearby), making it easier for them to form groups. All remaining penguins disappear 10 seconds after the igloo expires or is destroyed.
Damage values:
- Normal attacks: 100
- Jump attacks: 125
- Sliding thrusts: 150
- Group attacks: 400 (possible with at least 4 penguins)
The fork does not cause damage, but if an enemy naut is hit, they become "stuck" in it, ensnared, and silenced for 3 seconds, allowing them to use only AA attacks. Scoop also recovers 300 HP if the fork connects. The fork automatically tracks enemy nauts, meaning they cannot simply stand still to avoid it. It travels through terrain and will always target the enemy’s current location, so nowhere is safe except behind your own territory shields.
If the first fork hits, the maiden disappears immediately and the ultimate ends. If it misses, she throws again — this time with 2 forks targeting 2 different enemy nauts with all the same properties. If BOTH miss, she throws a third and final wave of 3 forks targeting all 3 enemy nauts in the same pattern.
The forks can hit enemies even while airborne. If struck in the air, the enemy is forced downward and pinned to the ground for the full duration. If there is a pit below, they will fall to their death. Once pinned, there is no escape.
The ensnare and silence effects apply immediately upon impact, even before the enemy reaches the ground. However, the actual “stuck in place” duration only begins once they land. If there are fewer enemy nauts than available forks (like throwing 3 forks with only 2 enemy nauts targetable), someone will have to dodge more than one fork (the maiden will throw one where the naut is normally and one nearby). She is totally invincible, cannot be hit, she does her thing and goes away.
_Upgrade interactions: None.
_When to use: It depends entirely on the situation. If you are low on health, the Level 1 summon may be the best choice, since the Royal member constantly attempts to stay between Scoop and incoming attacks.
If you are in a strong position and simply want to annoy or put pressure on enemies, the Level 2 summon is likely the better option.
Meanwhile, the Level 3 summon can make enemies extremely uncomfortable, especially during team fights, since they must dodge not only your attacks, but also the incoming forks — 'cause getting hit usually means death.
_Final notes: A very versatile and powerful ultimate that can adapt to multiple situations: defending yourself, creating pressure, or locking enemies down for kills. Unlike Coco’s 3-level ultimate, this one should not appear very frequently (especially the Level 3), so its charge rate is intentionally slower. We have family here!
Evaluation:
- Power: 5 – Very Strong
- Ease of Use: 4 – Easy (mainly about choosing the right summon for the situation)
- Charge Rate: 2 – Slow
- Pros: Flexible and powerful / useful in multiple situations / instant activation with no prep animation / can be activated in the air / difficult to interrupt
- Cons: Slower-than-average meter charge for a 3-level ultimate
Sentry X-58
"Long Distance Call"
_Activation: A beep is heard from Sentry, and the next time he teleports back to base, he leaves a telephone booth where he was standing. A second booth is automatically placed near your base.
_Duration: Lasts 40 seconds after the booth appears.
_Effect: You and your teammates can use the telephone booth at your base to appear at the other booth, saving travel time.
_Details: This can catch your opponents by surprise if used wisely, since you can practically travel from base to base in an instant. The trip is one-way only — you cannot use it to return to the booth at your own base. However, if you go back to base for any reason, you can use the booth there again.
The booth has a camera attached to it, so a PiP (picture-in-picture) window appears in the corner of your and your teammates’ screens, showing a close-up view of what is happening around the destination booth. This helps because you can check for traps, such as mines, that opponents may place around it to punish teleporting players. Just be aware that players are completely invulnerable for one second when appearing from the booth, so mines or even Derpl’s traps placed directly in front of it will be destroyed without harming the player who just teleported.
One important note: once you hear the beep after pressing the ultimate key, your next successful normal teleport will always leave the booth behind, even if previous teleport attempts were interrupted. You never lose the ultimate until you successfully place the booth.
_Upgrade interactions: None.
_When to use: This is a tactical ultimate that lasts for 40 seconds and can divert enemy attention. It can be used near the enemy base to draw attention while your team pushes turrets, or simply placed anywhere useful on the map to save travel time for your team. There is not much more to explain here, but saving travel time can be extremely valuable.
_Final notes: I saw a thread on Reddit a while ago about Awesomenauts ultimates where someone had already suggested this idea, so the core concept of this one in particular is not mine. I just added a few touches, such as requiring Sentry to use his normal teleport to activate it and giving the booth a camera. This can potentially be very strong, but also very situational, so you need to be smart about where you place the booth.
Evaluation:
- Power: 3 – Medium
- Ease of Use: 4 – Easy (you just need to decide where to leave the booth in a optimal way)
- Charge Rate: 3 – Medium
- Pros: can surprise enemies or at least distract them / saves travel time so your team gets back into the action quickly
- Cons: can be very obvious and easily trapped
Skølldir
“Lemonade is Ready!”
_Activation: 1.2-second prep animation (Skølldir is vulnerable during it and can be interrupted). Skølldir sits at a table, drinks a large cup of lemonade, then throws the cup away.
_Duration: 12 seconds after the initial animation / 24 seconds for table interactions.
_Effect: There are 5 different effects here. First, the cup thrown at the end of the initial animation can be aimed, stunning whatever it hits for 0.6 seconds (nauts, droids, or creeps). Second, Skølldir can now aim his punches in any direction, not just forward. Third, by holding the jump key until reaching maximum jump height and continuing to hold it, Skølldir performs a second huge jump (roughly the height of Frog’s jump with the boots upgrade), leaving behind a “lemon fart” cloud that lasts 3 seconds and deals damage over time to enemies touching it. This jump can only be used once during the ultimate (you can still use the regular double jump normally — just do not keep holding the key after the first jump; release it and press again). After using the special jump, you cannot jump again mid-air until landing. Fourth and fifth, when the initial animation ends, the table remains on the map for 24 seconds before disappearing. It has no hurtbox and cannot be interacted with by anyone except Skølldir, who can throw it using Mighty Throw, causing 300 damage and a 1.2-second stun on hit. The table remains on the ground after hitting an enemy, ready to be reused until the 24-seconds duration expires. Earthquake also interacts with it — hitting the table with Earthquake launches it straight upward, dealing 150 damage and stunning enemies hit for 0.9 seconds.
_Details: If Skølldir is stunned before finishing the drinking animation, the ultimate fails completely. However, after he finishes drinking, he can still be interrupted before throwing the cup at the end of the animation, but all the other effects will still activate normally. The punches, since they become aimable, are much more effective against enemies above or below him. The table can only hit one enemy at a time, immediately falling back to the ground after impact. The “lemon fart” deals 200 damage over the course of 5 seconds and works like Gnaw’s poison (so health packs cancel the effect). The interaction of the table with Earthquake is as follows: the table always launches straight upward, reaching slightly above the maximum height of the Earthquake just below it, causing the stun effect, along with 150 damage to only 1 enemy.
_Upgrade interactions: All upgrades affecting Skølldir’s skills or punches apply normally here.
_When to use: The “lemon fart” jump is especially useful for escaping, such as crossing the middle section of Aiguillon where Skølldir normally cannot reach that height, or to poison an enemy escape route. The aimable punches are strongest in team fights, since you no longer need enemies directly in front of you to attack effectively. The table effects are also excellent in team fights, and because the table lasts a long time (24 seconds), you can place it preemptively and wait for the perfect opportunity.
_Final notes: An ultimate that incorporates virtually everything Skølldir can do — Mighty Throw, Earthquake, punches, and jumps — making him versatile in many different situations. It offers long-range utility with the thrown table, vertical pressure with Earthquake launches, flexible punches that can hit above or below him, and even an escape option with the jump fart (or by using the table to hit enemies at your tail if it is already placed). That's why he wanted that lemonade in his theme song!
Evaluation:
- Power: 5 – Very Strong
- Ease of Use: 2 – Hard (requires landing hits and understanding how to use the different effects properly)
- Charge Rate: 2 – Slow
- Pros: Makes Skølldir much more versatile / many different utility effects
- Cons: Requires skill and good decision-making to fully utilize the effects
Skree
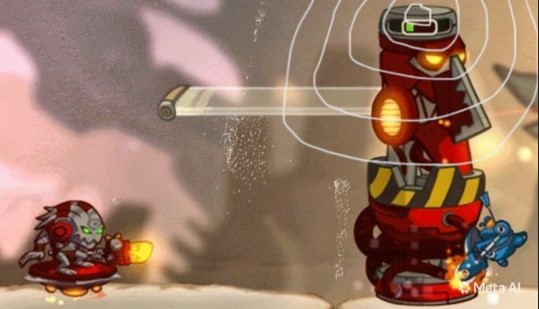
“Techno Voodoo!”
_Activation: Can only be used when the Totem of Power skill is ready. It uses the same skill with the added effect of the ultimate.
_Duration: Same as the regular skill, then 15 seconds after taking effect.
_Effect: When the ultimate meter is ready, your next Totem of Power also emits a circular radio signal in addition to its regular effects from the top of the totem. Enemy nauts standing near the signal risk becoming members of the enemy team, temporarily losing control of their character for 15 seconds. The effect also works on droids.
_Details: The totem emits a signal around itself from the top like a radio tower (roughly the size of a Clunk explosion). It does not cause any immediate effect on contact, but the longer an enemy naut stays within the signal, the higher the chance of “defecting” to the opposing team. Affected nauts essentially become CPU-controlled allies of the Skree's team. They gain all properties of an allied unit for that team: they cannot be damaged by their new teammates, but they can damage — and be damaged by — their original teammates. A visual effect appears on affected nauts and droids, indicating they have been “bewitched.”
The chances are as follows (just a note here: if a naut leaves the area and then returns, the chances reset):
- 0.5 seconds in contact with the signal: 8%
- 1.0 second: 16%
- 1.5 seconds: 24%
- 2.0 seconds: 32%
- 2.5 seconds: 40%
- 3.0 seconds: 48%
- 3.5 seconds: 56%
- 4.0 seconds: 64%
- 4.5 seconds: 72%
- 5.0 seconds: 80%
- 5.5 seconds: 88%
- 6.0 seconds: 96%
- 6.5 seconds: 100%
- 7.0 seconds: the totem expires.
Remember: this effect is applied on top of all regular upgrades. If you have upgrades such as the slow effect on the totem, they will still function normally.
One final detail: It works on any numbers of droids, but it'll only work at ONE naut at a time for balancing reasons. Any enemy naut in touch with the signal will risk being affected, but as soon as someone is, the others will become imune by default. And if the “bewitched” naut dies, the death still counts for their original team. This means their og teammates must be careful not to attack them, or they may end up killing one of their own members!
_Upgrade interactions: Everything that affects Totem of Power applies normally, since the ultimate effect is added on top of the regular skill. One curiosity however: if you have the height upgrade (Ornamented Pipe), two signals will be emitted — one from the normal upper position and another from the middle section of the totem.
_When to use: This is obviously a team-fight-focused ultimate. In 1v1 situations, enemies usually will not remain near the totem long enough to be converted (unless you manage to trap or corner them near it). Team crowd control is especially effective with this ultimate — for example, an enemy ensnared beside the totem becomes extremely vulnerable to conversion.
It is also excellent for lane pressure. If enemies have a Super Droid, or in situations like the middle lane of AI Station where hummingbirds and droids clash, converting units can heavily swing the push in your favor (imagine having 6 hummingbirds for your team!).
_Final notes: A powerful ultimate that not only removes a member from the enemy team temporarily, but also adds one to yours. It can completely shift the balance of a fight or lane push when used correctly. If you can’t beat them… make them join you!
Evaluation:
- Power: 4 – Strong
- Ease of Use: 3 – Medium (easy to convert droids, much harder to convert enemy nauts)
- Charge Rate: 3 – Medium
- Pros: temporarily adds another member to your team / excellent lane pressure / enemies can accidentally damage their own teammates
- Cons: can sometimes be difficult to trigger successfully
Smiles
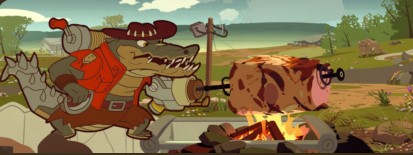
"I Like It Burnt!"
_Activation: Passive — with the ultimate meter ready, stand still (without moving or performing any action) for at least 3 seconds. You gain additional effects if this is done inside a hide area (those areas where enemy nauts cannot see you inside). Smiles begins cooking (humming or singing a swamp-like song!) for several seconds (see details below), remaining completely vulnerable the entire time, and can be interrupted.
_Duration: From 3 to 13 seconds while cooking, followed by 10 seconds of bonus effects if obtained.
_Effect: After standing still for 3 seconds, Smiles sets up a fireplace and begins cooking meat (to stop cooking, simply perform any action such as moving or attacking. Also, enemies can hear Smiles humming/singing). The longer he cooks, the stronger the bonuses he gains from the meat — and if he cooks inside a hide area, he also seasons the meat, granting additional effects. When the animation ends, Smiles automatically eats the meat within 0.7-seconds, after which he can move freely again.
Only Smiles can eat the main piece of meat, but there is a chance that pieces fall onto the ground after he takes a bite. Teammates can collect these pieces (Smiles himself cannot), receiving a smaller portion of the healing effects.
_Details: As described above, the cooking animation begins after standing still for 3 seconds. If Smiles is inside a hide area, he also performs an animation where he seasons the meat, granting additional bonuses.
The first cooking stage begins after 2 seconds of cooking (in other words, 5 seconds in total counting the initial "standing still" requirement), and every 2 seconds afterward the meat reaches a new doneness level with different effects.
Lore-wise, Smiles prefers burnt food, so less-cooked meat may cause him side-effects (indigestion), while burnt meat grants extra bonuses. See below:
[>>> OUTSIDE HIDE AREAS / INSIDE HIDE AREAS — CHANCE OF MEAT PIECES DROPPING / PERCENTAGE OF HEALING EFFECT TEAMMATES RECEIVE <<<]
- After 5 seconds standing still — Undercooked Meat:
[>>> Heals 30% of total maximum health and has a 25% chance of causing indigestion, dealing poison damage to Smiles equal to 1/4 of his total maximum health over the course of 5 seconds / same effect, but indigestion chance drops to 12,5% + grants 5% increased overall attack damage for 10 seconds — 5% / 10% <<<] - After 7 seconds standing still — Rare Meat:
[>>> Heals 45% of total maximum health and has a 20% chance of causing indigestion, dealing poison damage to Smiles equal to 1/4 of his total maximum health over the course of 5 seconds / same effect, but indigestion chance drops to 10% + grants 7% increased overall attack damage for 10 seconds — 10% / 15% <<<] - After 9 seconds standing still — Medium Meat:
[>>> Heals 60% of total maximum health and has a 15% chance of causing indigestion, dealing poison damage to Smiles equal to 1/4 of his total maximum health over the course of 5 seconds / same effect, but indigestion chance drops to 7,5% + grants 9% increased overall attack damage for 10 seconds — 15% / 20% <<<] - After 11 seconds standing still — Well-Done Meat:
[>>> Heals 75% of total maximum health and causes no indigestion / same effect + grants 11% increased overall attack damage and 5% movement speed for 10 seconds — 20% / 25% <<<] - After 13 seconds standing still — Overcooked (Burnt) Meat:
[>>> Heals 90% of total maximum health and causes no indigestion / same effect + Smiles now breathes fire from his mouth, dealing extremely high damage (300 damage per second — he loses all his base attacks in this state, including skills) + grants 10% movement speed for 10 seconds — 25% / 30% <<<]
A little complicated? Let’s use the 9-second version as an example:
After 9 seconds standing still, the meat reaches a medium point. If Smiles performs any action, he immediately eats it, restoring 60% of his total maximum health while having a 10% chance of suffering indigestion, taking poison damage equal to 1/4 of his total health over 5 seconds.
For example, if Smiles had 1000 HP, he would heal 600 HP, and if indigestion triggers, he would take 250 poison damage over the course of 5 seconds. This poison behaves like any other poison effect in the game and can be removed by picking up health packs.
If this happens inside a hide area, the indigestion chance drops to 5%, and Smiles gains 9% increased damage on all attacks and skills for 10 seconds.
The numbers after the hyphen “—” indicate:
>The chance that meat pieces can drop so teammates can have it;
>The percentage of the healing they will receive.
So in this example, there is a 15% chance that two meat pieces drop — one for each teammate (and only one, a teammate cannot eat two). Each teammate who eats a piece receives 20% of the healing Smiles gained (20% of 600 = 120 healing).
Teammates only receive healing — they cannot suffer indigestion or gain special effects such as fire breath.
The meat pieces remain on the ground indefinitely until they are consumed, or Smiles uses the ultimate again, causing old pieces to disappear. Enemies cannot consume them.
After 13 seconds, Smiles automatically eats the meat even if no action is performed.
One final detail: if Smiles takes damage while cooking, the ultimate is canceled, but the meter is not lost, allowing him to attempt it again immediately afterward. However, once the 0.7-second eating animation begins, the effect will take place normally even if he is stunned.
_Upgrade interactions: None.
_When to use: Using it preemptively is usually the best option, since it is difficult to fully channel during combat. It can also be used after fights if you desperately need healing (the ultimate can begin even while suffering poison damage).
On maps like Sorona, especially inside the middle hide area, reaching the full 13-second effect can allow devastating coordinated attacks with teammates, since the fire breath deals enormous damage.
_Final notes: I tried to be careful with the balance here because Smiles is not — and should not be — a healer. Lore-wise, the cooking concept fits him perfectly, and the side effects help balance the sustain. The healing is moderate unless you commit to cooking for a very long time, making this a “slow but rewarding” ultimate. Reaching the full 13-second effect can secure very easy kills if you land the fire breath properly, so aiming for the max effect whenever possible is ideal. Smiles is cooking!
Evaluation:
- Power: 2 – Weak
- Ease of Use: 2 – Hard (very slow and leaves you completely vulnerable)
- Charge Rate: 3 – Medium
- Pros: Can become extremely dangerous if fully charged / hide-area bonuses last a long time / can save your life when healing is unavailable
- Cons: Chance of side effects / heavily dependent on positioning and hide areas
Snork Gunk
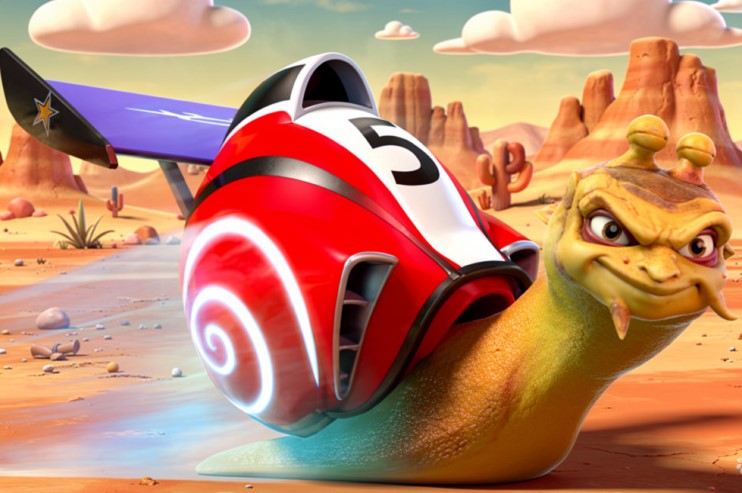
“Turbo Time!”
_Activation: Prep animation of half a second where Snork enters his shell (vulnerable during it, can be interrupted). Can be activated in the air.
_Duration: 0.5 second startup animation, then up to 3 seconds of movement unless the ultimate is canceled earlier or Snork dies, then another 0.5 second of getting out of the shell.
_Effect: Snork enters a giant shell, leaving only his head exposed (similar to a real-life snail), then accelerates, losing all forms of attack but gaining 2x base movement speed and 30% damage resistance for 3 seconds. Wherever he moves, he leaves behind a slime trail that slows enemies by 30% for 2 seconds on contact. The slime itself remains on the field for 3 seconds.
_Details: He basically becomes the snail from the movie Turbo — moving at high speed while disrupting enemy territory with slime trails. Keep in mind that he is still vulnerable to CC effects and can still die from damage, even with the increased resistance.
You can end the ultimate early by pressing the key again, causing Snork to jump out of the shell in another 0.5 animation and return to normal. Although the ultimate can be activated in the air, the acceleration will only happen when he touches the ground.
A note here: if activated while using the Shell Bombs skill, the shells will just fall off from Snork, losing any hit box and disappearing. Also, he can't use jump pads in this state.
_Upgrade interactions: None directly, and if you are wondering, the Space Air Max upgrade does not have any influence here.
_When to use: Use it whenever you want to chase down an enemy that is too far away for Sticky Snail to reach effectively, or when escaping dangerous situations. It is also useful in team fights to disrupt enemy movement, since opponents will need to be careful where they walk or land.
Since Snork also gains damage resistance, this ultimate can save you in situations where taking damage is unavoidable and you would otherwise die.
_Final notes: A simple but versatile utility ultimate that combines speed, survivability, and area control, making it useful in many situations. It truly is Turbo Time!
Evaluation:
- Power: 3 – Medium
- Ease of Use: 3 – Medium (you still need to watch out for CC and incoming damage, even with the 30% resistance)
- Charge Rate: 3 – Medium
- Pros: can reach faraway enemies quickly / great escape tool / strong area denial with slime trails
- Cons: still vulnerable to all CC effects
Admiral Swiggins
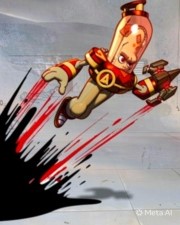
"I Love Being a Squid!"
_Activation: 0.3-second self-contracting startup animation, followed by 0.5 seconds propelling himself forward, during which he is completely vulnerable. Getting stunned interrupts the movement.
_Duration: 0.8 seconds total.
_Effect: Swiggins propels himself forward, leaving an ink spot behind (like real squids when they are in danger!).
_Details: After self-contracting for 0.3 seconds, he launches himself in the aimed direction, leaving behind an ink spot (roughly the size of Derpl's nuke core) that blinds anyone who touches it for 1.5 seconds. The ink remains suspended in the air for 3 seconds before disappearing.
He is still vulnerable to all CC effects during the movement — this ability only provides propulsion (the distance traveled is about twice as long as Frog’s dash). He can interrupt the movement at any time by pressing jump or attacking (AA or skills), so you are not forced to travel the full distance.
Also, he can do this at ANY time, even during other skills. For example, when you are being pulled toward an enemy after hitting them with the Anchor Hook skill, you can interrupt the movement if you do not want to go all the way by using this ultimate.
_Upgrade interactions: If you have the Royal Toy Castle upgrade and are not holding Homboldt, you will still receive the shield as usual. The Krill Biscuits upgrade (movement speed bonus when not holding Homboldt) does not affect this ability — the propulsion speed is fixed (and already quite fast, covering roughly twice Frog’s dash distance in 0.5 seconds). And you do not need the "Not Seeweed" upgrade for the ink to apply the blind effect.
_When to use: Use it when chasing enemies or escaping danger (keep the ink’s blind effect in mind). This can save your life, especially if Anchor Hook is on cooldown. You can also trick enemies — for example, by jumping off a jump pad and then suddenly coming back with the ultimate, or by using Anchor Hook on a ceiling in one direction and then using the ultimate to move in another — things like that.
_Final notes: A utility-focused ultimate that can catch enemies off guard or help you escape immediate danger. Choose your timing wisely.
Evaluation:
- Power: 3 – Medium
- Ease of Use: 1 – Very Easy (point and go!)
- Charge Rate: 3 – Medium
- Pros: flexible — can secure kills or help escape tight situations / can be used at any time
- Cons: still vulnerable to all CC effects / has a short startup animation
Ted McPain
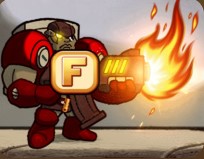
"Thank You!"
_Activation: Pre-animation of 1 second of Ted saluting an American flag, then some prisoners appear on the stage waiting to be rescued (yes, this is a homage to the Metal Slug games!). This can only be activated on the ground and on your side of the stage, and Ted is vulnerable while doing it. Can be interrupted during the animation.
_Duration: 15 seconds after activation to rescue a prisoner. Then, if successful, the effect lasts until you run out of ammo.
_Effect: Just like in Metal Slug, rescuing a prisoner makes them leave behind a weapon item that you can grab (or not). There are 4 different types, two for each of Ted’s default guns (machine gun and shotgun).
_Details: First, Ted has to be on his team side of the stage to be able to activate the ultimate. The prisoners appear tied up randomly on the map (but always on the enemy half of the stage, and they also have map icons that appear only for the enemy, so they can prepare a ambush for you if they want!). Ted just has to touch them to free them from the ropes (with a knife move just like in the original games, and they also say “Thank you!”). After being freed, they release new weapon item icons as follows:
- >Letter “F” – Flame Shot: Replaces the shotgun. Ted now releases short-range but large (double the shotgun’s area) bursts of flames in front of him that deal a great amount of damage over time. The best part is that the DoT can stack!
---Characteristics:
Damage per shot: 100 (direct) + 200 total over the course of 5 seconds;
Cooldown between shots: 0.7 seconds;
Quantity: 6 shots in total (3+3; after the first 3 shots, Ted will have a reload animation of 1 second. You can cancel this animation by changing weapons, but then you will lose it);
Best quality: As mentioned above, the DoT can stack. That means if you land two shots on an enemy, they’ll take 400 additional damage over time (not counting the direct damage dealt beforehand); 3 shots = 600 damage; 4 = 800 damage, and so on. It can also hit multiple enemies at once!;
Worst quality: It loses all upgrade effects from the shotgun, so if you need the knockback, for example, you will not get it here. - >Letter “G” – Grenade Launcher: Improves the shotgun rather than replacing it, and can only be used when you have previously purchased the “Ted McPain Unicorn Dance Karting” upgrade. Your grenades no longer simply fall on the ground; they are launched wherever you are aiming and explode on contact, allowing your shotgun to become a long-range weapon too! It is even burstier at close range because the grenades do not have a delay before exploding — if they touch an enemy immediately after being fired, they explode instantly! This also applies to floors, ceilings, walls, totems, and any physical structure, it will always explode on contact now.
---Characteristics:
Damage per shot: 80 per stage (not counting the shotgun itself), same as the regular upgrade;
Cooldown between shots: Same as regular shotgun shots;
Quantity: 6 shots. Note: upgrades that increase or reload the shotgun shots will influence only the shotgun shots themselves, not the grenade launcher. For example, you normally have 4 shotgun shots, but if you have the reload upgrade you won’t get 8 grenade launcher shots; once you reach the 6 ammo limit, the subsequent ones will be the regular grenades from the upgrade;
Best quality: This effect is applied on top of your regular shotgun properties, since it does not replace the shotgun. Regular shotgun damage, ammo count, and Stimpack effects still work normally. The grenades also deal instant damage;
Worst quality: the long-range grenades will not deal that much damage (but might be just enough to secure a kill). - >Letter “L” – Laser Gun: Replaces the machine gun. Ted now fires a chargeable medium-range beam that pierces through enemies in front of him (horizontal attack only). It is not extremely damaging, but fully charging the beam causes a stun.
---Characteristics:
Damage per shot: 70 per stage (it has 3 stages, 1 per 0.8 seconds you hold the attack key). If you charge it all the way, the beam also causes a 1-second stun;
Cooldown between shots: 0.5 seconds;
Quantity: 9 shots. Each charge stage consumes one ammo, so a full charge costs 3;
Best quality: Relatively long-ranged (similar to the “Can O’Juice!” upgrade for the machine gun). Potentially allows 3 consecutive stuns if you fully charge and hit all shots;
Worst quality: Horizontal-only attack, and it must be fully charged to stun. - >Letter “H” – Heavy Machine Gun: Improves the machine gun, and can only be used if you purchased the “Tedris Ville” upgrade. Your machine gun now fires the sniper shots from the upgrade on top of your regular AA without requiring you to stop firing (though it still keeps the 1.2-second cooldown between sniper shots. If you stop shooting, this cooldown resets).
---Characteristics:
Damage per shot: 135 (not couting the regular shots);
Cooldown between shots: 1.2 seconds;
Quantity: 6 shots. Once the ammo runs out, the weapon returns to normal;
Best quality: Similar to the Grenade Launcher — the effect is applied on top of your normal machine gun AA. Range and damage upgrades continue to affect the standard shots. If you have good aim and land all the shots, the damage can really stack;
Worst quality: It is not homing, so you still need good aim to land the shots.
Note 1: If you grab a new weapon from the ultimate, you must use it until the ammo runs out. However, if you switch weapons manually before using all the shots, the ultimate weapon is lost and the weapon returns to normal.
Note 2: The letters “G” and “H” can only appear if you own the required upgrades mentioned above. Otherwise, prisoners will never release them. Even if you do own the upgrades, there is still a 50/50 chance between the letters. This is because the weapon released always depends on the weapon Ted had equipped when freeing the prisoner. For example, freeing a prisoner while holding the shotgun will always result in either “F” or “G”.
Note 3: Your teammates can free prisoners too! However, for them, the prisoners always release food items that restore 150 health instead of weapons (I know it’s a small amount, but healing is not the focus of this ultimate). If Ted frees another prisoner after already grabbing a weapon, he will also receive the food items instead.
_Upgrade interactions: Already explained above.
_When to use: This ultimate is mainly about choosing — or at least increasing the chances of obtaining — your preferred weapon for upcoming fights. Avoid using it while your team is retreating or unable to reach enemy territory, since prisoners always appear on the enemy side of the map and you have limited time to rescue them. Remember: the weapons are ammo-based, not time-based. If you save the ammo, they can theoretically last forever. The downside is that if you preserve your ammo for fights, you may avoid shooting droids or creeps, which can reduce your pushing potential. Of course, the special weapons can also be used against droids and other units if desired.
_Final notes: A powerful ultimate with multiple “phases.” First, you must safely reach the prisoners, then you need to find the right opportunity to use the weapons effectively against enemy nauts. It might not be that impactful if not used in a fight, but at least it can put enemies on edge guarding some prisoners and leaving other areas of the stage unattended. Leave no man behind!
Evaluation:
- Power: 4 – Strong
- Ease of Use: 2 – Hard (you must first rescue the prisoners, then properly capitalize on the weapons. Some weapon types also require upgrades.)
- Charge Rate: 2 – Slow
- Pros: High damage potential / Multiple weapon options
- Cons: Requires setup and positioning to reach full potential
Vinnie & Spike
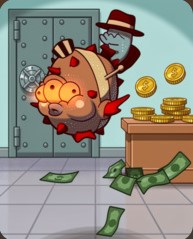
"Pay Day!"
_Activation: Passive. With ultimate available, your next Smoke Screen skill will also have the ultimate effect.
_Duration: Same as Smoke Screen skill.
_Effect: Enemy nauts inside the smoke cloud will have up to 10 solar per second stolen from them (one for every six frames spent inside the cloud), which is transferred to Vinnie & Spike. This is on top of the regular ability, so any upgrades you may have — such as health regeneration, team invisibility, or speed bonuses — will behave normally.
_Details: Not much to explain here: if you are inside the smoke while the ultimate is active, you'll get robbed! This is, of course, a reference to his old Rubber Musk upgrade, but with the limitation of only affecting enemy nauts, not droids or anything else, for balancing reasons.
The good news is that this is one of the fastest ultimates to charge, so you will probably get to use it many times throughout a match (compared to other ultimates, of course — it still won’t happen every minute).
The bad news, if a affected naut does not have solar to be robbed, you get nothing! It does not generate solar, it steals!
_Upgrade interactions: Increased smoke size and duration (such as the Rocketeer upgrade) may increase the total amount of solar stolen. In the end, it all depends on how long you can keep enemies inside the smoke.
_When to use: Preferably during team fights for optimal results, but aside from that, just use it whenever you have the opportunity.
_Final notes: Probably the simplest ultimate of them all, whose real strength is that it charges relatively quickly and can be used often. Just drop the smoke and get paid!
Evaluation:
- Power: 1 – Very Weak
- Ease of Use: 5 – Very Easy (just use it and get rich… probably)
- Charge Rate: 5 – Very Fast
- Pros: very fast recharge / can accelerate your build progression
- Cons: can be useless if you fail to catch enemies in the cloud / does not affect droids or anything other than enemy nauts
Voltar the Omniscient
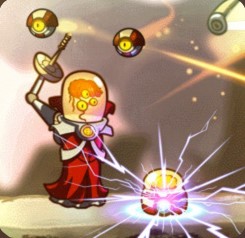
"My Operation Includes You!"
_Activation: Passive. With the ultimate meter ready, the next Healbot you use directly above a dead friendly naut’s “body” becomes the ultimate.
_Duration: 5 seconds of charge time until the effect triggers, or until the Healbot is destroyed.
_Effect: While playing as Voltar with the ultimate ready, your teammates leave a token on the ground when they die, representing the "body" of the dead naut. This token remains as long as they are not already respawning in the drop pod — in other words, while their respawn countdown has not reached zero. Using Healbot on top of this token causes it to defibrillate the area, reviving the fallen naut at that location with full health. The skills cooldowns will not be refreshed, will be the same as the moment the naut died.
_Details: The effect replaces the regular Healbot, so if you need its normal healing, damage, mine, pulse, or any other effect, do not use it on top of a token. It also uses the Healbot cooldown, so it cannot be activated if the skill is unavailable. There will be a visual indicator of shock effects that intensifies the closer it is to revive the naut.
Think of the tokens as small “graves” (if you’ve played any Worms game, they are similar to the tombstones worms leave behind when they die; and wouldn’t it be cool if each naut had a thematic one? Like LoneStar’s being a grave with his lasso, Leon’s with his sword, Penny’s with a bike helmet, and so on!), indicating the area where Healbot must be used to trigger the ultimate.
If a naut dies in the air, the token falls to the ground and remains there. However, it disappears if there is no valid ground beneath it. You also cannot resurrect someone mid-air — you must use Healbot on the ground where the token lands.
The ultimate version of Healbot has HP equal to the regular version — this is the only stat they share.
_Upgrade interactions: As mentioned above, the upgrade that increases Healbot’s HP (Energy Drink) also increases the HP of the ultimate version, since they share the same value.
_When to use: This is especially strong in longer matches, where respawn timers are longer. If possible, save it for those moments, but it can be used whenever a teammate dies — just be careful, as the Healbot can be destroyed before the effect completes, just like the regular skill.
_Final notes: Another simple yet powerful ultimate that should not be available too often. Revive your friend and return to the fight at full force!
Evaluation:
- Power: 5 – Very Strong
- Ease of Use: 3 – Medium (easy to activate but requires match awareness to know when to use, since it has a long charge time)
- Charge Rate: 1 – Very Slow
- Pros: revival is very strong in a 3v3-only game
- Cons: slow startup / can be destroyed before the effect triggers
Professor Milton Yoolip
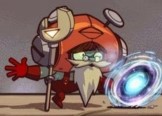
"Dino Bytes!"
_Activation: 1.5-second animation, must be on the ground . Yoolip trips, causing one of his time-travel slippers to fall to the ground and accidentally openning a portal to the Mesozoic Era at the end of the animation. The portal can suck in a single enemy naut standing nearby. Yoolip is vulnerable the whole time, and can be interrupted.
_Duration: The portal itself lasts for 3 seconds or until it captures a naut. If an enemy naut is sucked in, they are temporarily removed from the match and forced into a series of effects lasting up to 14 seconds.
_Effect: Temporarily removes an enemy naut from the game. After being sucked into the portal, the victim is sent back in time and must complete a random dinosaur-themed mini-game to recover the missing slipper and return to the match. Each mini-game has a maximum time limit of 14 seconds. Failing the mini-game — either by running out of time or dying inside it — counts as a death in the real match.
_Details: There are 5 possible mini-games, some with multiple layout variations. Once captured, the player’s screen is replaced by the mini-game. Successfully completing the objective allows them to return to the match through a new portal. When returning, he/she returns in the same place when sucked, totally invincible for 1.5 seconds. The mini-games are inspired by classic real-world games, but with dinosaur themes:
- 1 - Pterodactyl Assault (inspired by Space Invaders): you stand on the ground using a slingshot to shoot descending Pterodactyls (they move like the aliens from Space Invaders). Some suddenly dive toward you, so you must stay alert. If you are hit once, you die. Destroyed Pterodactyls may drop upgrades such as double shots or splitting projectiles, and a random one carries the missing slipper.
- 2 - Your Princess Is in Anot..., Wait! (inspired by Super Mario Bros.): a platforming stage filled with pits, Triceratops charges, flying Pterodactyls, and Brachiosaurus heads used as platforms. At the end is a T-Rex boss protecting the slipper behind it, which you must touch to finish the stage while avoiding its attacks. The platforming section can vary, so there are multiple versions of this mini-game.
- 3 - Beware of Raptors! (inspired by Metal Gear Solid): a stealth mini-game viewed from above in a dense grassy area. You move upward in a classic Metal Gear Solid-style camera perspective, while seeing trails of raptors moving through the tall grass. There is a map in the right corner indicating the raptors’ fields of view, which you must avoid, and you can hide behind rocks. The slipper is located at the very top of the stage.
- 4 - Run! (inspired by Enduro): You must win a race against a herd of Gallimimus fleeing from a T-Rex. Touching one of them slows you down, and if you are not careful, the T-Rex will catch you and end the game. If you fail to win the race, the Gallimimus escape and you are eaten by the T-Rex anyway — so either win or face game over! The slipper serves as the first-place trophy.
- 5 - Feed the Babies! (inspired by Duck Hunt): You control an aiming cursor and must shoot insects above a Pterodactyl nest (where you are located). Shooting insects feeds the hatchlings below. As time passes, more eggs hatch, increasing the number of babies to feed and raising the difficulty. If the babies are not fed enough, the mother Pterodactyl decides to make you their food! Overfed babies will poop, and one of the droppings may eventually contain the missing slipper.
All mini-games can theoretically be completed much faster than the 14-second limit. For example, in "Pterodactyl Assault", you could finish within seconds if you immediately hit the correct target. In "Run!", if you go fast enough and don't hit anything, in 5 seconds you finish. Some games are much more skill-intensive than others, especially under the pressure of an ongoing team fight.
Only one enemy naut can be captured — specifically the closest one to the portal when it activates.
Additionally, when the portal captures a naut, a black-and-white “old television” projection appears where the portal opened, allowing all players in the actual match to watch that player’s mini-game live in real time!
And one very important note!: To avoid really absurds amounts of time a naut can be removed from the game, at the moment you are caught by the portal, the game will start the counting as if you were killed. So, at later stages of the game where the respawn time could be like 20 seconds (or more), if you die in a mini game at a 10-second mark, you would have only 10 more seconds instead of a full 20 to respawn.
_Upgrade interactions: None.
_When to use: Best used during team fights, where enemies are more likely to remain close enough to the portal. Outside of large engagements, it may be difficult to catch someone, since the portal is obvious and relatively easy to avoid.
_Final notes: A highly unique ultimate capable of removing an enemy naut from the real match for a potentially long amount of time, giving your team a huge advantage. The mini-games themselves are not extremely difficult, but the pressure of knowing a fight is happening without you can easily cause mistakes. Spending like 10 seconds inside a mini-game only to fail and then having to wait for respawn afterward could completely change the outcome of a match!
Evaluation:
- Power: 4 – Strong
- Ease of Use: 3 – Medium (easy to activate, but difficult to catch enemies with)
- Charge Rate: 2 – Slow
- Pros: Can remove an enemy naut from the match for a very long time / highly disruptive during team fights
- Cons: Easy to avoid / skilled or lucky enemies may return surprisingly quickly even after being sucked into the portal
Yuri
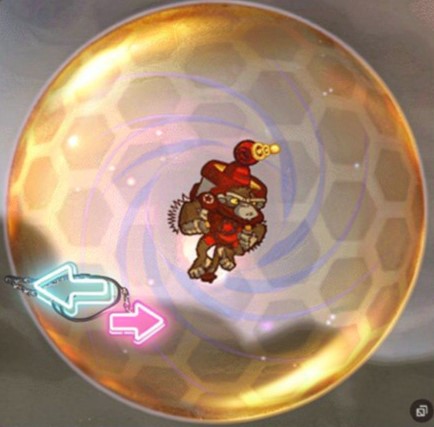
"Rewind"
_Activation: Passive. Once the ultimate meter is ready, your next Time Warp skill also gains the ultimate effect.
_Duration: Same duration as the regular Time Warp skill.
_Effect: Enemy nauts who touch Yuri’s Time Warp bubble have their left and right controls inverted.
_Details: Enemies inside the bubble will have their horizontal movement directions reversed for as long as they remain inside it. Once they leave the bubble, the inverted controls persist for 1 additional second before returning to normal.
Affected enemies display a reversed double-arrow icon above their heads to indicate the “rewind” status effect. Additionally, Yuri himself displays this same icon beneath him whenever the ultimate is ready, warning all players that his next Time Warp will carry the ultimate effect.
Only left and right is inverted — up and down inputs remain unaffected.
_Upgrade interactions: None directly. All regular Time Warp upgrades continue functioning normally, but they do not influence the inversion effect itself.
_When to use: Best used during hectic team fights where enemies have little time to mentally adapt to reversed movement. Combined with allied pressure, the confusion can easily cause positioning mistakes, failed escapes, or accidental movement directly into your team’s attacks.
However, using it aggressively without backup can still be dangerous. Skilled players may adapt quickly to the reversed controls, and if Yuri commits alone against multiple enemies, he may end up badly positioned himself.
It can also be used defensively. During escapes, even a brief moment of reversed movement may be enough to make pursuers accidentally move in the wrong direction and lose the chase.
_Final notes: A simple but extremely annoying ultimate that enhances an already powerful zoning skill. Time Warp is naturally disruptive, and adding temporary reversed movement on top of it can make team fights become chaotic very quickly. The visible warning icon beneath Yuri helps balance the effect, since enemies will know to play more cautiously whenever his ultimate is available.
Evaluation:
- Power: 3 – Medium
- Ease of Use: 5 – Very Easy (simply use Time Warp normally)
- Charge Rate: 3 – Medium
- Pros: Adds a disruptive effect to an already excellent skill / useful both offensively and defensively
- Cons: Enemies are warned when the ultimate is ready, allowing cautious players to play around it
Final considerations:
AND THAT’S IT! None of this is “set in stone” — some ultimates might be a little too strong or too weak, and I may change things later based on feedback. So, what do you guys think? Feel free to disagree, but let’s all be respectful toward each other, okay?
THANK YOU FOR READING!
THANK YOU FOR READING!
More Awesomenauts guides
- Pocket Voltar - A Medic's Guide to the Universe (v1.5)★ 5 (529)16k views366 ♥23 minUpdated Aug 4, 2013
- niki's in-depth guide to Awesomenauts (Updated Dizzy Build)★ 5 (887)13k views848 ♥35 minUpdated Mar 16, 2018
- Yummy Time With Gnaw! (v1.2)★ 5 (268)9.2k views205 ♥23 minUpdated Aug 4, 2013
- THE MANLY MAN GUIDE TO SWOLLDIR★ 5 (268)6k views183 ♥5 minUpdated Aug 9, 2014
- GET READY TO RIDE - MANLY MAN CLUNK GUIDE★ 4 (212)5.9k views147 ♥6 minUpdated Jul 12, 2013
- Welcome to Awesomenauts! Everything you need to know to get started!★ 5 (687)5.6k views260 ♥68 minUpdated Jun 1, 2017



This guide was created by its original author on the Steam Community. Are you the author and want it removed? Request removal.