
Overview
FFXV Textures Decoded Welcome to the comprehensive guide on the textures used by FFXV. From name conventions to recreating the original look of the models and material settings, I’ll teach you what all these disturbing images mean and how to use them.NOW UPDATED with a complete setup for mods!!Expect: A list of texture files used by the game’s models Naming conventions used by said files Explanation of what each file is, and what it actually does How to reapply the textures to models, with special focus on Blender (since it’s more complex of the two) Setting up materials just like in the game’s models Information on what is and isn’t known to be preserved during fbx export and mod building
TEXTURES – the overview
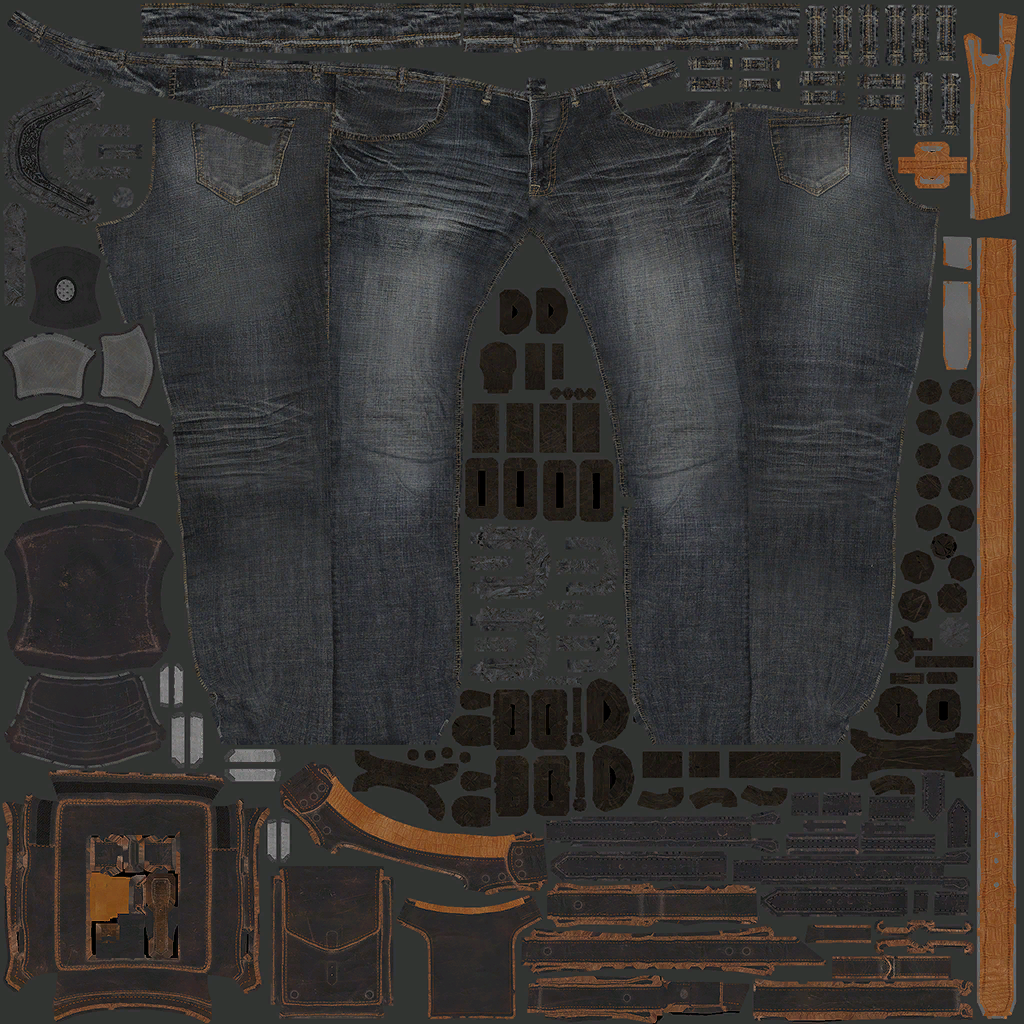
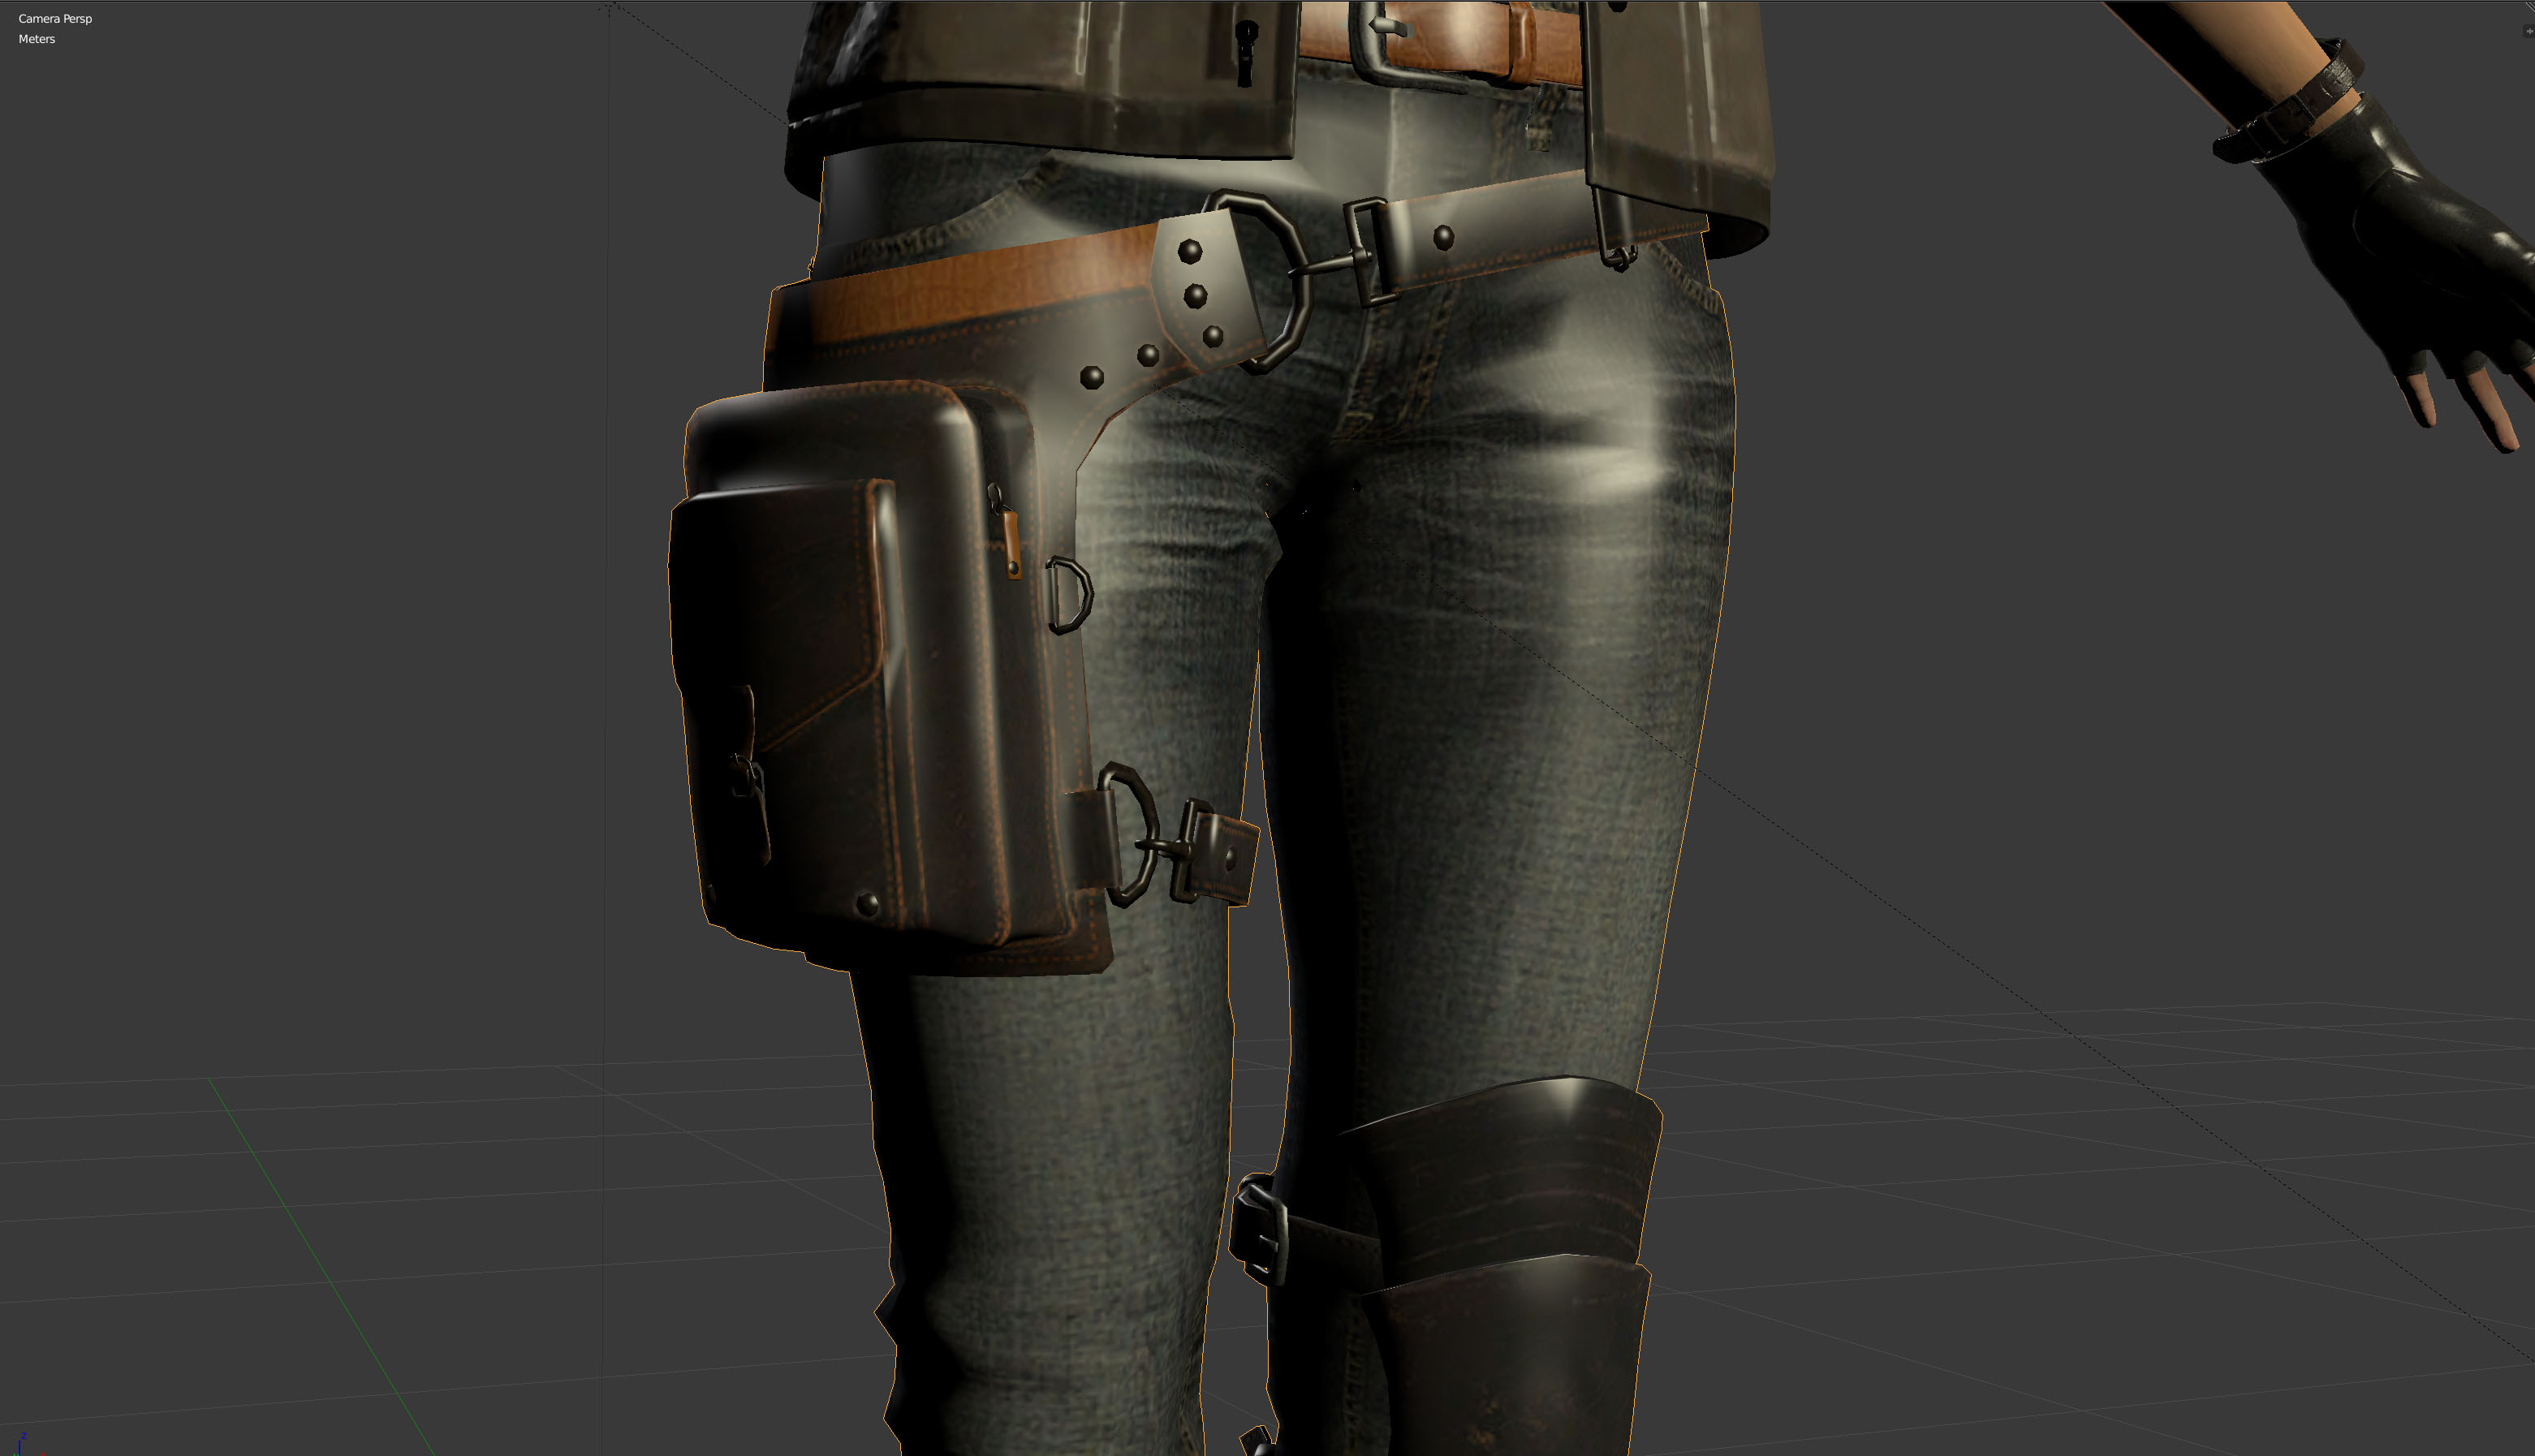
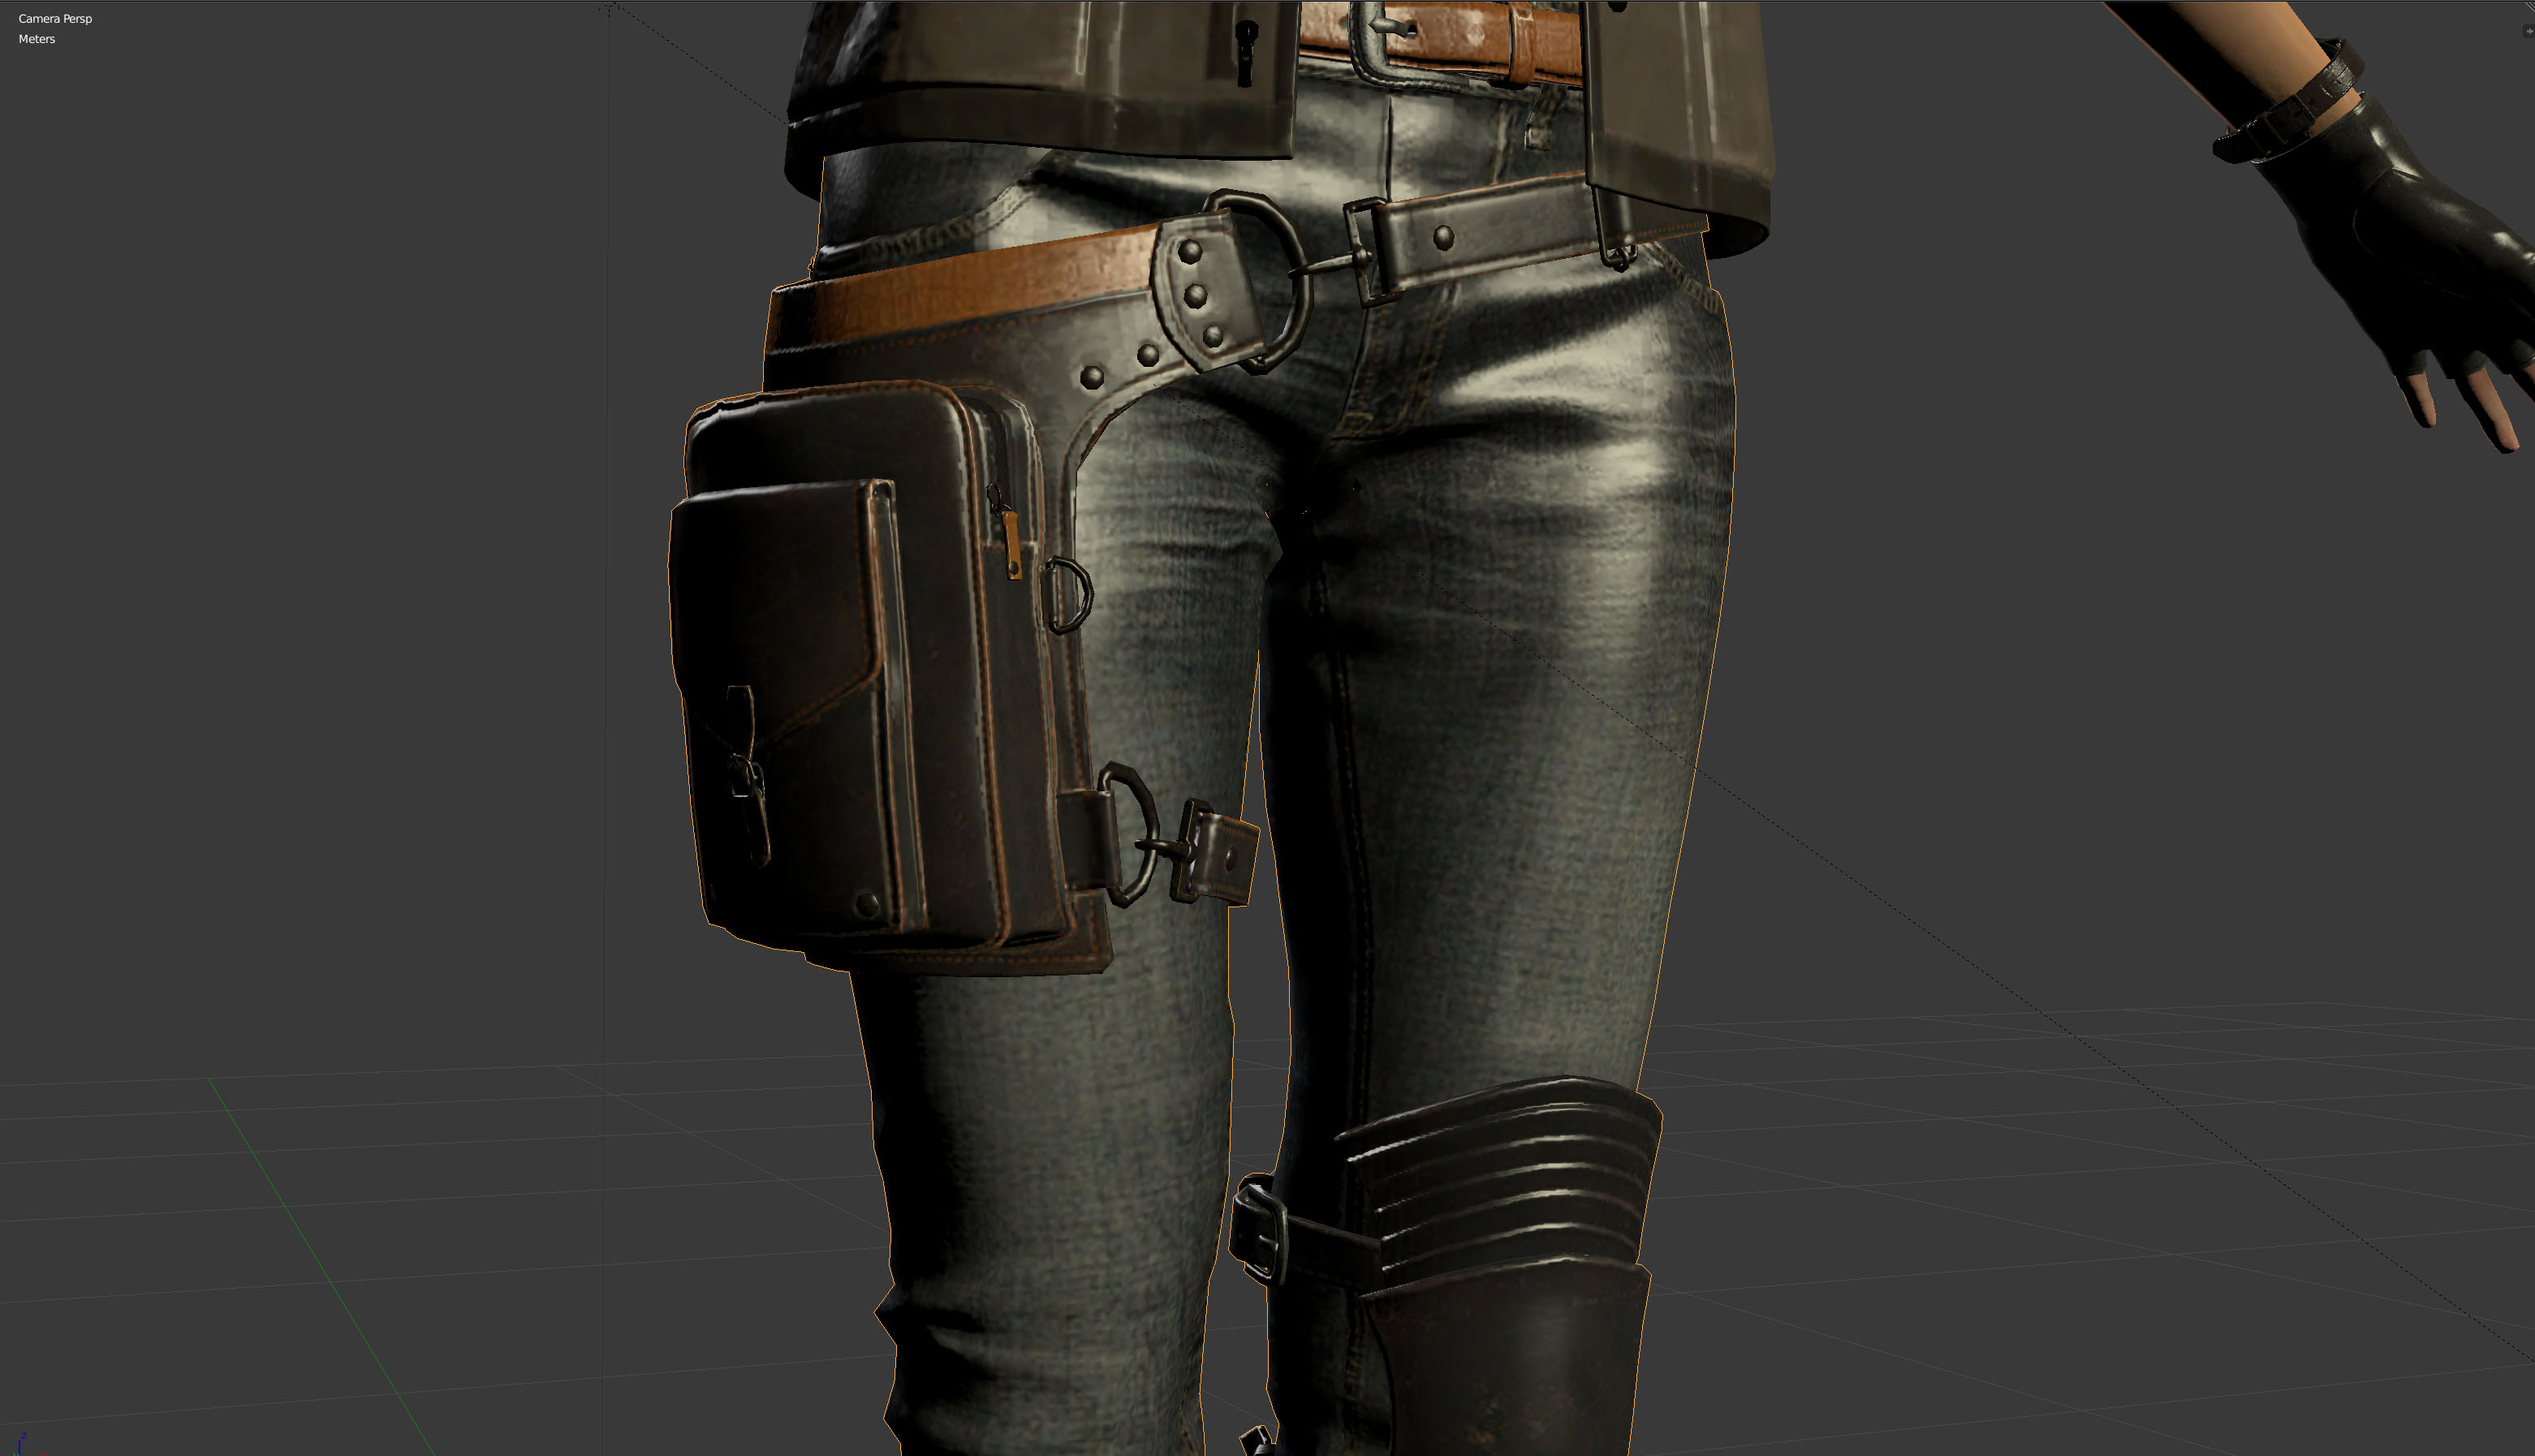
- _b – DIFFUSE. They tell the engine what color the object is
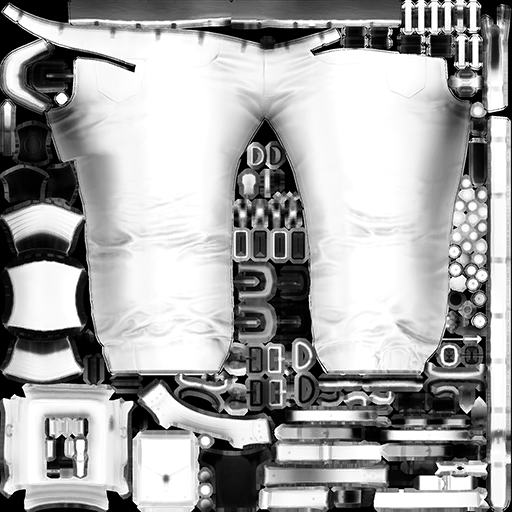
- _n – NORMAL. They create an illusion of surface detail
- _o – OCCLUSION. They provide additional shading
- _a – ALPHA. They inform which areas are transparent
- _m – METALNESS. They differentiate between metal and non-metal
- _r – ROUGHNESS. They decide how polished a surface is
- _s – SPECULAR. These say how shiny things are
- _mm – RECOLOR. These allow for customizing parts of the model by recoloring
- _mrs – METALNESS, ROUGHNESS, SPECULAR. The different channels contain different information and in Blender Internal you need to use them separately
- _e – EMISSIVE. It lets you make things glow
MATERIALS – FFXV
The current version of Blender is 2.8+ (that meaning, we are past the big 2.8 overhaul, 2.82 at the time of writing)
The “new” Blender versions got an overhauled version of the FBX exporter, which allows them to export basic(!) node setups from Cycles/Eevee. Note the word “basic”. Only single image into single shader input is supported, and only the Principled shader.
I have thoroughly tested the new FBX export and it remains barebones and quirky enough to require a guide of its own.
MATERIALS – BASICS
Most material settings are things we will soon be plugging textures into, so it’ll help to establish the basics. Also, if you input these settings first, you’ll be able to much more accurately see the changes your texture files make to your model. And since I’ve got visual examples coming up, I want you to know what you’re looking at! If I skip an option without explaining, assume it’s not relevant and you should probably leave it alone 😉
- WHAT IT IS
Diffuse, albedo or color, are all terms that different software and engines apply to this element. It defines the color of the material, and as such can be called the most basic property it has. In physics terms, it relates to how the material interacts with light resulting in our eyes being able to perceive color. - VALUES
color – It defines the color of the object. Since we’re using image maps for that, leave it white. If you apply color here, it will interact with the texture, so be careful!!
intensity – This tells us how visible the color is. The standard is 0.8 or 1, depending on the software and engine. There isn’t all that much of a difference between these two values. FFXV materials use 0.8.
shader – Since it isn’t the point of this guide, I won’t be going into detail, but basically these are different algorithms the renderer can use to calculate the material’s color. Be aware not all of them are compatibile with the game. You want to leave this at default unless you’ve made changes to your Blender startup file. If you have, swap it back to Lambert.
ramp – This option allows you to use a gradient to control the balance between the image texture and the diffuse color of the material. Let’s leave it be.
- WHAT IT IS
Specularity is essentially the shininess of the surface. Remember, it does not make things reflective, it only controls the specks of light visible on them. Think of it as an artist applying highlights to their work. - VALUES
color – Specular color tells the engine what color these highlights should be. In real world, however, the object doesn’t define what color the highlights will be – the lighting does. So, unless you want to make things unrealistic, leave it white.
intensity – The main setting controlling the shininess of the material. Again, we’re mapping this, so leave it at 0.5. The scale is confusing, I know. It looks like the “normal” value should be either at 0 or 1… But trust me, real world accurate neutral value is right at the middle there.
shader – Much like diffuse shaders are different algorithms for diffuse, specular shaders are algorithms used to calculate highlights. Again stick to the default, which should be CookTorr.
hardness – This setting controls the edge of the highlights. Whether it’s soft and blurry or sharp. Again, there’s a map for this, so you shouldn’t have to mess with it too much. A good neutral value that won’t mess up your spec map is 50.
ramp – In regards to specularity the ramp option works by giving you more control over the shape of the highlights. It’s not exactly realistic, so we’ll ignore it
- WHAT IT IS
Some special, additional options regarding shading. - VALUES
emit – Allows the material to emit light. Unless you specifically *want* light-up models, leave it at zero
ambient – Makes the object the ambient color. The ambient color is generally white, and represents the sort of “basic” color the world is before all other things come into play. You always want this set to zero unless you’re making a glowy material!!
WARNING ABOUT COMMON MISTAKE – When you create a new material Blender will set Ambient value to 1!! MAKE SURE YOU CHANGE IT, otherwise your model will glow in the dark!!
translucency – Immitates the way light can pass through very thin objects, like a sheet of paper. Should be turned off for anything that is not, in fact, paper thin!
shadeless – When you check this option, the object will not be shaded at all. No shadows. None.
- WHAT IT IS
Enables the object to have any transparent parts at all. - VALUES
alpha – Just how see-through the material is
specular – How much the object shines. It’s applied on top of the specular shader, so whatever the spec shader came up gets adjusted by this value.
WARNING ABOUT COMMON MISTAKE – If your material has ANY transparent elements, you need to enable transparency here IN ADDITION TO plugging in an alpha texture. In order for the texture to take effect you ALSO need to set both the alpha and specular sliders to ZERO
- WHAT IT IS
Makes things reflective. - VALUES
reflectivity – as the name implies, the main attribute controlling just how reflective the surface is.
mirror color – everything that’s reflective and not a metal will always have this white. Different metals have different mirror colors.
Fresnel – It controls the way an object’s reflectivity depends on the angle we’re looking from. It’s very technical stuff.
blend – It controls the balance between the object’s color showing through and the reflection. Kind of like applying a mask to the Fresnel effect and making it show more or less.
gloss – it controls whether reflections are sharp or blurry.
THIS IS NO LONGER THE BEST WAY TO APPLY METALNESS TO YOUR FFXV MODS!!
DON’T USE!!!
- WHAT IT IS
Allows for light to penetrate objects - VALUES
IOR – index of refraction, which describes the physical property of the material. Each material is different, and you can look up lists online or use the provided drop down menu for a few popular ones. For a good baseline try setting it to 1.45 or 1.5
blend – The balance between the effects of the SSS and the object’s surface color.
FFXV uses SSS but it won’t be retained on export from Blender through the MO
- WHAT IT IS
Controls the way shadows are rendered on the object - VALUES
RECEIVE TRANSPARENT is what allows the object to receive shadows of partially transparent objects (like hair) properly. Otherwise it will receive the shadow of the entire mesh, not the visible parts. REMEMBER, it’s counterintuitive but TO MAKE YOUR TRANSPARENT OBJECT CAST SHADOWS PROPERLY YOU NEED TO CHECK RECEIVE TRANSPARENT ON THE OBJECT RECEIVING THE SHADOW, NOT THE ONE CASTING IT!!
_b – DIFFUSE

Official files end with _b, no evidence of it being necessary
_n – NORMALS


Note: I have my influence set to 1 here and it looks good on my renders. However, game assets use an influence of 0.35, so you probably want to set that for your mods.
Official files end with _n, YOURS NEEDS TO BE NAMED THE SAME
_o – OCCLUSION
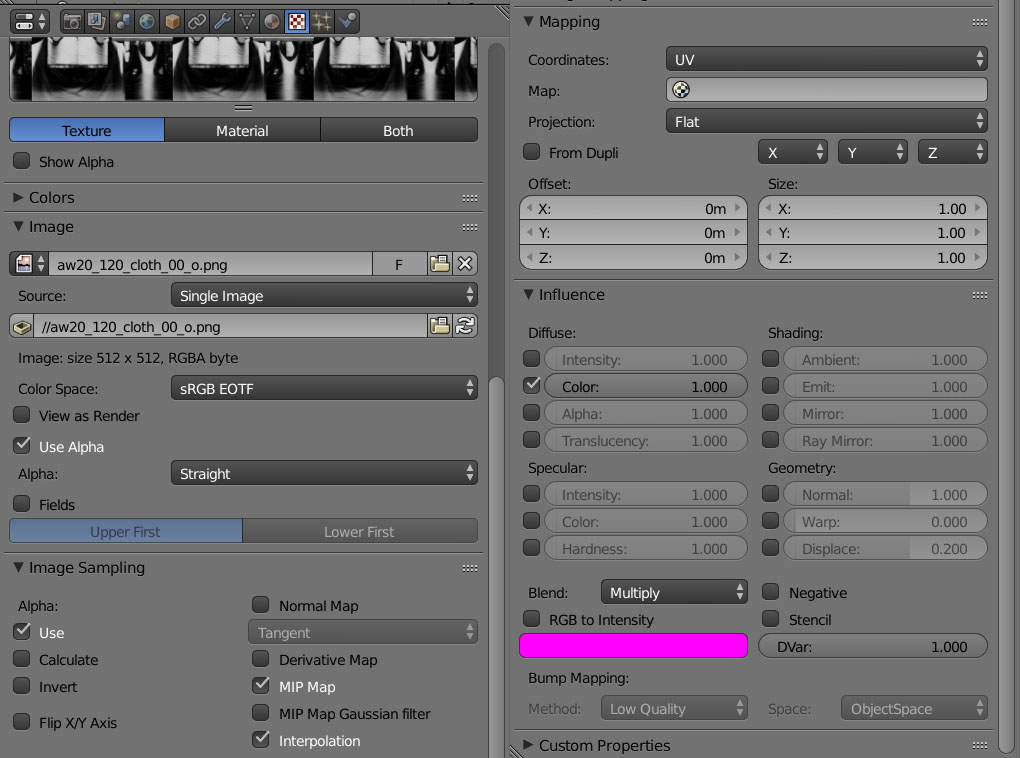
We can only have one texture influence each attribute of the material for the MO, so it’s not possible to plug the occlusion maps the way I showed you above.
IF the occlusion for what you’re working with uses the same UV layout as the diffuse, combine the two in photoshop or other graphics program (AO above diffuse, blend mode set to multiply, for most things you’ll get the best results if you lower the opacity to 30-60%)
IF the occlusion map uses its own UV layout, there is no easy way to combine them.
If you’re willing to put some effort into researching this or you know your way around Blender well enough already, you can often bake the AO onto the Diffuse UV with decent results, but a lot of the time the bake will be difficult/impossible to pull off.
Alternatively, you can draw additional shading on the diffuse by hand.
Official files end with _o, no evidence of it being necessary
_mrs – METALNESS, ROUGHNESS, SPECULAR

Long story short, you can’t. Use an image editor to separate it by channel.
The order of maps is the same as the order the channels are in. Thus:
Red = Metalness
Green = Roughness
Blue = Specular
Official files end with _mrs, no known way to plug it in as is
_m – METALNESS

Plug this one into the “specular color” and set “RGB to intensity” to on.

NOTE: This was not possible for a long time after the MO launched but was fixed at some point.
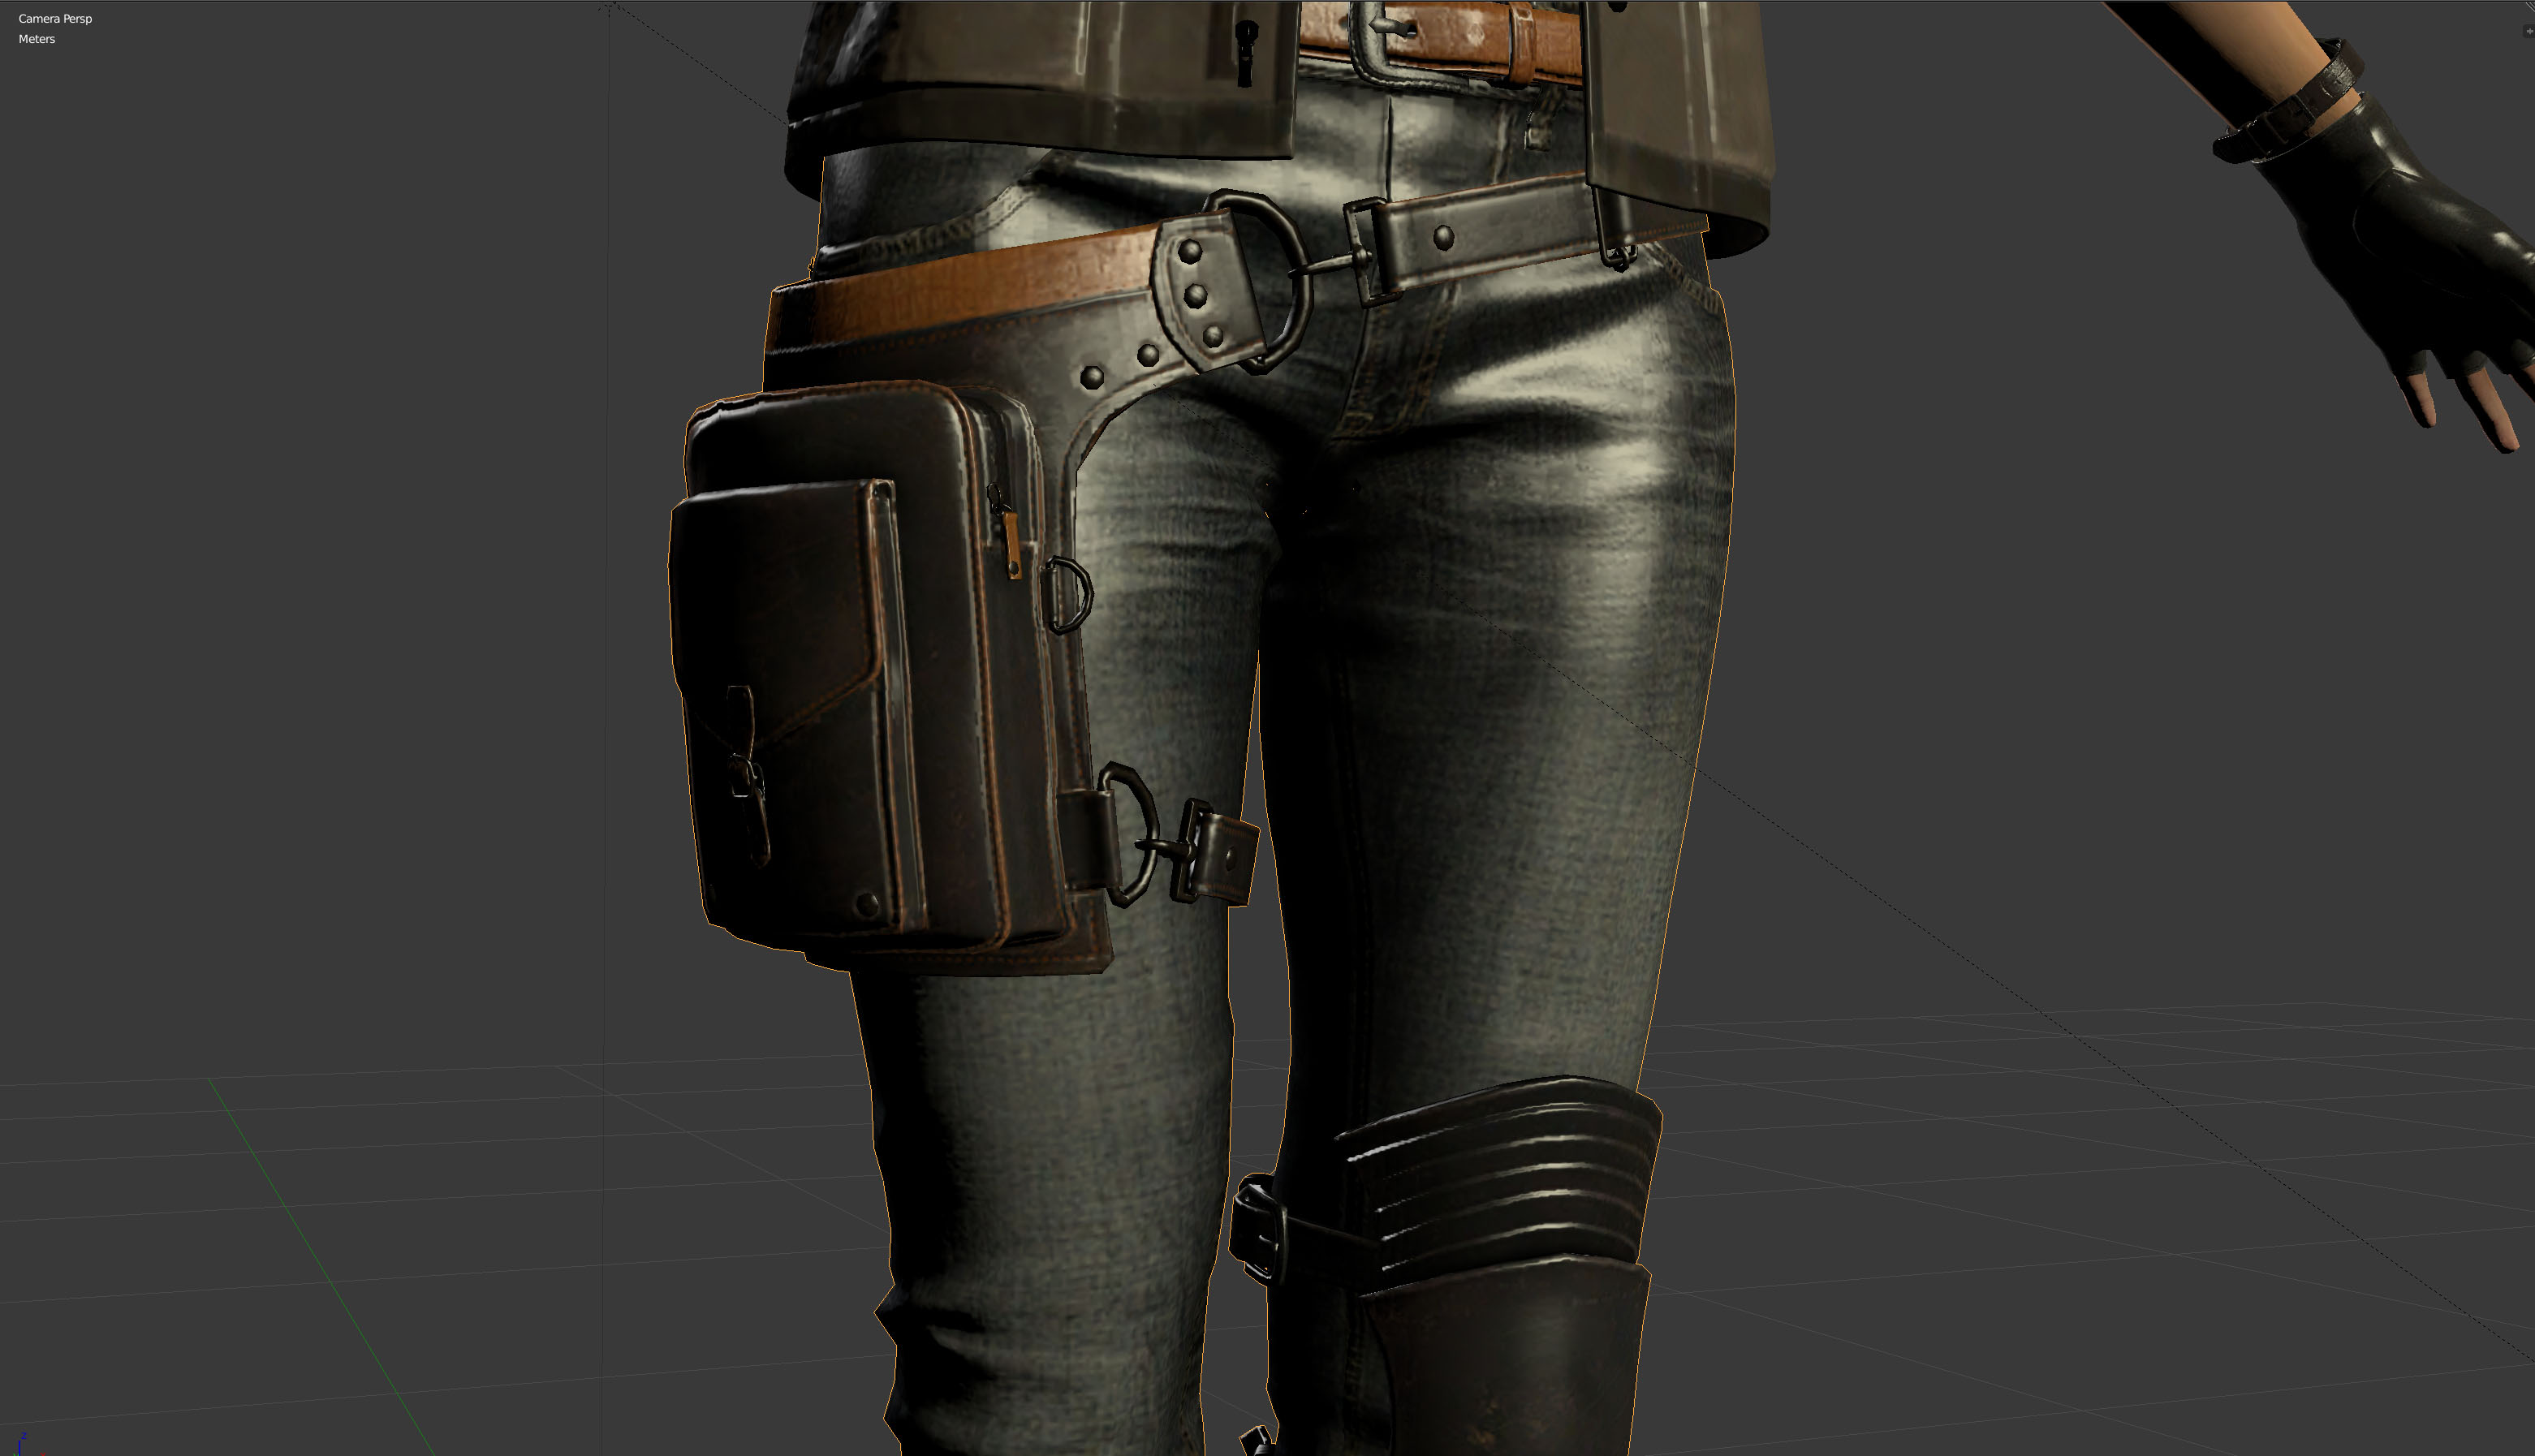
See: buckles on boots, buttons on jacket, gold thread pattern on the cape

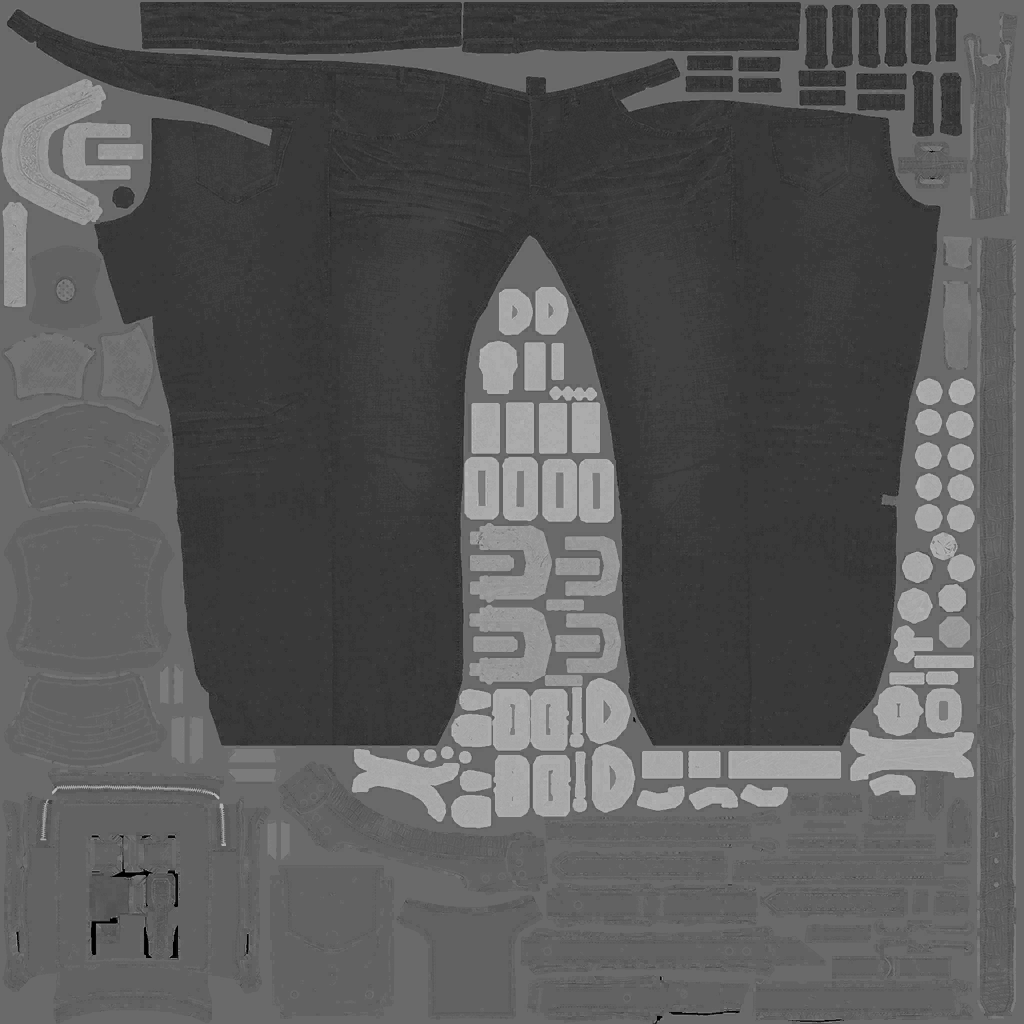
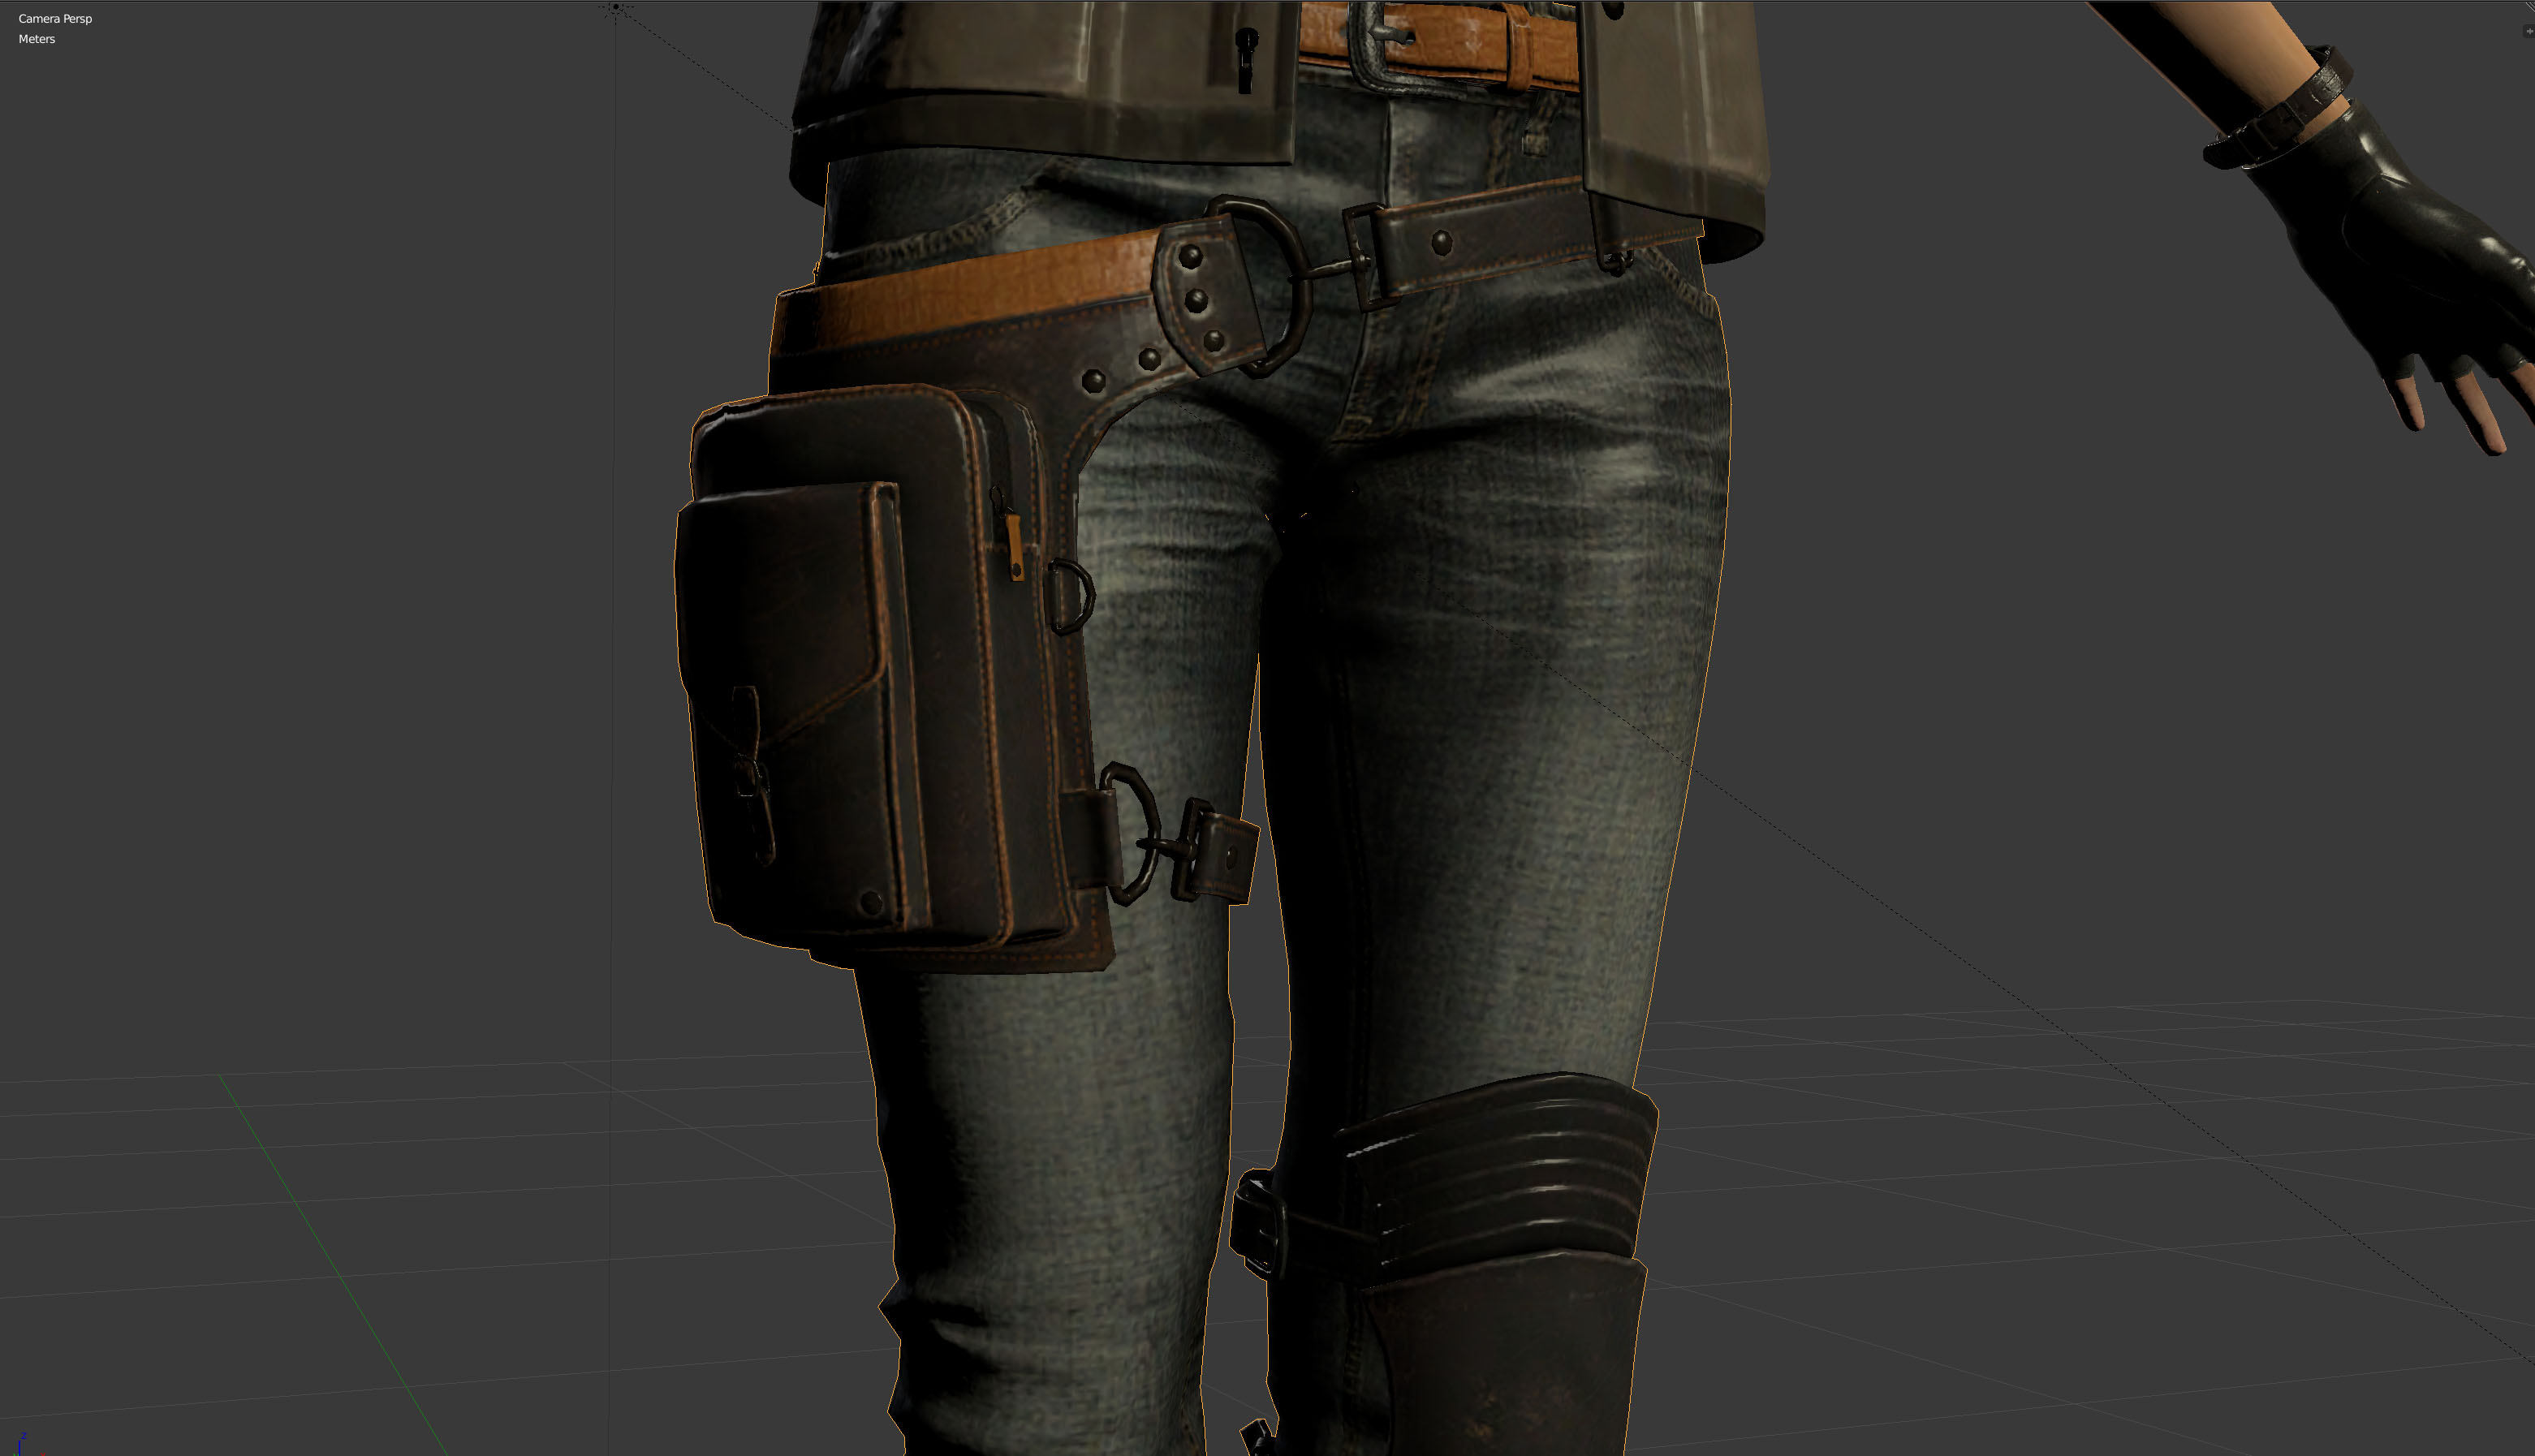
_r – ROUGHNESS

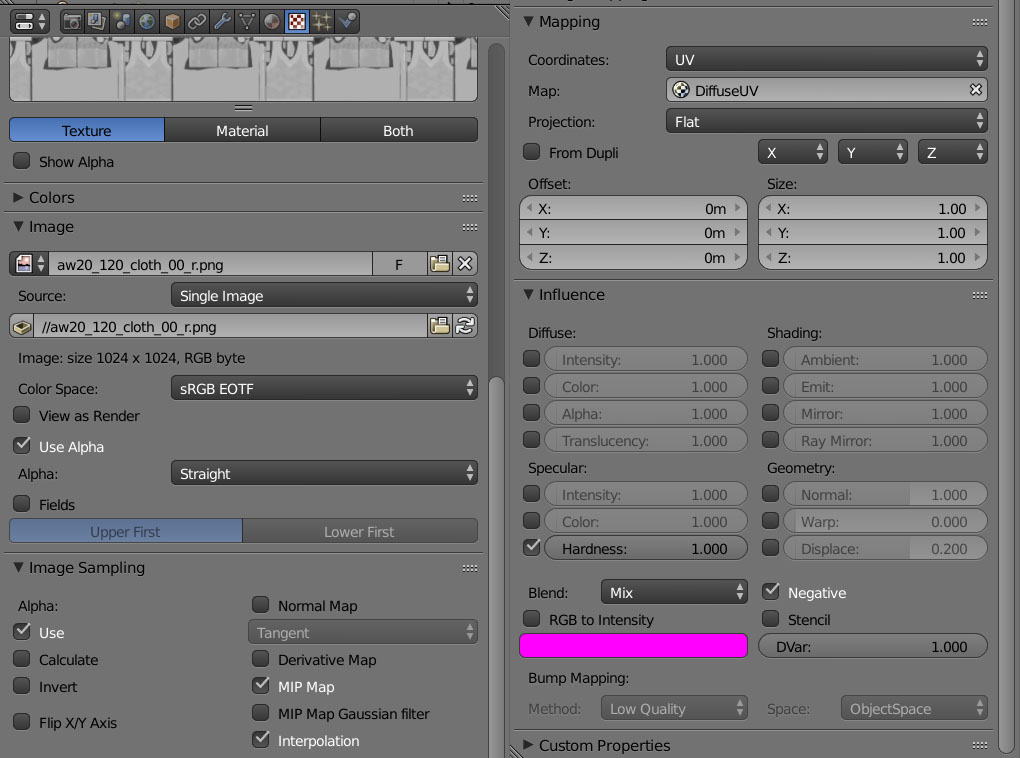
Quite simply, the value we’re working with in Blender Internal, Specular Hardness, is the opposite of Roughness.
Both describe the same thing, but in opposite way. Like how you’d answer differently when asked how bright the sun is (very) than when asked how dark it is (not much)
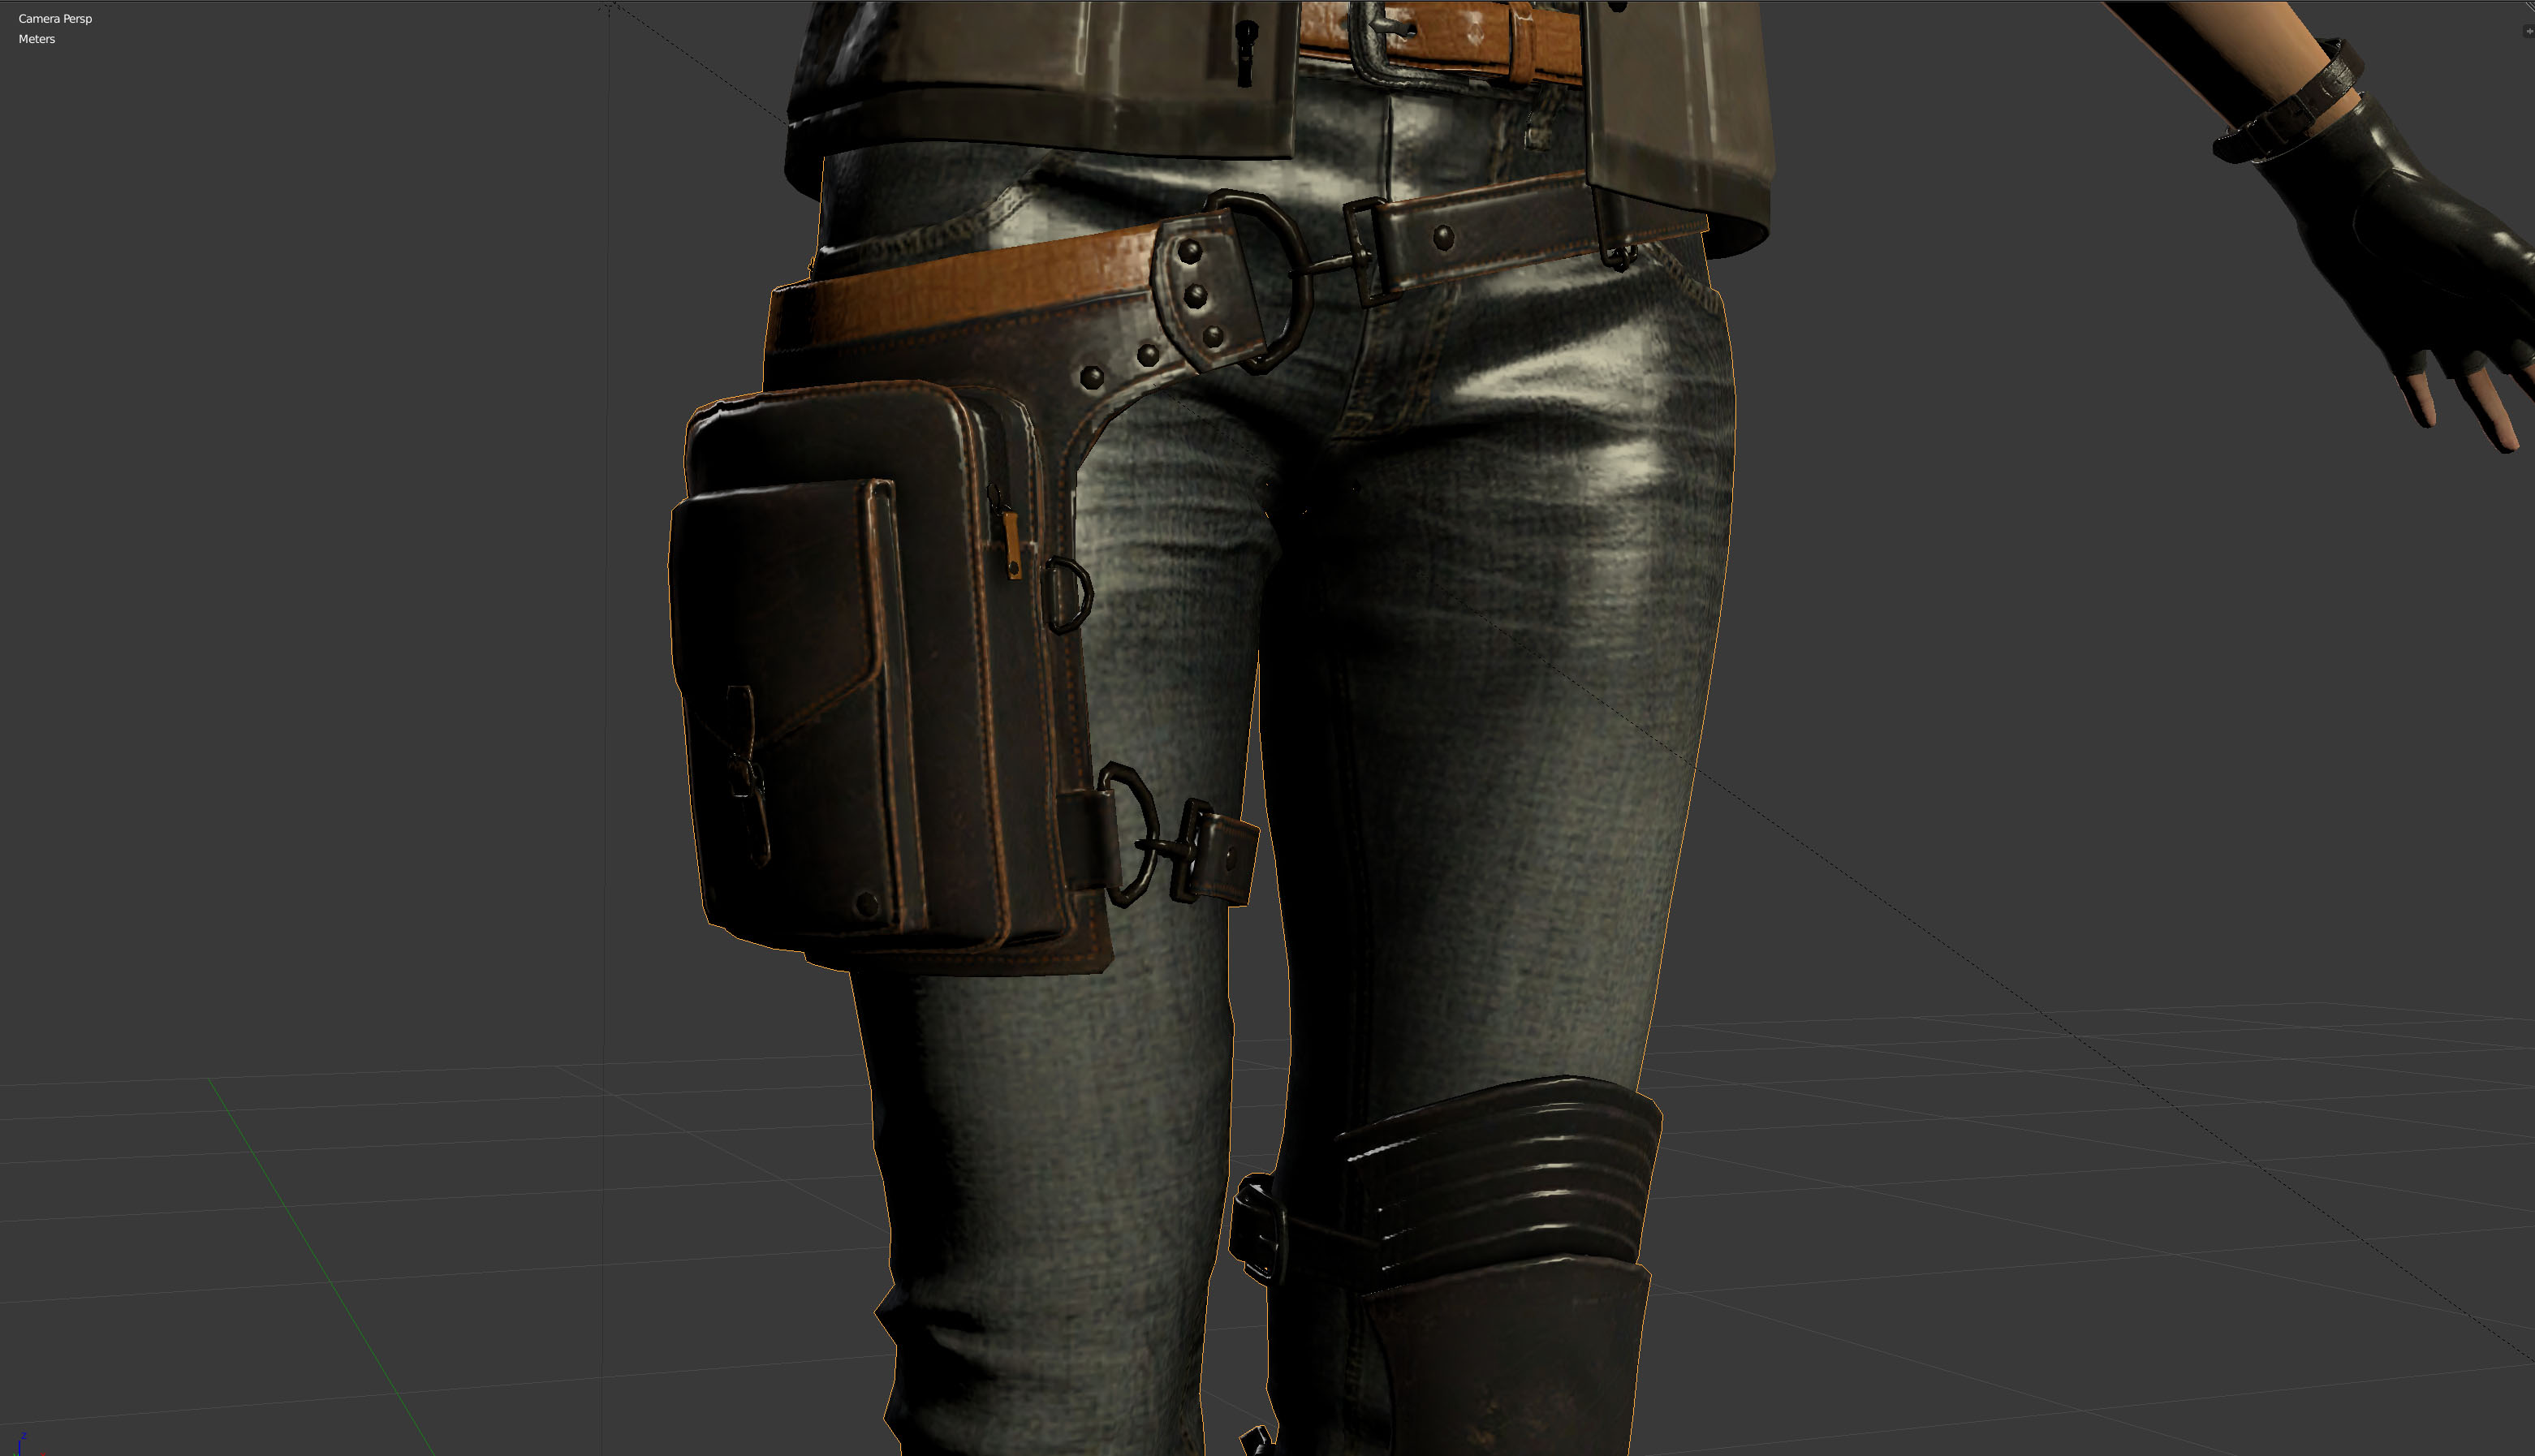
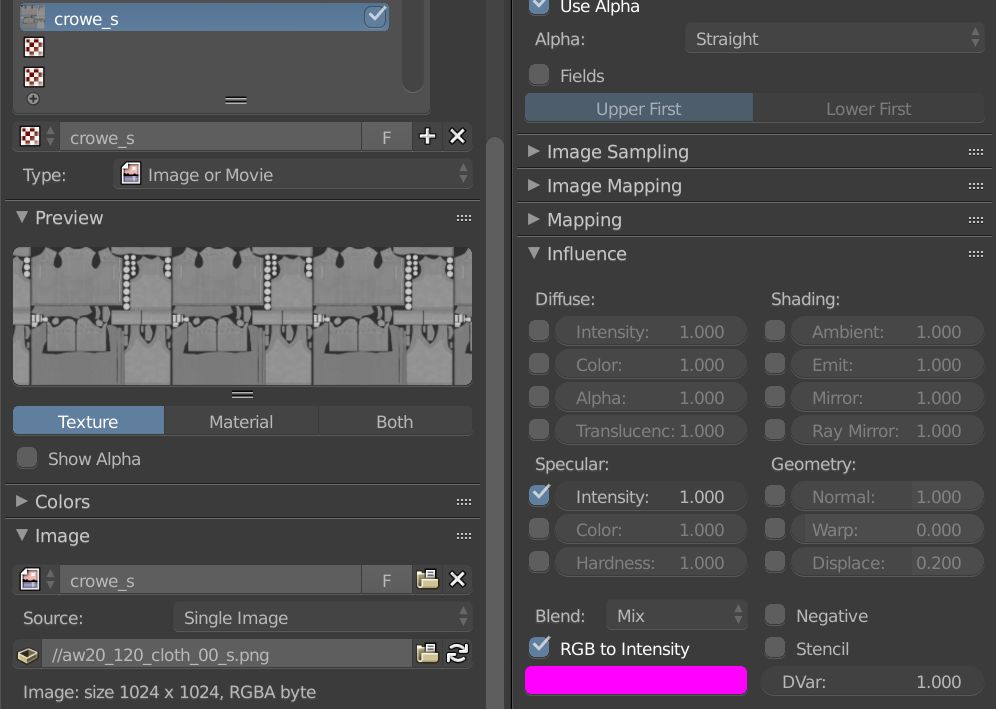
This one is a little complex.
Once you have it separated, you need to invert the colors.
Then, inside Blender, set it up as such:

Influence: Specular Hardness.
Blend: mix
RGB to intensity: ON
Do NOT check Negative (we’ve already done the inverting!)

_s – SPECULAR
For it to work properly in game you need only to set it up like so:
Influence: Specular Intensity
Blend: Mix
RGB to Intensity
_a ALPHA/TRANSPARENCY and hair materials

In order to set up hair transparencies properly, you need a proper diffuse texture as well. Make sure that your diffuse texture contains transparency where necessary.
In case you’re using a hair model you got from FFXV, you presumably unpacked it with Noesis. Take note, that Noesis will output hair diffuse maps differently depending on how you do it. If you unpack the texture by itself (on its own or via batch process), it will output like so:
Note this is WRONG and will not allow you to set up the hair material properly.
You must instead unpack the hair textures by converting the whole model, which will then properly read the material that’s being used and output them like so:


Both the _a and _b textures for hair need to be edited to make up for the limitations of the game’s default shader (that mods are confined to)
Let’s start with the _a map.
It needs to be made binary – that is, only black and white, as opposed to grayscale. The game’s default shader only allows for binary transparency, meaning things cannot be only partially translucent.
Open the _a texture in any graphics program of your choice, such as Photoshop.
In [IMAGE]=>[ADJUSTMENTS] you’ll find a [THRESHOLD] option (location and name will vary depending on software)
Once you click it you’ll be presented with a view of the image’s levels and a slider underneath. Adjust it to your liking and confirm your choice. Remember, everything that’s white will be visible, and everything that’s black will not.
Here’s a finished _a map edit:
Now we’ll edit the _b map.

Once you have your texture with transparency, we need to make sure that it also only features *binary* transparency and not partial. That is, every pixel needs to be either fully visible or fully invisible.
If you’re working with the game’s original textures, the best way to do that is to open the image in Photoshop or a similar graphics editor that supports layers, and then duplicate the layer until duplicating it no longer visibly changes the image. To see it easier, you can temporarily put a solid color layer underneath, but remember to delete it before you save the image!
A fixed _b map looks like this:

First, make sure your material tab has transparency enabled properly. Remember about the alpha and specular sliders!
Second, you need to add your diffuse texture to the material twice, and your alpha texture once.
Set up the first copy of the diffuse as usual (look at the _B texture section above)
Set up the second copy of the diffuse texture like this:
Now, set up the alpha texture like this:

NOTE this will not look correct in the viewport! This is a mod setup, and will look good in the game.
Here is an example of Prompto’s hair set up in Blender the way it should be for a mod:


Because of the binary alpha limitation, the game has issues rescaling these textures, especially in Ansel. The typical problems will involve jagged edges on the transparency.
It can be eliminated by keeping your hair textures no larger than 1024 pixels wide.
_e EMISSIVE + material setup
An emissive texture is the same as an alpha texture, and if you’re making your own or using ones coming from a different game, can be interchangeable.
They also need to be binary as that is the only kind of emission the default shader lets us use on mods.
If you need to, edit your emissive map the same way you’d edit an alpha map (see section above)
To prepare a glowing object, you must set the following options in your material tab:
You can see I’ve set up both Diffuse and Specular to be green. This is the place where you want to set whatever color you want your glowing object to be so adjust accordingly!


Because setting up an emissive material requires setting the Ambient option to 1, it *will* make the entire object glow in the dark.
If you want only part of a model to glow, there are two ways.
First option, if the glowing parts are a physically separate part, edit the model to separate them into their own mesh. The glowing mesh gets the emissive material as detailed in this section, the other mesh keeps the regular one.
Second option, you can use transparency to turn off the parts of the mesh that you don’t want to glow.
You’ll need to duplicate your mesh. The original you set up as usual, without the emission.
The second one you set up as emissive, and also transparent – you can use your _e texture as an alpha texture for that. That way only the glowing parts will remain visible.
This is what a setup like that looks like in action:
