Overview
Tips from a person who defeated this bossfight 10+ times on how to master Sans completely
Introduction
Although I know a lot, and I mean A LOT, about the Sans bossfight, so much that I usually defeat him in my first attempt nearly every time.
My first win against Sans required ~24 attempts (Including the winning one), my second win took ~10 attempts, and my third win took ~30 attempts (due to another reason that I will discuss later on in this guide)
And the next 2 wins required ~7 attempts
And every win after that took 1-2 attempts, with over 3 attempts being a rare occurence
Now, my guide will tell you hints on and might even walk you through the Sans fight, and will decrease your attempts (hopefully, if you listen) by a lot
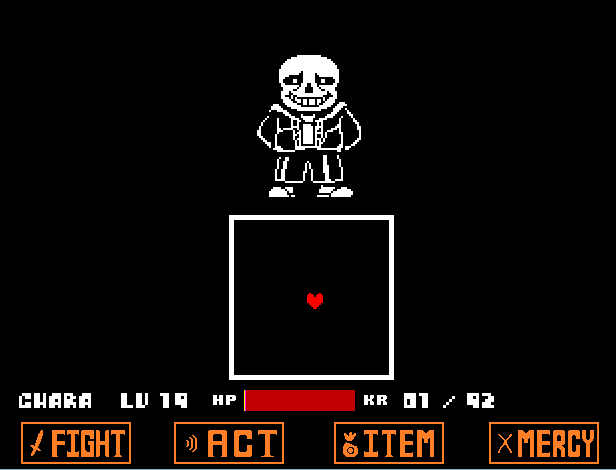
Now I will include pictures after finishing the guide, but not yet (due to me wanting to write, not to take photos)
Preparation
Now *munch*, this is where you *munch* get some food items, I would recommend getting all 3 snowman pieces (and don’t you dare tell me you used them already), and you probably have the pie (unless you used it during the undyne fight then you might be screwed), now go to Alphys’s Lab, and get the Instant Noodles, and then go to the Burnt Pan place in the Hotlands, I would recommend (but it’s not completely necessary), to get 3 Sea Teas (you can only stack up the speed 3 times), and, if your inventory has enough space, fill it up with the Mettaton Face Steak and the rest should be Legendary Hero *munch* Sandwiches, oh, sorry, I was just eating some dry Instant *munch* Noodles, don’t mind me, I’ll probably be done with them in the next section
Extra Related Hints:
1- Equipping the Burnt Pan adds 4 HP heal for any consumable
EX: Face Steak heals 64HP, Snowpiece heals 49HP, Sea Tea heals 14HP (you get where I’m going with this)
2- Sans has only 1HP so you don’t need the Real Knife to kill him
3- Consuming 3 Sea Teas makes the fight a lot easier and makes it require way less input, put it doesn’t make it any faster (sadly)
4- Sans will try to trick you 3 times at the beginning of the bossfight on different attempts, the first time is surprising you with his First Attack, the second time is cutting halfway through his speech to surprise you with his First Attack again, and the third time is when he shortens his speech to just 1 word, which will trick players who just keep pressing Z&X at the speech into accidentally surprising themselves
5- You can get 3 snowman pieces in total by talking to the snowman 3 times (it will also kill him, but killing him is not necessary for a genocide run to succeed)
First Phase
All I got here are tips, just read them
First Attack:
-Holding Up will let you dodge the Gravity Jump at the beginning, but press it too early and you will fall back into it
-Never move left or right during this attack, it will confuse you during the Gaster Blaster part (the laser shooting heads)
-Pattern for Gaster Blasters is: Middle, Up or Down (you can also go left or right but that will just confuse the pattern), Middle, Up or Down
-Every part of the First Attack begins right after the previous one ends, so you got to be ready at all times
In the first phase (before Sans spares you):
-NEVER, I quote, NEVER, and I quote, Never use any consumables during this phase, even if only have 1HP, it’s better for you to die in the first phase than anywhere else in the bossfight, because you will waste less times, and you will die in the second phase unless you can go through the first phase without hitting a thing
-He will always have the same pattern of attacks (unless you use any healing items or waste your turn doing something other than FIGHTing, then he will reuse random attacks)
-Unlike the first attack, the hopping attack, the bone zone attack (where long bones are on the top and short bones are on the bottom and they move at opposite directions), all of Sans’ attacks have random patterns (but he still has the same pattern of attacks)
-This phase is easier and longer than the second phase, if you, use only FIGHT, in all your turns, then Sans will attack you 12 times, after those twelve times, he will give you an infinite amount of free turns, in the time I like to call, the SPARE time, this is where you use any healing items you want to use, and even ACT –> [Check] Sans if you haven’t already, now, I recommend sparing Sans if you want a new ending*, but if you want to continue on with genocide, and/or want to continue this fight, then just FIGHT Sans, also, if you have the 3 Sea Teas like I told you to, then use them in this turn, and make sure they’re the first items you use, so you don’t waste any valuable Legendary Heros/Snowman Pieces
And BTW, only use Sea Tea, L.Hero and SnowPiece during this time, you should have enough for a full heal, if you listened to me so far
Now, if you are reading this tutorial while doing the bossfight (which I hope you’re not), then I recommend fully reading the rest of the tutorial before ending the SPARE time, Because, if you read and FIGHT at the same time, you WILL have a bad time, and this tutorial shouldn’t let you have a bad time
Also, use the SPARE time to rest, drink a soda, eat some dry instant noodles, or consume some doritois**, and when you are ready and mentally prepared, click FIGHT
* SPOILER: I know sparing Sans kills you, and no, I’m not trolling people into doing it, it actually is an ending because Sans tells you that, if you are really friends with him, then you will accept your fate and [Reset] the game, but, seeing how people got this far in the Genocide Path and don’t want to quit, 99.9% of people won’t do that
** It’s a Jobel reference, if you don’t know who he is, then you don’t watch Vinesauce, or don’t know that Joel’s nickname is Jobel, the reference is in his Facade Corruptions 2 video
Second Phase
This phase is pure hell, it requires many attempts to master, and if you didn’t get used to the first phase, you will definitely fail in this one (unless you get lucky)
Obey the following rules and you don’t get hurt:
1- Never press FIGHT if you have less than 4HP, unless you’re used to this phase/are depending on your luck
2- Save the Instant Noodles and/or Pie (Dammit Game Grumps) for the Final Attack, also save the steak for after those 2 items as a last resort, cause you WILL need full/near full health for this
3- If you have used the Sea Tea before this phase starts, then congrats, you are one of the lucky few who will need a tiny amount of control input to actually finish this phase, but, you can also be one of the unlucky few who can’t get used to all this speed, basically, never hold any of the button during this phase, and if you do need to hold them, then only hold them for a lil amount of time, unless you are faced with an attack that requires holding a button to evade, also, a hint for people who used the Sea Tea, pressing [X] slows you down
4- Never rest for a single second during this phase, the only way to rest, is to NOT press Z when Sans finishes talking, the speech bubble will be there forever*, you can also rest during the time where there’s only the one bone at the top of the menu, but that only lasts through one FIGHT turn
Now, while following these rules, you should get used to the bones on the menu, if you keep using FIGHT during this phase, then that will be easy, but switching over to ITEM will disorient you, so that’s why you should (but not necessarily have to) heal only when you are below 30HP.
Now, here’s a rule this game has, a rule barely anyone notices (unless they went through this bossfight), a rule that the game uses to make itself more unique than the rest
Holding 2 unparallel direction, which include:
Up-Right
Up-Left
Down-Right
Down-Left
It will make you go 2 times as fast, you may notice it unconciously, but that’s very important, cause you can’t go through the final attack without that
Also, Pressing/Holding [X] will slow you down, even if you never used the Sea Tea
BTW, you only need to click FIGHT 9 more times when you start this phase
Here are some milestones:
After 0 FIGHT clicks: Top-left menu bone appears
After 2 FIGHT click: Top-left menu bone disappears, bottom menu bones appear
After 4 FIGHT clicks: Top-left bone comes back
After 8 FIGHT clicks: Heal for Final Attack
After 9 FIGHT clicks: Final Attack begins
The Gravity Bones Attack (when Sans slams you to the wall and summons bones relatively under you):
I was gonna include an entire section for this attack, but I’ll just summarize it
You will only experience this attack 3-5 times if you follow my instructions
All you have to do in this attack, is hold all 4 arrow keys, the game only detects 3 directions during this attack, and the one that is the same as the gravity direction gets disabled, also, the game will detect your key input, despite the gravity switching, this way of doing it will always work (with a special case in the Final Attack)
Another Hint: Stay in the middle at all times unless there are gaster blasters, or the attack requires you to move, jump to avoid the bones only, and remember, Blue Stop Signs
The slightest mistake and you can mess this whole phase up, an estimate of 79% of failed attempts are in this phase, with 41% of failed attempts at the Final Attack*
Before you click FIGHT a 9th time, Think about the following:
1- If Sans didn’t say “now would be a good time to die”, then the Final Attack is not the next attack
2- If you are at ~80HP or more, then you’re ready, never heal when you’re 80HP and over, or you might mess up and have even less HP
3- Use the Instant Noodles first (if you need to heal), if you survive the next attack, and still have 80HP or more, then click FIGHT, otherwise, use the Steak/Pie depending on your HP, if the Steak will fully heal you, then use it, if the steak falls short of fully healing you by 5HP or less, then still use it, if the Steak will not do the above, then use the Pie
Now, before I explain the Final Attack, here’s an attack pattern:
1- Random Teleporting Attacks
2- Tiny Fast Free Moving Gaster Blasters (Laser Skulls)
3- Random Teleporting Attacks
4- Slow and Short Gravity Bones Attack
5- Medium-Speed and Short Gravity Bones Attack
6- Normal Free Moving Gaster Blasters
7- The Dodging Opposite Bones where you spin around attack (where the left side of the bones goes down and the right side goes up, I recommend spinning anti-clockwise to avoid it)
I recommend spinning around the middle to avoid them, learn to time it right
8- Random Teleporting Attacks
9- Fast and Medium-sized Gravity Bones Attack
And the rest will be random, and here are possible attacks:
1- Normal Free Moving Gaster Blasters
2- Random Teleporting Attacks
3- Fast and Medium-sized Gravity Bones Attack
Now, once you are ready for the final attack, remember the following:
1- Diagonal Directions are faster than up, down, left or right
2- Holding [X] slows you down
3- Your directions remain the same during Abnormal Gravities (like one that attracts you to the right/left/up side of the evading screen)
4- Your strategy for the Gravity Bones and Dodging Bones attack will remain the same, also, you will need to remember how to dodge bones like you did in the first phase
Now, finally, press that FIGHT button, and begin the treacherous Final Attack.
Final Attack
You have to memorize the pattern for this attack, there’s no other way around it
1- Fast, Large Gravity Bones (Which extends for 4 jumps, counted them so you can time it)
2- The Dodging Opposite Bones where you spin around attack (you will need to spin anti-clockwise ~3 times)
3- The Ultimate Dodging Attack
Pattern:
Down, Up, Down, Up, Down, Up, Down, Middle, Down, Up, Down, Up, Down, Up, Down, Up, Down, Middle
Remember: Tips of the bone do not have hitboxes, they do not damage you, but the rest of the bone will
At the End of the Ultimate Dodging Attack, once you hit the end, wait ~1 second before jumping, otherwise you will land back on the Gravity Bones, also, do NOT hold all 4 arrows keys like the other ones
4- Fast Large Dual Gravity Bones attack
Do NOT hold all 4 arrows keys, dodge them yourself, you will get ~0.8 seconds to jump, and no, you don’t have to wait, cause you will never land back on them due to Sans teleporting you after you jump
And Finally:
5- The Spiral Gaster Blaster Attack
Like aforementioned, Remember to hold diagonal directions during this (but not at all times, you can’t spiral around by only using 4 directions), this attack is the leading cause of death in the Final Attack, it’s literal hell, and, I forgot to mention this, but the Blasts from the Gaster Blasters have a bigger hitbox that their sprite, and it shrinks down (meaning it doesn’t disappear instantly), the Skulls themselves do not damage you when you hit them (but if you do try to hit them, the Blasts will catch up)
Once you dodge all these attacks, Sans will go completely insane and waste all the remains of their energy draining you down to 1HP, like the menu bones, you can’t die during this, and he will never drain the same amount of HP everytime he does it, it can range from ~22HP Drained to 91HP drained (if you try to increase his damage dealt)
After that, you will face his Special Attack
I recommend not moving
And, just for demonstration purposes, I included a video, but beware, this video is old and I didn’t know some of these hints when recording it, also, the audio is terrible, which is why I replaced it by music, and this video also includes the ending of the bossfight, so don’t watch the end unless you want spoilers
And now, you should have a good time during this bossfight, and may your nightmare end soon, my friend
Final Words from Me
I will add more patterns, images and tips to this guide as time flows, so don’t worry about me forgetting about something, and please, if you deconfirm something here, then don’t hesitate to comment
Also I forgot to mention, the reason it took me more attempts the third time than the second time and the first time is because when you die during this bossfight, your self-confidence, DETERMINATION and determination drop more and more, so please, know that the only reason you failed that attempt, is because you didn’t know what to expect and you messed up slightly, and know that when you come back, you will be stronger and more DETERMINED than ever.
Some of my info came from here:
[link]
but it mostly came from experience and watching other people play that bossfight
Also, For Dodging Practice:
[link]
(It might glitch and the HitBox might be a bit different, but the tips of the bones are increased in size which allows you to practice going through them during dodging)