
Overview
This guide aims to offer thorough information about the varios soldiers, vehicles, aircraft and structures employed by the Allies Faction in Red Alert 3. It does neither include information about units from the “Uprising” expansion pack, nor detailed strategies for the faction itself.
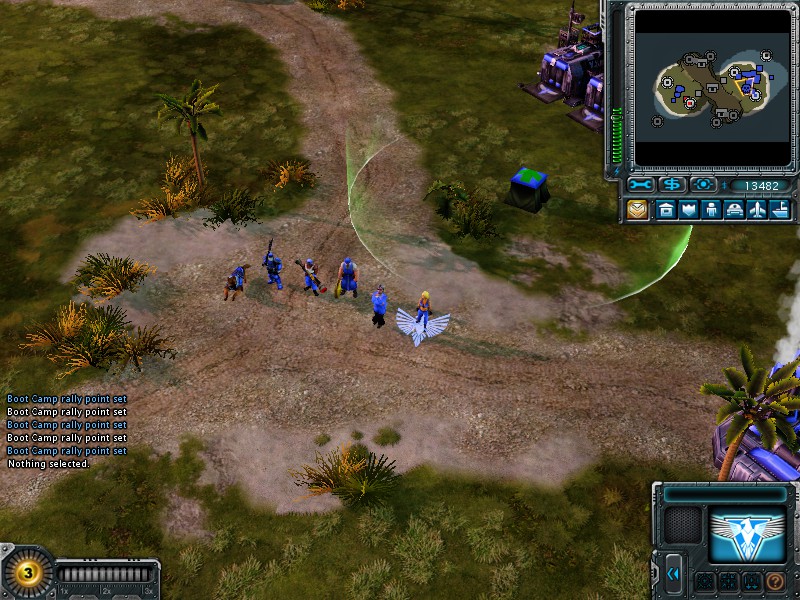
Infantry
From left to right: Attack Dog, Peacekeeper, Jav. Soldier, Engineer, Spy, Tanya
Attack Dog
Role: Anti-Infantry, Anti-Infiltration, Scouting
Cost: 200
Build Time: 2 sec.
Constructed in: Boot Camp
Amphibious
Weapon: Teeth
Melee Attack. Insta-kills any infantry unit (exception: Tesla Troopers). Can not attack non-infantry units.
Alt. Ability: Bark
Stuns nearby infantry. The attack dog itself also can not move for a short moment after using this ability, but affected infantry remains stunned slightly longer than the dog.
Comments: Superb scouts. Can sniff out camouflaged Allied Spies. Haves less armor but are faster than Soviet Attack Bears. Use their bark ability to stun enemy infantry and then mop them up with peacekeepers or other dogs. Can not attack Tesla Troopers, but can nonetheless stun them.
Peacekeeper
Role : Anti-Infantry/Anti Garrison
Cost : 300
Build Time: 5 sec.
Constructed in: Boot Camp
Weapon: Shotgun
Effective against infantry. Damage increases with proximity to target. May knock back enemies when fired at close range. Deals splash damage.
Alt Ability: Riot Shield (Toogle)
Switches from Shotgun to Riot Shield. Peacekeepers using the riot shield can not attack and move slower but also take significantly less damage. When using riot shields, peacekeepers may storm garissoned buildings.
Comments: The Peacekeepers’ shotgun is effective against both mass infantry (thanks to its splash damage) and single targets (due to the knockback). They also deal a surprising amount of damage against structures when at point blank.
On the downside, Peacekeepers need to get up close for optimal damage – and while their riot shields at least allow them to absorb large amounts of fire, they also slow them down to a snail’s pace.
Riot shields make the peacekeeper immune to many insta-kill attacks, i.e. Shinobis’ shuriken and Natasha’s sniper fire.
Javelin Soldier
Role: Anti-Vehicle, Anti-Aircraft, Anti-Structure
Cost: 300
Build Time: 5 sec.
Constructed in: Boot Camp
Weapon: Rocket Launcher
Effective against vehicles, ships, aircraft, and structures. Ineffective against infantry.
Alt Ability: Laser Lock (Toogle)
Dramatically increases accuracy and rate of fire of the rocket launcher. However, the javeline soldier must spend some seconds locking on to the target and the process must be repeated when switching to a new target of when the Javelin soldier has moved.
Comments: The Allied answer to enemy armor. Javelin soldiers make short process of vehicles but are utterly ineffective against other infantry.They also scream like little girls whenever they see attack bears or dogs.
When fighting enemy tanks, keep in mind that the latter can instakill your Javelin soldiers by running them over. Try garissoning them in neutral structures or splitting them up to maximize their survival chances.
The Laser Lock ability is best used against structures, Kirovs and MCVs, as other units can usually get out of range easily.
Engineer
Role: Support/ Aggressive Take-Over
Cost: 500
Build Time: 10 seconds
Constructed in: Boot Camp
Amphibious
Weapon: None
Main Ability: Capture/Repair
The engineer’s main ability depends on which structure it is used on (See addendum). However, the ability always requires the engineers to be next to the structure in question and removes the engineer from play when finished.
Alt Ability: Medical Tent (Toogle)
The engineer deploys a hospital tent that heals all player-owned or allied infantry units near it. The engineer can not move while the tent is deployed
Comments: The Swiss Army Knife of your forces. Although the engineer is completely unarmed and thus should ideally be escorted by one or two peacekeepers, his usefulness can not be overstated, as capturing structures such as oil rigs and garages can often turn the tide of battle. Likewise, the attempt to capture and subsequently sell or drive away the enemies’ construction yard/MCV is as risky as it is rewarding.
The use of the Medical tent is debatable: While the ability to heal infantry units opens up many strategies, most infantry units are either alive or dead, with very few stuck in between.
Placing an engineer into a Multigunner IFVs will give the latter a repair crane, allowing it repair the player’s vehicles and to remove terror drones.
Spy
Role: Infiltration
Cost: 1000
Buid Time: 10 sec.
Constructed in: Boot Camp
Requires: Heightened Clearance
Amphibious
Weapon: None
Ability: Disguise
The player may disguise the spy as any other infantry unit by right-clicking on the unit with the Spy selected. Can be sniffed out by Attack Bears/Dogs and Imperial Sunburst Drones.
Ability 2: Infiltrate
The Spy infiltrates a structure. The results depend on which kind of structure is infiltrated (see addendum). The Spy is always removed from play when infiltrating a structure.
Alt Ability: Bribe
The Spy converts any enemy units in close vicinity to your cause. Costs 1000$ per use. Only works on ground units. The Spy can not bribe Soviet Dreadnoughts and Imperial Nanocores. Using Bribe will remove the disguise of the Spy and stun him for a few seconds.
Comments: When in disguise, keep in mind that the spy can swim, but many others can not – a swimming Tesla Trooper is guaranteed to attract attention, and not the kind you want. Also stay clear of scouts (Attack Dogs, Battle Bears and Sunburst Drones), as they will reveal the spy.
The Bribe ability is extremely potent when used near clumped up enemy vehicles – this way, three Apocalypse Tanks (6000$) can be yours for only 1000$, albeit this requires good timing. Also keep in mind that the Spy can be run over by enemy tanks even when disguised.
Tanya
Role: Commando
Cost: 2000
Build Time: 30 sec.
Constructed in: Boot Camp
Requires: Maximal Clearance, Defense Bureau
Amphibious
Weapon 1: Dual Pistols (Infantry Only)
Instantly kills most infantry units, very high rate of fire.
Weapon 2: C4 explosives (Vehicles/Structures only)
If Tanya get close enough to vehicles/ships and structures, she may plant C4 on them and make them explode. This process takes roughly one second, during which Tanya is not attackable.
Alt Ability: Time Belt
Tanya travels back in time a few seconds, returning her to her previous position and healing any damage she may have taken.
Comments: Tanya is arguably the best Anti-infantry Commando, literally mowing down enemies left and right. She also can reduce enemy bases to rubble in alarmingly little time, particularly if the buildings are close together.
However, the fact that she needs to get up close in order to destroy vehicles and ships means that anti-infantry vehicles or those who insta-kill infantry (i.e. Stingrays) are extremely dangerous to her. She also can not attack aircraft and is defenseless against attacks from above.
Keep in mind that Tanya’s time belt only can heal her if she wasn’t or was less injured a few seconds ago – using the time belt if Tanya has been half-dead for a longer period or time results in (bad-dum-tsh) a half-dead Tanya.

Tanya is a very literal kind of blond bombshell.
Vehicles
From left to right: Riptide ACV, Multigunner IFV, Guardian Tank, Athena Cannon, Mirage Tank

Riptide ACV
Role: Anti-Infantry, Anti-Ship, Transport
Cost: 750
Build Time: 10 sec.
Constructed in: Armor Facility/ Sea Port
Amphibious
Weapon 1: Machine Gun
Effective against Infantry, ineffective against anything else. Cannot target air units.
Weapon 2: Torpedoes (only at sea)
Effective against ships. Can not target land or air units.
Alt. Ability: Transport
Can transport up to five infantry units.
Comments: Highly versatile, the Riptide combines three units into one. Its transport ability not only allows it to carry infantry across the sea, but can also be useful on land – particularly when carrying Javelin Soldiers to give the Riptide some punch against armored targets. However, if the Riptide is destroyed, all units inside are lost. Like most multipurpose units, the Riptide is not as good in all of its roles as a dedicated unit (i.e. Sickle, Yari Sub, Sudden Transport) would be, so it is essential to combine it with infantry support.
Multigunner IFV
Role: Anti-Aircraft, Multi-Purpose
Cost: 900
Build Time: 10 sec.
Constructed in: Armor Facility
Weapon 1: Rocket Launcher
(Effective against aircraft, decent against light vehicles)
Weapon 2: Depends on passenger
Alt. Ability: Transport
May transport one infantry unit. The Multigunner’s weapon changes depending on passenger (see addendum).
Comments: Another jack-of all trades, the Multigunner can be just about everything if “fed” with the proper passengers, the only limit being its low health and weak armor. Multigunners with engineers are a particularly useful combination as they allow the player to repair vehicles and destroy Soviet Terror drones even when far away from his or her Armor Facility.
The Multi-Gunner can also transport infantry units of other factions and its weapon will change accordingly. For instance, putting a Flak Tropper inside the Multigunner gives the latter an Anti-Air Flak Turret.
While it is fully possible to load Commandos into your Multigunners and give them one hell of a cannon in the process, this tactic is somewhat inefficient in the sense that the Multigunner is significantly more vulnerable to Anti-Vehicle fire than the Commando herself, negating one of the few advantages the Commando has againt vehicles.
Guardian Tank
Role: Main Battle Tank
Cost: 950
Build Time: 10 sec.
Constructed in: Armor Facility
Requires: Heightened Clearance
Weapon 1: Tank Turret
Effective against enemy armor and structures. Ineffective against infantry. Can only target ground units.
Alt. Ability: Target Painter (Toogle)
Switches from Turret to a Target Painter. The Target Painter deals no damage, but painted targets receive 50% (100% with high technology secret protocol) more damage from all attacks. The effect of multiple target painters does not stack.
Comments: Probably the only conventional tank in the Allies’ arsenal; a compromise between the Soviet Hammer Tank and the fragile Imperial Tsunami Tank in terms of armor and firepower. When using groups of these, it is highly recommended to switch a few of them to target painters, as this will dramatically increase the firepower of the group as a whole. However, the player naturally should try to keep the individual target painters on different targets.
While its gun barely scratches infantry, the Guardian can still run it over and insta-kill it (Tesla Troopers and Commandos being the exception).
Athena Cannon
Role: Artillery
Cost: 1400
Build Time: 20 sec.
Constructed in: Armor Facility
Requires: Max Clearance
Weapon 1: Athena Orbital Laser
(The Cannon designates a target for a laser beam from a satellite in low orbit. Effective against all ground units. Can only target ground units.)
Alt. Ability: Aegis Shield
Instead of calling down an orbital strike, the Athena Cannon may temporarily protect itself and Allies around it with an energy shield that blocks all incoming damage. However, the shield shrinks as it takes damage.
Comments: While the orbital strike is devastating, mobile targets are problematic as the Athena a) requires a short moment to lock on to its targent and the resulting orbital strike is b) stationary, so that mobile units may move away from under it and suffer only a fracture of the potential damage. It’s main use thus lies in bombarding enemy structures, particularly defensive structures such as Tesla coils.
The Aegis shield is powerful enough to protect the Athena Cannon from a direct hit with a super-weapon, but keep in mind that it is only temporary and that it will shrink over time as it takes damage. A single Aegis shield can take 2000 points of damage.
Mirage Tank
Role: Ambush Attacks,
Cost: 2000
Build Time: 15 sec.
Constructed in: Armor Facility
Requires: Max Clearance
Weapon 1: Spectrum beam
Extremely effective against all ground units. Beam may jump from main target to nearby targets. Can only target ground units.
Ability 1: Cloak
When stationary, the Mirage with disguise itself as a scenery item (i.e. a tree), making it effectively invisible to the enemy. The effect is cancelled if the Mirage moves or attacks.
Alt Ability: Gap Field (Toogle)
The Mirage cloaks all allied units nearby, but does not cloak itself. It can move but not fire while the Gap Field is active.
Comments: A glass cannon with a twist, the Mirage is capable of dishing out hurt in considerable force, but lacks the armor to actually take it. As such, it can not directly stand up to other Tier 3 Units (Apocalypse Tank & King Oni) but relies on its camoflage abilities to quickly ambush and destroy enemy forces.
When cloaking, the mirage will use fitting scenery; i. e. it will disguise as a street sign rather than a tree in urban environments.
Its gap field ability can be extremely useful as the enemy can effectively not see whether it is active or not. Thus, the three lone mirage tanks can suddenly turn out to have company in the form of twelve guardian tanks with them.
Aircraft
From bottom to top: Vindicator Strike Bomber, F-11X Apollo Fighter, B2-X Century Bomber. A Cryocopter can be seen flying above.

Vindicator
Role: Strike Bomber
Cost: 1200
Build Time: 15 sec.
Constructed in: Airbase
Weapon 1: Guided Bombs
Effective against ground units. The Vindicator only has a limited supply of bombs (2, 3 with the Advanced Aeronautics secret protocol) and will automatically return to its home Airbase after running out of bombs. Vindicators Bombs deal no splash damage.
Alt Ability: Afterburners
Forces the Vindicator to return to its home Airbase; movement speed is increased by 25%.
Comments: Does that one Apocalypse Tank ruin your day? Is that defensive turret giving your boys a hard time? Worry no more friend, for the Vindicator is here to bomb them to Kingdom Come (and annoy your enemies to no small end).
Vindicators work best in small squads as a single payload usually doesn’t fully suffice to destroy a target. A full squadron (4) of vindicators with the Advanced Aeronautics secret protocol can destroy a construction yard in three bombing runs, assuming they don’t get shot down on the way.
Vindicators are almost absurdley fast and albeit they are relatively fragile, they usually can fly in, drop their payload and be back in the base without taking to much proverbial flak.
Like the century bomber, the Vindicator can not stand still in mid-air and instead will circle around when not given any other command.
Apollo Fighter
Role: Air Superiority Figther
Cost: 1000
Build Time: 10 sec.
Constructed in: Airbase
Requires: Heightened Clearance
Weapon 1: Autocannon
Extremely effective against aircraft. Can not target ground units. The Apollo’s autocannon has a limited supply of ammo; it has to return to its home airbase to restock after running out.
Alt Ability: Afterburners
Same as Vindicator
Comments: On a one-on-one basis, the Apollo is the best Anti-Air aircraft in the game and outmatches both the Soviet MiG and the Imperial Jet Tengu, primarily because of its powerful gun. In return however, the MiG’s rockets deal splash damage, and the Tengu does not have a limited supply of ammunition (as well as being cheaper and available earlier).
Ironically, the Apollo is probably the best fighter to take out Allied bombers, given its high DPS.
Cryocopter
Role: Support
Cost: 1600
Build Time: 16 sec.
Constructed in: Airbase
Requires: Heightened Clearance
Weapon 1: Cryo-Beam
The Cryo-Beam itself deals no damage, but gradually cools down units until they are frozen solid. Frozen units are so brittle that any form of attack can insta-kill them. The amount of time it requires to freeze a unit or structure depends on the target and the number of cryocopters attacking it.
Alt. Ability: Shrink Beam
Shrinks the targeted vehicle, decreasing its hitspoints, armor and attack damage. Shrinked targets can also be run over by other vehicles. Shrinked units can not use special abilities.
Comments: One of the most iconic Allied Units in RA3, the cryocopter is capable of reducing all those hulking Apocalypse Tanks and King Onis into vaguely pretty ice sculptures, symbolizing how the Allies rely on powerful support abilities rather than brute force to gain victory.
The Shrink Beam is exceptionally useful to remove potential threats before they evolve into a serious problem – namely by making them small enough for your Guardian and Mirage tanks to crush them. Its advantage over the cryo beam primarily lies in the fact that it works instantaneously, although it naturally has a cooldown in return.
Another use for the cryocopter lies in neutralizing enemy artillery before the latter can shell your base – particularly because of the cryo-beam’s relatively long range.
Century Bomber
Role: Heavy Bomber
Cost: 2000
Build Time: 20 sec.
Constructed in: Airbase
Requires: Max Clearance
Weapon 1: Bomb Payload
The Century Bomber carries a payload of six (nine with the Advanced Aeronautics Secret Protocol) unguided bombs and will carpet bomb its targets with them in a straight line. Like the Vindicator, the Century Bomber has to return to its home Airbase to restock after running out of bombs.
Alt Ability: Paradrop
The Century Bomber can transport up to five infantry units and subsequently drop them in mid-air via parachutes. Parachuting units can be targeted by anti-aircraft weapons while landing.
Comments: Nothing says “Go to hell” like nine 500 pound bombs going down before, on and behind your doorstep. The Century takes the term “bombing run” to the next level, literally carpet bombing the living hell out of the player’s enemies.
As the bomb carpet falls down in a straigth line (the beginning point being the target and the end point being the last bomb), players should carefully consider the approach of the bomber so as to maximize its damage dealt. Furthermore, it is strongly advised to force the bomber to attack a position slighty in front of the target rather than the target itself, as this maximizes the amount of direct hits on it.
The Parachute ability is a two-edged sword: On the one hand, unloading a group of Jav Soldiers or Engineers into the enemy base after a bombing run can often serve as the final nail in the coffin of the player’s opponent, but the passengers will frequently be subject to anti-air fire while landing – and unlike in the case of the riptide, can not be picked up and brought back home if things get too hot. Because of this, it is not always a good idea to leave paratroopers in the field, particularly when resistance is still present.
Finally, Century Bombers generally work best in pairs, especially when bombing the enemy main base – it takes two (with Advanced Aeronautics) bomb payloads to destroy most static defenses.
Unlike the bombs of the Vindicator, those of the Century Bomber deal splash damage.
Navy
From left to right: Dolphin, Hydrofoil, Assault Destroyer, Aircraft Carrier

Dolphin
Role: Light Attack Mammal
Cost: 750
Build Time: 10 sec.
Constructed in: Seaport
Weapon 1: Sonic Wave
The Dolphin uses the Sonic Amplifier strapped to its back to attack the enemy. The sonic wave may hit multiple targets in a straight line. Can only target units and structures in the water
Alt Ability: Jump
The Dolphin leaps out of the Water for a short moment. Can be used to avoid attacks (particularly torpedoes), but the dolphin can be attack by anti-aircraft weapons in mid-air.
Comments: Dolphins are cheaper than their Imperial and Soviet counterparts (Yari Minisub and Stingray, respectively). However, they are extremely fragile, to the point that one Tesla Surge of the Stingray spells certain death for them. As a result, Dolphins are ill-suited for frontline-combat, but instead should be used as either support for Riptides, or for rushes and hit-and-run attacks against unprotected enemy structures.
Hydrofoil
Role: Anti-Aircraft, Support
Cost: 900
Build Time: 10 sec.
Constructed in: Seaport
Weapon 1: Anti-Air Gun
Very effective against aircraft. Can not target ground units.
Alt Ability: Weapon Jammer (Toogle)
The Hydrofoil may switch from Anti-Air Gun to Weapon Jammer, projecting a beam that disables the weapons of affected enemy vehicles. The effect persists so long as the Hydrofoil keeps firing.
Comments: The Hydrofoil is a neat little gadget that combined some serious anti-air firepower with a weapon that can turn an ugly and dangerous leviathan into an ugly leviathan. Given that the firepower of the Allied Ships generally is rather lacking, the good use of Weaponjammers to take care of threats such as Soviet Akula subs and Imperial Naginate Cruisers is integral.
Assault Destroyer
Role: Meatshield
Cost: 1500
Build Time: 20 sec.
Constructed in: Seaport
Requires: Heightened Clearance
Amphibious
Weapon 1: Assault gun
Deals moderate damage to enemy ground units. Can not attack air units. Relatively slow rate of fire.
Alt. Ability: Black Hole Armor (Toogle)
When activated, the Assault Destroyer will draw all enemy fire onto it, potentially saving less armored units such as aircraft carriers, Riptides and Dolphins from destruction. However, the Assault Destroyers gun can not fire while the armor is active.
Comments:
As strange as it may sound: The main task of the assault destroyer is being shot at. It serves as a bulky meatshield for all your other ships that have higher DPS than this old Man’o’War (which is not exactly difficult). This doesn’t mean its a bad unit, though: There are few things more frustrating than trying to kill that one aircraft carrier the enemy Allied player has stationed near your base, only to see all your bullets, rockets and whatnot being mysteriously drawn towards the hull of the assault carrier, which absorbs the blow without further notice.
Another thing is to keep in mind is that, absurd as it may be, the Assaul Carrier is amphibious. When ordered to land two gigantic tank treads suddenly appear under the ship, and the Assault Carrier slowly crawls unto the shore. Gameplay wise, it retains the low damage stat, but is capable of crushing most smaller tanks (with the exception of Apocalypse Tanks and King Onis) as well as walls under its sheer weights.
Still, assault carriers should never go unsupported – for what is a bodyguard without a body to guard?
Aircraft Carrier
Role: Naval Artillery
Cost: 2000
Build Time: 30 sec.
Constructed in: Seaport
Requires: Max Clearance
Weapon 1: Sky Knights
The aircraft carrier launches a series of small drones that fly towards the target, drop their bombs are return to the carrier. Effective against ground units. Can not target aircraft.
Alt. Ability: Blackout Missile
Launches a powerful EMP missile that temporarily disables all enemy units and structures near the impact site.
Comments: Unlike the Soviet Dreadnought or the Imperial Shogun Battleship, the Aircraft carrier does not launch unguided rockets or laser salvos, but small, computer-controlled drones called Skyknights. This, on the one hand, results in a great accuracy against moving targets, as the Skyknights will track their target and only the bomb dropped by them is unguided, but on the other hand means that the Aircraft Carrier’s “ammunition” can be shot down in mid air given sufficient anti-aircraft fire.
The Blackout Missile is probably amongst the dangerous special abilities in the entire game, as it essentially allows the player to disable and subsequently shoot the enemy army as if it consisted of clay pigeons. Thus, a small group of Aircraft carriers may can keep an entire enemy fleet EMP’d and shoot it down ship by ship with Skyknights.
Construction Vehicles
From left to right: A prospector ore collector truck and a Mobile Construction Vehicle (MCV). A prospector that has deployed into an outpost stands nearby.

Prospector
Role: Ore transporter
Cost: 1000
Build Time: 20 sec.
Constructed in: Armor Facility, Seaport, Ore Refinery
Amphibious
Weapon 1: None
Alt. Ability: Deploy
Transforms the prospector into a command hub. Outposts create and area of control around themselves in which buildings may be constructed.
Comments: These guys have the most intense job in the world: They drive to the ore mine, load up the ore, drive back to the refinery, load off the ore, drive to the ore mine . . . needless to say, 95% of the drivers are perfectly homicidial maniacs in their spare time.
Apart from hauling ore back and forth, Prospectors are also used to construct command hubs, which in turn are required if you want to build structures outside of your construction yard’s control zone, typically in order to acess new ore mines. Keep in mind that the prospector, while having some armor, carries no weapons – send some units with it to protect it if you want to establish a mining expansion.
When attacked by infantry, prospectors may attempt to retaliate by running them over. However, as they are not exactly fast it takes a particularly careless (or stupid) opponent for this to work.
Mobile Construction Vehicle (MCV)
Role: Semi-Mobile Construction platform
Cost: 5000
Build Time: 60 sec.
Constructed in: Armor Facility, Sea Port
Ampibious
Weapon 1: None
Alt Ability: Deploy
Transforms the MCV into a construction yard. Unlike the prospector, the MCV can transform back into its original form even after having deployed as a construction yard.
Comments: The heart of your base, or rather, how the heart used to look like before it became a construction yard. Unless the player’s original construction yard has been destroyed, there is no reason to build this, as prospectors fulfil the same role while being considerably cheaper.
ADDENDUM: As Command Hubs created by Prospectors do not give you an additional construction tab, having multiple construction yards is a useful if costly method for constructing multiple structures at the same time.
Being a super-heavy vehicle, the MCV can crush most other vehicles under its treads and break through walls, albeit its slow speed means that only the most unfortunate victims will be humiliated by being crushed under it.
Structures
Name: Power Plant
Cost: 800$
Build Time: 10 sec.
Comments: This is a Power plant. It plants the power. Jokes aside, Power Plants are important – if you consume more power than you produce, production structures requires 50% more time to finish units and your defensive structures are shut down entirely – which can lead to unpleasant situations. Albeit tempting, power plants should not be planted (Ba-dum-tsh) close to each other, as this makes them vulnerably to bombing runs and secret protocols dealing area-of-effect damage (i. e. the Imperial balloon bombs).
Name: Boot Camp
Cost: 800$
Build Time: 10 sec.
Comments: Trains Attack Dogs, Peacekeepers, Javeline Soldiers, Engineers, Spies and Tanya. Players looking for a infantry-heavy build should build multiple of these.
Name: Armor Facility
Cost: 2000$
Build Time: 20 sec.
Comments: Trains Prospectors, Riptides, Multigunners, Guardian Tanks, Athena Cannons, Mirage Tanks and MCVs. Also holds three repair drones, that will repair Allied Vehicles nearby and clean them of Terror Drones.
Name: Sea Port
Cost: 1000$
Build Time: 20 sec.
Comments: Trains Prospectors, Dolphins, Riptides, Hydrofoils, Assault Destroyers, Aircraft Carriers and MCVs. Also holds three repair drones, that will repair Allied ships and vehicles nearby (but not dolphins) and clean them of Terror Drones. Unsurprisingly can not be constructed on land.
Name: Airbase
Cost: 1000$
Build Time: 15 sec.
Comments: A single air base has four landing sites for Vindicators, Apollos or Century Bombers to land and restock their ammo on. They also feature the aforementioned repair drones, so restocking aircraft and nearby vehicles/ships will also get repaired.
Given the limited number of landing places, Allied players will air-heavy strategies should build multiple Airbases.
Name: Ore Refinery
Cost: 2000$
Build Time: 20 sec.
Comments: These refineries process the ore taken from the ores mines by your prospectors. Keep them well-defended, both because they are relatively costly and because no ore mining means no income, which in turn means you have no money for tanks and stuff.
Name: Defense Bureau
Cost: 1500$
Build Time: 10 sec.
Requires: Heightened Clearance
Comments: This is a pure tech building. It is required for Spectrum Towers, Chronospheres and Proton Colliders, as well as Tanya, the Allied Commando.
Name: Construction Yard
Cost: 3000$
Comments: The heart of your base. Construction Yards are not built like other buildings but are created by deploying a MCV. You need a construction yard to construct buildings and use secret protocols. They are the favorite thing to capture for enemy engineers, so you may want to surround them with a fortress wall. You can also research Heightened Clearance and Max Clearance here, which allows all production buildings in the construction yards control zone access to Tier 2 and Tier 3 units, respectively.
Name: Command Hub
Cost: 1400$
Comments: Construction Yard light. Primarily used to create control zones near ore mines to build ore refineries in. Created by deploying a prospector. Unlike in the case of the Construction Yard/MCV, the deployment can not be reversed. If production buildings are placed in the control zone, Heightened Clearance and Max Clearance must be researched in the respective Command Hub in order to give them access to Tier 2/Tier 3 units; having researched either technology in the construction yard does not suffice.
Unlike the Construction Yard, the Command Hub does NOT give you an additional construction tab.
Name: Fortress Wall
Cost: 10$ (per piece)
Build Time: 5 sec
Comments: More or less solid concrete walls to kep enemies outside of your base. Unfortunately, they are not quite as tough as they look and even can be crushed under the treads of Heavy Vehicles. As such, they generally are only used to keep spies, shinobi and terror drons away from your ore refineries and engineers out of your construction yards.
Name: Multigunner Turret
Cost: 800$
Build Time: 20 sec.
Comments: Essentially a Multigunner IFV without wheels but more armor. Also has a rocket launcher that is actually effective against infantry and light vehicles. It is possible to garisson units inside in order to give the turret different guns (see addendum)
Name: Spectrum Tower
Cost: 1500$
Build Time: 30 sec.
Requires: Heigthened Clearance, Defense Bureau
Comments: The Spectrum Tower serves as a heavy anti-ground static defense, but can not attack aircraft. The spectrum tower deals heavy damage to any would-be attackers but requires a lot of power and has a rather low rate of fire. However, adjacent spectrum towers can reroute their power to other towers to increase their rate of fire.
Name: Chronosphere
Cost: 3000$
Build Time: 30 sec.
Requires: Heightened Clearance, Defense Bureau
Comments. The Chronosphere, once powered up, allows you to teleport any units (both your own and enemy ones) within an area A to another area B that is within your vision. This can be used for defensive maneuvers (i.e. teleporting your army back to your base because the latter is under siege) but also in more aggressive ways: You can teleport enemy tanks into the sea, or enemy ships on dry land, resulting in a quick death for both.
Infantry units also will indiscriminately be killed inside the power field of a Chronosphere, unless they are stationed in vehicles.
Aircraft is not affected.
Name: Proton Collider
Cost: 5000$
Build Time: 30 sec
Requires: Max Clearance, Defense Bureau
Comments: The Allied Superweapon. Once powered up, the Proton Collider launches a salvo of projectiles made of hurt and pain right at wherever you point it at. Should you happen to point it in the rough direction of the the enemy base, not much of the latter will remain after the impact, albeit Construction Yards and other Super Weapons will survive the bombardment when at full health.
Like the Chronosphere, the Proton Collider will be revealed to your enemies once it has been built and furthermore has a long cooldown before it can be used, so make sure you have sufficient firepower to defend it.
Addendum: Engineer Commands, Multigunner Combinations, Infiltration Results
1. Engineer Abilities: The engineers . . . well, engineering abilities present themselves in a number of different ways, depending on which structure he is used on, albeit the engineer is always removed from play after finishing his, well, engineering.
- Allied Structure: Instantly repairs the structure with no further cost to the player. Useful when your construction yard or other key structures of your base are on the verge of destruction.
- Neutral Structure: Captures the structure. Neutrals structures include Oil Rigs, Observation posts , Garages, Airports, Hospitals and Veteran Academies, but not regular garisonable structures.
- Hostile Structure: Captures the structure. However, this requires a short amount of time during which the engineer is defenseless. This includes formerly neutral structures captured by enemy engineers.
- Bridge House: Repairs the Bridge should it have been destroyed. No effect if the bridge is still intact.
2. Multigunner
The main weapon of the Multigunner IFVs and Turrets changes depending on which kind of Infantry you garisson inside of them. What follows is a complete list of all possible Multigunner-Infantry options.
- Multigunner + Attack Dog = “Bark Machine”. Stuns all nearby units; has a wider range than the dog’s standard bark. Only affects infantry.
- Multigunner + Peacekeeper = Giant Shotgun. By all means a faster and more powerful peacekeeper without a riot shield. Useful to hunt down fleeing elite infantry and commandoes. Can’t attack aircraft.
- Multigunner + Javeline Soldier = Rocket Pods. Deals decent damage against vehicles, ships and aircraft, but has a lower rate of fire than the standard Multigunner Rocket Launcher
- Multigunner + Engineer = Repair Crane. Repairs nearby Vehicles and removes Terror Drones from them. This result is identical for the engineers of all three factions.
- Multigunner + Spy = Sniper Rifle. Can instakill enemy infantry, but does not have piercing shots. Can’t attack aircraft.
- Multigunner + Tanya = Machine Cannon. Extremely effective against infantry, less effective against armor. Can’t attack aircraft.
- Multigunner + Battle Bear = “Growl Machine”. Same as “Bark Machine”.
- Multigunner + Conscript = Machine Gun. Effective against infantry, ineffective against vehicles. Can’t attack aircraft.
- Multigunner + Flak Troopper = Flak Gun. Effective against aircraft. Can not attack ground units.
- Multigunner + Tesla Trooper = Tesla Gun. Effective against ground units (instakills infantry), but has a slow rate of fire. Can not attack aircraft.
- Multigunner + Natasha = Sniper Rifle. Instakills infantry, may hit several targets in a straight line. Can not attack aircraft.
- Multigunner + Imperial Warrior = Machine Gun. Effective gainst infantry, ineffective against vehicles. Can not attack aircraft.
- Multigunner + Tank Buster = Laser Gun. Effective against vehicles and structures. Ineffective against infantry. Can not attack aircraft.
- Multigunner + Shinobi = Shuriken Launcher. Instakills infantry. Can only target infantry.
- Multigunner + Yuriko = Psy Cannon. Effective against all units, but can only target one unit at a time, making it vulnerable to swarms of infantry. Can also attack aircraft.
Multigunners with different turrets. From left to right: Regular Multigunner Turret, Giant Shotgun, Rocket Pods, Repair Crane, Sniper Rifle, Machine Cannon. Bark Machine not included.

3. Spies and Infiltration Targets
Similar to Engineers, Spies can interact with enemy structures and bring a heap of trouble to your opponent. The effect of the infiltration depends on what structure is infiltrated by the spy:
- Power Plant : Temporarily shuts down all enemy power plants, disabling static defenses and increasing the production time of units by 50%.
- Production Building: Temporarily shuts down this building.
- Tech Building: Temporarily denies the enemy acess to the units unlocked by the structure in question. I.e. infiltrating a Soviet Battle Lab will make it impossible for the player to produce Kirovs.
- Soviet Super Reactor: Combines the results of a power plant and a tech building (the player will be unable to produce Hammer Tanks, Tesla Troopers, etc.)
- Ore Refinery: Steals up to 2000$ from the enemy treasury.
- Construction Yard: Temporarily disables the enemy map, removes the fog of war around the construction yard’s control zone for the player.
- Superweapon: Resets the cooldown (i.e. when infiltrating a Proton Collider that is ready to fire, it will be reduced to the standard five minute cooldown. This also applies to secondary superweapons, namely the Chronosphere, the Iron Curtain, and the Nanoswarm Hive.
- Static Defense Structures: None. Spies can not infiltrate Static Defense Structures, i.e. Tesla coils or multigunner turrets.
Acknowledgments
Most of the statistics of this guide (that is, Build Time and Build Cost) have been taken either from the fantastic EVA Database C&C Wiki, or from Carl’s Guides.