【Updated to Patch 6.11】Chaos Waste Mechanic Handbook
--- Holseher’s Map ---
Holseher’s Map Basic
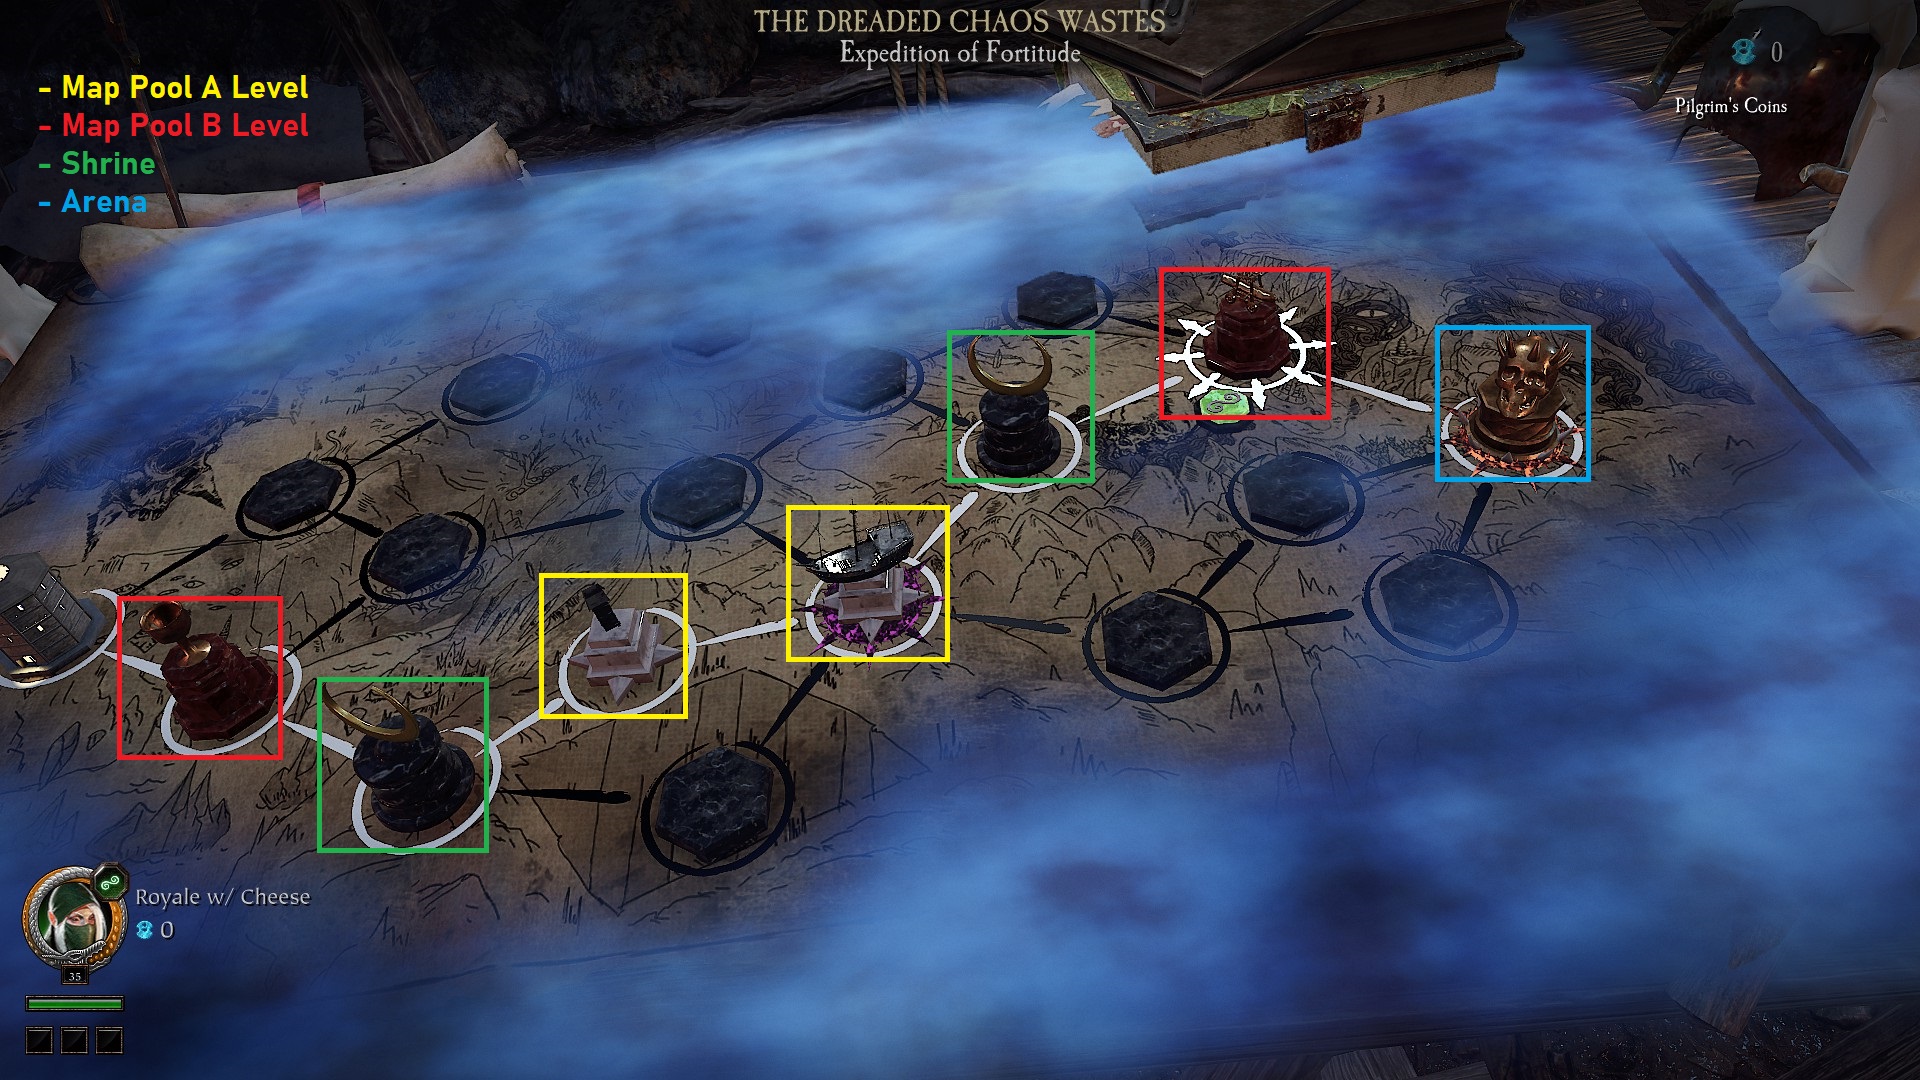
- Holseher’s Map is the path decider for your journey in Chaos Waste. You can see some valuable information about your next two steps.
- Holseher’s Map path is generated randomly. However, the path you can choose on the map is picked from 16 layouts. And no matter which layout you get, the number of Level/Shrine/Arena you will visit is fixed.
- Level - 2 of each map pool, 4 in total
- Shrine -2 per game
- Arena - 1 per game
- Level - 2 of each map pool, 4 in total
- The Monsters in the first Level have 75% HP, and 82.5% HP in the second. Third, fourth Levels and Arena Monsters have normal HP. This HP modifier is multiplicive with other HP modifiers like Miracle of Grimnir.
- The path vote on Holseher’s Map favours majority voting. The game will choose the path that most people voted on.
An example of a fully reviewed Holseher’s Map
All Possible Holseher's Map Path
Layout
First Node
Second Node
Third Node
Forth Node
Fifth Node
Sixth Node
Layout 1
Map Pool A Level
Map Pool A Level
Shrine
Map Pool B Level
Shrine
Map Pool B Level
Layout 2
Map Pool A Level
Map Pool B Level
Shrine
Map Pool A Level
Shrine
Map Pool B Level
Layout 3
Map Pool B Level
Map Pool A Level
Shrine
Map Pool A Level
Shrine
Map Pool B Level
Layout 4
Map Pool A Level
Map Pool B Level
Shrine
Map Pool B Level
Shrine
Map Pool A Level
Layout 5
Map Pool B Level
Map Pool A Level
Shrine
Map Pool B Level
Shrine
Map Pool A Level
Layout 6
Map Pool B Level
Shrine
Map Pool B Level
Map Pool A Level
Shrine
Map Pool A Level
Layout 7
Map Pool B Level
Shrine
Map Pool A Level
Map Pool B Level
Shrine
Map Pool A Level
Layout 8
Map Pool B Level
Shrine
Map Pool A Level
Map Pool A Level
Shrine
Map Pool B Level
Layout 9
Map Pool A Level
Map Pool A Level
Shrine
Map Pool B Level
Map Pool B Level
Shrine
Layout 10
Map Pool A Level
Map Pool B Level
Shrine
Map Pool A Level
Map Pool B Level
Shrine
Layout 11
Map Pool B Level
Map Pool A Level
Shrine
Map Pool A Level
Map Pool B Level
Shrine
Layout 12
Map Pool A Level
Map Pool B Level
Shrine
Map Pool B Level
Map Pool A Level
Shrine
Layout 13
Map Pool B Level
Map Pool A Level
Shrine
Map Pool B Level
Map Pool A Level
Shrine
Layout 14
Map Pool B Level
Shrine
Map Pool B Level
Map Pool A Level
Map Pool A Level
Shrine
Layout 15
Map Pool B Level
Shrine
Map Pool A Level
Map Pool B Level
Map Pool A Level
Shrine
Layout 16
Map Pool B Level
Shrine
Map Pool A Level
Map Pool A Level
Map Pool B Level
Shrine
--- Level ---
Level Basic
- There is a total of 12 different Levels in Chaos Waste.
- 12 Levels are split into two map pools, you will encounter two Levels from each map pool in every Expeditions. You can tell which map pool this Level is from by the colour of the map stature's base on Holseher’s Map.
- All Levels have multiple variations that change their layout and how you progress in it.
- All Levels can be found in all four Expeditions, except Citadel of Eternity, which can be only found in Expedition to the Citadel of Eternity
- All Levels will have 1 Faction Type Combination, 2 Level Mutator and 1 Power Up as a reward after finishing the level. All Levels might also have 1 Chaos Gods Curse as an additional muatator. You can see this information on Holseher’s Map.
- When you progress to the next Level, your wound will be cleared and heal to 50% of max HP.
All Levels & Variation Amount
Map Pool A - White BaseLevel Name
Variation Amount
Bel'sha'ziier's Mine
5 variants, with each variant has one corresponding chaos god version and a none-chaos version
Grimblood's Stronghold
5 variants, with each variant has one corresponding chaos god version and a none-chaos version
Holseher's Tower
5 variants, with each variant has one corresponding chaos god version and a none-chaos version
Pinnacle of Nightmares
5 variants, with each variant has one corresponding chaos god version and a none-chaos version
Slaughter Bay
5 variants, with each variant has one corresponding chaos god version and a none-chaos version
The Forbidden Trail
5 variants, with each variant has one corresponding chaos god version and a none-chaos version
Map Pool B - Red Base
Level Name
Variation Amount
Cinder Peak
5 variants, with each variant has one corresponding chaos god version and a none-chaos version
Citadel of Eternity(level)
5 variants, with each variant has one corresponding chaos god version
Count Mordrek's Fortress
5 variants, with each variant has one corresponding chaos god version and a none-chaos version
The Foetid Gorge
5 variants, with each variant has one corresponding chaos god version and a none-chaos version
The lost City of Marakza
5 variants, with each variant has one corresponding chaos god version and a none-chaos version
The Pit of Reflection
5 variants, with each variant has one corresponding chaos god version and a none-chaos version
Faction Type Combination
There are only 2 Faction Type Combination, which decides what kind of Roaming Enemies/Hordes/Elites you get during this Level:- Skaven, Chaos
- Skaven, Beastman
Level Mutator
Buff
Debuff
- Roaming Enemies
+ Roaming Enemies
- Hordes
+ Hordes
- Specials
+ Specials
- Elites
+ Elites
- Monsters
+ Monsters
+ Healing Items
+ Pilgrim's Coins
Power Up
Power Up are all normal adventure game Necklace/Charm/Trinket properties.Necklace Property
Charm Property
Trinket Property
+ 4 Stamina(2 Shields)
+ 10% Attack Speed
+ 5% Movement Speed
+ 20% Health
+ 40% Crit Power
+ 10% Crit Chance
+ 30% Block Cost Reduction
+ 40% Power vs Monster
+ 20% Cooldown Reduction
+ 60% Push/Block Angle
+ 30% Stamina Recovery
Chaos Gods Curse
- In Chaos Waste, Levels can be cursed by the four Chaos Gods.
- Each God has 3 kinds of curses. Only one God and one curse can be applied to the Level.
- You can see which God cursed the level from Holseher’s Map, but you can't tell which kind of curse until load into the level.
- For details of each curse, see sections down below.
- Weapons & Weapon Altar
Weapons and Weapon Altar Basic
- In Chaos Waste, you start with your loadout in the keep. But your weapons only have very low Hero Power and 0 property/trait. Your current Hero Power is the average of your two weapons.
- You can check your current weapons' Hero Power/Property/Trait by pressing Inventory Hotkey (default key: I).
- You can exchange or upgrade your weapons in respective Weapon Altar.
- If you don't own the DLC, weapons that are locked behind DLC cannot be obtained in the Weapon Altar.
- The result weapon rarity depends on the rarity of Weapon Altar. You can tell their rarity from their colour.
- Soldier's Altar will give you a random melee weapon, or Grail Knight/Slayer/Warrior Priest 1st slot weapon.
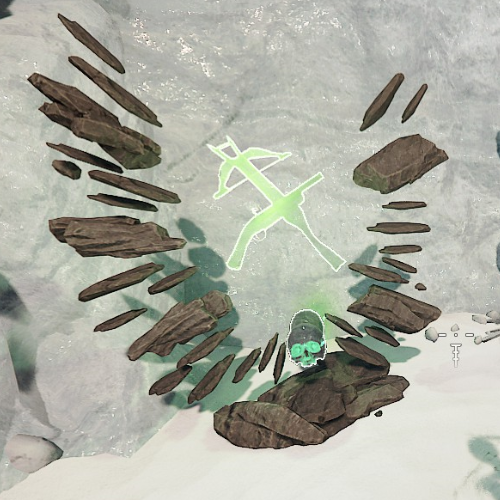
- Hunter's Exchange Altar will give you a random range weapon, or Grail Knight/Slayer/Warrior Priest 2nd slot weapon. Exchange range weapon will refill all your ammo.
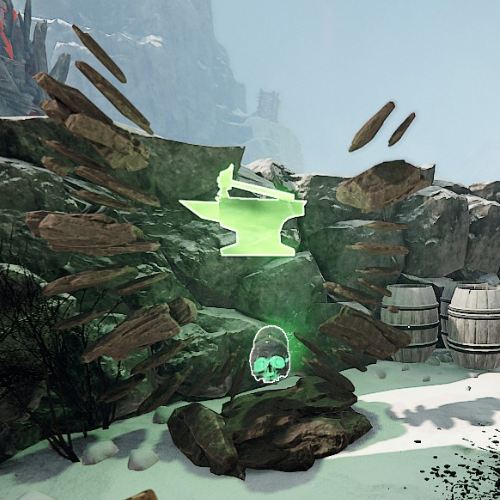
- Warrior's Altar will upgrade the weapon you are holding when you are interacting with the Altar. Using Warrior's Altar will keep your weapon's current Properties/Trait. Upgrade range weapon will refill all your ammo.
- Weapons can have Chaos Waste exclusive Traits. For details of exclusive Traits, see sections down below.
Weapon Altar Effect
Plentiful(White)
Common(Green)
Rare(Blue)
Exotic(Orange)
Unique(Red)
Result Property/Trait
0 Property
0 Trait
0 Trait
1 Property
0 Trait
0 Trait
2 Properties
0 Trait
0 Trait
2 Properties
1 Trait
1 Trait
2 Max Rolled Properties
1 Trait
1 Trait
Power Level - Recruit
200
250
300
350
450
Power Level - Veteran
250
300
350
400
500
Power Level - Champion/Legend/Cataclysm
450
500
550
600
700
Weapon Altar Cost
Soldier's Altar/Hunter's AltarTo Common(Green)
To Rare(Blue)
To Exotic(Orange)
To Unique(Red)
From Plentiful(White)
60
120
200
300
From Common(Green)
30
90
170
270
From Rare(Blue)
0
60
140
240
From Exotic(Orange)
/
20
100
200
From Unique(Red)
/
0
50
150
Warrior's Altar
To Common(Green)
To Rare(Blue)
To Exotic(Orange)
To Unique(Red)
From Plentiful(White)
100
200
350
500
From Common(Green)
/
150
300
450
From Rare(Blue)
/
/
250
400
From Exotic(Orange)
/
/
/
330
Weapon Altar Model
Soldier's Altar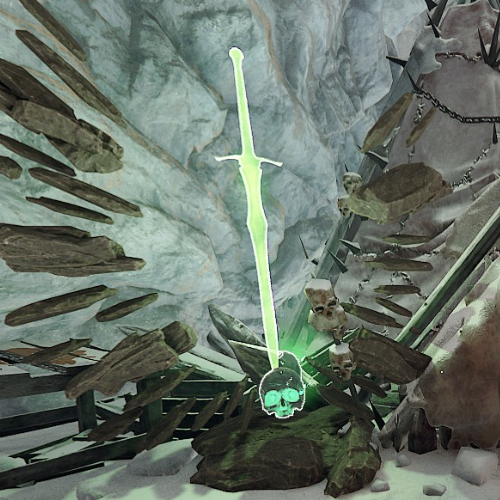
Hunter's Altar
Warrior's Altar
- Seer's Altar (Boon Altar)
- Seer's Altar(Boon Altar) grants you a random Boon and always cost 150 Pilgrim’s Coins.
- There is 60% chance to get a Rare Boon, 30% chance to get a Exotic Boon, 10% chance to get a Veteran Boon.
- When Event Boon is presented in the pool, Event Boon has 37.5% chance to appear, Rare Boon has 37.5% chance to appear. Exotic Boon has 18.75% chance to appear. Veteran Boon has 6.25% chance to appear.
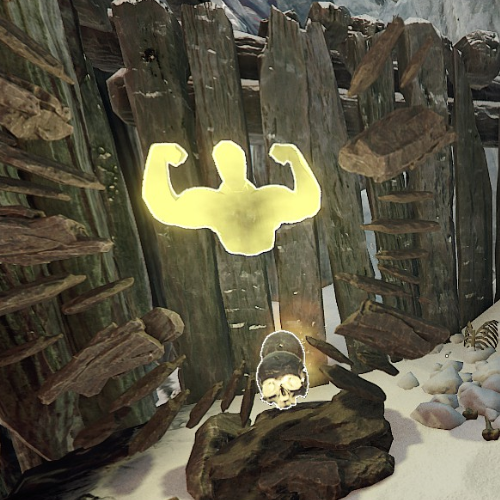
- Kurnous' Precision, Gork's (or possibly Mork's) Might, Khaine's Might cannot be obtained from Seer's Altar.
Seer's Altar Model
- Chest of Trials
Chest of Trials Basic
- You can find Chest of Trials in Levels.
- Chest of Trials have multiple possible trials(different enemy compositions). Both Faction Type Combination and Level Mutator(debuff mutator only) will affect possible outcome.
- Defeat the enemies spawned or 120 sec after activation , the chest will open and will allow you to choose one Boon from three.
- Chest of Trials is guaranteed 1 per level.
- Rare Boon has 60% chance to appear. Exotic Boon has 30% chance to appear. Veteran Boon has 10% chance to appear.
- When Event Boon is presented in the pool, Event Boon has 37.5% chance to appear, Rare Boon has 37.5% chance to appear. Exotic Boon has 18.75% chance to appear. Veteran Boon has 6.25% chance to appear.
Chest of Trials Trials List
On Khorne levels, Blightstormer Coven/Lifeleech Coven(Chaos Special trials) are replaced with Clan Skryre Incinerator Clawband/Clan Skryre Ratling Clawband/Plaguewind Clawband(Skaven Special trials).Faction Type Combination
Possible Level Mutator
Trial Name
Trial Spawn
Skaven, Chaos/Skaven, Beastman
+ Elites
+ Roaming Enemies
+ Hordes
+ Roaming Enemies
+ Hordes
Clan Fester Assault Clawband
Clan Rat with shield + Shield Storm Vermin.
Skaven, Chaos/Skaven, Beastman
+ Elites
+ Roaming Enemies
+ Hordes
+ Roaming Enemies
+ Hordes
Stormvermin Clawband
Storm Vermin.
Skaven, Chaos/Skaven, Beastman
+ Elites
+ Roaming Enemies
+ Hordes
+ Roaming Enemies
+ Hordes
Clan Pestilens Congregation
Clan Rat + Plague Monk.
Skaven, Chaos/Skaven, Beastman
+ Specials
+ Roaming Enemies
+ Hordes
+ Roaming Enemies
+ Hordes
Clan Skryre Incinerator Clawband
Clan Rat + Warpfire Thrower.
Skaven, Chaos/Skaven, Beastman
+ Specials
+ Roaming Enemies
+ Hordes
+ Roaming Enemies
+ Hordes
Clan Skryre Ratling Clawband
Clan Rat + Ratling Gunner.
Skaven, Chaos/Skaven, Beastman
+ Specials
+ Roaming Enemies
+ Hordes
+ Roaming Enemies
+ Hordes
Plaguewind Clawband
Clan Rat + Globadier.
Skaven, Chaos/Skaven, Beastman
+ Monsters
+ Roaming Enemies
+ Hordes
+ Roaming Enemies
+ Hordes
Clan Moulder Hunting Clawband
Clan Rat + Grudge Marked Rat Ogre.
Skaven, Chaos/Skaven, Beastman
+ Monsters
+ Roaming Enemies
+ Hordes
+ Roaming Enemies
+ Hordes
Clan Moulder Incinerator Clawband
Clan Rat + Grudge Marked Stormfiend.
Skaven, Chaos/Skaven, Beastman
+ Monsters
+ Roaming Enemies
+ Hordes
+ Roaming Enemies
+ Hordes
Abominable Duo
Two Grudge Marked Monsters.
Can be Rat Oger/Stormfiend/Bile Troll/Chaos Spawn.
Each has 50% max health reduction.
Can be Rat Oger/Stormfiend/Bile Troll/Chaos Spawn.
Each has 50% max health reduction.
Skaven, Chaos
+ Elites
+ Roaming Enemies
+ Hordes
+ Roaming Enemies
+ Hordes
Rotblood Raiding Party
Marauder + Mauler.
Skaven, Chaos
+ Elites
+ Roaming Enemies
+ Hordes
+ Roaming Enemies
+ Hordes
Rotblood Berserker Cult
Marauder + Berzerker.
Skaven, Chaos
+ Elites
+ Roaming Enemies
+ Hordes
+ Roaming Enemies
+ Hordes
Rotblood Chosen
Marauder + Chaos Warrior.
Skaven, Chaos
+ Elites
+ Roaming Enemies
+ Hordes
+ Roaming Enemies
+ Hordes
Rotblood Siege Party
Marauder + Chaos Warrior with Shield.
Skaven, Chaos
+ Specials
+ Roaming Enemies
+ Hordes
+ Roaming Enemies
+ Hordes
Blightstormer Coven
Fanatic + Blight Stormer.
Skaven, Chaos
+ Specials
+ Roaming Enemies
+ Hordes
+ Roaming Enemies
+ Hordes
Lifeleech Coven
Fanatic + Lifeleech.
Skaven, Chaos
+ Monsters
+ Roaming Enemies
+ Hordes
+ Roaming Enemies
+ Hordes
Troll-kin Harbingers
Fanatic + Grudge Marked Bile Troll.
Skaven, Chaos
+ Monsters
+ Roaming Enemies
+ Hordes
+ Roaming Enemies
+ Hordes
Fallen Champion's Retinue
Fanatic + Grudge Marked Chaos Spawn.
Skaven, Beastman
+ Elites
+ Roaming Enemies
+ Hordes
+ Roaming Enemies
+ Hordes
Raiding Bray Herd
Ungor + Ungor Archer.
Skaven, Beastman
+ Elites
+ Roaming Enemies
+ Hordes
+ Roaming Enemies
+ Hordes
Pillager Bray Herd
Gor + Bestigor.
Skaven, Beastman
+ Specials
+ Roaming Enemies
+ Hordes
+ Roaming Enemies
+ Hordes
Bestigor War Herd
Bestigor + Wargor with Ungor/Gor.
Skaven, Beastman
+ Specials
+ Roaming Enemies
+ Hordes
+ Roaming Enemies
+ Hordes
Ungor War Herd
Ungor + Wargor with Ungor/Gor.
Skaven, Beastman
+ Monsters
+ Roaming Enemies
+ Hordes
+ Roaming Enemies
+ Hordes
Bloodkine Bray Herd
Gor + Grudge Marked Minotaur.
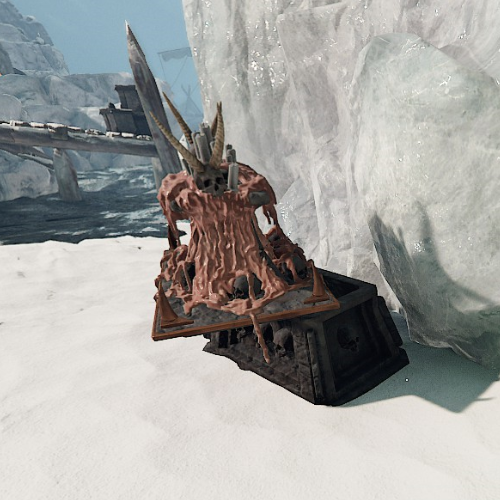
Chest of Trials Model
Chest of Trials - Before Opening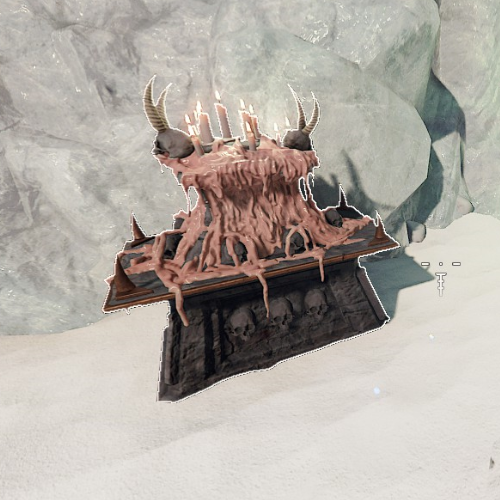
Chest of Trial - After Opening
- Pilgrim's Coins
Pilgrim's Coins Basic
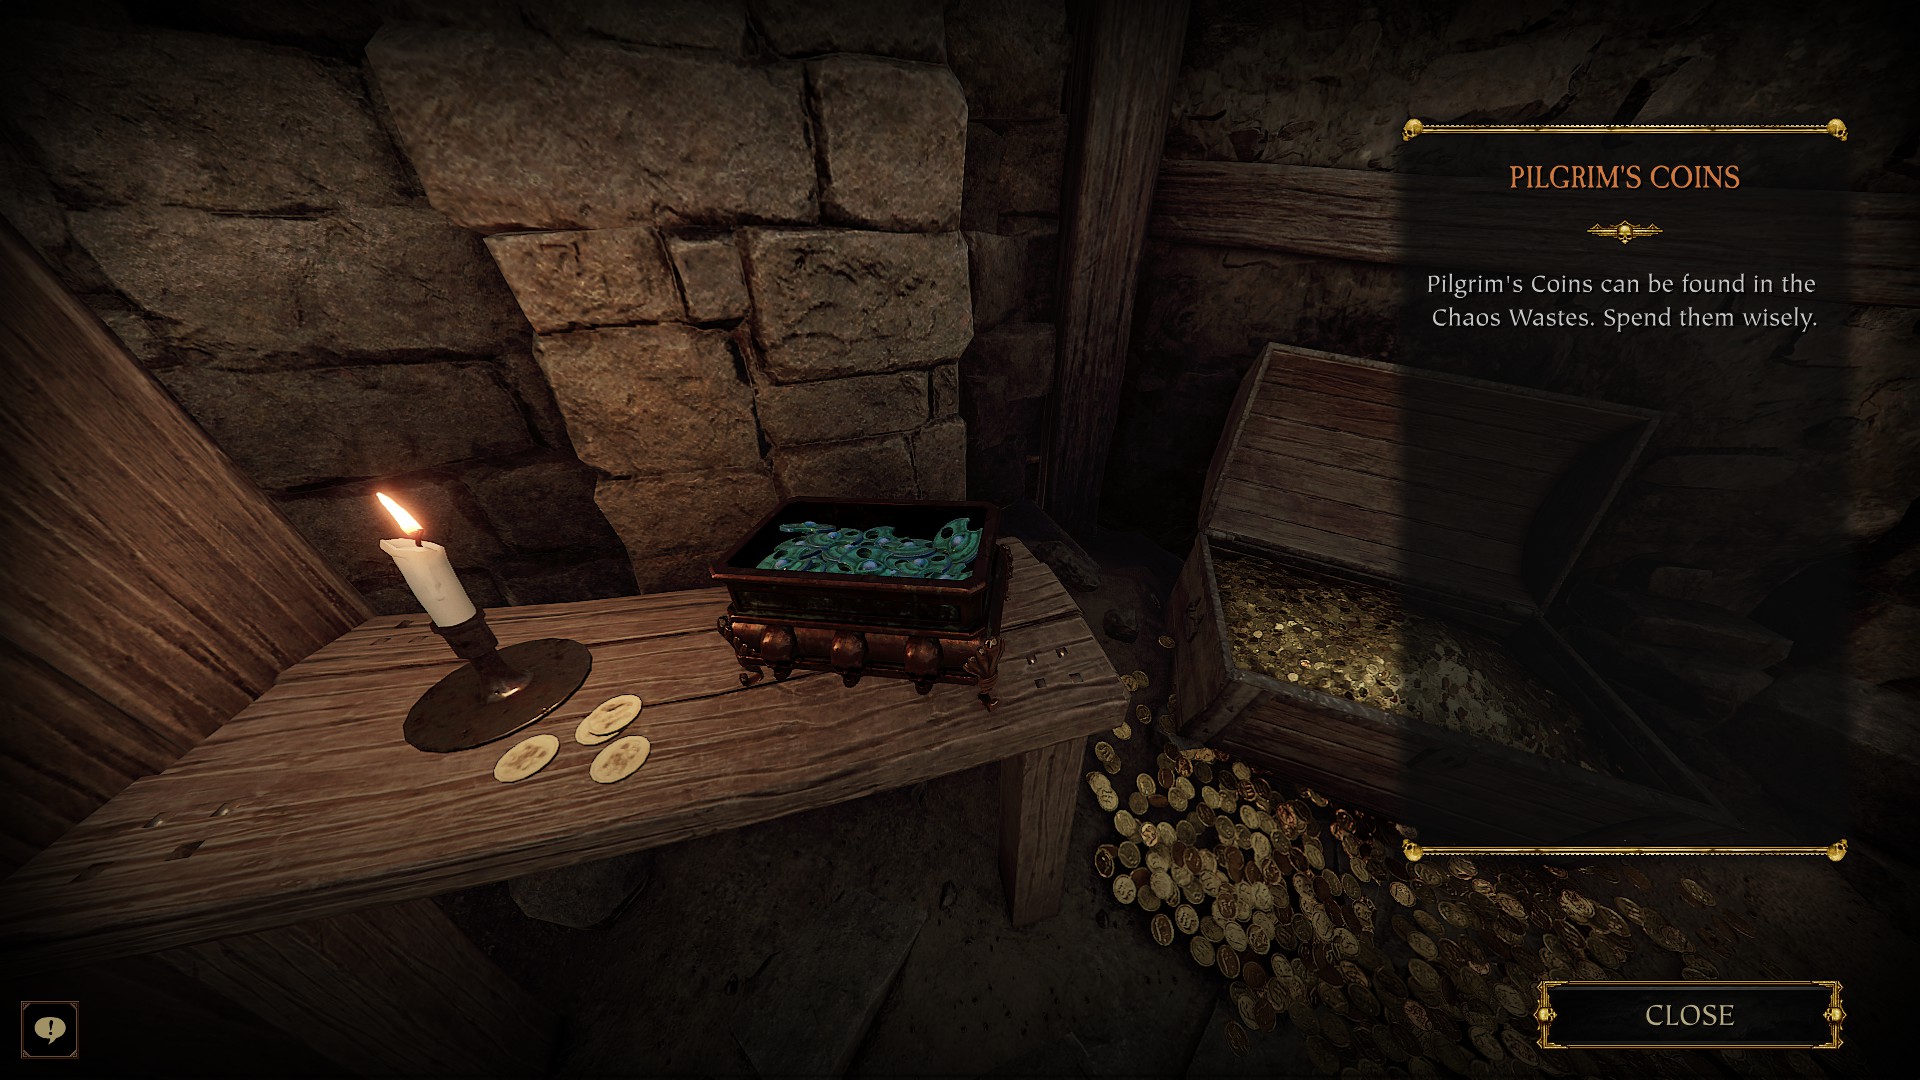
- Pilgrim's Coins is your currency in Chaos Waste. You can find them as map drop or by defeating Monster or get a Lootrat drop.
- Picking up coins benefits the whole party. All members will receive the full amount of coins.
- The Level modifier + Pilgrim's Coins increases the number of coins on the map, does not increase the single coin pickup amount.
- The Weapon Property + Pilgrim's Coins increases single coin pickup amount. You don't need to hold the weapon to receive the bonus. It does not benefit the whole team even if the person with the property picks the coin up.
- If you finished the Expedition, no matter win or lose, 25% of your leftover coins will be saved for the next run. The saved coins cannot be over 200. Leave the game early will not save any coins.
- Playing with Bots increases the amount of coins you get from the coin pickup. The more bots in the party, the more coins you get.
Pilgrim's Coins Amount
Coin Type
3 Bots
2 Bots
1 Bot
0 Bot
Small Pilgrim’s Coins
(map drop)
(map drop)
28 - 59
24 - 51
21 - 44
18 - 38
Large Pilgrim’s Coins
(Monster drop)
(Monster drop)
43 - 104
37 - 90
32 - 78
28 - 68
- Chaos Waste Potion
Chaos Waste Potion Basic
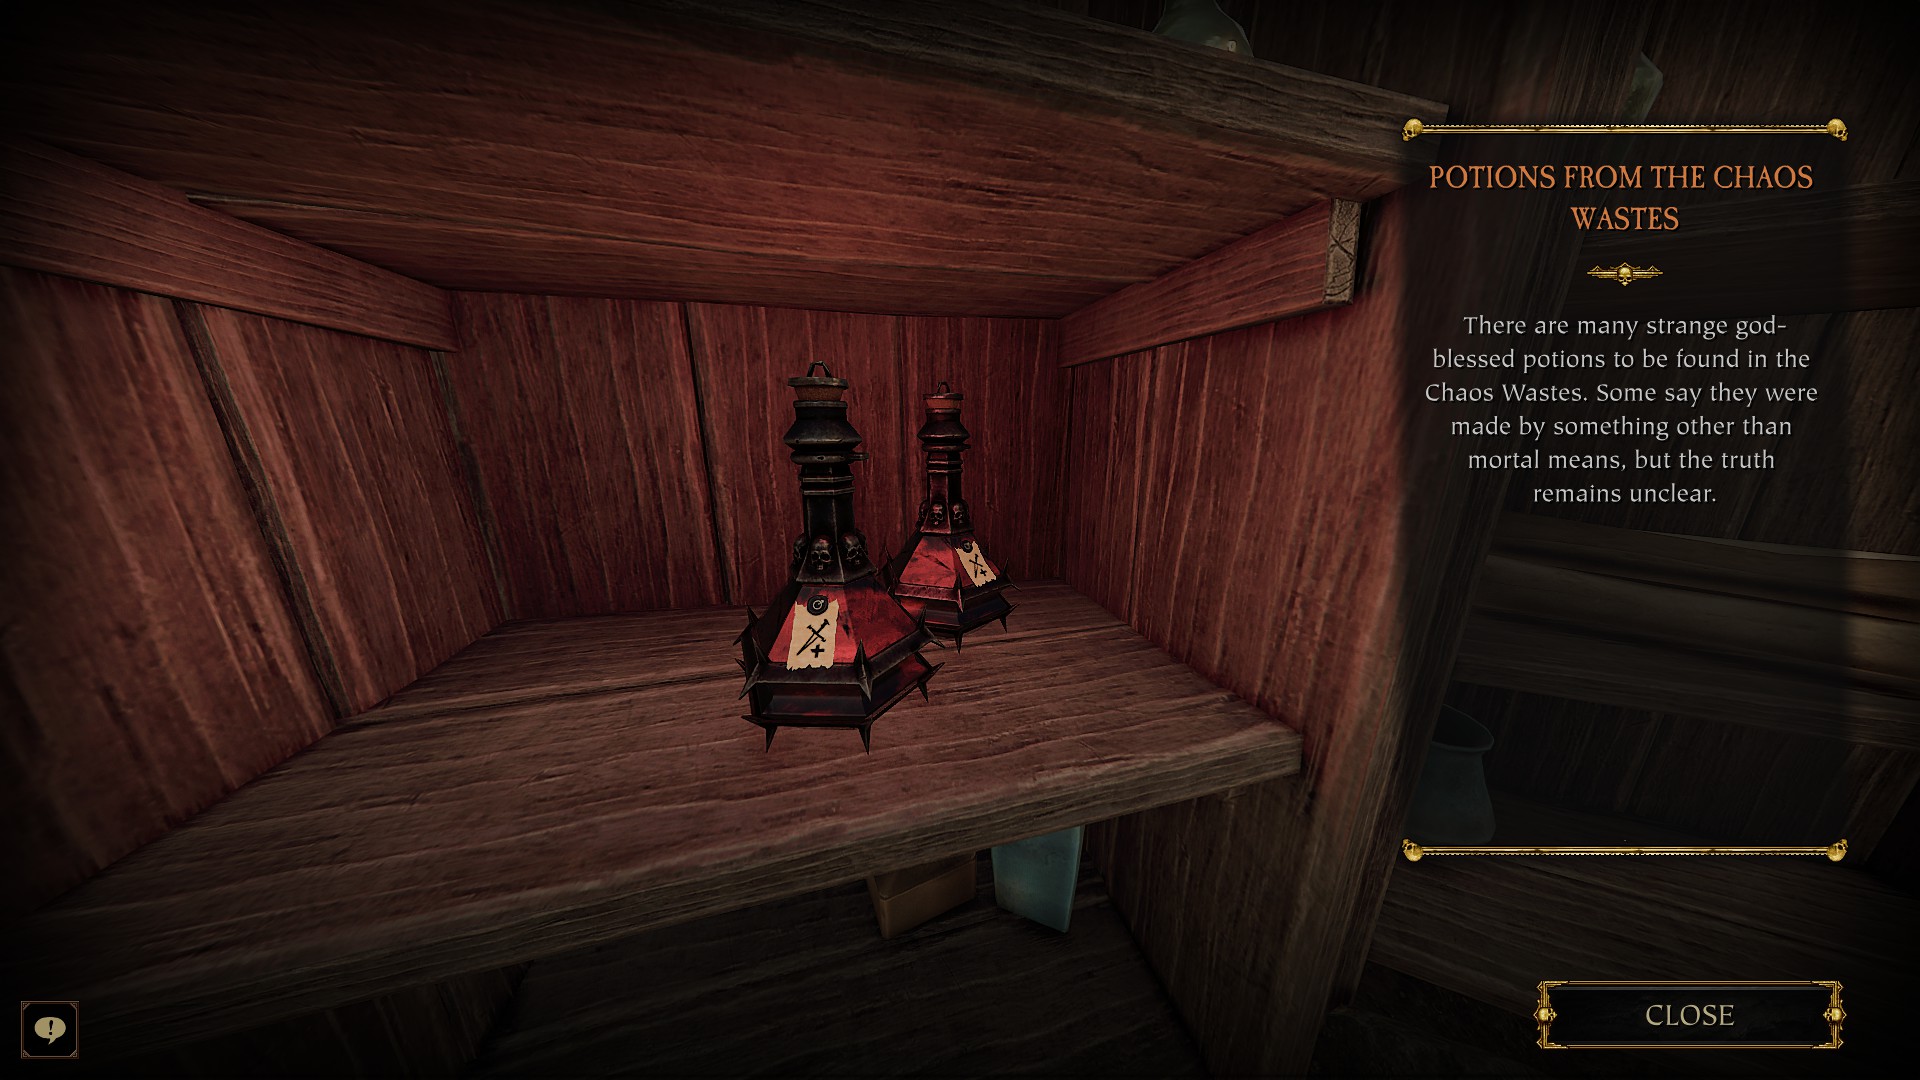
- In Chaos Waste, you cannot find normal potions (Concentration/Speed/Strength) from map drops. Ranger Veteran potion talent drops Chaos Waste Potion. Grail Knight Quest can still drop Strength potion.
- You cannot get Concoction or Proxy as Boon in Chaos Waste, only Home Brewer and Decanter.
- Unlike the description, Decanter grants some potion extra effect, not just increasing duration.
Chaos Waste Potion Effect
Potion
Default Effect
Decanter Effect
Potion of Endless Bombs

Only have 50% spawn chance as other potions.
Grant unlimited usage of equiped grenade, or frag grenade if there is none.
Decrease move speed by 50%, last 10 sec.
Cannot share bombs during the effect.
Grant unlimited usage of equiped grenade, or frag grenade if there is none.
Decrease move speed by 50%, last 10 sec.
Cannot share bombs during the effect.
Only have 50% spawn chance as other potions.
Grant unlimited usage of equiped grenade, or frag grenade if there is none.
Decrease move speed by 25%, last 20 sec.
Cannot share bombs during the effect.
Grant unlimited usage of equiped grenade, or frag grenade if there is none.
Decrease move speed by 25%, last 20 sec.
Cannot share bombs during the effect.
Potion of Life Share

Dealing damage restores all nearby teammates Permanent health for 10 sec. Does not clear wound.
Decrease amount of heal with difficulty. On Recruit heals 40% of damage dealt while Cataclysm heals 20% of damage dealt.
Decrease amount of heal with difficulty. On Recruit heals 40% of damage dealt while Cataclysm heals 20% of damage dealt.
Dealing damage restores all nearby teammates Permanent health for 20 sec. Does not clear wound.
Decrease amount of heal with difficulty. On Recruit heals 40% of damage dealt while Cataclysm heals 20% of damage dealt.
Decrease amount of heal with difficulty. On Recruit heals 40% of damage dealt while Cataclysm heals 20% of damage dealt.
Potion of Life Steal

Dealing damage restores your Permanent health for 15 sec. Does not clear wound.
Decrease amount of heal with difficulty. On Recruit heals 40% of damage dealt while Cataclysm heals 20% of damage dealt.
Decrease amount of heal with difficulty. On Recruit heals 40% of damage dealt while Cataclysm heals 20% of damage dealt.
Dealing damage restores your Permanent health for 30 sec. Does not clear wound.
Decrease amount of heal with difficulty. On Recruit heals 40% of damage dealt while Cataclysm heals 20% of damage dealt.
Decrease amount of heal with difficulty. On Recruit heals 40% of damage dealt while Cataclysm heals 20% of damage dealt.
Potion of Prophetic Strike

Increase power level(all types of damage/stagger/cleave) by 100%, last 15 sec.
Increase power level(all types of damage/stagger/cleave) by 150%, last 25 sec.
Potion of Wrath

Increase weapon damage by 100% for 20 sec, and decrease move speed by 50% for 1.5 sec. Weapon damage including most damage, excluding Bomb and all DoT.
Increase weapon damage by 150% for 30 sec, and decrease move speed by 25% for 1.5 sec. Weapon damage including most damage, excluding Bomb and all DoT.
Potion of Agility

Grants hangover screen effect for 3 sec. And then double the dodge distance for 30 sec.
Grants hangover screen effect for 3 sec. And then triple the dodge distance for 45 sec.
Potion of Stealth

Grant invisibility and phase walk for 5 sec.
Grant invisibility and phase walk for 15 sec.
Potion of Poison Aegis

Grant poison immune for 120 sec.
Grant poison immune for 240 sec.
--- The Dark Master Schemes ---
The Dark Master Schemes Basic
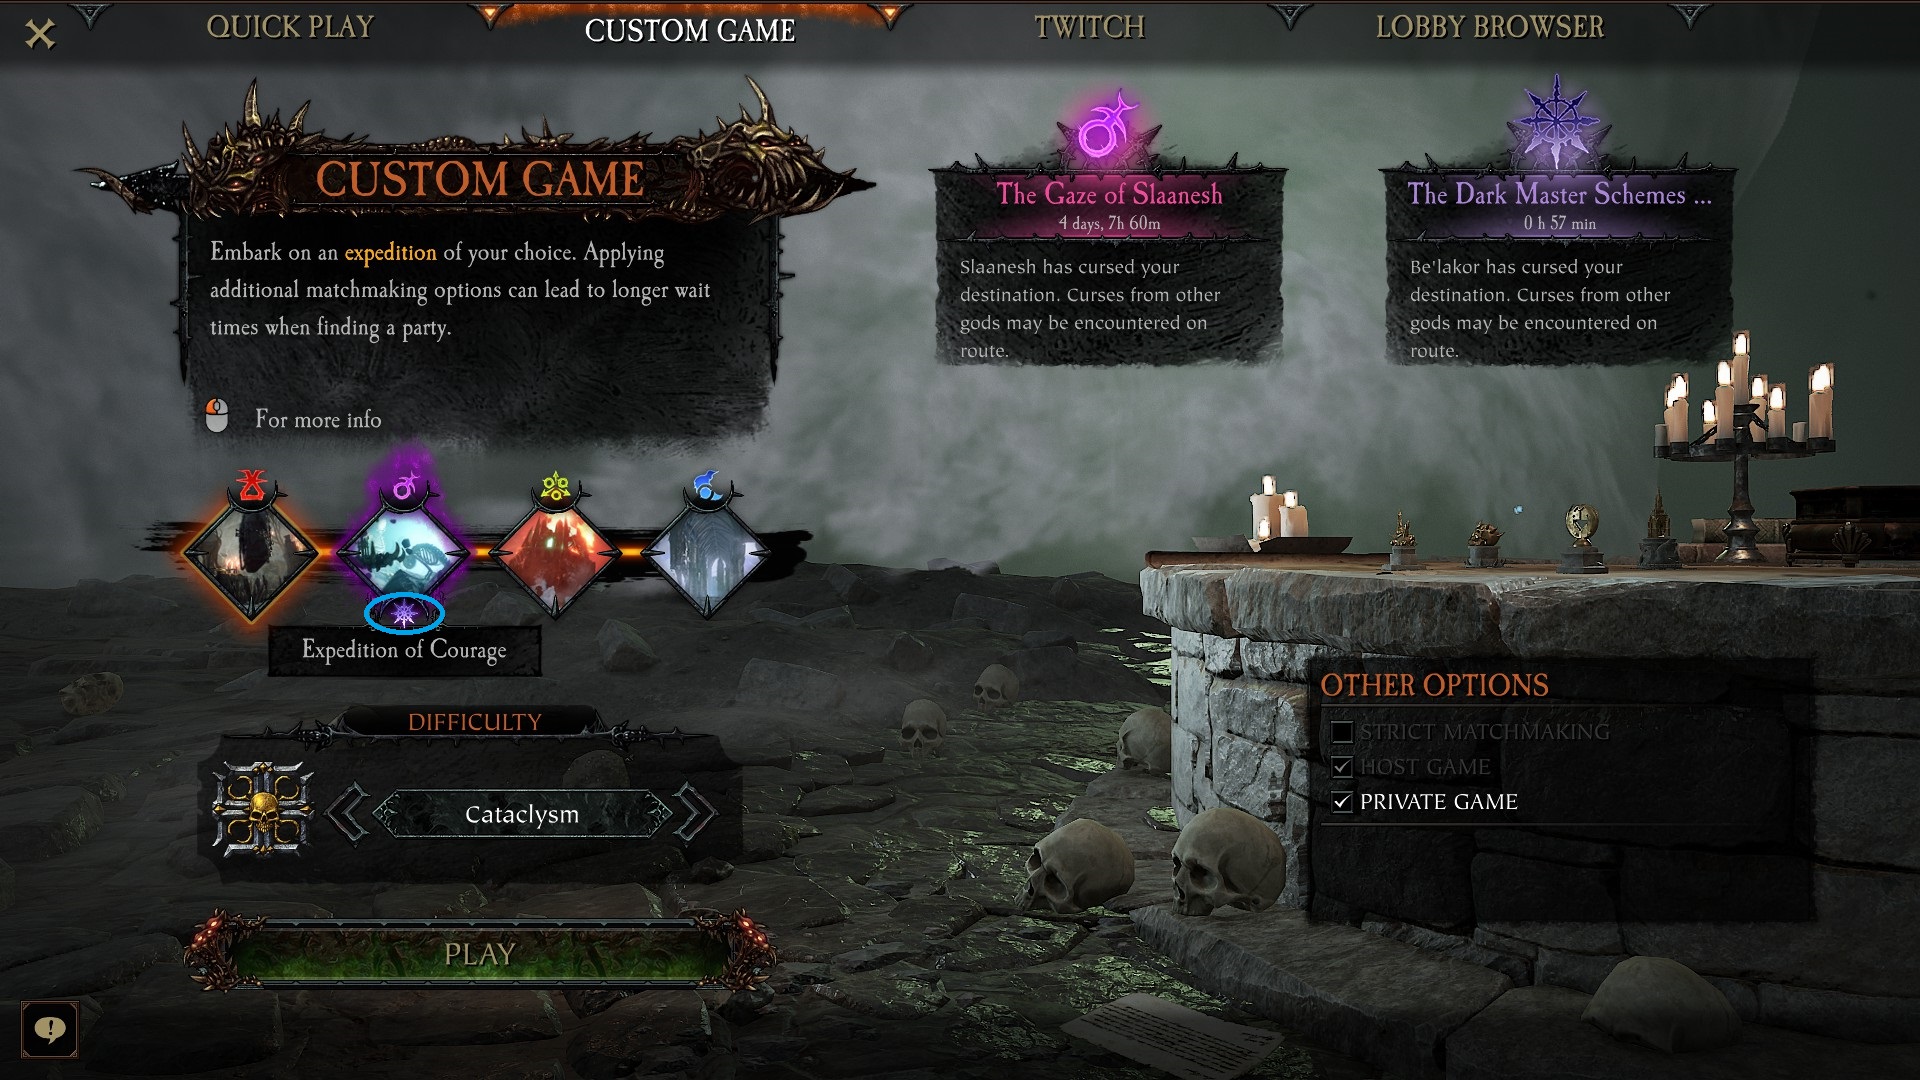
- The Dark Master Be'lakor can curse one of the four Expeditions. Every 3 hours, the cursed target will change.
- Be'lakor can only curse one of the first two Levels in the first half of the Expedition, and maybe change one of the second two Levels into The Temple of Shadows.
- Neither completing the Be'lakor cursed level nor The Temple of Shadows is required to finish the Expedition.
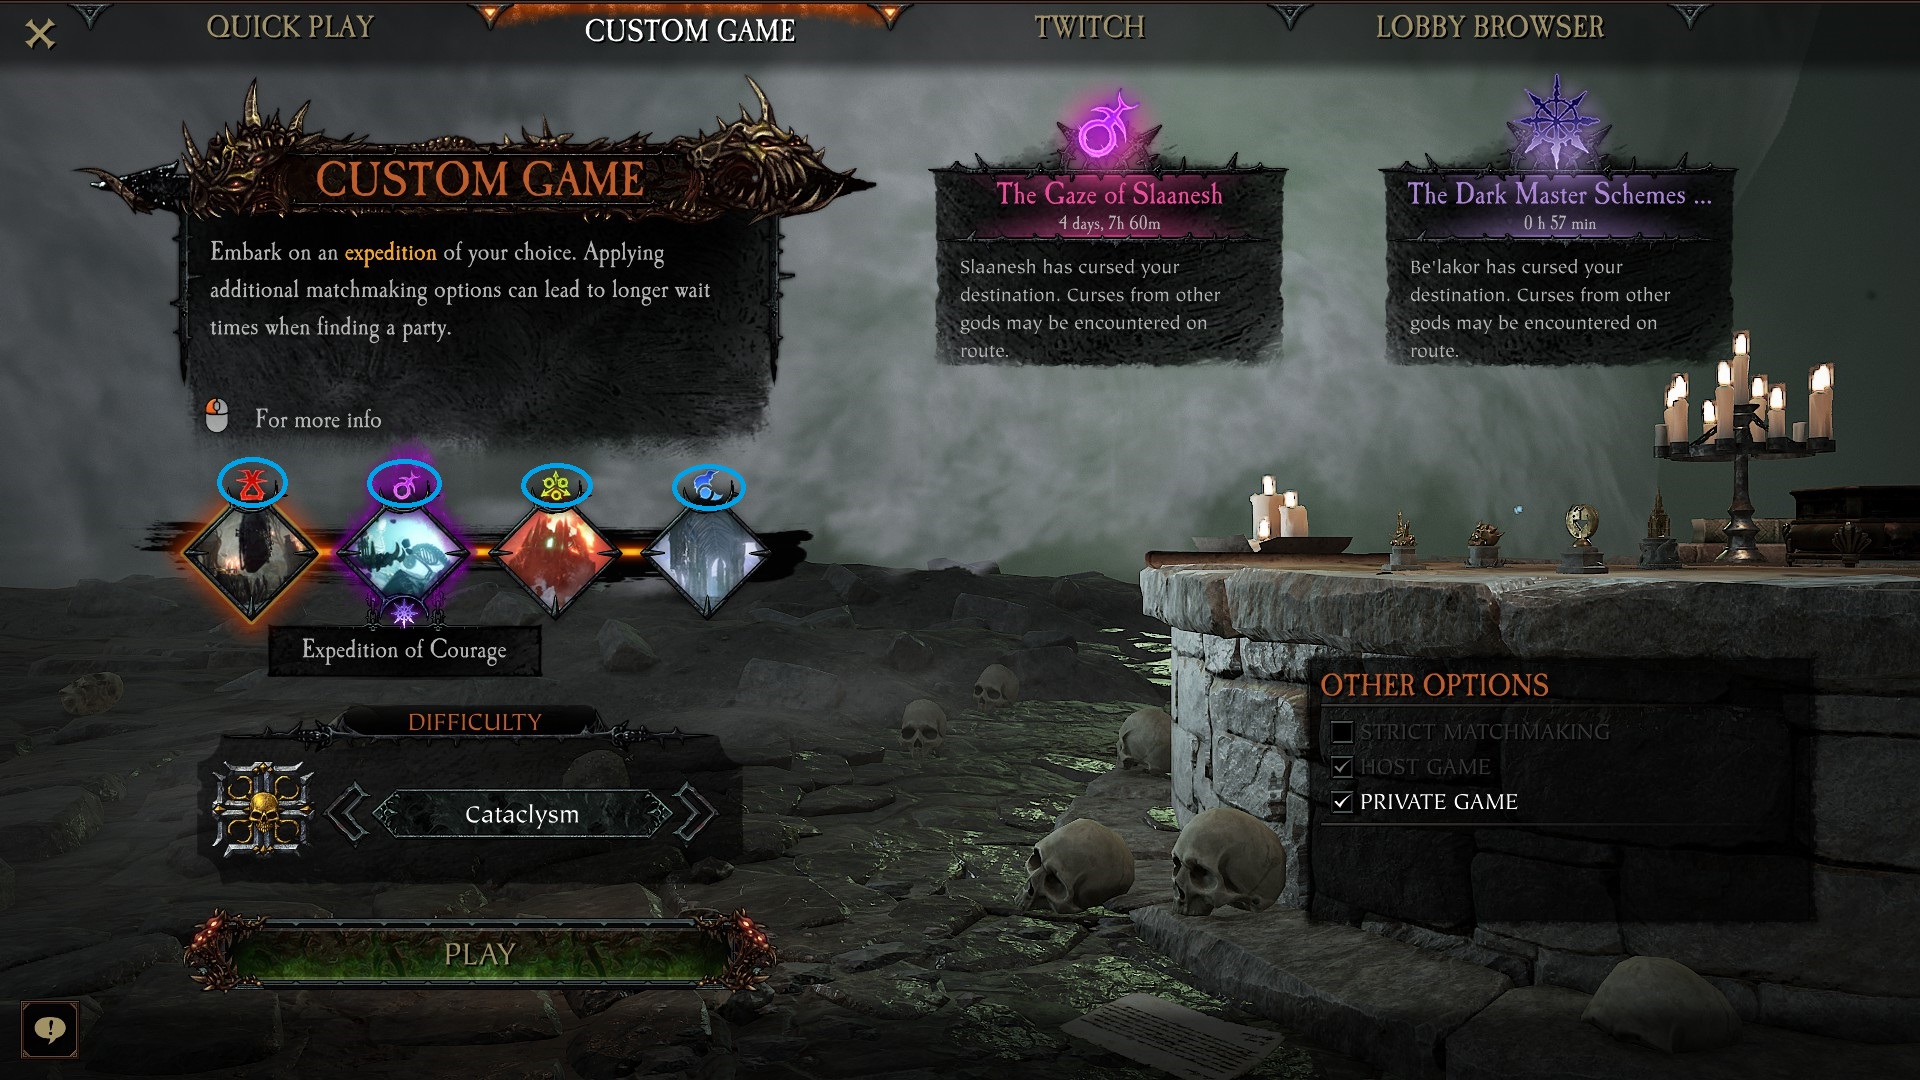
Current Be'lakor Curse is shown on the Custom Game page
- Be'lakor cursed level
Be'lakor cursed level Basic
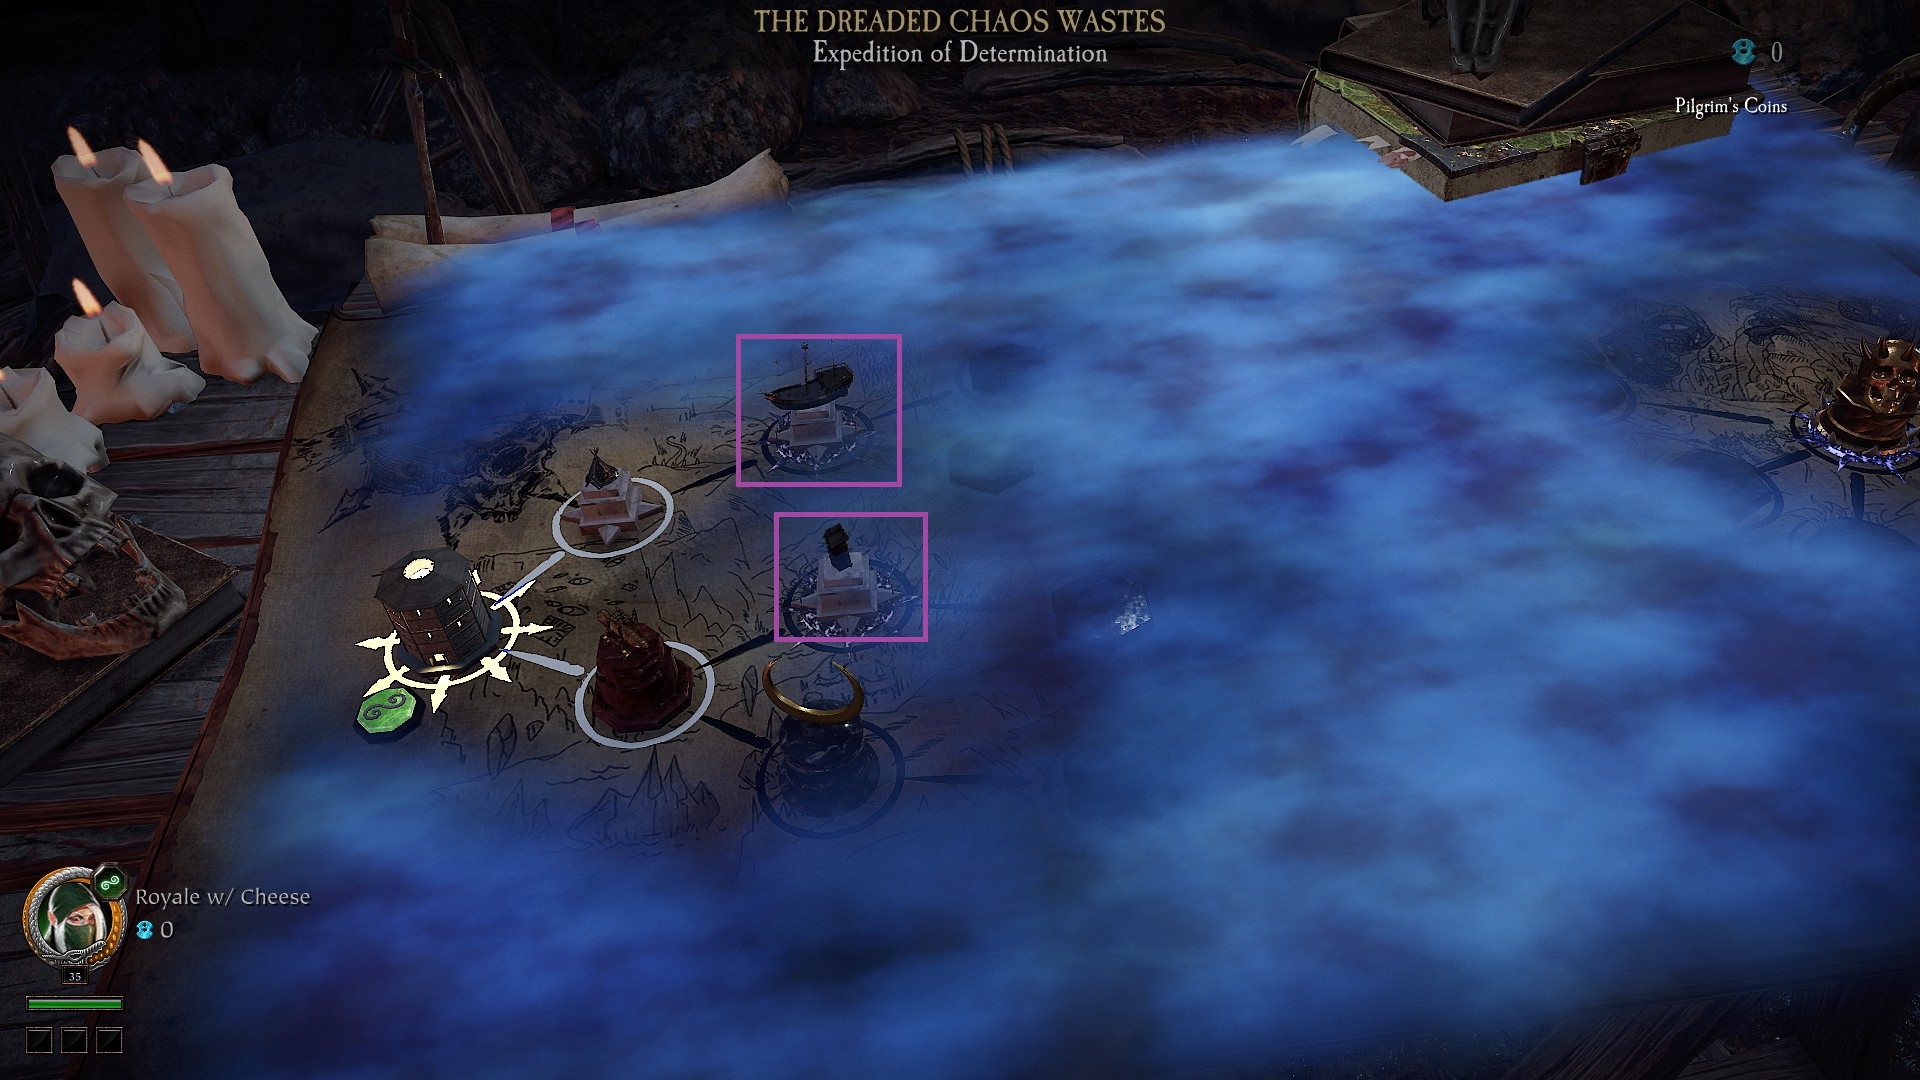
- Be'lakor cursed level can only be found in the first half of the Expedition. Indicated by a light purple halo under the map icon.
- Destroy the Shadow Locus in this level is mandatory to proceed to The Temple of Shadows, but not mandatory to finish the Expedition.
- Skipping the Be'lakor cursed level or not destroying the Shadow Locus in this level will result in being unable to finish the The Temple of Shadows, as Be'lakor cursed level will not spawn again on the Holseher’s Map in the same Expedition.
- Same as regular Level, Be'lakor cursed level will have 1 Faction Type Combination, 2 Level Mutator and 1 Power Up as a reward after finishing the level. It will also have 1 of the 2 Be'lakor Curse as an additional muatator.
Be'lakor Curse Effect
Curse
Effect
Additional notes
Shadow Skulls

Vicious skulls spawn out of thin air. Destroy or avoid them or else be incapacitated.
Spawn 3-5 homing skulls every 20-30 seconds.
The skull has 3 HP, Infantry armour. All parts of the skull are counted as head.
The skull will die/despawn after taking enough damage/hitting a player/hitting terrain.
Skulls in the same wave will all target the same player.
Hitting by the skull will take small damage and be stunned for 2.5 seconds. The stun effect cannot be resolved by teammates' attack/push.
If you got hit by the skull while in the mid air, you will still take damage but won't receive the stun effect.
The skull has 3 HP, Infantry armour. All parts of the skull are counted as head.
The skull will die/despawn after taking enough damage/hitting a player/hitting terrain.
Skulls in the same wave will all target the same player.
Hitting by the skull will take small damage and be stunned for 2.5 seconds. The stun effect cannot be resolved by teammates' attack/push.
If you got hit by the skull while in the mid air, you will still take damage but won't receive the stun effect.
Shadows Totems
Totems around the level will keep spawning enemies. Destroy them to stop the effect.
Can only have 1 Totem on the map. The map will spawn a totem in 25-35 seconds near players if the previous Totem was destroyed.
The Totem has 120 HP, Infantry armour. All damage works on it.
If players are too far away from the Totem, it will teleport near players and regen all the lost HP.
Every 3 seconds, the Totem spawns 4 purple circles near it. After 2 seconds, each circle will spawn one enemy. The circle cannot be stopped/destroyed.
The Totem cannot spawn specials or monsters and only spawn enemies belongs to current map faction.
Every 3 enemy waves, the Totem will spawn a wave with harder composition. When below 50% HP, it will spawn even harder waves.
The Totem has 120 HP, Infantry armour. All damage works on it.
If players are too far away from the Totem, it will teleport near players and regen all the lost HP.
Every 3 seconds, the Totem spawns 4 purple circles near it. After 2 seconds, each circle will spawn one enemy. The circle cannot be stopped/destroyed.
The Totem cannot spawn specials or monsters and only spawn enemies belongs to current map faction.
Every 3 enemy waves, the Totem will spawn a wave with harder composition. When below 50% HP, it will spawn even harder waves.
Be'lakor cursed level on Holseher’s Map
- The Temple of Shadows
The Temple of Shadows Basic
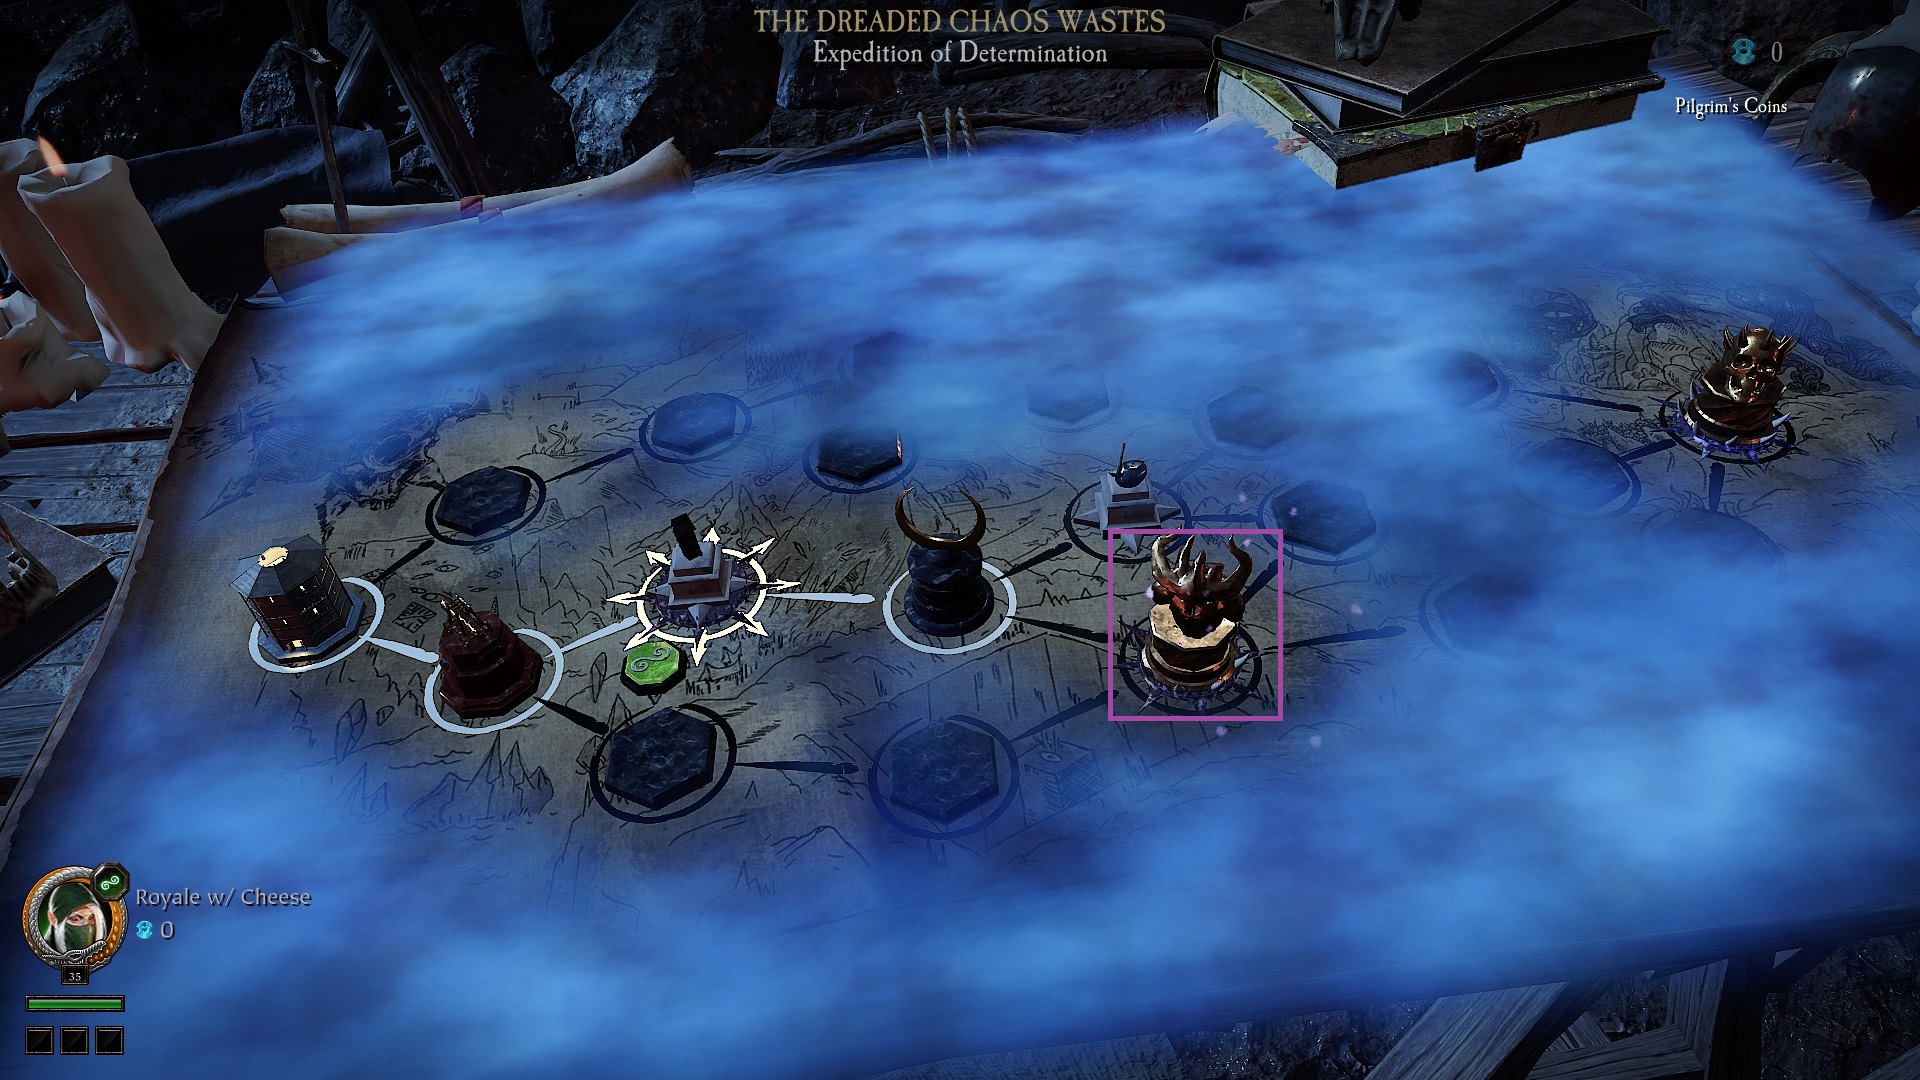
- The Temple of Shadows can only be found in the second half of the Expedition. Indicated by the unique map icon and a light purple halo under the map icon.
- The main objective of The Temple of Shadows is to destroy the three Shadow Locus in this level.
- Skipping the current The Temple of Shadows will result in being unable to finish the The Temple of Shadows map, as The Temple of Shadows will not spawn again on the Holseher’s Map in the same Expedition.
- Unlike regular Level, The Temple of Shadows will have 1 Faction Type Combination but no Level Mutator nor Chaos Gods Curse.
- Finishing The Temple of Shadows will be rewarded with 2 Veteran Boons.
The Temple of Shadows on Holseher’s Map
- Shadow Locus
Shadow Locus Basic
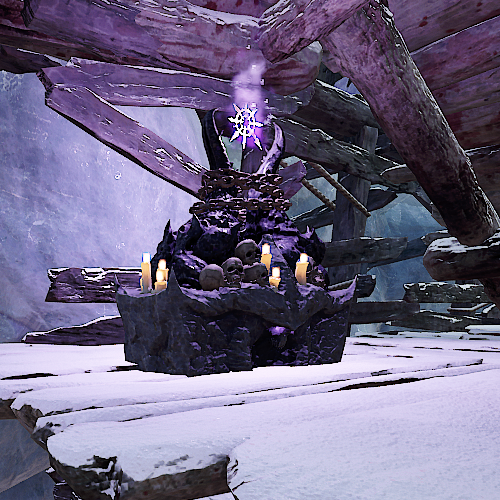
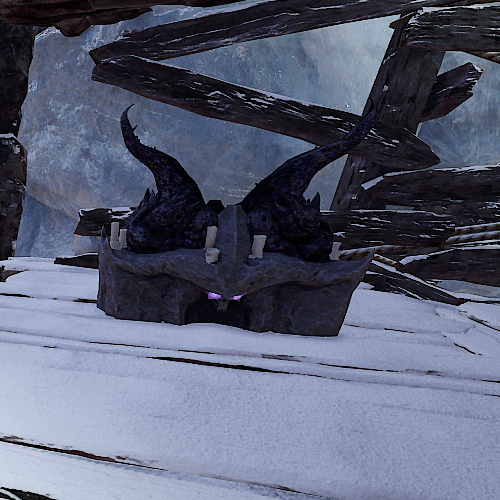
- Shadow Locus is a special objective that is unique to Be'lakor cursed level and The Temple of Shadows.
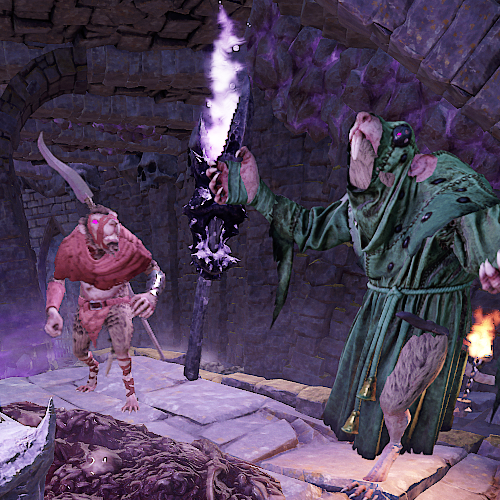
- Shadow Locus is guarded by Be'lakor Cultists. They can be aggroed by attacking them or interacting with Shadow Locus.
- Once activated by interacting with it, Shadow Locus will spawn 3 waves of enemies. The first two waves can be any regular non-special/monster & non-Chaos Warrior enemies. The last wave is consist of one Shadow Champion.
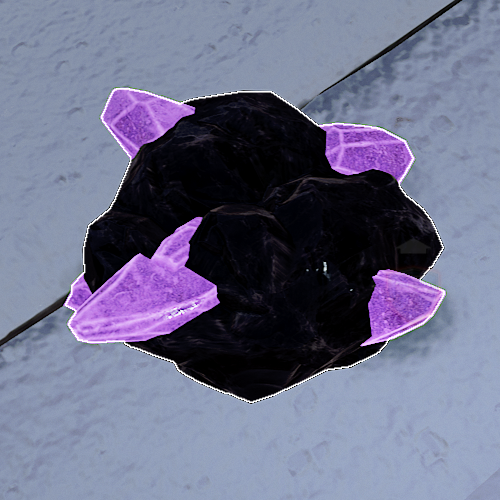
- After killing all three waves of enemies, an Ulgu Crystal will drop near the Shadow Champion or the Shadow Locus. Pick up the Ulgu Crystal and then interact with the Shadow Locus will destroy it.
Be'lakor Cultists
- Be'lakor Cultists are the Clan Rats and Plague Monks guarding the Shadow Locus. They can be aggroed by attacking them or interacting with Shadow Locus.
- Be'lakor Cultists have special purple eyes.
- Be'lakor Cultists have buffed stats. They have 225% HP, dealing 125% damage, have 190% mass and 110% stagger resistance.
Shadow Champion
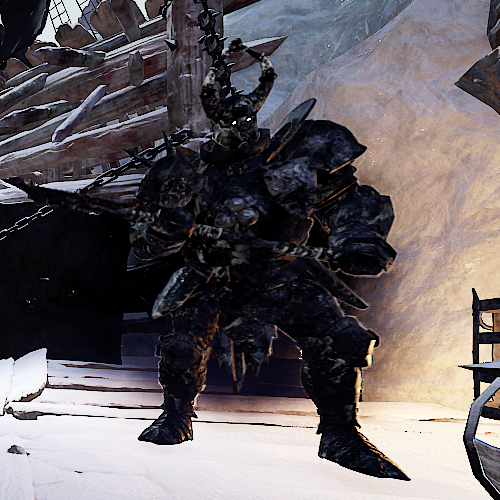
- Shadow Champion is a buffed Chaos Warrior with a unique visual presentation.
- Shadow Champion has 325% HP, dealing 20% more damage and its knockback distance is reduced by 70%.
- Shadow Champion also carries 1 or 2 Grudge Mark attributes. Its Grudge Mark attribute or Grudge Mark attributes combination, however, can only come from 1 of the 3 pools.
- Shadow Champion can be affected by Miracle of Grimnir
Grudge Mark Pool I
Crippling
Illusionist
Frenzy
Grudge Mark Pool II
Regenerating
Cursed Aura
Relentless
Grudge Mark Pool III
Shield-shatter
Rampart
Vampiric
Picture of Shadow Locus & Destroyed Shadow Locus
Picture of Be'lakor Cultists & Shadow Champion
Picture of Ulgu Crystal
--- Shrine ---
Shrine Basic
- All Shrine provides Miracles - party-wide buff and 4 Boons - single person buff.
- Rare Boon (60% chance to appear) costs 200 coins. Exotic Boon (30% chance to appear) costs 250 coins. Veteran Boon (10% chance to appear) costs 300 coins.
- When Event Boon is presented in the pool, Event Boon has 37.5% chance to appear and costs 100 coins, Rare Boon has 37.5% chance to appear. Exotic Boon has 18.75% chance to appear. Veteran Boon has 6.25% chance to appear.
- Different characters will see different Shrine models on the Holseher’s Map, as they worship different gods.
Shrine of Strife - Unique Miracles
Blessing
Cost
Effect
Additional notes
Miracle of Grimnir
200
A mighty monster waits for you in the next level. Slay it to increase max health by 20%.
Spawned boss has 50% more HP and does 50% more damage.
Shadow Champion counts as a Monster in this case.
In order to receive the max health buff, players need to be alive when the monster dies.
Shadow Champion counts as a Monster in this case.
In order to receive the max health buff, players need to be alive when the monster dies.
Miracle of Morgrim

200
Grants Morgrim’s Bomb(Bomb Item, One Use Only). A powerful explosive with a long delay.
Can be duped with some talents or boons.
Affected by Grenadier/Explosive Ordinance/Shrapnel.
Explode after 5 sec delay. Has no friendly fire damage.
Damage is not affected by Weapon Power but other damage buffs.
Base damage is different on different difficulties.
Recruit: 775
Veteran: 945
Champion: 1030
Legend: 1230
Cataclysm: 1790
Affected by Grenadier/Explosive Ordinance/Shrapnel.
Explode after 5 sec delay. Has no friendly fire damage.
Damage is not affected by Weapon Power but other damage buffs.
Base damage is different on different difficulties.
Recruit: 775
Veteran: 945
Champion: 1030
Legend: 1230
Cataclysm: 1790
Miracle of Ulric

100
Permanently increase your current weapons’ Power by 50.
Only affect current weapons.
Lose the effect after switching/upgrading weapons.
Lose the effect after switching/upgrading weapons.
Shrine of Harmony - Unique Miracles
Blessing
Cost
Effect
Additional notes
Miracle of Shallya

200
For the next level, temporary health is converted to permanent health.
/
Miracle of Isha

200
When the last member of the party is knocked down, Isha restores their hp to full and strikes down nearby enemy.
Last indefinitely until this effect is triggered.
The strike effect does not deal damage to enemies or teammates.
The strike effect does not deal damage to enemies or teammates.
Miracle of Rhya

200
Grants a Jade Censer(Healing Item, One Use Only). When deployed, heals and strengthens your team for 120 sec.
Increase players who are in the range max HP by 20%.
Regen 5 permanent HP per sec.
Can be duped with some talents or boons.
Regen 5 permanent HP per sec.
Can be duped with some talents or boons.
Shrine of Fortune - Unique Miracles
Blessing
Cost
Effect
Additional notes
Miracle of Smednir

200
Increase Pilgrim’s Coins gained by 50% for the next level at the cost of receiving an extra 20% damage for the next level.
/
Miracle of Ranald

200
For the next level, Elites and Special have a chance to drop pickups upon death.
Can drop Bomb, Incendiary Bomb, Ammo Pouch, all potions except Potion of Poison Aegis.
Has an extremely small chance to drop Morgrim’s Bomb(0.13%).
Has an extremely small chance to drop Morgrim’s Bomb(0.13%).
--- Arena ---
- Arena is at the end of each Expedition. Each Expedition has its corresponding Arena.
- Expedition of Fortitude - Arena of Fortitude
- Expedition of Courage - Arena of Courage
- Expedition of Determination - Arena of Determination
- Expedition to the Citadel of Eternity - Citadel of Eternity
- Expedition of Fortitude - Arena of Fortitude
- The Chaos Gods Curse on each Arena is changed every 7 days. It only decides the curse on the final Arena, does not affect other Levels during the Expedition.
- The following Chaos Gods Curse can not show up in the Arena.
- Nurgle - Skulking Sorcerer
- Tzeentch - Crystal Egg
- Slaanesh - Glory to Greed
- Slaanesh - Unquenchable Thirst
Current Chaos Gods Curse is shown on the Custom Game page - Nurgle - Skulking Sorcerer
--- Boon ---
- Boon is powerful buff you get from Seer's Altar/Chest of Trials/Shrine in Chaos Waste, or as rewards for complete The Temple of Shadows, or by acquiring a set of specific Boons.
- Each week's Weekly Expedition also grants a specific set of Boon
- There are 4 tiers of Boon: Event, Rare, Exotic, Veteran.
- While inside Holseher’s Map, you can check all your current Boon and Power Up you get from completed Levels by pressing Tab. After that, you can choose to purge Boon, remove it from your loadout by holding Mouse Middle Button.
You cannot purge Talents you selected at pilgrimage chamber or Power Up. - While inside a Level, you can check all your current Boon and Power Up you get from completed Levels by pressing Inventory Hotkey (default key: I). Hover over them to see their effect.
- For Outcast Engineer, all Boon that requires using Career Skill can be activated by using 50% of max cooldown in one activation of his minigun, holding down MLB the whole time.
- Base Game Ported Boon
Name
Rarity
Description
Level 10, 20, 25 talents
Rare
Can only get your career's talents.
Appear even if the Character does not reach the Level requirement.
Some talents do not stack with each other.
Appear even if the Character does not reach the Level requirement.
Some talents do not stack with each other.
Level 5 talents
Exotic
Can only get your career's talents.
Appear even if the Character does not reach the Level requirement.
Some talents do not stack with each other.
Appear even if the Character does not reach the Level requirement.
Some talents do not stack with each other.
Level 30 talents
Unique
Can only get your career's talents.
Appear even if the Character does not reach the Level requirement.
Some talents do not stack with each other.
Appear even if the Character does not reach the Level requirement.
Some talents do not stack with each other.
Home Brewer
Rare
25% chance to not consume potion on use.
Decanter
Rare
Increased the duration and improve some potion's effect.
Healers Touch
Rare
25% chance to not consume healing item on use.
Hand of Shallya
Rare
Healing yourself with a First Aid Kit or a Healing Draught also heals your nearby allies for 20% of their maximum health. Clears any wounds.
Boon of Shallya
Rare
Increases effectiveness of healing on you by 30%.
Natural Bond
Rare
Passively regenerates 1 health every 5 seconds. Healing from First Aid Kits and Healing Draughts are converted to temporary health and cure any wound.
Barkskin
Rare
Taking damage reduces the damage you take from subsequent sources by 40% for 2 seconds. This effect can only trigger every 2 seconds.
Grenadier
Rare
50% chance to not consume grenade on use.
Explosive Ordinance
Rare
Increases grenade explosion radius by 50%.
Shrapnel
Rare
Grenades cause hit enemies to take 20% increased damage for 10 seconds.
*Underline means effect got changed compares to the base game.
- Event Boon
Event Boon Basic
- Event Boon is a special rarity of Boon. It can only be acquired during certain in-game events.
- You can acquire Event Boon from Seer's Altar/Chest of Trials/Shrine, except Skulls Slaughter Boon Set and Skulls Pick Up Daemon Skull Boon Set.
- When Event Boon is presented in the pool, Event Boon has 37.5% chance to appear, Rare Boon has 37.5% chance to appear. Exotic Boon has 18.75% chance to appear. Veteran Boon has 6.25% chance to appear.
Skull Throne in-game event Boon
- For all 5 'Righteous' Skull Boons, upon getting the high tier buff, all Skull Event boons will refresh the buff you get from picking up the Khorne Daemon Skull on the ground, and all other Skull Event boons low and/or high tier buff.
Does not reset Righteous Finesse cooldown.
Name
Description
Righteous Frenzy

1% Attack Speed on hit(stack 10 times). Upon 10 stacks, gain a further 20% Attack Speed for 10 seconds and refresh the duration of other Skull Boons.
Trigger by hitting enemies with any melee attack.
Both stackable and bonus attack speed last 10 sec.
Up on 10 stacks, lose the low tier buff and gain the high tier buff.
With Skulls Slaughter Boon Set, both the low tier and high tier buff receive the 50% duration and effect increase.
Trigger by hitting enemies with any melee attack.
Both stackable and bonus attack speed last 10 sec.
Up on 10 stacks, lose the low tier buff and gain the high tier buff.
With Skulls Slaughter Boon Set, both the low tier and high tier buff receive the 50% duration and effect increase.
Righteous Strength

1% Power Level for each kill. Upon killing 10 enemies, gain a further 30% Power Level for 10 seconds and refresh the duration of other Skull Boons.
Trigger on kill.
Stackable buff provides 1.5% Power Level per stack and last 10 sec.
Up on 10 stacks, lose the low tier buff and gain the high tier buff.
With Skulls Slaughter Boon Set, both the low tier and high tier buff receive the 50% duration increase.
Currently only low tier buff receive effect increase.
Trigger on kill.
Stackable buff provides 1.5% Power Level per stack and last 10 sec.
Up on 10 stacks, lose the low tier buff and gain the high tier buff.
With Skulls Slaughter Boon Set, both the low tier and high tier buff receive the 50% duration increase.
Currently only low tier buff receive effect increase.
Righteous Finesse

Parrying and enemy inflicts a powerful Knockback and refreshes other Skull Boons. 30 seconds cooldown.
''Parry' means 'timed block'.
Create an explosion near the parried enemy.
Stagger all types of enemies and deal minor damage.
With Skulls Slaughter Boon Set, cooldown is reduced to 20 sec.
''Parry' means 'timed block'.
Create an explosion near the parried enemy.
Stagger all types of enemies and deal minor damage.
With Skulls Slaughter Boon Set, cooldown is reduced to 20 sec.
Righteous Regeneration

You Attacks consume up to 3 Temporary Health. Upon consuming 30 Temporary Health, gain a buff that provides 3 Temporary Health per seconds, 30% Cooldown Regen for 10 seconds and refresh the duration of other Skull Boons.
Trigger by hitting enemies with any melee attack.
With Skulls Slaughter Boon Set, the buff duration is increased to 15 seconds, the Cooldown Regen rate is increased to 45%.
Currently, Temporary Health regen pre tick does not change.
Trigger by hitting enemies with any melee attack.
With Skulls Slaughter Boon Set, the buff duration is increased to 15 seconds, the Cooldown Regen rate is increased to 45%.
Currently, Temporary Health regen pre tick does not change.
Righteous Smiting

Gain 2% stacking Power Level for 10 seconds on charged Melee Attacks. Upon reaching 5 Stacks, all Stacks a consumed, granting 20% Power Level for 10 seconds and refresh the duration of other Skull Boons.
Trigger on hitting enemies with heavy melee attack.
Up on 10 stacks, lose the low tier buff and gain the high tier buff.
With Skulls Slaughter Boon Set, both the low tier and high tier buff receive the 50% duration and effect increase.
Trigger on hitting enemies with heavy melee attack.
Up on 10 stacks, lose the low tier buff and gain the high tier buff.
With Skulls Slaughter Boon Set, both the low tier and high tier buff receive the 50% duration and effect increase.
Skulls Power Boon

+2.5% power for every active Daemon Skull buff.
Only counts the 5 buff you get when picking up Daemon Skull.
Does not count Chaos Waste Skull Boons.
With Skulls Pick Up Daemon Skull Boon Set, increase Power Level per stack to 3.125%.
Only counts the 5 buff you get when picking up Daemon Skull.
Does not count Chaos Waste Skull Boons.
With Skulls Pick Up Daemon Skull Boon Set, increase Power Level per stack to 3.125%.
Skulls Pilgrim's Coin Boon

Party members gain 10 Pilgrim's Coins when a Daemon Skull is picked up.
Any players picking up Daemon Skull will grant any players with this boon 10 coins.
The amount of coin per pick up is affected by all types of coin boost.
With Skulls Pick Up Daemon Skull Boon Set, increase coin gain to 12.5, rounded to 12 without other coin boost.
Any players picking up Daemon Skull will grant any players with this boon 10 coins.
The amount of coin per pick up is affected by all types of coin boost.
With Skulls Pick Up Daemon Skull Boon Set, increase coin gain to 12.5, rounded to 12 without other coin boost.
Skulls Cooldown Boon

Picking up a Daemon Skull refreshes 35% of your Ability Bar.
Gain 35% of max cooldown per Daemon Skull pickup.
With Skulls Pick Up Daemon Skull Boon Set, increase Cooldown Refund to 43.75%.
Gain 35% of max cooldown per Daemon Skull pickup.
With Skulls Pick Up Daemon Skull Boon Set, increase Cooldown Refund to 43.75%.
Skulls Slaughter Boon Set

Amplifies Set Effects by 50%. Increases duration of Set Buffs by 50%.
Cannot be acquired through Seer's Altar/Chest of Trials/Shrines/The Temple of Shadows.
Automatically acquired once get 5 of these 5 boons:
Righteous Frenzy
Righteous Strength
Righteous Finesse
Righteous Regeneration
Righteous Smiting
Has no effect on Daemon Skull buff duration.
Only affects the 5 Skull Boons with 'Righteous' in their name.
Cannot be acquired through Seer's Altar/Chest of Trials/Shrines/The Temple of Shadows.
Automatically acquired once get 5 of these 5 boons:
Righteous Frenzy
Righteous Strength
Righteous Finesse
Righteous Regeneration
Righteous Smiting
Has no effect on Daemon Skull buff duration.
Only affects the 5 Skull Boons with 'Righteous' in their name.
Skulls Pick Up Daemon Skull Boon Set

Amplifies Set Effect by 25%. Increases duration of Daemon Skull Buffs by 50%.
Cannot be acquired through Seer's Altar/Chest of Trials/Shrines/The Temple of Shadows.
Automatically acquired once get 3 of these 3 boons:
Skulls Power Boon
Skulls Pilgrim's Coin Boon
Skulls Cooldown Boon
Has no effect on Skull Boons with 'Righteous' in their name.
Only affects the 5 Daemon Skull buff duration and 3 Skull Boons with 'Skulls' in their name.
Cannot be acquired through Seer's Altar/Chest of Trials/Shrines/The Temple of Shadows.
Automatically acquired once get 3 of these 3 boons:
Skulls Power Boon
Skulls Pilgrim's Coin Boon
Skulls Cooldown Boon
Has no effect on Skull Boons with 'Righteous' in their name.
Only affects the 5 Daemon Skull buff duration and 3 Skull Boons with 'Skulls' in their name.
- Original Boon - Rare
Name
Description
Djaf's Reaping

Landing 3 Melee headshots in a row grants 15% increased Melee Power for 10 seconds.
Drakira's Thirst

Killing a Special replenishes 10% of your ability bar.
Any member in the team killing the special will trigger this boon.
Any member in the team killing the special will trigger this boon.
Esmeralda's Solace

Reviving a teammate grants both of you health regeneration for 15 seconds.
Can be triggered with Mercenary On Yer Feet, Mates!/Warrior Priest The Comet's Gift.
Heal both players 2 permanent HP every 1 sec.
Can be triggered with Mercenary On Yer Feet, Mates!/Warrior Priest The Comet's Gift.
Heal both players 2 permanent HP every 1 sec.
Estreuth's Abstinence

Taking damage while incapacitated grants you 50% damage reduction for 10 seconds.
Works on ledge too.
Works on ledge too.
Kurnous' Precision

Increase headshot damage by 50%. Lower non-headshot damage by 10%
Cannot be obtained from Seer's Altar (Boon Altar).
Increase headshot damage multiplier.
Cannot be obtained from Seer's Altar (Boon Altar).
Increase headshot damage multiplier.
Ptra's Endurance

Standing still grants you 60% damage reduction.
Works on Assassin, Hookrat and ledge too.
For Life Leech, when you are travelling through the air it doesn't work, but once you stopped it will provide the damage reduction.
Works on Assassin, Hookrat and ledge too.
For Life Leech, when you are travelling through the air it doesn't work, but once you stopped it will provide the damage reduction.
Quetzl's Protection

Gain 2 stamina shields.
Ualapt's Cunning

Picking up ammunition grants 15 health.
Grants permanent HP.
Cannot be triggered by picking up throwing axes.
Grants permanent HP.
Cannot be triggered by picking up throwing axes.
Verena's Inspiration

Increases Ability Bar cooldown rate by 10%.
Xokha's Duty

Using your Career Skill returns 10% of nearby allies' Ability Bars.
The effect is triggered when career skill is activated by pressing career skill key.
Can be triggered by effects like Sister of the Thorn's Radiance, and twice by Battle Wizard Burnout.
Allies need to be within 20 units.
The effect is triggered when career skill is activated by pressing career skill key.
Can be triggered by effects like Sister of the Thorn's Radiance, and twice by Battle Wizard Burnout.
Allies need to be within 20 units.
- Be’lakor update Boon - Rare
Name
Description
Eldrazor's Revenge

When your Block is broken you gain 15% Attack Speed for 15s.
Morai-Heg's Doom

For 2 seconds after leaving invisibility, all Attacks are automatically Critical Hits.
Instantly refresh duration when lose and regain invisibility.
Applies to all invisbility sources, including Potion of Stealth and the brief invisbility that Battle Wizard gains during the career skill.
Instantly refresh duration when lose and regain invisibility.
Applies to all invisbility sources, including Potion of Stealth and the brief invisbility that Battle Wizard gains during the career skill.
Valaya's Heart

Gain 5% Melee Power for each nearby ally.
Counts yourself, with minimum 1 stack & maximum 4 stacks.
Has a range of 10 units, same range as Ironbreaker/Witch Hunter Captain career skill default range.
Counts yourself, with minimum 1 stack & maximum 4 stacks.
Has a range of 10 units, same range as Ironbreaker/Witch Hunter Captain career skill default range.
Isha's Gift

You revive with full Health. 120 second Cooldown.
Khaine's Thirst

5% Damage Reduction for every 20 Health lost. Stacks up to 5 times.
Only counts permanent HP lost.
Only counts permanent HP lost.
Smednir's Wealth

Auto-pickup Pilgrim's Coins in a 10m radius.
Pick up coin every 1 second.
Same range as Ironbreaker/Witch Hunter Captain career skill default range.
Pick up coin every 1 second.
Same range as Ironbreaker/Witch Hunter Captain career skill default range.
The Great Maw's Resurgence

Gain 2 Health each second if below 30% Health.
Gain 2 permanent HP every 1 second.
Gain 2 permanent HP every 1 second.
Ulric's Pack

Gain 5% bonus to Power. This is multiplied by the number of allies with the Boon.
Increases Power Level. Counts yourself, with minimum 1 stack & maximum 4 stacks.
Has a range of 20 units, twice the range of Ironbreaker/Witch Hunter Captain career skill default range.
Increases Power Level. Counts yourself, with minimum 1 stack & maximum 4 stacks.
Has a range of 20 units, twice the range of Ironbreaker/Witch Hunter Captain career skill default range.
Ladrielle's Veil

Every 30 seconds, taking damage grants invisibility for 5s. Attacking removes the invisibility.
Grants invisibility and phase walk.
Can free you from disabler.
Invisibility does not end with missed attack or push.
Invisbility does not trigger on venting, fall damage, environmental damage and non hostile damage over time.
Grants invisibility and phase walk.
Can free you from disabler.
Invisibility does not end with missed attack or push.
Invisbility does not trigger on venting, fall damage, environmental damage and non hostile damage over time.
Ranald's Explosive Surprise

When you trigger a barrel explosion, the barrel spawns smaller barrels. These explode after a short time.
Spawn 4 mini barrels. All barrels have the same damage and explosion radius as normal barrels.
Spawn 4 mini barrels. All barrels have the same damage and explosion radius as normal barrels.
Myrmidia's Justice

You gain a stack of Justice each time you Block an Attack. Once you have 3 stacks, your next Attack is automatically a Critical Hit and all stacks are lost.
Even if your attack missed, it will still consume the guaranteed crit.
Push does not consume the guaranteed crit.
Even if your attack missed, it will still consume the guaranteed crit.
Push does not consume the guaranteed crit.
Hoeth's Method

Each Attack that doesn't causes a Critical Hit adds 5% Critical Chance to the next Attack. These bonuses stack, and reset after making a Critical Hit.
Estreuth's Roar

Staggering 5 enemies at once grants 20% Power for 5 seconds.
Increases Power Level. Can be any types of stagger, including items and career skills.
Increases Power Level. Can be any types of stagger, including items and career skills.
Ptra's Protection

Every 3 seconds, a Perfect Parry spawns an Orb that reduces Damage taken by 50% for 10 seconds.
Orb color is light blue.
'Perfect Parry' means 'timed block'.
Orb color is light blue.
'Perfect Parry' means 'timed block'.
Nethu's Harvest

Every 3 seconds, when you inflict a headshot on an enemy, spawn an Essence Orb at their location. The Essence Orb grants increased Cooldown Regeneration for 0.5 seconds.
Orb color is light purple.
Orb provides 450% cooldown regen for 0.5 second(2.25 second of cooldown).
Orb color is light purple.
Orb provides 450% cooldown regen for 0.5 second(2.25 second of cooldown).
Caxuatan's Boiling Blood

Spawn a Blood Orb for every 10 Health (or Temporary Health) damage taken. Each Blood Orb grants 5 Temporary Health.
Orb color is light green.
Has no cooldown.
Orb color is light green.
Has no cooldown.
Esmerelda's Generosity

On drinking a Potion spawn an Orb that grants the same effect.
Orb color is light red no matter the potion type, including strength potion.
Orb always uses potion default effect. Decanter does not effect the Orb effect.
Cannot pick up the Orb until the same potion effect runs out.
Orb color is light red no matter the potion type, including strength potion.
Orb always uses potion default effect. Decanter does not effect the Orb effect.
Cannot pick up the Orb until the same potion effect runs out.
- 5.5 update Boon - Rare
Name
Description
Grungni's Bombardment

Bombs have 50% reduced range, but have +50% explosion radius and Damage.
Reduce bomb throw range, but increases explosion radius and damage.
Reduce bomb throw range, but increases explosion radius and damage.
Bomb of Alchemical Concentration

Your Bombs consecrate the ground for 10 seconds on impact. Players within the consecrated ground gain 1000% Career Skill Cooldown rate.
Has radius of 6 units.
Removes Friendly Fire of all explosions from the owner.
Has radius of 6 units.
Removes Friendly Fire of all explosions from the owner.
Bomb of Alchemical Alacrity

Your Bombs consecrate the ground for 10 seconds on impact. Players within the consecrated ground gain 50% Attack Speed.
Has radius of 6 units.
Removes Friendly Fire of all explosions from the owner.
Has radius of 6 units.
Removes Friendly Fire of all explosions from the owner.
Ranald's Spiteful Plunder

When a Chest of Trial is activated, creates consecrated ground that grants you 35% Damage for 30 seconds.
Has radius of 10 units.
The consecrated ground lasts 30 seconds, or until the Chest of Trial is finished.
Increases all damage dealt by 35%.
Has radius of 10 units.
The consecrated ground lasts 30 seconds, or until the Chest of Trial is finished.
Increases all damage dealt by 35%.
Ranald's Hearty Plunder

When a Chest of Trial is activated, creates consecrated ground that grants you 500% Cooldown rate for 30 seconds.
Has radius of 10 units.
The consecrated ground lasts 30 seconds, or until the Chest of Trial is finished.
Has radius of 10 units.
The consecrated ground lasts 30 seconds, or until the Chest of Trial is finished.
Harrying Boon of Anath Raema's Deflection

Parries spawn 4 projectiles that seek out enemies.
Triggered by timed block.
Send out projectiles if there are enemies within 15 units.
Triggered by timed block.
Send out projectiles if there are enemies within 15 units.
Myrmidia's Wildfire
An enemy that dies while Burning inflicts a Burning to nearby enemies, causing damage over time.
Has radius of 5 units.
Apply 1 stack of burn to all enemies, last 10 seconds, can stack 5 times.
Has radius of 5 units.
Apply 1 stack of burn to all enemies, last 10 seconds, can stack 5 times.
Mathlann's Storm-Strike

Your career skill also calls down lighting on nearby enemies.
The effect is triggered when career skill is activated by pressing career skill key.
Can be triggered by effects like Sister of the Thorn's Radiance, and twice by Battle Wizard Burnout.
Has radius of 7 units.
Create an explosion and stagger all types of enemies and deal minor damage.
The effect is triggered when career skill is activated by pressing career skill key.
Can be triggered by effects like Sister of the Thorn's Radiance, and twice by Battle Wizard Burnout.
Has radius of 7 units.
Create an explosion and stagger all types of enemies and deal minor damage.
Myrmidia's Cleansing Flame

Your Career Skill also Burns nearby enemies for damage over time.
The effect is triggered when career skill is activated by pressing career skill key.
Can be triggered by effects like Sister of the Thorn's Radiance, and twice by Battle Wizard Burnout.
Has radius of 7 units.
Apply 1 stack of burn to all enemies, last 10 seconds, can stack 5 times.
The effect is triggered when career skill is activated by pressing career skill key.
Can be triggered by effects like Sister of the Thorn's Radiance, and twice by Battle Wizard Burnout.
Has radius of 7 units.
Apply 1 stack of burn to all enemies, last 10 seconds, can stack 5 times.
Atharti's Venomous Affection

Your Career Skill also inflicts Poison on nearby enemies for damage over time.
The effect is triggered when career skill is activated by pressing career skill key.
Can be triggered by effects like Sister of the Thorn's Radiance, and twice by Battle Wizard Burnout.
Has radius of 7 units.
Apply 1 stack of poison to all enemies, last 10 seconds, can stack 5 times.
The effect is triggered when career skill is activated by pressing career skill key.
Can be triggered by effects like Sister of the Thorn's Radiance, and twice by Battle Wizard Burnout.
Has radius of 7 units.
Apply 1 stack of poison to all enemies, last 10 seconds, can stack 5 times.
Drakira's Flensing

Your career skill also inflicts Bleed on nearby enemies.
The effect is triggered when career skill is activated by pressing career skill key.
Can be triggered by effects like Sister of the Thorn's Radiance, and twice by Battle Wizard Burnout.
Has radius of 7 units.
Apply 1 stack of bleed to all enemies, last 10 seconds, can stack 5 times.
The effect is triggered when career skill is activated by pressing career skill key.
Can be triggered by effects like Sister of the Thorn's Radiance, and twice by Battle Wizard Burnout.
Has radius of 7 units.
Apply 1 stack of bleed to all enemies, last 10 seconds, can stack 5 times.
Hekarti's Prophetic Bolt

Your career skill also spawns 6 projectiles that seek out enemies.
The effect is triggered when career skill is activated by pressing career skill key.
Can be triggered by effects like Sister of the Thorn's Radiance, and twice by Battle Wizard Burnout.
Send out projectiles if there are enemies within 15 units.
The effect is triggered when career skill is activated by pressing career skill key.
Can be triggered by effects like Sister of the Thorn's Radiance, and twice by Battle Wizard Burnout.
Send out projectiles if there are enemies within 15 units.
Ulric's Valour

Enemies close to you take 15% damage from teammates.
Enemies within 5 units from you take 15% more damage from players that are not you.
Enemies within 5 units from you take 15% more damage from players that are not you.
Valaya's Boozy Grant

Enemies close to you take 100% Stagger from teammates.
Enemies within 5 units from you take 100% more stagger from players that are not you.
Enemies within 5 units from you take 100% more stagger from players that are not you.
Lileath's Favour

Gain 1% Damage and 1% Attack Speed per active Boon.
Including the talents you picked before entering the expedition and itself.
Increases all damage dealt.
Including the talents you picked before entering the expedition and itself.
Increases all damage dealt.
Vaul's Disruptor

You gain 100% Stagger against enemies near to allies.
Gain bonus stagger against enemies within 7 units of players that are not you.
Gain bonus stagger against enemies within 7 units of players that are not you.
Ranald's Hasty Gamble

You gain 100% Cooldown rate, decreased by 25% per Rarity level of your Highest Rarity weapon.
Provides extra 100%/75%/50%/25%/0% cooldown regen when owning a Plentiful(White)
Common(Green)/Rare(Blue)/Exotic(Orange)/Unique(Red) weapon.
Use the highest rarity weapon in your inventory.
Provides extra 100%/75%/50%/25%/0% cooldown regen when owning a Plentiful(White)
Common(Green)/Rare(Blue)/Exotic(Orange)/Unique(Red) weapon.
Use the highest rarity weapon in your inventory.
Taal’s Crippling Shot

Enemies hit with your Range Weapon take +15% damage from you for 5 seconds.
Triggered by hitting the enemy with any range attack.
Increases all damage dealt by 15%.
Triggered by hitting the enemy with any range attack.
Increases all damage dealt by 15%.
- Original Boon - Exotic
Name
Description
Atharti's Malice

Damaging enemies with damage over time effects grants 0.25 health.
Grants permanent HP.
Heal you every time DoT ticks.
Grants permanent HP.
Heal you every time DoT ticks.
Caxuatn's Frenzy

Taking damage grants you guaranteed critical hits for 3 seconds.
Cannot be triggered by friendly fire.
Can be triggered by self-inflicted damage like venting.
Cannot be triggered by friendly fire.
Can be triggered by self-inflicted damage like venting.
Dazh's Peculiar Mirth

After killing an elite with a melee attack the next enemy you kill will explode.
Also works on special kill.
Also works on special kill.
Ellinill's Withering

Attacks against full health enemies deal 20% more damage.
Ereth Khial's Pride

Gain 100 % Power and rapid health regeneration for 10 seconds when all your allies are downed.
Heal 5 permanent HP every 0.5 sec.
Both power and healing last 10 sec.
Heal 5 permanent HP every 0.5 sec.
Both power and healing last 10 sec.
Gork's (or possibly Mork's) Might

Pushing an enemy makes you do a short charge forward.
Cannot be obtained from Seer's Altar (Boon Altar).
Cannot be obtained from Seer's Altar (Boon Altar).
Grimnir's Implacabilitiy

Falling below 10% health grants you 15% attack speed and movement speed and prevents incoming damage for 10 seconds.
Can prevent leathal damage.
Increase attack speed by 15%, movement speed by 20%.
Has a cooldown of 30 sec.
Can prevent leathal damage.
Increase attack speed by 15%, movement speed by 20%.
Has a cooldown of 30 sec.
Hekarti's Jealousy

Each time a nearby ally uses their Career Skill you replenish 10% of your Ability Bar.
The effect is triggered when career skill is activated by pressing career skill key.
Can be triggered by effect like Sister of the Thorn's Radiance, and twice by Battel Wizard Burnout.
Allies need to be within 20 units.
The effect is triggered when career skill is activated by pressing career skill key.
Can be triggered by effect like Sister of the Thorn's Radiance, and twice by Battel Wizard Burnout.
Allies need to be within 20 units.
Hoeth's Sword-Craft

Every block counts as a parry.
''Parry' means 'timed block'.
Has no effect by itself.
Requires other Boon/Trait to enable.
''Parry' means 'timed block'.
Has no effect by itself.
Requires other Boon/Trait to enable.
Hukon's Strength

Reduce push cost by 50%
Also reduces Markus Spear & Shield/Victor Bill Hook special attack stamina cost.
Also reduces Markus Spear & Shield/Victor Bill Hook special attack stamina cost.
Isha's Embrace

Increase healing received by 50%.
Khsar's Speed

Gain 10% Attack Speed.
Ladrielle's Meditation

Each 5 seconds not getting hit increases your Career Skill regeneration by 5%. Max stacks 5.
Stacks can be removed by self-inflicted damage like venting.
Stacks can be removed by self-inflicted damage like venting.
Lileath's Grace

Removes the limit on dodging efficiently.
Loec's Wardance

Gain up to 20 % Attack Speed based on your missing Ability Bar.
Bonus attack speed = missing ability bar% x 20%
Bonus attack speed = missing ability bar% x 20%
Mork's (or possibly Gork's) Onslaught

Using your career skill grants 40% movement speed for 5 seconds.
The effect is triggered when cooldown is reduced due to career skill key is pressed.
Cannot be triggered by effects like Sister of the Thorn's Radiance, and only trigged once by Battle Wizard Burnout.
The effect is triggered when cooldown is reduced due to career skill key is pressed.
Cannot be triggered by effects like Sister of the Thorn's Radiance, and only trigged once by Battle Wizard Burnout.
Ranald's Surprise

Powder Barrels you ignite deal 300% increased damage.
Shallya's Rejuvenation

Regenerate 1 health every 3 seconds.
The Lady of the Lake's Vigil

When you are above 75 % Health you take of the damage inflicted on nearby allies instead of them.
Share 50% of the damage taken.
Share 50% of the damage taken.
Ulric's Grim Resolve

Your attacks cannot be interrupted.
Can still be pushed by elites.
Can still be pushed by elites.
Ursun's Fortitude

Max health increased by 50%.
Valaya's Brew

Using your Career Skill has a 50% chance of granting you the effect of the potion you are currently carrying.
The effect is triggered when cooldown is reduced due to career skill key is pressed.
Cannot be triggered by effects like Sister of the Thorn's Radiance, and only trigged once by Battle Wizard Burnout.
Decanter has no effect.
Cannot trigger Esmerelda's Generosity.
The effect is triggered when cooldown is reduced due to career skill key is pressed.
Cannot be triggered by effects like Sister of the Thorn's Radiance, and only trigged once by Battle Wizard Burnout.
Decanter has no effect.
Cannot trigger Esmerelda's Generosity.
- Be’lakor update Boon - Exotic
Name
Description
Khaine's Might

Gain 25% Power, but 50% Curse.
Increases Power Level.
Cannot be obtained from Seer's Altar (Boon Altar).
Warrior Priest is immune to the curse effect.
Increases Power Level.
Cannot be obtained from Seer's Altar (Boon Altar).
Warrior Priest is immune to the curse effect.
Grimnir's Mettle

Every 10 seconds your next attack grants you Temporary Health. The amount of Temporary Health gains depends on the damage inflicted.
Heal 40% of damage dealt as temporary HP.
Only counts melee/range weapon non-explosion direct damage.
Heal 40% of damage dealt as temporary HP.
Only counts melee/range weapon non-explosion direct damage.
Addaioth's Embrace

A halo of fire damages enemies around as long as you are downed.
Spawn fire bomb ground fire 4 units near you.
Does not stagger.
Spawn fire bomb ground fire 4 units near you.
Does not stagger.
Stromfels' Retribution

Every 8 seconds, Parrying an Attack triggers a lightning strike against the attacking enemy.
''Parry' means 'timed block'.
Create an extremely small explosion near the parried enemy.
Stagger all types of enemies and deal minor damage.
''Parry' means 'timed block'.
Create an extremely small explosion near the parried enemy.
Stagger all types of enemies and deal minor damage.
Khsar's Uplift

When hanging from a ledge, automatically recover.
You cannot defend yourslef while recovering from the ledge.
You cannot defend yourslef while recovering from the ledge.
Hashut's Echo

Your grenades explode a second time (after a short delay).
Has a delay of 1 second.
Works on Miracle of Morgrim too.
Explode again in the orginal detonated location.
Has a delay of 1 second.
Works on Miracle of Morgrim too.
Explode again in the orginal detonated location.
Taal's Hunt

When you kill enemies marked as Taal's quarry, you gain +30% Power for 10s
Increases Power Level.
The marked enemy will have a yellow flame on top for indication. Only visible to you.
All enemeis except Monster and Special can be marked.
Automatically mark enemies in 10 units range if there is no other marked enemy
when mark is not on cooldown.
Enemy loses mark when killed or player exit the 10 units range.
Mark has a cooldown of 20 seconds. Mark goes on cooldown when the mark disappear in any way.
Increases Power Level.
The marked enemy will have a yellow flame on top for indication. Only visible to you.
All enemeis except Monster and Special can be marked.
Automatically mark enemies in 10 units range if there is no other marked enemy
when mark is not on cooldown.
Enemy loses mark when killed or player exit the 10 units range.
Mark has a cooldown of 20 seconds. Mark goes on cooldown when the mark disappear in any way.
Hukon's Sundering

After using your Career Skill your next 3 Melee Attacks launch a shockwave that damages and stagger enemies.
The effect is triggered when career skill is activated by pressing career skill key.
Can be triggered by effects like Sister of the Thorn's Radiance, and twice by Battle Wizard Burnout.
Has a max stack of 3.
Stagger all enemies in 5 units range near you when you land a melee hit. Doesn't do damage.
Only melee slot weapon can activate the stagger effect.
The effect is triggered when career skill is activated by pressing career skill key.
Can be triggered by effects like Sister of the Thorn's Radiance, and twice by Battle Wizard Burnout.
Has a max stack of 3.
Stagger all enemies in 5 units range near you when you land a melee hit. Doesn't do damage.
Only melee slot weapon can activate the stagger effect.
Neru's Patience

Blocking enemy attacks reduces Career Skill Cooldown.
Reduce cooldown by 2 second every time.
Has no internal cooldown.
Reduce cooldown by 2 second every time.
Has no internal cooldown.
Mathlann's Spark

Spawns a static charge Orb every 10 kills. The Orb Damages and Staggers nearby enemies for 5 seconds.
Orb color is blue.
After picking up the orb, creating an aura constantly damage and causing mini stagger near you.
Orb color is blue.
After picking up the orb, creating an aura constantly damage and causing mini stagger near you.
- 5.5 update Boon - Exotic
Name
Description
Bomb of Alchemical Lethality

Your Bombs consecrate the ground for 10 seconds on impact. Players within the consecrated ground gain 100% Critical Strike Chance.
Has radius of 6 units.
Removes Friendly Fire of all explosions from the owner.
Has radius of 6 units.
Removes Friendly Fire of all explosions from the owner.
Bomb of Alchemical Rejuvenation

Your Bombs consecrate the ground for 10 seconds on impact. Players within the consecrated ground gain 2% healing per second.
Has radius of 6 units.
Heals 2 THP per second.
Removes Friendly Fire of all explosions from the owner.
Has radius of 6 units.
Heals 2 THP per second.
Removes Friendly Fire of all explosions from the owner.
Bomb of Alchemical Strength

Your Bombs consecrate the ground for 10 seconds on impact. Players within the consecrated ground gain 35% Power.
Has radius of 6 units.
Increases Power Level by 35%.
Removes Friendly Fire of all explosions from the owner.
Has radius of 6 units.
Increases Power Level by 35%.
Removes Friendly Fire of all explosions from the owner.
Harrying Boon of Anath Raema's Precision

Headshots spawn 4 projectiles that seek out enemies.
Triggered by landing melee or range headshot.
Send out projectiles if there are enemies within 15 units.
Triggered by landing melee or range headshot.
Send out projectiles if there are enemies within 15 units.
Harrying Boon of Anath Raema's Perfection

Critical Hits spawn 6 projectiles that seek out enemies.
Triggered by landing melee or range critical hit.
Send out projectiles if there are enemies within 15 units.
Triggered by landing melee or range critical hit.
Send out projectiles if there are enemies within 15 units.
Taal's Roar

Periodically send out a shockwave that staggers nearby enemies. Cooldown decreases with missing health.
Create an explosion that provides weak stagger within 5 units.
Has cooldown ranges of 5 sec to 2.5 sec depends on current Permanent Health percentage,
reaching the lowest possible cooldown when at or below 30% Permanent Health.
Cooldown = 10/7 + 25/7 * Current Permanent Health%
Create an explosion that provides weak stagger within 5 units.
Has cooldown ranges of 5 sec to 2.5 sec depends on current Permanent Health percentage,
reaching the lowest possible cooldown when at or below 30% Permanent Health.
Cooldown = 10/7 + 25/7 * Current Permanent Health%
Eldrazor's Avenger

You gain 20% Damage against enemies near to allies.
Gain bonus damage against enemies within 7 units of players that are not you.
Gain bonus damage against enemies within 7 units of players that are not you.
Ranald's Mighty Gamble

You gain 100% Critical Hit Chance, decreased by 25% per Rarity level of your Currently Equipped weapon.
Provides extra 100%/75%/50%/25%/0% crit chance when wielding Plentiful(White)
Common(Green)/Rare(Blue)/Exotic(Orange)/Unique(Red) weapon.
Use the rarity of the weapon you are wielding.
Wielding items that has no rarity removes all bonus, e.g torch, crankgun, WS/BH/Pyro Career Skill.
Provides extra 100%/75%/50%/25%/0% crit chance when wielding Plentiful(White)
Common(Green)/Rare(Blue)/Exotic(Orange)/Unique(Red) weapon.
Use the rarity of the weapon you are wielding.
Wielding items that has no rarity removes all bonus, e.g torch, crankgun, WS/BH/Pyro Career Skill.
Anath Raema's Cruel Volley

Range attacks inflicts +100% Damage, but use +100% ammo or Overcharge.
Affects all range attacks/weapons, including Crankgun and Moonfire Bow.
Affects all range attacks/weapons, including Crankgun and Moonfire Bow.
- Original Boon - Veteran
Name
Description
Eldrazor's Deflection

Parrying an attack makes you immune to damage for the next 2 seconds.
'Parry' means 'timed block'.
'Parry' means 'timed block'.
Geheb's Brawn

Pushing increases Cleave by 50% for 3 sec.
Kalita's Barter

Using your Career Skill will drop a duplicate of one of your inventory items.
The effect is triggered when cooldown is reduced due to career skill key is pressed.
Cannot be triggered by effects like Sister of the Thorn's Radiance, and only trigged once by Battle Wizard Burnout.
Have different cooldown for different item dupe.
Normal items have cooldown of 60 sec.
Potion of Endless Bombs has cooldown of 120 sec.
Miracle of Morgrim and Miracle of Rhya have cooldown of 180 sec.
The effect is triggered when cooldown is reduced due to career skill key is pressed.
Cannot be triggered by effects like Sister of the Thorn's Radiance, and only trigged once by Battle Wizard Burnout.
Have different cooldown for different item dupe.
Normal items have cooldown of 60 sec.
Potion of Endless Bombs has cooldown of 120 sec.
Miracle of Morgrim and Miracle of Rhya have cooldown of 180 sec.
Khaine's Fury

While above 50% health, you gain 25% more melee power but deal 3 damage to yourself every swing.
Morr's Protection

Downed friends near you are invulnerable.
Does not work on ledge.
Does not work on ledge.
Salyak's Charity

Gaining temporary health while at full health will give the temporary health to the nearest ally instead.
Sigmar's Comet

Throwing a bomb throws one additional bomb (of the same type).
Works on Miracle of Morgrim too.
Works on Miracle of Morgrim too.
Stromfels' Savagery

Killing 10 enemies with melee attacks in quick succession grants 20 % attack speed and movement speed for 10 seconds.
Increase both attack speed and movement speed by 20%.
Quick succession = 10 sec.
Increase both attack speed and movement speed by 20%.
Quick succession = 10 sec.
- Be’lakor update Boon - Veteran
Name
Description
Djaf's Rejection

You will always be downed, rather than be killed outright. (You can still bleed out.)
You will never be wounded.
You will never be wounded.
Sigmar's Intervention

Every 45 seconds, if you are disabled a bolt of lightning knocks the disabler back.
Only triggers on Life Leech grab/Hookrat hook/Assassin pounce.
The lightning spawns on the disabler and stagger all enemies within 5 units. Does not deal damage.
Only triggers on Life Leech grab/Hookrat hook/Assassin pounce.
The lightning spawns on the disabler and stagger all enemies within 5 units. Does not deal damage.
Atharti's Vigour

Healing an ally with a health pack grants both of you 20% Power for 40 seconds.
Increases Power Level.
Stack up to 5 times.
Increases Power Level.
Stack up to 5 times.
Drakira's Malice

Taking damage deals damage to nearby enemies.
Deal fixed damage, no matter the original damage taken.
Damage drop off with distance dramatically.
Deal fixed damage, no matter the original damage taken.
Damage drop off with distance dramatically.
- 5.5 update Boon - Veteran
Name
Description
Lileath's Blessed Destiny

Increases your Career Skill maximum charge by 1.
Engineer has two career skill bars too.
Engineer has two career skill bars too.
Grand Boon of Anath Raema's

Increases the number of projectiles spawned by the set's boons by 2.
Cannot be acquired through Seer's Altar/Chest of Trials/Shrines/The Temple of Shadows.
Automatically acquired once get 3 of these 4 boons:
Harrying Boon of Anath Raema's Precision
Harrying Boon of Anath Raema's Deflection
Harrying Boon of Anath Raema's Perfection
Hekarti's Prophetic Bolt
Cannot be acquired through Seer's Altar/Chest of Trials/Shrines/The Temple of Shadows.
Automatically acquired once get 3 of these 4 boons:
Harrying Boon of Anath Raema's Precision
Harrying Boon of Anath Raema's Deflection
Harrying Boon of Anath Raema's Perfection
Hekarti's Prophetic Bolt
Divine Grant of Immortal Might

All Heavy Attacks cause Critical Hits.
Cannot be acquired through Seer's Altar/Chest of Trials/Shrines/The Temple of Shadows.
Automatically acquired once get 3 of these 3 boons:
Myrmidia's Justice
Caxuatn's Frenzy
Bomb of Alchemical Lethality
Cannot be acquired through Seer's Altar/Chest of Trials/Shrines/The Temple of Shadows.
Automatically acquired once get 3 of these 3 boons:
Myrmidia's Justice
Caxuatn's Frenzy
Bomb of Alchemical Lethality
- Unachievable Talents/Boons Combo
- Certain talents/boons cannot be acquired at the same time. If you have already got one talent/boon of the combo, you will not find the other one inside Chaos Waste.
Career
Unachievable Talents Combo I
Unachievable Talents Combo II
Unachievable Talents Combo III
Unachievable Talents Combo IV
Mercenary
lvl20 Reikland Reaper & Enhanced Training
lvl20 Reikland Reaper & Strike Together
lvl20 Enhanced Training & Strike Together
lvl10 Helborg's Tutelage & Hoeth's Method
Huntsman
lvl30 Concealed Strikes & Head Down and Hidden
N/A
N/A
N/A
Foot Knight
lvl20 Rock of the Reikland & That's Bloody Teamwork!
lvl20 Rock of the Reikland & Comrades in Arms
lvl20 That's Bloody Teamwork! & Comrades in Arms
N/A
Grail Knight
lvl30 Virtue of Audacity & Virtue of Confidence
N/A
N/A
N/A
Ranger Veteran
lvl20 Drunken Brawler & Grungni's Cunning
lvl20 Drunken Brawler Shot & Scavenger
lvl20 Grungni's Cunning & Scavenger
lvl30 Exhilarating Vapours & Surprise Guest
Outcast Engineer
lvl20 Full Head of Steam & Superior Gaskets
lvl30 Gromril-Plated Shot & Linked Compression Chamber
lvl30 Gromril-Plated Shot & Innovative Ammo Hoppers
N/A
Waystalker
lvl20 Isha's Embrace & Spirit Arrows
lvl20 Spirit Arrows & Rejuvenating Locus
lvl30 Piercing Shot & Loaded Bow
lvl30 Piercing Shot & Kurnous' Reward
Shade
lvl30 Shimmer Strike & Cloak of Pain
N/A
N/A
N/A
Sister of the Thorn
lvl30 Ironbark Thicket & Tanglegrasp Thicket
lvl30 Tanglegrasp Thicket & Blackvenom Thicket
N/A
N/A
Bounty Hunter
lvl30 Double-shotted & Indiscriminate Blast
N/A
N/A
N/A
- Unacquirable Boons
- Certain careers cannot acquire certain Boons in Chaos Waste naturally.
- Weekly Expedition may bypass these.
Career
Unacquirable Boons
Grail Knight
lvl20 talent Virtue of Duty
lvl20 talent Virtue of Purity
lvl20 talent Virtue of the Penitent
Ualapt's Cunning
Atharti's Malice
Anath Raema's Cruel Volley
Taal’s Crippling Shot
lvl20 talent Virtue of Purity
lvl20 talent Virtue of the Penitent
Ualapt's Cunning
Atharti's Malice
Anath Raema's Cruel Volley
Taal’s Crippling Shot
Slayer
Ualapt's Cunning
Atharti's Malice
Atharti's Malice
Outcast Engineer
Valaya's Brew
Mork's (or possibly Gork's) Onslaught
Kalita's Barter
Verena's Inspiration
Xokha's Duty
Ladrielle's Meditation
Ranald's Hasty Gamble
Mork's (or possibly Gork's) Onslaught
Kalita's Barter
Verena's Inspiration
Xokha's Duty
Ladrielle's Meditation
Ranald's Hasty Gamble
Warrior Priest of Sigmar
Ualapt's Cunning
Anath Raema's Cruel Volley
Taal’s Crippling Shot
Anath Raema's Cruel Volley
Taal’s Crippling Shot
Battle Wizard
Ualapt's Cunning
Pyromancer
Ualapt's Cunning
Unchained
Ualapt's Cunning
Necromancer
Ualapt's Cunning
--- Grudge Mark ---
- The Grudge Mark is a unique mechanic that applies only to Chaos Waste. It gives monsters and Shadow Champion a random set of attributes modifying their offensive and defensive behaviour.
- Grudge Marked Monsters can only spawn from the Chest of Trials and Arenas of each Expedition. Shadow Champion can only spawn from Shadow Locus.
- Depending on the difficulty and progress in the Expedition, a Grudge Marked Monster will have from 0 attributes to 3 attributes. And even with no attributes, they are still stronger compared to their unmarked counterpart.
- You can differentiate Grudge Marked Monsters by their unique appearance, names and maybe attributes under their health bar.
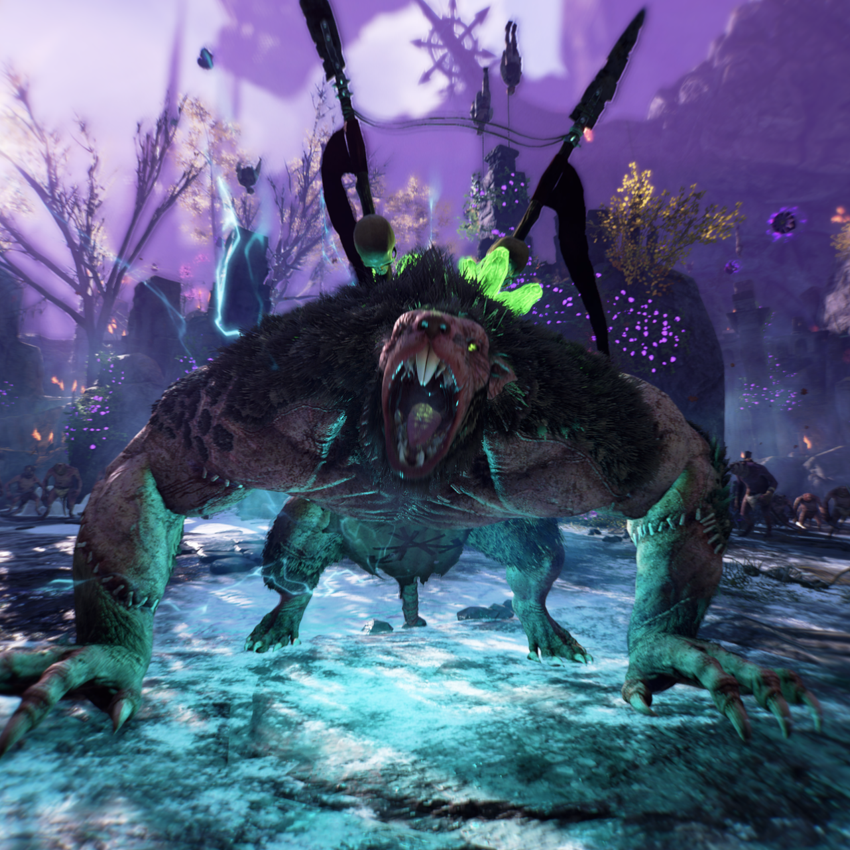

- Grudge Mark Monster Attributes Amounts
Difficulty
First Node
Second Node
Third Node
Fourth Node
Fifth Node
Sixth Node
Arena Level
Recruit
0 Attribute
0 Attribute
0 Attribute
0 Attribute
0 Attribute
0 Attribute
1 Attribute
Veteran
0 Attribute
0 Attribute
0 Attribute
1 Attribute
1 Attribute
1 Attribute
2 Attributes
Champion
0 Attribute
0 Attribute
1 Attribute
1 Attribute
1 Attribute
2 Attributes
3 Attributes
Legend
0 Attribute
1 Attribute
2 Attributes
2 Attributes
2 Attributes
2 Attributes
3 Attributes
Cataclysm
1 Attribute
1 Attribute
2 Attributes
2 Attributes
2 Attributes
3 Attributes
3 Attributes
Cataclysm 2
1 Attribute
2 Attributes
2 Attributes
2 Attributes
2 Attributes
3 Attributes
3 Attributes
Cataclysm 3
2 Attributes
2 Attributes
2 Attributes
3 Attributes
3 Attributes
3 Attributes
3 Attributes
- Grudge Mark Attributes Effect
Attribute
Effect
Exclusion
Basic - Apply only to all grudge-marked enemies
Dealing 20% more damage.
Having 42% more health.
Knockback distance reduced 70%.
Having 42% more health.
Knockback distance reduced 70%.
None.
Shadow-step
10% chance to teleport upon damage taken, including DoT damage.
Has 10 sec teleportation cooldown.
Teleportation has a min/max distance and can only teleport near the players.
Has 10 sec teleportation cooldown.
Teleportation has a min/max distance and can only teleport near the players.
Has reduced chance to show up together with Illusionist.
Relentless
Immune to any source of knockback and stagger.
None.
Mighty
Every 25 sec Monster will gain a buff, dealing 100% more damage for 10 sec.
Has a unique VFX when Monsters gains their damage buff.
Has a unique VFX when Monsters gains their damage buff.
None.
Vampiric
Dealing damage heals equal to 200% of damage dealt.
Stormfiend direct fire/Troll direct poke trigger this effect, but ground fire/ground puke doesn't.
Stormfiend direct fire/Troll direct poke trigger this effect, but ground fire/ground puke doesn't.
None.
Rampart
Immune to ranged attacks and explosion damage(bomb etc.).
Not immune to DoT damage applied by ranged weapons.
Not immune to DoT damage applied by ranged weapons.
None.
Invincible
Every 20 sec, the Monster will be invincible for 5 sec.
Has visual effect during invincibility. Hitting invincible enemies has a unique sound effect.
Has visual effect during invincibility. Hitting invincible enemies has a unique sound effect.
Has reduced chance to show up together with Illusionist or Regenerating.
Cannot be a Bile Troll attribute.
Cannot be a Bile Troll attribute.
Illusionist
Creates 3 low hp illusions of itself every 45 sec.
Illusions have 0.25 hp and can't damage or stagger players.
Bile Trole puke can still blind players but doesn't deal damage.
Illusions do not inherent original monster Attributes.
Can only have up to 3 illusions at the same time.
Illusions have 0.25 hp and can't damage or stagger players.
Bile Trole puke can still blind players but doesn't deal damage.
Illusions do not inherent original monster Attributes.
Can only have up to 3 illusions at the same time.
Has reduced chance to show up together with Shadow-step or Invincible.
Crippling
Dealing damage reduces players’ normal movespeed/crouch and walk movespeed/jump height by 70% and dodge distance by 50% for 5 sec.
Stormfiend fire/Troll ground puke does not trigger this effect. Troll direct puke does trigger this effect.
Stormfiend fire/Troll ground puke does not trigger this effect. Troll direct puke does trigger this effect.
Has reduced chance to show up together with Shield-shatter.
Shield-shatter
Blocking Monster an attack reduces max stamina by 1(half shield) for 8 sec.
Blocking an attack again refreshes the duration.
Can stack up to 20 times.
Stormfiend fire/Troll puke do not trigger this effect.
Blocking an attack again refreshes the duration.
Can stack up to 20 times.
Stormfiend fire/Troll puke do not trigger this effect.
Has reduced chance to show up together with Crippling.
Regenerating
Regenerate 2% of its max health every 1 sec after stopping taking damage for 3 sec.
Has reduced chance to show up together with Invincible.
Cursed Aura
Gain 1 stack of curse every 2 sec if you are
inside of Boss's aura.
Each stack reduces your max HP by 5%.
Can have up to 20 stacks of curse.
Curse expires after 5 sec not affected by the aura.
Warrior Priest is immune to this effect.
inside of Boss's aura.
Each stack reduces your max HP by 5%.
Can have up to 20 stacks of curse.
Curse expires after 5 sec not affected by the aura.
Warrior Priest is immune to this effect.
None.
Frenzy
Hitting Monster 10 times within 3 sec gap with
melee attacks will enter Frenzy state.
Frenzy state provides the player 25% Attack Speed,
25% Movement Speed and 20% Power Level Melee.
Each successful melee hit on any enemies
during Frenzy state will cause the player to take 10 damage.
Cannot be reduced by any damage reductions.
Damage is not lethal.
Frenzy state last 5 sec. Each successful melee hit
refreshes its duration.
melee attacks will enter Frenzy state.
Frenzy state provides the player 25% Attack Speed,
25% Movement Speed and 20% Power Level Melee.
Each successful melee hit on any enemies
during Frenzy state will cause the player to take 10 damage.
Cannot be reduced by any damage reductions.
Damage is not lethal.
Frenzy state last 5 sec. Each successful melee hit
refreshes its duration.
None.
Warchief
Spawn troops nearby every 40 sec.
Rat Ogre/Storm Fined can spawn either 2-3 Storm Vermin + 2-3 Clan Rat or 1-2 Shield Storm Vermin + 2-3 Shield Clan Rat.
Bile Troll/Chaos Spawn can spawn either 1-3 Mauler + 2-3 Marauder or 1 Chaos Warrior + 2-4 Marauder.
Minotaur can spawn either 1-2 Bestigor + 2-4 Gor or 1-3 Bestigor.
Rat Ogre/Storm Fined can spawn either 2-3 Storm Vermin + 2-3 Clan Rat or 1-2 Shield Storm Vermin + 2-3 Shield Clan Rat.
Bile Troll/Chaos Spawn can spawn either 1-3 Mauler + 2-3 Marauder or 1 Chaos Warrior + 2-4 Marauder.
Minotaur can spawn either 1-2 Bestigor + 2-4 Gor or 1-3 Bestigor.
None.
--- Chaos Gods Curse Effect ---
Nurgle
Curse
Effect
Additional notes
Infested Foes

Hexed enemies deal poison damage and create poison clouds when they die.
Enemies have a 30% chance to spawn with the hex.
Only Ungor Archer, Monsters and all Specials cannot be hexed.
Hexed enemies have a visual particle effect.
Only Ungor Archer, Monsters and all Specials cannot be hexed.
Hexed enemies have a visual particle effect.
Miasma of Pestilence
The level is covered in a poisonous miasma that inflicts the Curse effect. Stand close to the Purifying Torch to quell the curse.
Gain/lose 1 stack of curse every 1.3 sec if you are outside/inside of the Purifying Torch range.
Each stack reduces your max HP by 2%.
Can have up to 35 stacks of curse.
Warrior Priest is immune to this effect
Each stack reduces your max HP by 2%.
Can have up to 35 stacks of curse.
Warrior Priest is immune to this effect
Skulking Sorcerer
A malevolent spirit haunts this level. It cannot be slain, only driven off.
Classified as an Infantry Special.
Once the sorcerer gets killed, it will respawn after 30 sec.
Once the sorcerer gets killed, it will respawn after 30 sec.
Khorne
On Khorne cursed levels, Blight Stormer/Lifeleech are replaced with aggroed Chaos Warrior.Curse
Effect
Additional notes
Skulls of Wrath

On death, enemies drop an exploding skull totem.
Slightly increases horde frequency.
All horde units and Berserker/Monk have a 5% chance to spawn the skull.
Storm Vermin and Mauler have a 10% chance, Chaos Warrior and Bestigor have a 20% chance, Monsters have a 50% chance.
All horde units and Berserker/Monk have a 5% chance to spawn the skull.
Storm Vermin and Mauler have a 10% chance, Chaos Warrior and Bestigor have a 20% chance, Monsters have a 50% chance.
Blood God’s Fury
Beware of hexed enemies. Their fury enhances those who fight at their side.
Double enemies’ HP that is near the hexed enemies.
Only Storm Vermin, Mauler, Chaos Warrior, Bestigor can be hexed.
Only Storm Vermin, Mauler, Chaos Warrior, Bestigor can be hexed.
Blood Tornados
Blood tornados move randomly around the level, inflicting bleeding on those they touch.
Dealing heavy damage. Does not move around or lift players/enemies.
Max 3 blood storms on the map, each last 4-6 seconds. Respawn immediately when last one died.
Max 3 blood storms on the map, each last 4-6 seconds. Respawn immediately when last one died.
Tzeentch
Curse
Effect
Additional notes
Twin Blight

Enemies have a chance to be reborn as smaller enemies upon death.
Strong enemies have a 25% chance to split into two weaker enemies on death.
Bolt of Change
Tzeentch launches arcane bolts from the skies, dealing damage to players and randomly transforming enemies.
Recruit can have 1 unit be changed per lighting, Veteran can have 2 units, Champion/Legend/Cataclysm can have 3 units.
Monsters are not affected by lighting change, only receive damage and stagger.
Enemies cannot be changed into Ungor/Fanatic/Slave Rat.
Enemies cannot be changed into Monsters, except Chaos Warrior and Bestigor, which have a 30% chance to turn into Chaos Spawn.
Slave Rat has a 0.5% chance to turn into critter rat.
Monsters are not affected by lighting change, only receive damage and stagger.
Enemies cannot be changed into Ungor/Fanatic/Slave Rat.
Enemies cannot be changed into Monsters, except Chaos Warrior and Bestigor, which have a 30% chance to turn into Chaos Spawn.
Slave Rat has a 0.5% chance to turn into critter rat.
Crystal Egg
Destroy the crystal eggs before they hatch, or face the fury of the beast within!
90 sec after spawned, the egg will be broken and release a random Monster.
Can only have 1 egg spawned monster on the map.
Next egg will spawn after 30 sec once the previous egg/monster is killed.
All damage works on the egg.
Can only have 1 egg spawned monster on the map.
Next egg will spawn after 30 sec once the previous egg/monster is killed.
All damage works on the egg.
Slaanesh
Curse
Effect
Additional notes
Glory to Greed!

Pickups are disabled on this map, but hexed enemies spawn items for the taking!
A Pinata will spawn after the hexed enemies got killed.
The Pinata has double the HP of a Lootrat, Infantry armour, damaging it will drop items. All parts of Pinata are counted as neck.
Drop total of 3 items.
Can only spawn on Elites, Specials, Monster and Gor.
Item list:
Medical Supplies, Healing Draught, Bomb, Incendiary Bomb, Potion of Life Share, Potion of Stealth, Potion of Wrath, Potion of Endless Bombs, Potion of Life Steal, Ammo Pouch, Small Pilgrim’s Coins, Ignited Lamp Oil, Ignited Explosive Barrel
The Pinata has double the HP of a Lootrat, Infantry armour, damaging it will drop items. All parts of Pinata are counted as neck.
Drop total of 3 items.
Can only spawn on Elites, Specials, Monster and Gor.
Item list:
Medical Supplies, Healing Draught, Bomb, Incendiary Bomb, Potion of Life Share, Potion of Stealth, Potion of Wrath, Potion of Endless Bombs, Potion of Life Steal, Ammo Pouch, Small Pilgrim’s Coins, Ignited Lamp Oil, Ignited Explosive Barrel
Baleful Empathy
A portion of damage inflicted on a player is also inflicted on other players in close proximity
The closer you are, more damage you share.
Share up to 50% of damage taken.
Single shared damage instance cannot exceed 50.
Share up to 50% of damage taken.
Single shared damage instance cannot exceed 50.
Unquenchable Thirst
Players suffer damage over time. Drinking potions restores health lost to Unquenchable Thirst.
Remove all Medical Supplies and Healing Draught map drops, increase Potion map drops.
Taking damage as 1% of your max HP every 2 sec.
Drinking potions restore 100 permanent HP and clear wound.
The DoT will stop once you are below 30% HP.
Taking damage as 1% of your max HP every 2 sec.
Drinking potions restore 100 permanent HP and clear wound.
The DoT will stop once you are below 30% HP.
--- Exclusive Weapon Trait ---
- In Chaos Waste, weapons can have Traits that are unobtainable in normal Adventure mode.
- These Traits have more limitations than Adventure mode traits, as they can only show up on certain weapons.
- Exclusive Weapon Trait - Original
Name
Description
Available Weapons
Regrowth

Critical hits heal 5 health.
Restore Temporary HP.
Can trigger multiple times per swing depends on the number of enemies you cleave (damage and stagger).
Restore Temporary HP.
Can trigger multiple times per swing depends on the number of enemies you cleave (damage and stagger).
Normal Melee Weapons, Shield Melee Weapons, Heavy Melee Weapons
Shard Strike

Killing an armoured enemy sends metal shards to damage other nearby enemies.
Creating an aura constantly damage and causes mini stagger near you.
The aura lasts 16 sec.
Creating an aura constantly damage and causes mini stagger near you.
The aura lasts 16 sec.
Normal Melee Weapons, Shield Melee Weapons, Heavy Melee Weapons
Bloodthirst

Increase Attack Speed by 2% for every 5 kills (Up to 5 times). Resets if you do not kill anything for 30 sec.
Also reset if you switch weapon.
Also reset if you switch weapon.
Normal Melee Weapons, Shield Melee Weapons, Heavy Melee Weapons
Deadeye

Each headshot increases the damage of the next attack by 10%. (up to 20 times). If you hit an enemy anywhere otherthan the head, 1 stack gets removed.
Can be triggered on normal enemy head and stormfiend control panel.
Also reset if you switch weapon.
Can be triggered on normal enemy head and stormfiend control panel.
Also reset if you switch weapon.
Normal Melee Weapons, Shield Melee Weapons, Heavy Melee Weapons, All Range Weapons Except Moonfire Bow
Divine Shield
Damage taken is reduced to 20 damage or half of its original value, which ever is highest.
Shield Melee Weapons
Shockwave

Critical hits stagger nearby enemeis.
Heavy Melee Weapons, All Range Weapons Except Moonfire Bow
Heavy Melee Weapon Table
Markus Kruber: Bretonnian Longsword, Executioner Sword, Great Hammer, Greatsword, Halberd, Tuskgor Spear
Bardin Goreksson: Great Axe, Great Hammer, War Pick, Cog Hammer
Kerillian: Elven Spear, Glaive, Greatsword
Victor Saltzpyre: Greatsword, Bill Hook
- Exclusive Weapon Trait - Be’lakor update
Name
Description
Available Weapons - Markus Kruber
Available Weapons - Bardin Goreksson
Available Weapons - Kerillian
Available Weapons - Victor Saltzpyre
Available Weapons - Sienna Fuegonasus
Follow Up

Every 3 seconds Melee Headshots grant your next Attack a Critical Hit.
Sword
Mace
Bretonnian Longsword
Breton Sword & Shield
Great Hammer
Executioner Sword
Halberd
Mace
Bretonnian Longsword
Breton Sword & Shield
Great Hammer
Executioner Sword
Halberd
Axe
Hammer
Axe & Shield
Great Hammer
Great Axe
Warpick
Cog Hammer
Hammer
Axe & Shield
Great Hammer
Great Axe
Warpick
Cog Hammer
Sword
Axe
Axe
Axe
Falchion
Hammer
Flail
Axe & Falchion
Dual Hammers
Hammer & Tome
Flail & Shield
Reckoner Great Hammer
Falchion
Hammer
Flail
Axe & Falchion
Dual Hammers
Hammer & Tome
Flail & Shield
Reckoner Great Hammer
Sword
Crowbill
Flaming Flail
Mace
Crowbill
Flaming Flail
Mace
Anatha Raema's Talons

Increase Ranged Attack penetration by 1.
Handgun
Repeater Handgun
Longbow
Repeater Handgun
Longbow
Handgun
Masterwork Pistol
Throwing Axe
Drakefire Pistol
Masterwork Pistol
Throwing Axe
Drakefire Pistol
Hagbane
Swiftbow
Moonfire bow
Longbow
Swiftbow
Moonfire bow
Longbow
Brace of Pistol
Repeater Pistol
Repeater Pistol
Fireball staff
Beam staff
Bolt staff
Conflagration Staff
Coruscation Staff
Beam staff
Bolt staff
Conflagration Staff
Coruscation Staff
Rhya's Thorns

Breaking shields sends splinters at the nearest enemies dealing damage.
Also causes small stagger.
Also causes small stagger.
Bretonnian Longsword
Sword & Shield
Breton Sword & Shield
Mace & Shield
Executioner Sword
Great Hammer
Blunderbuss
Sword & Shield
Breton Sword & Shield
Mace & Shield
Executioner Sword
Great Hammer
Blunderbuss
Axe & Shield
Hammer & Shield
Great Axe
Great Hammer
Warpick
Cog Hammer
Throwing Axe
Hammer & Shield
Great Axe
Great Hammer
Warpick
Cog Hammer
Throwing Axe
Glaive
Axe
Hammer & Shield
Reckoner Great Hammer
Griffonfoot
Hammer & Shield
Reckoner Great Hammer
Griffonfoot
Mace
Asaph's Endless Quiver

Ranged Critical Hits cost no ammunition.
Refund ammo in clip without reloading.
Need to land the critical hit.
Refund ammo in clip without reloading.
Need to land the critical hit.
Handgun
Repeater Handgun
Blunderbuss
Repeater Handgun
Blunderbuss
Handgun
Masterwork Pistol
Grudge Raker
Masterwork Pistol
Grudge Raker
Brace of Pistol
Repeater Pistol
Griffonfoot
Repeater Pistol
Griffonfoot
Vaul's Tempo

Every Critical Hit increases your Crit chance by 5% for 10s. This effect can stack 10 times.
Sword
Mace
Sword & Mace
Mace
Sword & Mace
Axe
Hammer
Dual Hammers
Hammer
Dual Hammers
Axe
Dual Daggers
Sword
Dual Swords
Glaive
Dual Daggers
Sword
Dual Swords
Glaive
Falchion
Hammer
Axe & Falchion
Dual Hammers
Hammer
Axe & Falchion
Dual Hammers
Flaming Flail
Sword
Mace
Dagger
Sword
Mace
Dagger
Quetzl's Repulsion

Increases knockback from staggering attacks and pushes.
Increase ragdoll distance on most enemies by 1000%, stagger knockback distance by 50%, stagger
power by 40% while wielding the weapon.
Increase ragdoll distance on most enemies by 1000%, stagger knockback distance by 50%, stagger
power by 40% while wielding the weapon.
Great Hammer
Great Hammer
Cog Hammer
Cog Hammer
Reckoner Great Hammer
Huanchi's Fangs

Melee Attacks cause Bleed.
Same as Waystalker Serrated Shots/Witch Hunter Captain Flense.
Same as Waystalker Serrated Shots/Witch Hunter Captain Flense.
Sword
Axe
Dual Axes
Dual Axes
Sword
Sword & Dagger
Axe
Dual Swords
Sword & Dagger
Axe
Dual Swords
Rapier
Axe
Falchion
Axe & Falchion
Billhook
Axe
Falchion
Axe & Falchion
Billhook
Sword
Anath Raema's Swiftness

Picking up ammunition grants 50% decreased reload time for 10 seconds.
Handgun
Repeater Handgun
Blunderbuss
Repeater Handgun
Blunderbuss
Handgun
Masterwork Pistol
Crossbow
Trollhammer
Masterwork Pistol
Crossbow
Trollhammer
Volley Crossbow
Brace of Pistol
Repeater Pistol
Griffonfoot
Crossbow
Volley Crossbow
Repeater Pistol
Griffonfoot
Crossbow
Volley Crossbow
Myrmidia's Great Leveller

Striking 5 enemies in one swing increases stagger power by 70% for 3 seconds.
Bretonnian Longsword
Greatsword
Great Hammer
Executioner Sword
Greatsword
Great Hammer
Executioner Sword
Great Axe
Great Hammer
Cog Hammer
Great Hammer
Cog Hammer
Glaive
Greatsword
Reckoner Great Hammer
Reckoner Great Hammer
Asuryan's Wrath

Melee Attacks that kill enemies have a 50% chance to deal damage to an additional nearby enemy.
Spread the killing blow melee hit damage
Spread the killing blow melee hit damage
All melee weapons
All melee weapons
All melee weapons
All melee weapons
All melee weapons
Manann's Tempest

Critical strikes trigger a chain lighting that jumps to the nearest 5 enemies.
Deal damage equal to the attack that triggered it.
Ignore armour.
Deal damage equal to the attack that triggered it.
Ignore armour.
Sword
Mace
Mace
Axe
Hammer
Hammer
Axe
Sword
Sword
Falchion
Hammer
Hammer
Dagger
Sword
Flaming Flail
Mace
Sword
Flaming Flail
Mace
Taal's Twinned Arrow

Ranged attacks now fire one additional projectile.
Handgun
Repeater Handgun
Longbow
Repeater Handgun
Longbow
Handgun
Masterwork Pistol
Crossbow
Throwing Axe
Trollhammer
Drakefire Pistol
Masterwork Pistol
Crossbow
Throwing Axe
Trollhammer
Drakefire Pistol
Hagbane
Swiftbow
Longbow
Volley Crossbow
Javelin
Moonfire bow
Swiftbow
Longbow
Volley Crossbow
Javelin
Moonfire bow
Brace of Pistol
Repeater Pistol
Crossbow
Volley Crossbow
Repeater Pistol
Crossbow
Volley Crossbow
Vaul's Anvil

While wielding your melee weapon all attacks made against you count as being blocked. When your block is broken you lose this effect for 10 seconds.
Sword & Shield
Mace & Shield
Breton Sword & Shield
Spear & Shield
Mace & Shield
Breton Sword & Shield
Spear & Shield
Axe & Shield
Hammer & Shield
Hammer & Shield
Spear & Shield
Hannmer & Shield
Flail & Shield
Flail & Shield
Addaioth's Splendour

Every 30 seconds, ranged Critical Hits explode for 10% of their Damage in area around the target.
Has cooldown of 10 seconds instead of 30.
Deal damage related to Hero Power, instead of original hit damage.
Stagger enemies.
Has cooldown of 10 seconds instead of 30.
Deal damage related to Hero Power, instead of original hit damage.
Stagger enemies.
Handgun
Repeater Handgun
Longbow
Repeater Handgun
Longbow
Handgun
Masterwork Pistol
Crossbow
Throwing Axe
Drakefire Pistol
Masterwork Pistol
Crossbow
Throwing Axe
Drakefire Pistol
Hagbane
Swiftbow
Longbow
Volley Crossbow
Javelin
Moonfire bow
Deepwood staff
Swiftbow
Longbow
Volley Crossbow
Javelin
Moonfire bow
Deepwood staff
Brace of Pistol
Repeater Pistol
Crossbow
Volley Crossbow
Repeater Pistol
Crossbow
Volley Crossbow
Fireball staff
Bolt staff
Bolt staff
--- Grail Knight Quest in Chaos Waste ---
- Since there are no Grimore/Tome in Chaos Waste, Grail Knight Quests are different here.
- Benisons only last one Level. Once entered a new one, you will receive new Benisons and finish them again.
Benison
Quest
Amount
(Recruit - Veteran - Champion - Legend - Cataclysm)
(Recruit - Veteran - Champion - Legend - Cataclysm)
Power Level
Slay Elites
7-7-10-10-15
Attack Speed
Slay Specials
5-5-7-7-10
Cooldown Regen
Slay Monsters
1
Damage Reduction
Find Pilgrim’s Coins
5
Health Regen
Finish Chest of Trials
1
Strength Potion
Slay Enemies
50-60-75-85-100
More Warhammer: Vermintide 2 guides
- 【Updated to Patch 6.10】【All Careers】Legend Builds Collection★ 5 (2.6k)99k views7.6k ♥87 minUpdated Mar 10
- 【Updated to Patch 6.10】【Cataclysm Builds】Kruber all careers★ 5 (1.8k)60k views5.7k ♥33 minUpdated Mar 10
- 【Updated to Patch 6.11】Optimal Melee Weapon Combo★ 5 (1.9k)58k views5.2k ♥26 minUpdated Jun 11
- 【Updated to Patch 6.10】【Cataclysm Builds】Saltzpyre all careers★ 5 (1.7k)57k views5.6k ♥36 minUpdated Mar 10
- 【Updated to Patch 6.10】【Cataclysm Builds】Bardin all careers★ 5 (1.8k)57k views5.6k ♥33 minUpdated May 12
- 【Updated to Patch 6.10】【Cataclysm Builds】Sienna all careers★ 5 (1.7k)57k views5.4k ♥37 minUpdated Mar 10






This guide was created by its original author on the Steam Community. Are you the author and want it removed? Request removal.