Overview
Can be used for every Source Engine game.
A more in-depth version
A more in-depth version can be found in Valve Developer Community.
This guide is more of a beginner-friendly version. (Though, you could say that the VDC version is better. Still though, plsz read my guide)
Introduction
.cfg files are macros (basically a set of inputs executed). Like the developer console, but without text suggestions & outputs.
Finding the place to put them
First, locate the cfg folder in your game’s directory. This is the folder most Source games use.
Well, it depends.
It should be in the <game + mod> folder.
For those:
<steam installation directory>/Steam/steamapps/common/<game name>/
In the common folder:
- Half-Life 2/hl2/cfg/
For Episode 1 & 2 (Inside the Half-Life folder): - episodic/cfg/
- ep2/cfg/
- Portal/hl2/cfg/
or - Portal/portal/cfg/
(Explained: Since Portal uses the same engine from HL2, it’s directory for the HL2 files remain the same.) - Portal 2/portal2/cfg/
- Garry’s Mod/garrysmod/cfg/
- Team Fortress 2/tf2/cfg/
Adding .cfg files
- Now, create a .txt file (or text document if you prefer)
- Put your prefered name in it. (eg: Moo.txt)
- In that, type out the command(s) to be executed. (eg: sv_cheats 1) (to include messages, include “//” in the beginning of a sentence. eg: // im a potato)
Now, here’s the most important part.
- Rename the file extension from .txt to .cfg (eg: Moo.txt –> Moo.cfg)
- Create a .txt file, name it hovever, but when naming it, change the file extension from .txt to .cfg
(When prompted, select “Yes“) - Open the file, if prompted, choose your text editor.
- Type out the command(s) to be executed.
Windows 8 & above
- Click on the View tab on the top of Windows Explorer.
- Enable “View file extensions“
All versions
Open Control Panel (small or large icons) > Folder Options > View
Disable/untick “Hide extensions for known file types“
(You can do this in any order you want)
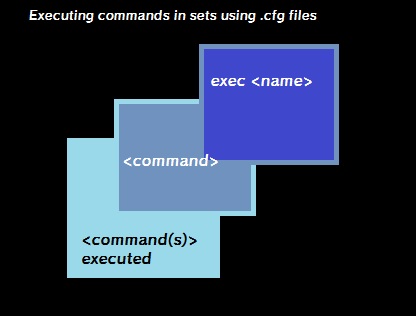
Executing .cfg files
(the quotes in commands are required if it has spaces)
- Type in the console: “exec <name>” (eg: “exec Moo”)
The command have been executed as if you put from the console itself.
This is more apparent if you’re using action commands (+jump, +attack, etc).
You see, when binding it to a key & using it, instead of jumping (+jump for this example), you would jump everytime after unpausing the game. (which is the same result when you put the same command directly into the console.)
To undo this action, instead of using ‘+’ on the action, use ‘-‘ instead. That’ll stop the action of whatever is put into it, say with our jump example.
Well done! You know how to use them.
Also there’s
It’s a self-executing file upon boot up of the game.
Some commands don’t work with it. In that case, use
Bonus Uses
You might have also seen the “chapterxx” (the ‘xx’ being the number) in the cfg folder. Those, of course, are chapters in the New Game menu & they usally execute:
But, of course, they can be modified too.
For this example, I’m using my own modification to Portal: accessing the credits from the New Game dialog.
How it works:
It loads up a save from the map:
that is about to play the credits sequence.
The code itself:
In Portal/portal/chapter12.cfg:
Created a folder in portal/custom called credits
The contents are: materialsvguichapterschapter12.vtf
This one’s only for the chapter preview.
Here’s the crucial part:
I’ve edited the portal_english.txt file in portal/resource & added another entry:
The 1st sentence with quotes is:
“game+mod-name_chapternumber_title”
The 2nd is..obviousl, the title (duh!):
“<chapter title>”
& that is how it works in a nutshell.
Conclusion
Hope you enjoyed this guide.
& thanks for reading.
I would say like & share, but I’m not going to. Do them if you wish.