Overview
How to open, edit, export, and save textures (for Bethesda games – Skyrim specifically) using GIMP 2.8 > Includes easy-to-understand explanations and helpful advice for newcomers and pros alike.
Introduction
This guide is for anyone wanting to edit textures in Skyrim, though it should work for the two previous Elder Scrolls games, as well as some other Bethesda titles like the Fallout series. A lot of the information I found online was vague, incomplete, or sometimes incorrect. And some of the mistakes that I made because of this required lots of work and experimenting to find / fix.
So here’s a step by step guide (it’s my first actually)
It’ll not only tell you what to do, but why – so you can learn a little about how Skyrim and other (Bethesda) games work, and be more equipped when a problem comes along.
You can skip the rest of this introduction, if you just want to get started.
But it might have some useful information for you.
GIMP (GNU Image Manipulation Program) is an image editing program, much like photoshop; except that it’s FREE. It’s easy to use, and I find it more “adjustable” than photoshop. So for a knob twiddling maniac like me, that’s a great thing. The more options, the merrier.
You can get it for Windows, OS X, and Linux here: [link]
Please donate, even just a little, to the creators. Their tireless work has created a great program for people to try out, before / instead-of hefting wads of money at Adobe.

Skyrim has four types of textures.
- Diffuse Maps: These should be familiar to everyone. They’re the colours that coat every “thing” in Skyrim. Without these, almost everything would be invisible. This will be the kind of texture you edit most often.
- Specular Maps: These are the reflection textures. They’re just grey-scale images. The black areas will not reflect, and the white areas will be mirror-like to light sources. If you’re using an ENB, you can adjust their strength and ‘curve’ to make things look more glossy or matte. Their filenames should be the same as the diffuse maps, but usually have “_s” at the end.
- Glow Maps: These are additive textures; meaning that they only ever increase brightness of what they cover. Only a few vanilla objects use this, like the Vampire eyes, and Nirnroots. Edit these sparingly, as it’s easy to make them blinding-ly bright (especially if you use an ENB). Their filenames should be the same as the diffuse maps, but usually have “_g” at the end.
- Normal Maps: These allow the lighting engine for Skyrim (or your ENB) to add correct lighting and shading to objects. This texture is created by the 3D model being lit from different angles by a certain colour on each axis. From this map, the engine can then determine how the in-game light sources affect the object based on what coloured parts are exposed. I don’t suggest editing these in GIMP unless you’re doing small fixes (like removing details/mistakes). Their filenames should be the same as the diffuse maps, but usually have “_msn” at the end.
Low poly? No problem?
POTENTIAL “BLOCKY FACE” FIX:If you find that your characters in Skyrim have blocky / pixelated faces in certain lighting or camera distances; and Skyrim.ini tweaks haven’t fixed the problem for you, then an incorrectly exported Normal Map might be the culprit (it was for me – and took me AGES to find).
By opening and re-exporting your Normal Map with new mipmaps, you may fix the problem. Continue reading for how to open and export textures with new mipmaps, and to learn what mipmaps even are.
\\\\\\\\\\\\\\\\\\\\\\\\\\\\\\\\\\V////////////////////////////////////////////////////////////////////
~~~~~~~~~~~~~~~~~~~~~~~~~~~~~~~~~~~~~~~~~~~~~~~~~~~~~~~~~~~~~~~~~~~~~~~~~~~~
///////////////////////////////////////////////////////////////////////A\\\\\\\\\\\\\\\\\\\\\\\\\\\\\\\\
1. Installation

Visit [link]
Then download and run the installer for GIMP 2.8 It works for both Windows 32 and 64 bit.
Once installed, you’ll need the plugin. Click the link below and save the latest “binaries” ZIP file that matches your system (i.e. 32bit OR 64bit): [link]
The zip file will contain an EXE file which you should extract and move to the plugins folder for GIMP.
Unless you changed the default location, that plugins folder should be here:
C:Program FilesGIMP 2libgimp2.0plug-ins
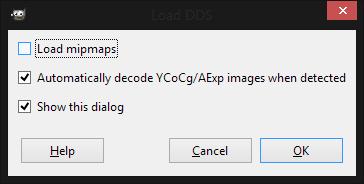
2. Opening the DDS file
When opening a DDS file with GIMP, you’ll be given a few options.
I suggest that you untick “Load mipmaps”, as it is easiest to edit the high resolution texture, and let GIMP create new mipmaps for you when exporting. But if you know how to use GIMP, there’s no harm in creating your own manually from the ‘master’ layer, halving the dimensions as you go. Doing this will also allow you to chose how small the minimum sized texture will be, so if you have no mipmaps, Skyrim will just use the full sized texture (not a good idea unless you have lots of VRAM).
They’re the smaller versions of the texture, which Skyrim will use as the camera moves further away. So if you really wanted, you could have different colours for each Diffuse mipmap, and watch things change colour as you approach them.
3. Editing (Optional)
This step is optional – as if you are just re-exporting a texture, I doubt you’ll need to edit anything.
If you’ve never used GIMP or Photoshop before, then this guide isn’t the place to learn. But don’t worry, there are many tutorials out there; both video guides on YouTube, and step by step text & image guides like this one.
You can also ask me questions if you are still stuck – as I’m quite skilled in GIMP (and Photoshop)
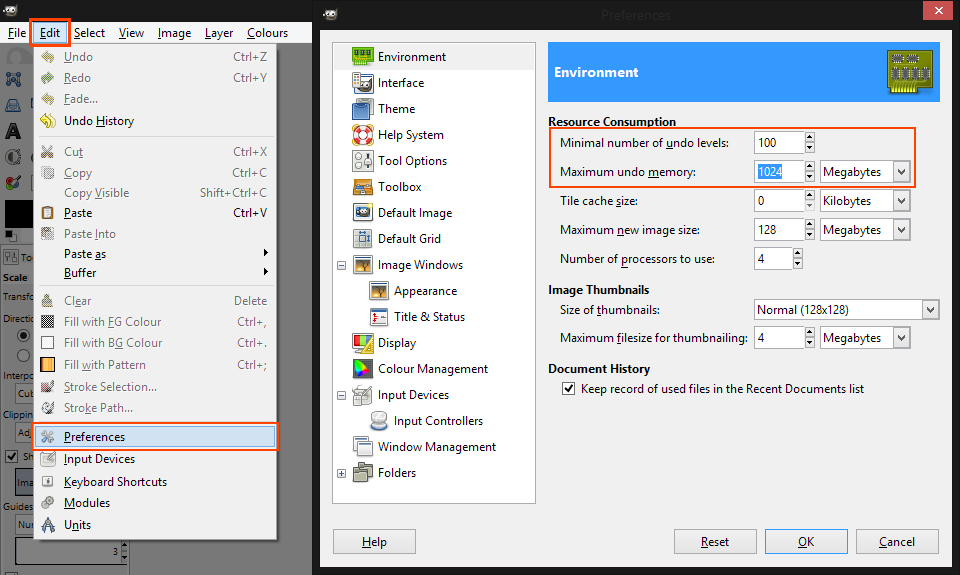
Don’t feel afraid to experiment with tools and filters. Just make use of the undo button, and to have a backup of the original texture too.
You might want to increase the amount of undo memory and levels you have, which you can do here. GIMP will make sure that you always have the minimum number of undo levels that you specified, otherwise it will stay limited to your maximum undo memory setting.
This means that if you set it to 100, you will always be able to undo at least 100 times. I suggest setting the “Maximum undo memory” to no more than half of your RAM. Do not worry though, if GIMP is near filling all of your RAM, it will store undo levels on your hard drive (in the Swap folder), which can be specified in the “Folders” branch, at the bottom of the Preferences tree menu.
4. Exporting / Saving
As you can probably tell from the title, exporting and saving are different.
If you want, you can save your work as well as exporting. This will let you keep a full quality copy of all the layers (if you’re using more than one). You have the option of using the GIMP project format .xcf, or a few others including the Photoshop project format .psd. Alternatively, you can export the image as a high quality PNG for later edits, but your image will be reduced to one layer.
Exporting will let you save your work as an image file. In our case, the DDS file for Skyrim.

Compression: It’s best to choose “BC3 / DXT5” compression. As it will reduce the filesize of the texture, but keep the alpha channel (transparency) for various textures that might need it, like fur and hair. But for high quality things like faces and any *Normal Maps, I suggest that you choose “None” for a nearly lossless file.
Mipmaps: If you want to have Mipmaps (you can go without them if you have lots of VRAM), select “Generate mipmaps” on the exporting window. But you NEED to have combined all your layers first. You can do this by right clicking on any layer, clicking “Merge Visible Layers”, and then selecting “Clip to Image”.
Advanced Options: If you chose to use compression, then expand this section and tick the “Use perceptual error metric” box to improve the compression quality slightly.
NOTE:
*Exporting Normal Maps without compression is essential! Because of the wide range of colours, GIMP (and Photoshop) will ruin their quality (most noticeably in the mipmaps) if you use ANY compression.
If you have a BLOCKY face that you can’t fix, opening the file without loading mipmaps, and exporting the file with new mipmaps (and without compression) might be the cure. It was for me.
5. Checking and Re-Editing
If you’re like me, you’ll probably be making many edits to your textures and checking them in-game.
So with that in mind, here is the fastest way to check, edit, re-export and re-check your textures; without having to waste time closing and reopening Skyrim (as loading another save will not reload textures). You’ll need to be able to run both GIMP and Skryim together of course; so if you’ve no way to switch applications or your computer isn’t powerful enough, this method won’t be possible.
There’s little harm in trying though, as long as you’ve saved. At worst, one of the two will crawl/crash.
- Check your texture in-game (obviously).
- Once deciding to make a change, save your game and Exit to the Main Menu.
- Switch to GIMP and edit the texture as you desire.
- Hold [Ctrl]+[E] to overwrite the last file you exported.
(If your first edit didn’t show up, you might be using the wrong filename/location).- Switch back to Skyrim, and load the save you just created.
(You could load another save, but you’ll need to be able to see your texture, right?)- Repeat as needed until you’re satisfied
Conclusion
Well, that’s all there is to it really. Best of luck to you all! 😀
Feel free to ask questions and give feedback (even complaints).
I’ll help any way I can, and whenever I can. My knowledge only goes so far, as does my free time.
…The whole point of mods is to improve or add to the game.
So, don’t mod it untill it crashes… Mod it till it’s better in every way!
I don’t use LOOT, BOSS or any other mod conflict / ordering program, and yet I have 277 mods (212 plugins) all running without conflicts or crashes at the time this guide was made. Yes, there’s a minor issue here and there (the fault of the mod creators or base game, not me), but one by one I’m ridding myself of them all.
My Humble Rig’s Specs (at the time of this Guide) – In case you want to compareOS – Windows 8.1 Pro 64bit (Modified)
CPU – Intel Core i3-4160 (Dual Core) @ 3.6GHz
RAM – 8GB DDR3 (Skyrim only uses 4GB)
GPU – 2GB Nvidia GTX 750 Ti
MOBO – ASUS H97M-E
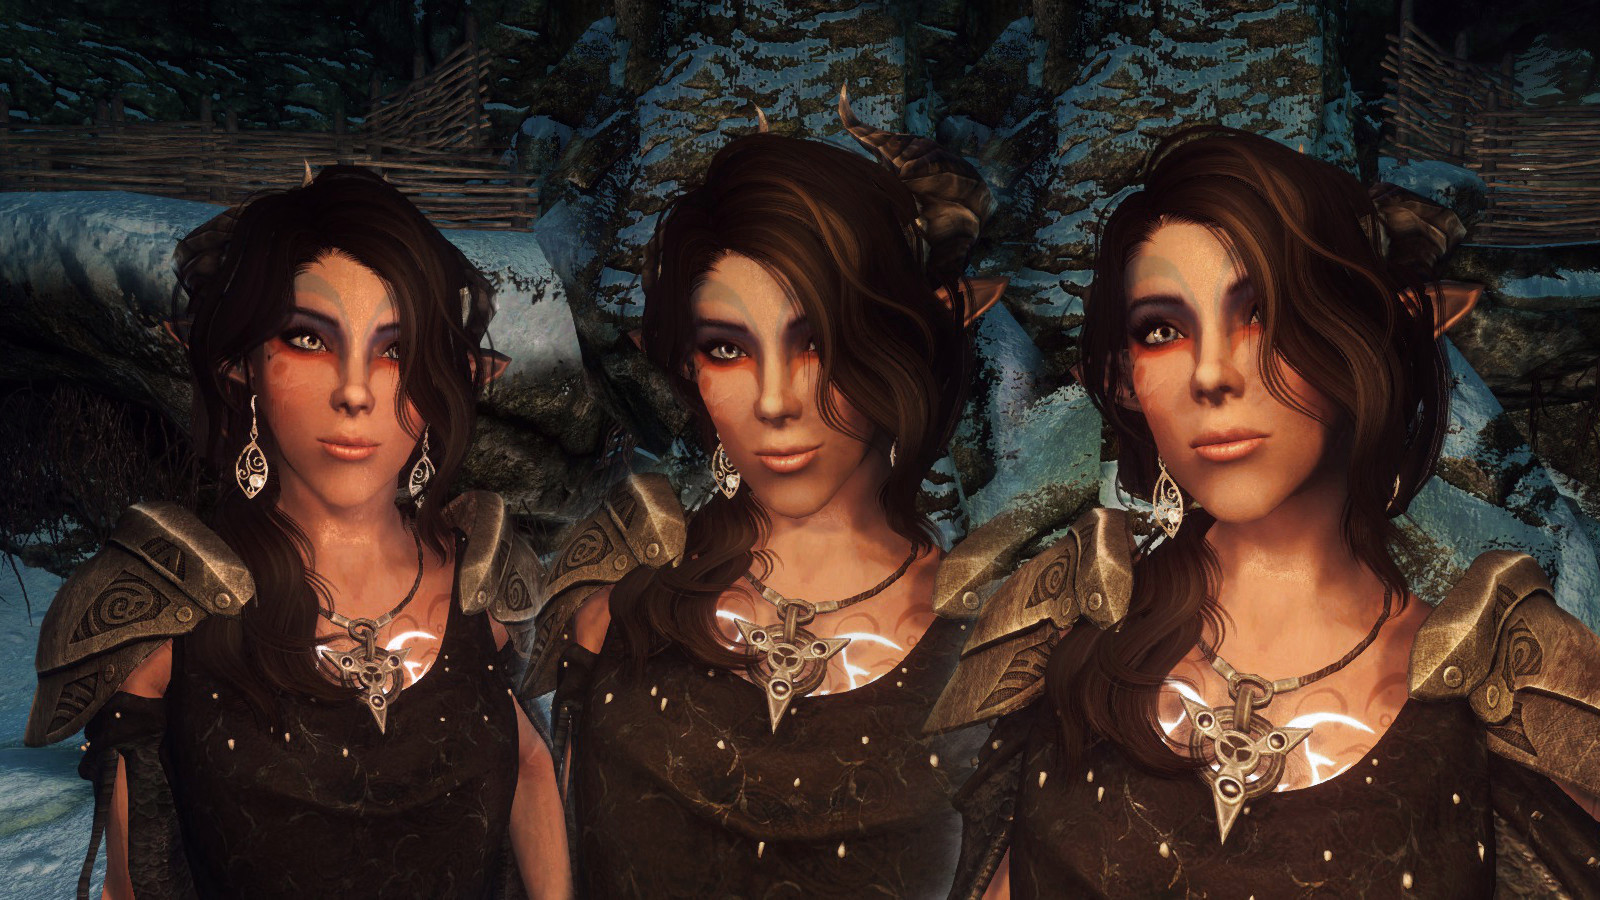
*NOTE: If your specs are the same or better than mine – and you mod Skyrim properly – you should be able to make it look as good as mine (see screenshots above, or the Skyrim Artworks on my profile) at over 45 FPS outdoors, and 55 indoors.