Overview
This guide will contain several chapters in it. Each of which will help with varying aspects of this game. First will be basic info to start surviving in this realm using as bare minimum materials/time as possible.We will also be including as we learn guides on crafting, building, boss fights, ect. As my knowledge grows, and as the game changes I will update this guide to include all we need to know on basic starting, farming, taming animals, building and boss fights.
Lore of the Realm

World Lore { No spoilers }
“Long ago, the all father Odin united the worlds. He threw down his foes and cast them into the tenth world, then split the boughs that held their prison to the world-tree, and left it to drift unanchored, a place of exile…
For centuries, this world slumbered uneasily. But it did not die… As glacial ages passed, kingdoms rose and fell out of sight of the gods.
When Odin heard his enemies were growing once again in strength, he looked to Midgard and sent his Valkyries to scour the battlefields for the greatest of their warriors. Dead to the world, they would be born again…
In order to prove your worth you have been sent to the 10th Norse world – Valheim. Only by surviving and fighting in a harsh environment with many mythical monsters and beasts will you prove your worth to the gods. For those who don’t prove their worth though, the only place they will find is Hel – The underworld, where their soul will be tormented for centuries. Or maybe you will be one of the strong warriors who will prove their worth and earn the favor of the gods, then your place will be in Valhalla – a majestic, enormous hall located in Asgard, and by your side Odin.”
When you first spawn into this world you will be carried here by Hugin whom will lead you on your journey by giving you tips as you remember more and unlock greater things. He will appear, pay heed to his words for they will guide you on your journey
Lore On The Stones

Through out the different lands you will find stones that have runes on them, if you choose to read them they have stories as well as some handy tips on them as well.
Eikthyr
Found within the meadows
Hold, traveler, and bear witness to my warning. We are many who have come before you, carried by Odin’s will to do his work. The path ahead is hard and the dangers great. If you hold your life dear, keep to these meadows and make your dwelling away from the trees. Fear the Horned One and spare his kin.
Found on several stones, this is one warns you of Eikthyr as well as gives you the tip to build away from the tress so you are further from the monsters of the land.
Boar
This land is hard and wild but we who are brought here are harder still. Take comfort, traveler, in the gifts before you, the good wood and stone, the fruits and flowers of the forest.
Look also to the wild boar who roam these lands. They fear fire and the hand of man but they can be taught to obey it. Go quietly to them and let them eat of your stock. Roots of the ground are their pleasure.
Found on several rune stones as well, this one is giving you a tip that if you are clever, and have the means to feed them that you can tame a boar for a ready food source.
Ulf
Heed these words of Ulf, a poor settler in a strange land. You will find here good stone and wood, all you need to build a house. You will need to craft a roof to keep out the rain. Then you will need walls to stop the roof from falling down. Finally, you must have a door or it will be much harder to go in and out.
These things Ulf has learned for himself. now he writes them on this stone to help others. Pray to Odin for his soul.
Astrid
I was Astrid, a shieldmaiden of the forest. I know nothing of my life before I came here but my arm remembers the sword and my eyes see the course of the arrows.
Now the raven guides me and I fight the great beasts in Odin’s name.
Movement and Map Marking
WASD ~ Movement buttons
Moving mouse around will change your view as well as the direction you walk in
Mouse right click will swing or do the action of whatever tool it is that you have in your hand at the time is
Mouse left click will block or if you have a hammer equipped and an item highlighted to build this is how you will place the item
Mouse middle click with hammer in equipped will destroy the item/building block
Shift is run
Mouse roll will make your camera zoom out a little more
Once you get your power from beating the boss F will activate it
E will be used to pick up, open boxes/door ect, load smelters, pet animals which in turn can make some of them follow you or stay,
Your number bar will be your hot keys. You will drag items like your sword, ax, shield, bow, pick ax, ect in there in order to use them. In order use the item you do have to have the number hit that the item aligns with as well as hit the mouse button.
If you want to go open hand so you can use E and you have something equipped hit the number that aligns with that a second time and you go bare hand again. Hit the number once again to pull the item back up
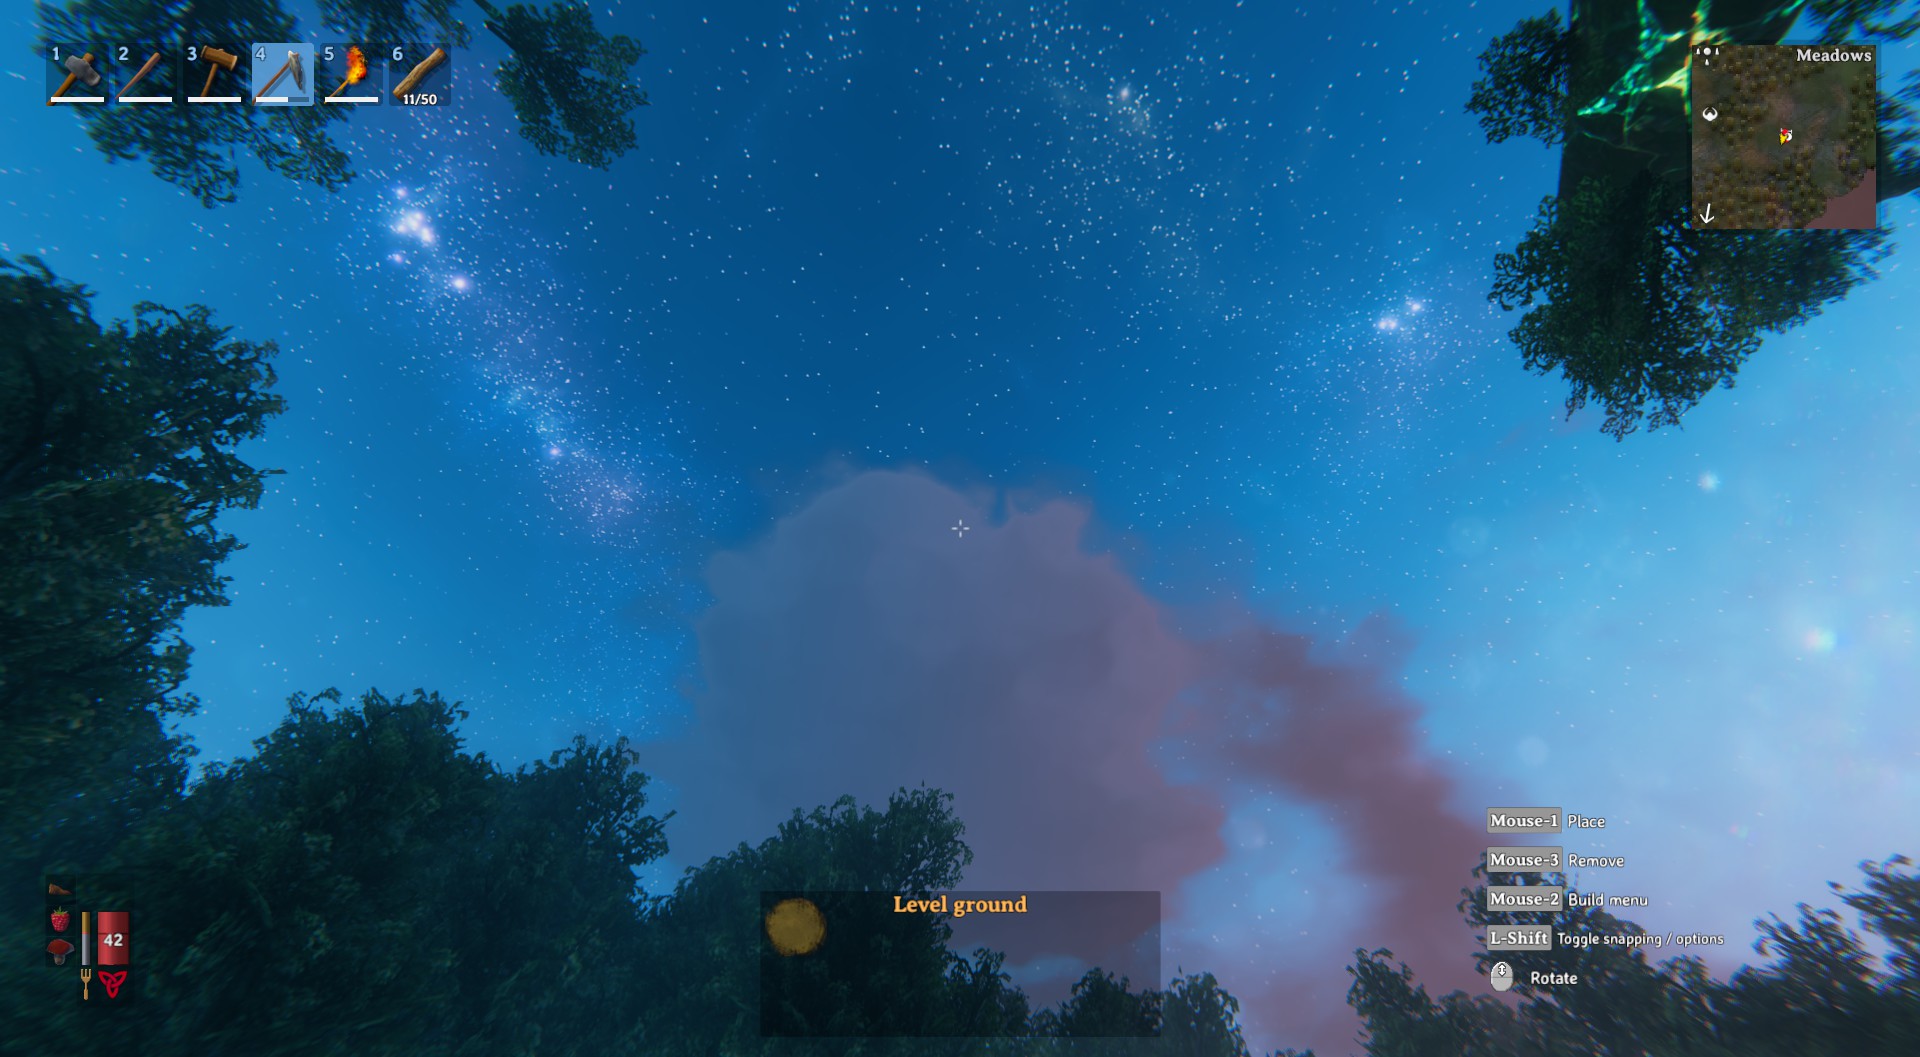
Map Basics and Marking
Mini map is top right hand side of your screen.
To open your main map hit M, to zoom in and out use the middle mouse wheel. It is a huge map and you will know you reached the end of it when it looks like a grey plain circle resting within a beautiful cosmic purple sky.
When you first spawn in you will have the shrine auto marked on your map for you. After you click the red stone right in front of you the first boss will be marked as well.
Everything on the map is in a “fog of war”, meaning you can’t see it till you cross over it.
Your symbol will appear on the map in the shape of an arrow or a compass head. As you go over the map you will start to see images of trees, water ect appear showing you the land you have uncovered.
You will see on the right hand side of your map several marker symbols, these will come in handy to you along your travels
They can be easily place as well as removed, and you can name them as well as you should
The way you place them is you go to the site on your map you want your marker on.
You will choose the symbol for you that will work best to mark what it is that you want to mark.
Highlight the symbol
Now on the map right mouse click twice, The symbol will appear on your map and a box will appear at the bottom of your map, put the name in it you want the marker to have, Hit enter
The way to remove them is to go to the placed marker on the map and mouse click on it twice
You will develop a system, make sure to name it something you will remember and that means something to you for what it is that you deem important enough to mark.
Tip if you die and you have a lot of stuff you care about in that bag I would go ahead and place a marker where the death marker is. Label it Bag. You will be deleting this
The reason why is if you die on your way to get your bag, your marker is now where you just died at and not at the location of your good stuff.
Once you have your goodies marked you will gear up as best you can, than go out and grab all your content.
Make two trips if you have to
Once all your stuff is home you can now go to your bag marker and delete it
It is much better to do this than to die along the way and not know where idk your Troll armor and upgraded weapon is at than have to search for hours to find the original bag all the while not having your gear to fight effectively.
Trust me, that is not fun at all (not that I would of done that facing say a troll and some grey dwarves across the ocean or anything)
You will want to mark things on your map like dungeons, ore, bosses, your many viking halls, villages, and castles that your portals, docks ect
The trader will show up as a marked bag on your map once you enter the area close enough to him for it to pop.
That being said I have never known of anyone to have it happen on your starter island but it could happen
He generally lives in the Black Forest and we will have a chapter on him later
When you find shrines and other things along your travels some of them will unlock markers on your map.
These will lead to areas that will have boss shrines there, for example I found the marker for the second boss in a dungeon by reading one of the red shrines
Day 1 Basics
When you first land in this realm you will be carried here by Hugin, a great crow about the size of an elephant or so it feels.
Hugin will drop you on a shrine that you will have five tall stones that have hooks on them as well as one small glowing red stone that Hugin is sitting on.
You will go talk to the bird then click on the red glowing stone, this will reveal the location of the first boss… you are not ready to fight them but you need to know where they are.
Now that we have basic movement and map reading down we will get into some tips that you will need order to survive
First step is to start to explore a bit, you want a location close to the spawn shrine as well as close to WATER as possible. If you get to where you have wondered for a bit and not found water go back to the shrine and head the opposite way so that hopefully you will find some as close as possible.
As you explore, pick up wood, stone, berries and as you are able to make yourself a few tools. As soon as you are able to make the things Hugin tells you to do so, this will give you tips as well as unlock new things for you.
You can easily build a shelter that will allow up to two people to sleep as well as a workbench, and later a forge if needed that is only three by two. Three tiles long by two tiles high. go small at first you can easily change builds in this game and you need shelter NOW.
Very first step is to flatten a very tiny spot of land, at least a small circle to make it easier to build.
Next you will need a spawn point.
First you will have to place a workbench to build. Do this by equipping the hammer to go to your craft menu than you select the work bench. After you place it you will go behind the bench and begin placing your walls. They will need to be two high by three long. Place walls at both ends at least one high so that you semi enclose it and place beds down.
You will need flooring where you want the beds to lay down, but the whole “building” can be covered with three tiles.
Next you will need a roof, do this by placing pointing up off the top of the walls you placed behind the workbench than another piece connected to that pointing down.
Place a campfire outside of it against the outer wall with a piece of roof pointing up away from it to cover it from the rain.
You can build this around the work bench easily and with very little materials or time have a spot to sleep through the night.
Place a box or two off to the side for storage and set your spawn point.
Once you place the workbench you are ready to build. If you need to move the bench later so you better fit it in the tiny hut after you get it built, you can easily do so by equipping the hammer then clicking the middle mouse button on the item you want to break. You will need to have whatever it is you need to move or break highlighted blue. As well as be in the area of a bench.
You will get the supplies back so you can replace it. Make sure to set your spawn point to your bed as well as to test it before dark so you can sleep at night since more monsters attack at night.
Now that you have a basic shelter built, with your spawn point and a few boxes you need to go out and start gathering/hunting. Make sure to grab flint so you can make some cooking racks, hunt you a few boars, pick up all the mushrooms and berries you find and as the sun starts to set head back to spawn point, if you are out at night you will have small hordes of monsters attack you and this is never a good idea on day one with a wooden stick for a weapon.
Following this small build you can easily have a shelter built that will hold several beds(more than two you will need to add more roof), a work bench, as well as a cooking fire
Starter Foods 🍖🍄
These are foods that you will be able to easily get on the first day, that you will need to save your life.🍖🍄
We will go into a detailed guide on all foods and know that everything in the game does get used but some things you will need to focus on at certain times.
Food being important at all times, as the game progresses your diet will as well, therefore the types of food you can cook to have available for you to eat will vary over time.
Let us get started with the basic and work our way up from there in later chapters shall we.
First you can only eat 3 different types of food at one time. So one meat, one neck and one berry for example.
All food will have certain hp/stam it gives you as well as an amount of time it keeps you fed. Of course as you further in the game you will learn how to make better foods that last you for awhile, as well as pick and choose some bonuses but for now we will just eat the berries raw and learn what to do in order to just survive
When you first spawn in you will go through the Day one guide and get you a small base built. It is very important that you find WATER, there are more animals there as well as Necks and buddy we need those in our life.
You will spawn in the Meadows which as several types of food that you can forage as well as the two types of meat that you can cook
Meadow Food Types
1. Mushrooms ~ little red caps on the ground, can be eaten raw
2. Raspberries~ found on bushes throughout the Meadows, can be eaten raw
3. Cooked Meat~ obtained by killing deer, boar or fish (fishing is much later in game unless you get lucky and catch ones with your hands) . You will get raw meat that you will have to cook on an active campfire with a cooking rack placed on it
4. Cooked Neck~ obtained by killing Necks found in the Meadows along the WATERS EDGE. Has to be cooked the same way meat is and can be eaten along side meat
5. Honey ~ obtained by finding a home in the Meadows that has a bee hive in it. You will shoot the hive and a Queen Bee will fall out. Take her home, make sure to build her a home inside your protected garden or fenced in area with an open area above them. They have to be happy and outside to produce honey.
6. Dandelion~ can not be eaten raw you will save them for when you unlock the cauldron
The foods listed above 1~4 will be what you will be surviving on for a bit, unless you get lucky and find a Bee and use the honey to live off of.
You will need to spend part of the day hunting meat, gathering berries, shrooms, as well as trying to make sure you have a little time left over to work on your base.
The sooner you can get to the Black Forest, find some carrot seeds, a smelting core and get a cauldron the better. However you can live very well off of foraging and hunting for a long time.
Trust me on this I like to take my time in games and lived on basic foods for about 50 in game days on one world because I needed time to flatten my plot of land, as I was in no rush to build.
Make sure to always have three food types eaten, if that box isn’t full fill it up, that is your health and stamina points. You can’t hunt, build, or build a ship if you have no energy
Remember that you will unlock better foods later, that they will all be used for cooking things like carrot soup, Queen’s Jam, health potions, ect.
However you need to live now and you need to make sure that you keep all three food type boxes full at all times just don’t eat any produce that you need for your farm.. long term not short term is the goal here
Taming of the Boars
In order to eat a decent food supply going to be needed.
One of the ways you achieve this is by taming animals and breeding them.
First step is will need to tame you some Boars, sounds harder than it is.
First make sure you have a small area that is fenced you can use the little wooden fences, you don’t have to use the tall outer walls.
You will want to make sure to put a door/gate, that the area if fully enclosed, and that if you have steps in there that they do not touch the ground fully if they lead out because the animals can climb them.
It will be easier on you long term when you build this area if you keep in mind that you will need to feed them as well. Build a small stair case along one of the fence sides that leads up over the top of the fence, but not into the area totally so that the animal can not climb up than out.
You will go engage a Boar, don’t hit it just walk up till your toon gets where the boar wants to attack you.
RUN... run into your cage with the door open. The Boar will follow you inside you shut the gate and jump out over the small fence. Do not go out the door the Boar will follow, jump over the fence and leave the boar in there and do so Before it kills you
On the outside of the fence if you want to make it easier to feed them place a step leading up the side of the fenced in area with a floor piece attached to the stairs and off to the side of the Boar pen. You will climb up there and throw in some food.
The way you will feed them is to open your inventory and throw the item out. If you have your area above built before hand it is easier to achieve feeding the animal without risk of attack.
They do not like meat.. give them mushrooms, berries, if you have them carrots ect.
Another way to do this is simply let the Boar chase you make sure you got wood in your inventory. Get a work bench put down or in the area of one and start trapping it by building the fence around it.
Either way works the planned one goes smoother though.
Make sure with both ways that you REPAIR THE FENCE AND THE BOAR HAS NO ESCAPE OUT, REMEMBER THEY CAN CLIMB STAIRS THAT TOUCH THE GROUND.
After enclosing the animal in the cage if there is food in the area the animal is in that the animal will eat you will start to notice little 💛 hearts pop up over the animals head. This means it is starting to get tamed.
If you hover over the animal you will see a degree of tameness, that will go up slowly over time if the animal has a steady supply of food.
Don’t go in the fenced in area while it is still wild, you can get close enough to check stats and feed without it being able to reach you
Once the animal is tamed when you hover it you will see 💓a pink heart tameness 100%. You may now pet your beast and it will love you 💓💓 Some of them will even follow you and fight by your side…. not the boar they refuse to leave the farm once they have carrots.
💓💓If you get two of them in there, keep them fed up so they are not hungry, make sure they have room so that they will start to have babies, lots of them. You will see venture off to the side than a heart 💓 will pop over there head, wait a bit and later that day a baby will appear in the area. The babies do take a couple of in game days to grow, and are utterly adorable. 💓💓
You have to have 2 grown animals in order for babies to happen, they have to be tame, fed as well as have room. Once the area is what the game considers full you need to consider culling the numbers as you would do at a farm, this will provide you with meat, leather ect.
Tip if you are struggling with food make sure that you don’t feed the Boars till after you kill them and get there numbers down to two but never lower than two. That way you are not feeding them just to turn around and butcher them for meat. Waste of resources. If you go outside and have four Boar butcher two of them, and feed the other two in the am you will have another baby piglet or two.
They do prefer certain types of food over others but just make sure they are fed to begin with and as you get more food supplies than you can feed them the grown vegetables and mushrooms they love
There are other animals in the game you can tame as well. The Wolves and Loxes are the only other two that I know of atm. The wolves you can breed just like the boars and the Loxes as far as it is known in the gaming universe at this moment sadly are not able to have babies.
The stronger the animal the stronger they will hit you, your walls and more capable of escape, bear that in mind when you engage them to tame them.
The boars are easy to find as well as tame being they don’t destroy walls with a hit or two before breaking free and eating your face.
The wolves/lox will require a little more effort, planning and thought to capture.
We will have a chapter on that with some photos of cage designs at a later date. For now I am focusing on basics.
Basic of Building And Starting Crafting
Building Basics
In order to build anything you have to have a workbench placed and be within it’s circle, that being said you can always move it when and if you need to as your build changes or you get more land leveled the way you want.
First it is easier to build anything on flattened land, any game I have ever played with building in it this always holds true. That being said you can build quick and easy if you need a place to stay over night a two by three base on non flattened ground will suffice, guide on it is in the first day chapter.
When you are in the circle of land that your workbench gives you in order to get to the building menu you will right click your mouse button, with the hammer equipped at the time.
Once that is open you will see several tabs, each one contains different items that you can build. The ones you have the materials for atm in your inventory will be lite up
Now comes the fun part, you get to start your dream home
Anything not covered by a roof that gets rain on it will take damage and decay over time. When you place your building you will notice that there are colors to each block as you place it, those tell you how strong the blocks are, or how weak.
1. Blue = strongest block fully supported
2. Green = still supported and can be built on
3. Yellow = caution you are starting to get weak
4. Orange= you better support that thing it might fall
5. Redish Orange== I am telling you this is going to fall any moment
6. Red == it falls and breaks
When you are building you will need to keep in mind that you have to have a roof over your building, as well as if you want your fire inside a chimney with a cover of it that has a gap for smoke to escape or you will die from smoke damage.
The support beams will help you once you start building bigger bases. I would start small and learn from there. Make sure that if your blocks start turning red and you want your roof higher to look and see if you can use angled supports that touch a support beam that touches the ground, add some beams in and look at the color of it from that point with the hammer in hand to see if you changed it.
You have to have a hammer in hand, within the range of a work bench. Than you will click your mouse to go to the crafting menu where you will see several tabs from where you will choose the item you want to build by using your mouse to highlight the item and click on it.
Once you do that you can use the other click button to place the item and if you don’t like where it is or it doesn’t snap into place right use your middle mouse button to break it.
Framing out your bases will help, remember that you get all the resources back when you destroy things so don’t be afraid to experiment and see what builds you like the best.
Basics Of Crafting
In order to craft anything in this game you will need to unlock the recipes first. As Hughin will tell you when you first spawn in you do this discovering things and picking items up.
For example when you pick up flint you will unlock the recipe for a flint ax. Some recipes will require that you pick up more than one item to unlock it, whatever is required for building the item will be what you will have to pick up to learn how to make it.
Some items will be made on the work bench, forge or hammer. You will be able to make armor, weapons, food, potions, ammo, ships, buildings, lights, farms, tools, bee hives, wagons, portals many many items are in the list of things to be crafted in this game.
If an item requires a table or bench to be made than sometimes you will have to upgrade them in order to be able to craft such said item.
I will compile a list of upgrades, costs ect and include that in a different chapter or add it to this one at a later date.
Almost all things you craft in this game can be leveled. There will be a tab on the table that says upgrade click on that and see what items pop up as well as what they cost. Make sure to keep your items upgraded as much and fast as possible to make your game play easier.
Basics of Cooking
When you first start the game as we discussed in the Day One chapter you will need to cook and eat right away. This is a survival game and never have I played on that this is not an important part of the game.
There are three ways to cook in Valheim the meat rack, cauldron and the fermenter.
You will need each to survive as well as get the best food bonus, however the last two will not be unlocked until after you are able to smelt metal
To make a basic starter fire place you will need 5 stone and 2 pieces of wood, make sure you have a roof over it that has some ventilation above it as well. After placing you will need to have something to cook on as well, the starter one will be a cooking rack. Gather up leather scraps that you get from killing boar and flint that you will find along the shore line. You need 15 flint, some scraps, and I think some wood to build this.
Go back to your fire now that you have gathered the stuff to make your cooking rack than you will place it over the fire, if it is lite up blue when trying to place it will than fit and work on top of the fire. You can place up to 6 racks on 1 campfire if you are careful, I prefer no more than 4 tbh cause it makes it easier to get the meat on and off the fire but everyone is different so play around with it and figure out what works for you.
Now that we have our cooking rack or racks in place we can start to cook some cooked meat and some grilled necks which will be what you will be living off of for awhile.
To use the cooking rack have the meat in your inventory, make sure the fire is lite, than go over to the rack. You will place the meat on the rack by pressing E, when you do there will be a pop then a hiss noise.
You can only place two on each rack and they take time to cook. When they are done you will hear the pop hiss noise again, it will end up turning into coal if you take to long, which is good if you need it if you need food that is bad. Listen for that noise and the meat will change colors as well when it is done.
You can not take meat off the rack that is not done, and once it is you will be able to remove it as well as place more on there if needed. Hit your E button to remove the meat, E to pick it up.
When the meat comes off take it off one at a time a little slow because it will pop up a bit and might fly if you don’t. If you do it a little slow and the meat will gather at the top to grab it off, if not it will fly
The first cooking you will do will be with the rack, which will cook all types of meat in the game and keep you fed for a long time.
After you unlock a smelter you can build a cauldron as well as the fermentater. You will make these with tin and cooper on the forge table, these items will let you make soups, brew base and other foods.
The fermentater that will allow you to brew your brew base that you made previously in the cauldron in the fermentator turning them into potions for healing, poison and frost resistance. It does take a few days for your potion to be done., once it is simply empty the fermentater by hitting e allowing the contents within to be released. They will show up as glowing vials if they go to the floor, if you stand in the right place as well as have room they will fall into your inventory.
You will need all the things you gather for the cauldron things like thistle, dandelions, ect that when you first start you don’t know what they are for they are for cooking later in game. Mushrooms will be used in soup, berries can be turned into jam.
Different types of meat that you can use on the rack will be basic meat, neck, fish, serpent and lox. You will only have the basic meat from boars/deer, neck and if you are lucky fish at first, as you progress you will find the other creatures that contain these meats and with Odin’s blessing you may even slay them for dinner.
The cauldron will unlock soups, brew bases for the fermentator, sausages, jams, and maybe other types. There will be another chapter on this as well that will cover all the foods.
Make sure you save all the dandelions, mushrooms, honey, berries ect as much as possible for when you unlock the cauldron but again do not die because you have no food and make sure to keep all 3 of the food boxes full at all times so you have the most health in game.
You do need an empty slot to cook in the cauldron so make sure you have at least 2 when you go over there to cook so the items have some where to go and you are allowed to do so
Those supplies do you no good later in game if you are miserable and dying all the time at the start. So eat but also be mindful of what you will need to cook better food with later. I NEVER eat raw blueberries or mushrooms now I save them for soups and potions now, but at the start I will eat whatever I got in order to keep my three food boxes full at all times.
Smelter and Tool basics
Most things in the game will need a crafting table like the work bench or forge to be made however there are some basic that you need that you can craft without the bench
Tools you can make without a workbench will be
1. Stone Ax
2. Torch
3. Hammer
First step in any building you will want to do be it crafting tools, a base, or a ship is to place a work bench in the area.
You do so by equipping your hammer than left clicking to open the menu for it, go to the crafting tab and there is a work bench high light that than place it where you want it.
It does have to be covered for you to repair your tools but will allow you to build even if it is not.
The work bench and later in game the forge are both needed to craft the tools you need to progress in the game, they can be upgraded as well (we will cover that in a later chapter) as you develop more skills and unlock items. Some things can only be crafted on upgraded benches/forges so having one of each close to each other upgraded as much as you possibly can is a must in this game.
Level 1 Workbench
1. Hoe
2. Flint Ax
3. Rag Tunic
4. Rag Pants
5. Leather Tunic
6. Leather Pants
7. Antler Pickax (unlocked after first boss)
8. Flint Knife
9. Flint Spear
10. Crude Bow
11. Fine Wood Bow
12. Wooden Shield
13. Wooden Tower Shield
14. Wooden Arrows
The hoe along side the hammer will be your best friends for building, it will allow you to level ground making it easier to build. Of course it works better if you are using the pick ax as well as the leveling tool, however you can get a huge flat area with just the hoe, trust me I have being that it took me forever to build up to unlock the first boss.
After you can venture out to the Black Forest you will start finding dungeons, you need to go in those and find a red glowing cube called a smelter core. You will need at least 5 for the smelter so you can melt your metals to make tools, as well as 5 for a charcoal cooker so you have the material to fire up your smelter.
If you can only find 5 core place the smelter first so you can start cooking your metal, you can always burn meat for coal if you need to. You need metal for tools so that you can get your farm going, cut down different types of wood, as well as make better quality food/ potions. Which all require metal to build
The forge can be built without the smelting cores but you will need metal for that as well, so the smelter should come first, than the charcoal cooker.
Once you have these items placed in your compound you can start to cook your metals tin, cooper ect so that you can make a forge that you can make your tools on.
Farming Basics
You will unlock the ability to farm and cultivate the land after you can make a cultivator.
Which you will not be able to make without having a smelter.
There is a chapter on that above however on this one we will focus only info to get us started with farming as well as how to keep it running.
You will need a small plot of land, you might want to flatten it as well as put a fence around it or the deer as well as any other animal in the area will eat your crops.
The first seeds you find will more than likely be carrot seeds which grow
Image on the left is of carrot seeds in their natural habit.
If you see these pick them up, store them till the cultivator is unlocked enabling you to use them
After you have found the seeds, as well as have the cultivator in hand you will be ready to start building a farm.
First step is to prep the land and place it either within your walls or place it outside of them with one of the small fences around them. After you do that you will get your cultivator equip it and if you have the proper materials you can start farming.
You will first choose cultivate the land which will change it from a tan colored dirt to a blackened dirt, that area is now ready to have seeds placed in it.
Make sure you have the seeds you want to plant carrot or turnip in your inventory. You will than click open the cultivator tool again and choose the option carrot. You place them by clicking on your mouse bottom on the blackened ground that you just tilled.
In order to keep your farm always turning out food you will need to make sure that you have an area for replanting the crop as well as the area for the crop.
Once the carrots are grown you will be tempted to eat them all, DON’T take at least 1/3 of them and replant them back in the ground. You will have the option carrot seed now, click on that and plant those seeds so that you can get you a farm going.
This will need to be done every time you grow or you will NOT HAVE SEEDS FOR FUTURE CROPS.
You will get three seeds for each one carrot plant. So it will to go you find seeds and have three plant the 3, once they are grown to carrots you will replant them all 9 of them as carrot seeds, harvest them as carrots giving you 27 carrots, again you re- plant ALL OF THEM as seeds after this till you will have 81 carrots when you harvest. Keep half of the carrots to eat 40 and plant 40 as seeds.
Comfort Basics
When you sleep you will get a comfort bonus with your sleep that will extend the amount of time the sleep bonus lasts.
Easy way to reach higher comfort levels is by making sure you have “pretty” things around your area you sleep in
You will be able to craft things like a rugs, tables, chairs, banners, thrones ect that will add to the bonus number of the comfort level.
These numbers DO NOT STACK ON THE SAME TYPE OF THING SO ONLY BUILD ONE unless you want more tables, rugs ect for the pleasure of having them decorate your home.
When you place your items you will notice that some of them have a level 1 comfort like the stool, and bench. Don’t place those items or if you want to before you unlock the other better decorations break them when you place the better items. The reason for this is because their bonus of 1 will over write the bonus of the table and chair that have a comfort level of 2. Same with the beds, when you unlock the Dragon beds all of the beds need to be torn out and replaced with the Dragon beds or the bonus will not go up
You will want to place one of each of the three types of rugs you unlock (deer, lox, and wolf), each rug type will give a bonus, one table, one chair, the best bed you can craft atm, one banner, and one throne.
Of course some of these items are later in game as you will have to unlock them so you will start with the basics and work your way up from there. Make sure if you place a stool and a bench you go back and tear them out after you unlock the table and chair so you get the higher bonus. Craft the rug as soon as possible, as well as your banner. This will give you a level 7 comfort in the stone age, 9 after you replace the stool and bench in the bronze age.
Upgrading Basics
When you craft your tool, weapon or armor you will notice that there is a number next to it. That number is the level of your item.
You will need to be at the work bench (or forge if the item was made there), click open the top tab to upgrade instead of craft and have a look to see what you can upgrade.
You should immediately upgrade all that you can as soon as you can, upgrade them all as far as the age will allow you to do so.
Certain items can only be upgraded so far depending on the level of the work bench and forge. You will unlock items that you build than place around the work bench/forge that will upgrade them. There will be a more in depth chapter on that later but for now we will focus on the basics.
The upgrades for the tables, forges ect can be found under the crafting tab and will say on them when you hover over them what they are.
You will need to make sure that the items for the upgrades are placed within range of the table for the upgrade to take effect. You can tell this because it will be red if it is outside the area and unable to be place.
Certain items cannot even be crafted until you get the tables upgraded, each upgrade will unlock different items as well moving up through the ages as you go.
You will have to have the materials in your inventory when you go to the table to do the upgrade as well, different items will have different costs ex armor might cost leather or leather scraps but a tool could cost wood, stone or flint ect.
Upgrading the hammer, hoe and items like that will give it a bigger radius as well as make it that tiny bit more effective.
The tables (work bench and forge), will end up taking up a fair bit of room with the upgrades. They do have to be covered to repair your items and will take damage as well if exposed to the rain.
The monsters like to target them if they are exposed so try to keep this in mind when you are placing them.
Also remember that you can easily move them (as well as everything else in this game) around as and when you need to by having the hammer equipped than middle mouse clicking.
You get all supplies back, make sure you have room to carry the materials before you break it so they don’t just lay on the ground and rot. If this does happen to you don’t panic just make sure to get to a box and drop some items off, go back to where you broke whatever it was than pick up the materials laying there. Just make sure to do it before you log off.
Food Bonus Basics
As with every survival game food will be an important part of survival. You will be foraging, hunting, farming, raising animals, as well as cooking so that you have the health to take on the monsters roaming the land.
That being said there are three boxes you can have for food. Each food you eat will fill such said box for a certain amount of time, making your character full on that box for the amount of time that food gives.
The food box will appear at the bottom left of your screen, you will notice when you eat that one of the boxes is now full, it will stay that way for the duration that type of food allows. During this time till that box is flashing you can not eat that food again.
Meaning that if you are still hungry you need to eat another type of food. If you just ate berries and all three boxes are not full then you need to eat cooked meat, grilled neck, honey or whatever else you have available.
You will always need to have three food types eaten . Meaning that those three boxes at the bottom of your screen need to be full at all times.
These will increase your over all stats, increasing your chance of living.
Each food will increase your max stamina and health, it varies per food type and we will go over that in a different chapter but for now I want to focus on understanding how the food bonus works.
You will notice the box start to flash when it is about to expire go ahead and eat as soon as it starts so your health stays nice and high.
Eat the bests foods you have available to you, however remember to always hold back product to replant for seeds if you are at the stage that you have a farm or you will not have a constant food source
When you hover over your food say it is cooked meat you will see a list of stats on them, time, health, stamina, heal bonus. Each food type will give you a different bonus as well as last for different times.
You can have 3 food types eaten and the bonus from all of them do stack.
The potions you will brew in the fermenter do not count as a box of food and will help to save your life once you get into the areas where it is extremely cold, there are tons of poison monsters around ect.
The potions can not be made early game, they are only unlocked after the smelter and the ability to forge metals.
Combat Basics
You will have two types of weapons and a shield that you will want to carry with you at all times. The weapons will be a melee one, as well as your ranged one (bow) the starter one being your club, and your bow.
The starter basics of combat are pretty simple you put your club in your hand, click your mouse button then bop the boars in the head. The opposite mouse button is your block button.
You have to have the weapon equipped on your hot bar as well as that be the item in hand for it to be used. Switch between them by hitting the number assigned.
When you are able to build you a bow and some simple wooden arrows you will want to do so, they may save your life and make hunting a world easier.
Each weapon, even the shield has it’s own skill with it. As you use the weapon you will level the skill, the higher your skill with any weapon the higher the damage, the higher the level on your shield the more damage you are able to block. Some of the bosses hit hard this will be important.
The bow is a little tricky to get used to at first. It is more like real life and you have to take into account the angle of the wind as well. Aim up a little from your target, and realize this may take a little time to get down. You will want to draw your bow fully to get the most effect, if you shoot early you will not get as long a range nor as hard a hit.
As you progress through the ages you will be able to upgrade your weapons, shield as we discussed in an early chapter do so, as soon as you can. You will also unlock different types of weapons like a spear, a mace ect, we will do another chapter on that with a complete list of them all when you unlock them ect but this is basics and we need to get that down first.
Play with the different types and see what works for you, each player is different and we all have different play styles. Just because I prefer the sword/bow combo doesn’t mean you won’t like the mace/bow combo
How To Build a Raft. Starting of Ocean Travel Basics
As a viking warrior you might be wondering when will Odin and Freya call me forth to the seas, so I can explore the world encounter new creatures, build new long halls and spread my clan across the land.
Well that will depend on you fellow warrior.
As you progress through the ages your ships building skills will grow as well. Starting with the ability to make a raft and ending with massive long boats capable of sailing the 7 seas as well as defending against attacks The image to the left is one you make after you unlock copper nails. You can fit several people in it, and it does have a small storage space in it. Hold on if you go out into the seas and are a passenger, or you might find yourself swimming.

When you first start you will remember the ability to be able to craft a raft rather quickly.
The cost of a raft is
Wood x20
Leather scraps x6
Resin x6
Remember to unlock a recipe you have to have had all the items in your inventory at some point that the item requires to build it.
Once you have the recipe unlocked you will have to make sure you are in the white circle radius of the work bench, then you will equip your hammer. Once it is in had go to the misc tab and you will see the raft. Now place it in the water by hitting Left Mouse button.
You can now sail the seas, explore find out if the Earth is flat or round, discover other lands, if the stories of the Kracken are true.
The rafts do not have any storage on them, are easy for monster to break and are not meant for travelling long Ocean journeys.
That being said they are handy to help you know where to build your dock out to be able to get in and out of ships easy, fast travel from village to village (base to base) on your starter island especially before portals and even after to carry metals, learning to sail so you can move the larger boats effectively, and most importantly FUN.
Remember the Ocean in this game is like real life. It may be calm one second than a storm come crashing in.
The waves and wind will move you and you can die out there.
Repairing and Deconstruction of Trash Items
Deconstruction of Trash Items
As far as I am aware at this moment in time deconstruction is not a feature in the game.
What I can do is tell you my work around it.
As you go in the game you will find that you outgrow certain items like the stone ax for example, you just don’t need it anymore, it is taking up space in a box somewhere never to be touched again.
If you are like me the idea of taking it and throwing it willy nilly out in the world to just lay there forever,, well that just doesn’t sit right with you.
I made a personal world, went into it got away from the spawn circle so I could build. I than threw together one of those quick one shacks in the photo we have in our Day 1 chapter above, put a few boxes on the ground and started putting items in there that we have no use for at this moment and it is highly likely we ever will again.
I named this world Trash world, I only use it for storage.
This way I can get rid of the items we don’t need without polluting the universe that my toon resides in. The thought of all that stuff out there in the woods or Oceans gets to me. We have enough nasty in real life I don’t need it in game as well.
You don’t even have to go so far as to build anything and the server/world can be deleted once you dump if you wish to do so. Me being me though the boxes were built.
Repairing
First off everything in this game can be repaired, at no cost. Depends on what it is what you will need to do in order to repair it.
Item/Armor Repair
If the item was made at the work bench it will need to be repaired at the work bench., if it was made on the forge you will need to repair it there.
For example a bronze ax can not be repaired at a work bench and troll armor can not be repaired at the forge.
You will go to the table you need than open up the table. There will be hammer off to the left side of the table. Click that till all your items you need repaired are repaired, now go forth and slay some monsters
Building Repair
You will notice if your building does not have a roof over it that the wood will start to change color over time. It will slowly go from the nice bright wood it started as to a moldy green color.
You will want to repair that if you plan on keeping the block there.
Equip your hammer then go to the crafting menu you will see a picture of the hammer at the end, it says repair on it. click on that. You will now go out of the crafting menu and keep the hammer equipped. Left mouse click on the part you need repaired same as you would to build it.
You do have to be within a work bench circle to repair
The piece will change back and now you are done.
This applies to everything you have built forge, fire, boxes, all of it
Ship/Wagon Repair ~~~~ see above you follow the same steps and you can repair them for free. You do have to be in the circle of the work bench however it does not have to be upgraded or covered so if you need to just throw a temp one down.
🐉💙𝒯𝒽𝒶𝓃𝓀 𝓎𝑜𝓊 💙🐉
💙I want to thank everyone for all the kind words, the favorites and the awards.💙
I plan on working a lot more on this guide and to me it is not even complete and you guys are giving me awards on it.
Thank you so very much.
I will add more photos, some videos, as well as more detailed information as I have time to do so.
I also plan on going through it re~reading it then editing, often.
My favorite English teacher taught me that you write than you re~write, and when you think you are done you edit it again.
In most games I play I end up helping as well as teaching people, I have begun to learn a lot more about forums, how to use them, computer editing ect that has enabled me to start writing some small guides.
This guide is my first official public game guide, I hope that I do the game justice as well as make it worth your time to read.
I can’t promise I will update this every day, or that it will be a perfect guide but I hope that it helps you and maybe even makes you smile a little
I can promise I will try to make it as easy to understand as well as read as possible, that I will add videos, screenshots as well as lists in it with more detailed later game info and that I will make the information as accurate as possible
That being said, I also stream daily, have been writing stories for all my sims, I try to do some art work of some sort at least once a week, try to work on my you tube, have adulting that has to be done, as well as have basic needs.
This guide and anything that I produce with my name on it is important to me, I have no in between and am passionate about the things I create, hopefully that show in this guide as well in any future content.
💙𝒯𝒽𝒶𝓃𝓀 𝓎𝑜𝓊 💙
𝒫𝑒𝒶𝒸𝒽🐉
✨Come join me in our many adventures ✨
🐉Link below contains all sties about Peachie as well as our Demented Dragons🐉
[link]