
Overview
If you’ve ever wanted to play VRChat over Remote Play only to be greeted by “This game currently doesn’t support streaming” message, this guide is for you.
Requirements
Streaming device:
- Administrator privileges
- Working RDP connection. There are plenty of guides on the internet for that.
- VBANReceptor. You can get it here: [link]
- VB-CABLE. You can get it here: [link]
Receiving device:
- RDP client
- VBAN-Spot. You can get it here: [link] (you can also use Voicemeeter, but it’s more advanced, so I’m not covering it).
Getting streaming device ready
1. Get current IP of our host device. It should be relatively easy, just search for “get local network ip” on your favorite search engine.
2. Launch VBANReceptor and choose VB-Audio Point or VB-Audio Virtual Cable as Hardware Out

3. Create some magical launch file
Open a simple text editor of your choice (I prefer Notepad++) and copy-n-paste this:
If you feel paranoid, here’s a line by line explanation:
- The first line would allow us to get a name of current RDP session. Some nice trickery here, because, you know, Windows.
- The next line would force-terminate current RDP session. It is different from a normal termination, as it would leave your PC unlocked.
- The third line is just a 5 second timeout to ensure that Windows have finished with all the under the hood things completely before executing the next command. It may not be a necessity if your PC is fast enough, but it wouldn’t hurt anyway.
- The last line would launch VRChat.
Now, let’s save this file on the desktop. Let’s name it VRChat_Remote_Play.bat.
Make sure that the file extension is correct!
4. Now, open sound setting and change your default recording device to VB-Audio Virtual Cable.
Be sure to change it back to your primarily device once you’re done playing VRChat remotely.

And that’s about it.
Getting receiving device ready
1. Open VBAN-Spot and go straigh to Setting -> Network Address…

Remember that local IP address we were talking about getting earier?
Mine is 192.168.1.67, so I enter it for IP Range Start Address and 67 (the part after the last “.”) for Last Address and click “Ok”.
Why do we need this? Just to ensure that the audio from your microphone on receiving device will go only to your streaming device, not to every possible device in your local network.
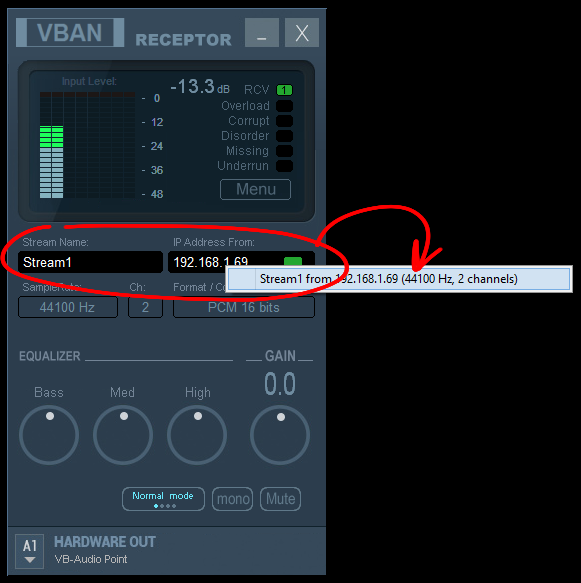
2. Now, go click on the Stream Name / IP Address From section on the streaming device and choose the audio stream from your receiving device, you should be able to see changes in input as you talk through your microphone on your receiving device.
Playing the game
On your streaming device:
- Have Steam and VBAN-Receptor running
On your receiving device:
- Launch Steam
- Connect to your streaming device over RDP.
- RIght-click VRChat_Remote_Play.bat and choose “Run as Administrator”
- If everything is configured correctly, you should be able to see this message. Don’t worry, everything is going according to the plan!
- Now go to Steam, choose VRChat from your game library and click connect.
- That’s it! Look, I can run VRChat on the 2006 notebook that cannot even push past 10 FPS in Starbound.

