![[Weapon Guide] Ballistic Knife for Call of Duty: Black Ops II - Multiplayer](https://steamsolo.com/wp-content/uploads/2021/07/weapon-guide-ballistic-knife-call-of-duty-black-ops-ii-multiplayer.jpg)
Overview
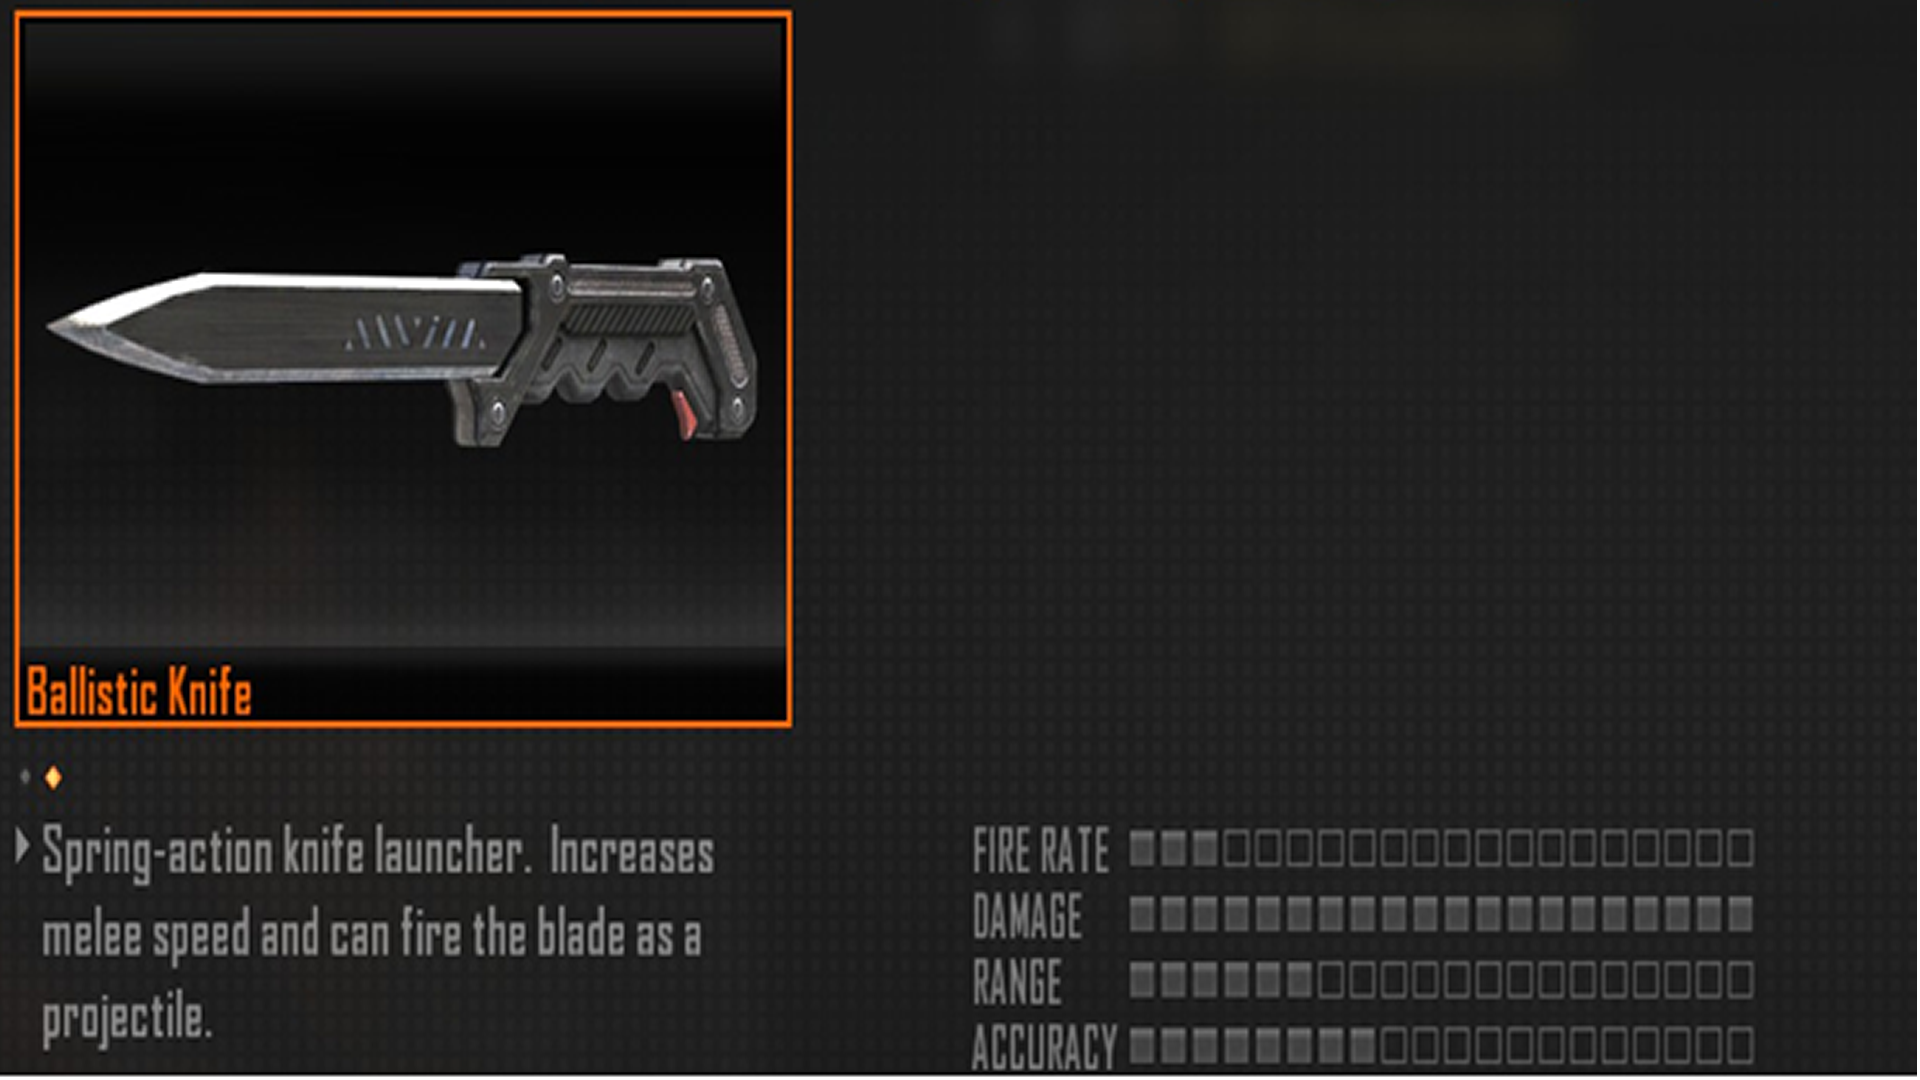
Welcome to my Ballistic Knife weapon Guide. I hope to give a deteailed explanation on: Tips, Tricks, Classes and other game play aspects of using the Ballistic Knife weapon in Call of Duty Black Ops II Multiplayer. By Pwn Believable (http://steamcommunity.com/profiles/76561198032107981)All the screenshots are old, I now have a gold one ^_^
Introduction
Hello there fellow Black Ops II players, my name is Pwn Believable (or Iain) and you have come to (Hopefully) read my Ballistic Knife guide for Black Ops II Multiplayer. The Ballistic Knife is a favourite secondary of mine and throughout this guide I hope to outline what makes it so fun to use and some tips and tricks when using it!
Don’t forget to comment + rate 🙂
Notes:
1) Anyone wishing to translate this guide into another language is more than welcome to. I ask that you send me a friend request on steam, tell me what language you want to help me translate to (MUST BE FLUENT SPEAKER) and then we can get to work!
2) Any mistakes noticed *please* do comment and I will correct as soon as possible!
3) I now have a gold Ballistic Knife and the screenshots were taken a long time ago (:
Reserved for future use.
The contents will include:
Introduction
Patch Notes/Change List
Abbreviations
Optimal Classes
Map tactics
Striking Tactics
Useful Videos
Special Thanks
***The Map Tactics class will only cover the following maps: Hijacked, Express, Yemen and Drone. The section will be relatively small but will have screenshots of the map in overview and be annotated***
Patch Notes
This section may be re-named to change list in the future. The point of this section is to list all changes made to this guide after being published (If that’s possible, not sure yet)
27th January 2013 – Guide started
28th January 2013 – Guide finished and published
29th January 2013 – Realised guide is in wrong section
31st January 2013 – Started Re-making the guide in correct section
4th February 2013 – Finished and published (Was having trouble with screenies)
9th February 2013 – Added a “Striking Tactics” section due to request.
14th April 2013 –
*Added Drift0r to the special Thanks
*Added a Useful videos section
*Removed Drift0r’s toughness video from the introduction section
*Added both Drift0r’s Toughness and Ballistic Knife In-depth videos to the useful videos section.
Abbreviations
A nice short section detailing all of the abbreviations used in this guide:
BK – Ballistic Knife
TDM – Team Deathmatch
FFA – Free For All
DOM – Domination
SS: Scorestreaks
CaC: Create-a-class
CoD: Call of Duty
P1/P2: Part 1/Part 2
Optimal Classes (P1)
As with all weapons in Black Ops 2 there will be different classes for different situations (E.g. When using a Sniper for defense, you will take the perks to help you defend (Toughness, Dexterity, Tactical Mask etc.) and of course, the Ballistic Knife is no different. For each situation, there will be a different class setup.
Now for this guide I’m only going to be going for the big main 3 game types: Team Deathmatch, Domination and Free For All. Now with these game types you will be doing different things (I’m only covering somebody who’s either playing objectively or trying to help the team, this guide doesn’t really cover people going for high killstreaks and not playing objectively, with the execption of Free For All)-
Team Deathmatch: Going for kills/Supporting your team
Domination: Going for flags/Defending Choke Points
Free For All: Kill whoring, playing to win.
TEAM DEATHMATCH
Our first class we start with is for the Team Deathmatch game mode. The main aspect of TDM is first team that gets to 75 kills wins. This BK setup is more about running and staying out of the way of the enemy, while managing to still get kills. Please see Fig 2. for the class and the description will be following.
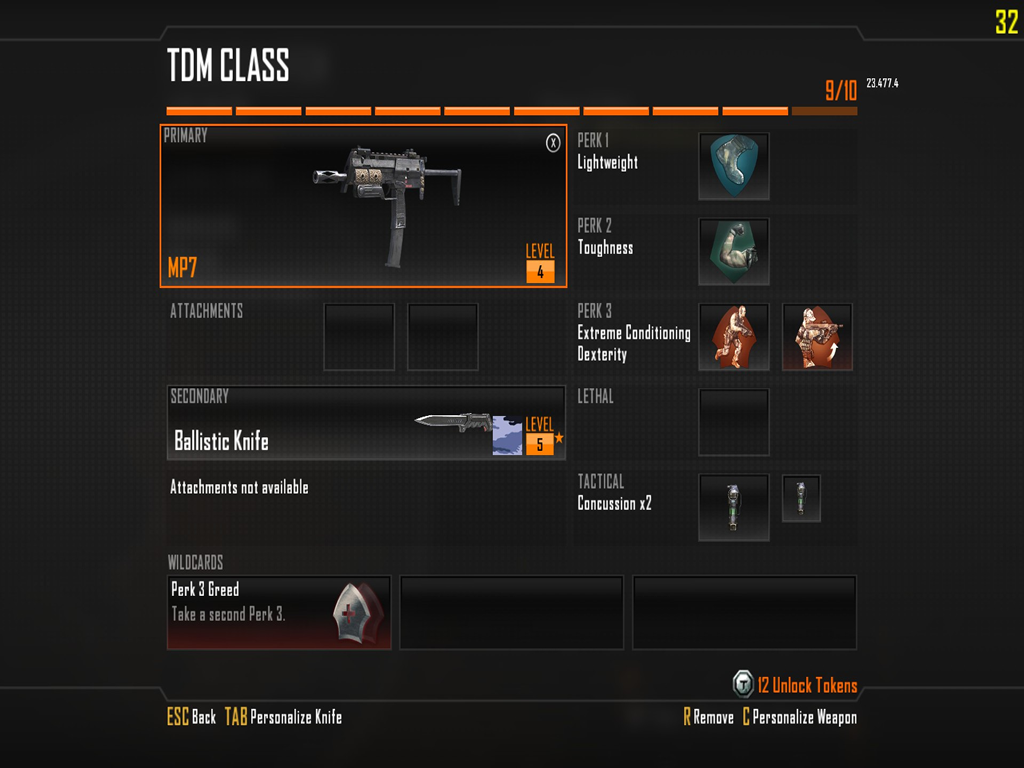
Here is our TDM class. As you can see at the top only 9/10 slots are taken up. This can be substituted for anything, such as an attatchment on your primary (Maybe a suppressor) or a lethal grenade.
First we see that in fact, we have taken a primary, this is the only class out of TDM/FFA/Dom that actually comprises of a primary weapon. This is just mainly if you get into a fire fight and either, cannot switch to your BK or have run out of ammo and are going for the “Skewered” medal. You will be able to see that the primary weapon (In this case the MP7 Sub-machine gun for the 100% aim speed and run speed). It has no attatchment as it is un-needed, but it can be given an attatchment if wished. Then of course for a secondary, we are obviously running the BK.
Then for perks we have selected:
-Lightweight
-Toughness
-Extreme Conditioning.
The perks are pretty self-explanatory, Lightweight will allow you to move faster which when moving around areas such as corridors or halls where the BK comes into its prime.
Then Toughness will stop you flinching so much when getting shot. This will allow for you to easly see where you’re trying to run to and get an easier kill.
Then dexterity will allow you to climb obstacles faster and escape high traffic areas easily (Or get somewhere faster) and Extreme conditioning will allow you to run much further distances and has similar reasons to Dexterity.
Then you will be able to see there are no lethals, but this could be changed. You could swap that last slot out for either an attatchment for the primary or the lethal grenade (or axe). Moving on to the tactical grenades, we have two concussion grenades. These could be swapped out for shock charges or flash bangs but either way it doesn’t matter, they all do more or less the same thing. These will prove rather useful when trying to either clear large rooms or take out a target who has a major advantage (E.g. sitting at the top of stairs with an SMG. Throw a flash, strafe run up the stairs and pick up an easy knife). Fast Hands is not really necessary as if you have your team using UAV’s or if you watch your minimap, you will be able to notice people pretty easily. Then last, but not least, is the Perk 3 Greed wildcard which allows you to use Dexteriy/Extreme conditioning.
Overview: The TDM setup mainly comprises of a rushing/support the team layout. Using the perks Lightweight, Dexteriy and Extreme conditioning to reach areas faster and making the most use out of your Concussion grenades to take out large rooms or people with an advantage over you. The alternate option is switch out the primary and take Perk 2 Greed Wildcard and Scavenger for re-supplying Concussion Grenades/BK knives.
DOMINATION
“DOMINATION” as the old Quake/Unreal Tournament annoucers used to say.
Domination is easily one of the best game modes for making the best out of the BK. The class setup which is about to be pictured lets you easily rush between points, cap and take out the defenders (or attackers). The main aspect of Domination is: 2 rounds (5 minutes each), 3 Flags to capture. Every 5 seconds, points are given depending on how many flags that team is holding (E.g. 1 flag = 1 point). The first to 200 points wins. At the end of the first round, the teams switch spawn points.

We start out DOM class with a difference to the TDM setup – there is no primary weapon. The reason I have done this is when I’m playing Dom I don’t find myself in situations where I’m constantly going for kills (Unless I’m defending an objective). The main thing to do in this sort of situation in DOM for me is usually just try to out run the enemy and lure them into traps – sort of a pick them of one by one scenario.
Then our perks are what make this class so good:
Perk 1: Lightweight/Hardline
Perk 2: Toughness
Perk 3: Dexterity/Extreme Conditoning
Now you’ll be saying “Hang on, this is almost exactly the same as the TDM setup” and what do I have to say to that is, yes, you’re completely right. Domination is such a great game mode for building up high SS that when you’re running Hardline, you get them so much quicker. Lightweight will allow you to reach points faster and mixed with extreme conditoning, vacate the area with relative speed and ease, removing the possibity of death and ruining your SS. Then Dexterity adds to this and allows you to mantle objects faster, and the same as Ext. Conditioning and Lightweight, get away with speed.
Then like TDM, there are no lethals and still left with tacticals. For our DOM class we have used all 10 spots of our CaC menu so there are no substitues available (Of course, you can edit these classes to your preference but this is just my recomendation). Our two concussion grenades prove most useful when trying to clear a point of enemies ripe for the capturing (or defending your own). You can simply throw them, blind them, then go in for the knife. I don’t recommend running Scavenger on this class as you will be primarily knifing and going for the points and leaving quickly so there is no need to stay behind.
Then for the wildcards we have: Perk 1 and Perk 3 greed which allows us to have an extra perk 1 and perk 3.
Overview: The DOM setup is similar to the TDM setup in the sense that there are similar perks and tacticals, yet there is no primary. This setup allows the user to rush from point to point, clearing enemies along the way and giving you the perfect chance to take your team forward to win the match. It also works suprisingly well for defending as well. You can also use the short corridors on some maps to lure the enemy round the corner and back stab them easily.
Please read on to Optimal Class (P2) to see the FFA setup.
Optimal Classes (P2)
I seem to have reached the character limit on Optimal Classes (P1) so let’s continue with FFA on P2…
FREE FOR ALL
Free for all, the gamemode which incurs much raging between players, be it in Black Ops 2 or any other CoD game. The main point of FFA is to kill ♥♥♥♥♥, kill anything that moves, JUST SHOOT EVERYTHING. Oh wait…this is a BK guide. Well damn, we’ll just have to knife everything instead. You have to get 30 kills within 10 minutes to be the vicor, this isn’t normally too hard…but when you’re being faced with the constant SMG’s, it can be hard. ANYWAY, moving back to the guide. This class has probably been the “hardest” one for me to make. Just for the simple fact I’ve made so many variants of it, it’s mind numbing the number I’ve done, but it was all worth it for the guide. Please see Fig 4. for the class!

Now this setup, as mentioned earlier, took me a long time to setup and perfect. Obviously, no primary and just the BK for easy knifing and moving around without being seen. You will be able to see only 7 spots have been used but that will all be explained in time.
The perks are as follows:
-Blind Eye
-Toughness
-Extreme Conditioning/Engineer
This is the first class where we see a slight change in the perks. This time instead of Lightweight or Hardline we are running Blind Eye. There are many AI controlled score streaks in FFA ranging from the lowly Hunter Killer all the way up the the Escort Drone or Stealth Chopper. Blind Eye could be substituted for Ghost though depending on what you want. Then we have toughness, to be blunt, toughness is probably the *best* Tier 2 Perk. If you watch the video from Drift0r which will be linked in the Introduction then you will be able to see just how awesome it is and how almost over powered it is. Then we have extreme conditioning so we can move around the map easier. Then Engineer is why only 7/10 slots are used. At the time of Figure 4 being taken, I hadn’t unlocked Black Hats yet. That is what 2 of the 3 remaining slots should be filled with. Black Hats are extremely over powere as a tactical equipment. They allow you to hack more or less any lethal slot except the Frags, Combat Axes and I think Semtex. You can also destroy Guardian’s and Sentry Gun’s with only one Black Hat.
Overview: This FFA class covers the majority of scenarios that you will be in. It covers campers, AI controlled air support and allows you to run for maximum distance with extreme conditioning. There is still one space left on the class so you may want to put either a primary weapon on or get rid of one of the black hats and use Perk 2 Greed and Scavenger. Either way, this class setup is very useful for taking out campers and targets that don’t notice you.
Map Tactics (P1)
This section is open to debate whether or not it can be used for all purposes but the overhead pictures I will be using in this guide are for the DOM game mode. This way you can see where the flags are and many of the areas I think are good choke points will be coloured in. I will label the choke points on each map and then discuss them below the picture.The main point of this section is to discuss tactics on certain maps and where the best choke points are for holding small areas (Corridors, Halls etc.). This section may be seen as a paradise for campers, but the point of holding a point is not to camp there for the whole game, but to take that point under your control then move tactically to the next point and so on.
The following Maps are included (In that order):
-Drone
-Express
-Hijacked
-Yemen
DRONE

Point 1: Point 1 is the building that leads of the Drone manafacturing building that is the near the spawn point of the FOB Spectre. This building is a very good point to catch people who are in fact coming out of the Drone building. If you want, you can walk over the balcony to catch people who try to head to the C flag, but this would leave you open to people all over the middle of the map.
Point 2: Point 2 is very close to point 1 as it is is just inside the Drone factory. As you will see on the picture, the room/area is only on the side closest to the C flag. This is because it is a much better area to maneuver than that of the area closest to A. It is also enclosed, whereas the area leading into to the room closest to A has an outside area where you could be sniped or shot by people on the heli-pad (Point 3).
Point 3: As mentioned at the end of Point 2, Point 3 is the Heli-Pad and the surrounding building. This is a very fun area to control. Even though staying on the Heli-Pad makes you viewable from the other side of the map and all down the middle, the point of this point is not to stay on the Heli-pad but to every so often pop out and check for any enemies moving around the middle of the map (Whether it be TDM/DOM/FFA). The building provides excellent cover of the grassy corridor area of the map and the stairs provide a great trap area. If you also have claymore’s or Bouncing Betty’s they can be used to protect you from behind.
EXPRESS

Point 1: Point 1 is the middle of the Terminal building, though very large and not much cover apart from a few stands. This point is actually not as hard to control as you would think. There is an elevator at the back of the area which could be used for watching the area and the numerous ticket machines/advertisement stands can be used for cover as well. There are also 4 exits to leave from if you get into trouble. So in total, Point 1 is a large area which isn’t too hard to control and has a good choice of exits if you get in trouble.
Point 2: Point 2 is a very common sniper spot but can be rather easy for you using your BK. Really I should’ve put the red area covering the stair area as well but it’s not really that important. What my main tip for you here is, stay in the stair area and lie in wait for people coming through the bridge/tunnel corridor. Then when they do, you can strike for an easy kill.
Point 3: Point 3 is very close to point 1 but I’m not really sure what to call it, I’m just gonna call it a security office for ease of this section. Point 3 is a very good area to use if trying to control point B in DOM. It can be used to pop in and out of the two windows to see if anyone is on the point or not and allowing you to climb out and knife them. The only problem with Point 3 is the numerous entrances and the space. If you’re caught out by someone with an SMG, you’re likely to die. But all in all, point 3 is very good for keeping the middle of the map yours!
PLEASE CONTINUE ONTO THE NEXT SECTION FOR HIJACKED AND YEMEN
Map Tactics (P2)
HIJACKED

Point 1: Point 1 is the area of the map where SEAL Team Six spawn and the C flag lies. Like the other side (Where the Mercs spawn) it is an easy area to control because of the amount of cover provided. You can also use the balcony of the Bedroom/Gym building to take out unsuspecting players capturing the flag.
Point 2: Point 2 is NOT the area of the map where flag B is. It is in-fact the under-boat section. This section is one of the most un-used sections in the whole map or whole game even. The amount of times I’ve jumped down, ran through and ended up on the enemies side of the map is stupid. It is such a powerful room and I don’t understand why more people don’t use it. It’s brillaint for the knife as it is a small area which can be quite challenging for players with fully automatic guns.
Point 3: Point 3 is the complete opposite side of the boat to Point 1. Point 3 is the area where the Mercs team spawn and where flag A lies. This area, like Point 1 is easy to control for the simple fact of so much cover. There are 2 yachts/smaller boats which you can stay behind for cover and also the area right at the back which is sometimes used for a spawn. This point in my oppinion is not as good as point 1 because of the lack of cover in the middle (Only one thing sticking out the middle).
YEMEN
– Fig 7. The Yemen Choke Points
Point 1: In my oppinion, if you spawn by flag C you have the major advantage. Compared the side that spawns at Flag A you have many more points. Point 1 is the building that has a large view of the majority of the map. This building is very good for heading towards the tower (jump of the balcony, jump to the next building and run) and is good for heading to point B or towards the South side of the map. This building is also quite small so easy for a BK runner to move around.
Point 2: Point 2 is the tower/cat walk area of Yemen. This area is very fun to run around, if you take the area around the side of the tower, then you can easily take out people camping inside the tower, or you can use the cat walk infront of the big window and jump in to surprise them. You have to be careful of lethal equipment such as betty’s, but if you don’t get caught out by them, you can easily take out the people in this area.
Point 3: Point 3 is sort of a grocery shop building. This is good building to use as long as you don’t go infront of the door way or upstairs window (I’ve been killed by Target Finders and snipers alike standing there). This building can be used to your advantage, by sitting behind the grocery shelves you can easily see people walking past and then run out and knife them. The doorway can be rigged with Betty’s, Claymore’s or C4 bombs if you have them though!
Point 4: Point 4 is the only building on the A flag section of the map that is useful. The other buildings either: Lead you to your own base or you can get shot by snipers. This building (and outside area) allow you to slip around that area of the map undetected. You do have to watch when coming out of the catwalk area for people coming to your area from the tower or outside of the basement corridor of the building. The inside of the building is good as there is some cover you can stay behind AND it’s dark as well, so you can’t be seen as easily.
Striking Tactics
I would like to thank “Texasriffraff” (http://steamcommunity.com/profiles/76561198033718501) for bringing this to my attention that I hadn’t made a section regarding HOW to strike, more so of preperation to striking so here it is for you Texasriffraff.
No screenshots as it’s not really something thats easy to show in game.
STRIKING TACTICS
I’ll be honest here at the start, the BK is…glitchy to say the least. Throughout the way to the gold camo, I have lunged so many times into the actual enemy and it hasn’t killed them. I’ve even heard the noise of when you hit someone and as I’m lunging towards their frontm, they’ve managed to kill me. But what I just said, I was lunging at their front. Now of course, on the way to gold I did get many backstabs and what I did find is:
-Lunging is slightly glitchy whether it be chest or back
-Going for chest stabs are a lot harder the hit than back stabs
-Back stabs seem to hit more often.
So basically, you want to aim for backstabs as often as possible. But how are you going to do this if you’re in a full on fight with someone. Most of the time I will just continue trying to stab them and keep lunging, but this isn’t probably the best tip to give someone in a guide as that is just common sense. So I have found retreating, yes you read it right, retreating to prove a rather successful tactic. What I have found is that if you retreat away from the enemy while strafing (to reduce their chances of hitting) and then find the most suitable place to hide, be it in a doorway, corner or crouching behind a wall. Then when the enemy shows himself you’ll want to run up behind him and lunge towards his back.
Now when an enemy comes, say for example you are in a doorway (next to the doorway), there will be a 50% chance they’ll look left and another 50% chance they’ll look right as when they go in the room they will be able to see straight in. So yes the striking tactics are marginally luck based but I’d recommend when you’re in a doorway, try staying out of the way of the actual door as the player entering might see you in the corner of his eye.
Try to use the fact you can shoot a knife to your advantage as well. Many people will see you and think “Knife runner > can’t kill me at a distance so I can kill them before they reach me”. Wrong. This is the BK we’re talking about here, it’s a spring action knife launcher, that is what seperates the BK runners and the Combat Knife runners. For example: In long corridors such as the overbridges in Express, you’ll get many people camping towards the end stairs headglitching so they will be hard to hit. Normally you’ll get very arrogant people staying here and thinking “I can beat you”. But so many times have I managed to either BK them or Combat Axe them. If you get lucky as well you can hide behind the entrance to the overbridge and after they have seen you they may walk towards you, into your trap. You can lie in wait and strike them.
Useful Videos
1)Drift0r’s toughness video:
2) Drift0r’s Ballistic Knife In-Depth video:
Special Thanks
Special thanks go to the following:
Pwn Believable: Without me, the guide wouldn’t have been made 😛
The CoD Wiki (http://callofduty.wikia.com/wiki/Call_of_Duty_Wiki): Information on spawn points
CoD Elite for the overhead map pictures.
Texasriffraff (http://steamcommunity.com/profiles/76561198033718501): He requested a “Striking tactics” section and I would like to say a HUGE thank you to him, please if you see him, say thanks 🙂
Drift0r, for the videos (His youtube channel can be found at) – http://www.youtube.com/user/Drift0r?feature=watch
Outro
Wow, the guide is finally finished. After me putting countless hours into it (over a couple days period) it has finally been finished. All proof read for the publishing and I so hope you, as the reader, enjoyed reading it and you see the Ballistic Knife in a new light. Thank you once again for reading: Make sure you comment, rate and favourite to show some support. I will be taking on ideas for my next weapon guide but we’ll have to see how this one goes down first.
All the pictures are owned by me, or I have permission to use so please, don’t take them.
Pwn Believable (Iain)