Overview
When I first started playing The Long Dark (TLD) I died. A lot. Once I stopped dying a lot, I realized I was playing inefficiently and randomly, and wasting a lot of time and resources. There’s definitely good information out there, but some if it is outdated and hasn’t kept pace with more recent patches and changes. This guide was orginally published 7/11/16. I am updating it now to reflect the most recent (and last) sandbox update – Faithful Cartographer. This guide is intended to incorporate a lot of the (painful) lessons I’ve learned and to give a step-by-step guide to your first few weeks in TLD, broken down into bite-sized chunks. This guide is intended to train you in the fundamentals and prepare you for the step up to Stalker difficulty.
3 assumptions, 2 disclaimers, and a cookie.
So, before we get rolling:

Assumption 1: You’re familiar with the basics of TLD. You’ve played a couple games and probably died horribly, but you understand the basic commands and interactions and where to find information in-game (Tab to check status, Space Bar to take various actions, how to chop wood or skin an animal, etc.). In other words, you know on a basic level how the game works – you now want to up your game.
Assumption 2: This guide will assume a Mystery Lake (ML) starting map at Voyager (medium) difficulty. ML is the recommended starting area for new players and is the best place to cut your teeth learning how to survive. A lot of this information can be applied to any starting map, of course, but I’m going to be making recommendations specific to ML in this guide, with the end goal being a transition to Pleasant Valley (PV) – the central map in the game. Pilgrim difficulty holds your hand too much, IMO, and stops you from learning some of the core game concepts. Stalker is too punishing for a learning guide (which is what this is), but you will be absolutely be equipped to give Stalker a try once you’ve taken in the concepts and lessons we’re going to be talking about. Some of the specifics of this guide will be directed towards planning for Stalker runs, even though Voyager is a bit more forgiving on things like intestinal parasites and cabin fever. In other words, we want to toughen you up a bit.
Assumption 3: You’re using an external map. Purists will argue that you’re undermining one of the challenges of the game by using a map and they’re right. However, the very fact that you’re reading a guide already means you’re interested in some external assistance, so we’re going to make that assistance as helpful as possible. I would encourage you, once you move to a new location or decide to start on a new map, to give it a try without a map but that’s beyond the scope of this guide. I strongly recommend Whiteberry’s maps, which cover every location in the game and are incredibly detailed and professionally done. They can be found here in a separate Steam Guide, or a Google image search will find them quickly as well. He’s done fantastic work. I use a two-monitor setup and his map sits open on my other monitor while I’m playing, usually.
Disclaimer 1: This is the way I do my first couple weeks, more or less, in a ML start at Voyager. Other players may argue it’s not the “best” way or the way they do it, or whatever, and that’s totally fine. They can write their own guides or add their comments below. This is just the way I do it, and I’ve found it effective. Different strokes for different folks, and all that – we’re all just trying not to get eaten by wolves here.
Disclaimer 2: This guide is a work in progress and I’m updating it bit by bit as of 6/12/17. I’ll add a line here when I’ve finished the revisions but if you don’t see anything after this sentence I’m still working on it.
And finally, here’s your cookie for reading all this:

Day 1 (Part 1) – “Wow, it’s really cold out here!”

Day 1 Goals:
- Make it to shelter
- Survive!
Core Concepts:
- The Four “Bars”
- Navigating and Getting Around
- I HAVE MADE FIRE!
- Gimme Shelter
Here we go. You’ve spawned at one of the random starting locations in ML. The starting weather and time of day are random as well. So’s your starting gear.
Welcome to the wilderness.
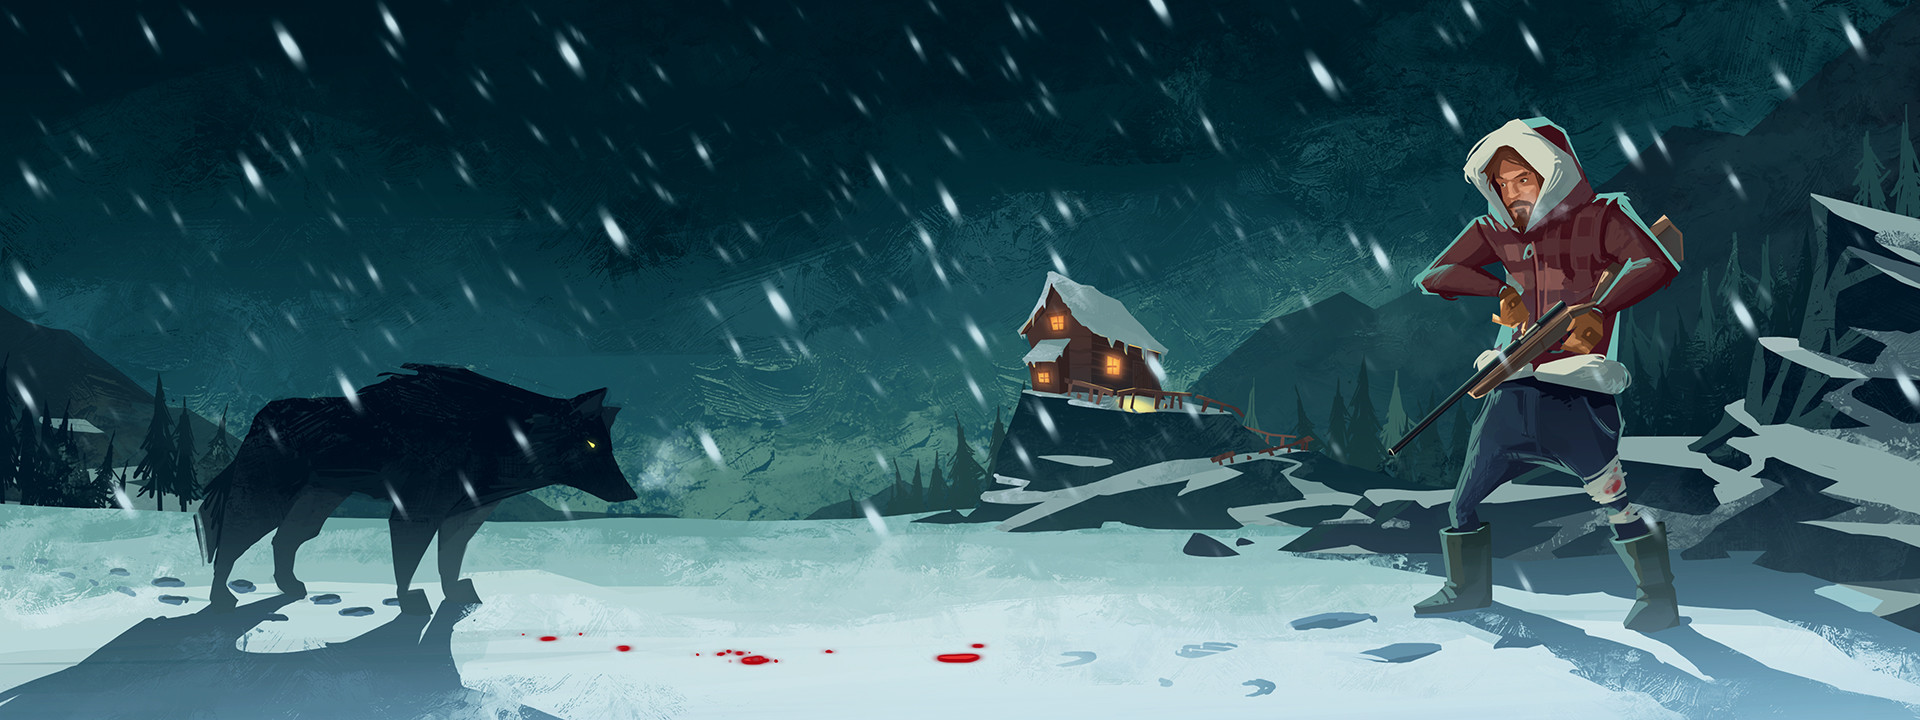
Weather in TLD is unpredictable. If the weather looks like the picture at the top of this section when you spawn in, you have an IMMEDIATE problem. Blizzards are icy death in your first couple days, and even once you’re weeks in to your run you shouldn’t go out in a blizzard absent an emergency. Weather patterns do vary from region to region. ML (particuarly on Voyager) is not going to be a brutal experience, but you still need to be careful. Just because things are clear and sunny now does not mean they’ll remain that way. 2 hours from now it can be a nightmare out there.You’ll start to pick up on small clues hinting about shifts in the weather. One of the dead giveaways of bad weather incoming is a flock of birds flying above you in a straight line to the horizon, cawing the whole time. When you see that, start heading to shelter.
Anyway, the first thing we need to do is a quick status check. You need to figure out where your bars are at and what you’ve got on you. As you know from the game backstory, you’ve just escaped a plane crash and scavenged what you could from the wreck. Your bars should all be around 75%, give or take. In fact, let’s talk about those bars now.

The Four “Bars”: This game, boiled down to its core, is real simple – keeping those four bars as full as possible at all times. That’s it. As long as those bars are full, or close to full, you’re in great shape. This sounds obvious, but you’d be surprised how easy it is to lose sight of it sometimes. All the advice in this guide can also be boiled down to maximizing your ability to keep those bars full, and minimizing the effort to do it. That’s how we survive. The four bars determine your overall condition (the bar with the heart). Condition represents your “hit points,” if you like. When your condition reaches zero, you die. Decreasing condition is an issue that always needs to be fixed right away. Condition will slowly decrease when any of the four bars goes in the red. You can also lose it in large chunks when attacked by wildlife.
Body Temperature: The most variable bar (the thermometer symbol), since it’s dependent on the whims of the weather and your clothing. It’s also your most pressing concern in the first few weeks or so but we’re going to be working towards making it less of a threat. In fact, it’s going to be one of our primary goals. “Feels Like” temperature is the number you care about (press the “F” key). It’s derived from the air temperature and wind chill, offset by your clothing bonuses. If this number is positive, this bar increases. If it’s negative, it drops. Hot foods and liquids, when consumed, act as a temporary buff that slows the degradation of this bar, so they’re strongly recommended in the early going to further help yourself out. Keep an eye out for coffee in particular, as it also buffs your fatigue bar for a double bonus (AND provides a few calories, so it’s really a TRIPLE bonus). Once body temperature drops into the red, you get a hypothermia warning (a yellow First Aid cross in the bottom right corner of the screen serves as a reminder). This means it’s time to finish what you’re doing and plan to make a fire or get to shelter. We’ll talk about the hypothermia affliction itself more in a bit. Suffice to say, you need to get your temperature back into the positive and out of the red to get rid of the warning. The risk of developing hypothermia constantly increases the longer you stay out in the cold. Hypothermia itself isn’t the end of the world or a reason to freak out. Just be aware and plan accordingly.
Fatigue: This bar (the eye symbol) depletes somewhat predictably with activity. In fact, it will drop even if you’re just standing there doing nothing. Walking around causes it to slowly drop, doing anything strenuous (chopping wood or skinning corpses) will accelerate that drop. Sprinting should always be avoided unless it’s an emergency – it drains fatigue like mad. Only run if you’re being chased by a wolf or want a last burst to get to shelter, otherwise you’re always better off walking. Encumbrance (exceeding your 30KG allowance) causes the bar to drop at an accelerated rate, and it’s worse the more overweight you are. Fatigue is regenerated by sleeping, and that’s pretty much how you fill the bar back up (coffee, as mentioned above, can provide a quick 10% burst in a pinch). The game seems to be relatively balanced that a day of walking around with a couple moderately strenuous activities will have you worn out by the end of the day, but not totally exhausted. You’ll basically be ready to sleep for the night. You should always sleep until fully rested, if possible, so you’re ready for a full day. You want to be able to maximize the daylight hours as doing activites at night is much more difficult. Certain afflictions, such as hypothermia, cause this bar to drop at an accelerated rate.
Hunger: Hunger is actually the least threatening bar (the stomach symbol) from the standpoint of condition. Condition will, or course, decrease if your hunger bar gets to zero, but at a slower rate than any of the other bars. Still, food is plentiful at the start of the game – you’ll find pre-packaged food and drinks everywhere and these will be your primary method of eating. Don’t be stingy, and don’t be afraid to eat (or drink) these items. I promise, in a few weeks food isn’t going to be a concern at all. Food, like all items, has a condition percentage which degrades at a fixed rate on a 1000 day scale. It will have a random condition when generated in a new game, and will slowly degrade from there. Food, even cooked food, carries a risk of food poisoning and the lower the condition, the higher the risk. Raw meat has a VERY high probability of making you sick – never eat it raw. Food poisoning does two things – it depletes condition directly and causes your fatigue bar to drop quickly. We’ll talk about more about the food poisoning affliction shortly. To minimize the risk of poisoning, I generally avoid consuming food or drinks below 25% condition unless it’s an emergency. It’s not worth it – just leave them where you found them. Because there’s always a risk, you WILL get poisoning every now and then – eventually the RNG gets us all – but it becomes more of a nuisance than anything else. Like the hypothermia affliction, food poisoning is very manageable. Finally, eating predator meat (wolves and bears) carries the risk of developing intestinal parasites. This affliction is like food poisoning on steroids and is a HUGE nuisance. The good news is that you can’t get it on Voyager difficulty – it only shows up on Stalker and Interloper. But we’re going to act like it’s a threat so you don’t develop the bad habit of relying on predators as a food source.
Thirst: And we come to our last bar (the raindrop symbol) and, fortunately, the easiest to manage. Water, like hunger, will cause condition to deplete once it reaches zero but at a faster rate. The good news is you’re surrounded by water (in frozen form) at all times. The bad news – you gotta boil it. Since you’re going to be making fires all the time, get in the habit of melting and boiling a bit of water every time. If you’re by a fire for an hour or two with nothing else to do, there is no reason NOT to make some water. Store the extra in your base camp and slowly build up a stockpile so you’ve got some in case of an emergency.
Continued in Part 2…
Day 1 (Part 2) – “GET TO THE SHELTAAA!!!”

Alright. You’ve spawned in, taken stock of your status bars and what you’ve got on you. Check the immediate area around your spawn point – there are sometimes a few items to be found and maybe a body. You now have one, AND ONLY ONE, goal: GET TO SHELTER. You are currently at the most vulnerable you will ever be in this game and if anything goes wrong, you’re probably going to die. You need to do everything possible to minimize that risk, which means no distractions. Your current bar levels should absolutely be sufficient to get you to safety if you don’t dither – even if you spawn in a blizzard. Our goal is to get to the Camp Office. The reason we want to head there immmediately, today, is that there is a 24 hour grace period on Voyager with no wolves or bears – we need to take advantage of that. There are about a dozen starting locations, including the Camp Office and Trapper’s Cabin. Here’s how to proceed based on where you spawned:
Camp Office or Trapper’s Cabin: You got lucky. If you actually spawned at the Camp Office, you don’t need to really do anything else except loot it and spend the rest of the day repairing clothing or gathering wood in the area. Say fellow to Fred (as we players have named him) if you find his frozen corpse at the top of the stairs. If you’re at the Trapper’s Cabin, loot everything you can find – it will be a lot of stuff. The Camp Office, Trapper’s Cabin and Carter Hydro Dam are the three most bountiful locations in ML for supplies. To open the safe, it’s works just a like a standard combination lock. Turn clockwise SLOWLY (one tick at a time) until the first tumbler unlocks. Make a note of the number (in case you have to start over). Turn counterclockwise and do the same thing. Now clockwise again to the last number. Open the safe and loot it as well. The only things to leave behind are food/drinks below 25% condition. You may be encumbered, but that’s OK – just try to keep it below 40 KG, anything more than that you’ll need to come back for. If you’re lucky, you may get a rifle (check the weapon rack above the safe – it seems obvious but I’ve missed it once or twice even though it was staring me in the face). You need to be quick here, though – you want to have 5 hours to make the journey to the Camp Office. If you’ve got less than 5 hours, or if the weather is a blizzard or below -10 degrees, go ahead and plan on spending the night in the cabin and making the trip the next day – there’s too much risk in going now. If you do head out, quickly check 2 places – behind the cabin itself (there’s sometimes a body and/or rifle) and the barn below the cabin. The barn often has a deer corpse – leave that be for now – but it’s another possible rifle location and there may be other goodies. Move quickly east along the southern edge of the map to the rail line and then follow that north to the Camp Office.
Random Named Location: A named location identity may have popped up on your screen when you spawned (Alan’s Cave, Dave’s Silent Clearing, etc.). That makes life easy – check the map and figure out where you are. A word of warning if you spawn in the NE corner of the map – do NOT go into the Carter Hydro Dam (CHD) yet – it’s often home to a very mean wolf (TLD players have named her “Fluffy” and we’ll deal with her later). Get to the rail line and follow it to the Camp Office.
Random Unnamed Location The trickiest start, particularly if the weather is also bad. You’ll need to check landmarks and begin making your way towards the largest notable place you think is nearby (Unnamed pond, Mystery Lake, Deadfall Area, etc.). You need to confirm your location with certainty and then navigate your way to the Camp Office. If you get lost for a few hours, you’re probably going to die. This is a good time to talk about moving around the world.

Navigating and Getting Around: See that thing up there? It’s called a compass and you don’t have one. You’ll need to navigate from place to place using a combination of landmarks and estimates. As of the Faithful Cartographer update, you CAN make maps. You need to have a piece of charcoal (which you can loot from stoves and fires once they go out) and it takes 15 minutes to “draw” the immediate area, with any points of interest. The map is not “dynamic.” You don’t appear on it. The best use I’ve found for it is highlighting something I want to come back for later.
ML itself is a very manageable map. It’s comparatively small (you can fit 4 ML’s in Pleasant Valley, with room to spare). The north and east parts of the map are very distinctive, particularly the areas around the lake itself – you’ll learn to recognize them in your first few days. The rail line runs through the middle of the map and, conveniently, right next to the Camp Office. You’ll find that usually your best way to get somewhere is to follow the rail line and then branch off into the woods in the direction you need to go. As a bonus, you also walk faster on firm surfaces (like the rail line) than deep snow. The main area you’ll get in trouble is the forest west of the rail line – it’s easy to get turned around or to go in circles.
Three final comments on getting around. First off, never forget that you are a delicate little flower and highly breakable. This is not your typical first-person shooter, or Skyrim, where you can happily just bound down the sides of mountains. Even small drops of just a few feet can result in a sprained ankle and some condition damage. Falls from higher distances will result in more damage, or can kill you outright. You will find yourself at the top of hills or peaks and will be tempted to try and follow the ledges and go straight down. Don’t. Stay on snowy, sloped areas and take the safe way. Remember that you don’t have a saved game – all it takes is one bad fall and you’re starting over because you couldn’t be a little patient. You’ll feel stupid, and you’ll be right to feel stupid. Second, walking on ice (mostly in frozen lakes and rivers) is colder than walking on snow and will drain heat more quickly. Follow the shore if you can. The ice in ML is safe, but in other zones it’s a hazard and can break, dropping you in the water (which is very bad). Third, encumbrance slows you down and increases the rate at which you get fatigued. Having said that, a little encumbrance isn’t a big deal if you’re fatigue bar is in good shape – don’t sweat anything up to 40 KG if you’re heading back to Camp Office and will be there in a few hours. I travel “heavy” a lot and while the slow walk speed is annoying, it’s sometimes worth it to save a return trip. Encumbrance DOES increase the possibility of sprained ankles, so be very careful when dropping even short distances.

Now, back to our Day 1 journey. Following the navigation guidelines above, begin making your way to the Camp Office. Do not get distracted. You may see likely looking looting opportunities from time to time. Ignore them – you’ll be coming back for them eventually. Remember that you’re operating on a razor’s edge here. The only exceptions are things which are directly in your path (if you’re following the railway from the north, you can check the Derailment area as you pass through it, for example). Also feel free to pick up any small sticks in your path but do not stop to break up larger sticks or, heaven forbid, to chop logs. If you’re able to make it to the Camp Office alive, congratulations and good work.
If you got an unlucky spawn and some bad weather, though, you may need to make a fire to stave off hypothermia. So let’s talk about fires in Part 3…
Day 1 (Part 3) – Home Sweet Home.
As mentioned at the end of Part 2, you may need to make a fire on your initial journey to the Camp Office, particularly if you got a tough initial spawn with bad weather. So let’s talk a little about fires…

I HAVE MADE FIRE!: Looks cozy, doesn’t it? It will also save your life, time and again. “4” is your hotkey for laying a fire and will bring up the “ghost” of where the fire will be placed, or you can do it from the radial menu. The ghost needs to be near you or it will always be red – it won’t show you viable options at a distance. It also needs to be out of the wind, if there is any, and not on a slope. In a storm or heavy wind, you want to try and find a location blocked from the wind – the opposite side of a large boulder is ideal. Once you’ve got your green ghost, the menu pops up. You need three things to make a fire at this point: a starter, tinder, and fuel. Accelerant is optional, but you probably don’t have any anyway (yet). The “shield” symbol on the top center of the screen indicates that you are out of the wind. This means the temperature will be less cold (no wind chill) and making a fire will be possible. Fire making is a skill, and you’ll improve it every time you successfully use it (indicated by the white fire symbol with the white plus sign on the right of the screen).

Starters: You will mostly be relying on matches as a starter throughout the game. They’re plentiful, you always spawn with some, and they don’t degrade. Carboard matches provide no bonus chance to start a fire. Wood matches, a lit flare, a lit torch, and the magnifying glass each give +5%. The firestriker gives +15%. All of these items are consumed upon the attempt except the magnifying glass and the firestriker. The firestriker degrades with use but the magnifying glass does not. I recommend that if you find a firestriker you should always use it first (carry some matches for backup), the reason being that it will help you level up your firestarting skill early with more successes. Later, once your skill is higher, that 15% bonus doesn’t matter as much. As a Protip, ALWAYS use the magnifying glass outdoors when you can. You’ll need clear weather and sunny skies, but the magnifying glass doesn’t degrade so it costs nothing to use. On a long enough timeline once you exhaust all the matches and other consumable fire starters, the magnifying glass will be the only option you have left.
Tinder: For tinder, you should rely on tinder plugs and should always have a couple on you. Tinder plugs can also be found while scavenging and are a byproduct of chopping wood. Newsprint, newspaper rolls, and small sticks can be harvested for tinder plugs and this is a much more efficient use of the newsprint and newspaper rolls in particular so you should always do this. You can also find birch bark and cat tail heads in the wild, which work as tinder. All tinder is equivalent and none provides bonuses so just use what you’ve got. Eventually once you level up your fire starting skill, you will no longer require tinder to start fires. Cool!
Fuel: You generally want to use books or sticks as your starting fuel. They’ve got the best chance to light. Unfortunately, they don’t burn very long so you need to pile on more sticks or some logs to keep it going. Be careful not to use skill books as fuel (the game will pop up a helpful warning if you try to do this). You’ll find logs while scavenging, or you can harvest them from large branches. Branches are a renewable resource (blizzards will make more, which makes logical sense) so eventually, once you’re established, it’s good to get in the habit of chopping some firewood and leaving it outside the Camp Office for when you need it. Reclaimed wood burns for .5 hours – you get it from chopping up furniture. Cedar logs burn for 1 hour, fir logs burn for 1.5 hours, and firelogs burn for 2 hours. Firelogs are awesome when you find them, but they’re heavy as hell so they’re best saved in the Camp Office for projects when you’ll need a fire going for a while. Coal is also a fuel (and a renewable resource) but it is primarily found in mines, and there aren’t any in ML. Still, on rare occasions I’ve found it as loot, or lying around on the ground. Save it if you find some – you’ll need it for forging (a late game activity).
Accelerant: You can find bottles of this lying around, or can use kerosene or lantern fuel as an accelerant in a pinch. They add a huge bonus to your success chance and greatly decrease the amount of time it takes to start the fire itself. I keep some on me as part of my regular kit, to be used emergencies when I need a fire right away.
Uses: Obviously the most important use of fire is warming you up. You can also heat up certain foods, cook raw meat/fish, brew drinks, and melt/boil water. It provides light, so you can also read skill books while by a fire and it will allow you to do activities indoors you normally couldn’t otherwise because of the darkness. Melting snow takes 10 minutes per 0.5L and boiling it takes 5 minutes per 0.5L. A good shorthand for this is that you can fully process 1L of water in half an hour, or 2L of water per hour.

Gimme Shelter: There it is – the Camp Office. Ain’t she a beauty? Doesn’t that Canadian flag make your heart swell with…well…whatever. Civilization is gone and you’ve got bigger problems to worry about. You made it. Get comfortable, this is going to be your base of operations for the next few weeks. If your status and condition allow, feel free to do some light foraging around the area and make sure to check behind the building itself and across the way (there are sometimes bodies in these locations). Get inside before dark. Inside, loot everything that isn’t nailed down – we’re going to be reorganizing in the next section but for now just store stuff wherever if you’re overloaded. On Voyager you’ll usually find a lamp and a magnifying glass (make sure to check corners and under furniture). You’ll always find a line and a hook on the crafting table. There’s always a skill book somewhere inside, and a sleeping bag upstairs. Everything else is random luck but you can usually count on a couple clothing items, some food/drinks, and some first aid supplies.
Simply being inside will raise your body temperature, but making a fire to boil some water is a good idea – you can start stockpiling now. Start getting familiar with the layout of the Camp Office and where everything is located – you’re going to spend a lot of time wandering around here in the dark. You should learn to navigate your way to the upstairs beds and the downstairs stove in complete darkness with nothing but the dim glow of the windows as landmarks. You can “cheat” and punch up the gamma in the graphics settings a bit, which makes your “nightvision” a bit better and will stop you from barking your shins on the furniture. When you’re ready (or worn out), top off your hunger and thirst and crawl into bed upstairs and get a good night’s sleep. You’ve earned it.
Days 2-5 (Part 1) – Ramblin’ Man (or Woman).

Goals:
- Organize the Camp Office
- Begin scavenging/foraging
- Get some better clothing
- Begin building your gear set
- Harvest gut and hide from a deer carcass
Core Concepts:
- Organization 101
- Clothing types/slots
- Gearing up
Well good morning! Hope you had a good night’s rest – we’ve got a lot to do. Let’s start by talking about why we’re here (as opposed to setting up shop somewhere else). There are really only two viable options for a permanent base camp in ML – the Camp Office or the Trapper’s Cabin. These are the only two locations with an interior that hosts a crafting table, a bed, a place to make a fire, and decent storage. We’ve selected the Camp Office for two main reasons. First, it has more storage than the Trapper’s Cabin, and WAY more floor space (this will become important later). Second, and more importantly, it’s centrally located. The main problem with the Trapper’s Cabin is that it’s in the SW corner of the map and it’s a real hassle to get anywhere since you have to trek through the forest. Hunting locations are a bit more convenient to the Trapper’s Cabin, but that alone isn’t enough to tip the scales.
Let’s talk about organization. I generally set things up as follows:
First Aid kit on the wall: first aid supplies and harvested organic materials (rose hips, old man’s beard, and reishi mushrooms).
Drawer in the work bench: small crafting materials and finished goods (hooks, lines, crow feathers, arrowheads, etc.).
File Cabinet Drawer 1 (numbered from top to bottom): Water and beverages.
File Cabinet Drawer 2: Food
File Cabinet Drawer 3: Tools (knives, hatchets, lanterns)
File Cabinet Drawer 4: Firemaking materials (matches, tinder plugs, accelerants). Store sticks and logs outside in the snow by the front door – they take up too much space to keep inside
Upstairs cupboard: Clothing, cloth pieces, leather pieces, sewing kits
Upstairs dresser, top drawer: Weapons, ammunition, cleaning kits
Upstairs dresser, bottom drawer: sleeping bags and miscellaneous stuff that doesn’t fit anywhere else (climbing rope, for example).
The goal here is to have everything stored by general categories – organization 101. Now that that’s done, it’s time to get out there and start finding…MORE STUFF! Before I get into specifics, we’re going to have a few rules of the road:
No fighting: Simply put, you’re not yet equipped for combat. You’re clothing is suboptimal and you don’t want to degrade it any more than it already is. You probably don’t have a rifle yet, or even a hunting knife. Your medical supplies are limited. Combat is a very, very bad idea. Give wolves a VERY wide birth. You’ll get a feel for their detection ranges over time and you can run away if one gets interested, but stay away. This is doubly true for bears, but bears are easier to avoid – they only get interested if you enter their territory and won’t hunt you.
Keep your eyes open: Scavenging and foraging opprtunities abound and we’ll talk more about specifics in a minute, but make sure you’re looking for bodies in the snow, random carcasses, and that sort of thing. Make a note of any rabbits that are near the Camp Office – there are a couple possible spawn points.
Be safe: You still don’t have much margin for error. If the weather looks like it’s turning bad, get back to the Camp Office. Don’t wait until you’ve got hypothermia – make a fire and warm up for an hour or two if your temperature gets low. Don’t jump down hills or mountains.
Bring enough food and water: I generally try to bring 2L of water/beverages and 2500 calories of food with me (I’ll explain more about why in Part 3 of this section when we talk about your gear.
No wandering in the dark: You’re not equipped to survive the temperature drop and the wolves get a lot more aggressive at night. Get back to the Camp Office before dark.

Primary Scavenging Locations: I define these as the major map locations where you’re likely to find high concentrations of supplies and your best shot at rarer equipment, like a rifle. These are:
- Trapper’s Cabin
- Forestry Lookout – the intact one
- Logging Camp
- Lake Cabins
- Carter Hydro Dam
- The Prepper’s Cache (aka “The Bunker”)
You should be trying to make it to these locations, loot them, and get back in the same day. All of these locations (with the exception of Carter Hydro Dam) have beds, so you don’t need to bring a sleeping bag, in case you get stuck and can’t make it back.
You should start with these locations in Days 2-5. You won’t be able to get to all of them, but definitely hit as many as you can. Prioritize the Trapper’s Cabin – it’s generally the first foraging trip I make on Day 2, if weather and status cooperate. It’s a bonzanza of supplies.Make sure to check outside buildings as well as inside – items are often behind structures. Also, make sure to check nooks and crannies between pieces of furniture and under beds. Rifle cartridges in particular tend to be found in these locations. The easiest way to to get to the intact Forestry Lookout is by climbing the bank west of the Train Derailment area and keep heading uphill. Look for the wooden fence marking the path up.
Do NOT enter Carter Hydro Dam (I list it here only because it’s a primary location). Fluffy, who I mentioned earlier, is highly territorial and WILL hunt you down and pounce on you when you least expect it if she’s there. It’s close quarters, poorly lit, and a challenging combat (I believe Fluffy also has above average hitpoints for a wolf). We’ll be clearing out CHD later in this guide, but stay away for now.
I’m going to save the discussion of the Prepper’s Cache for the end of this guide, under “Odds and Ends.” At this point, it’s easy to get overinvested in hunting for it and to get stuck in a bad situtation – some of the locations are extremely remote. However, some are also on your way to these other areas so I’d recommend skipping ahead to that section now and planning a few minor detours.
Secondary Scavenging Locations: These are smaller areas with smaller quantities of supplies, but still well worth searching. The wrecked Forestry Lookout is a pain in the butt to get to – you pretty much have to loop around to the Clear Cut and follow the path up (look for the sign in the Clear Cut that marks the start of the path). I know it looks on the map like you can get up there from Frozen Creek, but I’ve never been able to make that work. You may be able to hit some of these while on your way to a primary location, but don’t overload yourself.
- Tunnel Collapse
- Hunter’s Blind at Unnamed Pond
- Cabin north of Unnamed Pond
- Train Derailment
- Alan’s Cave and Hunter’s Blind outside of cave
- Fishing Huts on Mystery Lake
- Dave’s Silent Clearing
- Wrecked cabin in Deadfall Area
- Forestry Lookout – the wrecked one
Foraging Outside: Keep an eye out for Old Man’s Beard (a moss that hangs from trees), Rose Hips (small bushes with red berries) and Reishi Mushrooms (the grow on stumps). Also look for birch and maple saplings (birch saplings commonly grow in clusters, maple saplings are usually alone). Saplings are about 6 feet tall and can be easy to miss. Saplings need to cure before they can be used, so dump them on the ground in the main room of the Camp Office and leave them be. We’ll talk more about curing and crafting in days 6-10.
Days 2-5 (Part 2) – “What do I do with all this crap?”
Find a Deer Carcass: There is almost always a deer carcass in the barn outside the Trapper’s Cabin. At the very least you need to get the deer hide and 2 guts. When you get back to the Camp Office, throw the hide and the carcass on the ground in the main room. If you can find more deer carcasses, they’re well worth carving up for parts.
Get Some Better Clothing: This is a good time to talk about clothing, since you’re probably going to be finding some, and you don’t want to be walking around out there in nothing but long underwear and a baseball cap.

To start with, you have 16 “slots” for the clothing on your body. Your goal, ultimately, is to have a number of different options for these slots but to have a primary “base” set that provides a good compromise between warmth and weight. It’s going to take us a while to get there, though. The 16 slots are:
- Head (2)
- Accessories (2)
- Torso (inner) (2)
- Torso (outer) (2)
- Legs (inner) (2)
- Legs (outer) (2)
- Gloves (1)
- Socks (2)
- Feet (1)
There are a TON of different options for most of these slots and you started with some (but by no means ALL) of them filled already. What you are looking for are possible upgrades from what you’ve got. Each clothing piece has a couple of different stats. Warmth bonus and windchill bonus are arguably the most important. There is also weight, speed reduction (bulkier clothing slows you down), waterproof rating, and protection (against damage from wild animal attacks). Waterproof rating relates to being outside in the snow (or falling into water). This rating determines the rate at which the clothing become damp, and then freezes (there’s a graphical depiction of a blue bar over the clothing item as it becomes saturated). Frozen clothing provides no warmth bonus and actively SUCKS AWAY warmth. Wet clothing can be dried out by getting out of the snow or, more quickly, by standing near a fire. There are some other great guides out there that detail all of the clothing items and their ratings. The short version is that most pieces are a trade-off. High warmth/windchill ratings usually come at the cost of weight and bulkiness. In previous versions of the game, there were clear “best in slot” items. That is no longer the case and different players have different preferences for what trade offs they prefer. That said, there a few items I want to highlight, and that I recommend you keep an eye out for as they are great “all around” pieces.
Head: The cotton toque, wool scarf and balaclava have great warmth/weight ratios and are desirable in almost all circumstances. The baseball cap and cotton scarf, by contrast, should be shredded for cloth unless you’ve got nothing better.
Hands: Wool mittens are an outstanding value.
Socks: Climbing socks are clearly better than the other two options (sports socks and wool socks) and should always be worn and doubled up on.
Shoes: These are basically a necessary evil. The weight/warmth ratios for all of them are crummy (they all weigh more than they’re really worth). This is the one case where your starting possibilities of running shoes or leather shoes aren’t terrible options long term (insulated boots are probably your best bet here if and when you find some).
Again, a detailed analysis of clothing sets and options is outside the scope of this guide and I encourage to read some of the other resources out there. At the end of the day, you’ll come up with your standard “set” that you’re looking to fill out as you explore. For now you just need to analyze each new piece you find and make a decision on whether it fits in to what you want for your overall set.
Crafted hide clothing In earlier builds of the game, the crafted hide clothing pieces were the clear best in slot winners (and this guide was more focused on crafting them). That is no longer the case. They basically now offer the highest warmth/weight disparities. They tend to be the warmest options out there, but they weigh a ton and completely outfitting yourself with them will slow you to a crawl and make you constantly encumbered. They’re best used as a stopgap measure to fill slots where you’re just not getting lucky finding pieces in the wild. I find myself making the deerhide pants or boots quite often. The wolfskin coat or rabbit mittens – not so much. The bear skin (should you end up bagging a bear as recommended later in this guide) should be used foremost to craft the sleeping bag – not the coat (which weighs almost as much as a real bear).
A couple final comments. Blizzards and high winds increase the decay rate of your clothing – they rip it up. This isn’t a major problem – you clothing won’t drop from a 100 to 0 in an hour or anything – but it’s something to be aware of. Animal attacks are much more of a concern – they can SHRED clothing and will knock condition down signficantly. Bear attacks are absolutely the worst. Your clothing also just decays on its own, like most everything else. You will need to repair it from time to time.
Cloth is the primary material used to repair stock clothing items (crafted items use hides). Shoes require leather. Cloth can by hard to come by in ML, unfortunately, and it’s usually the one thing I’m running short on by the time I leave (fortunately, it’s abundant in PV). Clothing becomes less effective as it degrades, so my rule of thumb is to try and keep it above 75%.
Continued in Part 3…
Days 2-5 (Part 3) – “We got the tools, we got the talent!”
So what’s the end goal of the first 2-5 days? The simple answer: to gear up. That’s it right now. So what gear do you want/need?

Your “kit” is the loadout of equipment you take out with you when you’re scavenging or whatever. Your goal in the first 2-5 days is to fully build out your kit so you’re ready for anything that comes your way. Reasonable people can (and will) disagree on what you should carry around on you when you’re out and about. This is just what I carry, mostly so I’m ready for anything, but bear in mind that I tend to err on the side of caution.
Here’s what I like to have on hand, with a couple explanations:
Standard Kit
First Aid: As you can see, your goal is to be able to treat any individual affliction in the field.
4 Antibiotics (or 2 Reishi Teas)
4 Painkillers (or 2 Rose Hip Teas)
1 Bottle of Antiseptic, or 2 Old Man’s Beard Dressings (the dressings are preferable as they weigh less)
2 Bandages (you can craft 2 of these from a single piece of cloth if you run short)
1 Emergency Stim
Clothing: As discussed above, your goal is to have every slot filled with the clothing that fits your goals for warmth/weight. Otherwise, you’re not going to fiddle with your clothing much unless you’re outfitting for a specific reason (extra warm set for a blizzard, light set for a run where you’re going to be hauling a lot of stuff, etc.).
Food/Water: The amount of food and water you’re going to use in the field is variable based on your activity level and temperature, so bear in mind that you may need to find more while you’re out there if you’re especially active.
2.0L of water – in TLD, you require 1.0L of water every 12 hours while active and 0.67 every 12 hours while sleeping. However, your thirst bar has a maximum capacity of .67L, forcing you to drink at least twice during the day. My recommendation of 2L gives you more than enough for the day and, if you get struck in the field, the night, with some left over to top off in the morning. Also, non-water drinks have some calories in them (sodas have 250, coffee and teas have 100) so they actually regenerate your hunger bar a bit, too.
2500 Calories of food – Your hunger bar can hold a maximum of 2500 calories. However, your hunger bar depletion is variable based on activity, so this recommended amount is based on a similar theory to the water – enough for a day of “average” activity and to top you off in the morning if you have to sleep in the field. There are a couple foods that also reduce thirst (canned goods packed in fluids, like pinnacle peaches), and there are a couple – tin of sardines, salty crackers, beef jerky – that increase thirst. Some can also be heated before eating for a temperature boost. You can absolutely do some math and figure out what food/weight ratios are optimal to get the most “bang for your buck” in your kit. I’m not doing that because, eventually, you’re pretty much just going to be carrying cooked meat around anyway.
Coffee – It’s extremely light (0.1KG per cup) and I always carry some with me. If you need a mid-day fire in the field, it’s a nice way to increase your temperature recovery, give your fatigue bar a slight boost, satisfy some thirst AND get some calories. Much as in real life, coffee does it all.
Tools and Equipment: This is where you’re likely to get the most divergent opinions. To reiterate, it’s what I carry because I like to be ready for anything.
Bedroll – I used to carry one as a rule. However, I’ve come around to leaving it at base camp unless I’m going somewhere without beds nearby (CHD is the main example). It’s just not worth the weight. I’d suggest keeping one with you while you’re learning the ropes, and then get used to leaving it behind.
Can Opener – for opening cans and not much else, but you never know what you’ll find out there.
Hunting Knife – Your single most important tool, hands down. It can do it all. Never leave home without it – it will save your life more than once.
Hatchet – Almost as useful as the hunting knife, but primarily used for chopping wood. It’s actually more effective at harvesting animal carcasses that are mostly frozen, and can also be used in self-defense.
Crowbar – Has three uses – prying open locked containers, breaking ice for fishing, and self-defense as a weapon of last resort. The only places you’ll use it in ML are in the Trapper’s Cabin (the locker is sometimes locked) and in CHD (many lockers, some of which are always locked). If you’re going one of those two places (or fishing) bring it. Otherwise leave it at home.
Magnifying Glass – The only infinitely reusable fire starter in the game. Use it when possible to stretch your supply of matches.
Matches – Because it won’t always be sunny or partly cloudy, or you may be indoors. Keep some on you always.
Sewing Kit and Whetstone – I carry these for the same reason. Clothing and tool maintenance is something you need to do regularly to keep them in a high condition (which makes them more effective). I like to keep clothing above 75% and my knife and hatchet above 90%. Keeping these items on you lets you do your maintenance work while you’re sitting by a fire warming up and not doing anything else productive. In other words, you can multitask – which is always a good idea.
Flare – Can scare off wolves, can function as a light source, and can start a fire in a pinch. I keep two on me in lieu of a lantern.
Weapon of Choice – When you start out this will be your rifle (once you find one) and a dozen rounds of ammo. You’ll eventually want to swap this out for a bow and arrows and save the rifle for bear hunting. The Distress Pistol is also a weapon but cannot be found in ML (although I have found the odd shell), so I’m not including it in this guide.
Tinder Plugs x5 – Lets you start a couple fires, with a couple failures. You can make more in the field from sticks if needed.
Sticks x15 – They’re light and this will let you start a fire that will burn for over an hour. You can gather more in the field, of course, to give you a longer burn if you know you’re going to make a fire at some point.
Accelerant – Also light, I carry a small bottle for emergencies, when I’ve GOT to get a fire going.
Cloth – 10 pieces. Along with the sticks you can build a snow shelter in an emergency. You can also do some mending of clothing if you get some free time.
Skill Book of choice – Again, a useful way to pass the time productively if you get stuck somewhere.

And with that, we’re done with Days 2-5. By the end of day 5, you should be well on your way to clearing out a number of primary and secondary locations. Food and water should be out of crisis mode and you should have some nice stockpiles and your kit should be mostly, if not completely, filled out. Time to start planning for the long term.
Days 6-10 (Part 1) – “Looting is fun, but let’s kill some stuff.”

Goals:
- Continue scavenging and foraging
- Finish your kit
- Begin trapping/hunting
Core Concepts:
- Mad Skillz
- Crafting basics
- Trapping/Rock Throwing
- Hunting
- Predator Behavior
- First Aid
So, at this point your base camp should be well-established. You should have a lot of supplies and your kit should be mostly (if not totally) complete. If you followed the instructions in the previous section, you should have at least one deer hide and some guts curing on the ground and, depending on when you got them, just about fully cured. You’re ready to start moving into the next phase – living off the land. You should be comfortable in the outdoors making day trips, and have probably survived a couple scares and maybe even a night in the wild. Now is a good time to talk about your survival skills, which can be found in your Journal.

Mad Skillz: You’ve got 7 survival skills, which start at base level 1 and can increase to 5. The easiest way to level them up is simple – just do the activity. Skill books also exist (you probably already have a couple) and these can also help you level up just by reading, which is another great activity to do while sitting by the fire doing nothing else productive. As a rule, the level 2 and 3 bonuses make you more efficient or accurate at the activity – they give you a flat percentage bonus. Level 4 and 5 bonuses are where it’s at – you usually get an additional passive bonus that is VERY helpful to your ongoing survival.
Fire Starting: Level ups increase your chance of starting a fire and cause a fire to last longer. At level 3 you no longer need tinder to start a fire and at level 5 fires start 50% faster, which is mind-blowing when you look back on how slow you are at doing it at level 1.
Cooking: Level ups increase the calories in a cooked food item and reduce cooking times. At level 3 food items no longer lose calories if you smash them open and at level 5 you can never get parasites or food poisoning from cooked food. The immunity to parasites is a HUGE benefit on Stalker difficulty.
Carcass Harvesting: Level ups decrease the time it takes to harvest meat, increase the amount of meat that can be harvested from carcasses by hand, and also reduce the time to harvest hide or gut. These all start kicking in at Level 3 and scale up from there.
Firearms: Level ups increase critical hit chance starting at level 2, accuracy starting at level 3, and damage starting at level 4. You get more condition back per repair action starting at level 3 as well and at level 5 degradation is cut in half by 50% per use.
Archery: Similar to Firearms. Bow “sway” gets reduced starting at level 2 and arrow damage increases. Critical chance increases at level 3, and bleed out time is reduced at level 4. Condition loss on use also starts decreasing at level 4. The holy grail is level 5 – you can now fire the bow while crouched. This makes deer hunting a cinch, which is great because it’s going to be your primary food source once you run out of pre-event manufactured foods.
Ice Fishing: Level ups reduce fishing time (time between fish being caught) and decrease the chance of a line breaking. Starting at level 4, average fish weight increases.
Mending: Chances of successful repair increase per level and repair times decrease starting at level 2. At level 3, condition increases improve per use and at level 4, wear and tear on sewing kits decrease.

Crafting Basics: As discussed above, you should have gotten at least one deer hide and 2 pieces of gut and should have them lying on the ground. If you were lucky you may even have found a couple more, which will definitely help jump start your crafting. You get three things from carcasses – meat, hide and gut. Meat, by far, takes the most time to harvest completely. Harvesting is an intensive activity and anything larger than a rabbit will generally wear you out until your skill levels increase.
Animal meat degrades very slowly, and even more slowly in the cold. You should simply dump it in the snow outside your door. Be forewarned, though – fresh meat attracts wolves so keep an eye out when you step outside. You’re pretty much using the outdoors as a natural icebox.
Hides and gut need to be cured before you can craft with them. Curing is a remarkably complex and scientific process in TLD. Drop the hides and gut on the floor inside the Camp Office. Same thing with saplings. That’s it – you’re done. Now you just need to wait. Rabbit pelts cure quickest at 3 days. Gut and Deer Hides take 5 days. Wolf pelts take 7 days. Bear pelts take the longest at 12 days. Birch saplings (used for arrows) take 4 days to cure and Maple saplings (used for bows) take 6. Cured items don’t degrade so there’s really no downside to having them. You’ll eventually stockpile a bunch. In the Camp Cabin, I usually throw all of my curing items in the front of the office between the front door and the counter, and the fully cured items on the floor in the back between the crafting table and the back door.

OK. Crafting isn’t rocket science. Go to the table and flip through the options until you find what you want. You can also view crafting recipes in your journal and some basic items can be crafted on the fly without a crafting table. You don’t have to “learn” recipes – you already know all of them. You will see the required materials and the time to create the item. In fact, you may have already used the table to make some stuff. Some items may require you to have a sewing kit, and you can use a fishing tackle in a pinch.
Later, when you’re crafting clothing items, the times are a lot more lengthy. There is an initial “setup” period when you first start crafting the item and then you need to work on it for whatever time remains. The materials do stay in your possession until you’ve completely finished the item, so make sure to have them on you if you need to craft the item over multiple sessions (which you will). Some clothing items also allow you to use a tool (knife or hatchet) to cut the crafting time in half and this is ALWAYS what you want to do. The Wolfskin Coat and Bearskin Bedroll are particularly punishing.
We’ll continue in Part 2…
Days 6-10 (Part 2) – Hungry like the woooooooolf….
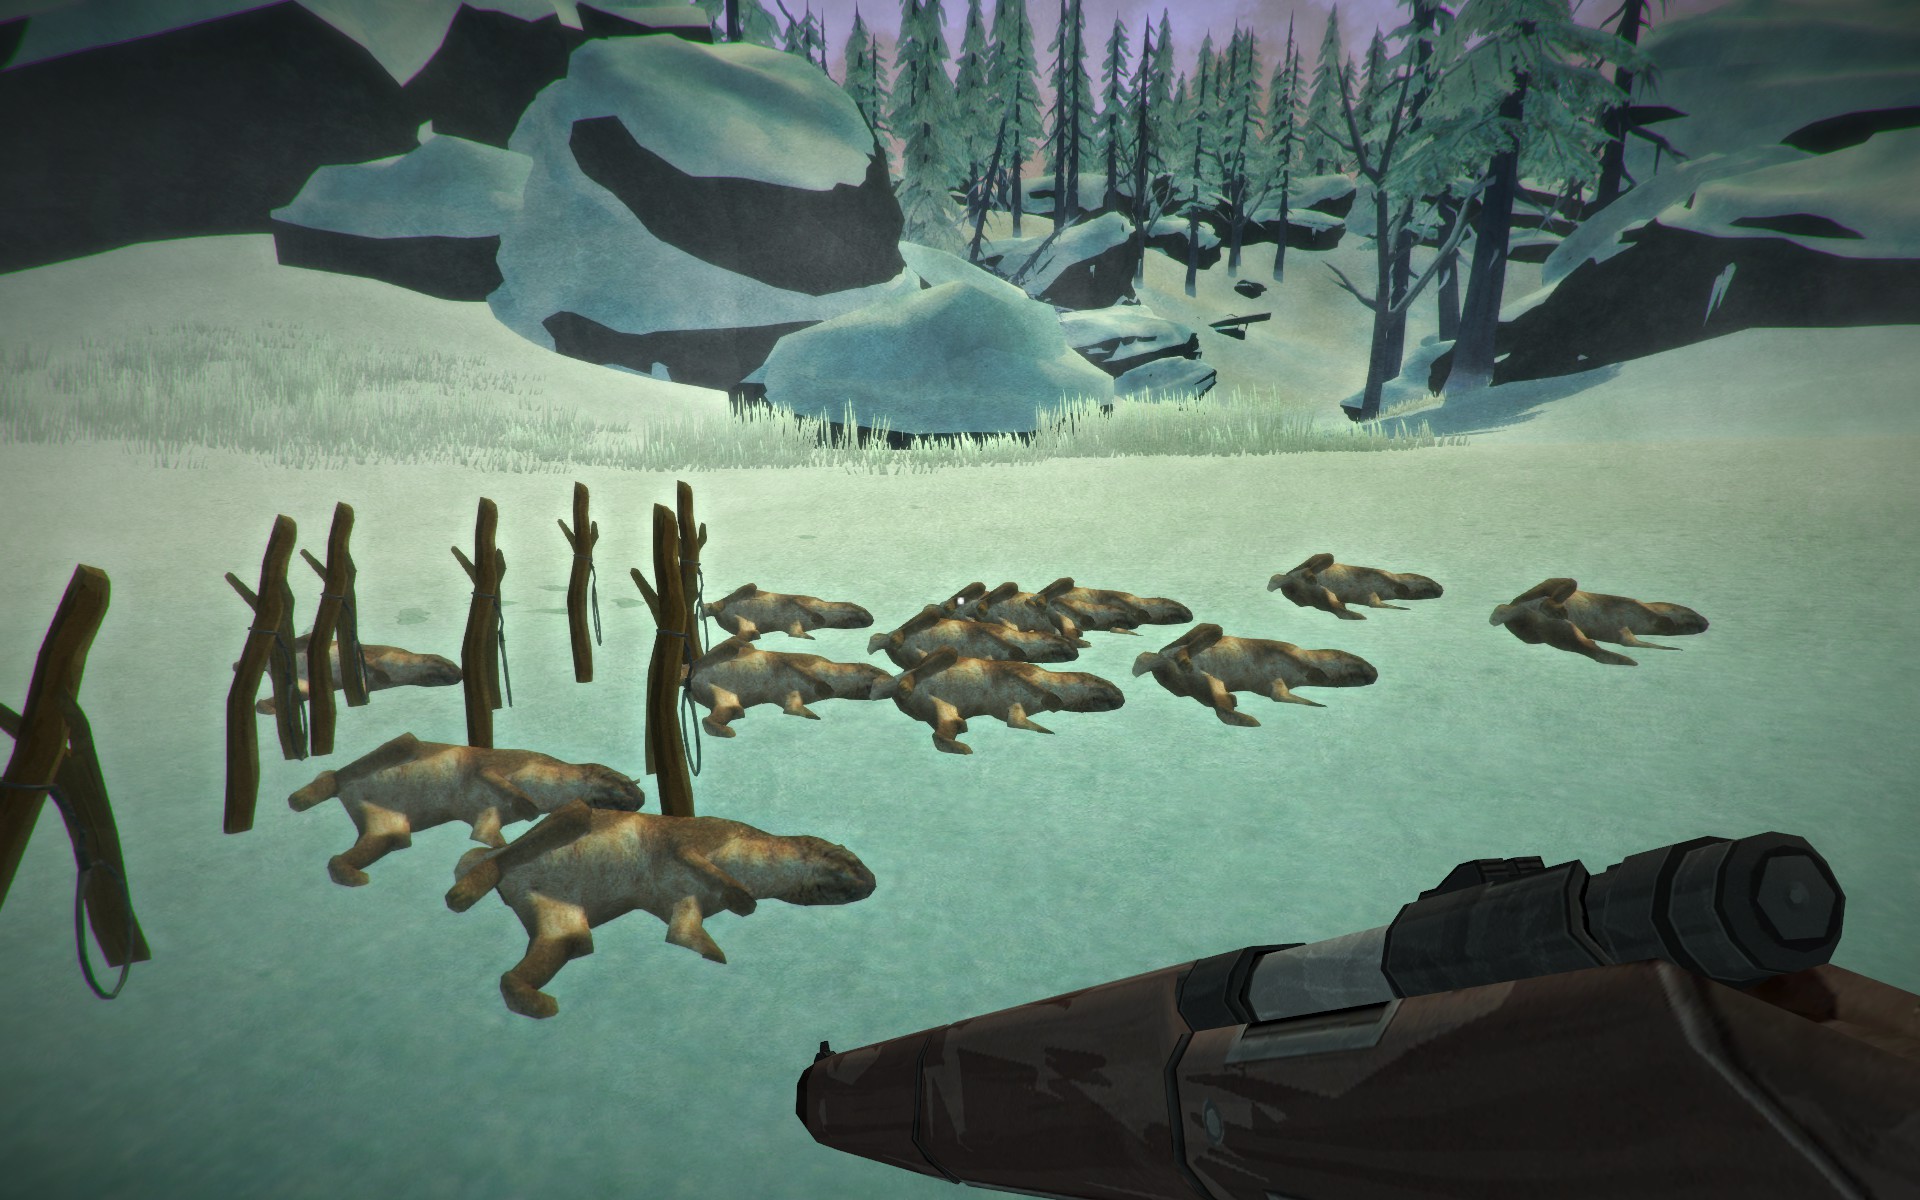
Trapping and Rock Throwing: Hopefully you were able to locate a couple rabbit spawning areas near the Camp Office over the past couple days. The most likely ones are northwest across the rail tracks or near the Mystery Lake Southern Access point. Trek over there and observe the rabbits at a distance. Aren’t they cute? They’re going to run when you approach, so you want to have an idea of where they hang out when they’re not spooked. Now head in there and select your snare in your inventory. You place it just like you would a fire, but in this case you want to place it where the rabbits were hanging out (you can sometimes find tracks on the ground as well). That’s it – you’re done.
Snares need to be left alone for a minimum of 12 hours before they can catch anything, so don’t plan on checking them until the next day. With a little luck, you’ll have a dead rabbit waiting for you. You can harvest in place, or take the corpse with you. Snares are breakable, either by a rabbit or by adverse weather, so there’s a chance you may get a busted snare. Harvesting a broken snare gives you back the reclaimed wood, but you’ll need another cured gut to make a new one. Snares are also not “active.” You can’t chase a rabbit into them. They just work on their own and a trapped rabbit either magically “appears” after 12 hours or it doesn’t.
A couple final thoughts about Trapping. I generally get a ratio of about 8 rabbits caught for every busted snare, but your mileage may very. As long as it’s better than 1 to 1, though, you’re getting more gut than you’re spending (setting aside any other carcasses you harvest). Because you get the reclaimed wood back from harvesting the broken snare, this means that snares (and by extension, dead rabbits) are an infinitely renewable resource. They don’t give a lot of meat and rabbits are pretty much only useful as an early game resource. They’re not worth the trouble later on. Also, rabbits can be depopulated in a given area over time. It’s best to trap somewhere for 3 or 4 days and then move somewhere else before coming back.
Rock throwing is a mechanic released in the most recent Faithful Cartographer update. Frankly, it feels like it’s rendered trapping obsolete. You can find rocks everywhere. Grab a couple. Find rabbits as described above. Ready a rock in your radial menu. Get close to rabbits and crouch down and inch closer. For best results, try to position yourself so the rabbit is heading straight at you (this is also a good habit for “real” hunting, which we’ll get to shortly). Take aim – the rabbit will get VERY close to you if you let it – it’s like shooting fish in a barrel. You want the rabbit in the middle of the “circle” between your fingers. THROW. If done right, you’ll bean the rabbit and stun it. Now get up QUICKLY and RUN to the rabbit – you’ve only got a few seconds before it recovers. Grab it and snap its little bunny neck. Make sure to look deeply into its eyes while you do this, you monster. Congratulations – you are now the proud owner of a dead rabbit. Harvest at your leisure.

Hunting: So at this point, we’re pretty much talking about hunting deer. There just isn’t much reason to hunt wolves for reasons we’ll get to shortly. We cover bears in the next part of the guide. You’ll need a rifle – you can’t kill a deer with rocks (I know, I’ve tried). Ultimately, you’ll want to hunt with a bow and arrows and, in fact, that should be one of your primary crafting goals. You may have been lucky enough to have found a bow/arrows at this point. If so, use those and skip ahead in this guide to that section to find out the methods I suggest. Once you’ve got a bow/arrows, you’ll want to save the rifle for bear hunting.
Deer: There are two ways to hunt deer – you can do it yourself, or you can try to get a wolf to do it for you. Doing it yourself is pretty straightforward. Find a deer, crouch down, and creep towards the deer. Unlike the bow (until Level 5…), you CAN fire the rifle while crouched, and the deer’s detection radius is minimal while you’re crouched (even if you’re in plain sight). Get as close as you’re comfortable, line up for a headshot and pull the trigger. Bears, deer and wolves have four “zones” where they can be hit as far as I can tell – head/neck, chest, hindquarters, and foot. I’ve read several places that a shot to the heart (and you’re to blame…) can result in an instakill but I’ve never seen this happen – only from headshots, which is why I recommend you aim there. Or maybe I’m just a bad shot – who knows? In any case headshots with a rifle have a high probability of killing a deer or wolf immediately – it happens most of the time. I’ve been told a bear can be one-shotted with a critical hit to the head, but I’ve never had this happen.
So, you’ve taken your shot and, hopefully, killed your target. If not, or if your aim was off, it bolted leaving a blood trail. At this point you need to chase it down and wait for it to bleed out. I don’t recommend shooting it again unless your previous shot hit it in the foot. Otherwise, it should bleed out in an hour or less (sometimes in a matter of minutes). Just follow the blood trail until you find a carcass.
The other way to hunt deer is to “herd” them towards a wolf (or wolves). In fact, it sometimes happens in the TLD that they randomly spawn next to each other, which provides you with a free National Geographic Special. Wolves will hunt and kill deer on sight (unless they’re busy trying to kill you). They do the same with rabbits, but they mangle the corpse completely so this isn’t useful to you. The downside is that the wolf begins eating the carcass, and will tear away most of the meat. This isn’t a big deal if all you care about is the hide/gut – just wait patiently until the wolf wanders off. If you want the meat, though, you’ll need to drive away the wolf. You can do this by simply moving in range, in which case the wolf will pounce on you normally and you’ll take some damage and need to fend it off with your knife or hatchet. You can also sneak up and shoot the wolf (piling up the corpses) or drive it off with a flare.
Herding deer can be frustrating. They usually, but not always, move away from you in a straight line. Sometimes they go at an angle. If they hit an obstacle they can’t climb, they can even “rebound” straight back at you. It works best in more open areas where the deer and the wolves are in relatively close proximity and the deer just need a bit of a nudge to trigger the wolves.
Wolves: As we’ll get to under First Aid, predator meat has a large downside – intestinal parasites. They don’t exist in Voyager difficulty, but if you plan on graduating to Stalker (and you should) you need to avoid the habit of relying on wolf meat. You’ll mostly be killing wolves out of self-defense unless you REALLY need a pelt. When charging you, the wolf AI zigs and zags a bit so lining up your shot can be a bit of a challenge, and if you wait too long you’ll get pounced. They do always come straight on for the last few seconds so ignore the zig zags and wait for your moment. Practice makes perfect.
Alternatively, you can just get pounced and stab it with your knife, in which case you just need to follow the blood trail until it dies after you take care of any afflictions (blood loss, infection) you sustained. Because medicine is fairly plentiful this is actually a perfectly viable option if your condition is at 100% – the wolf isn’t going to really do all that much physical damage to you with one attack. The main drawback is the damage to your clothing, which you’ll need to repair.
Although less of a concern on Voyager, wolves do sometimes come in packs. Fighting a whole wolfpack WILL mess you up and potentially kill you. If you get more than two hunting you, RUN.
Days 6-10 (Part 3) – Live and let die. But probably just die.

Predator Behavior: Unfortunately for you, you do NOT smell like an elf princess. You’re pretty nasty actually. This becomes a particular problem when you’re carrying around dead animals, or their meat (cooked or raw). You’re basically ringing the dinner bell for the wolves. The game tells you this by showing a meter at the top center of the screen which looks like 3 wavy lines. This is your “scent-o-meter.” The more lines lit, the louder you’re ringing the bell. The effect of this is that you attract wolves from further away. At three lit lines, they’ll hunt you from other time zones (at least it feels that way). This also creates a rather devious problem as the game progresses, since you’ll become more and more dependent on animal meat for your diet as pre-event food items become more scarce. Essentially, you’ll be forced to go hunting more often, and it will become more difficult since you’ll have to bring animal meat with you so you don’t starve.
So what to do? First, to the extent possible, use animal meat as a food source only when at base camp. Don’t take it with you into the field if you’ve got pre-event foods available. Canned and pre-packaged goods also weigh less and generally have better calorie/weight ratios. Second, avoid carrying around dead animals or their parts. As you’ve probably noticed, you can carry around dead rabbits and you can quarter animal corpses and haul the parts with you for harvesting at a later point in time (valuable if the weather turns bad and it’s not feasible to harvest a corpse where it died). Head straight back to camp if you’re carrying dead animal bits.
Also, in a broader sense, learn to recognize wolf behavior patterns. They generally operate in patrol mode until they are attracted to you, and then start stalking. However, they’re (sort of) cowards and if you’re looking at them they’ll keep their distance and stalk. They usually won’t charge unless you turn your back on them. There is also an audible growl when they get on the scent. When you hear that, stop what you’re doing IMMEDIATELY and identify where the wolf is. Walking speed is generally not sufficient to shake a wolf off your tail – you need to run to lose it.
Now let’s talk about to do if you get mauled by a wolf or have some other calamity befall you (which you will, probably within the first 15 minutes of starting your game if you’re like me).

First Aid:
Negative Afflictions: This category describes all the bad things that will happen to you. Let’s look at them individually, and how to deal with them:
Hypothermia: Discussed previously, you’ll get a warning once your temperature goes into the red. You then get a steadily increasing chance of developing the affliction (which can be viewed on the afflictions menu). Once you’ve got it, it doubles your ongoing condition loss from freezing and you fatigue at twice the normal rate as well. Hypothermia will kill you dead in about two hours unless you deal with it. Fortunately, it’s a relatively painless fix. Get your temperature positive and keep it that way for 12 hours (18 on Stalker, and 24 on Interloper). It cannot be allowed to dip below freezing again during this time or the clock resets.
Frostbite: Think of it like hypothermia’s ugly older brother. It is caused by wearing frozen (completely soaked) clothing for an extended period of time or having exposed body parts not covered by clothing in freezing temperatures. There is no cure. You get a warning (similar to hypothermia) and then it either happens or it doesn’t. Frostbite permanently and irrevocably reduces your overall condition. You have to avoid frostbite – you can’t fix it. Fortunately, it’s easy to avoid – just have all body parts covered and if you get soaked, get near a fire and dry out.
Dysentry: Caused by drinking non-potable water (basically water that you melted but didn’t boil). Causes your thirst bar to rapidly deplete, causes condition loss, and stops condition from regenerating during sleep. Cured by taking two antibiotics (or one reishi tea), drinking 2L of purified water, and resting for 10 hours. These three steps must be done in this order. However, dysentery is really the result of laziness – there’s no excuse for drinking non-potable water. You should boil it whenever you melt it. Period.
Food Poisoning: Caused by eating low condition foods or raw meats. Raw meat has a VERY high chance of poisoning you and should never be consumed. In theory, any food item with a condition below 75% can cause food poisoning, but the odds really ramp up when you get below 25%. Note that low condition beverages (i.e. canned sodas) CANNOT cause food poisoning so, as far as I know, there’s no reason not to hang on to those. Treatment is the exact same as Dysentery, minus the 2L of water. The effects are also not as dire as Dysentery – it will drop your condition to 15% and hold it there. Food poisoning also passes on its own after 18 hours without treatment (assuming the condition loss doesn’t kill you). You WILL get food poisoning every now and then, but it’s more of a nuisance than anything else – you basically lose a day dealing with it and then get on with your life.
Intestinal Parasites: Mentioned here for the sake of completeness. You cannot get it on Voyager difficulty. However, we’re training for Stalker so here’s the deal. Every time you eat a piece of predator (wolf or bear) meat you get a warning and a 1% chance of contracting IP at the end of 24 hours. That chance increases by 1% for every additional piece of predator meat you eat in that 24 hour window. At the end of 24 hours, the die gets rolled and you either get it or you don’t. If you don’t, nothing happens and the warning goes away. If you eat another piece of predator meat, you start the process over again at 1%. The net upshot of this is that you’re always gambling by eating ANY piece of predator meat. 1 in 100 doesn’t seem like much but if you keep rolling the dice long enough over days and weeks of game time, you’ll get hit eventually. And it’s a pain in the butt to cure. You have to consume 2 antibiotic pills or 1 Reishi Tea for 10 DAYS, once every day for ten cumulative days. You can skip a day, but make no progress towards being cured that day. In the meantime, every day you have the disease you suffer 2% cumulative condition loss (which, in turn, causes your max fatigue level to decrease by 4% per day). This adds up. By day 10, you’ve got a 20% reduction in your max condition and 40% reduction to max fatigue. It’s accordingly worse if you skipped any days. In short, avoid predator meat unless you have no options. You just don’t want to take the risk.
Cabin Fever: Another fun one. On Voyager you cannot develop this in the first 50 days of game play – you’re immune. On Stalker you get 25 days of grace. Basically, the game keeps a running total of the amount of time you’ve spent indoors over the previous six days. If that balance “tips” to a majority of that time being indoors, you get Cabin Fever. Cabin Fever has one consequnce – it stops you from resting indoors for 24 hours (which, as a result, forces your balance to tip back in the correct direction). It’s a major nuisance, and one you have to start planning around. Basically, you just have to plan to spend the night outdoors every couple days and that solves the problem. Obviously, having warm clothing and/or the bearskin bedroll make this a lot more viable.
Bruising/Lacerations These are basically one-time hits to your condition. You can get bruising from falling down or being attacked by wildlife. Lacerations are caused solely by attacks. You can’t do anything to “heal” these – you just have to rest and regenerate the condition lost.
We’ll finish in Part 4…
Days 6-10 (Part 4) – Yes, I know this section is really long. Stop whining.
OK, let’s finish up with First Aid and we can move on to killing bears. I promise. But pay attention, I’m trying to save your life here!

Sprained Wrist/Ankle: Not life threatening, but annoying. You can get these from animal attacks but more commonly you get them from falling down. The chance increases the more you are overweight and/or the greater the distance you fall. Note, however, that being overweight alone can do it – just walking in the snow you can twist an ankle. You’ve got two ankles and two wrists and, yes, you can sprain them both. Sprained ankle (one or two) stops you from sprinting. Sprained wrist (again, one or two) stops you from using any projectile weapons (rifle, bow or distress pistol). Sprains will heal on their own with 4 hours’ rest or can be cured immediately with 2 painkillers or one Rose Hip Tea. Honestly, the biggest problem I have with these is forgetting I have them and then needing to run or defend myself on short notice and not being able to use my bow or take off.
Blood Loss: This is a big one that can (and will) kill you. Commonly caused by wildlife attacks, but you can also get it if you fall far enough. Condition will drop at a rate of about 30% per hour if untreated. You also get the visual effect of trailing blood behind you, which has the in-game effect of attracting more wolves. You can get this effect multiple times and they do stack, so two instances of blood loss is really bad, and 3 instances is probably fatal in a few minutes. Fortunately, it’s easy to fix. Just apply a bandage (you’ll need to use one per each instance of Blood Loss, of course). No bandages on hand? You can make some on the fly from any cloth in your possession. In a pinch, you can even shred an article of clothing. Blood Loss is a condition that needs to be dealt with right away.
Infection Risk/Infection: Commonly shows up with the Blood Loss affliction above when caused by an animal attack. The risk starts at 50% and then increases 5% per hour until cured or until you get an infection. The risk can be deceased by use of a bandage (which automatically reduces it by 25% when you treat concurrent blood loss), use of antiseptic (which reduces it by 40%) and use of an Old Man’s Beard dressing (which reduces it by 65%). The net effect of this is that so long as you bandage the Blood Loss and use antiseptic or an OMB dressing on the body part with the infection risk within 3 hours, you’re fine and it goes away. If you waste time dealing with it, though, your risk increases and may require multiple treatments. If you do get an infection, you lose 5% condition per hour (with resulting 10% decrease in fatigue levels per hour). You treat the infection itself by taking two antibiotics or 1 Reishi Tea and then resting for 10 hours. Without treatment, the infection will kill you – it will not heal on its own. Like Blood Loss, you can get this condition multiple times and can get multiple infections, and they do stack. It’s a life-threatening condition that needs to be dealt with immediately.
Burns: Yes, this can happen if you walk into an open fire. So don’t do it, stupid. Reduces your condition to 75% and then caps it there until treated or until 30 hours passes. Treated by applying a bandage and then taking two painkillers or one Rose Hip Tea.

Positive Afflictions: Yes, there are some! Although I tend to refer to them as “buffs” in keeping with normal game terminology.
Reduced Fatigue: You get this from coffee (because of course you do!). It lasts one hour and gives you an immediate 10% recharge on your fatigue bar and slows ongoing fatigue decay by 50% (including sprinting).
Improved Rest: You get this from hot Herbal Tea. Increases condition recovery from sleeping by 2% per hour for up to 6 hours. In other words, it can increase condition recovery by up to 12% in a single burst. Very useful if you’re trying to recover from a serious condtion hit, like a bear attack or sequence of wolf attacks.
Warming Up: You get this from eating any hot food or hot beverage. It lasts for two hours and adjusts your “feels like” temperature by 4% for the duration. There’s really no downside aside from the time spent in heating the food. In short, whenever you’ve got the opportunity to eat hot food, you should!
And that’s it! Now let’s move on to some more “advanced” topics.
Days 11-??? (Part 1) – The Danger Zone

Goals:
- Kill Fluffy
- Craft a bow and arrows
- Kill a bear
- Try ice fishing
Core Concepts:
- Bow hunting
- Bear hunting
- Ice fishing
Let’s briefly take stock of where things should be if you’ve been following this guide. You should have a well-provisioned Camp Office with a ton of meat (mostly deer, hopefully) in the snow outside. Food and water are really no longer a concern, and certainly not a pressing one. You’ve got a decent clothing set and some clear ideas on where you want to upgrade. Even better, you’ve got the necessary pelts, hides and guts curing on the floor that you’ll need to craft most any hide upgrades you want, and you may have already started. You’ve got a completely tricked-out kit, and you’ve looted most of the locations on the map. It’s time for some challenges.
Now, it is possible that the weather hasn’t cooperated and some things have taken longer than planned – you may not have all this stuff done heading in to Day 11 and that’s fine. You’re not on any specific timetable and nothing bad is going to happen – take whatever time you need – this guide is strictly aspirational. At this point, in fact, you can really do the remaining goals on whatever timetable you want. If you’ve made it this far, you’re well positioned to survive for a long, long time.
Let’s start by killing Fluffy.

Kill Fluffy: Go ahead and head up to the Carter Hydro Dam (CHD). There are no beds and it’s probably going to be an overnight trip, so I recommend bringing a bedroll. In fact, if you’ve got two bedrolls it’s a smart idea to bring the extra and plan on leaving it there for later – you’re going to be coming back at the end of this guide. A lantern or some flares may be useful, although you’ll probably find some in the dam – there’s a ton of junk in there.
Honestly, the main problem with Fluffy isn’t the wolf herself. She seems to have above-average hit points (I’ve never killed her with a single headshot) but that’s about it – she otherwise follows normal wolf behavior. The main challenges are the confined spaces and the limited visibility. CHD is also just generally creepy. It is entirely possible that Fluffy doesn’t spawn for you. Even on Stalker and Interloper I’ve had it happen. But we need to plan for the worst.
You can find a map of CHD online but to give you a quick overview, the floor you enter on has 4 rooms – an entryway, a large “main” room, a control room, and a storage room. There is also a set of stairs leading down. The main room is centrally located and has entrances to all the other rooms on that floor. The stairs lead down to a long hallway that runs straight, then turns left and then opens into the large generator room (the control room has a glass wall that looks down into this same room). The generator room is mostly occupied by the generators and also has two elevated catwalks. There’s a large metal door that leads deeper into the CHD complex. Fluffy USUALLY spawns on this side of it, but based on feedback from other players it IS possible for her to spawn on the other side (I’ve just never had it happen, and that’s across over 60 sandbox playthroughs).
So Fluffy can be in any of the above areas and it’s possible you’ll be face to face with her when you walk in, although with me she’s almost always (greater than 90% of the time) in the downstairs generator room. Make sure that you’re entering during daylight hours. Ambient light is more than enough for you to see. Creep forward, stay frosty, and quickly survey the entry area rooms. This is not the time to loot – you’re just securing the area. Once you verify that she’s not on this floor, you know she’s on the lower levels. Head downstairs, weapon of choice at the ready. You can go with a bow if you want, but for newer players I recommend just sticking with the rifle here. You may find her in the lower hallway. The reason we’re hurrying here is because she will come upstairs and attack you if you dawdle. It’s possible she may be in the hallway. If so, you’ll have a straight shot at her. Otherwise, I recommend heading into the generator room and up the staircase to the landing on the first generator. Survey the room and see if she’s pacing around. She may come to you, or you may need to “encourage” her by taking aim. Either way there’s only one way she can get at you – up the stairs. Ready, aim, fire. Once you wound her, back out and wait for her to bleed out if you didn’t kill her. She’ll die eventually. Good work, Fluffy’s dead and CHD is yours. The rest of this section assumes that Fluffy was on this side of the door and you took her out. If not, you’re going to need to go through the steel door and be ready for the unlikely event that she’s on the other side (which, again, I’ve never had happen).
Now, assuming Fluffy is dead, use your lantern – this is the one location where I recommend it. CHD is a BIG building – by far the biggest structure you’ve encountered so far – but some areas are shadowy, even in the middle of the day. The irony is that at this point you don’t really need a lot of the stuff in here since you’re already well supplied, but it is a BONANZA of supplies. As mentioned above, there is a metal door in the generator room that leads deeper into the complex and that’s really what you’re here for. On the other side of that door, there is always a corpse (TLD players have named him “Frank”) with a couple broken arrows nearby (sometimes stuck in the door itself). Grab those. You can now freely explore and loot CHD at your leisure. Further in, you’ll come to a door that leads to the outside. This is a one-way door that leads to Winding River, on the other side of CHD from where you entered. Winding River is the connecting area between ML and PV, so you’ll be back here later if you decide to move on to PV (which I recommend at the end of this guide). Don’t freak out about the door being one-way. Outside, you can walk along the dam, CAREFULLY, to a fenced in area that leads to a slope and a broken window back into CHD.
Again, don’t feel obligated to completely loot the dam. It’s a lot of stuff and there are a bunch of lockers, cabinets and drawers to check. Take stuff you think you’ll need (at this point I’m usually looking for cloth and whetstones) but feel free to leave extra equipment in the lockers in the main room. Like I said, you’ll be back. Most likely, you’ll want to crash here for the night. There is a fire barrel in the main room but you’ll need to use your own bedroll – firewood is plentiful outside.

Craft a Bow and Arrows: Believe it or not, the main reason we went to the dam was for those broken arrows – they can be harvested for arrowheads, which are in short supply. Arrowheads CAN be crafted from scrap metal but you need a forge, and the only forges currently in the game are in Desolation Point and Forlorn Muskeg, which are highly dangerous areas.
The other items needed for arrows – birch wood and crow feathers – are easier to find and you should (hopefully) have some cured birch wood at this point. Ditto with cured maple wood. If not, you need to prioritize going out to find some. If you’re just getting some now, it will take 4 days for birch wood to cure and 6 days for the maple, so you won’t be crafting your bow for a couple days. At this point in TLD, birch and maple wood have no uses other than making bows and arrows, so use them freely – you don’t need the wood for anything else. Arrow heads are reusable and don’t degrade, and crow feathers spawn infinitely around corpses. So pretty much the only limitation you have are saplings.
Go ahead and make your bow and as many arrows as you can when able. We’ll continue in Part 2…
Days 11-??? (Part 2) – “I never liked Yogi anyway.”
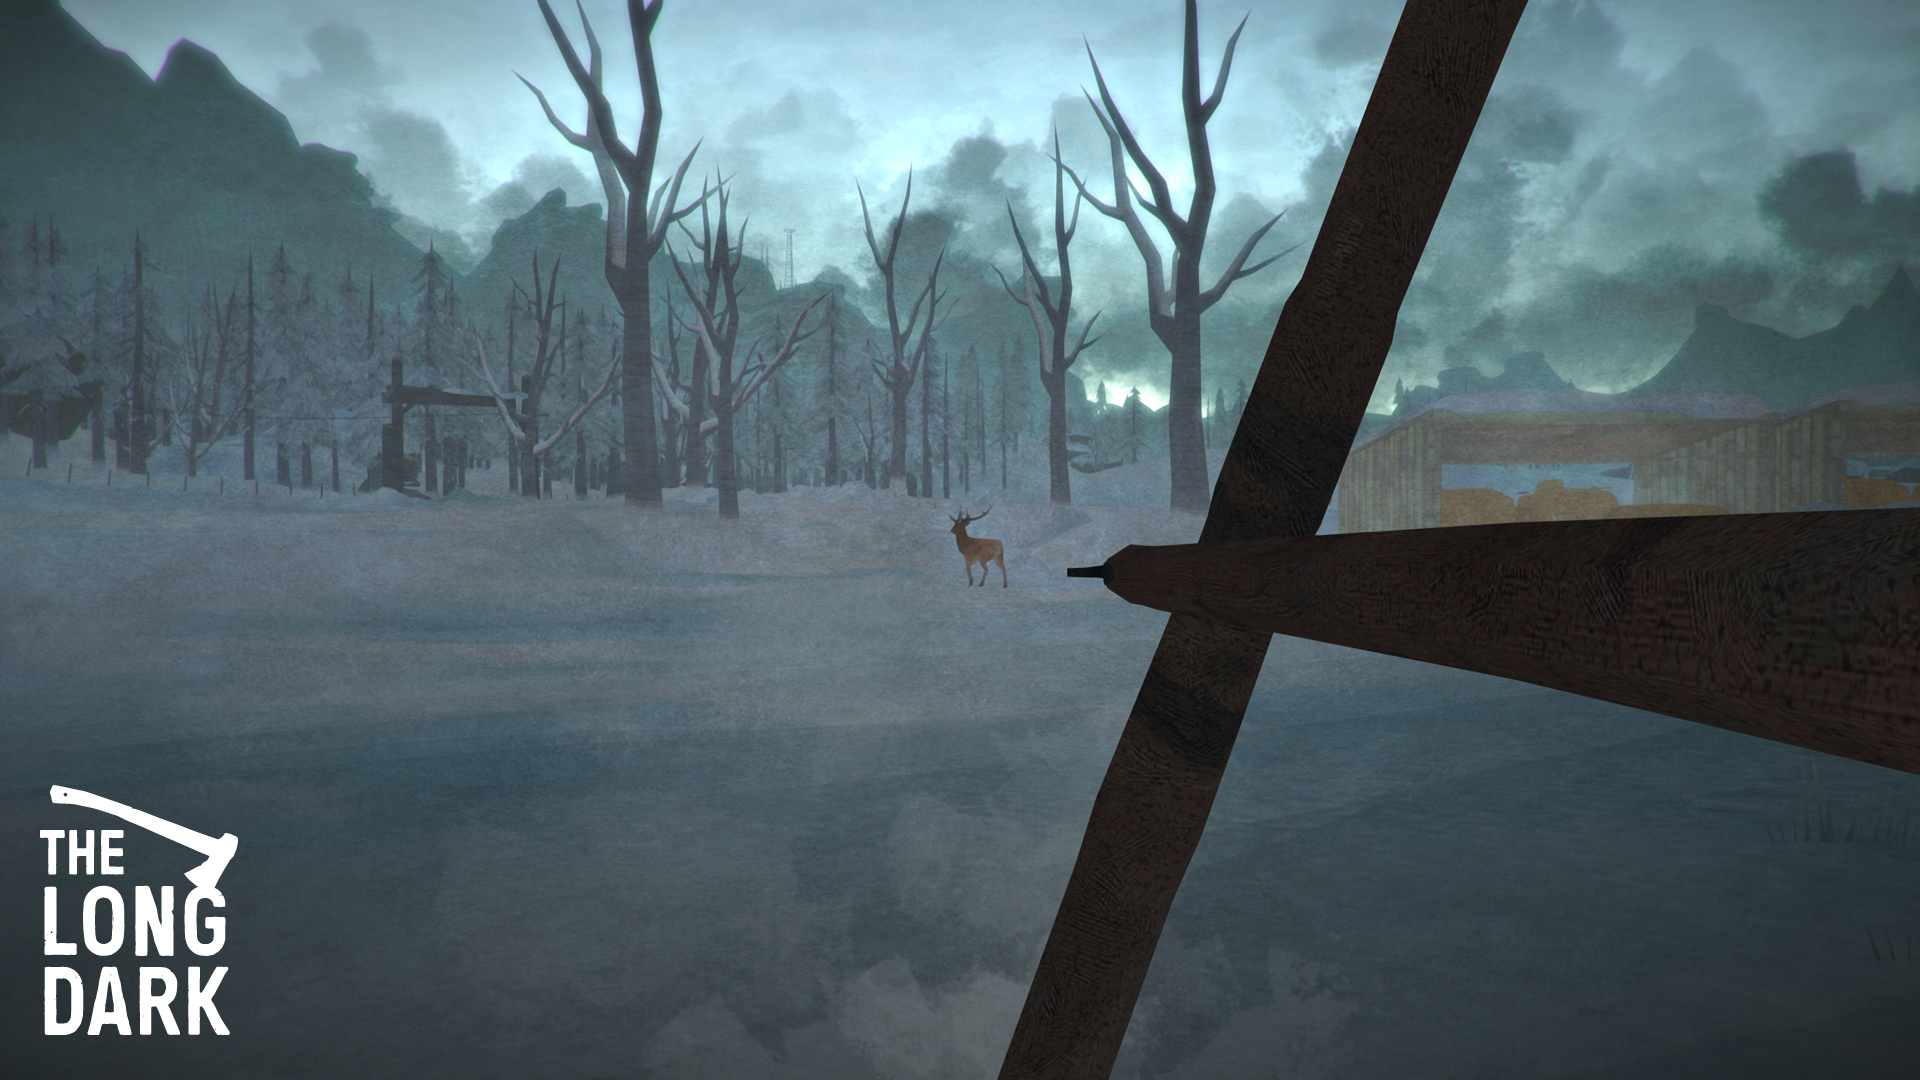
Bow Hunting: The bow is both a blessing and curse. On the one hand, arrows are reusable and you can salvage the arrowheads when they do eventually break. Crow feathers are an infinite resource and birch wood is plentiful (and each makes 3 arrowshafts), so you’re not going to have to worry about having ammunition for your bow for a long, long time. Similarly, the bow degrades with time but you can always just craft another bow. For this reason, the bow should be your primary weapon and you should store your rifle away except for specific circumstances from here on out.
The curse, though, is that the bow is a pain in the butt to use. There’s no aiming reticle when you drraw the bow, so you have to eyeball your target. The arrow also arcs when fired, making range something else you have to guesstimate. There’s no way around it, you just have to practice with it and get better over time. Finally, the bow can’t be fired while crouching (until Level 5 in archery) and this makes hunting deer a bit more exciting.
Wolves are easier – they charge at you so you just need to line up your shot as normal, wait for them to get close, and go for a headshot. To hunt deer, you pretty much have to creep up as close as you can (Again, I like to try and come at them head on to make lining up the shot easier). Then you need to smoothly, but swiftly, stand-draw-fire. If you’re on the mark, you’ll get your hit and then just need to follow the blood trail. Arrows tend to bounce off their target and they can get easily lost in the snow, so make sure you’re diligent about recovering them right away after you fire them (when you know where they are). Having to hunt around the general area for a single lost arrow sucks (but you’ll end up doing it many times). You can also hunt rabbits with a bow if you want, but there’s not much point – snares and stones work fine and it’s unnecessary wear on your gear.
And with that, it’s time to talk about bear hunting.

To be honest, you really don’t NEED to hunt a bear. For the reasons we’ve discussed we don’t want to eat the meat and you can get guts anywhere, so the main reason is the skin. Two bearskins can be used to make a bearskin bedroll, which is a great item, but your bedroll(s) are probably in fine condition at the moment. However, the bearskin bedroll will help you down the line when Cabin Fever comes into play, so let’s plan for the future.
Step 1. Grab your rifle and check your condition. You’re free to try this with a bow later, and it’s certainly doable, but for our first time we want to minimize the risks. This IS dangerous and a bear can easily kill you – bring the heavy artillery. You also want your condition to be at 100% – this will allow you to survive one grapple with the bear if things go south. You cannot survive two, so there’s no point in bringing extra medical supplies. If the bear grapples you twice, you’re toast.
Step 2. Find a bear. Bears only spawn in a couple places on the map. The two I recommend are the spawn point on the north end of Mystery Lake (you’ll usually see the bear wandering around on the ice). The other one is the area east of Trapper’s Cabin. The reason I like these locations (particularly the one on Mystery Lake) is that you can get an elevated position at the top of an unscaleable cliff, with a clear angle of fire down at the bear, at decent range.
Step 3. Kill the bear. Line up your headshot and pull the trigger. As mentioned elsewhere, I’ve heard stories of people one-shotting a bear so I suppose it IS possible. I’ve never had it happen – it just gets REALLY pissed off. Stay calm and stay away. When the chance presents itself, go for another headshot. If you got both headshots and it’s still up just wait – it’ll bleed out eventually. If you misjudged your location and the bear is able to come at you, you can try to run but you’re probably not going to get away. You’re going to get mauled (the animation itself is appropriately terrifying). You’ll black out and when you come to, you’re going to be in BAD shape. You’ll probably have a couple afflictions and your condition will be below 10%. Some of your clothes will also be seriously beaten up, and some of your equipment will be lying on the ground around you. The bear will be nearby, nonchalantly walking away. Your call if you want to try and finish it off but if you get attacked again, you’re dead.
Step 4. Harvest the bear. Now the fun part. Bears have a TON of meat – between 35 and 50 KG. Again, you really don’t want the meat but I always feel obligated to take and eat one piece as a trophy. They also have 10 gut and, of course, the bear skin itself. Give youself a pat on the back. Bears are the toughest enemy in TLD and you just took one out!
You’ve killed Fluffy. You’ve killed a bear. Now what? Let’s go fishing!
I’ll be honest here – I’m not a fan of fishing (in TLD, anyway). I don’t think the devs have balanced it quite right yet, or made it interesting enough. It’s also too much effort with too little return – fish don’t provide hides or gut, just meat and a small amount of fuel (fish oil, I suppose). Still, it’s an activity you can do which is something different. It’s also a parasite-free source of meat, like deer or rabbit, so you can work it into your diet. Let’s cover the basics.
To start off, you’ll need a fishing tackle. You’ve probably already found at least one and, if not, the Camp Office always spawns a hook and line on the crafting table, which is what you need to craft one. If starting from scratch, 3 hooks can be crafted from a single scrap metal and 2 lines from a single gut. Tackle doesn’t degrade with use, but they have a chance of breaking, so bring a couple with you. I also recommend bringing a couple pieces of firewood. If we’re going to do this, let’s plan on doing it for 4-6 hours. Lastly, don’t forget your prybar – it only has two uses (aside from being a club) and this is one of them.
Head over to a fishing hut on Mystery Lake (watch for wolves). You’ve probably already looted it but, if not, make sure to clear it out – they usually have some goodies. Go ahead and get a roaring fire going for 4-6 hours, depending on how much wood you brought. Use your prybar to crack open the ice. There, after ALL THAT, now you can fish. Click the hole and select how long you want to fish (just pick a time roughly equivalent to how long your fire’s gonna last). Now you wait. The time will run until it ends, unless your line breaks in which case the whole thing stops and you have to start again with a new line. You’ve got a chance of catching fish throughout the process and it will pop up anything you catch. Once you click on your catch you automatically go back to fishing and the fish is put in your inventory. In ML you can catch Lake Whitefish and Smallmouth Bass – that’s it (other catches are possible in other maps). On top of everything else, fish are HEAVY, so if you’ve got half a dozen in your inventory you’re probably going to get encumbered. But congrats, you’ve now mastered ice fishing! Be very careful to check for wolves on your way out – I’ve had it happen a couple times that wolves have spawned or wandered in while I’ve been fishing and that’s a nasty surprise, particularly if you’re loaded down with fish. Fish have a crummy calorie/weight ratio but you can throw them in the snow and store them outside. I don’t recommend hauling them around as a food source while foraging, though.

And we’re now on to the last section! Days 21-30.
The End of Days – Hit the Road, Jack (or Jill)
Goals:
- Find the Prepper’s Cache (maybe…)
- Relocate to CHD
- Move to Pleasant Valley
Core Concepts:
- Moving Your Base Camp
- Misc. Odds and Ends

Well, we’re just about to the end. It’s been a long journey, so let’s take care of a couple odds and ends and then we’ll be ready to move on.
Let’s talk about the mythical Prepper’s Cache.

The Prepper’s Cache is a small, hidden, underground bunker absolutely LOADED with a certain type of gear – food, firewood, hunting gear, clothes, tools or medicine. Here’s how it works. When you start a new game, TLD randomly selects one, and only one, of the nine possible Prepper’s Caches and spawns it in to your game. The others will not exist. A specific location always has the same type of gear assigned to it so once you find the cache in your game, you’ll know exactly what will be in it based on which location it is. 4 of the possible bunker spawn locations are food caches, and the other 5 contain the other 5 possible types of gear. In other words, you have a 4 in 9 chance of getting a food cache, and a 1 in 9 chance of getting any of the others. This (obviously) kinda sucks because food is the least useful thing to you at this point. Without question, you’re rooting for the Hunting Cache. It contains weapons and ammunition which are, by far, the most beneficial things to you in the long term. The runner-up is Clothing, because you’ll probably get a couple good pieces and a bunch of cloth and sewing kits. After that, meh. You’re probably pretty set for tools but having some backups never hurts, I suppose. You’ll eventually run low on pre-event medicine, so that’s got some benefit, but you can find substitutes for everything in the wild. Firewood is about as useless as food (there’s an infinite supply in the wild, after all), but at least getting a ton of matches and firestarters is semi-useful. But you’re not going to have a choice, of course – you’ll get what you get (and the odds are it will be food).
The bunker locations themselves are generally tucked in out of the way locations near the edges of the map – you’ve got to go out of your way to find them for the most part. The odds are against you just stumbling over one so refer to a map to make your life easier. The entrances look like the picture above this section – like a vault door in the ground. The Hunting Cache location is actually very close to the Camp Office – it’s just on the other side of the tracks. The others generally require a dedicated trip (particularly the ones in the NW corner of the map). If you get one of the food ones, there will be a TON of water down there (something like 20L). Feel free to ignore that since you can make your own.
And just like that, we’re pretty much done with Mystery Lake. You do NOT have to leave, of course. At this point you’re pretty much setting your own goals (and it IS Sandbox Mode, so it’s not like you’re following a quest chain or something). If you want to see how long you can survive in ML, have at it. My recommendation, though, is that you get out there and explore the world and see some of the other areas, some of which have strikingly different terrain and themes and are pretty cool. You’ll also get a chance to find and play with some of the items and features that don’t exist in ML, like the Distress Pistol or one of the forges. There’s even different fish to catch! The last Steam achivement for number of days in game is 200, so that’s a great goal to set for yourself and is easily reachable without supplies becoming dire if you’re moving around.
Moving Your Base Camp: To start with, you’re going to relocate to CHD. This is going to involve, as you would suspect, moving everything you ultimately want to bring with you to PV in a couple trips. My recommendation is that you bring pretty much everything except excess firewood, water and meat. Bring SOME meat with you to keep you fed while you’re moving from CHD to PV (which is the next part of this process). With decent weather, you can make 2 runs – there and back – from the Camp Office to CHD in a day. It usually takes me 3, sometimes 4, runs depending on how much you’re willing to overload yourself each run (I don’t recommend more than 40 KG). Your biggest risk, in my experience, is wolves spawning at the Derailment – they’re right in your way and are pain in the butt to go around without getting attacked. I recommend storing everything, by type, in the multiple lockers in the main room.
Misc. Odds and Ends: I really didn’t have anywhere else to fit these things, so I’m putting them here.
Snow Shelter: This can save your life. Created from the radial menu under Camp Craft, it requires 15 sticks, 5 pieces of cloth, and a clear area. It takes 45 minutes to construct. Inside the shelter, the temperature is 15 degrees higher than the outside air. Coupled with your clothes, this should allow you to get your temperature positive in anything but the most extreme circumstances. You can sleep in the shelter and if you use your bedroll you get an additional 3 degree boost. You can take actions in the shelter including firing a weapon, lighting a fire, or harvesting a kill. On the other hand, animals can get at YOU as well. The shelter will slowly degrade over time if not dismantled, but it can be repaired. Dismantling takes 20 minutes and gives you back 10 sticks and two cloth.
And you’re done! With relocation, and pretty much with this guide. Get a good night’s sleep, top off your bars, load up and head out the back door. This exits to Winding River, which is the connecting area to Pleasant Valley. . Get out there and explore! Thanks for reading this guide – I hope it’s been helpful to you and I wish you all the luck in the world out there. Don’t forget to have some fun, too. If you found this guide helpful, please rate it to help promote it to others!