What's Behind That Door?
Introduction
While navigating Sevastopol Station, you may wish to have some idea of what lies ahead and on the other sides of the numerous doors.
The design of Alien: Isolation is very true to the original Alien movie, taking directly its design motifs - such as the "Semiotic Symbology" that appeared in the original movie.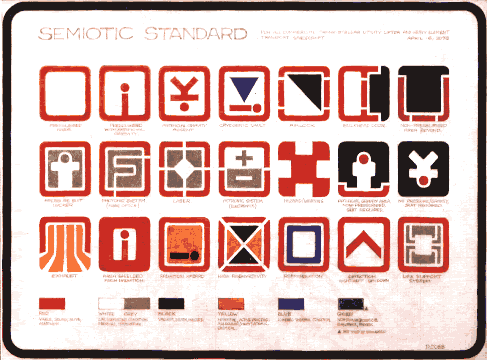
These symbols appear in the film on numerous occasions - here are just a few examples.
The "Hazard" symbol appears multiple times in this shot:

The symbol locates an out-of-shot storage area adjoining the crew mess/galley through a bulkhead door:

A ladder is located through the door at the rear:
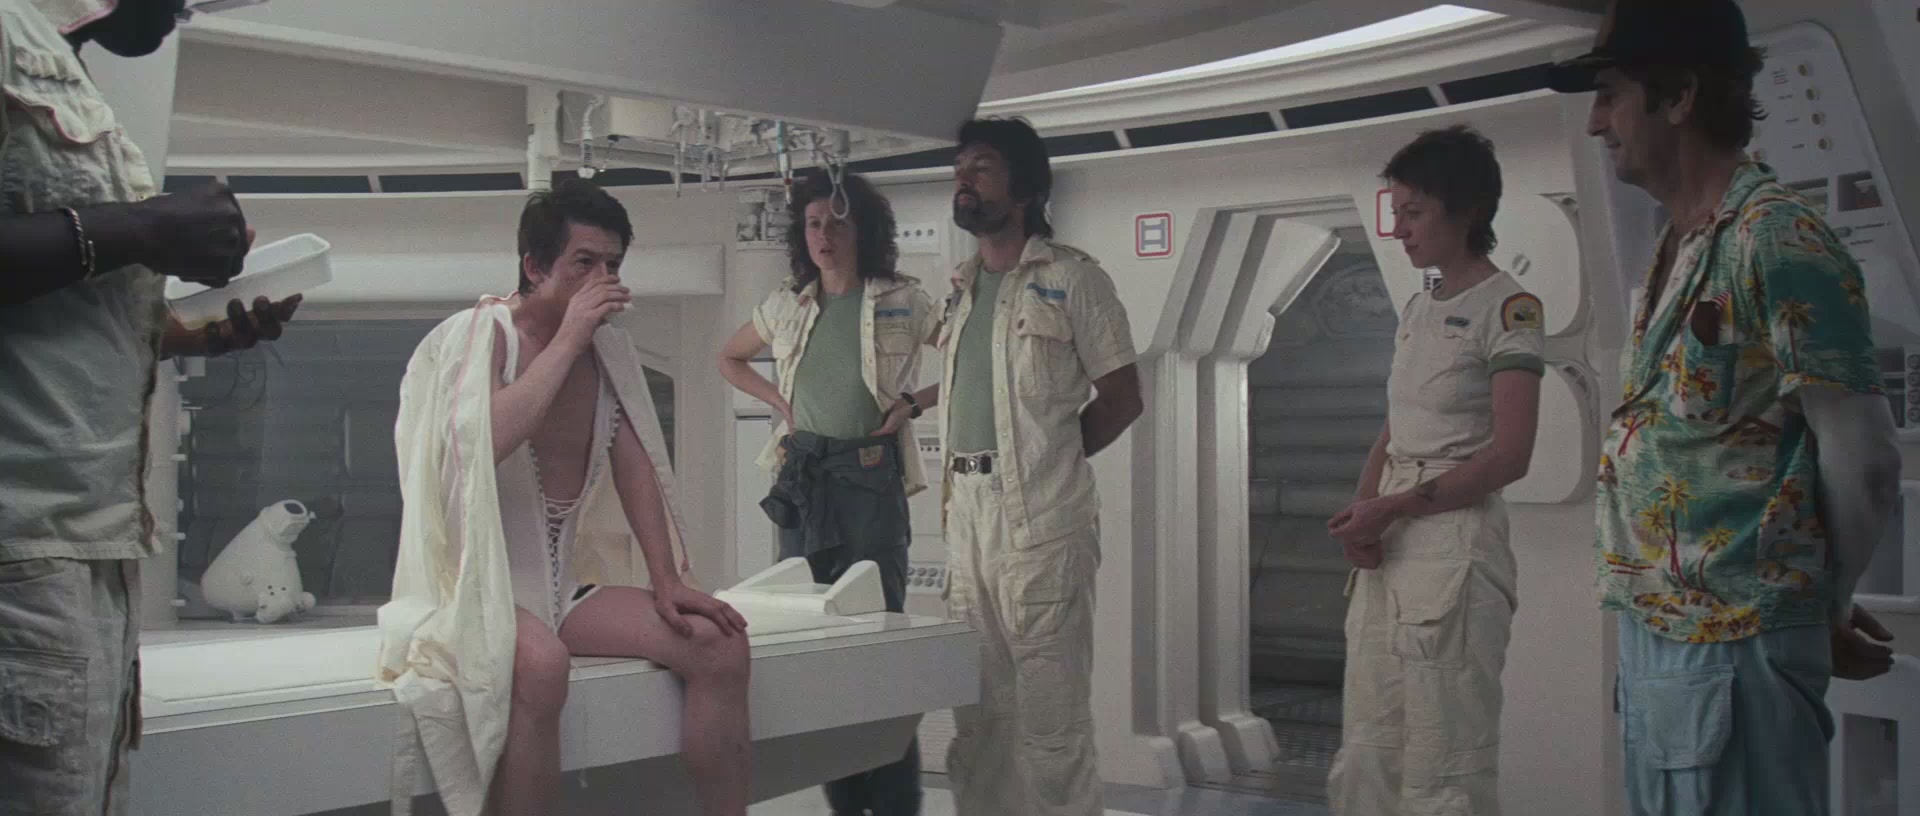
And finally (obviously) cryogenics:

The design of Alien: Isolation is very true to the original Alien movie, taking directly its design motifs - such as the "Semiotic Symbology" that appeared in the original movie.
These symbols appear in the film on numerous occasions - here are just a few examples.
The "Hazard" symbol appears multiple times in this shot:
The symbol locates an out-of-shot storage area adjoining the crew mess/galley through a bulkhead door:
A ladder is located through the door at the rear:
And finally (obviously) cryogenics:
Updated Symbology
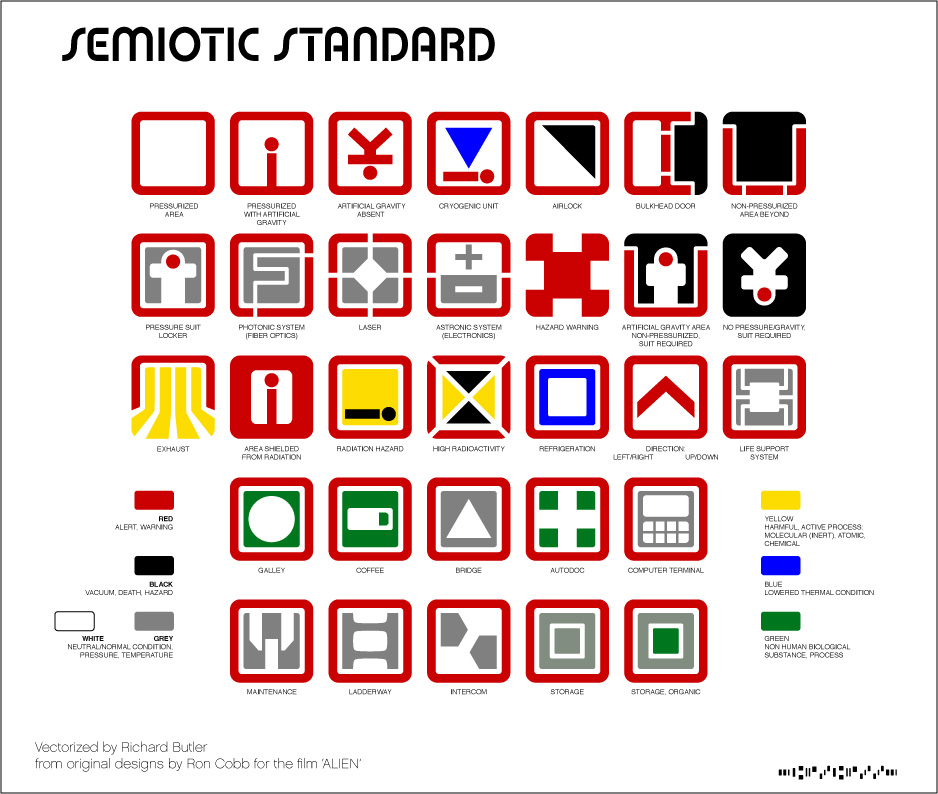
Several of these symbols were updated by graphic artist Ron Cobb, and later by the Alien: Isolation development team.
This legend offers a good overview of many signs you will find.
For the most part, these symbols are just window dressing, and it's entirely possible to ignore them completely. However, if you take a moment to understand what they convey, you might better prioritise your exploration.
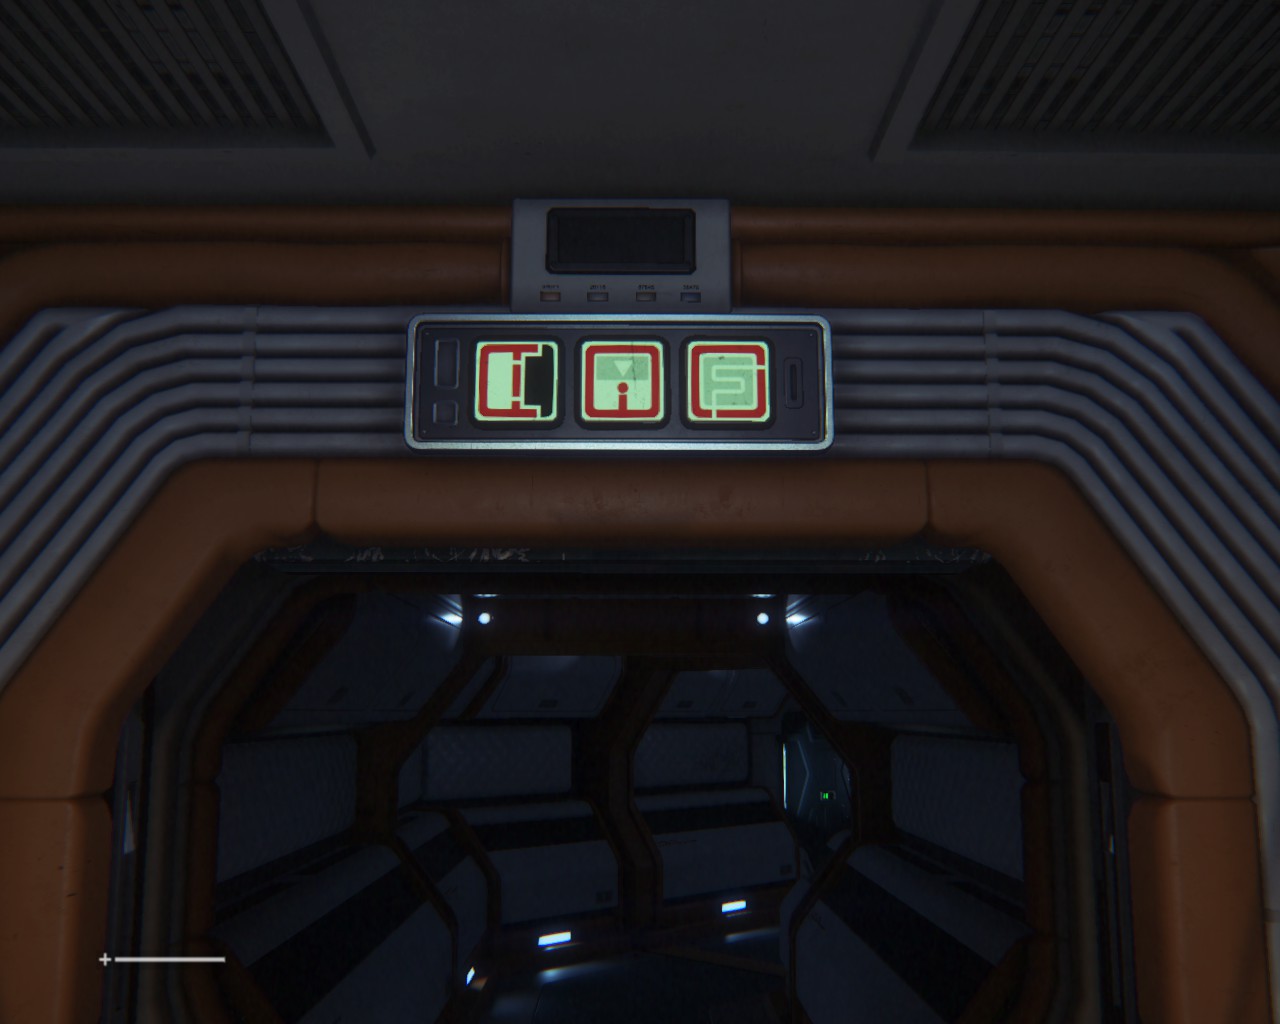
For example, this sequence is basically useless to us: A) This is a bulkhead door, B) It opens/closes from above, and C) It provides access to some fibre optic system.
On the other hand, a series of symbols like these indicates a crew galley/break room: A) Coffee station, B) Galley, and C) Door opens/closes from above.
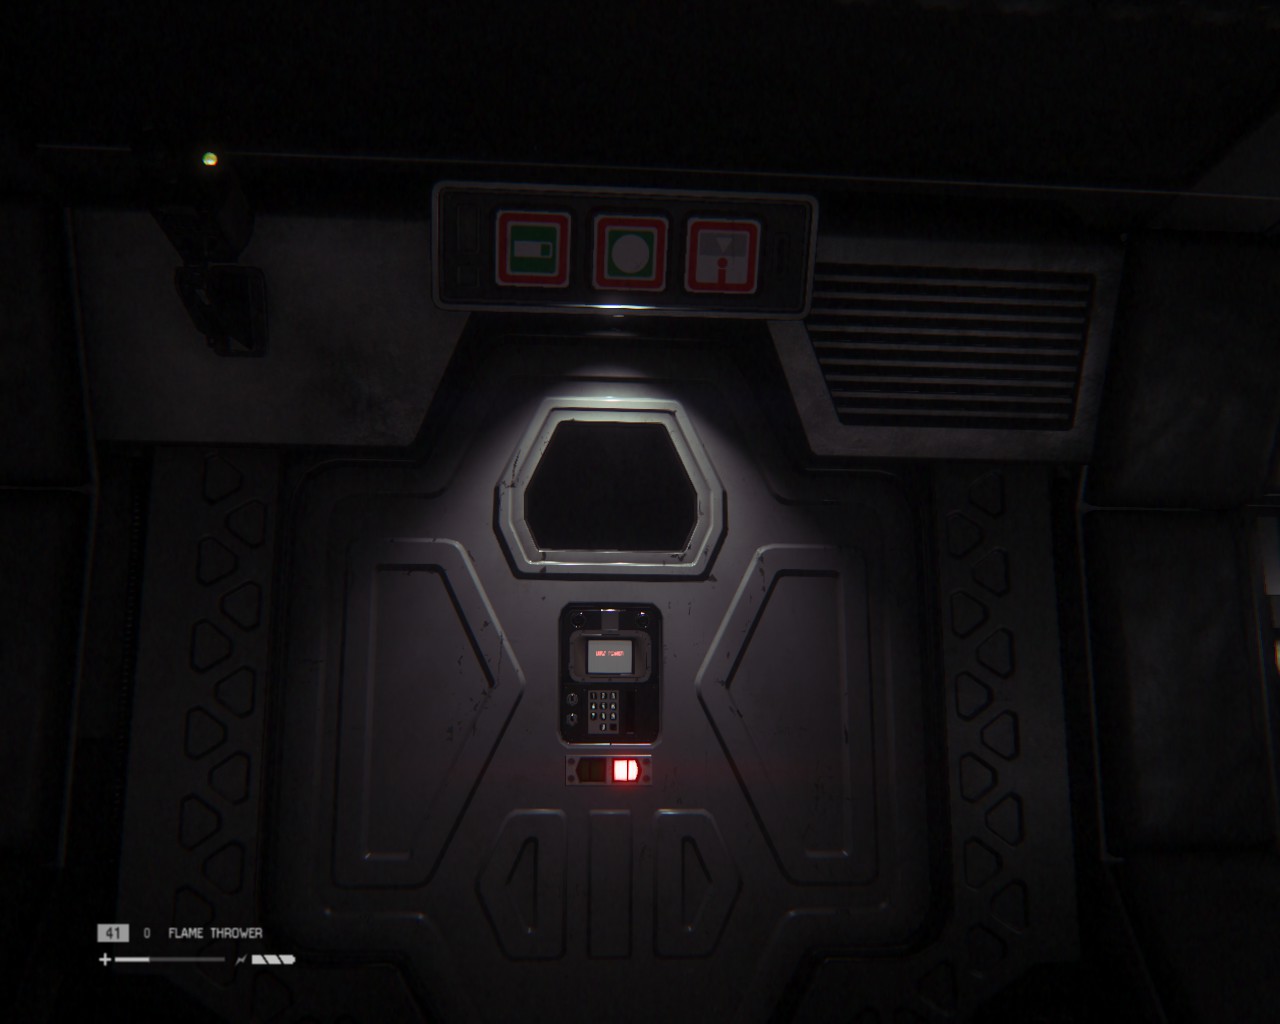 Crew break rooms and galleys are often good places to check for salvagable parts and hiding places from the Alien.
In addtion to these existing symbols, a range of additional symbols were created by the development team, including this one, which (as far as I can tell) means "High Voltage".
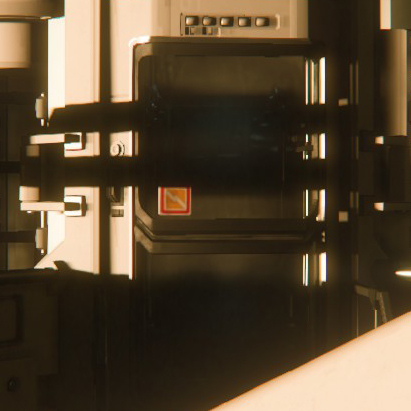 Or this one, to locate Reception.
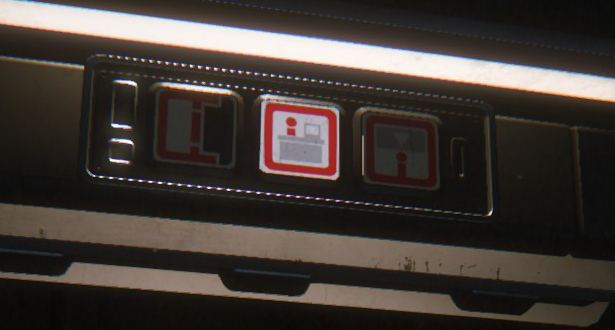 You can check out the Acheivement Icons to figure out some other symbols, so I'll leave it at that, but not all of the Acheivement Icons appear in the game as symbols.
So if you're getting disorientated, just check your bulkheads for location data - I found it helped somewhat to locate ladders, storage areas, and confirm that I was headed in the right direction - the in-game map, useful as it is, usually doesn't label the rooms by their contents unless they're significant.
One additional note: Many doors have the "Hazard/Warning" symbol on them. As far as I can tell, the warning applies just to the door itself (as in, "Warning: This door opens/closes quickly/automatically"), rather than applying to any special danger in the room beyond.
Hope you guys find this useful, and thanks for reading.
All images are sourced either from the interwebs from public websites and are used without permission for demonstrative purposes only, or in-game screenshots.
This legend offers a good overview of many signs you will find.
For the most part, these symbols are just window dressing, and it's entirely possible to ignore them completely. However, if you take a moment to understand what they convey, you might better prioritise your exploration.
For example, this sequence is basically useless to us: A) This is a bulkhead door, B) It opens/closes from above, and C) It provides access to some fibre optic system.
On the other hand, a series of symbols like these indicates a crew galley/break room: A) Coffee station, B) Galley, and C) Door opens/closes from above.
Crew break rooms and galleys are often good places to check for salvagable parts and hiding places from the Alien.In addtion to these existing symbols, a range of additional symbols were created by the development team, including this one, which (as far as I can tell) means "High Voltage".
Or this one, to locate Reception.You can check out the Acheivement Icons to figure out some other symbols, so I'll leave it at that, but not all of the Acheivement Icons appear in the game as symbols. So if you're getting disorientated, just check your bulkheads for location data - I found it helped somewhat to locate ladders, storage areas, and confirm that I was headed in the right direction - the in-game map, useful as it is, usually doesn't label the rooms by their contents unless they're significant.
One additional note: Many doors have the "Hazard/Warning" symbol on them. As far as I can tell, the warning applies just to the door itself (as in, "Warning: This door opens/closes quickly/automatically"), rather than applying to any special danger in the room beyond.
Hope you guys find this useful, and thanks for reading.
All images are sourced either from the interwebs from public websites and are used without permission for demonstrative purposes only, or in-game screenshots.
More Alien: Isolation guides
- How To Not Get Spooked★ 5 (1.4k)46k views804 ♥5 minUpdated Apr 2, 2015
- Alien: Isolation 100% Achievement Guide★ 5 (1.2k)31k views2k ♥20 min
- The Silent Walk★ 5 (428)26k views303 ♥1 minUpdated Feb 27, 2017
- Alien: Isolation maps★ 5 (704)22k views1.1k ♥3 minUpdated Mar 17
- All Collectibles★ 5 (1.1k)22k views1.8k ♥75 minUpdated Jan 10, 2015
- Alien: Isolation - Survival Guide★ 5 (568)21k views908 ♥46 minUpdated Jun 8, 2024


This guide was created by its original author on the Steam Community. Are you the author and want it removed? Request removal.