![[WIP] Don't panic! The adventurer's guide to Talisman for Talisman: Digital Edition](https://steamsolo.com/wp-content/uploads/2021/07/wip-don-t-panic-the-adventurer-s-guide-to-talisman-talisman-digital-edition.jpg)
Overview
Talisman can be quite a frustrating game for beginners – it all appears to be RNG based, with absolutely no room for strategy. In fact, even though it’s oblivious to the newbie, strategy does come into play more often than not. I will try in this guide to summarize the most common strategies and guidelines used, starting with the base game without any expansion, and adding each expansion one by one.
Introduction
Hello! potterman here 🙂 I started playing Talisman since August 2017, so quite late in comparison to some other folks out there. I had the occasion to play many online matches since then, and had the time to get used to the game mechanics ; however, I won’t hide that it was quite an overwhelming experience at first. The amount of existing online resources is indeed quite limited, you have to figure out most of strategies by yourself, or by watching others play.
I hope to correct that in this guide, by providing you with basic understandings of the game mechanisms in terms of strategy. That is, what are the things to look out for when playing Talisman, what should be your long term goal(s), how to position yourself, etc..
This guide won’t be exhaustive at all. There are a lot of subjects in Talisman that needs some coverage, including (but not limited to): spells, precise description of the mechanisms, character guides, item combos.. Many topics that could be covered, for Talisman is a game more complex than it looks!
Out of the very few available resources online, Cragspyder wrote a very helpful guide about characters that helped me a lot when I started out. I really recommend checking it out.
[link]
I will assume that you play with Talisman Bloodbath (permadeath) enabled – that’s how 99% of online games are played. Non-bloodbath games are dull ; when you die early on it’s ok to draw a new character, but when you die late in the game, you lost so much that you cannot possibly win and there is nothing you can do to prevent it. So it’s best to toggle permadeath for this reason, it will avoid frustrations, and will shorten the game length.
Overview of the game
Your goal is to win the game, either by reaching the center of the board, or by killing other characters.
The goal is to reach the center of the board. For this, you have to cross:

- From Outer Region to Middle Region: via Sentinel (Strength 9), or by rolling 6 in Tavern.
- From Middle Region to Inner Region: by opening Portal of Power (requires Str/Craft of at least 9 to have a good chance to succeed).
- From Inner Region to Crown of Command (CoC): you must have a Talisman, and survive the obstacles in Inner Region
The entire game of Talisman revolves around farming Strength/Craft as fast as possible, in order to be the first to reach CoC. What happens when someone get there? It depends on the ending – in most of the cases, the game is won as soon as you reach it, or a couple of turns after.
Play well, farm cards, do whatever you are doing in Outer or Middle Region.. But never forget why you came here. You are here to go to CoC! This must never get out of your mind. A lot of newbies forget about it, and tend to move aimlessly accross the board.
I’ll take you on a guided tour of the board – starting with Outer Region, then Middle Region, and finally Inner Region.
Character Attributes

Your character has various attributes:
- Strength: how strong your character is in (physical) Battle
- Craft: how strong your character is in Psychic Battle. It also governs how many spells you can have
- 3 craft: 1 spell
- 4-5 craft: 2 spells
- 6 craft: 3 spells
- Life: health pool of your character. When it reaches 0, you die.
- Fate: amount of fate tokens you have. You can spend 1 fate token to reroll 1 die, once per die.
- Gold: used to replenish life/fate, and to purchase items at the Village
- Alignment:
- Good: Free healing in Chapel, but cannot visit Graveyard to replenish fate (loses a life instead)
- Neutral: No bonus/malus
- Evil: Free fate replenishing in Graveyard, but cannot visit Chapel to replenish life (loses a life instead)
Characters also have special effects ; make sure to read them, and use them as much as you can! These special effects are what make your character strong in most of the cases.
Outer Region
Outer Region is where most of the characters start, and is the safest region out of the 3.
Let’s start with the areas where you do not encounter cards from the adventure deck: Chapel, Graveyard, Town, Village, Crags and Forest.


Chapel is heavens for character of Good alignment. These replenish their life for free. Evil characters lose a life. Neutral characters pay to replenish their life, 1 gold per life.
Graveyard is the Evil version of the Chapel. Evil characters replenish their fate for free. Good characters lose a life. Neutral characters pay to replenish their fate, 1 gold per fate.
It can be a good idea for Good characters to stick around Chapel early on, so they can heal for free.

The village has 3 NPCs:
- Healer: heals 1 life for 1 gold
- Blacksmith: sells swords/axes and armors. The 4 gold Armour can be very useful to preserve your life during battle (non-psychic). Sword or Axe can help you a little bit, by providing you a +1 bonus. You can use the Axe in Woods or Forest to build a Raft and travel to Middle Region.
- Mystic: NPC allowing you to change your alignment ; if you are an evil/neutral character, are close to dying, and don’t have any gold to heal, it can be a possibility to land on Mystic to turn into a Good person, to later land on Chapel. You can also gain spell and craft there. Do not land on Mystic if you want to stick to your alignment though.

City also has 3 NPCs:
- Enchanteress: It’s very good to land on her early on, since you have no strength/craft point to lose, and the probability to get turned into a toad is low (and being toadified isn’t that bad if it’s only early into the game). Avoid enchanteress like the pest late in the game. Being toadified is almost as bad as being killed.
- Doctor: like village, heal 1 life per 1 gold
- Alchemist: if you have items you don’t want, or if you need gold, you can visit him to alchemize items and gain 1 gold per alchemized item.

Tavern 4-6) results are quite good ; with 4 you gain 1 gold, 5 and you can teleport to any other place in Outer Region (very useful to land on a particular place), 6 and you can go to Temple, free ride to Middle Region! The 1) result isn’t that bad, and 2) might result in a loss of life early on. 3) might be nasty though.
In general it’s always a good idea to land on Tavern and have a few drinks. Bonus point if you fetch a beer in your fridge whenever you land on Tavern.
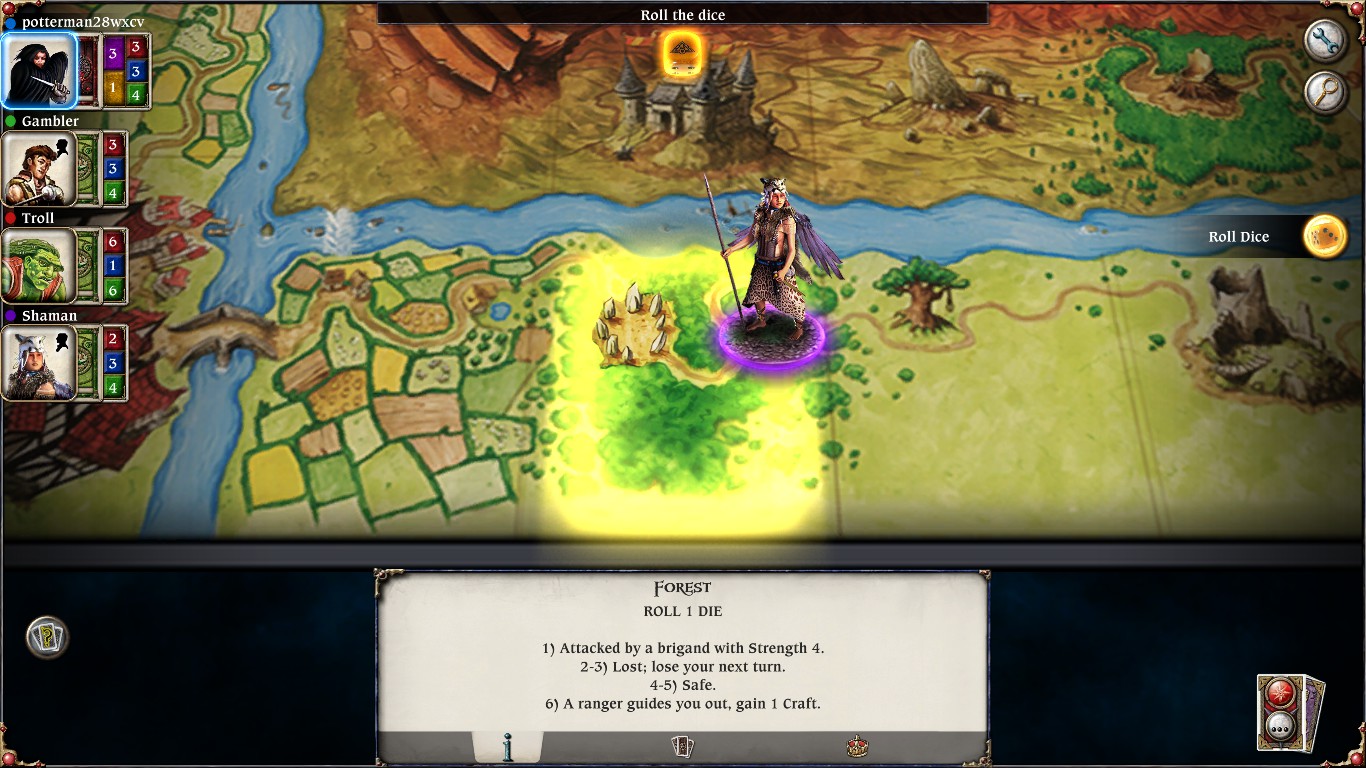

Crags and Forest potentially allows you to gain resp. 1 Strength/Craft point, but that’s only if you roll a 6. All other effects are either bad, or do nothing (meaning you wasted your turn). I do not recommend landing there, unless the other alternative is losing 1 life. Avoid it as much as you can.
It is everywhere else! There is no difference between Plains/Woods/Hills/Fields, but some characters have bonuses based on where they stand.
The only exception is the Ruins, where you draw 2 cards instead of 1

Drawing 2 cards instead of 1 means:
- You have more probability to get good loot!
- You have more probability to get nasty encounters.
Drawing lots of cards is how your character will progress though – so i recommend taking the risk to go to Ruins and draw these 2 cards. The only exception is if you’re low on life: if you only have 1 life point remaining, do you really want to take the extra risk? Or wouldn’t it be better to land somewhere safer?
Middle Region
Middle Region is quite a dangerous area to go in, but has more rewards than Outer Region. You can go to Middle Region either through Sentinel, or by rolling 6 at Tavern.
Starting with the bad places to avoid:

- Desert: lose 1 life, then draw 1 card. You lose a life no matter what
- Black Knight: either pay 1 gold or lose 1 life
- Chasm: Roll 1 die for yourself and each of your follower. If you roll 1-2, your follower is killed (or you lose a life if it’s the die for yourself).
Then there’s the dangerous places. They do not necessarily result in a loss of life, but their nasty effect can result in you losing one.
- Cursed Glade – Strength and Craft derives from Objects do not count, and you cannot use Magic Objects or use Spells
- Runes – Enemies add 2 to their attack roll
Finally, the good places! Those that make it worth going in Middle Region 😉
- Temple – this is a very good place to farm! You can get strength, craft, Spell, Talisman, Lives, Fate.. It is most probabilistic to gain strength/craft. You can be unlucky though and lose lives. Watch your fate points!
- Castle – Meeeeediiiiic! Healing for 1 gold per life.
- Oasis & Hidden Oasis – just like ruins, you draw more cards, so you have more chance to find good stuff! But also more chance to find mighty enemies..

Warlock Quests are one of the ways to get a Talisman (required to go to CoC), but I set this one apart because it’s not always a good choice to start a Warlock Quest.

Completing a Warlock Quest is one of the way to gain a Talisman. However:
- Since we are playing with the Talisman Bloodbath house rule, only 1 Talisman is available. If someone already has a purple Talisman (Talisman on a purple card, from the Talisman deck – as opposed to the Talisman you find in the Adventure deck), completing a Warlock Quest rewards you nothing.
- You cannot pass Portal of Power if you have a Warlock Quest active! And maybe you cannot even replace the quest by landing back on Warlock neither (that’s only possible if the Replacing Quest house rule is activated).
Let’s say you already have a Talisman, but you have a Warlock Quest that instructs you to Take 1 life from another character, except that everyone is too strong for you. In that situation, you cannot do anything, and you are basically screwed.
Also, as soon as you have the requirements to complete the quest, then you automatically complete it (and get teleported to Warlock Cave). If your quest was to discard a Magic Object, but you only have one magic object in your inventory, you have no choice but to discard it. If it was a good object, too bad for you.
Inner Region
The only way to go in Inner Region is through Portal of Power, in Middle Region.
Similarly to the Sentinel, you have to pass a test in order to go through. For this, choose strength or craft, then roll 2 dices. If the total is inferior or equal to your str/craft, you pass. If not, you lose 1 point of strength or craft.
It’s a bit of a gamble to get there ; because if you lose, you actually become weaker. If you have a fate point, you have good chances to open it with 9-10 str/craft. You can attempt it at lower than that, but it’s risky.
There are two possibles routes in Inner Region: craft-based, and strength-based.
Strength route:

- Crypt: roll 3 dices, if the total is inferior or equal to your strength, you pass. Else, you get teleported elsewhere.
- Death: play a dice battle with Death (2 dices each). If you win, you pass. If you lose, you lose 1 life and play again next turn. If tie, play again next turn.
- Werewolf Den: roll 2 dices – this is the strength of the Werewolf. If you win, you pass. If you lose, you lose 1 life, and fight the same Werewolf again next turn.
Craft route:
- Mines: roll 3 dices, if the total is inferior or equal to your craft, you pass. Else, you get teleported elsewhere.
- Vampire Tower: roll 1 dice, if it’s 1-2, lose 1 life. If 3-4, lose 2 lives. If 5-6, lose 3 lives. You can kill followers instead of you to spare you (1 life per follower).
- Pits: roll 1 dice. This is the number of Pitfiends you have to defeat (one at a time). Their strength is 4 – you fight them until they’re all defeated.
At the end of these two routes, stands the Valley of Fire. You must have a Talisman to go forward. If you land on this place and do not have a Talisman, you have to go all the way back to Plains of Peril before having to take the Strength/Craft route again. Do not make that mistake, always check out whether you have a Talisman or not before going in Inner Region.
Just like Portal of Power, 9-10 str/craft is a good number to start planning to go to Inner Region. It can be attempted with more than that if you want to feel even safer ; or less, but it’s more risky. When to go to Inner Region depends on a lot of factors, including (but not limited to):
- How far of a lead you have. Maybe you can wait a bit more to have more safety?
- How strong are the other players. If you don’t go there, maybe another one will, and you will lose.
- Do you still have fate points? It can help a lot to pass the obstacles.
- What are your items/followers? Some of them can help you a great deal.
Once a character is at CoC, he must stay there until either he wins or he dies.
Knowing when to go for Inner Region is mostly a matter of experience – try, and learn of your mistakes!
Summary of Outer/Middle/Inner region

Base game strategies
At each of your turn, you have to decide in which direction you want to go. You should land somewhere that doesn’t result in a loss of life, but you should also be careful about where you will be landing next.
The following have to be considered before you move:
- Which cards are present on where you move
- What is near where you want to move? Try to maximize your chance to get a “good movement roll” next turn! (i mean, a movement roll that would lead to you getting something good)
- Where are other characters? What is the possibility that they land on you? If someone is stronger than you, and you have a good item, he will likely try to land on you to steal it.
Imagine the situation where you land somewhere and 3 other characters are nearby. For each of them, there is only 1 chance out of 6 that he lands on you. But the probability that someone land on you is higher than that – 3 chances out of 6. So if they’re all stronger than you, you have 50% probability that they will land on you and steal something from you.
Be careful about that. That’s all the more true in the base game (no expansion), since the board is small, and most of your power is in the items you wear.
Good characters have free healing at Chapel – losing a life is not a big problem for them, since they can replenish it without much trouble. As a Good character, you want to play a bit more risky. See that Str 7 dragon while you only have 6 strength? Worth a try.
However, good characters cannot replenish fate at Graveyard. So you really have to make each fate point count and spend them very wisely. It’s very probable that the fate points you have at the start will be the only fate points you will ever get in the game.
Evil characters on the contrary, have free fate replenishing at Graveyard. They can reroll more often than other characters, though they should still spend their fate wisely, for landing on Graveyard isn’t exactly guaranteed. However, they cannot heal at Chapel, and have to go in City, Village or Castle to heal instead. In outer region, that means there are only 2 places where they can heal – needless to say, life is precious to them, and they should replenish their health pool whenever they have the chance.
Given they have enough money to do it, that is. An Evil/Neutral character at low health with 0 gold is likely to be a dead character in a few turns. As non-good character, be very careful on your money. Money is life.
As a Neutral character, a very good place to be to maximize healing is at the left of the board, between Chapel and Town. If you are say at 1 space of Town : if you roll 1, you go in town -> heal. If you roll 5, you go in Chapel -> heal. That’s 1 chance out of 3 to heal next turn! But that crosses the point I wrote earlier – maximize your chance to land on somewhere good 🙂
This is how encounter works in Talisman.
You land on a space ; you can either encounter the space, or encounter a character if he is on the same space as you.
If you encounter the space, 1) you first encounter any card that is already there ; and if you’re victorious, only then 2) you move on to actually encounter the space.
Say there is a Ghost in Town. Then you can only visit Town after having defeated Ghost. If Ghost defeats you, you lose a life, and the encounter is over, meaning you won’t be able to visit a NPC.
This does not apply to Desert or “draw cards” effects in general. These occur before encountering the cards on your space. So if you land on Desert and there is already another card in Desert, you will lose 1 life (desert effect), and then encounter the card.
However, if you encounter a character instead, you do not encounter the space. If I land on Desert with 2 Dragons and a Warrior character on it, and I choose to encounter Warrior, I will fight with Warrior (and resolve the character encounter accordingly), but I will not encounter Desert, and thus I will not lose a life from desert (though I can still lose a life if Warrior defeats me and chooses to take a life). This is very important to keep in mind, if you have no choice but to land somewhere and there are nasty cards and/or nasty effect on the space, you can encounter character instead.
About multiple adventure cards on a space: you encounter them based on their encounter number. This encounter number might change depending on the effects, but in general it is:
- 1) Events
- 3) Craft enemy
- 4) Strength enemy
- 5) Items and/or Strangers
- 6) Places
If you see a shiny weapon but it’s guarded by a Dragon, well, you have to kill the Dragon first before looting the weapon. In addition, reminder that enemies fight together. If there is a Dragon (Str 7) and a Goblin (Str 4), they will fight together and you will have to defeat an equivalent foe of Strength 11.
Do no mistake, and pay attention to where you land.
In the base game, it usually goes like this:
- Start in Outer Region. Farm until you have the chance to go to Middle Region.
- Once in Middle Region, farm Oasis, Hidden Oasis and Temple. If you find yourself in difficulty (Oasis/Hidden Oasis denied by strong foes, or the region is becoming too dangerous, or your life is low), don’t hesitate to go back to Outer Region – the Sentinel will let you pass (he only fights if you go from Outer region to Middle region)
- Once you have enough str/craft, hunt for a Talisman. Either steal one from a character, or complete a Warlock Quest to get one (if no one got it yet).
- Go for CoC and win
That’s the general guideline, but it can be better to stay in Outer Region, or to attempt CoC earlier. The Dwarf for instance, can attempt CoC way earlier since he only rolls 1 die at Portal of Power, and only rolls 2 dices in the Mines. And if there is a Strength Fountain in Outer Region, it might be better to stay around it.
If you are a spellcaster character (one that has the ability “You always have 1 Spell”), you must cast a spell whenever you have the chance. Spells do awesome stuff, spells win games! But, a bit like warlock quests, at time you can get stuck with that one spell you can’t get rid of it. Just cast it at the first opportunity you get to draw new ones.
When you’re reaching late game though, you might want to hold on a few spells instead of spamming them. You can also wait a few turns before casting a spell, instead of dumping it right away, if you deem it more worth. Whether you should dumping a spell or keep it for later is a delicate balance – but if you keep a spell for 30 rounds you potentially missed out ~10 spells you could have gotten in the meantime.
Spells (base game)
Here is a list of spells to look out for (no expansion):

Cast it (at the start of your turn) when you see someone close to reaching CoC, and watch him cry as he realizes his Talisman is now gone. 🙂

Got some shiny items in there protected by a dragon? Cast it on the dragon – no more guardian, you are now free to take these items! You can also cast it on a Strength fountain far from you for instance, so that players can’t profit from it.

Same remark as destruction – cast it on an enemy, you are then free to take the loot! (when you evade an enemy, you still get to encounter the other cards)

I love that one. There is always someone out there that has a good follower. That’s you now. 🙂

Cast it on someone that has spent all his fate points. 1) is very violent ; when i wrote earlier that being toadified is almost as bad as being killed, I really mean it. 2) and 3) can be really nasty too if the character gained only strength/craft point (all his progression reduced to 0). That can be one of the ways to get rid of someone too strong.