
Overview
NOTE – This guide requires you to have installed the World of Pain modWorld of Pain is a massive expansion mod to the Mohave Wasteland, filling it with over a hundred unique locations, each with it’s own characters, lore, and history behind it. I plan to, in this guide, catalog some, if not all, of the major dungeons that can be found with the World of Pain mod, and major personalities connected to the mod’s additions as well. As a result, spoilers will be aplenty and this guide will swap between step-by-step walkthrough and general explanation guide relatively often.
Introduction – What is World of Pain?
Welcome to the new, deadlier Mohave Wasteland.
World of Pain is a huge dungeon/expansion mod for Fallout New Vegas, which currently boasts a total of 114 unique new areas dotting the wasteland and all sorts of minor and major modifications to how the world works and certain quests to work with World of Pain.
However, one thing I noticed when I was looking for guides for World of Pain is that there seemed to be no guides available for this mod.
Well, let’s rectify that, shall we?
A Note On Equipment and Mods Used During Guide Creation
World of Pain adds, among it’s dungeon changes and everything else, it’s own tier of equipment wielded by the wastelanders in these new areas or included as loot. This type of equipment is known as MkII equipment, and in general is a little stronger than the base default versions found in the game. Sometimes this guide will denote MkII equipment as it’s ran into, but don’t expect me to catch every MkII that shows up, especially when apparel comes around.
In order to use mods on the MkII weapons it is suggested that you get ahold of Weapon Mods Enhanced or Weapon Mods Expanded. I am using Weapon Mods Expanded (aka WMX) at the current moment.
It should also be noted that the MKII gear will have some issues with certain player model replacers, as far as I’m aware. As a user of Daughters of Ares myself, I know that MkII gear does not trigger the underbody mesh replacer, so unless it has a AWOP patch built for it, there will be issues. I am sure similar issues will regard to other major bodytype replacers like the other Robot Playertype.
The mods used in the latest form of updating the Guide will be:
A World of Pain (Obvs)
Project Nevada
Mission Mohave
Weapon Mods Expanded (WMX)
More Perks
NV Enhanced Camera
Bag of Holding
Light Steps ED-E
JIP Companion Control
Glowing Star Bottlecaps
Helpless Falling
JIP Fast Travel Anywhere + Random Encounters
No Robot Goo
JIP Improved Recipe Menu
JIP Selective Fire
Vault 22 Flora Overhaul
Modified Areas of New Vegas
This list is simply to mention areas that had been majorly changed with AWOP.
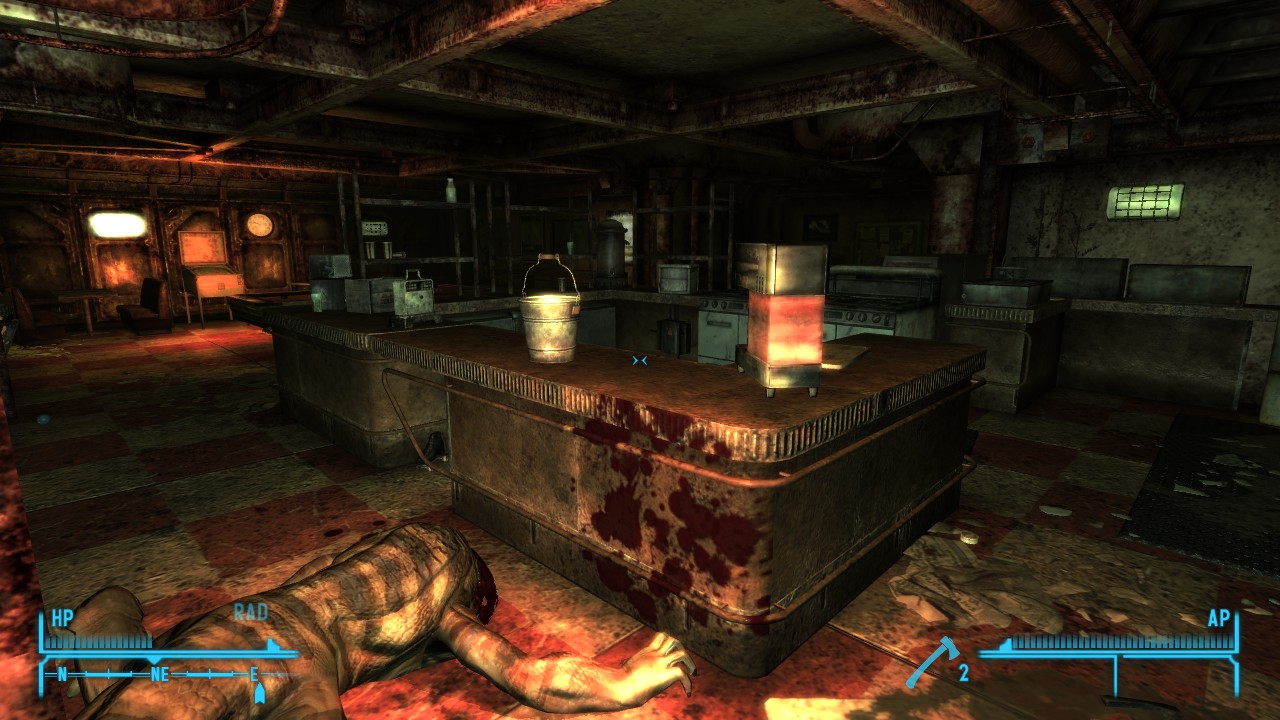
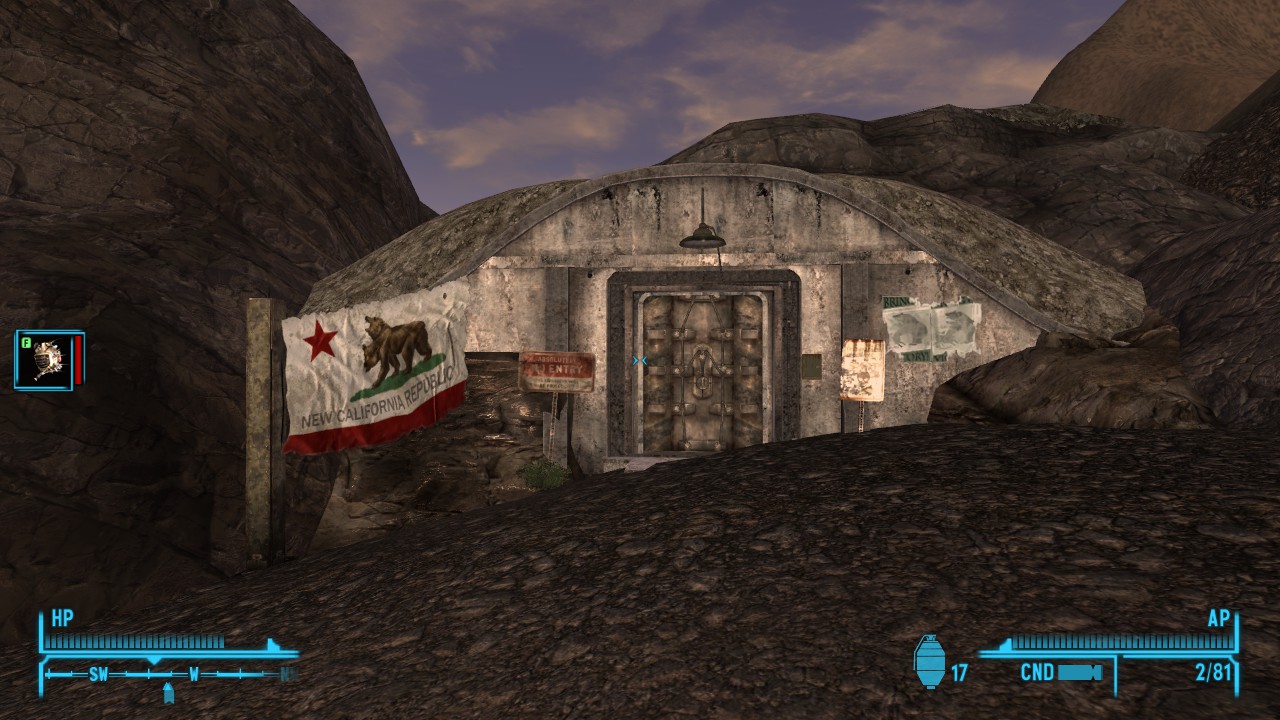
The Devil’s Gullet
A standard pit in the vanilla game, now this area has a secret cave hiding inside of it, that’s required to visit for Frankie’s Quest.
Lone Wolf Radio
Lone Wolf Radio apparently had a few Tech Raiders move in, only to have the Jackals wreck them up. When you arrive, a few Jackal gang members will try to accost you, but afterwards you can find a few Tech Raider corpses laying around for extra looting. Lone Wolf also has a map marker now.
Jean Sky Diving
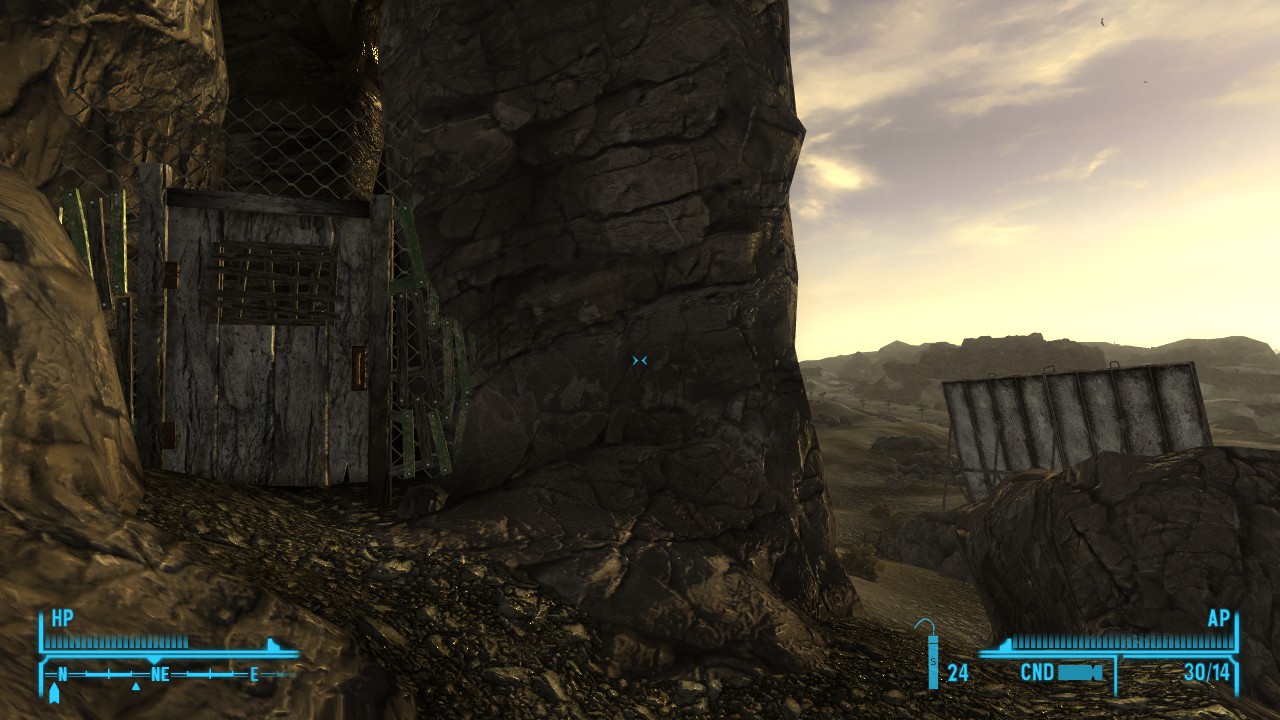
A old skydiving instructor’s office, turned refuge from the wasteland, only to be taken over by Powder Gangers too vicious that even the other Powder Gangers kicked them out. Inside of the basement to this place is a shelter taken over, and you’ll need to be decently armed to take on the gangers inside.
Nipton Road Rest Stop
This stop right before the road to the Mohave Outpost has a new door connected to it, leading inside of the gas station. Entering the hard-locked door will lead to a guy called Pez accosting you, and a very awkwardly set up room. Oops for interuptions.
Nipton Road Pit Stop
As well as the usual Jackal riff-raff, you’ll be able to find a trap door that leads into the Pit Stop Bomb Shelter.
Camp Searchlight
There’s a door located inside of the East Church Basement, leading to the Searchlight Bomb Shelter.
Emergency Service Station
A interior is added to the main office area here to lead to the Emergency Service Railyard.
Clark Field
The location of Mr. RADical! for one of the items for ‘Fly Me Away’, Clark Field is one of the potential areas you can look around for with the issues in ‘The Good, The Bad, and the Ghoulish’. It also has a new dungeon location, Clark Field Reserivor.
Gibson Scrapyard
A new NPC, named Reed, runs a weapons and ammo store inside the fence, and will offer you a few tasks as well, starting the questlines ‘The Good, The Bad, and the Ghoulish,’ as well as the Bounty Hunter quest for Ghouls.
Matthews Animal Husbandry Farm
It feels like there is a lot more farm animals located in this area, at the very least both Bighorner and Bhramin can be found in the three pens and the barns now.
Old Nuclear Testing Site/Nuclear Test Shack
A Mad Ghoul Camp can be found here, with many Crazed Ghouls hanging around the area of the testing site point They occasionally have MkII gear on them as well.
Tech Raider Camp North
A loose Tech Raider collection located north of New Vegas, a short way east from the Northern Passage.
Caville Bay
A few more Tech Raiders will have made themselves at home in the far eastern side, patrolling around the cop cars and halted train in this area.
New and Unique Weapons – World of Pain Addition
Unique weaponry is possibly one of my favorite things about the Fallout universe, as they often have special effects and bonuses over the standard versions, while being quite viable even to the lategame in certain specific points.
12GA SHOTGUN
A modified Single Shotgun, that equips a larger shell grade than normal. This modifies the Single Shotgun damage to be a bit better, with the same pros (high damage, ammo efficient, quick reload) and cons (single shot power, requires a reload to fire again.) From personal experience, this has a hell of a kick that blows through plenty of enemy types in that one shot.
The shotgun uses 12 gauge shells, and holds a single shot.
It can be located in Reinmann Bunker, in the Equipment Room.
RECHARGER PLASMA DEFENDER
The Recharger Plasma Defender (Mk 15) is a Plasma Defender with recharging cell capabilities and bonus critical damage over it’s fellows. It’s a useful weapon if you are trying to stick to uniques or the World of Pain weapons, as if you are wandering through the land following the guide, this is your first plasma weapon from the mod.
It uses 2 charges per shot, and slowly recharges it’s 38 charges over time.
It can be found in a Very Hard locked briefcase under it’s note in the Weapons Research Facility, Sector B.
5MM HUNTING RIFLE
While most hunting rifles are loaded with the .308 round, the 5mm Hunting Rifle is exactly what the name on the tin states- it’s equipped with 5mm rounds, the round most commonly used in Assault Carbines and Miniguns. This means a minor damage boost and slightly more common rounds, with all the same perks and modifications of a standard Hunting Rifle.
It can be found in a Footlocker inside the Ant Caves, under the watchful guard of both a Giant Ant Queen and the Legendary Warrior Ant.
New and Unique Armorsets and Special Items of AWOP
While at first I was going to not record specific special instances of unique equipment, as it’s something I sadly don’t know a lot of already, there is a few rare exceptions where I can easily identify something that’s not usual even for AWOP. If I can manage to locate them, I’ll make note of them here like the weapons and such. In a similar instance, this also allows me to record special items of the player’s use I’ve located as well.
The 4D Storage Devices
These extremely useful items are scattered across the wasteland, and when recovered, they offer you a nice buff to your carry weight as you wander the wasteland. Each one offers it’s own buff as long as it’s carried in your inventory, and stacks with it’s fellows for even greater inventory weight limits.
4D Storage Device Mk IV – Supply Crate, Doc Mitchell’s House, Pocket Warehouse Loadout – 500 Wg Buff, Weight 1
New Questlines for AWOP
This section is dictated to every quest relating to A World of Pain.
Oh Where Oh Where Has the Leigon Spy Gone?
Help Sargent Arkus find the missing Leigon Spy.
One of the goals of Sgt. Arkus’s visit to Goodsprings was the tracking of a Leigon spy named Baxter, who had stopped at the town but hasn’t been seen in a few weeks since then. Arkus will tag the locations Reinmann Caves, Goodspring Sewer, and The Devil’s Gullet for potential locations of the spy, but all you have to do is check out Goodspring Sewer. Reach the end of the Sewer and defeat the Glowing One Baxter had turned into, and return to Arkus with his dogtags to be rewarded.
Frankie’s Quest
Before Frankie will allow you in the Underground, he wishes to test your mettal…
Frankie used to live inside the Underground, and will not only sell the Goodsprings Abandoned Home to the player, but he will offer the key to the Underground should they complete two big game hunts. The first stage of the quest will send you after three larger than normal Gecko variants- Smokey, a normal Gecko, Labal, a Golden Gecko, and Firetooth, a Fire Gecko.
Defeating these three, Frankie will grant you some supplies and caps, and send you after Bertha, a truely massive Radscorpion. Upon defeating Bertha, you will get even more resources and the key to the Underground.
The Good, the Bad, and the Ghoulish
Assist Reed with finding the reason for the enhanced Ghoul problem and the fate of some friends.
Reed will inform you of an NCR hunt for the sudden upsurgance of ghouls located east of Novac and the scrapyard. In addition, she has not heard from the group of toughs under the Novac Shipping Office, which she’ll tag on your map alongside the Toxic Dumpsite (a surface area with nothing of note) and Clark Field Resivor. Travel into the Shipping Office and head through it’s basement door to reach the Collapsed Tunnel Sub-Level, finally defeating Kent and Salvador. Upon gathering Kent’s Confession, return it to Reed for caps and goodies.
Bounty Hunter: Ghouls
Kill Ghouls east of Novac to lower population and line your pockets.
This repeatable quest will allow you a constant form of caps and goods when you fight around Novac. Every 12 Ghoul Ears (gained from Ghouls east of Novac) can be turned in to Reed, inside the Gibson Scrapyard.
Payback Time for X-13
An NCR spec ops force has ran afoul of some Deathclaws… Assist them with revenge!
Located inside the Collapsed Underpass accessed in Emergency Service Railyard, you start this quest by convincing Bulldozer you can assist it. From there, locate each of the remaining members of X-13 and defeat the final Deathclaw boss ‘Big Momma’ to be rewarded by the squad survivors that stuck around.
Goodsprings – Starter Crate and Other Misc Changes
When first arriving in Goodsprings, right away World of Pain has done several changes. In particular, you may notice that the town is a bit more heavily armed and that there’s a box waiting for you inside of Doc Mitchell’s house. This crate is an additional Starter Kit for equipment should you so choose to use it, offering some of the items available in the Wasteland based off various archtypes. Keep in mind you only can select one such starter package, at which point you can’t use the crate anymore. This crate is found on the lefthand side of the hall after you finish your psychyatric examination, right before exiting into the Mohave Wasteland.
The crate packages, and their contents, include:
Nothing – Vanilla
You get nothing! You lose! Good day sir!
As a note, this does not remove the chance to acccess the box either.
Berzerker
Weapons – Bladed Gauntlet, Frag Grenade x2, Sawed-Off Shotgun, Super Sledge
Apparel – Merc Cruiser Outfit MkII
Aid – Stimpak x4, Buffout x2, Concentr8 Pills Purple, Psycho x2, Purified Water x4, Boxing Times x2, Tales of Chivalrie x2
Ammo – 12 Guage, Buckshot x60
A perfect loadout for a brawler type, giving you a pair of pretty high-grade melee weapons and a LOT of chems related to melee combat.
Doctor
Weapons – .44 Magnum Revolver, Ripper
Apparel – Armored Doctor’s Fatigues
Aid – Doctor’s Bag x2, Stimpak x8, Concentr8 Pills Yellow, MedX x2, Purified Water x8, Today’s Physician x2
Ammo – .44 Magnum Rounds x100
Designed as a roleplay role as much as for the first aid events of the game, the Doctor loadout offers quite a lot of healing items, perfect for a charismatic assistance to his companions or for a rather healthy soloist.
Repairman
Weapons – 10mm Pistol, Cowboy Repeater
Apparel – Armored Trader Outfit
Aid – Stimpak x4, Weapon Repair Kit x4, Concentr8 Pills Blue, Purified Water x4, Fixin’ Things x2
Misc – Scrap Metal x2
Ammo – .357 Magnum Rounds x100, .357 Magnum, Hollow Point x50, 10mm Rounds x100, 10mm, Hollow Point x50
Become a handyman of the wastes, perfect for a high repair or just the prospector type of character. Even comes with a few early pieces of scrap!
Scientist
Weapons – Laser Rifle, Plasma Pistol
Apparel – Armored Lab Technician’s Outfit
Aid – Stimpak x4, Concentr8 Pills Blue, Purified Water x4, Future Weapons Today x2, Programmer’s Digest x2
Misc – Fission Battery x2
Ammo – Energy Cell x100, Energy Cell, Max Charge x50, Microfusion Cell x160, Microfusion Cell, Max Charge x80
A scientific mind’s dream, allowing you to unleash energy-based nerd rage quite early into your adventure.
Soldier
Weapons – 10mm Submachine Gun, Frag Grenade x2, Lever-Action Shotgun
Apparel – Merc Adventurer Outfit MkII
Aid – Stimpak x4, Concentr8 Pills Red, Purified Water x4
Ammo – 10mm Rounds x200, 10mm, JHP (Hand Loaded) x100, 20 Guage, Buckshot x80, 20 Guage, Lead Slug x30, 20 Guage, Magnum x30
A perfect loadout for lots of ballistic fun, unleashing plenty of bullets at enemies in the Mohave.
Trapper
Weapons – Bottlecap Mine x2, C4 Plastic Explosive x2, Caravan Shotgun, Detonator, Frag Mine x8
Apparel – Merc Grunt Outfit MkII
Aid – Stimpak x4, Concentr8 Pills Red, Purified Water x4, Patriot’s Cookbook x2
Ammo – 20 Guage Buckshot x140
Loaded with more than enough starting mines and explosives to make drunken one-eyed scottsmen turn their heads.
Skulker
Weapons – 10mm Pistol MkII, Varmint Rifle MkII
Apparel – Merc Troublemaker Outfit MkII
Aid – Stealth Boy x3, Stimpak x4, Purified Water x4, iLa Fantoma! x2
Misc – 10mm Pistol Silencer, Varmint Rifle Night Scope, Varmint Rifle Silencer
Ammo – 10mm Rounds x100, 5.56mm Rounds x45
Stealthy assassin loadouts will love this starter, by far having the most MkII weapons and the tools required for quiet assassinations.
Pocket Warehouse
Apparel – Merc Veteran Outfit MkII
Aid – Stimpak x4
Misc – 4D Storage Device Gen IV
This loadout has only one purpose, the unique item set known as the 4D Storage Devices. These machines grant you MASSIVE increases to your carry capacity, and are rarely scattered across the wasteland. This device is extremely exclusive for this loadout however, so unless you plan on one of the others, it may be worth picking this one up for yourself.
Home Buyer
Apparel – Merc Charmer Outfit MkII
Aid – Stimpak x4
Misc – 5000 Caps
A suave gambler or a prospective home buyer, this set is mostly non-combative, designed for you to let your money talk for you.
Something else you will notice in Goodsprings is several Mercernary gunman located around the vicinity of the Saloon, stealing chairs from Easy Pete to lay about in. These mercernaries are also assisted by a NCR captain, Sgt. Arkus. Arkus will give you locations to various nearby locations, as well as point you in particular towards the Goodspring Sewers, The Devil’s Gullet, and Reimann Cave for a new quest, ‘Where Oh Where Has The Legion Spy Gone?’ It should also be noted that when it comes to the quest ‘Ghost Town Gunfight’, the Powder Ganger forces has also gotten a slight buff to compensate for the heavily-armed mercernaries.
There are two other buildings that have been modified or changed as well here: a house for Frankie over in Frankie’s Guns and Ammo, and the building next to Doc Mitchell’s house has been converted to the Abandoned House, locked until you gain the key from Frankie.
Frankie’s Guns and Ammo – Early-Game Gunstore and Quest Hub
Just south of Goodsprings, duitifully guarded by Rogan and Rusty.
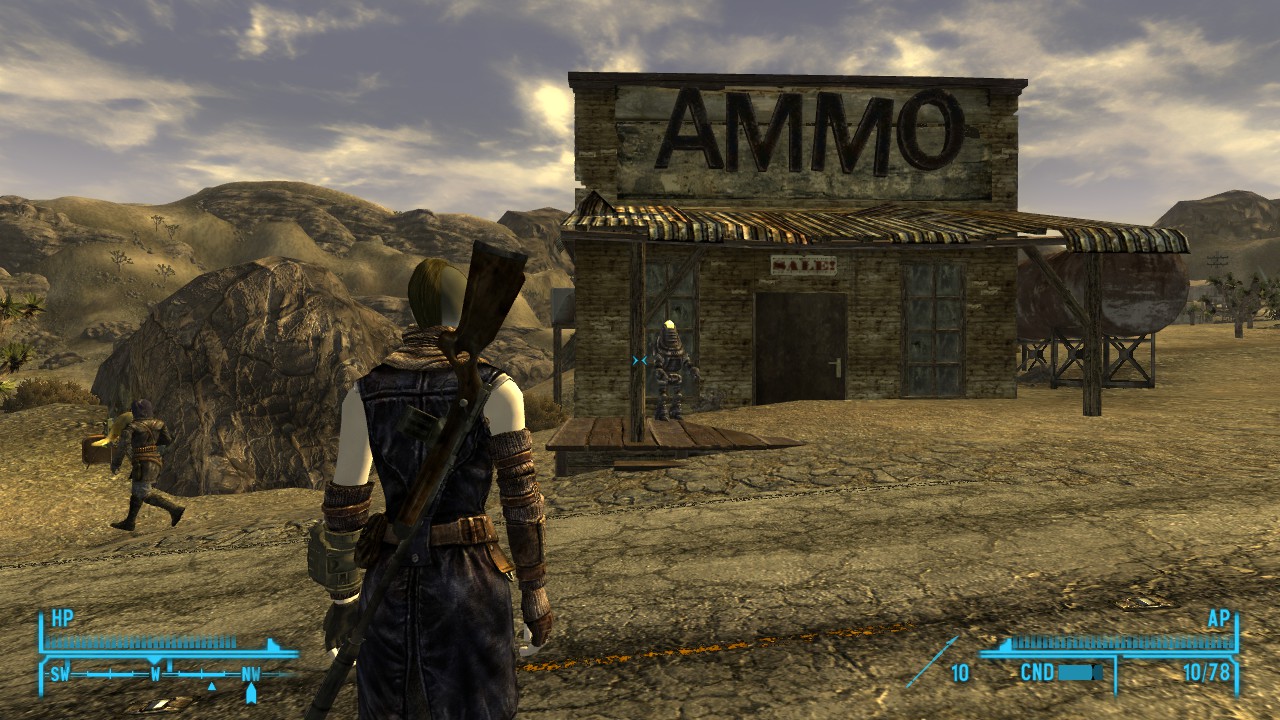
Frankie’s Guns and Ammo is a new store just south down the road near Goodsprings, about level with the Wild Wasteland encounter with a certain refrigerator. In some regards, this is the first ‘major quest’ hub for World of Pain, giving you a elongated quest for a new Player House located in the town and the key for a expansive dungeon. You can talk to the woman up front, Rogan, to get map markers for several locations in the wasteland both near and far, but be sure to enter Frankie’s shop to speak to the cowboy hat wearing man himself.
Frankie and his ever-present merc bodyguard ensure that it’ll not be easy to sticky fingers in here.

Inside the shop will be a wide variety of goods and items, with Frankie and a Mercenary holding out behind the counter. Frankie will offer a variety of services, including selling items, offering repair services, and selling the key to the Goodsprings Abandoned House for 5000 Caps. You can also prod Frankie about the Underground, which starts ‘Frankie’s Quest’ for access to the Underground.
Goodsprings Abandoned Home – Player Housing For World of Pain
Located just south of Doc Mitchell’s house in Goodsprings, this abandoned house was left for whoever had 5000 caps for Frankie to sell the key to. You can’t pick the lock here, so you need those 5000 caps in order to enter.
Top part of the house doesn’t look too impressive- a standard-looking pre-war house, unlit and dusty. There’s a wall safe with a basement key built into a counter, several ammo crates and other containers, and a suit of leather armor laying around this top floor. There is also a sink with radless water inside. After looting it all, feel free to head to the real housing in the basement.
Downstairs is a large complex of rooms built by the previous owner, well stocked with many dfferent things and offering locations to store your crap to boot. Right off the ladder of the house, you can find a workbench and reloading bench. More ammo boxes with random ammo and a few crates are located here, and a terminal explaining about the Underground can be found here – the same Underground related to Frankie’s Quest.
Taking the door on the wall with the workbenches leads you to a collection of beds and other ammenities- important of which is the machine that takes Sierra Madre chips for various vendor items, as well as let you dump ciggarettes and ciggarete cartons into it. A Mk3 Autodoc and several (empty, non-restocking?) containers can be found here as well, as well as another door leading to an equipment area. Most of these containers are empty, but one of the weapon containers when I arrived had a Laser RCW, Varmaint Rifle and 9MM pistol with a few mods. In addition, there’s another huge pile of ammo crates with various ammo stuffed inside.
Taking the door near the terminal leads you to a kitchen, with several vending machines and kitchen cabinets, plus a RobCo Water Purifier that will let you purify diirty and irradiated water. Past that room is a bathroom, with a final door leading to a couch, campfire and a few more lootables.
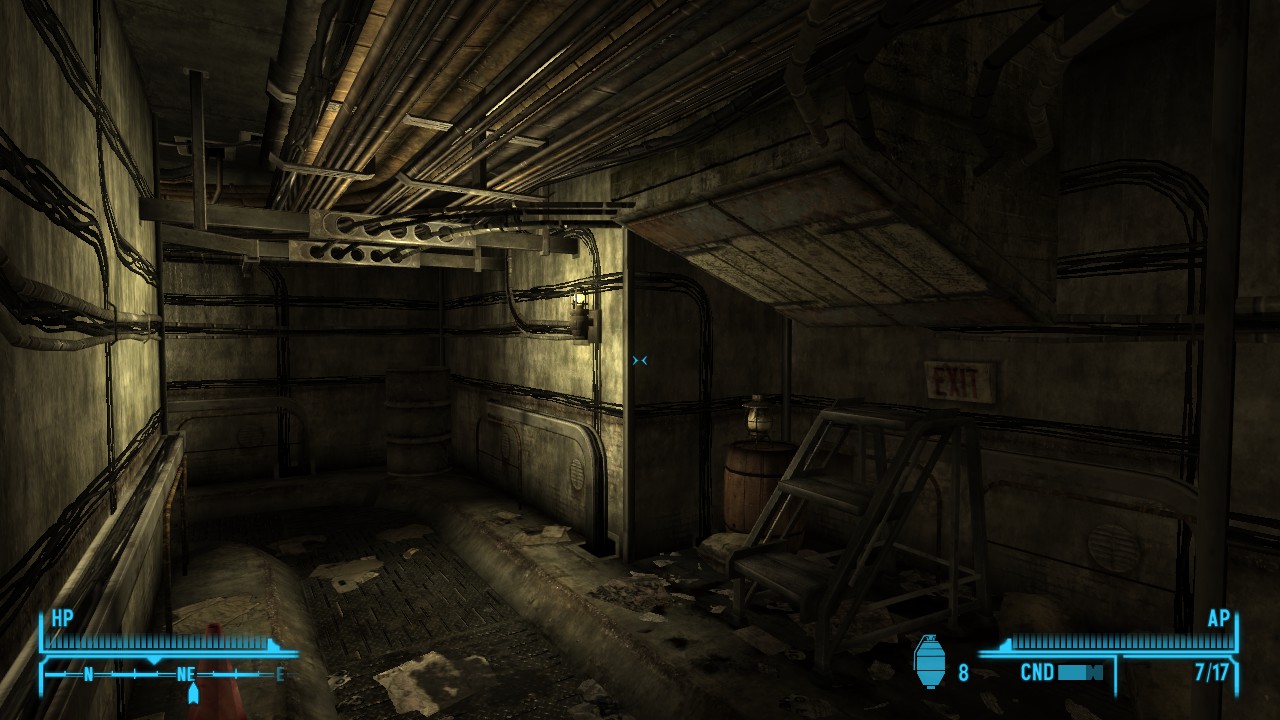
Reinmann Caves – Rats, Bunkers and Teleporters
Highest Lockpick Level: Average – Very Hard (Key Available)
Highest Hacking Level: Average
-Notable Loot-
12ga Shotgun
Chemistry Set
Exterior of the Cave.
The cave’s main chamber.
The final path of the righthand tunnel.
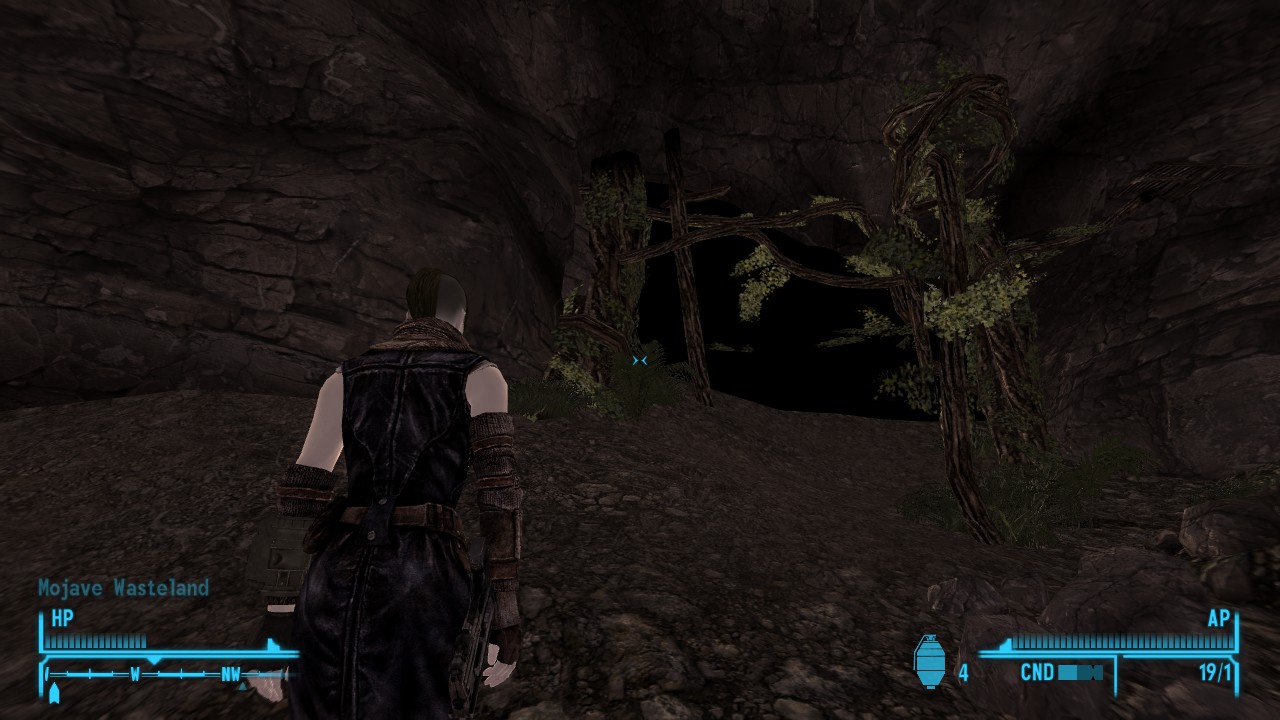
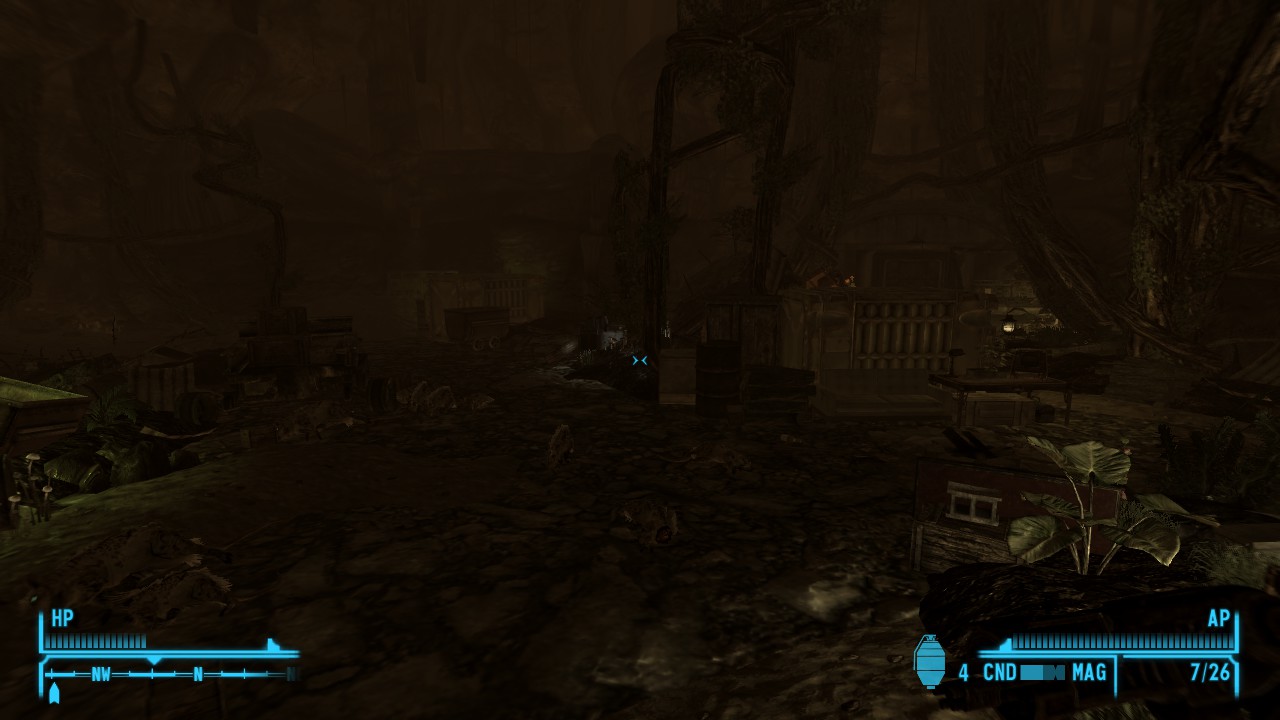
Reimann Caves (and it’s interconnected Reimann Bunker) are a clusterfuzz of random debris and items stacked pell-mell. Expect to be constantly barraged with Large and Huge Rats as well upon entering the cave, as they are literally swarming the area and will gladly take a chunk out of you in swarms. This may be a bit harder than Goodsprings Sewer as a result, but it’s another potential location of the fugative that the Sgt. is looking for.
Unfortunately, Mufasa turned out to be a Deathclaw this time and kicked him out of the pridelands.
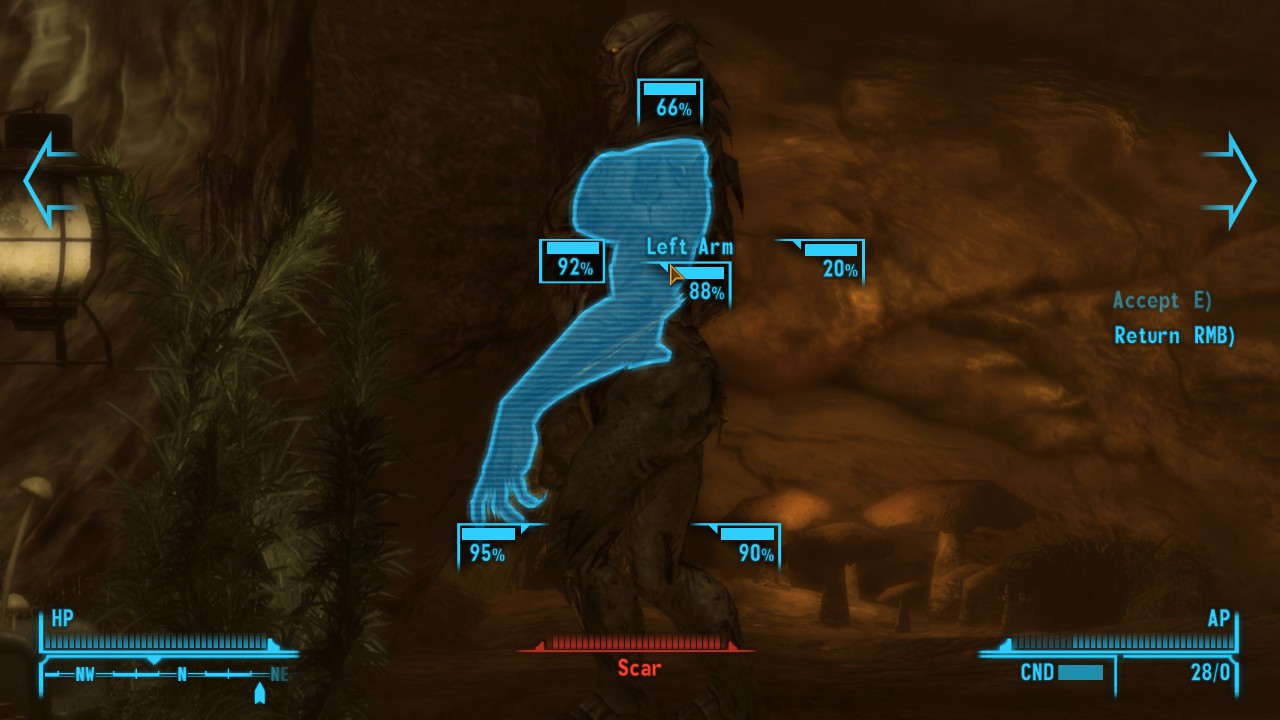
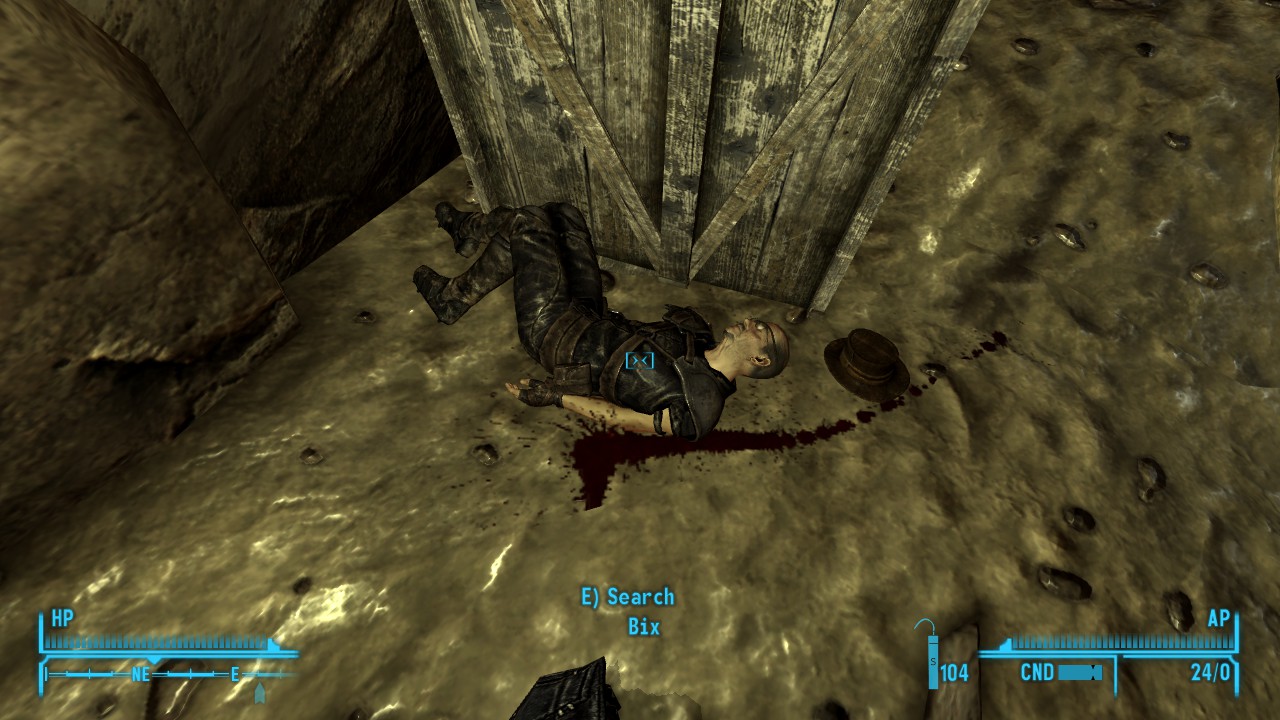
Another major threat located in Reimann Cave? Scar, a named Lakelurk. If you want access to the Bunker, however, you’ll have to either sneak past or tangle with him, and he can do some pretty painful damage to a new character if you’re not careful. After you slay Scar, you can sneak past him and find the unfortunate body of a man named Bix, who has the keycard for the bunker on his sorry butt. This is naturally also where I point out the idiot clearly had walked all the way around the bunker at where his body is located.
The poor body of Bix.
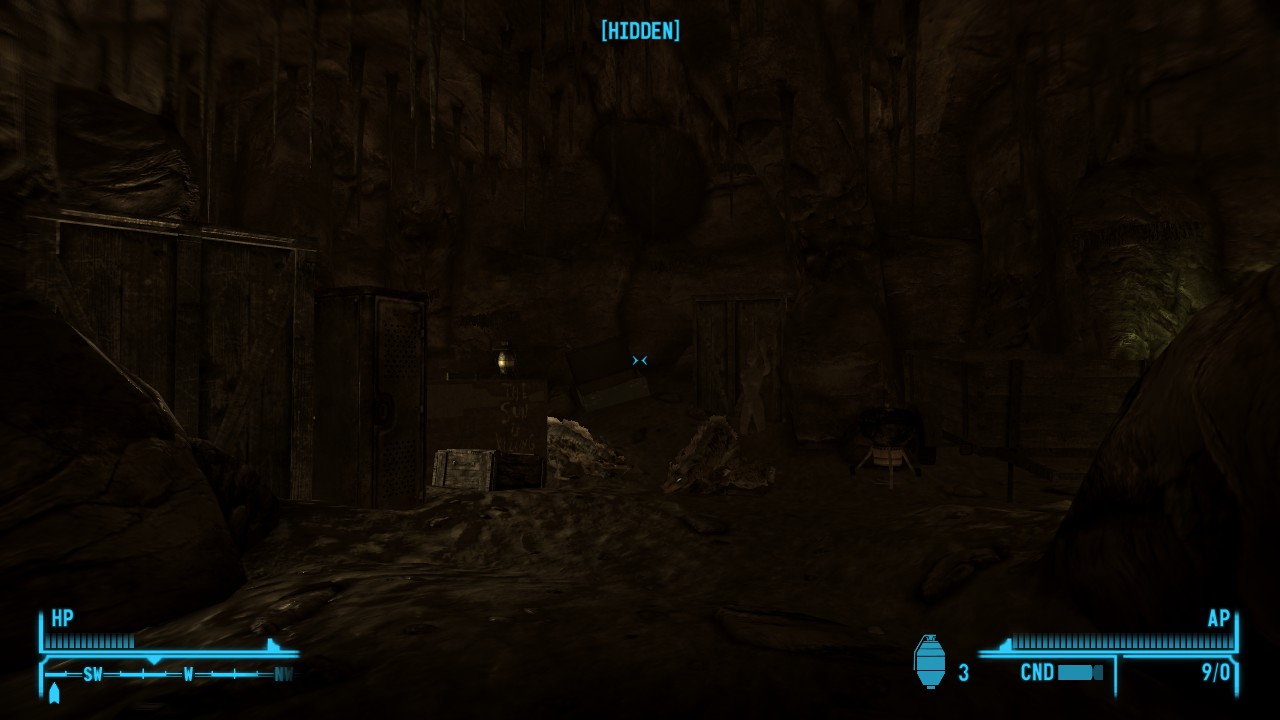
Eventually, there is a blocked off area of irradiated water that probably explains how Scar got in there along the leftside tunnels. From the righthand side of the tunnels, you have several more looting zones, including a Easy Lock in another submerged area and several other containers and rats to deal with.
Probably the dirtiest the actual bunker get.
Entering the bunker proper leads to another cluttered entry room, however after using the keycard you’re able to enter deeper in, finding a rather orderly and neat interior bunker area done in pre-war style. The interior rooms to the right and the first of the three doors to the left leads to sleeping arrangements and even a laboratory with plenty of different plants all growing and harvestable, and a terminal with Roth’s Diaries loaded onto it. For some reason, the man is rambling on about teleporters, interesting.
The mysterious teleport Redoubts.

Third door from the left in the main room leads to restrooms, while the second door (and the bedding area) seems to lead to a main hallway, which includes other rooms curving off of it. The main room of concern here is an armoy with an absurd amount of ammo boxes with varying levels of Energy Cells and Microfusion Cells, the unique 12ga Shotgun and both types of benches, a sciience lab with even more crates and lootables, and Condor’s terminal.
Of specific interest here is the various ‘Redoubt’ terminals, that allow you to teleport to similar facilities. I will be exploring these facilities in future, but for now I will leave thier potentials for you to find out.
Teleport Redoubt Dropoff Locations – Playing Roulette with 5 Bullets
This part’s heavily WIP atm. All this is covering at present is the room directly after teleport, we won’t be continuing past it into other areas just yet.
??? – Redoubt 007
Sadly, no jokes about secret agents, as sadly this redoubt’s kinda borning. Just a small room of stacked junk and broken robots. The pathway outta here is blocked off with more junk, so all that’s left is some ammunition creation items.
Vault-Tec Research Offices – Redoubt 016b
Highest Lockpick Level: Easy
A simple location connected to Vault-Tec, this is more or less a tiny Vault, with a kitchen, office area, and an armory with energy weapons. Nothing really here of note either…
Hidden Valley Bunker – Redoubt 0291a
Highest Lockpick Level: Average
-Notable Loot-
T-45d Power Arnor Helmet
Another quick tunnel to a highly desirable area, there is a few things in the way to you quickly joining the Brotherhood of Steel- mostly, Radscorpions, a LOT of radscorpions. Of special note, however, is there’s a crate with a Brotherhood marker on it, and inside? A helmet for T-45D Power Armor!
– Redoubt 03S4
Highest Lockpick Level: Hard
-Notable Loot-
Control Room Keycard
Tales of a Junktown Jerky Vendor
Alien Power Cells
Space Suit
This partly submerged redoubt is home to a small group of Lakelurks, as well as the King variety, and is on a major slant, partly submerged in water towards the back. These Lakelurks do have a few goodies to find however if you have the lungs- primarially an unsubmerged office will have a briefcase with a magazine to increase Barter, as well as a mysterious Control Room Keycard. This keycard is used for a submerged door in the facility, where Alien Power Cells can be located on the desk here, and an armor cabinet holds a Space Suit!
Radialogical Research Facility – Redoubt 044R8
Highest Lockpick Level: Hard
Highest Hacking Level: Average
-Notable Loot-
Hunting Shotgun Long Barrel
.357 Magnum Revolver MkII
2 ‘The Ones’
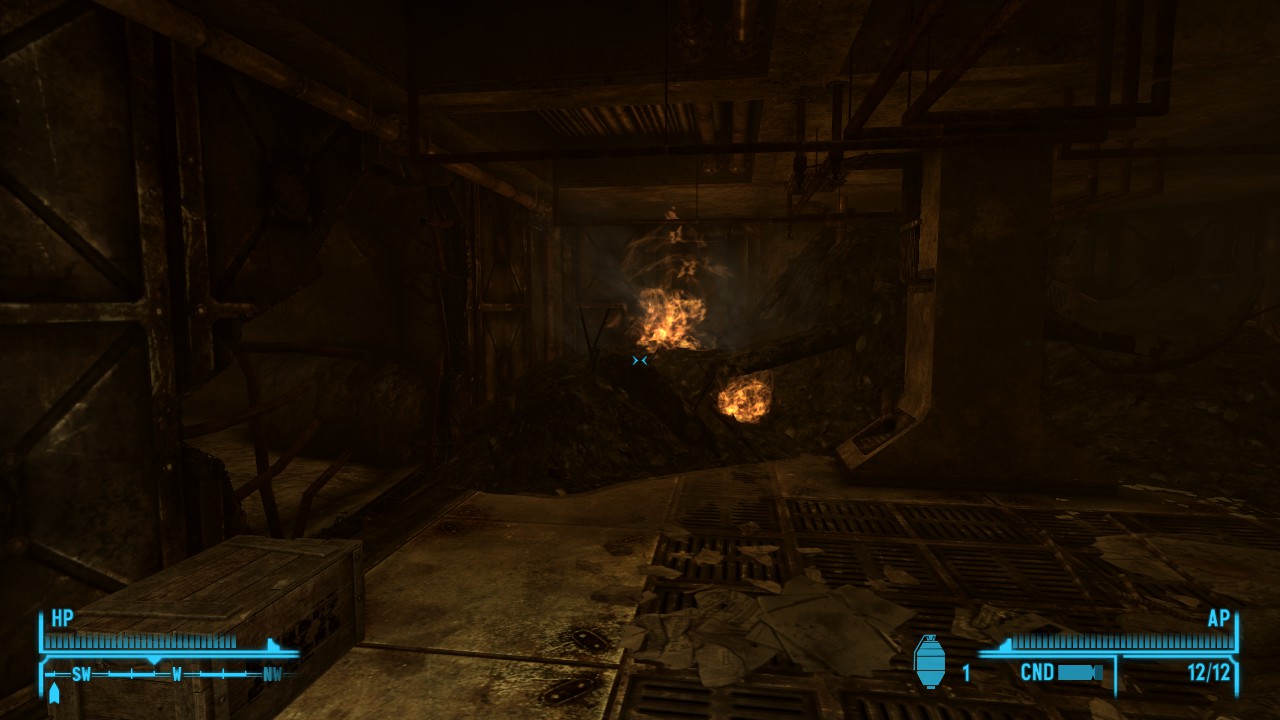
With radiation levels of up to 6+ (that’s +18 without RadAway and wearing the Advanced Radiation Suit, btw…) and filled with all sorts of ghouls, it’s much mure suggestable you enter this redoubt from the Radialogical side, due to the immense amount of RadX and Radaway that can be found there to assist with exploring this Redoubt to it’s fullest. The biggest ‘selling point’ in this irradiated hellhole is the two large nukes that are stored here, that like the one Wild Wasteland one in the crater, can be scavenged with high enough Science for Energy related salvage.
Vault 21 Waste Disposal – Redoubt 055Va
This Redoubt opens you to a cleanish facility, with items marked as owned upon entry of the Bunker. A woman named Rose lives here, and she requires a 35 Speech or 8 Charisma check when she asks if you work for Mr. House. Using the Speech route to get on her good side, she’ll act as vendor as well as request an unmarked quest for some fresher fruit and access to a key to another part of the Redoubt.
Nellis AFB – Redoubt 06AF14
-Notable Loot-
9mm SMG Light Bolt
Nuka Cola Quartz
Much more dingy than the previous Redoubt, this fragment of Vault 34 is infested with Fire Ants and loose-sitting missiles. Unfortunately, there’s not a lot as far as interesting things here- There’s a locked door that I couldn’t find the key of in the dungeon, and a spare missile launcher in the ant hive area of this Redoubt, but otherwise? It’s more or less a generic Fire Ant hive with fragments of Vault built in. There is an Ant Queen here to be worried about, but beyond that most I can think of that’d be useful here comes from the existence of it and a cheap way to dodge artillery shells into Nellis to begin the Boomer’s questline.
There are two unique exits to this redoubt- one requires the Nellis AFB Generator Key, required for clearing the ants from the generator room as a part of Ant Misbehavin’, and the other exit dumps you out of a cave along the fenceline of Nellis, at the secondary gate along the railroad tracks. Simply run along the fence to make first contact from here, if you so wish.
Xander Bay Labs/Xander Bay Storage Area – Redoubt 07GV18c
Highest Lockpick Level: Hard
…Deathclaws. DEATHCLAWS. DEATHCLAWS!!!
This Enclave facility brances off into two other sections of the facility, with 4 or so Deathclaws wandering around the place. I was able to scavenge some pieces of Enclave gear (including a Power Helmet, but nothing specifically unique to be found directly in here. After more exploration of the Overworld, we shall see if this Xander Bay is accessable from outside and perhaps see what other secrets are hidden in this Redoubt.
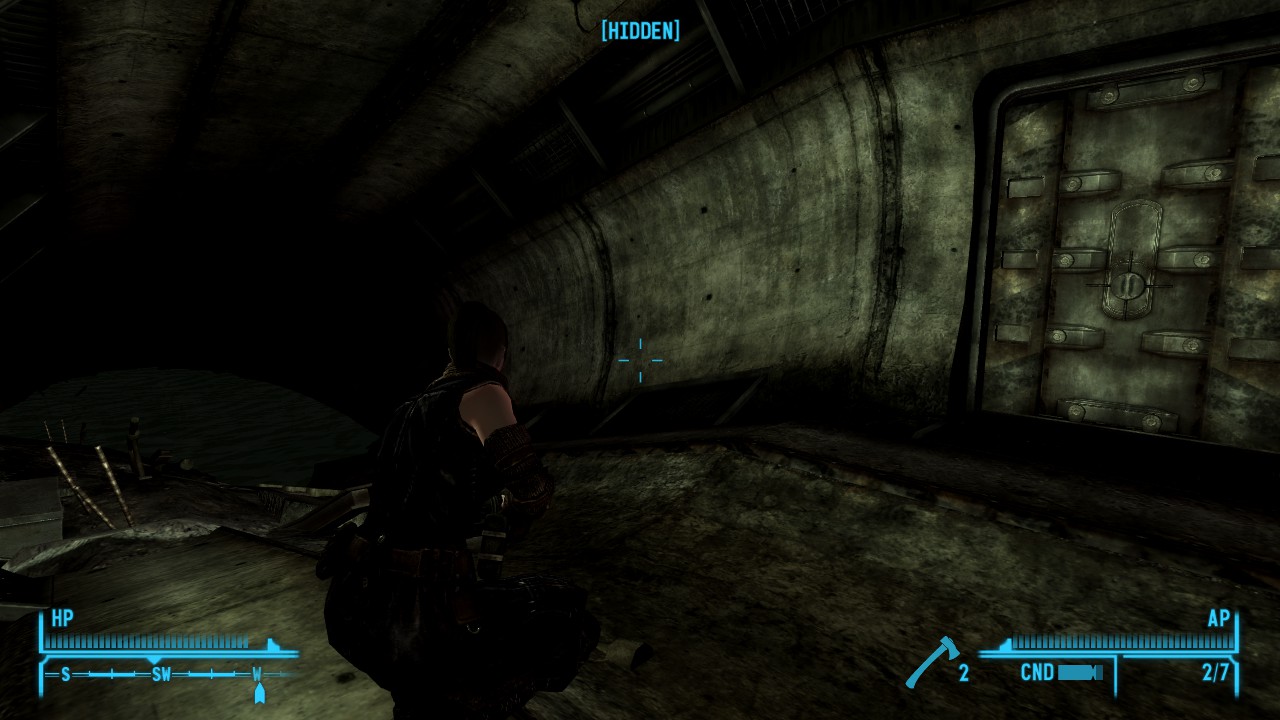
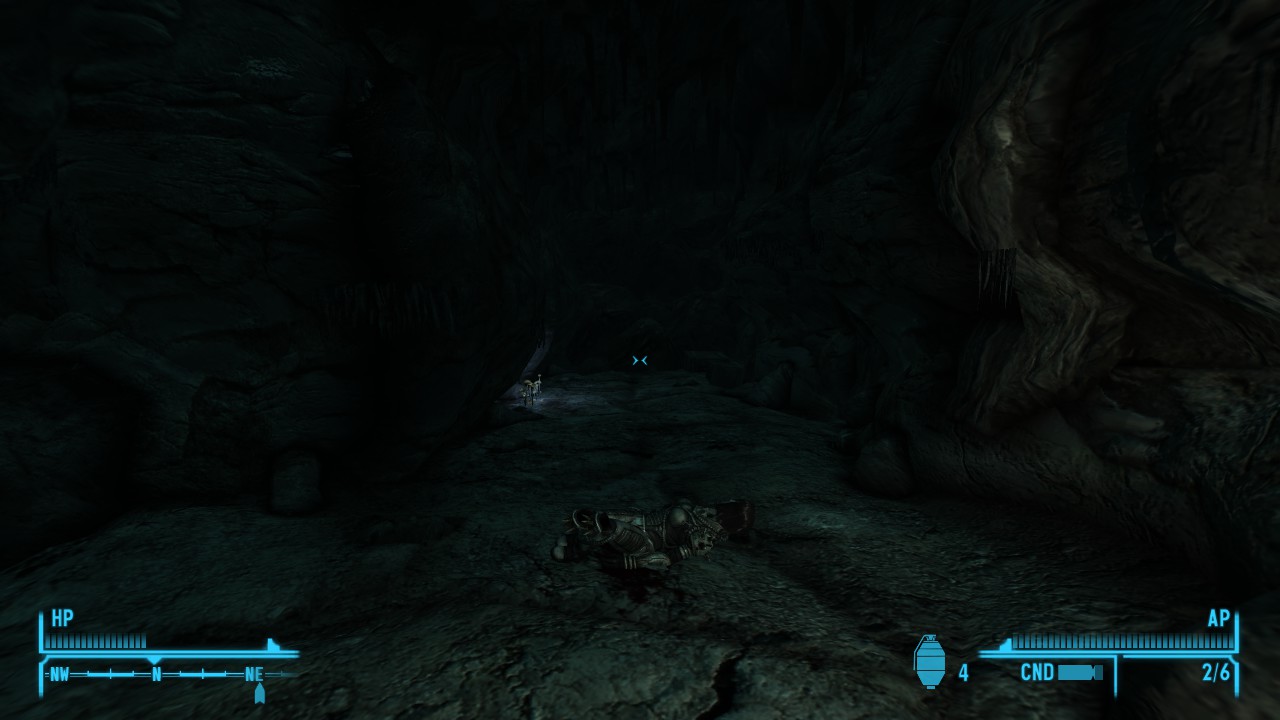
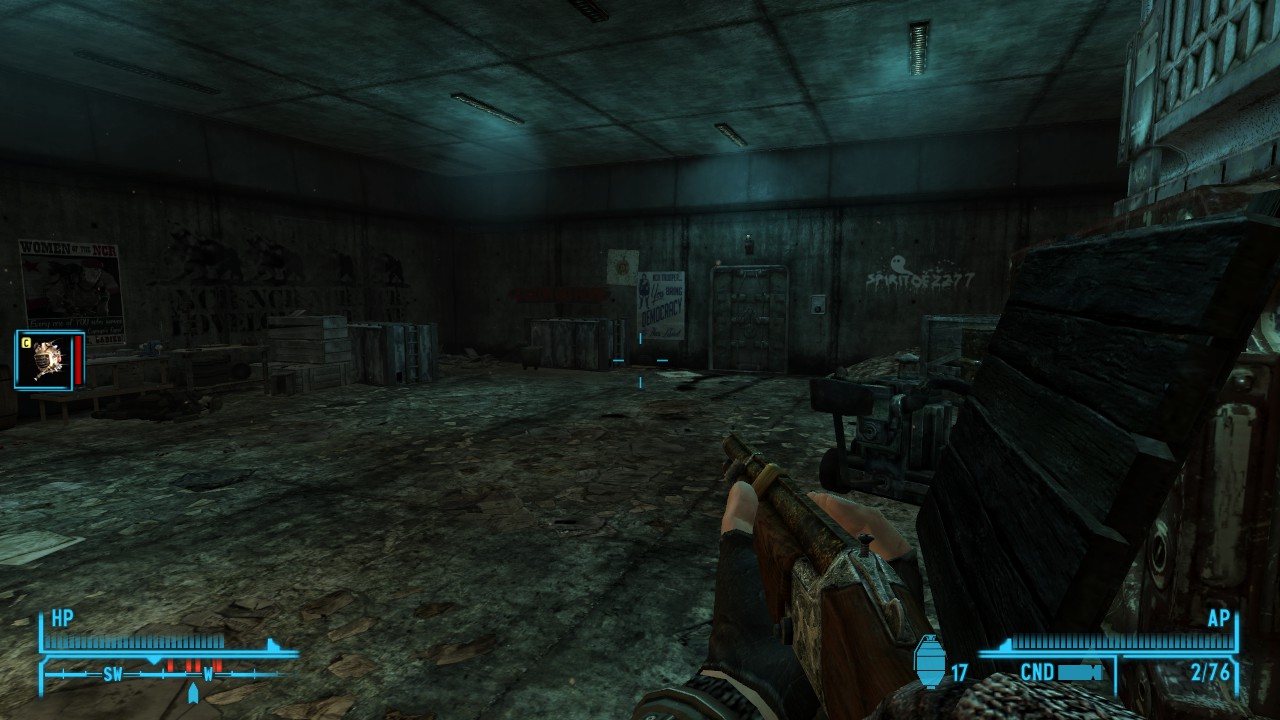
Goodsprings Sewer – Mole Rats, Darkness and Spies
Highest Lockpick Level: Average
-Notable Loot-
Service Rifle MkII
Guns and Ammo Book
As it would naturally be the case, Goodsprings Sewer is accessed via a manhole along the north road from Goodsprings, level with the Keep Out sign located along the road to no doubt stem the deaths caused by cazadors. It should be noted that this sewer is extremely dark, so prepare to either bring a sizable amount of meds to give you night vision, have a perk that increases night vision, or use a helmet with nightvision, otherwise you may blunder into one of the many bear traps that are located here (as a result a sufficient skill to disarm these traps is also suggested). For the most part though, this dungeon should be easy enough to do when first starting out at least, as long as you have a decent weapon from your starting arsenal (the Sturdy Caravan Shotgun comes to mind.)
See? Told you it was dark.
As mentioned before, the first parts of this dungeon is extremely dark, so if you don’t have the night vision equipment you will have to rely on your Pip Boy light (hold your Pip Boy key, for those not in the know). Upon entering the sewer, enter the visible door and prepare to watch for bear traps along the floor leading into the stairs down.
The next chamber after the stairs leads to a two-way split, another bear trap, and your first major enemy in this dungeon- Mole Rats are investing the sewer! The left-side exit leads to a Easy locked door and a few lootables, but there’s a collapsed tunnel in the way of further exploration, forcing you to take the right exit.
The eventual door onward, and the drowned tunnel end with a safe hiding in it.
This right path will eventally lead you to a heavy duty door and the sewer tunnels proper, the tunnels being infested with Mole Rats and a Giant Mole Rat. After cleaning up, be sure to check the submerged area a short way away from your entry point to the tunnels- a quick swim reveals an Average locked safe for you to crack.
Running along the lefthand wall will lead you to a room where the center of it is submerged in water. More Mole Rats and a few more Giant Mole Rats can be found here, and there’s a few lootable locations and bodies around here. Of special note is a Easy locked Footlocker
Hugging along the righthand wall meanwhile will eventually lead you to an Easy locked door, behind which is a Gun Cabinet, several Bobby Pins and other misc. supplies.
Level with the submerged area with the Average safe is another door, leading further into the Sewer System and left open, more than likely allowing some of the Mole Rats to join earlier fights. This leads to a blocked off stairway and another hall further into the dungeon, including a side room with another Giant Mole Rat, a dead dog and some unidentified meat splatter around a broken terminal.
I’d have taken a more dynamic shot, but, well, my HUD says all I need to here.
Baxter’s crib. Beware the far wall, it’s under radiation.
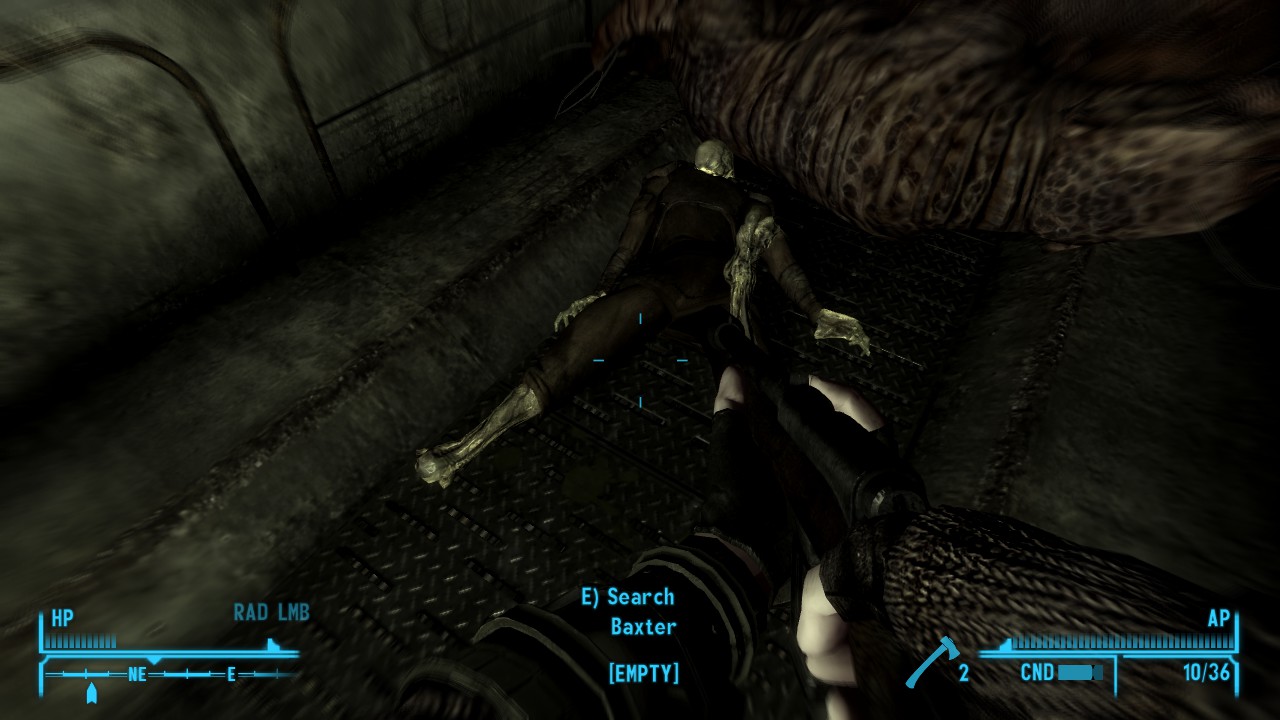
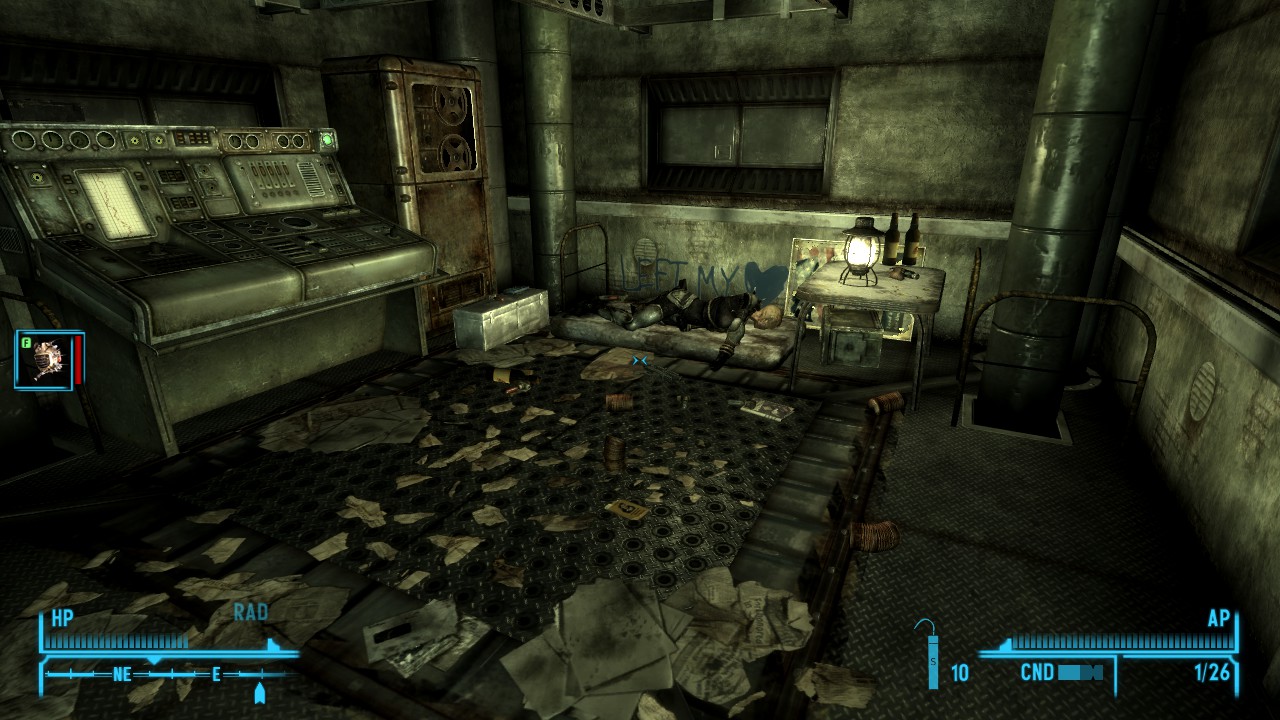
Going up the stairs from this point will lead to you starting to gather radiation, and the source is clear upon unlocking and opening the next Easy door- a Glowing One named Baxter! This may be a bit of a challenge for a newbie character, but it should be managable with a few levels behind you from the Mole Rats. Baxter will drop a note and his Dog Tags, which you will need to return to the Sgt. in Goodsprings to finish the hunt for the legion spy. You will also discover a Service Rifle Mk II laying on his matress, and other supplies scattered around the small room as well. Mind the small radiation leak towards the back of the room.
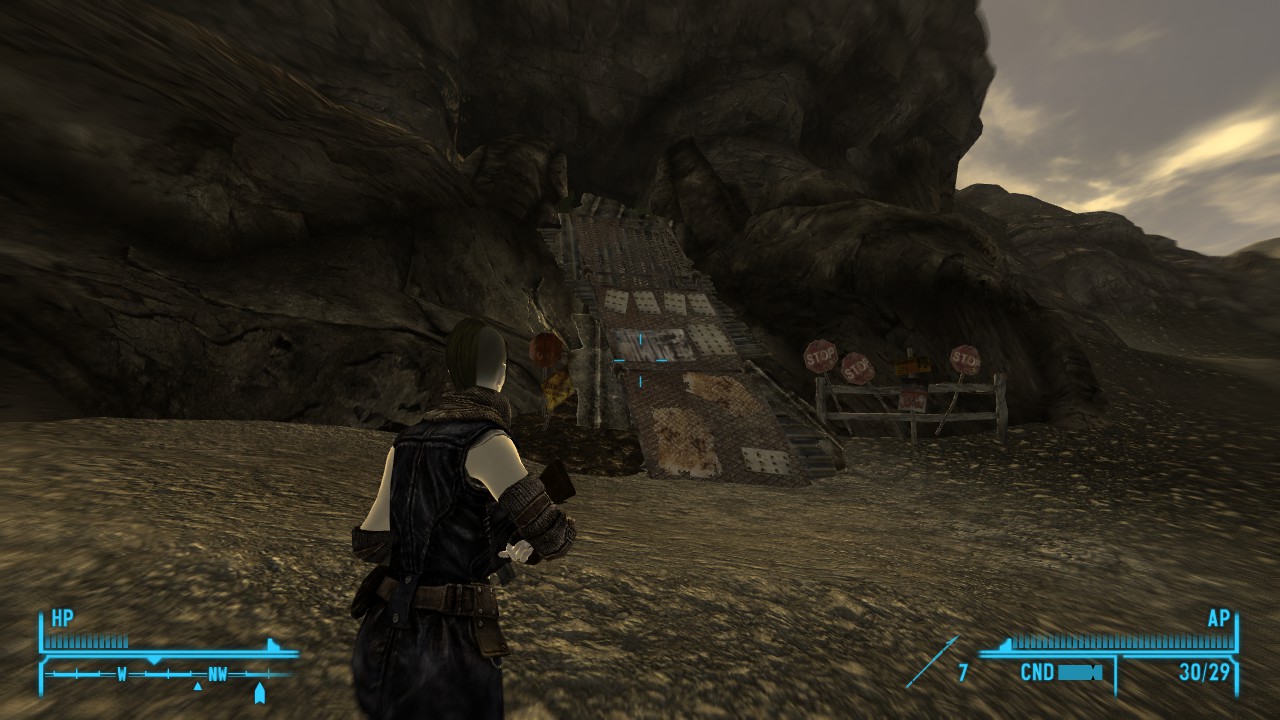
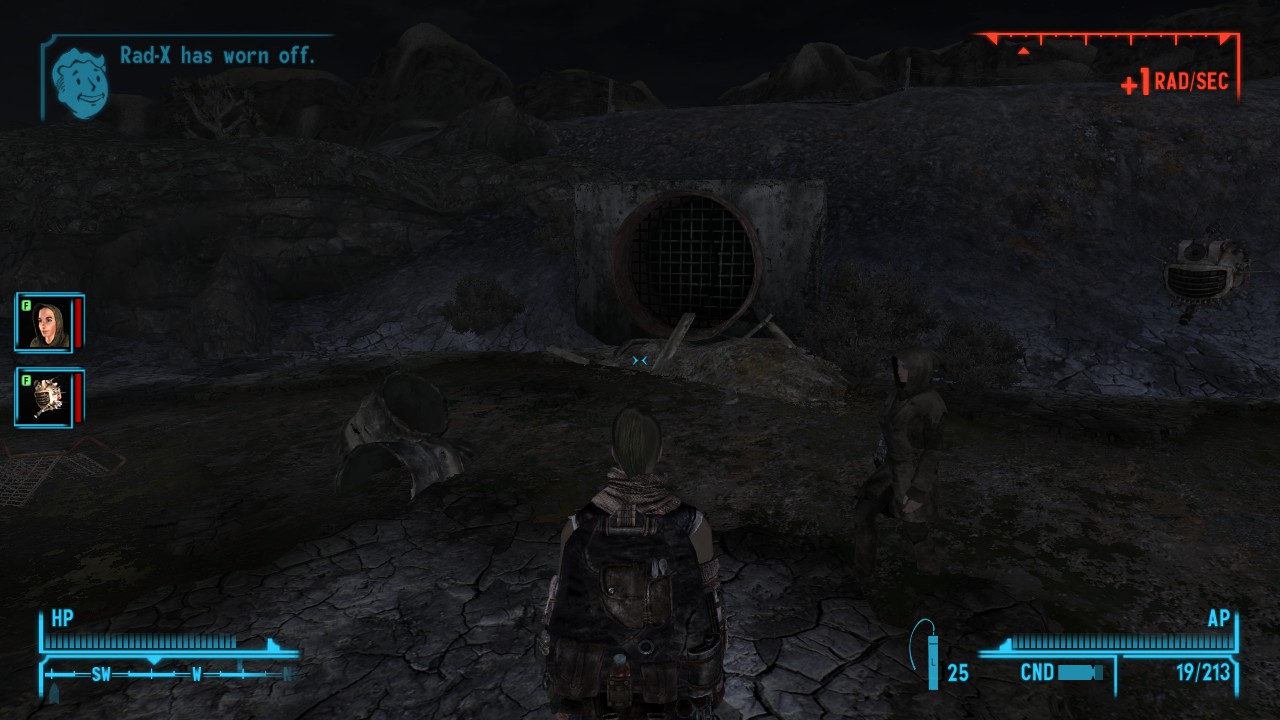
The Devil’s Gullet – Holes, Golden Geckos and Vault Chambers?
Highest Lockpick Level: Average
Highest Hacking Level: Very Easy
-Notable Loot-
Small Handgun Scope
Devil’s Gullet is a large hole in the ground, with a broken-down waste truck acting as a ramp down to the cave in the bottom of the hole. Right off the bat, there’s treasure aplenty- ammo crates, and a Sunset Sasparilla Star are waiting to be claimed.
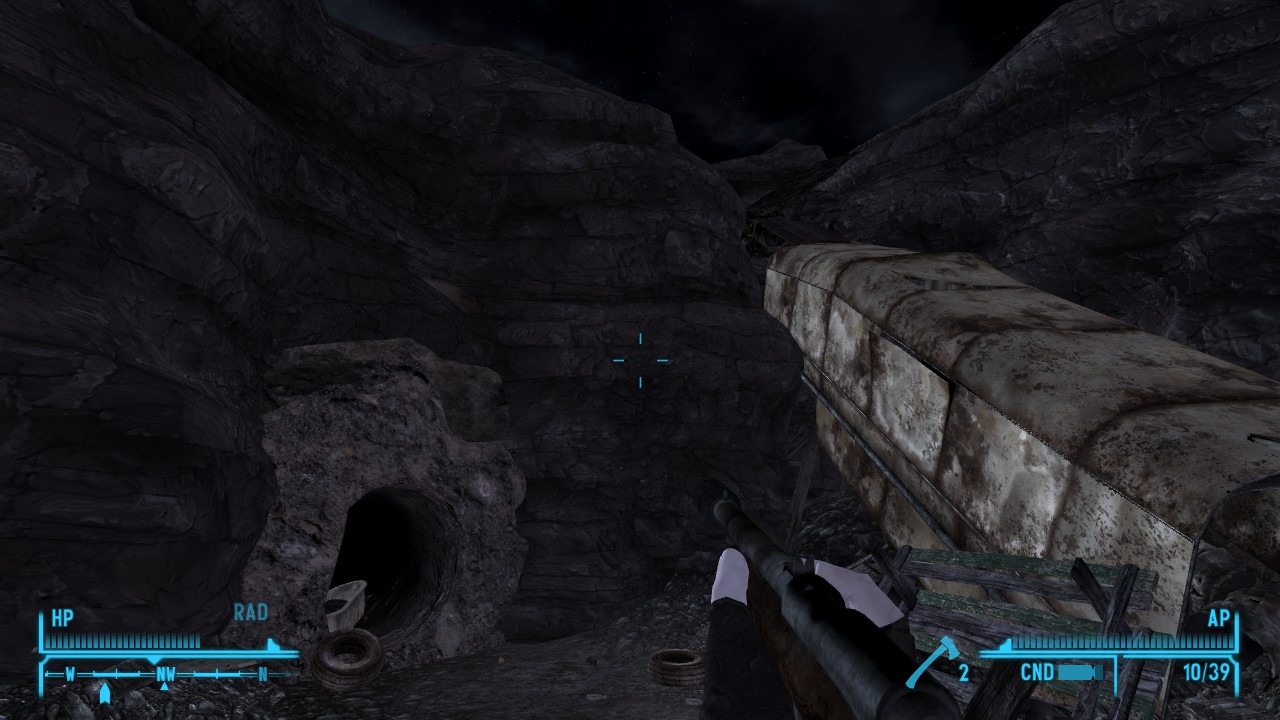
Devil’s Gullet exterior. It’s suggested you use the crashed vehicle as your ramp up and down. The new stuff happens inside the hole to the left.
The cave inside is more or less linear, mostly lit to the glowing mushrooms, and no doubt your skin once the Geckos go nuts on you.
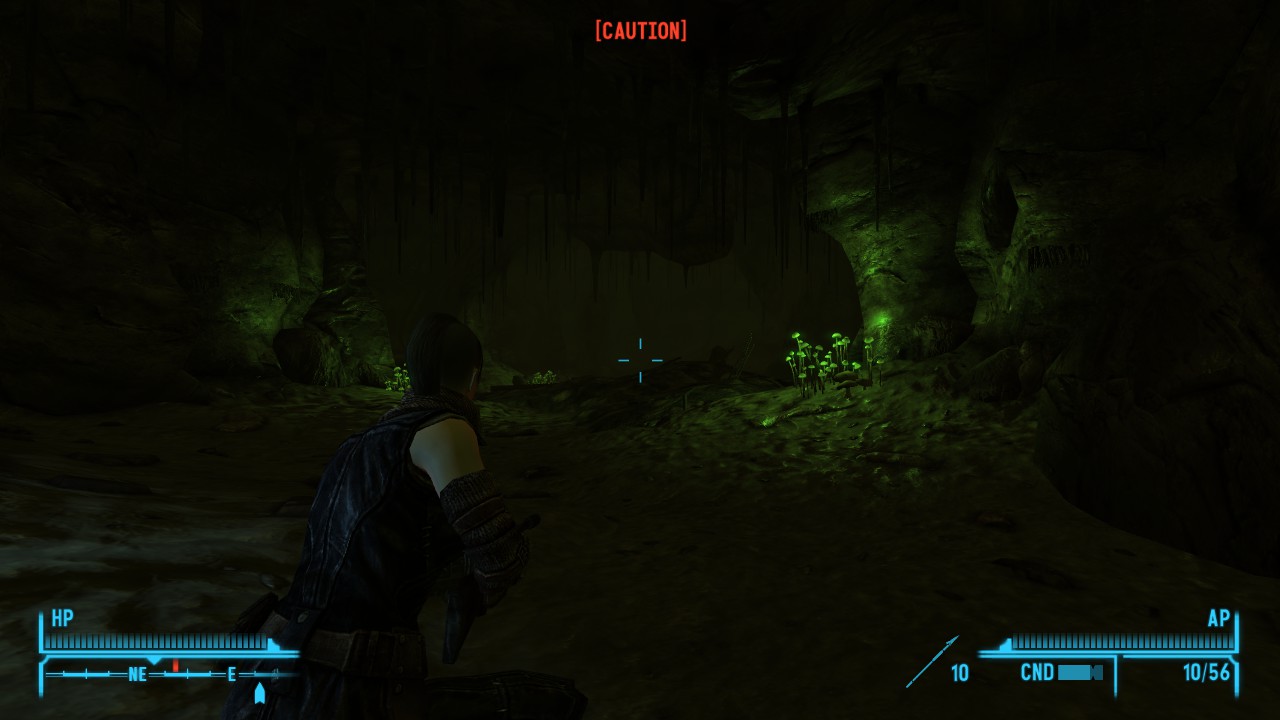
Entering the cave proper, the situation is very similar to Sunnytime Ciggarettes HQ, as it’s infested with Geckos, however these geckos are irradiated Golden ones, and you’ll take some spare RAD damage if you get bit. Take a few RadX in your pack as a percaution. Also, the encounters aren’t quite as confined or as swarming as they are in Sunnytime as well, as the cave is much more open.
Once I can figure out how to get out of the door, you are so freakin dead!
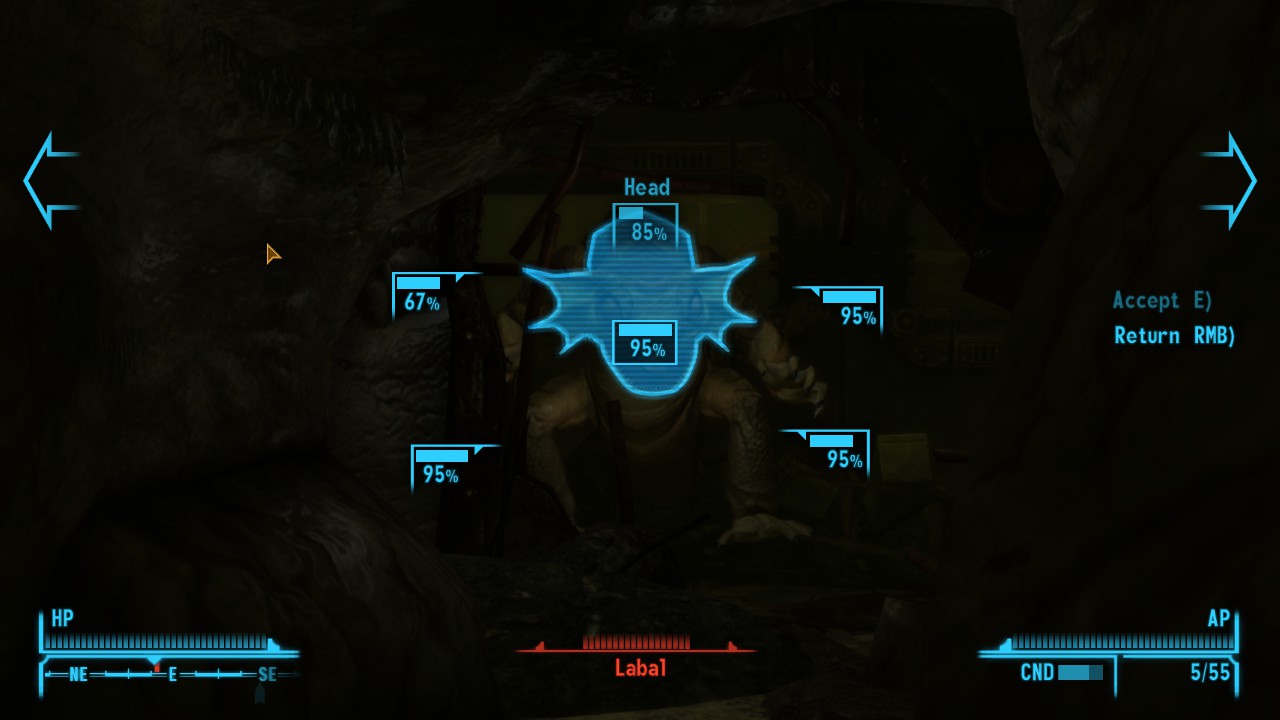
Eventually, you will reach what appears to be a fragment of a facility similar to a Vault. Labal will be waiting for you there, and will provide a similar challenge as Smokey did back in the Cigg HQ. Most interesting however is there’s a few warheads stored in the same chamber as Labal.
The window that acts as the door between Vault 40’s blocked off areas and the cave.
The eating areas, the remaining accessable point of Vault 40.
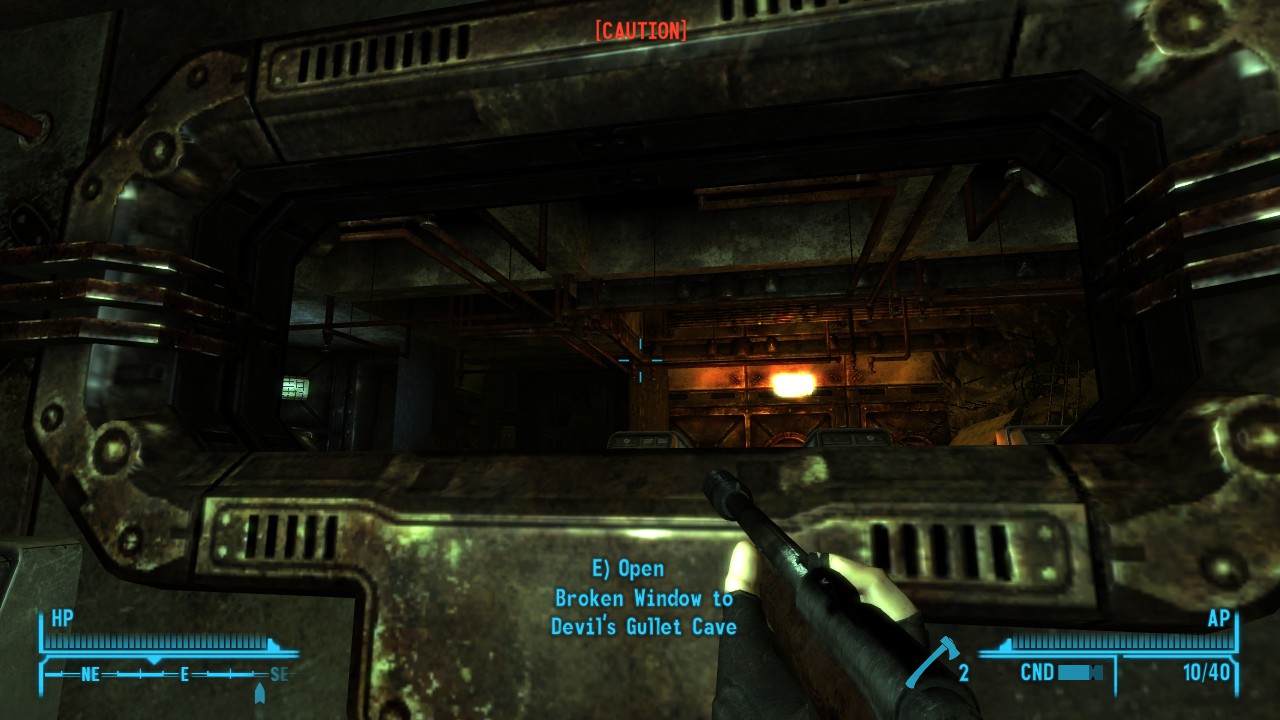
Crawling through the window, you find yourself apparently in a lost fragment of Vault 40, a recreational room at that. Beyond the terminal there, there’s a few random lootables located in this chamber as well for you to grab, and a few more Golden Geckos to purge.
Sunnytime Ciggarette HQ – Geckos, Ciggs, and Hunters
Highest Lockpick Level: Average
-Notable Loot-
Varmint Rifle MkII
Nuka Cola Quartz
Varmint Rifle Silencer
Tales of a Junktown Jerkey Vendor
Sunnytime Ciggarette HQ is a small dungeon complex and the first of the gecko-infested areas that you’ve been sent after by Frankie. As far as difficulty, there’s nothing too dangerous, mostly just standard Geckos and Young Geckos to deal with.
The dungeon can be sorted into two seperate areas- the office areas on the first two floors, and the industrial area below with the ciggarette factory and the lair of the main Gecko threat, a large one named Smokey. In the upper areas, there’s a few cash registers with some decent cap amounts. Of special note is the main atrium, where a jumping puzzle is required to get to the far side of the upper floor. Crossing over there will be the body of a Gecko Hunter and a few of his remaining supplies.
Upon reaching the manufactoring floor, expect another flood of Geckos to smack into you for a bit, as well as a stairway up to the manufactoring office. A terminal here will help explain some of the sorry state the company is in, as well as a few extra safes and lootables located here.
Past the factory floor there’s a few rooms with containers before a doorframe, which after opening will unleash Smokey on you. He’s a decent bullet spongue for early levels but not too difficult for a 10mm Pistol to gun down. In his room is three wall safes, locked from Very Easy to Average, and a small back chamber with a body for you to loot and a small section of irradiated water. The duffle bag in this area comes equipped with a Varmint Rifle Silencer for your troubles, something possibly useful for later adventures.
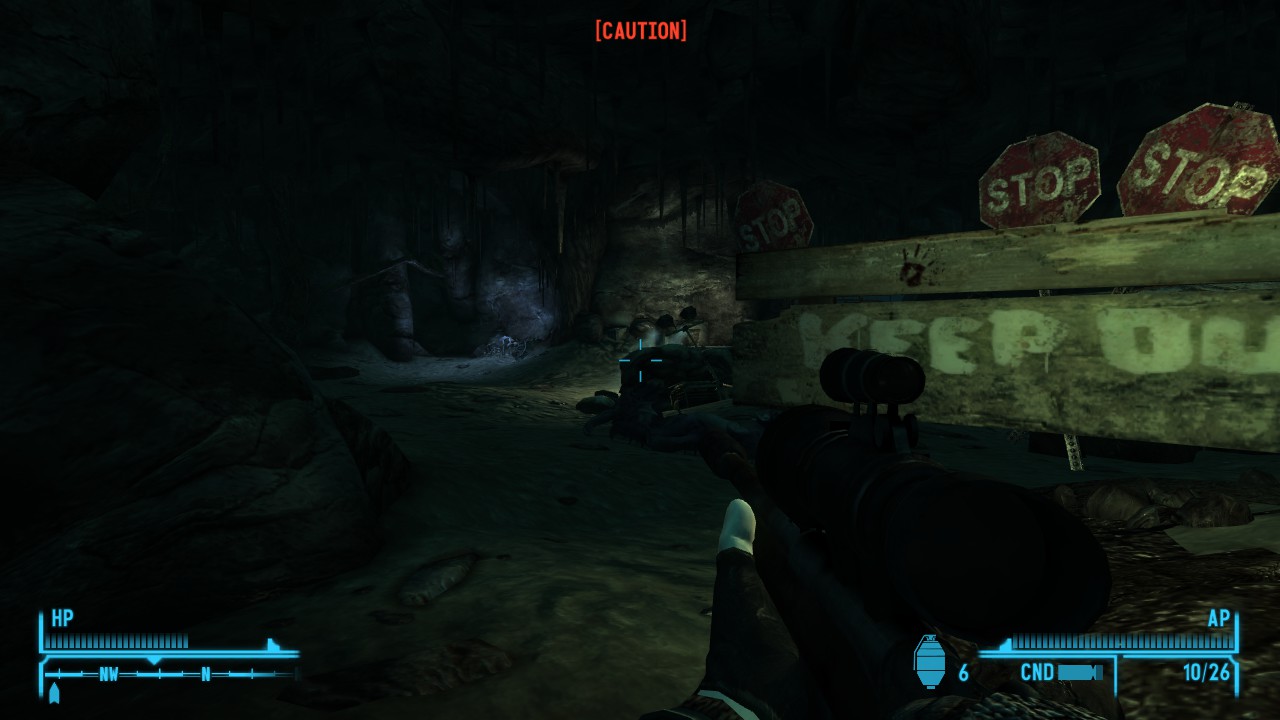
Firetooth Caverns – Fire Geckos, Mercernaries, and Explosions
Highest Lockpick Level: Easy
-Notable Loot-
Lever Action Shotgun MkII
The exterior to Firetooth’s lair.
Firetooth Caverns is the furthest location that Frankie sends you to during the first part of the quest, and naturally it’s one of the most dangerous primarially because you start facing off against Fire Geckos inside of it. These are technically the most dangerous of the Gecko subspecies due to the flamethrower breath adults of the species are packing. Naturally, Firetooth himself will have this firebreath, so procede with caution and pick your fights a little bit. If needbe, it may be wise to pick up a companion, either a modded one that starts in Goodsprings or traveling to Primm to repair ED-E for a bit of extra fire support.
The first chamber. Behind the signs to the right are a ton of useful supplies for the fight ahead.
The first chamber of Firetooth Caverns features a sizable stockade with a few explosives crates and other lootables, as well as a spare Shovel that you can pick up. Among the items is Mercernary Orders, explaining the surprisingly large amount of military presense.
The cave has three seperate tunnel splits, which I will refer to as Left, Center, and Right. Following the right path, you’ll immediately have it split left and right, left following the same route as Center and right continuing onward to a dead end with a duffle bag and some bones.
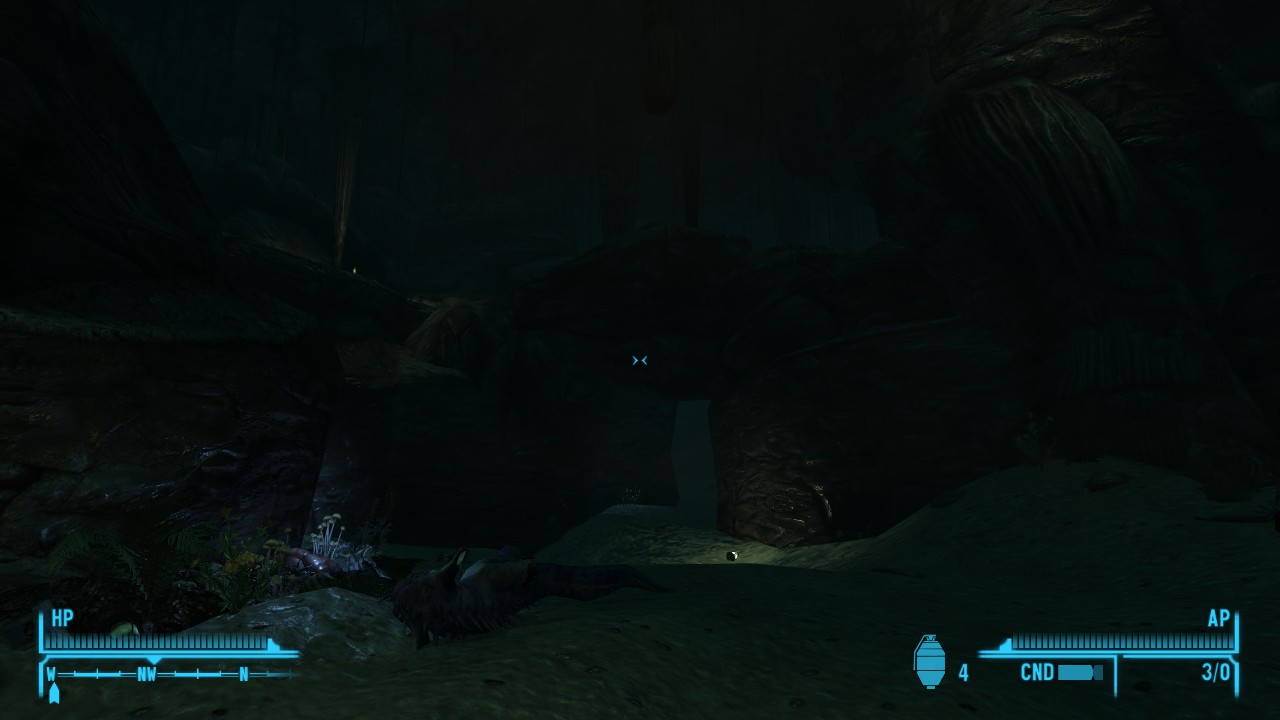
Firetooth’s home turf. Taking the walkway dead ahead upon reaching the merc camp leads you to the upper ridge.
Careful, he spits pure promethium.
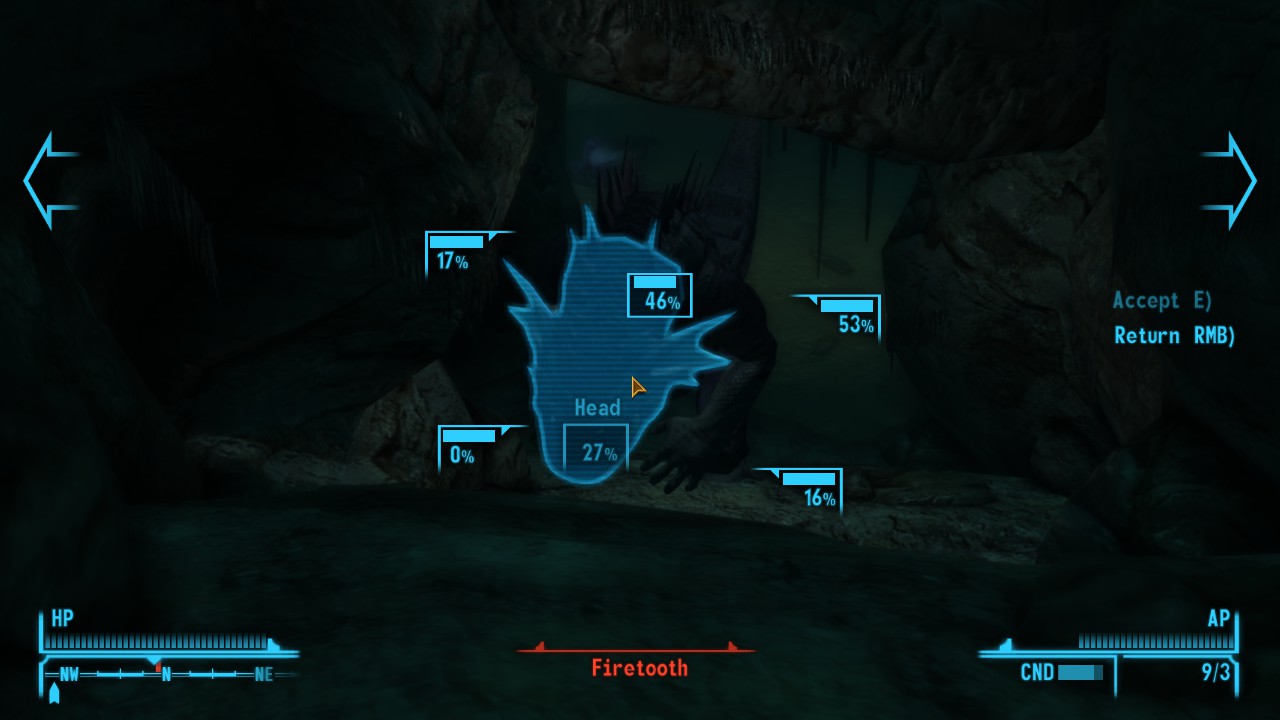
Center (and Right’s left path) will lead to a massive chamber where one will find a lot more Fire Geckos and Firetooth himself. Of note, Center will actually put you a level above where Firetooth and the rest is, whereas the fork from Right will put you level with Firetooth and his posse. As is, Firetooth is MUCH tougher than the other two, so I’d suggest leading him into a frag mine or two if you can. A good way to do that is setting a few mines down the Right side of the tunnel and then fireing from above at Center, so when it runs to Center to attack it catches some of the explosives.
After finishing off Firetooth, it’s time to search around for what else his cave is hiding. Sadly, there’s not too much on the ground section of his chamber that’s interesting. On the upper layer however is a lootable Powder Ganger corpse and a foot locker you can pilfer, however. Moving on to the Left path, you run into yet another two-way split, with the Left on this split leading to ANOTHER left-right split. Right is sadly a dead end at this point. At the second left-right, left is more Fire Geckos and an irradiated water pool. Right leads to another horde of Fire Geckos, a few mangled bodies to loot, and eventually another overlook to Firetooth’s chamber with more Explosive Crates.
The long and convoluted left pathway eventually reaches this dead raider with a MkII weapon and some more explosive crates.
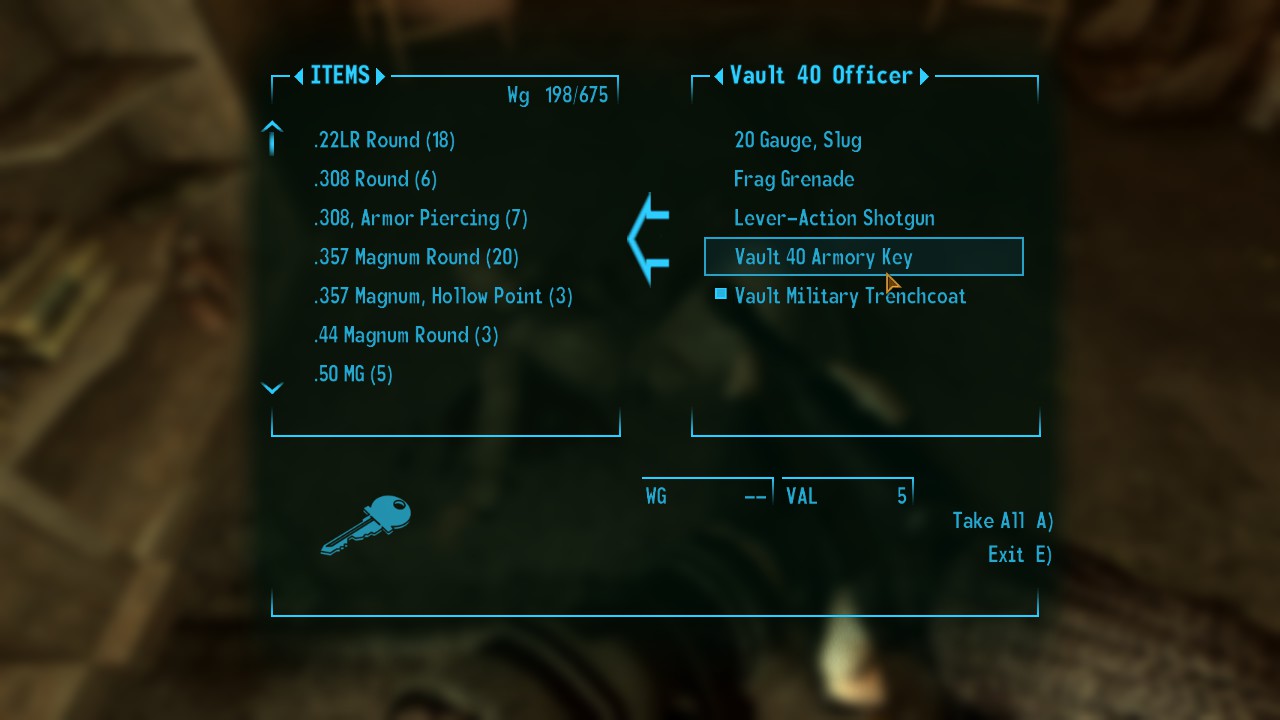
Vault 40 – Mantises and Legendary Mantises!
Highest Lockpick Level: Easy – Very Hard (Key Available)
Highest Hacking Level: Easy
-Notable Loot-
Radiation Suit
Vault Uniforms
Svc. Rifle Upgraded Springs
Chinese Army Spec. Op Training Manual
10mm Pistol Extended Mags
10mm Pistol MkII
The unassuming doorway to Vault 40.
Vault 40 doesn’t have any connection to quests nearby Goodsprings, but as it IS a vault it’s just asking to be plundered to find out what Vault-Tec did to this poor group of test subjects.
Cleanup on, well…
Right off the bat, Vault 40 seems wierd, as it doesn’t have the huge Vault door like other vaults. In addition, you very quickly find that the Vault is filled with Giant Mantises. In the first room after entering the partially-collapsed Vault you find a Powder Ganger, however, which could explain that this was the unofficial exit.
The sparsely filled storage room.
The primary floor you arrive on includes a storage room, small cafe, and a school room. There’s also access to the Armory (Very Hard, and you can find a key for it) and the lower level Quarters. Entering the Quarters will lead you to eventually finding a Legendary Mantis! This guy has a crapton of HP and naturally hits like most the Legendaries, however because he’s a Mantis he should perhaps be more managable to take at the end of the day in comparison. Still, grab a big gun and prepare to spam your Stimpacks!
Well at least we’re sure it wasn’t a giant deadly mantis…
The rec room that’s claimed by the Legendary Mantis

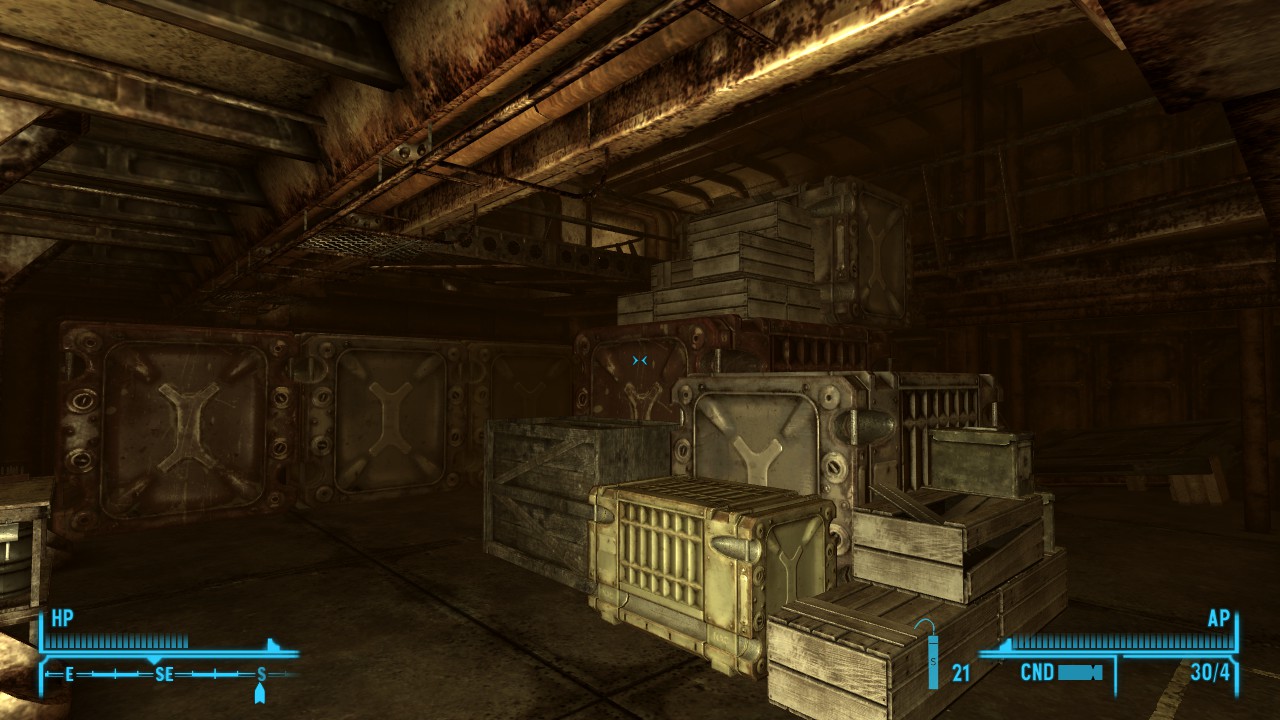
Getting past the Legendary Mantis will give you access to the breakroom it was inhabiting, including the body of one of Vault 40’s military members holding the Armoy Key. This will let you into the Vault 40 armory and it’s oodles of lootable containers! In order to get to all of it, you’ll have to climb up the stack of crates in the center of the room, where among some other ammo boxes you can find the 10mm Pistol Mk II
The guard with the armory key.
The spoils of war. The spoils of war never changes.
Jean Sky Diving Bunker – Powder Gang Villification Assurance
Highest Lockpick Level: Very Easy
-Notable Loot-
9mm Pistol MkII
Chinese Army Spec. Op Training Manual
Jean Sky Diving naturally is a Powder Ganger installation, and as I tend to side with Goodsprings against Joe Cobb, this location is more geared as another combat run. Perhaps in future I’ll side with the gangers and explain if new information is gleaned if you are on the good graces with the gang.
The outside area of Jean Sky Diving is patrolled by several Powder Gangers, forcing you to take them on in combat if you want to get near the location. Inside the small office, you’ll find another ganger and a locked Bomb Shelter. There’s a key for it sitting on the table nearby, as well as a few lockers as well.
Interior access for the Bomb Shelter.
The bomb shelter’s exit ladder.
Inside the Bomb Shelter is yet more Powder Gangers, with five or so of them all ready to chuck dynamite in close quarters fighting. Smooth. Upon finishing up with these gangers, though, you’ll find that there’s a few Strange Pies and Strange Meat kicking about as part of the loot. Awkward… This is all explained in Rick’s Terminal, located in the last room of the Bomb Shelter.
Lower rooms of the bomb shelter area.

Drainage Chamber – Heartache By The Number
Highest Lockpick Level: Easy
-Notable Loot-
Guns and Bullets
Right at the entry to this area, you’ll locate an explosive crate and a Scrawled Powder Ganger Note, indicating the situation you’ll be facing as you start to move inside of the building. As indicated by the note, there’s a few booby traps set up to impede your progress inside.
Yup, another heavily dark area.
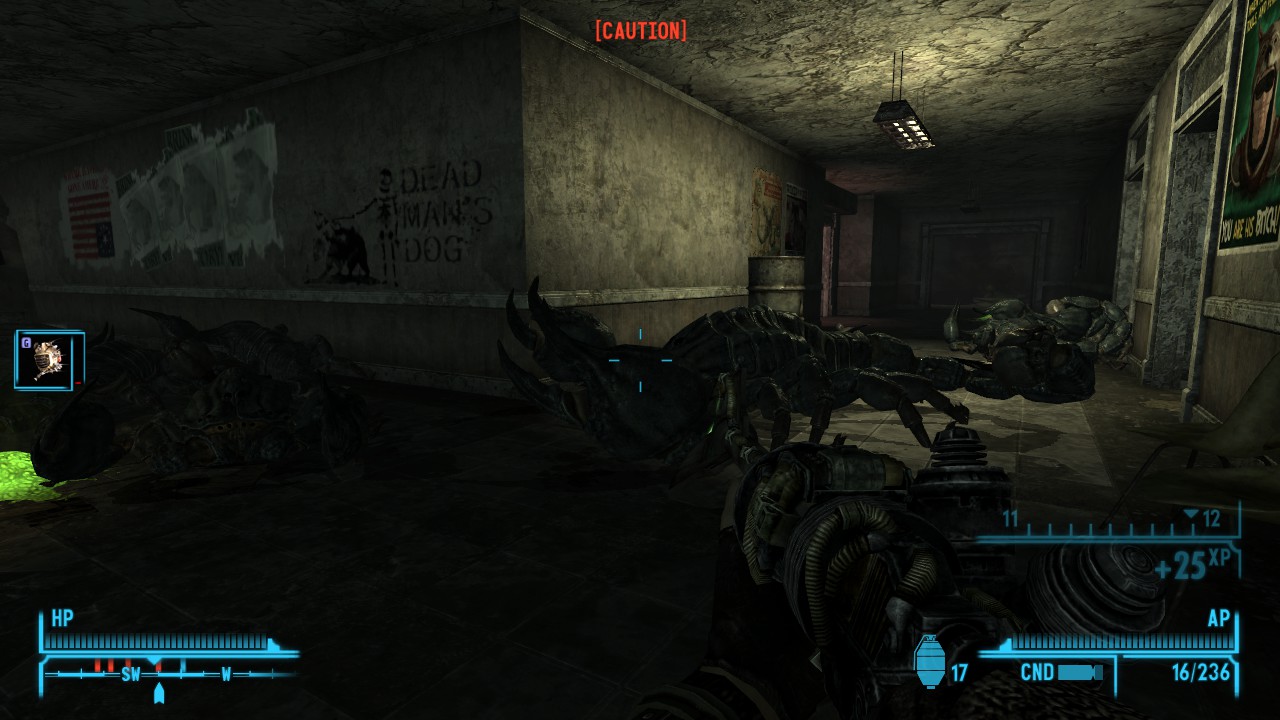
It doesn’t take too long for the place to start throwing horrors at you, as shortly past the boobytraps a Giant Radscorpion will pop out to assault you. Past the tunnel it pops out of, the mutilated corpse of the ganger the note speaks of, leaving behind a few pieces of dynamite and a duffel bag.
The next tunnel over is flooded, so prepare to go for a bit of a swim.The water is irradiated as well, like the irradiated water pooled outside. Exiting the water, you may notice several radscorpions attacking off both sides.
Moving straight ahead will lead to a couple of ammo boxes and a medical cabinet, but also a dead end, leading the way of progress to the side path. This side path eventually leads to the corpse of a Wastelander Ghoul, and a footlocker and ammo box. There’s plenty of Jet inhalers and bottles around her, indicating perhaps her form of death, as she had seemed to have avoided the brunt of the Radscorpions.
*Sad violin music*
Toxic Cave and Primm Sewers – Feral Ghouls, Gangers, and Radiation
Highest Lockpick Level: Hard
-Notable Loot-
9mm SMG MkII
9mm SMG Drum
The entry to the Toxic Cave, outside the walls of Primm.
The sewer entry inside Primm
Toxic Cave steps it up right out of the gate by throwing the player against Feral Ghouls this close to Goodsprings. By this time, however, a player will have access to ED-E and a few MKII weapons of note, so taking out these foes with two to three shots of a rifle doesn’t seem too unrealistic.
The central chamber of the Toxic Caves.
The first chamber is infested with Ghouls, and forks off to both sides in a roundish, earthy tunnels sorta way- Right side includes a dead Powder Ganger and an entry to Primm Sewers. On the body will be a note, Jarvis’s Orders.
To the left, the radiation begins to show up to ruin your day. A Radiation Suit will be close to the entry of this part of the tunnel however, as well as another note trying to explain why this is a problem in the first place. There’s a few lootable crates, including ammo box and explosives, but otherwise there isn’t much located in this room either.
Meanwhile, traveling to the Sewers, you lessen the risk of radiation, but then you get a new problem- Powder Gangers will start dueling Feral Ghouls nearly immediately upon entry. You can try to wait them out, or take them on head-oh if you wish. I’d not advise the head-on approach myself, because they are pretty nasty. Expect Explosions.
Once the dust settles, you can get a better look at where ya started. Starting from the Manhole entry in Primm, there’s a barricaded path forcing you further into the sewer in a linerar fashion, and a office locked that requires a key- Jarvis’s key to be specific, which can be found on the Powder Ganger lug himself. More then likely, he’ll join the charge of the other Powder Gangers once the battle’s been joined. Finally being able to open this door, you can find some benches, a bed, and a Hard-locked safe with a note from Jarvis and a Drum Mag that he had neglected to put on his weapon.
Beating Jarvis, you can nick his key to get better access to this makeshift Powder Ganger base (and his 9mm SMG MKII while yer at it). allowing you to explore Jarvis’s domain a bit better. There’s a kitchen, living quarters, and a stairway that leads to the connection with the Toxic Caves,
Moving further into the sewers past the makeshift barricades, expect to have to use your radiation gear and take on the Feral Ghouls again yourself. Left path loops around to the barricades from entering the Primm Sewer Manhole, and a stairway to a lower floor complex that eventually loops back around to the rest of the sewer tunnel. Among the things to find here is a Powder Ganger corpse with a MKII Merc armor, a bottle of Nuka Cola Victory floating in some bloody water, and RAD levels of +3 or more even in a radiation suit. Of final note, there’s one section of the tunnel with flooded irradiated water with a ammo box locked inside of it.
Radiological Research Facility – RADical!
Highest Lockpick Level: Hard
Highest Hacking Level: Average
-Notable Loot-
Merc Troublemaker Outfit MkII
Laser Rifle MkII
9mm SMG Drum
Hunting Rifle Scope
Well, at first glance, this place is false advertising. No radiation right inside the door, considering the irradiated wasteland that you found yourself in to trek into this place. With that said, you can find Radiation and Advanced Radiation Suits plus RadX and RadAway in a closet right next to the entry. Hints, I think there might be one here. There’s also a note from a guy named Henderson here as well, clearly annoyed about his relationship issues.
This confusion only grows as going through the first few rooms and aggroing Feral Ghouls and Crazed Ghouls quickly swarm you, however the radiation levels don’t rise, and yet you also see corpses of scientists that seemed to have been trying to escape but didn’t manage it, all in rad suits.
Moving through the atrium rooms and to the left, you find a still-lit laboratory, with Rotson’s notes inside a locked desk, musing about the laboratoy itself here. To the surprise of noone, a scientist in the Fallout Universe is a pathological monster, as we’ll see later, Ghoul or not.
Before rounding around the halls to the right, there’s a locked door. Opening it up, you get to face offf against a few more ferals, and then over an overlook you can get the easy job to absolutely wreck a unique enemy, poor ol Butch Henderson. He’s a bullet sponge, but as he can’t unlock the door on the stairway in the way, not much he can do to free himself from the situation he’s in, thus reducing him to a bullet spongue. Also down here is a scientist with a Master Key for the facility, and a Laser Rifle MKII!
Moving past the door to Butch’s room, there’s another grouping of rooms, this time actually having some radiation in it!… thanks to some Glowing Ones in a few cells. Looping around, you can find some living quarters on the other side of a barricade, and a stairway down.
At the bottom of the stairway leads to one of the Redoubts that are linked via teleporter to Reinmann Cave. I’ll cover this in more detail when I do the article on all the Redoubts.
Infested NCR Bunker – Big Bertha’s Haunt
Highest Lockpick Level: Average
Highest Hacking Level: Average
-Notable Loot-
NCR Ranger Guerilla Corpse (Ranger Loot!)
.357 Magnum Revolver MkII
The bunker exterior.
This NCR Bunker has had better days, at any rate. Radscorpion infestations, and of course Frankie’s mark- Bertha, a massive Radscporpion ready to wreck your butt.
The upper levels of the bunker look similar to the abandoned bunkers used by the Brotherhood.
The first levels of the bunker won’t seem too unusual if you’ve been to the Hidden Valley Bunkers, full of NCR supplies and several Radscorpions.
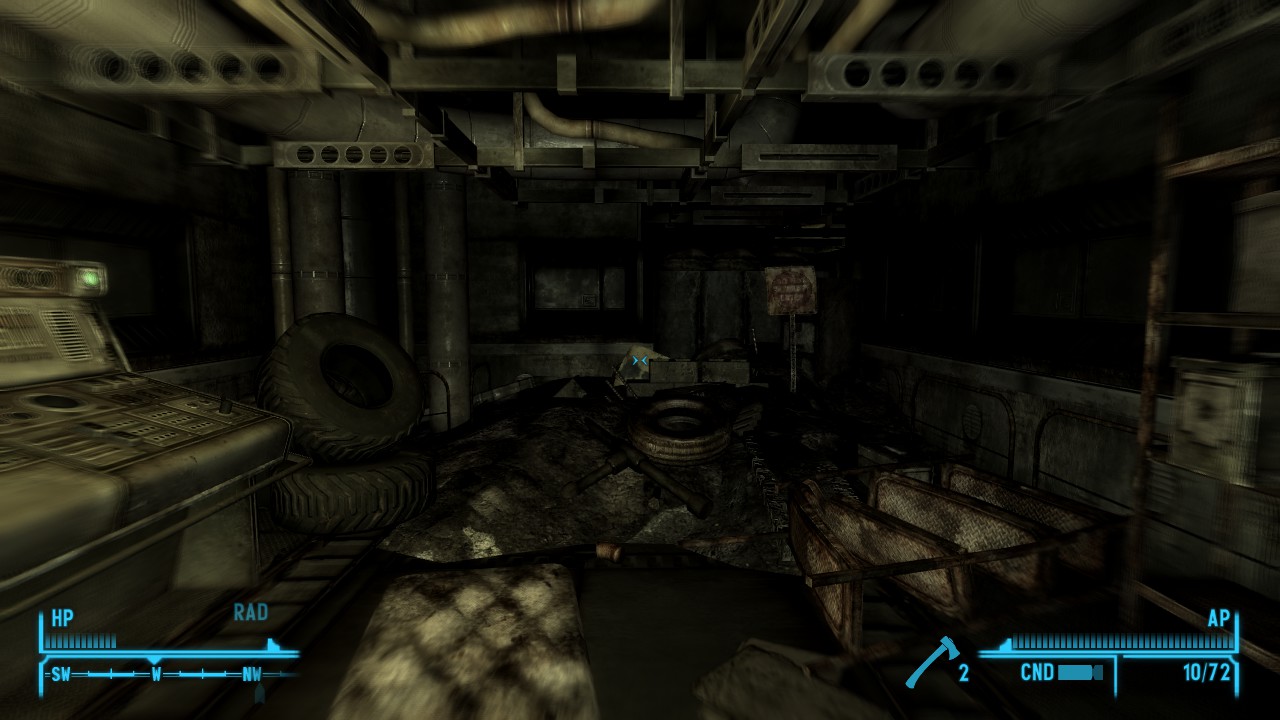
A diner in the bottom floor of the bunker.
A whole host of Radscopions run around here.
A ammo station buried in the room, full of goods.
The true face of terror, Big Bertha!
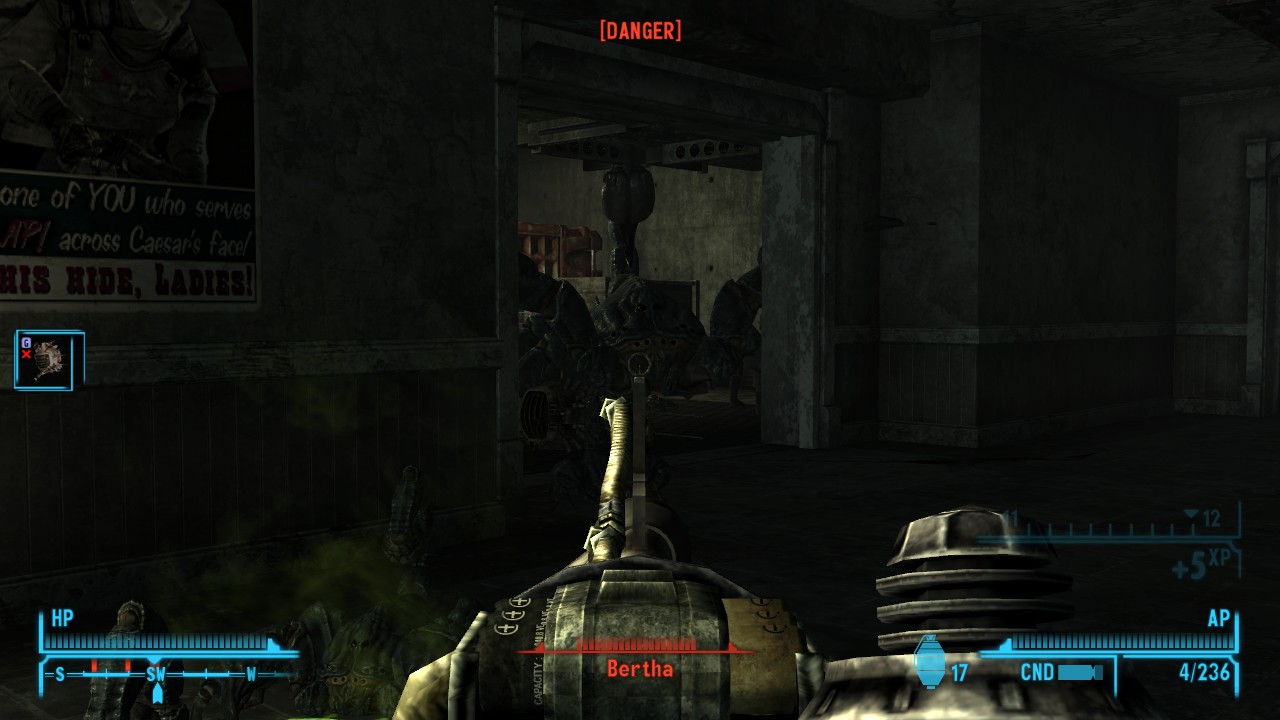
Going downstairs, you can see the signs of disrepair much more actively. The hall ahead will have a large secure door on it’s left- Bertha and her sizable group of young are hiding in here, ready to strike. Bertha will be hardened and ready to wreck your day, it’s suggestable that you use a competent rifle or energy weapon to pierce her hide. Considering there will also be a LOT of Small, standard, and Giant Radscorpions in the area as well, be sure you got competent backup to face off with them.
By far the potential shinies of the Rangers
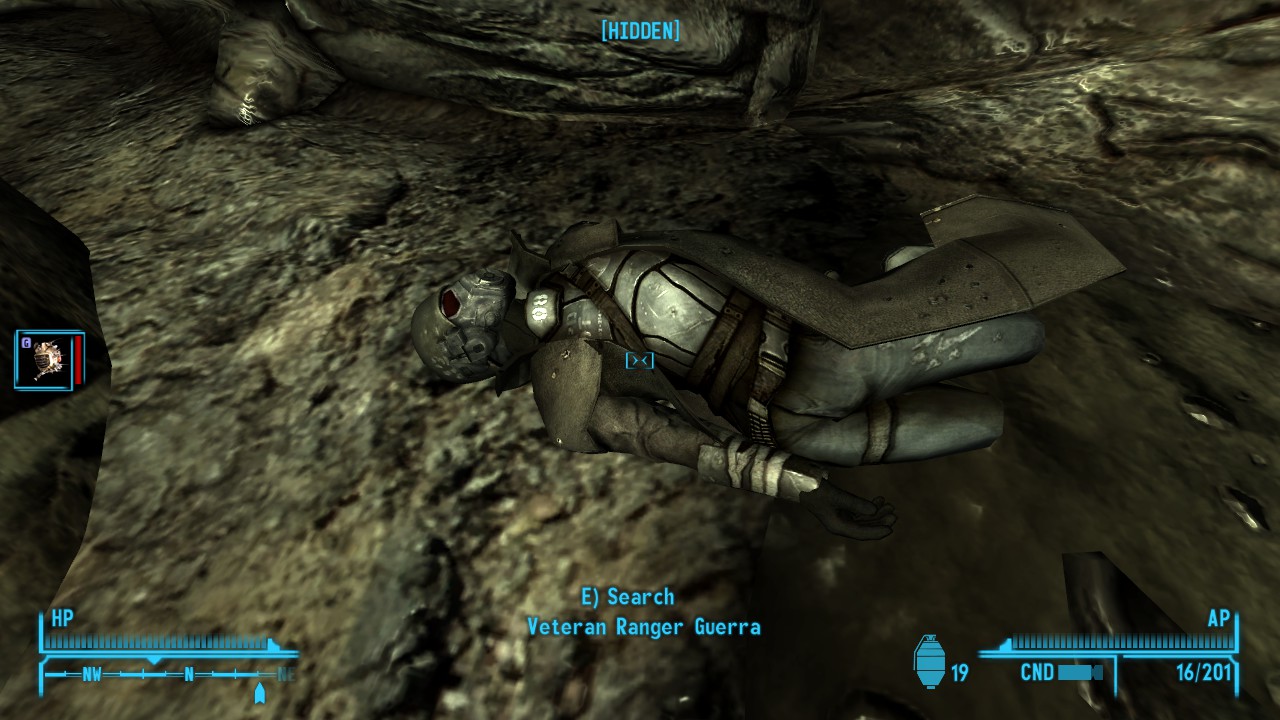
After stealing the poison glands of about 20 different Radscorpions, you’ll be free to explore the area proper. Of special note includes a reloading station located off to one side of the bunker’s computer farm, the big hole in the living area where you can find a Elite Ranger corpse (I found a Anti-Matter Rifle on him!) and of course the armory itself, which said Elite Ranger corpse will be holding the key for.
Inside the locked armory, you’ll find another corpse and a terminal that better explains some of the problems that befell the bunker and got the scorpions inside. Between the reloading station, Elite Ranger, and the armory’s loot, you’re more than compensated for your job as pest control.
Ivahpah Maintenance Tunnels, Underground Facility Barracks – Mutants and Vipers Aplenty
Ivanpah Maintenance Tunnels
Highest Lockpick Level: Average
Highest Hacking Level:
-Notable Loot-
Leather Armor (Reinforced) MkII
Merc Veteran Outfit MkII
Nuka Cola Victory
Light Machine Gun MkII
Super Mutants (Loot Pool)
Entering the Ivahpah Maintenance Tunnels (and getting the massive darkness assault like back in Goodspring Sewer) is similar to the entry to Primm Sewers- yer gonna be hearing some gunfighting to start off with. Prepare to take on some Jackels shortly upon entering, luckily among them is a Armory Master who will give you the key to the Armory in the Jackel’s little makeship base here. The armory’s full of several goods, and has a powerfist and a grenade rifle on the shelves inside.
Along the outer edges of the Jackel’s makeshift base, you’ll find a horde of grenades and small-to-medium arms. The reason soon becomes clear as you may find a Super Mutant corpse along the outer perimiter as well- Super Mutants, Centaurs and Nightkin have set up a defense on the other side of the Jackel’s base and will no doubt have survived the first wave of Jackel goons as they got distracted on your approach.
The sewer itself goes along in a loop, with two seperate groups of battling Jackels and Super Mutants. I’ll try to explain things from the Local Map’s perception here for a bit:
– The bottom of the minimap is the Jackel Armory/Basecamp as described above. At the first entries to the tunnel via the Ivahpah Overpass this is where you’ll show up.
– The lefthand tunnels are short and eventually lead to a coupe of gore sacks in the room crossing to the righthand tunnels. There is also however a bunker entry, labeled ‘Underground Facility Barracks’. We will cover that later.
– The righthand tunnel is where the bulk of the Jackel/Super Mutants fighting was. A gang member called Terrance and several other Jackel ganger bodies will no doubt be here, as will be the bodies of several Super Mutants and Nightkin. One or two of the Super Mutants no doubt survived the melee, so watch out for that. When I went through here, I found everything from powerfists to miniguns and incinerators on people’s bodies. The righthand defense line for the Jackels also has plasma grenades, so keep an eye for those.
– There’s a northern exit to the sewers that leads to a slightly-marked manhole to the northeast of Ivahpah Racetrack, a bit south of Primm next to Jackrabbit Springs. This could be another potential entry for you as well, putting you behind the Super Mutant lines. Mind the centaurs and radiation!
– Level with the Super Mutants on the right side of the chamber, you can find the Super Mutant’s little base, among the loot there being a Nuka Cola Victory, a Mini-Nuke, a unique Super Mutant named Mercer with the Light Machine Gun MKII on him, and several more lootable containers.
Underground Facility Barracks
Highest Lockpick Level: Hard
Highest Hacking Level: Easy
-Notable Loot-
4D Storage Device Mk II
Merc Cruiser Outfit Mk II
Pugilism Illuistraited
Sniper Rifle Suppressor
Super Mutants (Loot Pool)
Just like the exterior, the warfare’s not over when you enter the Underground Facility Barracks, as the fighting that had sparked outside is continuing to rage inside. After getting through two mutants, it’s time to take on the predominance of the Jackel invaders. Compared to the mutants, this is easy peasy though.
This path is mostly linear to start with, until emptying to a hall with another small host of Jackel gangmembers, led by some chick named Raven. One of her specialists has a Cowboy Repeater MKII on him, btw. Beating her allows you to loot through the little complex you have found yourself in. Mind the lower floor and it’s slightly-irradiated water, however in one of those flooded rooms is a hole you can dive into to find an armor cabinet and a locked safe. In another locked safe in the flooded area, you can find the 4D Storage Device Ver 2, which gives you a free 150 storage space!
Moving to round the corner after looting these offices, don’t forget to stop in the Supervisor’s office to pilfer his safe and read his terminal. Much like Raven’s note, it hints turrets ahead, and it doesn’t take long to find them, either. There’s a terminal behind the first four that allows you to turn off the rest after a science check however. Past here, the door to the Weapons Research Facility can be found…
Weapons Research Facility, Weapons Research Sector B – Robot Invasion!
Weapons Research Facility
Highest Lockpick Level: Very Hard
Highest Hacking Level: Hard
-Notable Loot-
10mm Pistol Silencer
Recharger Rifle MkII
Mann Co is under attack! Stop the robots!
Ok, not seriously, but expect to be jumped by Robobrains, Mr. Gutsies, Sentry Bots and Protectotrons entering this area. Even worse, it seems the turret controls from just a door away don’t penetrate here, as the turrets will attack occasionally as well.
Going to the right, through the five turrets there, shows you a door to the Nipton Sewers. We’ll come back to that in another section.
A short way into the facility, there’s another turret control panel. However, it requires 75 Science, so don’t expect to gain control of it without a character specificly built to take control. A locked door impedes progress in the hallway, so you’ll have to move further on to the far rooms. In one room is a grouping of barricades with ammo boxes and a few weapons on the floor. The other is a office with several safes, one of which requires 75 Lockpick and the Sector A Key required to get further into the facility.
Once in the locked room, you have two Hardened Mister Gutsyies and two MkVIII turrets to deal with. Expect to deal a lot of damage to the turrets if you hadn’t taken the turret controls yet. A Recharger Rifle MKII is your reward for getting this far, however, before moving into Sector B.
Weapons Research Sector B
Highest Lockpick Level: Very Hard
-Notable Loot-
Recharger Defender
Sector B has a minor trickle of radiation going through it, so bring your radiation suits and Rad-X. Still more robots to stomp however! A central room once entering here will have some loose RadAway if you’re running low as well, even though they are stored near some toxic barrels. There’s two other doors in this area as well, the lefthand door of the loop has a safe and a medical box, the right has a locked door that requires a key, forcing you to go to the back room.
Located in the back room is a testing area with 3 MkVII turrets and two named Security Robots, Decimator and Eradicator stuck in a bunch of sandbags. A workbench is located here as well in case you need to build more repair kits after all that laser and rocket fire as well. With broken stairs, they only way to go from here is further in. To make matters worse, companions tend to glitch out here, so don’t expect them to come help you until you unlock the Requires Key door.
Another named Security Robot, Ahnihilator, will be waiting at the bottom of the sairs from the fight with his fellows, so hopefully you got more AP rounds to deal with him. Four MkVIII Turrets will also make your life hell when facing him.
In order to get further, you will need to use the two small terminals to unlock the two small doors that are blocking a side hall. Four Hardened Mr. Gutsyies will attack from there as you do, and there’s more turrets guarding this area as well. Stop at the side room to get the lootable containers and then reach the other side of the large door, where the true treasure trove of the area is.
Several ammo boxes and weapons are laying here, but a briefcase with a Very Hard lock is what you will be most interested in- Inside, is the unique weapon that the research laboratory was working towards, the Recharger Defender MK15. This is a excellent weapon to have in your arsenal.
The final few rooms hold a few turrets, and then you finally reach the exit door that required the key in the first place. Use the terminal to disengage the lock and then walk on through.
Ant Caves, Pit Stop Bomb Shelter, and Nipton Sewer – Ants, Jackals, and Connection Tunnels
Ant Caves
Highest Lockpick Level: Average
-Notable Loot-
5mm Hunting Rifle
Cowboy Repeater Custom Action
Assault Carbine Extended Mags
That Gun
To the surprise of noone, the primary enemy in the Ant Caves is giant ants. To the surprise of some, the Ant Caves are connected to a nearby area, the Pit Stop Bomb Shelter, so expect some Jackels to pop up eventually as well.
Sneak through the linear path to find and hear a combat between Jackels and Giant Soldier Ants, but beware, for you may run into the biggest enemy in this area- the Giant Ant Queen!
Wait, that’s not right. Even bigger threats are here- a Legendary Warrior Ant! Pack your plasma weapons and get cracking!
In the middle of the queen’s chamber, next to some egg sacks and a dead Wasteland Adventurer, you can find a footlocker, inside of which holds a 5mm Hunting Rifle for you to wreck enemy face with.
Entering the tunnels behind the queen’s chambers, there’ll be a split that’ll have the right hand side lead to a outcropping above the queen’s chambers, eventually leading to some rather grumpy Jackels. One of these gangsters will be wielding That Gun for some reason… Among them will also be a named guy called Drake, wielding a Light Machine Gun, so watch out for that.
This area of the Jackel encampment has a few different things, including a shooting range, medical table with a Jackel body laying on it, and an entry to the Pit Stop Bomb Shelter. For the sake of the guide, I’ll enter from the surface entry of that location in the next section.
The lefthand tunnel side has a slightly-barricaded adventurer’s camp at the end, with a Torn Note, an assault carbine, and several lootable containers and a campfire.
Pit Stop Bomb Shelter
Highest Lockpick Level: Hard
Highest Hacking Level: Easy
-Notable Loot-
Wasteland Survival Guide
Silenced .22 Pistol MkII
Roach – Substance C (Apr 2275)
.44 Revolver Heavy Frame
Don’t expect entering from the Bomb Shelter doors to be easy- the Jackels here are up and raring to go almost immediately upon entering, and even the stealthiest characters will have a hard time surviving the zerg rush if you’re spotted. Most of the Jackels that will attack will be melee wielders, including one with a chainsaw(!), though a few will be gun nuts, like a named dude named Roland and a Specialist.
Ruining the days of the Jackels, you then get some free reign to loot the area. Of special note is a room marked ‘Computer Room’ by a sign, which the Jackels converted to a jail cell. A Very Easy locked computer terminal (I call bramancrap, that took three tries!), will lead to a terminal with cryptic notes in it. Down the stairs past here is the Nipton Sewers entry to this place.
Moving downstairs from between the office and computer room, you find a diner and some various storage rooms, with fresh food and some extra items laying around. Inside a bunkbed filled room is a Hard-locked safe and on one of the beds an item called Roach Substance C, an item I am unsure of the use of yet.
Inside a closet, you can find a Torn Investment Proposal, which will be near a Electrical Switch. Activate the switch to open the wall to a secret room with a VR machine located inside of it. Jhonny’s Terminal will explain what is up with the VR terminal, and a Auxillery Generator that I am not sure what to do with is located here as well. You get the copies of the terminal records when you log off as well, which leads me to believe these may come important in the future.
Nipton Sewer
Highest Lockpick Level: Hard – Very Hard (Key Available)
-Notable Loot-
Recharger Pistol MkII
I’m not even joking. Nipton Sewer has shown up a couple times during the Ivanpah section of this guide, I will not be surprised if it doesn’t continue the connection trend somehow!
Entering and exploring this from the Nipton entry seems the sanest way to take this path. Upon entry, you will find yourself in yet another annoyingly dark area, with the occasional light to guide your way. Expect Giant Rats, Huge Rats, and Gigantic Rat to attack if you really are quite loud.
Similar to Ivanpah Maitenence, as this area is non-linear, I’ll try and explain it from the Local Map view what can be found here:
– The main body of this room is a central loop, with a Utility room stuffed with giant rats all over the place. There’s several bits of random refuse but not much interesting for loot in this loop.
– The bottom right corner of the loop is the entry from Nipton.
– To the north, there’s a small subarea in some unlocked doors. This leads to a door with a broken terminal lock, requiring a Average lockpick. Entering the room, a Huge Rat and a chewed up corpse will be here, with a few lootables including a Duffle Bag and a Security Keycard for the fence near this point.
– Through the fence past here, using the security card, you can begin combat with several robots here. To the surprise of noone, this eventually leads to the Weapon Research Facility, so expect Turrets, Mr. Gutsies, Protectrotrons, and Sentry Robots. A Recharger Pistol MKII can be found as part of the stuff in this area, tucked inside a breakroom.
– The bottom left corner has even more rats, a flooded in section with a locker, and eventually the door to the Pit Stop Bomb Shelter, with several bear traps in the way.
Canyon Station Utility Tunnel – More Reasons To Hate The Leigon
The sound of gunfire echos through the tunnel as you enter, follow the tunnel entry into the train tunnel, leading to several Leigonaries. Feel free to engage in combat if you’re not a part of Ceaser’s Leigon, otherwise these guys are kinda pointless to the end. Among the Leigonares will be Leigonary Burr, a named guy.
Along the tracks, there’s a side-chamber that holds several lootables and more of the Leigon, including a Praetorian Guard! Prepare for some heavy fighting as you loot and plunder the tunnels. The body of a woman named Julie can be found in this room, and a Laser RCW will be sitting on a shelf as well, a corpse nearby with some microfusion cells as well.
Another body, Ariel, can be found shortly after the room you found Julie in. More train tunnel can also be found past here as well, as well as a hard-locked door full of equipment. A 10mm SMG MK2 and the MK2 version of the Merc Charmer outfit can be found here as well.
At the end of this second tunnel, the body of a man claled Holt and several Leigonary corpses can be found, sadly I did not find too much of interest here sans a Explosive crate.
An easy-locked door will lead you to the discovery of a survivor named Frost, who (if you killed the Leigonaries to this point, or if you are Leigon and kill him yourself) you can get his master key from. Using the key, you can enter the office behind him and his little greenhouse, finding a decent pile of chems and other goodies in the office, including one of those science sets Doc Mitchell had.
One last thing, expect a small ambush on the way out.
Searchlight Bomb Shelter and Searchlight Sewers – Slightly Safer Havens
Searchlight Bomb Shelter
Highest Lockpick Level: Hard
Highest Hacking Level: Average
-Notable Loot-
Puligism Illustrated
Right off the bat you need Hard lockpick level in order to access this location from the church. As it is still Camp Searchlight, bring along anti-radiation equipment and friends to make the job a little easier.
Once in the bunker, some of your radiation woes will lessen, as the only source of major rads will be Glowing Ones and Glowing Trooper Ghouls. Spent shell casings will be all over the place, as a NCR Searchlight Terminal in a room close to your entry will share some information as well.
The biggest selling point here is the various lootable ammo and food storages around the place, allowing a nice restock zone for the player. NCR Ranger corpses and the occasional MKII weapon from the gun nuts just sweeten the deal.
Searchlight Sewers
Highest Lockpick Level: Average
-Notable Loot-
Glowing mushroom clusters will add to the radiation growth in the sewers, but as far as situation, you’ll still not see a lot of rads beyond the major ghoul encounters and a short time after cutting down the Glowing Ones. Golden Geckos populate the area as well, but beyond an NCR ammo dump in a supply closet and an irradiated water source, there’s not a lot of meat in this sewer.
Cottonwood Bunker – Deeper Leigon
Highest Lockpick Level: Hard
-Notable Loot-
MKII Weapons (MkII Sawn Off on Centurian Bachulus)
Armored Prost. Outfit
Milsup Reviewer
This cellar door located in Cottonwood Cove HQ will act as a expanded spot to assault should you seek to. Playing as an NCR alligned character for much of this, naturally this will be a hostile take for much of this guide.
As you can probably expect, there is a LOT of high-grade Leigon forces in this area, several of them are higher-grade ones including a Leigon Legend, and a few named ones: Roon, Recruit Michaels, Assassin Marshal, and the one that scared the crap out of me most, Slave Bodyguard with a ballistic fist. Round a corner into that without flincing… Also, a Centurian named Bachulus and a Liegonary named Kendall that were not agressive when I first entered, and Boone didn’t immediately shoot at. I made sure to rectify that part :3
After you’ve murderhobo’d through the leigon’s finest here, let’s go through what’s actually here for terminals and such. The first rooms are mostly living quarters, and a bulk of the leigonaries that attack you here are the smaller stuff. From the kitchen and living areas, we move to a large room full of footlockers and ammo crates. This room also features a crucifixian site behind a locked gate, where an NCR Ranger corpse can be found, weaponless but still armored.
Upstairs in this room is a collection of beds, no doubt a bunker area for many of the leigonaries. A ‘Recruit’s Diary’ can be found in an Average-locked container here. It would seem some drama was quietly happening during our named leigonarie’s stay here.
From the backroom of the armory area, you can find an exit to a leisure room, and through that, the Molerat-skinned rug threshold to the room of the previous Centurion. Marshall’s room key can lead to similarly decadent rooms as well, allowing for you to peek into what these soldiers were hiding here. A dead slave can be found in Bachulus’s room, as can his vial of concentrated Psycho in a wall save, while Marshal has a copy of Milsup Reviewer in their room, if you use their personal keycard to get in.
Off to the right of the leisure room is a firing range, a great area to get ammo and gun-related goodies of all kind, if you don’t mind the karma hits. From there, there’s a short downstairs leading to a generator room and a few leftover lootables.
Emergency Service Station and Collapsed Underpass – The Saga of X13
Emergency Service Station
Highest Lockpick Level: Average
Highest Hacking Level:
-Notable Loot-
Emergency Service Station greets you with a massive hole in the floor. Resist the urge to jump straight in and explore the top floor for a second, to find a Construction Hat, a Average locked safe and a cash register.
Hopping down the makeshift ramp to the caves below, follow the tunnel for a little while. Once down here, you meet the terros of the wastelands themselves, Deathclaws.
Through the tunnel of Deathclaws and Deathclaw corpses, you will find a manmade tunnel that leads to Collapsed Underpass South. Short, not so sweet, and to the point.
Collapsed Underpass South
Highest Lockpick Level: Average
Highest Hacking Level:
-Notable Loot-
Entering into Collapsed Underpass, you find yourself seeing the standstill traffic of your typical metropolitan area. Inside one of the nearby cars however is a chap named Bulldozer, who’s in a bad state. Part of a secret NCR project called X13 (which may or may not be related to the locked console in the Abandoned NCR Bunker), he was sent with his squad to hunt down and destroy the local Deathclaw population. You can get him back on his feet with a Doctor’s Bag, and offer to help kill the Deathclaws with him.
You have to travel through an abandoned bus, but afterwards you’ll be where the start of the Deathclaws are located. Bulldozer is a great asset, but he CAN die unfortunately, so be careful- even with a host of companions at your back, you ARE fighting Deathclaws. Mostly Blind Deathclaws but younger ones and a Deathclaw Mother can be found here as well. Nearby where you find Bulldozer you can also find one of the first corpses, Bruce, tucked in the backend corner upon entering the deathclaw arena proper near a motorbike.
While traveling through, be sure to look around for supply stashes scattered aroudn as well. A stash located on the south end of the middle ‘aisle’ is where Vizzy’s draped over the metal roof at. From Underpass South you got two exits, Underpass Control Center and Emergency Tunnels.
Underpass Control Center
Located here is Merrick, who will make a break for it when you go to rescue him. Otherwise, random lootables are all you’ll find.
Emergency Tunnels
Highest Lockpick Level: Easy
Shortly into here, you can find Lizard’s corpse, continuing Bulldozer’s questline even if Bulldozer doesn’t survive. Irradiated water in the tunnel and for added bonus, incendiary gases will plague you here, though the fire isn’t too strong if it’s triggered.
Beyond an Easy locked door, you’ll fnd another living member of X13, Nola. She’s equipped a little less powerful than Bulldozer was, so don’t count on her lasting too long, though her Laser RCW does pack a punch and she comes equipped with stimpacks. A door to Collapsed Underpass North can be found here as well.
Collapsed Underpass North
Kendo and Franko’s corpses can be found in this area, filling out your list of recovered bodies, as more blind deathclaws are scattered about. A Giant Deathclaw or two in particular will come and ruin your day here as well, and (unlike me) watch where you spray and pray- like the surface, too many shots in the vehicles here will cause catastrophy and chain reaction into a deadly field.
To make matters worth, the final enemy here is a Legendary Deathclaw Alpha and his buddies. This entire area is pain incarnate. Franko’s Heavy Incinerator may be worth using due to abomination’s weakness to fire, but it’s a pretty nasty foe regardless.
From here, there’s only one door: Carmaggedon.
Carmaggedon
The location of Big Momma, an absolutely gigantic Deathclaw. My suggestion? Visit the Mercenary Campsite/Alien Crashsite first so you can use the Alien Blaster/Railgun Prototype… between her and the host of deathclaws here, you’ll be glad you did.
If you can manage to survive it, you can get ahold of Sarge’s corpse as well as a body of a Wasteland Adventurer. This Adventurer of note cames with some decent loot, but always spawns with the Rusty version of the 4D Storage Device!
Upon defeating all the Deathclaws, you acquire some rewards and experience from the survivor of this crazy trip. In my trip, only Nola survived, though you may get more rewards if both Bulldozer and Nola make it out alive.
Viper’s Lair – Totally Not Full of Vipers
Highest Lockpick Level: Very Hard
-Notable Loot-
Roach – Recharger (Dec 2180)
Cowboy Repeater Custom Action
A LOT of MkII Gear
Chained Pros. Outfit, Reinforced
Upon entering the railroad tunnel, prepare for trouble, as the entry of this railroad tunnel will lead to lots of Vipers very fast. Either try to use stealth to take them, or feel free to unleash your firepower on the entire force of them.
Once the smoke settles, prepare to loot the bodies. Some of them will have some nasty weapons, like grenade rifles and flamers. Various minor loot can be found in the tunnel as well, leading into the next part of the facility. There’s a set of bathrooms, a locker room/dormatory, and stairs down. Looting this upper area may lead to more enemies from below showing up. One of these guys will be named Trevor, carrying a motherfuzzing Rocket Launcher! Another of these goons will also be carrying a Grenade Launcher.
The stairs down lead to another railway tunnel, and a set of rooms afterwards. Inside these rooms, another special enemy will be here, a man named Vex with a Plasma Rifle Mk2 and another dude. There’s also a lightly-equipped lady in a bedroom. Inside the cabinets in the bedroom is another of the Roach items, Roach – Recharger – Dec 2180. In the armor cabinet nearby as well, you can find Sexy Sleepwear and Reinforced Prost. Chain Outfit. Vex will also have his own note talking of his plights.
Clark Field Reserivor – Grabbing the Ghouls By the Ears
Highest Lockpick Level: Hard
Highest Hacking Level:
-Notable Loot-
Resivor Keycard
Dean’s Electronics
Lots of Ghoul Ears
Attacking this place will lead to a swarm of ghoul attacks, though a good pile of Ghoul ears will come from this. The office at the start here will probably fill with ghoul corpses however.
Moving downstairs from the office, some trashed bathrooms and storage rooms will be on this level. Of note is one of the storerooms has a gun cabinet. Eventually, a door requiring a keycard will block your way, but the key will be located nearby in a school desk. A ghoul with a Vault suit will attack you during that time, but little will be beyond that door.
Moving downstairs to the next landing, a long pathway will lead from there. Several adventurer bodies and a duffel bag will wait for you, and while the Adventurer’s Note of his last words may be solem, the parting gift of the Grenade Rifle Mk2 will make the sting go away.
Down to the next floor, there’s a small half-flooded room with some minor loot.
Novac Shipping Office – That Was Short…
The Shipping Office sadly does not have much of interest inside of it, just a few crates. What is interesting is it’s connection to the Novac Collapsed Tunnels Access.
Novac Collapsed Tunnel Access, Collapsed Tunnels, and Collapsed Tunnels Sub-Level – Irradiated Hell Hole
Highest Lockpick Level: Hard
-Notable Loot-
Novac Metro Key
Anti-Material Rifle
Several weapon mods
A lot of Ghoul Ears
Kent’s Confession
Diving into this location from the spot that makes the most sense – this being the Novac Shipping Office – you go down a short set of stairs to a few random rooms full of crates and refuse. Among them will be a pair of Feral Ghoul Troopers, so be sure to grab the ears. Through one door of this area, a small office area is cornered off via a metal cage, but it’s locked and needs a key. Similarly there’s a door that also leads to the Collapsed Tunnels themselves that requires a key here. A stairway down will lead to the Collapsed Tunnels Sub-Level, being the only unlocked door from here.
Entering into the Collapsed Tunnels Sub-Levels, you’ll find yourself in a railway tunnel before becoming attacked by a decent horde of various ghoul types. At the end of the always-blocked-off tunnel, you can find a broken office area that leads deeper in. Eventually the long hallway beyond the stairs will spring a radiation leak, so bring your suit and prepare for even more ghouls. Ghoul Gun Nuts will probably be attracted to this next barrage of gunfire, so prepare for that. An Average Lock door here will guard a Marksman Carbine and a Combat Helmet plus a few grenades and other misc goodies as well. Up the stairs from here is the Gun Nut’s hangout, where some Vicky and Vance Casino Chips can be located, as can various goodies and a campfire for you survival nuts. Eventually from there, you’ll run into another railyard tunnel with a few more ghouls, that lead you to either a door to the Novac Collapsed Tunnels or a dead end, where a body of a Wastelander in a lab coat or a NCR ranger with a set of Orders on him can be found.
Entering the Collapsed Tunnels proper, another train tunnel is found, with more ghouls inside of it. If you continue all the way to the end of the tunnel, a crashed train and a door can be found, with a hard lock and a few ammo boxes hidden inside. In addition, there is a doorway in the middle of the tunnel as well, leading onward. Be sure to take the side route to a duffle bag and a 12.7mm pistol. Another railroad tunnel leads down from here, full of more ghouls, then a short stairway that ends in a large complex and is guarded by a Gun Nut named Kent. Kent’s wearing some MKII armor and is carrying around a flamer, so don’t get too crispy. Another Gun Nut named Salvador will be down here, with an Anti Material Rifle(!) and a decent pile of ammo for it, plus the Master Key for the Tunnels. Another thing of note- this area has gas leaks that can be shot to cause fiery misery to the gits if you’re quick on the draw and watch out for it. Past them up some stairs, there’s some Very Hard Locked ammo boxes with more .50 rounds, a reload and workbench, and some other random supplies. A terminal here can unlock the door to leave to the Maintainance Access as well.
With key in hand, you can open the cell door and look through the office area behind it, revealing a rather comfy home area, if a bit covered in gore. After which, you can return to the junkyard and show the evidence of the situation you found to Reed in the Nipton Scrapyard for some extra loot as well.