
Overview
Accurate as of Closed Beta Update 27 (New Foundations)Check out previous patchnotes: on the wiki[worldsadrift.gamepedia.com]Full Disclosure: I am a volunteer community moderator for Worlds Adrift forums, and discord.Worlds Adrift is a unique community-driven game full of adventure. I hope to tell you how to enjoy the game to its fullest.If you want to ask questions or chat about Worlds Adrift is a great place to start.I’m constantly updating this guide with the game’s updates, so if you find any inconsistencies or mistakes don’t hesitate to let me know. I’ll get it fixed asap.Helpful Links: The Closed Beta server status[wa.glitch.me] (There is daily maintenance from 12-12:30 BST for US servers, 9-9:30 BST for EU servers) The Closed Beta World Maps, provided by the Cardinal Guild Group Updated for Update 27[map.cardinalguild.com]. Official Worlds Adrift Discord[discord.gg]. Worlds Adrift Subreddit (/r/WorldsAdrift). Worlds Adrift Official Forums[www.worldsadrift.com]. Worlds Adrift Gamepedia Wiki[worldsadrift.gamepedia.com]. Worlds Adrift Twitter Bossa Studios (developers) Customer Support: (Bossa are London-based, and don’t have fully 24/7 support staff, although response time is usually very good.)[support.bossastudios.com]. Bossa Studios (developers) Twitch Channel. Occasional streams on Thursday at 17:00 BST.[www.twitch.tv]. Worlds Adrift Island Creator Store Page (its free).Guide Translations: Türkçe (Outdated as of latest revision 15/12/18)
Controls & Settings
Probably the best thing to do before hitting “Play” is to be aware of the default in-game controls. Luckily, for the first few hours of gameplay the game will hint at the relevant controls.
* Climbing can be done on any surface, including ceilings.
** The Grapple boost will “boost” you toward the connection point of your grapple. It has a short cooldown during which the tool will just fizz.
*** The screenshot will be saved to your games install directory, under the name “Travellers0000.png”, where 0000 will be an incrementing number
Dedicated settings are now available. Press esc then go into Settings.
What does DAD levels mean?
This means “Detail At Distance”.
FPS?
Typing into the chat “/showFPS” will create a small window in the top right of your screen showing a debug FPS graph.
If you need to improve your FPS: try some of these settings [link]
First Steps
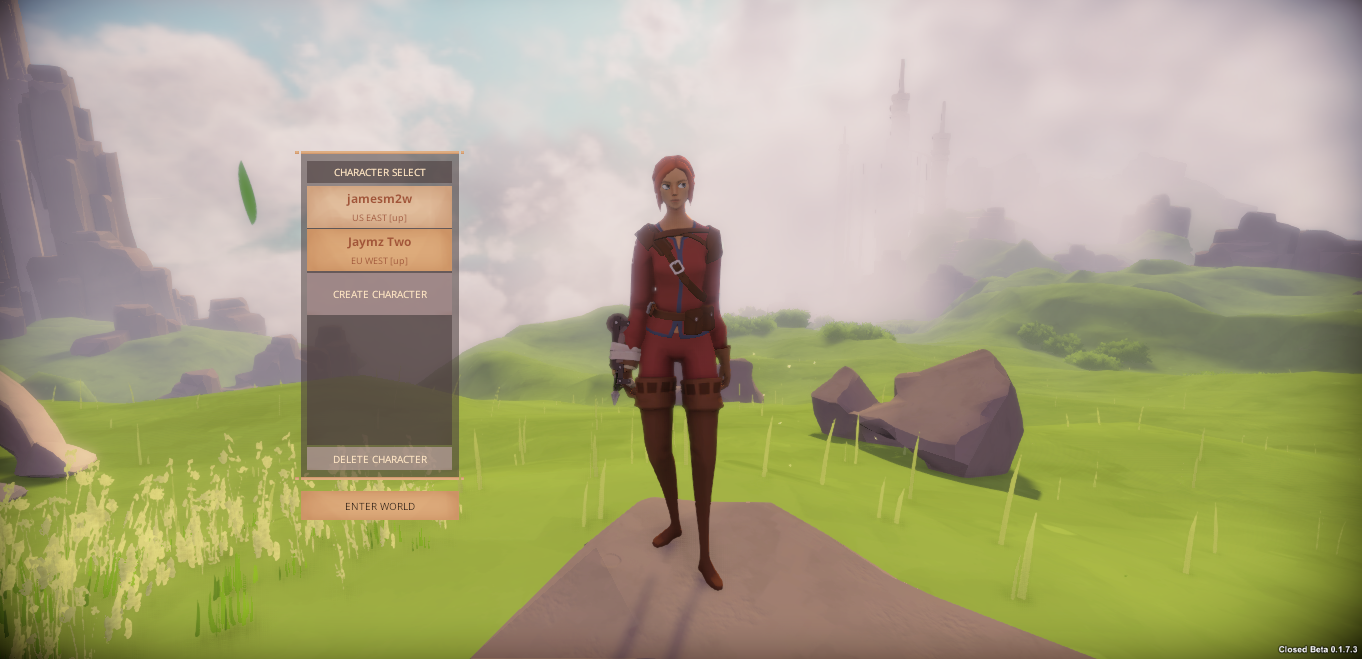
So, you hit “Play” on the main menu. You’re now looking at the character creator, or the character selection if you’ve already made one.
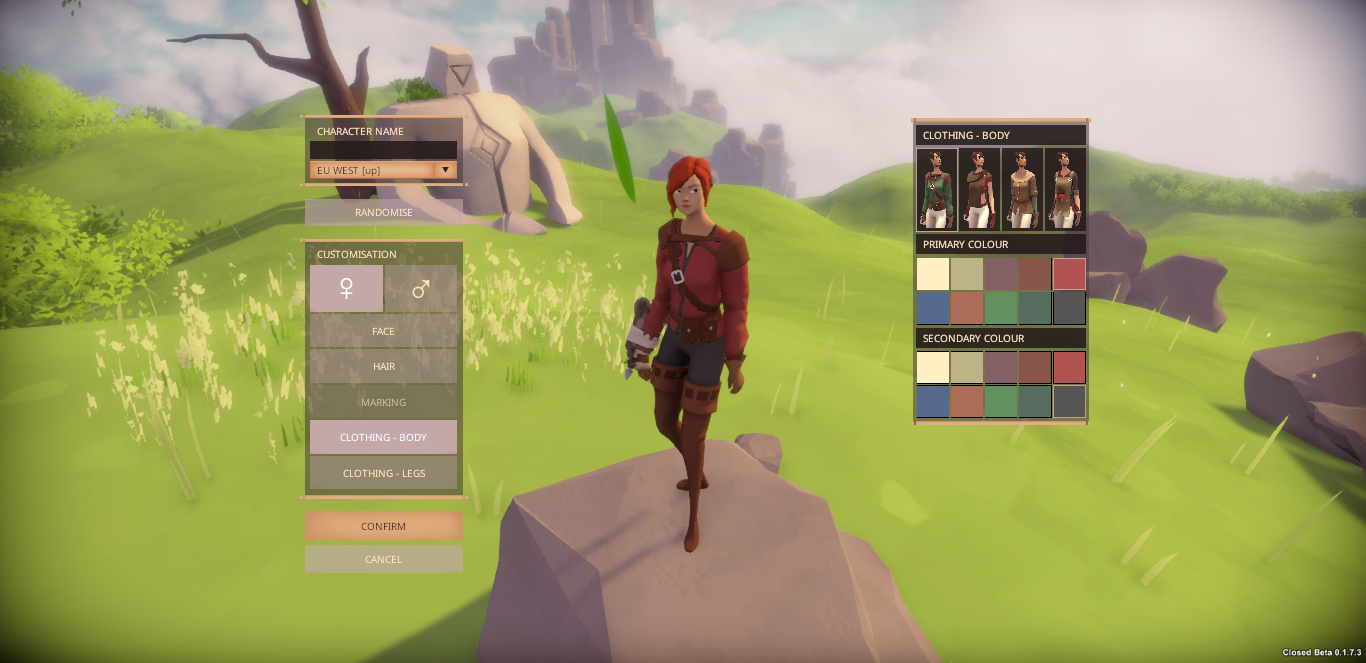
Go ahead and design a character you like the look of, and make sure to select the right server you want to play on. Both servers are located in the Eastern US. (Currently, you can not change server after you’ve made the character without deleting all your progress and starting again, however you do have 3 different character slots.)
The currently available servers come in two flavours:
PvP:
Right from the beginning you have the risk of being attacked at any time. This is initially how the game was designed, a potentially dangerous world from the beginning. Don’t forget to arm yourself and your ship with cannons.
PvE:
Introduced in New Foundations, this server type is more peaceful in the early to late-mid game. All outright hostile player interactions (shooting, salvaging ships) are disabled in the first three tiers of progression. However, in the dangerous lands beyond the sandwall PvP is enabled.
Once you’ve decided, feel free to press “Enter World”. The game will load for a minute or two and may put you in a queue if too many people are also trying to join at the same time.

It is currently a known bug to be kept at position 2 in the queue indefinetly, if this happens just restart the game
As of Update 27 — New Foundations — the tutorial area “Haven” should now be the default spawning area.
The game will try to guide you through the initial steps via a series of simple instructions, as such some of this part of the guide may be rendered obsolete, but I’ve left it in the case it is useful to you.
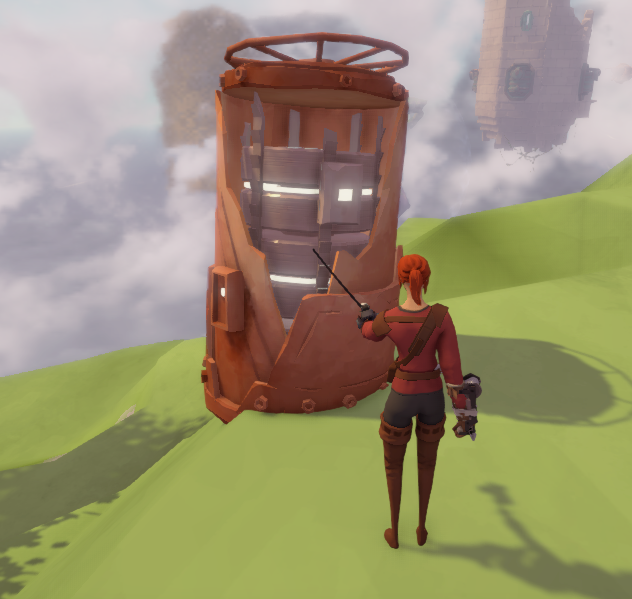
After integrating your character to the revival network at the end of the Haven tutorial, you should spawn in a revival chamber like this one:

Spend a minute or two to familiarise yourself with the grappling hook and how it works. Be careful not to smash into walls and rocks as you will take damage.
After you can move fairly adeptly, you need to collect (salvage) wood, metal, atlas and knowledge. For more detail on how to do this see the section on Collecting and Crafting.
Now would also be a good time (if you haven’t been shot yet) to put your Pistol and Bullets in your Belt. To do this open your inventory (“TAB”) and drag the pistol & bullets (if you have them) into the lower section of the inventory under the labelled “Belt” divider. They will no longer drop on death now.
You should now be all set, feel free to move on and read the rest of the guide for basic shipbuilding and explanations on the game’s mechanics.
Collecting and Crafting
In order to make anything you need to salvage, collect and learn. Here’s how.
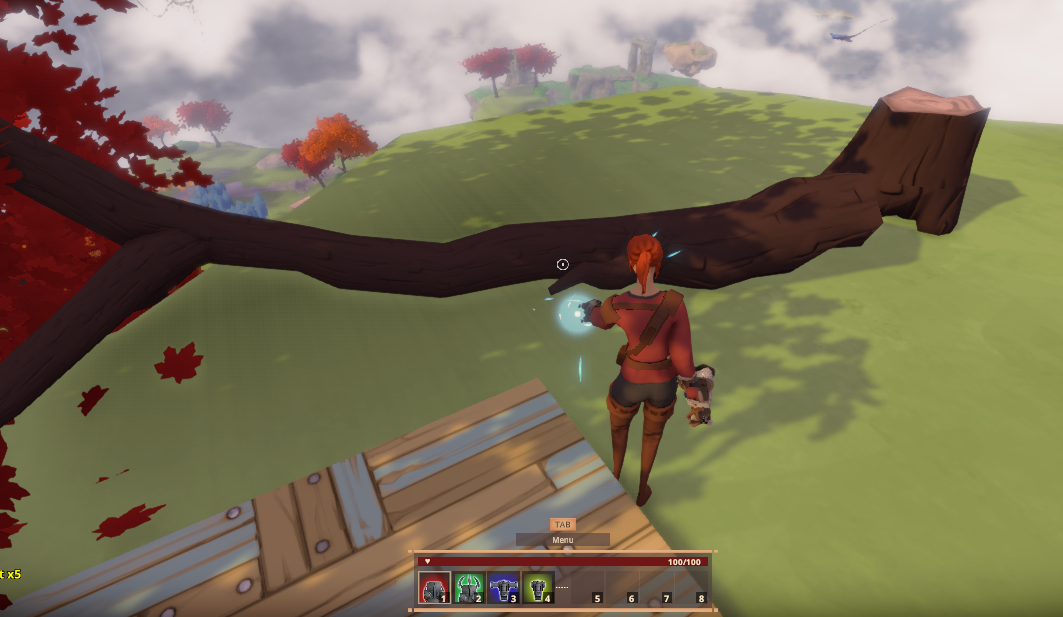
In order to get resources (Metal, Wood, Fuel and Atlas) to build your ships you’ll need to salvage trees, mine ore nodes, and gather fuel. All of these tasks can be accomplished with the salvage mode on the Gauntlet (Default slot ‘1’).
- Trees: Aim you tool at the position you want to cut the tree, then hold ‘LMB’ to charge the tool. Once charged it will zap, and cut the tree. Keep ‘LMB’ held; to avoid having to wait as long to recharge the tool. Then repeat until the whole tree has been cut up and put in your inventory. You should have seen a series prompts informing you that you got a type of wood and some Daccat Berries
Salvaging a tree for wood. Note the success message saying I salvaged the wood
- Ore Nodes: Aim your tool at the node, then hold ‘LMB’ to charge the tool. Once charged it will break away a small section of the exterior. Repeat this to break more of the exterior until you find little black shapes sticking out. These are metal ore which you can harvest using the salvage tool, also look out for little green shards which will be outlined when hovered over with your cursor. These are Atlas Shards, hover over them and press ‘E’ to collect, they are very important in crafting the Atlas Core and subsequent extensions. Once you are sure you have got all the metal and the Atlas Shards from the node you should break the interior of the node. To do this hit it repeatedly with the salvage tool until it cracks and breaks.
The two different types of metal node
Salvaging a node to breakaway the outer shell and reveal metal. Salvage the metal to actually get the metal in the inventory.
- Fuel: To collect fuel for your engines, repeatedly hit the small brown pumps scattered around with your salvage tool. Note: after 1 hit they will break out of their cradle and roll away. Each lump currently provides a maximum of 25 fuel.
An example of a fuel lump

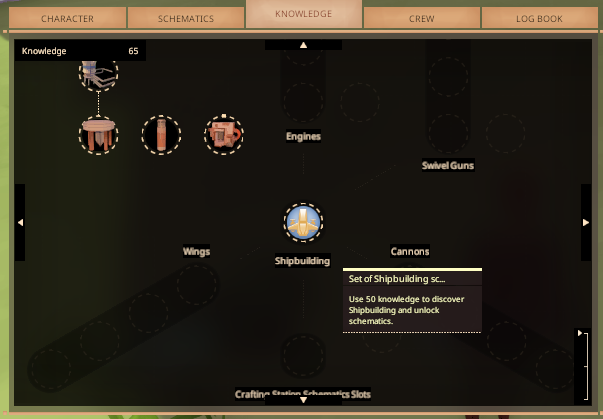
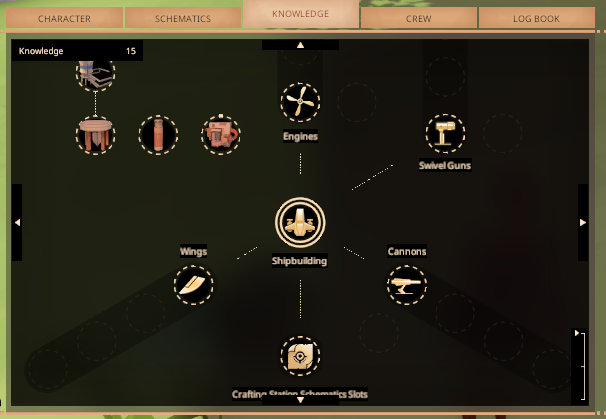
After getting enough resources you should aim to collect all the knowledge on your island, you can do this by finding rusted cylinders and using the scanner tool (Default slot ‘4’) to receive 25 Knowledge (in the Wilderness biome, biomes further on in the game give you more).
You can also scan all the game’s “assets” once to learn small bits of knowledge. After you have 50 Knowledge you can go to the “Knowledge” tab of your inventory and learn “Shipbuilding” which should be a highlighted blue circle in the middle. If you don’t have enough it will be greyed-out.
You can also learn several core upgrades from your amount of “lifetime knowledge”, this is the total amount of knowledge you have learnt over the entire course of your character.
“Shipbuilding” includes all the basic ship schematics including a Shipyard and Assembly Station which are vital for building you ship.
NOTE: At the beginning of the game you can only learn a max of 35 schematics, while this shouldn’t be a problem at the beginning later on, you will need to be aware of which ones to keep and which to not. N.B. If you can’t “Unlearn” the schematic it won’t count towards the limit.
Once you’ve researched “Ship Building” you can start to craft your ship. See below for more info on how crafting is specifically done, then move on to the next section.
There are two main ways to craft something:
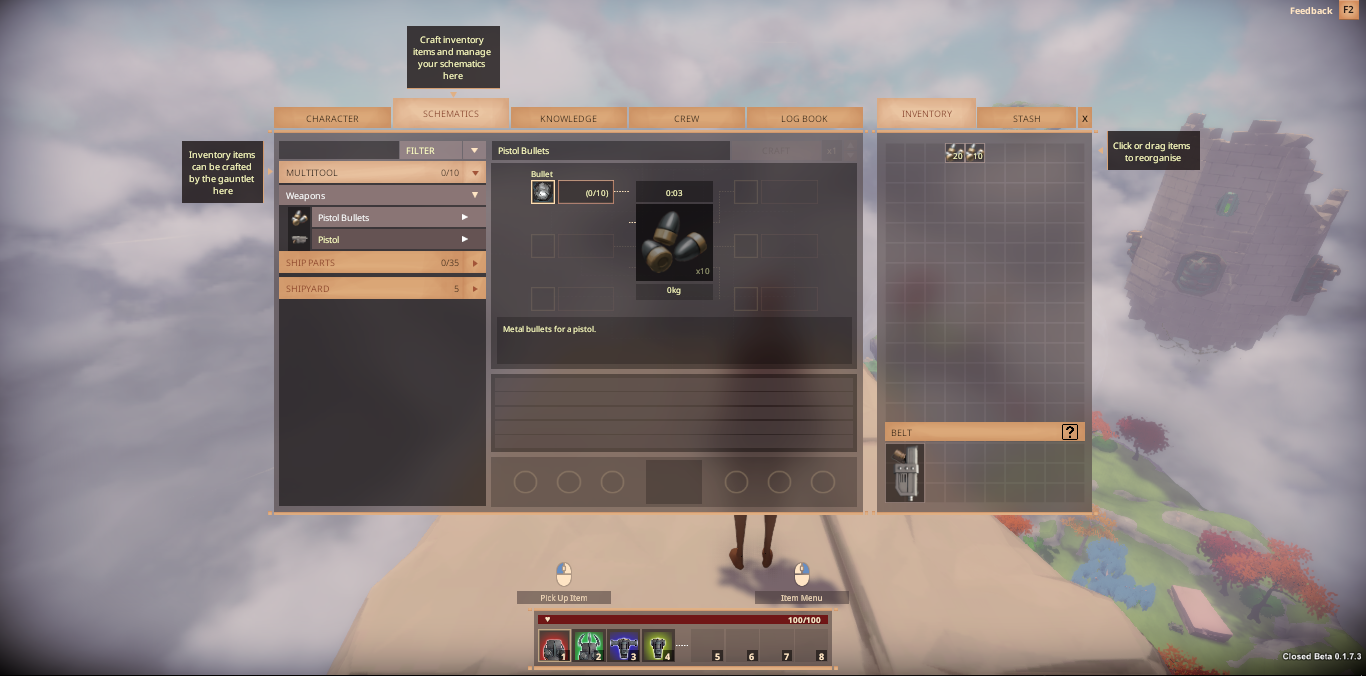
- Gauntlet Crafting: Once you have gathered some materials you can bring up your Inventory (with ‘TAB’) and go to the “Schematics” tab to view the current learned schematics. Click on one, to expand it into the centre area. Items crafted from the gauntlet will be placed in free slots in your inventory
- Ship Part Crafting: Craft an Assembly Station with your Gauntlet, place it by equipping it then holding ‘E’ then interact (using ‘E’) to see your ship part schematics.
(If you can’t craft the Assembly Station, ensure that you’ve researched “Shipbuilding”). Objects crafted here will materialise above the assembly machine and can be picked up and placed with the gauntlet’s lift mode (Default slot ‘3’)
Once you have selected the schematic you want to craft you’ll see a number of slots with amounts.
Each slot corresponds to one of the four main resources and will have a generic Log icon for wood; Metallic blob for metal; Green shard for Atlas Shards or a Grey-ish box for Fuel. Other special items will use their icon texture. Dragging and dropping the appropriate materials into the slots should fill them up. Once all slots have been filled the “Craft” button will light up allowing you to craft the schematic.
Health, Environments and Creatures
You can see your health in the red bar along the top of the hotbar.
If you are attacked, by player or environment, you’ll likely need to regenerate your health. You can do this by eating food. To do this, simply place the foodstuff into your hotbar, switch to it and hold “use” until the circle is complete. Your health will now start to replenish.
There is a whole range of foodstuffs made from the base ingredients of Daccat Berries, Manta meat and Thuntomite meat. Different foods will regen different amounts at different speeds. You can find Daccat berries when salvaging trees and the meat from salvaging corpses of dead Mantas and Beetles.
Most cooking schematics require you to be near a campfire to craft it, however, they are still crafted in the multitool screen.
If you can’t regenerate enough health you will die.
When you die you will lose everything in your inventory, apart from items in the “Belt” and “Stash” section. The others will be dropped in a little loot bag which will stay in the world until someone loots it. You clothes will not be lost; but any equipped gliders, will be.
When you die in the game you can respawn at any of 3 provided options.
- Personal Respawner – If you have one of these crafted on your ship and you’ve registered to it, this will respawn you there.
- Nearby Revival Chamber – Will respawn you at the nearest revival chamber
- Random Revival Chamber – Will respawn you at any random chamber in the same sector of the map.
Worlds Adrift has a completely simulated ecosystem. The creatures are born, not spawned, from puple eggs and live, eat, reproduce and die.
Manta’s are type of ray that migrate around the world in small groups. Mantas don’t like the sound of engines and using them near mantas will cause them to become agressive. You can tell a manta has gone aggressive by the unpleasant sound it makes and its spots will change colour to red. Although, mantas can be annoying, the best tactic is to switch off your engine when they start to eat your ship, and then dangle off your ship taking their aggro away, eventually they will lose interest. However, cannons are particularly effective against them if that’s more your style.

Or more often called “Beetles” or “Bugs”, they usually fly around islands but do move between them occasionally. Bugs like trees, and will get annoyed and attack you if you are cutting trees down near them. You can tell when a beetle is annoyed as their eyes will be red. The best tactic here is to quickly grapple boost away and dodge their attacks, shooting them is not recommended as more will aggro onto you and increase your problems. Thuntomites generally will fly out to a distance then rapidly accelerate and ram into you, particularly strong hits may knock you off an island – be careful.
A baby beetle, just hatched from an egg

Jellyfish are completely passive and won’t attack you at all. Sometimes they will have a spiky shell and give off a little bit of light.
Jellyfish have been removed for the time being 🙁
Mantas and Beetles have different variants in each biome, which look similar in shape but the colour of their skin will change, in addition creatures in later biomes will be more aggressive.
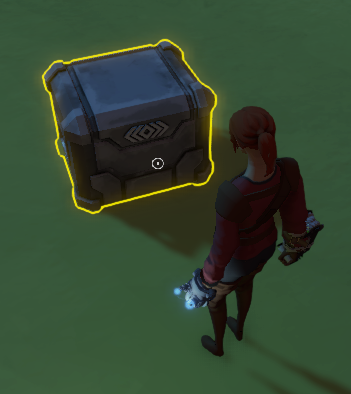
Loot and Scrap
Not everything in-game can be researched so you have to find it in the loot boxes.
Coming two main variations, loot boxes are either the bigger chest-like version or some form of smaller contianer. On the whole big chests will give better loot. Usually: one lore piece; a schematic; and something else. While silver chests only contain 1 to 2 items/schematics.

TOP TIP: Loot boxes will be refreshed with every understorm (when an island is hit by lightning), the longer a chest goes unlooted, the more loot it will accumulate inside.
Most commonly, you will find 1-3 big chests per an island an up to 5 containers. However, some islands may differ.
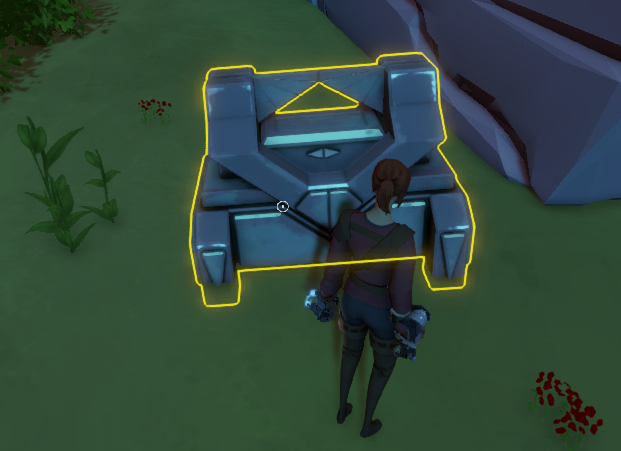
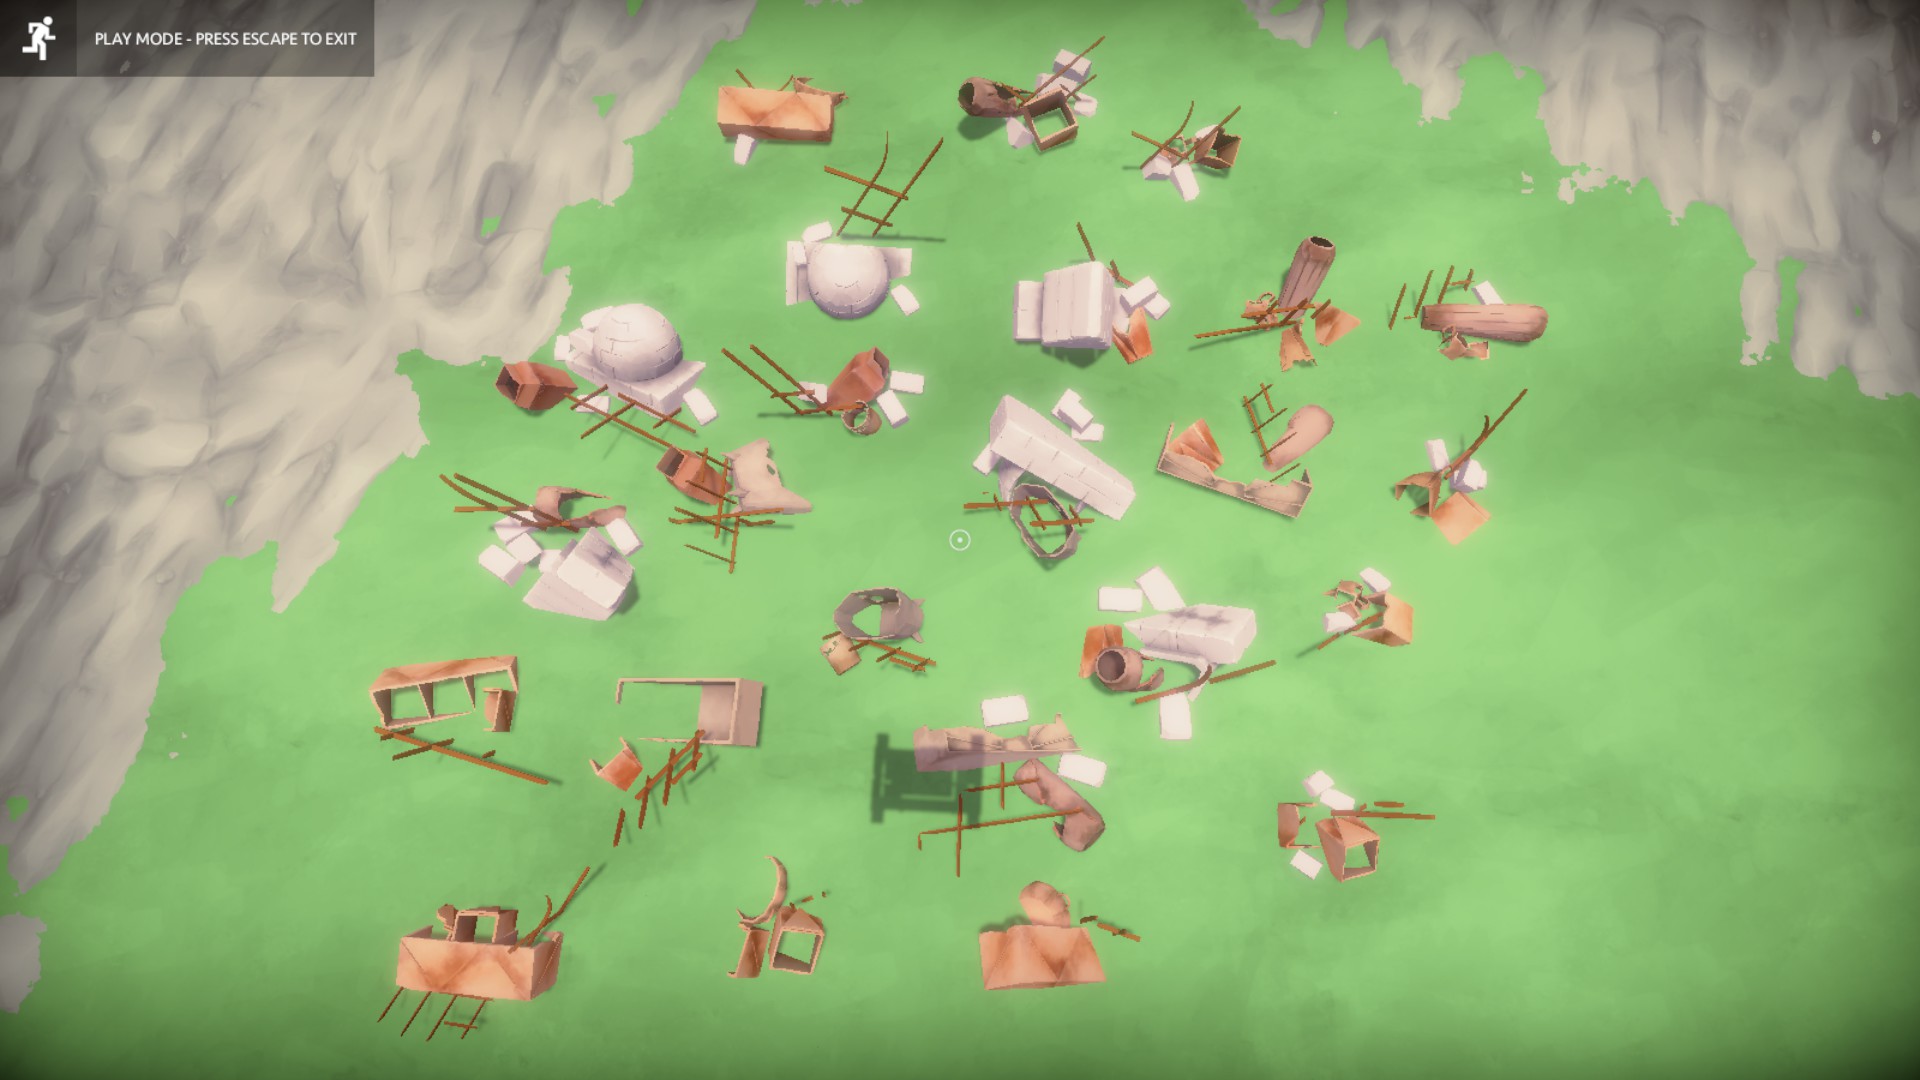
A good way to find resources without grinding the salvage tool under the island is to scavenge in the scrap piles.
Scrap piles will commonly yield one stack of material or a piece of scrap from Foundation (the world before the cataclysm event, in the lore). This scrap can be salvaged for material but will also have a little bit of flavour text in its mouse over tooltip.
You can also find loot bags dropped by players when they dies which contains their inventory (NB: On the PvE servers, you cannot loot anothers death bag for up to 30 minutes after they died), as well as makeshift storage chests, which can be placed by players to store items
Left: Loot bag, Right: Makeshift storage

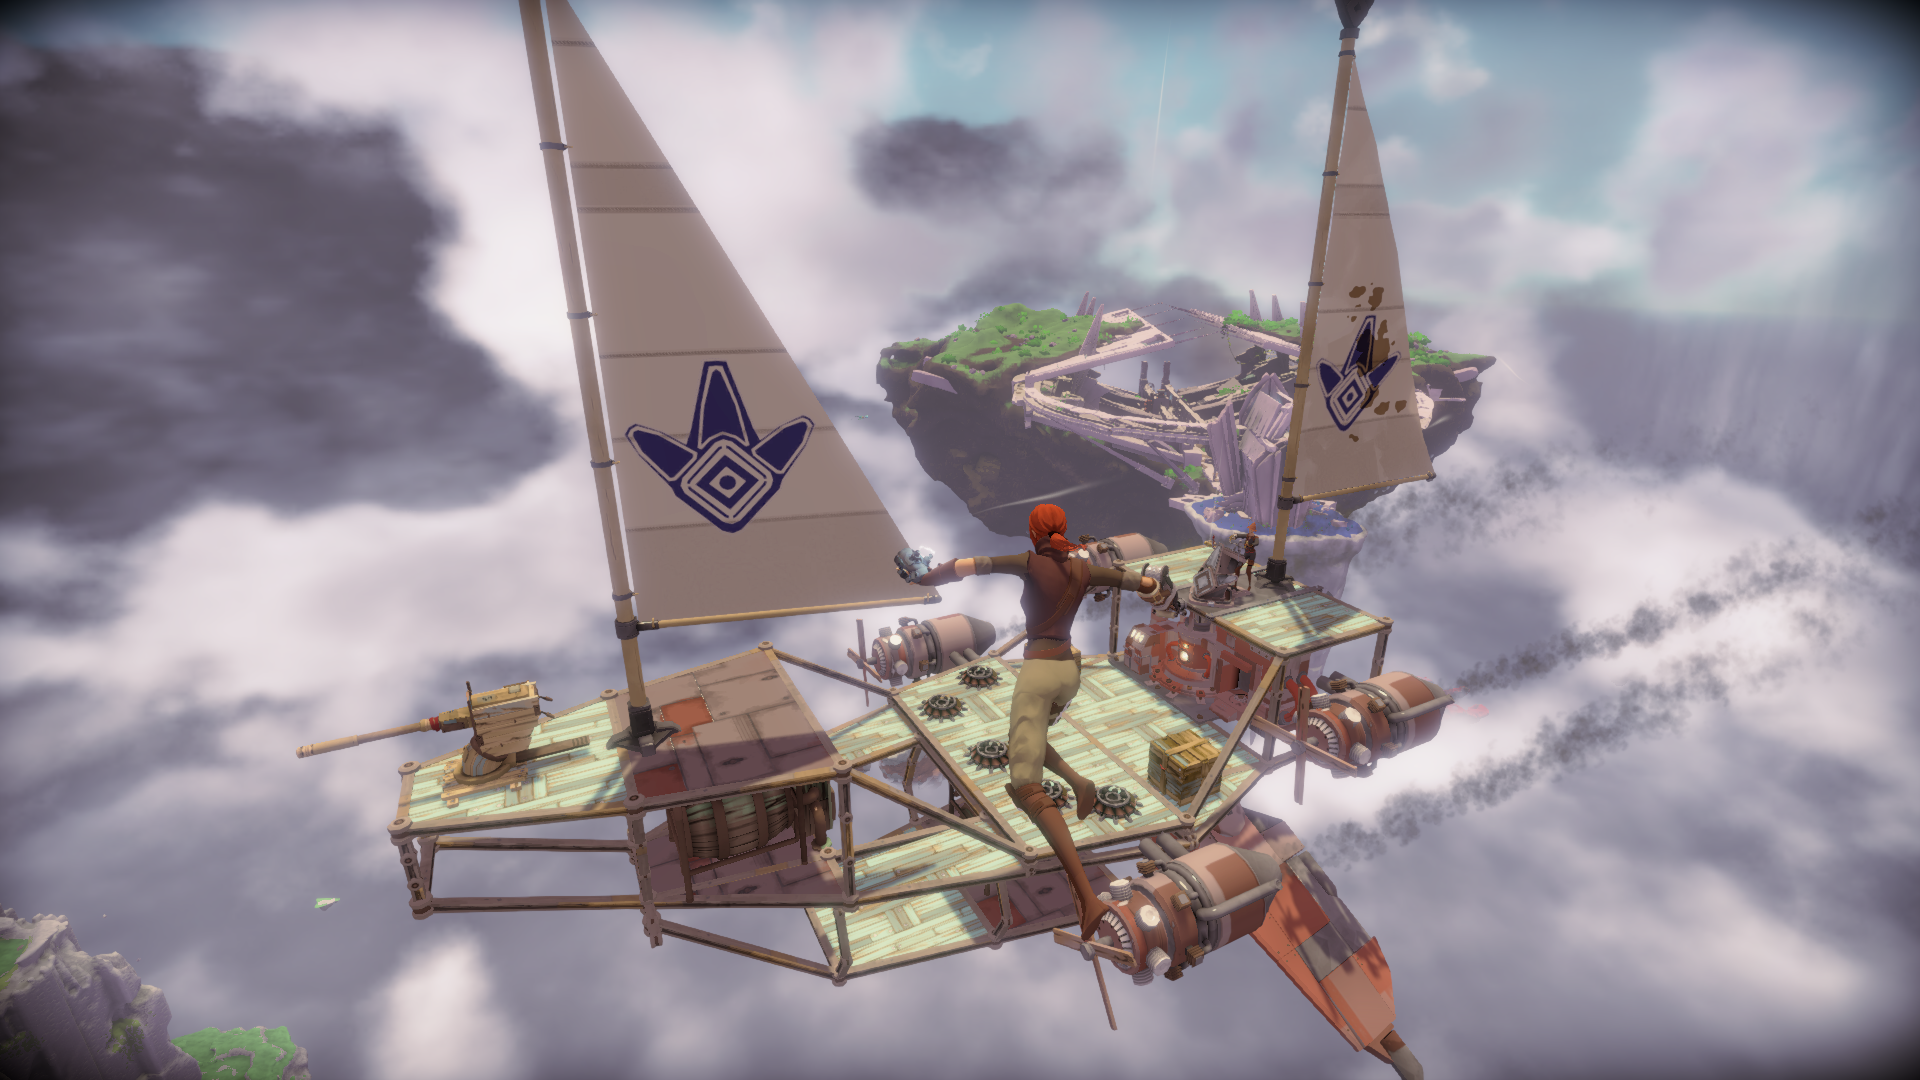
Building Your Ship
Here it is, the main event, shipbuilding. The most intricate aspect of the game; Advanced shipbuilding can require an acute knowledge of mechanics and your materials. But since you’re likely new, here are the basics:
To start ship building craft a Shipyard and an Assembly Station. Place the Shipyard down and interact (with ‘E’) to claim ownership.
Having ownership over the shipyard means that access to craft ships and to place/remove ship parts is restricted to you and those who have entered the 4 digit code which is randomly generated.
The frame design
Now you can craft your ship frame. Currently there are 5 ship schematic slots each with a different example design. You can click “EDIT” on any schematic to see the model and modify it.
To modify the design, click on a blue sphere and there should be several different coloured ovals. The red, green and blue ones will modify the spheres position and the wireframe will automatically adjust to the position. The purple ovals will adjust the curvature of the wireframe segment.
To add a new deck section click on a red square and drag it out. Currently the limitations is 4 deck sections vertical, 1 wide and 6 long (Though the width can be extended, you can’t add extra deck sections).
Crafting the frame
Once you are happy with the shape of your frame, be aware that if you make it too big it will be too heavy with its parts for the weight limit of your Atlas Sky Core, which is 1000kg to begin with. Click “SAVE” to finalise the design before crafting (You can come back to edit it later) and you can rename your ship by using the button named: “RENAME” above the schematic list.
Now place the relevant resources into the crafting slot (for more information on that see the crafting section), click “CRAFT” and the frame will begin to materialise above you. The iconic blue bubble will extend around you and the frame and you can begin to place components on the frame.
To place a component you have crafted with the Assembly Station you need to use the Gauntlet’s Lift Tool (Default ‘3’).
You can rotate components by 90 degress with “Z”, if you hold and move your mouse you can more precisely set the angle.
Mousing over a component it should glow blue to indicate it can be manipulated, you can click to pick it up, and click again to place. When you “pick it up” you should see a coloured hologram of the component. The colour mean a specific state:
- Red: The component can’t be placed here
- Blue: The component can be placed but it’s not attached to anything.
- Green: The component can be placed here and will be attached to the ship.
Basic Components Every Ship Needs:
- Helm – Whether the Metal, Wood or Founders varient; your ship won’t lift off dock without one.
- Atlas Sky Core (& Extensions) – Keeps your ship floating in the air. More extensions will allow it to carry more weight.
- Sail (or other method of propulsion) – Keeps you moving. If you use engines, make sure to attach a Power Generator.
- Personal Reviver – See below.
Here’s why:
- It will reduce the salvage rate of your Shipyard when docked for other players.
- It will stop other players from interacting with your ship when docked, including accessing chests and placing components.
- It will significantly block other players from others gaining access to your ship in the sky. It will take them 10 seconds to gain access to any component.
- It will significantly reduce the salvage speed of your attached ship parts.
- Not to mention, it will mean that when EVERYONE who has a respawner logs off the ship will too shortly afterwards (It will come back in with the first crew member to log back on)
And you can have several Personal Respawners on a ship for all your crew. Just make sure they all hold “E” and register to one.
- Don’t try to overlap parts (apart from panels) as it won’t work, and glitches could destroy your ship without warning when logging in.
- Be aware of your weight and maximum Atlas Core capacity, don’t go over the limit without being able to craft an extension.
- Engines need Power Generators to run, but they will automatically drain fuel from them, no connection is needed.
- You can have more than 1 Power Generator to increase your fuel capacity
- More wings will increase your turn speed and maximum roll/pitch
- More engines will increase your speed, up to a point where they’ll be diminishing returns with the weight vs. the power. Furthermore, engines with low overheat or cooling factor will cease to function after prolonged running.
- Your choice of metal/wood has a profound difference on the stats of your components, chose carefully, see Resources section.
- If you mess up the frame you can “Salvage Frame” to reclaim a portion of the frame and deck cost.
Biomes and Progression
To start these are some common terms when dealing with the progression, this will greatly understand your knowledge of the game.
Table of equivocacy:
The items colour is the colour of the top and bottom bars of the items description
The Biome is the lowest which the item spawns in.
You may have heard of “Pristine” and “Legendary” Schematics – These don’t spawn in-game anymore as of the end of Alpha 5. You won’t be able to find one.
Said to be a luscious area of green space the wilderness is where you’ll begin. Unfortunately, it won’t be very green anymore – probably very littered. You can find Common, T1 schematics here.
No core upgrades spawn here.
No flight instruments spawn here.
To get here you need to cross a Windwall – This takes around 60 total engine power and similar total on wings. No components will take damage, but you might be pushed down by the winds – be careful not to hit the world’s floor — if you do your ship will be deleted.
Said to be a land of sleepy villages, you’ll find more ruins of the previous civilisations here. That’s uncommon (T2) schematics.
Two core upgrades spawn here: Generator and Enhancer – See Sky Core Section for more info
Two instruments spawn here: Heading Indicator and Fuel Guage.
To get here you need to cross a Stormwall – This is pretty RNG but you can increase your chances by having lots of components (such as bar pipes) to draw lightning. You need good 120+ power preferably over several engines. Similar for wings. It helps to have a Heading Indicator (Compass) as there won’t be any visibility.
Land full of rich loot and ruins, much more than before. You can find Rare (T3) schematics.
Three core upgrades spawn here:
Three instruments spawn here:
To get here you need to cross a Sandwall – These will only damage your wings and engines, so make sure they are strong as well as effective. Also helps to have a heading indicator as there will not be any visibility.
A devastated area of the game, watch out for the mantas. You can find Exotic (T4) schematics.
Three core upgrades spawn here:
All instruments can spawn here.
The glider and glider schematic are both possible loots.
The badlands doesn’t have any fuel deposits or ancient revival chambers, be careful as it is very inhospitable, and can be full of pirates!
If you are slightly confused about how this design translates into the game, taking a look at the world maps (linked in the info of this guide) might be enlightening
Note about the walls
- In some cases, you can make it more than halfway and just respawn on the other side (Not possible for sandwalls, since badlands have no respawn chambers)
- Stormwalls and Sandwalls will very likely turn your ship around 180 degrees, so it’s very handy to have a Heading Indicator and Artificial Horizon to keep your ship going straight through.
Advanced Resource Stats
Each type of resource has its own statistics which define how it behaves and how the crafted part looks.
Probably the most important stat is weight (listed below) and modifier values for Ship Component values. It is worth noting that certain components like revivers and panels have weight bonuses (they are lighter than the base listed), but the order remains the same.
(It has been brought to my attention that the descriptions are no longer accurate, I will replace them when I have complete list)
Procedural Schematics: Engines, Wings, Cannons & Swivels
As of New Foundations, all procedural schematics can be salvaged for knowledge and a cipher. A cipher is a simple modifications which can be placed into another schematic of the same type to boost some stats (and decrease others). You can research more cipher slots from the knowledge tree.
Engines are the fastest method of propulsion. Engines provide a pulling thrust, placed with the prop facing forward. They can be found as procedural schematics located within chests, or they can be learned by spending knowledge. When you first start out it costs 250 knowledge to create the first Tier 1 engine schematic and the Power Generator will be automatically learned as well.
Engines need to be placed with the prop facing forwards.
The Power Generator needs to be placed on the ship and fuelled for the engines to work, each Power Generator can hold 100 fuel. To refuel your Power Generator simply hold ‘E’ on it with fuel in your inventory. You don’t need to connect your engines in any way as the fuel will be shared equally to each engine. You can have multiple Power Generators to hold more than 100 fuel, they will all connect and you only need to refuel one to refuel all of them.
To activate your engines simply throttle up (‘W’) on the helm, you can revese thrust by throttling down behind the red zone (‘S’). Engines are also directionally controlled, meaning you can place vertical engines to help with ascending.
Engines have 5 perameter values:
- Resilience – The effective HP of the component, best buffed by strong materials
- Fuel Efficiency – How quickly the engine will drain fuel
- Overheat Limit – In a ratio to power, this represents how long an engine can run for before it gets too hot and shuts down.
- Power – Effective representation of top speed engine can achieve
- Spin-Up – Effective acceleration of engine
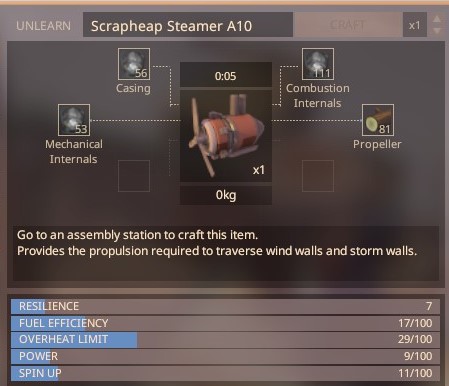
Wondering which materials to use? Putting materials into the crafting grid should give you an indication of which metals will give you the best boosts.
Wings are the best way to turn your ship. Wings increase your torque and are placed with the flap (aileron) facing backwards. They can be found as a form of procedural schematic in the loot chests, or by spending knowledge in the knowledge tree. It costs 100 knowledge to learn the first Tier 1 Wing.
Top Tip: Use vertical wings as well to act as a rudder if your ship is having difficulty turning.
Wings have 3 perameter values:
- Resilience – The effective HP of the component, best buffed by strong materials
- Power – How much torque the wing can produce
- Pivot Speed – How fast the wing makes the ship to turn

Wondering which materials to use? Putting materials into the crafting grid should give you an indication of which metals will give you the best boosts.
Cannons are the best way to arm your ship for Ship v. Ship combat. Note: They don’t do effective and reliable damage to players, only ships. They fire cannon shells, which themselves are slightly influenced by the material you make them out of. Cannons can not be used when they aren’t attached to the ship. You can find cannons as procedural schematics in chests, or research them from the knowledge tree for 150 knowledge. This also unlocks the Cannon shell schematic.
To load your cannon you should interact with the magazine on the side, which will bring up a chest UI which only accepts cannon shells.
Swivel Guns:
Swivels are much the same as cannons, however, they do damage only to soft targets and fire cones of projectiles (akin to a shotgun). They take a different type of ammunition and can aim 360 degrees. Swivel guns can one-shot mantas and players alike.
To fire your cannon use ‘E’ to take control and ‘LMB’ to fire. You can use your mouse to aim.
Cannons have 5 perameter values:
- Resilience – The effective HP of the component, best buffed by strong materials
- Capacity – How much the cannon can hold
- Power – The power of the shot, higher means it can travel farther
- Overheat Limit – How much the cannon can fire before overheating
- Rate of Fire – How quick it can reload for another shot

Wondering which materials to use? Putting materials into the crafting grid should give you an indication of which metals will give you the best boosts.
Non-Procedural Schematics
What follows is a non-exhaustive list of the basic schematics for you and your ship which you’ll find in Foundation. Other schematics like clothing and consumable items also exist for you to find!
Weapons:
- Basic Pistol
- Cannon Shells
- Metal Bullets
- Timed Explosives
Shipbuilding:
- Shipyard I
- Assembly Station
Utility:
- Makeshift Storage
- Torch
- Glider
- Atlas Lifter
- Hip Lamp
- Head Torch
Cooking: These schematics are crafted at a stove or campfire.
Clothing: These schematics are crafted at a loom.
There is an initial schematic limit on how many you can learn at once, you can raise this by researching the knowledge node in your knowledge tree. Schematics that don’t count to the limit will be listed as “(Free)” — These schematics are the ones you initially learn with the “Shipbuilding” knowledge node.
N.B. I have omitted limited edition cosmetic skins which came with early access Pioneer or Founders packs
Decoration:
- Bossa Flag
- Improbable Flag
- Pirate Flag
- Lamp
- Horn
Basics:
- Sail (Free)
- Personal Reviver (Free)
- Helm (Free)
- Power Generator (Free)
Structural:
- Deck (Free)
- Small Panel (Free)
- Window
- Stairs
- Large Panel
- Medium Panel
- Bar Pipe
- Bent Bar Pipe
- Railing
- Railing Corner
Storage
- Barrel (Free)
- Cuboard
- Mounted Box
- Trunk
- Storage Container
- Shipping Container
Instruments:
- Heading Indicator
- Airspeed Indicator
- Artificial Horizon
- Fuel Guage
- Altimeter
Atlas Sky Core:
See Next section for detail on upgrades
- Atlas Sky Core (Free)
- Sky Core Generator
- Sky Core Enhancer
- Sky Core Air Filter
- Sky Core Coolant System
- Sky Core Stabiliser
- Sky Core Computer
- Sky Core Circuitry Network
- Sky Core Efficiency Module
Atlas Sky Cores
Atlas Cores make your skyship, and the islands, float. If you lose your Sky Core your ship is going to sink. Your atlas core also has an interactable ability called the “Atlas Pulse” which will detach grappling or climbing players and will prevent them from re-attaching for a short while.
Your basic core can hold exactly 1000kg of weight but you can upgrade this by adding extensions. There are 8 extensions to find, all spawn in the Expanse, Remnants or Badlands biome meaning you ave to cross at least one windwall to find the first few.
You can boost the base lifting power with the type of material you use. The full list of boosts is detailed in this sheet[docs.google.com]
Table of current extensions, all data is current and up-to-date
As the table says the first 4 core upgrades are automatically unlocked after the specific amount of lifetime knowledge, this is the amount of knowledge the character has gained through all of its lifetime, excluding spending on other schematics.
Tips
- Destory the central core of all ore nodes you mine this will remove the node completely and make others FPS a bit better
- Don’t leave sections of trees on the ground Loose sections of trees are killer to FPS on some systems
- When looting a chest, take all the loot, even if you destory it or leave it in a wooden chest it can be really disheatening to find useless stuff in chests. More so than finding nothing.
- Always say hello to people in chat. It is just a nice thing to do.
- Mousing over a user will show you their name and alliance
- Head Gear slot activates with “T”, Body with “Space” and Leg/Hip with “V”
- All your gear has a durability which will eventually wear out.
- You must have your feet on the ground to unequip/equip gear.
- Chatting in all CAPS will send your message further, IT’S A BIT LIKE SHOUTING!
- Press F4 (or fn+F4 on some systems) to hide the UI
- Ships will despawn approximately 3 minutes after the last player with a registered Personal Spawner (on the ship) has logged out
- If you’re a nice, helpful person don’t jump on someone elses ship. That can be seen as a hostile action
- You can also see a ship’s weight by scanning a beam section
- Ships with a weight imbalance will tilt to one side
- Vertical Wings (like a rudder) can help with turn speed
- If your ship is docked it can’t log out!
- During understorms grounded ship frames will gradually sink into the ground
- Scanning an island wil tell you the biome and the island creator
- Interacting with a Shipyard will tell you all the attached parts and their respective weights as well as your total lift capacity
- Reclaiming a frame salvages the beams and decks.
- If you don’t have a registered respawner on your ship then it’ll take you 10 seconds to interact with anything
- The Shipyard bubble will protect you from incoming cannon/pistol fire! As well has notifying you if someone starts to salvage your ship.
Credits & Footnotes
I’d like to thank the the following for donating their screenshots:
- Cailco (ShadowTitan)
- Strite
- Hark Scrumpy
- Panzercult
If you want more helpful tips I recommend the following:
ShadeTheWanderer’s guide on Piracy Encounters:
[link]
Fureniku’s Self Defense Guide:
[link]
Thanks to the Worlds Adrift Science Community[discord.gg] who have collected data on all things Worlds Adrift! And to all those community members encouraging me to update the guide every update (That’s you Node).

For more information on Worlds Adrift check out the forums here[worldsadrift.com], the main discord server here[discord.gg] and the wiki here[worldsadrift.gamepedia.com]