Overview
Walkthrough, collectibles, easter eggs, and achievements.
Introduction
This guide contains a complete walkthrough of the game as detailed as possible to collect all things in one run. This guide also lists separate sections of notes, figures, posters, and radios. It also contains achievements and troubleshooting for two of the achievements, plus some information on how the game is saved.
Clear Save File/Progress
If you cannot obtain “The curious” achievement, it is bugged. You will have to do a separate run without collecting anything else except required items to progress the game and the easter eggs itself.
To fix this issue: do the following.
Uninstall the game.
Go to Users>(youruser)>AppData>LocalLow> TGA Company & Raul etc.>You Deserve> and delete savedgames.gd or just the folder.
On the first playthrough, be sure to get the graffiti on Part 3: Park. It will pop up again on the second playthrough.
Approach the graffiti from behind the spotlight, and the achievement should unlock.
If you cannot obtain the “Survivor” achievement, that is because there is an error on the registry that does not delete the number of times you died when you start a new game.
To fix this issue: do the following.
Uninstall the game.
Go to Users>(youruser)>AppData>LocalLow> TGA Company & Raul etc.>You Deserve> and delete savedgames.gd or just the folder.
Open start menu, and type in regedit in the search box.
Open regedit.exe (alternatively, you can find it in the “WINDOWS” folder)
First, backup your registry in case anything screws up (which shouldn’t but you never know), by clicking on File>Export. This may take a while, so don’t force-close it and let it do its thing.
Go to HKEY_CURRENT_USER>Software>TGA Company & Raul Borreguero & Matias Aguilera>You Deserve and delete the TGA Company & Raul Borreguero & Matias Aguilera registry.
Part 0: Tutorial
Start by going straight through the door.
Pick up the hammer on top of the barrel. You do not need the hammer.
Keep clicking on the boxes to your left until you can pass through.
Go straight and go through the door.
(CHECKPOINT)
Crouch to pass in the tunnel. Continue through the tunnel.
(ACHIEVEMENT UNLOCKED!: “Welcome to You Deserve”)

Part 1: Underground
Continue the path, past the graves until you get to the front of a gate to your right.
Click on the gate and go downstairs.
Go right until you come across an altar.
Go in the left hallway and you’ll come across a shelf.
There is a note on the shelf.
Pick up “Psychological Assessment Report” note by right-clicking, then press tab to close.
Click on the bottom right drawer to open it. There is a key.
Pick up “Key” by right-clicking it.
Leave the shelf room.
Back at the altar room, there are a pair of batteries on the left.
Pick up the batteries (using right click) to carry them.
On the right, there is a dark room. Before it, there is a power box.
Click on the power box to open it.
Click on the tiny square box on the top left to place the batteries.
Click on the black bars on the opened power box once.
(ACHIEVEMENT UNLOCKED!: “The illuminator”)
Head to the end of the room and double-click on the door to the left.
“Key” will be used.

Walk in towards the photo.
On the left, open the bottom cupboards.
Pick up “Key” #2 by right-clicking it.
On the desk, there is a note.
Pick up “Letter to the Headmaster” note, then press tab to close.
Exit the room, go right, then left room by the power box.
Go through the room.
(CHECKPOINT)
Keep clicking on the boxes to move them until you can go through.
Follow the path, and wait for the figure to disappear.
Turn right and walk into the next area where the bear is.
On the shelves to your right, open the bottom-left drawer.
There is a blue cap in the drawer.
Right-click to pick up Easter Egg #1.
Go through the door by double-clicking it.
“Key” #2 will be used.
Follow the path.
Click on the ladder on the ground to get into the next area.
(CHECKPOINT)
After going down, walk to the door and wait for the figure to pass.
The door will be opened after that. Click on the door to continue.
Go through, and go to the left side of the barrels and crates that are near the gate.
There is a slim candle there.
Right-click to pick up the candle.
Go to the other side where the door is.
Click on top of the box where there is a crevice to place the candle.
Click on the door to go through.
Head right, and continue straight on the fork.
Go left. There is a chest in the room that closes. Open it.
There is a red-black striped beanie in the chest.
Right-click it to pick up Easter Egg #2.
Go left after in the shelf area.
Under the shelf that is turned over, there is a fuel canister under it.
Right-click to pick up the fuel canister.
Turn around and head back to the fork, then head right. Go through the door.
Click on the unlit torch to light it.
Turn around and click on the trap door do go through.
On the left, there is a framed drawing on the desk.
Pick up “Drawing” note.
On the right of the desk, there is a key poking out of the rubble on the ground.
Pick up “Key” #3.
Right-click on the candle to pick it up.
Click on the trap door go go through.
Exit the room, then head right to go back to the area with the barrels and gate.
Double-click on the gate to go through.
“Key” #3 will be used.
Go through the left tunnel. You cannot outrun the figure and you will load into the next area.
Part 2: School
(CHECKPOINT)
Before heading straight, look around the fenced areas for a crowbar.
Right-click to pick up the crowbar.
Walk straight and click on the door.
Double-click on the boxes to knock them away from the drains (they are in front of the stone pillars). Note that they have to be completely uncovered or the water won’t drain.
If you finish in time, an achievement will unlock. If you miss it, you can always quit to main menu and load game to try again.
After the water finishes draining, click on the door to go through.
Head up the steps.
(CHECKPOINT)

Go through the door on the left to head into the gym.
Head straight to the figure in the center.
Head to the left corner of the gym where there are some scattered items.
There is a key on top of the small boxes.
Pick up “Key” #4.
Head back out of the gym.
Go left and go to the maintenance room door.
Double-click on the door to open it.
“Key” #4 will be used.
Open the gray power box.
Click on all the four switches to turn them on.
Close the power box, turn around, and click on the white square by the door to turn the lights on.
Head out and go right up the sets of stairs.
Go to the last door on the left and click on it.
Look up to the left at the vent. A message will pop up to find a ladder.
Turn around to face the lockers on the other side.
In the middle locker, there is a red poster.
Right-click to pick up Poster #3
Backtrack to the maintenance room down stairs.
When entering the room, there is a ladder to your right.
Right-click to pick up “Ladder.”
Click on the ladder hologram to place the ladder.
You will drop down to a room with a time limit. You will teleport to a different room within a couple of seconds. If that happens, go back to click on the ladder to try again until you get a key.
Head to the shelf on the side of the room in front of you.
Open the cupboard at the bottom. There is a key.
Pick up “Key” #5.
Head out of the room (either through the door or wait to be teleported).
Backtrack to go through the last door to your left, which is the staff room.
Double-click on the door to open it.
“Key” #5 will be used.
Go to the last shelf to the left.
Open the cupboards on the bottom. There is an item there.
Right-click to pick up a lever.
Backtrack to the maintenance room again and open the power box.
Click in between the four levers to place the missing lever.
Click on the lever to activate it.
Head up the stairs again, go straight, then go right.
Before heading up the stairs, go in the classroom to the left.
On the side of the white board, under the green alphabet, there is another red poster.
Pick up Poster #1.
Head out of the classroom, and go left up the stairs.
(CHECKPOINT)
Head straight, and go through the first door to your right.
Look on the left side for another red poster on the wall.
Pick up Poster #2.
Head out and head towards the lockers with names.
Go to the psychology office after the lockers on the left. There is a note on the door.
Pick up “Names” note.
The note appears to be the order to open the lockers in.
Open the lockers in the following order:
“Garcia,” “Lee,” “Harris,” “Clark,” “Carter,” “Peterson,” then finally “Cooper.”
A note will come out of the bottom of the psychology office door.
Right-click to read the note, which is “6231.”
Press “Tab” to close the note.
Before going through the psychology office, head straight to the boy’s bathroom (right bathroom).
Go through the bathroom.
On the left side stalls, starting from the left when facing them, open the third stall.
The last poster is on the wall on the left side.
Right-click to pick up Poster #4.
(ACHIEVEMENT UNLOCKED!: The publicist)
Head out and go to the next bathroom.
One of the stalls on the left has an opening to get into the art room.
Crawl under, after the scene, turn the light on in the classroom by the door.
Look at the teacher’s desk. There is a book sticking out of the shelf.
Pick up Easter Egg #3.
Head back to the psychology office door and click on the keypad.
Enter “6231” then “OK.”
The door is now open. Click on the door to go through.
(CHECKPOINT)
Continue heading straight until you get to the door on the other side.
Click on the door once, then backtrack to the beginning of the hall until the figure pops up.
Turn around again and run towards the door on the other side again.
Click on the door to get into the next area.
Part 3: Park
(CHECKPOINT)
Go up the stairs and go through the door straight ahead.
Head straight then turn right onto the trail at the water fountain.
Follow the side of the grass until you come across a note on a street lamp (there are two bridges in front of it)
Pick up “Journal” note.
Backtrack to the entrance, then head straight through the canopy.
Continue straight after coming out from under it.
At the fork, turn and go left.
Shortly after, you’ll come across a path to your right.
There is a radio in the trashcan nearby.
Right-click to pick up Radio #1.
Go right towards the brick wall.
(CHECKPOINT)
There is a key on the water fountain by the gate.
Pick up “Key” #6.
Walk alongside the brick wall. Before taking the last right, head straight towards the bar fence.
After you’re right by it, follow it to the right until pass the first brick pillar.
Turn around and walk towards the lit wall with unique graffiti on it.
When the chime plays, you’ve obtained Easter Egg #4.
(After obtaining the last Easter Egg in Part 4: House, if you go back to this same area and approach from behind the spotlight, you will obtain “The curious” achievement. I count this as Easter Egg #6)
Turn around, head back onto the path, and turn right on the path.
Continue straight until you come across a gate.
Double-click on the lock on the gate to open it.
“Key” #6 will be used.
(CHECKPOINT)
Go to the side of the house on the right. There is a small photo on the wall to your left.
Pick up “Teddy Bear Picture” note.
Head back to the front of the house and click to go through the door.

Part 4: House
(CHECKPOINT)
On the left on the counter, there is a flashlight.
Right-click to pick up the flashlight.
Head up the stairs.
Go through the door to your right.
In the bathroom, there is a key on the sink.
Pick up “Key” #7.
Head out, go to the next door on the right.
Behind the door, under a box, there is a drawing on a crate.
Pick up “Mat Madison Drawing” note.
Go towards the bed. On the other side, there is a figure behind some boxes.
Pick up Figure #1 “Xavier Garcia.”
Head out, then head straight through the door ahead.
On the right side of the bed, there is a hat in a box.
Pick up Easter Egg #5.
On the left side of the bed, there is a key in the drawer.
Pick up “Key” #8.
Alongside the drawer, there is a chest with a figure in it.
Pick up Figure #3 “Kinsley Harris.”
Head back downstairs and double-click on the door to the right to go through.
“Key” #8 will be used.
(CHECKPOINT)

Head behind the chair to your left. There is a figure behind it.
Pick up Figure #6 “William Peterson.”
Head straight and double-click the second door on the right.
“Key” #7 will be used.
Go to the right side of the desk and look up. There will be a vent on the wall.
Click on the vent to go to the next part of the area.
Look around the pantry. There is a figure on the bottom shelf in between some jars.
Pick up Figure #4 “Lauren Clark.”
Click and go through the door.
(CHECKPOINT)
Head to the fridge. There is a note on it.
Left-click to read it. It reads a number “0810.”
Press “Tab” to close.
On the stove, there is a hammer.
Pick up “Hammer.”
Turn around and head through the door on the left side. The path to your right is blocked.
Go to the door blocked by planks and double-click on it to open it.
“Hammer” will be used and dropped.
Pick up “Hammer” again. You will need it later.
Go through the same door again that is in front of you
(CHECKPOINT)
Go back into the office where the vent was.
On the shelf, there is a lockbox. Click on the panel.
Press “0810” then “OK.” Click on the lockbox to open it.
Inside, there is a note and key.
Pick up “Insane Note” note.
Pick up “Key” #9.
Go back upstairs.
(CHECKPOINT)
Double-click on the locked door to open it.
“Key” #9 will be used.
On the bed, there is a note.
Pick up “Parents Note” note.
On the desk, there is a book, which is the last note.
Pick up “Ritual Objects” note.
(ACHIEVEMENT UNLOCKED!: Detective)
On the top cupboard to the right, there is a figure once you open it.
Pick up Figure #5 “Chris Carter.”
Before heading out, go on the other side of the room and crawl under the wall.
In the lit bathtub, there is the last figure.
Pick up Figure #2 “Daniel Lee.”
(ACHIEVEMENT UNLOCKED!: The collector)
Head through the wall, then head out of the room, but do not go downstairs.
Outrun the figure using the fence, then go downstairs.
Double-click on the door to exit the area.
“Hammer” will be used.
Part 5: Park (Finale)
(CHECKPOINT)
Head straight until you come across a trail.
There’s a chance the figure will walk across. Just wait for it to pass and then continue.
(The house will disappear once you land on the nearest trail).
When on the trail, head right.
Keep going straight until you see another path and a train station to your left.
Head across the grass to go to the train station.
On the pillar near the trash can, there is a cross on it.
Pick up “Holy cross.”
(It’s hard to see since it blends in, so here is a screenshot of it.)
Head back onto the path.
(CHECKPOINT)


At the fork, go left onto the other path.
Head straight until you come across an open cement area with a fence surrounding the water.
Head right alongside the fence until you come across a bridge (if you hear the wind, you’re going the right way. It’s a long walk.)
Head over the bridge to your left.
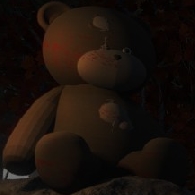
Follow the ground path until you come across a tree with a teddy bear laying on it.
Pick up “Teddy Bear.”
Backtrack over the bridge, and go over the grass to get under the canopy.
Head right and continue straight.
On the fork, head left.
Head to the first right path you come across.
(CHECKPOINT)
Go into the brick wall area.
Head on the first left path.
You will come across a gate which requires two keys.
Backtrack past the lamp and go left.
Head straight until you come across a lit area to your right.
Go right past the garbage can and benches.
(CHECKPOINT)
On the fork, head left.
On the next fork, head left.
On the circular path, go left.
Go straight on the next fork, then go on the ground on the right and continue.
You should hear a radio and see two benches facing eachother.
Under the bench to your right, there is a radio.
Pick up Radio #4.
Backtrack to the lit area in the brick wall by turning around and go back to the trail on the fork.
Go left and continue straight.
There is a checkpoint ahead.
(CHECKPOINT)
Turn around, and go left.
On the fork, go straight.
On the next fork, go right.
On the other fork, go straight.
Go straight again on the next fork.
Go right on the next fork.
On the fork, go right and you should be back at the lit area in the maze.
(CHECKPOINT)
Head towards the fence then go right.
Continue straight and turn left.
Continue again and go right, then left.
Head straight and take the last left.
Head straight. If you come across some barrels, you’re in the right place.
Head left, move the barrel, and go through the whole in the wall by crouching. This may be complicated to get through, but it’s possible.
Head right until you come across a lit area with some crates.
There is a key on top of the corner of a crate.
Pick up “Key 1st.”
Backtrack by turning around and going back to the hole in the wall.
Chances are the figure is there. If so, wait for it to go away. Otherwise, it can go through the hole in the wall and make it difficult for you to escape.
Go past the barrels and head right.
Head straight, then take the last right.
Go left, continue straight.
Go right, continue straight.
After passing the fence to your right, go right onto the next path. You should be back where the center tree is.
It’s recommended to exit the brick wall maze to get back on the path to make a checkpoint.
Head back into the brick wall maze.
Head to your first right and continue straight until you hit a wall.
Go left, then take the first right.
Go right again, then straight.
Go left, left again, then straight. You should see a chest ahead that contains a key on the left.
Pick up “Key 2nd.”
If the figure is close by when you turn around, just hang around the trees until it goes away.
Backtrack by turning around and go right, then right again.
Continue straight, then go left, then left again.
Take the first right, then continue straight, and you should be back at the tree again.
Double-click on the gate to go through.
“Key 1st” and “Key 2nd” will be used.
Go left.
(CHECKPOINT)
Go right, then right again, then straight.
Head right, continue straight, then right again. You should come across a lit area with some benches and a tunnel in between.
Continue straight then go right into the bushes and trees.
Behind the tree at the center, there is a radio.
Pick up Radio #3.
Head back to the tunnel and start running in it and continue.
It’s a long chase so keep going until you come across a door.
Go through the door then click to close it.
(CHECKPOINT)
Head right to go through a door.
On the right side of the room, there is a gold sculpture on a barrel.
Pick up “Goat figure.”
Go to the other side of the wall. There are some bricks poking out.
Click on the center brick, then the bottom left brick, then the top brick, then the bottom right brick.
A wall will open to your right.
Go into the path and go through the door.
(CHECKPOINT)
Continue straight then go left, then go right and click on he door.
After the scene, click on it to open it.
Continue on the right path.
Continue straight until you come across the train station again.
Head right to go back on the path.
(CHECKPOINT)
Head left, and continue straight until you’re back at the fence surrounding the lake.
Go left and go over the first bridge you see.
Head over the grass to get back on the canopy path and go right.
Continue straight, then on the forked path, go left.
Continue straight on the upcoming fork.
(CHECKPOINT)
Continue straight until you come across a barred area, then go on the left path.
Continue straight until you come across a gate to your left.
Before that, continue straight and go past the playground until you come across the canopy area again.
(CHECKPOINT)
Go right, click to open the door, then go straight inside.
In the back of the room, there is a radio.
Pick up Radio #2.
Backtrack to the gate area by going left before the canopy area.
Follow the trail, past the playground until you come across the gate to your right.
Click on the gate to go through.
(CHECKPOINT)
Climb the area and follow the path and go over the bridge until you come across a small altar rock.
Click on the slab.
(ACHIEVEMENT UNLOCKED!: “You have finished “You Deserve””)
(Other two achievements: “Fast and Scared” and “Survivor” will unlock if requirements are met.)
Go on the flame and click on the hand.
Complete List of Posters (Part 2: School)
These posters are required for “The publicist” achievement. Once collected, they cannot spawn again in the next playthrough. You cannot go back to the area once you leave. The achievement will unlock though once you collect them all, no matter how many playthroughs you make.
This is the second poster you come across. After the one in the locker, go into the hall that leads to the stairs to the third floor (do not go up the stairs). Go into the classroom on the left and look on the right side of the white board under the green alphabet.

When you head up to the third floor, go into the first door to your right (before the vending machines ahead). Look to your left and the poster will be on the wall.

This is the first one that is obtainable. This one is on the second floor, last set of lockers to the right that is under the book sign, in the middle locker.

On the third floor, head to the back where the bathrooms are and go into the right bathroom. The last poster is in the third stall in front of you starting from the left on the side. This may be difficult to spot since it is the darkest place out of all posters.

Complete List of Figures (Part 4: House)
These figures are required for “The collector” achievement. Once collected, they cannot spawn again in the next playthrough. You cannot go back to the area once you leave. The achievement will unlock though once you collect them all, no matter how many playthroughs you make.
Up the stairs in the first door to your left. Go towards the bed, on the side of the boxes, the figure is there.

In Holly’s room on the second floor, go to your right and crawl under the hole in the wall. It is in the lit bathtub. This is the last figure of the house.

On the second floor in the master bedroom (with the two lamps) on the left side of the room. There is a chest on the side of the drawer that contained a key. The figure is inside that chest.

After clicking the vent in the office on the first floor to go to another area, there is a figure on the bottom shelf in between some jars.

In Holly’s room on the second floor, on the top of the desk where the ritual book is, there is a figure in the top right cupboard.

On the first floor in the room with the covered furniture, walk behind the first chair to your left. The figure is behind there.

Complete List of Radios (Part 3 & 5: Park and Park (Finale))
These radios are required for “We are listeners” achievement. Once collected, they cannot spawn again in the next playthrough. The achievement will unlock though once you collect them all, no matter how many playthroughs you make. They are simple to come across and look for if you have the sound on; and you hear static and talking.
After the canopy area while following the trail, head left. You hear something and come across a radio in the trash can before you turn right to get the key on the water fountain near the brick wall. This radio does not spawn again in Part 5 if you don’t pick it up.

Before the gate leading to the ritual, continue the trail until you go past the playground and get back to the canopy area again. Go right and go inside (where you spawned after part 2). Go down the stairs and on the ground to your left, the radio is there.

After opening the gate in the brick wall maze with the two keys, continue the path until you reach an area with benches and tunnel. Before hitting the tunnel, turn around and head straight towards the wall, then go right until you hit another wall. Follow the path and the radio will be in the bushes behind a small tree.

In the brick wall maze, before the area with the huge center tree, head right then go left until you come across a lit area with benches and a trash can. Go through until you come across a fork leading out of the area. On the fork, head left. On the next fork, head left. On the circular path, go left. Go straight on the next fork, then go on the ground on the right and continue. You should hear a radio and see two benches facing eachother. Under the bench to your right, there is a radio.

Complete List of Easter Eggs
These unique items are required for “The curious” achievement. Once collected, they cannot spawn again in the next playthrough (except for one). This achievement is a bit bugged, and it is recommend to have a separate run to collect only these items except the items that are required to progress through the game (that means no posters, no figures, no radios, no notes except that one book). Please see the “Clear Save File/Progress” section for more information. Picking them up (or looking at them for two of the Easter Eggs) will play a chime sound.
When you come across the teddy bear for the first time in the game, there is a shelf in that area. Open the bottom left drawer and look for a blue cap.

After opening the door by placing the candle by it, go right until you come across an area with shelves. There is a chest in the area that contains a red-black beanie.

In the area with names on the locker, head to the left-side bathroom. One of the stalls has a hole behind it. Crawl in it to go in an art room with a skeleton in it. Go to the teacher’s desk. There should be a book in the slot.

[link]
At the beginning, walk straight until you come across a small water fountain, then head straight into the light on the right and look at the white part of the pond.
When you arrive outside, follow the canopy, past the falling rocks, then go left until you see a lit area to your right. Follow the brick wall until you come across a bar fence. Walk towards it, turn around, and approach the graffiti from behind the spotlight. If you hear a chime, it is registered.

Inside the house, go upstairs, and go to the other side of the second floor. Open the door to the master bedroom. On the right side of the bed, there is a cowboy hat in the box.

Same as #4, except it appears again in the second playthrough, which should be the last Easter Egg you’re looking for. Once you approach it, the achievement should unlock. If not, see the “Clear Save File/Progress” section for more information.
Complete List of Notes
The notes are required for the “Detective” achievement. They are listed in the order they can be obtained. Note that these are missable.
None.
1. “Psychological Assessment Report” (In the left hallway in the altar room, on the shelf.)
2. “Letter to the Headmaster” (On the desk in front of the animated-text picture.)
3. “Drawing” (After going through the trap door, there is a desk with a frame. The picture in the frame is the note.)
4. “Names” (Near the labeled lockers, on the door with the label “Psychology Office” on top.)
5. “Journal” (At the beginning, go right to go past the water fountain. Follow alongside the grass until you come across a street lamp with a note on it.)
6. “Teddy Bear Picture” (Before entering the house, go on the right side. There is a photo on the wall of the house.)
7. “Mat Madison Drawing” (When you go upstairs, go to the left room. On a crate, there is a drawing under the box by the door.)
8. “Insane Note” (Inside the lockbox in the office after entering the code “0810” then “OK.”)
9. “Parents Note” (When going through the last locked room, there is a note on the bed.)
10. “Ritual Objects” (In the same room as the “Parents Note,” but on the left side on the desk once entering the room. This is the last note of the game.)
None.
Achievements
Achievements are listed in the order in which they can be unlocked
Achievement Description: Play “You Deserve” for the first time
How to get: The achievement automatically unlocks when you exit the cave tunnel at the beginning for the first time (during tutorial).

Achievement Description: Find the battery and turn on the light
How to get: Going through the gate in the beginning at the graveyard, go right until you come across two fires and an altar in between. By the altar, there are a pair of batteries. Right click to pick up, look for a power box on the wall. Left click to open it, and left click on the slot on the top left.

Achievement Description: Move the boxes and escape from drowning in only 15 seconds
How to get: At the beginning of the school area, drain the water within 15 seconds of the area filling up. It’s recommended to grab the crowbar first before clicking on the door. Keep clicking on the boxes to move them to completely reveal the drains behind the two stone pillars. Note that they have to be fully revealed in order for the area to drain. If you don’t finish in time, you can always quit to the main menu and load the game again.

Achievement Description: Collect all the posters
How to get: Collect all 4 of the red posters in the school area. You can start a new game to go back to find the ones you missed. The ones you already collected are not there.

Achievement Description: Collect all the figures
How to get: Collect all 6 of the wooden figurines in the house area. You can start a new game to go back to find the ones you missed. The ones you already collected are not there.

Achievement Description: Collect all the notes
How to get: Collect all the notes in the game. The last two notes will be in a room inside the house.

Achievement Description: Collect all the radios.
How to get: Collect all 4 radios in the final park level (after finishing house). The ones you already collected are not there. There is one near by if you hear static and talking.

Achievement Description: Finish game in a record time
How to get: Complete the game within 3 hours. It will unlock alongside the “You have finished “You Deserve” achievement. This achievement unlocked for me for the first time playing.

Achievement Description: Win the game without dying
How to get: Win the game without dying by drowning or being caught by the figure (excluding being caught at the end of part 1). This is a bugged achievement because the death count does not reset when you start a new game and delete data. Check the “Clear Save File/Progress” section at the beginning for the fix.

Achievement Description: Finish game in a record time
How to get: The achievement will unlock after finding all the requirements for the final level (three items and location).

Achievement Description: Discover all the easter eggs
How to get: Find all the easter eggs in the game. There are a total of 6 easter eggs in this game (blue cap, red-black beanie, book, cowboy hat, and graffiti x2). The graffiti appears again on your second playthrough, which I count it as Easter Egg #6. If you’re having trouble, check the “Clear Save File/Progress” section for more information.

Credits
The Hench©💪😈👍 – For save file location and Easter Egg achievement troubleshooting.
Stealth – For registry fix.
Knot – For easter egg achievement troubleshooting.
alphabetsoup – For easter egg #3 and source.
