100% Achievement Guide [SPOILERS] (including DLC)
Introduction
Pillars of Eternity II, in contrast to the first part, does not have that many achievements and they are all fairly easy to obtain. With just a bit of save-load magic, you can get them all in one playthrough without putting much special effort into it, just by having fun exploring the archipelago.
This guide includes achievements from the base game and all the DLCs.
 Screenshot form Cyberpunk 2077, as I don't have any missing achievements form Pillars to show this on :)
 Story-related
Those achievements are unlocked as you progress through the story and cannot be missed.


Faction quests
There are four factions in Deadfire and, if you so wish, you can do quests for all of them throughout most of the game. Yet at the very end, before your final voyage, you will have to chose – doing the last quest for any faction will make you unable to finish the other ones. So, if you would like to get all of the achievements listed in this section in one playthrough, make a branching save when you get all the faction quests to this last step (more details below). Each faction has their own category in the journal and as such their quests are easily identified.
Note! It is worth noting that you do not always have to do exactly what the faction likes, as long as you do not fail the given quest and fulfill it in some fashion. However, you may have to use some serious silver tongued skills to appease your allies afterwards. To give one example, I killed Scyorielaphas during “The Shadow Under Neketaka” quest and Queen Onekaza II was majorly pissed at me. Yet I convinced her (with some diplomacy) that our alliance is still beneficial – Huana quest continued with no trouble.

Huana faction quests are given by Queen Onekaza II and Prince Aruihi (both located in Kahanga Palace). Just follow the questline – it is all rather straightforward. The “point of no return” comes with a quest “Taking Out the Traders” – if you do that one, you will forfeit every other alliance and bind yourself to Huana. So, save before going into Royal Deadfire Company's powderhouse if you want to pursue other faction quests first.

Príncipi faction quests are given by Captain Furrante (in Dunnage) and Aeldys (in Fort Deadlight). Those two pirates are at odds, so you will have to choose between them at some point. It doesn't matter who you choose, you can continue Príncipi faction quest with either of those two in charge. The “point of no return” comes with a quest “A Dance with Death” – if you do that one, you will forfeit every other alliance and bind yourself to Príncipi. So, save before sailing into deep waters to summon and overtake the Floating Hangman if you want to pursue other faction quests first.
This achievement has a bit of a bug. Luckily, the bug is easy to circumvent. While allied with Príncipi, save right after you land in Ukaizo. Then just load that save and viola – achievement pops.
Note! Be careful when dealing with Crookspur slavers during Príncipi questline. I am not sure if you can help the slavers and still normally do Huana faction quest. Judging by how other quests work, I think you can – yet cannot 100% confirm yet. If somebody tested it and can say for sure how keeping the slavers alive and doing their quest (“Tip of a Spear”) affects Huana faction quest, I’d love to hear about it.

Vailian Trading Company quests are given by Alvari and Ignato Castol (both located in Vailian Trading Company Headquarters). Those two are at odds and you will have to choose between them at some point. It doesn't matter who you choose, you can continue VTC faction quest with either of those two in charge. The “point of no return” comes with a quest “Sabotage at the Brass Citadel” – if you do that one, you will forfeit every other alliance and bind yourself to VTC. So, save before talking to Flaune at the Spire of the Soul-Seekers if you want to pursue other faction quests first.

Royal Deadfire Company quests are given by Hazanui Karū and Atsura (both located in the Imperial Command). Just follow the questline – it is all rather straightforward. The “point of no return” here is obvious as both Hazanui Karū and your journal will point it out. It comes with a quest “The Final Maneuver” – if you do that one, you will forfeit every other alliance and bind yourself to RDC. So, save before agreeing to commit to Hazanui Karū if you want to pursue other faction quests first.
Quests

Quest is given by Captain Furrante when you meet him for the first time – when leaving Port Maje after fixing your ship. Just follow the quest and resolve it in any way you wish.

This quest will be given to you by Arkemyr.
First though, you will have to finish “The Archmage's Vault” quest – given by Tumara and Netehe (two women arguing outside of the Arkemyr's Manor in Periki's Outlook area of Neketaka). After you finish this quest and give the tablet to one of the women, Arkemyr will send an imp to invite you to his mansion. Go to him and he will give you “Berkana's Folly” quest. From there, just follow the questline.

To start this quest you need to sail to Splintered Reef (southeast corner of the map). Once there, visit The Pickled Eel and talk to an undead guy named Copperhead. Afterwards, just follow the questline and solve it however you wish.

To start this quest you need to sail to Junvik Village (northwestern corner of the map). Once there, speak with a dwarf Tatok. Afterwards, just follow the questline and solve it however you wish.

There are two dragons in Deadfire. One of them, Jadaferlas the Ancient, you will find in the Lair of the Ancient during “He Waits in Fire” stage of the main quest.
The other one, Scyorielaphas, you will find in the temple below the Watershaper's Guild building during “The Shadow Under Neketaka” quest. This quest is given by Queen Onekaza II after you return from Hasongo. You will not be able to access the chamber with the dragon if you did not take this quest.
You do not have to kill the dragons to get this achievement. You can solve their problems in any way you chose.

There are several NPCs that give bounties in different areas of Neketaka.
Abocco – found at The Wild Mare (Queen's Berth area). Gives:- Bounty – Meryel the Mad
- Bounty – Pūrākau
- Bounty – Nomu the Marauder
- Bounty – Tāhae
- Bounty – Biakara
- Bounty – Veen
- Bounty – Desiwa the Shark
- Bounty – Beina
- Bounty – Flamewalker Vessali
- Bounty – The Steel Preacher
- Bounty – Uamoru the Pretender
- Bounty – Diccila
- Bounty – Oheiro
- Bounty – Rafiq the Red Beard
- Bounty – Dhwrgas the Ascetic
- Bounty – Onadere the Siren
- Bounty – Ikorno
- Bounty – Urnox the Rathun
- Bounty – Assila Wave-Skipper
- Bounty – Radulf
- Bounty – Burunga
There are also two bounty-givers in Dunnage:
Udita – found in Lifter's Refuge area. Gives:
- Bounty – Chornu
- Bounty – Kuaro
- Bounty – Rock-Stomper Rodul
- Bounty – Torkar
- Bounty – Katrenn
- Bounty – Lord Admiral Imp
- Bounty – Lady Epero
Doing the bounties does not affect your relations with a faction of origin of a guy you are hunting. So you can happily sink and board every ship and their faction of origin won’t even bat an eyelash.
Exploration

- Port Maje
- Tikawara
- Neketaka
- Dunnage
- Sayuka
- Crookspur
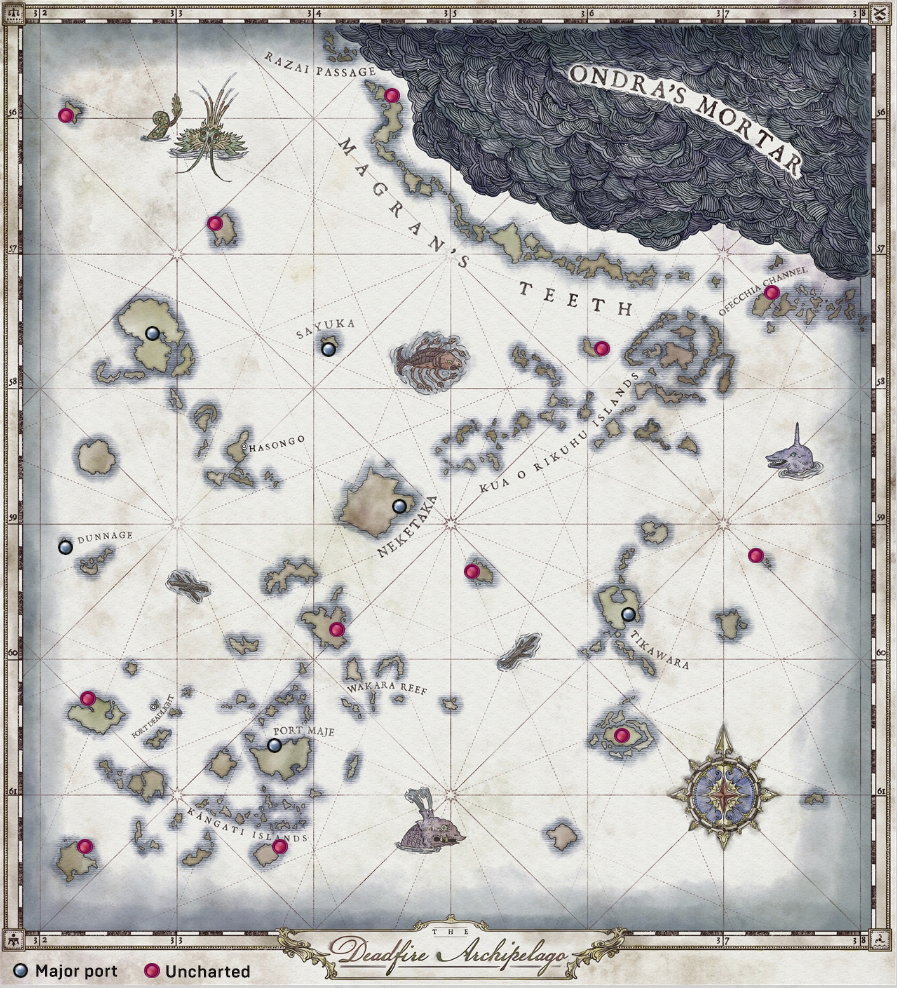
You get an opportunity to name an uncharted island after you explore the locations on it. There are 12 uncharted islands in Deadfire – all of them marked on the map below. If you just follow “Mapping the Archipelago” questline given by Sanza (you will find him in Sanza's Map Emporium in Queen's Berth area of Nekateka), you will find them all.

- Mapping the Archipelago: Port Maje
- Mapping the Archipelago: Tikawara
- Mapping the Archipelago: West Wakara Reef
- Mapping the Archipelago: The Burning Shoals
- Mapping the Archipelago: Razai Passage
Companions

- Edér – found at the very beginning of the game.
- Xoti – found at Port Maje or later in the Temple of Gaun (The Sacred Stair area of Neketaka).
- Aloth – found at Engwithan Digsite, east of Port Maje.
- Serafen – found during an encounter with Captain Furrante right after you fix your ship.
- Tekēhu – found at Watershaper's Guild (Periki's Outlook area of Neketaka).
- Maia Rua – found at Kahanga Palace (Serpent's Crown area of Neketaka).
- Pallegina – found at Kahanga Palace (Serpent's Crown area of Neketaka) or at Queen's Birth.

- Fassina – found at The Dark Cupboard (Periki's Overlook area of Nekateka). You will need to complete both “Velvet Glove, Brass Fist” (given by Fassina herself) and “The Archmage's Vault” (see “Constellation Prize” achievement) to be able to recruit her.
- Konstanten – found at The Wild Mare (Queen's Berth area of Nekateka). Just talk to him to recruit him.
- Ydwin – found at Spire of the Soul Seers (The Sacred Stair area of Neketaka). Just talk to her to recruit her.
- Rekke – found during Flotsam event (eastern edge of the map). Chose to bring him to your ship during the event to recruit him.
- Mirke – found at Fort Deadlight
- Vatnir – found at Harbinger's Watch (Beast of Winter DLC) - does not count towards the achievement

In every tavern, you can create adventurers and recruit them to your party. Just make one.

In the Reputations, menu you can check likes and dislikes of all the companions currently in your party. You can also check their attitude towards you (and each other). If you express opinions that a companion approves of, you will gain reputation with him. Roughly counting, you need about 8-10 such reputation-increasing events to maximize a positive relationship (to get it to +2).
I found it the easiest with Edér and Xoti – they like clever dialogue options (which suited my character just fine) and as such I got them to +2 in no time.

In the Reputations menu you can check likes and dislikes of all the companions currently in your party. You can also check their attitude towards you (and each other). If you express opinions that a companion disapproves of, you will lose reputation with him. You need several such reputation-decreasing events to maximise a negative relationship (to get it to -2).
Below, there are several easy ways to get this achievement, contributed by the community (thanks, everyone!) - most exploit Edér's good nature, poor Edér ;).
The easiest way to get this one (thanks to blthzr): Have Xoti in your party. Sail to 3-4 shrines and desecrate/destroy them. Done!
Alternative way no. 1 (thanks to Karo): Go to the Xaurip island south of Nekataka where you find Mother Sharp-Rock. Have Edér with you and approach the cage, then leave. This is considered animal cruelty and spamming this interaction allows to get the achievement in like 5 min tops.
Alternative way no. 2 (thanks to Yanomir of Poland): Start new game and recruit Edér. Intimidate Dawnstars on the road to Port Maje, get to Neketaka, start Shipwright mission and threaten Cotta, go to Gaun's temple and ask Adaryc why he worships Engwithans. That gives enough bad reputation for the achievement.
Alternative way no. 3 (thanks to Angel): Takes about 15 minutes.- Start the game and have Edér in your party.
- Go to the Ilonet's Fork (Island Maje) and intimidate the pilgrims you meet there. When they give you stuff, tell them it is not enough and attack them all. Afterwards, when Edér wants to talk about it, tell him to shut up.
- Go to Upoho Wharo Woods (Island Maje) and threaten the druid you meet there. First you need to tell him you just want to go through the forest and then you get an option to tell him that you will kill his boars if he doesn't let you through.
Sailor’s life

Each ship has slots for six types of equipment: Sail, Hull, Helm, Anchor, Lanterns, Cannons, and two slots for upgrades: Captain's Quarters, Menagerie. Just acquire any of those - you can buy them in ports and even get some from the Scavenger Hunt [eternity.obsidian.net] and equip on your ship.

Each ship has slots for six types of equipment: Sail, Hull, Helm, Anchor, Lanterns, Cannons, and two slots for upgrades: Captain's Quarters, Menagerie. Acquire items to fill every last slot (that includes all the slots for cannons that your ship has) and equip them on your ship.

- Voyager (base cost 20000)
- Dhow (base cost 35000)
- Galleon (base cost 50000)
- Junk (base cost 60000)

You need to assign a sailor to each available slot on your active ship – including the slots for resting crew. Logically, it is easier to do with a smaller ship but you will find no shortage of sailors in your travels and you can always hire more in ports if you lack some.

You get experience for each ship you sink/board at sea (unique ships will give you a Triumph), as well as for some events and your rank rises. You can check your current rank in “Ship Management” screen – it’s expressed in stars under your character portrait, from 1 to 5.
You can also easily do this if you have at least 4 Berath's Blessings. Just start a new game and spend those 4 blessings on “Experienced Ship Captain” – you will begin the game as an Expert ship captain.

You get experience for each ship you sink/board at sea (unique ships will give you a Triumph), as well as for some events and your rank rises. You can check your current rank in “Ship Management” screen – it’s expressed in stars under your character portrait, from 1 to 5.

Your crew will (possibly) mutiny when their morale drops to 1. Achieving this is very easy – just take away all the food and water from your ship’s holds and their morale will be dropping like crazy. You can help it along by attacking ships and surrendering during the fight – your crew doesn’t like it when you flee from inferior opponents. Some random events at sea will also allow you to drop some morale.
After your morale reaches 1, a random even will pop up. I saw at least 4 different ones. One of those events is a mutiny. During the mutiny, you need to chose to attack your crew and win the subsequent fight. The achievement will pop after the fight, when you get back to sailing.
If the mutiny did not happen to you on your first try, just keep sailing around with 1 morale, it will come eventually.
Crafting

Just go to crafting menu and make five different potions. Ingredients you can either acquire on your travels, they are plentiful, or buy from traders.

Just go to crafting menu and make five different scrolls. Ingredients you can either acquire on your travels, they are plentiful, or buy from traders.

Only unique (named) weapons and armor can be enchanted – they will have a tiny plus icon on them. Clicking on it will take you to Enchantment Menu, where you will be able to choose and add new properties to your equipment. Just do it five times (it does not have to be five different items). Ingredients you can either acquire on your travels, they are plentiful, or buy from traders.

Just go to crafting menu and make five different explosives. Ingredients you can either acquire on your travels, they are plentiful, or buy from traders.
Miscellaneous

- Blightheart (arquebus) – found at Burial Mound south-west of Motare o Kōzi
- Lord Darryn's Voulge (pollaxe) – found at Shipwreck south west from Takenaka in an enclose island
- Magistrate's Cudgel (mace) – found at Subterranean Temple north of Poko Kohara.
- Marux Amanth (dagger) – found at Poko Kohara Ruins (Engwithan Waystation, Level 2).
- Modwyr (sword) – found at Old City Ruins, small hideout in the northeast part of the area.
Soulbound items in Beast of Winter DLC:
- Guardian's Plate (breastplate) - found on a frozen elf by the gate in the Temple of Decline area.
- Wintertide Bulwark (shield) - found in a tomb in the Eastern Cave in The Rimebound Temple area.
Soulbound items in Seeker, Slayer, Survivor DLC:
- Seeker's Fang (rapier) - granted as a reward for winning The Contest of the Seeker challenge and becoming the chosen of the Seeking Face.
- Slayer's Claw (battle axe) - granted as a reward for winning The Contest of the Slayer challenge and becoming the chosen of the Slaying Face.
- Survivor's Tusks (helm) - granted as a reward for winning The Contest of the Survivor challenge and becoming the chosen of the Surviving Face.
- The Changeling's Mantle (hide armor) - reward for Tactical Ogres challenge (challenge unlocked by the Luckless Coin artifact).
Soulbound items in The Forgotten Sanctum DLC:
- Robes of the Weyc (cloth armor) - found on the Spun Terrace.
- The Weyc's Wand (wand) - found in a chest the Quarantined Section of the Archives.
After you acquire such an item, bind it to an appropriate character and follow the steps it specifies to unlock all the powers.

You can acquire traps by disarming existing traps or just buying some from a trader. You need mechanics adequate to the level of a trap to be able to set it. When you have one, place it in your quick slot and set it anywhere. Rinse, repeat.

Nothing to add, really. Well, except for a minor complaint that level-cap is too low ;)
Beast of Winter (1st DLC)

Story-related. Can't be missed.

Story-related. Can't be missed.

Story-related. Can't be missed.

Story-related. Can't be missed.

You will need to finish three side quests connected to three side-areas: The Drowned Kingdom, The Endless Queries and The Bridge Ablaze.
At the end of The Drowned Kingdom quest, you will need to decide to either enlist the King's aid in defeating Neriscyrlas, take him into the Wheel, or destroy his realm.
At the end of The Endless Queries quest, you will need to decide to either let Naxiva join you, ask her to slay an ancient dragon, or convince her to let go.
At the end of The Endless Queries quest, you will need to decide to either ask him to aid you against Neriscyrlas or Eothas, or let him descend into the void.
It does not matter what you choose.
Seeker, Slayer, Survivor (2nd DLC)

Story-related. Can't be missed.

Story-related. Can't be missed.

Story-related. Can't be missed.

Story-related. Can't be missed.

Story-related. Can't be missed.

In the Crucible, you will meet a man named Engari. He will be giving you tasks to find certain artifacts. There are three artifacts for each face, for the total of nine. You need to find and collect all of those artifacts to unlock the achievement.
The first three tasks are unlocked after you collect the starting artifact for each face by exploring the island and finish at least one challenge (unlocked tasks: The Surviving Face’s Hunt for the Matron’s Skull, The Slaying Face’s Hunt for the Luckless Coin, The Seeking Face’s Hunt for the Adra Pearl).
Second task for each face is unlocked after you finish at least two challenges for that face (unlocked tasks: The Surviving Face’s Hunt for the Uncut Gem, The Slaying Face’s Hunt for the Titan’s Heart, The Seeking Face’s Hunt for the Fortuneteller's Ear).
The third batch of tasks is unlocked after you finish Battle Royale and the events that come after, so basically after the DLC story-line ends (unlocked tasks: The Surviving Face’s Hunt for the Finger of the Exiled Queen, The Slaying Face’s Hunt for the Hunter’s Head, The Seeking Face’s Hunt for the Haemneg’s Handmaiden).
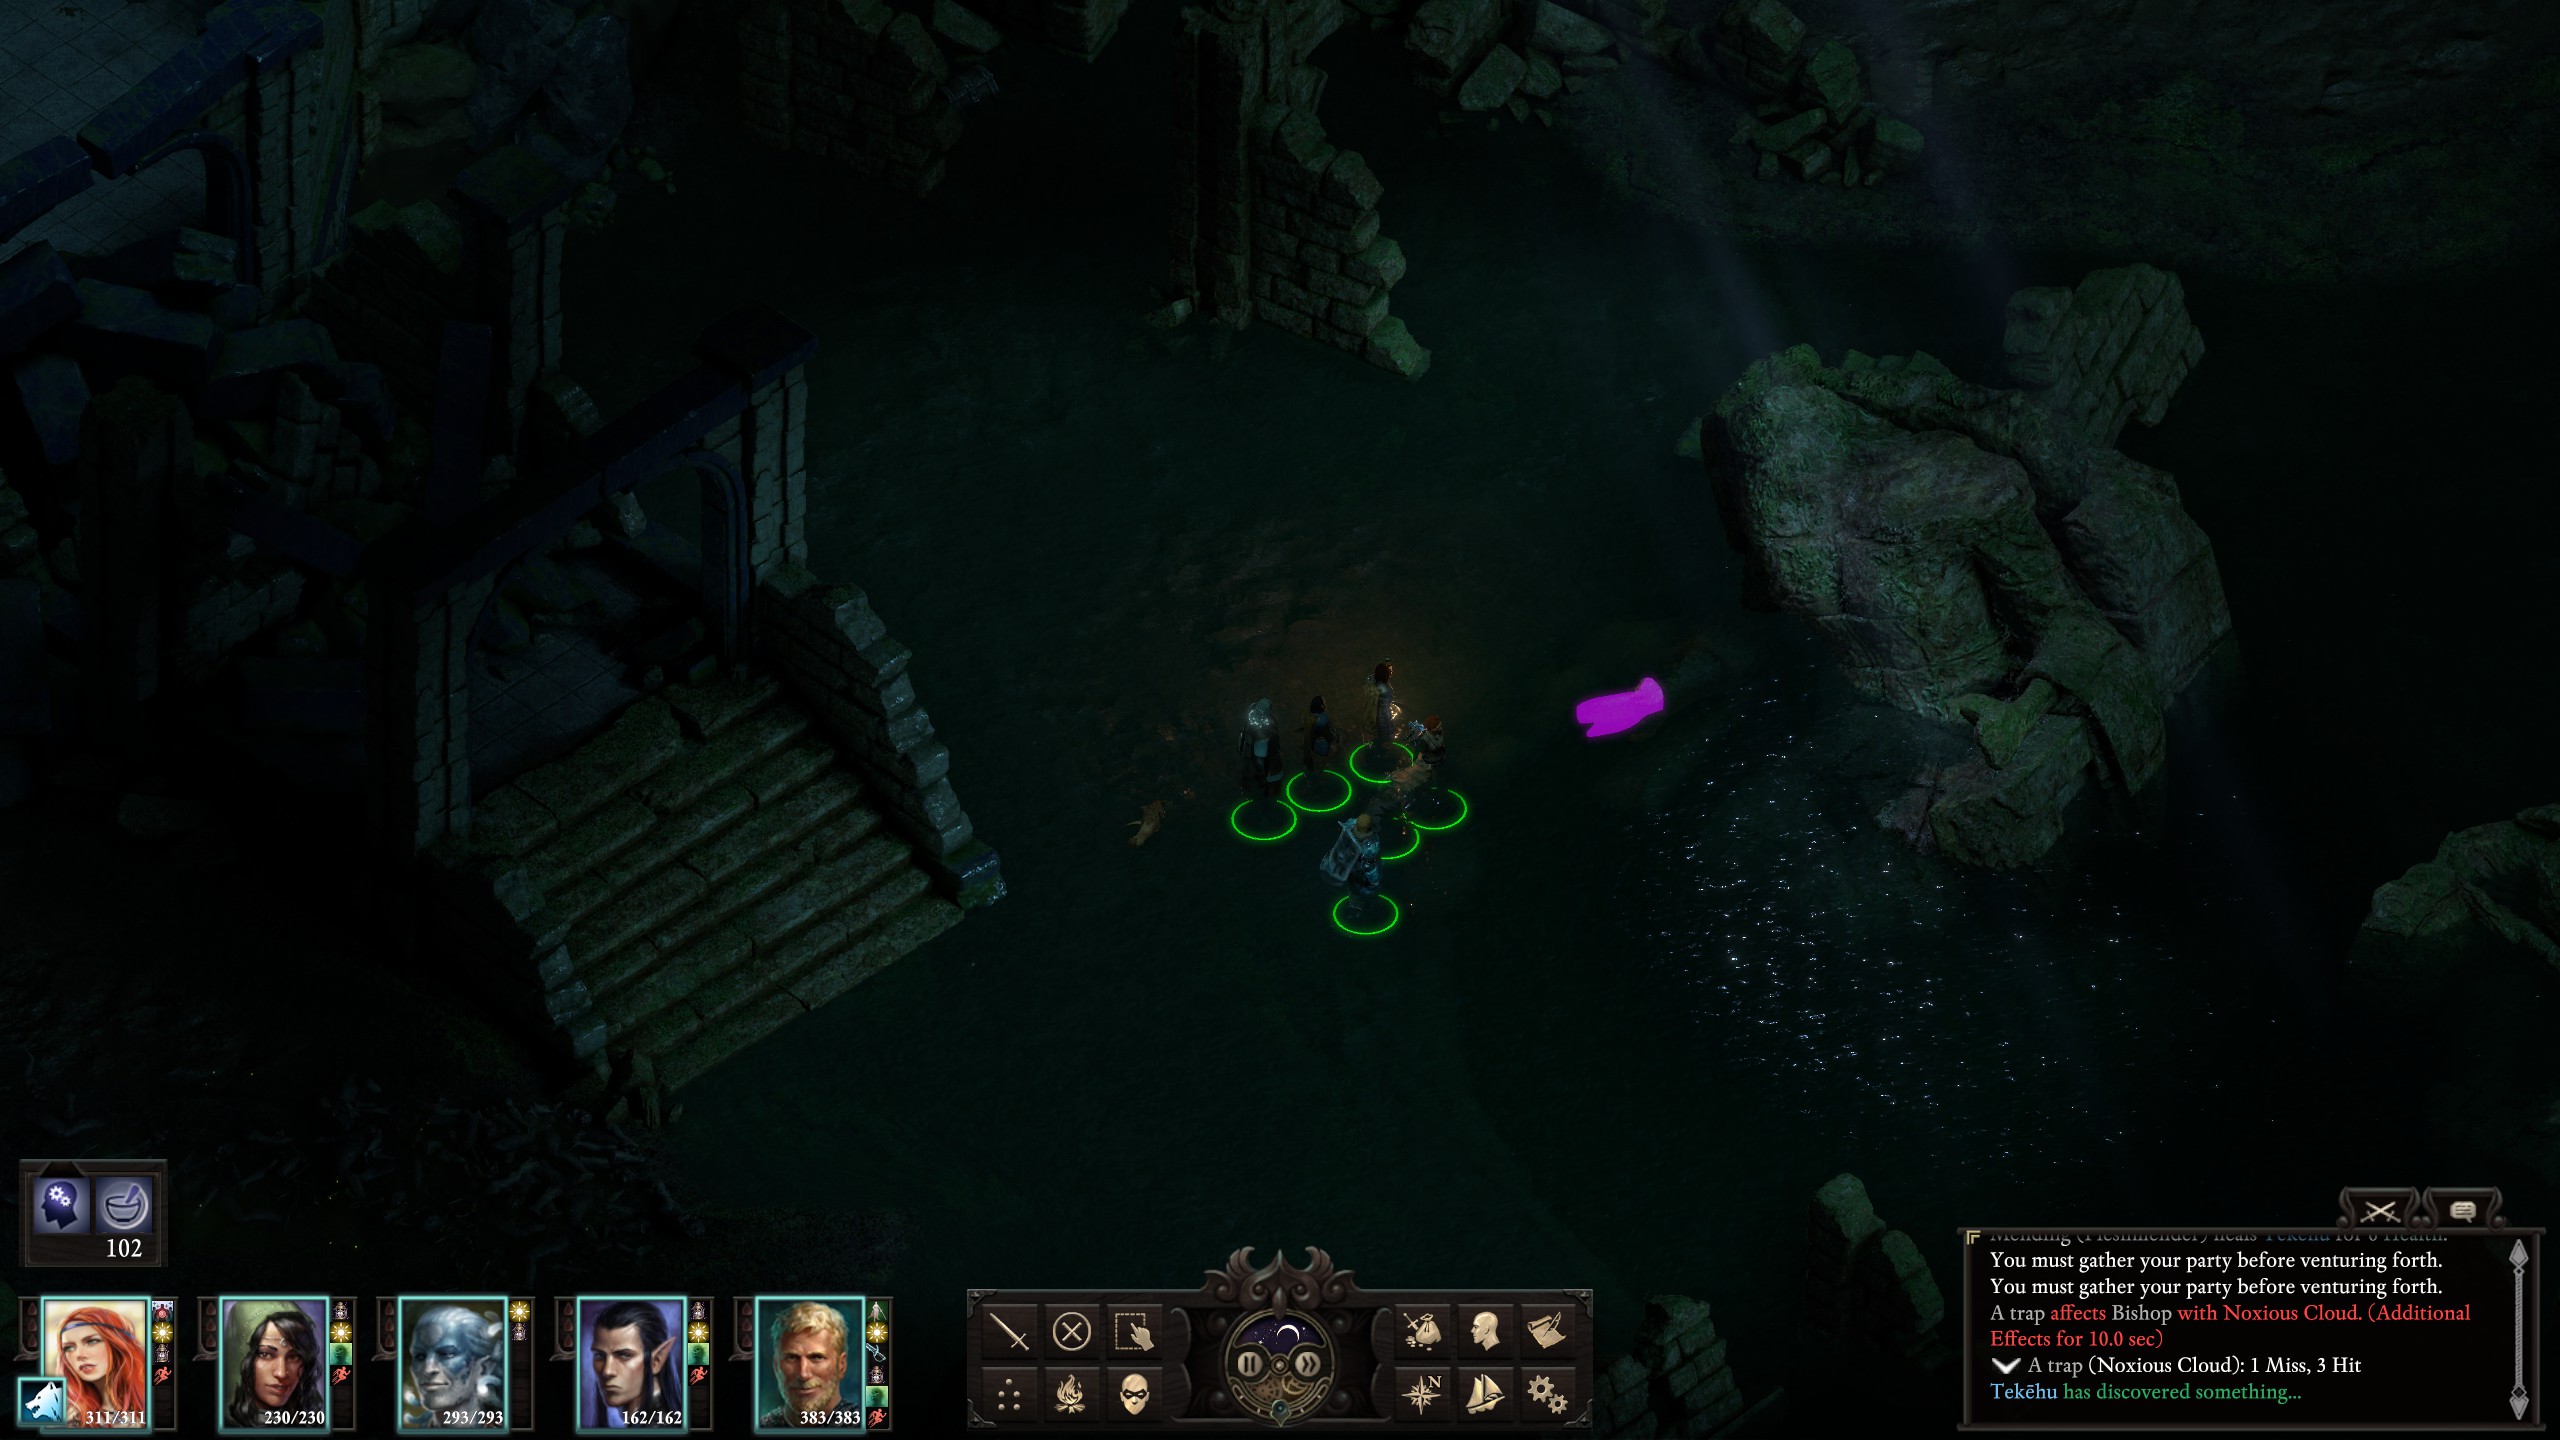
Adra Pearl
Location: Neketaka, Old City
Enter the Old City Overlook through the lift in the Gullet. Head down to the second level of the Old City, the very flooded one. Look in the water near a big boulder and stairs at the centre of the map.
 Predictor’s Ear
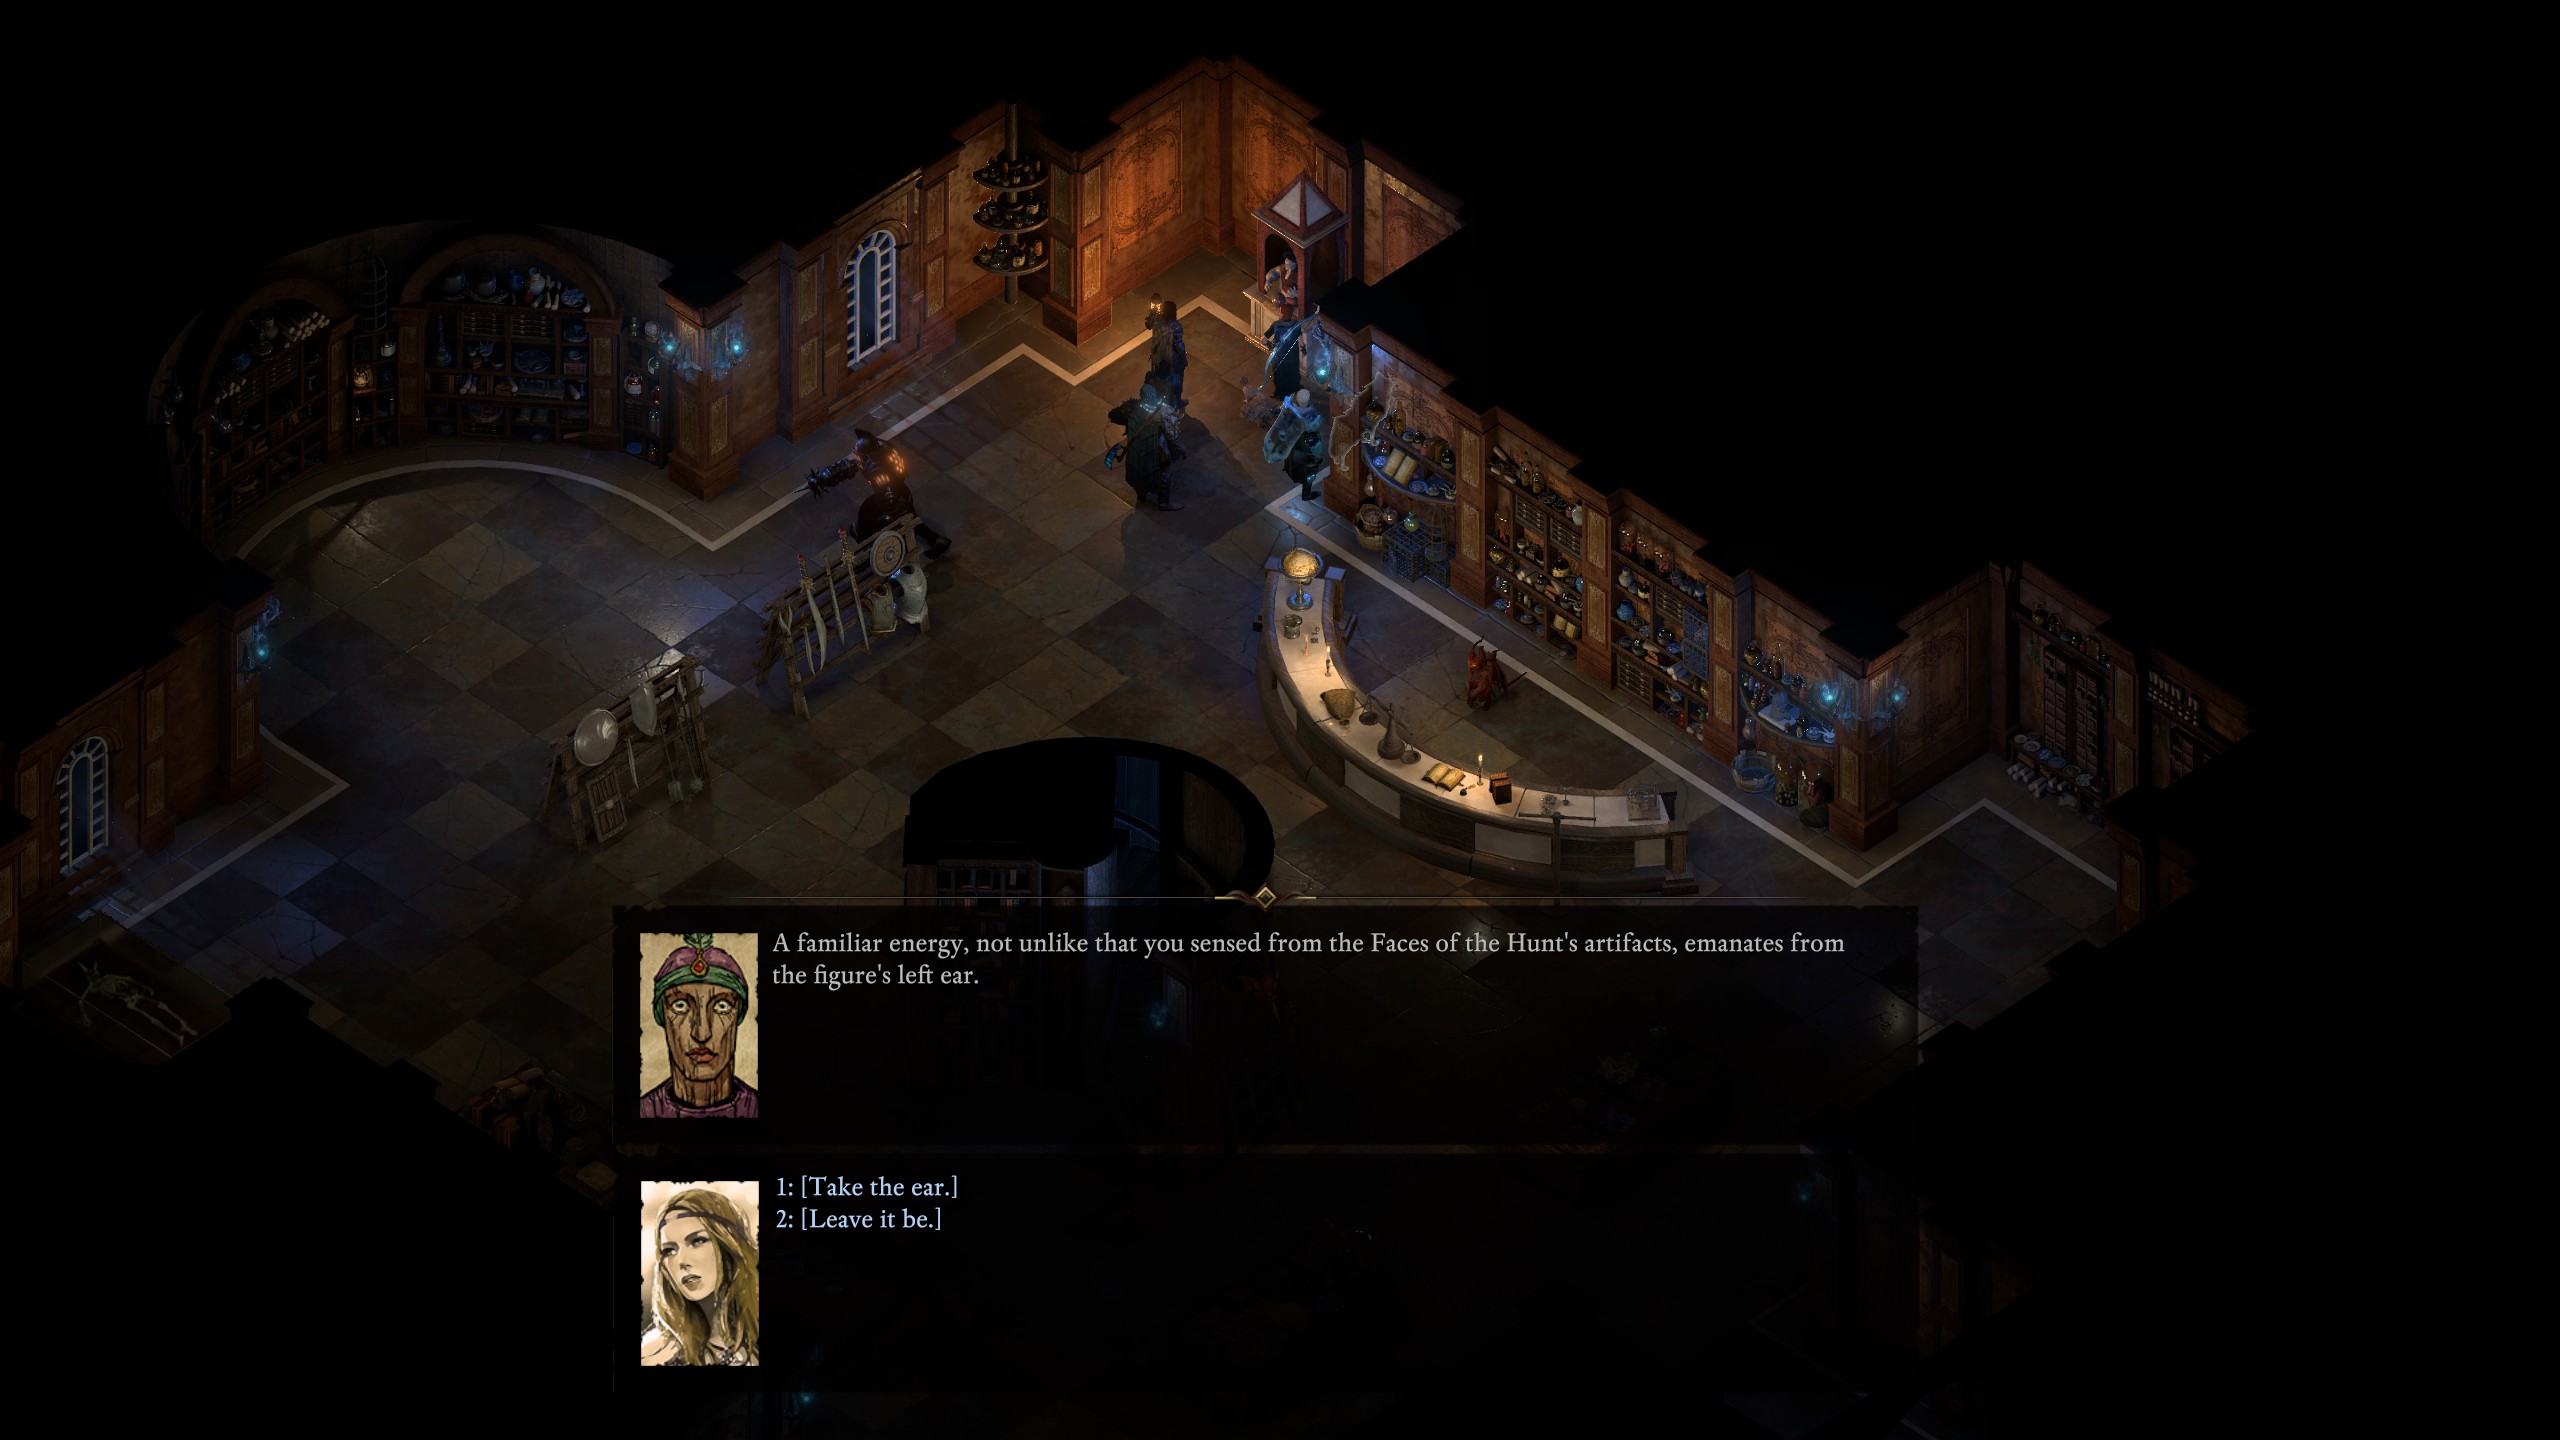
Location: Neketaka, Periki’s Overlook, The Dark Cupboard
You will find Predictor in the upper right corner of the shop. Interact with it (him?) and take his ear.
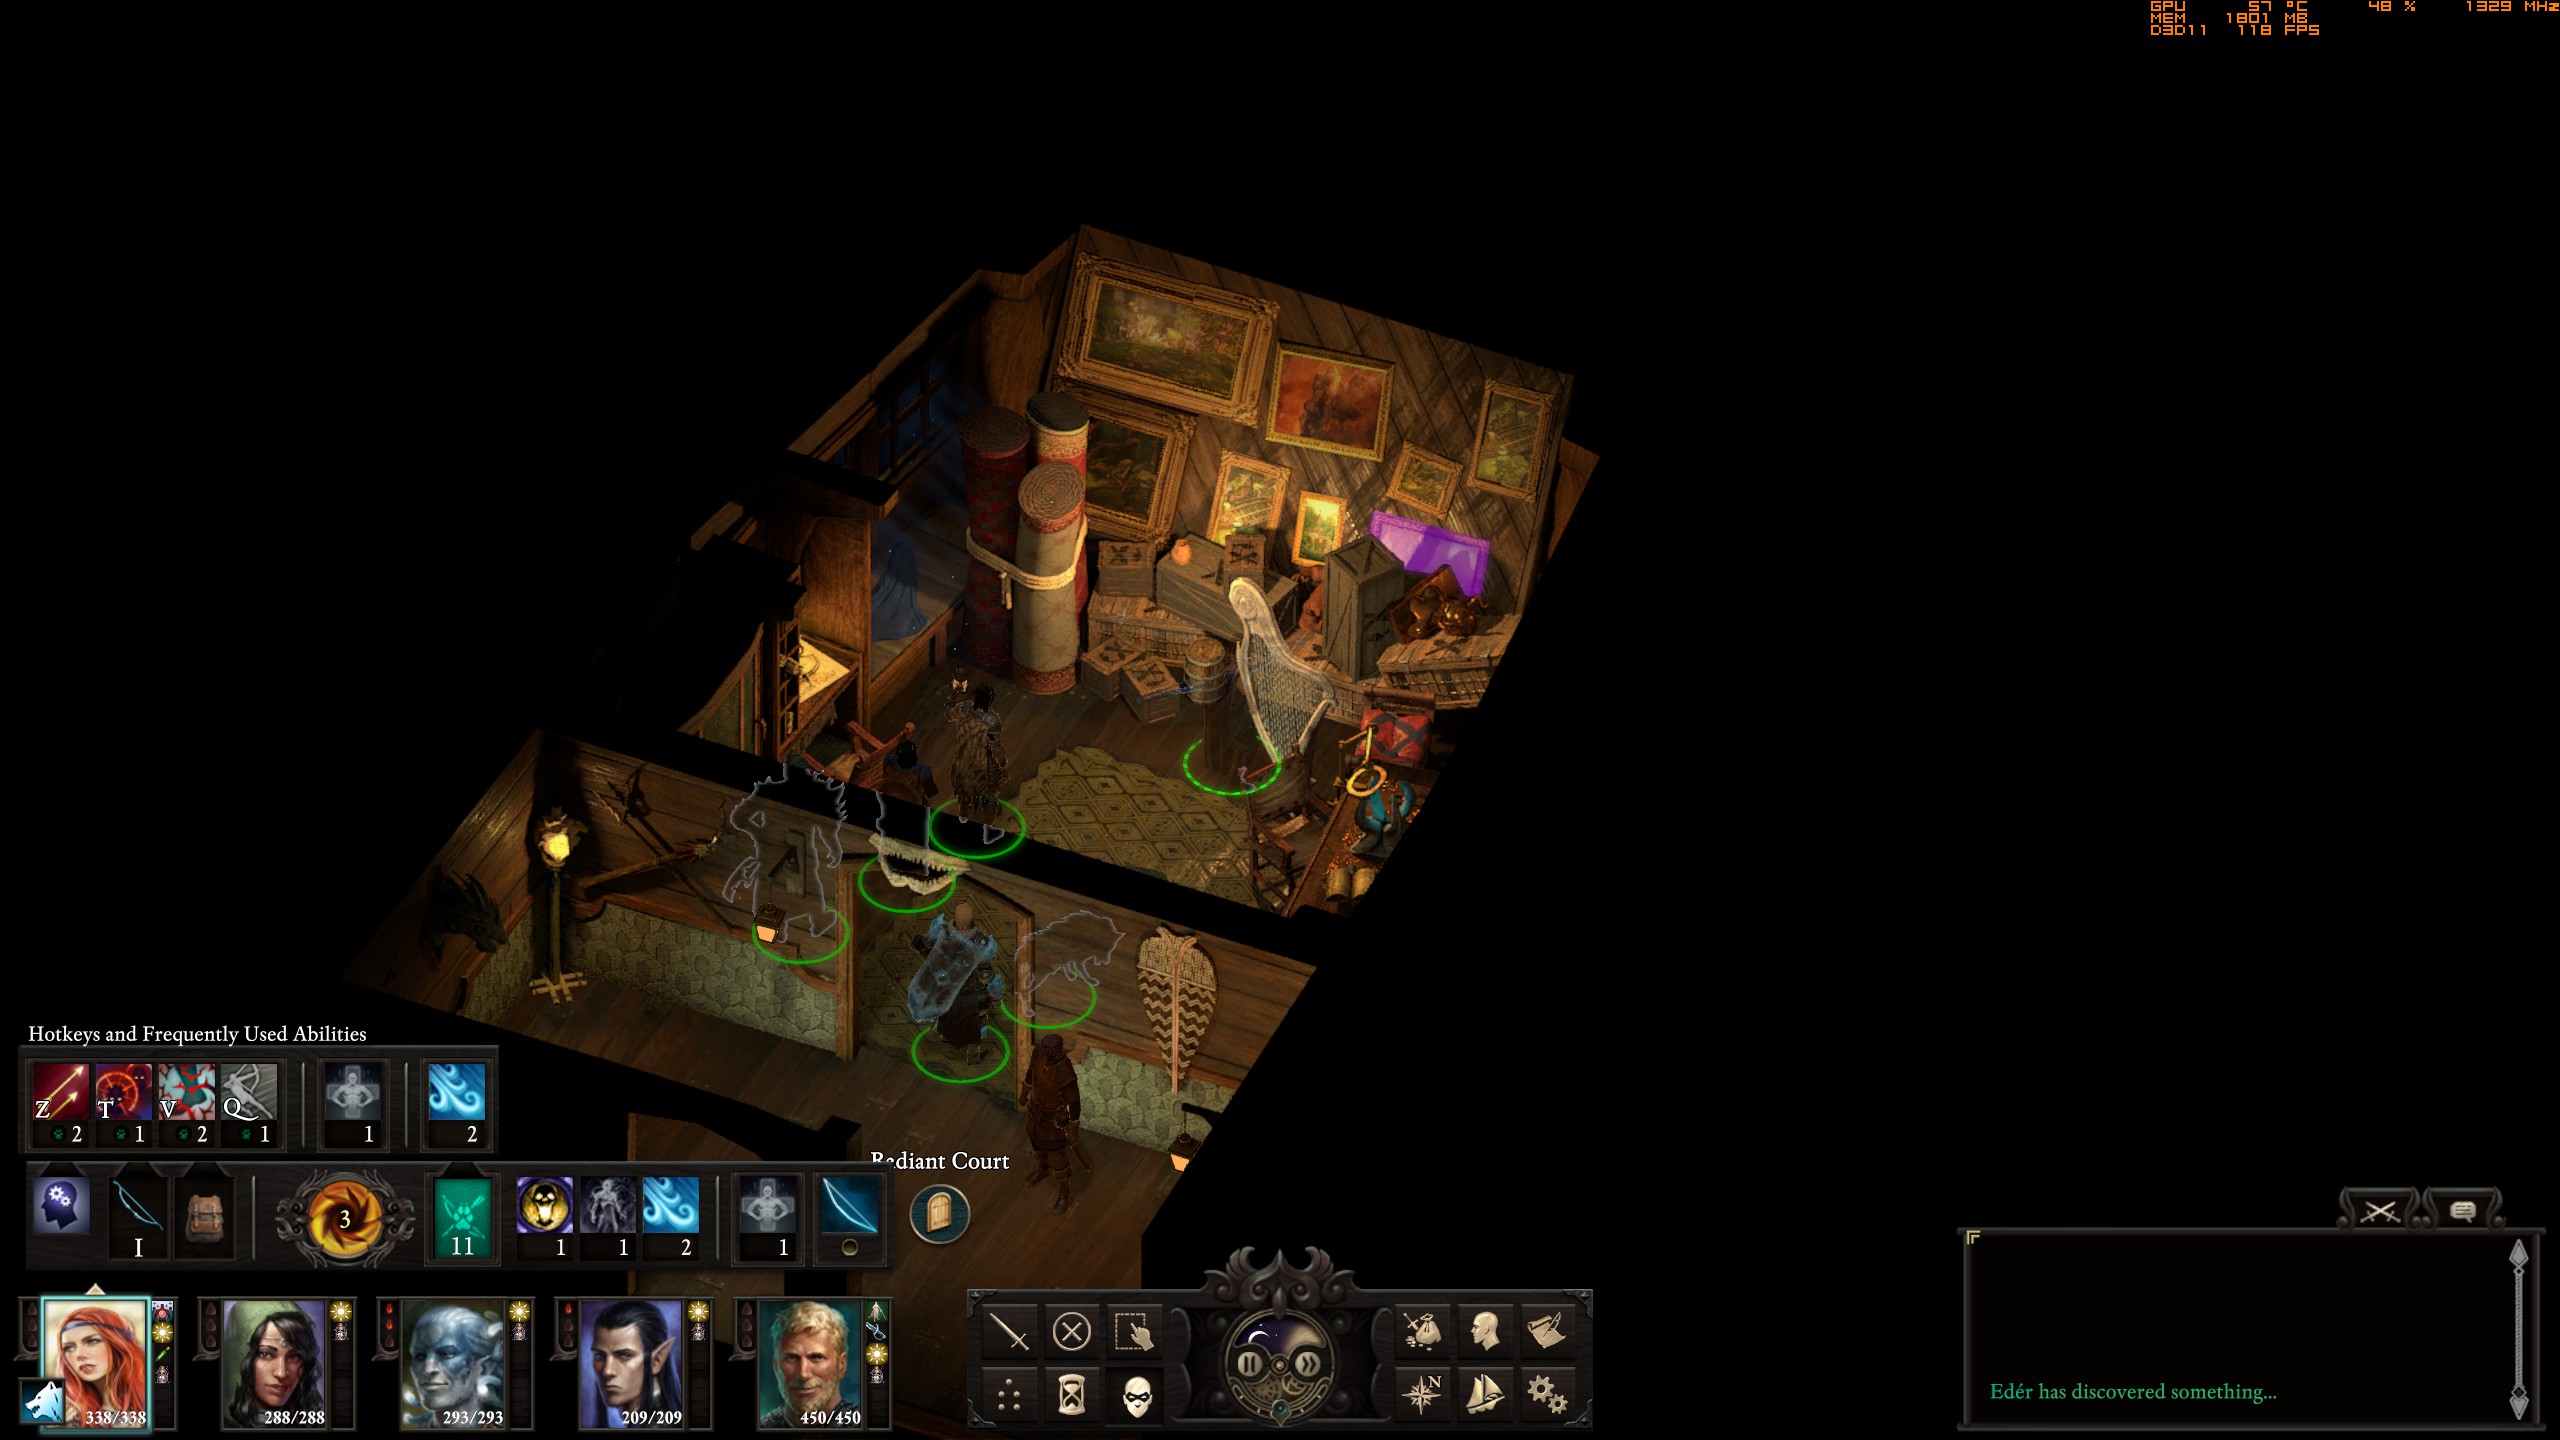
 Haemneg’s Handmaiden
Location: Dunnage, Radiant Court, Treasure Trove
Tapestry is in a small storage room that you see immediately after entering the shop. It’s considered stealing to take it, so be sneaky and beware the guard standing outside that room.
 SLAYER ARTIFACTS
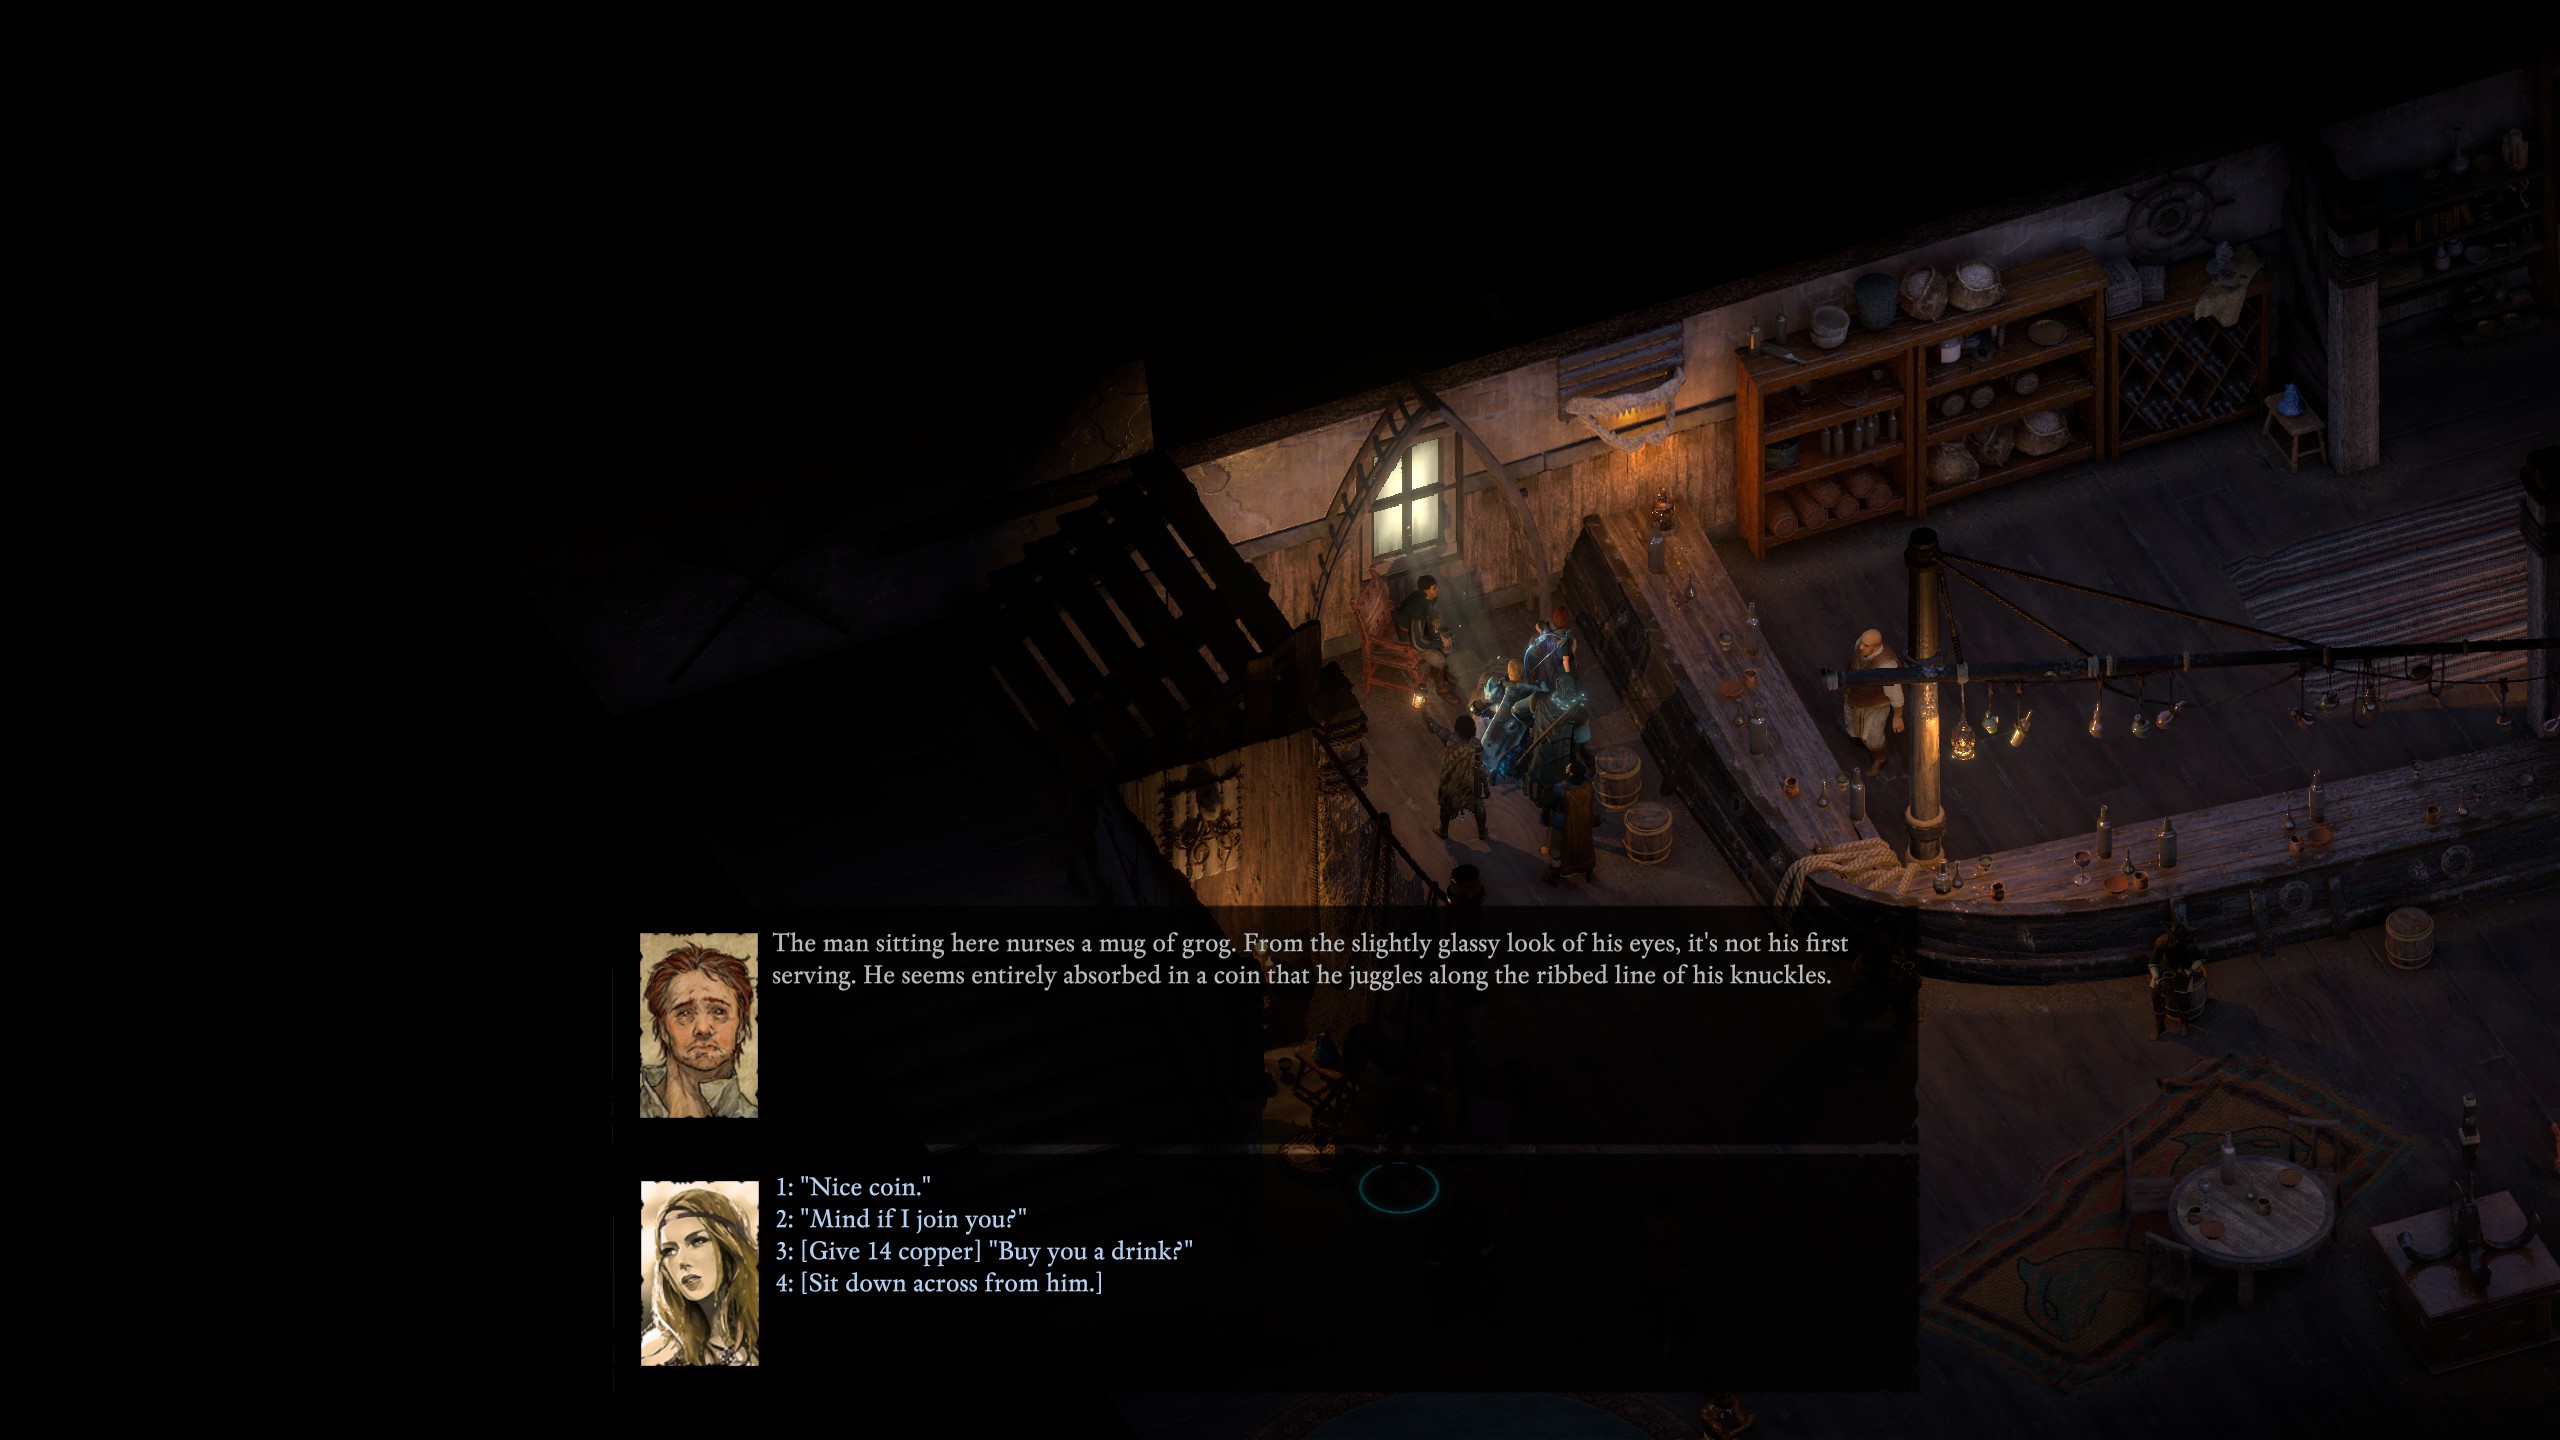
Luckless Coin
Location: Island Maje, Port Maje Harbor, Kraken’s Eye
There is a man seating to the left of the bar. Talk to him to find out about his curious coin. He is unwilling to part with the artifact. You can chose to order some rum and drink him under the table to take his coin after he passes out.
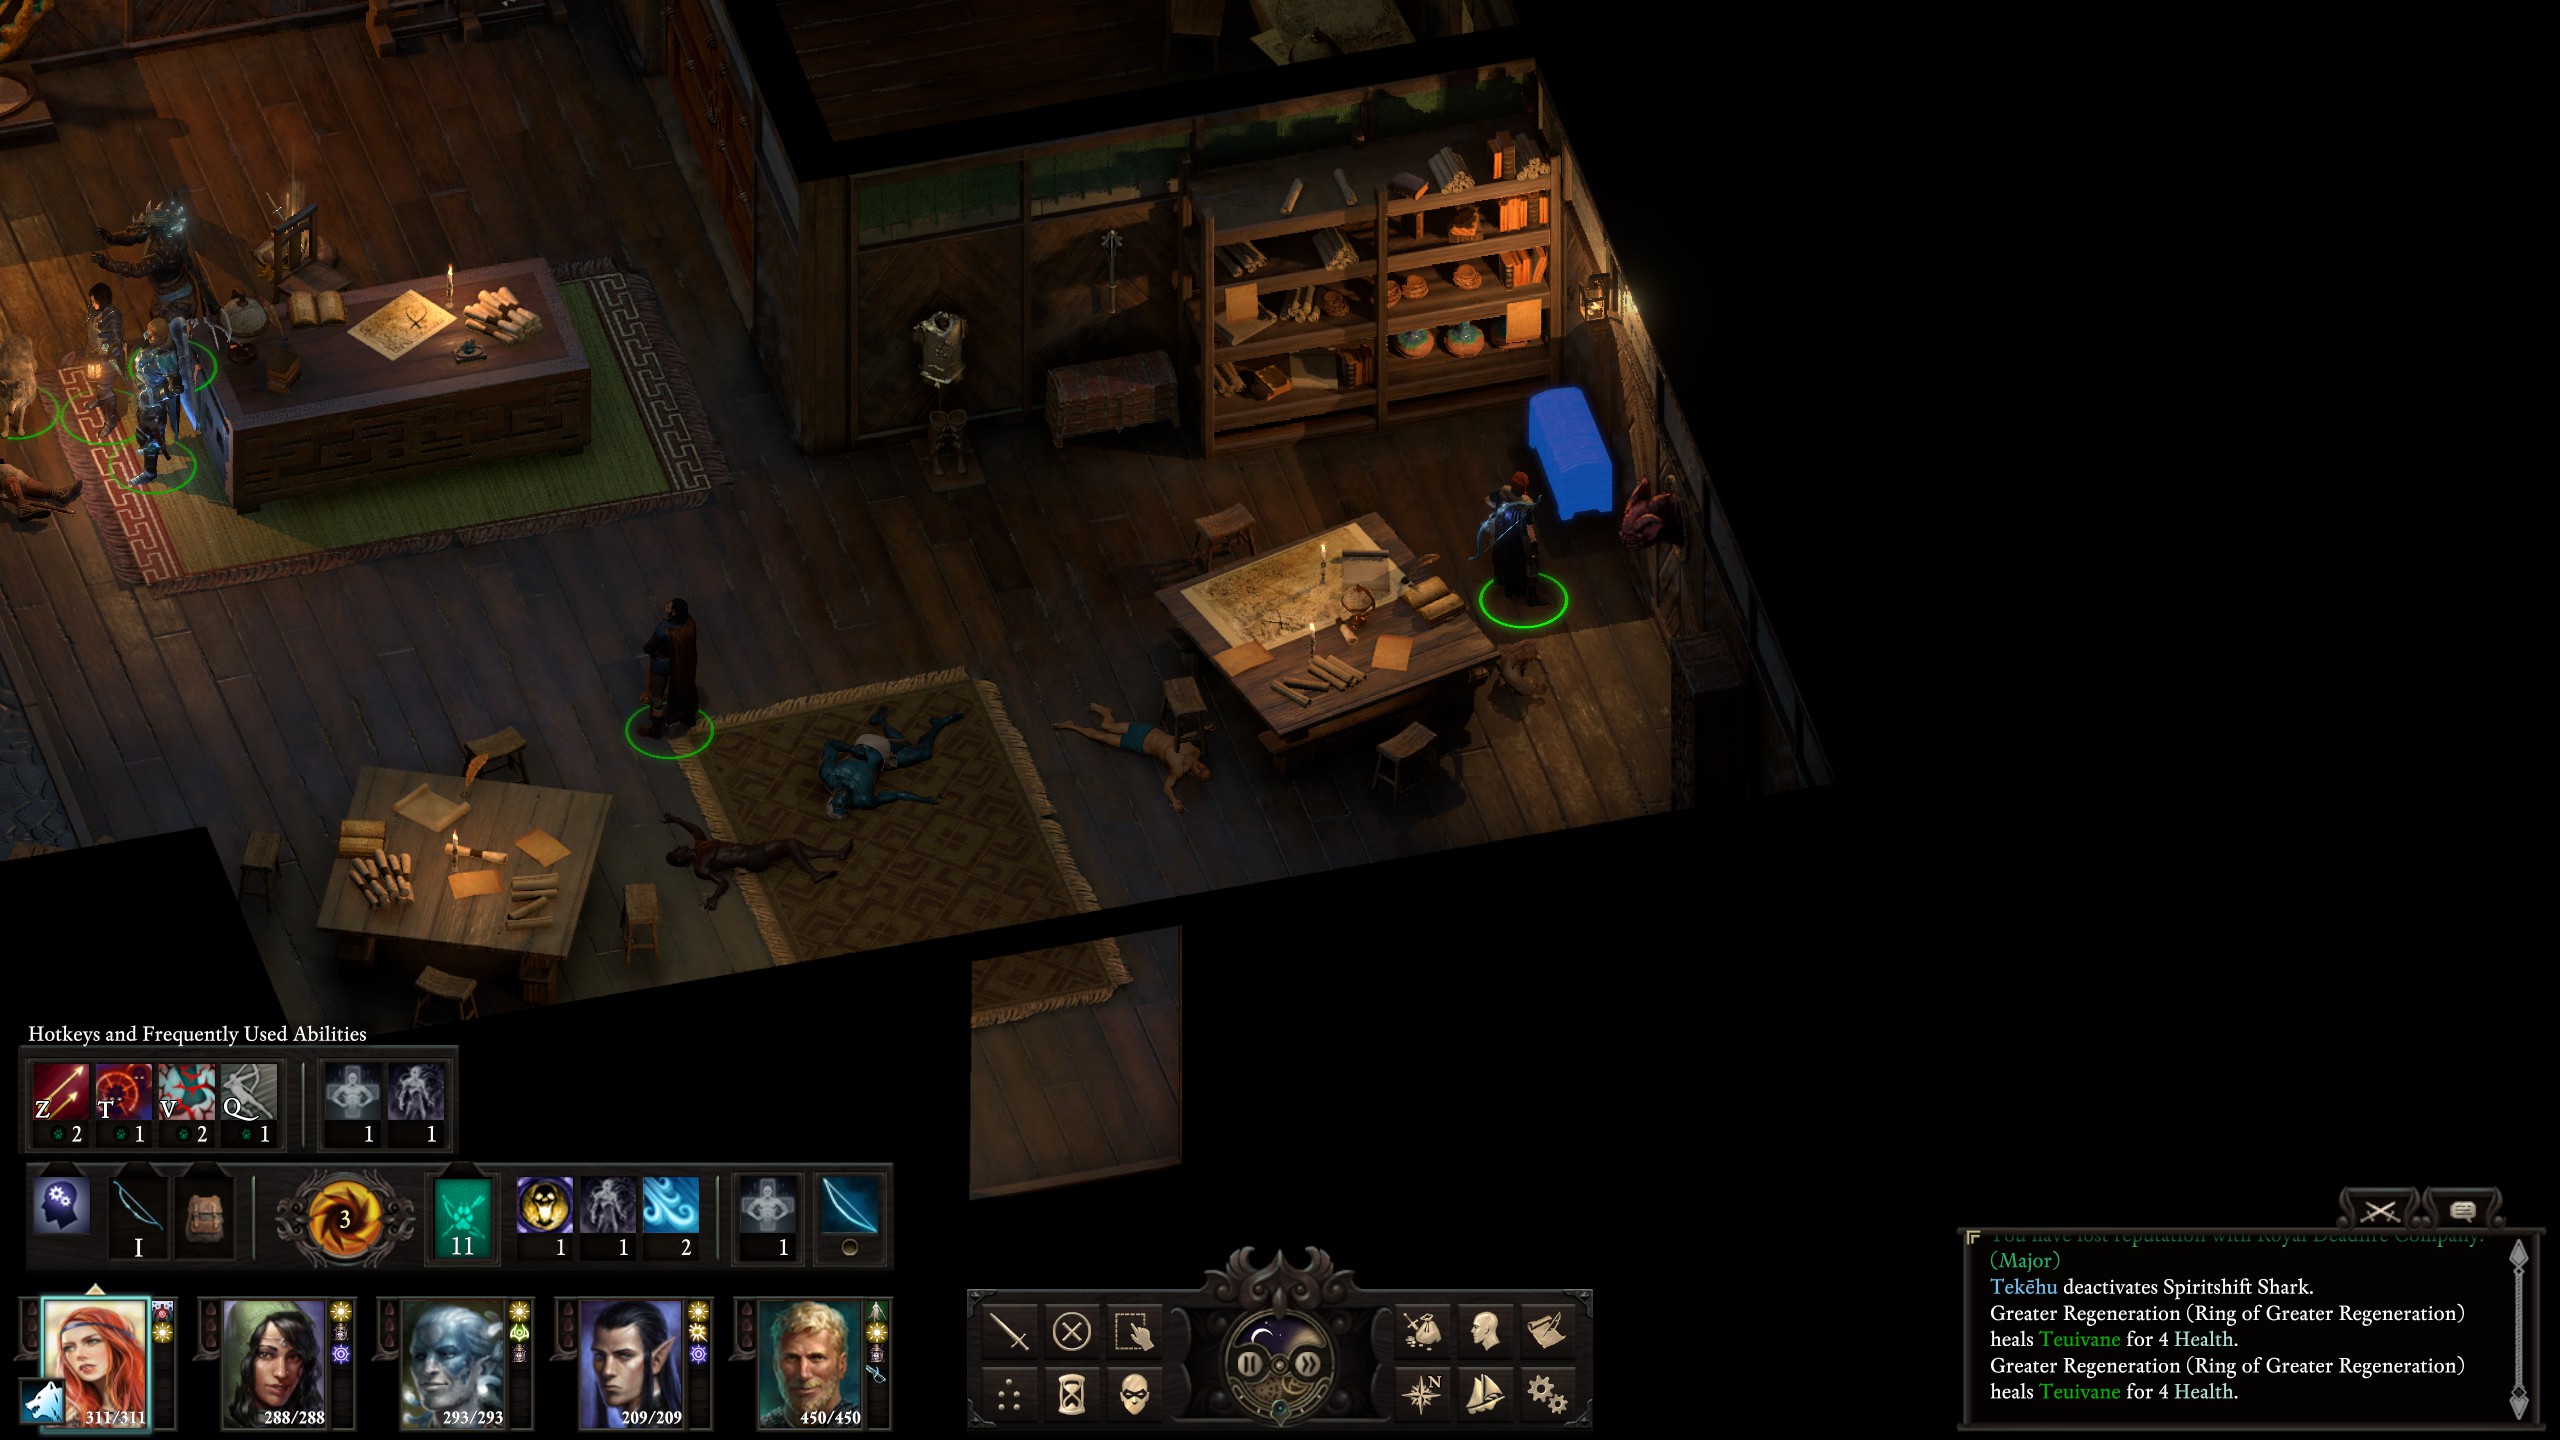
 Titan’s Heart
Location: Neketaka, Brass Citadel, Fleet Master’s Office
You will find the artifact in a chest to the right side of the entrance.
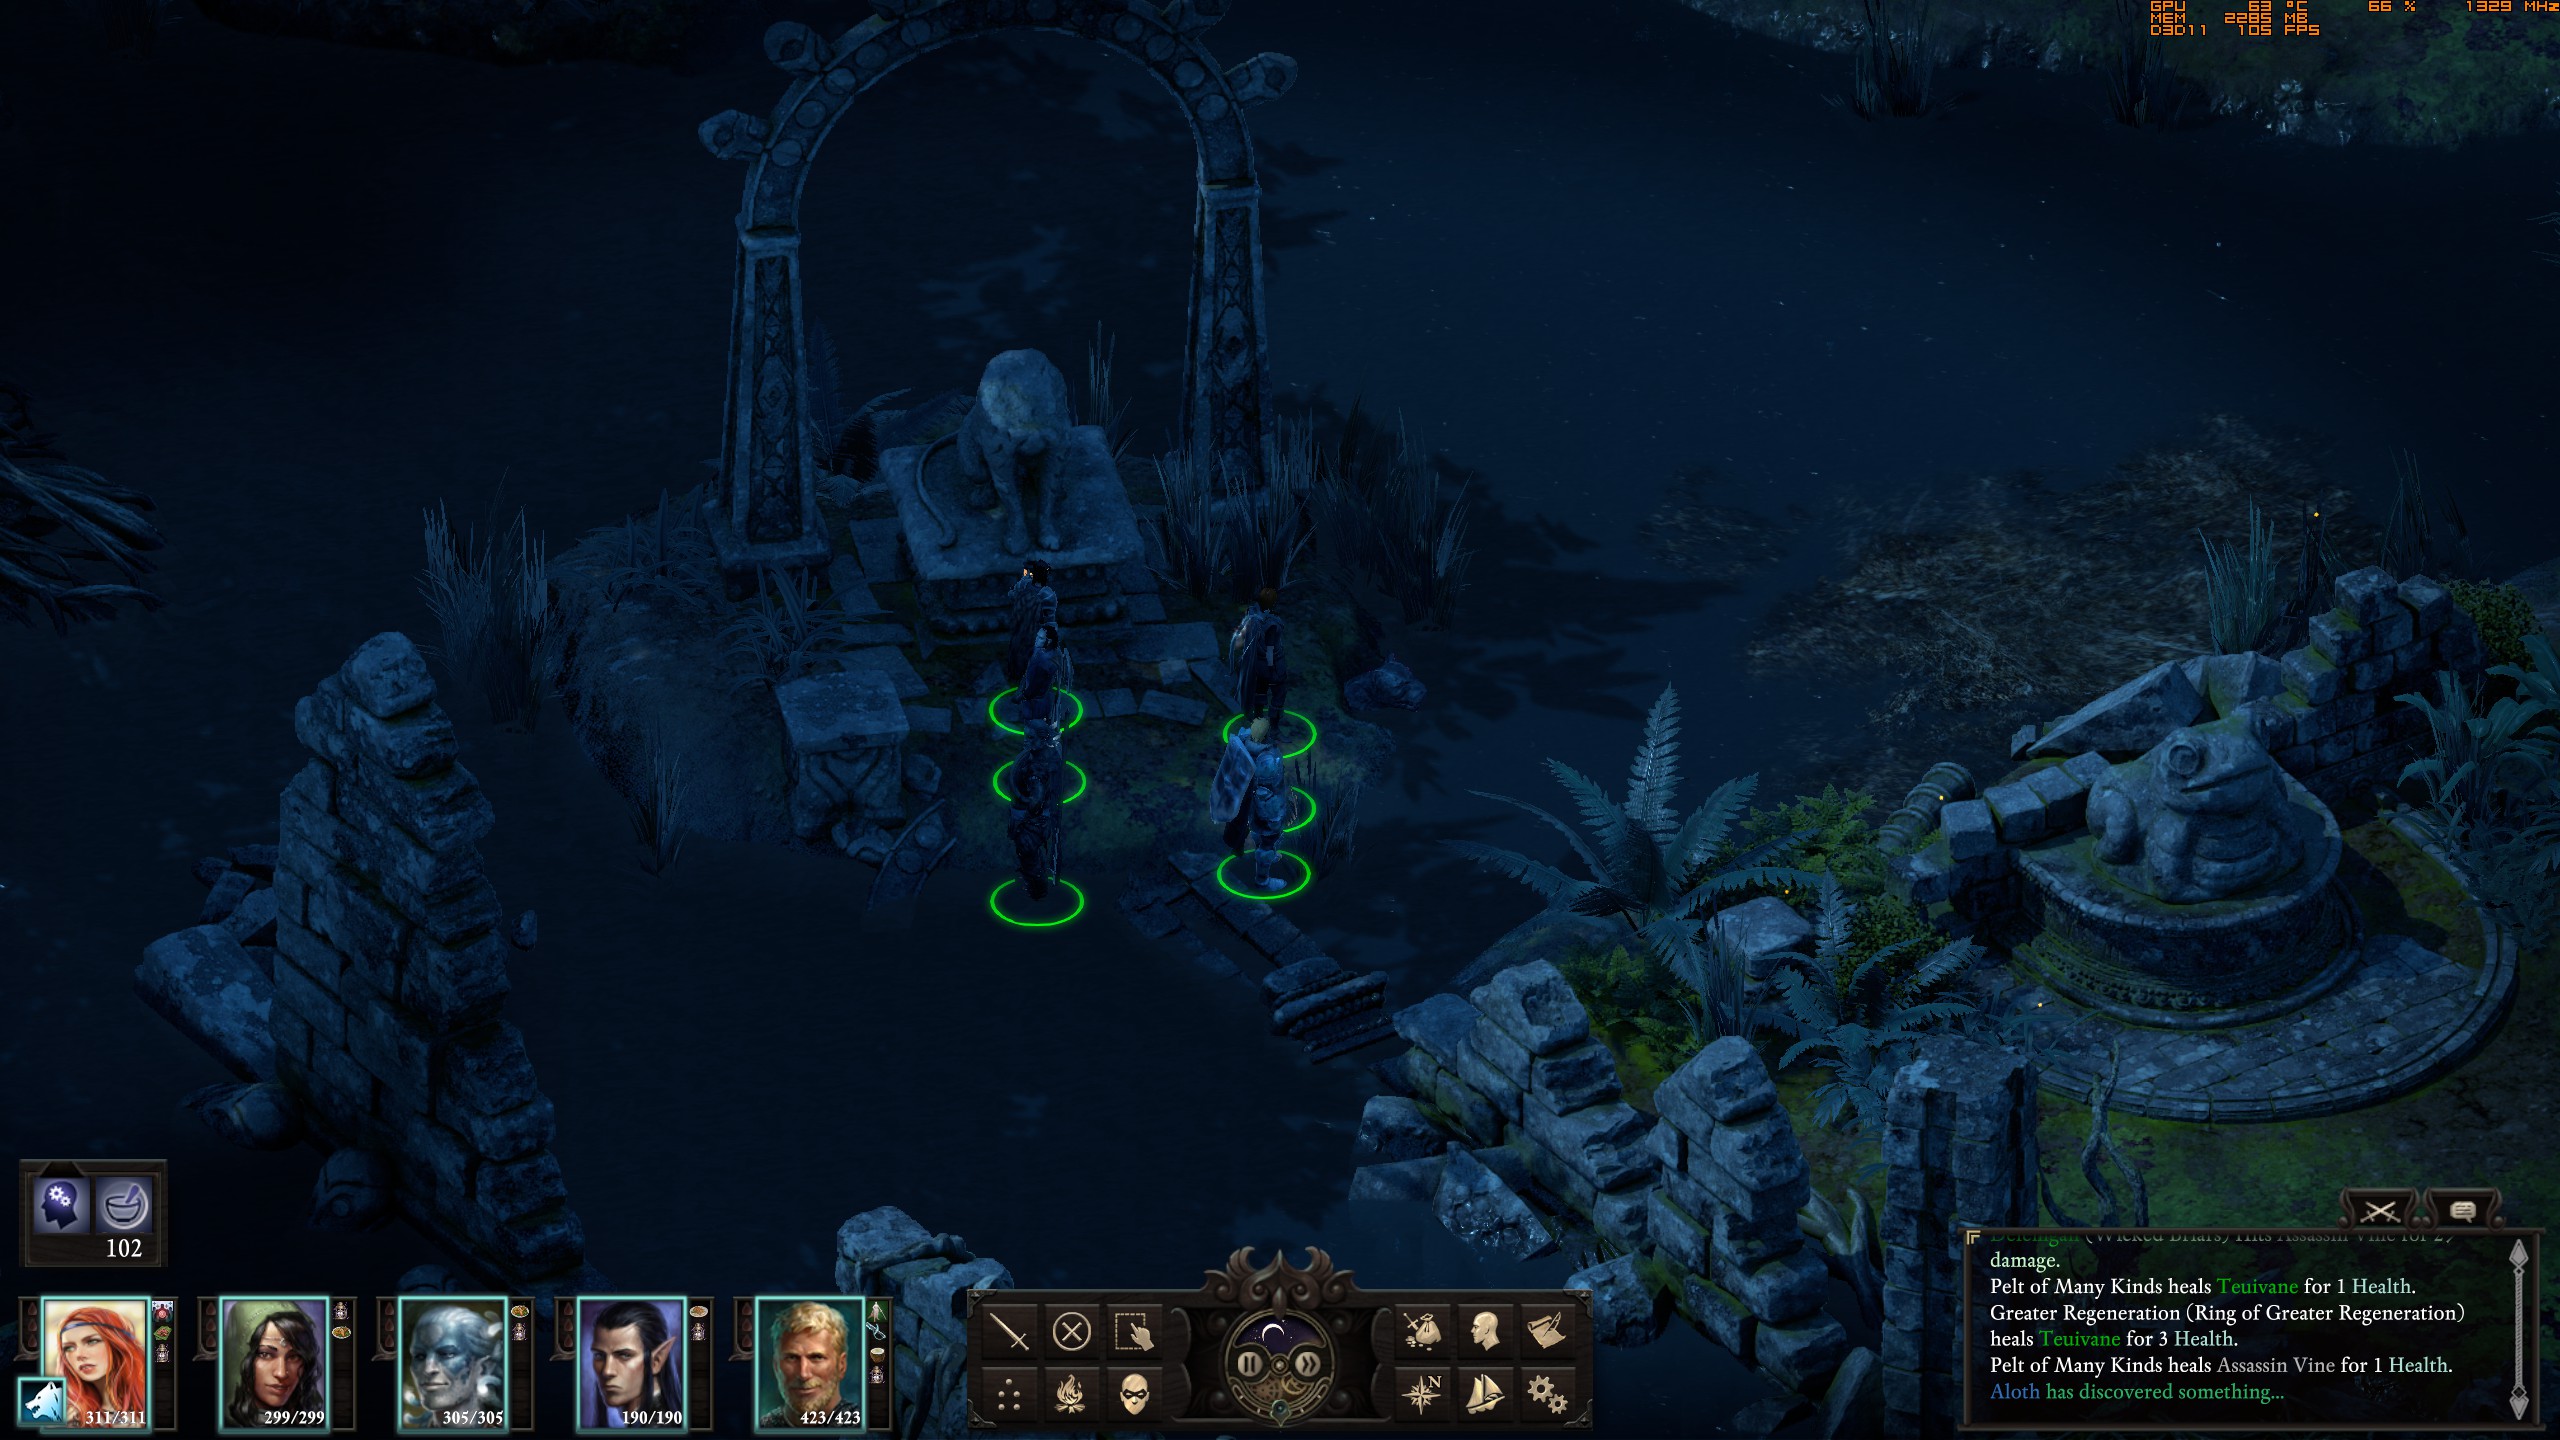
 Hunter’s Head
Location: Motare o Kōzi
In the north-west part of the location, just below the big ancestral tree, the is a headless statue of a stelgaer. You will find the artifact right next to it, to the right. It's not highlighted very well, so just search around with your cursor.
 SURVIVOR ARTIFACTS
Matron’s Skull
Location: Neketaka, Sacred Stair, The Hanging Sepulchers on the Temple of Berath
You will find the artifact in the northern part of the location, near bunch of stone slabs with skeletons on them.
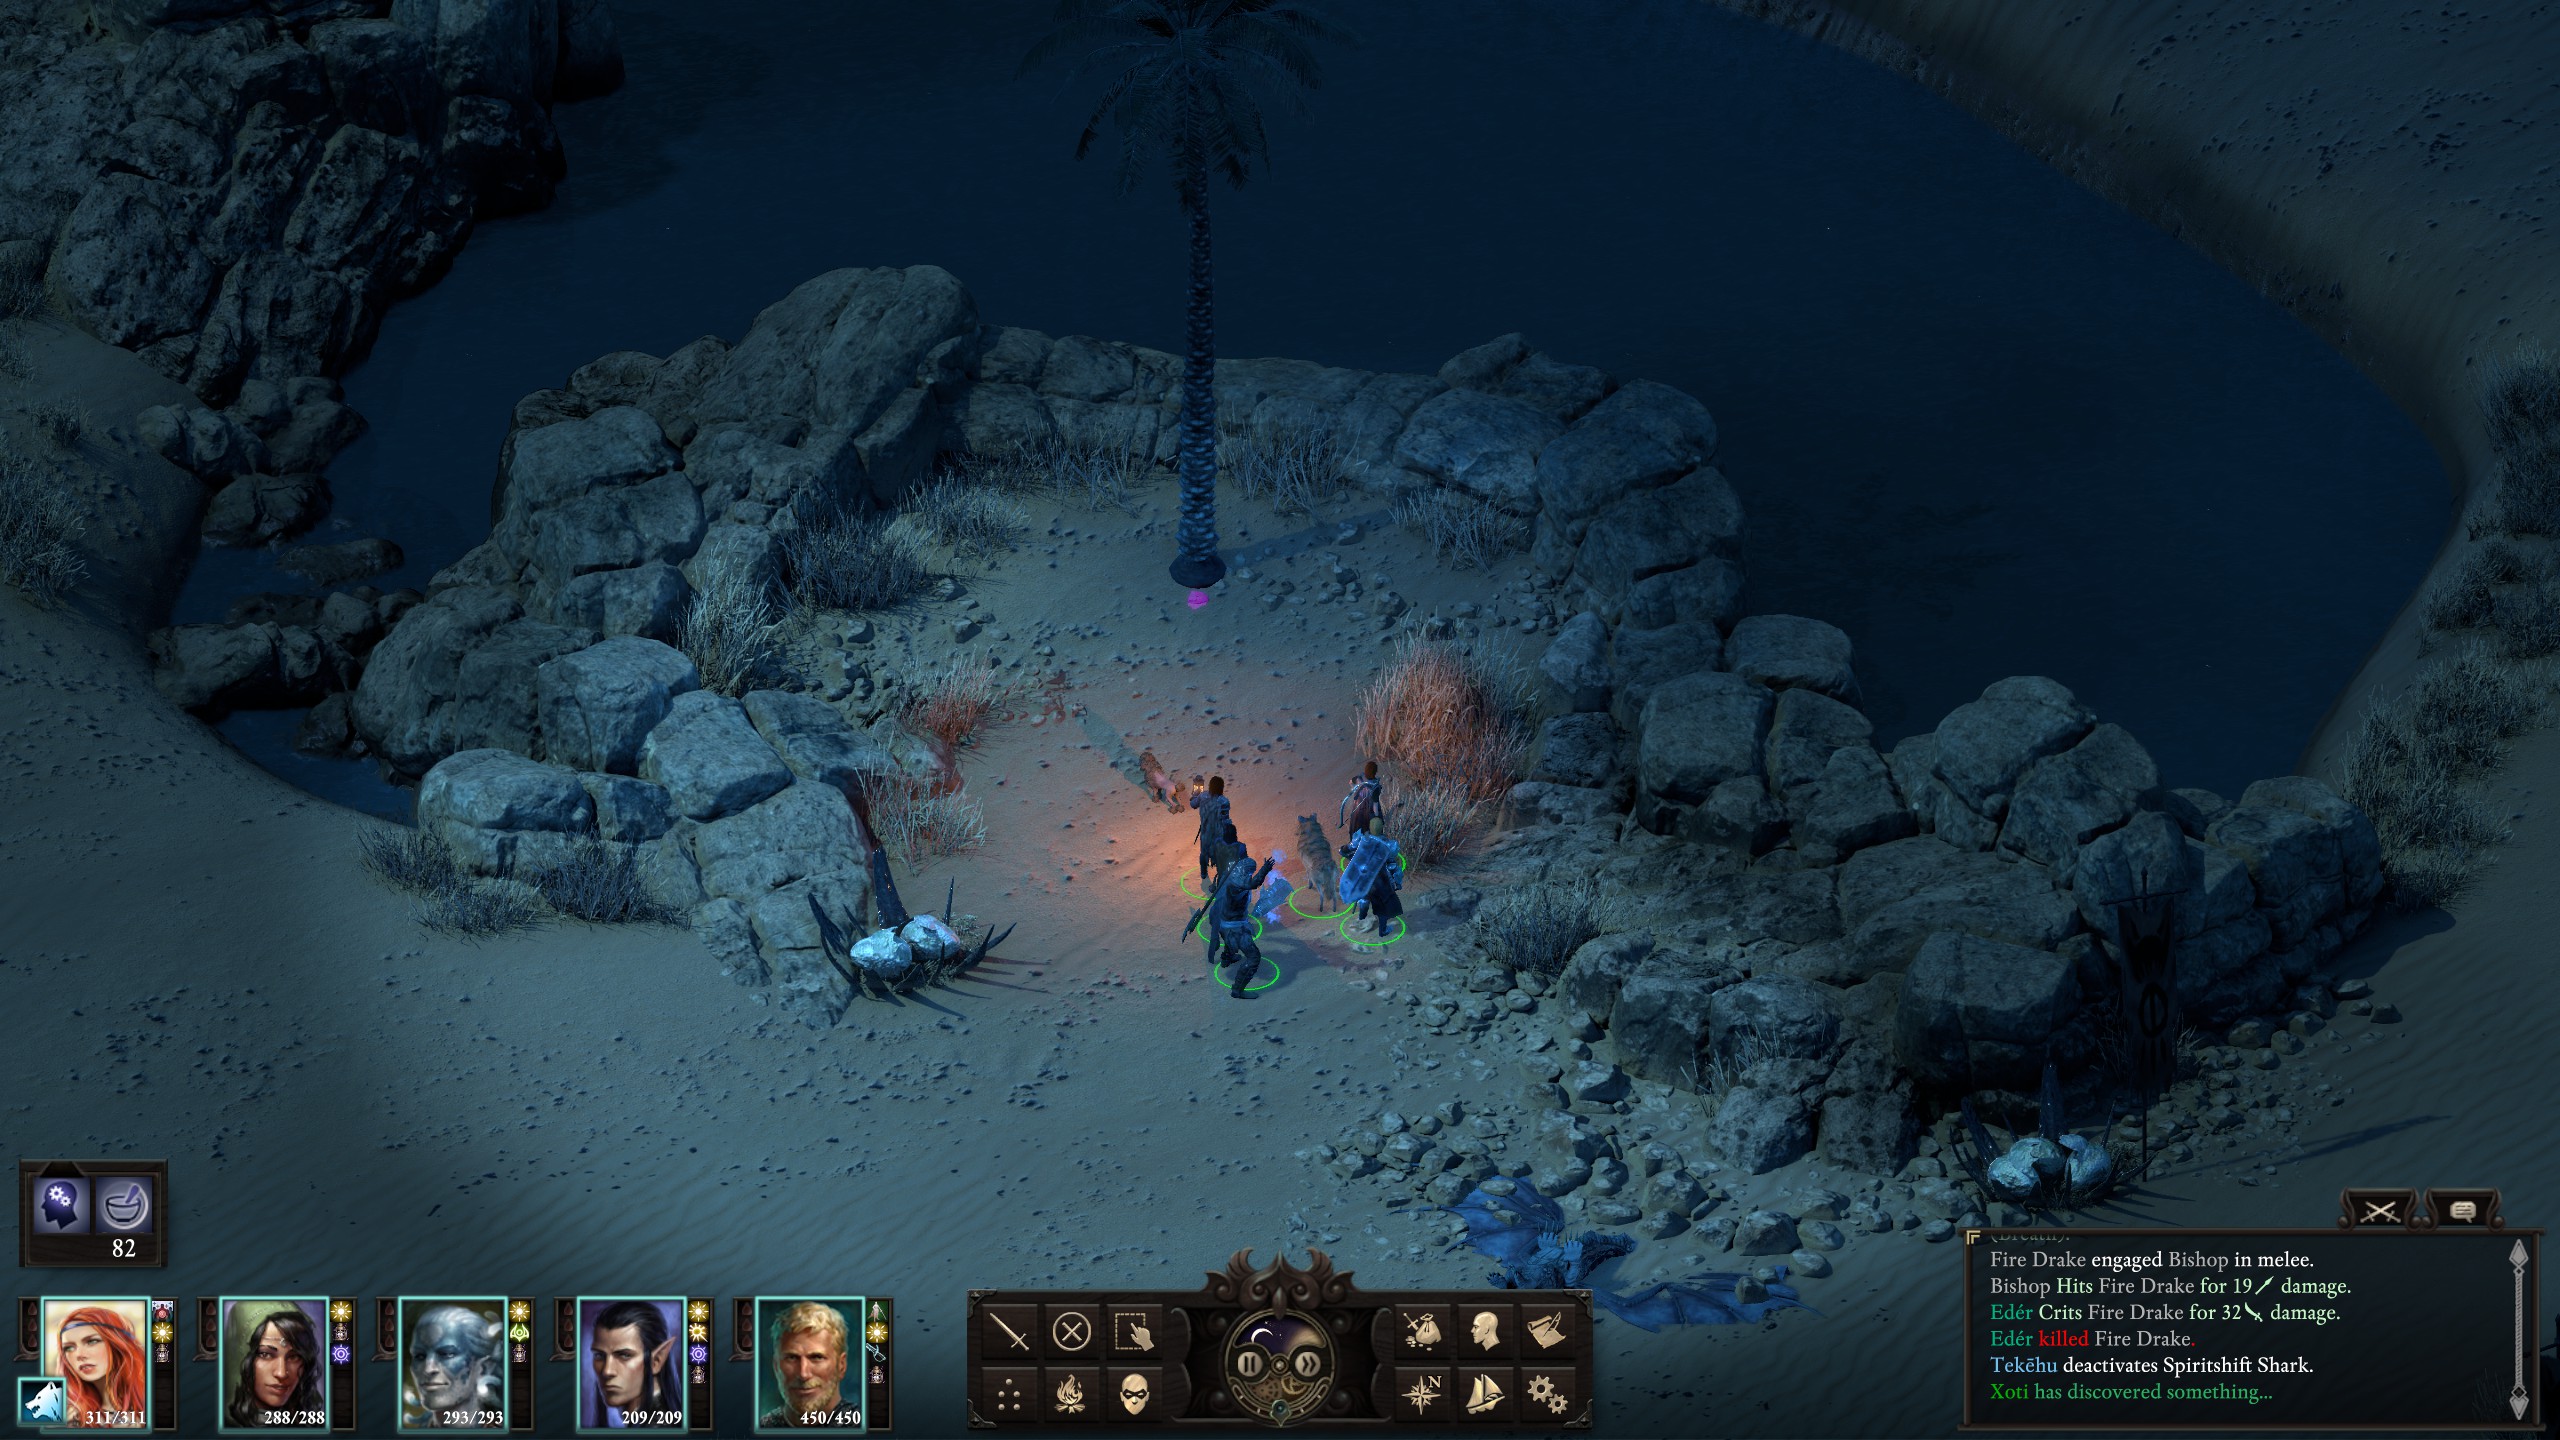
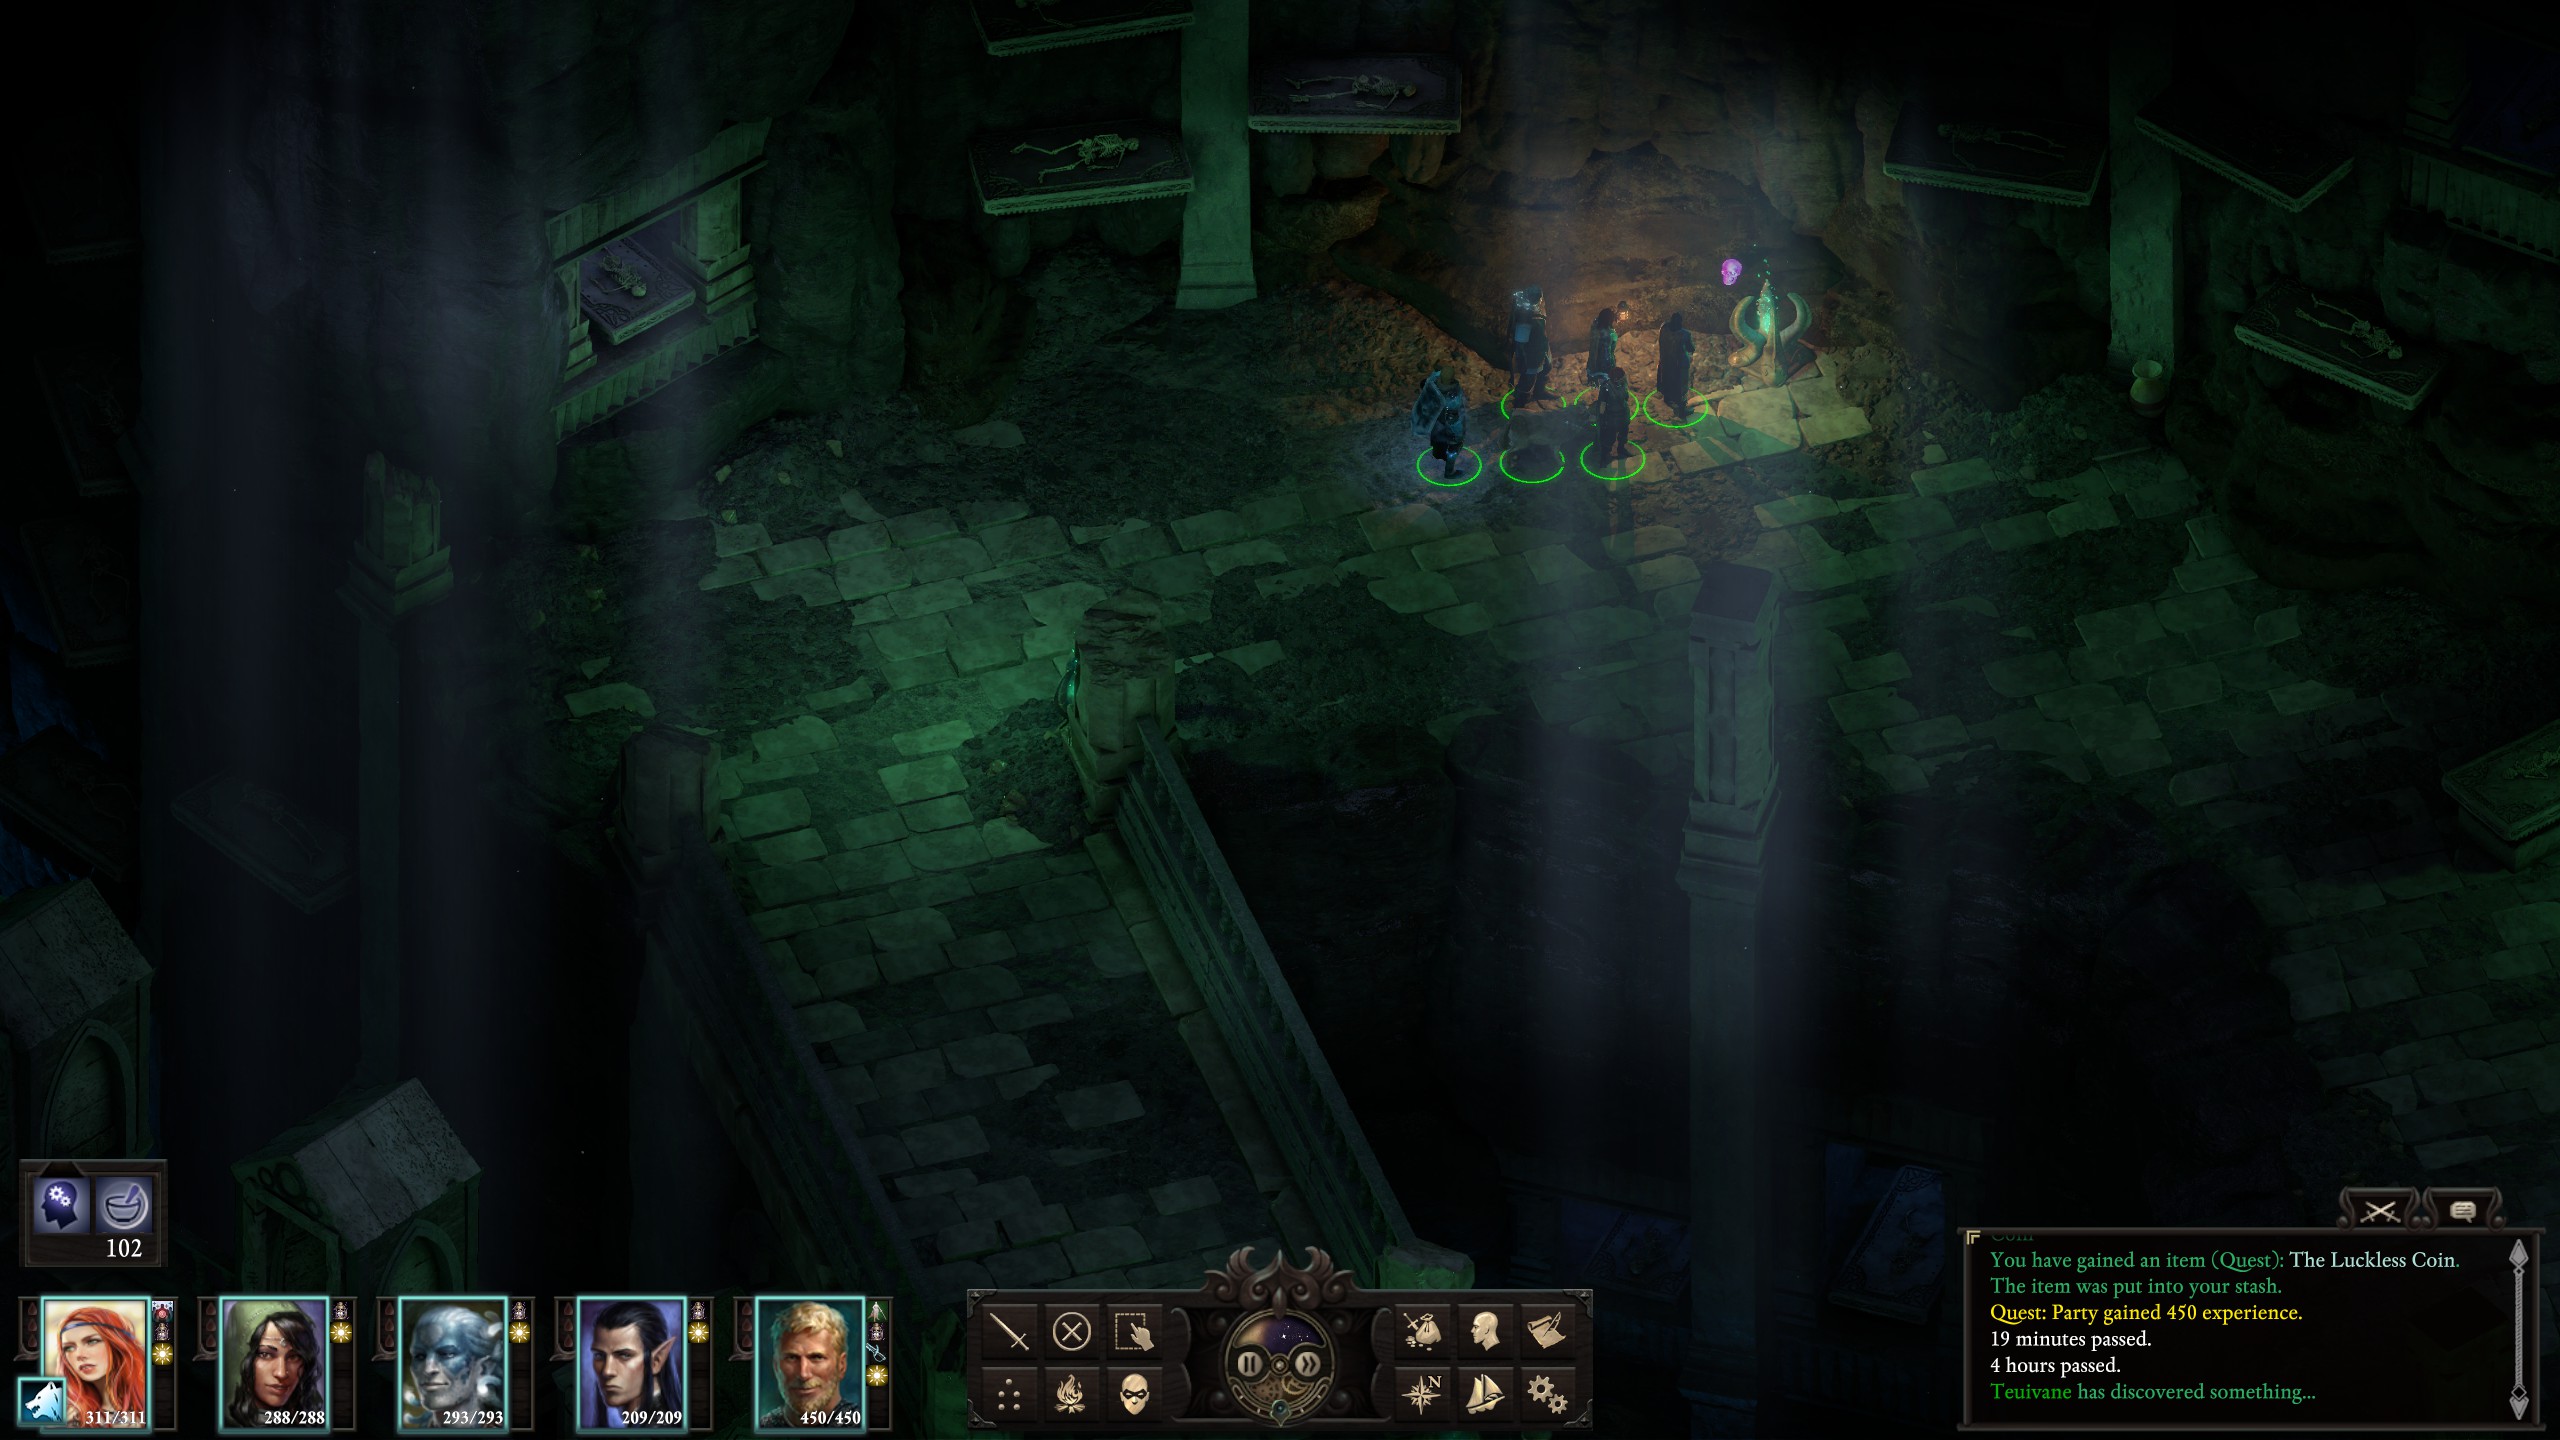 Uncut Gem
Location: Poko Kohara Ruins
There is a big solitary palm tree near a small pond in this area. You will find the artifact next to it.
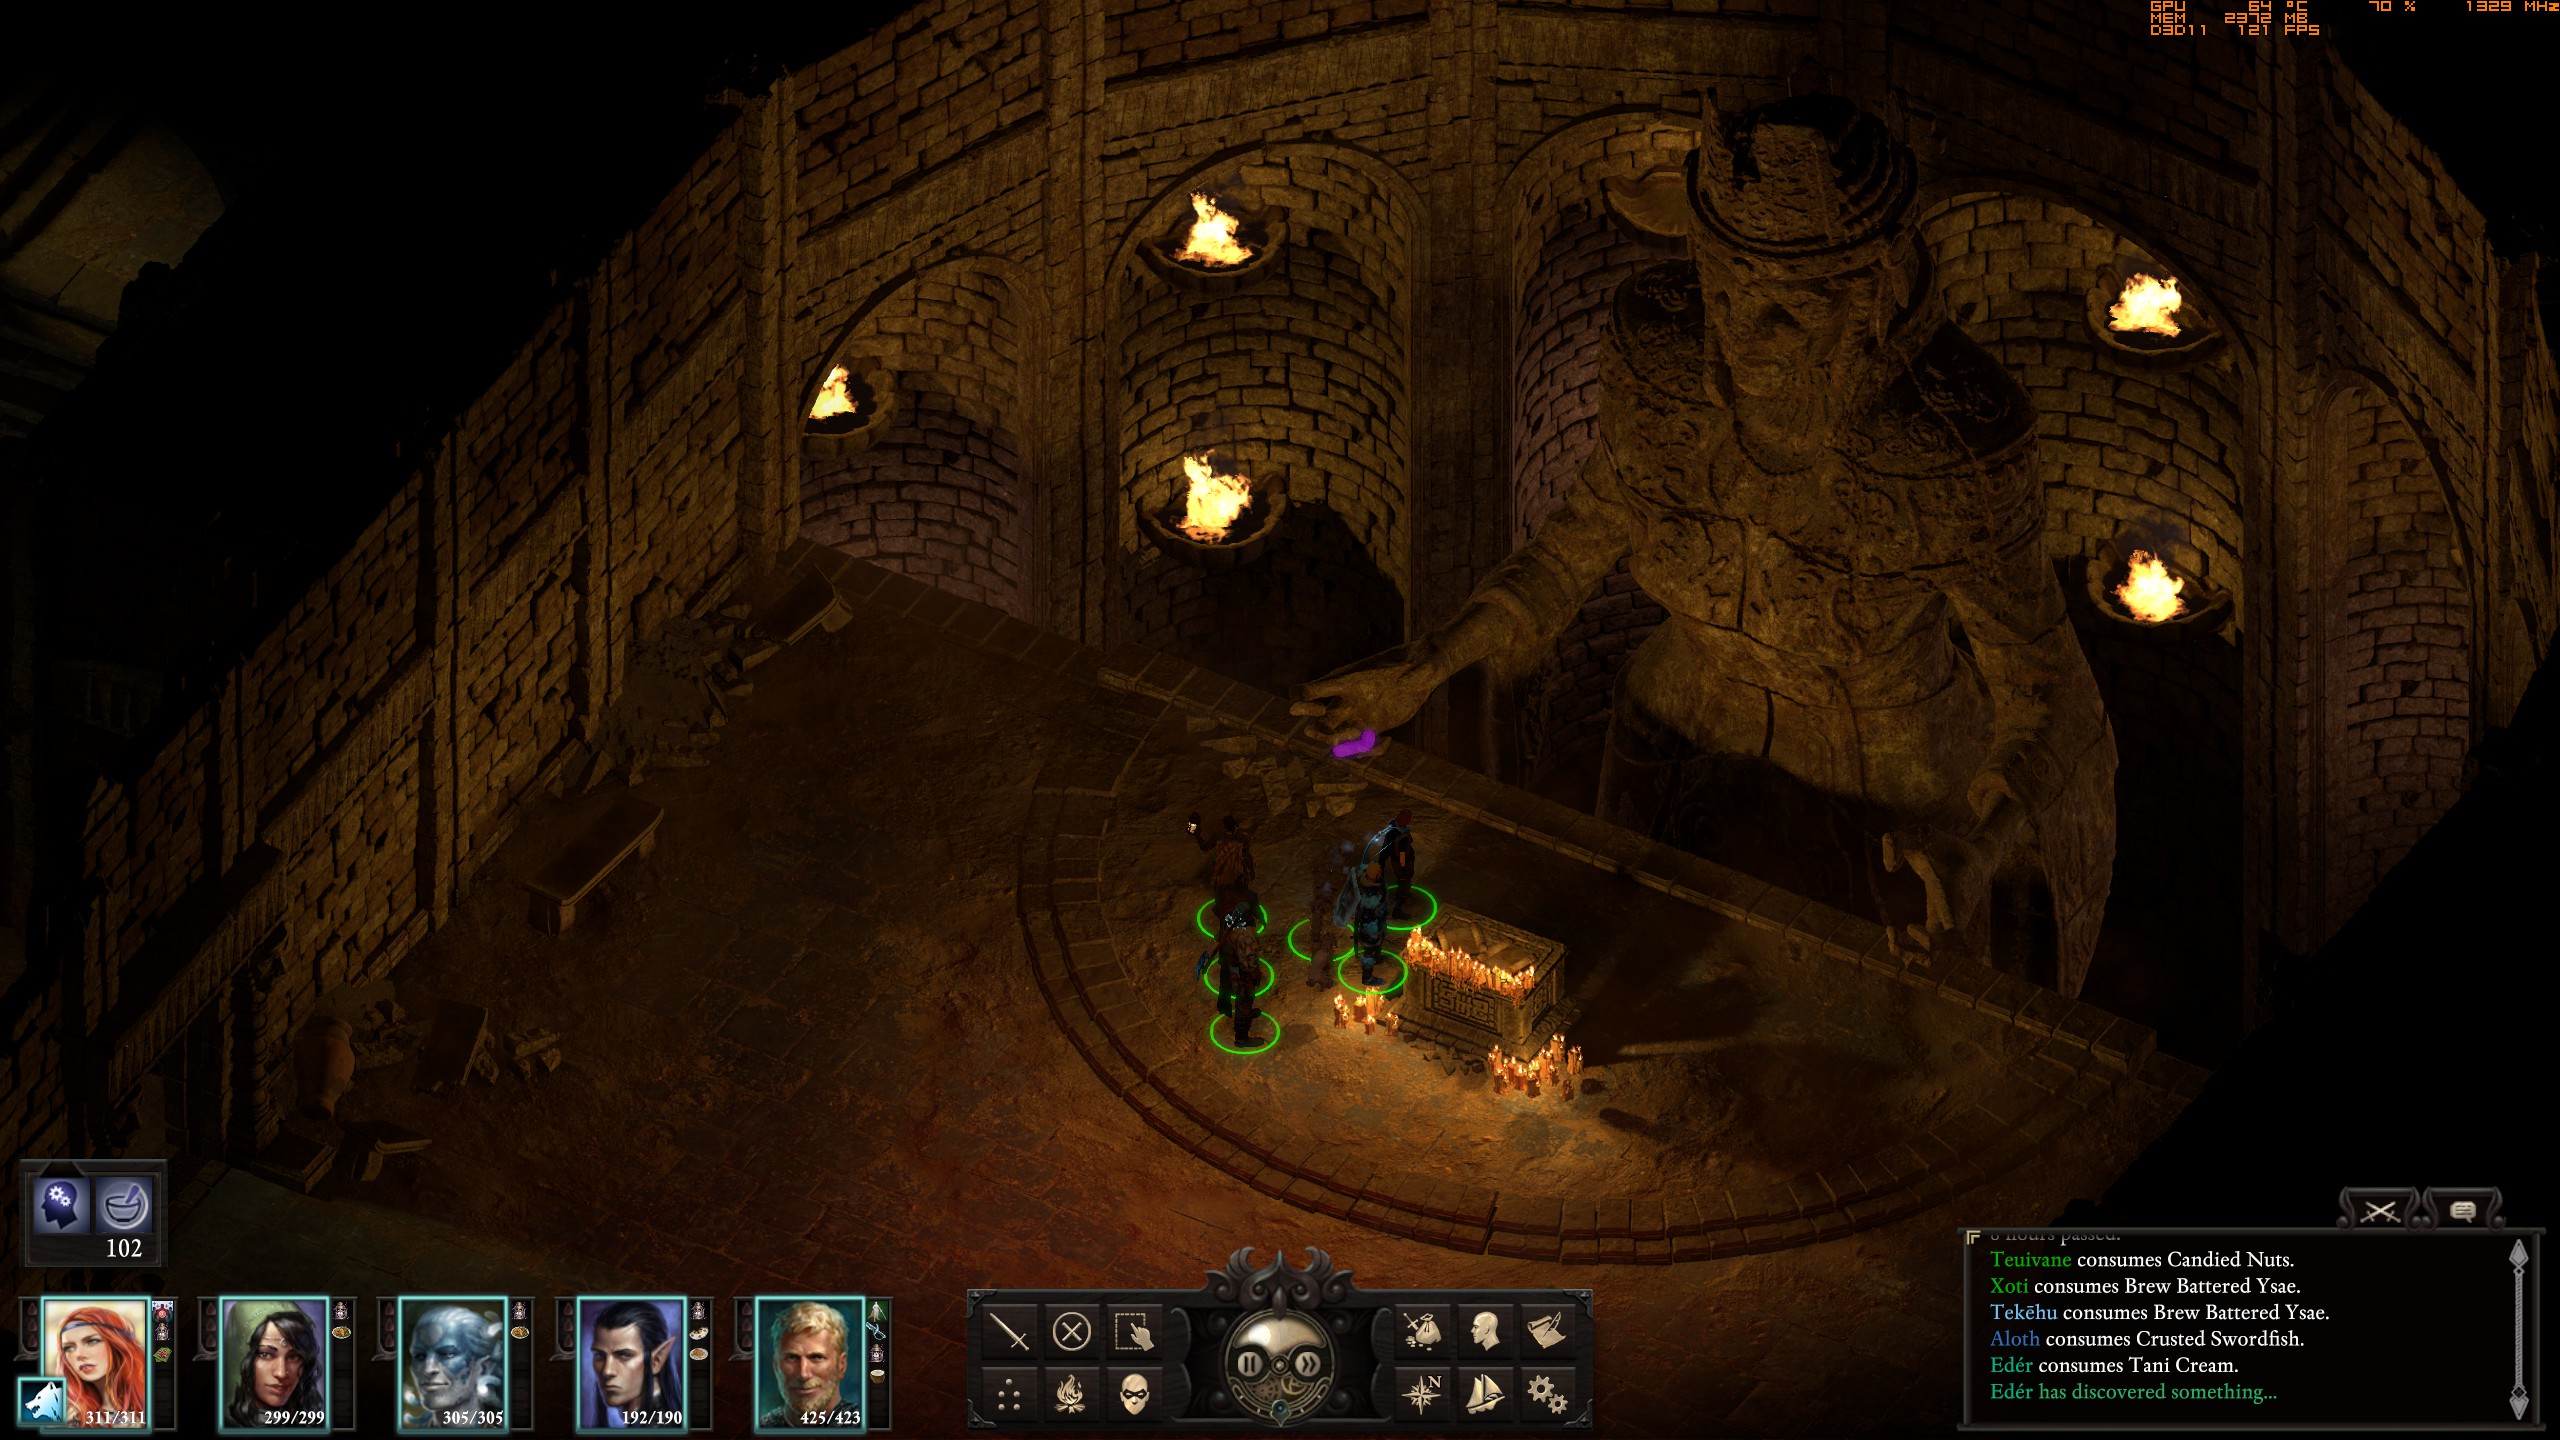
 Finger of the Exiled Queen
Location: Oathbinder’s Sanctum
The Sanctum is on a small island just south of Neketaka. You need to head to the last level of the Sanctum where you will find a big statue of Woedica. The finger of this statue is your artifact.
Forgotten Sanctum (3rd DLC)

Story-related. Can't be missed

Story-related. Can't be missed

Story-related. Can't be missed

Critter Cleaver can be found in The Dark Cupboard in the Periki's Overlook district of Neketaka. First you will need to cleave at least two pets, making their looks and bonuses available for creation. Afterwards, you can create a pet in the creation section of the Cleaver by choosing looks, bonuses and paying appropriate amount of credits.

- The Weyc’s Wand – found in a chest the Quarantined Section of the Archives;
- The Mask of Weyc – Taken from a body of Fyonlecg in The Oratory of Wael (if you went to Archives section first) or in The Heart of the Mystery (if you went to Collections section first);
- The Robes of Weyc – found on the Spun Terrace;
- The Weyc’s Orcular Focus – this one you can get in the Scriptorium. You need to put a Heldr’s Horn (found on a dead body in the Assembly of Echoes, where you fight the Memory Hoarder) into the Incinerator and the Memoirs of Heldr (found in the Archives section, The Oratory of Wael) on the Lectern of Obfuscation. When you do that, Heldr’s Inheritance will be revealed and inside you will find the shield.

- 7 cages in The Enclosures,
- 5 cages in the Hall of Reconfiguration.

In the Archives, in a part of the Restricted Section that can be accessed from the Quarantined Section (where you fight Notnok), you can find a book “Alchemy of Imp Spray”. Give this book to Fetid Spray and you will get the achievement.
Beat Pillars of Eternity II: Deadfire's 100% run?
Flex it — let your friends know you pulled it off.
- Xoti the Lightbringer (Harvester of Gaun) – POTD Build Guide★ 5 (290)29k views1.5k ♥5 minUpdated Jun 8, 2018
- Characters and classes: How to make a GOOD character ?★ 4 (200)24k views343 ♥30 min
- Eder the Blackguard (Fighter/Rogue) - POTD Build Guide★ 5 (257)23k views1.4k ♥4 minUpdated Jun 17, 2018
- Aloth the Arcane Master (War Mage) – POTD Build Guide★ 5 (187)22k views1.1k ♥6 minUpdated Jun 15, 2018
- Pallegina, Herald of Hylea (Valkyrie) - POTD Build Guide★ 4 (158)16k views837 ♥5 minUpdated Jun 5, 2018
- AI Behavior : Understanding how it works and how to make good use of it★ 5 (191)16k views428 ♥26 minUpdated Jun 6, 2018




- Upgrading to PremiumTeam Fortress 2★ 5 (20k)1441k views11k ♥6 minUpdated May 11, 2022
- No More Room in Hell Official ManualNo More Room in Hell★ 5 (2.8k)569k views2.1k ♥29 minUpdated Apr 22, 2019
- NMRiH Community Hosting GuidesNo More Room in Hell★ 5 (526)351k views653 ♥1 minUpdated Aug 10, 2022
- Лучшие кооперативные игры SteamPAYDAY 2★ 5 (1.5k)315k views2.1k ♥56 minRussianUpdated Apr 27, 2025
- Desert Eagle Heat Treated | Blue GemCounter-Strike 2★ 5 (1.6k)292k views1.5k ♥2 minUpdated Jan 16
- Treasure Hunt Puzzle SolutionsTotal War: WARHAMMER II★ 5 (6.9k)281k views15k ♥3 minUpdated Aug 19, 2021






This guide was created by its original author on the Steam Community. Are you the author and want it removed? Request removal.