100% One-Life Guide
Introduction
- Provides a proven and reliable path to get 100% of all items in a reasonable time span
- Gives tips and tricks for avoiding death in tricky and dangerous areas.
Some notes about this guide:
- The images and path taken are based on the video below, as is the skill tree. Videos are also taken from the video. However, images used to visualize tips or tricks are NOT necessarily used in this video since I have come up with additional techniques since I recorded this run.
- The difficulty setting was One-Life Mode. Although I have only played the game on that particular difficulty setting once (when I recorded this run), I have played the game on Normal with 100% and zero deaths at least 5 times, so the techniques described are well tested and proven reliable.
Also, check out my guide for Ori and the Will of the Wisps here.
General Tips
- Instant Death is very common (lasers, crushers, lava, spike pits)
- Jumping is much tighter. This game is closer to a precision platformer than its sequel.
- Ori is less powerful in the beginning, with less energy and less abilities
- Walls aren't as reliable. More on this below.
- It isn't as easy to recover. Health is more limited, especially in the beginning before you can heal with a soul link, and many spike pits and other traps are designed so you cannot escape from them.
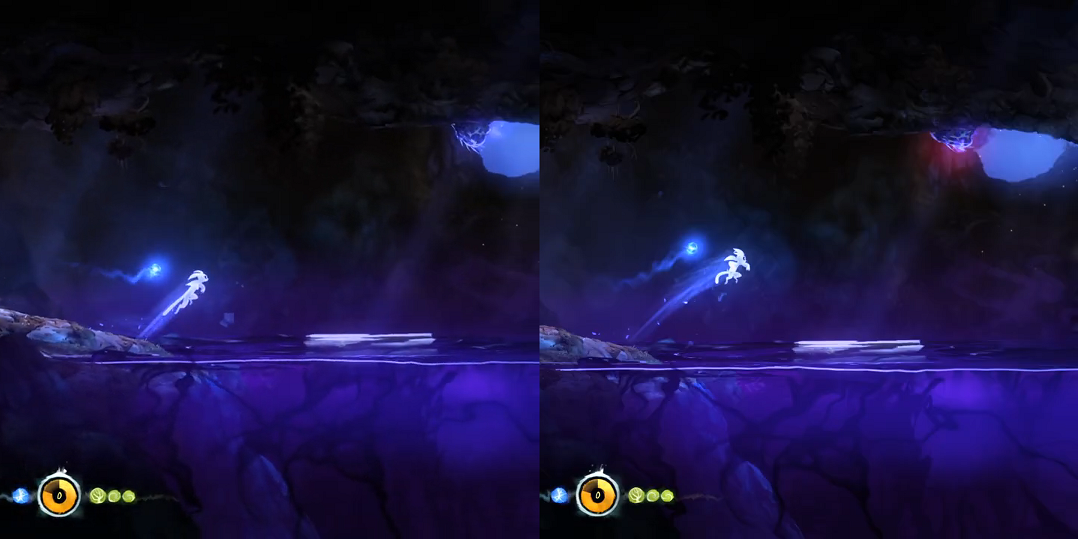
The best way to handle this situation is to recognize walls where this most commonly occurs. It can be extremely subtle, so I will be pointing them out throughout this guide.
A plus-side to Ori, however, is their ability to "slide" up walls from the ground, as seen in the video. This allows you to climb up a wall, often times quite far up, without having to do a wall jump. Plus, it can be done before acquiring wall jump.
Skill Tree
Sunken Glades
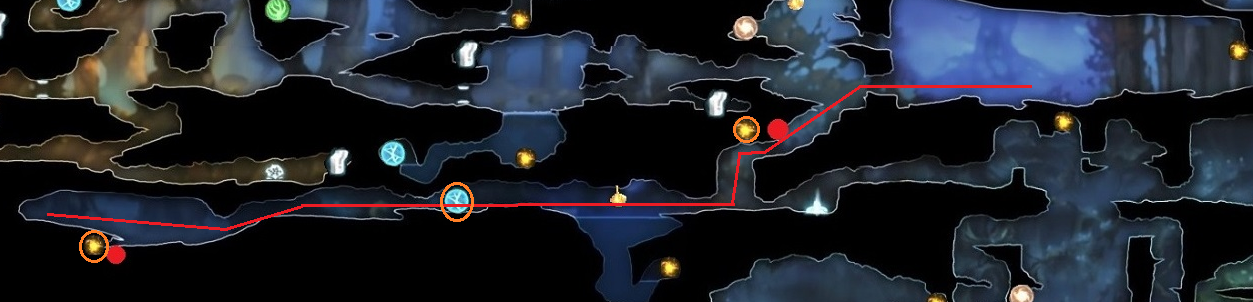
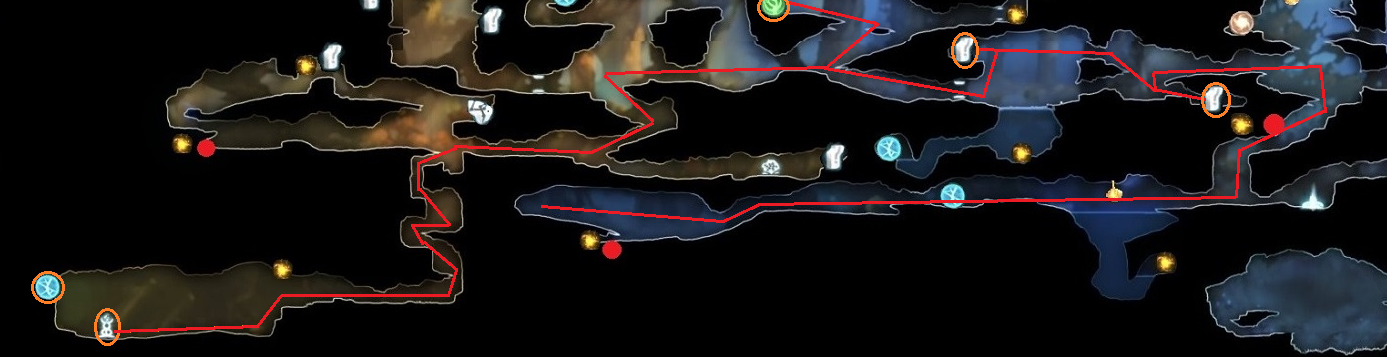
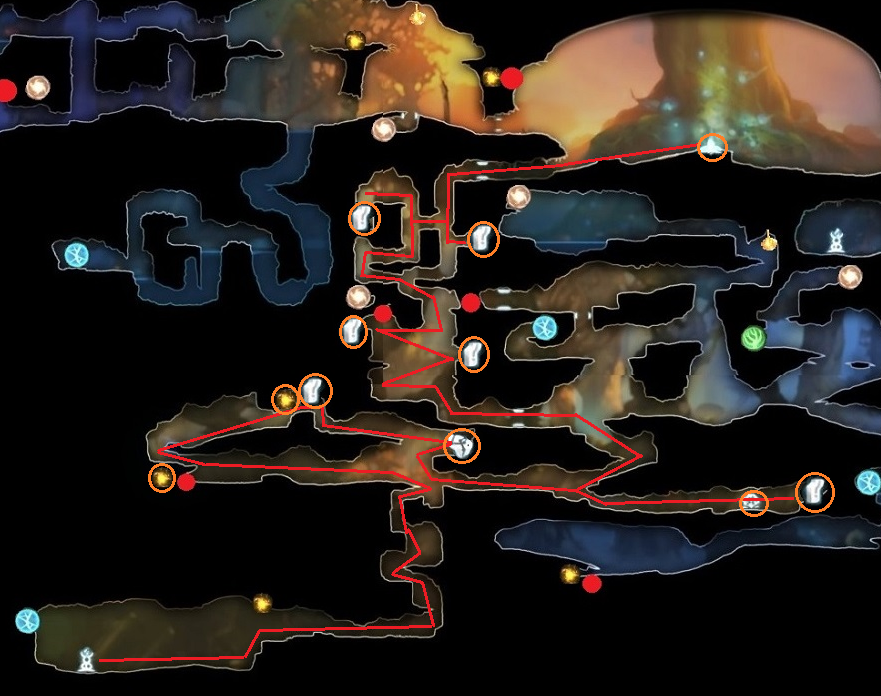
Black Root Burrow (Optional, if you want Dash early)
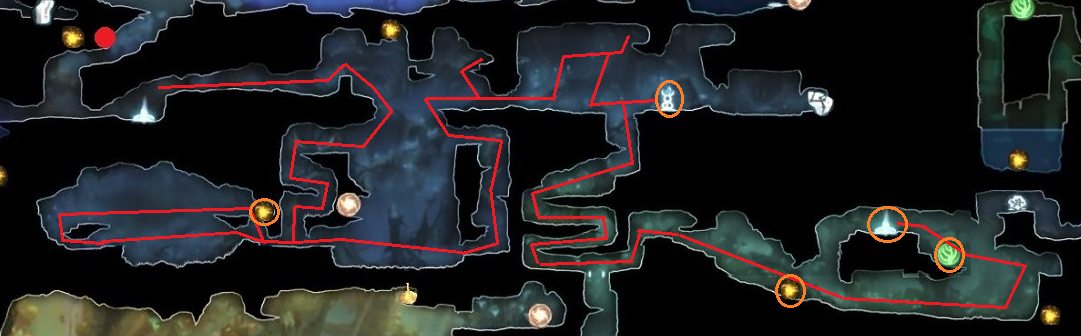
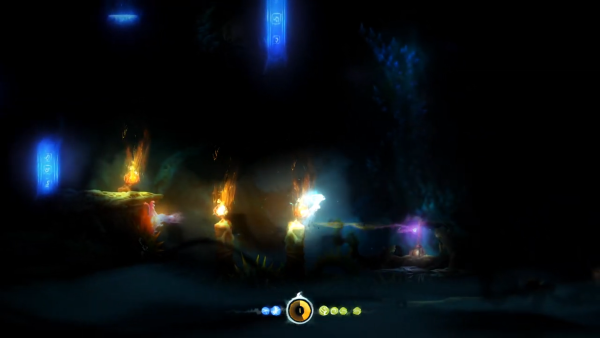
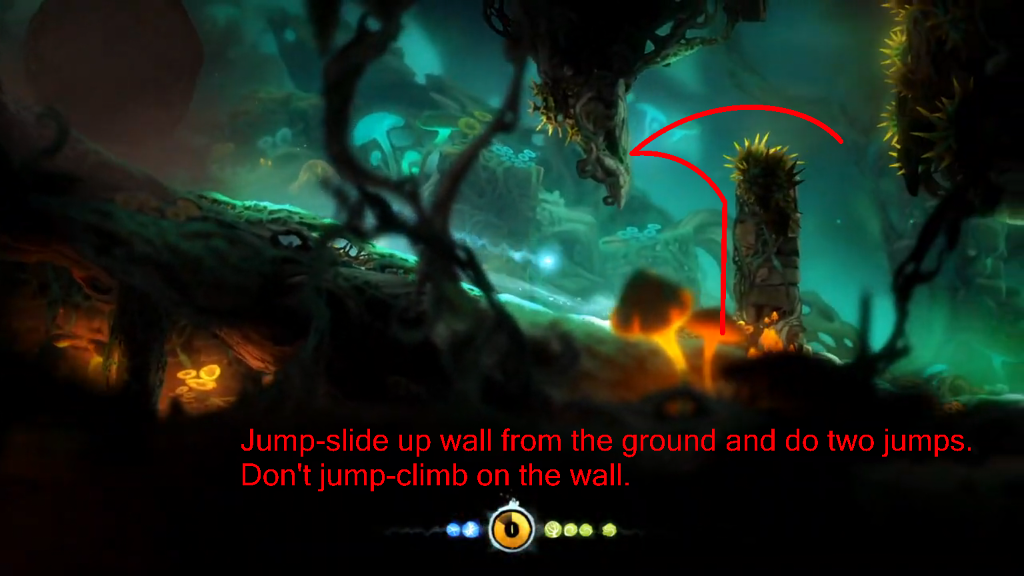
Hollow Grove
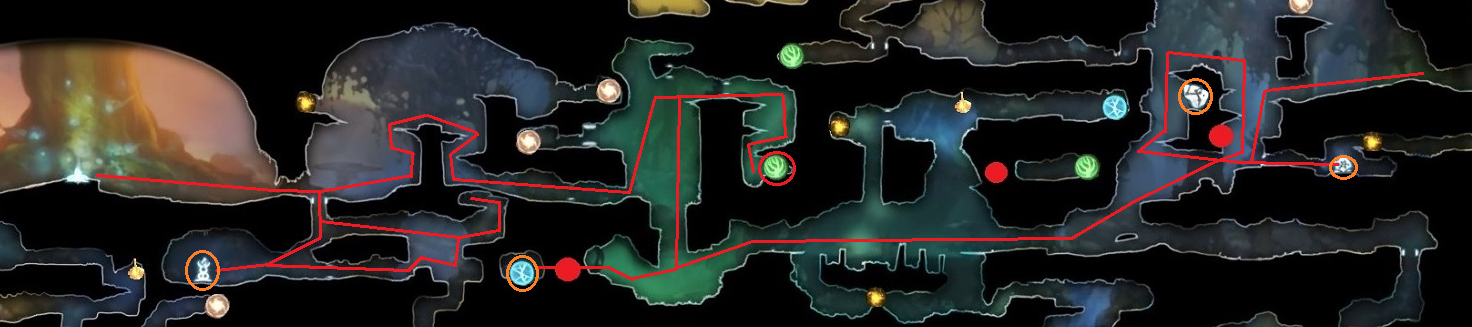
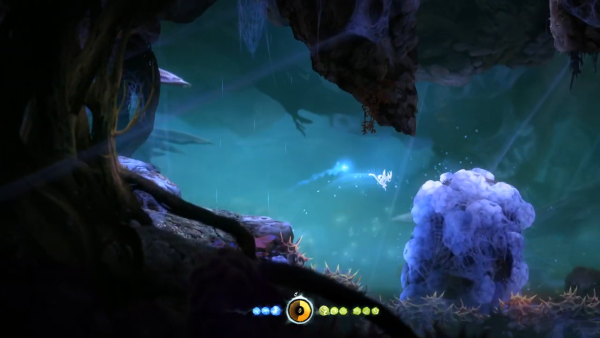
Thornfelt Swamp
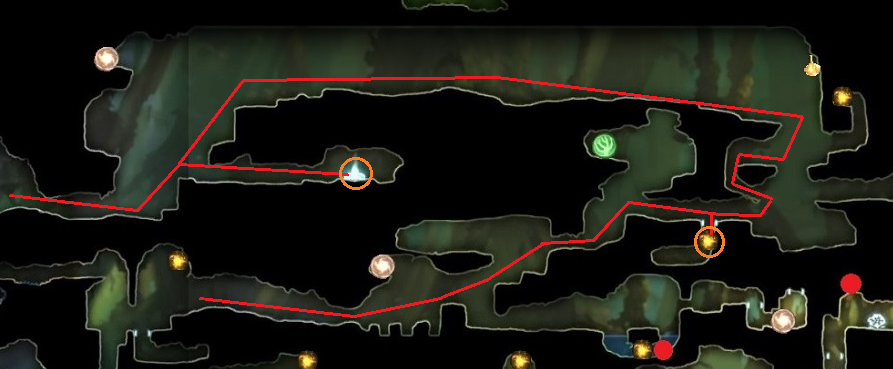
Moon Grotto
This is one of the more dangerous areas of the game due to all the instant-death traps. Take it slow and methodically. I avoid the energy door with the three energy pips until I clear the water as the health sphere isn't worth getting at this point. Besides, you have to return later anyway to get the spirit light at the bottom of the pool.
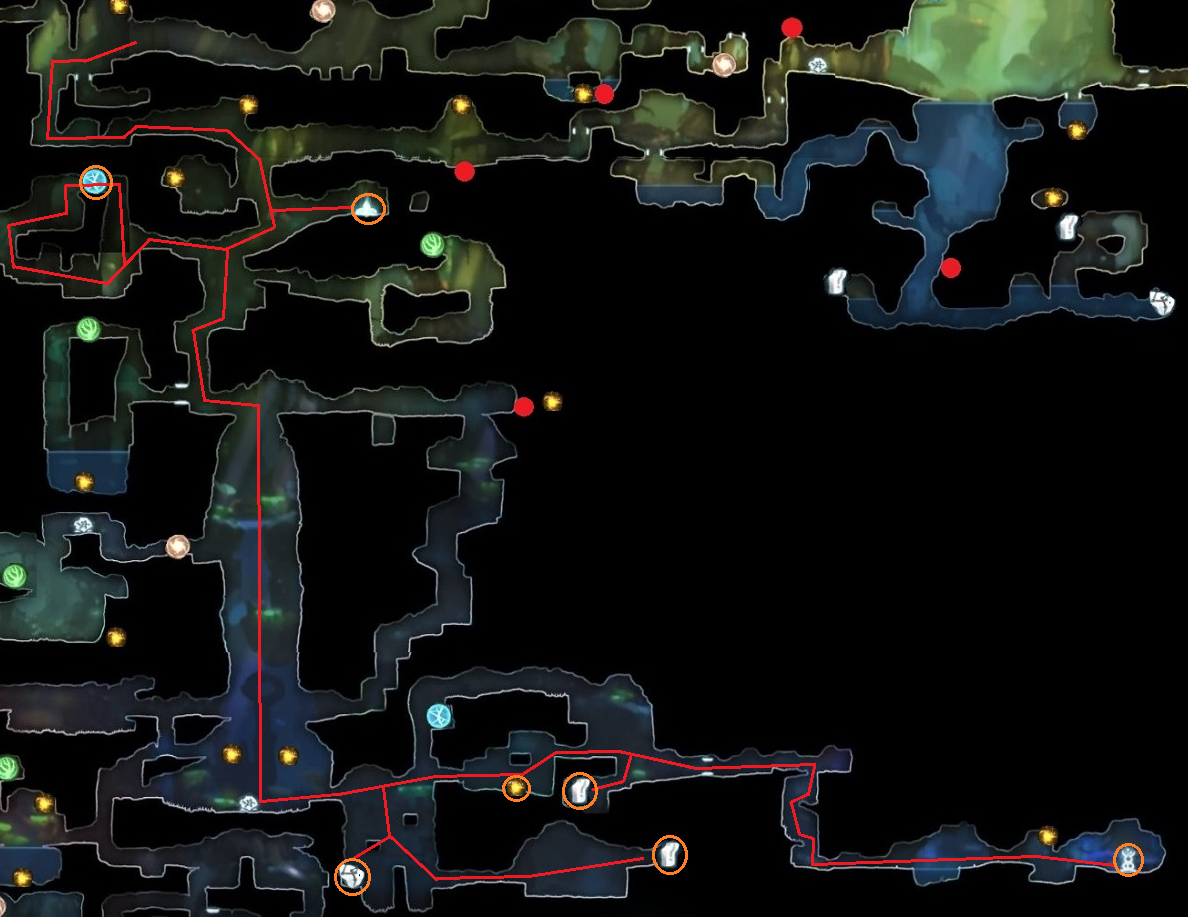
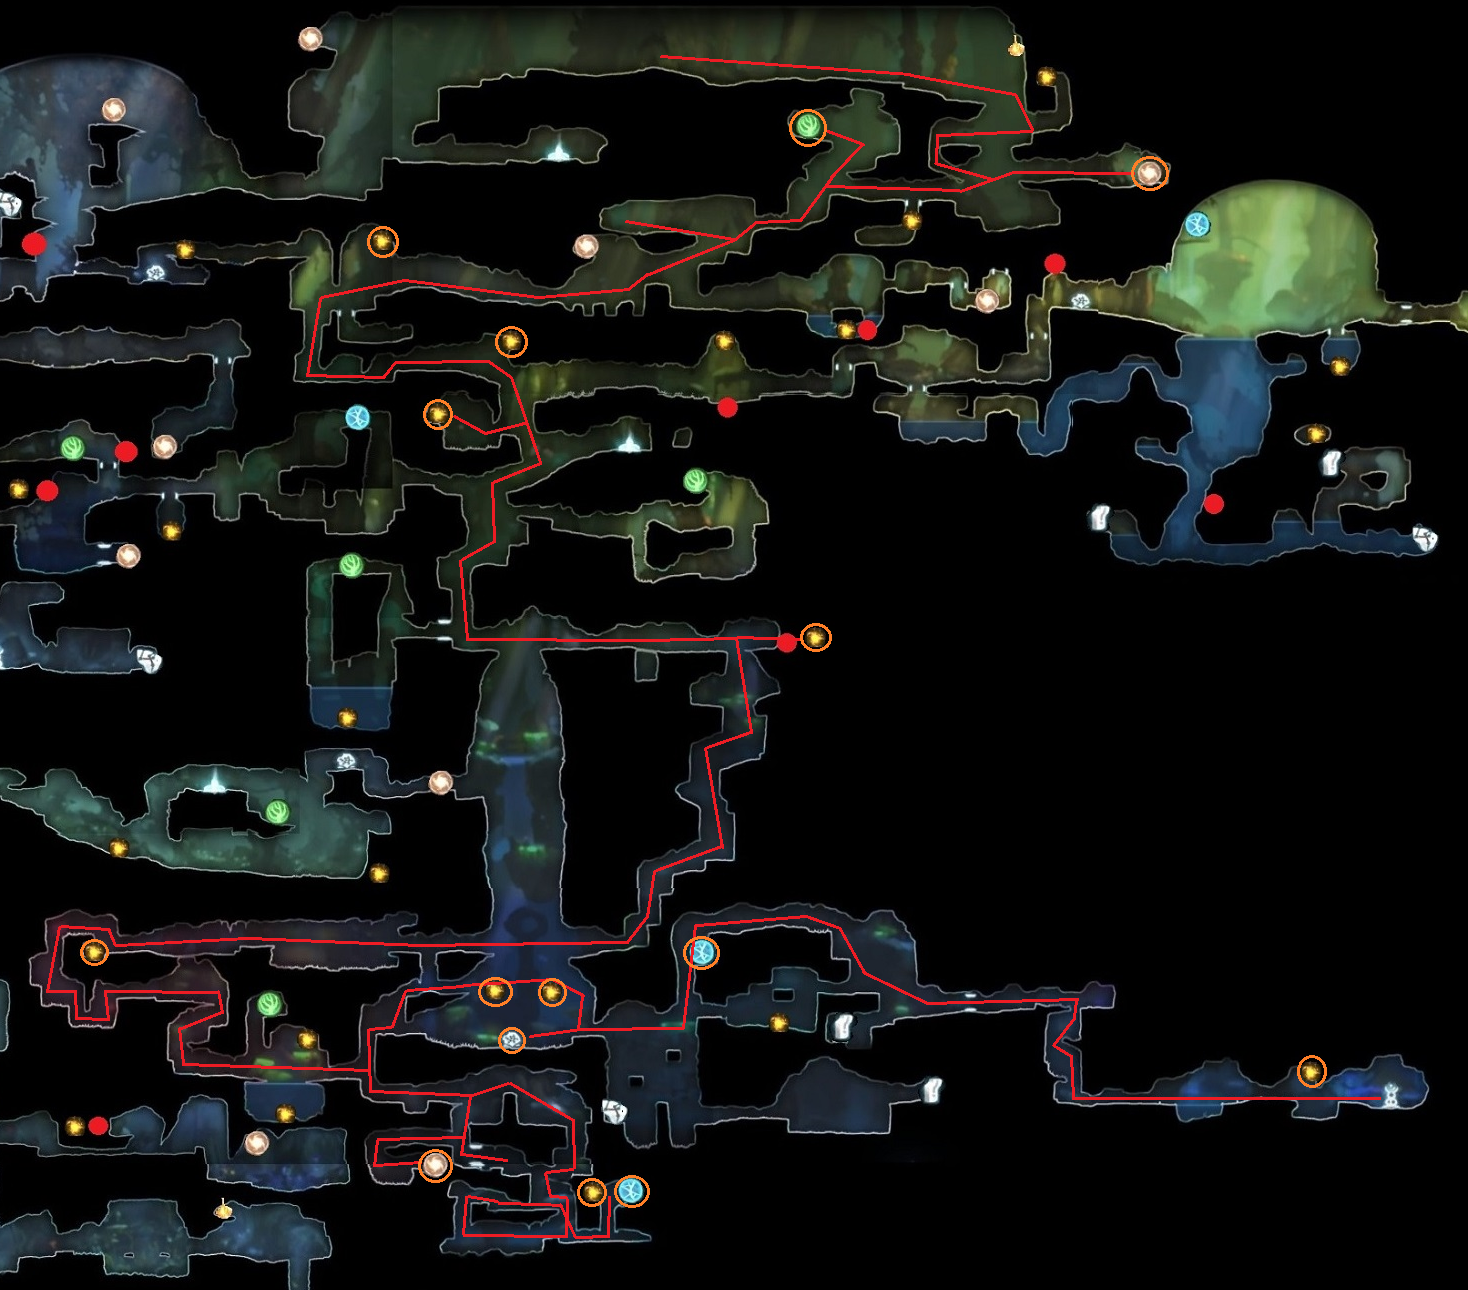
Obviously if you have Dash you can use it to great effect. Make sure you don't dash too far, though, or you'll find yourself stuck against a wall.
When returning, Dash is not needed for the second laser.
You can also duck under the first laser.
Finally, if you've already used Stomp, you won't be able to use Dash without much greater risk, but if you time it right, jumping across is relatively safe.
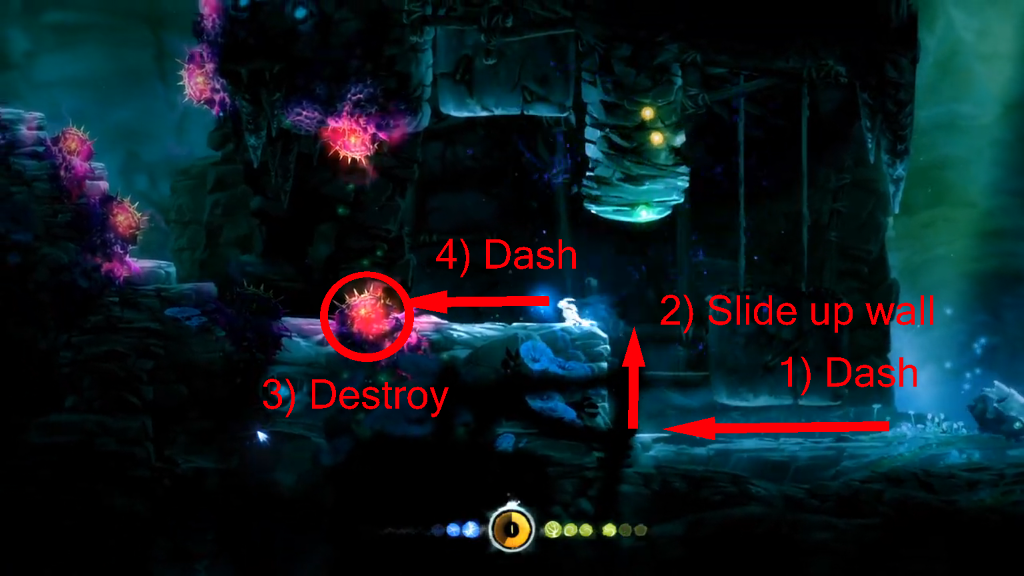 This keystone is very tricky to get as well, owing to the wall on the left being uneven and thus very unreliable. The better technique is to use the much more even wall on the crusher next to it. Just be sure not to go too high and hit the spikes.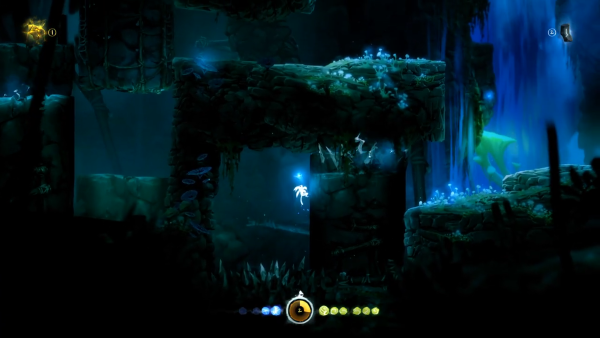
 This wall is uneven and thus unreliable. Be extra cautious. It is more even towards the top and bottom.
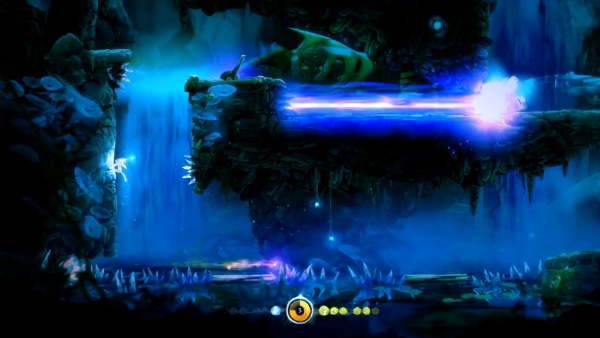 There's no way out of this spike pit. Don't jump the gun and be sure to double-jump as soon as Ori slips off at the top of the rock's cycle.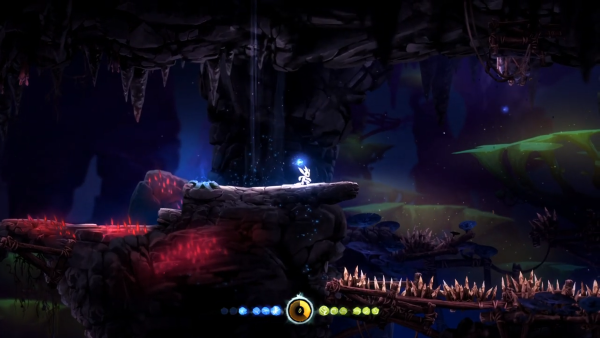
Ginso Tree
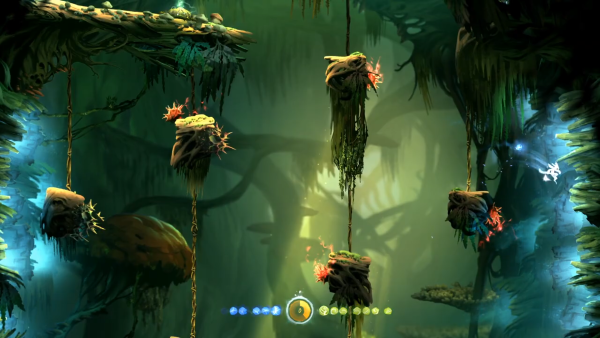
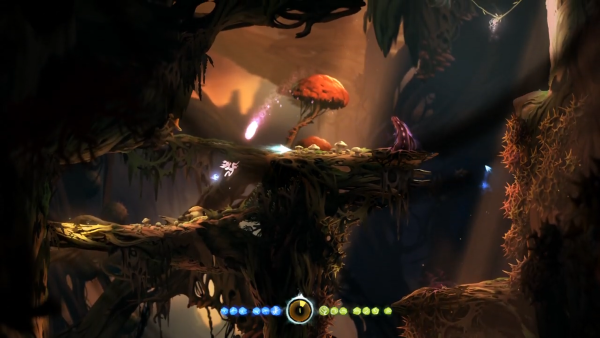
- 0:18 - Bash this enemy instead of wall-climbing. You can even bash to the right to grab the spirit light faster.
- 0:40 - DO NOT double-jump here. There is literally not enough time. It feels tight but it is very doable.
- 0:57 - Bash straight at the projectile, then double-jump to the next projectile to bash onto the wall. (I nearly screwed this up in this run)
- 1:05 - Bash this enemy early, before it gets below the rock
- 1:12 - Don't bother waiting for a projectile. Just bash directly off the spider.
Thornfelt Return
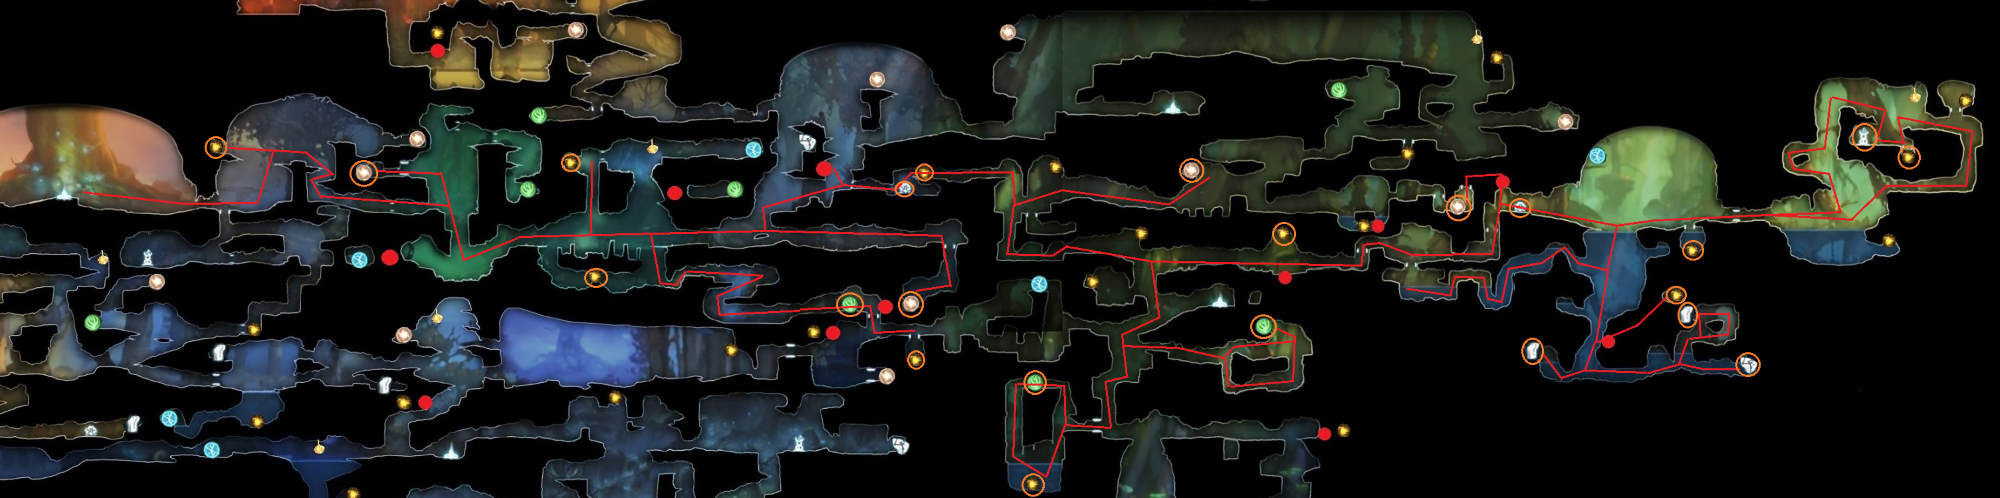
Not much to say here. Just remember to stomp everything and remember to use light burst on the fish and you'll be fine. Also, this is the ideal time to grab things you missed in Thornfelt Swamp, the Moon Grotto, and Hollow Grove.
Valley of the Wind
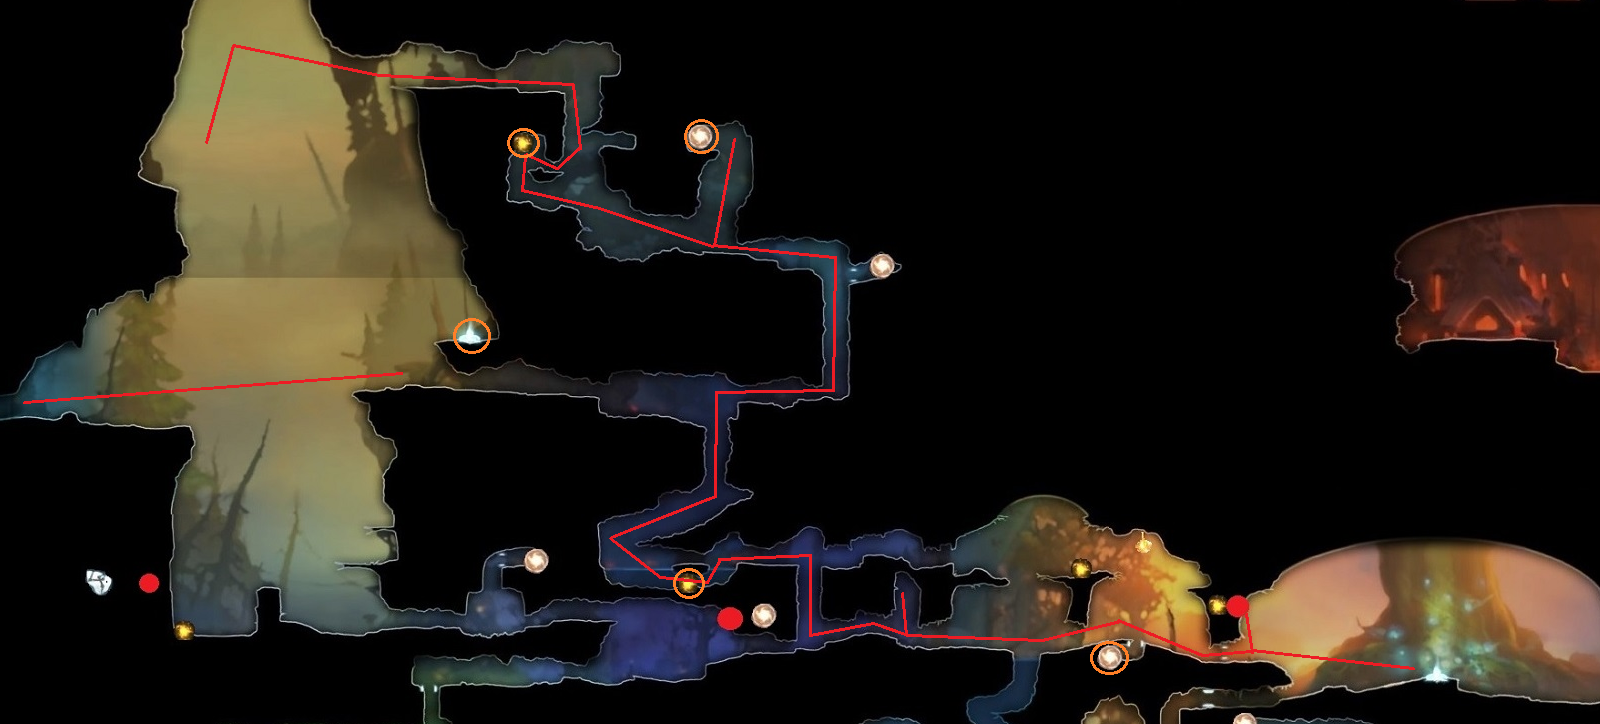
This area is also relatively straight forward. Remember the spiders themselves can be bashed in the spike area, and the bash-luring trick also works for getting the ability point half-way up the pass.
Misty Woods
- Use Charge Burst to take out troublesome slimes in the middle area, as well as when you're carrying the torch
- Bash enemies into spikes. They're everywhere, so you may as well use them to your advantage.
- Stomp EVERYTHING, including flying enemies like the ravens.
- Remember you have Kuro's Feather in this area. If you bash yourself up high, it will give you time to drift down and assess your surroundings. Just be sure not to bash yourself into ceiling spikes.
- And, finally, look before you leap. This mean panning the camera down before jumping off a ledge, and being careful around the wall-climb challenge to make sure the leaves are in the right configuration.
The only "trick" I discovered is the use of Kuro's Feather to traverse this laser-section without triggering the leaves.
Forlorn Ruins
There are two infamous sections in this dungeon: The criss-crossing lasers, and the final sequence. However, neither of them are very challenging given a few tricks here and there.
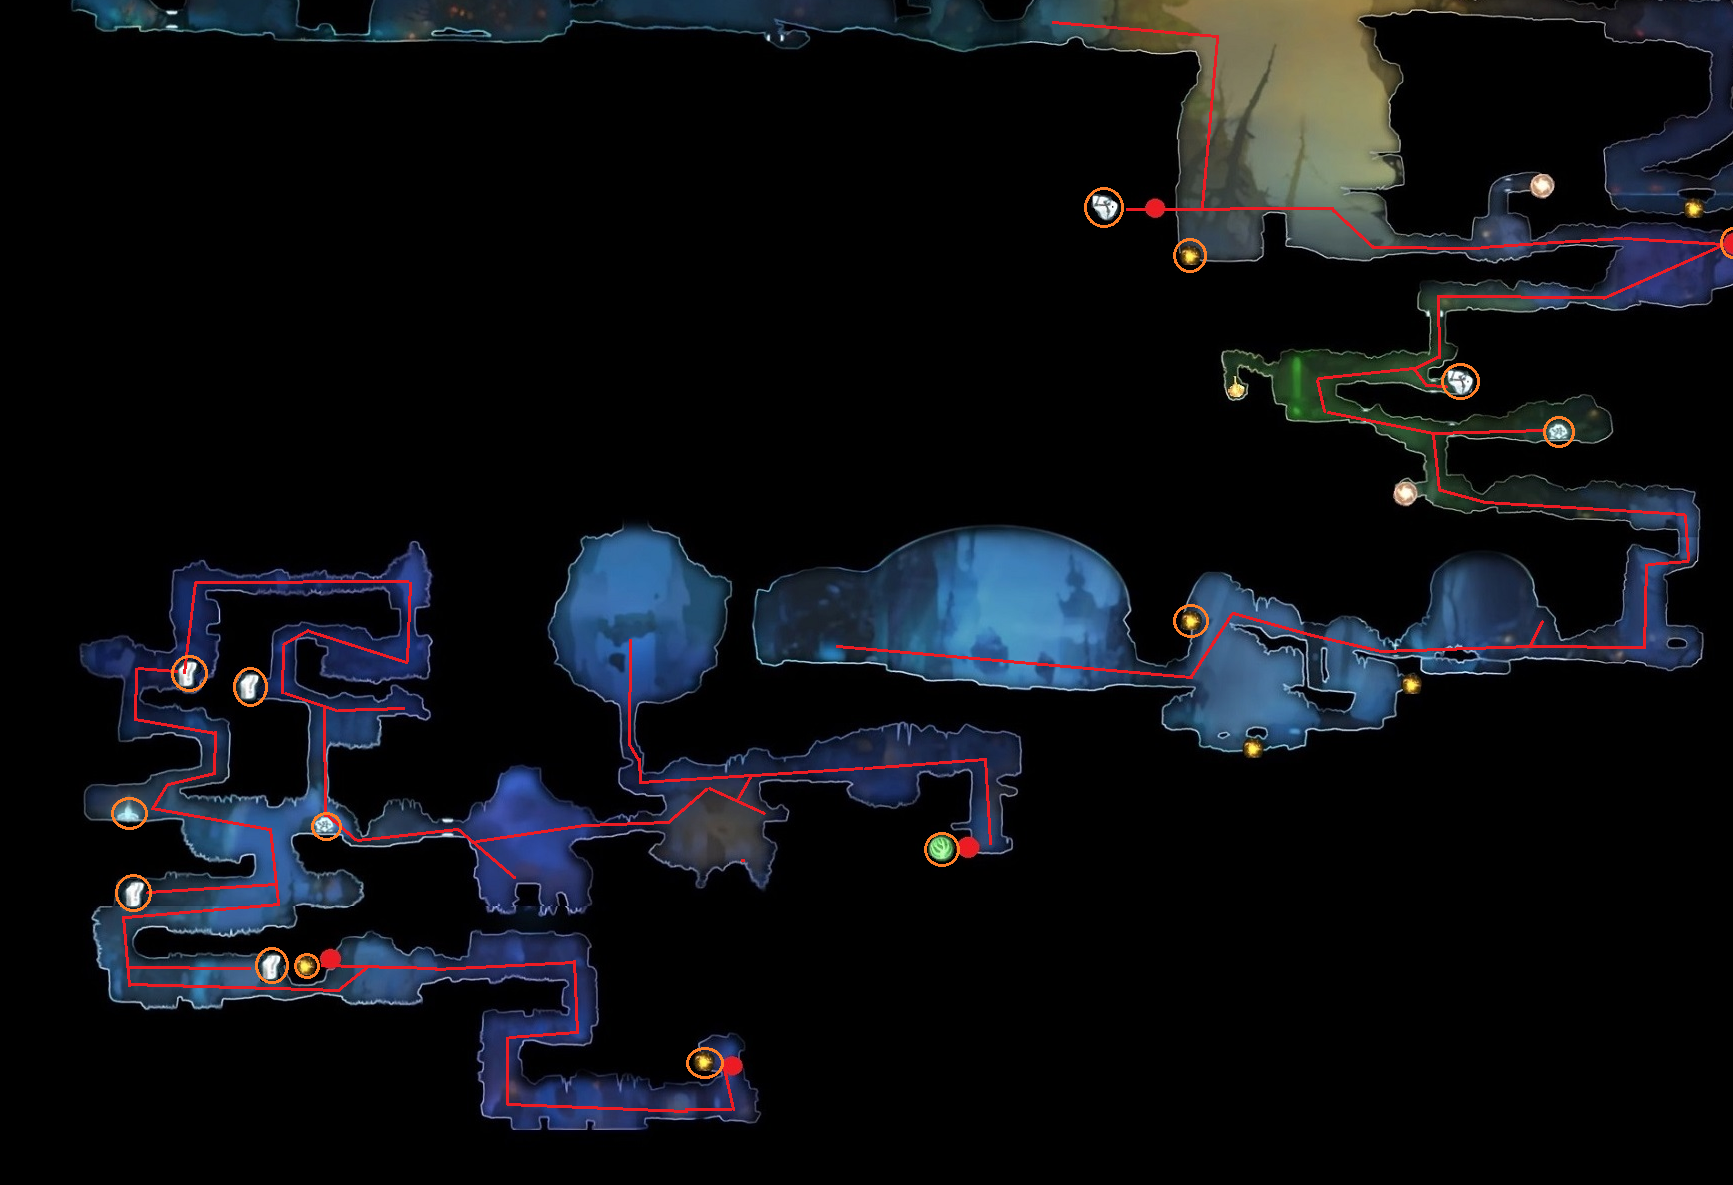
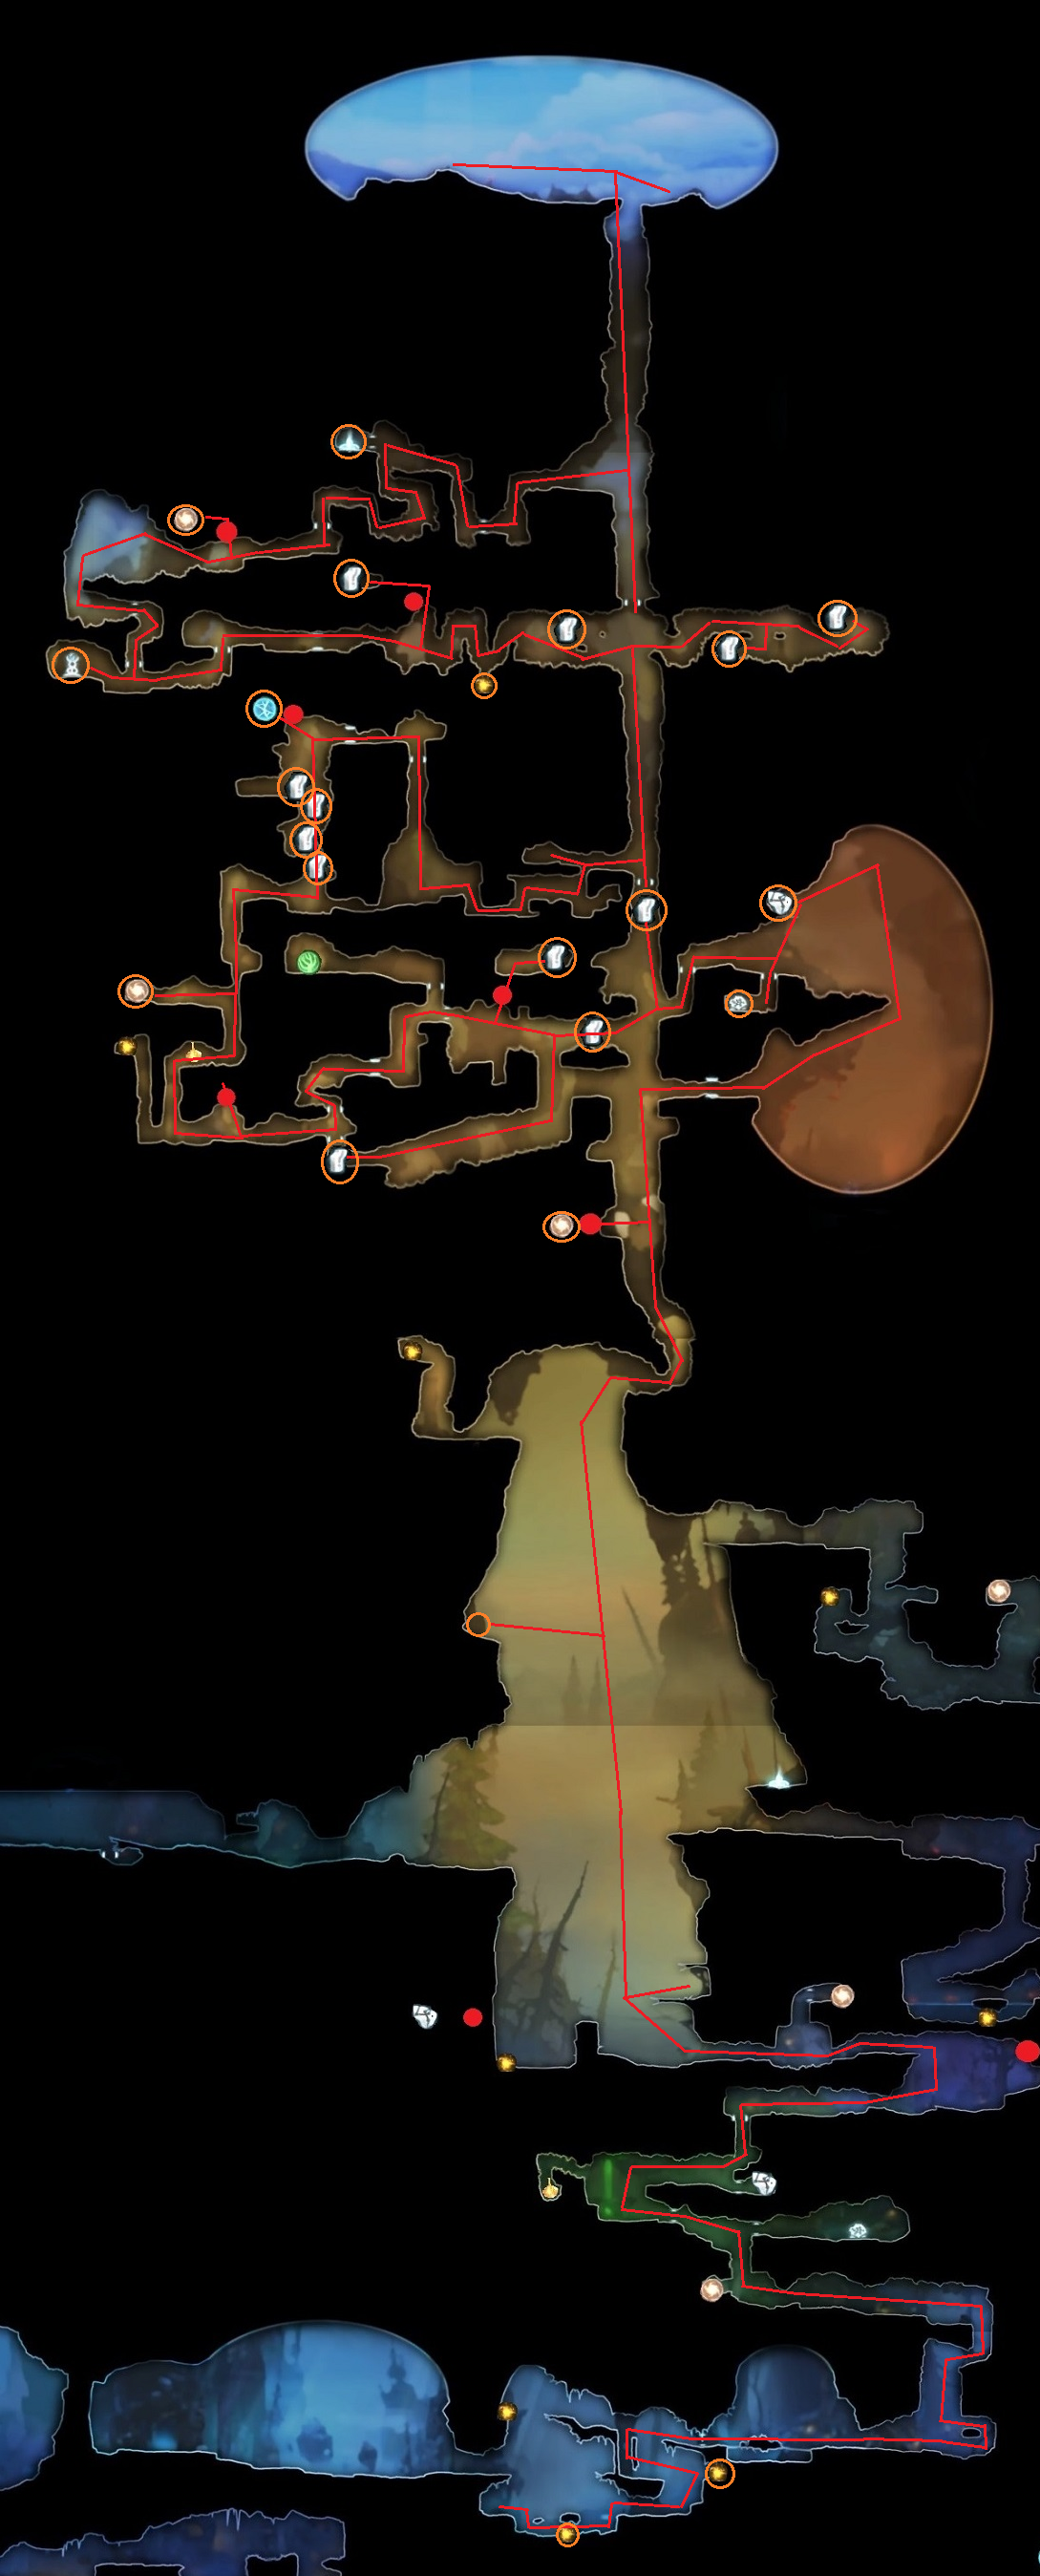
There are two opportunities to skip across the dungeon a long ways. Take advantage of the changing gravity.
- The safest time to enter the laser area is when the lasers are spread open.
- You can jump safely from one of the inner-most rocks to another inner-most rock when either the lasers are spread OR when they're fully crossed.
- The best time to ground-pound the pillar-switch is when the lasers are fully crossed.
- Once you reach the end of the cave (on the right), use the walls to wait for a good time to fall to the health sphere.
- 0:19 - Remember you can bash this projectile. Don't try to lure it by clinging to the wall
- 0:23 - Don't bother floating through this area. Just drop to the ground and dash.
- 0:29 and 0:50 - There's a precise trigger point for these falling rocks. Carefully approach them and be ready to duck into the right-hand alcove as soon as you see them move.
Sorrow Pass
This area has some very dangerous spike traversals, as well as a lot of traps that can catch you off guard (e.g. lasers, falling slimes, small areas where there's no wind). Move slowly and watch your surroundings. Remember to use Bash to keep up your height and don't be afraid to use Dash to get some distance into a long stretch so you don't have to Kuro's Feather the entire thing (with the exception of that one infamous keystone part towards the end. Take that part very slowly)
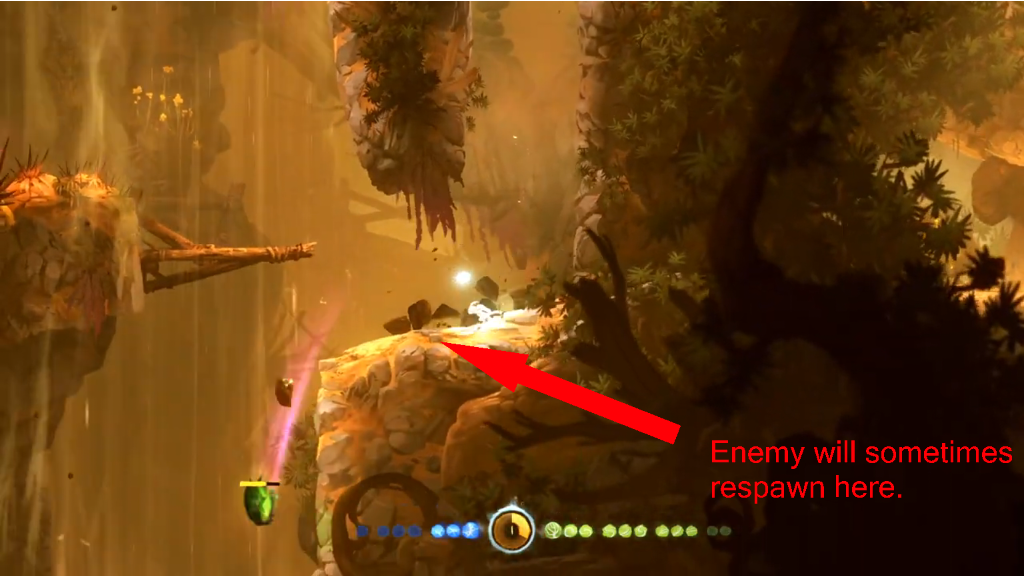
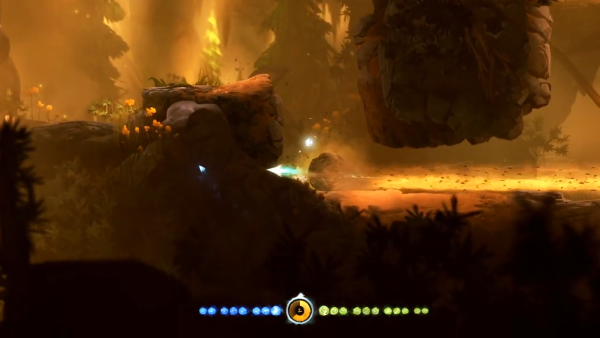
The temptation is to do what I did this this run, which is to micromanage the feather to the point it looks like Ori's having a seizure. I've since learned there's no need to do this, and it's not a great idea anyway since it'll wear out your glide-finger. Instead, find a set of sweeping motions that can carry Ori to their destination. It takes a LOT of practice, so find a safe open area where you can spend plenty of time.
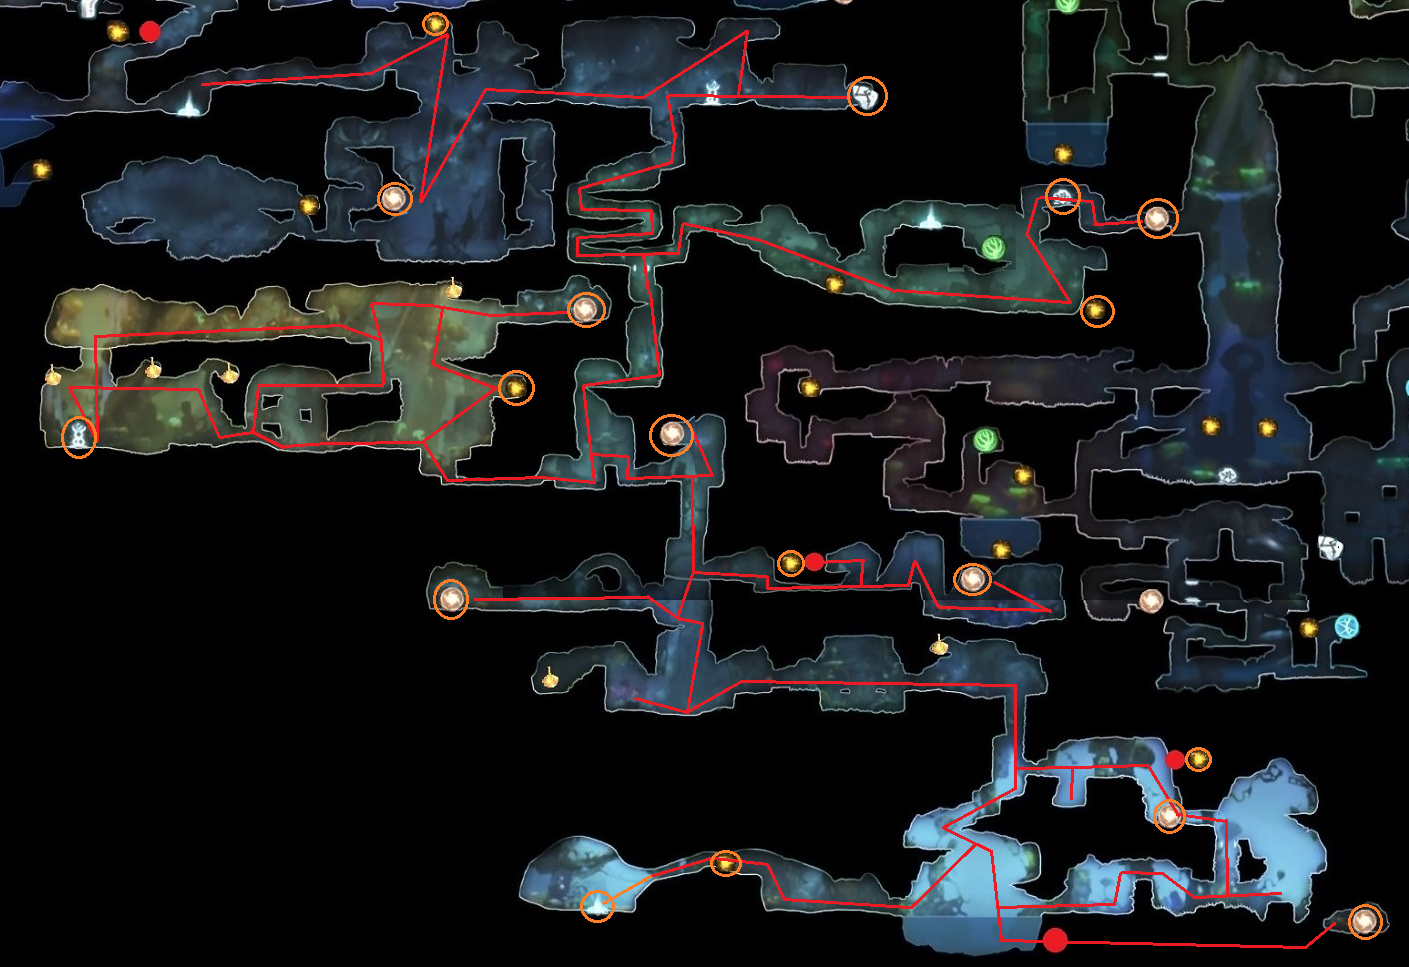
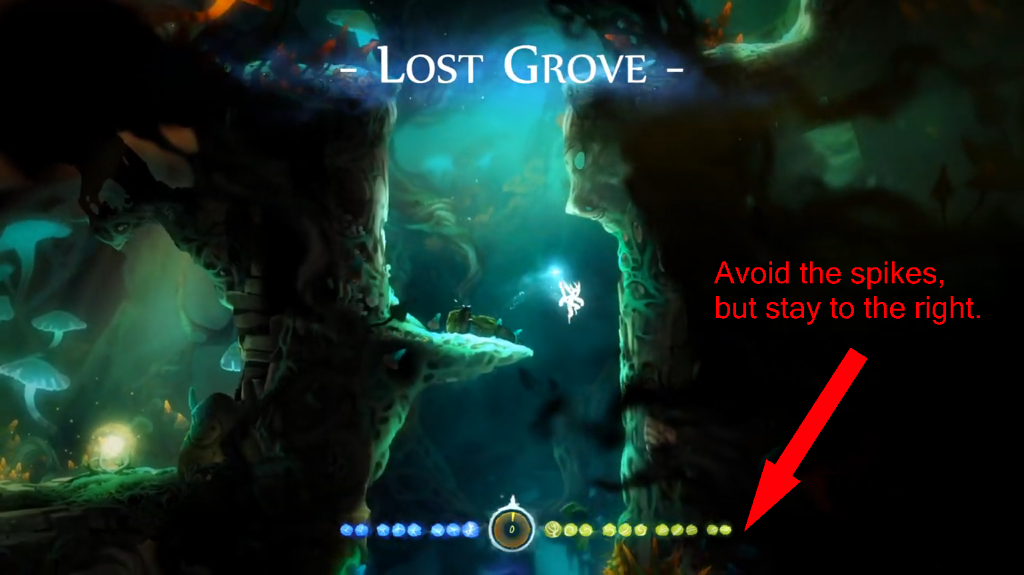
Lost Grove

Cleanup
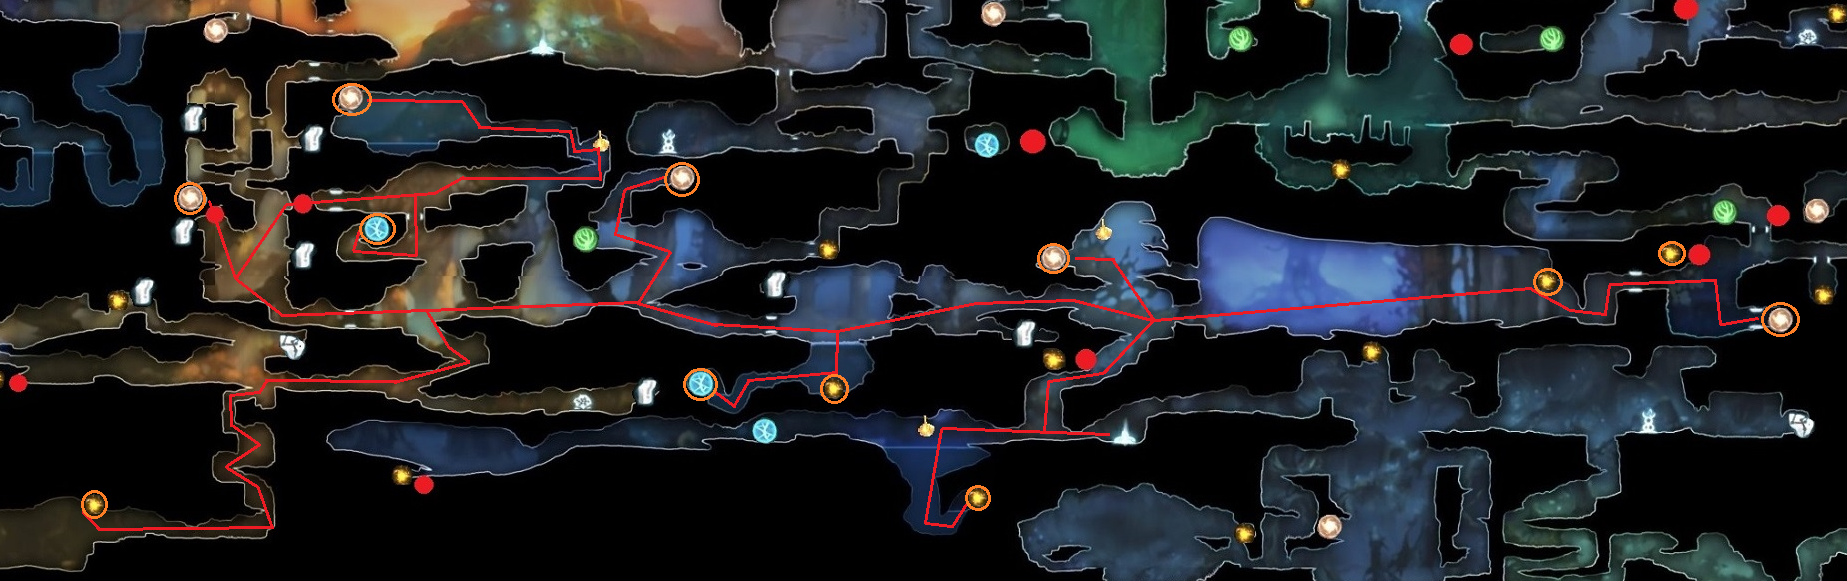
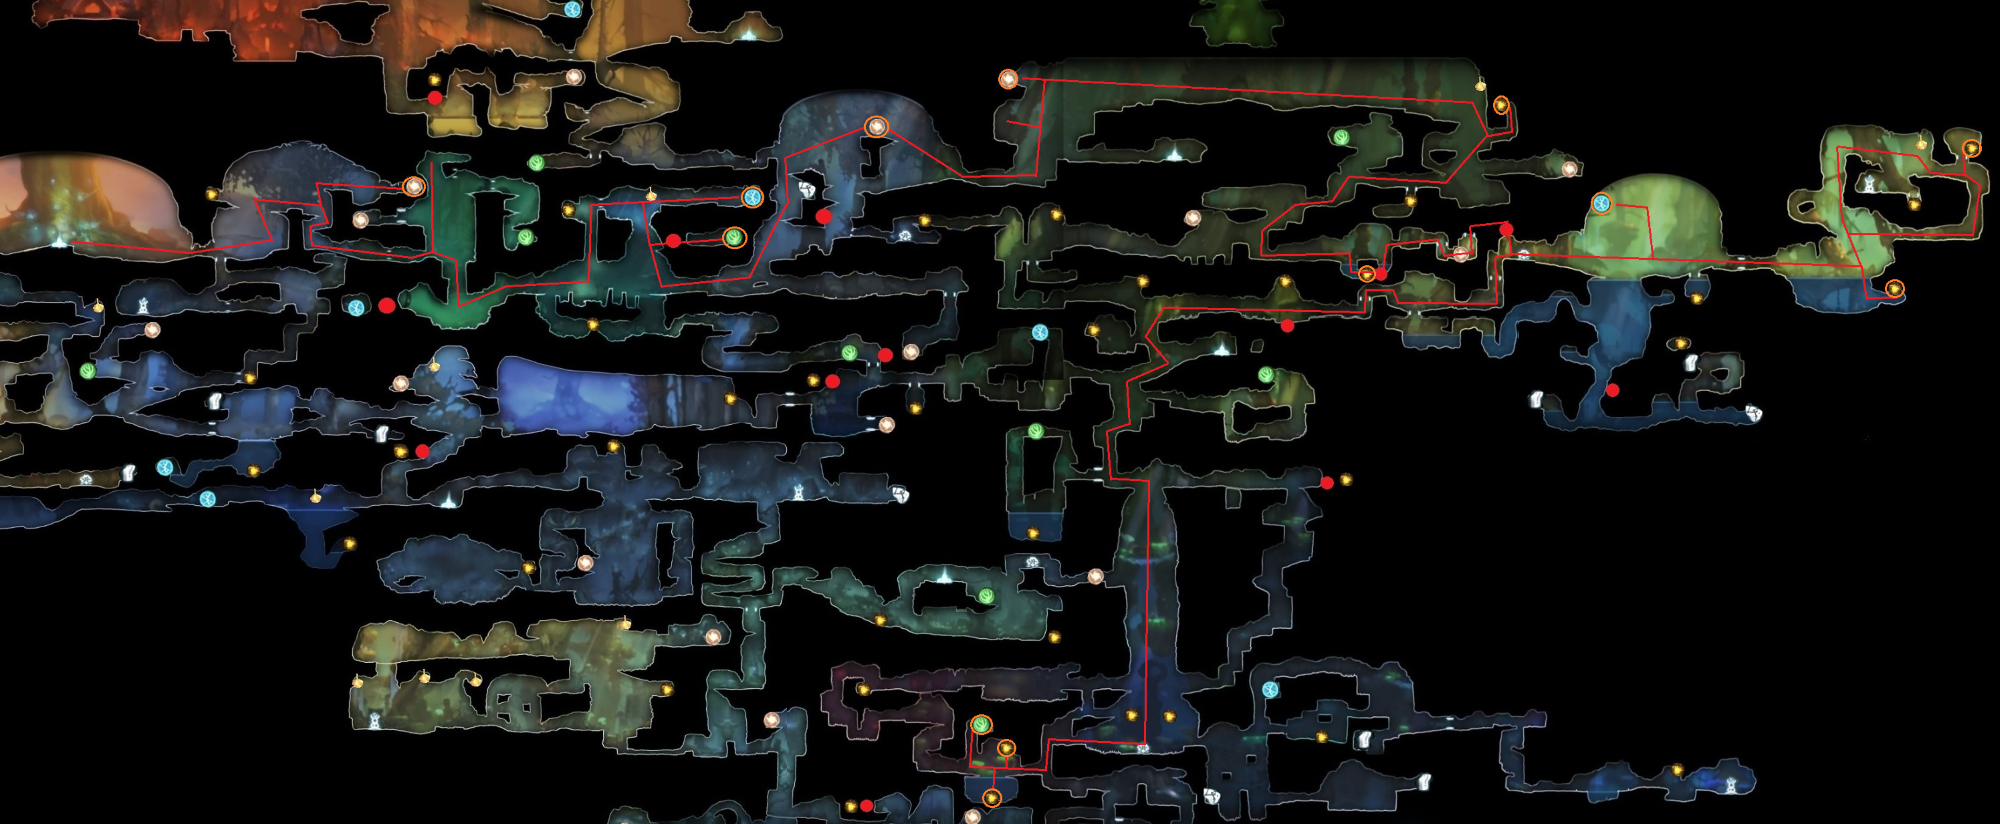
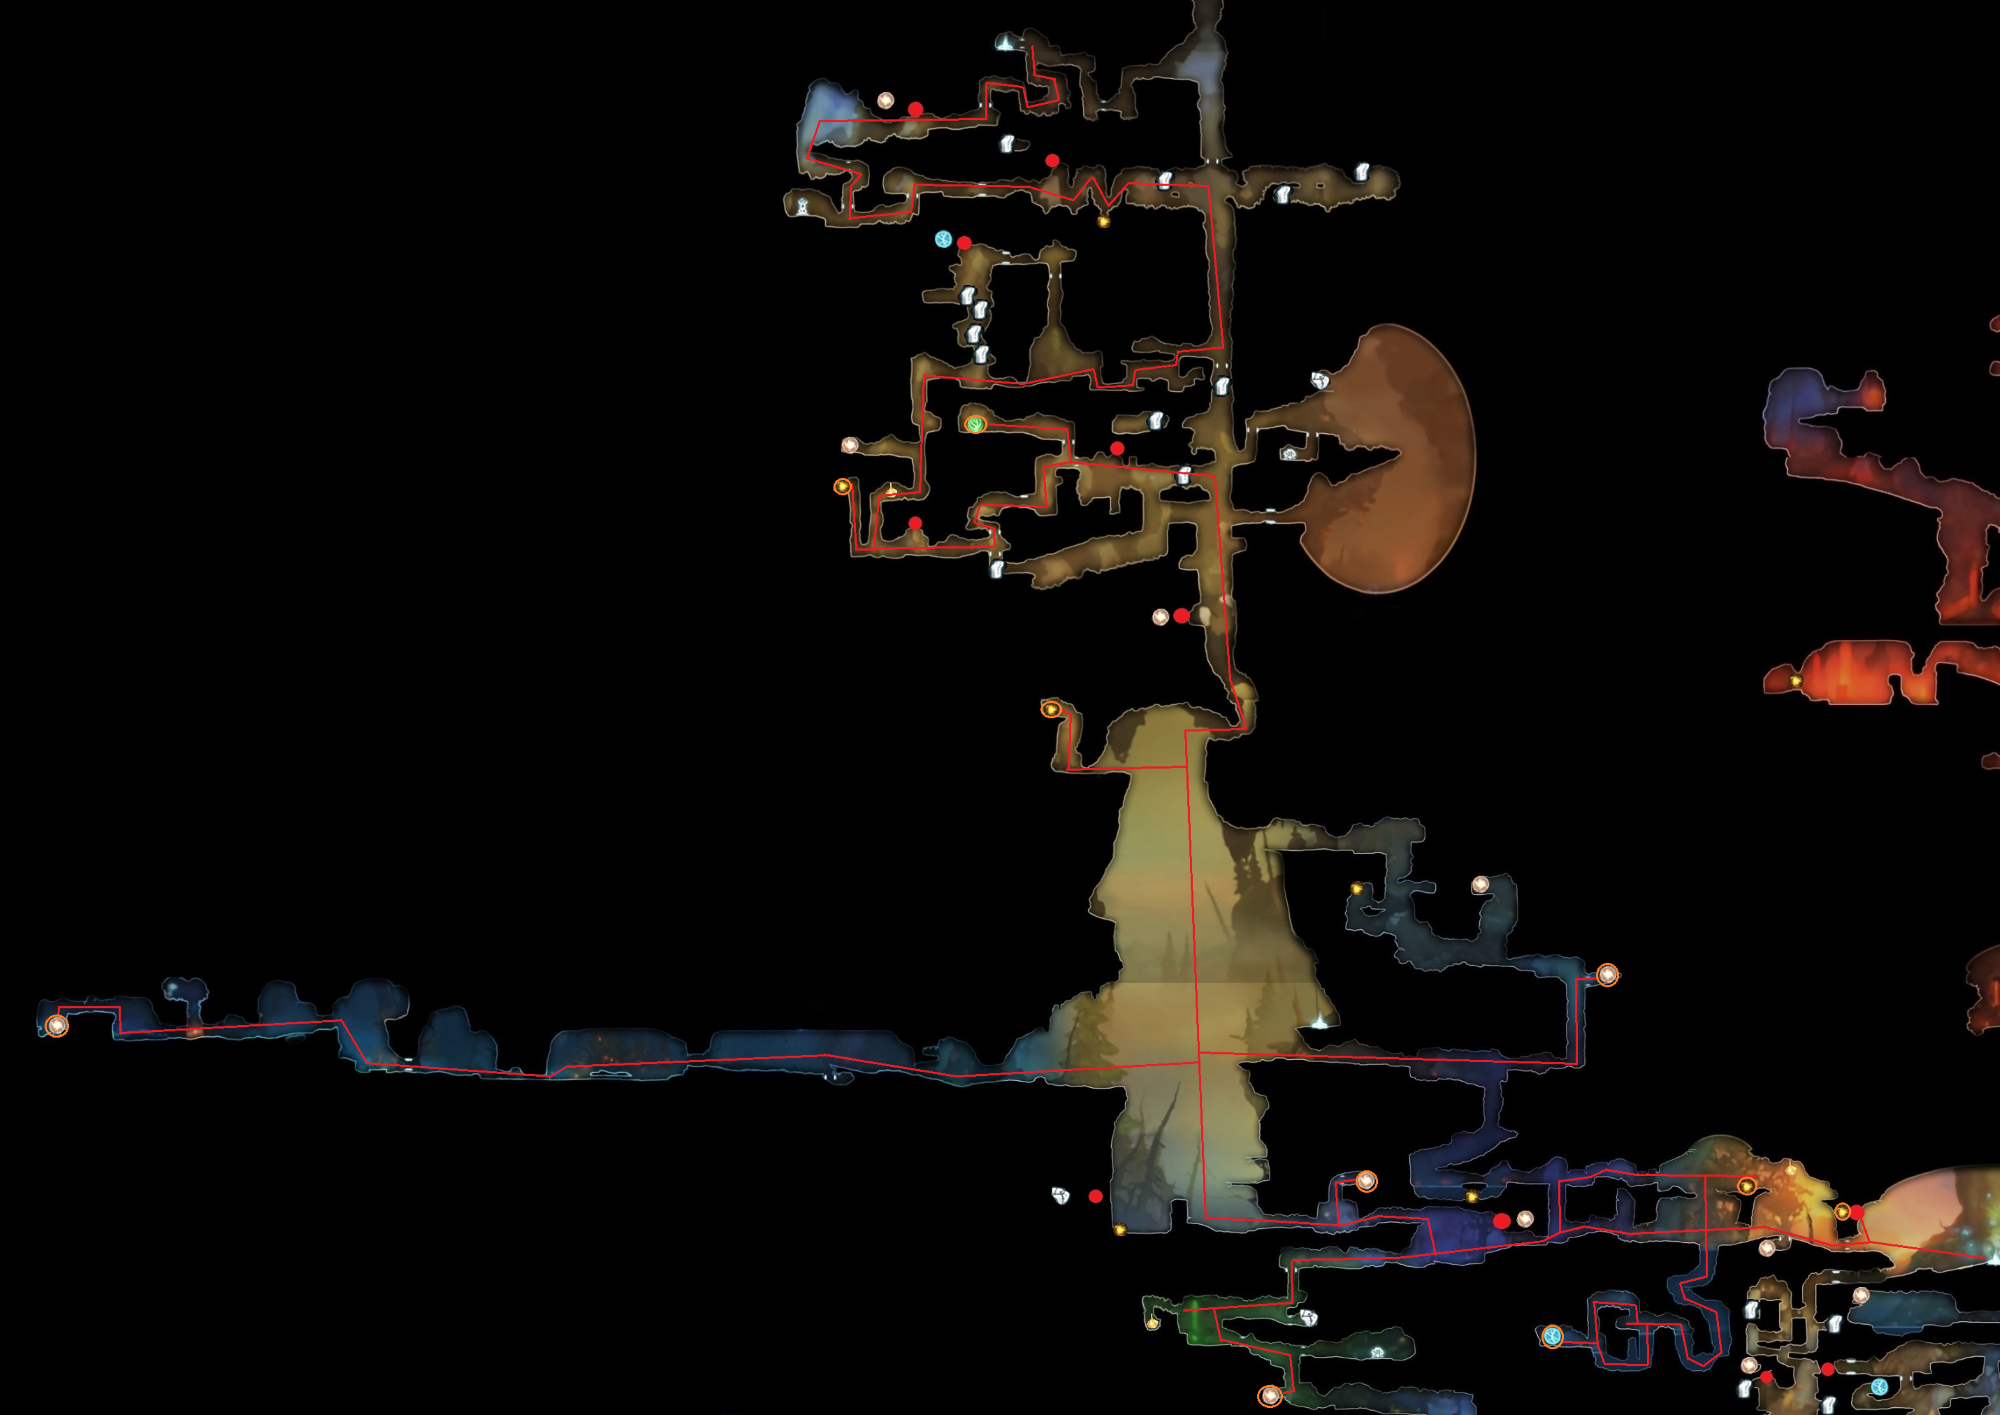
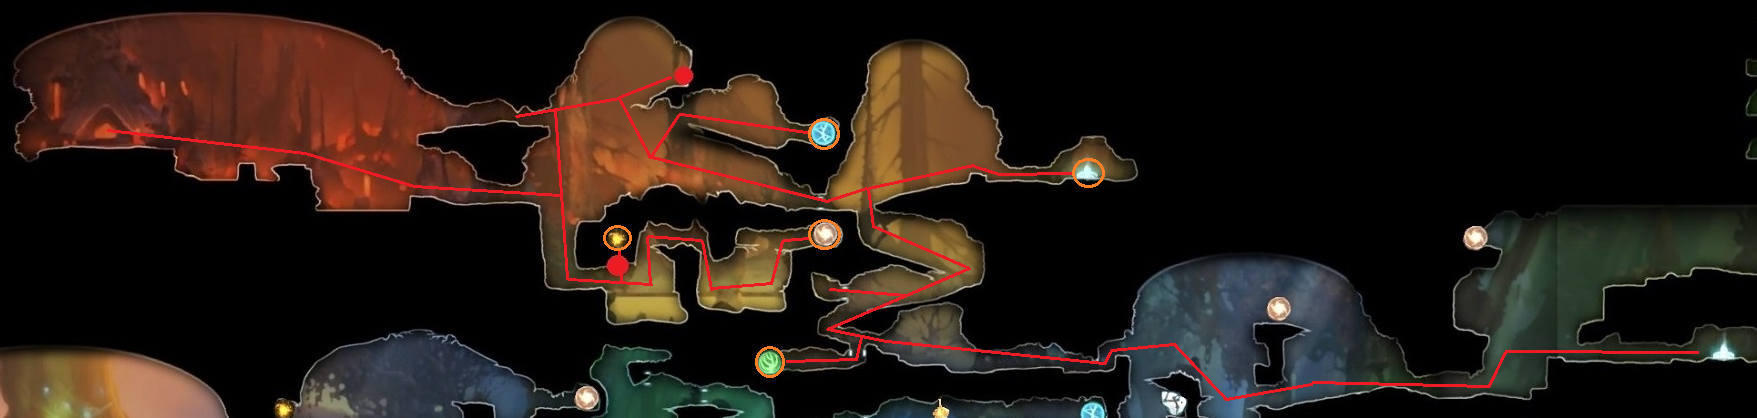
Once you have all the abilities, it's time to go back through the game and grab everything you missed. This part is very non-threatening is is mostly just a fun opportunity to go on a power trip as you re-traverse all the early parts of the game.
Mount Horu
As dangerous as this area is, the toughest thing you'll probably be fighting is your own nerves. Practice this area on normal difficulty. Make a save backup so you can replay each room and practice them until they're second-nature. None of them are particularly threatening, especially compared with earlier parts of the game (Black Roots Burrow or Moon Grotto), but it can take some time to find a strategy and path that works for you.
Also WATCH OUT when you go for that spirit light container. There is a GLITCH where the laser will occasionally slip between the cracks and strike the area down there. It's a good rule of thumb to pretend the laser always reaches that section and time it accordingly.
- 0:05 - DO NOT dash here. There's no rush and you're most likely just going to dash your way into the lava. Ori is very small on the screen and easy to lose track of. Take it slow.
- 0:19 - Bash straight up when you get to this part and wait for the lava spout to go back down. You never want to find yourself trying to "beat the train" so to speak.
- 0:37 - This is the trickiest part since there's so much to traverse in such a short time. Don't try anything fancy like trying to recharge your dash by touching the ground. Just use your dash to get across one way and your double-jump to get across the other way.
- 0:52 - Don't even bother dodging the rocks. They don't matter at this point. Just make sure you get over to the right in time.
Let me know in the comments if there's a particular area that caused you a lot of trouble that's not mentioned in the guide.
Also let me know if there's anything in this guide you found particularly confusing and I will try to make it clearer if I can.
Beat Ori and the Blind Forest: Definitive Edition's 100% run?
Flex it — let your friends know you pulled it off.
- Full Achievement Guide for Ori and the Blind Forest: Definitive Edition★ 5 (901)41k views1.2k ♥4 minUpdated May 6, 2016
- One Life Difficulty and Unhinged Achievement★ 5 (500)27k views733 ♥11 minUpdated Mar 14, 2021
- Ori 1终极版最全简体/繁體汉化指南★ 5 (416)25k views467 ♥1 minSimplified ChineseUpdated Oct 19, 2023
- Ori and the Blind Forest: Definitive Edition collectible map\奥日终极版全收集地图★ 5 (372)22k views423 ♥1 minSimplified ChineseUpdated May 5, 2016
- Карта мира и пояснения к достижениям "Лесничий" и "Под каждым камушком"★ 5 (349)21k views405 ♥1 minRussianUpdated Aug 16, 2024
- Простой фарм опыта★ 5 (261)16k views205 ♥1 minRussianUpdated Mar 1, 2021





- Upgrading to PremiumTeam Fortress 2★ 5 (20k)1441k views11k ♥6 minUpdated May 11, 2022
- No More Room in Hell Official ManualNo More Room in Hell★ 5 (2.8k)569k views2.1k ♥29 minUpdated Apr 22, 2019
- NMRiH Community Hosting GuidesNo More Room in Hell★ 5 (526)351k views653 ♥1 minUpdated Aug 10, 2022
- How to 'Git Gud' Soon™MORDHAU★ 5 (2k)318k views3k ♥68 minUpdated Nov 16, 2024
- Лучшие кооперативные игры SteamPAYDAY 2★ 5 (1.5k)315k views2.1k ♥56 minRussianUpdated Apr 27, 2025
- Desert Eagle Heat Treated | Blue GemCounter-Strike 2★ 5 (1.6k)292k views1.5k ♥2 minUpdated Jan 16





This guide was created by its original author on the Steam Community. Are you the author and want it removed? Request removal.