Beginner's Guide & Quick References
Currency Artifacts
Darkness 
Used to upgrade Abilities (at the Mirror of Night) that provide passive bonuses.Chamber Rewards
- 10 Darkness (or 20 Darkness from skull chambers)
- +5 maximum health (from Pitch-Black Darkness work order)
- For comparison, 25 Darkness cost 25 Obols in Charon's shop and a Centaur Heart (+25 maximum health) costs 125 Obols.
Gemstones 
Used to complete Work Orders (at the House Contractor) that add helpful features in the chambers, such as fountains and troves. Also used for cosmetic additions to the House of Hades.Chamber Rewards
- 5 Gemstones (or 10 Gemstones from skull chambers)
- 20 Obols (from Brilliant Gemstones work order)
- For comparison, 20 Gemstones cost 75 Obols in Charon's shop.
Chthonic Key 
Used to permanently unlock Weapons and to permanently unlock additional Abilities (at the Mirror of Night).Chamber Rewards
- 1 Chthonic Key (or 2 Chthonic Keys from skull chambers)
- 1 Dice (from Fated Keys work order)
- For comparison, 1 Chthonic Key costs 50 Obols in Charon's shop.
Nectar 
Used to permanently unlock Keepsakes (by gifting to characters) and increase your bond with characters. Each character (with a few exceptions) offers one keepsake. The Codex tracks your progress with each character.Chamber Rewards
- 1 Nectar (or 2 Nectars from skull chambers)
- +1 level to random boon (from Vintage Nectar work order)
- For comparison, 1 Nectar costs 200 Obols in Charon's shop and 1 Pom Slice (+1 level to random boon) costs 50 Obols.
Other Artifacts
Daedalus Hammer 
Used to modify your weapon, sometimes drastically.
- In general, get these whenever they are available since they will largely influence your boon choices. However, if you pass on one, it's possible to find others later.
- You can acquire a maximum of 3 Daedalus Hammers per escape attempt. No more than 2 can be acquired before Styx.
- Daedalus Hammer costs 200 Obols in Charon's shop.
Charon's Obol 
Used to purchase artifacts, health, and boons at Charon's Shop, and to purchase instant and temporary buffs at Well of Charon.Chamber Rewards
- 100 Obols (or 200 Obols from skull chambers)
Pom of Power 
Used to increase the level of a boon.Chamber Rewards
- +1 level to a boon (or +2 levels to a boon from skull chambers)
- For comparison, a 1-level Pom of Power costs 100 Obols in Charon's shop and 2-level Pom of Power costs 300 Obols.
Centaur Heart 
Used to increase your maximum health.Chamber Rewards
- +25 maximum health (or +50 maximum health from skull chambers)
- For comparison, a Centaur Heart costs 125 Obols in Charon's shop.
Olympian Boons
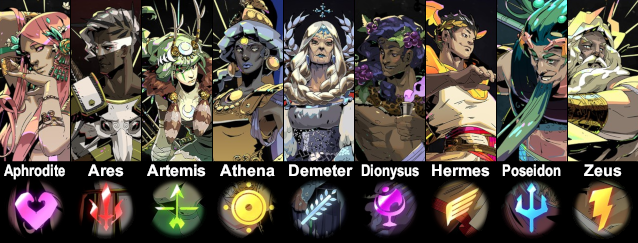
Aphrodite 
Inflicts Weak (victim deals less damage)Large damage increase for Attack and Special
Notable Boons
- Heartbreak Strike: Attack inflicts Weak and has a large damage increase
- Heartbreak Flourish: Special inflicts Weak and has a large damage increase
- Aphrodite's Aid: Greater Call inflicts Charm (victim turns against other enemies) and a large spike of damage
- Unhealthy Fixation (legendary): Weak effects have a chance to inflict Charm
Ares 
Inflicts Doom (delayed burst of damage, not stackable)Creates Blade Rifts (area damage over time)
Notable Boons
- Curse of Agony: Attack inflicts Doom
- Curse of Pain: Special inflicts Doom
- Blade Dash: Blade Rift is created at the beginning of a Dash
- Dire Misfortune: Doom effects now stack and deal more damage
- Vicious Cycle (legendary): Blade Rifts deal more damage with each consecutive hit
Artemis 
Chance for Critical damage, which can also inflict Marked (higher chance of taking critical damage)Large DPS increase for Attack and Special
Notable Boons
- Deadly Strike: Attack has a chance to deal Critical damage and has a large DPS increase
- Deadly Flourish: Special has a chance to deal Critical damage and has a large DPS increase
- Hunter Dash: Dash-Strike deals more damage
- Artemis' Aid: Greater Call inflicts a large spike of damage
- Hunter's Mark: Critical damage also inflicts Marked on another enemy
- Support Fire: Fires a seeking arrow after hitting with Attack, hitting with Special, or Casting
- Fully Loaded (legendary): +2 Max Ammo
Athena 
Deflect projectiles, which can also inflict Exposed (bonus backstab damage)Resist damage
Notable Boons
- Divine Dash: Dash can Deflect. This is one of the single best boons for beginners.
- Athena's Aid: Greater Call makes you invulnerable for a long duration
- Blinding Flash: Abilities that can Deflect also inflict Exposed. Pairs extremely well with Divine Dash.
- Deathless/Last Stand: Replenishes 1 Death Defiance
Demeter 
Inflicts Chill (slows victim, stackable status effect)Moderate damage increase for Attack and Special
Notable Boons
- Frost Strike: Attack inflicts Chill and has a moderate damage increase
- Frost Flourish: Special inflicts Chill and has a moderate damage increase
- Crystal Beam: Cast drops a crystal that fires a beam
- Glacial Glare: Cast fires longer and inflicts Chill
- Rare Crop: A few of your current boons (randomly selected) become common and then gain rarity every 3 encounters
Dionysus 
Inflicts Hangover (damage over time, stackable status effect)Conditionally restores health
Notable Boons
- Drunken Strike: Attack inflicts Hangover
- Drunken Flourish: Special inflicts Hangover
- Trippy Shot: Cast sends out Festive Fog (area that repeatedly stuns enemies inside)
Hermes 
Enhance Speed of movement and abilitiesNotable Boons
- Hyper Sprint: After Dashing, you run very fast for a short period of time
- Greatest Reflex: You can Dash more times in a row
- Side Hustle: Gain Obols at each chamber
- Maximum 3 boons from Hermes
- No Duo boons
Poseidon 
Adds Knock-away to abilities, which can also inflict Ruptured (damage while moving or knocked away)Moderate damage increase for Attack and Special
Notable Boons
- Tempest Strike: Attack knocks enemies away and has a moderate damage increase
- Tempest Flourish: Special knocks enemies away and has a moderate damage increase
- Typhoon's Fury: Deals more damage when slamming enemies into barriers
- Breaking Wave: Slamming enemies into barriers creates area damage
- Razor Shoals: Knock-away effects also inflict Rupture
- Second Wave (legendary): Knock-away effects activate a second time (after a brief delay)
Zeus 
Adds Lightning (area damage) to abilities, which can also inflict Jolted (self-inflicted area damage on next attack)Notable Boons
- Tempest Strike: Attack also deals Chain-Lightning
- Tempest Flourish: Special also deals Lighting Bolt
- Thunder Dash: Dash deals Lightning Bolt
- Double Strike: Lighting Bolts have a chance to strike twice
- Static Discharge: Lightning effects inflict Jolted
- Splitting Bolt (legendary): Lighting effects create an additional burst
Chambers
Charon's Shop 
Purchase items from Charon's shop, which includes artifacts, health, and boons. Enemies do not appear here (i.e. this is a non-encounter chamber).Offerings
- 25 Obols: 25 Darkness
- 50 Obols: Chthonic Key
- 50 Obols: Restore 50 Health
- 50 Obols: Pom Slice
- 75 Obols: 20 Gemstones
- 100 Obols: Pom of Power
- 125 Obols: Centaur Heart
- 125 Obols: Random God Boon
- 150 Obols: God Boon
- 200 Obols: Nectar
- 200 Obols: Daedalus Hammer
God Boon 
Gain a boon from a god, which enhances abilities and provides passive bonusesChamber Rewards
- Boon (increased rarity at skull chambers)
- For comparison, a God boon costs 150 Obols in Charon's shop.
Hermes
- Hermes is treated a bit differently from the other gods.
- You can have a maximum of 3 boons from Hermes.
- Hermes does not inflict any status curses.
- Hermes does not have any Duo boons.
- It's possible to find Hermes before triggering one of the other God's keepsake since Hermes is not considered a God Boon in that regard.
Trial of the Gods 
Gain a boon from each of the two godsIn this chamber, you gain a boon from the god that you choose first. Then you will have an encounter with an extra environmental hazard based on the second god. After the encounter, you can claim a boon from the second god.Environmental hazards, ordered from hardest to easiest to deal with:
- Aphrodite: A projectile aims for you, stunning and dealing damage
- Poseidon: Waves spawn and aim for you, dealing damage
- Zeus: Circles on the ground spawn, dealing damage
- Artemis: Circles on the ground spawn and follow you, dealing damage
- Ares: Circles on the ground spawn, dealing damage
- Dionysus: Circles on the ground spawn, dealing damage over time
- Demeter: Circles on the ground spawn and grow slowly, slowing and dealing damage
- Athena: Grants enemies invulnerability
NPC 
Chamber Rewards (choose one)Tartarus: SisyphusAsphodel: Eurydice
- Restores 42 health
- 50 Darkness
- 100 Obols
Elysium: Patroclus
- Upgrade rarity of 2 random boons of yours
- Upgrade level of 4 random boons of yours
- Upgrade rarity of the next 3 boons you acquire
- Replenish all Death Defiances
- Restore 50% more health from Stubborn Defiance (for the next 15 encounters)
- Restore 30% health per chamber for the next 5 chambers
- Attack +60% damage for the next 10 encounters
Chaos 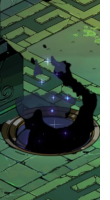
Gain a boon after a temporary curse expiresWhen is it safe to visit Chaos?The list below tells you which chambers are safe to enter the Chaos gate such that you will not be cursed for the boss fight. It assumes that you will have an encounter every chamber after the Chaos chamber. If you want to be safer, assume that you will have one non-encounter chamber (e.g. Charon's shop, NPC, etc) and adjust the numbers accordingly.
- From Chamber 1-6, enter Chaos Gate and get 5-encounter (or less) curse
- From Chamber 7, enter Chaos Gate and get 4-encounter (or less) curse
- From Chamber 8, enter Chaos Gate and get 3-encounter Curse
- At Chamber 12, safe to get Light of Ixion (spawns Chaos Gate at next opportunity) from Well of Charon.
- Chamber 14: Tartarus boss (Furies)
- From Chamber 16, enter Chaos Gate and get 5-encounter (or less) curse
- From Chamber 17, enter Chaos Gate and get 4-encounter (or less) curse
- From Chamber 18, enter Chaos Gate and get 3-encounter curse
- At Chamber 22, safe to get Light of Ixion (spawns Chaos Gate at next opportunity) from Well of Charon.
- Chamber 24: Asphodel boss (Hydra)
- From Chamber 26-28, enter Chaos Gate and get 5-encounter (or less) curse
- From Chamber 29, enter Chaos Gate and get 4-encounter (or less) curse
- From Chamber 30, enter Chaos Gate and get 3-encounter curse
- Chamber 36: Elysium boss (Heroes)
Weapons
Recommended BoonsStygian BladeHeart-Seeking BowShield of ChaosEternal SpearTwin FistsAdamant Rail


Stygian Blade (Stygius) 
Balanced melee weapon with good DPS and area damageRecommended Boons
- Artemis: passive Attack damage and Special damage increase -- plus criticals -- to multiply the large base damage
- Athena: Deflect and Expose for backstab damage
- Aphrodite: passive Attack damage and Special damage increase
- Avoid Poseidon (for knock-away effects)
Heart-Seeking Bow (Coronacht) 
Long-range weapon with low DPSSurprisingly, the bow can be much more effective in short range. The Special can hit an enemy multiples times in close range and deal a large amount of damage.Recommended Boons
- Ares: reapply Doom with the slower attack speed
- Demeter: Chill for easier kiting
- Poseidon: Knock-away for more distance/time
Shield of Chaos (Aegis) 
Melee weapon with low DPS and the ability to blockRecommended Boons
- Ares: reapply Doom with the slower attack speed
- Hermes: movement speed and positioning is important to get the extra collision damage
- Poseidon: Knock-away works well with the shield's passive knock-away
Eternal Spear (Varatha) 
Melee weapon with good DPS and rangeRecommended Boons
- Artemis: passive Attack damage and Special damage increase -- plus criticals -- to multiply the large base damage
- Aphrodite: passive Attack damage and Special damage increase; can spread Weak easily with Spin Attack
- Dionysus: can spread Hangover easily
Twin Fists (Malphon) 
Risky close-quarters melee weapon with high DPSRecommended Boons
- Hermes: movement speed and positioning is important due to the short range
- Athena: Deflect and Expose for backstab damage
- Zeus: lightning from rapid attack speed and dashes
- Avoid Poseidon (for knock-away effects)
Adamant Rail (Exagryph) 
Medium-range weapon with good DPS and area damage, and is more difficult to useYou may want to disable aim assist with the rail.Recommended Boons
- Zeus: lightning from rapid attack speed
- Demeter: quick stacks of Chill and for easier kiting
- Dionysus: quick stacks of Hangover
- Avoid Poseidon (for knock-away effects)
Keepsakes
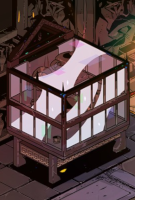 Keepsakes provide a passive buff for Zagreus while equipped. One keepsake can be equipped at a time. You can equip a keepsake in the weapons room. Your currently equipped keepsake is shown in the Boon Info overlay, last boon in the left column. The Keepsake Collection work order (at the House Contractor) allows you to switch keepsakes between Underworld regions.
Recommendations
- Old Spike Collar from Cerberus: Increase maximum health
- Chthonic Coin Purse from Hypnos: Instantly receive Obol. Since there is no passive benefit, swap to another keepsake at the next opportunity.
- Lucky Tooth from Skelly: Revive after taking fatal damage (once per escape attempt). This activates only if there are no more Death/Stubborn Defiances.
- Broken Spearpoint from Patroclus: Gain temporary invulnerability after taking damage.
Abilities
Slot #1
Shadow Presence: Bonus damage to enemies from behindFiery Presence: Bonus damage to undamaged enemies
Recommendation: Shadow Presence
Slot #2
Chthonic Vitality: Restore 3 health per chamberDark Regeneration: Upon collecting Darkness, also restore health by 60% of the Darkness
Recommendation: Dark Regeneration is triggered by collecting Darkness from chamber rewards, from Charon's shop/well, from Infernal Troves, and from Sisyphus. A large amount of Darkness is dropped from bosses if you have already defeated them once before. Dark Regeneration is a good choice for beginners especially if you are collecting a lot of Darkness to upgrade your abilities.
Dark Regeneration has almost no benefits in Styx because Darkness is only available in Well of Charon here. Once you can comfortably reach Styx, you may want to switch to Chthonic Vitality.
Slot #3
Death Defiance: Revives you with 50% health (3 chances) Stubborn Defiance: Revives you with 30% health (1 chance per chamber)
Recommendation: Death Defiance offers much more survivability. It's important to note that Death Defiances can be replenished from Well of Charon (replenish 1 Death Defiance for 200 Obol), from some of Athena's boons, and from Patroclus (replenish all used Death Defiances).
Slot #4
Greater Reflex: Extra dashRuthless Reflex: Bonus damage and dodge if you dash before getting hit
Recommendation: The extra dash from Greater Reflex allows for more mobility and more safety. Midway through a dash, you can cancel into another dash. This is very helpful when you mistakenly dash into incoming enemy attacks.
Slot #5
Boiling Blood: Bonus damage to enemies with bloodstone (Cast ammo) attachedAbyssal Blood: Reduces speed and damage of enemies with bloodstone (Cast ammo) attached
Recommendation: Boiling Blood
Slot #6
Infernal Soul: Extra bloodstones (Cast ammo)Stygian Soul: Bloodstones (Cast ammo) instead regenerate over time
Recommendation: Stygian Soul offers more consistent usage of Cast and is in general easier to use.
Slot #7
Deep Pockets: Start with 100 ObolsGolden Touch: Gain 15% of your Obols when you exit a region
Recommendation: Once you find yourself exiting a region with 500 Obols or more, Golden Touch will provide significantly more wealth than Deep Pockets.
Slot #8
Thick Skin: +50 maximum healthHigh Confidence: +25% damage when above 80% health
Recommendation: Thick Skin
Slot #9
Privileged Status: +40% damage to enemies with at least 2 status cursesFamily Favorite: +5% damage for each unique Olympian whose boons you have
Recommendation: Privileged Status. It is not too difficult to apply two status curses. See notes below. Also, Family Favorite discourages you from getting higher tier boons.
Notes about Privileged Status
- Boon Tiers: Some boons enhance others and won't appear until you have the prerequisite(s). For example, Aphrodite's Broken Resolve enhances the Weak status curse and this won't appear unless you already have a boon that applies Weak. There are 3 tiers.
- Status Curses: Each god (except Hermes) offers boons that can apply a status curse. Some of the status curses are available at Tier 1 and some at Tier 2.
Best Status Curses for Privileged StatusSome of the status curses are more accessible than others, and some are easier to maintain on enemies than others.
- Chill (Demeter, Tier 1, 8s duration)
- Hangover (Dionysus, Tier 1, 4s duration)
- Weak (Aphrodite, Tier 1, 3s duration)
- Exposed (Athena, Tier 2, 5s duration)
- Doom (Ares, Tier 1, 1s duration, duration does not refresh, see note below)
- Jolt (Zeus, Tier 2, 10s duration, expires when enemy attacks, see note below)
- Ruptured (Poseidon, Tier 2, 3s duration)
- Marked (Artemis, Tier 2, 2.5s duration, expires when enemy takes critical damage)
- When the conditions are met, the enemy is marked with a Punished icon next to their health bar.
- Attacks, Specials, and Casts inflict damage before they apply any status curses. For example, when an enemy is inflicted with only Hangover and then is hit with a Cast that applies Weak, the Cast's damage comes first and is not increased due to Privileged Status.
- Doom technically deals damage before its status curse ends. This means that the enemy only needs to be inflicted with one other status curse in order for Doom to benefit from Privileged Status.
- Jolt deals damage after its status curse ends. This means that the enemy needs to be inflicted with two other status curses in order for Jolt to benefit from Privileged Status.
- Marked needs to be confirmed.
Slot #10
Olympian Favor: +40% chance for Rare boonsDark Foresight: +10% chance for God Boon, Daedalus Hammer, and Pom of Power chambers
Slot #11
God's Pride: +20% chance for Epic boonsGod's Legacy: +10% chance for Legendary or Duo boons
Slot #12
Fated Authority: Gain dice to alter the reward for the selected chamberFated Persuasion: Gain dice to alter the Boon and Well of Charon choices
Notes about Fated Authority
- 1 dice is needed to alter a chamber, and only that one chamber is altered.
- Gain 1 dice from Chthonic Key chambers.
- There are three types of chambers. A chamber can be altered only to another of its type.
Types of Chambers
- Blue laurel (Gemstones, Darkness, Chthonic Key, Nectar)
- Gold laurel (Obol, Pom of Power, Centaur Heart, Daedalus Hammer, God Boon)
- Unalterable (Charon's Shop, NPC, Boss)
Notes about Fated Persuasion
- 1 dice is needed to alter a set of choices the first time, another 2 dice for the second successive alter, another 3 dice for the third successive alter, and so forth.
- Gain 1 dice from Chthonic Key chambers.
General Tips
- Fishing: Instead of looking directly at the fishing spot, look above it and keep it in your peripheral vision. It will be easier to see the flash.
- God Mode: God mode grants 20% damage reduction plus 2% per failed escape attempt (i.e. damage reduction increases the more you fail). Turn on God Mode if you ever feel like the game is too difficult. You can enable and disable this at any time in Settings. There are no penalties for enabling or disabling this, and this has no impact on the story events. All achievements and all items in the Fated List can be unlocked with God Mode enabled.
- Focusing on Particular Gods: The gods that you have are more likely to appear later in the run than gods that you don't have. It's a valid strategy to avoid getting boons from particular gods (or purging boons) to increase the chances of getting boons from the gods that you want.
- Bosses: Boss chambers appear at fixed numbers and the chamber immediately before will not have any enemies. The Boon Info overlay displays the current chamber number.Boss Chambers
- Chamber 1: Tartarus
- Chamber 13: no enemies
- Chamber 14: Tartarus boss (Furies)
- Chamber 16: Asphodel
- Chamber 23: no enemies
- Chamber 24: Asphodel boss (Hydra)
- Chamber 26: Elysium
- Chamber 35: no enemies
- Chamber 36: Elysium boss (Heroes)
- Chamber 1: Tartarus
Closing
This guide is aimed at new players who are working towards beating the game for the first time. Please feel free to leave a comment if you have any questions, suggestions, or corrections. Thanks for reading!
Last updated: v1.37133 (Post-Launch)

Last updated: v1.37133 (Post-Launch)
More Hades guides
- Guide to Unlocking Hearts (Completing Favors)★ 5 (1.9k)170k views4.4k ♥13 minUpdated 15 Apr, 2021
- Hades 100% Achievement Guide★ 5 (1.8k)90k views3.9k ♥13 minUpdated 17 Jan, 2022
- Квесты персонажей и открытие сердец★ 5 (881)57k views2k ♥4 minRussianUpdated 12 Dec, 2022
- Guide to (Help You) Unlock Hidden Aspects★ 5 (542)46k views1.3k ♥3 minUpdated 6 Apr, 2024
- Hades - Руководство по достижениям★ 5 (1.1k)40k views2.1k ♥15 minRussianUpdated 23 Jan, 2025
- Гайд по достижениям★ 5 (752)36k views1.7k ♥12 minRussianUpdated 30 Jan, 2021





🔥 Popular guides
- Upgrading to PremiumTeam Fortress 2★ 5 (20k)1441k views11k ♥6 minUpdated May 11, 2022
- No More Room in Hell Official ManualNo More Room in Hell★ 5 (2.8k)569k views2.1k ♥29 minUpdated Apr 22, 2019
- NMRiH Community Hosting GuidesNo More Room in Hell★ 5 (526)351k views653 ♥1 minUpdated Aug 10, 2022
- Лучшие кооперативные игры SteamPAYDAY 2★ 5 (1.5k)315k views2.1k ♥56 minRussianUpdated Apr 27, 2025
- Desert Eagle Heat Treated | Blue GemCounter-Strike 2★ 5 (1.6k)292k views1.5k ♥2 minUpdated Jan 16
- Treasure Hunt Puzzle SolutionsTotal War: WARHAMMER II★ 5 (6.9k)281k views15k ♥3 minUpdated Aug 19, 2021






This guide was created by its original author on the Steam Community. Are you the author and want it removed? Request removal.