Camp Crystal Lake Employees Guide
1. Company Goals
At the beginning of a match, you will be placed in a random location on one of the various camps along with up to seven of your fellow councilors. You will either be killed by Jason, our resident serial killer, succeed in killing him, or escape. All three conclusions, along with what you do during the match, will earn you experience points that will be shown at the end of the match which occurs when no players are left either due to death or escape, Jason dies, Jason leaves, or time runs out. As you gain experience, you will increase your level, which earns you a promotion within our company and unlocks new councilors, new versions of Jason, new clothing, and also earn you Customization Points, or CP, that you can use to purchase new perks that will help make you and even more powerful and efficient employee here at Camp Crystal Lake.
2. Know Your Surroundings
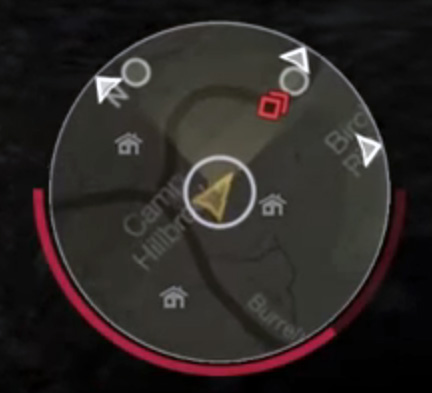 First and foremost, always be aware that the forest around Crystal Lake is wild and can be hazardous to those not aware of your surroundings. Always make sure to keep an eye on your mini map that can be found on the lower right hand corner of your screen. This map will show the terrain such as roads, bodies of water, the edge of the campgrounds, campfires, boats, cars, location names, and buildings. Another feature we have added to your mini map is the ability to see your fellow counselor, who will appear either as white circles if they are near you, or as white arrows if they are off the edge of your map, pointing you in their general direction. You will also be able to see nearby items these counselors have found and have dropped on the ground, as well as Jason himself if he is near your location or has been marked. Jason will appear in bold red to help you easily identify him.
Below your mini map is a red bar that shows your stamina. This allows you to run at a faster pace but also more loudly. The more your run or jog, the more the stamina will run out. It will deplete faster or slower depending on your stats, which we will discuss later. If you stand still, the stamina bar will slowly return, and if it depletes completely, you will only be able to jog slowly until you take a rest.
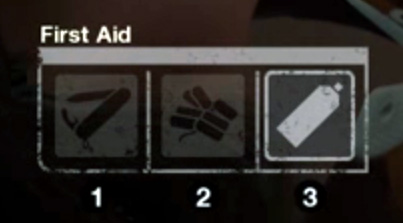 On the lower left hand side of the screen you will see the items you have picked up around the camp, either inside drawers or off the ground. You are allowed to carry 3 items and these are essential to your survival. These are smaller items that are used to increase your chances of survival with the exception of the large map item and the walkie-talkie. You will not find larger items displayed in this section either as they must be carried with your hands. You may only carry one large item at a time.
 Finally, the upper left corner of your screen will be empty until you find a walkie-talkie, after which an icon will appear. This icon will light up when another counselor in the game who has also found a walkie-talkie is speaking through it.
Camp Tips
Finally, the upper left corner of your screen will be empty until you find a walkie-talkie, after which an icon will appear. This icon will light up when another counselor in the game who has also found a walkie-talkie is speaking through it.
Camp Tips- When communicating with counselors, use the names of locations on your map to help to point out various objective spots, items, Jason himself, or your own location.
3. Know What You Are Capable of (Part 1)
We at Camp Crystal Lake believe in extensive training for each of our employees so that they are capable to handle any situation that they face. In this section we will discuss what you will be able to do after training when confronted with Jason. Please keep in mind that we will be discussing the default controls but we fully recommend that you customize these so that you are comfortable and confident in your new abilities. Whether it is with a keyboard or a controller, Camp Crystal Lake wants you to be proud of your own individual style.
Walking
Your most important ability is movement. You will constantly be using it so please be aware of its different forms. You have the basic walk forward, backward, as well as strafing left and right. This is the second quietest form of movement that will not deplete your stamina, but keep in mind your stamina will not replenish if you are walking. These movement keys will have a different outcome under certain situations, such as in the water, or combined with the crouch or run button.
Crouching
If you press the crouch button, you will get down lower to the ground and stay there until you press the crouch button down again. In this stance you can use your movement keys to stalk very slowly. This is the quietest form of movement, but is also the slowest. Your stamina will replenish but slower than if you were simply standing still. While it has its uses, more than likely Jason will be able to use his sense abilities to find you, so do not assume you are safely hidden from Jason ever. Crouching is good for getting away from a distracted Jason, increasing distance from him while not shifting his focus off whomever he is chasing and on to you.
Jogging
If you press the jog button, you will enter a jogging stance and will remain that way until you press the jog button again. While in this mode, your movement keys will have you move at a brisk pace that is not as quiet as crouching, but is quicker than walking. Jogging is useful because you will want to move around the map quickly to accomplish your goals, but will not want to be so loud that Jason can find you easily.
Running/Sprinting
The run button allows you to use your direction buttons to get you to where you need to go as fast as possible. You will be loud and will deplete your stamina very quickly, but sometimes this is necessary if you need to get into a building as fast as possible or to increase your distance from Jason. This button, is different than the other stance buttons in that you must constantly have it pressed down while you move to run, and as soon as you depress the run button, you will begin to walk or jog depending on if you had pressed the jog button previously.
Swimming
While in water, movement buttons will allow you to swim and holding your run button while moving will increase the speed you swim. Keep in mind swimming depletes your stamina very rapidly, forcing you then to tread water to increase stamina or just swim at a very slow pace. Swimming is also the loudest form of movement, creating large pings that Jason will no doubt see. Jason is at his fastest in the water, and while you can usually outrun him on land, you can never out swim him. He is also incredibly difficult to see while he is underwater, only visible by a light red glow on the water’s surface. Jason can instantly kill you while you both are in the water, pulling you down into the murky depths and drowning you. SWIM AT YOUR OWN RISK
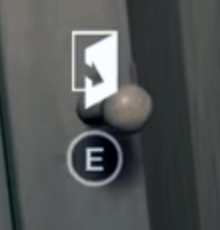 Your interact button is another very important action, because this allows you to perform a number of actions while in a match with Jason. By tapping the interact button, you can pick up items, close or open doors, open windows, enter or exit hiding places, pick up or lay down a trap, and so much more. You will know when you can interact with an object when an indicator appears in the middle of your screen. While Jason has you in a grab, continuously tap the interact button as fast as you can to build up your strength and break free of his hold before he kills you.
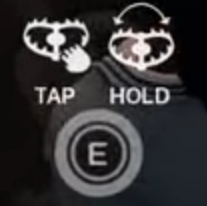 For certain actions, you must hold down the interact button until the action is completed. You will know when this is necessary by an indicator in the middle of your screen. You will hold down the interact button for actions such as calling Tommy Jarvis or the police, arming or disarming a trap you or another counselor has placed on the ground, fixing the boat, car, or fuse box, locking doors, and other such actions.
Flashlight
Outside of the city, it can get pretty dark! Your flashlight button turns your flashlight on and off. You start with the flashlight and usually you want to always keep your flashlight on to avoid the fear inducing dark but you might find yourself in situations where you want to turn it off to avoid Jason from physically spotting you in the distance.
- Pay attention to your mini map with each form of movement, as you will be able to see how much noise you are making by observing the white rings that emit from your location arrow.These are pings and each one that appears also appears on Jason’s screen, showing him your position. The faster you move, the louder you move, and the more pings appear that Jason can see.
- Jogging as much as you can to stay somewhat quiet, move quickly, and save the most stamina
- Walking outside makes you vulnerable. When you're on the move, try to create a path that takes you from one barricaded cabin to another
- Stamina is a precious resource that will not be easy to recover when Jason is chasing you. Jogging allows you to not waste stamina so quickly compared to if you were running everywhere.
- Always try to keep some stamina in your tank just incase Jason appears and you need to get away quickly. Your stamina will deplete slowly but not as quickly as if you were running.
- Unless you are in danger or are a counselor with a high stamina, it is advisable to not misuse the run button unless you want to be spotted by Jason and then completely drained of stamina when he shows up.
- While we all enjoy a nice swim in the summer, Camp Crystal Lake advises you to swim as little as possible when Jason is around.
- Only swim if you absolutely must, for example, if your boat was tipped over or you think you can get to a boat that’s close to shore. Make absolutely sure Jason is not around or is heavily distracted before you even think of entering the water.
- Double tapping the interact button while opening windows or doors will allow you to open them much quicker.
- If you run and press the interact button near a window you will jump through it which is quicker than climbing through. This gets you in the building faster, which is useful when Jason is on your tail.
- You can also jump through a closed window if you are in absolute danger, taking damage in the process
- Climbing or jumping through broken windows will hurt you
- If there is a fellow counselor behind you, it's always better to climb through the window so that they can get in as well. After jumping, it takes time to stand back up, leaving your counselor outside waiting
- Keep your flashlight on as often as possible to reduce fear
4. Know What You Are Capable of (Part 2)
Using Small Items
Any items you pick up with your interact button can be seen in your inventory on the left hand side of your screen and can be used when you need them. There are two ways to do this. You can scroll through your three items with your inventory previous and inventory next buttons, and then pressing the use selected item button. The other way is to press the number associated with the item if you are using a keyboard. Each item in your inventory will have a 1, 2, or 3 underneath them. Simply press the number key to use that item. Some items cannot be used at certain times or can be used differently if you hold down the use item button. Please see our section on items to learn more about this.
Using Large Items
At Camp Crystal Lake we believe safety is the most important ingredient to having fun. We encourage our counselors to be able to defend themselves whenever it is necessary. Your use large item button should be thought of as a trigger on a weapon. Other than vehicle parts, the only large items you will be carrying are weapons. Press this button to shoot a shotgun, a flare gun, or swing a hand held weapon.
Dropping Items
Crystal Lake believes in the power of sharing. Sometimes you want to trade an item you find with another counselor or simply leave it behind for use later. To drop a small item on the ground, press your drop item button once. To drop a large item that is in your hand, hold down your drop item button.
Looking Behind You
Always pay attention to your surroundings! Press the rear view button to look behind you, and then let go of it to return to your front view. This is especially useful when being chased by Jason and you want to see what he is doing or how far away he is. Just be sure to be aware of what’s in front of you. You don’t want to end up running into a wall or some other object that will stop you from maintaining your distance from Jason.
Hiding
While hiding under a bed, in a closet or tent, fear might cause you to breath heavily, giving away your location to Jason. Press and hold down the hold breath button to stop this from happening. Keep in mind you can only last a few seconds and will then gasp very loudly for fresh air, giving up your position indefinitely to Jason if he’s still around.
Combat
Your movement and use large item buttons will change their use if you press the combat button. After pressing the combat button, tapping your movement buttons will cause you to jump quickly forward, backward, or side to side, allowing you to quickly dodge incoming attacks. Your use item button will now become a more powerful, but much slower attack. You will also have a block button.
Communication
To talk, simply press the talk button. You must hold it down while delivering your message and then letting it go when you are done. You can also change it in your options to always be turned on, freeing up the need to press the button all together. Keep in mind though that other counselors, as well as Jason will hear you and anyone else around you at all times. While talking, only players within a small area around you can hear you unless you, as well as the person you are trying to talk to, both have a walkie-talkie.
Using the Large Map
After you have picked up a large map item, you will be able to press the map button and look at the entire layout of the camp you are in. Use this to coordinate with fellow counselors or find which direction an objective is.
Checking the Scoreboard
Press the show scoreboard button to bring up the list of counselors and see who has been killed. Next to their name will be which counselor they are, as well as who is playing as Jason and which version he is.
- While running away from Jason, hold down the rear view button and watch for when he pulls out a knife. Be prepared to juke left or right quickly to dodge those incoming knives he throws.
- Please be polite and don’t play loud music or anything that can be distracting while using your walkie-talkie. You will most likely be muted and unable to communicate strategy with your fellow counselors
- Keep in mind that Jason can also hear you when you are speaking. Do not talk or give away plans while he is chasing you
- Use the fact that Jason can hear you talk to your advantage by outright lying and sound as if you're strategizing with another counselor at another location. If it sounds like another counselor is about to achieve an objective, Jason may take the bait and abandon his pursuit of you.
- Be sure to stay silent if Jason not sure where you are. He might give up the pursuit if he’s not sure you’re even in the area anymore.
- REMEMBER CAMP SAFETY. Do not get caught up in staring at your map as things are still going on in real time around you. A distracted counselor is easy prey for Jason.
5. Safety First!
Various weapons can be found at Crystal Lake and we strongly urge all employees to train with each one before venturing out at night. Knowing the strengths and weaknesses of each weapon will ensure your survival if you happen to encounter Jason.
Each weapon can be broken down into three catagories:- Stun (STN) the ability to stun Jason and stop him in his tracks. He might either stagger a bit or completely fall down on his back, which takes longer to recover from. Either one will give you and your fellow counselors time to get away or regain stamina. Use it wisely!
- Damage (DMG) the amount of hit points you remove from Jason’s health with each successful attack. While he cannot be killed from attacks alone, once his health bar reaches zero, his mask will fall off and, and with the right course of actions after that, can indeed be put down permanently.
- Duration (DUR) the higher the duration, the more attacks you can land on Jason before your weapon breaks.
These weapon stats can be augmented in two ways, the stats of the counselors and the perks they have equipped. Please see our sections on stats and perks for more information on this.
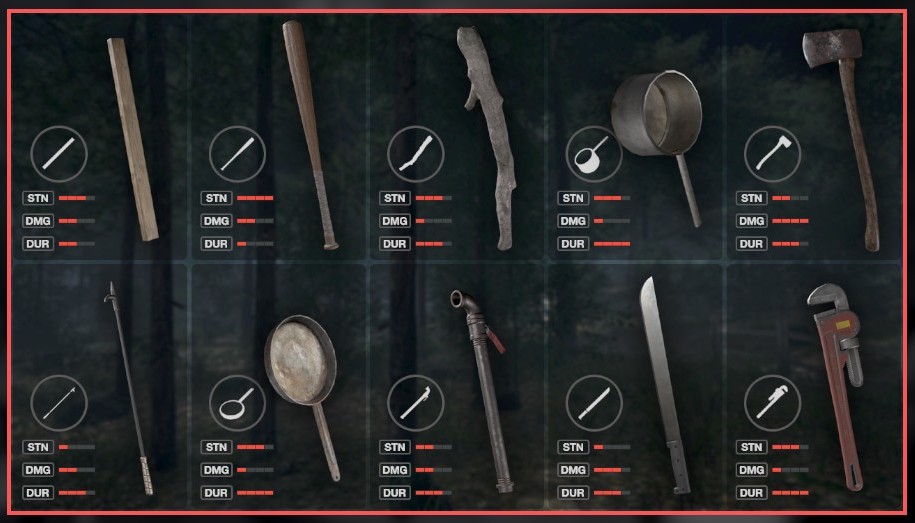
- The wooden plank is slightly rare and can be found on picnic tables or outside in garages. It has a good stun chance and has a quick swing, but will not last long.
- The baseball bat is a rare item found in cabins and has the highest stun chance, making it the most powerful weapon to use against Jason when you absolutely must drop him. It’s also one of the flimsiest weapons with the lowest duration, so be prepared with an exit strategy when it inevitably breaks on you.
- The branch is similar to a wrench and is a good second tier weapon that can be found near campfires or in the woods. It has a slow swing so do not attempt to attack Jason head to head or he will see the attack coming.
- The cooking pot is a common weapon found in the kitchens of cabins. Usually overlooked because of its common looking nature but a decent stun chance and one of the most durable weapons means this should not be slept on.
- The hatchet is one of the rarest weapons that can usually only be found outside the barn, on a log in the woods, or possibly in cabins. High damage and decent duration make this an excellent weapon if you plan to kill Jason and need to remove his mask. This is also the only weapon besides the machete that Tommy can use to inflict the killing blow on Jason so keep an eye out for it.
- The fire poker can be found near fireplaces. It has a quicker swing but low stun and damage and should only be used as a last resort.
- The frying pan is exactly the same as the cooking pot. Look for it in kitchens usually next to the pot.
- The metal pipe is pretty common and can be found on shelves in cabins. It’s not the best for stunning but is very durable so a great support weapon.
- The machete is similar to the hatchet in its ability to damage Jason as well as being the only one of two weapons Tommy can use to kill Jason with. It’s a little weaker than the hatchet but has a very fast swing making it a powerful weapon.
- The wrench is fairly common, being found on shelves or tables inside cabins. Its decent stun chance with a great duration makes it a good weapon for counselors who have a bit of strength but are not fighters.
- The shotgun is the rarest weapon in the game, found on only a few shelves in main houses or in a barn once in a while. Keep an eye on it laying on a chair by a campsite as well. It will always drop Jason on his back but only has one shot, so use it wisely.
- The flare gun is a shotgun’s little brother. It can slightly stun Jason if you hit him with it, and can drop him on his back if you get a headshot with it. Regardless of where you hit him, a nice side effect of the flare gun is it will mark Jason on the map for others to see regardless of their distance for a short amount of time.
Camp Tips
- Overall, Crystal Lake employees feel you should prioritize stun first, duration second and damage last
- Priortize damage when you are planning on killing Jason
6. The Tools You Need to Succeed
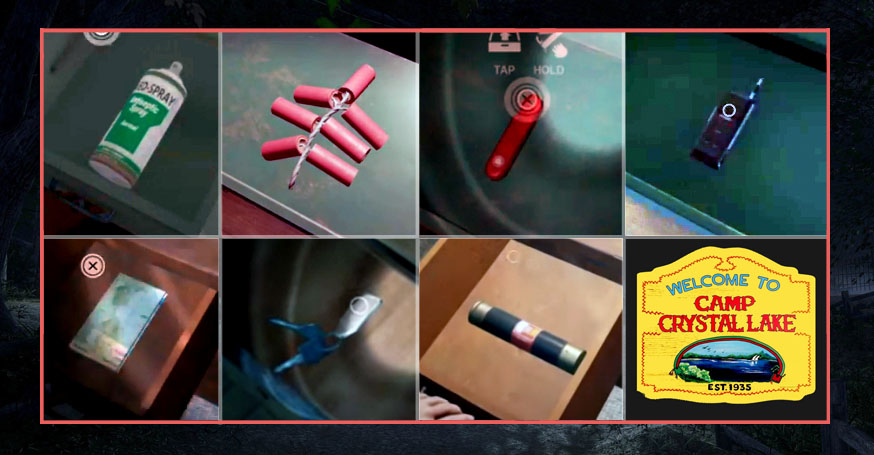
- The First Aid Spray (Medical Spray)(Med Spray) is commonly found in bathrooms and sometimes drawers. Tap the use item button to spray yourself or hold down the use item button to spray another counselor who is visibly injured. The healing effects can be increased with certain perks.
- Fire Crackers are thrown in front of you when you press the use item button. They are found in drawers and can be used to make a cabin glow red when Jason uses his sense ability on it. This can be used to bluff him while you get away or a double bluff, tricking him into thinking you ran while you are actually hiding. Jason will also get stunned if he walks into the fireworks. The ability to stun Jason like a weapon while still being carried like a small item make the fire crackers an important item to carry if you have a vehicle part in your hand and have no other way to defend yourself.
- The pocket knife is one of the most rare small items in the game, only three will spawn on a map during each match. A pocket knife will automatically save you if Jason successfully grabs you, stabbing him in the throat and stunning him for a short amount of time. Another use for the pocketknife is to silently disarm one of Jason’s traps. Simply crouch next to the trap and press the interact button. They can be found in drawers or campfires.
- The Walkie-Talkie allows you to talk to other counselors who have a walkie-talkie over large distances. It does not take up a spot in your inventory and is absolutely necessary if you wish to plan any sort of strategy against Jason. It only works one way unless you have an actual mic hooked up to your computer.
- Large maps can be found in drawers and in map kiosks and are fairly common. They allow you to see general information on a much larger scale than your mini map such as items dropped, Jason and counselor locations, as well as vehicles. It does not take up a slot in your inventory and is very important in order to see what is going on around you.
- Car keys can be found in drawers and there will always be one set per car (up to two) in every map. These are a necessary objective part used to start a car after the battery has been installed and the gas tank has been filled.
- The fuse is a small item that is an objective part. It is used to fix the fuse box allowing the counselors to call the police. While vehicles always have more than one part to fix and a small amount of room for people to sit, the phone only needs one part to fix and allows everyone to survive. Also, while carrying it you can carry a weapon, allowing you to pursue an objective and defend yourself at the same time.
Large Items that are not weapons are objective items similar to the fuse and car keys. These can be cumbersome due to forcing you to carry them in your hands and dropping any weapons you were carrying. Walk with caution and hurry to your objective or you might get caught without a means to defend yourself.
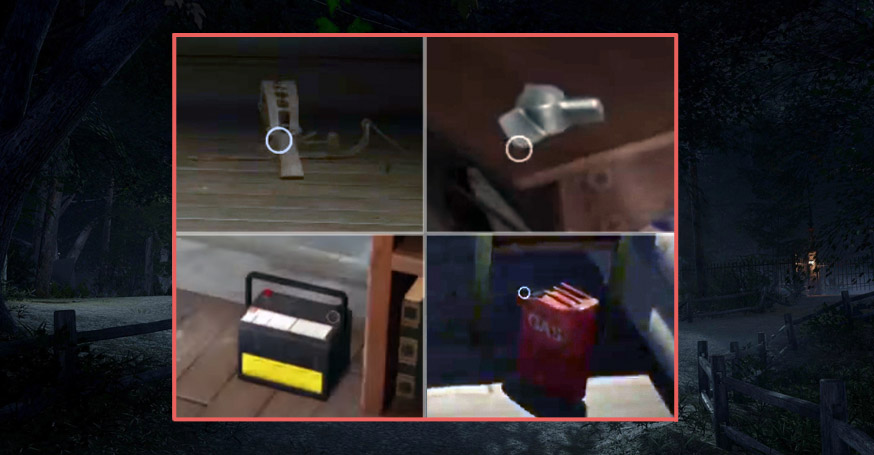
- Traps are found in cabins and sometimes the barn. They can be carried and laid down anywhere and then armed. If Jason steps on it, he will be stunned while attempting to release his foot. Be careful, and know that you and fellow counselors can be injured by your own traps.
- The boat propeller only spawns if a boat is in the match, and there is only one. It is one of two pieces necessary to fix the boat. Keep in mind though, that if Jason catches you, you will be in the water and severely weakened against him.
- The car battery is one of three items needed to fix the car, and the number that spawn depends on the number of cars on the map (up to two). They can be found on the ground in buildings.
- Gas cans are needed to fix both the boat and cars, and are the second most important objective part after the fuse box. Keep in mind while carrying it that you cannot carry a weapon. There will always be two on the map, one for a car and either the second car or the boat.
Camp Tips
- Pocket knives should always be picked up and have a higher priority than other non objective small items
- Always pick up a walkie-talkie. They take up no space in your inventory and even if you don't have a mic and can't communicate you can still hear other counselors for warnings or strategy
- All Camp Crystal Lake staff should have a map with them, find one as soon as possible.
- Keep in mind starting a car makes a loud noise that Jason can hear no matter his location on the map.
- Crystal Lake Staff support our brave police force and feel the fuse should be the highest priority small item and objective part for every counselor.
- It is Crystal Lake policy to only arm traps near locked doors in cabins. Never arm a trap near an unlocked door or window as you may catch a fellow counselor or even yourself.
- Set traps often, and before Jason appears, as it may save your life later.
- Jason usually cannot trap the boat, and with only two items needed to repair it, the boat becomes the second highest priority for counselors to fix in the eyes of Camp Crystal Lake.
- If you plan on running large items to their respective vehicles, be sure to either have a high stealth stat, fire crackers, or a friend armed with a weapon. Carrying a large item leaves you defenseless.
- Objective items usually spawn close to their respective vehicle, check cabins by the vehicle first for whatever it is you need to repair them.
7. A Winning Personality 1
- Surviving for 20 minutes
- Repairing one of the cars and escaping in it
- Repairing the boat and escaping in it
- Repairing the fuse box and calling the police
- Killing Jason
20 minutes with Jason can seem like an eternity. There is no one strategy that will guarantee you a victory in this way. Jason gets more and more powerful as time goes on, making it harder to avoid him.
- At the beginning of the game he has the ability to morph to any spot on the map instantly
- After 45 seconds into the game, Jason achieves the ability to sense nearby counselors. They will glow red through objects normally Jason can’t see through, or if they are in a building, that building will glow red giving off their position.
- After 2:15 Jason gains the ability to shift, which is a way for him to move very quickly for a short amount of time (5 seconds) from his current location to another.
- After 4:15 Jason can stalk, which disables a counselors ability to hear Jason’s music when he is near, as well as muffling his footsteps as he walks.
- Jason will enter rage mode after 15:00 or sooner depending on how much damage he has taken. Rage increases the speed in which Jason can gain his other abilities back after using them, as well as giving him the ability to walk through doors instantly, destroying them on contact. It is also impossible to hide from Jason’s senses when he is enraged.
The more time that passes in each match, the more your chances of survival decrease. It is important to always remember that escape is your number one priority, and to work towards that goal at all times.
Escape With the Cars
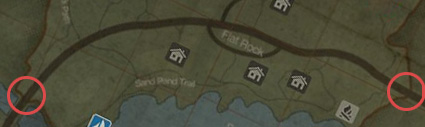
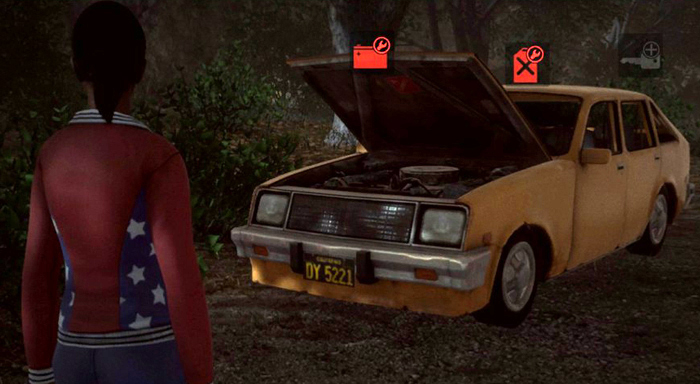 To escape in a car, you and your fellow counselors must find three items: the keys, a battery, and a gas can. After repairing the car, whoever has the keys in their inventory must start it, and then drive away from danger via one of the two exits. There are always two and are always at opposite ends of the main road on each map. The main road is always the largest road on your map and is in a different location depending on which map you are playing. Be carefull when driving, as Jason can smash the hood of the car, stopping the car in its tracks. It can be restarted without repair.
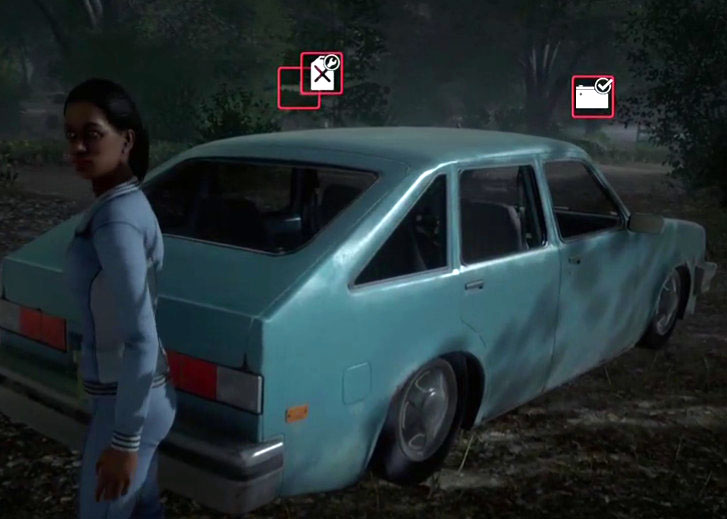 There will always be at least one car in every match, but sometimes two. One has enough room for 4 counselors to sit in and is blue, while the other only has enough room for two counselors and is yellow. How many keys and batteries are hidden on the map will depend on how many cars there are, and both batteries and keys are universal and work on either vehicle.
Escape With the Boat
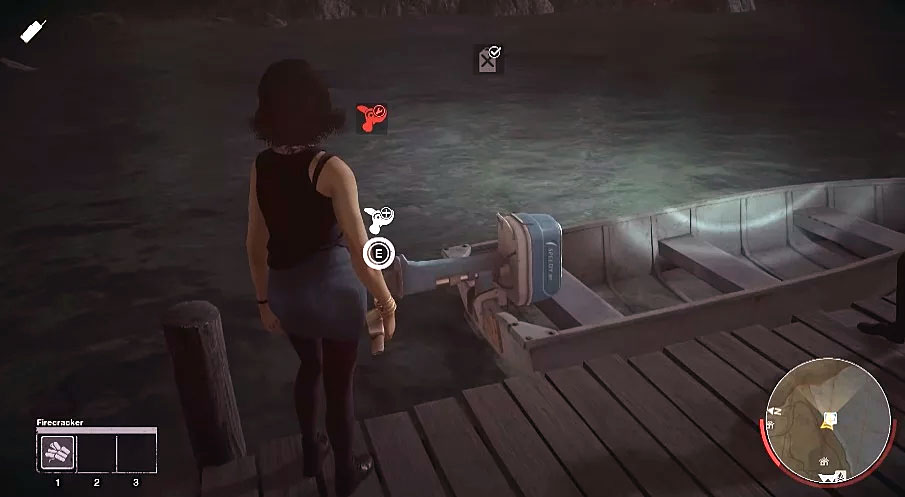 To escape in a boat, you must find the propeller and a can of gas and repair it. The propeller will only appear if a boat is available in the match, and there will always be two cans of gas on the map, which are interchangeable between the boat and the cars. Most of the waterways at Camp Crystal Lake are netted off, blocking the boats path, but there is always at least one exit marked on the map. The boat can hold two counselors but if Jason catches the boat he can rock it, causing both couselors to fall into the water. The boat can be restarted afterward without repair.
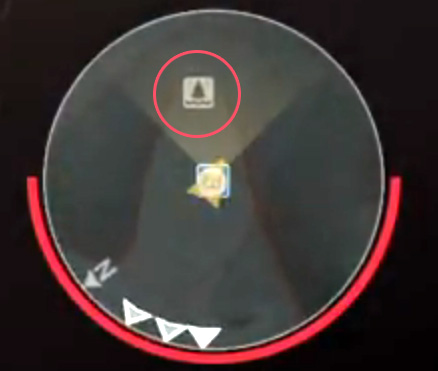
Controlling both the car and boat work the same as your basic movement controls. The car also has a horn to honk, and a handbrake.
Escape With the Police
If a fuse is found, it can be inserted into a fuse box, allowing counselors to call the police for help. The fuse box will flash red when broken and after it is repaired will glow a steady blue, indicating the phone inside is operational. The phone is always inside the building that the fuse box is attached to. After the fuse has been successfully inserted, Jason can destroy the box, making the phone nonoperational again. It can be repaired as many times as needed, but only needs a fuse the first time.
After the phone call has been made to the police, a 5 minute countdown will appear on the left hand side of your screen. It is now up to you to survive until that timer reaches zero and the police arrive. Police appear randomly on one of the two exits on the main road, and you simply have to walk through to escape. You can see which side they have appeared on using either your big map or your mini map.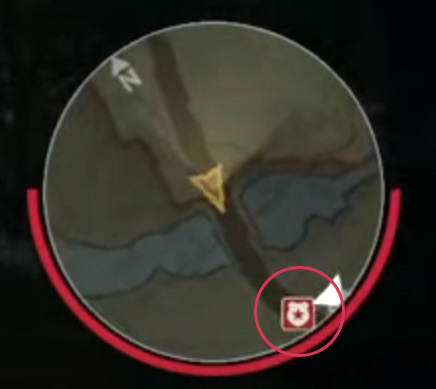
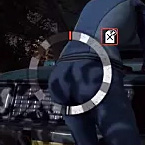 When you are repairing any of the objectives above, a short quick time event will appear asking you to press one of two buttons when your icon is inside of a grey window. If you fail this event your indicator will jump back a bit allowing you to try again, but a sound will also emit which Jason can hear anywhere on the map, letting him know what you are attempting to do. The quick time event gets easier with a higher intelligence stat, asking for less button pushes and having a larger window allowing for more time to press the button.
Camp Tips
When you are repairing any of the objectives above, a short quick time event will appear asking you to press one of two buttons when your icon is inside of a grey window. If you fail this event your indicator will jump back a bit allowing you to try again, but a sound will also emit which Jason can hear anywhere on the map, letting him know what you are attempting to do. The quick time event gets easier with a higher intelligence stat, asking for less button pushes and having a larger window allowing for more time to press the button.
Camp Tips- Jason will most likely arrive at each vehicle and the phone box first to place down traps. If you spawn near one of these objectives, get out as quick as you can and come back later to search the cabins in that area
- The phone box allows the most counselors to escape with the least amount of repairs needed and should be the highest priority for every counselor. Beware though; this is also Jason’s highest priority as well.
- The time it takes for the police to come after being called can be lowered with the ‘My Dad’s a Cop’ perk
- The boat is the second easiest to repair and could be considered the second best means of escape. If Jason catches you though, chances of surviving the water are slim to none
- Of the two cars, the blue four-seater should always be a higher priority.
- The handbrake is useful for doing sharp turns and 180s, which can be used to avoid Jason if he's in front of you. If he shifts in front of you can you can turn around quickly, he will not be able to catch up to you until his shift charges back up
- Never leave in a vehicle by yourself! If not because it is rude, but also because if Jason catches up to you, you are the only counselor he will focus on
- Sometimes it is better to drive backwards in a car so that Jason has a harder time smashing the hood
- If Jason is present, don’t rush to get into a car, make sure to drop him on his back first to increase your chance of escape
- There are perks to increase the speed of repair as well as the speed of the various vehicles
- Unless you are a stealthy character with a strong repair skill, be careful when repairing if you're by yourself. Jason can appear at any time, especially if he heard you make a mistake. Always have backup.
8. A Winning Personality 2
 In order to kill Jason you must first contact Tommy Jarvis via CB Radio. If you see the communications radio, always take a few seconds to call Tommy Jarvis if you can. The radio will always be found inside a cabin and can be spotted outside by the giant radio antenna next to the cabin. The first or second counselor who is killed or escapes will be able to come back as Tommy, essentially adding another ally to your side in the fight against Jason.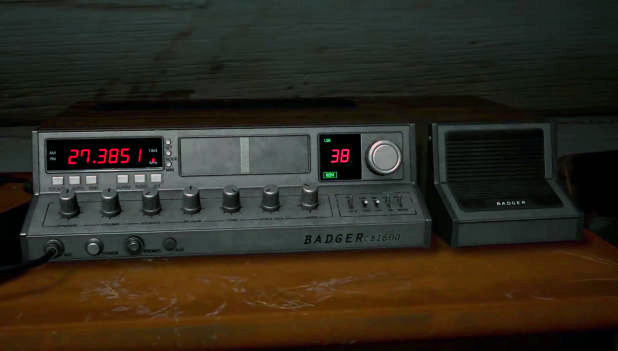
 Tommy is the most powerful counselor with all perfect ten scores for his stats, and starts with a pocketknife, a med spray, a walkie-talkie, a large map, and a shotgun. He is also essential if you are trying to kill Jason. Jason can prevent a counselor from calling Tommy Jarvis for help by destroying the power box outside that corresponds to that cabin. Without power the radio will not work but repairing the power box will allow someone to make the call.
Killing Jason
In order to kill Jason, several steps must be taken beforehand:
- You must have at least one female counselor and Tommy Jarvis must be on the scene
- Jason's hit points must be taken down to zero and his mask has fallen off
- The female counselor has found Jason's cabin and stolen Pamela Vorhees' sweater
- Tommy must be holding a hatchet or a machete
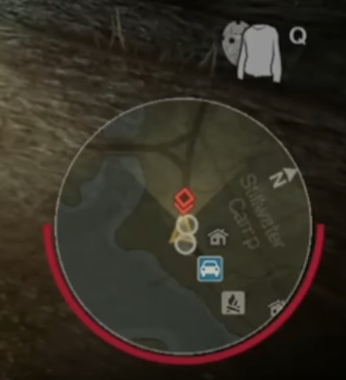 After those criteria have been filled, you are ready to kill Jason. When you have picked up the sweater, an icon will appear on your screen. Press the use sweater button to mimic Jason's mother, which will stop him in his tracks. While he hesitates, a counselor must hit him with a weapon so he falls to his knees. The final step is for Tommy to press the interact button so that he delivers the final blow to Jason.

Congratulations! You have saved the camp and deserve a promotion!
Camp Tips- Tommy's job is to escort the other counselors to safety and that player recieves the most amount of points when others escape before him. Playing as Tommy is not a second chance to escape and everyone benefits more if Tommy is selfless
- Once the counselor sees Pamela's head, she will be inflicted with a huge increase in fear
- As soon as a counselor grabs Pamela's sweater, Jason will receive a warning. Be ready for him to teleport to you instantly
- Protect the counselor with the sweater at all cost, give her a pocketknife if there is one to spare
9. Lessons Today for a Brave Tomorrow
Fear accumulates over time and creates many penalties for a counselor while they are in a match, such as difficulty breaking free of Jason’s grasp, losing stamina, and losing control over their actions. A fearful counselor will also glow red when Jason uses his sense ability, lightning a counselor through walls and terrain, making them an easy target. There are four stages of fear that a counselor may undergo that are represented by their body posture as well as how they behave.
- The counselor is at ease and stands straight with a blank facial expression, there are no penalties suffered.
- The counselor is nervous and starts to look over their shoulder. The counselor is beginning to gain fear and may suffer from a slight increase in stamina gain time.
- The counselor is scared and will being to stumble while moving. Their stamina increase time is increased even further, making it harder for them to gain stamina. They will also shriek and if they are hiding, will breath heavily or even begin to murmur to themselves, all of which uncontrollably giving away their position to Jason.
- The counselor is hysterical and must deal with all previous penalties as well as having their mini map and inventory box disappear from their view. Stamina regeneration is at its lowest and after Jason activates his sense ability, a hysterical counselor will continue to glow red no matter how far away from Jason they are.
As fun as summer camp can be, everything looks different at night. Here are the various ways that a counselor can gain fear during a match.
- Being alone
- Walking through the woods
- Being in the dark without the flashlight turned on
- Being in a cabin or house while doors are not barricaded
- Not having a weapon in hand
- Being near Jason and hearing his music
- Seeing Jason destroy an object
- Seeing a dead body
- Seeing Pamela Vorhees’ head in Jason’s cabin for the first time in a match
The staff at Camp Crystal Lake strongly believe that instilling bravery and a level head to counselors and campers alike will increase their self esteem and prepare them for rough roads ahead. A counselor can do the following things to control their fear during a match.
- Illuminating dark areas with their flashlight
- Staying near light sources outside
- Staying close to a fellow counselor
- Holding a weapon in hand
- Keeping all doors in a building locked
- Concealing themselves in a hiding spot
- Staying near a campfire or a fireplace
- Staying away from Jason
Camp Tips
- A high composure stat will help combat the increase of fear
- Certain Perks can also slow down the effects of fear or prevent them all together
- Keep your flashlight on as much as possible
- Repair broken power boxes whenever you can to turn the lights back on in nearby cabins.
10. You Are Capable of So Much More!
The main goal here at Camp Crystal Lake can be summed up in one word: growth. We believe every person who walks through these woods should come out the other side a stronger and wiser person, equipped the tackle any challenge life may throw at you.
Perks are special attributes you can buy and add to your counselor. They make you stronger, faster, smarter, and anything else you can think of. You are allowed to equip 3 perks per counselor and hold 30 perks total in your library. You can use the same perk on different counselors at the same time but cannot use two of the same perk on one counselor (one friendship perk between 3 counselors but not 3 different friendship perks on one counselor). You need 500 CP to buy a perk, which will be a randomly selected for you. Perks come in different colors based on their rarity, the more rare the perk the higher the positive effects each perk will have.
Poor – White
Common – Blue
Uncommon – Yellow
Rare – Orange
Epic – Red
Legendary – Fuchsia
You can also sell back a perk to make room in your library and gain back a little CP. The CP you get back is based on the perk’s rarity.
Poor – 100 CP
Common – 200 CP
Uncommon – 300 CP
Rare – 400 CP
Epic – 500 CP
Legendary – 1000 CP
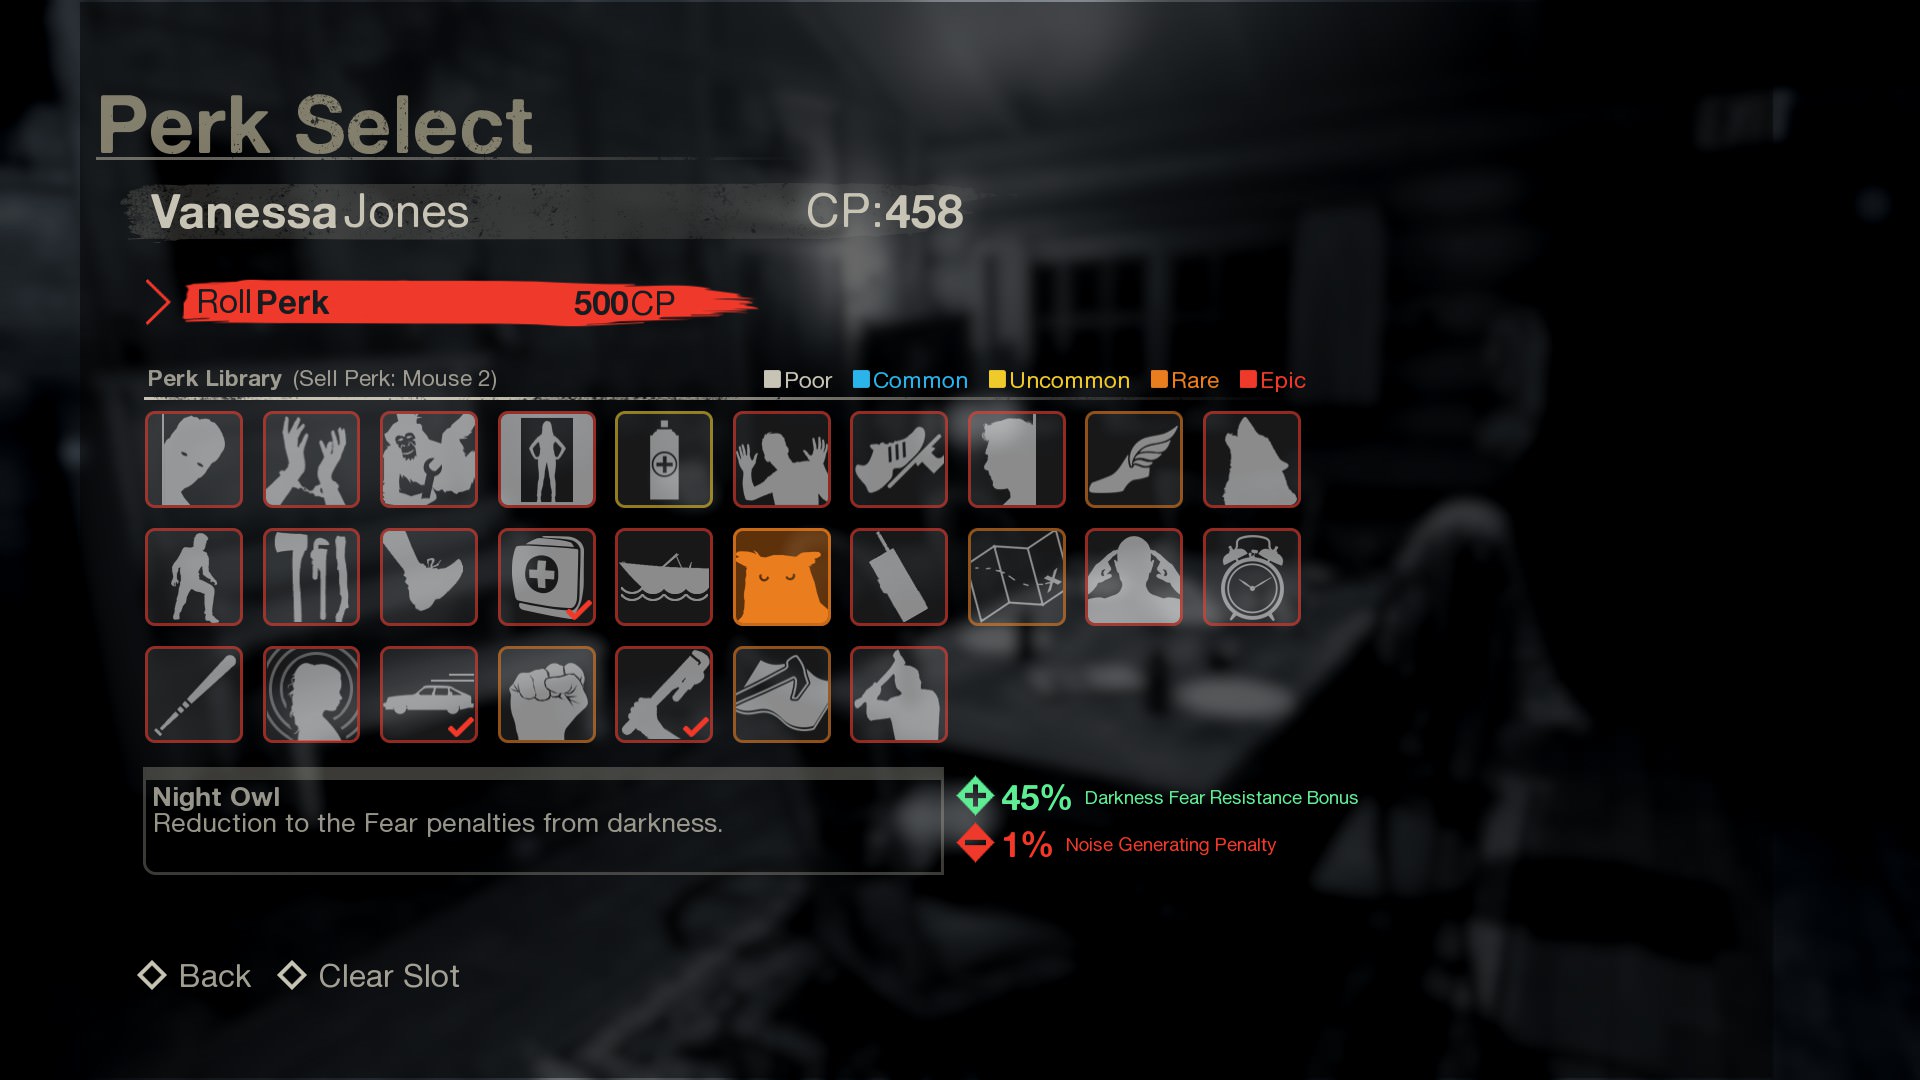 List of Perks
Camp Tips
- Since perks can be shared between counselors, you only need one of each perk, so sell any duplicates that are weaker than the best one you have
- Sometimes a more rare perk will come with a higher negative attribute and might not be as good as a less rare perk of the same type with a lower negative attribute.
- Perks that offer passive positive attributes to your counselor (like higher stamina) are usually a better choice than a perk with a one time gain at a certain time (like faster car speeds). You may not find yourself always in that particular situation and at that point the perk has been wasted.
- You cannot hold one of every type of perk so sell ones you will never use despite how rare they might be
- Perks that offer you higher attributes in the water will never save you from drowning when Jason catches you, stay out of the water and stay away from water related perks.
- The medic perk essentially adds another slot to your inventory and should not be overlooked
- Only use perks on counselors that make their strongest stats even more powerful. Don't waste a +Damage perk on a stealthy character who has no business getting into fights
- While perks of the same name cannot be used on the same counselor, attributes from two different perks that are the same do indeed stack (The Sense Avoid attribute from both Level Headed and Low Profile).
- Always keep in mind what you will be doing the most during a match when choosing a perk. You will be draining stamina a lot more from jogging/running than you will be repairing, so prioritize your perks accordingly
- To live longer, you want to either run faster for a longer amount of time, stun Jason more often, move around quieter, suffer less from fear, take less damage, be able to heal from damage, or any number of those things combined. Watch for perks that help you in those categories
11. Meet Our Staff 1
Each of our counselors here at Camp Crystal Lake have been trained to offer every camper a rewarding experience. They are each unique and we believe it is important for you to know their strengths and weaknesses so that they may be utilized in the best way possible to make your stay at Camp Crystal Lake a fun and safe one.
Each counselor has 35 points that are put into 7 different stats:
Composure: Reduces the rate of fear increase, breaking free of Jason’s grab
Luck: Increase in weapon durability, minor increases to other stats
Intelligence: Increases repair skill
Speed: Increases top movement speed
Stamina: Increases amount of stamina and reduces cost of stamina per action
Reduces noise generated and avoids Jason’s sense ability
Strength: Increases attack damage and stamina cost of attacking
When it comes to stats, anything above a 7 can be considered a strength and should help frame the type of play style one should use with that counselor. Conversely, any stat with a score of 3 and below should be considered a weakness and should not be relied upon during a match. Each Counselor will have at least 2 strong stats, 2 weak stats, and a few average stats that could be used under certain situations.
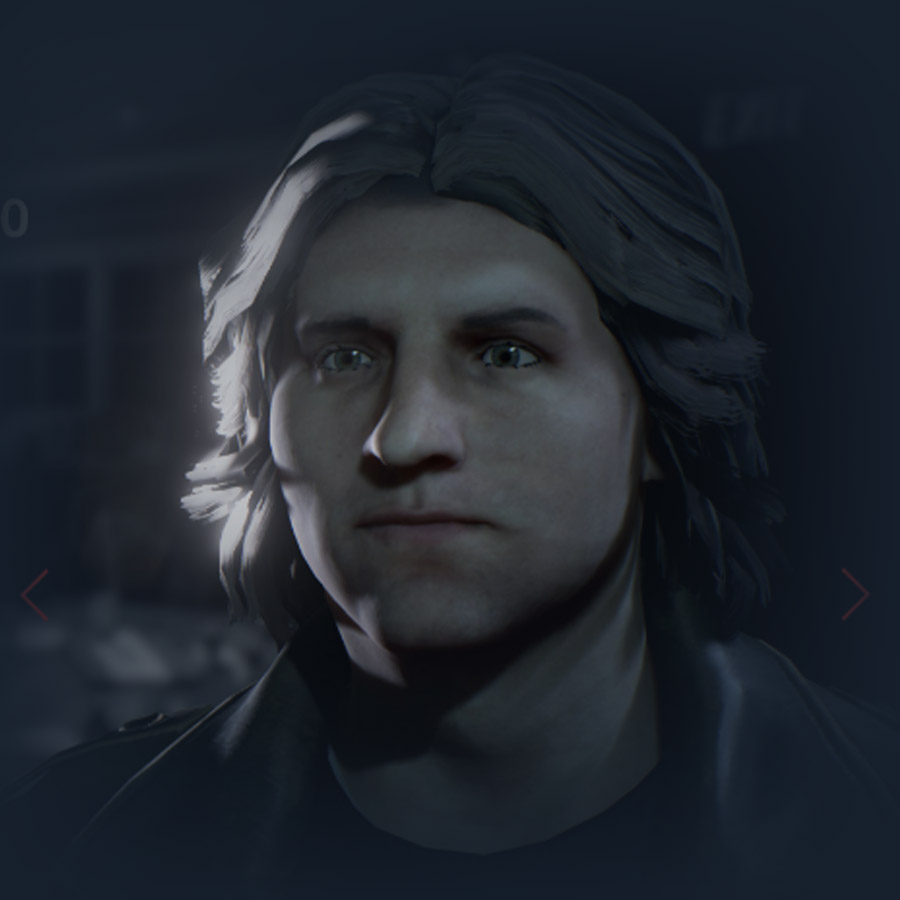 Adam Palomino
Unlocks at level 14
Adam is the fearless muscle head who isn’t easily intimidated by Jason. He is good for going toe to toe with Jason for an extended amount of time before he succumbs to his fear. He is very loud and not afraid to make it known to Jason where he is. If absolutely necessary, Adam could repair a part if Jason is distracted and Adam has some time to figure out which wire goes where.
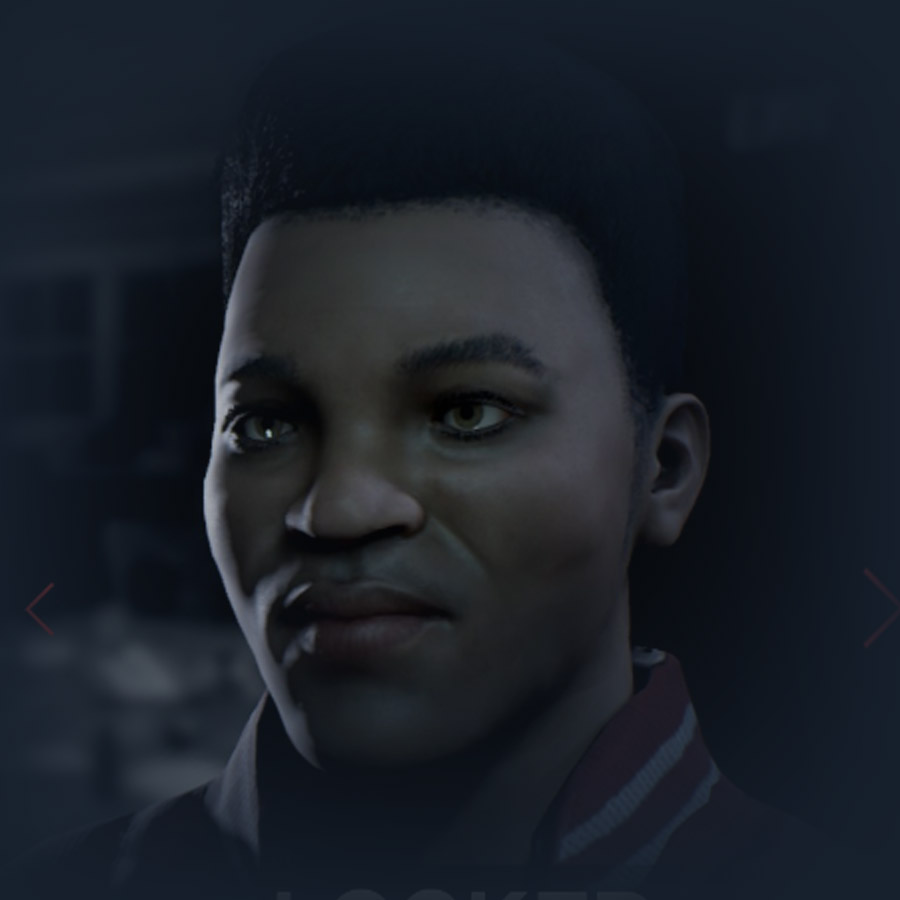 Brandon ‘Buggzy’ Wilson
Unlocks at level 8
The jock of the group succeeds in all of the athletics but can’t be relied on for anything else. His strength makes him another good fighter against Jason, but he’s easily intimidated and will need to use his speed and stamina to make a quick get away when his fear takes over. Be prepared at all times to have Jason on your tail because Brandon is always giving away his position and do not ever attempt to repair, Brandon did not pay attention in school.
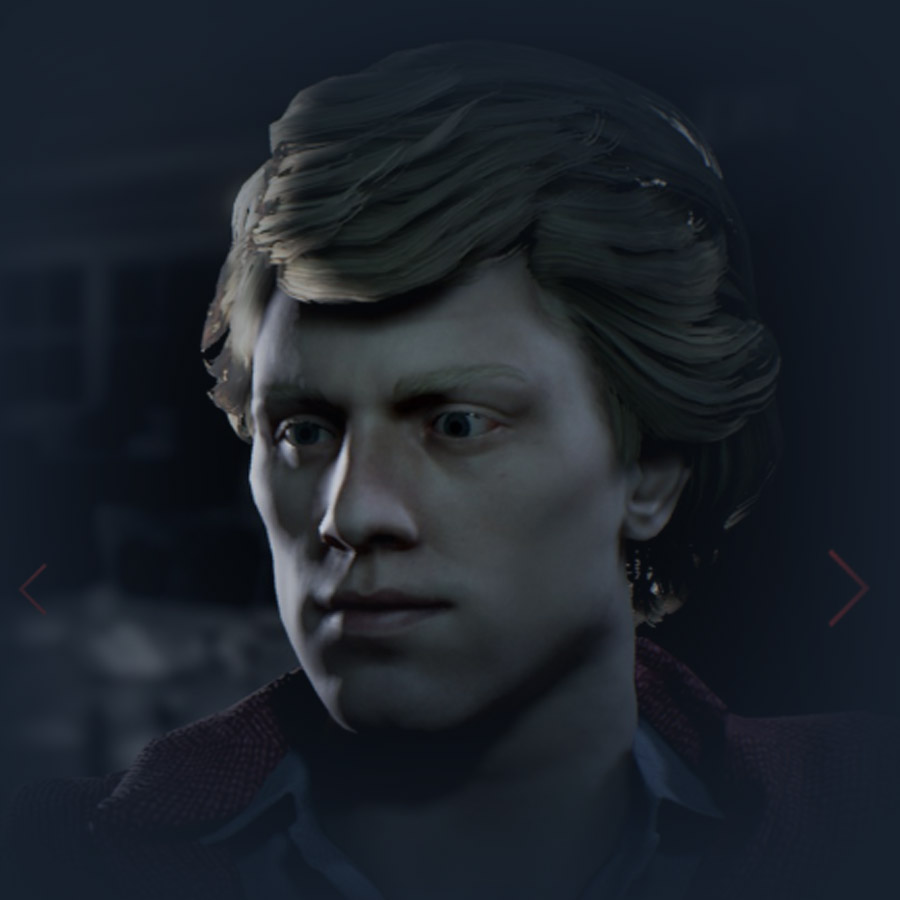 Chad Kenington
Everything seems to go Chad’s way with his high luck. One of the more versatile characters, Chad could use his luck to fight Jason for a short amount of time or use his speed to be a runner and avoid confrontations if he isn't in the mood to fight. While he’s running, his average stealth might help keep him safe for a short amount of time. He should not go one on one with Jason for too long or he might succumb to fear, and don’t bother trying to repair anything, that’s for poor people.
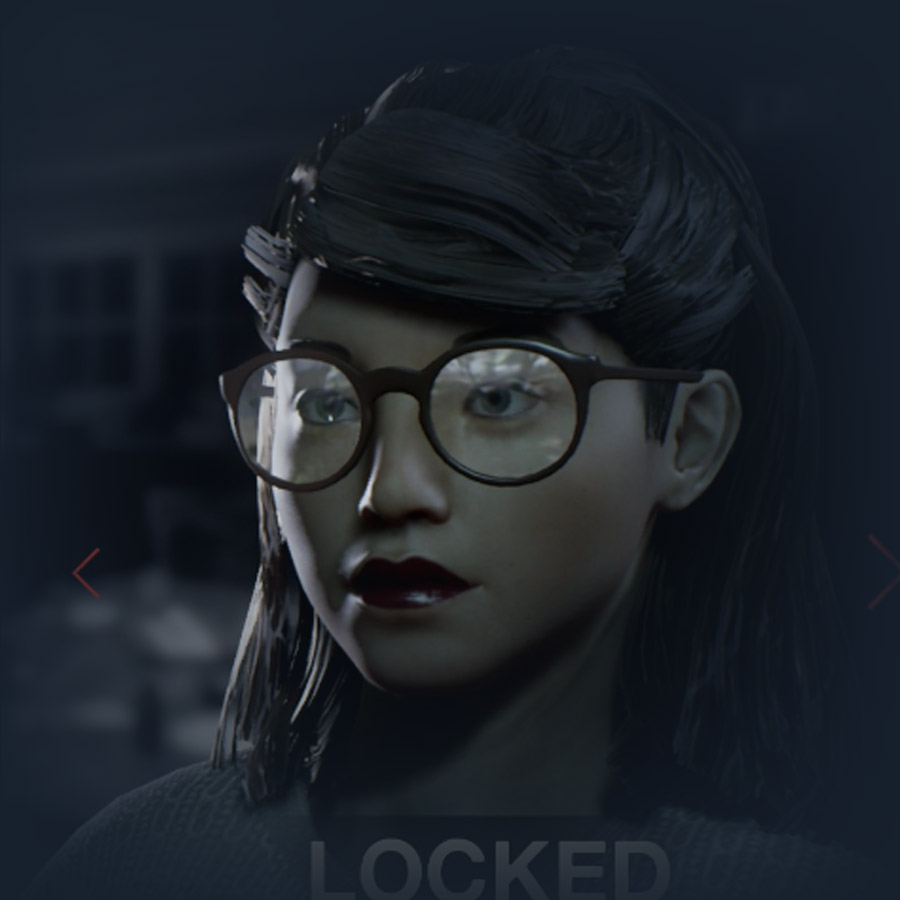 Deborah Kim
With the highest intelligence and second best stealth, Deborah is all about avoiding fights and fixing vehicles when Jason is not around. Partner her up with another stealthy character or use a perk to control her fear of being alone because her average composure will leave her in a vulnerable state. Always have a plan B, because Deborah has very low stamina and terrible strength, so being caught by Jason will leave her in extreme trouble.
 Jenny Myers
Nothing breaks Jenny. With the right perks Jenny could play a whole match and never succumb to fear. Although not very strong, her weapons will last forever and she will not be easily intimidated by Jason, making her an excellent support character for the other fighters. Her average stealth lets her move around the map with minimum problems, but not for repairing. Use her to support other characters with fighting, healing, traps, or anything else they need. Jenny is not afraid of any struggle.
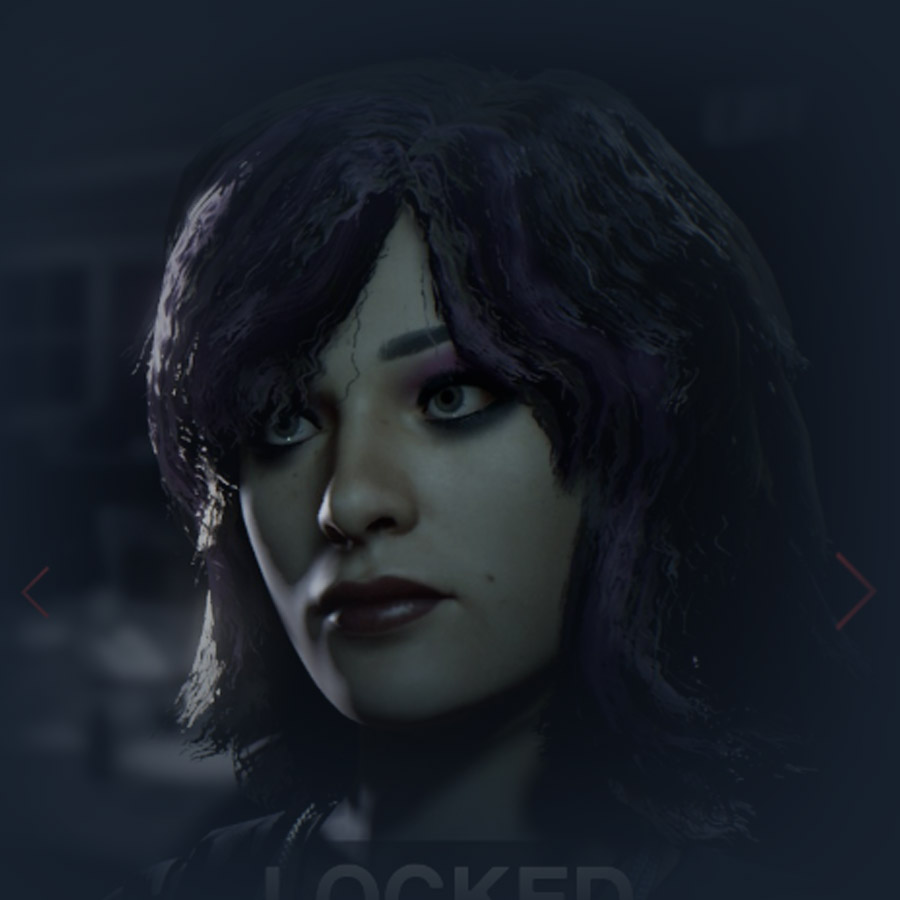 A.J. Mason
Unlocks at level 4
The loner of the group, A.J. works best by herself. She can repair anything within a few seconds, and her strong composure coupled with the highest stealth score in of all the counselors allows her to be alone without becoming too nervous. Be prepared to distract Jason in some way because A.J. isn’t hurting him anytime soon, nor is she prepared to outrun him.
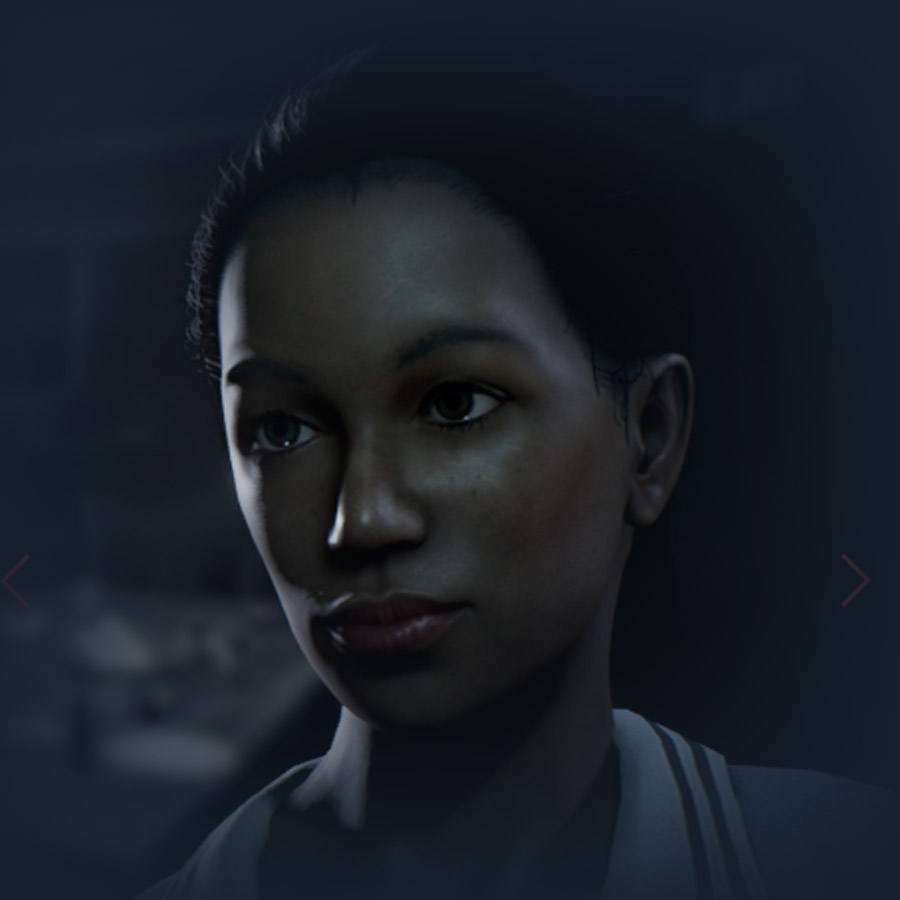 Vanessa Jones
Stat Score
Vanessa leaves Jason, along with every counselor in the dust with her unreal speed and endless supply of stamina. She is best used to find and move objective items to wherever they need to go, leaving it for a smarter counselor to repair as she runs circles around Jason, giving weaker counselors a chance to escape. When she moves, she makes noise, and Jason will know exactly where she is. She can get intimidated easily, so get as much distance from Jason as soon as possible.
12. Meet Our Staff 2
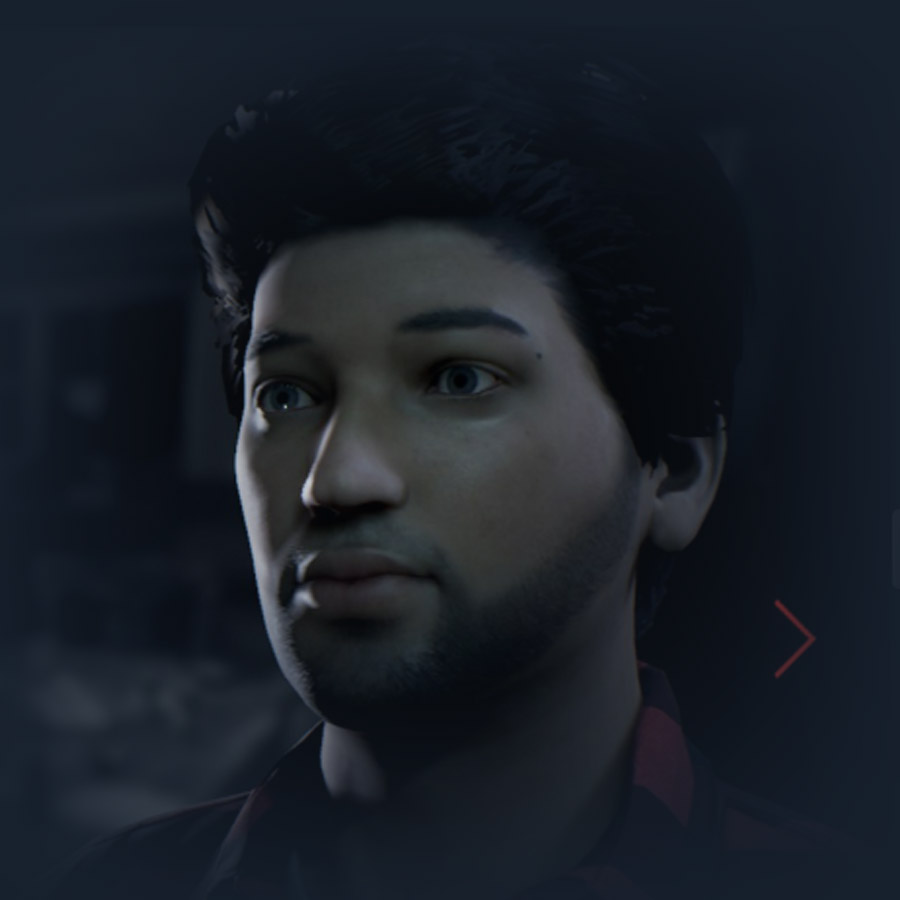 Kenny Riedell
A jack-of-all-trades, Kenny is average at everything and a master at nothing. With the right perks, he can keep up with any of the stronger, smarter, or faster counselors and provide excellent support for them. Because he will always be average at best though, he should never try to work alone or be the main hero in a group.
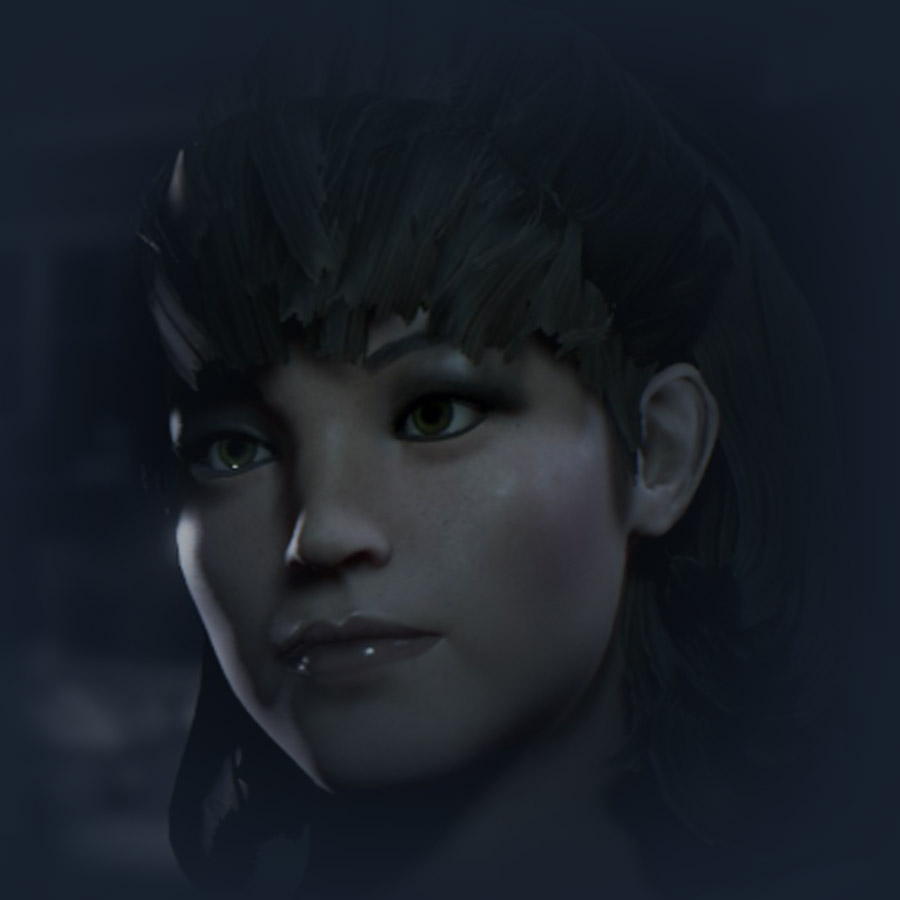 Tiffany Cox
Unlocks at level 18
Of all the stealthy characters, Tiffany works best as the runner of the group. Much like Vanessa, she can use her stamina to get items to much more intelligent counselors, but because she can do it quietly, she doesn’t put them at risk. Her endless supply of stamina allows her to keep Jason away from her for an extended period of time, but she should not attempt to fight him if she can help it.
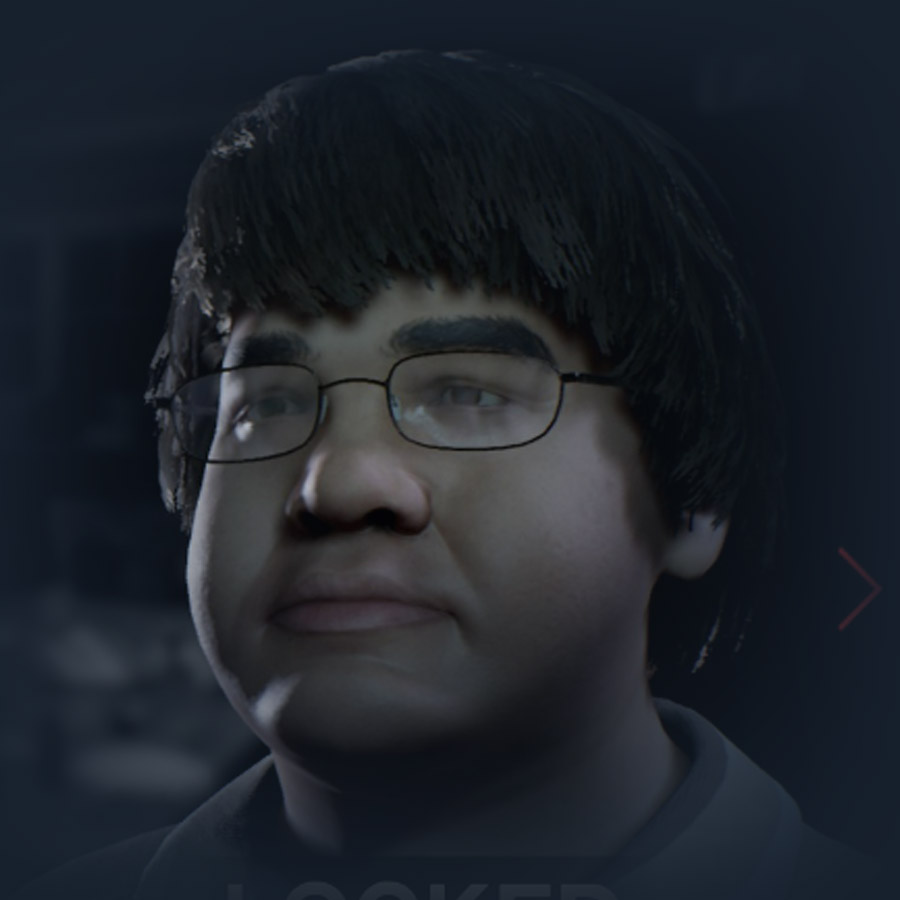 Eric ‘J.R.’ Lachappa
Unlocks at level 10
Similar to Deborah except even less athletic, Eric can fix a vehicle faster than it takes to pick up and drop an item. His high stealth and low composure means he works best with another stealthy character to keep him company, and under no circumstances should Jason ever catch him. He can’t run, can’t fight, and is quick to get hysterical, so he’ll absolutely need a plan to distract Jason while he makes his escape.
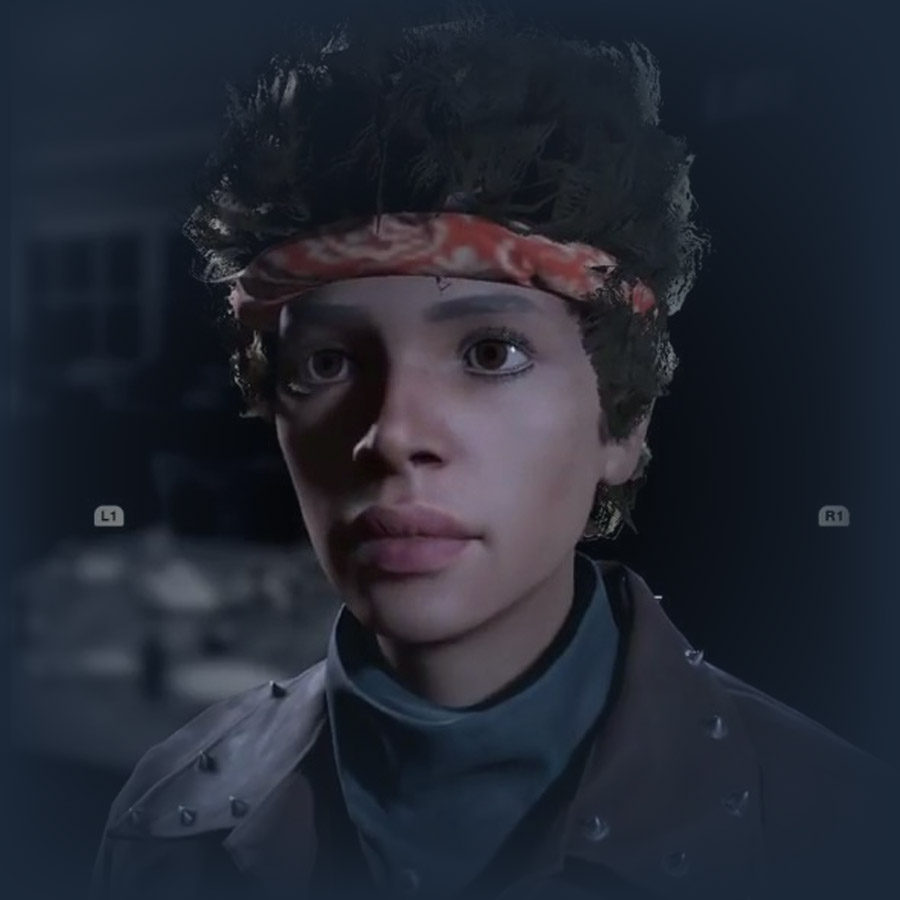 Fox
FoxUnlocks at level 32
Fox is similar to Kenny as being able to really jump into any role and make it work if she has the perks to back it up, She has a slight lean towards athletics, making her the perfect support counselor in the fighter group. Unlike other fighters though, she can repair if nobody else is around, making her a great addition to a loud and strong group of knuckleheads.
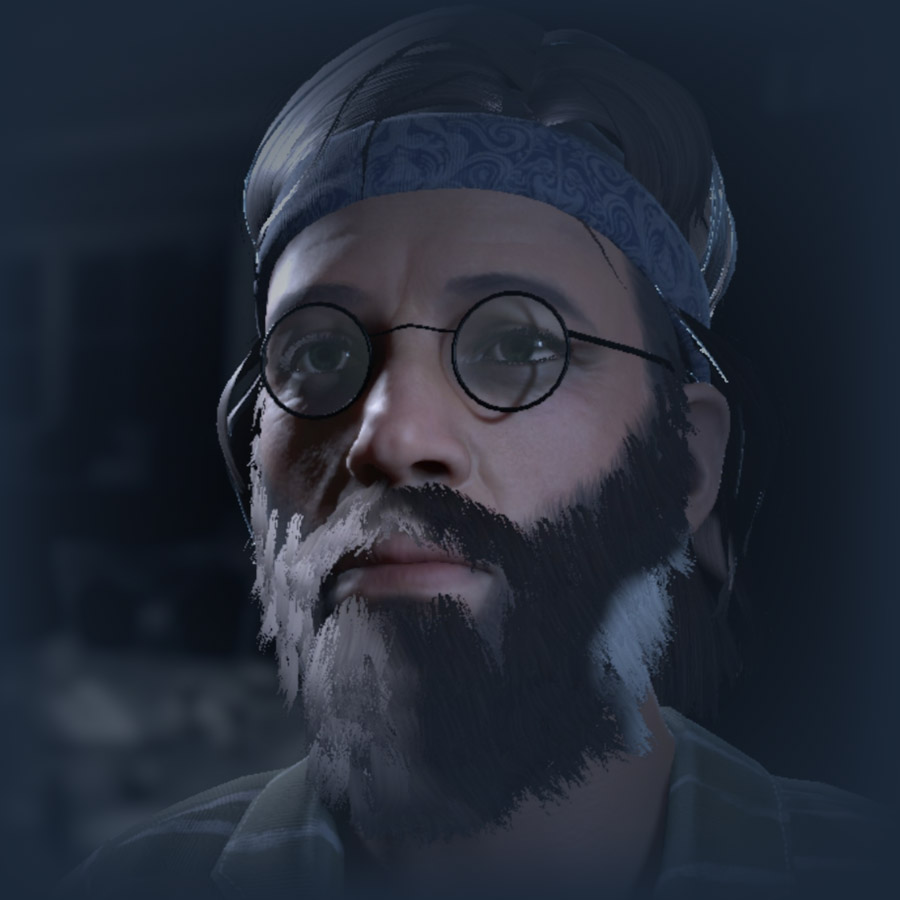 Mitch Floyd
Unlocks at level 24
Mitch is too chill to ever lose his cool, even when there’s a killer stalking him. His decent stealth and high composure make him an excellent character to find and fix objectives with his excellent repair skill. He’s not a fighter by any means; so when Jason is around, try to keep out of sight. He works best with Jenny, another brave counselor, with Mitch being the fixer and Jenny being the bodyguard.
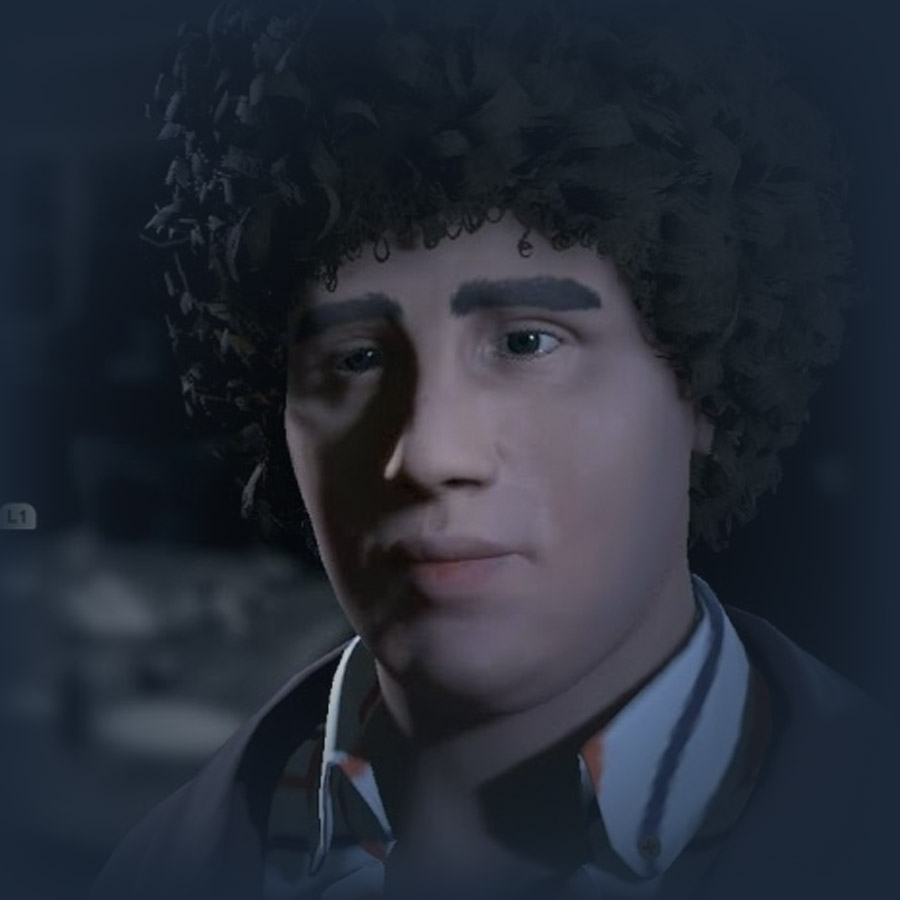 Sheldon ‘Shelly’ Finkelstein
Sheldon is one of the most unique counselors, being the only one that can move silently as well as go up against Jason in a fight. Although he may not look it, with his stealth and strength and his average composure, Sheldon is the ninja of Crystal Lake. He works best with other stealthy characters, acting as a bodyguard, moving silently with them and taking Jason down if he happens to show up. He’s a bit slow so he needs to be careful when he’s running so that he does not lose all of his stamina with nowhere to go.
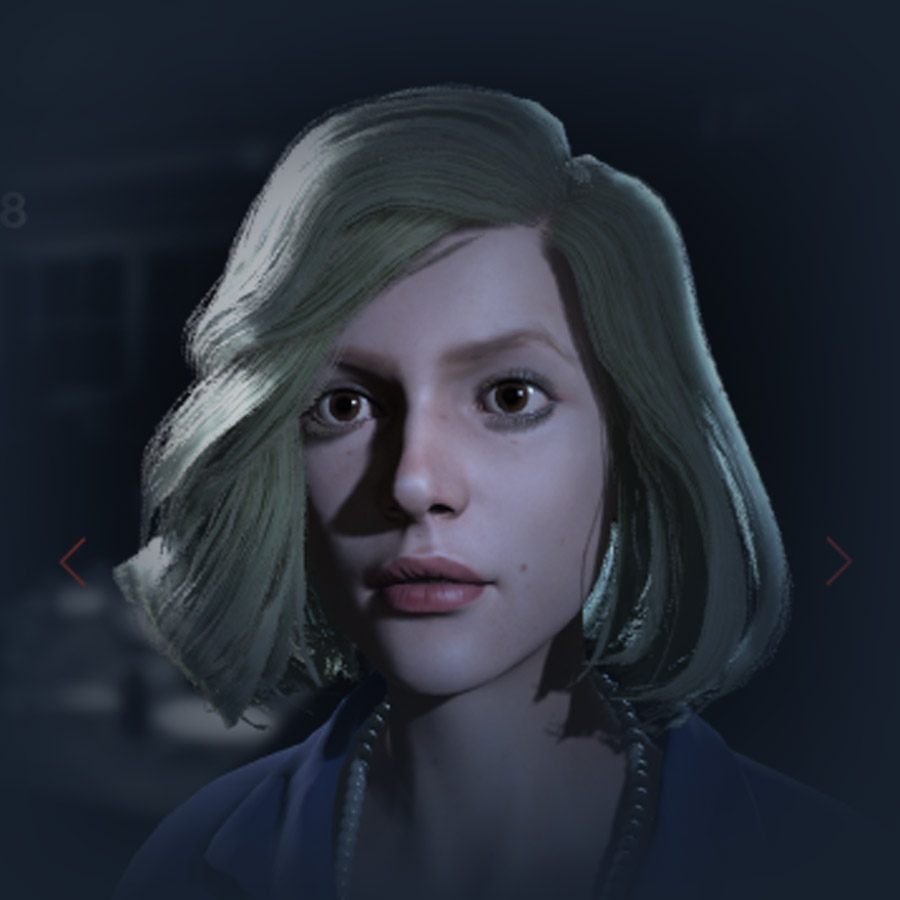 Victoria Sterling
Unlocks at level 42
Another lucky character, Victoria works best being a runner for a stealth group, finding and moving items to where they need to go. Her high luck keeps her weapons together, so she is also excellent for supporting her stealthy friends with a baseball bat if Jason happens to show up. She does not work well alone, as she is a weaker character and easily startled.
- Как выжить, если Джейсон уже спалил.★ 5 (334)22k views218 ♥8 minBulgarianUpdated 14 Oct, 2017
- How to play online in 2026 [FIX]★ 5 (235)22k views402 ♥1 minUpdated 11 Jan
- Jason's Cabin Locations (Pinehurst updated)★ 5 (568)20k views793 ♥3 minUpdated 13 May, 2022
- [FIX] How to play on Friday the 13th in 2025 | Как играть в пятницу 13 в 2025★ 4 (74)13k views177 ♥1 minRussianUpdated 14 Mar, 2025
- How To Play As Chad★ 5 (305)12k views140 ♥1 minUpdated 9 Jan, 2018
- Complete Virtual Cabin 2.0 Walkthrough and Secrets Guide★ 5 (238)11k views286 ♥8 minUpdated 22 Dec, 2017




- Upgrading to PremiumTeam Fortress 2★ 5 (20k)1441k views11k ♥6 minUpdated May 11, 2022
- No More Room in Hell Official ManualNo More Room in Hell★ 5 (2.8k)569k views2.1k ♥29 minUpdated Apr 22, 2019
- NMRiH Community Hosting GuidesNo More Room in Hell★ 5 (526)351k views653 ♥1 minUpdated Aug 10, 2022
- How to 'Git Gud' Soon™MORDHAU★ 5 (2k)318k views3k ♥68 minUpdated Nov 16, 2024
- Лучшие кооперативные игры SteamPAYDAY 2★ 5 (1.5k)315k views2.1k ♥56 minRussianUpdated Apr 27, 2025
- Desert Eagle Heat Treated | Blue GemCounter-Strike 2★ 5 (1.6k)293k views1.5k ♥2 minUpdated Jan 16





This guide was created by its original author on the Steam Community. Are you the author and want it removed? Request removal.