Danmei Character Guide (Outdated)
Introduction
Update: The contents of this guide are no longer up-to-date and my editing speed will be slow if it ever happens. I recommend you instead visit my Comprehensive Basics guide, which will be updated more frequently, located here: http://steamcommunity.com/sharedfiles/filedetails/?id=140147688
--------------
My experience with this game is still somewhat limited. I do not claim to be the best Danmei user out there; far from it, there's always room for improvement. Nevertheless I hope this is or will become a helpful resource to any prospective Danmei players. Feedback is more than welcome.
--------------
My experience with this game is still somewhat limited. I do not claim to be the best Danmei user out there; far from it, there's always room for improvement. Nevertheless I hope this is or will become a helpful resource to any prospective Danmei players. Feedback is more than welcome.
Character at a Glance
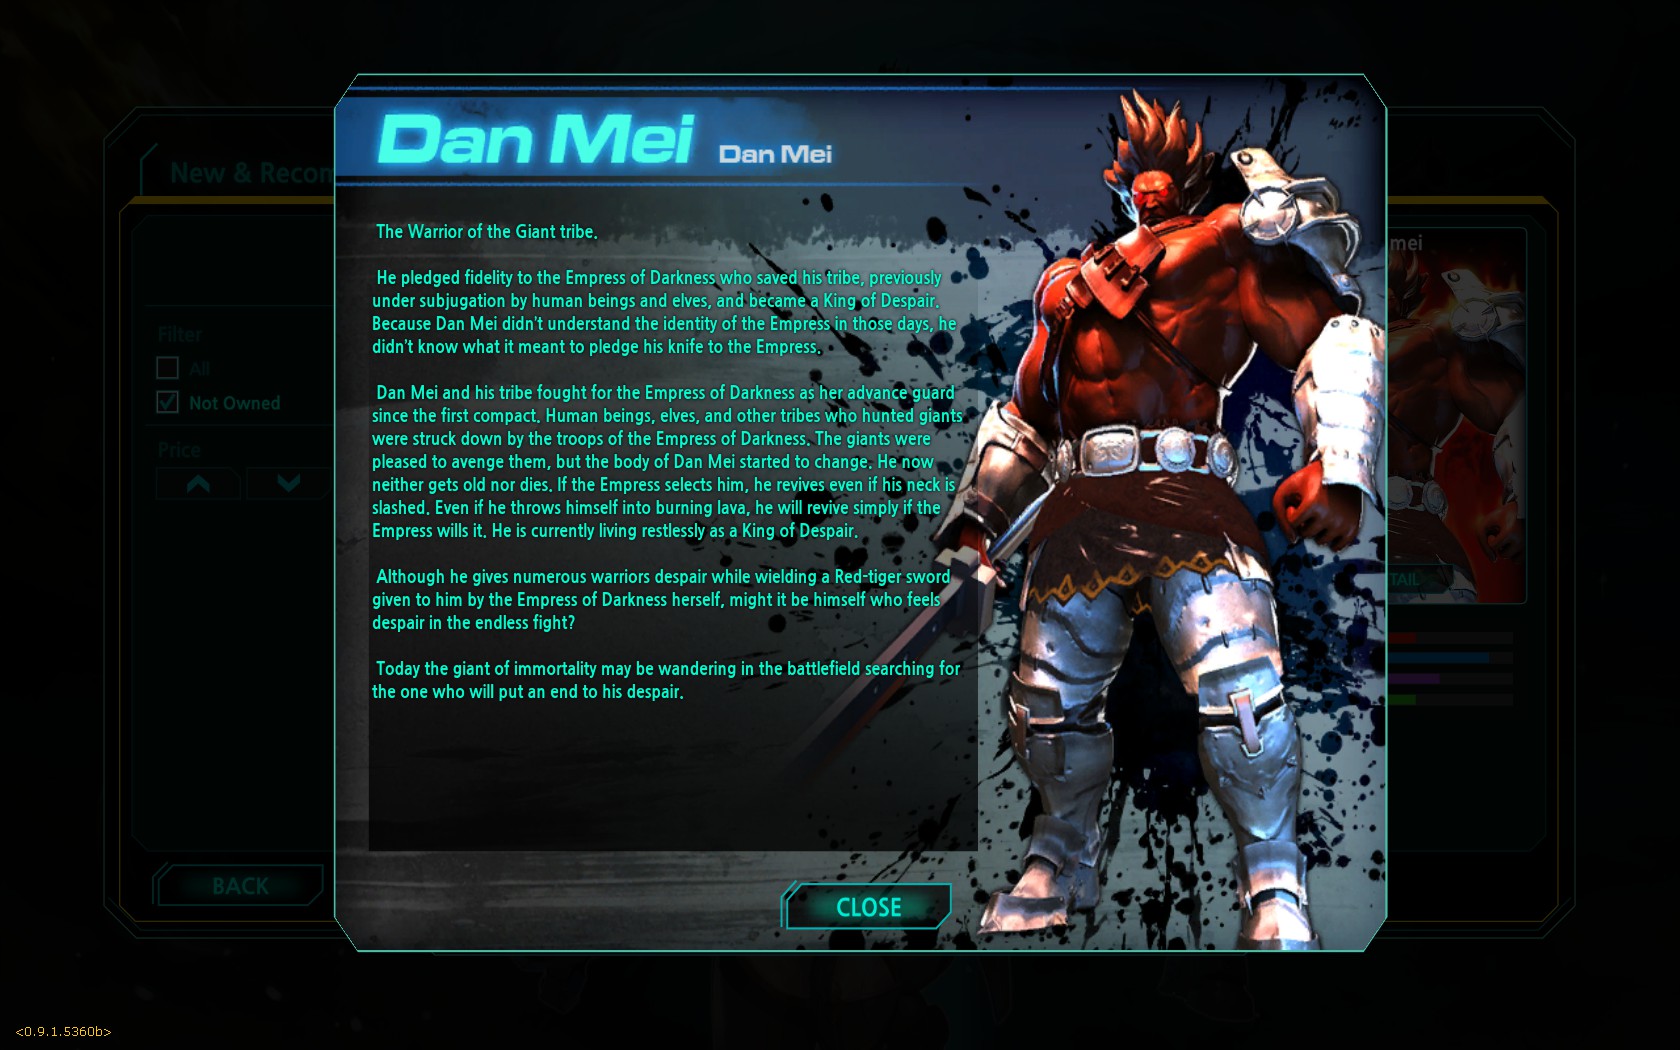
It's easy to typecast Danmei as a "tank" character due to his size and having an invincibility-granting RP skill. When compared to the likes of Valle or Tiac, I feel he suffers in attack startup, on-command movement speed, and his "armor" skill being a bit more heavily dependent on your RP supply. He somewhat compensates for these downsides by nearly ignoring "bind" abilities, having a potent medium range attack, and his "armor" being complete invulnerability instead of just nullifying stun and reducing damage.
Put it all together and Danmei has the tools to chase down or retreat from many characters, support team fights from a short distance, and get in the fray with little fear of death if the need arises.
Put it all together and Danmei has the tools to chase down or retreat from many characters, support team fights from a short distance, and get in the fray with little fear of death if the need arises.
Attacks
Shorthand Notation Key:
L - left mouse button
R - right mouse button
(R) - Hold Ctrl (Power Attack) while inputting R command. Costs 1 RP per input.
j. - Indicates a jumping attack. Example: j.L for jumping L
For most attacks listed, the damage is the average value observed in Training Mode tests against Valle. The value can fluctuate +/- 1 damage, and the range will be 1-2 points higher against characters with a lower defense value.. Back attacks do around 50% more damage.
L-L-L
Damage: 24, 24, 18+14
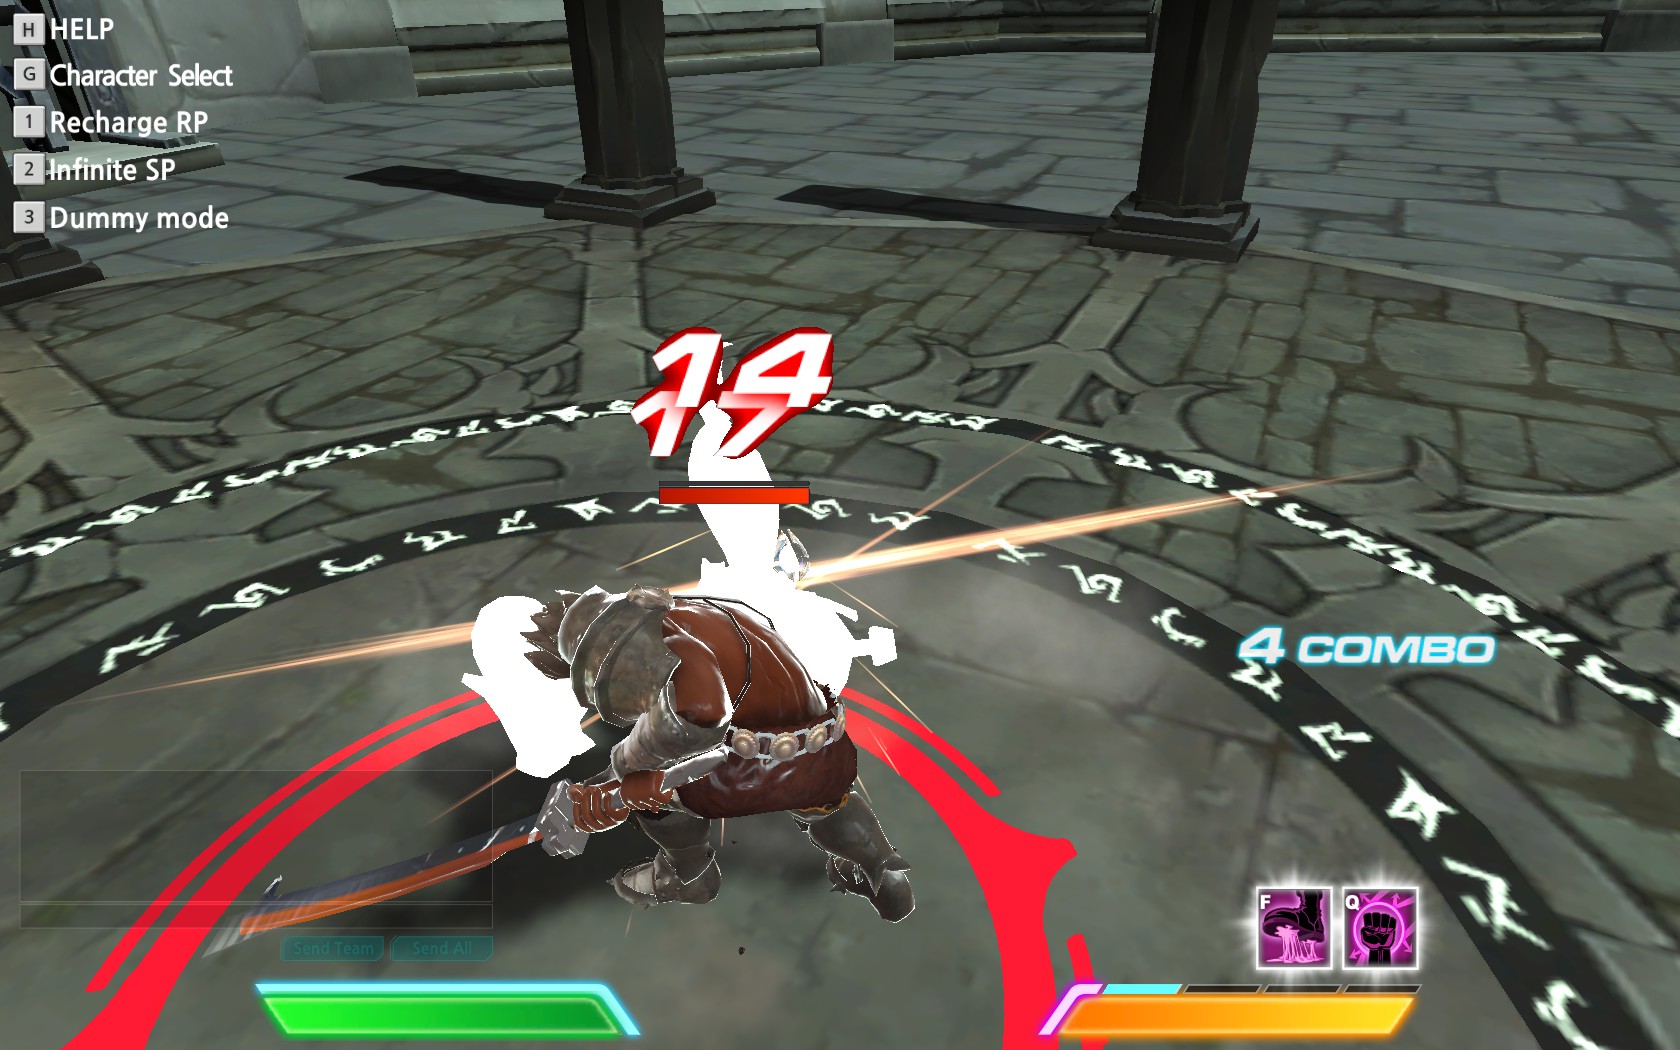
A forward-moving sequence of slashes. This will be your go-to attack for most occasions. If you're new to Danmei, you need to really play around with this move to get comfortable with the hitbox and the range at which you rush forward, especially on the first slash. Try to imagine a V shape in front of Danmei; most of the area hit is the right half of the V. Shorter or thinner characters tend to not get hit by the second slash if they are to your immediate right.
As an aside, try to mix up whether you do only two slashes or all three. Two is preferable to minimize your vulnerable time. Go for three if you're confident you will combo and kill. If you are affected by any slowing or binding effect you can use this attack or Shift to move. Use the forward momentum to make sneaky approaches. You may not get a back attack bonus all the time but this does allow for some room to dodge short range attacks.
While each slash has a tremendous amount of hitstun or blockstun, it's quite noticeable and abusable if you simply use the first slash repeatedly. Most characters will be forced into a very small window where they can jump (get hit but recover sooner and run), use a VERY fast startup rage skill, or teleport (as with either Renny).
L-R-R
Damage: 24, 30, 18+18
L-(R)-(R)
Damage: 24, 47, 39+18
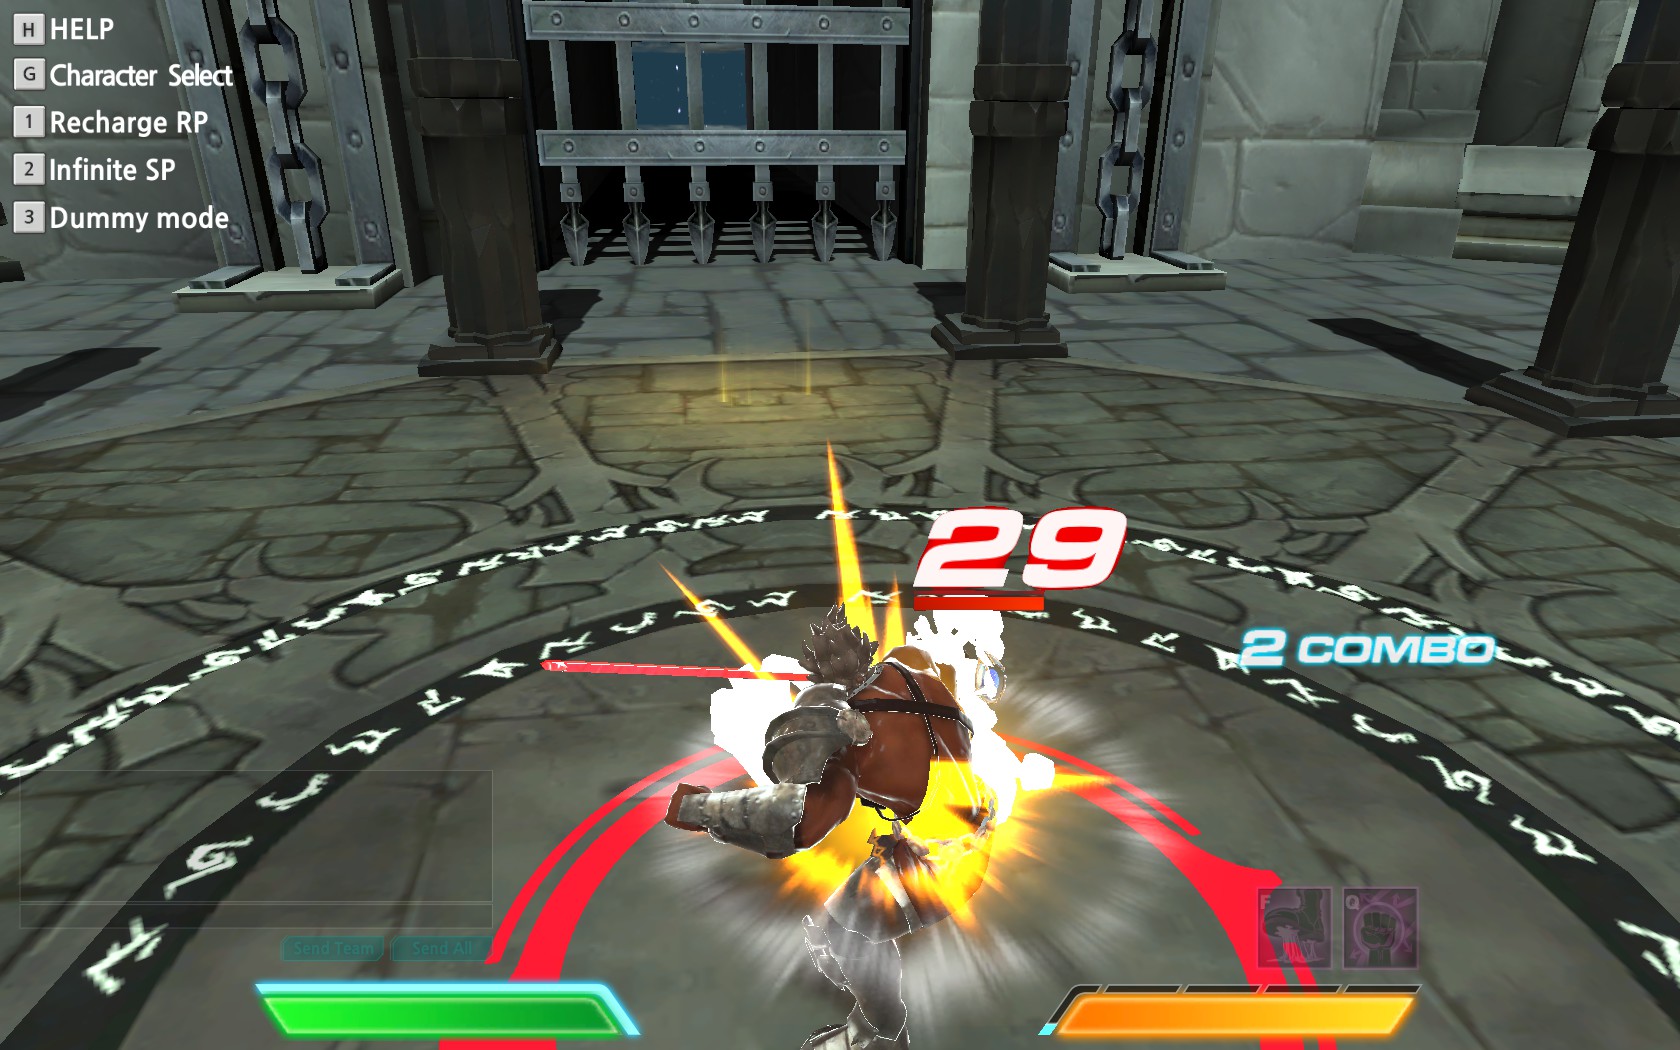
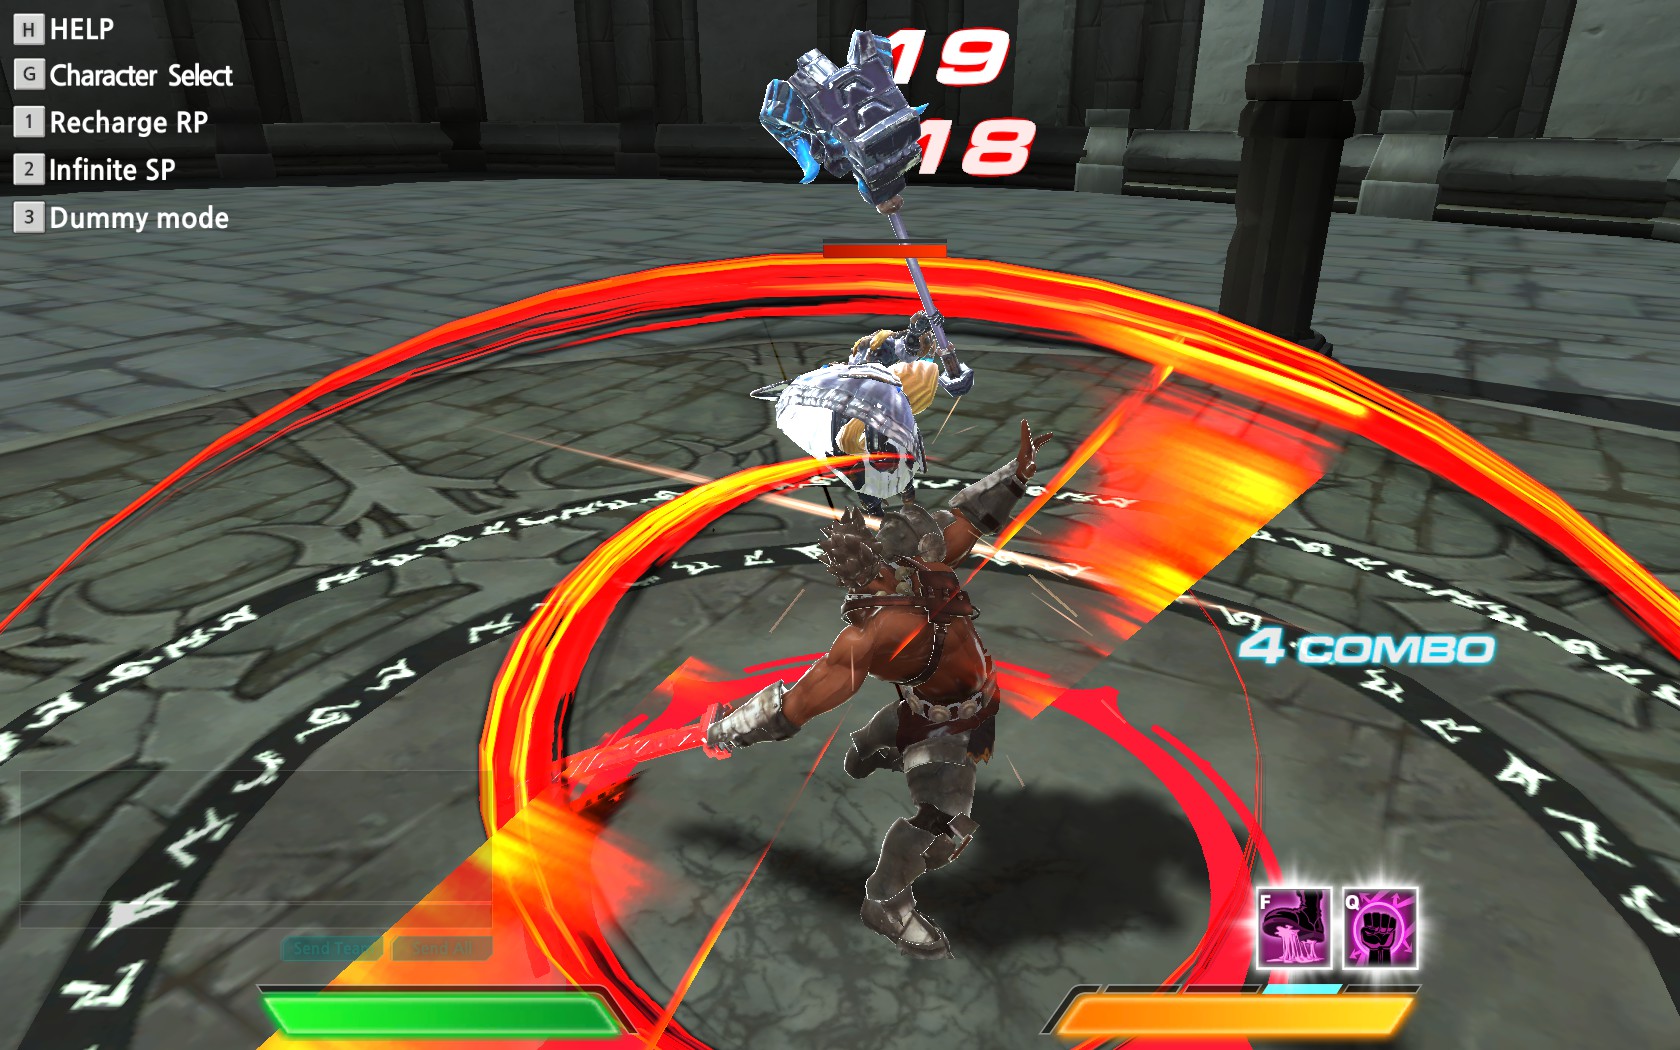
Danmei slashes once, then kicks the ground to launch surrounding enemies into the air, then slashes in an upward arc and around himself. When used as a power attack, the first R will guard break. The second R tends to only hit once or not at all against enemies who aren't launched. I strongly advise to never use the second R. It is almost always better to use a jump attack after, since it's far less likely to miss.
If you have a long invincibility running in a crowd, this isn't a bad move to throw out. The startup on the first R is quite slow, so try not to throw it out at random in 1v1 engagements against fast-hitting characters.
After LR, a launched opponent can be juggled in the air with well-timed j.L attacks. This is a much more damaging follow-up when you have the uninterrupted time to do so. In practice I was able to get anywhere from 4 to 6 j.Ls before an enemy hit the ground. Obviously don't try this with multiple enemies around; instead try to retreat and counter with j.L or some ground L chain. To end this juggle you may wish to use j.R to force guard break on landing.
R
Damage: 20+18
(R)
Damage: 35+18
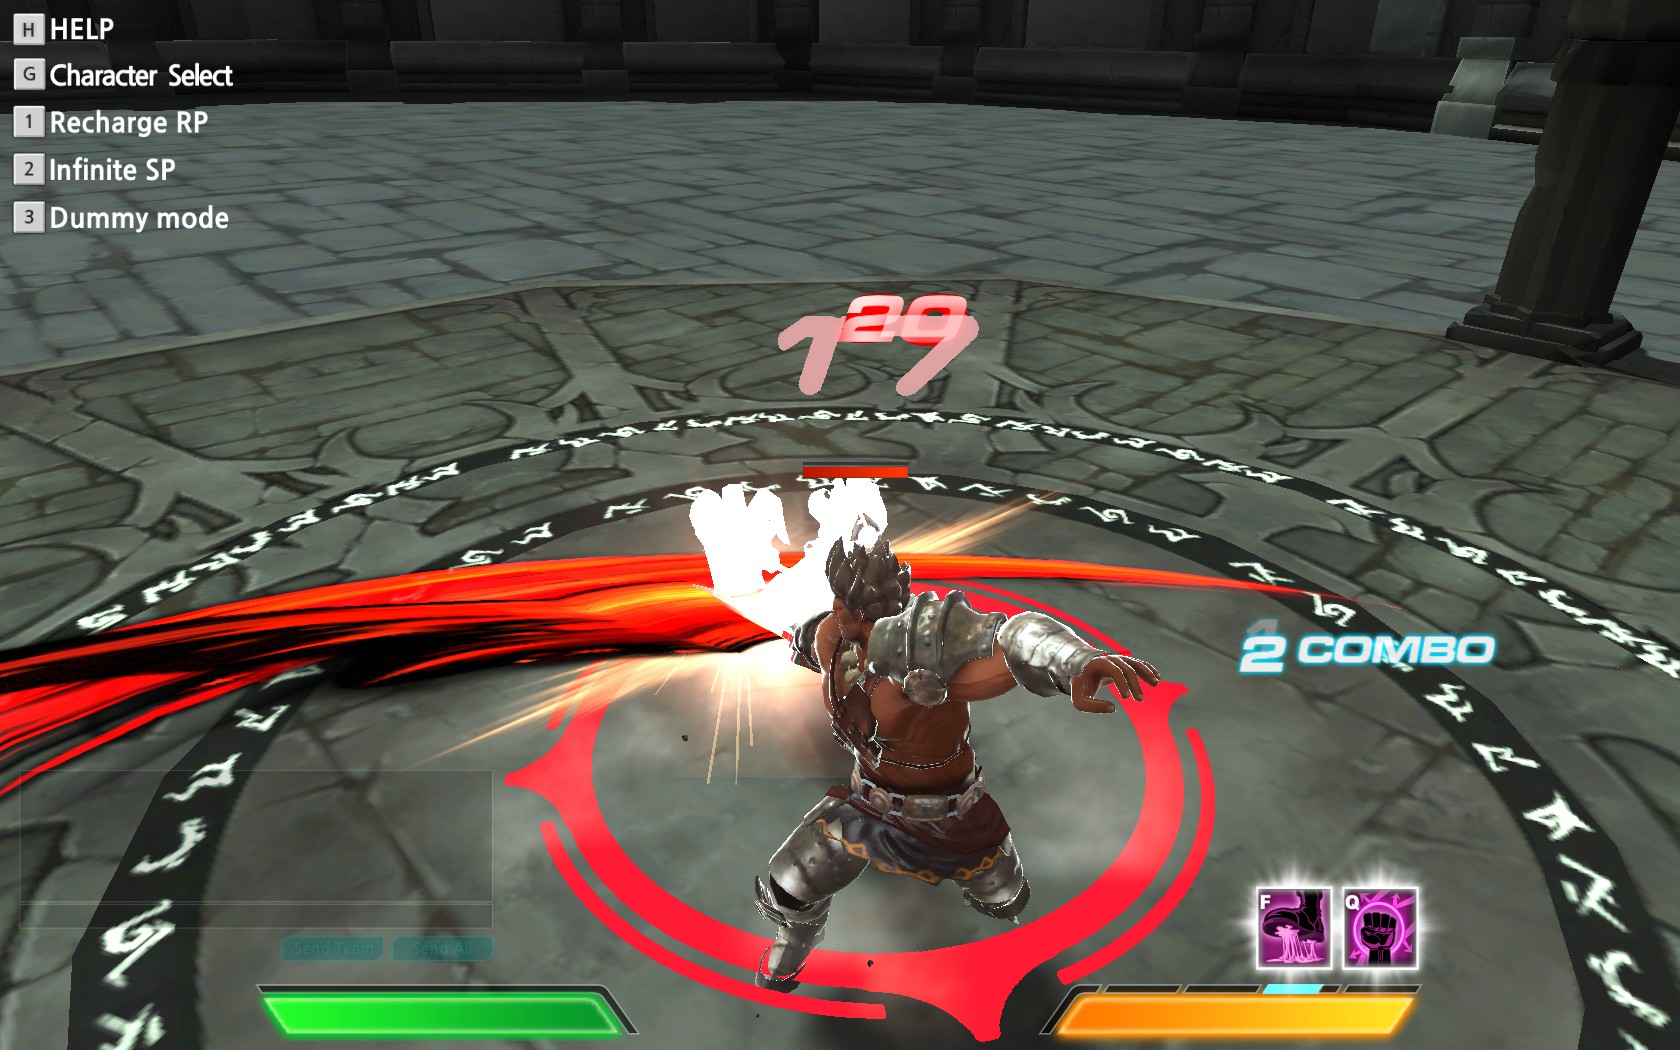
A sweeping slash with some super armor properties if you use it as a power attack. That is, during the animation you will take damage normally but will still continue as if uninterrupted. I rarely ever use this attack intentionally. Slow speed and an awkward hitbox makes it ill-suited to most occasions. Almost always preferred to simply use any other move. Can be used to bait a hit if you have the health to survive such a gamble, but again only as a power attack.
j.L
Damage: 20
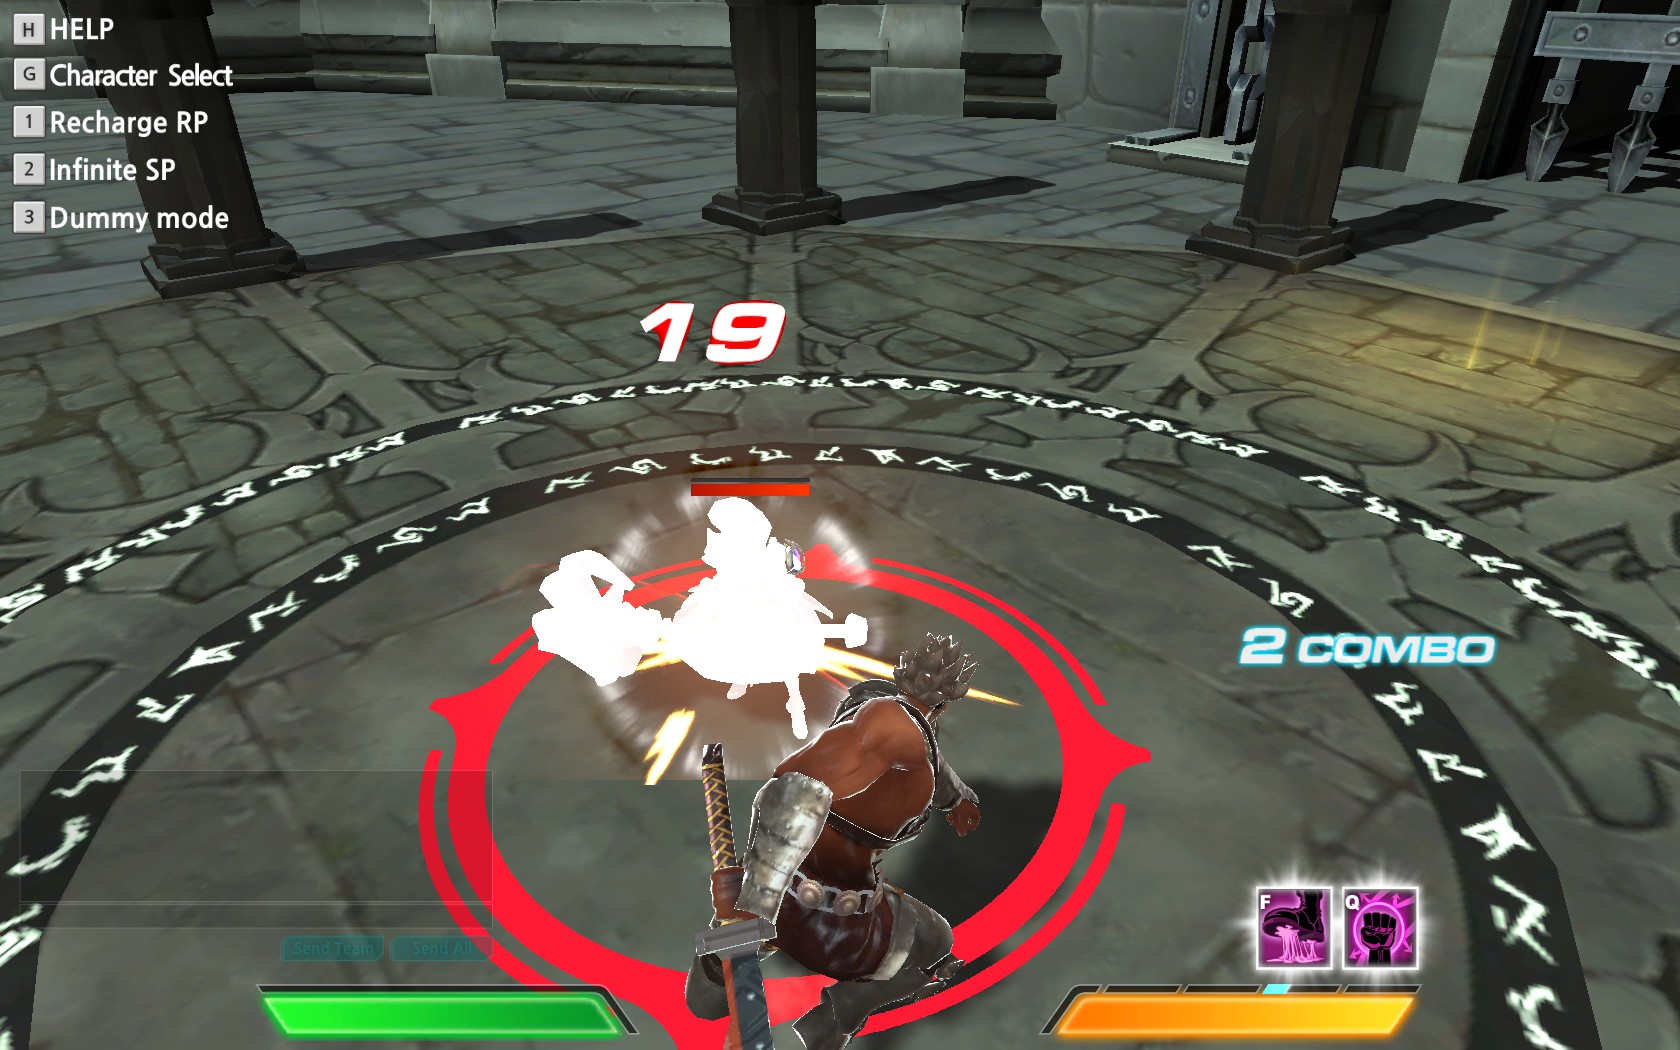
A short-ranged midair punch. Worth mentioning as one of Danmei's fastest attacks and tends to stun briefly if it hits. If an enemy is jumping around to harass you, try using this to throw them off balance. Also fairly good to use on an enemy Danmei. Can be used to juggle after your launching moves as well, leading to Danmei's best combo damage.
j.R
Damage: 18+12
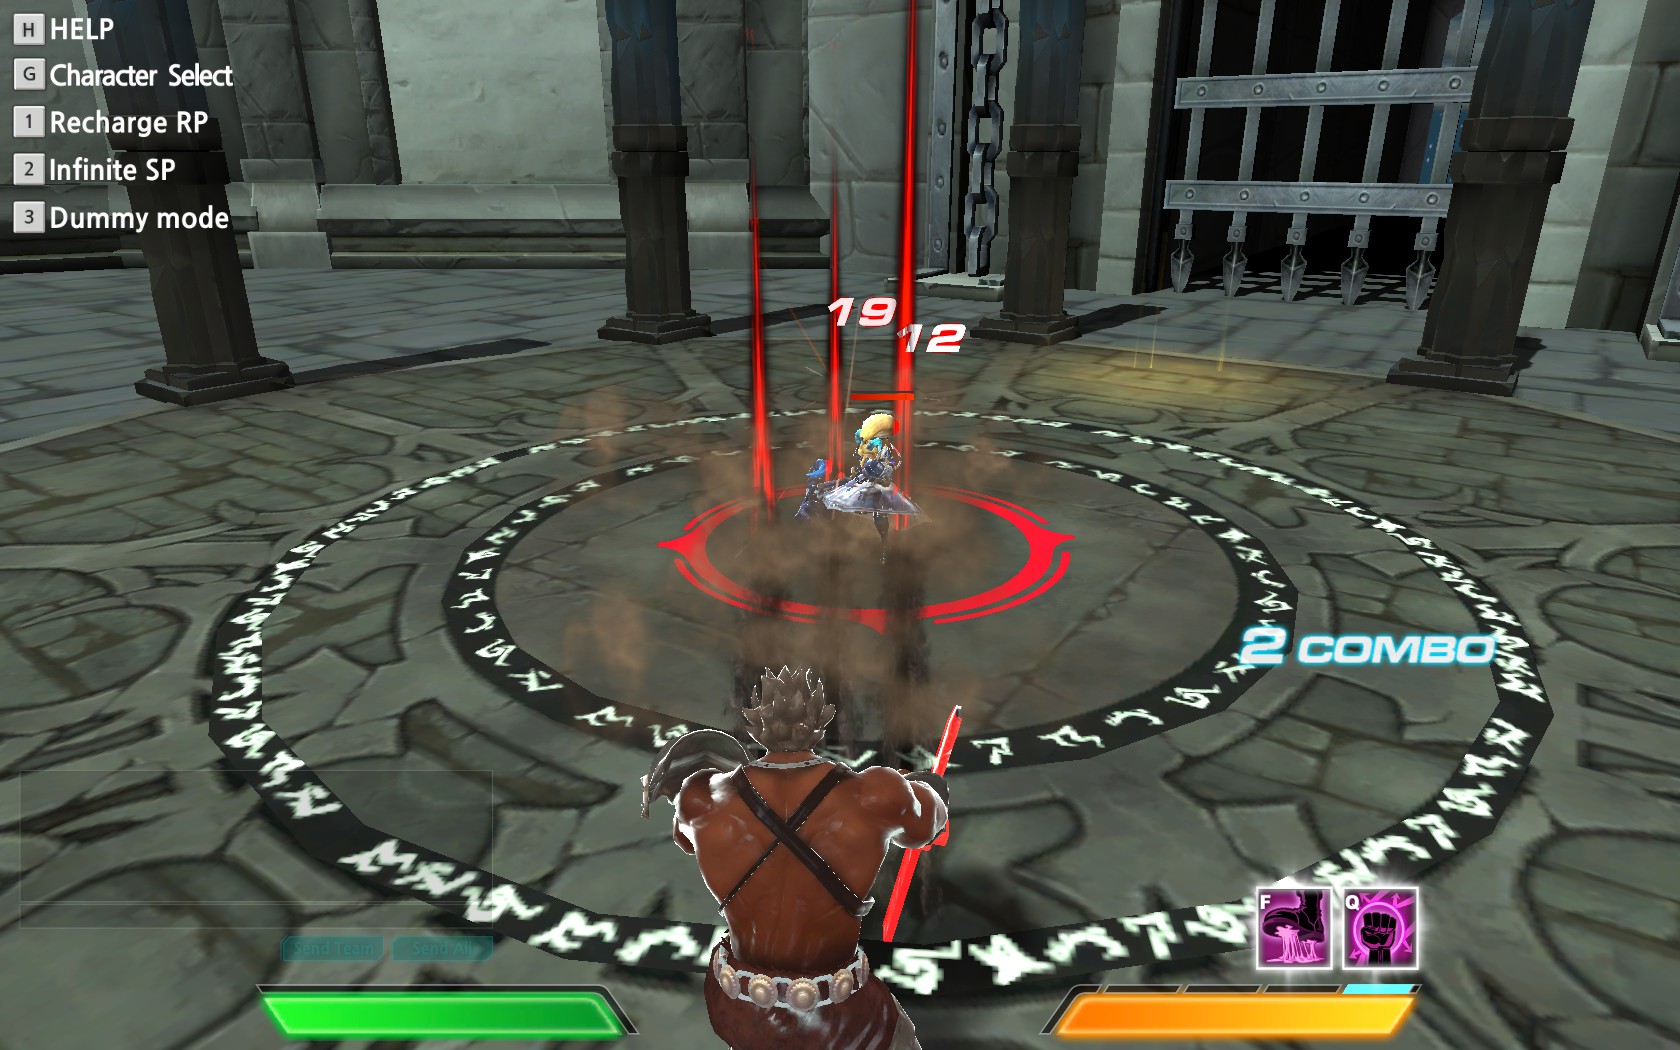
"Mind Shatter", a medium range projectile slash. At the edge of its range it tends to only hit once (with the lower damage value). Enemies hit by this are stunned. This attack also has innate guard breaking properties; enemies who guard this stagger for longer than usual. Enemies near walls tend not to get hit by this, so be advised.
When you input this command, Danmei dives down forward rapidly in the direction you were facing and cannot be steered until after he hits the ground and attacks. When using this on level ground, try to make a very short jump for the quickest execution. If you end up doing the grounded R instead, you need to slow down your R input a little bit.
Try not to spam this in wide-open terrain and instead use it more as a punishing tool. If Cezanne wants to play keepaway at the optimal range for his L-L-L, guard and counter with this. Any characters trying jumping spam in front of you? Stun them. When ganging up on a group of enemies with an even or larger group of allies, try to hang back at medium range and use this to support any other close-range teammates. Use your own judgment for when it's appropriate to use this or L-L.
If you hit an airborne enemy with this, close in with L-L and begin pressuring your opponent. If you're lucky, they might even be high enough to juggle with j.L.
Shift (hold for at least 2 seconds, then release while on the ground), R
Damage: 3 to 34 depending on proximity
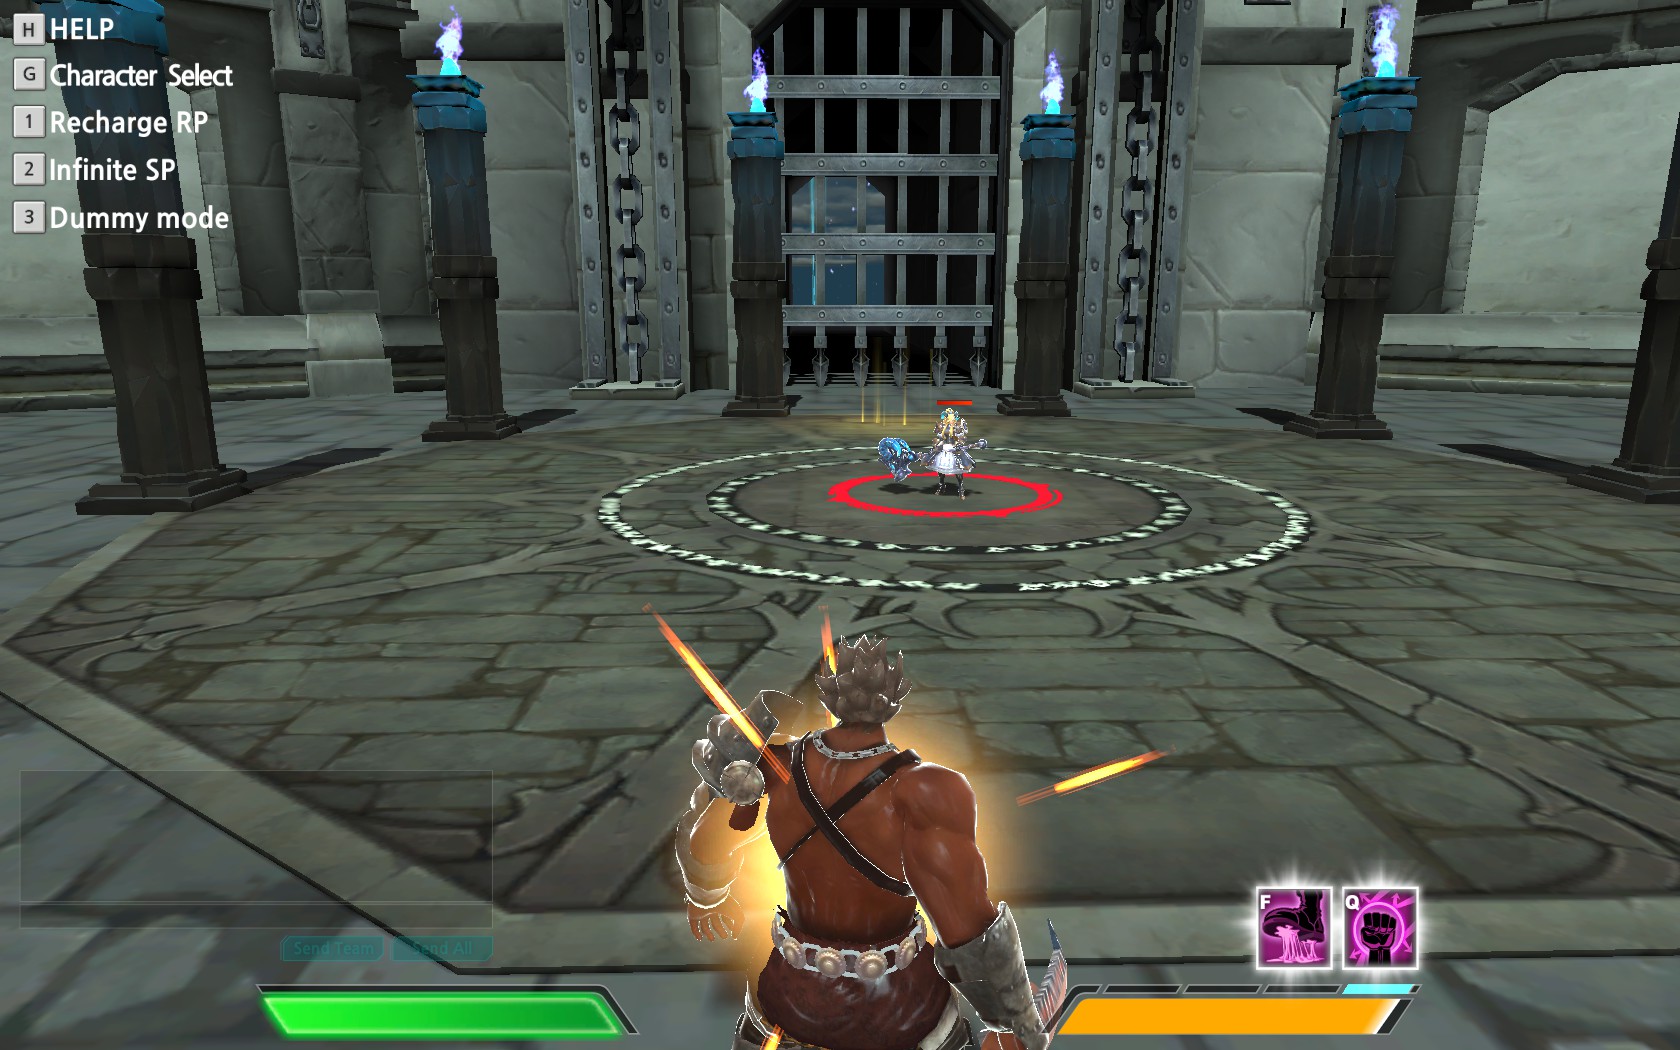
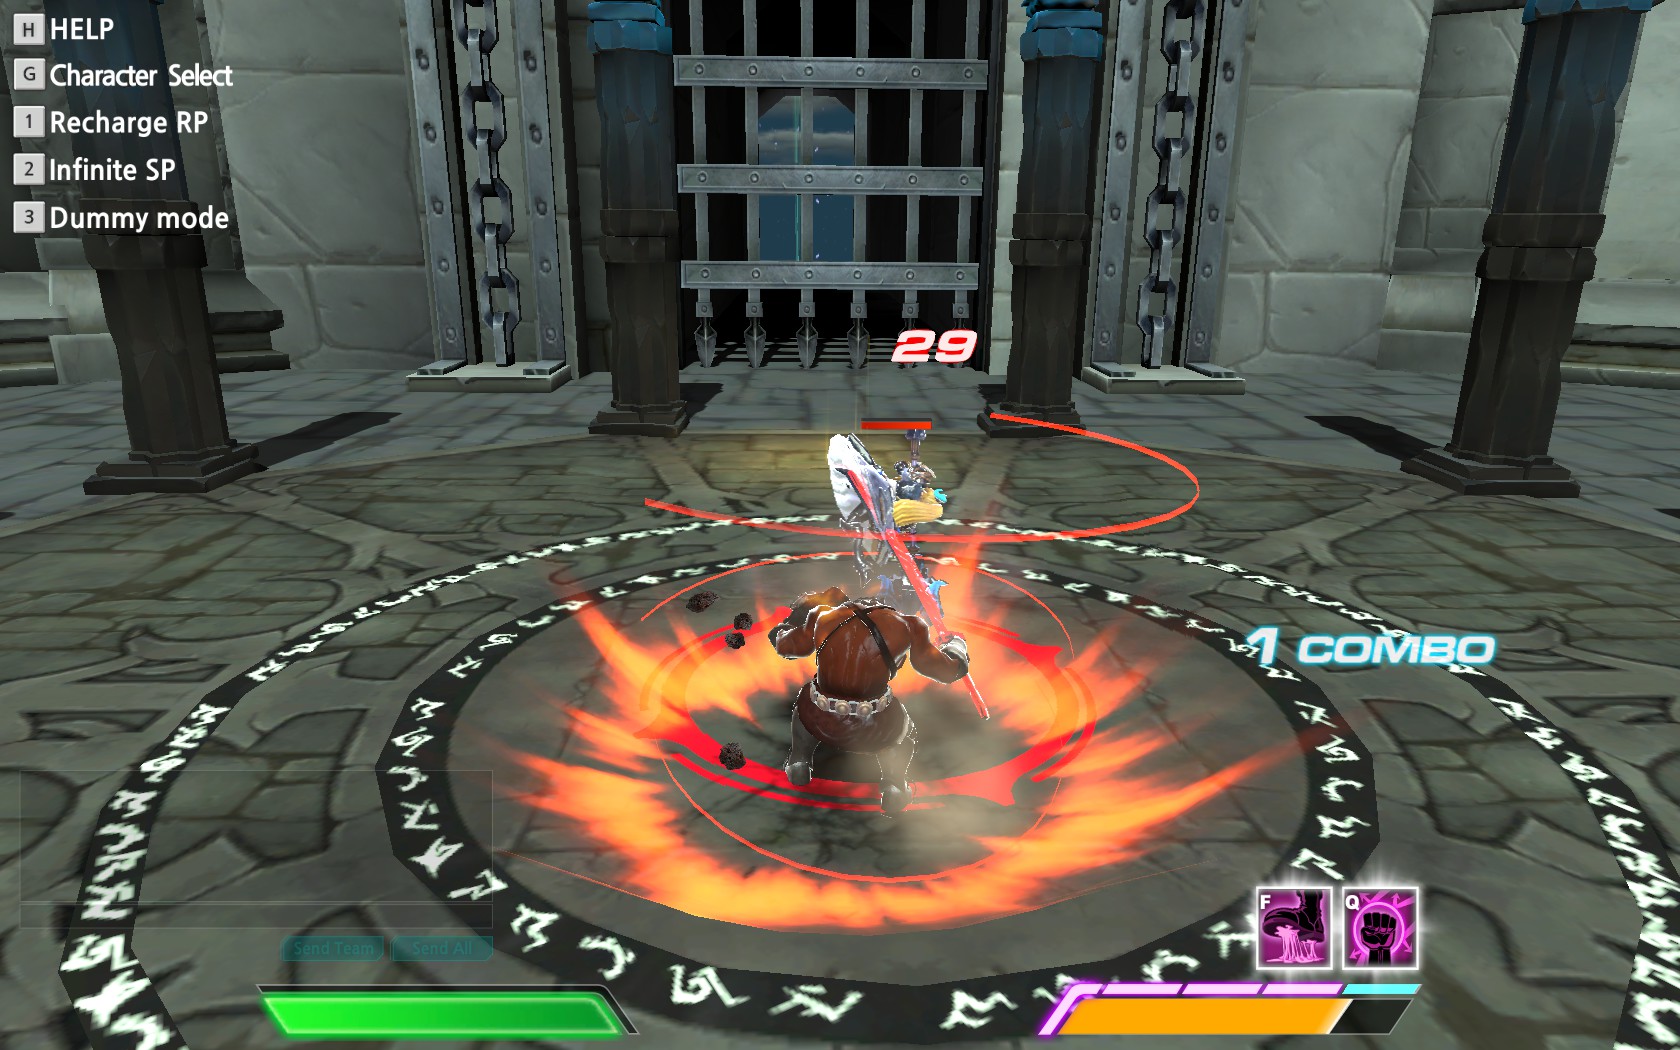
The flying leap is one of Danmei's most important movement tools. After holding Shift for a short time, Danmei starts to glow; you don't need to wait for this glow effect to finish, just seeing the animation start is a sign that it's ready. In fact, once you leave the ground you can start charging another leap. Each use of the leap consumes about 1/5th of Danmei's SP. Try to always have this ready.
A leap followed by Danmei's standard L chain can cover a lot of ground when chasing down most characters. Likewise, it provides an excellent way to retreat if you can get through the startup safely; this is where a short-duration invincibility is handy. On maps like Nether Vale and Naga's Pit you can also use this leap to traverse some of the larger gaps, either for pursuing or fleeing. On even terrain Valle and Tiac can catch up with their dashes so you may prefer to just guard against them unless you can get your Q activated first.
Pressing R during the leap will cause Danmei to stop flying forward. Instead he will slam down and launch any enemies nearby when he lands. The damage on this varies depending on how close they are to where you land but will launch even at the lowest damage range. Use this aspect of the attack mainly for launching enemies (preferably while invincible) or stopping short of a maximum length leap for whatever reason.
When you do hit with the leaping slam, I tend to followup with the reliable L-L, or you can L-R-R and use the first L to manuever yourself behind your launched target. You can also try the j.L juggle mentioned in the L-R-R entry, and this works as well as it does there. Nice reward for predicting which way your enemies will retreat.
If you ever need to release Shift without wanting to leap, just do so while jumping.
L - left mouse button
R - right mouse button
(R) - Hold Ctrl (Power Attack) while inputting R command. Costs 1 RP per input.
j. - Indicates a jumping attack. Example: j.L for jumping L
For most attacks listed, the damage is the average value observed in Training Mode tests against Valle. The value can fluctuate +/- 1 damage, and the range will be 1-2 points higher against characters with a lower defense value.. Back attacks do around 50% more damage.
L-L-L
Damage: 24, 24, 18+14
A forward-moving sequence of slashes. This will be your go-to attack for most occasions. If you're new to Danmei, you need to really play around with this move to get comfortable with the hitbox and the range at which you rush forward, especially on the first slash. Try to imagine a V shape in front of Danmei; most of the area hit is the right half of the V. Shorter or thinner characters tend to not get hit by the second slash if they are to your immediate right.
As an aside, try to mix up whether you do only two slashes or all three. Two is preferable to minimize your vulnerable time. Go for three if you're confident you will combo and kill. If you are affected by any slowing or binding effect you can use this attack or Shift to move. Use the forward momentum to make sneaky approaches. You may not get a back attack bonus all the time but this does allow for some room to dodge short range attacks.
While each slash has a tremendous amount of hitstun or blockstun, it's quite noticeable and abusable if you simply use the first slash repeatedly. Most characters will be forced into a very small window where they can jump (get hit but recover sooner and run), use a VERY fast startup rage skill, or teleport (as with either Renny).
L-R-R
Damage: 24, 30, 18+18
L-(R)-(R)
Damage: 24, 47, 39+18
Danmei slashes once, then kicks the ground to launch surrounding enemies into the air, then slashes in an upward arc and around himself. When used as a power attack, the first R will guard break. The second R tends to only hit once or not at all against enemies who aren't launched. I strongly advise to never use the second R. It is almost always better to use a jump attack after, since it's far less likely to miss.
If you have a long invincibility running in a crowd, this isn't a bad move to throw out. The startup on the first R is quite slow, so try not to throw it out at random in 1v1 engagements against fast-hitting characters.
After LR, a launched opponent can be juggled in the air with well-timed j.L attacks. This is a much more damaging follow-up when you have the uninterrupted time to do so. In practice I was able to get anywhere from 4 to 6 j.Ls before an enemy hit the ground. Obviously don't try this with multiple enemies around; instead try to retreat and counter with j.L or some ground L chain. To end this juggle you may wish to use j.R to force guard break on landing.
R
Damage: 20+18
(R)
Damage: 35+18
A sweeping slash with some super armor properties if you use it as a power attack. That is, during the animation you will take damage normally but will still continue as if uninterrupted. I rarely ever use this attack intentionally. Slow speed and an awkward hitbox makes it ill-suited to most occasions. Almost always preferred to simply use any other move. Can be used to bait a hit if you have the health to survive such a gamble, but again only as a power attack.
j.L
Damage: 20
A short-ranged midair punch. Worth mentioning as one of Danmei's fastest attacks and tends to stun briefly if it hits. If an enemy is jumping around to harass you, try using this to throw them off balance. Also fairly good to use on an enemy Danmei. Can be used to juggle after your launching moves as well, leading to Danmei's best combo damage.
j.R
Damage: 18+12
"Mind Shatter", a medium range projectile slash. At the edge of its range it tends to only hit once (with the lower damage value). Enemies hit by this are stunned. This attack also has innate guard breaking properties; enemies who guard this stagger for longer than usual. Enemies near walls tend not to get hit by this, so be advised.
When you input this command, Danmei dives down forward rapidly in the direction you were facing and cannot be steered until after he hits the ground and attacks. When using this on level ground, try to make a very short jump for the quickest execution. If you end up doing the grounded R instead, you need to slow down your R input a little bit.
Try not to spam this in wide-open terrain and instead use it more as a punishing tool. If Cezanne wants to play keepaway at the optimal range for his L-L-L, guard and counter with this. Any characters trying jumping spam in front of you? Stun them. When ganging up on a group of enemies with an even or larger group of allies, try to hang back at medium range and use this to support any other close-range teammates. Use your own judgment for when it's appropriate to use this or L-L.
If you hit an airborne enemy with this, close in with L-L and begin pressuring your opponent. If you're lucky, they might even be high enough to juggle with j.L.
Shift (hold for at least 2 seconds, then release while on the ground), R
Damage: 3 to 34 depending on proximity
The flying leap is one of Danmei's most important movement tools. After holding Shift for a short time, Danmei starts to glow; you don't need to wait for this glow effect to finish, just seeing the animation start is a sign that it's ready. In fact, once you leave the ground you can start charging another leap. Each use of the leap consumes about 1/5th of Danmei's SP. Try to always have this ready.
A leap followed by Danmei's standard L chain can cover a lot of ground when chasing down most characters. Likewise, it provides an excellent way to retreat if you can get through the startup safely; this is where a short-duration invincibility is handy. On maps like Nether Vale and Naga's Pit you can also use this leap to traverse some of the larger gaps, either for pursuing or fleeing. On even terrain Valle and Tiac can catch up with their dashes so you may prefer to just guard against them unless you can get your Q activated first.
Pressing R during the leap will cause Danmei to stop flying forward. Instead he will slam down and launch any enemies nearby when he lands. The damage on this varies depending on how close they are to where you land but will launch even at the lowest damage range. Use this aspect of the attack mainly for launching enemies (preferably while invincible) or stopping short of a maximum length leap for whatever reason.
When you do hit with the leaping slam, I tend to followup with the reliable L-L, or you can L-R-R and use the first L to manuever yourself behind your launched target. You can also try the j.L juggle mentioned in the L-R-R entry, and this works as well as it does there. Nice reward for predicting which way your enemies will retreat.
If you ever need to release Shift without wanting to leap, just do so while jumping.
Rage Skills
F: Snare for hunting a dragon
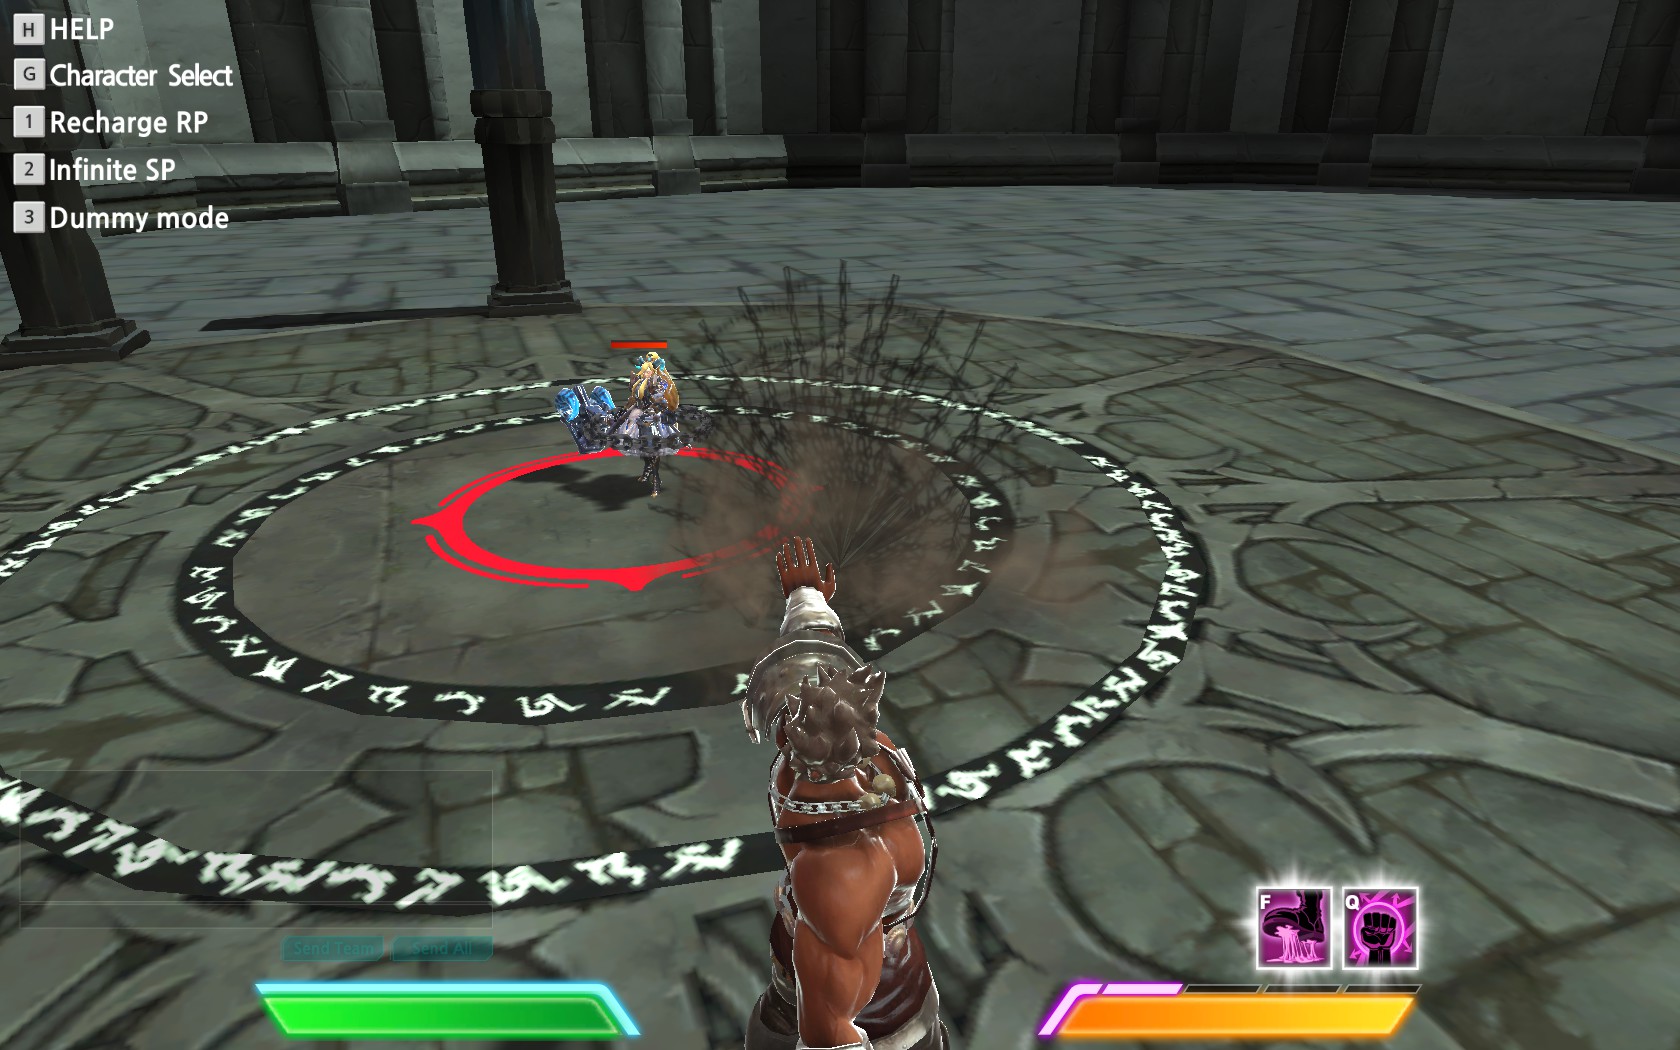
Danmei casts a net in front of him, binding any enemies within a medium range for 3 seconds. Bound enemies cannot move. Unlike the similar freezing effect from Renny Glacier, Danmei's chain bind also prevents jumping and mobility granted by attacking, such as with Danmei's own L chain. This is also a special debuff in that Elrath's Q does not prevent it and Sewon's F cannot remove it.
If you can snare multiple enemies at once for the benefit of your allies, it can be worth using in some situations. Especially useful on more fragile characters who are harder to catch up with, such as Renoah or either Renny. Also very useful to hold back a Tiac with Q (gold armor) on; when used against him, Valle, or an enemy Danmei, it can be momentarily confusing for them to have their high-mobility attacks just cause them to sit there and look silly. While they are bound, feel free to rain down j.R attacks.
Q: Embrace of the Empress
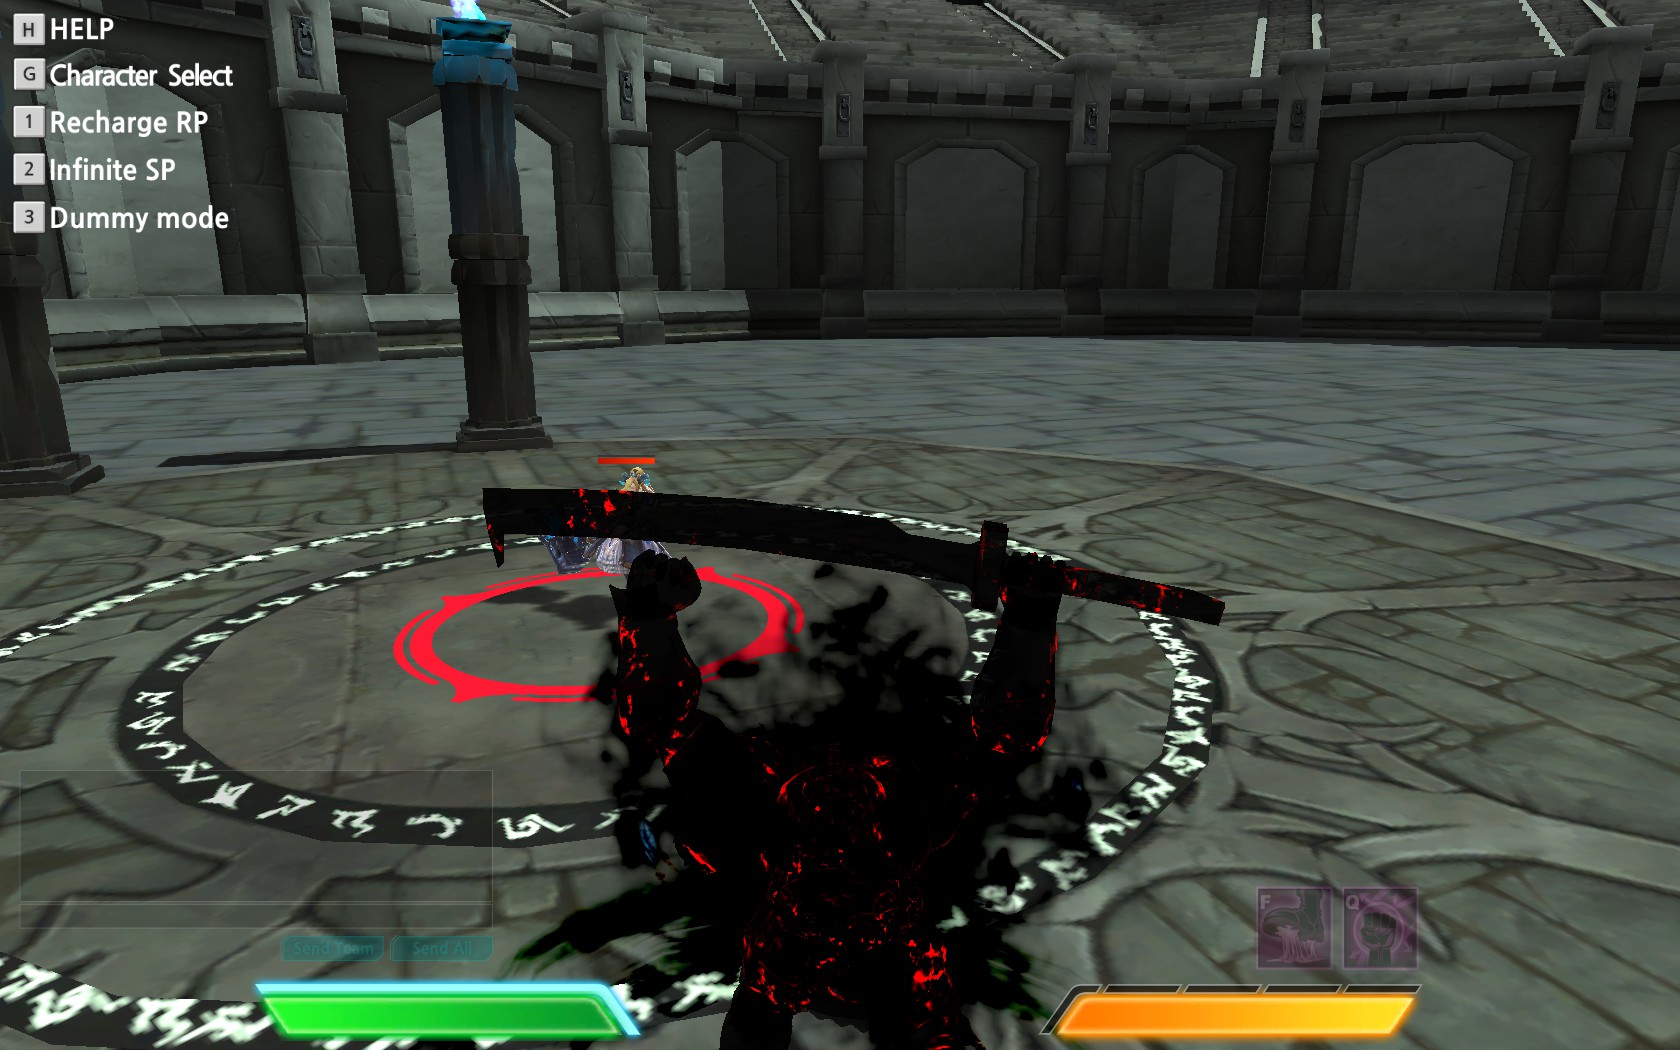
Danmei becomes a black silhouette; when using this rage skill Danmei consumes all full segments of his rage meter. For each segment he will remain in this state for 3 seconds. While under this effect, Danmei cannot be stunned, launched, debuffed, or damaged. This also cures any existing debuffs on him, including burn, poison, chill, Renny Glacier's F freeze, and Renoah's Q seeking attack.
Pressing E while under the effects of this power allows Danmei to unleash a medium range shout that deals low damage and consumes ~40% SP, but stuns enemies in its radius.
How and when you use this depends on many factors. You generally never want to waste a 4 or 5 RP invincibility on just one or two enemies. At the same time, using it in a group where you are vastly outnumbered (in free for all or 7v7) only does so much; you typically will only have time to kill or wound 1-2 enemies and then hopefully only have another 1-2 to deal with. Any more than that and you should just consider leaping away near the end of your invincibility time.
As mentioned previously, a 1 RP invincibility is great for an emergency retreat even if you didn't have a leap charged in advance. Just guard and activate if you see an opening.
On a map-specific note, a 4 or 5 RP invincibility allows you to claim a pylon while completely invincible on Nether Dale (the process takes 12 seconds). This makes Danmei a VERY strong choice on that map.
Danmei casts a net in front of him, binding any enemies within a medium range for 3 seconds. Bound enemies cannot move. Unlike the similar freezing effect from Renny Glacier, Danmei's chain bind also prevents jumping and mobility granted by attacking, such as with Danmei's own L chain. This is also a special debuff in that Elrath's Q does not prevent it and Sewon's F cannot remove it.
If you can snare multiple enemies at once for the benefit of your allies, it can be worth using in some situations. Especially useful on more fragile characters who are harder to catch up with, such as Renoah or either Renny. Also very useful to hold back a Tiac with Q (gold armor) on; when used against him, Valle, or an enemy Danmei, it can be momentarily confusing for them to have their high-mobility attacks just cause them to sit there and look silly. While they are bound, feel free to rain down j.R attacks.
Q: Embrace of the Empress
Danmei becomes a black silhouette; when using this rage skill Danmei consumes all full segments of his rage meter. For each segment he will remain in this state for 3 seconds. While under this effect, Danmei cannot be stunned, launched, debuffed, or damaged. This also cures any existing debuffs on him, including burn, poison, chill, Renny Glacier's F freeze, and Renoah's Q seeking attack.
Pressing E while under the effects of this power allows Danmei to unleash a medium range shout that deals low damage and consumes ~40% SP, but stuns enemies in its radius.
How and when you use this depends on many factors. You generally never want to waste a 4 or 5 RP invincibility on just one or two enemies. At the same time, using it in a group where you are vastly outnumbered (in free for all or 7v7) only does so much; you typically will only have time to kill or wound 1-2 enemies and then hopefully only have another 1-2 to deal with. Any more than that and you should just consider leaping away near the end of your invincibility time.
As mentioned previously, a 1 RP invincibility is great for an emergency retreat even if you didn't have a leap charged in advance. Just guard and activate if you see an opening.
On a map-specific note, a 4 or 5 RP invincibility allows you to claim a pylon while completely invincible on Nether Dale (the process takes 12 seconds). This makes Danmei a VERY strong choice on that map.
Tactics - Harassing the Enemy
One of Danmei's greatest strengths is his ability to harass. His Q, great range, and mobility while attacking allow him to eliminate fragile characters caught off-guard with relative ease. If an enemy activates their own invincibility or armor power, he can use his own and run or tank through it as appropriate. Don't be tempted to just rush into a crowded fight with L spam, consider using j.R to play a keepaway game before closing in. The maximum range for j.R is at just near the right range to rush with L: a clear sign that this is a tactic worth using when you have the opportunity.
Taking a rather extreme example, let's say you're playing 7v7 in Nether Dale and go to harass the opposing team's base pylon. If their team is smart, they will maybe commit 1-3 players to dealing with you, though even 3 is probably more than enough. If they commit more, they'd better be winning by a massive lead since that's otherwise becoming a huge waste of manpower. With full RP you could end up distracting 5+ enemies for well over the 15 seconds granted by your invincibility, maybe even killing 1-2 in the process before you leap to relative safety. If they insist on harassing you for that whole time, they've made a huge misplay and wasted time while your team secures pylons.
Just because you have Q to fall back on does not mean you should rush in and use it as soon as possible. Pick your battles carefully; single out characters who have trouble escaping like Cezanne and Renoah. If other enemies join the fight, turn your attention to the most fragile character that can stun you (Cezanne, Renny Flame, and Elika as examples). Take note of enemy health and armor before committing to Q and use that chance to decisively even the playing field.
Taking a rather extreme example, let's say you're playing 7v7 in Nether Dale and go to harass the opposing team's base pylon. If their team is smart, they will maybe commit 1-3 players to dealing with you, though even 3 is probably more than enough. If they commit more, they'd better be winning by a massive lead since that's otherwise becoming a huge waste of manpower. With full RP you could end up distracting 5+ enemies for well over the 15 seconds granted by your invincibility, maybe even killing 1-2 in the process before you leap to relative safety. If they insist on harassing you for that whole time, they've made a huge misplay and wasted time while your team secures pylons.
Just because you have Q to fall back on does not mean you should rush in and use it as soon as possible. Pick your battles carefully; single out characters who have trouble escaping like Cezanne and Renoah. If other enemies join the fight, turn your attention to the most fragile character that can stun you (Cezanne, Renny Flame, and Elika as examples). Take note of enemy health and armor before committing to Q and use that chance to decisively even the playing field.
Tactics - Movement Options
I've talked a bit about how Danmei's leap (and to a smaller extent j.R) can be used as movement tools. Beyond more direct uses like chasing enemies and running away, let's take a look at what else we can do with these options in specific maps and situations.
Under Siege (3 vs 3 map) - Relatively flat terrain. Not many interesting things to do with leaping, though be aware that you need a bit of distance from the center platform if you want to leap cleanly over it. Otherwise you'll skate to either side a bit.
Nether Dale (7 vs 7 map) - The chasms near either team's spawn can be leaped across in some places; jump cleanly across the broken bridge segments or leap to/from the RP pickup and the section of land between the home pylons and the center pylon. If an enemy is fleeing from you or other teammates by these chasm paths, punish them with a leaping slam to their doom.
The narrow passages along the side pylons' path make great spots to abuse your j.R, but only against characters with a shorter range than you. Do not try this on Renny Flame or Elrath. They are better at this than you. Also with proper distance, you can jump back up to the center path from either side pylon using your Shift. Try to practice this move when you can; it saves a lot of time and makes Danmei very formidable on this map.
As mentioned in the Q move entry, a 4 or 5 RP invincibility allows you to claim a pylon while completely invincible (the process takes 12 seconds). This allows you to occasionally force an offensive push no matter what the odds are.
Naga's Pit (Free for all) - Each of the three floors has several places where you can leap across the central hole. Take advantage of this on the middle floor when the healing pickup is active. Danmei also has a somewhat unique tool to go safely downward from these holesquickly: his j.R! Fall down a ways towards one of the outer edges, then execute this move to fly down and forward towards the ledge.
Steam Canal (4 vs 4) - A battle fought on the catwalks can lead to advantageous uses of j.R, but as with Nether Dale be aware when your ability to do so it outmatched by other characters.
Save RP between rounds unless you are relatively confident you can secure a win. You earn a small bit of RP at the beginning of each round but that doesn't mean you have to waste what you gain naturally.
Some characters are thin enough to hug the walls in the train tunnel and not be hit by the train. Danmei is not one of those characters. If you hear the train coming, get off of the tracks immediately.
Night Under Siege / Alter of War (3 vs 3 / 2 vs 2) - Same rules as Steam Canal but on flatter maps with fewer people.
Under Siege (3 vs 3 map) - Relatively flat terrain. Not many interesting things to do with leaping, though be aware that you need a bit of distance from the center platform if you want to leap cleanly over it. Otherwise you'll skate to either side a bit.
Nether Dale (7 vs 7 map) - The chasms near either team's spawn can be leaped across in some places; jump cleanly across the broken bridge segments or leap to/from the RP pickup and the section of land between the home pylons and the center pylon. If an enemy is fleeing from you or other teammates by these chasm paths, punish them with a leaping slam to their doom.
The narrow passages along the side pylons' path make great spots to abuse your j.R, but only against characters with a shorter range than you. Do not try this on Renny Flame or Elrath. They are better at this than you. Also with proper distance, you can jump back up to the center path from either side pylon using your Shift. Try to practice this move when you can; it saves a lot of time and makes Danmei very formidable on this map.
As mentioned in the Q move entry, a 4 or 5 RP invincibility allows you to claim a pylon while completely invincible (the process takes 12 seconds). This allows you to occasionally force an offensive push no matter what the odds are.
Naga's Pit (Free for all) - Each of the three floors has several places where you can leap across the central hole. Take advantage of this on the middle floor when the healing pickup is active. Danmei also has a somewhat unique tool to go safely downward from these holesquickly: his j.R! Fall down a ways towards one of the outer edges, then execute this move to fly down and forward towards the ledge.
Steam Canal (4 vs 4) - A battle fought on the catwalks can lead to advantageous uses of j.R, but as with Nether Dale be aware when your ability to do so it outmatched by other characters.
Save RP between rounds unless you are relatively confident you can secure a win. You earn a small bit of RP at the beginning of each round but that doesn't mean you have to waste what you gain naturally.
Some characters are thin enough to hug the walls in the train tunnel and not be hit by the train. Danmei is not one of those characters. If you hear the train coming, get off of the tracks immediately.
Night Under Siege / Alter of War (3 vs 3 / 2 vs 2) - Same rules as Steam Canal but on flatter maps with fewer people.
Tactics - Character-Specific
(Not totally complete at the moment. Just want to tackle very simple things first)
Vs Cezanne (Lich)
His best range for L is right around the best range for your j.R. Predict him and go first, or block and approach with L. However a better Cezanne will try use his j.R to dance around you and force you to come to him. Be patient and just block unless he is extremely close. If you want to take a chance you can use F to neuter his jumping for a short while, Q to try for some pressure, or trade his j.R with yours (though this last one is usually disadvantageous).
Cezanne's phase shift (Shift) lasts around 6 second if he starts with full SP. He won't be able to guard after he exits this mode so be patient, guard, and pursue him relentlessly once it wears off.
Vs Danmei
The worst part of a mirror match is not knowing how long their Q is going to last when you hit yours. Try not to be the first one to use it unless you're being ganged up on.
If he tries to rush with L and you see an opening, stun him with j.L to stop his momentum. F combined with j.R are also effective at locking him down.
Vs D!ck (Shotgun dwarf)
A D!ck playing really aggressive keepaway is hard to keep up with. His L and j.L are relatively quick, so don't try to beat him at execution speed. His short height also makes connecting with your j.L more difficult. I prefer to leave this matchup alone if I can help it, but if you really have to kill him you absolutely need to block his shotgun as you walk towards him.
Vs Elika (Melee-gunner)
Be patient and guard. If she misses during her L spam and you have room to run, get out of her range and play keepaway with j.R or close back in with L. A short-length Q can really help even the field with her, as one or two combos is generally fatal.
Be ready to block anytime you or she finishes a combo; her Q is not usually fatal to Danmei on its own due to his high health, but it's better to block it if possible.
Vs Elrath (Scythe)
Be aware that the 4th hit of her L combo (where she pulls the scythe back) hits behind you. You need to turn around while guarding or you will get hit. However Elrath should generally not be using LLL in 1v1 situations (LR is better for her) as the third L itself is unsafe on hit.
Block when she is up close unless you have the advantage of range. She's quick enough to knock you out of your own startup.
Danmei's leap can go right over her F (stone wall) if both it and you are on level ground.
Vs Gaspar (Explosives dwarf)
Generally a little easier to catch up with than D!ck due to his slower speed. Also a little less threatening at a distance to his longer reload and shaky accuracy. If you can knock him out of the air with j.R, he can be punished hard. His L and j.L are extremely quick, so don't try to beat him at execution speed. His short height also makes connecting with your j.L more difficult.
Vs Renny Flame
Her L-R-R (punch-launcher-teleport kick) is tricky; the third hit comes from behind you, so you need to turn around to block it. However they may also fake you out and not use the last hit so practice your reaction time.
Her tornado (R-R) reaches farther than your j.R, but if you're close enough to use it (or sidestep L) before she launches it you can create an opening to approach. She can launch it in a different direction than where she is facing, so don't think you're safe all the time.
Her Shift teleport-step makes her hard to catch; do not get caught spamming if she is blocking. She can escape and start pressuring you with tornados if you are careless.
Vs Renny Glacier
Try your best to not let her chill or freeze you. Her R and j.R ice projectiles deal a lot of damage on top of this, and she's rather difficult to catch up with between her Shift teleport-step and the backwards movement of her j.R.
Vs Renoah (Sniper)
She's almost completely helpless against you up close. Her j.R-R (aerial shotgun) can float over your L chain, but you can just punish with j.L or j.R instead. Binding her with F tends to seal the deal.
Vs Sewon (Monk)
If he tries to use his R to heal while alone, poke him at a distance with j.R or just suck it up and finish him off with L or j.L. The super armor on his move fades when he begins to slam the orb down.
Counter any jumping spam on his part with your own jumping moves. Even if you trade hits it usually works out in your favor.
Vs Tiac (Mace Knight)
Don't try to run away by leaping unless invincible; he can punish easily with his Dashing R. If you manage to get the leap started you're generally safe, but it's a bit difficult to find a time to use it if you're on the defensive.
His Q armor buff lasts 10 seconds. He does still take damage during his armor (though he does not become stunned and takes about half damage). Decide if the sitation calls for your own armor, but 1v1 you should be able to block anything he can throw at you. You can also use F to make him waste 3 valuable seconds of his armor, but you should be at a safe distance before doing so.
Vs Valle (Hammer Knight)
Don't try to run away by leaping unless invincible; she can punish easily with her Dashing R. If you manage to get the leap started you're generally safe, but it's a bit difficult to find a time to use it if you're on the defensive.
Her Q armor buff lasts 15 seconds at most, but also wears off when she takes enough damage (I would estimate around 100) so it's possible to power through it while invincible.
Miscellaneous
Vs Cezanne (Lich)
His best range for L is right around the best range for your j.R. Predict him and go first, or block and approach with L. However a better Cezanne will try use his j.R to dance around you and force you to come to him. Be patient and just block unless he is extremely close. If you want to take a chance you can use F to neuter his jumping for a short while, Q to try for some pressure, or trade his j.R with yours (though this last one is usually disadvantageous).
Cezanne's phase shift (Shift) lasts around 6 second if he starts with full SP. He won't be able to guard after he exits this mode so be patient, guard, and pursue him relentlessly once it wears off.
Vs Danmei
The worst part of a mirror match is not knowing how long their Q is going to last when you hit yours. Try not to be the first one to use it unless you're being ganged up on.
If he tries to rush with L and you see an opening, stun him with j.L to stop his momentum. F combined with j.R are also effective at locking him down.
Vs D!ck (Shotgun dwarf)
A D!ck playing really aggressive keepaway is hard to keep up with. His L and j.L are relatively quick, so don't try to beat him at execution speed. His short height also makes connecting with your j.L more difficult. I prefer to leave this matchup alone if I can help it, but if you really have to kill him you absolutely need to block his shotgun as you walk towards him.
Vs Elika (Melee-gunner)
Be patient and guard. If she misses during her L spam and you have room to run, get out of her range and play keepaway with j.R or close back in with L. A short-length Q can really help even the field with her, as one or two combos is generally fatal.
Be ready to block anytime you or she finishes a combo; her Q is not usually fatal to Danmei on its own due to his high health, but it's better to block it if possible.
Vs Elrath (Scythe)
Be aware that the 4th hit of her L combo (where she pulls the scythe back) hits behind you. You need to turn around while guarding or you will get hit. However Elrath should generally not be using LLL in 1v1 situations (LR is better for her) as the third L itself is unsafe on hit.
Block when she is up close unless you have the advantage of range. She's quick enough to knock you out of your own startup.
Danmei's leap can go right over her F (stone wall) if both it and you are on level ground.
Vs Gaspar (Explosives dwarf)
Generally a little easier to catch up with than D!ck due to his slower speed. Also a little less threatening at a distance to his longer reload and shaky accuracy. If you can knock him out of the air with j.R, he can be punished hard. His L and j.L are extremely quick, so don't try to beat him at execution speed. His short height also makes connecting with your j.L more difficult.
Vs Renny Flame
Her L-R-R (punch-launcher-teleport kick) is tricky; the third hit comes from behind you, so you need to turn around to block it. However they may also fake you out and not use the last hit so practice your reaction time.
Her tornado (R-R) reaches farther than your j.R, but if you're close enough to use it (or sidestep L) before she launches it you can create an opening to approach. She can launch it in a different direction than where she is facing, so don't think you're safe all the time.
Her Shift teleport-step makes her hard to catch; do not get caught spamming if she is blocking. She can escape and start pressuring you with tornados if you are careless.
Vs Renny Glacier
Try your best to not let her chill or freeze you. Her R and j.R ice projectiles deal a lot of damage on top of this, and she's rather difficult to catch up with between her Shift teleport-step and the backwards movement of her j.R.
Vs Renoah (Sniper)
She's almost completely helpless against you up close. Her j.R-R (aerial shotgun) can float over your L chain, but you can just punish with j.L or j.R instead. Binding her with F tends to seal the deal.
Vs Sewon (Monk)
If he tries to use his R to heal while alone, poke him at a distance with j.R or just suck it up and finish him off with L or j.L. The super armor on his move fades when he begins to slam the orb down.
Counter any jumping spam on his part with your own jumping moves. Even if you trade hits it usually works out in your favor.
Vs Tiac (Mace Knight)
Don't try to run away by leaping unless invincible; he can punish easily with his Dashing R. If you manage to get the leap started you're generally safe, but it's a bit difficult to find a time to use it if you're on the defensive.
His Q armor buff lasts 10 seconds. He does still take damage during his armor (though he does not become stunned and takes about half damage). Decide if the sitation calls for your own armor, but 1v1 you should be able to block anything he can throw at you. You can also use F to make him waste 3 valuable seconds of his armor, but you should be at a safe distance before doing so.
Vs Valle (Hammer Knight)
Don't try to run away by leaping unless invincible; she can punish easily with her Dashing R. If you manage to get the leap started you're generally safe, but it's a bit difficult to find a time to use it if you're on the defensive.
Her Q armor buff lasts 15 seconds at most, but also wears off when she takes enough damage (I would estimate around 100) so it's possible to power through it while invincible.
Miscellaneous
- With a few exceptions, all status debuffs (chill, Cezanne's poison, Renny Glacier's freeze) last 10 seconds.
- Exceptions to the above include: Burn (5 seconds), Danmei's F bind (3 seconds), and Renoah's Q (3 seconds after the crosshairs appear).
Outro / Version History
If you're new to Danmei hopefully this can give you a push in the right direction. If anyone feels they have a better grasp of Danmei or has criticisms towards any particular sections, please share and I'll do my best to test and incorporate such feedback into this guide.
Until then, keep swan diving and keep smashing.
Version 1.07 (current)
-Additional comment to F discussing how it is not affected by Elrath's Q or Sewon's F.
-Additional comment to Q and Nether Dale discussing Danmei's unique ability to claim pylons while invincible.
Version 1.06 Been a while. A bit more experience under my belt. Lots of minor changes:
-All entries of "LMB" and RMB" replaced with L and R; the community seems to prefer using the latter (and it saves space and is easier to type so I'm not complaining)
-Most attacks have additional comments:
--LLL: Note about first hit being good for stun.
--LRR: Note about ending juggle with j.R for pressure. Added strong emphasis that the last hit (LRR) should never be used.
--R: Note about using super armor properties to bait attacks.
--F: Note about potential uses against Tiac, among others. Also added to his matchup section.
-Nether Dale entry in movement options edited to reflect Danmei's ability to return to the center path from the side pylons with Shift.
-Matchups slightly edited all around to reflect additional experience. More feedback would be appreciated, especially for dealing with D!ck or Gaspar.
Version 1.05 - Updated F with more accurate info on how the bind effect works. Added observation on j.RMB having guard break properties.
Version 1.04 - Added notes to L-R-R, j.L, j.R, and Shift regarding the use of j.L to juggle launched or airborne enemies. Additionally, the Tactics section will be expanded and revised to specific goals; currently "Harassing the Enemy", "Movement Options", and "Character-Specific".
Version 1.03 - Added Tactics section. Discusses Danmei's utility with harassing the enemy.
Version 1.02 - Edited L-R-R, j.R, Shift, and F entries slightly for opportune timings to use. Separated Attacks and Rage Skills due to character length constraints.
Version 1.01 - Addition to Q rage skill: didn't figure out how to do his shout until just now. Oops.
Version 1.00 - First draft
Until then, keep swan diving and keep smashing.
Version 1.07 (current)
-Additional comment to F discussing how it is not affected by Elrath's Q or Sewon's F.
-Additional comment to Q and Nether Dale discussing Danmei's unique ability to claim pylons while invincible.
Version 1.06 Been a while. A bit more experience under my belt. Lots of minor changes:
-All entries of "LMB" and RMB" replaced with L and R; the community seems to prefer using the latter (and it saves space and is easier to type so I'm not complaining)
-Most attacks have additional comments:
--LLL: Note about first hit being good for stun.
--LRR: Note about ending juggle with j.R for pressure. Added strong emphasis that the last hit (LRR) should never be used.
--R: Note about using super armor properties to bait attacks.
--F: Note about potential uses against Tiac, among others. Also added to his matchup section.
-Nether Dale entry in movement options edited to reflect Danmei's ability to return to the center path from the side pylons with Shift.
-Matchups slightly edited all around to reflect additional experience. More feedback would be appreciated, especially for dealing with D!ck or Gaspar.
Version 1.05 - Updated F with more accurate info on how the bind effect works. Added observation on j.RMB having guard break properties.
Version 1.04 - Added notes to L-R-R, j.L, j.R, and Shift regarding the use of j.L to juggle launched or airborne enemies. Additionally, the Tactics section will be expanded and revised to specific goals; currently "Harassing the Enemy", "Movement Options", and "Character-Specific".
Version 1.03 - Added Tactics section. Discusses Danmei's utility with harassing the enemy.
Version 1.02 - Edited L-R-R, j.R, Shift, and F entries slightly for opportune timings to use. Separated Attacks and Rage Skills due to character length constraints.
Version 1.01 - Addition to Q rage skill: didn't figure out how to do his shout until just now. Oops.
Version 1.00 - First draft
More Archeblade guides
- How to make Your Own Server?★ 5 (283)17k views289 ♥1 minUpdated Mar 31, 2013
- Play more and better to get Meceta, Buy Recipies for Consumables★ 4 (114)9.9k views27 ♥1 minUpdated Nov 7, 2013
- Comprehensive Basics Guide★ 4 (145)6.1k views141 ♥95 minUpdated Aug 7, 2013
- ArcheBlade - The Original Novel in English★ 4 (92)4.8k views146 ♥9 minUpdated Mar 25, 2014
- All characters stats★ 4 (38)2k views13 ♥1 minUpdated May 10, 2014
- Beginners guide to Ridika★ 3 (28)1.9k views24 ♥4 minUpdated Apr 30, 2014




This guide was created by its original author on the Steam Community. Are you the author and want it removed? Request removal.