Dark Souls II – Full Walkthrough, Optimized Build, All NPC Quests
Walkthrough Overview
- Step-by-step walkthrough of a full Dark Souls II: Scholar of the First Sin playthrough
- All missable NPC questlines completed in a single run
- Efficient routing to become powerful early
- An optimized PvE and PvP-viable melee build
- Clear and efficient stat allocation
- Efficient soul farming routes at multiple stages of the game
- Suitable for both first-time players and experienced players
This guide shows how an experienced player routes Dark Souls II to build a strong character early and avoid common mistakes. While player skill is important, proper stat allocation, gear choices, and routing dramatically reduce difficulty. Min-maxing is not required to enjoy Dark Souls II, but having a solid foundation helps players focus on learning and having fun.
Join my Discord server (linked on my Steam profile) to ask questions, leave feedback, or view my other guides.
Leveling Strategy
- Upgrade your weapon early using titanite from late-game areas
- Use spice to reduce the stat requirements of weapon buff spells
- The walkthrough uses the Rapier (strong early weapon with low requirements)
- Any weapon works if you stay below 70% equip load
- Visit DLC areas early for a stronger rapier and a powerful ring
- Some soul farming may be required
How to Use This Guide
- It assumes basic familiarity with Dark Souls II mechanics
- Kill most Crystal Lizards to avoid farming upgrade materials later
- NPC questlines must be completed before killing area bosses
- Once a boss dies, all unfinished NPC quests in that area become locked
- The guide prioritizes becoming as strong as possible before boss fights
- Weaker bosses are generally tackled first
- Boss strategies are not explained in detail; external references are recommended
- Soloing bosses is strongly encouraged, as boss HP increases per summoned ally
Quit-out Definition:
- Quit to the main menu and reload the game
- Resets enemies and advances NPC quest states without resting at a bonfire
Stat Leveling Order
- Adaptability → 10
- Vitality → 8
- Dexterity → 12
- Vigor → 20
- Endurance → 20
- Adaptability → 17
- Faith → 14
- Intelligence → 10
- Attunement → 10
- Dexterity → 15
- Strength → 13
- Faith → 25
- Attunement → 13
- Vigor → 50
- Faith → 40
- Attunement → 30
Help, I’m Using Mouse and Keyboard
Dark Souls II has unusual default keybindings, especially for mouse and keyboard players. The recommended bindings below make it control much more like the other Dark Souls games.
Important notes:- To save keybindings, you must cancel out of the menu (Backspace by default)
- Even if you change the cancel key, you must still press Backspace to confirm changes
- Due to a long-standing bug, the Disable Double Clicking option only works after opening the keybindings menu each time you launch the game
Recommended keybindings:
Keyboard
- Confirm → E
- Cancel → Q
- Function 1 → B
- Use Item → R
- Interact → E
Mouse
- Attack (Right Hand) → Left Click
- Attack (Left Hand) → Right Click
- Strong Attack (Right Hand) → Shift + Left Click
- Strong Attack (Left Hand) → Shift + Right Click
- Use Item → Double Left Click
- Interact → Double Right Click
- Disable Double Clicking
Things Betwixt
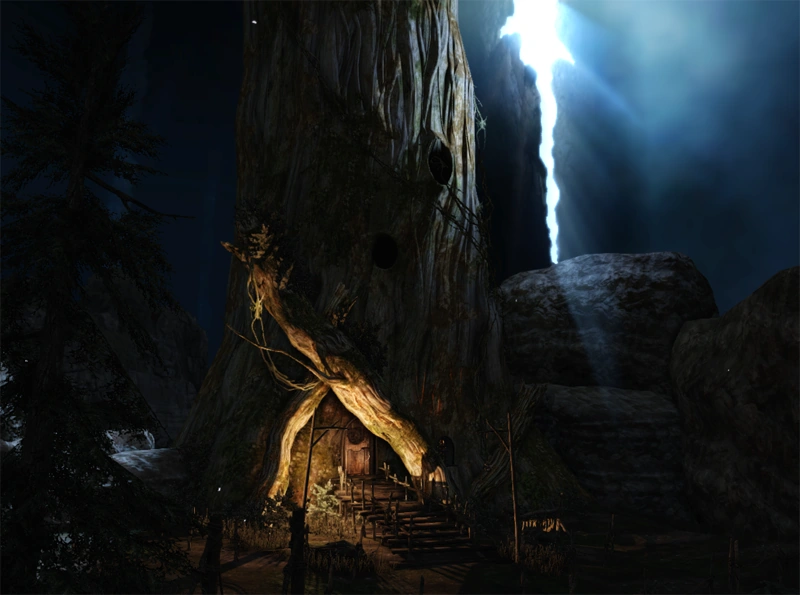 Step 1 – Explore Things Betwixt
- Get accustomed to the game’s controls
- Search the area for loot (Gold Pine Resin, Rusted Coin, Small Smooth & Silky Stone)
- Kill the Ogre for the Stone Ring (can be done later when you’re stronger)
- Enter the Firekeeper’s house
Step 2 – Create Your Character
- Talk to the Firekeeper
- Choose Knight as your starting class (best stats for this build)
- Choose the Life Ring as your starting gift
- Smaller character models slightly improve visibility
Step 3 – Prepare Before Leaving
- Two-hand your Broadsword for increased damage
- Equip the Life Ring
- Go upstairs and loot the chest for a Human Effigy
Step 4 – Complete the Tutorial
- Exit through the back door to the Fire Keeper’s Dwelling bonfire and light it
- Follow the path forward through the tutorial area
- Enter both fog gates on either side of the path and clear each mini-area
- Return to the main path and continue to Majula
Majula
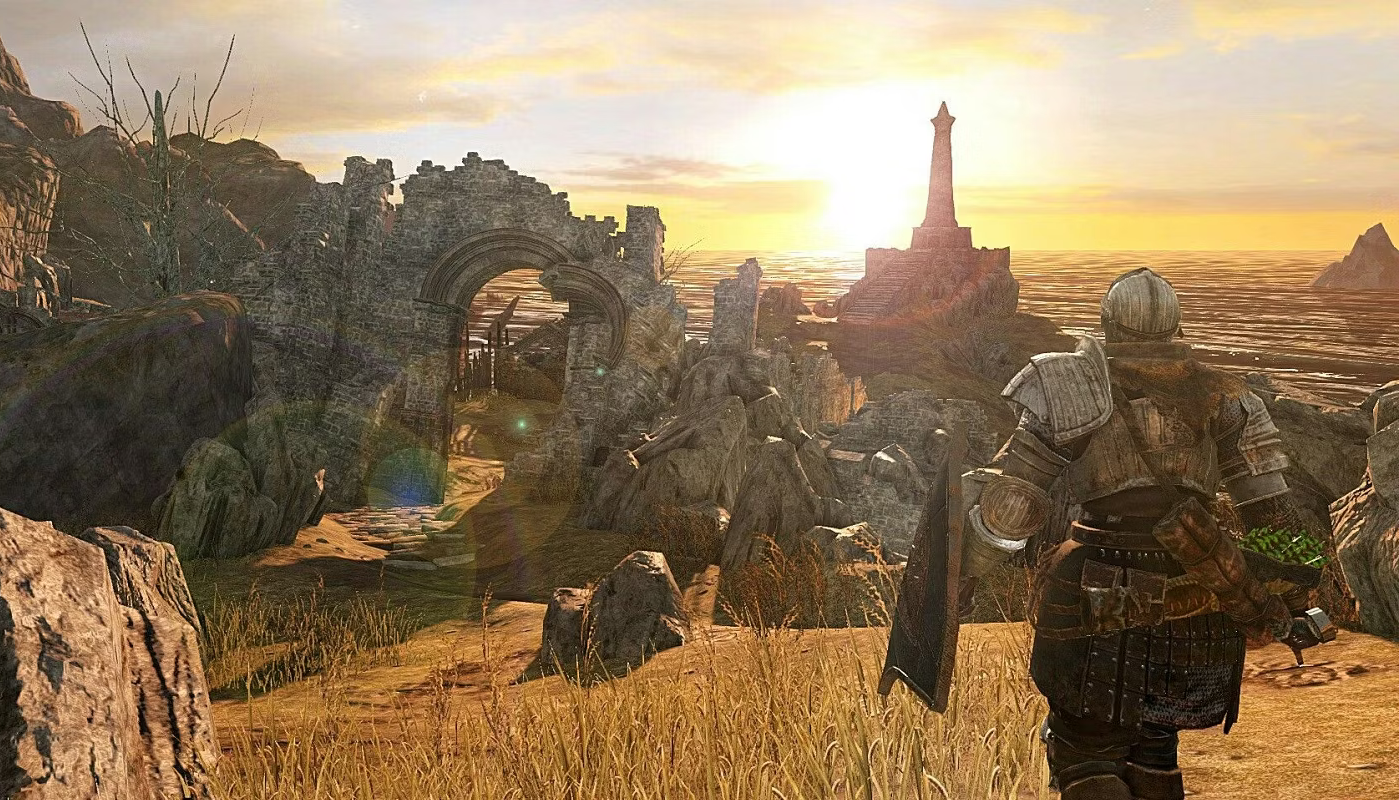 Step 5 – Shaded Woods Detour
- Before entering Majula proper, take the tunnel on the left toward the Shaded Woods
- Talk to Benhart of Jugo at the blocked gate
- Return through the tunnel
- Walk off the cliff onto the hidden path and loot Morning Star and Binoculars
Step 6 – Reach Majula’s Bonfire
- Follow the cliffside path upward
- Light the Majula bonfire (you can now warp between bonfires)
Step 7 – Level Up
- Talk to the Emerald Herald at the bonfire and receive the Estus Flask
- Talk to her again to unlock leveling
- Follow the stat leveling order listed above
Step 8 – Join the Way of Blue
- Go up the stairs to the monument near the bonfire
- Talk to Crestfallen Saulden and join the Way of Blue covenant
- Receive the Blue Seal ring and equip it (increases max HP, similar to Life Ring)
Step 9 – Majula Overview
- The blacksmith shop near the bonfire is locked for now
- Sweet Shalquoir lives in the house past it (lets you leave your covenant if needed)
- The manor near the well is locked
- Avoid falling into the pit in the center of Majula
Step 10 – Upgrade Your Estus Flask
- Go to the well in front of the mansion
- Attack the stone on the well and loot the Estus Shard
- Talk to the Emerald Herald and upgrade your Estus Flask
Step 11 – Loot Maughlin’s Shop
- Go to the armorer on the opposite side of the mansion
- Enter Maughlin’s shop and loot the chest upstairs for a Titanite Shard
Forest of Fallen Giants
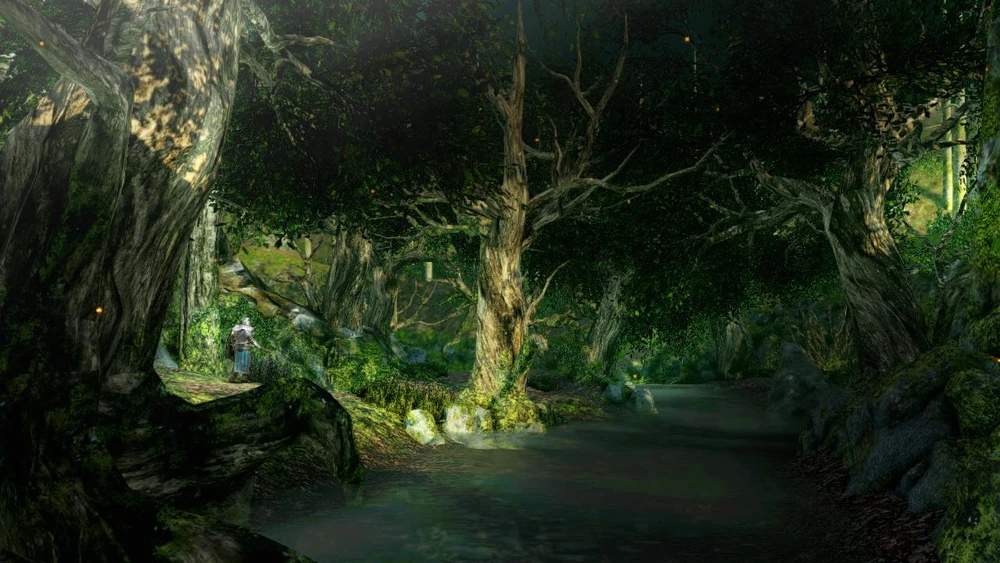 Step 12 – Enter the Forest of Fallen Giants
- From the bonfire, take the path opposite the monument down below the cliffside
- Enter the tunnel and cross to the middle of the wooden bridge
- Jump to the chest below to loot a Human Effigy
- Continue into the open area (run past the Ogre if needed)
- Follow the right riverbank and light the Crestfallen’s Retreat bonfire
Step 13 – Reach Cardinal Tower
- Cross the wooden planks and climb into the circular area
- Climb the ladder on the right and kill the firebomb-throwing Hollow Soldier
- Enter the doorway opposite the ladder and follow the tunnel
- Go up the stairs and climb the ladder
- Enter Cardinal Tower and light the bonfire
Step 14 – Obtain Leningrast’s Key
- Talk to Merchant Hag Melentia and buy Leningrast’s Key (1000 souls)
- Break the door upstairs and loot the chest
- Kill the Crystal Lizard (rest at the bonfire and retry if it escapes)
- Exit the tower, drop onto the wooden scaffold below, and loot the area
Step 15 – Upgrade Your Weapon
- Return to Majula and unlock Lenigrast’s blacksmith shop
- Talk to him, rest, then buy the Rapier (1000 souls)
- Equip and two-hand the Rapier
- Have Lenigrast upgrade the Rapier → +1
Step 16 – Loot the Estus Shard
- Warp to Cardinal Tower and climb down the ladder
- Go left past the room with a locked door and exit outside
- Climb the tree root ramp to the upper walkway
- Turn around and follow the walkway to the explosive barrels
- Stand near the barrels to bait a Hollow Soldier’s firebomb, blowing a hole in the wall to the bonfire
- Turn back and climb the ladder along the walkway
- Loot the Estus Shard on the platform
- Ignore the Pursuer (you will fight him later)
Step 17 – Meet Cale the Cartographer
- Jump from the tree root ramp onto the rooftops and navigate across while avoiding archers
- Drop to the ground to loot a Titanite Shard, then return to the rooftops
- Enter the cave near the top of the ramp
- Talk to Cale until he gives you the Manor Key
Step 18 – Loot the Large Titanite Shard
- From the Cardinal Tower bonfire, run out the hole in the wall and down the stairs
- Enter the open doorway on the right
- Avoid the ballistae and drop to the lower floor
- Open the trapped chest and dodge the trap
- Attack the nearby locked door to trigger enemies to open it
- Kill them and loot the chest for a Large Titanite Shard and Life Ring
Step 19 – Upgrade Your Weapon
- Return to Majula and use the Manor Key to enter the manor
- Loot the Pharros’ Lockstone, Titanite Shards, and the Estus Shard in the basement
- Upgrade your Rapier → +4
- Buy and equip Hard Leather Gauntlets from Maughlin (940 souls)
- Talk to Cale again in his cave so he moves to the manor
Step 20 – Loot the Chloranthy Ring
- Return to the ballista room
- Use a Pharros’ Lockstone in the wall
- Strike the face that appears to reveal a secret room
- Loot the Titanite Slab and Chloranthy Ring (equip it)
Step 21 – Meet Mild-Mannered Pate
- Exit the building and head right to find Pate and talk to him
- Enter the gate and go through the building
- Interact with the illusory wall at the bottom of the stairs to loot the Sorcerer’s Staff
- Return to Pate to receive the White Sign Soapstone
Step 22 – Open the Gate Shortcut
- Return toward the ballista room, turn right, and run past the explosive barrels
- Go through the doorway, turn left, and open the gate (shortcut to Cardinal Tower)
- Climb the ladder near the explosive barrels for additional loot
Step 23 – Defeat The Last Giant
- Take the lift past the gate shortcut down
- Stay behind the boss to avoid attacks
- Defeat the Last Giant and receive the Soldier’s Key
Step 24 – Reach the Soldier’s Rest bonfire
- Unlock the door in the room before the tree root ramp
- Light the Soldier’s Rest bonfire and loot the Leather Gloves (and the rest of the set)
Step 25 – Defeat the Pursuer
- Return past the explosive barrels, turn left, and unlock the door
- Fight the Pursuer (optionally use the ballistae to two-shot him)
- Defeat him and equip the Ring of Blades
Step 26 – Loot the Drangleic Armor Set
- Continue past the boss room and drop onto the broken stone slab
- Loot the Drangleic armor set and equip the Drangleic Mail and Leggings
- Return to the ledge and interact with the crow’s nest to travel to the Lost Bastille
Lost Bastille
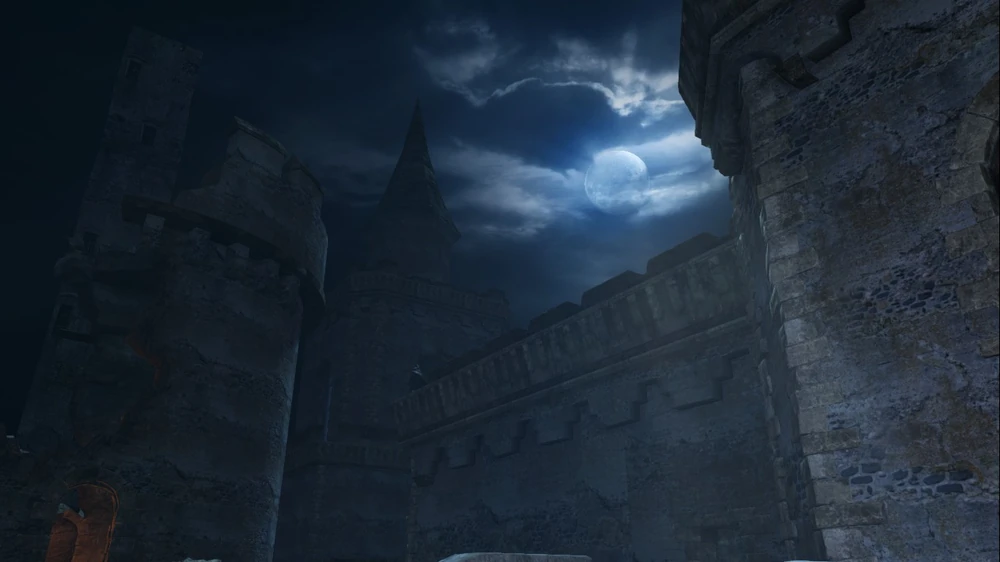 Step 27 – Loot the Covetous Silver Serpent Ring
- Loot the chest beside you to obtain the Dull Ember
- Exit the building, turn right, and follow the ledge
- Loot the Large Titanite Shard at the end
- Drop down and loot the chest for the Covetous Silver Serpent Ring and a Fragrant Branch of Yore
- The Pursuer will spawn behind you (leave the area to despawn him)
- Equip the Covetous Silver Serpent Ring (replace Blue Seal)
Step 28 – Loot the Large Titanite Shard
- Continue forward through the barricaded door and talk to Lucatiel of Mirrah
- Exit through the side door
- Turn around and go up the stone parapet
- Climb the ladder to the second floor
- Loot the Large Titanite Shard
Step 29 – Reach McDuff’s Workshop
- Continue down the path past the first Gaoler
- Push the explosive barrel behind the second Gaoler down the stairs
- Detonate the wall to reveal McDuff’s Workshop and light the bonfire
Step 30 – Upgrade Your Weapon
- Light your torch at the bonfire
- Enter McDuff’s workshop and light the brazier
- Rest at the bonfire so McDuff moves
- Loot the two Large Titanite Shards from the chests
- Give McDuff the Dull Ember, and buy a Large Titanite Shard (2500 souls)
- Have him upgrade your Rapier → +6
Step 31 – Loot the Antiquated Key
- Return to Lucatiel’s building
- Loot the chest to obtain the Antiquated Key
- Warp back to Majula
Shaded Woods
 Step 32 – Unpetrify Rosabeth of Melfia
- From Majula, head toward Things Betwixt and enter the tunnel to the Shaded Woods
- Use a Fragrant Branch of Yore to unpetrify Rosabeth
- Give her any armor set (e.g. Imported Set) so she relocates later
- Talk to Benhart of Jugo so he acknowledges the path is open
Step 33 – Reach the Ruined Fork Road Bonfire
- Kill the enemies hiding behind nearby doors
- Pull the lever Rosabeth was blocking
- Defeat the ambush and kill the Basilisk behind the gate
- Open the left door and light the Old Akelarre bonfire
- Open the opposite door and loot the Estus Shard
- Return to Majula and upgrade your Estus Flask
- Continue forward to the Ruined Fork Road bonfire
Step 34 – Loot Vengarl’s Helm
- From the Ruined Fork Road, take the right path into the misty woods
- Hug the left wall to find Vengarl of Forossa’s head in a clearing
- Talk to him repeatedly to receive Vengarl’s Helm
- Equip Vengarl’s Helm (+2 Vitality, high defense)
Step 35 – Loot the Chloranthy Ring +1
- Return to the start of the misty area
- Hug the right wall instead
- Loot the Old Sun Ring from the first chest
- Loot the Chloranthy Ring +1 from the second chest
- Replace your base Chloranthy Ring
Step 36 – Reach the Shaded Ruins Bonfire
- Continue past the chests up the hill
- Cross the stone bridge
- Turn around and light the Shaded Ruins bonfire
Step 37 – Loot the Sublime Bone Dust
- From the bonfire, jump through the window facing back toward the bridge
- Enter the building and kill the Syan Knight
- Loot the Sublime Bone Dust
- Return to Majula and burn it at the bonfire
Step 38 – Upgrade Your Weapon
- At the end of the bridge, circle around and jump to the upper level
- Loot the Titanite Chunk
- Return to Majula and upgrade your Rapier → +7
Step 39 – Obtain the Covetous Silver Serpent Ring +1
- Warp to Cardinal Tower
- Buy a Fragrant Branch of Yore from Melentia (12,000 souls)
- Talk to her until she gives Covetous Silver Serpent Ring +1 (equip it)
- Exhaust her dialogue so she moves to Majula
Step 40 – Rescue Weaponsmith Ornifex
- Return to Shaded Ruins and head right from the bridge
- Drop through the breakable boards into the cave and kill the Basilisks
- Exit to the ledge, unpetrify the lion warrior, and kill it to obtain the Fang Key
- Free Ornifex and exhaust her dialogue
- Loot the Fragrant Branch of Yore from the cell
Step 41 – Loot the Skeptic’s Spice
- Return to the hole above Ornifex’s cave
- Continue past it and climb one of the two towers to loot a Skeptic’s Spice
- Drop into the hole in front of one of the towers to meet Darkdiver Grandahl
Step 42 – Defeat Vengarl’s Body
- From the bonfire, head left to the building near the bridge
- Exit through the basement to reach Manscorpion Tark’s area
- Kill the Crystal Lizard to obtain a Boltstone
- Unpetrify the lion warrior blocking the path
- Fight Vengarl’s body (heavy attacks will stagger him)
- Defeat him and loot Vengarl’s armor set
- Equip Vengarl’s Armor and Boots, and the Leather Gloves to stay under 70% equip load
Step 43 – Infuse Your Weapon with Lightning
- Warp to McDuff’s Workshop
- Infuse your Rapier with Lightning using the Boltstone
Heide’s Tower of Flame
 Step 44 – Loot the Ring of Binding
- From Majula, enter the stone rotunda next to the manor and light the Heide’s Ruin bonfire
- Progress through the area, defeating the Old Knights
- Defeat the third Old Knight to spawn a lever and pull it
- Defeat the greatsword Old Knight in the large room to spawn a second lever and pull it
- Take the right exit, kill the Heide Knight, and loot the Ring of Binding
- Equip it (replace the Life Ring unless you rarely die)
Step 45 – Defeat the Dragonrider
- Enter the fog wall and defeat the Dragonrider
- Stay behind the boss to avoid attacks
- Light the Tower of Flame bonfire and exhaust Licia of Lindeldt’s dialogue (she moves to Majula)
Step 46 – Loot Sublime Bone Dust
- Continue toward No Man’s Wharf
- Kill the Syan Knight guarding the chest and loot the Sublime Bone Dust
- Return to Majula and burn it at the bonfire
Step 47 – Unlock Future Estus Shard
- Continue along the path toward No Man’s Wharf
- Note the petrified enemy near the end of the path blocking a doorway
- After obtaining a Fragrant Branch of Yore in the next area, return here to unpetrify him and loot an Estus Shard
- Light the Unseen Path to Heide bonfire, then return to Majula
The Gutter
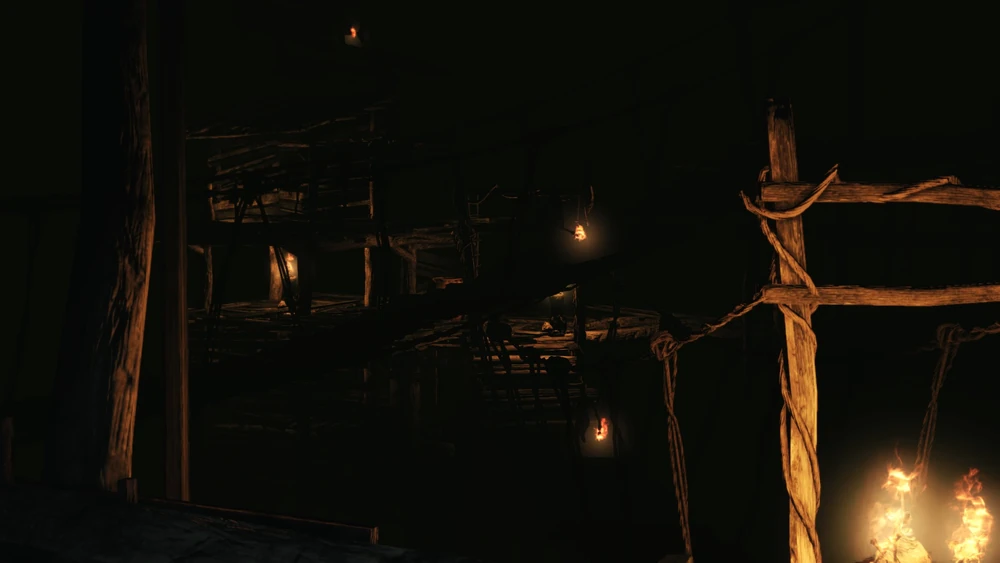 Step 48 – Enter the Gutter
- Buy the Silvercat Ring from Sweet Shalquoir (13,400 souls) and equip it (replace the Covetous Silver Serpent Ring +1)
- Drop down the Majula pit using the wooden platforms, and heal as needed
- Use the binoculars to prevent rolling upon landing
- Enter the lower doorway leading to the Gutter (not the Grave of Saints)
- Swap back to your Covetous Silver Serpent Ring +1 after landing
Step 49 – Reach the Upper Gutter Bonfire
- Cross the rope bridge, drop down, and head left to kill the Syan Soldier and loot the Sublime Bone Dust
- Turn around and go right past the Rupturing Hollows
- Climb down the wooden structures and light the Upper Gutter bonfire
Step 50 – Loot the Fragrant Branch of Yore and Estus Shard
- Use a torch and light sconces to help navigate
- Cross two rope bridges, then descend into the building and loot the Fragrant Branch of Yore
- Return to the bridges, then cross the third rope bridge to the tower with a ladder
- Walk off the outcrop near the base of the ladder to reach a hidden platform
- Loot the Titanite Chunk from the nearby jars
- Continue descending to loot the Estus Shard
Step 51 – Reach Black Gulch
- Continue through the area until you reach a gap guarded by poison-spitting statues
- Jump across to the building with a fog wall and break the wall on the far side to reveal the Central Gutter bonfire
- Descend the ladders to the bottom (most are safe)
- Break the jars and drop into Black Gulch
- Loot the Fragrant Branch of Yore near the entrance
- Light the Black Gulch Mouth bonfire
Black Gulch
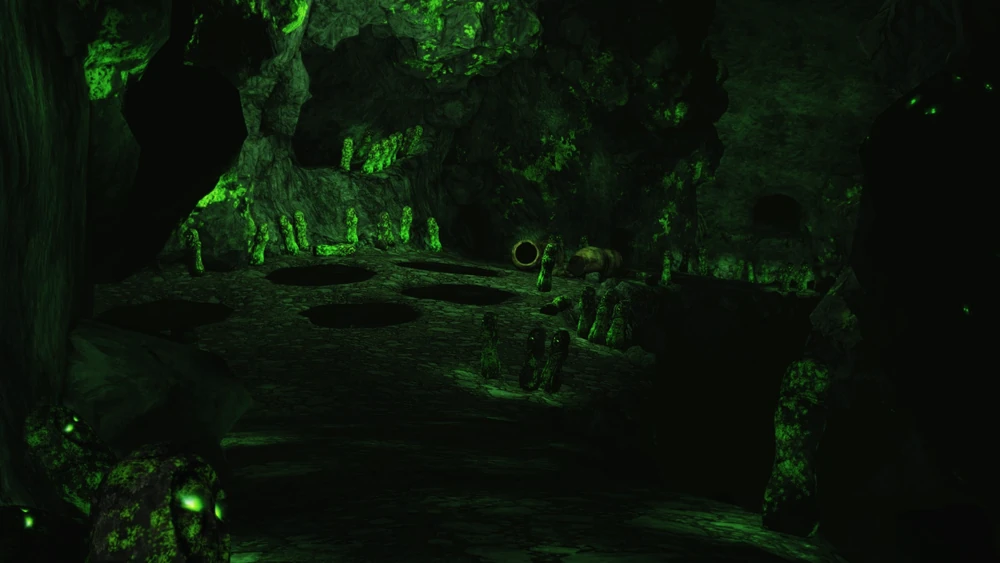 Step 52 – Upgrade Your Weapon to Max
- Progress through Black Gulch while avoiding poison statues and ambushes from Darksuckers
- Farm the Darksuckers for Titanite Chunks (5% drop rate)
- Return to Majula once you have enough Titanite Chunks
- Upgrade your Rapier → +10
Step 53 – Loot the Estus Shard in Things Betwixt
- Warp to Things Betwixt
- Use a Fragrant Branch of Yore to unpetrify the hollow at the third fog gate
- Drop into the pit and loot the Estus Shard
- Farm the Basilisks here for a Boltstone (can also buy one later)
Step 54 – Loot the Heavy Iron Key
- Warp to the Cardinal Tower bonfire
- Go to the lift leading to the Last Giant
- Equip the Silvercat Ring and drop into the salamander pit
- Follow the tunnel into the cave
- Loot the Heavy Iron Key from the skeleton
Huntsman’s Copse
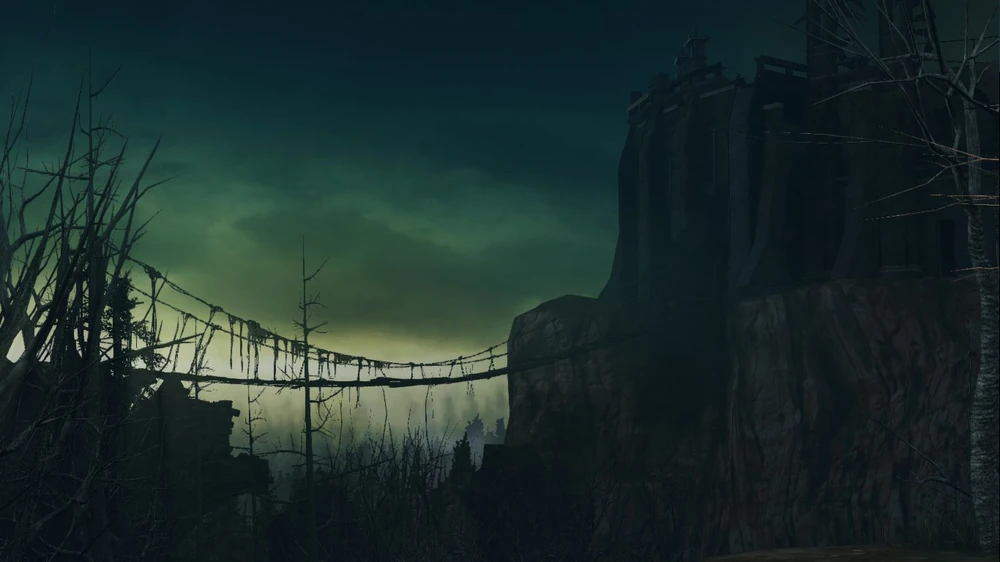 Step 55 – Enter Huntsman’s Copse
- Talk to Licia of Lindeldt in Majula and pay 2000 souls to rotate the rotunda
- Enter Huntsman’s Copse and light the Undead Refuge bonfire
- Talk to Felkin the Outcast (requires 8 INT / 8 FTH to access his shop)
- Continue past the first large building and light the Bridge Approach bonfire
Step 56 – Loot the Sublime Bone Dust
- Cross the footbridge, then head uphill and curve around to the right
- Walk off the ledge onto the round metal structure
- Drop inside and loot the Sublime Bone Dust
- Return to the top of the hill, pull the lever to lower the bridge, and ignore the cave and locked building ahead
Step 57 – Unlock the Undead Lockaway Bonfire
- Cross the small bridge and follow the cliffside path
- Go up the path on the left, defeat the invading NPC, and loot the Undead Lockaway Key
- Continue along the cliffside and enter the cave from the back
- Pull the lever to open the gate, loot the Estus Shard, and kill the Crystal Lizard (Titanite Chunk)
- Return to the locked building, unlock it, and light the Undead Lockaway bonfire
- Talk to Creighton the Wanderer and exhaust his dialogue
- Warp to Shaded Ruins and talk to Creighton atop the right-most tower near the fog wall
No Man’s Wharf
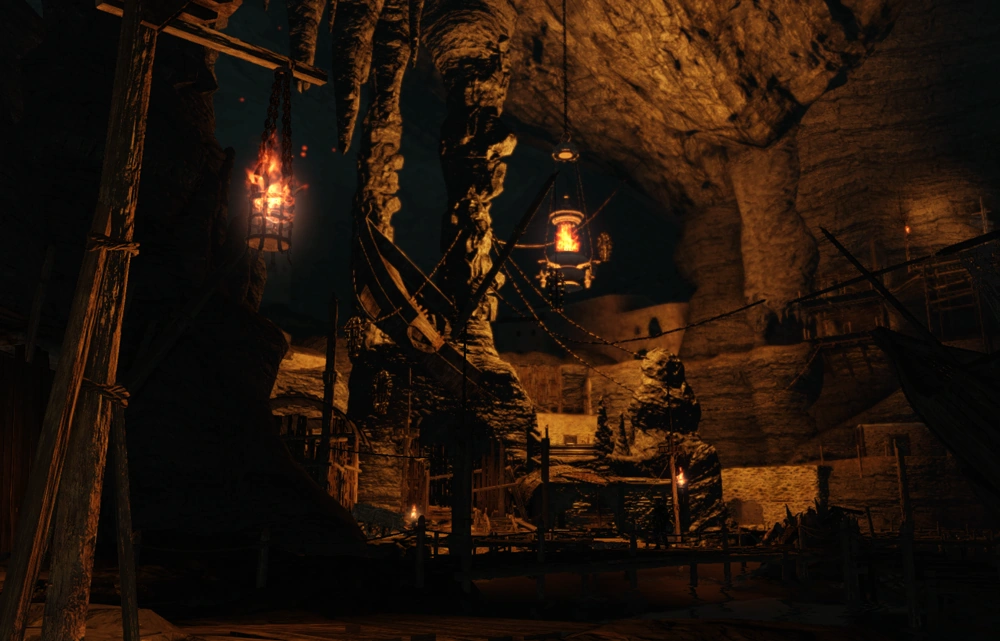 Step 58 – Light Up the Wharf
- Progress into No Man’s Wharf and climb the stairs
- Enter the building on the left and talk to Lucatiel of Mirrah
- From the stairs, go right into the clearing guarded by Stray Hounds
- Use a Pharros’ Lockstone in the Pharros’ contraption to illuminate the area
Step 59 – Summon the Ship
- Go up the stairs to the cliff inhabited by Darkdwellers
- Enter the building with the hole in the wall
- Approach the door to trigger the ambush and loot the chests inside
- Continue upward and pull the lever to summon the ship
- Drop down into a building and loot the Fragrant Branch of Yore
- Continue into a small building and talk to Lonesome Gavlan
Step 60 – Defeat the Flexile Sentry
- Reach the pier and lower the bridge to unlock the shortcut to the bonfire
- Ignore Carhillion of the Fold (requires 8 INT)
- Use a Human Effigy and summon Lucatiel of Mirrah on the pier
- Board the ship and defeat the Flexile Sentry
- Use the contraption past the boss room to sail to the Lost Bastille
Lost Bastille (Return Visit)
Step 61 – Open the Shortcut to McDuff
Step 62 – Defeat the Ruin Sentinels
Step 63 – Reach Belfry Luna
Step 64 – Defeat the Belfry Gargoyles
Step 65 – Reach Sinner’s Rise
- Take the lift up and light the Exile Holding Cells bonfire
- Descend into the courtyard
- When the Pursuer invades, run left and loot the Estus Shard from the chest
- Pull the lever by the gate to unlock the shortcut to McDuff’s Workshop
Step 62 – Defeat the Ruin Sentinels
- From McDuff’s Workshop, climb the stairs and unpetrify the Royal Swordsman
- Enter the boss room and defeat the Ruin Sentinels (be aggressive to avoid being outnumbered)
- Search the room for 4 illusory walls, then proceed to the Servant’s Quarters bonfire
Step 63 – Reach Belfry Luna
- Exit the door to the Bastille wall, turn left, and loot the Bastille Key
- Return to the bonfire and go down the ladder
- Repel the Pursuer’s invasion and loot the Priest’s Chime nearby
- Use a Pharros’ Lockstone to access Belfry Luna
Step 64 – Defeat the Belfry Gargoyles
- Enter Belfry Luna and run to the top
- Loot three Skeptic’s Spice along the way
- Ring the bell and defeat the Belfry Gargoyles
Step 65 – Reach Sinner’s Rise
- Return to McDuff’s Workshop and go past the Pursuer into the room full of Rupturing Hollows
- Use the Antiquated Key to open the door at the far end
- Cross the courtyard, climb the ladder, and enter the building
- Ride the cage lift up and loot the Skeptic’s Spice
- Open the gate leading to Sinner’s Rise
- Note the Straid’s Cell bonfire up the stairs (blocked by a statue) for later
- Cross the bridge, enter Sinner’s Rise, and climb the ladder to light the Saltfort bonfire
Sinner’s Rise
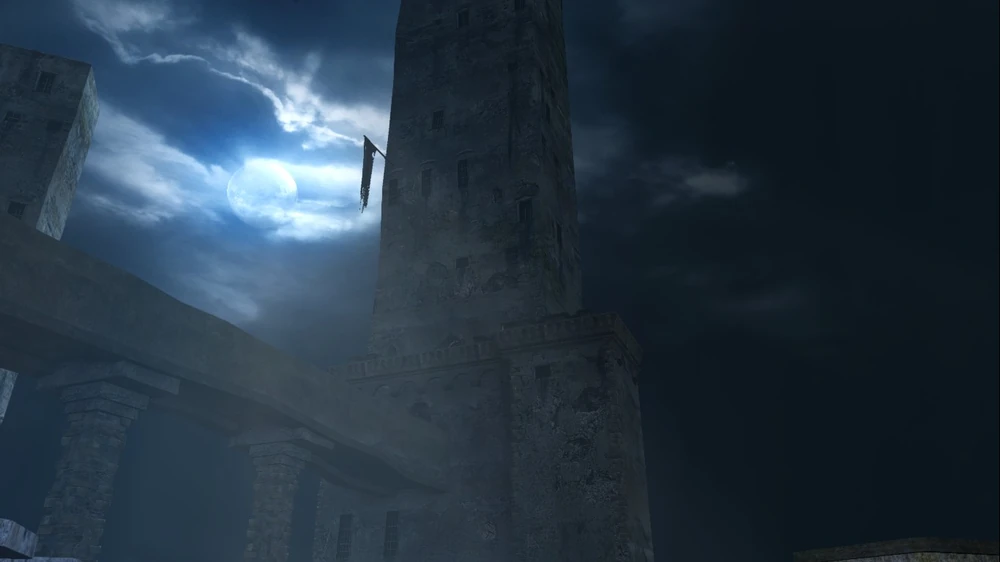 Step 66 – Defeat the Lost Sinner
- Ride the lift down and use the Bastille Key to unlock all of the doors
- Light the oil on both sides of the fog wall with a torch (enables locking onto the boss)
- Use a Human Effigy and summon Lucatiel at the base of the lift
- Enter the fog wall and defeat the Lost Sinner
- If Lucatiel dies, use a Homeward Bone and retry
- Loot the Fragrant Branch of Yore and light the Primal Bonfire
Step 67 – Unpetrify Straid of Olaphis
- Return to the Saltfort bonfire, cross the bridge, and go up the stairs
- Use a Fragrant Branch of Yore to unpetrify Straid and light his bonfire
- Straid can transmute boss souls — do not consume them (used to create unique weapons later)
Grave of Saints
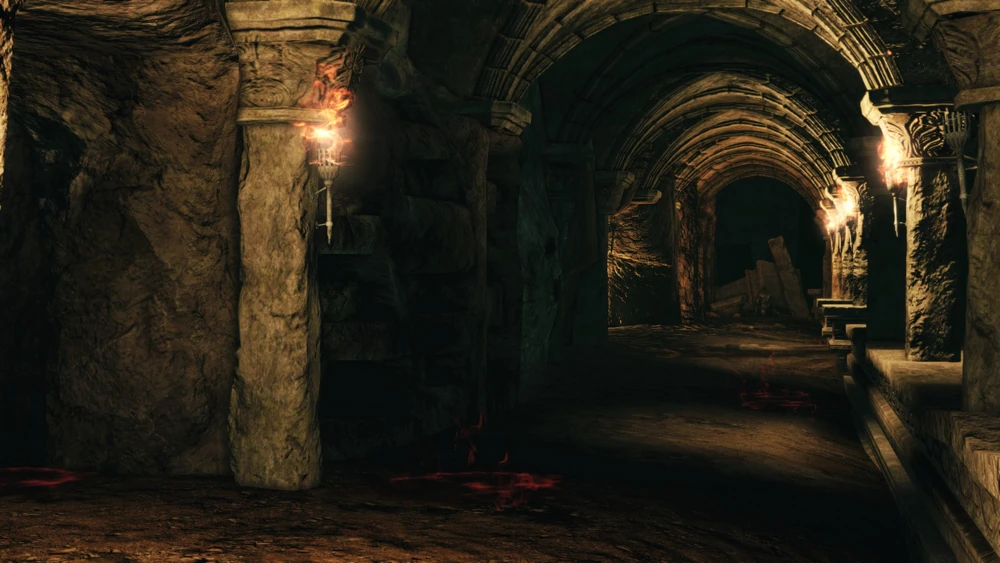 Step 68 – Defeat the Royal Rat Vanguard
- Drop down the Majula pit and enter the first doorway to reach the Harval’s Resting Place bonfire
- Progress through the area and defeat the Royal Rat Vanguard
- Talk to the Rat King after the boss to join the Rat King covenant
Heide’s Tower of Flame (Return Visit)
Step 69 – Defeat the Old Dragonslayer
- Warp to the Heide’s Ruin bonfire
- From the large room, take the left path and fight through the knights
- Defeat the Hellkite Dragon to spawn a lever, then pull it to lower the drawbridge
- Enter the fog wall and defeat the Old Dragonslayer
- Light the Blue Cathedral bonfire and talk to Blue Sentinel Targray (sells Boltstones for 7000 souls; requires a Token of Fidelity)
Shaded Woods (Return Visit)
Step 70 – Defeat Scorpioness Najka
- Buy the Ring of Whispers from Sweet Shalquoir (5800 souls)
- Warp to the Shaded Woods and speak to Manscorpion Tark with the ring equipped
- Exhaust his dialogue, then unequip the ring
- Use a Human Effigy and summon Tark near the fog wall
- Defeat Scorpioness Najka
- Speak to Tark again with the ring equipped to receive a Fragrant Branch of Yore
- Continue through the boss room to the Doors of Pharros
Doors of Pharros
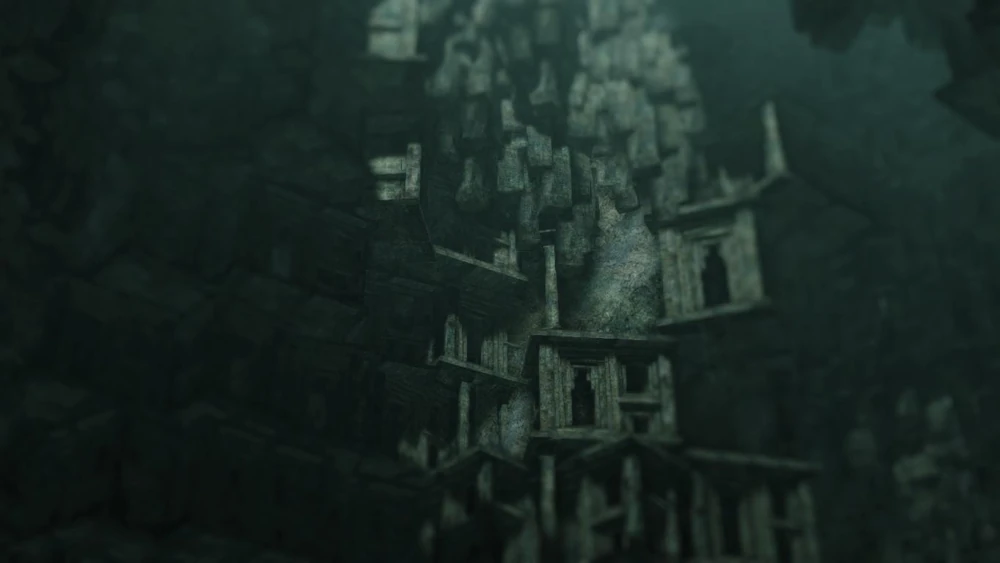 Step 71 – Loot Santier’s Spear
- Pass the Mastodon Warrior to light the Gyrm’s Respite bonfire
- Continue into the large room and activate the Pharros’ contraption on the ground
- Crawl through the partially opened door, defeat the Mastodon Warrior, and loot Santier’s Spear
- Ignore the other Pharros’ contraptions
Step 72 – Defeat the Royal Rat Authority
- Climb the ladder on the far side of the room and follow the narrow path
- Loot the trapped chest in the alcove for a Titanite Chunk
- Continue along the path and light the Ordeal’s End bonfire
- Defeat the Royal Rat Authority (bring Poison Moss Clumps)
- Kill the small rats quickly and cure poison before focusing the boss
Step 73 – Reach Brightstone Cove Tseldora
- Return to the Gyrm’s Respite bonfire
- Climb the staircase to reach Brightstone Cove Tseldora and light the Royal Army Campsite bonfire
Brightstone Cove Tseldora
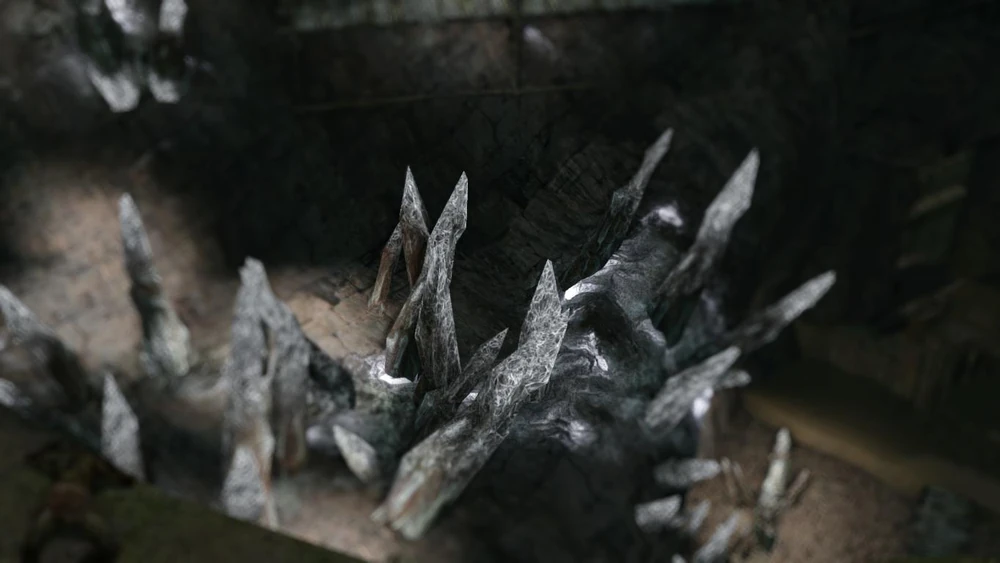 Step 74 – Defeat the Prowling Magus and Congregation
- Cross the field and jump into the well at the far end
- Follow the tunnel into the building, kill the Mimic, and loot it
- Use a Human Effigy and summon Benhart of Jugo near the tents
- Proceed through the spider cave to the fog wall
- Enter the fog wall and defeat the Prowling Magus and Congregation (kill casters first)
- Exit the boss room, climb the ladder outside to reach Cromwell the Pardoner’s room, and loot the Skeptic’s Spice
- Enter the cave on the right and light the Chapel Threshold bonfire
Step 75 – Loot the Estus Shard
- From the Chapel Threshold bonfire, head out of the cave and jump off the ledge onto the lower area with a doorway
- Run right onto the wooden platform, drop down, kill the Hollow Mage, and loot the Estus Shard from the structure beside him
- Return to the Chapel Threshold bonfire, take the two ziplines down, and drop to light the Lower Brightstone Cove bonfire
Step 76 – Defeat the Duke’s Dear Freja
- Return to the Chapel Threshold bonfire and enter the doorway instead of dropping down
- Pass through the building, exit, and cross the wooden walkway into the spider-infested building
- Pull the lever on the left, climb the ladder, and descend the spider webs
- Loot the Simpleton’s Spice near the fog wall
- Enter the fog wall and defeat the Duke’s Dear Freja (attack the heads)
- Continue past the boss, kill the Duke of Tseldora, and loot the Fragrant Branch of Yore
- Light the Primal Bonfire
Step 77 – Obtain the Second Dragon Ring
- Warp to the Shaded Woods
- Equip the Ring of Whispers and speak to Manscorpion Tark
- Receive the Second Dragon Ring and equip it (replace the Ring of Binding)
- Equip the Drangleic Gauntlets
Black Gulch (Return Visit)
Step 78 – Obtain the Forgotten Key
Step 79 – Loot the Dragon Talon
Step 80 – Defeat The Rotten
Step 81 – Obtain Flynn’s Ring
- From the Black Gulch Mouth bonfire, light a torch and drop down just before the first tar pools
- Talk to Lucatiel of Mirrah on the hidden platform below
- Continue past the tar pools to the narrow section where Cragslippers pop out of the wall and try to push you off
- Stand between them and carefully walk off the ledge onto the platform below
- Facing the stone door, hug the wall and walk off the right side onto a narrow ledge
- Follow the ledge in the opposite direction to reach a second platform and enter the cave
- Bait the two giants to the cave entrance and kill them to obtain the Forgotten Key
Step 79 – Loot the Dragon Talon
- Use the lift in the cave to exit
- Return to the Cragslippers, drop down to the first platform, unlock the stone door, and talk to Darkdiver Grandahl
- Return to Majula, descend the pit, and unlock the stone doors between the Grave of Saints and Gutter entrances to loot the Dragon Talon
- Warp to the Upper Gutter bonfire, cross the first rope bridge, turn left, drop to the ring of sconces, climb the ladder, and unlock the stone doors
Step 80 – Defeat The Rotten
- Return to Black Gulch and continue past the cragslippers
- Hug the right cliff and use a Fragrant Branch of Yore to access the Hidden Chamber bonfire
- Use a Human Effigy and summon Lucatiel nearby
- Enter the fog wall and defeat The Rotten (destroy arms to limit moveset)
- Light the Primal Bonfire
Step 81 – Obtain Flynn’s Ring
- From the Primal Bonfire, interact with the obelisk to enter the Crown of the Sunken King DLC (endgame-level area)
- Use the Dragon Talon to open the door and reach Shulva, Sanctum City
- Run through the area, descending the stairs until you cross the bridge to the Dragon Sanctum
- Progress through the sanctum, passing the circular, revolving stone door, until you reach a staircase in a narrow corridor with a hole in the floor
- Drop into the room full of Corrosive Egg Crawlers, climb the ladder, and loot Flynn’s Ring from the chest
- Equip Flynn’s Ring (replace the Ring of Blades)
Huntsman’s Copse (Return Visit)
Step 82 – Defeat the Executioner’s Chariot
Step 83 – Defeat the Skeleton Lords
- From the Bridge Approach bonfire, cross the first footbridge, then make a sharp right and cross the second bridge
- Climb the hill past the ambush to reach the large rope bridge
- Drop off the right side onto a platform to loot the Token of Fidelity (needed for Blue Sentinel Targray), then return and cross the bridge
- Enter the Undead Purgatory and reach the boss’ fog wall
- Use the wall inlets to avoid the chariot and move forward
- Pull the lever to lower the gate, then fight and defeat the Executioner’s Chariot (stay beside it, not in front)
Step 83 – Defeat the Skeleton Lords
- Warp to the Undead Lockaway bonfire and pass through the cave
- Enter the fog wall and defeat the Skeleton Lords (Alluring Skulls help control adds)
- Continue forward, cross the metal bridge, and enter Harvest Valley
Harvest Valley
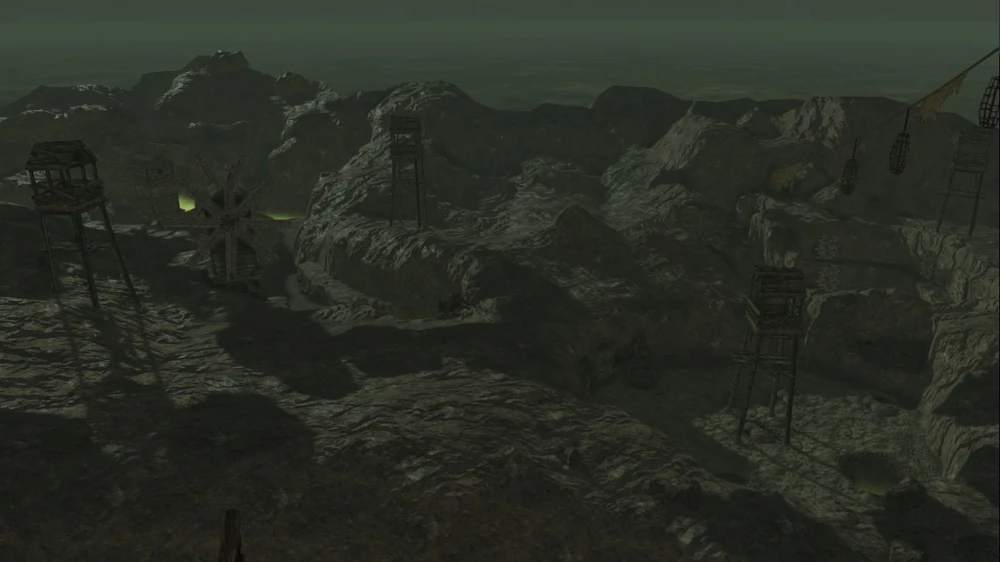 Step 84 – Reach the Mines Bonfire
- Enter Harvest Valley and talk to Stone Trader Chloanne near the Poison Pool bonfire (exhaust her dialogue so she moves to Majula)
- Loot a Fragrant Branch of Yore from the cave in the first poison pool
- Talk to Gavlan in the nearby cave (he relocates to the Doors of Pharros)
- Continue through the valley and light the Mines bonfire
Step 85 – Reach Earthen Peak
- Past the bonfire, drop into the holes to loot a Simpleton’s Spice
- Continue forward and loot another Simpleton’s Spice and a Skeptic’s Spice in the next area (guarded by Undead Huntsmen)
- Proceed to the bridge leading to Earthen Peak
- At the end of the bridge, go left and interact with the statue to join the Heirs of the Sun covenant
Earthen Peak
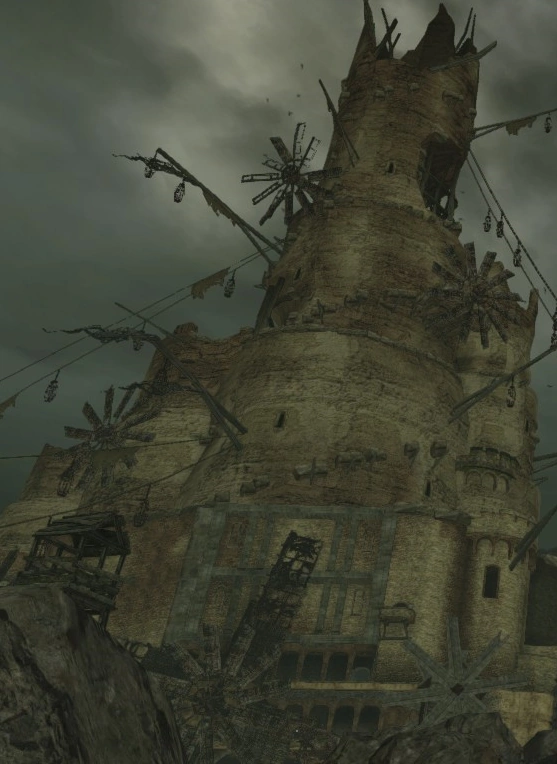 Step 86 – Defeat the Covetous Demon
- Enter Earthen Peak and talk to Lucatiel of Mirrah at the end of a flooded hallway to receive the Ring of Steel Protection +1
- Loot the Skeptic’s Spice from the alcove near the stairs (guarded by a Poison Brumer)
- Enter the fog wall and defeat the Covetous Demon (stay behind it)
- Cross the bridge and light the Central Earthen Peak bonfire
Step 87 – Recruit Laddersmith Gilligan
- Light a torch at the bonfire and burn the windmill to remove the poison from the next boss room
- Go upstairs and outside to find Laddersmith Gilligan
- Buy a ladder (2000 souls) and exhaust his dialogue so he moves to Majula
- Loot the nearby Simpleton’s Spice
Step 88 – Complete Pate and Creighton’s Questline
- Continue through Earthen Peak to find Mild-Mannered Pate
- Drop to the platform behind his door, open it, and exhaust his dialogue
- Warp to Brightstone Cove Tseldora (Chapel Threshold bonfire)
- Drop down, enter the doorway, and find Pate and Creighton fighting
- Kill one — the other rewards you with a key to the locked house ahead
Step 89 – Defeat Baneful Queen Mytha
- Return to Earthen Peak and climb to the top
- Use a Human Effigy and summon Jester Thomas near the fog wall
- Enter the fog wall and defeat Baneful Queen Mytha (Thomas will carry the fight)
Iron Keep
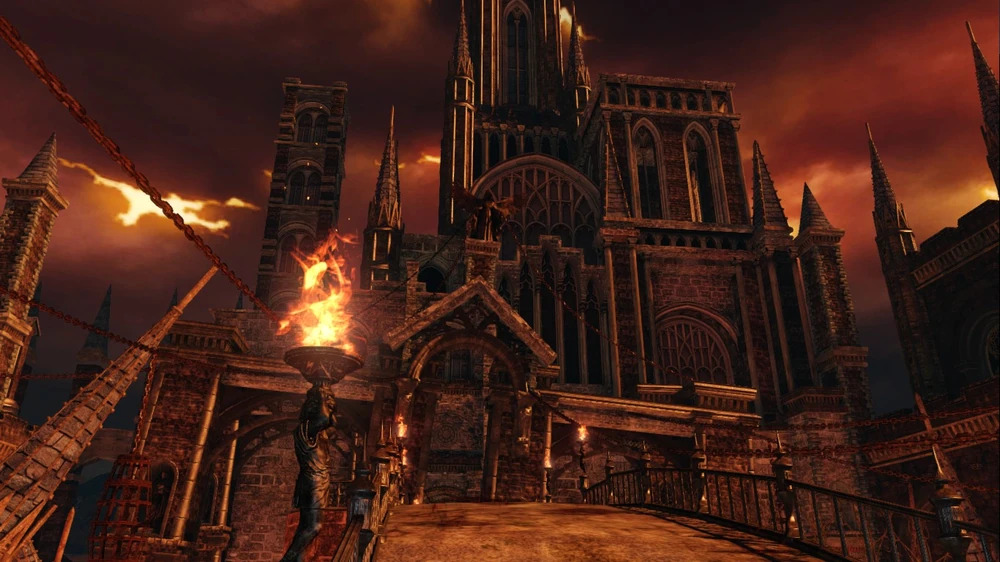 Step 90 – Defeat the Smelter Demon
- Take the lift past Mytha’s boss room and light the Threshold Bridge bonfire
- Cross the bridge, turn right, and talk to Magerold of Lanafir
- Buy a Fragrant Branch of Yore (7500 souls) and enough items (10,000 total) to receive the Covetous Gold Serpent Ring +1
- Enter the next area, turn right, and cross the iron bridge to the fog wall
- Defeat the Smelter Demon (play cautiously; Lucatiel can be summoned if needed)
- Light the Ironhearth Hall bonfire
- Return to the boss room and defeat the Pursuer (drops Ring of Blades +1)
Step 91 – Loot Belfry Sol
- From the bonfire, continue forward and use a Pharros’ Lockstone to reveal the ladder
- Climb up to Belfry Sol
- Run through, loot three Simpleton’s Spice, ring the bell, and return to Iron Keep
Step 92 – Unlock Dark Weapon
- Ensure you have at least 10 ATN / 10 INT / 14 FTH to cast Dark Weapon
- Warp to No Man’s Wharf and talk to Carhillion of the Fold so he moves to Majula
- Warp to Huntsman’s Copse and buy Dark Weapon from Felkin the Outcast (2700 souls)
- Return to Magerold and use 6 Simpleton’s Spice to reduce Dark Weapon’s INT requirement to 10
- Equip the Sorcerer’s Staff in your offhand, swap to the Hard Leather Gauntlets, and attune Dark Weapon at a bonfire
- Use Dark Weapon to buff your Rapier before fights (short duration, multiple casts — best used for bosses)
Step 93 – Defeat the Old Iron King
- Continue through Iron Keep and use the lever to reveal the ladder over the lava walkway
- Climb the ladder to loot a Simpleton’s Spice if needed
- Proceed through the trap room, climb the ladder, and light the Eygil’s Idol bonfire
- Pull the lever to disable the flamethrowers
- Exit outside, enter the fog wall, and defeat the Old Iron King
- Light the Primal Bonfire
Drangleic Castle
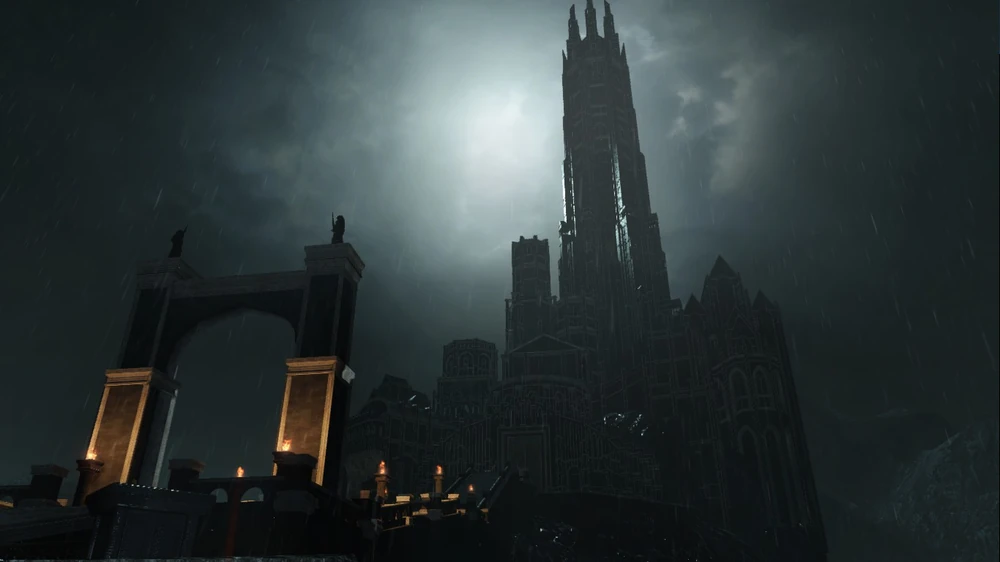 Step 94 – Enter Drangleic Castle
- From the Ruined Fork Road bonfire, take the left path to the Shrine of Winter
- Enter Drangleic Castle (kill enemies near the golems to open the doors)
- Talk to Chancellor Wellager on the staircase and exhaust his dialogue (becomes a merchant)
- Go left from the entrance, kill the Syan Knight, and loot the Undead Bone Shard
- Return to Majula and burn it to upgrade your Estus Flask to +5 (max)
Step 95 – Reach the King’s Gate Bonfire
- Continue through the castle and descend the ladder to the King’s Gate bonfire
- In the next room, kill enemies near the doors to activate them
- Take the rightmost door on the right wall to progress
- Loot the Frozen Flower from the corpse ahead
Step 96 – Meet Darkdiver Grandahl
- Open the far right door on the opposite wall and drop down
- Light the Under Castle Drangleic bonfire
- Talk to Darkdiver Grandahl and exhaust his dialogue to join the Pilgrims of the Dark covenant
- Do not enter the Dark Chasm of Old — warp back to the Ruined Fork Road bonfire
Step 97 – Obtain the Ice Rapier
- Warp to the Shrine of Winter and enter the Crown of the Ivory King DLC
- Use the Frozen Flower to access Frozen Eleum Loyce
- Equip the Covetous Gold Serpent Ring +1 in place of the Covetous Silver Serpent Ring +1
- Head right at the first fork and farm the Ice Rapier from rapier-wielding Rampart Soldiers
- Once obtained, swap back to the Covetous Silver Serpent Ring +1
- Warp to McDuff’s Workshop and infuse the Ice Rapier with Lightning (buy a Boltstone from Blue Sentinel Targray if needed)
- Upgrade the Ice Rapier to +5 (requires 15 Twinkling Titanite; upgrade as much as possible if you don’t have enough yet)
- Equip the Ice Rapier once upgraded (significant damage and range increase over the Rapier)
Step 98 – Defeat the Dragonrider Duo
- Return to the King’s Gate bonfire and climb the staircase looking over the poison pool
- Descend the ladder at the top and open the illusory wall to unlock the Forgotten Chamber bonfire
- Enter the throne room and talk to Queen Nashandra
- Enter the fog wall and defeat the Dragonrider Duo (kill the archer first)
- Continue forward and talk to Benhart of Jugo at the Central Castle bonfire
Step 99 – Loot the Estus Shard
- Climb the tall ladder at the end of the corridor to a room with a golem
- Loot the chests in the next room and kite the assassins to the golem and kill them to activate it
- Proceed into the cathedral and defeat the Executioner’s Chariot
- Exit the cathedral doors and descend the stairs to a small building and loot the Estus Shard
- Have the Emerald Herald upgrade your Estus Flask to have 12 charges (max)
Step 100 – Defeat the Looking Glass Knight
- Return to the Central Castle bonfire and use the lift near tall ladder to reach Milfaneto
- Loot the Key to King’s Passage and ride the lift down to open the locked door
- Use a Human Effigy and summon Benhart of Jugo near the fog wall
- Enter the fog wall and defeat the Looking Glass Knight (stay on his right side)
- Take the lift down to the Shrine of Amana and light the Tower of Prayer bonfire
Shrine of Amana
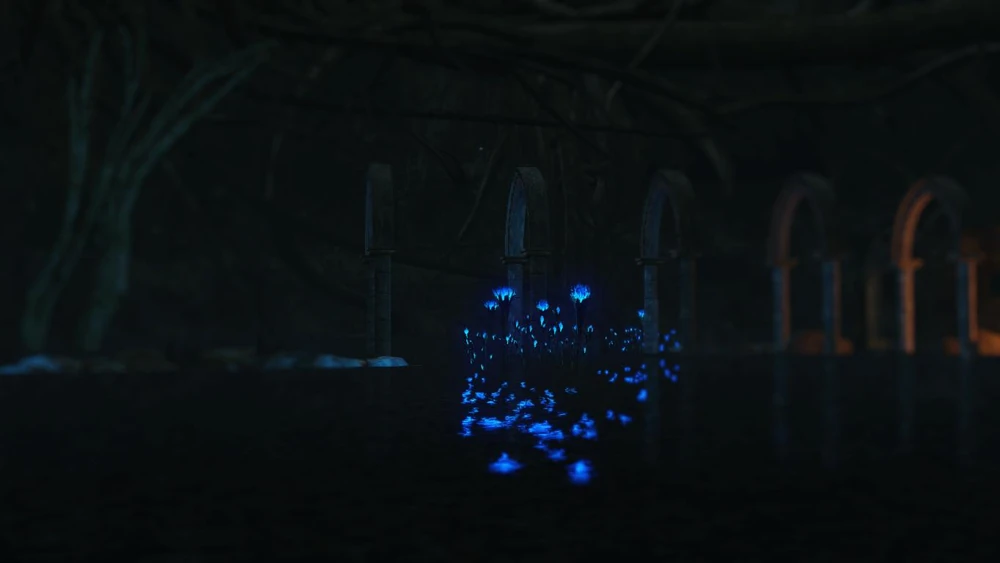 Step 101 – Reach the Crumbled Ruins Bonfire
- From the Tower of Prayer bonfire, loot Twinkling Titanite and a Skeptic’s Spice from the branch-covered path
- Follow the main path to the hut and talk to the Milfanito, then loot the nearby Skeptic’s Spice
- Continue through the cave and light the Crumbled Ruins bonfire
Step 102 – Farm Twinkling Titanite and Upgrade Gear
- Archdrake Pilgrims and Amana Priestesses can drop Twinkling Titanite
- Equip the Covetous Gold Serpent Ring +1 while farming
- Farm Twinkling Titanite until you have enough to upgrade the Ice Rapier → +5 (equip it)
- Farm an additional 36 Twinkling Titanite and upgrade Vengarl’s Armor, Helm, Leggings, and Drangleic Gauntlets → +5
Step 103 – Loot Sunlight Blade
- From the bonfire, continue forward and note the bridge on the left guarded by a Dragonrider (return later)
- Take the narrow water-covered path opposite the bridge and past the Ogre
- Loot the Estus Shard (if you missed one) and Sunlight Blade miracle at the end of the path
- Continue to the next hut and loot the Fire Tempest pyromancy from the chest in water to the right
- Proceed through the cave and light the Rhoy’s Resting Place bonfire
- Loot the Skeptic’s Spice in the circular area ahead
Step 104 – Unlock Sunlight Blade
- If you have 25 FTH, warp to Magerold of Lanafir
- Use 11 Skeptic’s Spice to reduce Sunlight Blade’s faith requirement (36 → 25 FTH)
- Equip the Priest’s Chime in place of the sorcerer’s staff
- Equip the Drangleic Gauntlets
- Sunlight Blade > Dark Weapon for damage (but only 1 cast vs 4)
- Swap based on encounter length
Step 105 – Defeat the Demon of Song
- Continue through the heavily guarded path to the fog wall
- Enter and defeat the Demon of Song (attack the face only)
- Light the Rise of the Dead bonfire
Step 106 – Free the Milfanito
- Return to Central Castle Drangleic and take the lift to Milfanito
- Use the Key to the Embedded to free her
- Talk to the Milfanito in the hut past the Tower of Prayer bonfire
- Talk to the Milfanito past the Rise of the Dead bonfire
- Return to the bonfire and take the lift down to the Undead Crypt Entrance bonfire
Undead Crypt
 Step 107 – Reach the Undead Ditch Bonfire
- Do not light a torch (Grave Warden Agdayne becomes hostile)
- Before crossing the bridge, drop down to the left and climb the ladder
- Loot the Crushed Eye Orb from the chest
- Cross the bridge and enter the graveyard room
- Light the Undead Ditch bonfire on the left
- Warp to Maula and use the Crushed Eye Orb in the rotunda to invade Licia
Step 108 – Unlock the Shortcut to the Boss
- Return to the Undead Ditch bonfire and proceed through the crypt
- Destroy tombstones that spawn Leydia Pyromancers to prevent being overwhelmed
- Continue to the end and pull the lever to unlock the shortcut to the boss
Step 109 – Clear the Main Hall
- Enter the large room leading to the fog wall
- Kill the three hollows near the alarm bell below the stairs without hitting the bell
- Clear the room if you want safe access to the chests at the end
Step 110 – Defeat Velstadt, the Royal Aegis
- Enter the fog wall and defeat Velstadt
- At ~50% HP he buffs himself and becomes more aggressive
- He is highly resistant to dark — use Sunlight Blade instead
- Continue forward and loot the King’s Ring behind King Vendrick
Step 111 – Unlock Sacred Oath
- Warp to the Straid’s Cell bonfire in the Lost Bastille
- Buy a second Sunlight Blade from Straid (12,400 souls)
- With 13 ATN, attune both copies for two casts per rest
- Transmute the Soul of Velstadt into the Sacred Oath miracle (3000 souls)
- Grants +50 physical attack and +75 defense for ~65 seconds
- Requires 4 attunement slots (not practical until 30 ATN)
Aldia’s Keep
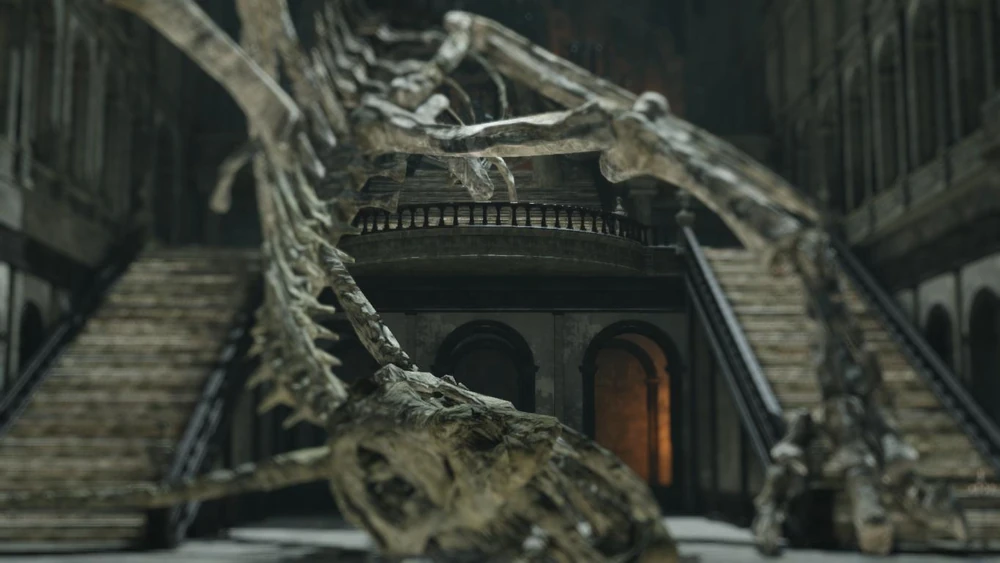 Step 112 – Enter Aldia’s Keep
- Warp to the Ruined Fork Road bonfire and take the center path
- Equip the King’s Ring to open the gate to Aldia’s Keep
- Light the Foregarden bonfire and talk to Lucatiel of Mirrah (if she survived 3 boss fights)
Step 113 – Reach the Ritual Site Bonfire
- Proceed through the ground floor and find Royal Sorcerer Navlaan behind the barrier
- Do not pull the lever (breaks his questline)
- Continue up the stairs and bypass the petrified Ogre using the left path
- At the top, pull the lever on the dragon statue to progress
- Enter the first door on the left, reveal the illusory wall in the stairwell, and light the Ritual Site bonfire
Step 114 – Obtain Aldia’s Key
- Light all four sconces throughout the keep
- Return to the dragon skeleton at the base of the stairs to receive Aldia’s Key
- Use the key to unlock the side rooms in the main hall
Step 115 – Defeat the Guardian Dragon
- Continue forward (ogres will break through blocked paths)
- Enter the fog wall and defeat the Guardian Dragon
- Ride the lift after the fight and light the Dragon Aerie bonfire
Dragon’s Aerie
 Step 116 – Reach the Dragon Shrine
- Talk to the Emerald Herald at the entrance to receive the Aged Feather (infinite Homeward Bone)
- Equip it on your item bar for quick use
- Take the long zipline to skip the area
- Cross the unstable rope bridge to reach the Dragon Shrine and light the Shrine Entrance bonfire
Step 117 – Clear the Dragon’s Aerie
- Return to the Dragon Aerie bonfire and explore the Aerie instead of taking the zipline
- Kill the Crystal Lizards and Hellkite Wyverns for extra Twinkling Titanite, then return to the Dragon Shrine
Dragon Shrine
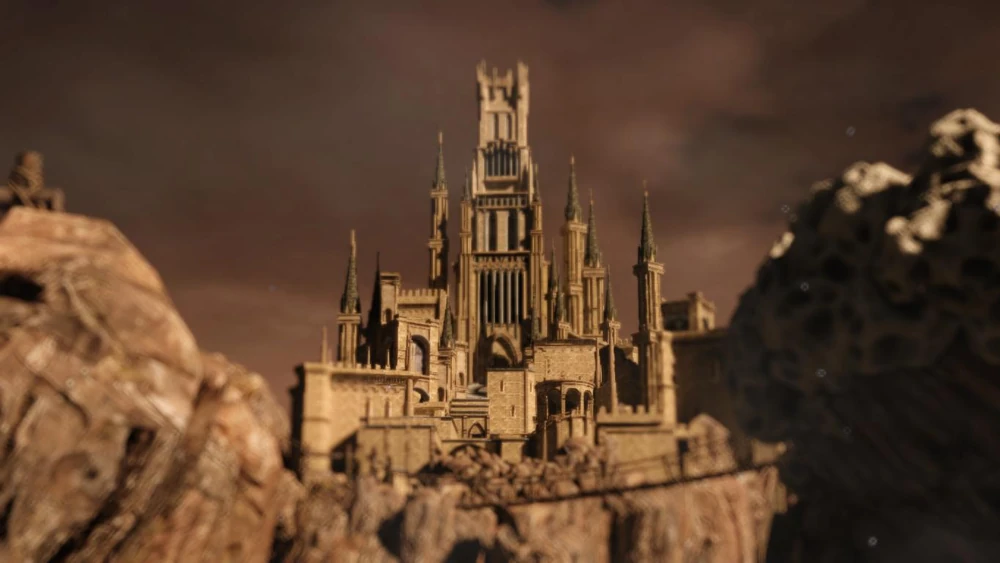 Step 118 – Loot the Third Dragon Ring
- Defeat the massive Drakekeepers (the Dragon Knights become hostile if you run past them)
- From the Shrine Entrance bonfire, climb the stairs toward the small door guarded by a greatsword-wielding Drakekeeper
- Before entering, turn around and drop down from the stairs to the lower courtyard
- Pass through the double doors and defeat the Drakekeeper inside
- Climb the spiral staircase to the large room
- Loot the Third Dragon Ring from the chest and equip it (replace the Second Dragon Ring)
- Loot the Petrified Dragon Egg just past it
Step 119 – Speak to the Ancient Dragon
- Return to the small door guarded by the greatsword-wielding Drakekeeper
- Continue up the massive staircase to the fog wall
- Enter the fog wall and speak to the Ancient Dragon to receive the Ashen Mist Heart
- Warp to Magerold of Lanafir and show him the egg to join the Dragon Remnants covenant
Forest of Fallen Giants (Return Visit)
Step 120 – Obtain Vammar’s Giant Soul
Step 121 – Obtain Orro’s Giant Soul
Step 122 – Defeat the Giant Lord
Step 123 – Obtain the Drangleic Helm
- Warp to the Cardinal Tower bonfire
- Use the Ashen Mist Heart to enter the memories of the giant corpses
- Enter the Memory of Vammar (near Mild-Mannered Pate)
- Talk to Captain Drummond
- Run to the end of the area and loot the Giant Soul from the corpse
Step 121 – Obtain Orro’s Giant Soul
- Enter the Memory of Orro (past the Pursuer arena near the crow’s nest)
- Talk to Benhart of Jugo before and after entering the memory
- Run to the end and loot the Giant Soul from the corpse
Step 122 – Defeat the Giant Lord
- From Cardinal Tower, descend the ladder and use the King’s Ring to open the door
- Light the Place Unbeknownst bonfire
- Enter the Memory of Jeigh
- Use a Human Effigy and summon Benhart of Jugo
- Run through the area while avoiding fireballs
- Defeat the Giant Lord to receive the Giant’s Kinship (stay behind him)
- Loot the Giant Soul past the boss
Step 123 – Obtain the Drangleic Helm
- Return to the Memory of Vammar
- Talk to Captain Drummond again to receive the Drangleic Helm
Dark Chasm of Old
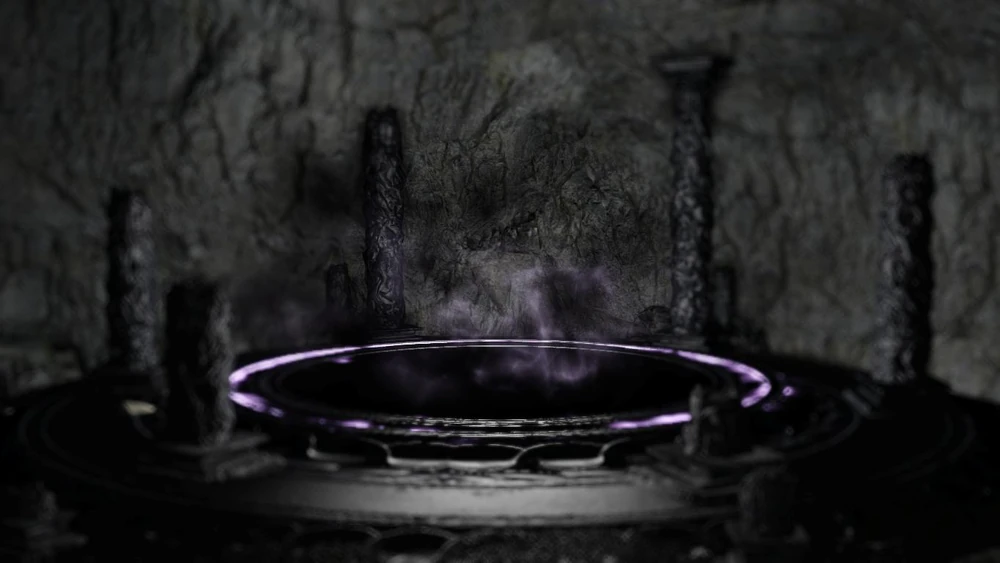 Step 124 – Clear the First Two Chasms
- Talk to Darkdiver Grandahl in the Shaded Woods to enter the Dark Chasm of Old
- Use a Flame Butterfly to light the large sconce
- Defeat all enemies to dispel the fog wall blocking the exit
- Drop through the hole to exit (each attempt after the first costs a Human Effigy)
- Talk to Darkdiver Grandahl in Black Gulch and clear the next Chasm the same way
Step 125 – Defeat the Darklurker
- Talk to Darkdiver Grandahl near the Under Castle Drangleic bonfire and enter the final Chasm
- Light the sconce and defeat all enemies
- Drop through the hole to enter the boss arena
- Defeat the Darklurker
- Talk to Darkdiver Grandahl to receive your reward
Dragon Shrine (Return Visit)
Step 126 – Defeat the Ancient Dragon
- Return to the Dragon Shrine
- Enter the fog wall and defeat the Ancient Dragon for another Giant Soul
- Attack its back legs
- When it flies up to breathe fire, run toward its tail
- Do not fully exhaust your stamina (you need it to sprint)
Undead Crypt (Return Visit)
Step 127 – Defeat King Vendrick
Step 128 – Loot King Vendrick’s Gear
- Return to the Undead Crypt
- Enter King Vendrick’s room and defeat him (each Giant Soul halves his defenses)
Step 128 – Loot King Vendrick’s Gear
- Use a human effigy to become human
- Warp to the Shrine of Amana
- Cross the bridge guarded by the Dragonrider and open the door at the end
- Loot the King’s Soul, King’s Armor Set, and King’s Crown
Throne of Want
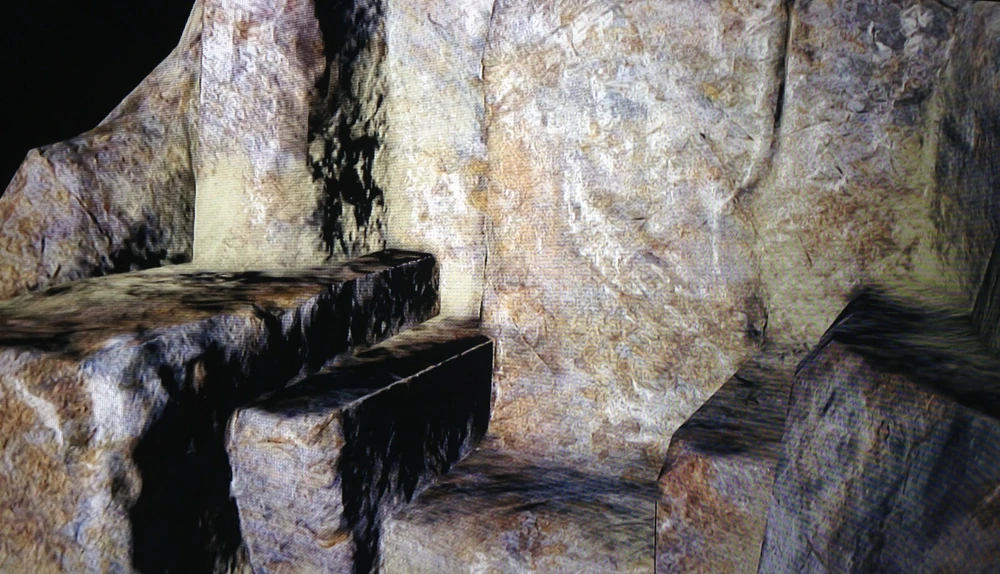 Step 129 – Defeat the Throne Watcher and Throne Defender
- From the King’s Gate bonfire, open the sealed door using the King’s Ring and Giant’s Kinship and enter the Throne of Want
- Defeat the Throne Watcher and Throne Defender
- Use the Aged Feather if you are not ready to fight another boss fight
- Return to Majula and talk to Cale the Cartographer to receive his armor set
Step 130 – Defeat Nashandra
- Return to the Throne of Want
- Enter the fog wall and defeat Nashandra
- Curse buildup is constant — consider using the Ring of Binding
Step 131 – Defeat Aldia, Scholar of the First Sin
- After defeating Nashandra, Aldia will appear
- Stay away when he is surrounded by fire
- Attack when the fire disappears
- Defeat Aldia to complete the base game
- Do not start Journey 2 yet, there’s still the DLC to clear
Step 132 – Complete Royal Sorcerer Navlaan’s Questline
- Return to Aldia’s Keep and talk to Navlaan while hollowed
- Do not kill the target NPCs — you can complete the quest safely
- Buy the Ladder Miniature from Laddersmith Gilligan (8000 souls)
- Show Cale’s Helm (obtained after Throne Watcher and Defender)
- Obtain the Sunset Staff from Felkin (requires 20 INT / 20 FTH — respec if needed)
- Show the Aged Feather (from the Emerald Herald in Dragon Aerie)
- Complete the quest to receive the Chaos Armor set
- Navlaan’s shop is now accessible while hollowed
Frozen Eleum Loyce
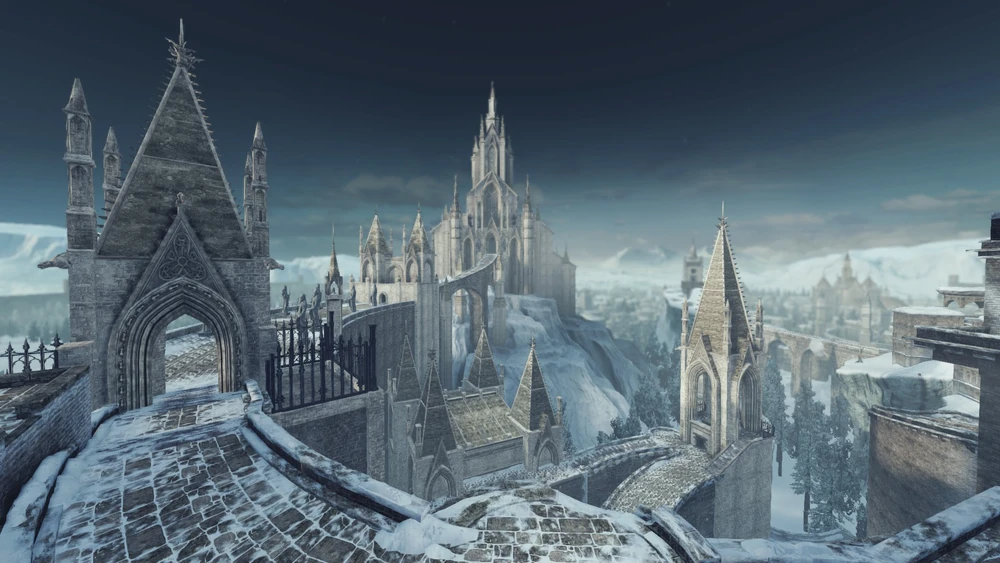 Step 133 – Obtain the Eye of the Priestess
- From the Outer Wall bonfire, take the right path (left leads to the boss)
- Descend the large staircase and pass through the frozen village
- Go up the small staircase and through the building to reach a three-way fork
- Ignore the forward path (leads to sealed door with four sconces)
- Take the right doorway and drop through the broken floor to reach the Abandoned Dwelling bonfire
- From the bonfire, head uphill and follow the stone walkways to the lit structure
- Climb up to the altar and loot the Eye of the Priestess (reveals invisible enemies)
- Continue forward to loop back near the boss area and light the Inner Wall bonfire
Step 134 – Defeat Aava, the King’s Pet
- Warp to the Outer Wall bonfire
- Enter the fog wall and defeat Aava (invisible without the Eye of the Priestess)
- Continue forward and speak to Alsanna, the Silent Oracle, to remove the ice barriers
Step 135 – Rescue the Knights of Eleum Loyce
- Warp to the Outer Wall bonfire and return to the frozen village
- Take the lift near the bridge down to the Lower Garrison bonfire
- Take the lift past the bonfire up to rescue the first knight (they assist in the Ivory King fight)
- Warp to the Abandoned Dwelling bonfire and take the staircase (now unfrozen) to the balconies where you can loot a Priest’s Chime +8
- Upgrade it to +10 and infuse it with lightning if you want to boost the damage of offensive miracles
- Continue forward and rescue the second knight
- Warp to the Inner Wall bonfire and proceed to the group of three golems where you can rescue the third knight
Step 136 – Defeat the Burnt Ivory King
- Return to Alsanna and leap into the Old Chaos
- Defeat the Charred Loyce Knights before the boss arrives (your knights will seal the mirrors they spawn from)
- Defeat the Burnt Ivory King
- Loot the Ivory King’s Crown
Step 137 – Unlock the Frigid Outskirts
- Return to the area with four sconces just before the Abandoned Dwelling bonfire
- Now that the winds are gone, use a torch to light all four sconces
- Open the door and defeat the Flexile Sentries
- Loot the Garrison Ward Key and Bone Fist
- Warp to the Abandoned Dwelling bonfire and unlock the nearby gate to the Expulsion Chamber bonfire
Step 138 – Defeat Lud and Zallen, the King’s Pets
- Use the coffin near the Expulsion Chamber bonfire to travel to the Frigid Outskirts
- Move between the distant buildings during breaks in the blizzard (use them as landmarks)
- Pass three buildings to reach the ice bridge and fog wall
- Defeat Lud and Zallen (very aggressive)
- Use Green Blossoms to maintain stamina
Shulva, Sanctum City
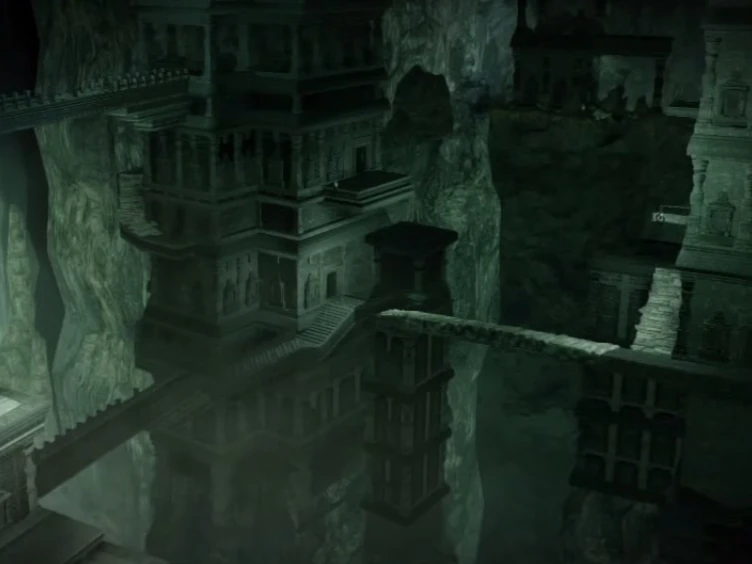 Step 139 – Reach the Tower of Prayer Bonfire
- Warp to the Sanctum Walk bonfire and progress through the city using the obelisks to raise/lower structures
- Use a bow or spells to activate distant obelisks
- Near the far end, activate the line of towers to create a path forward
- Cross the towers and light the Tower of Prayer bonfire
Step 140 – Explore the Dragon’s Sanctum
- Enter the Dragon’s Sanctum from the Tower of Prayer
- Use the buttons on the walls to open and rotate doors (a bow helps)
- Destroy the physical bodies of Sanctum Knights to damage their specters
- Loot the Eternal Sanctum Key in the room with multiple Sanctum Knights
- Loot the Dragon Stone from the chest in the room covered with spikes
- Shoot the button on the wall above the stairs to unlock the Hidden Sanctum bonfire
Step 141 – Reach the Lair of the Imperfect
- Continue descending through the Sanctum
- Light the Lair of the Imperfect bonfire and traverse to the far side of the cave
- Use the Dragon Stone to unlock the path to Dragon’s Rest and the Sanctum Interior bonfire
Step 142 – Defeat Elana, the Squalid Queen
- At the bottom of the Sanctum, enter the fog wall and defeat Elana
- Play aggressively to limit her summons
Step 143 – Defeat Sinh, the Slumbering Dragon
- Enter the next boss room and defeat Sinh
- Stay behind the dragon and watch for aerial attacks
- Loot the Crown of the Sunken King
Step 144 – Defeat the Graverobber, Varg, and Cerah
- Return to the entrance of the Dragon Sanctum
- Use the Eternal Sanctum Key to climb up to the Priestess’ Chamber bonfire
- Follow the path to the Cave of the Dead
- Move quickly — traps build curse and can kill you
- Defeat the Graverobber trio (kill the archer first)
Brume Tower
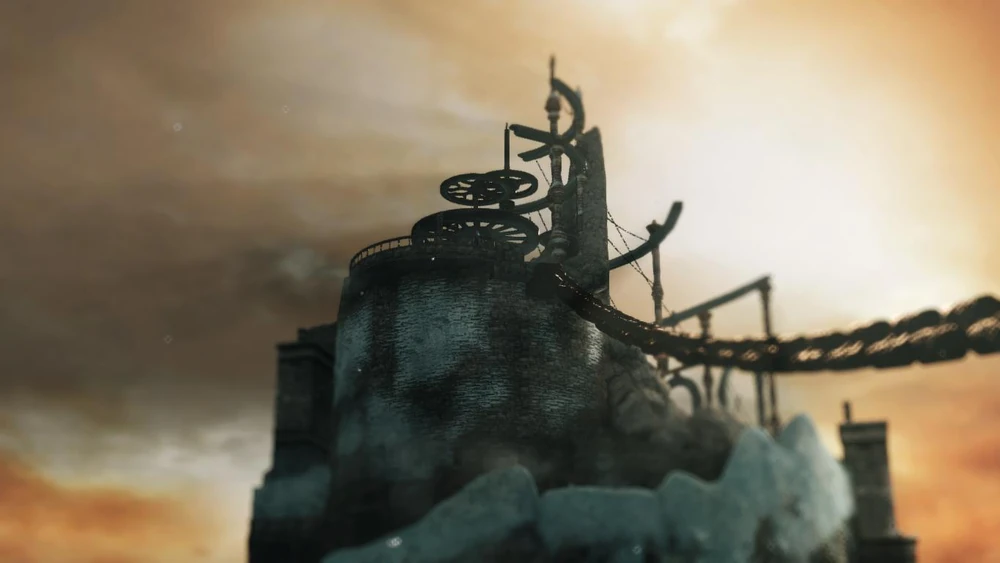 Step 145 – Enter Brume Tower
- Return to the Old Iron King’s boss arena and interact with the obelisk near the Primal Bonfire
- Use the Heavy Iron Key to open the door
- Collect Smelter Wedges before crossing the large chain (used to destroy Ashen Idols)
- Cross the chain and light the Throne Floor bonfire
Step 146 – Reach the Foyer Bonfire
- Descend the tower (the path is mostly linear despite appearances)
- Light the Upper Floor bonfire
- Continue past the fog gate, down the ladder, across the ash field, and down the stairs
- Light the Foyer bonfire
Step 147 – Activate the Lift Mechanism
- Cross the chain past the Foyer bonfire into the adjacent tower
- Loot the Scorching Iron Scepter
- Return to the Foyer bonfire and use it to activate the tower’s lift mechanism
Step 148 – Defeat the Aged Smelter Demon
- Take the lift down one level and enter the stone passage
- Loot the Tower Key from the ledge outside (guarded by Iron Warriors)
- Use the key to unlock the gate to the Iron Hallway Entrance bonfire
- Enter the fog wall and defeat the Aged Smelter Demon
Step 149 – Defeat the Fume Knight
- Return to the lift room and descend to the Lowermost Floor bonfire
- Use Smelter Wedges to destroy the Ashen Idols around the boss room
- Enter the fog wall and defeat the Fume Knight
- Use Brightbugs if needed (they stack with Gold Pine Resin)
- Loot the Crown of the Old Iron King
Step 150 – Defeat Sir Alonne
- Warp to the Foyer bonfire and take the lifts up
- Unlock the gate with the Tower Key to reach the Smelter Throne bonfire
- Interact with the armor to enter the memory
- Enter the fog wall and defeat Sir Alonne
- Avoid his grab attack (his sword glows gray)
- If grabbed, he gains a damage buff for the rest of the fight
- Loot the final Smelter Wedge past Sir Alonne’s arena
Step 151 – Complete Nadalia’s Soul
- Return to the Foyer and unlock the door behind the lift mechanism
- Destroy the final Ashen Idol
- Combine Nadalia’s fragments into her full soul
Step 152 – Upgrade the King’s Crown
- With all crowns obtained, return to the Undead Crypt
- Interact with Vendrick’s clothing to enter his memory
- Speak to King Vendrick to upgrade the King’s Crown
- Wearing it prevents hollowing
New Game Plus
Step 153 – Obtain the Chloranthy Ring +2
Step 154 – Obtain the Ring of Blades +2
Step 155 – Obtain the Dragonrider Gauntlets
- Enter NG+ from the Majula bonfire after beating the game
- Defeat the Executioner’s Chariot in NG+ to obtain the Chloranthy Ring +2
- Alternatively, burn a Bonfire Ascetic at the Undead Purgatory bonfire to respawn the boss
- This permanently scales the area to the next NG+ level though
Step 154 – Obtain the Ring of Blades +2
- In NG+, go to the throne room above the entrance of Drangleic Castle
- Defeat the Two Pursuers (the left one drops the Ring of Blades +2)
- Alternatively, burn a Bonfire Ascetic at the King’s Gate bonfire to scale the area to NG+
Step 155 – Obtain the Dragonrider Gauntlets
- In NG+, defeat the Dragonrider Duo in Drangleic Castle
- Purchase the Dragonrider Gauntlets from Magerold of Lanafir in Iron Keep
- These replace the Drangleic Gauntlets
- Alternatively, burn a Bonfire Ascetic at the Central Castle Drangleic bonfire to respawn the boss
Soul Farming
- Equip all soul-boosting gear before farming (e.g. Covetous Silver Serpent Ring)
- Soul-boosting effects stack multiplicatively
- Most enemies stop respawning after being killed 15 times
- Joining the Company of Champions prevents despawning but makes enemies stronger
- This is useful for extended farming despite the difficulty increase
- You can reach ~SL150 without farming, so farming is rarely required
- NG+ and beyond naturally provide large amounts of souls
Recommended Locations
- Early Game: Heide’s Tower of Flame
- Mid Game: Iron Keep
- Late Game: Dragon Shrine
Fastest Farming Method
- Use Bonfire Ascetics at the Place Unbeknownst bonfire
- This respawns the Giant Lord, which is easy to defeat and drops many souls
- Repeat this process for very fast soul gain
Build Guide – Stat Progression (SL 150)
Recommended starting class: Knight
Recommended Leveling Order:
PvP Matchmaking:

- Best starting stats with no wasted levels
Recommended Leveling Order:
- Adaptability → 10
- Vitality → 8
- Dexterity → 12
- Vigor → 20
- Endurance → 20
- Adaptability → 17
- Faith → 14
- Intelligence → 10
- Attunement → 10
- Dexterity → 15
- Strength → 13
- Faith → 25
- Attunement → 13
- Vigor → 50
- Faith → 40
- Attunement → 30
- Vigor softcaps at 20 and 50
- Endurance softcaps at 20
- Leveling Vigor from 20 → 50 gives ~43.5% more HP
- 8 base Vitality + Vengarl’s Helm + Third Dragon Ring reaches 60.2 max equip load
- This maximizes Flynn’s Ring’s damage bonus
- 17 Adaptability + 13 Attunement → 96 Agility (early roll i-frames breakpoint)
- 16 Adaptability + 30 Attunement → 99 Agility (final roll i-frames breakpoint)
- 17 Adaptability + 30 Attunement → 100 Agility (adds 1 backstep i-frame)
PvP Matchmaking:
- SL 150 is optimal for multiplayer activity
- Leveling beyond SL 150 significantly reduces matchmaking
Rings
- Chloranthy Ring +2 → 25% increased stamina regeneration
- Ring of Blades +2 → +50 weapon damage
- Flynn’s Ring → up to +50 weapon damage at 60 or less max equip load
- Third Dragon Ring → +7.5% HP, +12.5% stamina, +12.5% equip load
Armor
- Vengarl’s Helm, Armor, and Leggings + Dragonrider Gauntlets
- Best physical defense-to-weight setup while maintaining Flynn’s Ring’s bonus
- Physical damage is the most common damage type in the game
The Rapier
- Available at the start of the game
- Low stat requirements and very lightweight
- Very low stamina consumption
- Best used two-handed (more efficient than dual wielding; no need to upgrade a second weapon)
- High attack speed → benefits more from flat damage boosts (Flynn’s Ring, Ring of Blades, weapon buff spells)
- Fast attacks let you take advantage of more openings between boss attacks, increasing damage
- High critical damage multiplier
Damage Advantages
- Many enemies are weak to thrust damage
- Hitting enemies during their attack animations deals bonus thrust damage (counterattacks)
Upgrading
- Uses regular titanite (not Twinkling Titanite)
- Does not compete with Ice Rapier upgrades (which use Twinkling Titanite)
Weaknesses
- No horizontal attacks → struggles against groups
- Weakness mostly offset by high attack speed
- Difficult to hit low targets like Crystal Lizards
- Tilt the camera downward to improve hit consistency against low enemies
The Ice Rapier
- Direct upgrade to the standard Rapier
- Longer range
- Causes bleed buildup
- Among the highest DPS weapons in the game
Infusion
- Loses less physical damage when infused than most weapons
- Lightning infusion significantly increases damage
- Outperforms standard Rapier when infused
Moveset
- Unique heavy attack fires a projectile
- Hitting with both the blade and projectile deals very high damage
Durability Warning
- Heavy attacks consume a large amount of durability — reserve for emergencies
- Weapon breaks quickly if overused
Tools and References
- Soulsplanner for their build planner
- Fextralife Wiki — used for stats, testing data, and item placement verification
- Image credit for all screenshots: Dark Souls Fandom Wiki — Licensed under Creative Commons BY-NC-SA 3.0
🏆
Beat DARK SOULS™ II: Scholar of the First Sin's completion?
Flex it — let your friends know you pulled it off.
More DARK SOULS™ II: Scholar of the First Sin guides
- Dark Souls II: Scholar of the First Sin 100% Achievement Guide★ 5 (2.5k)56k views4.6k ♥81 minUpdated 28 Nov, 2021
- 100% Achievement Guide: Dark Souls 2 - SotFS★ 5 (1.8k)42k views5.1k ♥94 minUpdated 8 May
- Пошаговое получение всех достижений★ 5 (2k)30k views3.7k ♥28 minRussianUpdated 6 Dec, 2022
- Достижения DARK SOULS™ II: Scholar of the First Sin★ 5 (981)28k views1.8k ♥28 minRussianUpdated 2 May, 2020
- Mapa Orientativo - DARK SOULS II - Map★ 5 (728)22k views766 ♥1 minUpdated 6 Apr, 2017
- Настройки управления: клавиатура+мышь - это удобно★ 5 (346)20k views650 ♥2 minRussianUpdated 17 Jun, 2022





🔥 Popular guides
- Upgrading to PremiumTeam Fortress 2★ 5 (20k)1441k views11k ♥6 minUpdated May 11, 2022
- No More Room in Hell Official ManualNo More Room in Hell★ 5 (2.8k)569k views2.1k ♥29 minUpdated Apr 22, 2019
- NMRiH Community Hosting GuidesNo More Room in Hell★ 5 (526)351k views653 ♥1 minUpdated Aug 10, 2022
- ULTIMATE GUIDE FOR GAME DEV TYCOONGame Dev Tycoon★ 5 (5.8k)326k views10k ♥4 minUpdated 23 Jan, 2014
- How to 'Git Gud' Soon™MORDHAU★ 5 (2k)318k views3k ♥68 minUpdated Nov 16, 2024
- Лучшие кооперативные игры SteamPAYDAY 2★ 5 (1.5k)315k views2.1k ♥56 minRussianUpdated Apr 27, 2025






This guide was created by its original author on the Steam Community. Are you the author and want it removed? Request removal.