Don't Starve Together Ultimate Guide
Basic Controls and Needs
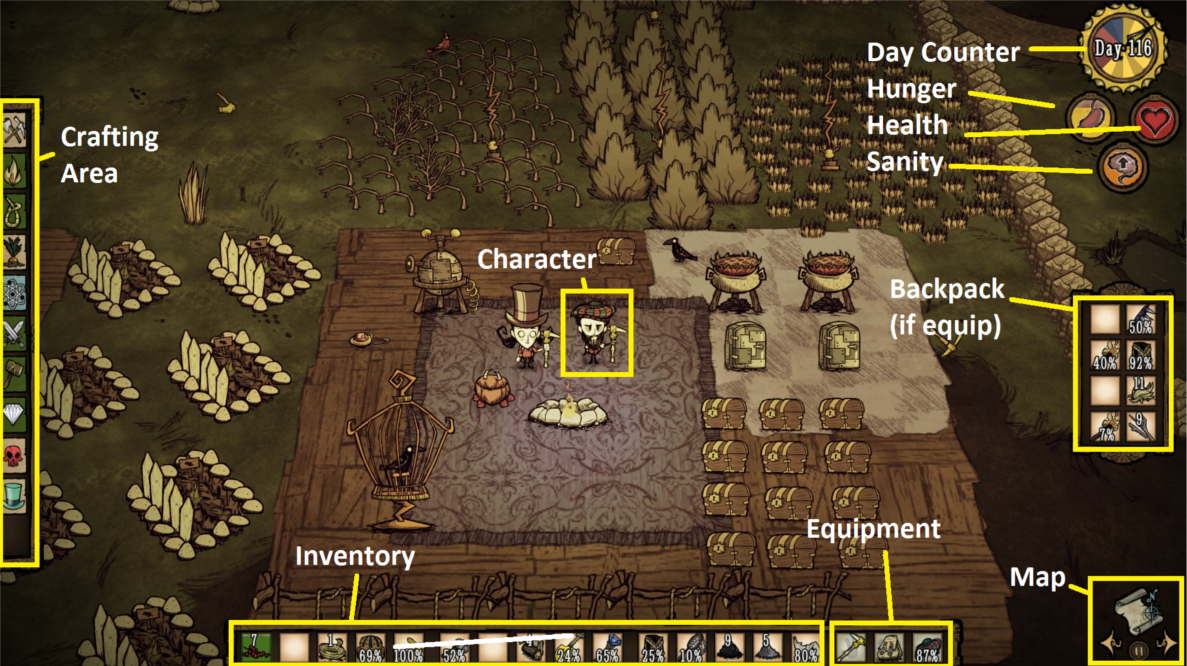
 Hunger drains at 75 points per game day (112.5 as normal Wolfgang, or 225 as mighty). When your hunger reaches 0, health will drain at 1.25 points per second.
 Sanity drains at dusk and night, or when monsters are nearby or when you eat the wrong food. When your sanity is too low, shadows will start to attack you.
 Health is lost when a character takes damage while attacked, burning, starving, or freezing. Losing all Health results in death.
Rotate - Q, E
Player Status - TAB
Toolbar Menu - Caps Lock
Map - M
Map Zoom In/Out - Mouse Scroll
Toggle Say - Y
Toggle Whisper - U
Do action - Space (hold it)
Attack - F
Force attack - Ctrl + F
Split Items - Ctrl+Left Mouse Button
Move Items - Left Mouse Button
Fast Moving - Shift + Left Mouse Button
Seasons
Season default length
Spring - 20 days
Summer - 15 days
Autumn - 20 days
Winter - 16 days
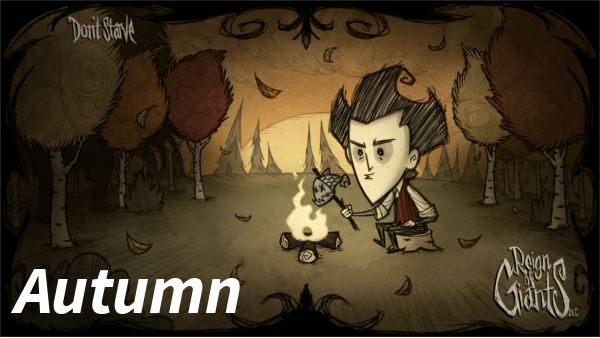 Autumn is the starting season for Don't Starve Together. During Autumn, the player does not have to worry about Overheating or Freezing, there is only occasionally Rain, Farm Crops grow normally, Walrus Camps are not active, Red Hounds may occasionally appear rather than Normal Hounds during timed Hound attacks, Redbirds and Crows appear, and the Koalefant appears with a red hide. Also, Birchnut Trees will start to lose their leaves, which change color, and fully-grown ones will yield extra Birchnuts when cut down. Any resource such as Grass, Saplings, or Berry Bushes that withered in the Summer will return to their harvested state at the beginning of Autumn.
Autumn's seasonal Giant is the Bearger. It will eat Food off the ground and destroy any Structures and Plants that get in its way when it is rampaging.
Autumn leads to Winter, so players might want to spend their first Autumn preparing for the harsh weather that will soon be upon them.
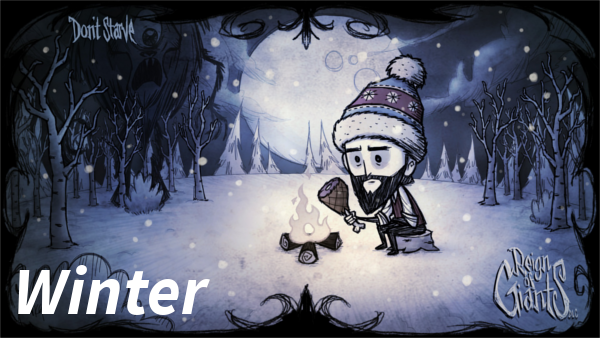 Winter lasts for 16 days; the first winter will start on day 21 and end on day 36. The biggest change in Winter is the drop in temperature which results in freezing if the character gets too cold. Freezing quickly drops the player's health. To prevent freezing, characters must maintain their body temperature by regularly going back to a source of heat. The best way to do that is to carry around a heated Thermal Stone, and one should always have the means to make Fire in an emergency during winter. Additionally, wearing warm clothing increases the time a character can be away from fire before getting too cold. Wilson's and Webber's Beards also helps them keep warm similar to warm clothing, and their efficiency increases as it gets longer.
Building a Thermal Measurer helps the player know when the change in seasons is coming ahead of time, and tells how cold it is getting. Dusk and Night are colder than Day, and they last longer in Winter. Freezing is often a recurring death for new players as they don't prepare well enough to stop the freezing in an emergency. A good strategy to keep temperature up is to put on warm clothes on the last day Autumn so heat will start off higher in winter.
During Winter several new creatures appear and some others go into hiding. The change which can be seen on the first day of Winter (even before snow begins to fall) is that the sepia toned environment gets a bluish tint instead, Redbirds are replaced by Snowbirds, Rabbits change into a white winter coat, and both remain an active and stable food source throughout the Winter season. When the Hounds attack, Red Hounds are replaced with Blue Hounds. Going on a Koalefant hunt will result in finding a Winter Koalefant whose trunk can be made into a warm Puffy Vest.
Some new aggressive creatures appear as well. A Walrus hunting party led by MacTusk along with his son WeeTusk and their 2 Blue Hounds will appear in an igloo at their Walrus Camp (which can be found during Summer). In addition, Deerclops also roams the Winter landscape. Deerclops is huge but slow, and will smash structures in addition to characters. A new type of neutral creature known as Pengulls will often hop out of the ocean in huge flocks during the first few days of winter.
Many creatures are inactive in Winter. Bees do not leave their hives and thus do not produce honey (Killer Bees and homeless Bees can still be found). Butterflies do not spawn from flowers; nor do Mosquitoes or Frogs spawn because Ponds themselves are frozen over and cannot be fished, although they can be walked across. Batilisks will spawn in fewer numbers but stay out longer.
In addition to Rain, snow begins to fall during Winter which builds up on trees and many other objects (this snow melts away during Summer or Winter rain). Farms do not grow crops, however any crops currently awaiting harvest will still be fresh until picked. Berry Bushes, Saplings, and Grass Tufts regrow extremely slowly in Winter, to the point that they seem to stop completely. Spiky Bushes are not affected by the winter cold and will regrow as normal.
Nights and dusks are much longer (and days shorter) in winter, and this has a subtle impact on Sanity. Sanity slowly drains at night, and does not have a chance to fully recharge during the winter day. This is compounded as sanity falls, because night-time hallucinations (and nearness to dark) further drain sanity -- spiraling into more impactful hallucinations, including Night Hands. A large set of Drying Racks (10 to 20) can be a great help, allowing Rabbits and Birds (which continue to spawn during Winter) to be turned into Small Jerky -- restoring 10 Sanity each. In fact, living off Traps and Drying Racks is a simple and sustainable way to conquer winter, hunger, and sanity. Mini Glaciers will form during Winter making is very easy to harvest Ice.
Mini Glaciers will form during Winter.
Food rots 25% slower in Winter due to the cold. Food stored in the fridge will stay fresh for almost the entire normal-length winter if its default lifetime is 10 days.
Seasons (Cont.)
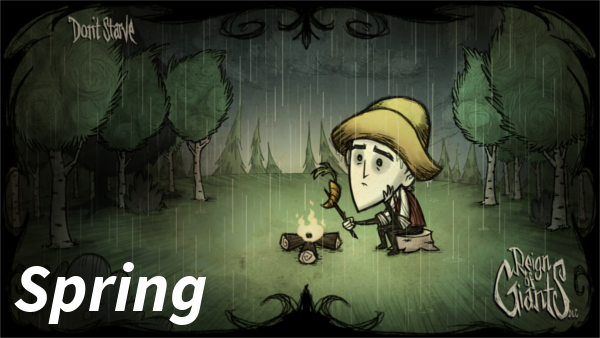 Spring is indicated in appearance by the world having a greenish tint. Therefore, the first Spring lasts either from day 1 to 20, or from day 37 to 56. During Spring, Dusks can be very long, especially during midpoint of the season. Stages in Adventure Mode may have different seasonal variations. Some characteristics in the world change in Spring, and surviving can become more difficult.
Spring is the season where rainfall is very frequent and puddles form on the ground. While temperature is not such that the player will overheat or freeze, freezing is still a threat due to the very frequent rainfall combined with the addition of Wetness. Constant rain means that more fuel items are needed to maintain a fire. Additionally, Lightning strikes are much more common in Spring which can cause damage to the player if hit, or unprotected structures to be vulnerable to fire. There is also a chance of Frog Rain. Constant rain makes tracking Koalefants more difficult due to tracks disappearing. Trying to dry Meats with a Drying Rack is also more time-consuming because of rain.
On the positive side, rain causes crops to grow much quicker and Mushrooms can be picked more frequently as rain causes them to regenerate. Berry Bushes and other plants also regenerate faster.
During Spring, Mini Glaciers will begin to melt and all Bees will turn red and become more hostile (though they are still not considered Killer Bees). New flowers will randomly spawn during spring even when there are no insects around. Rabbit Holes close during Spring, forcing the player to look for another food source. The Moose/Goose or its nest can sometimes be encountered during Spring. The Lureplant will naturally spawn in areas that the player has explored. Additionally, Beefalo will always be in heat and Blue Hounds can spawn with Hound waves.
Spring's seasonal Giant is the Moose (also known as Goose) which is a neutral giant unless you move near its 5 Moslings. Moslings won't grow into a Moose/Goose, but when attacked, they will let out a cry, spawning another Moose/Goose.
Spring leads into Summer. As Summer can be very deadly when unprepared, the long-term survival goal for spring is to prepare for summer in advance.
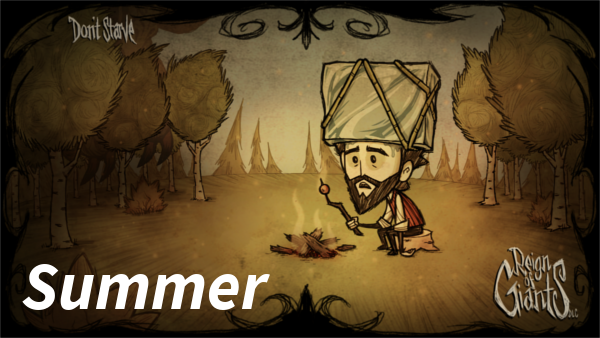 Summer is indicated by the world having much more sepia-toned tint than normal. Days are also much longer in Summer, while both Dusk and Night being the shortest with Dusk lasting just one segment during mid-season.
During Summer, plants will wilt and require fertilization in order to regrow, and food will spoil 25% faster. Plants return to normal a few days into Autumn, even without fertilizer. On the other hand, fertilized crops tend to grow fast due to longer daylight but not as fast as during spring due to less rain. Cactus will yield Cactus Flowers when picked during Summer.
The intense heat provides the challenge of the season. Similarly to freezing in the Winter, an unprotected player will suffer damage from Overheating. The player can use or wear items such as ice, an Ice Cube, and a Chilled Amulet or stand under a tree to cool themselves. They can also use shade from a Straw Hat, Umbrella or Eyebrella, or wear a Summer Frest or Floral Shirt to delay the rate at which they overheat. The player can also freeze a Thermal Stone in an Ice Box or Snow Chester, even placing it next to a level 4 Endothermic Fire and hold onto it to cool themselves.
Additionally, the summer season experiences a drought, and items can ignite and burst into flames. This includes plants, such as Berry Bushes, mobs, and even structures like the Science Machine. When an item is nearing its combustible point, it will begin to visually smoke and the player's character will comment on it. When the structures have been burnt down, players can hammer burnt structures to regain some of the materials back, about 25% of what it was made of if crafted.
Items and structures can be also be protected from combustion by using an Ice Flingomatic, which will fire snowballs at smoldering or flaming objects. Smoldering objects (including smoldering Pigs) can be manually cooled with Ice, Fertilizers, Ice Staff or with the player's hands (it will damage the player by 5 health), but Ice is not readily available in the Summer, and in a large base, fires may start faster than the player can reach them. This makes it very hard to protect Saplings, Grass, Berry Bushes, Trees and other flammable farms during the Summer, as the fire will keep spreading until everything is burned. Items will only combust when near the player, so they may also be protected simply by avoiding them until Autumn.
Summer's seasonal Giant is the Dragonfly can be encountered who will roam around the landscape, setting nearby structures on fire.
Health
Health is a measurement of overall physical well-being. Wilson, Willow, Wendy and Wickerbottom have 150 Health. Wolfgang has 200 health by default (his health limit rises to 300 with a full belly and drops to 150 when starving). WX-78 begins with 100 Health and is capable of increasing its health cap up to 400 by eating Gears.
Unlike Hunger (and in many situations Sanity), Health does not drain over time.Health is lost when a character takes damage while attacked, burning, starving, or freezing. Some foods like Monster Meat can also reduce Health, and having a Meat Effigy lowers max Health. Losing all Health results in death. Health can be seen on the heart-shaped gauge in the upper-right corner of the screen, which shrivels and empties as the character's Health is depleted.
- Crock Pot - Several crock pot recipes provide substantial healing. Fishsticks [40 health] are an easy recipe to make. Pierogi [40 health] is also a good recipe. Dragonpie [40 health] is excellent if the player manages to create a Dragon Fruit farm. However, regarding Crock Pot recipes in general, the player must make sure that the individual components (raw or cooked) won't heal more if eaten on their own.
- Braised Eggplant / Sliced Pomegranate - When cooked, Eggplants and Pomegranates heal 20 health.
- Jerky/Small Jerky - Jerky restores a nice amount of health, and lasts for a very long time. If primary concern is health, and only food source is Meats, they should be made into jerky. Jerky can be used in Crock Pot as normal meat, if needed.
- Spider Gland /Mosquito Sack / Healing Salve/Honey Poultice - Spiders drop Spider Glands that can be used immediately for a small health boost of 8 health. In a similar way, Mosquitoes drop their sacks which heals the same amount of health as Spider Glands. Spider Glands can also be made into Healing Salve for a larger boost of 20 health. Neither item is food, so they don't spoil.
- Bee Boxes - Bee Boxes produce Honey, which can be used to create Honey Poultices [30 health], as well as health restoring Crock Pot dishes. Since Honey Poultices are not food, the player can stockpile them without worrying about spoiling.
- Butterflies - Butterflies drop Butterfly Wings, which restore 8 health. Also, Butterflies have a 2% chance to drop Butter, which heals a massive 40 health. Additionally, the wings can be easily used to craft a Butter Muffin, which heals for 20 health, while also filling some hunger. The Butter can be used to cook Waffles, which heal for 60 health. Butterfly farms can be created easily and synergize well with Bee Boxes.
- Blue Mushroom - Eating a raw Blue Mushroom restores 20 health, although at the cost of 15 Sanity. Blue mushrooms can only be picked at night and can't be relocated, so large scale farming is usually impractical. Still, they provide a nice boost for players who build their base near them.
- Life Giving Amulet - Wearing a Life Giving Amulet will automatically heal the player by 5 health in exchange for 5 Hunger and 5% of its durability. Upon death while wearing it, it will automatically restore the player's health to 50.
 If the player builds a Meat Effigy, then their maximum health is decreased by 30. This health is impossible to regain unless the Meat Effigy is destroyed or used.
An Ancient Pseudoscience Station may spawn Meat Effigies when hammered. The health penalty from these do not take effect until the character dies and is resurrected, after which they behave like built effigies.
There may be more than one Touch Stone in the world, but the player will respawn at the one closest to their death point. Touch Stones may only be used once and drop Marble, Rocks, and Nightmare Fuel upon doing so.
Hunger
Hunger is one of the primary game concepts, as it is the measurement which determines whether or not the character is starving (which is, of course, the game's namesake). As a Character gets hungrier, the meter will empty, and the stomach pictured will shrivel.
A full stomach for most characters is measured at 150, except for Wolfgang (300), WX-78 (100-200). Hunger drains at 9.375 points per minute, (14.0625 as normal Wolfgang, or 28.125 when mighty) or 75 points per game day (112.5 as normal Wolfgang, or 225 when mighty). Hunger drain can also be slowed to 60% of its normal rate by equipping a Belt of Hunger.
 When the Hunger meter is emptied, Health will begin to drain at 1.25 points per second (37.5 per one game hour) until something is eaten or the character dies. Most food will restore the Hunger meter when eaten. The amount restored depends on the food eaten; cooked food typically restores more than raw food. Some food also has the potential to decrease Hunger, Sanity, or Health. Also, when going to sleep in a Straw Roll, Fur Roll or a Tent, the character takes a hunger penalty.
Sanity
 Being alone in the wilderness will take its toll on the character's mental state after a few days. The effect it has can be seen through Sanity. As sanity decreases, strange things start to happen: the player's vision becomes shaky, over-saturated, and bright, whispers are heard, and Shadow Creatures start to appear. When the character becomes completely insane, these creatures become aggressive and start to attack.
Characters can gain and lose sanity in various ways. A small animated arrow appears in front of the Sanity, showing when sanity is increasing or decreasing. A bigger arrow means that sanity is increasing / decreasing faster. Being in close proximity to Monsters, Darkness, Rain, or eating bad Food decreases sanity; while wearing dapper clothes, eating jerky and Crock Pot food, being near friendly Pigs, and sleeping increases sanity. See the Sanity Table below for a complete list.
Due to the fact that several magical items decrease sanity when used, it could be thought of as a sort of mana that is depleted by magic use. However, having little sanity brings about its own benefits (for example getting Nightmare Fuel for powerful weapons and armor.)
- Sleeping in a Tent
- Eating Gears as WX-78
- Eating Ice Cream
- Sleeping in a Straw Roll
- Killing a Terrorbeak (Shadow Creature)
- Killing a Crawling Horror (Shadow Creature)
- Eating Taffy / Pumpkin Cookies / Jerky / Cooked Green Cap
- Prototyping a new Item
- Eating Small Jerky / Cooked Blue Cap
- Shaving Wilson's Beard
- Eating most Crock Pot Dishes except for Wet Goop, Powder Cake, Guacamole, Spicy Chili
- Picking Flowers
- Using a Ice Staff / Fire Staff
- Eating Dark Petals, Durian, Extra Smelly Durian, Monster Jerky, Lichen
- Picking Evil Flowers
- Eating Meat, Morsel, Drumstick, Frog Legs, Cooked Monster Meat, Cooked Red Cap, Batilisk Wing, Leafy Meat and Spoiled Food
- Digging up a Grave
- Eating Monster Meat, Blue Mushroom, Deerclops Eyeball
- Going through a Worm Hole
- Using The Lazy Explorer
- Eating Monster Lasagna
- Charlie (Night Monster) attack
- Using a Star Caller's Staff / Deconstruction Staff
- Reading Applied Horticulture / Sleepytime Stories / The End is Nigh
- Getting hit by lightning as WX-78
- Eating Green Mushroom / Glommer's Goop
- Reading Birds of the World / On Tentacles
- Using a Telelocator Staff
- Spawning Abigail
- Using a Codex Umbra
- Resurrection
Monsters drain more sanity when playing as Wolfgang (+10%) and less as Wendy.
Wendy (because she loses less sanity in darkness and when near monsters), Willow (because she can negate nighttime sanity loss when near fire) and Wolfgang (because when mighty, fights last only for half the time) are characters which have the potential to stay sane longer when compared to other characters if used correctly.
- Lighting starts to become desaturated (Sanity ≤ 60%). Near total insanity, lighting even dims (Sanity ≤ 10%).
- Mr. Skits starts to appear (Sanity ≤ 80%).
- Shadow Watchers and Night Hands start to appear at night (Sanity ≤ 65%).
- Eyes will appear in darkness (Sanity ≤ 60%).
- The screen starts to shake (possibly indicating nausea) (Sanity ≤ 60%).
- Crawling Horrors and Terrorbeaks will become visible (Sanity ≤ 50%).
- The insanity ambience becomes audible (Sanity ≤ 50%). It's so quiet that it can only be heard with headphones or by turning the volume up. It gets louder as sanity continues to drop.
- Whispering sounds begin to play (Sanity ≤ 45%).
- Rabbits will turn into Beardlings (Sanity ≤ 40%).
- The screen is surrounded by red tendrils (Sanity ≤ 15%).
- Crawling Horrors and Terrorbeaks will start to attack (Sanity ≤ 15%). While idle, the player character holds their head with their hands and rocks back and forth.
- A more disturbing, warped version of the "day to night" transition jingle plays (Sanity ≤ 15%).
- In the Options, the player can turn off distortion, resulting in the blurry effect on the edges of the screen not occurring, which helps boost performance on slow systems.
Sanity - Temporal Sanity Table
Wetness
 Whenever it rains, a small meter will appear under the other three meters, showing the player's current 'wetness'. Except for WX-78, wetness will not directly damage the player's Health. When the Wetness meter reaches 35, held items will become slippery, items become less efficient, worn items drain Sanity, and the player will begin to Freeze. The meter empties as the player dries, and once the player is completely dry, the meter will disappear.
The wetness of an item depends on the wetness of the player when it's in their inventory and on that of the world otherwise. Items in waterproof containers will always be dry. An item's wetness is seen by a blue outline around it in the inventory. The text also becomes blue. Wet structures and environmental objects like trees become darker when wet. An item can be kept dry by being stored in a waterproof container, such as a Chest, Piggyback, or Krampus Sack. Items can also be dried faster by placing them next to a fire. Items and objects that become wet will become titled as followed with following effects:
Whenever it rains, a small meter will appear under the other three meters, showing the player's current 'wetness'. Except for WX-78, wetness will not directly damage the player's Health. When the Wetness meter reaches 35, held items will become slippery, items become less efficient, worn items drain Sanity, and the player will begin to Freeze. The meter empties as the player dries, and once the player is completely dry, the meter will disappear.
The wetness of an item depends on the wetness of the player when it's in their inventory and on that of the world otherwise. Items in waterproof containers will always be dry. An item's wetness is seen by a blue outline around it in the inventory. The text also becomes blue. Wet structures and environmental objects like trees become darker when wet. An item can be kept dry by being stored in a waterproof container, such as a Chest, Piggyback, or Krampus Sack. Items can also be dried faster by placing them next to a fire. Items and objects that become wet will become titled as followed with following effects:- "Wet X": Most items and objects. Wet Mobs take more damage from being hit with a Morning Star.
- "Soggy X": Consumables. Soggy food spoils 30% faster.
- "Waterlogged X": Logs and other combustibles. Waterlogged fuel is less efficient.
- "Slippery X": Tools and weapons. Slippery tools have a chance to slip out of grip when used.
- "Soaked X": For non-water-resistant wearable items (like the Garland). Wearing soaked items reduce a lot of sanity.
 Ice melting in the inventory will increase wetness, and so will wearing an Ice Cube or Fashion Melon. Wetness lowers the thermal sensation of the player. At maximum wetness, the ambient temperature is perceived to be 30 degrees lower and proportionally for other values (for example, at half wetness the temperature is perceived to be 15 degrees lower). If the perceived temperature falls below 0 degrees, the player begins to freeze. For tips on surviving Freezing, please go to Surviving Winter.
The player can dry themselves out faster by standing next to a fire. The rate of wetness can also be decreased, but not stopped, by standing under a Tree (including Birchnut Trees). This will decrease the amount of time waiting to lose the 'Wet' status. Standing under a Tree grants 40% Water Resistance. Using the Luxury Fan on the player can dry them, however, this costs the player a large amount of heat, as it can decrease a user's heat down 15%.
The best way to keep wetness low during Spring is to wear some Water Resistant gear. These items decrease the rate at which the player gets wet, and having more than one of them equipped provides a cumulative bonus. The character stops getting wet when 100% water resistance is achieved, so the player will want to wear a combination of them that doesn't surpass 100% by too much. When 100% water resistance is achieved, any wetness previously had will start to lower until the player becomes completely dry.


Overheating
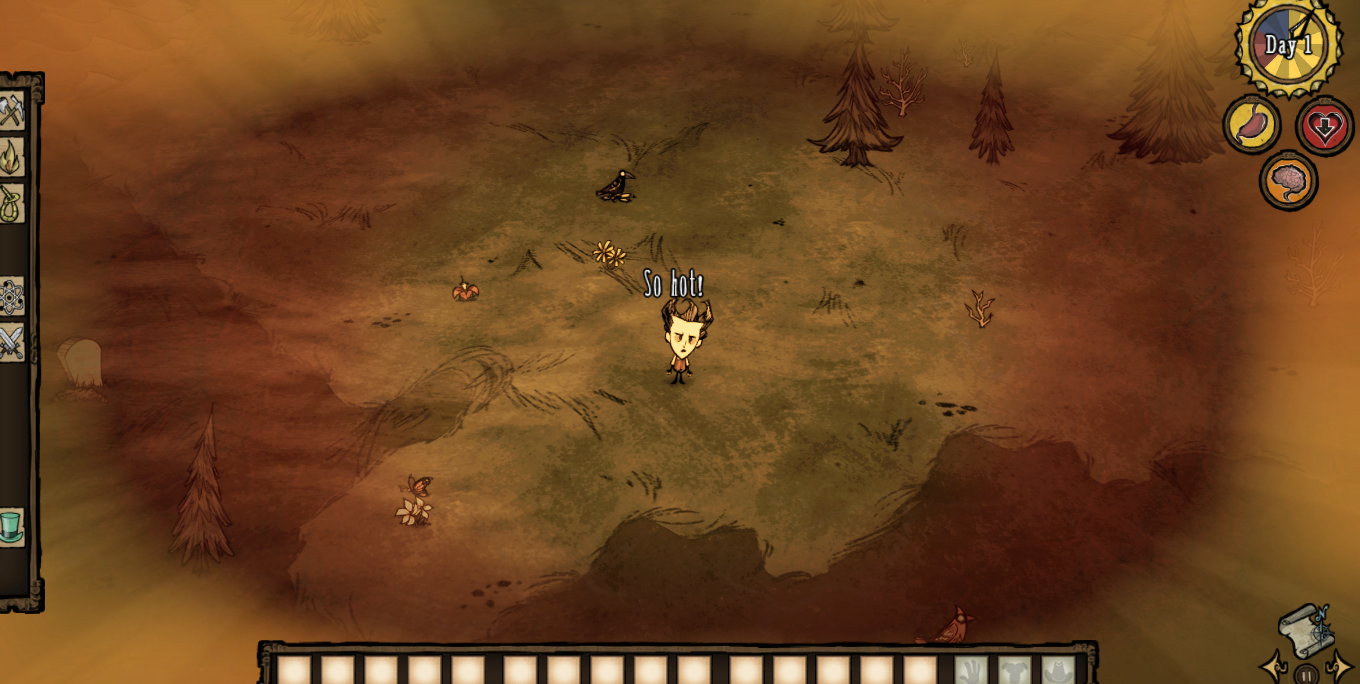 Overheating is a game mechanic found in the Reign of Giants DLC, functioning as the Summer counterpart to Freezing that happens in Winter. When the player begins to take in too much heat (at 65°C), the edge of the screen will begin to turn orange and become a hazy ring while a warning sound plays (much like freezing leaves ice on the edges of the screen and crackles). Once the player begins to take continuous damage (at 70°C), the screen will gain a reddish ring within the orange haze. The only way to stop this is by cooling off, such as being near a sufficiently cold source.
There are a few ways to cool oneself down:
- An Endothermic Fire or Endothermic Fire Pit is a stationary light source that works like a fire, but cools instead of heats.
- A Chilled Amulet, Ice Cube, and Fashion Melon will lower temperature when worn. Note that these have different cooling values.
- Standing under a tree cools the player down to just below the overheating threshold. It appears that bigger trees will cool you down faster and more than smaller ones.
- This is not always right. When it comes to the middle of summer, the temperature is at highest and this method will not prevent you from overheating.
- Using a Luxury Fan will lower the player's temperature instantly. This item has 15 uses, however, it puts out fires, so be wary around light sources.
- Eating a Watermelon, Fruit Medley, Ice, Melonsicle or Ice Cream will cool the player down by various amounts.
- Wetness will decrease gained temperature up to 30 at the cost of Sanity and negative effects on items.
- Sleep during the day in a Siesta Lean-to to cool down and skip to dusk, thus preventing further overheating.
- A Thermal Stone can be placed in a stationary Ice Box or a mobile Snow Chester to freeze them. It will cool the player down as long as it's colder than the player. Note that the Thermal Stone states have different temperature ranges in different seasons. The coldest and quickest methods of freezing a Thermal Stone are: Ice Box(best), Snow Chester, and then Endothermic fires (least efficient).
 In addition, there are several ways to delay overheating:
- A Pretty Parasol, Umbrella, Straw Hat, Fashion Melon, Ice Cube, Eyebrella, Summer Frest or Floral Shirt will reduce the amount of heat taken.
- Retreating to the Caves will slow down the rate at which heat is gained.
- You can stay under a Tree to delay Overheating (exept in middle of summer were Dusk has like 1 segment)
- you can make 2 Thermal stones and put one in an Ice Box or in Snow Chester. Having snow chester and 2 Thermal Stones, won't make any problems anymore of Overheating


(+2 Sanity)

(-10% Speed, Wetness up to 50)
(-2 Sanity, Wetness up to 33)
Naughtiness
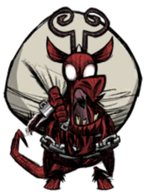 Once the player reaches a threshold of naughtiness (a random number between 31 and 50), Krampus will spawn. One or two Krampi can spawn at the same time after day 50, and two or three after day 90. After Krampus appears, the naughtiness level is reset to 0.
Each minute of restraint (⅛ of a day) reduces naughtiness by 1, meaning the player can reduce their naughtiness by 8 points by not attacking anything innocent for one day.
It is worth noting that setting creatures ablaze will not raise the player's naughtiness level. This is because the fire is considered to be the killing factor. The same goes for Tooth Traps, Bee Mines and Gunpowder, as they are considered to be environmental damage.
Server Creation Settings
Password - Gives the host the ability to lock out random players and only let a select group join the server.
Description - Gives a short description for your server to help players find the best one for them.
Game Mode - There are three different modes; "Survival Mode", wherein the world is reset if all players are ghosts for a period of time, "Endless Mode," wherein the world never resets and players may freely resurrect at the spawn portal, and "Wilderness Mode", wherein there are no ghosts and players are returned to the character selection screen then respawned in random locations.
PvP - Determines whether or not players can attack eachother on the server. Available options are On (Yes they can) or Off (No they can't).
Players - Sets the maximum number of players allowed on the server. Available options are 2, 3, 4, 5 and 6.
Friends Only - Determines whether the server is to be steam friends only. Available options are On and Off.
Server Type - Determines whether the server will be online or off. Available options are Online and LAN.
 World Size - Determines the size of the world. Available options are default, medium, large, and huge.
 Land Branch - Determines the degree to which the land will branch off and be connected by bridging pieces. Available options are least, default and most.
 Land Loop - Determines the degree to which the Roads will tend to lead you in circles, in addition to determining the degree to which the land wil curve. Available options are none, default and always.
 Seasons - Determines the length of Summer and Winter. Available options are only Summer, only Winter, default, long Summer, long Winter, long both and short both.
 Season Start - Determines the starting season. Available options are Summer and Winter.
 Length of Day - Determines the length and/or presence/absence of Day, Dusk, and Night. Available options are only Day, only Dusk, only Night, default, long Day, long Dusk and long Night.
 Weather - Determines the frequency of weather events.
 Lightning - Determines the frequency of lightning strikes.
 Pig Heads - Determines the amount of naturally spawning pig heads.
 Skeletons - Determines the amount of naturally spawning skeletons.
 Grass - Determines the amount of naturally spawning grass.
 Saplings - Determines the amount of naturally spawning saplings.
 Trees - Determines the amount of naturally spawning trees.
 Flint - Determines the amount of naturally spawning flint on the ground.
 Rocks - Determines the amount of naturally spawning rocks on the ground.
 Boulders - Determines the amount of naturally spawning boulders.
 Meteor Storms - Determines the frequency of Meteor Storms.
 Meteors - Determines the number of Meteors in a Meteor Storm.
 Flowers - Determines the amount of naturally spawning Flowers on the ground.
 Reeds - Determines the amount of naturally spawning reeds.
 Spiky Bushes - Determines the amount of naturally spawning spiky bushes.
 Berry Bushes - Determines the amount of naturally spawning berry bushes.
 Carrots - Determines the amount of naturally spawning carrots on the ground.
 Mushrooms - Determines the amount of naturally spawning mushrooms.
 Rabbits - Determines the amount of naturally spawning rabbit holes.
 Gobblers - Determines the amount of naturally spawning gobblers.
 Pigs - Determines the population of pig houses.
Server Creation Settings (Continued)
 Butterflies - Determines the population of butterflies naturally spawning from flowers.
 Birds - Determines the population of Birds that naturally spawn and the frequency with which they appear on screen.
 Beefalo - Determines the amount of naturally spawning beefalo.
 Beefalo in Heat - Determines the frequency at which beefalo will go into heat. Beefalo on Heat will become aggressive towards players and other animals / monsters.
 Suspicious Dirt Pile - Determines the amount of naturally spawning Animal Tracks.
 Koalefants - Determines the frequency of naturally spawning Koalefants. If set to none, Suspicious Dirt Piles will not appear.
 Pengulls - Determines the population of pengulls that naturally spawn.
 Ponds - Determines the amount of naturally spawning ponds.
 Beehives - Determines the amount of naturally spawning beehives.
 Killer Beehives - Determines the amount of naturally spawning killer beehives.
 Tallbirds - Determines the amount of naturally spawning tallbirds.
 Spiders - Determines the amount of naturally spawning spiders.
 Hounds - Determines the frequency of hound attacks.
 Merms - Determines the amount of naturally merms.
 Tentacles - Determines the amount of naturally spawning tentacles.
 Lure Plants/ Meatbulbs - Determines the amount of naturally spawning lure plants.
 MacTusks - Determines the number of naturally spawning Walrus Camps.
 Treeguards - Determines the spawn rate of Treeguards.
 Clockwork Mobs - Determines the amount of naturally spawning Clockwork Mobs.
 Krampus - Determines the spawn rate of Krampus.
 Deerclops - Determines the spawn rate of Deerclops.
- A long season lasts around 50 days.
- A short season lasts around 10 days.
- A long day is 14 daylight hours, 1 dusk hour and 1 night hour of the clock.
- A long dusk is 7 daylight hours, 6 dusk hours and 3 night hours of the clock.
- A long night is 5 daylight hours, 2 dusk hours and 9 night hours of the clock.
- Resources, animals, and foods set to lots will spawn in every biome, with the exception of plants in Rockyland.
- Weather set to lots is infinite.
- When Lightning is set to lots, lightning will strike every 12 - 30 seconds.
Characters
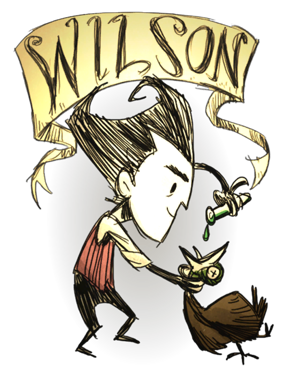
- Hunger - 150
- Sanity - 200
- Health - 150
Skill Level Needed - Beginner Advantages
- Depending on volume, the Beard provides 15/45/135 insulation against Freezing.
- Shaving beards provides +10 Sanity for Wilson.
- No Disadvantages
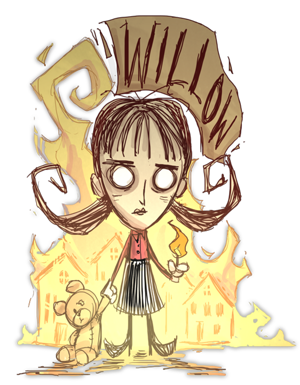
- Hunger - 150
- Sanity - 120
- Health - 150
Skill Level Needed - Moderate Advantages
- Fire damage to Willow is reduced by 50%
- Willow can craft 'Willow's Lighter'.
- Willow can craft 'Bernie' the teddy bear.
Disadvantages
- Loses heat when insane
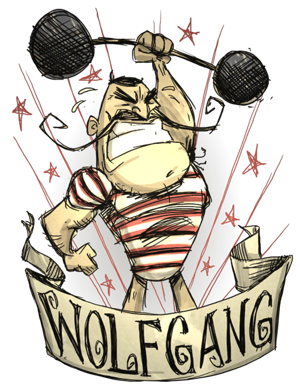
- Hunger - 300
- Sanity - 200
- Health - 150 - 300 (Max Health depends on hunger)
Skill Level Needed - High Advantages
- He will receive a damage bonus from 1.25 to 2.0 when completely full and he will also receive a slight but noticeable speed boost.
Disadvantages
- In regular form, Wolfgang's Hunger decreases 1.5 faster than normal, and 3 times faster in mighty form.
- His max health goes from 200 down to 150 at 0 hunger and his damage goes from 0.75 from the initial downgrade to 0.5 when completely starving. In this form, his speed slightly decreases.
- He suffers from +10% Sanity drain from Monsters and the dark.
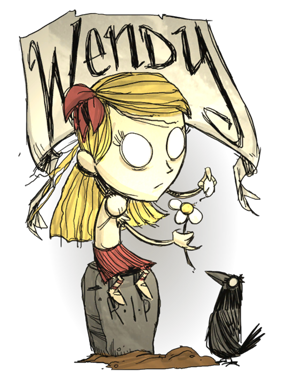
- Hunger - 150
- Sanity - 200
- Health - 150
Skill Level Needed - Moderate
Advantages- When Abigail's Flower has bloomed, it can be placed on the ground to prepare the summoning. If any creature is killed near the flower at this moment, Abigail will be summoned.
Abigail is good at killing large number of spiders, which is quite useful. Abigail has aoe attack: 10(day), 20(dusk), 40(night). - Wendy Suffers 25% less Sanity drain from Darkness and from being near Monsters.
Disadvantages- Wendy's attacks are 25% weaker than normal.
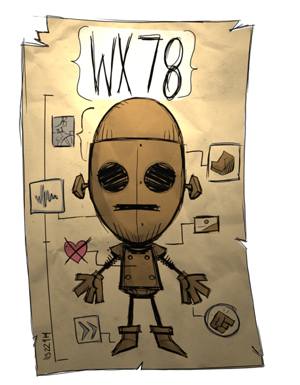
WX78Nickname - The Soulless Automaton Base Stats- Hunger - 150 - 200
- Sanity - 150 - 300
- Health - 150 - 400
Skill Level Needed - High Advantages- WX-78 can eat stale and spoiled Food without penalties.
- When hit by Lightning WX-78 will be overcharged and emit light while moving at heightened speed.
- WX-78 can eat gears to upgrade his stats.
Disadvantages- WX-78 can be damaged by rain.
- When hit by lightning, WX-78 will set fire to nearby objects
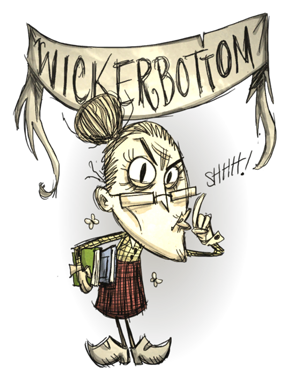
WickerBottomNickname - The Librarian Base Stats- Hunger - 150
- Sanity - 250
- Health - 150
Skill Level Needed - Moderate Advantages- Wickerbottom can make all Science Machine recipes without having to build the Science Machine.
- Wickerbottom can make books.
Disadvantages- Wickerbottom can't gain the 15 Sanity per known recipe.
- Wickerbottom hates spoiled and/or raw food, causing her sanity to suffer greatly.
- Wickerbottom can't sleep.
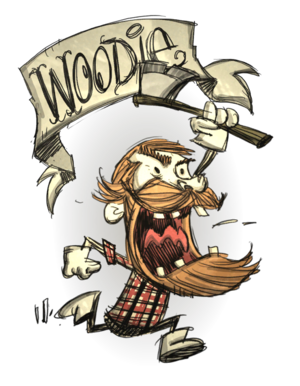
WoodieNickname - The Lumberjack Base Stats- Hunger - 150
- Sanity - 200
- Health - 250
Skill Level Needed - Moderate Advantages- Has a infinite durably axe named Lucy
- Cuts down trees extremely fast
- Woodie’s beard provides insulation, but cannot be shaved
- Can eat wood to increases beaver meter
- Gains sanity from planting trees
Disadvantages- Transforms into a Werebeaver when his beaver meter drops below 25 forcing the player to eat wood objects to turn back
- Chopping trees drains his beaver meter
WesNickname - The Silent Base Stats- Hunger - 113
- Sanity - 150
- Health - 113
Skill Level Needed - Very High Advantages- Starts with a Pile o' Balloons (drops 5 sanity to make a balloon, balloons do 5 AOE damage around itself and can link a chain reaction. Balloons can also be used as decoys to distract Mobs)
- Can craft Pile o' Balloons
Disadvantages- Doesn't give player warning messages
- x0.75 damage Multipler
- Low Stats
- Loses hunger at a 125% rate
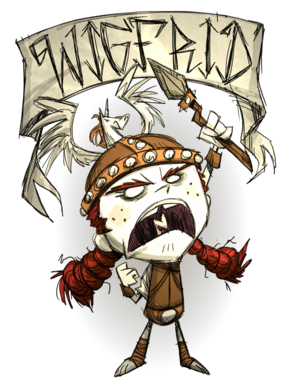
WigfridNickname - The Performance Artist Base Stats- Hunger - 200
- Sanity - 120
- Health - 120
Skill Level Needed - High Advantages- Starts with a Battle Spear, a Battle Helm and 4 Meat
- Can craft a Battle Spears and Battle Helms
- x1.25 damage Multipler
- When she kills an enemy, she gains a percentage of that enemy's attack damage as Health and Sanity (except for Lureplants)
Disadvantages- Can only eat meat (including Eggs)
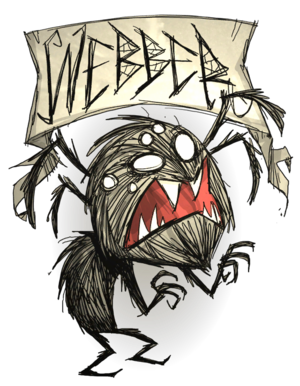
WebberNickname - The Indigestible Base Stats- Hunger - 175
- Sanity - 100
- Health - 175
Skill Level Needed - Easy Advantages- Spider's don't attack you or drain your sanity when you are close
- Spider webbing does not slow you down
- Can craft and upgrade Spider Dens (5 Silk per Upgrade)
- Giving meat to spiders will make them follow you for 1 day
- Grows a beard made of silk (75% of Wilson's Beard's Insulation)
- Doesn't take damage from eating Monster Meat
- Starts with 2 monster meat and spider eggs
Disadvantages- Is a Monster (Good Mobs [pigs] attack you)
- Low maximum sanity
Days until growthLengthSilk YieldInsulation3 DaysShort Beard1 (0.33 per day)11.25 sec6 DaysLong Beard3 (0.5 per day)33.75 sec9 DaysSilky Smooth Beard6 (0.67 per day)101.5 sec[/tr] - When Abigail's Flower has bloomed, it can be placed on the ground to prepare the summoning. If any creature is killed near the flower at this moment, Abigail will be summoned.

New Starter Guide - Day 1-5
Activities:
- Gather basic resources like twigs, flint, grass, gold, carrots, and berries.
- Make basic tools like an axe and pickaxe.
- Explore the map to identify key locations (beefalo herds, pig villages, etc.).
- Avoid combat and focus on understanding game mechanics.
Activities:
- Look for a place near resources like food, trees, and stones.
- Build a fire pit and a science machine to unlock new crafting recipes.
- Start collecting resources for future use (wood, stone, food).
Activities:
- Start thinking about long-term food sources like traps for rabbits or farms.
- Consider exploring more to find gears for an icebox (preserves food).
- Experiment with crafting and try to build a crockpot (better food options).
Items - Gravedigger & A
This section of the guide will cover all items except for those that are crafted by the player, books, environment and food (refer to the crafting, book, environment or food section for information on those items)


Mobs engaging each other and causing a mob death near the flower (e.g., Pigs vs Spiders) can also cause Abigail to spawn. However, if Abigail "dies" and despawns into a flower and mobs die (or Wendy kills something) around the flower after the cooldown period, Abigail will not spawn unless the flower is picked up first and then placed down near a death occurring.
Summoning Abigail drains Sanity by 50 points. When she "dies," she will drop the flower so Wendy can spawn her again after the cooldown period has expired. Abigail flowers will automatically disappear after being abandoned for 3 days.
The flower has three stages of blooming. Initially, it will start as a pale, closed flower. Once charged, it becomes a more reddish pink color and is in bloom. In the third stage, when ready for the blood sacrifice, it will levitate slightly above the ground. Abigail's flower is also visible from the map screen, making it easy to relocate should the player accidentally lose track of it. If the flower somehow falls in the ocean, it will disappear as a normal item will and re-spawn near the player.

Items - B to F


Items - F to L


Items - M to S


Planting Pine Cones can calm and put to sleep nearby Treeguards, whether or not they are aggressive. The chance of this happening is a maximum of 33% when planted near the Treeguard, with a lower chance when planted farther away. The Treeguard will groan in acknowledgement when a Pine Cone is planted within range, even if it has already been pacified.


Items - S to Z


Walrus Tusks can only be used to craft a Walking Cane at an Alchemy Engine.


Books

- Number of Uses - 3
- Cost per use - 50 Sanity
- Crafting - Papyrus x2 + Egg

- Number of Uses - 5
- Range - 30
- Cost per use - 33 Sanity
- Crafting - Papyrus x2 + Seed + Manure

- Number of Uses - 5
- Range - 30
- Cost per use - 33 Sanity
- Crafting - Papyrus x2 + Nightmare Fuel x2

- Number of Uses - 5
- Range - 8
- Cost per use - 50 Sanity
- Crafting - Papyrus x2 + Tentacle Spots

- Number of Uses - 5
- Range - 3 to 15
- Cost per use - 33 Sanity
- Crafting - Papyrus x2 + Red Gem
Crafting - Tools
- Materials Needed - Twigs ×1, Flint ×1
- Tier - Always available
- Damage - 27.2
- Durability - 100 uses
- Perk - Chops wood
- Stacks up to - Doesn't Stack

- Materials Needed - Twigs ×4, Gold Nuggets ×2
- Tier - Alchemy Engine
- Damage - 27.33
- Durability - 400 uses
- Perk - Chops wood
- Stacks up to - Doesn't Stack

- Materials Needed - Twigs ×2, Flint ×2
- Tier - Always available
- Damage - 27.2
- Durability - 33 uses
- Perk - Mines Boulders
- Stacks up to - Doesn't Stack

- Materials Needed - Twigs ×4, Gold Nuggets ×2
- Tier - Alchemy Engine
- Damage - 27.2
- Durability - 132 uses
- Perk - Mines Boulders
- Stacks up to - Doesn't Stack

- Materials Needed - Twigs ×2, Flint ×2
- Tier - Science Machine
- Damage - 17
- Durability - 25 uses
- Perk - Used for Digging
- Stacks up to - Doesn't Stack

Shovels can also uproot Tree stumps for 1 Log, regardless of their size, and chopped Mushtrees, also for 1 Log. They can dig up Rabbit Holes at the cost of permanently robbing the rabbits of a home, therefore, preventing any more to respawn from that point. Additionally, the Shovel can be used to dig up Graves to acquire Gravedigger Items at the cost of -10 Sanity per Grave dug.
- Materials Needed - Twigs ×4, Gold Nuggets ×2
- Tier - Alchemy Engine
- Damage - 17
- Durability - 100 uses
- Perk - Used for Digging
- Stacks up to - Doesn't Stack

- Materials Needed - Twigs ×2, Flint ×2
- Tier - Science Machine
- Damage - 17
- Durability - 200 uses
- Perk - Digs up Turfs
- Stacks up to - Doesn't Stack

- Materials Needed - Twigs ×2, Flint x2
- Tier - Science Engine
- Durability - N/A
- Perk - Shaves Beards and Beefalo
- Stacks up to - Doesn't Stack

The Razor can also be used to shave Beefalos while they are sleeping (whether at night or when put to sleep using Sleep Darts, Amulets, or Pan Flutes), resulting in 3 Beefalo Wool. Using the Razor to acquire Beefalo Wool is arguably more efficient than killing Beefalo outright. The Beefalo will not wake up after being shaved, but Beefalo in heat will sometimes wake up and attack. Wearing a Beefalo Hat prevents Beefalo in heat from attacking the player.
- Materials Needed - Twigs ×3, Rocks ×3, Rope x2
- Tier - Science Machine
- Damage - 17
- Durability - 75 uses
- Perk - Deconstructs Structures
- Stacks up to - Doesn't Stack

Crafting - Light
Campfire / Firepit Warning
Adding too much fuel to a campfire / firepit can cause nearby Trees, Grass, Saplings, or any other flammable objects to catch fire, which can start large forest fires in a Forest biome. This danger can be averted by building away from other flammable objects, or opting for the Fire Pit. During Winter, Campfires provide enough warmth to keep a character alive without any additional clothing, provided that the character stays nearby and keeps adding fuel.
- Materials Needed - Logs x2, Cut Grass x3
- Tier - Always Avaliable
- Renewable - Yes
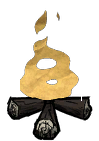
Once built, the Campfire lasts 2 minutes and 15 seconds unless more fuel is added. Additional fuel increases fire duration linearly up to a maximum of 4.5 minutes while heat and light emitted goes up in four discrete steps: 70 / 120 / 180 / 220 degrees and 2 / 3 / 4 / 5 units of distance, respectively. The different stages can be observed by the growing flames and left-click feedback.
In rain, a campfire may burn its fuel up to 250% faster (depending on precipitation rate).
- Materials Needed - Logs x2, Rocks x12
- Tier - Always Avaliable
- Renewable - Yes
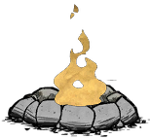
In rain, a Fire Pit may burn its fuel up to 200% faster (depending on precipitation rate).
- Materials Needed - Straw Hat ×1 Gold Nugget ×1 Fireflies ×1
- Tier - Alchemy Engine
- Water Resistance - 20%
- Durability - 7 min 48 sec
- Perk - Provides light while worn
- Materials Needed - Cut Grass ×2, Twigs ×2
- Tier - Always Available
- Durability - 75 seconds (2.5 game hours)
- Perk - Provides light while worn

- Materials Needed - Pumpkin ×1, Fireflies ×1
- Tier - Alchemy Engine
- Durability - 10 min in Summer, 12 min 30 sec in Winter
- Perk - Spooky Illumination

- Materials Needed - Light Bulb ×2, Twigs ×3, Rope ×2
- Tier - Alchemy Engine
- Durability - 8 min
- Perk - Refuelable Portable Light

- Materials Needed - Rope x1, Gold Nugget x2, Petals x3
- Tier - Always available (for Willow only)
- Durability - 10 mins
- Perk - Provides light while worn
- Materials Needed - Nitre ×2, Cut Grass ×3
- Tier - Science Machine
- Perk - Provides light, cools the player
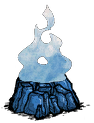
- Materials Needed - Nitre ×2 Cut Stone ×4 Electrical Doodad ×2
- Tier - Alchemy Engine
- Perk - Provides light, cools the player
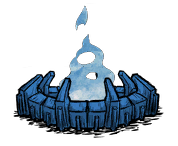
- Materials Needed - Moleworm ×2, Electrical Doodad ×2, Glow Berry ×1
- Tier - Alchemy Engine
- Perk - Nightvision
- Duration - 1.5 Days

Moggles will last for one and a half days in total but can be recharged using Glow Berries, which will restore their durability by 33.3%.
Crafting - Survival
- Crafting - Cut Grass ×3 Spider Gland ×1
- Durability - 1 use
- Perk - Revives a Ghost
- Stacks up to - Doesn't Stack
- Crafting - Cut Grass ×4 Twigs ×4
- Tier - Science Machine
- Durability - Has no durability
- Perk - +8 inventory slots
- Stacks up to - Can't be held in the inventory

- Crafting - Cut Grass ×6, Rope ×1
- Tier - Science Machine
- Perk - Gives you Sanity at the cost of hunger
- Fuel Value - 360/180 sec
- Stacks up to - 10

- Crafting - Twigs ×3, Silk ×4
- Tier - Science Machine
- Durability - 8 uses
- Perk - Catch winged birds
- Stacks up to - Doesn't Stack

Captured birds will become an inventory item and are currently the only way to place a bird in a Bird Cage. These cages will hold a single bird of any type. The bird will always produce Eggs when fed Meats, which is especially good for about-to-spoil meats, and when fed certain fruits or vegetables, they will produce the corresponding Crop Seeds with a 50% chance of acquiring 1 normal Seeds as well.
- Crafting - Twigs ×4, Silk ×2, Rope ×1
- Tier - Science Machine
- Damage - 4.25
- Durability - Loses 10% per use, 30% per strike
- Perk - Catch bugs
- Stacks up to - Doesn't Stack

- Crafting - Gold Nugget ×1 Papyrus ×1
- Tier - Science Machine
- Perk - Points the Way North
- Stacks up to - Doesn't Stack

- Crafting - Twigs ×2, Silk ×2
- Tier - Science Machine
- Damage - 4.25 per strike (melee)
- Durability - 9 reels
- Stacks up to - Doesn't Stack

Ponds can be found in any part of the map, but they are most common in Marshes, Forests, and Grasslands. After 2–32 seconds, the line will tug and the "Hook" option will appear. Clicking the left mouse button on the pond will hook the fish, and an additional click will reel it in.
The more often any given pond is used for fishing, the longer it will take for another fish to bite. A fish respawns in a pond after 3.34 game hours.
- Crafting - Ash ×2, Rocks ×1, Spider Gland ×1
- Tier - Science Machine
- Perk - Heals 20 health and can never spoil
- Stacks up to - 40

- Crafting - Papyrus ×1 Honey ×2
- Tier - Alchemy Engine
- Perk - Heals 30 health and can never spoil
- Stacks up to - 40

- Crafting - Silk ×6, Twigs ×4, Rope ×3
- Tier - Alchemy Engine
- Durability - 6 uses
- Perk - Increases Health and Sanity at the cost of Hunger

- Crafting - Rocks ×10, Pickaxe ×1, Flint ×3
- Tier - Alchemy Engine
- Perk - Stores temperatures for travel
- Freezing White : < 0°C
- Blue : 0°C - 25°C
- Grey : 25°C - 40°C
- Yellow :40°C - 50°C
- Glowing Orange : 50°C - 60°C
- Crafting - Cut Grass ×6, Twigs ×2
- Tier - Always Available
- Durability - 8 uses
- Perk - used to catch small animals such as Rabbits, Frogs, and Spiders

- Crafting - Twigs ×6, Pig Skin ×1, Silk ×2
- Tier - Science Machine
- Damage - 17
- Water Resistance - 90%
- Perk - Protects from rain and the sun.
- Stacks up to - Doesn't Stack
- Crafting - Papypus x3, Healing Salve x2, Stinger x1
- Tier - Alchemy Engine
- Perk - Restores 20 maximum health
- Stacks up to - 40

Crafting - Survival (Cont.)
- Crafting - Beard Hair x2, Beefalo Wool x2, Silk x1
- Tier - Always Available
- Perk - Distracts Shadow Creatures
- Stacks up to - Doesn't Stack
When Bernie's durability drops to 0%, he will stop attracting Shadow Creatures. His appearance and icon change to reflect that he is "dead", and examining him will provide a different quote. Using a Sewing Kit on Bernie will restore him to 100% durability.
- Crafting - Twigs ×4, Cut Grass ×3, Petals ×6
- Tier - Always Available
- Sanity Aura - 2/min
- Perish Time - 2 days
- Water Resistance - 50%
- Perk - Protects against wetness and overheating.
- Stacks up to - Doesn't Stack
- Crafting - Silk ×2, Boards ×4, Rope ×3
- Tier - Always Available
- Perk - Lowers temperature and raises Sanity and Health at the expense of Hunger
- Stacks up to - Doesn't Stack
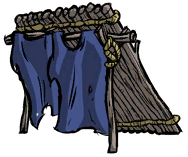
- Crafting - Down Feather ×5, Cut Reeds ×2, Rope ×2
- Tier - Alchemy Engine
- Perk - Cools you down and puts out fires
- Stacks up to - Doesn't Stack

Due to the range of its effect, the Luxury Fan is a good substitute for the Ice Flingomatic to put out fires during Summer, especially when the player starts in Spring, since Ice could possibly be scarce.
- Crafting - Thick Fur ×1, Gears ×3, Electrical Doodad ×3
- Tier - Alchemy Engine
- Perk - Slows stored food spoilage
- Stacks up to - Doesn't Stack

Although Insulated Packs cannot be placed in inventory or in Chests, they can be placed on the ground and used for storage. Any item clicked on an Insulated Pack which is on the ground will give the 'Store' option allowing the pack to be filled without equipping it.
Despite slowing the spoilage of food items, the Insulated Pack does not completely work the same way as an Ice Box. Unlike the Box, the Pack will not stop the spoilage of Ice and Ice Cubes and will not be able to freeze a Thermal Stone.
Whirly Fan- Crafting - 3 Twigs, 1 Petal
- Perk - Prevents overheating in summer
- Durability - 1 min 30 seconds
- Stacks up to - Doesn't Stack

- Crafting - Mosquito Sack x2, Ice x1
- Perk - Puts out fires.
- Durability - 1 use
- Stacks up to - 20

- Crafting - Unknown
- Perk - Make Balloons
- Stacks up to - Doesn't Stack

- Crafting - Straw Roll, Bunny Puff
- Tier - Alchemy Engine
- Duration - 3 Uses
- Perk - Gives you Sanity at the cost of hunger
- Fuel Value - 360/180 sec
- Stacks up to - Doesn't Stack

- Crafting - Pig Skin ×4, Silk ×6, Rope ×2
- Tier - Alchemy Engine
- Perk - +12 inventory slots, slows move speed by 10%
- Stacks up to - Can't be held in the inventory

Crafting - Food
- Crafting - Boards ×2, Honeycomb ×1, Bee ×4
- Tier - Science Machine
- Spawns - BeeKiller & Bee
- Renewable? - No
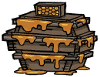
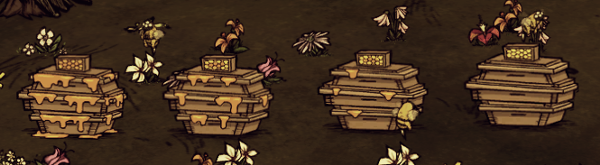
After harvesting their Honey, all remaining Bees in the Bee Box will emerge as workers and attack while those that were already outside will ignore the threat unless the player fights back. Tips
- A good way to get honey faster is to capture some Butterflies with a Bug Net and plant them as Flowers near the box, increasing efficiency of bees for collecting honey.
- Bees are slow and can easily be outrun if aggravated. Their kite attacks can even create a larger distance between themselves and the player. It will only take a few seconds of running before Bees will lose interest.
- Equip a Walking Cane or build a Cobblestone path to the Bee Box. A player can use the increased movement speed to harvest Honey without fear of retaliation if timed correctly.
- Keep Boxes close to the base. If the player gets too far away, the game hibernates all bees and switches to a simplified model to simulate Honey production, which yields considerably less Honey.
- Crafting - Cut Stone ×3, Charcoal ×6, Twigs ×6
- Tier - Science Machine
- Perk - Cook better food
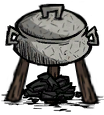
It takes 40 seconds to cook an average recipe (exact times are listed in each individual recipe). Cooked meals will not begin to spoil until the player removes them from the Crock Pot - the food will stay as it is in the pot until the player takes it, it's eaten by a Lureplant, or the pot is destroyed, leaving the meal on the ground among the resources. All Crock Pot dishes can be stacked up to 40.
- Crafting - Twigs ×3 Charcoal ×2 Rope ×3
- Tier - Science Machine
- Perk - Dry meats
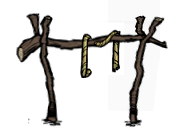
Unlike cooking meat, the jerky created will always be completely fresh, instead of having half less spoilage than the meat used. This means a spoiled morsel can be dried to get a completely fresh piece of Jerky. Meat left on the racks do not spoil until collected.
All Meats take 1 day to dry (expect Meat and Batilisk Wing which take 2).

- Crafting - Cut Grass ×8, Manure ×4, Log ×4
- Tier - Science Machine
- Perk - Grows Seeds

- Crafting - Cut Grass ×10, Manure ×6, Rocks ×4
- Tier - Science Machine
- Perk - Grows Seeds Faster
- Crafting - Boards ×1, Gears ×1, Gold Nugget ×2
- Tier - Alchemy Engine
- Perk - Reduces spoilage rate by 50%

As food spoils faster in Summer, it is recommended players put their food in the Ice Box to slow down the spoiling rate of food and help preserve food for Winter.
- Crafting - Manure ×3, Bone Shards ×2, Log ×4
- Tier - Alchemy Engine

Crafting - Science
- Crafting - Gold Nugget ×1, Log ×4, Rocks ×4
- Tier - Always Available
- Perk - Unlock even more Crafting Recipes
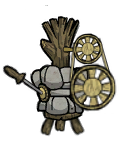
- Crafting - Gold Nugget ×2, Cut Stone ×1
- Tier - Science Machine

- Crafting - Boards ×4, Cut Stone ×2, Electrical Doodad ×2
- Tier - Science Machine
- Perk - Unlock even more Crafting Recipes
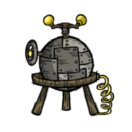
A Science Machine is required to prototype an Alchemy Engine, unless the player is playing as Wickerbottom. When built, the Alchemy Engine is still able to unlock Tier 1 items even without a Science Machine, so it is wise to break the Science Machine for resources.
- Crafting - Twigs ×1, Nightmare Fuel ×4, Gears ×1
- Tier - Alchemy Engine
- Perk - Helps locate Things and Maxwell's Door

- Crafting - Rotten Egg ×1, Charcoal ×1, Nitre ×1
- Tier - Alchemy Engine
- Damage - 200
- Stacks up to - 40

- Crafting - Gold Nugget ×3, Cut Stone ×1
- Tier - Science Machine
- Renewable - Yes

The Lightning Rod also provides a small radius of light (but not heat) after absorbing a Lightning bolt, which is just bright enough to prevent Charlie from attacking. The light lasts for a few Days and will go dark as soon as morning comes.
- Crafting - Boards ×2, Gold Nugget ×2, Rope ×2
- Tier - Science Machine
- Perk - Indicates the probability of precipitation

- Crafting - Boards ×2, Gold Nugget ×2
- Tier - Science Machine
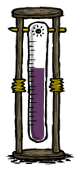
- Crafting - Gears ×2, Ice ×15, Electrical Doodad ×2
- Tier - Alchemy Engine
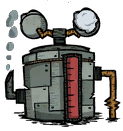
The Ice Flingomatic has a limited fuel tank, indicated by a red gauge on the front of the unit. A full tank will last 5 days, and can be refueled with any fuel substances, such as Logs or Rot. Fuel is consumed over time (not uses). The Ice Flingomatic will target withered Berry Bushes, Grass Tufts, and Saplings, allowing them to be harvested normally throughout the Summer.
Crafting - Fight
- Crafting - Boards ×1, Bee ×4, Flint ×1
- Tier - Science Machine
- Stacks up to - Doesn't Stack

If the Bees from the Mine are attacked by their target, other Bees from either Bee Boxes or Bee Hives will come to help. Once the target is dead, the Bees will remain and can be caught with a Bug Net to make another mine. Catching them counts as aggression, and if there were others nearby assisting against the bomb target, those will attack the player, too.
Bees, Killer Bees, Butterflies, Batilisks, Mosquitoes, and Shadow Creatures cannot activate Bee Mines.
- Crafting From - Cut Reeds ×2, Hound's Tooth ×1, Azure Feather ×1
- Tier - Science Machine
- Damage - 100
- Stacks up to - 20

- 2 shots can destroy a Bee Hive
- 1-5 shots can kill normal mobs (including Guardian Pigs, MacTusk, Merms and Spiders)
- A shot will cause neutral mobs such as a Koalefant to attack the player
- Crafting From - Cut Reeds ×2, Charcoal ×1, Crimson Feather ×1
- Tier - Science Machine
- Damage - 50
- Stacks up to - 20

If a mob drops cookable food and is killed with a Fire Dart, the mob will drop cooked food instead (e.g. a rabbit would drop a cooked morsel).
Red Hounds are immune to Fire Darts.
- Crafting From - Cut Reeds ×2, Stinger ×1, Jet Feather ×1
- Tier - Science Machine
- Damage - 0
- Stacks up to - 20

Butterflies, Ghosts, Shadow Creatures, Mandrake, Depths Worms and Tentacles are immune to Sleep Darts.
- Crafting From - Boards ×1, Silk ×1, Charcoal ×1
- Tier - Alchemy Engine
- Damage - 27.2
- Duraability - 10 Uses
- Stacks up to - Doesn't Stack

The Boomerang will return to the player even if the player moves from the original throwing spot. It will not hit a target if the target moves out of range before the Boomerang reaches it, but it will always return to the player no matter how far they are.
- Crafting From - Pig Skin ×1, Rope ×1
- Tier - Alchemy Engine
- Water Resistance - 20%
- Durability - 315 hp
- Perk - Absorbs 80% of physical damage
- Dropped by - Ornate Chest
- Stacks up to - Doesn't Stack
- Crafting From - Cut Grass ×10, Twigs ×2
- Tier - Always Available
- Durability - 157.5 hp
- Perk - Absorbs 60% of physical damage
- Fuel Value - 360 / 180 secs
- Stacks up to - Doesn't Stack

- Crafting From - Logs ×8, Rope x2
- Tier - Science Machine
- Durability - 315 hp
- Perk - Absorbs 80% of physical damage
- Fuel Value - 360 / 180 secs
- Dropped by - Ornate Chest
- Stacks up to - Doesn't Stack

- Crafting From - Marble ×12, Rope x4
- Tier - Alchemy Engine
- Durability - 735 hp
- Perk - Absorbs 95% of physical damage
- Dropped by - Ancient Pseudoscience Station
- Stacks up to - Doesn't Stack

When equipped, it slows the player down by 30%. Because of this, the Marble Suit is better suited for tanking instead of kiting, making it a great asset for Wolfgang and WX-78, who can achieve high Health.
- Crafting From - Pig Skin ×1, Twigs ×2, Meat ×2
- Tier - Always Available
- Durability - 225 hp
- Perk - Absorbs 60% of physical damage
- Fuel Value - 360 / 180 secs
- Stacks up to - Doesn't Stack

- Crafting From - Twigs ×2, Rope x1, Flint x1
- Tier - Science Machine
- Durability - 150 Uses
- Dropped by - Ornate Chest
- Stacks up to - Doesn't Stack

- Crafting From - Log ×1 Rope ×1 Hound's Tooth ×1
- Tier - Alchemy Engine
- Durability - 10 Uses
- Perk - Deals 60 damage when triggered
- Stacks up to - Doesn't Stack

Mobs damaged by these traps do not see the player as the cause; thus, using them is a safe way to kill a neutral mob. Mobs killed by Tooth Traps do not increase the player's naughtiness. A Tooth Trap can be moved at any time regardless of having been triggered or not.
Bees, Killer Bees, Butterflies, Batilisks, Mosquitoes, Birds, Chester, Lureplants and their Eyeplants, Dragonflies, and Shadow Creatures cannot activate these traps.
Crafting - Fight (Continued)
- Crafting From - Twigs ×2, Flint ×2, Gold Nugget ×2
- Tier - Always available
- Damage - 42.5 damage per hit (53.125 as Wigfrid)
- Durability - 200 uses
- Stacks up to - Doesn't Stack

- Crafting From - Gold Nugget ×2, Rocks ×2
- Tier - Always available
- Water Resistance - 20%
- Durability - 750 hp
- Perk - Absorbs 80% of physical damage
- Stacks up to - Doesn't Stack
- Crafting From - Volt Goat Horn ×1, Electrical Doodad ×2, Nitre ×2
- Tier - Alchemy Engine
- Damage - 43.35 (72.25 wet)
- Durability - 6 mins
- Perk - Emits Light, Does more damage to wet targets
- Stacks up to - Doesn't Stack

- Crafting From - Scales ×1, Log Suit ×1, Pig Skin ×3
- Tier - Alchemy Engine
- Sanity Aura - +3.3 per min
- Durability - 1800 hp
- Perk - Absorbs 70% of physical damage, Grants immunity to fire damage, Ignites attackers, Restores sanity over time
- Stacks up to - Doesn't Stack

- Crafting From - Down Feather ×10, Volt Goat Horn ×1, Gears ×1
- Tier - Alchemy Engine
- Durability - 15 uses
- Perk - Creates a tornado to damage enemies and destroy objects
- Stacks up to - Doesn't Stack

Crafting - Structures
- Crafting - Papyrus ×2 Gold Nugget ×6 Seeds ×2
- Tier - Alchemy Engine
- Spawns - Egg, Seeds
- Renewable? - Yes

Feeding a bird in a Birdcage a raw Fruit or Vegetable (except Berries, Mushrooms, Lichen, Cave Banana, and Mandrake) will make it drop 1–2 Crop Seeds of the same type, as well as having a 50% chance to drop an additional regular Seed. These specialized seeds can be planted on a Farm plot, enabling selective crops. The player can also feed the bird regular Seeds to get fresh Seeds in return.
If fed any kind of Meats (excluding uncooked Monster Meat and raw Eggs) or meat-based food in any state of spoilage, the bird will produce a fresh Egg. Eggs can be eaten raw or cooked, as well as used in Crock Pot recipes such as Bacon and Eggs and Pierogi. Eggs can also be offered to the Pig King in exchange for Gold Nuggets.
- Crafting - Boards ×3
- Tier - Science Machine
- Renewable? - Yes

Backpacks, Piggybacks, and Krampus Sacks cannot be stored in Chests, even if the containers are empty.
- Crafting - Boards ×4, Cut Stone ×3, Pig Skin ×4
- Tier - Alchemy Engine
- Spawns - Pigs
- Renewable? - Yes
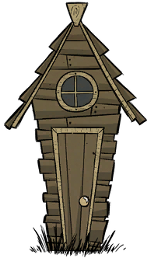
At dusk and night, Pig Houses with Pigs in them will have a light on. However, as soon as the player approaches the house, the light is switched off. The Pig will relight the light only when the player moves away.
- Crafting - Foliage ×5 Broken Shell ×1
- Tier - Alchemy Engine
- Renewable? - Yes

- Crafting - Boards ×1
- Tier - Science Machine
- Renewable? - Yes
- Walls are craftable Items and deployable Structures that prevent the player's and Mobs' movement. Hay, Wood and Stone walls have 100, 200 and 400 maximum health, respectively. Contrary to popular belief, walls seem to not be able to restrict movement when placed next to water.
- Once built, it can be repaired or upgraded into a second tier.
- The Hay Wall and Wood Wall is highly flammable and one should exercise caution when fighting Red Hounds near it. If burned they will drop one ash.
Hay Wall

- Crafting - Cut Grass ×4 Twigs ×2
- Health - Up to 100
- Tier - Science Machine
- Fuel Value - 30/15 sec
- Stacks up to - 20
- Renewable? - Yes
Wood Wall

- Crafting - Boards ×2 Rope ×1
- Health - Up to 200
- Tier - Science Machine
- Fuel Value - 30/15 sec
- Stacks up to - 20
- Renewable? - Yes
Stone Wall

- Crafting - Cut Stone ×2
- Health - Up to 400
- Tier - Alchemy Engine
- Stacks up to - 20
- Renewable? - Yes
Moon Rock Wall

- Crafting - Moon Rock ×12
- Health - Up to 800
- Tier - Alchemy Engine
- Stacks up to - 20
- Renewable? - Yes

- Crafting - Boards ×1
- Health - Up to 400
- Tier - Alchemy Engine
- Stacks up to - 10
- Fuel Value - 90/45 Secs
- Renewable? - Yes
Carpeted Flooring
- Crafting - Boards ×1 Beefalo Wool ×1
- Tier - Alchemy Engine
- Fuel Value - 90/45 sec
- Stacks up to - 10

Eyeplants cannot spawn on this Turf, making it an expensive, artificial way of protecting oneself from Lureplants.
Although 1 Beefalo Wool is used to craft the Carpeted Flooring and Beefalo Wool is mainly used to craft warm clothing for Winter, Carpeted Flooring does not provide the player with any warmth.
Checkerboard Flooring- Crafting - Marble x1
- Tier - Alchemy Engine
- Fuel Value - 90/45 sec
- Stacks up to - 10

- Crafting - Rocky Turf ×1 Boards ×1
- Tier - Alchemy Engine
- Fuel Value - 90/45 sec
- Stacks up to - 10

Placing Cobblestones near bases or paths can significantly decrease the character's travel time. In addition, Eyeplants cannot spawn on Cobblestones, making it even better for use around bases.
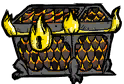
Scaled Chest- Crafting - Scales ×1, Boards ×4, Gold Nugget ×10
- Tier - Alchemy Engine
- Resources - Anything contained within
Crafting - Structures (Continued)
- Crafting - Scales ×1, Cut Stone ×2
- Perk - Quell the spread of fire.
- Fuel Value - 90/45 sec
- Stacks up to - 10

- Crafting - Boards ×1

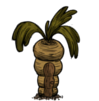
- Crafting - Boards ×4, Carrot ×10, Bunny Puff ×4
- Tier - Alchemy Engine
- Spawns - Bunnyman
- Renewable? - Yes
Crafting - Refine
- Crafting - Logs x4
- Tier - Science Machine
- Fuel Value - 360 / 180 sec
- Stacks up to - 10

- Crafting - Rocks x3
- Tier - Science Machine
- Stacks up to - 10

- Crafting - Dark Petals ×4
- Tier - Prestihatitator
- Dropped by - Beardling (40%), Splumonkey (50%), Damaged Knight, Damaged Bishop, Damaged Clockwork, Crawling Horror, Terrorbeak (×1.5), Hammered Pig Head, Hammered Merm Head, Shoveled Graves, Ornate Chest
- Stacks up to - 40
- Crafting - Cut Reeds ×4
- Fuel Value - 30/15 sec
- Tier - Science Machine
- Stacks up to - 40

- Crafting - Red Gem ×1 Blue Gem ×1
- Tier - Prestihatitator
- Stacks up to - 40

It can be used to craft the Shadow Manipulator, Bat Bat, Telelocator Staff and Nightmare Amulet. A quantity of 3 Purple Gems are also required to be installed in the Telelocator Focus before it will function.
- Crafting - Cut Grass ×3
- Tier - Science Machine
- Stacks up to - 20

- Crafting - 90 Fur Tufts (makes Thick Fur x3)
- Stacks up to - 10

Crafting - Magic (Prestihatitator)
- Crafting - Nightmare Fuel x1, Petals x6
- Tier - Always Available (for Wendy only)
- Use Cost - 50 Sanity
- Perk - Summon Abigail
- Stacks up to - Doesn't Stack
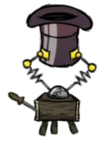
- Crafting - Rabbit ×4, Boards ×4, Top Hat ×1
- Tier - Science Machine
- Perk - Unlock even more crafting recipes
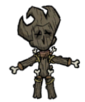
- Crafting - Planks x4, Cooked Meat x4, Beard Hair x4
- Tier - Prestihatitator
- Durability - One use
- Perk - Resurrects the player on Death
As long as there is a Meat Effigy standing somewhere in the world, the character will be revived at the nearest Meat Effigy, however if a touch stone is closer than the meat effigy they will be resurrected at the touch stone. After death and resurrection, the Meat Effigy used will be destroyed. Alternatively, the Meat Effigy can be destroyed using the Hammer or Deconstruction Staff which will return the lost 30 health.

- Crafting - Cut Reeds ×5, Mandrake ×1, Rope ×1
- Tier - Prestihatitator
- Durability - 10 uses
- Perk - Puts nearby mobs to sleep
It takes 1 second to begin playing the Pan Flute after clicking it. Mobs will be put into a deeper sleep than usual, allowing the player to move closer to them without waking them up; for example, the Tallbird. If a mob that was put to sleep is attacked, all of the similar nearby mobs will wake up after a couple of seconds. Mobs sometimes sleep all day after they have been put to sleep by the Pan Flute.

- Crafting - Gold Nuggets x2, Nightmare Fuel x4, Pig Skin x2
- Tier - Prestihatitator
- Insanity Aura - -2 sanity per min (-25/min per follower)
- Perk - Unlock even more crafting recipes

- Crafting - Gold Nugget ×8, Nightmare Fuel ×2, Red Gem ×1
- Tier - Prestihatitator
- Insanity Aura - -3 sanity per min
- Renewable? - Yes
- Crafting - Gold Nugget ×3, Nightmare Fuel ×2, Red Gem ×1
- Tier - Prestihatitator
- Sanity Aura - +2 sanity per min
- Durability - 20 uses (hunger to health conversion), 1 use (resurrection)
- Perk - On death, resurrects the player and puts nearby mobs to sleep. Converts hunger to health.
- Dropped by - Graves
- Crafting - Gold Nugget x3, Blue Gem x1
- Tier - Prestihatitator
- Sanity Aura - +2 sanity per min
- Durability - 6 mins
- Perk - Restores Sanity, freezes attackers and yourself
Anything that attacks the player while they're wearing the Chilled Amulet will be slowed down and then frozen if attacks are repeated, much like Ice Staff needs several hits to freeze certain mobs.

- Crafting - Gold Nugget x3, Blue Gem x1
- Tier - Prestihatitator
- Use Cost - 1 Sanity
- Durability - 20 uses
- Perk - Freezes the Target
- Stacks up to - Doesn't Stack
Creatures that periodically drop things (such as Beefalo producing Manure) will still leave them behind while frozen.
Lureplants, Eyeplants, Chester, Baby Beefalo, Blue Hounds, Ghosts and Shadow Creatures are immune to the Ice Staff's freezing effect.

- Crafting - Glommer's Wings ×1, Glommer's Flower ×1
- Tier - Blueprint
- Durability - 3 uses
- Perk - Summons a giant creature to smash things in its path.
- Stacks up to - Doesn't Stack
Crafting - Magic (Shadow Manipulator)

- Crafting - Living Log ×3, Purple Gem ×1, Nightmare Fuel ×7
- Tier - Prestihatitator
- Perk - Unlock even more crafting recipes
Its function is similar to the Science Machine and the Alchemy Engine. Likewise, the player's Sanity will increase by 15 points if an object is prototyped on a Shadow Manipulator.
- Crafting - Nightmare Fuel ×5, Living Log ×1
- Tier - Shadow Manipulator
- Insanity Aura - -20 sanity per min
- Damage - 68
- Durability - 100 uses
- Stacks up to - Doesn't Stack

- Crafting - Nightmare Fuel ×5, Papyrus ×3
- Tier - Shadow Manipulator
- Insanity Aura - -10 sanity per min
- Durability - 750 hp (Absorbs 95% of physical damage)
- Perk - Decreases sanity by 10% of total damage taken
- Stacks up to - Doesn't Stack

- 80 × 0.95 = 76 damage is taken by Night Armour.
- 80 − 76 = 4 damage is taken by the player's Health.
- The player's Sanity will be decreased by 80 × 0.1 = 8.
- Crafting - Batilisk Wing ×5 Living Log ×2 Purple Gem ×1
- Tier - Shadow Manipulator
- Damage - 42.5
- Durability - 75 uses
- Perk - Leeches 6.8 of target's health hit and 3.4 from the user if their health isn't full.
- Stacks up to - Doesn't Stack


- Crafting - Gold Nugget ×6 Nightmare Fuel ×4 Purple Gem ×2
- Tier - Shadow Manipulator
- Insanity Aura - -3.33 sanity per min
- Durability - 4 mins
- Perk - Induce insanity
- Stacks up to - Doesn't Stack
While wearing the Nightmare Amulet, the player also loses 3.33 sanity per minute. This sanity loss is taken from their "actual" sanity - that is, the sanity they would have if they weren't wearing the amulet. This sanity loss will only become apparent once the amulet has been removed or has worn out, in that the player's sanity level will be lower than it was prior to wearing the amulet.
The Nightmare Amulet's induced effect cannot be used to raise or lower Obelisks.

- Crafting - Nightmare Fuel ×2, Spear ×1, Red Gem ×1
- Tier - Shadow Manipulator
- Use Cost - 1 sanity
- Durability - 20
- Perk - Ignites mobs and flammable objects
- Stacks up to - Doesn't Stack

- Crafting - Nightmare Fuel ×4, Living Log x2, Purple Gem x2
- Tier - Shadow Manipulator
- Use Cost - 50 sanity
- Durability - 5
- Stacks up to - Doesn't Stack

- Crafting - Nightmare Fuel ×4 Living Log ×4 Gold Nugget ×8
- Tier - Shadow Manipulator
- Perk - Used to control the randomness of the Telelocator Staff
- Stacks up to - Doesn't Stack
Upon construction, the Focus has three posts in which the player must install 3 Purple Gems in order to activate it. When the Telelocator Staff is used on the player (by means of right clicking it) anywhere in the world, they will be immediately transported to the center of the nearest active Focus. After use, the Gems will be consumed and must be replaced before the Focus can be used again. If the player has already placed 3 Purple Gems onto the posts and wishes to deactivate it, the player can remove the gems from the posts.
Crafting - Dress
- Crafting - Petals x12
- Tier - Always Avaliable
- Sanity Gain - 1.33/min
- Rots in - 6 days
- Stacks up to - Doesn't Stack

- Crafting - Rabbit x2, Twigs x1
- Tier - Science Machine
- Durability - 5 days
- Perk - Delays freezing during Winter
- Stacks up to - Doesnt stack

- Crafting - Beefalo Wool x8, Beefalo Horn x1
- Tier - Science Machine
- Water Resistance - 20%
- Durability - 10 days
- Perk - Delays freezing during winter, Prevents beffalo from attacking during mating season
- Stacks up to - Doesn't Stack
- Crafting - Cut Grass x12
- Tier - Always Available
- Water Resistance - 20%
- Durability - 5 days
- Stacks up to - Doesn't stack
- Crafting - Silk x6
- Tier - Science Machine
- Water Resistance - 20%
- Sanity Gain - +3.3/min
- Durability - 8 days
- Stacks up to - Doesn't stack
- Crafting - Log x1, Silk x8, Hound Tooth x2
- Tier - Alchemy Engine
- Durability - 5 uses
- Perk - Repairs degraded clothing
- Stacks up to - Doesn't stack

- Crafting - Silk x8, Rope x1
- Tier - Science Machine
- Water Resistance - 20%
- Durability - 750 Hp
- Perk - Absorbs 80% of damage taken from Bees and Killer Bees
- Stacks up to - Doesn't stack
- Crafting - Jet Feather x3, Crismon Feather x2, Tentacle Spots x2
- Tier - Science Machine
- Sanity Gain - +2/min
- Durability - 8 Days
- Perk - Increases Bird Spawn Rate, Decreases Bird Spawn Delay
- Stacks up to - Doesn't stack

- Crafting - Straw Hat x1, Rope x1, Berry Bush x1
- Tier - Science Machine
- Durability - Infinite
- Perk - Camouflages the player
- Stacks up to - Doesn't stack

When hiding, enemies will not notice the player unless the enemy was already targeting the player. Charlie is not fooled by the disguise. Also, Gobblers can distinguish between Berry Bushes and the Bush Hat; hence, they will not approach the player when the player is hiding with the Bush Hat.
- Crafting - Beefalo Wool x4, Silk x4
- Tier - Science Machine
- Sainty Gain - 1.33/min
- Durability - 10 days
- Perk - Delays freezing during Winter
- Stacks up to - Doesn't stack

- Crafting - Gold Nuggest x2, Walrus Tusk x1, Twigs x4
- Tier - Science Machine
- Damage - 17
- Durability - Infinite
- Perk - 25% faster movement speed
- Stacks up to - Doesn't stack

The Walking Cane can also be used as weak backup weapon. Although it only deals half the damage of a Spear when used as a weapon, it has infinite durability and can be swung indefinitely whilst providing the user with a speed boost for kiting. It can also serve in the faster killing of small critters, such as Butterflies and Moleworms, since it swings at a faster rate than unarmed. The Walking Cane can be used to craft the The Lazy Explorer.
- Crafting - Hound Tooth x8, Silk x6
- Tier - Science Machine
- Sanity Gain - 3.3/min
- Durability - 10 days
- Perk - Delays freezing during Winter
- Stacks up to - Doesn't stack

- Crafting - Winter Koalefant Trunk
- Tier - Science Machine
- Sanity Gain - 2/min
- Durability - 15 days
- Perk - Delays freezing during Winter
- Stacks up to - Doesn't stack

Crafting - Dress (Continued)
- Crafting - Cat Tail ×4 Silk ×4
- Tier - Alchemy Engine
- Sanity Gain - 3.3/min
- Durability - 10 days
- Perk - Restores sanity over time, Delays freezing during Winter
- Stacks up to - Doesn't stack

- Crafting - Watermelon ×1 Twigs ×3
- Tier - Science Machine
- Health Gain - -6-10/min (only with WX-78)
- Sanity Gain - -2/min
- Durability - 3 days
- Water Resistance - 20%
- Perk -
- Lowers sanity over time
- Increases wetness over time
- Delays overheating in Summer
- Lowers sanity over time
- Crafting - Electrical Doodad ×2 Rope ×4 Ice ×10
- Tier - Alchemy Engine
- Health Gain - -6-10/min (only with WX-78)
- Durability - 4 days
- Perk -
- Prevents overheating in Summer
- Increases wetness over time
- Walking speed reduced by 10%
- Prevents overheating in Summer
The Ice Cube does not have durability, instead melting after 4 days, similar to the Ham Bat and Garland. That being said, it can be replenished with Ice.
- Crafting - Tentacle Spots ×2 Rope ×2 Bone Shards ×2
- Tier - Science Machine
- Durability - 10 days
- Perk - Protects from rain and lightning
- Crafting - Moleworm ×2, Straw Hat ×1, Bone Shards ×1
- Tier - Alchemy Engine
- Durability - 10 days
- Perk - Protects from rain and lightning
- Crafting - Thick Fur ×1 Dapper Vest ×1 Rope ×2
- Tier - Alchemy Engine
- Durability - 7 days
- Perk -
- Restores Sanity over time.
- Delays Freezing during Winter.
- Slows Hunger loss.
- Restores Sanity over time.

The Hibearnation Vest is a tier 3 warm clothing, increasing the time a character can be away from fire before Freezing during Winter. Characters that lose Hunger at a normal rate of 75/day will, instead, lose Hunger at a rate of 56.3/day. Wolfgang's normal form will lose 84.4/day while his mighty form will lose 168.8/day, and Wes will lose 70.3/day.
- Crafting - Deerclops Eyeball ×1 Twigs ×15 Bone Shards ×4
- Tier - Alchemy Engine
- Durability - 9 days
- Perk - Delays overheating in Summer, Protects from rain and lightning
While playing with WX-78, this item can prove to be especially useful. During Spring, it can completely protect him from getting wet (and taking damage) during the frequent raining while keeping his hands slot free - unlike an Umbrella. During summer, it is an effective way to protect him from overheating using the headgear slot - other options for this slot like the Ice Cube and the Fashion Melon will damage him via wetness.
- Crafting - Papyrus ×3, Silk ×3, Cactus Flower ×5
- Tier - Alchemy Engine
- Sanity Aura - 3.3/min
- Durability - 15 days
- Perk - Delays overheating in Summer, Raises sanity over time
Since the item requires Cactus Flowers to be crafted, it cannot be crafted until the first Summer. Unfortunately, it only lasts 12 days after that, because things spoil 25% faster in Summer.
- Crafting - Rope ×1, Crimson Feather ×3, Pig Skin ×2
- Tier - Science Machine
- Water Resistance - 20%
- Sanity Aura - 2/min
- Durability - 8 days
- Perk -
- Delays overheating in Summer
- Raises sanity over time
- Slightly protects from the rain
- Delays overheating in Summer
- Crafting - Koalefant Trunk ×1, Silk ×8
- Tier - Alchemy Engine
- Water Resistance - 20%
- Sanity Aura - 2/min
- Durability - 15 days
- Perk -
- Restores sanity over time
- Delays freezing during Winter
- Restores sanity over time
Creatures - Passive
- Aggressive - Attack you when they have noticed you.
- Neutral - Attack you when you attack them.
- Passive - Don't fight back when attacked.


- Health - 25
- Running Speed - 5
- Loot - Seeds, Morsel (50%), Jet / Crimson / Azure Feather (50%),
- Loot with - Bird Trap

- Health - 1
- Walking Speed - 1
- Running Speed - 5
- Loot - Butterfly Wings (98%), Butter (2%)
- Loot with - Bug Net
- Spawns From - Flower, Evil Flower


- Health - 450
- Walking Speed - 3
- Running Speed - 7
- Loot - Current Inventory
- Shadow Ability - Has 3 more inventory slots than normal
- Snow Ability - Stores items & Halves spoilage
- Spawns From - Eye Bone
Shadow Chester is a special transformation for Chester. If he has at least one Nightmare Fuel in each inventory slot on the night of a Full Moon, he will consume them and transform into a Shadow Chester
Snow Chester is another form of Chester. If he has a Blue Gem in each slot at the night of a Full Moon, he will consume them and transform into a Snow Chester.
- Special Ability - Emits Light
- Loot - Fireflies
- Loot with - Bug Net
Fireflies can be captured with a Bug Net (even during daylight hours) by pressing the Spacebar when nearby. Because they do not respawn, they are considered a limited resource.
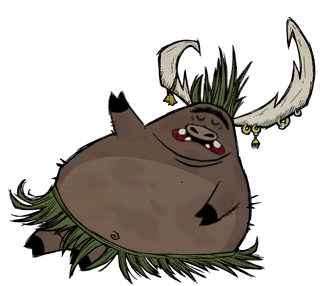
- Renewable? - Can't be killed
- Common Biomes - Pig Village
- Health - 50
- Damage - 20
- Attack Delay - 3
- Walking Speed - 3
- Running Speed - 8
- Special Ability - Eats Berries from Berry Bushes
- Loot - Drumstick x2
- Spawns from - Berry Bushes
Hunting Gobblers
Gobblers will eat most vegetable and fruit foodstuffs (like Carrots, Corn, or Berries) left on the ground. When placed nearby a Gobbler, they will slowly walk towards the foodstuff and consume it while completely ignoring the character. As long as the Gobbler doesn't make it to the bait before being attacked, it will not flee like normal. If it reaches the bait, the Gobbler will eat it instantly and begin fleeing again.

- Health - 20
- Walking Speed - 6
- Running Speed - 6
- Special Ability - Follows the player when picked late
- Loot - Mandrake
When picked at night or dusk, it will turn into a living Mandrake, following the player around constantly making noise until morning, after which it will replant itself on the spot. When picked during the day, it will die instantly and can be obtained as an item.
- Health - 25
- Walking Speed - 5
- Special Ability - Eats Vegetables and Fruits left on the ground. Turns into Breadling when sanity is below 40%
- Loot - Morsel
- Loot (trap) - Rabbit
- Spawns from - Rabbit Holes & Prestihatitator
Rabbits are cowardly creatures and will run away if the player gets too close. They will also run straight to their Rabbit Holes at dusk and if they witness the death of a nearby Rabbit.
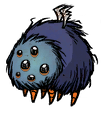
- Health - 100
- Sanity Aura - 6.25/min (when allied)
- Loot - Monster Meat x3, Glommer's, Wings x1, Glommer's Goop x2
- Spawns from - Glommer's Statue
Glommer will be found during a full moon at Glommer's Statue, along with a Glommer's Flower. Glommer will become a follower to the player when Glommer's Flower is picked up, similar to Chester and his Eye Bone. If Glommer's Flower is dropped on the ground or put inside a stationary container, Glommer will remain at the area near the flower. When tamed, Glommer provides a Sanity aura of +6.25/min, making it useful in countering the nighttime sanity drain of -5/min. It will also drop Glommer's Goop once every 2–4 days.

- Health - 25
- Special Ability - Hides underground and steals items
- Loot - Morsel x1, Any items they are carrying
- Spawns from - Burrow, Tumbleweed (0.1%x3)
Creatures - Neutral
- Aggressive - Attack you when they have noticed you.
- Neutral - Attack you when you attack them.
- Passive - Don't fight back when attacked.


- Health - 100
- Damage - 10
- Attack Delay - 2 (Bee) / 3 (Killer Bee)
- Attack Range - 3
- Walking Speed - 4
- Running Speed - 6
- Loot - Honey (16.7%) Stinger (83.3%)
- Loot With - Bug Net
- Spawns from (Bee) - Beehives, Bee Box, Bee Mine, Tumbleweed (0.1% x 3)
- Spawns from (Killer Bee) - Beehives, Bee Box, Killer Beehive
Killer Bees are Aggressive
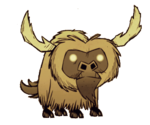
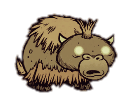
- Health - Adult 500, Rest 300
- Damage - 34
- Attack Delay - 4
- Attack Range - 3
- Walking Speed - 1 - 1.5 Depending on Growth
- Running Speed - 4.5 - 7 Depending on Growth
- Loot - Meat (x4), Beefalo Wool (x3), Beefalo Horn (33%)
- Shave with Razor - Beefalo Wool (x3)
- Produces - Manure
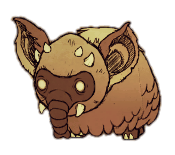
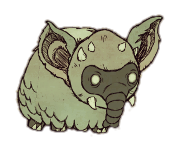
- Health - 1000
- Damage - 50
- Attack Delay - 4
- Walking Speed - 1.5
- Running Speed - 7
- Loot - Koalefant Trunk, Meat (×8)
- Produces - Manure
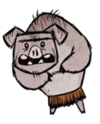
- Health - 250
- Damage - 33
- Attack Delay - 3
- Attack Range - 3
- Walking Speed - 3
- Running Speed - 5
- Special Ability - Sanity aura - +25/min (when allied)
- Special Ability - Can be befriended with Meat
- Loot - Meat (75%), Pig Skin (25%)
- Spawns From - Pig House Build

- Health - 150
- Damage - 33
- Attack Delay - 3
- Attack Range - 2.5
- Walking Speed - 2
- Special Ability - Hides Egg
- Loot - Jet Feather (20%), Drumstick (10%), Morsel (10%), Egg (If one was hidden)
- Spawns From - Ocean
Killing Pengulls at night time with gunpowder is a very quick way to farm eggs, feathers and meat.
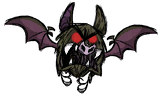
- Health - 50
- Damage - 20
- Attack Delay - 1
- Attack Range - 1.5
- Walking Speed - 8
- Loot - Batilisk Wing, Guano (15%), Monster Meat (10%)
- Produces - Guano
- Spawns From - Sinkhole
A Batilisk that isn't attacking anything will eat Meats left on the ground. If it comes across a stack, it will chew through the whole stack before moving on, ignoring other mobs or the player until then.
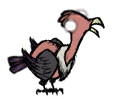
- Health - 175
- Damage - 15
- Attack Delay - 2
- Walking Speed - 4
- Running Speed - 8
- Loot - Morsel (1-2), Drumstick x1, Jet Feather x1 (33%)

- Health - 150
- Damage - 25
- Attack Delay - 2
- Attack Range - 3-4 (when Leaping)
- Walking Speed - 3
- Special Ability:
- Can be befriended with toys
- Vomits gifts
- Can be befriended with toys
- Loot - Meat, Cat Tail (33%)
- Spawns from - Hollow Stump
Catcoons can be befriended by giving them "toys" or food, and they will give "gifts" to the player by coughing up items, such as Rot and Cut Grass, as if it is a hairball. Each item given to the Catcoon will add a tenth of a day (48 sec) to the time they spend following the player (up to a maximum of 1 day) and force the next hairball to be sooner. The item that they give depends on the number of times they hack before coughing it up. Currently, there are two lists for neutral and friendly Catcoons.
Birchnut Pile o' Balloons, Beefalo Wool, Butterfly Wings, Cut Grass, Egg Jet, Feather Azure, Feather Crimson, Feather Foliage, Bunny Puff, Moleworm, Papyrus Petals, Pine Cone, Rabbit, Rope, Silk, Spider Eggs, Spider Gland, Tallbird Egg and Trinkets Twigs
Catcoon Food
Eel, Egg, Fish, Frog Legs, Morsel, Moleworm and Rabbit
Rot, Cut Grass, Flint, Moleworm, Rocks, Dark Petals, Petals, Ice, Pine Cone, Crimson Feather, Birchnut and Wet Goop
Friendly
Rot, Cut Grass, Flint, Moleworm, Rocks, Dark Petals, Petals, Ice, Pine Cone, Crimson Feather, Birchnut, Rabbit, Gold Nugget, Twigs, Tumbleweed, Berries, Silk, Morsel, Carrot, Seeds, Corn Seeds, Ashes, Azure Feather, Jet Feather, Bone Shards, Pumpkin Seeds, Eggplant Seeds, Durian Seeds, Pomegranate Seeds, Dragon Fruit Seeds, Watermelon Seeds, Batilisk Wing, Red Cap, Blue Cap, Green Cap, Fish, Frog Legs, Bee, Butterfly, Redbird, Snowbird, Crow, Cut Reeds, Tentacle Spots, Beefalo Wool and Electrical Doodad

- Health - 350
- Damage - 25 (37.5 when Charged)
- Attack Period - 2
- Attack Range - 3
- Walking Speed - 4
- Running Speed - 8
- Special Ability - Becomes charged by lightning
- Special Ability (charged) - Stuns opponents with electricity
- Loot - Meat x3, Volt Goat Horn 25%
- Loot (charged) - Electric Milk x1
Creatures - Neutral (Continued)
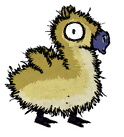
- Health - 525
- Damage - 50
- Attack Period - 3
- Attack Range - 2
- Walking Speed - 5
- Special Ability - When angry, forms whirlwind to attack player
- Loot - Meat, Drumstick, Down Feather x2-3 (133%)
Under normal circumstances they try to avoid conflict, and will run from an aggressor. If attacked while their parent is alive, all members of the herd will run toward the nest and call for help, causing a Moose/Goose to land and protect them. If their Moose/Goose guardian is slain, the Moslings will become enraged and attack the player. Moslings attack by spinning so fast that they appear as a whirlwind which radiates electricity, travelling in a straight line. While in their whirlwind attack animation, there is a chance for them to be struck by lightning (which does not damage them) and rain to start falling for a short period. After each attack they will become dizzy for a short period of time, making them vulnerable to counterattacks.
Moslings can be a lot of trouble when playing as WX-78. Their spinning attack calls lightning strikes on the player which means the player will be overloaded many times, causing a large amount of Sanity loss.
Creatures - Aggressive
- Aggressive - Attack you when they have noticed you.
- Neutral - Attack you when you attack them.
- Passive - Don't fight back when attacked.
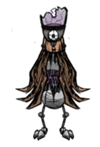
- Health - 900
- Damage - 40
- Attack Delay - 4
- Attack Range - 6
- Walking Speed - 5
- Special Ability - Has a Ranged Attack
- Loot - Gears (x2), Purple Gem
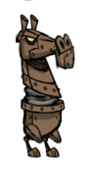
- Health - 900
- Damage - 40
- Attack Delay - 2
- Walking Speed - 5
- Loot - Gears (×2)
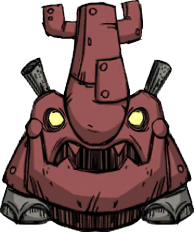
- Health - 900
- Damage - 45 to player, 400 to rest
- Attack Delay - 2
- Walking Speed - 5
- Running Speed - 16
- Special Ability - Ram charges destroying structures in its path.
- Loot - Gears (×2)
You can easily use clockwork rook's ram to clear forests for wood and even other creatures.

- Health - 100
- Damage - 10
- Attack Delay - 1
- Attack Range - 3
- Walking Speed - 4
- Running Speed - 8
- Special Ability - Knocks out items from the players inventory when attacking
- Loot - Frog Legs
- Spawns from - Pond

- Health - 200
- Damage - 15
- Attack Delay - 1.2
- Attack Range - 1.5
- Running Speed - 2
- Special Ability - Insanity Aura -40 sanity per min
- Loot - None
- Spawns from - Grave
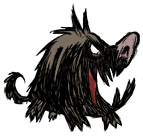

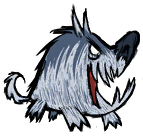
- Health - 150, (100 Red and Blue)
- Damage - 20, (30 Red and Blue)
- Attack Delay - 2
- Attack Range - 3
- Running Speed - 10
- Special Ability (All) - Insanity Aura -40 sanity per min
- Special Ability (Red) - Bursts into flames when killed
- Special Ability (Blue) - Freezes close range attackers upon death.
- Loot (All) - Monster Meat
- Loot (Black) - Hound's Tooth (12.5%)
- Loot (Red) - Hound's Tooth, Ash, Red Gem (20%)
- Loot (Blue) - Hound's Tooth (×2), Blue Gem (20%)
- Spawns from (All) - Hound Mound
- Spawns from (Blue) - Walrus Camp Winter
Read the hound attacks section for more information about hounds.
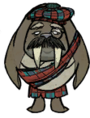
- Health - 300
- Damage - 33
- Attack Delay - 3
- Walking Speed - 2
- Running Speed - 4
- Loot - Meat, Blow Dart,Walrus Tusk (50%), Tam o' Shanter (25%)
- Health - 600
- Damage - 33
- Attack Delay - 1.5
- Attack Range - 3
- Walking Speed - 3
- Running Speed - 5
- Special Ability - Werepig Transformation is shorter
- Loot - Meat (75%), Pig Skin (25%)
- Spawns From - Pig Torch
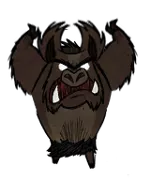
- Health - 700
- Damage - 40
- Attack Delay - 12
- Attack Range - 3
- Walking Speed - 3
- Running Speed - 7
- Special Ability - Insanity aura -100/min
- Loot - Pig Skin, Meat (×2)
During a full moon or after eating 4 pieces of Monster Foods (Monster Meat Cooked Monster Meat Monster Jerky Monster Lasagna Durian Extra Smelly Durian), Pigs and Guardian Pigs will turn into Werepigs.
Werepigs will stop to eat any Food on the ground and will produce Manure if they eat Fruits or Vegetables.


- Health - 100, (400 Spider Warrior)
- Damage - 20
- Attack Delay - 3, (4 - 6 Spider Warrior)
- Attack Range - 3, (6 Spider Warrior)
- Walking Speed - 3, (4 Spider Warrior)
- Running Speed - 5
- Special Ability - Insanity aura -25/min, (-40/min Spider Warrior)
- Loot - Monster Meat (50%), Silk (25%), Spider Gland (25%)
- Spawns from (All) - Spider Den, Spider Queen
- Spawns from (Black) - Tumbleweed (0.1% x 3)
They are generally nocturnal; only coming out in daylight if their den is attacked, or if the webbing from their dens is stepped on. .
- Health - 800, (600 Teen), (50 Baby)
- Damage - 50, (37.5 Teen), (10 Baby)
- Attack Delay - 2
- Attack Range - 3
- Walking Speed - 7, (6 Teen & Baby)
- Running Speed - 7, (6 Teen & Baby)
- Special Ability - Lays a Tallbird Egg in its nest
- Loot Adult - Meat (×2)
- Loot Teen - Meat
- Loot Baby - Morsel
- Spawns from (Adult) - Tallbird Nest
- Spawns from (Baby) - Hatching Tallbird Egg
- Health - 500, (20 Baby Tentacle)
- Damage - 34, (5 Baby Tentacle)
- Attack Delay - 2
- Attack Range - 4
- Special Ability (Normal Tentacle) - Insanity aura -40/min
- Special Ability (Normal Tentacle) - Retreats underground when not attacking
- Loot (Normal Tentacle) - Monster Meat (×2), Tentacle Spike (50%), Tentacle Spots (20%)
- Spawns from (Normal Tentacle) - On Tentacles [Book] (Only available when playing as Wickerbottom)
- Spawns from (Baby Tentacle) - Tentapillar, Ancient Pseudoscience Station
Tentacles are hostile Monsters that specifically spawn in Marshes, though they will not spawn on world-generated roads.
- Health - 100
- Damage - 3 (34 by explosion)
- Attack Delay - 2
- Attack Range - 4
- Walking Speed - 8
- Running Speed - 12
- Special Ability - Explodes after the 4th successful attack
- Loot - Mosquito Sack (50%)
- Loot (Caught with Bug Net) - Mosquito

- Health - 300
- Damage - 20
- Attack Delay - 2.5
- Attack Range - 20
- Running Speed - 3
- Insanity Aura - -100 per min
- Special Ability - Teleports when attacked
- Loot - Nightmare Fuel (150%)

- Health - 400
- Damage - 50
- Attack Delay - 1.5
- Attack Range - 20
- Running Speed - 7
- Insanity Aura - -100 per min
- Special Ability - Teleports when attacked
- Loot - Nightmare Fuel (150%)
Creatures - Aggressive (Continued)

- Health - 50
- Damage - 5
- Attack Period - 2
- Attack Range - 2.5, 3
- Walking Speed - 3.5
- Loot - Twigs 60%, Birchnut 40%
- Spawns from - Poison Birchnut Tree
Birchnutters, unlike Eyeplants, can spawn from any kind of turf. They take one hit from an Ice Staff to be frozen but they can't be put to sleep. Instead, they go back underground when a Pan Flute or other similar items are used against them.
- Damage - 40
- Attack Period - 1.5
- Attack Range - 2
- Loot - Birchnut ×3, Living Log ×1-2, Living Log ×1 (Shovel), Nightmare Fuel (20%)
An angry Birchnut Tree can spawn up to 5 Birchnutters to attack the player or nearby Mobs. They will also do a root attack, behaving similarly to tentacles, that will attempt to home in on the player's position. Unlike the somewhat similar Treeguards, angry Birchnut Trees have to be felled with an Axe (12 swings) or any other method that will destroy the average tree. Torching an angry Birchnut Tree spawns another, final wave of Birchnutters.
An angry Birchnut Tree will drop 1 Living Log and 3 Birchnuts and has a 20% chance to drop an additional Living Log or Nightmare Fuel. Its stump can also be dug up to yield an additional Living Log.
Creatures - The Big ♥♥♥♥♥♥♥

- Damage - 100
- Attack Delay - Random
- Insanity Aura - -20 on hit
Most characters can survive a single attack, even without armor.
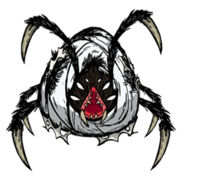
- Health - 2500
- Damage - 80
- Attack Delay - 3
- Attack Range - 5
- Walking Speed - 1.75
- Special Ability - Insanity aura -400/min
- Special Ability - Spawns Spiders and Spider Warriors
- Loot - Monster Meat (×4), Silk (×4), Spider Eggs, Spiderhat
- Spawns from - Spider Den
Spider Queen spawns from overgrown tier 3 Spider Dens, if a player or other mobs wander close by
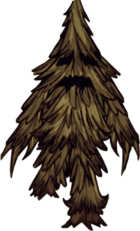
- Health - 2100, 3000, 3750
- Damage - 35, 50, 62 to player / 105, 150, 186 to mobs
- Attack Delay - 3
- Attack Range - 2.1, 3, 3.75
- Walking Speed - 1.05, 1.5, 1.875
- Insanity aura - -100 Sanity per min
- Loot - Monster Meat, Living Log (×6)
- Spawns from - Trees
There are three sizes available for Treeguards– short (70% scale), normal (100% scale), and tall (125% scale) that spawn from the respective size Evergreens.
Treeguards will aim to attack whoever chopped down trees near them and will follow their target indefinitely; however, they can be pacified by planting Pine Cones. Planting one within 16 units away has a 15% chance to pacify them, while within 5 units away has a 33% chance. Treeguards give a soft growl every time a pine cone is planted, whether or not it pacifies. If an angered Treeguard following the player does not growl when a pine cone is planted, it was not planted close enough to calm the Treeguard.
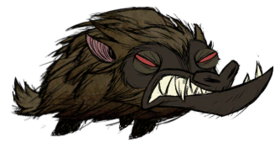
- Health - 600
- Damage - 50
- Attack Delay - 3
- Attack Range - 5
- Walking Speed - 5.5
- Special Ability - Can summon Hounds, Red Hounds and/or Blue Hounds
- Loot - Hound's Tooth (×1-3), Monster Meat (×4-6)
The Varg takes 3 hits with the Ice Staff to be frozen, and 1 Sleep Dart to be put to sleep.
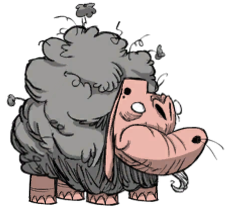
- Health - 800
- Damage - 60
- Special Ability - Spits mucus that immobilizes players.
- Loot - Meat (x4), Steel Wool (x2-3), Phlegm (x1-2),
- Produces - Manure
The Ewecus has a short-ranged melee attack and a long-ranged projectile. When it uses its short-ranged attack, it will attempt to kite the player. The projectile attack, in which it spits mucus at the player, will halt the player's movement on impact. The player will escape over time, but the player can escape faster with the help of other players or befriended Pigs.
The Ewecus takes 3 blasts from the Ice Staff to be frozen and 4 Sleep Darts to be put to sleep.
- Health - 300
- Damage - 50
- Attack Delay - 1.2
- Attack Range - 3
- Running Speed - 7
- Special Ability - Steals Items
- Loot - Monster Meat, Charcoal ×2, Krampus Sack (1%)
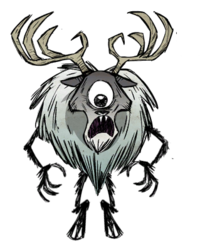
- Health - 4000
- Damage - 75 to player (150 to mobs)
- Attack Delay - 3
- Attack Range - 6
- Walking Speed - 3
- Insanity Aura - -400 Sanity per min
- Special Ability - AoE attack. Destroys structures and trees
- Loot - Meat ×8, Deerclops Eyeball
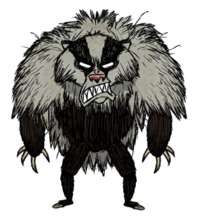
- Health - 6000
- Damage - 100 to player / 200 to mobs
- Attack Delay - 3
- Attack Range - 6
- Walking Speed - 3 - 6
- Running Speed - 10
- Insanity aura - 400/min when fighting, -100/min otherwise
- Special Ability - AoE attacks. Eats food, be it in containers or on the ground. Sheds fur every 45 seconds.
- Loot - Meat x8, Thick Fur
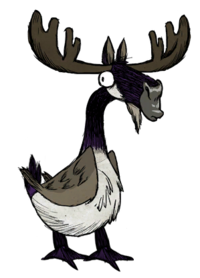
- Health - 6000
- Damage - 75 to player / 150 to mobs
- Attack Delay - 3
- Attack Range - 5.5
- Walking Speed - 8
- Running Speed - 12
- Special Ability - Honks to make the player drop their weapon.
- Loot - Meat x6, Drumstick x2, Down Feather (3-5)
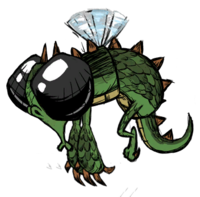
- Health - 27500
- Damage -
- 75 Swipe and 37.5 x3 (112.5) Ring of Fire (to player)
- 150 Swipe and 75 x3 (225) Ring of Fire (to mobs)
- Fire damage when enraged
- 75 Swipe and 37.5 x3 (112.5) Ring of Fire (to player)
- Attack Delay - 2.5
- Attack Range - 4
- Walking Speed - 4 (2 when recently unfrozen)
- Insanity Aura - -400/min
- Special Ability - Spits lava. Engulfs itself in fire when attacked, sets anything near it on fire and deals constant fire damage to anything nearby.
- Loot - Meat x8, Scales
Food - Information
- Green (50-100% Fresh) - Restores the full amount of hunger, health and sanity for a given food.
- Yellow (21% - 49% Stale) - Restores 2/3 of Hunger, 1/3 of Health and doesn't restore any sanity
- Red (0-20% Spoiled) - Restores 1/2 of Hunger, doesn't restore any Health and decreases sanity by 10.
- Any kind of cooked meat lasts longer than any raw meat, but any kind of raw vegetable lasts longer than any cooked vegetable. The exceptions are Popcorn, which lasts longer than raw Corn, and Mushrooms, which last the same amount of time whether cooked or raw.
- Food dropped on the ground will perish at 1.5 rate, while keeping it in the Ice Box will reduce the rate to 0.5. Additionally, during Winter and when world temperature is below 0°, the food base perish rate is multiplied by 0.75 instead of 1. I.e. during winter, when temperature is below 0°, food in the Ice Box will spoil at 0.5 × 0.75 = 0.375 rate.
- Soggy food spoils 30% faster.
- The stale and spoiled effects do not apply when eaten by WX-78.
- The effects of eating stale or spoiled food are worse when playing as Wickerbottom. Stale food will only give 1/3 of the hunger and 1/4 of health. Spoiled food will restore only 1/6 of the hunger. The rest of the values is the same as other characters.
- Cooking Food on fire or in Crock Pot halves the spoiled amount of the Food.
- Tallbird Eggs, Mandrakes (raw and cooked), the Deerclops Eyeball, Guardian's Horn and the Glommer's Goop (RoG only) are the only Food items which don't spoil.
- Food cooked in the Crock Pot and meat dried on the Drying Rack do not begin to spoil until picked up.
Food - Meat
- Meats (except for raw Monster Meat) in any state of spoilage can be given to the bird in a Birdcage to produce a fresh Egg.
- Meats can be given to Pigs to befriend them. If the Pig eats four of any of the health damaging monster foods Monster Food, it will turn into a Werepig.
- Meats except for Monster Meat, Cooked Monster Meat, Frog Legs, Cooked Frog Legs, can be given to the Pig King in exchange for Gold Nuggets
- Meats can be placed on the drying rack for 1 day to create jerky. Normal Meat will take 2 days on the drying rack.

 1
1 25
25 -10
-10 6 Days
 3 25 0 10 Days
 20 25 15 20 Days
 -20 18.75 -15 6 Days
 -3 18.75 -10 15 Days
 -3 18.75 -5 20 Days
 0 12.5 -10 6 Days
 1 18.75 0 10 Days
 0 12.5 -10 6 Days
 1 12.5 0 10 Days
 8 12.5 10 20 Days
 0 12.5 -10 6 Days
 1 12.5 0 10 Days 8 12.5 10 20 Days
Food - Meat (Continued)
 1 12.5 0 3 Days
 1 12.5 0 6 Days 8 12.5 10 20 Days
 0 12.5 -10 6 Days
Legs
1 12.5 0 10 Days 8 12.5 10 20 Days 3 12.5 -10 6 Days
 8 18.75 0 10 Days
Winter Koalefant Trunk
30 37.5 0 6 Days 40 75 0 15 Days
 60 75 -15 Doesn't Spoil
 0 9.375 0 10 Days
 0 12.5 0 6 Days
Food - Meat (Continued)
3 25 0 Doesn't Spoil 0 37.5 0 6 Days
Food - Vegetables
- The cooked version of a vegetable almost always rots faster than the non-cooked version, except for Mushrooms. All farmable vegetables last the same amount of time when raw.
- Carrots, Lichen, Mandrakes, and Mushrooms can be found naturally in the world, however most of the other vegetables have to be Farmed by planting Seeds.
 3 25 0 10 Days
 3 12.5 0 15 Days
 1 12.5 0 10 Days
 3 12.5 0 6 Days
 3 37.5 0 10 Days
 8 37.5 0 6 Days
 8 25 0 10 Days
 20 25 0 6 Days
 -20 12.5 0 10 Days
 1 0 -10 10 Days
 0 12.5 -50 10 Days
 -1 0 15 15 Days
 20 12.5 -15 10 Days
 -3 0 10 10 Days 60 75 0 Does Not Spoil
 100 150 0 Does Not Spoil
Food - Vegetables (Continued)
1 0 0 6 Days 0 0 0 6 Days -3 12.5 -5 10 Days
 1 12.5 15 10 Days
 8 12.5 5 10 Days
Food - Fruit
ALL FRUIT VALUES ARE 1 EXCEPT BERRIES & ROASTED BERRIES WHICH ARE 0.5
 3 9.375 0 6 Days
 20 12.5 0 3 Days
 3 9.375 0 6 Days
 20 12.5 0 3 Days
 -3 25 -5 10 Days
 0 25 -5 6 Days
 0 9.375 0 6 Days
 1 12.5 0 3 Days
 3 12.5 5 8 Days
 1 12.5 7.5 3 Days
Food - Crock Pot Meals
(days) (Secs)


Food - Crock Pot Meals (Continued)
(days) (Secs)


Food - Dairy & Other
![.png]](https://images.steamusercontent.com/ugc/436072840512686121/4A6D4B028C59FFF8CAE745887BFC2C710E41918A/) 3 12.5 10 6 Days 40 25 0 40 Days
3 12.5 10 6 Days 40 25 0 40 Days 3 9.375 0 40 Days N/A N/A N/A N/A
Not Edible
20 Days 1 9.375 0 6 Days 0 4.6875 0 40 Days
 1 4.6875 0 10 Days 40 9.375 -50 N/A 0.5 2.3 0 3 days
Environment
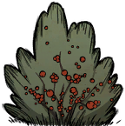
Replanted Berry Bushes will only produce Berries for 4 to 5 harvests, after which they will require additional fertilizer. As the plant gets closer to this point, it will begin to show fewer berries in its branches. When it can no longer be harvested, it will again resemble an unfertilized bush. Picking Berries from a Berry Bush before enough are shown will also cause the bush to become dry and require fertilization.
Berry Bushes are highly flammable and can be used as fuel in Campfires and Fire Pits. When burned on the ground, they will leave behind 1 Ash. Because they burn easily, Berry Bushes planted close together are very susceptible to Lightning strikes. This can be prevented by building a Lightning Rod to draw the lightning.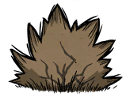 Berry Bushes will not produce Berries in Winter, although any Berries left unpicked can be harvested during that time.
There are two distinct varieties of Berry Bushes, which stack separately. The "leafy" variety cannot be used to make Bush Hats. Snow will not fall on this variant. Other than this however, they function exactly the same.
Gobblers consume Berries from bushes very quickly and can clean off multiple Bushes rapidly if not stopped.
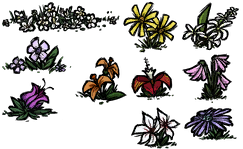
Flowers serve a variety of purposes. Picking 12 of them for their Petals allows the creation of a Garland, which provides a Sanity boost over time in addition to the 5 sanity gained from picking each flower. This is especially useful early on in the game.
Flowers also spawn Butterflies, which can be killed for their wings and Butter or be captured in a Bug Net. Captured butterflies can be planted anywhere to produce a new flower, thus making each of these items renewable. Homeless Bees can also produce Flowers over time. Many Flowers can be planted together to build a Butterfly farm, an area where Butterflies can easily be killed for their wings. Large groups of Flowers are also useful for Honey production. Building Bee Boxes near such fields increases the speed at which the bees produce Honey.
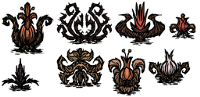
Evil Flowers drain 25 Sanity in a minute when stood by, 5 when picked, and 5 more if the player eats the Dark Petals it provides. Since the Dark Petals do not have any sort of purpose when eaten and only drain sanity, it is advised that the player not eat them unless they want to purposely lower Sanity to fight Shadow Creatures or move Obelisks.
Grass Tufts can be dug up with a Shovel or Regal Shovel and replanted in a new location (typically closer to a base camp). Doing this will give it a shorter, withered appearance, requiring the tuft to be fertilized before it will regrow any new grass. It must be fertilized again after 20 harvests. Grass will grow really slowly during Winter.
These plants are flammable and can be used as long-lasting fuel in Campfires and Fire Pits, but that is not recommended since Grass Tufts are a nonrenewable resource. When unpicked Grass Tufts are burned, they will leave behind 1 Ash and no plantable tuft. The same applies to dug-up tufts.
Because they burn easily and are usually planted very close together in a large cluster, Grass Tufts are very susceptible to Lightning strikes which occur during heavy Rain. This can be prevented by building Lightning Rods near them.
When picked at night or dusk, it will turn into a living Mandrake, following the player around constantly making noise until morning, after which it will replant itself on the spot. When picked during the day, it will die instantly and can be obtained as an item.
The Mandrake cannot be replanted by the player and is unable to be fed to an imprisoned bird. There are no "Mandrake Seeds" in the game; thus, it cannot be farmed or reproduced.
Although very rare, Mandrakes are some of the best foods in the game. Raw or cooked Mandrakes do not spoil, and when eaten raw, a Mandrake heals 60 Health and 75 Hunger and puts oneself and nearby Mobs to sleep. Eating Mandrake Soup restores the same amount of Health and Hunger as a cooked Mandrake in addition to 5 Sanity, and will not knock the player out upon eating it.
With normal damage modifiers, Mandrakes instantly die from any hit from a Spear or any better weapon. The only tools that will do the same are the Axe, Pickaxe, their golden counterparts, and the Pick/Axe.
Environment (Continued)
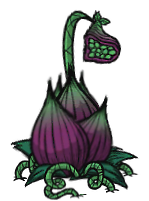
When it is ready to produce a lure but no meat is available, it will produce Leafy Meat as a lure instead. This lure, along with any other meats the Lureplant may use as bait, may be harvested by unequipping any weapon such that the option to "harvest meat" appears instead of "attack". When a meat is successfully harvested from a Lureplant, all Eyeplants will disappear, and the bulb will revert to a "just planted" look. The bulb will not display another meat until it is capable of producing Eyeplants, 2 days later. If a Lureplant dangles the same lure for more than the time it takes for the lure to spoil, harvesting it will give nothing. The player can hit the Lureplant to make it retract its empty tendril, and soon, it'll come out again with a fresh Leafy Meat. During Winter, Lureplants will withdraw their roots and Eyeplants, producing no lures.
With normal damage modifier characters, Lureplants take 9 hits with a Spear; 8 with a Bat Bat; 6 with a Tentacle Spike, Ham Bat, and Thulecite Club; and 5 with a Dark Sword to be killed. Killing the Lureplant will also allow the player to collect the Leafy Meat, in addition to any items the Lureplant has collected in its inventory, provided they have not yet been digested. Additionally, a Lureplant will always drop a Fleshy Bulb after death, which may be replanted on any valid terrain.
A Lureplant will only spawn in a location situated within a certain distance of any area the player has previously walked, but will not grow on certain terrain types (man-made turfs, rocky turfs, or spider creep). This can be where the player is standing currently (on screen), but it actually has a range well beyond what one uncovers on the map, so it may not be noticed right away. However, unlike other changes to the landscape, the map updates immediately when a Lureplant has spawned, without requiring the player revisit the location. This makes detecting a Lureplant spawn easier.
The Lureplant's bulb itself does not possess any offensive or defensive capabilities, relying instead on the Eyeplants surrounding it for protection and sustenance.

Both the Lureplant and the Eyeplants are highly vulnerable to fire. Once one catches fire, it will quickly spread to the others, and they remain on fire until death. Lureplants that die in this manner destroy most of the items they have collected, though there exists a chance for some items to emerge unscathed, including its current lure and Fleshy Bulb.
With normal damage modifier characters, Eyeplants will retreat into the ground with a single hit from all weapons.
Eyeplants cannot emerge from man made turfs, rocky turfs, or spider creep. This makes Leafy Meat farms viable if bulbs are planted near a great deal of turf that Eyeplants cannot grow on.
Eyeplants will not spawn during winter (i.e. the parent Lureplant effectively "hibernates" until winter is over); any Eyeplants that have already spawned will de-spawn when winter arrives, and the Lureplant will look "just planted" for the rest of the season.
A single Lureplant is capable of sustaining up to 27 Eyeplants at once.


Each of the three mushrooms can be hand picked at different times of the day (Red Mushroom during the Day, Green Mushroom during the Dusk, and Blue Mushroom during the Night), which then re-grow after 10–20 hours of rain. They can also be dug up with a shovel, at any time of day - this will yield two mushrooms, but mushroom spawn will be destroyed. Mushrooms don't regrow during winter.

Every mushroom has positive and negative effects. All of the mushrooms refill 12.5 hunger and drain varying amounts of sanity and health. Please refer to the food - vegetable section for more information on this.
Planting Pine Cones can calm and put to sleep nearby Treeguards, whether or not they are aggressive. The chance of this happening is a maximum of 33% when planted near the Treeguard, with a lower chance when planted farther away. The Treeguard will groan in acknowledgement when a Pine Cone is planted within range, even if it has already been pacified.
Reeds can not be dug up and relocated like Grass Tufts or Saplings. They are flammable and will leave behind 1 Ash when burned.
They are also highly flammable and may be used as fuel in Campfires or Fire Pits. When burned on the ground a Sapling will leave behind 1 Ash. Because they burn easily, Saplings planted close together are very susceptible to Lightning strikes. This can be prevented by building Lightning Rods. Saplings will not regrow during Winter.
Despite their name and comments from some characters, Saplings will never grow into Trees.
Environment (Continued)
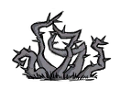
Spiky Bushes can be dug up with a Shovel and replanted in a new location. This gives a Twig and an equivalent Sapling and is the safer way of getting Twigs, as digging and picking up a Spiky Bush does not damage the player. The bushes themselves can also be used as an effective fuel for Campfires, though they are not renewable. In this regard, they are similar to Saplings and Grass Tufts.
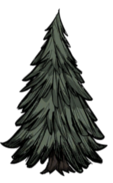
Trees are the primary source of Logs and Pine Cones. They can be chopped down with an Axe or by Pig followers. A felled tree leaves behind a tree stump, which can be dug up with a Shovel for an extra Log.
Evergreens have a 4-stage life cycle (small, medium, large, and aged) which they continuously cycle through. Once cut, stumps do not regrow into trees nor do new trees spawn naturally; the only way to get more trees is to plant them with Pine Cones. Tree stumps, however, are treated as normal trees by the game: they are shown on the map as normal trees and they change their size from small to aging continuously like trees do. Planting a Pine Cone will produce a sapling tree which will grow into a small Evergreen and follow the life cycle until it is chopped down or burned.
When a tree is chopped down, a nearby Evergreen may stand up and become a Treeguard. After day 3, each tree felled has a 1.3% percent chance of spawning a Treeguard from a nearby Evergreen, including trees you have planted yourself. The Treeguard will chase whoever chopped down trees near them until the player plants enough Pine Cones to pacify it or runs beyond the Treeguard's attack range. Since Treeguards are quite slow, they're relatively easy to outrun. Note that a pacified Treeguard will "hibernate" into a normal Evergreen - it will appear as a normal Evergreen but will actually be identified as a Treeguard when hovered-over. Treeguards that have been simply outrun will wander about in their active form.
Burning
If a tree is exposed to fire (such as from an uncontrolled Campfire, a Torch, or other nearby burning object) it will quickly ignite and can rapidly spread to nearby trees or other plants. Forests in particular are prone to large forest fires. The damage caused by fire will kill small creatures like Birds and Rabbits almost instantly and can damage the player if they stand too close. Burning trees produce a great deal of light and heat, however they burn out quickly. Once a tree is consumed by fire, it will be reduced to a burnt tree, which can be chopped down with an Axe to produce a piece of Charcoal (and occasionally a pine cone or two). Stumps that have been burned will turn into Ash.
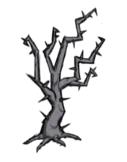
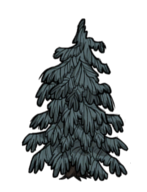
 There are multiple Worm Holes in most worlds and they always connect the same two places on the map. Often they will end in two completely different areas with different resources, such as a Forest (with lots of Trees) and a Savanna (with lots of Grass and Boulders).
Traveling through a Worm Hole causes a Sanity loss of 15. Sanity can be quickly drained by repeatedly jumping into them. Smallbirds, Pigs, Mandrakes and other followers will follow any Characters through a worm Hole, as will Chester if the Eye Bone is in your inventory. Many objects, such as Food, Gravedigger Items, and Wooden Thing components can be dropped into the Worm Hole, and will be spat out the other end. Ghosts can also travel via worm holes.
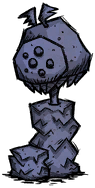
On a full moon, a Glommer's Flower will spawn at the base of Glommer's Statue. Picking up Glommer's Flower will trigger Glommer to become a permanent "follower" (until Glommer dies). After mining the statue, the base will remain, allowing Glommer and Glommer's Flower to respawn at a full moon.
The Pan Flute has a 75% chance to be found near the Statue.
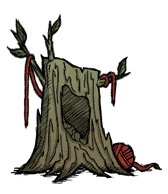
The Hollow Stump can be destroyed with a Hammer to yield 2 Twigs, 2 Logs, and a chance of another random item, detailed below in the chart.
After the Catcoon living in the Hollow Stump has run out of lives, the stump will go into a "dead" state, which will never spawn another Catcoon and will serve no purpose other than being hammered down for its resources. Despite appearing to be mostly destroyed, a Hollow Stump in this state will drop the same number of items.


Environment (Continued)
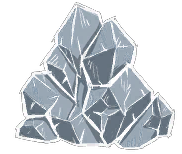
Additionally, Mini Glaciers will appear next to Pengull breeding grounds during Winter, making them a renewable resource.

Burrows can be dug up with a Shovel to randomly yield Rocks, Flint, Nitre, and Gold Nuggets. When dug, Burrows will also drop any item stolen by Moleworms as long as there weren't more than 50 of them.
If a Burrow is dug up, the Moleworm that inhabited it will make a new one after some time. This makes Burrows renewable as long as the Moleworm is not also killed. If a Moleworm is killed, the Burrow will spawn a new Moleworm, in the same way Rabbit Holes spawn Rabbits.
The player can harvest a Tumbleweed and get any of the loot items listed below. This list includes Gems and other previously non-renewable items, now making them renewable. Note that food items gathered from Tumbleweed are not always fresh.
The following items may appear after a Tumbleweed has been harvested: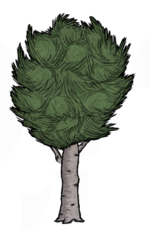
If cut in its prime (the largest form) it will yield 2 Birchnuts in Autumn (colored leaves), 1 in Spring and Summer (green leaves), and no Birchnuts in Winter (leafless). Standing under one offers moderate wetness protection from Rain, and slows Overheating.

Cacti cannot be dug up with a Shovel. The player will have to wait for them to regrow in 3 days to be able to harvest them again. Unlike most other plants, Cacti can grow back during winter, unaffected by the cold.
Once the Egg hatches, the small nest will remain behind, giving Moose/Goose the possibility to lay another Egg. At the end of Spring, both the egg and the nest will despawn.
They have 300 health and drop 3 Hound's Teeth with a 1% chance each of dropping a Blue or Red Gem when destroyed.
Biomes
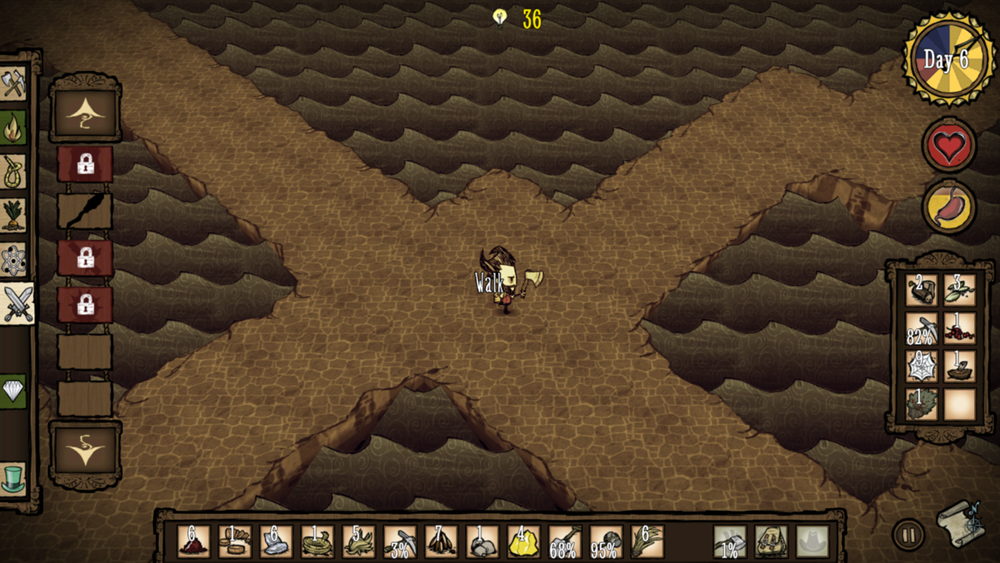 Bridges
Bridges are rare tiles that spawn over the ocean, forming long narrow strips of land that connect larger landmasses. The turfs underneath cannot be moved with a Pitchfork.
 Chess
ChessThe Chess Biome is a terrain that can be distinguished by its Checkerboard and Carpeted Flooring. Marble Trees, Marble Pillars, Harp Statues, and Maxwell Statues can all be found in this biome, being limited but abundant sources of Marble. Meanwhile, Flowers are replaced by Evil Flowers, which will quickly drain Sanity if the player is near them. Clockwork Knights, Clockwork Bishops, and a Clockwork Rook can be found on a Chess biome as well.
 Forest
Forest is a biome designated by dark green ground and lot of Trees. In addition to Trees, Boulders, Graves and Spider Dens can be found. The trees can either be Pine Trees or Lumpy Evergreen Trees.
The forest biome is the most prone to Fire and the spawning of Treeguards, due to the number of Trees in close proximity.
Forests can be found as whole islands, in the center of a Marsh, or as small portions of other islands, typically near the center. It is also possible to find other biomes in the center of a forest biome.
 Grasslands
Grasslands are a common Biome found in the world. They are generally safe areas with many types of useful resources. The player always spawns in a Grassland upon entry to a world, whether it be a small, zigzagged patch of green or a whole biome. Grasslands often mingle with areas of Forest and occasionally Marsh.
Grasslands are characterized by their green Grass Turf and scattered Evergreens, Grass Tufts, Saplings, Carrots , Flowers, and Berry Bushes. Flint can also be found on the ground occasionally. Beehives and Pig Villages are commonly found on Grassland terrain. Rabbit holes appear sparsely in Grasslands, as do Ponds which spawn Frogs. Butterflies are commonly found here due to the abundant Flowers.
The primary dangers in Grasslands are Spider Dens (which are typically spread out) and Killer Bee Hives, which can sometimes be found in in dense formations along with regular Beehives and many Flowers.
 Graveyard
A Graveyard (or Cemetery) is found in one of the Forest patches of a world's Mosaic Biome with a layer of fog covering the ground. It contains numerous Graves (with and without Headstones) and often has Gold Nuggets lying on the ground. There are few Trees in this biome and occasionally a few Boulders.
Graveyards are a good source of Gold Nuggets for players just starting out. Any Gravedigger Items acquired from digging up Graves can be traded to the Pig King for even more Gold Nuggets. Graves can sometimes contain Red Gems, Gears, etc, but digging too many Graves at once will reduce a player's Sanity level significantly.
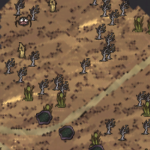 Marsh
MarshThe Marsh (commonly referred as Swamp) is one of the Biomes in the game and the place where Marsh Turfs are abundant.
Marsh is considered the most dangerous of all Biomes for its native Tentacles, which attack without provocation, and Merms which, while only hostile at close proximity, present a danger when camping in or near marsh areas. Spider Nests appear frequently in the Marsh, which normally leads to confrontation with other mobs. As a result, players can take away lots of loot after their wars end.
It is recommended to keep moving and stay on the roads to avoid being attacked by the marsh's hostile inhabitants. Tentacles cannot spawn on roads, which makes them useful when moving around. A player can find Reeds randomly scattered across the area, which can also rarely spawn outside of the Marsh/Swamp biome.
Marshes are also the only locations to find Tentacles, Spiky Trees, Spiky Bushes, and Rundown Houses.
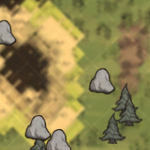 Mosaic
Mosaic biomes are typically restricted to one per map (though they also tend to be rather large), and contain a random patchwork of all other biomes within them. A signature of the Mosaic biome is the presence of lakes (several small holes of ocean), identical to the edges of islands, in the appearance of a circular shape or other obscure polygon.
Naturally spawned Rocks and Flint can be found lying on the ground. Mosaic is also the only place in which Graveyards and Cobblestones can be found, aside from the Metal Potato Thing Set Piece.
Mosaic biomes would make excellent homes, if not for the uncommonness of signature biome benefits, such as Tallbirds and Beefalo, due to the considerably small area of each biome region.
Mosaic biomes' main Turf is Forest Turf with some small patches of Marsh Turf, Rocky Turf, Savanna Turf, and Turfless ground that are spread in the entire biome.
 Ocean
OceanCurrently, the ocean acts as a barrier, and during Winter, a place for Pengulls to spawn before they hop onto shore. No living thing can cross the ocean, even flying mobs like Batilisks.
Objects that are situated on the coast very close to the ocean may drop their items in the ocean, and aside from bugged objects, they will fall into the water with a splash and be unretrievable.
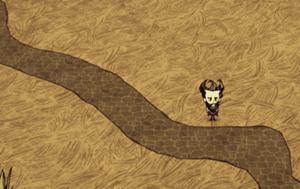 Roads
RoadsRoads can be found throughout the world. Walking on Roads allows the player and most in-game mobs to move 50% faster.
Roads are different from Cobblestones and cannot be dug up. Cobblestones are Turf items, craftable by the player, that act like Roads when placed on barren land. These can be dug up and replaced using the Pitchfork. A road's speed boost can be stacked with the Walking Cane and Magiluminescence.
Trail (commonly referred to as Path) is a retextured, transparent version of the Road. Likewise, it gives the same speed boost to players that are moving on it.
Trails are displayed differently than Roads on the map. Identical to Roads, they cannot be dug up as Turfs, though the ground directly beneath can still be dug up. They appear more frequently than Roads and may also lead the players to Things, Pig Villages or Ponds.
Roads appear dark-grey on the map, while Trails appear light-brown.
 Rockyland
Rockylands tend to have few things growing on them, although the occasional Evergreen Tree, Sapling, or Grass Tuft may sneak in on the edge. Redbirds and Snowbirds do not spawn here, only Crows.
This is one of the native habitat of Tallbirds and their Nests. In addition, Boulders are plentiful and the ground is covered with a combination of Rocky Turf and barren turf.
Rarely, there is a branch of this biome which is infested with Spider Dens packed together, making travel quite dangerous. Gold Nuggets may also be found on the ground in this biome branch.
 Savanna
Savanna (also referred to as Plains) is a Biome rich with Grass and Mobs, while containing little flora. It is the only known Biome to spawn Beefalos, but it is also host to many Rabbits, Redbirds and Crows. Spider Dens may also rarely appear. Flowers are sometimes found, which spawn Butterflies.
While many Grass Tufts grow on this terrain, Evergreens don't spawn on a Savanna. However, it is possible to manually plant Trees in a Savanna.
Hound Attacks
Character Warnings:- Wilson: "Did you hear that?"
- Willow: "Show yourself!"
- Wolfgang: "I hear puppies!"
- Wendy: "The hounds are baying."
- Wickerbottom: "Something is approaching."
- WX-78: "SOMETHING IS COMING."
Hounds will immediately charge the player when they spawn from a Hound attack. Unlike regular Hounds, they will not be distracted by any Meats on the ground because of their strong aggro on the player. After a while, they can become distracted again and may attack other Mobs or eat Meats.
If a Hound's target is completely surrounded by Walls, they will attack the Walls in an attempt to break them down. If there is even a single hole in the chain of Walls, the Hound will run around towards the entrance.
Once a Hound executes an attack, successful or not, it may stop to bark. When they do this, their A.I. will change targets to the nearest Mob/Meat. If they attack a Mob that fights in a group such as a Beefalo, they can quickly be dispatched.
After the second attack, there is a chance that some of the Hounds will be Red Hounds in the Summer and Blue Hounds in the Winter. The chance of those varieties appearing increases with the day.
- For a few Hounds (2-3), the player should be able to defeat them simply with a Spear, Log Suit, and Football Helmet. A player can even tank the damage when kiting is not an option.
- Hounds are easily distracted. As such, many strategies involve leading Hounds into other Mobs. Their reckless attacks will usually be their end.
- Lead Hounds into a Marsh. The resident Tentacles, Merms, and Spiders can aggro on the Hounds, who will then retaliate. This can also be a good way to get Tentacle Spikes, Hound's Teeth, Tentacle Spots, and Monster Meat, and other goodies.
- Lead Hounds to groups of Frog Ponds. When a Frog is attacked, Frogs will swarm from nearby Ponds to attack the Hounds. Red Hound explosions cannot destroy Ponds, so no resources are at risk. Frogs do not eat Meats, so you can recover all loot including any Frog Legs the Hounds did not eat.
- Neutral Treeguards can be very effective against Hounds. Large and medium Treeguards will kill Hounds in one hit. Beware of Red Hounds; they can set Treeguards on fire, who in turn can wander around and set other things on fire.
- Lure Hounds to a Killer Bee Hive or attack a Beehive and gather a swarm of Killer Bees. The Bees may take a while to change targets if aggroed by the player, but will prioritize Hounds that have attacked them.
- Lead Hounds to Beefalo and run through the herd until one gets bit, the herd will kill them if they can.
- Lead Hounds into a Marsh. The resident Tentacles, Merms, and Spiders can aggro on the Hounds, who will then retaliate. This can also be a good way to get Tentacle Spikes, Hound's Teeth, Tentacle Spots, and Monster Meat, and other goodies.
- Leaving any type of Meat on the ground can distract Hounds that are chasing you. The Hound will do its attacking animation when it eats, but you won't take any damage if you are nearby.
- One can create a walled-off area with an entrance filled with Tooth Traps. Incoming Hounds can be funneled through the entrance, killing off most, if not all. A Fire Pit and other supplies can be kept inside for night attacks. You can never have too many Tooth Traps at the entrance.
- Some more places or creatures one can lead Hounds to are Spider Dens, Spider Queens, Pigs, and Lureplants. Keep in mind that Red Hounds may burn down any nearby structures or resources.
Killing a Spider Queen
Killing Krampus
- One of the simplest ways to kill Krampus is to lure him to a Pig Village. The Pigs will automatically be aggressive towards it.
- The player can kill Krampus in direct combat. One can use a ranged weapon such as a Boomerang or Blow Dart to strike Krampus from afar and get his aggro (much like a Koalefant).
- One can also put Krampus to sleep with a Sleep Dart or Pan Flute, then proceed to melee it with a Spear or Tentacle Spike.
- If the player keeps track of their naughtiness level, they can set a trap for the Krampus before its arrival. The player can place a Chest with a few dummy items and surround it with Bee Mines. The Krampus should approach the Chest, trigger the mines, and die from the Bees. A player without mines can also directly engage Krampus while it is busy with the chest.
- One of the most popular ways of spawning Krampi is to kill many, many Rabbits. Their single naughtiness point allows a player to keep track of their naughtiness level, and they can be carried to remote locations or Krampus traps.
- A Chest full of Killer Bees can be an effective trap for Krampus. Krampus will become attracted to the Chest, proceed to destroy it, and let out all the Bees, who will attack Krampus.
- Items can be taken back from Krampus if it runs into some Frogs: their tongue attacks will make Krampus drop its stolen items (if they do not kill him outright), which can be picked up at will.
- If a Krampus is led to a Tallbird Nest, the Tallbird will attack it to defend its territory. The player can fight alongside the Tallbird since they do not change their target until the original invader is killed or leaves.
- If one is hunting for a Krampus Sack, the Fire Staff will work quite well. Fire is effective against Krampus, and the sack does not burn. Krampus' other drops will be turned to ash, but since they are common drops, this is not a big deal.
Killing Deerclops
Deerclops has an attack in which it will either swipe or pound the floor at its current target. Both animations have the same effect, damaging all mobs and structures within a radius of about 2.5 berry bushes. It usually does not immediately target the player upon arrival, having an "aggro distance" toward any mob it gets close to. Deerclops first tries to target the closest structure to the player at time of being "released" (i.e. spawned); if no structure is close enough to the player, then the player is targeted instead (although this tends to be rare). Deerclops will in general not target walls, unless the object or mob Deerclops is aiming to destroy is behind a wall. Often, walls and other structures or mobs nearby may suffer collateral damage anyway, despite what Deerclops may target. This is the reason walls don't stand up well to a Deerclops.
Deerclops aims to destroy all structures and then leave. Note that the only structures counted are the ones targeted by Deerclops directly - collateral damage is not counted, meaning many more structures may be destroyed before Deerclops is "done". Naturally, if Deerclops is aggroed by the player or other mobs, it will hang around to take care of them first, before continuing to destroy structures or leave.
It is possible to stay out of the way as it passes by. However, Deerclops can easily ravage the structures in the player's camp, with Pig Houses and Rabbit Hutches being especially costly. If Deerclops collapses (dies) close enough to structures, it will damage or destroy them due to collapsing on top of them.
Deerclops doesn't sleep during the night but can be put to sleep by a Pan Flute or Sleep Darts. Fire Darts or the Fire Staff are also effective, although it will take several hits to kill it, and this may result in the loot it drops turning to Ashes, in which case you will get 8 cooked meat but no Deerclops Eyeball. Deerclops can also be frozen and then attacked from behind.
Deerclops can be easily killed by using the Snurtle Shell Armour. Before it strikes, hide in the shell, then unhide and strike between its attacks. A quick method, if the player happens to have a lot of Tooth Traps, is to lead Deerclops to an open area covered in the traps. As with other aggressive creatures, it will walk towards the player without avoiding the traps. It'll take 67 sprung traps to kill Deerclops, but the player can kite it to speed up the process.
Alternatively, Deerclops can be lured to fight other creatures. It does a wide-area cleave-style attack that can damage several surrounding targets at the same time. For example, if Deerclops were lured to a group of Beefalo, it will hit several at the same time and cause them to attack. It's advised to have an Ice Staff in this situation, as Deerclops can make quick work of a small to medium Beefalo herd. Using the staff on it as it prepares to strike, will stun it and cancel its attack, protecting the Beefalo in the process. Treeguards will also fight Deerclops and are very effective. Walrus Camps can also be used: MacTusk can dodge Deerclops nicely and eventually kill it.
Another way to kill Deerclops involves having a neutral Treeguard in your backyard. Guide Deerclops into some trees to destroy them, then let the Treeguard handle him. Using the same tactic as the beefalo will result in the Treeguard killing the Deerclops
The quickest method of killing Deerclops requires Gunpowder and a Torch. Gunpowder deals about 200 damage, so 20 of these would instantly kill Deerclops. Place the gunpowder, 19 in a stack, as close as possible to Deerclops (it's recommended to freeze or put it to sleep to hold it still). Then light the gunpowder with a torch and run. For Deerclops' remaining health, hit it with non-fire weapons. Only 19 stacks of gunpowder should be used, since the player presumably wants fresh loot.
Alternatively, Deerclops can easily be lost by moving a good distance away, or jumping into a Worm Hole. After losing interest in you it will find something else to smash. A Bush Hat will keep the character hidden if necessary.
Below is the number of hits it takes with each weapon to kill Deerclops when playing with characters with a default damage modifier. The Weather Pain is not included due to the random nature of its projectile.
Deerclops can attack up to four times in a season by default (with 0, 2, 8, and 10 attacks for other world configuration options, respectively). Deerclops will attack in (season length - 1)/(number of attacks) days (2.8 days by default, for an attack near the end of day 30)
Killing Bearger
Bearger is one of the giants in the Reign of Giants DLC. He appears during Autumn; looking for food to eat (including stashed food). Bearger is particularly attracted to Bee Boxes. He can only be satisfied by eating 10 Honey, after which he'll fall asleep. However, he'll choose to fight the player over eating honey when aggroed.
Bearger will attack nearby mobs and eat any food off the ground, destroying trees in his path as he moves about. If he happens upon a Chest, he'll rummage through it, tossing items to the ground, while eating any food he finds inside it. When there is no food in the area, Bearger will passively follow the player.
Bearger's 'aggro' range is small, but approaching him directly will cause him to attack. Otherwise, picking up food that he wants to eat will upset him and he'll issue a "warning growl". The second time that this happens, he'll issue another warning growl. Stealing his food a third time will aggro Bearger and he'll attack.
Bearger has two 'different' close-range attacks. He slams the ground with his front paws, creating a shockwave that will demolish structures, fell trees, and uproot plants in a large area. This attack does more damage at the point of impact. With the second attack, Bearger will stand on his hind legs and swipe with his front paws (up to three times), then slam the ground once. Bearger will pursue a target that runs away from the battle, destroying trees and structures in its path, then slamming the ground when he catches up.
When killed, Bearger drops 8 Meat and 1 Thick Fur, which can be used to craft the Hibearnation Vest and the Insulated Pack.
There is enough time to attack Bearger 2-3 times before having to dodge, except after he uses his slam, as a swipe comes right after. Equipping at least a Log Suit and Football Helmet is recommended. Note that
- Weapons can get knocked into the water if fighting him near an ocean.
- Fighting him in melee could drain up your sanity in a few minutes, this will cause Shadow Creatures attacks, especially when it gets dark.
- If a sleeping Bearger is woken up, he will yawn. This causes nearby mobs and players to fall asleep (DST)
Nuke
One of the fastest ways to deal with any boss is a Sleep Dart/Pan Flute and Old Bell/Gunpowder combination. Use Gunpowder to bring Bearger down to 200 health, then you can easily take it down from there with 2 Blow Darts and still get its loot. The Old Bell on the other hand, can be used thrice after 30 gunpowder to finish it off while still obtaining its loot. While it may seem easy to take it down, it is hard to obtain these items. For example, the Old Bell requires the Glommer to be found and killed.
Poisoning
Unlike other bosses, the Bearger eats whatever he sees, and is affected by poisonous food such as Red Mushrooms or Monster Meat. So, you can get him to eat poisonous food and he will eventually get himself weakened or maybe killed.
One way is to attract him into the Marsh by attacking him. He will easily get attacked by the native creatures there (e.g. Tentacles), and eat a considerable amount of Monster Meat. Each piece of Monster Meat dealing 20 damage, plus the attack damage, will kill him soon.
Notes- Armors are optional, but still recommended for safety.
- The Bearger will not attack the Spider Dens. This means there will still be Spiders after the battle. So if you want the looted Meat, you should avoid getting him killed near Spiders, because they will eat the Meat quickly.
- No extra preparation is needed.
- The process can be paused at any time. You can leave him there and return home for a rest, and come back sometime later. (Since entities far enough from the Player are paused.)
Other
Another way to easily kill Bearger is to lure it into a forest and let it destroy some Trees until a Treeguard spawns.
When lit using a fire staff or a fire dart, Bearger will run around, not attacking the player. Because of this, lighting the beast on fire a number of times can be a good way to deal damage without much risk.
Below is the number of hits it takes with each weapon to kill Bearger when playing with characters with a default damage modifier. The Weather Pain is not included due to the random nature of its projectile.Killing Moose/Goose
Moose, also known as Goose, is one of the four giants. Moose/Goose can appear 2–4 days into Spring, if more than three base structures have been built relatively close to each other (Science Machine, Lightning Rod, Crock Pot, etc.). The giant will disappear when Summer arrives.
The Moose/Goose takes 4 blasts from the Ice Staff to be frozen, and takes 1 Sleep Dart to be put to sleep. When killed, the Moose/Goose will drop 6 Meat, 2 Drumsticks, and 3 to 5 Down Feathers.
If left alone for roughly 1 day after it arrives, a Moose/Goose Egg will spawn, which will hatch into 5 Moslings. Moslings won't grow into a Moose/Goose, but when attacked, they will let out a cry, spawning another Moose/Goose. Note that a Frog Rain could potentially spawn another Moose/Goose, if the Frogs attack the Moslings. When a Mosling is slain, all Moslings will become enraged and use a whirlwind attack that attracts lightning to them, attempting to strike the player.
When the player is a considerable distance away, Moose/Goose will jump towards the player, making a honking sound. When in close range, Moose/Goose will make a charging animation and buck the player with its antlers. It's possible to hit it three times before the animation starts, and twice during the animation. When Moose/Goose bellows a particularly loud honk, the player will drop whatever they are currently holding in their hand. Moose/Goose will destroy player structures, though not nearly as bad as Deerclops, with his area-of-effect attack.
Moose/Goose will make a warning animation once it spots the player, becoming aggressive towards them. She will proceed to slowly hop towards the player. When in range, she will attempt to buck the player. After every third swipe, she will honk, knocking the player's weapon out of their hands. Due to her slow movement, and slightly slow attack, she can be fought the same way as Deerclops, using a 3-hit kite method. Another option is to tank all the damage with a Football Helmet and Log Suit, eliminating the need to kite.
Nuke
One of the fastest ways to deal with any boss is a Sleep Dart/Pan Flute and Old Bell/29 Gunpowder combination. Use 29 Gunpowder to bring Bearger down to 200 health, then you can easily take it down from there with 2 Blow Darts and still get its loot. The Old Bell on the other hand, can be used thrice after 15 gunpowder to finish it off while still obtaining its loot. While it may seem easy to take it down, it is hard to obtain these items. For example, the Old Bell requires the Glommer to be found and killed.
Beefalo
Alternatively, since Moose/Goose lacks an area-of-effect attack, it can be lured into a herd of Beefalo during mating season. Since it can only strike one at a time, losses to a large herd will be minimal. The player can also use friendly pig men, but they will eat the meat after it is killed.
Killing Dragonfly
Dragonfly is one of the four giants. It spawns during Summer. When killed, Dragonfly drops Scales and 8 Meat.
When attacked or the player gets too close, it enters his "enraged mode," lighting everything in his path on fire. During rain, this mode doesn't last as long, and if frozen, Dragonfly will immediately return to his calm state when it thaws (barring player proximity). It thaws almost instantly, though, so the old bell and ice staff combo is not the best of ideas. When it gets in range of his target, it uses a swipe attack while moving forward. When contact has been made, it will slam the ground three times, creating a ring of fire with each impact. This attack will set objects on fire, causing massive AoE damage.
A Tentacle Spike or better is recommended when fighting Dragonfly, as well as two Football Helmets and two Log Suits. The AoE ground slam can deal enough damage to instantly kill some characters. Hit-and-run tactics will allow two strikes from the player while it is using this attack. A very cold Thermal Stone will likely be needed during this fight, to avoid Overheating.
One of the easiest ways to deal with any boss in Don't Starve (including Dragonfly) is a Sleep Dart/Pan Flute and Old Bell/138 Gunpowder combination. Not only does the 138 Gunpowder instantly bring Dragonfly down, but since it is immune to fire damage, the explosion will not destroy any loot.
Another effective way to deal with Dragonfly is by dropping 20 Ashes. After this, it will start flying toward the pile and then inhale those Ashes. Before long it will stumble into a deep sleep. At this point, the 138 Gunpowder listed above will finish it off.
The Old Bell can be used to weaken it. Placing three or four piles of Ashes on the ground and ringing the Old Bell as Dragonfly comes for them is a very effective way to get it to stay put as Bigfoot approaches.
Treeguards or any type of monster with large amounts of health seem to be able to fight Dragonfly and deal noticeable damage. Refrain from luring it to areas with Beefalo or Pigs, as tempting as it may be, as it will simply kill them all in 1-2 attacks.
If unable to apply the above strategies, try to lure the Dragonfly to a Swamp (or run to a Swamp after hearing its "incoming attacker" growl). Merms have a faster move speed and Tentacles generally hit Dragonfly first (unless caught in the AoE). You can bait the Dragonfly toward the Tentacles by dropping Ashes . Even if the Merms and Tentacles can't defeat it, they can at least be used to weaken or distract it. Every time it kills any hostile monster, it will be reset to a calm state, making it easy to escape.
Below is the number of hits it takes with each weapon to kill Dragonfly when playing with characters with a default damage modifier. The Weather Pain is not included due to the random nature of its projectile.During the fight, when the Dragonfly reaches 80%, 50%, or 20% health, it will also move away from the player toward lava pools, spawning lavae. Lavae will attack the players, and if all are killed, the Dragonfly will become enraged. The dragonfly also increases its freezing threshold by two each time it is frozen, and has four added to the threshold when enraged. If the player leaves the dragonfly arena, the Dragonfly will fly away and respawn one day later. If the Dragonfly is killed, it will respawn 20 days later.
Surviving Winter
In addition to the three basic things you need to keep up to stay alive (hunger, health, sanity), and to the task of avoiding getting killed, in winter your temperature becomes an issue. Fire will warm you, but going away from fire too long will lower your body temperature. If it dips below 5, you get cold (visual indicator, edges freezing), if it gets below 0, you start losing health.


To mitigate losing temperature fast, you can wear protective clothing. Such as Winter Hat, Tam o'Shanter and Beefalo Hat.
Another easy (cheap) way to lower the freezing rate is a thermal stone. Warm one near a fire (even holding it and standing near a fire works), you'll get cold slower.
As you figured out, the biggest problem with cold is that it makes it harded to stay away from your camp for a long time. A solution could be to have everything you need close to your camp. Have a lot of berry bushes, crock pots, drying racks, twigs, grass, and trees. Being near to rabbit holes (in combination to a boomerang or traps) can get you food as well. As a lot of food sources don't regrow during winter (Berry Bushes, Farms, Etc) you should use them to stack food up during Autumn, it isn't however goo to use them as a main food source. Good food sources for winter are as follows:- Build yourself a Birdcage and trap a Bird
- Get a Crock Pot
- Kill Spiders for Silk, Monster Meat and Spidergland
- Feed caged bird with cooked monster meat to get 3x eggs
- Combine these 3x eggs with one monster meat in crockpot (cooked or uncooked doesn't matter) and get meatballs
One pitfall: when killing innocent creates (birds, rabbits), your naughtiness goes up. Kill enough on a small timescale, and Krampus appears...
Hatching a Tallbird Egg
A Hatching Tallbird Egg is a Tallbird Egg that has started to hatch after being placed near a Campfire or Fire Pit for at least 10 seconds. Hatching takes roughly 3 days and, when hatched, it will turn into a Smallbird. The Hatching Tallbird Egg can be eaten, providing the player with 23 Hunger and 5 Health, and cooking it over a fire produces Fried Tallbird Egg.
Day it will become too hot and after 30 seconds will become a Cooked Morsel. Eggs are neither cold nor hot next to a fire during the Dusk. The player can safely pick up the Egg and move it to avoid the Egg becoming cooked or gooped. However, it will not continue hatching unless it is on the ground. During winter the egg cannot be placed away from fire during the day without becoming cold.
- It will not reset the hatching process if picked up, so don't worry about moving it around.
- Pigs, like Spiders, can and will eat this as a Food source, followed by a comment "mmm, beaky".
- The Smallbird will grow into a Smallish Tallbird after 11 days.
- The Smallish Tallbird will grow to an adult after another 11 days.
- The full-grown Tallbird will have the same aggressive behavior as any other Tallbirds.
Silk Farming
Another good tactic for farming a lot of silk is to firstly kill a tier 3 Spider Den or Spider Queen to obtain a Spider Eggs, which will allow the player to place a tier 1 Spider Den anywhere. Now proceed to place the spider den in the middle of a large Pig village near camp, so whenever a spider spawns from the den, the Pigs will instantly attack and kill it, leaving the loot on the ground to be picked up whilst ignoring the den itself. A good example of this is pictured. The only thing to watch out for is the Monster Meat - the Pigs will eat it if the player doesn't pick it up fast enough.Spider Dens should be destroyed ideally as soon as they reach tier 3, unless the player is well-equipped or wants a Spiderhat. As tier 3 dens drop Spider Eggs, this will enable the player to reset the silk farm without having to deal with a Queen.
Lureplant Farming
The Meat Bulb, also more commonly known as the Lureplant, is a hostile plant which is so named for its behavior of dangling meat to attract prey. When it is ready to produce a lure but no meat is available, it will produce Leafy Meat as a lure instead. This lure, along with any other meats the Lureplant may use as bait, may be harvested by unequipping any weapon such that the option to "harvest meat" appears instead of "attack". When a meat is successfully harvested from a Lureplant, all Eyeplants will disappear, and the bulb will revert to a "just planted" look. The bulb will not display another meat until it is capable of producing Eyeplants, 2 days later. If a Lureplant dangles the same lure for more than the time it takes for the lure to spoil, harvesting it will give nothing. The player can hit the Lureplant to make it retract its empty tendril, and soon, it'll come out again with a fresh Leafy Meat. During Winter, Lureplants will withdraw their roots and Eyeplants, producing no lures.
Killing the Lureplant will also allow the player to collect the Leafy Meat, in addition to any items the Lureplant has collected in its inventory, provided they have not yet been digested. Additionally, a Lureplant will always drop a Fleshy Bulb after death, which may be replanted on any valid terrain. The Lureplant's bulb itself does not possess any offensive or defensive capabilities, relying instead on the Eyeplants surrounding it for protection and sustenance.
Eyeplants cannot emerge from man made turfs, rocky turfs, or spider creep. This makes Leafy Meat farms viable if bulbs are planted near a great deal of turf that Eyeplants cannot grow on.
Nightmare Fuel Farming
If a character's Sanity decreases below 40% of their maximum (80 for most characters and varies for WX-78 based on the upgrade level), all Rabbits change into Beardlings and can be killed to gather Nightmare Fuel (along with Monster Meat and Beard Hair). An easy way to do this is by trapping a large number of Rabbits and then lowering Sanity to below 40%, after which they can all be murdered all at once while in inventory. However, be careful, as this is liable to trigger the Krampus by advancing the player's naughtiness level beyond the threshold.
Alternatively, Nightmare Fuel can be acquired by killing Crawling Horrors and Terrorbeaks. Crawling Horrors are easier to deal with than Terrorbeaks; the latter don't appear until Sanity is very, very low, so it's possible to kill Crawling Horrors one at a time.
A safer and simpler way to get Nightmare Fuel is to capture Bees with a Bug Net and then release them at an Evil Flower patch, which can be found where the Things. This will eventually cause more Evil Flowers to spawn, and their petals can be crafted into Nightmare Fuel.The Night Hand
 Night Hands are Shadow Creatures that extend from the darkness at night. While not directly attacking the player, Night Hands will attempt to put out fires. Up to 3 Night Hands can spawn at the same time. Their appearance is also marked by a music box playing, which layers as more Hands appear on-screen.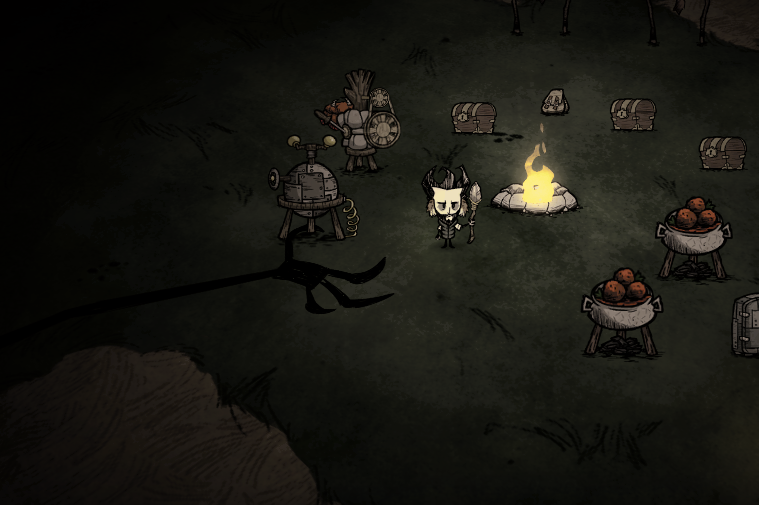
When stepped on, Night Hands will shrink away from the player (with a small insanity aura at -40/min). Once far enough into the darkness, a Night Hand will disappear and the music box will stop playing, though usually the player has to briefly be in total darkness to chase it away. If the player stokes their fire after the Night Hand appears, it is possible to see the "end" of the night hand. Forcing the Night Hand to shrink away until its wrist is touching its "end" will kill the Night Hand. If not taken care of, a Night Hand (or more) can easily take out a small fire, reducing 50% of the fire's strength each. Night Hands do have the potential to actually put out a fire if this occurs; however, it is somewhat rare, and the more hands that appear, the less they can damage a fire (1 Hand = <60% per hand. 3 Hands = <30% per hand).

If the fire is at its highest strength, then it is unlikely that even three hands can completely snuff it out, so a potential tactic is to max the fire and stand near to max it out again after the attack, although this burns quite a few resources and does not get rid of the Night Hands. A second fire nearby "cancels" Night Hands altogether for the night. A Miner Hat does the same, as does placing Fireflies around the base.
Occasionally, even when sanity is over half full, the Night Hand still appears.
FAQ (Waiting for Questions)
 A1. Mr. Skits is a small, serpent-like creature that will watch the player from afar. He also appears above Obelisks when they are raised or lowered, flying into them. If the player attempts to reach Mr. Skits, he will turn and slither away, disappearing from the screen. He may then reappear elsewhere.
Mr. Skits may also flicker on the screen for a fraction of a second, then disappear. Mr. Skits will only appear if the sanity level of the player is below 82.5%. He cannot attack, nor can he be attacked. His only purpose is to remind players of their sanity level and provide a scare.
Facebook Community !
- Free Spools, Klei Points, Twitch Drops (22nd-July-2026)★ 5 (8.7k)283k views12k ♥5 minUpdated 22 Jul
- Modding Don't Starve and Don't Starve Together★ 5 (1.8k)263k views2.3k ♥4 minUpdated 11 Oct, 2024
- ⭐ All links for Free Spools, Klei Points & Twitch Drops★ 5 (4.8k)139k views5.2k ♥1 minBulgarianUpdated 21 Jul
- Полезные моды для Don't Starve Together★ 5 (503)58k views955 ♥4 minRussianUpdated 11 Nov, 2024
- ВСЕ Кулинарные РЕЦЕПТЫ и способы их приготовления★ 5 (1.8k)44k views2.5k ♥6 minRussianUpdated 15 Dec, 2022
- Бесплатные нитки и очки Klei + (Умножаем их в 5 раз)★ 5 (765)43k views1.8k ♥2 minRussianUpdated 2 Aug, 2023


- Upgrading to PremiumTeam Fortress 2★ 5 (20k)1441k views11k ♥6 minUpdated May 11, 2022
- No More Room in Hell Official ManualNo More Room in Hell★ 5 (2.8k)569k views2.1k ♥29 minUpdated Apr 22, 2019
- NMRiH Community Hosting GuidesNo More Room in Hell★ 5 (526)351k views653 ♥1 minUpdated Aug 10, 2022
- ULTIMATE GUIDE FOR GAME DEV TYCOONGame Dev Tycoon★ 5 (5.8k)326k views10k ♥4 minUpdated 23 Jan, 2014
- How to 'Git Gud' Soon™MORDHAU★ 5 (2k)318k views3k ♥68 minUpdated Nov 16, 2024
- Лучшие кооперативные игры SteamPAYDAY 2★ 5 (1.5k)315k views2.1k ♥56 minRussianUpdated Apr 27, 2025






This guide was created by its original author on the Steam Community. Are you the author and want it removed? Request removal.