[EN] Comrades: Detailed Guide about an Overpowered DPS Build (All Missions = Soloable)
🖱️ Foreword
After trying several things out over the past days (weeks) I found my perfect setup to make through every single mission without any hassle.
I've posted some videos in the end of this guide so you can check how powerful this build can be ;)
I hope you enjoy this guide and if you have any questions or suggestions, feel free to ask them out or give away your suggestions :)
🖱️ Any Tips of what I should go for First?

- You should work towards the Corsesca with Double Penetrator X. It isn't that hard to farm the materials for it (Behemoth Tears is a hard drop, but it will be 100% worth it, I guarantee!).
That weapon is really awesome and you will start dealing way more damage and be able to do harder missions. - ⚠️Very Important Info: If you want to be able to swap to ANY Optional Weapon at ANY given moment, you must sacrifice 900 EXP on this Weapon (Dancing Daggers) in order to add in +1 Dark Shard (+300 EXP) and +2 Sturdy Plates (+600 EXP). With that, you must remove -1 Laser Sensor (-1000 EXP).
This will give more versatibility on weapon switching since you will have everything with 100% Resistance on your Dancing Daggers (meaning you will be able to use all weapons from the Optional Section or add any weapon of your taste to this build at any given moment) but you will have to sacrifice 11 STR & 11 VIT (because the game doesn't make round numbers calculation).⚠️
I recommend working on Dancing Blades because the Penta Res is really a game changer. You won't have full Penta Res if you follow the build the way I have it, meaning, you will be missing some Dark Resist (2%) and 19% Bullet Resist (taking in consideration only these two weapons, the other two to be crafted, one will have +7% Dark and the other +19% Bullet, filling the gap up), but still, this will make your life WAY EASIER, because you will have all Res + Dance Buff for + STR & VIT and, 30% Enemy Vitality Debuff - chance on hit and daggers are fast hitting :)If you decide to Sacrifice 11 STR & VIT, it won't make a huge difference on the long run to be honest, and it's probably the best option if you want to avoid grinding another set of Dancing Blades with different resistances to fill the Gaps.
- After those two weapons it's somewhat indifferent what you go for, but if it was me starting from scratch, I would probably go for Bandit's Blades, since these are somewhat easy to attain in my honest opinion and will allow you to get better drop probabilities on kill.
Besides that fact, they are mostly Laser Sensors and 1 Behemoth Tears, so, it's a walk in a park with that Corsesca & Dancing Blades that you already crafted. - As the 4th Item, you go for the Drain Life weapon of your choice. I gave as Primary a Corsesca with Lifedrain II, but you can opt for the Hotarumaru with Lifedrain X instead. But take in consideration that if you take Hotarumaru, that means you will have to change your Dancing Daggers materials, I've explained it at "🖱️ Extra: Optional Weapons"
Hopefully this will aid you on your first steps towards this ultimate build! :)
May the For~ Uh, I mean, For Hearth and Home!
🖱️ Needed Weapons & Where to get them
Before explaining which weapons you will be needing for this Build, I just want to point out that I've put in a separate section how to get the materials for these weapons. Look on the Side Menu and click on 🖱️ Extra: How to get these Weapons.
⚠️⚠️⚠️ Very Important ⚠️⚠️⚠️
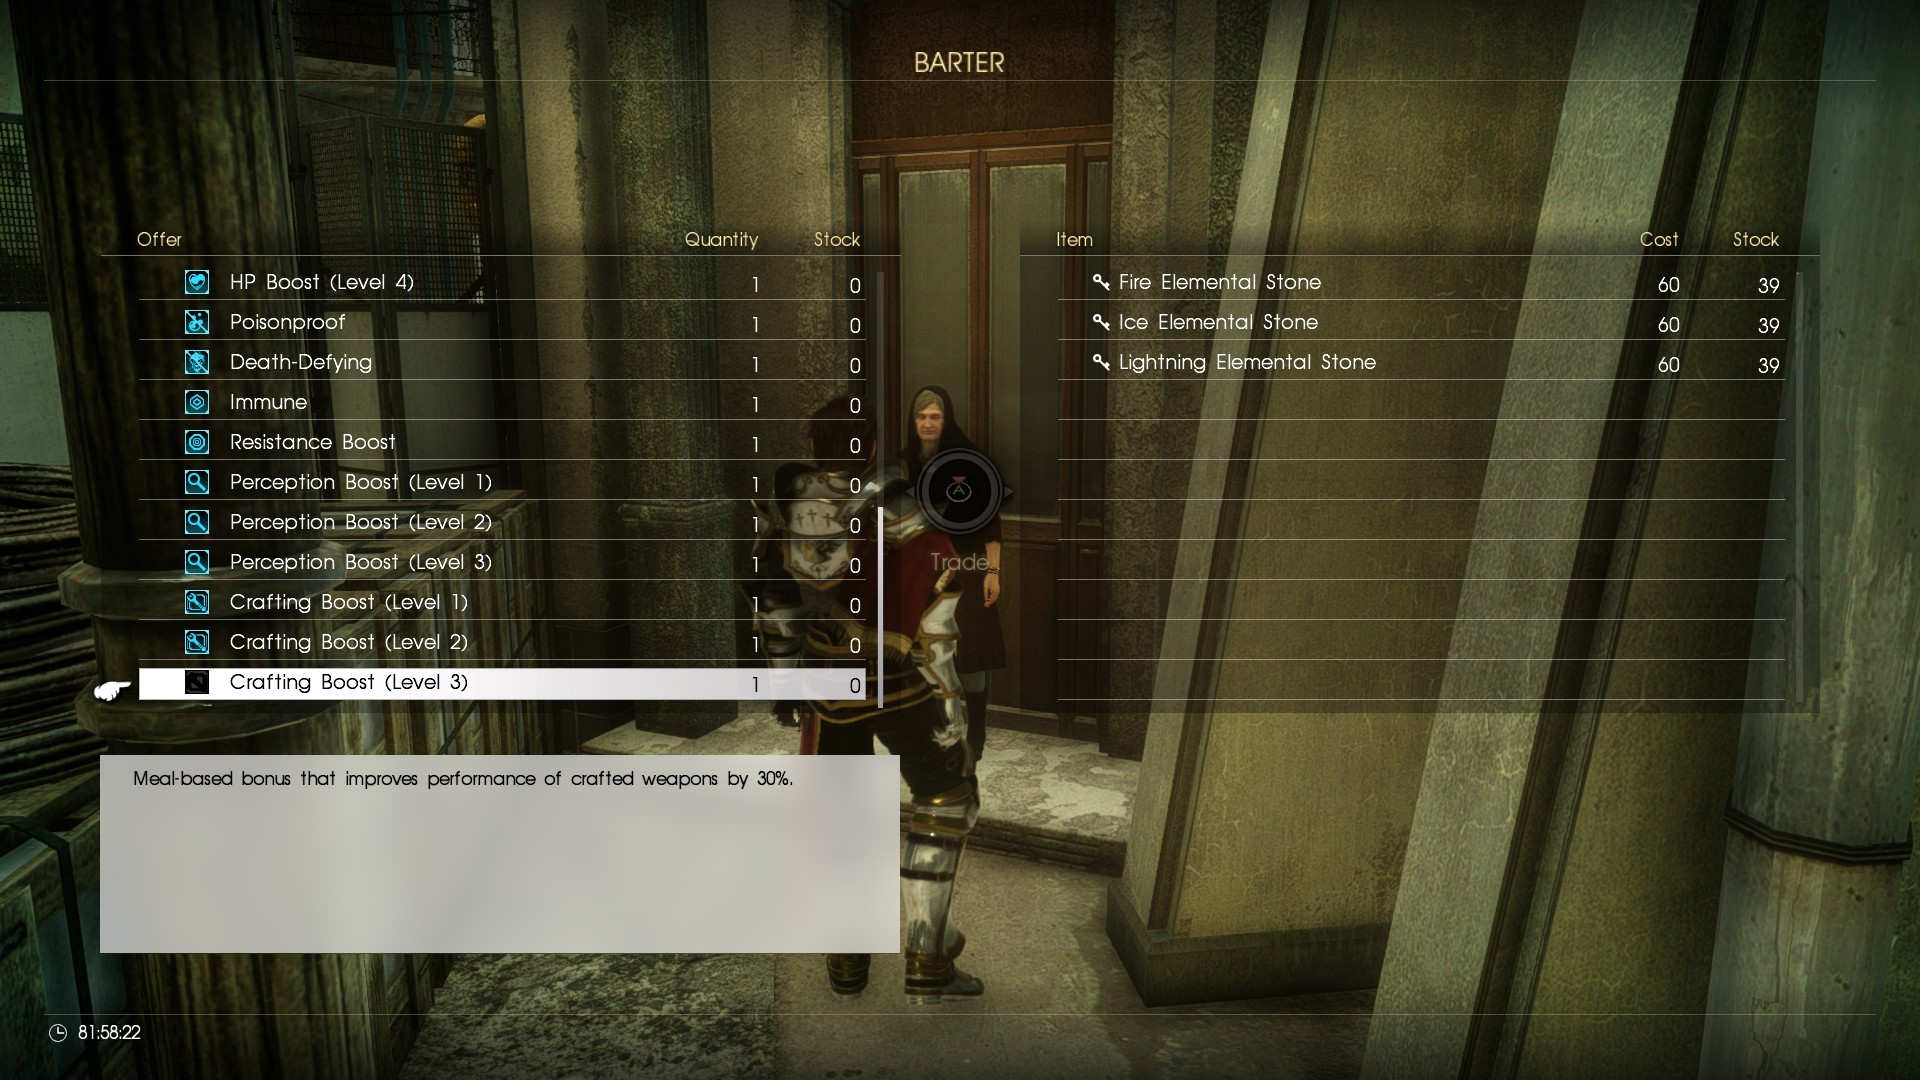 Make a new character for this porpuse. Since resources are shared, you can gather all the ingredients and then use this character for crafting porpuses only. Don't forget, buffs aren't shared between characters, so, you must buy that buff while you are using your "Buff 30%" character.
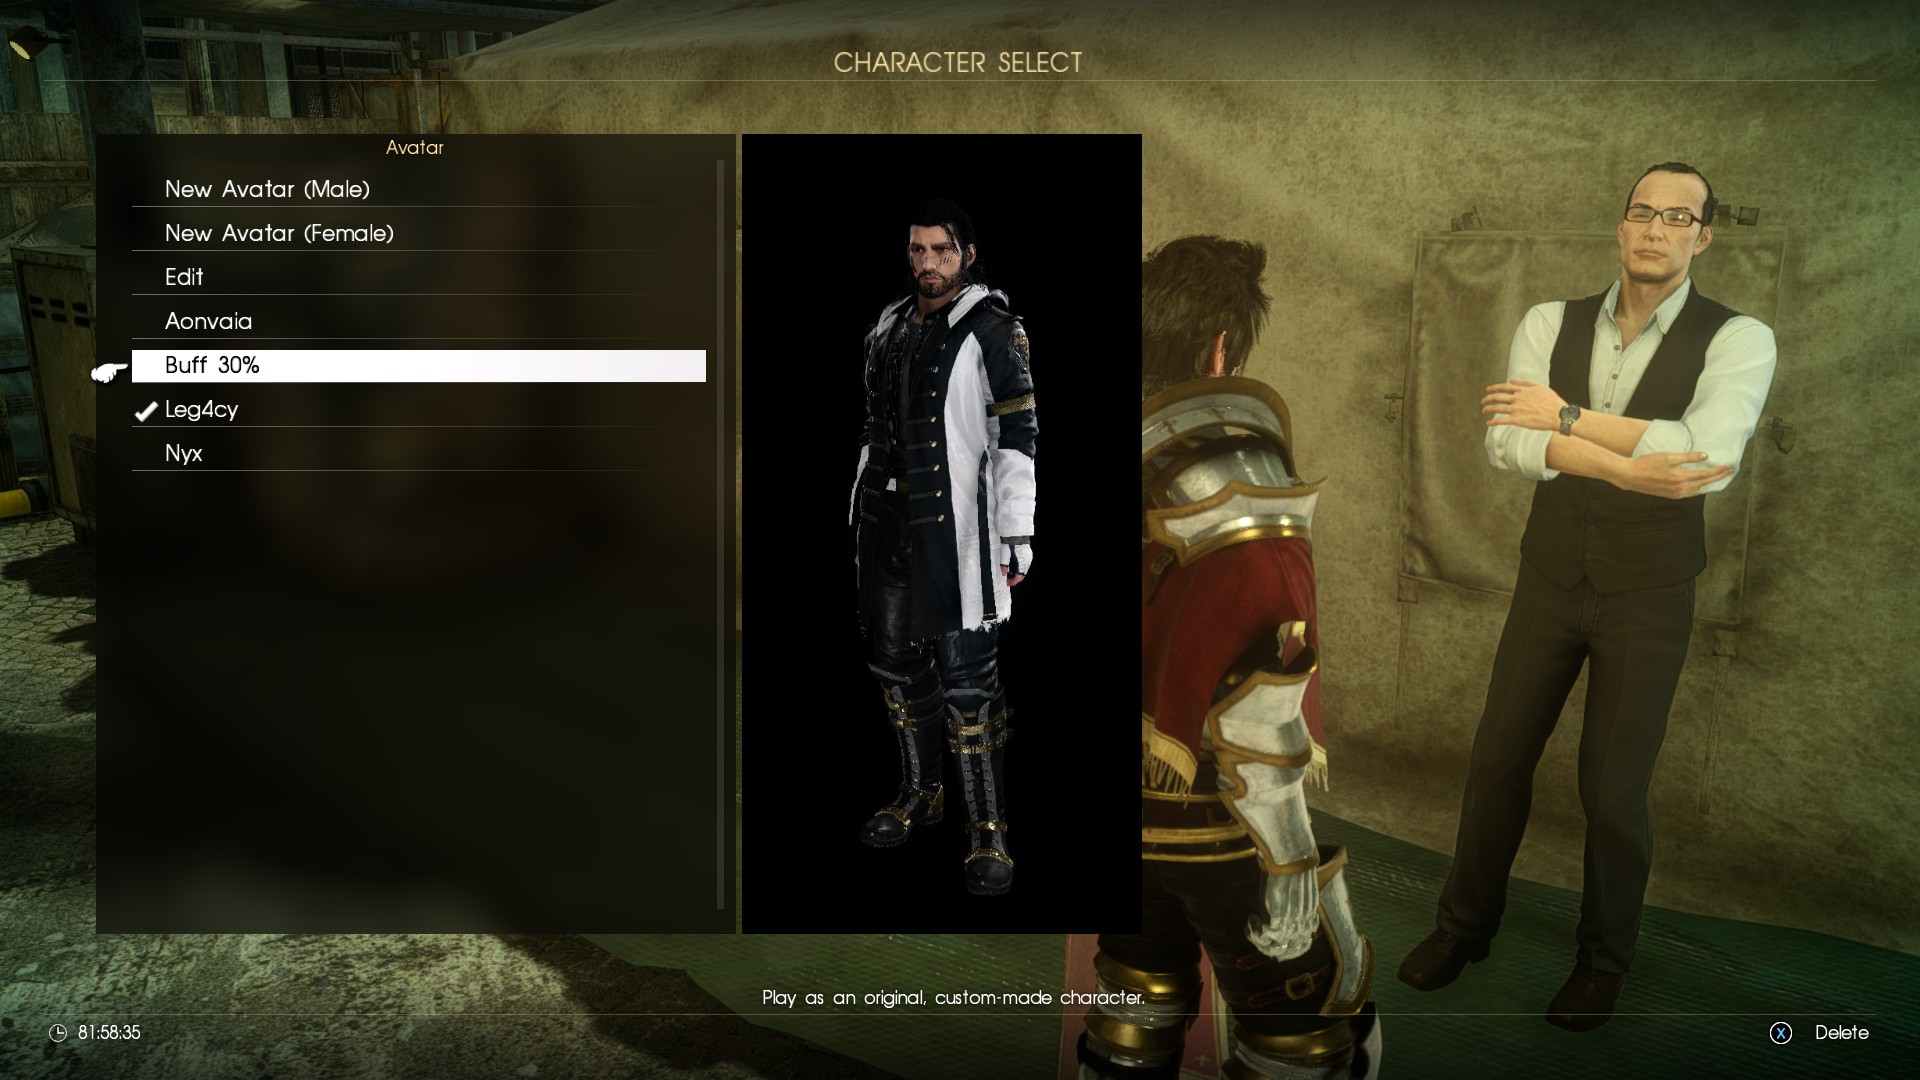 You just have to do the Daily Mission 6 times in order to buy the Buff at the "Witch" (it costs 60 of each element as seen in the first screenshot from this section), she's located behind Iris, near the Tent where you clean your clothes.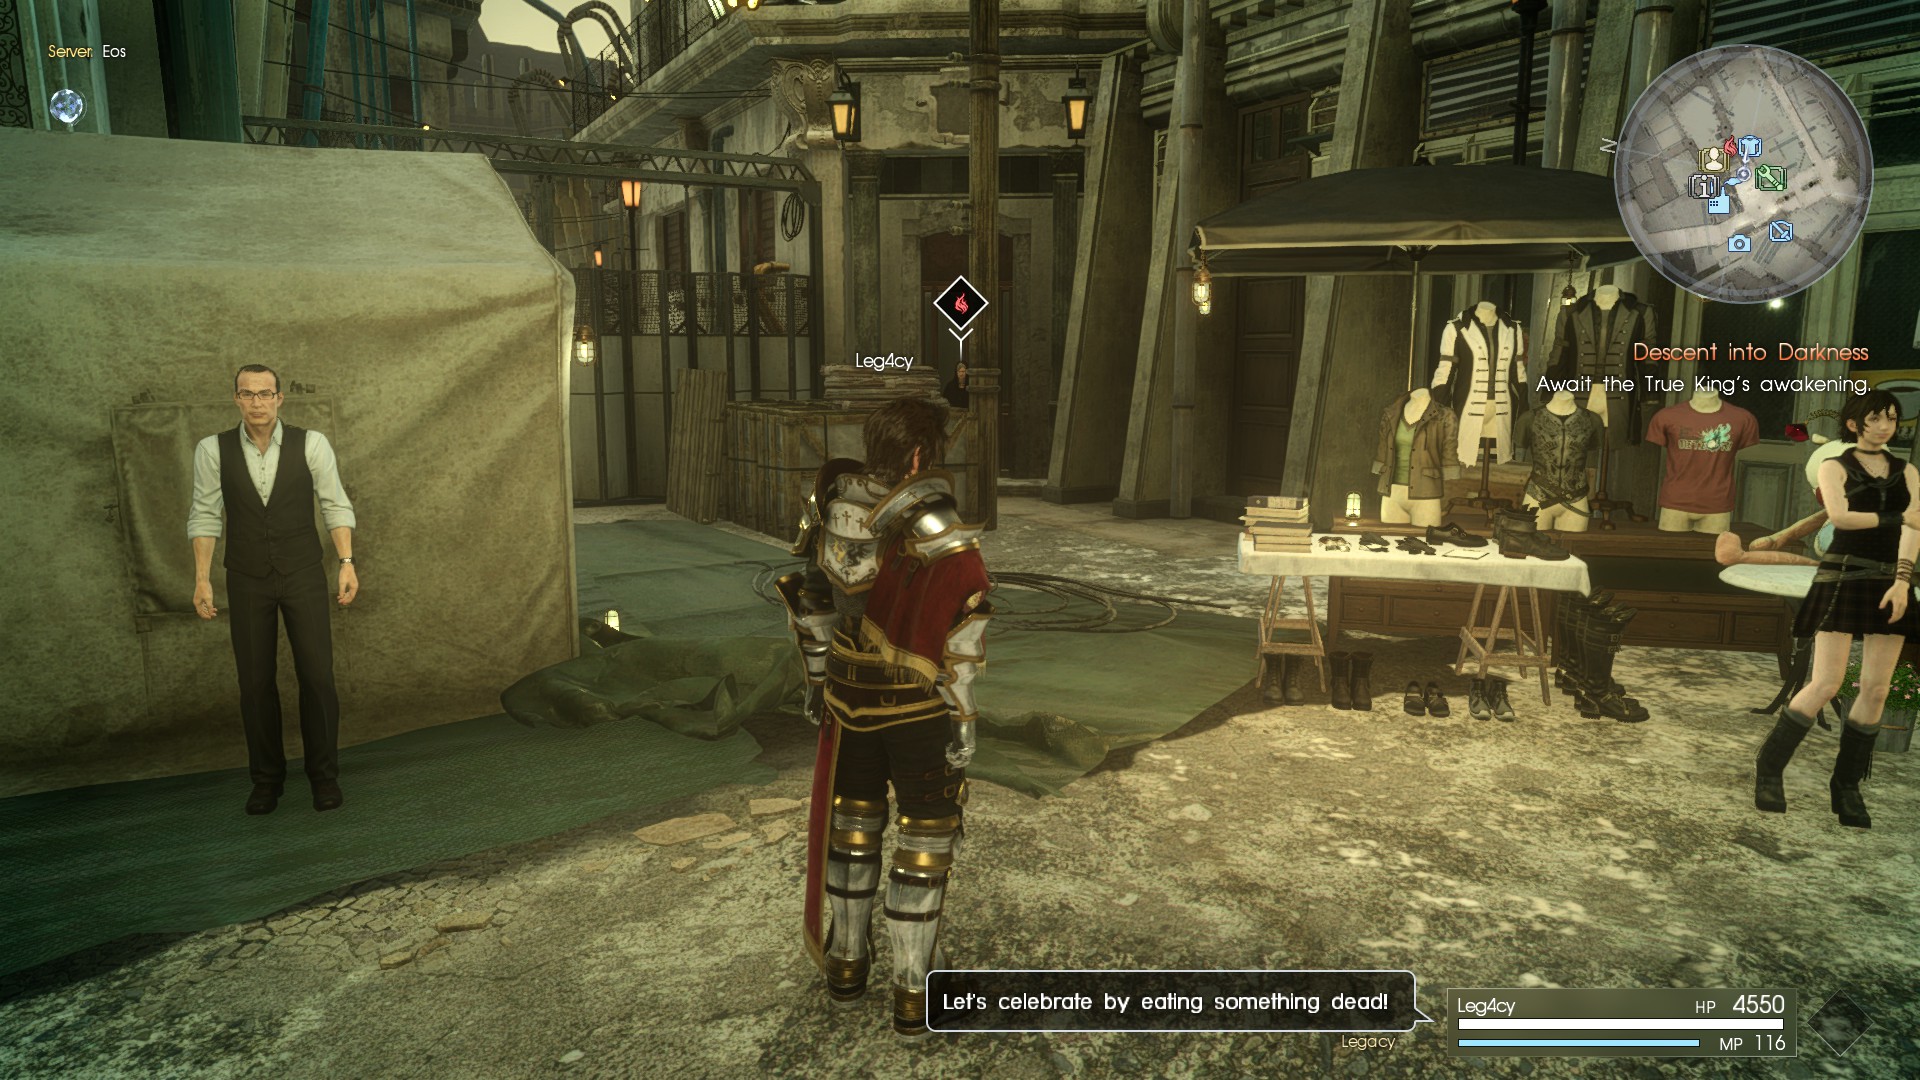
🖱️ Weapons Evolution
(Dragon Whisker for DPS)
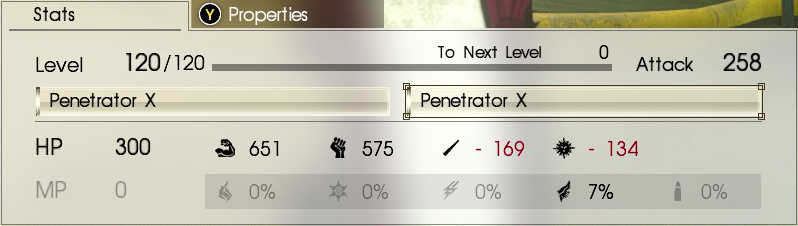 300 HP // 651 STR // 575 VIT // -169 MAG // -134 SPI // 7% Dark Res
Total Materials Needed
1 Ancient Cloth
1 Behemoth Tears
1 Dragon Horn
1 Strength Gemstone
2 Strength Shards
2 Meteorites
52 Laser Sensors
300 HP // 651 STR // 575 VIT // -169 MAG // -134 SPI // 7% Dark Res
Total Materials Needed
1 Ancient Cloth
1 Behemoth Tears
1 Dragon Horn
1 Strength Gemstone
2 Strength Shards
2 Meteorites
52 Laser Sensors
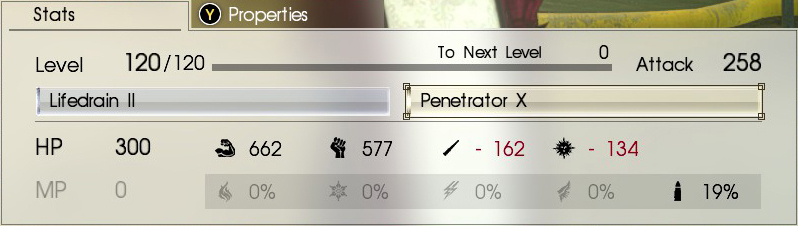 300 HP // 662 STR // 577 VIT // -162 MAG // -134 SPI // 19% Bullet Res
Total Materials Needed
1 Strength Gemstone
1 Ancient Dragon Tooth
1 Deadly Stinger
2 Meteorites
2 Dragon Horns
52 Laser Sensors
300 HP // 662 STR // 577 VIT // -162 MAG // -134 SPI // 19% Bullet Res
Total Materials Needed
1 Strength Gemstone
1 Ancient Dragon Tooth
1 Deadly Stinger
2 Meteorites
2 Dragon Horns
52 Laser Sensors
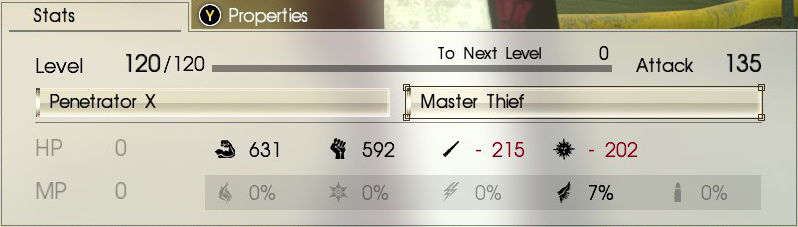 631 STR // 592 VIT // -215 MAG // -202 SPI // 7% Dark Res
This will give more versatibility on weapon switching since you will have everything with 100% Resistance on your Dancing Daggers (meaning you will be able to use all weapons from the Optional Section at any given moment) but you will have to sacrifice 11 STR & 11 VIT (because the game doesn't make round numbers calculation).⚠️
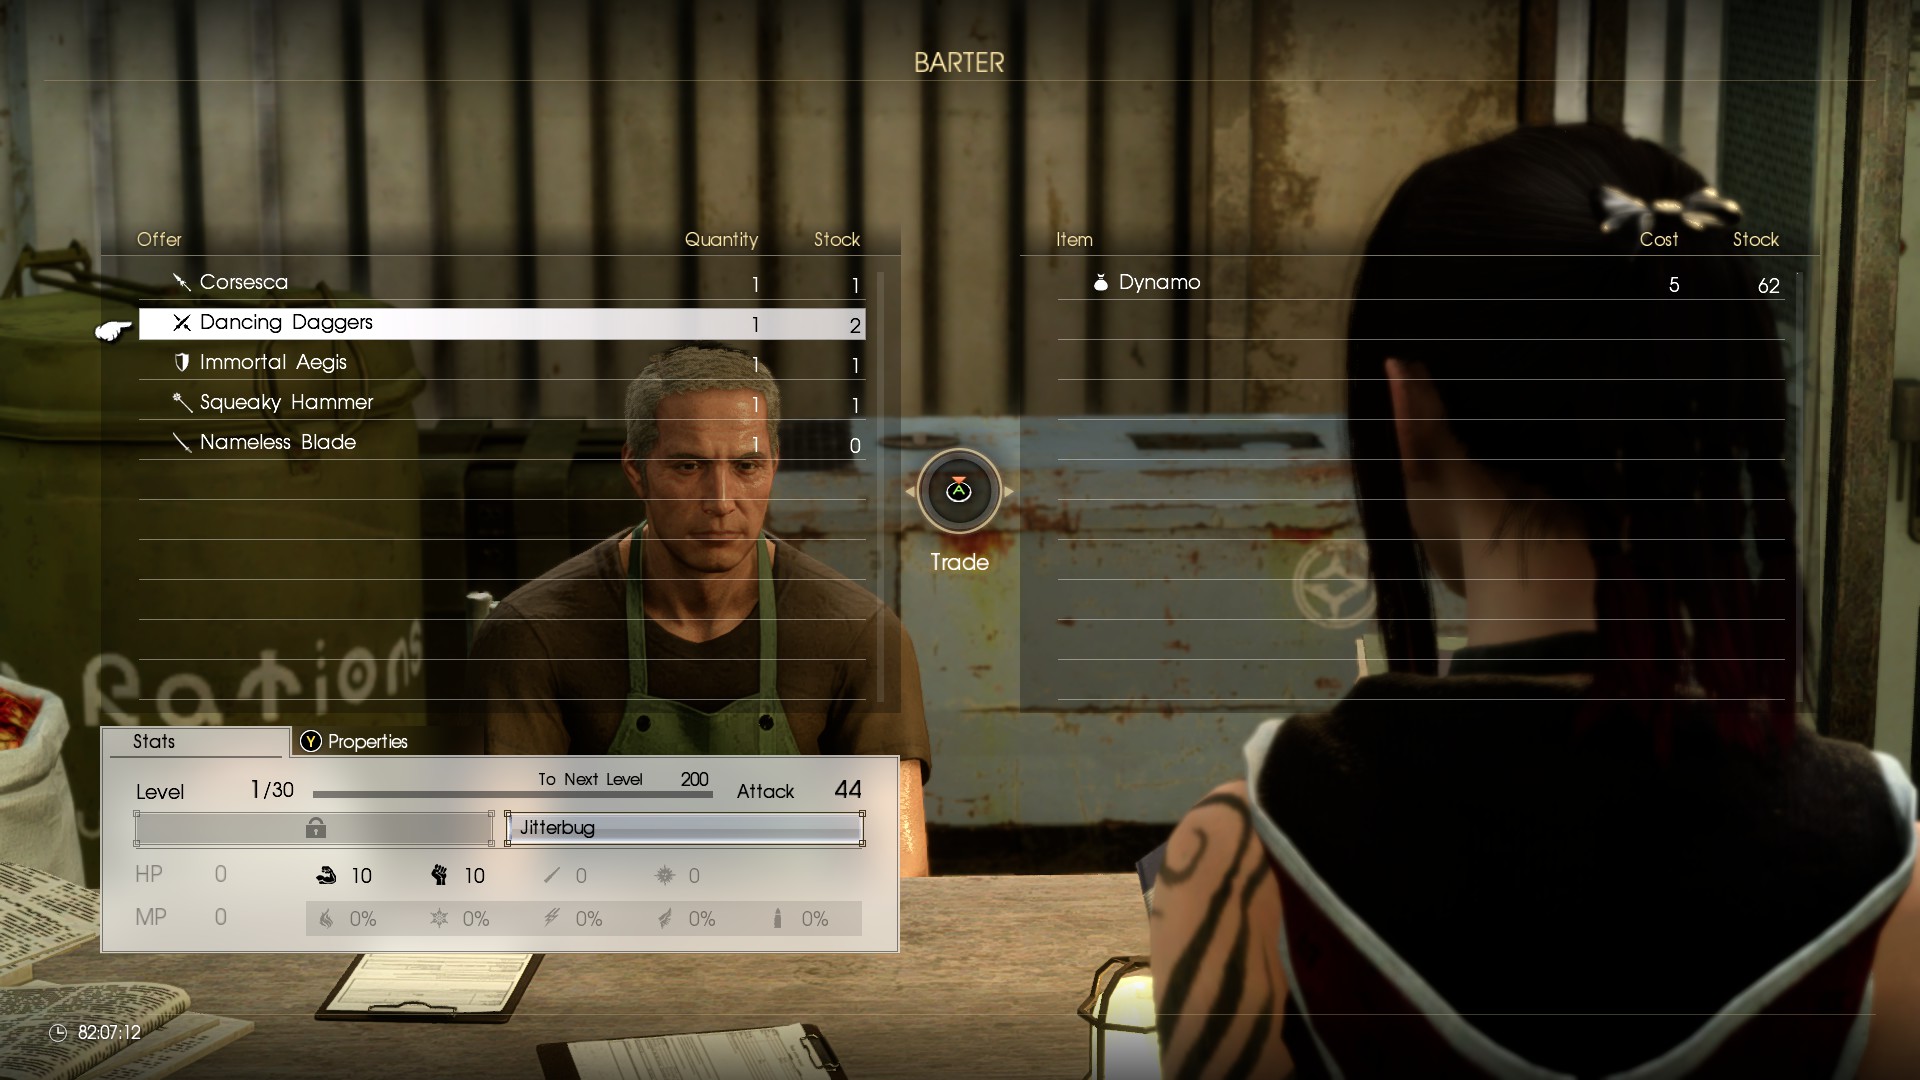
Extra Usage Info: These are some REALLY AWESOME DAGGERS! They give a +STR & +VIT Buff. Unlike Protetga (+VIT) or Temperga (+STR) which only lasts for 15 seconds, this buff has a total duration of 30 Seconds!! In order to stop the Dancing Animation, you just need to move, your buff is applied as soon as you start dancing, plus, you can also use these Daggers to apply the 30% Armor Reduction debuff on Stronger enemies if you feel like to, sometimes that works fine along with Bandit's - faster DPS.
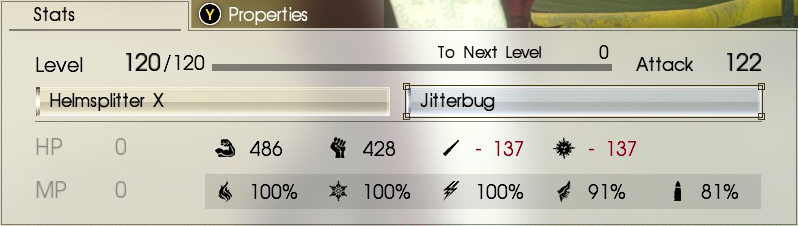 486 STR // 428 VIT // -137 MAG // -137 SPI // 100% Fire, Ice & Lightning Resist // 91% Dark Resist // 81% Bullet Resist
🖱️ Stats Gained from This Build
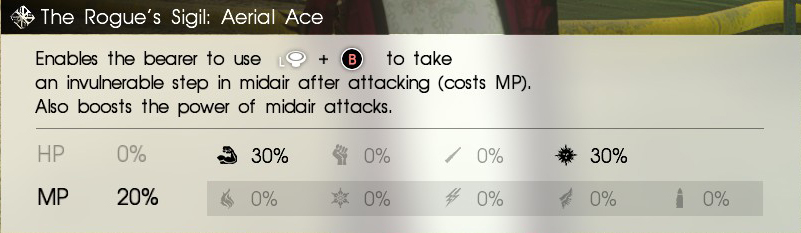
- +20% MP // +30% STR // +30% SPI + Lots of Versatility while in Air, avoiding a lot of dangers.
Plus, MP Regen is a % based on Max MP, meaning, the more MP you have the "faster" your MP Regen will be, aka, longer airborn time :)
These are without counting your character's attributes, which are pretty much negligible even at level 99.
🖱️ Global Materials Needed (Checklist)
🖱️ Farming Locations
- Location: Meldacio Hunter HQ
- Attainable from: Mining
- Info: I get this mostly from Fossil-Laden Rocks, but sometimes (way less frequent), I also find them in Metal-Laden Rock or Fragile Rock.
- Location: Lestallum
- Attainable from: Mission: The Calamitous Karlabos - Urgent L10
- Info: Break that Mutant!
- Location: Cauthess Depot
- Attainable from: Mission: Lighting the Way - Escort L27 & Mission: Havoc Befalls The Hut - Defense L28 & Mission: Havoc Befalls the Hut Again - Defense L36
- Info: You guessed it right. It's the Necromancers. Go and get 'em Tiger!
- Location: Cauthess Depot
- Attainable from: Mission: Double Deadeyes - Urgent L33
- Info: Only from the Last Behemoth Horn Breaking, with Aerial Dance it's easy to get it.
- Location: Cauthess Depot
- Attainable from: Mission: Ghost In The Machine - Urgent L39
- Info: Break every breakable part, really easy & fast mission, I usually start by the rocket launcher.
- Location: Cauthess Depot
- Attainable from: Mission: The Injurios Jabberwock - Urgent L40
- Info: Break those Dragon's Horns! Just dooo it! :D
- Location: Old Lestallum
- Attainable from: Mission: Seaside Skrimish - Hunt L60
- Info: From the Queen Bees, you can always try bargaining some Honey, but I doubt they will listen to it anyways.
- All Gemstones and shards are found through weapon disassembling and as some Chocobo Arena rewards.
- To get a +7 Shard in a stat, you will need to get 14 points in that particular stat before dismantling the weapon.
Used on this Guide to Attain: Sturdy Plates, Dark Shards, Flame Shards, Frost Shards and Storm Shards. - To get a +30 Gemstone you need to get a 60 points in that particular stat before dismantling the weapon.
Used on this Guide to Attain: Strength Gemstones. - Around every ~19k XP, weapon dismantling gives 1 Meteorite.
🖱️ Extra: Optional Weapons
This section is a WIP (Work In Progress).
Attention: If you pickup this weapon in the place of Dragon Whisker that has "Lifedrain II", that means you will be lacking 19% Bullet Resistance, you will need to change the formula at Dancing Daggers. You won't need 2 "Dark Shards" (leaving it at 81%), instead, you will need 2 more "Sturdy Plates" (leaving it at 100%).
Other option, it's to go 100% All Res on Dancing Blades, leaving you able to use any weapons from this Section which was explained in detail before how to do it.
If you remove the Bandit's Blades to put this weapon, you don't have to change anything on Dancing Daggers.
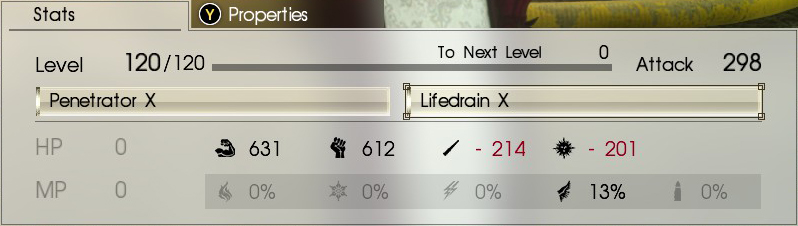 631 STR // 612 VIT // -214 MAG // -201 SPI // 13% Dark Resist
Total Materials Needed
1 Behemoth Tears
7 Meteorites
57 Laser Sensors
This one is a good example. This Katana comes with the impressive "Lifedrain X" (50%). It can be used in the place of "Bandit's Blades" or instead of the "Dragon Whisker" that has "Lifedrain II"
(30%).
For me, the use of this Katana is situational due to its Range during Aerial Combat. Spears are way more effective during Aerial Combat in my opinion, principally, against smaller targets, like, Birds, Tonberries and some other smaller targets.
If you are fighting at the ground, Spears also have longer reach and bigger vertical hit box. But, Katanas clearly wins when it comes to Bigger Targets at air or even during close ground combat against all kind of targets.
631 STR // 612 VIT // -214 MAG // -201 SPI // 13% Dark Resist
Total Materials Needed
1 Behemoth Tears
7 Meteorites
57 Laser Sensors
This one is a good example. This Katana comes with the impressive "Lifedrain X" (50%). It can be used in the place of "Bandit's Blades" or instead of the "Dragon Whisker" that has "Lifedrain II"
(30%).
For me, the use of this Katana is situational due to its Range during Aerial Combat. Spears are way more effective during Aerial Combat in my opinion, principally, against smaller targets, like, Birds, Tonberries and some other smaller targets.
If you are fighting at the ground, Spears also have longer reach and bigger vertical hit box. But, Katanas clearly wins when it comes to Bigger Targets at air or even during close ground combat against all kind of targets.🖱️ Extra: How to get these Weapons
- Location: Lestallum
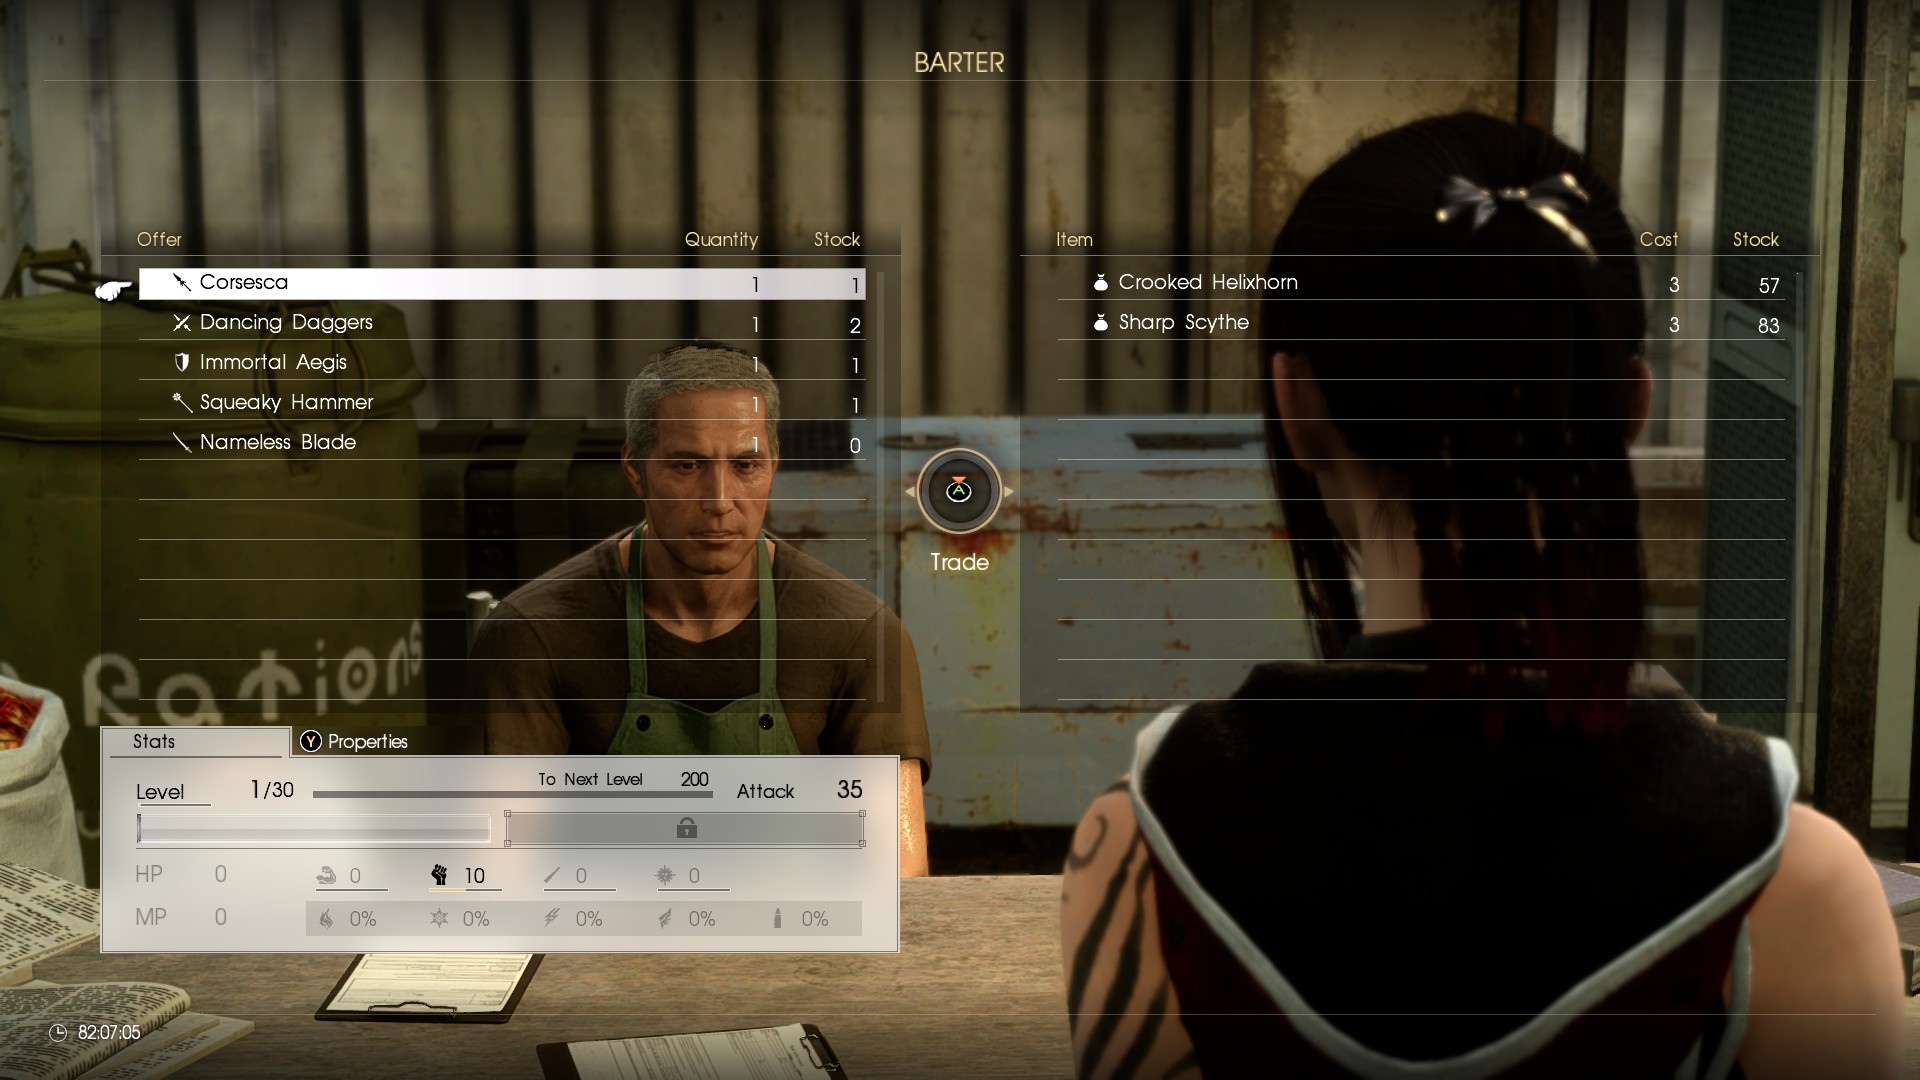
- Attainable at: Mission: Too Tough To Tame - Defense L4
- Info: Break those Unicorn wannabe Horns! (You can target directly their horns)
- Location: Meldacio Hunter HQ
- Attainable at: Mission: The Terrible Treant - Hunt L20
- Info: Kill those Killer Bees, they will drop them.
- Quantity: You will need 3 Crooked Helixhorn and 3 Sharp Scythe for each Corsesga.
- Location: Cauthess Depot
- Attainable at: Mission: Roboresurrection - Urgent L25
- Info: Break parts from the Robots, you can target them individually.
- Quantity: You will need 5 Dynamo to attain this weapon.
- Location: Meldacio Hunter HQ
- Attainable from: Mission: The Malevolent Malboro - Urgent L16 & Mission: Smog on the Water - Hunt L43
- Info: Break those pesky big Malboros before they open their mouth :) Just take in consideration that this Katana appears as "Besmirched Blade" and it has no level up requirements.
It levels up at level 20.
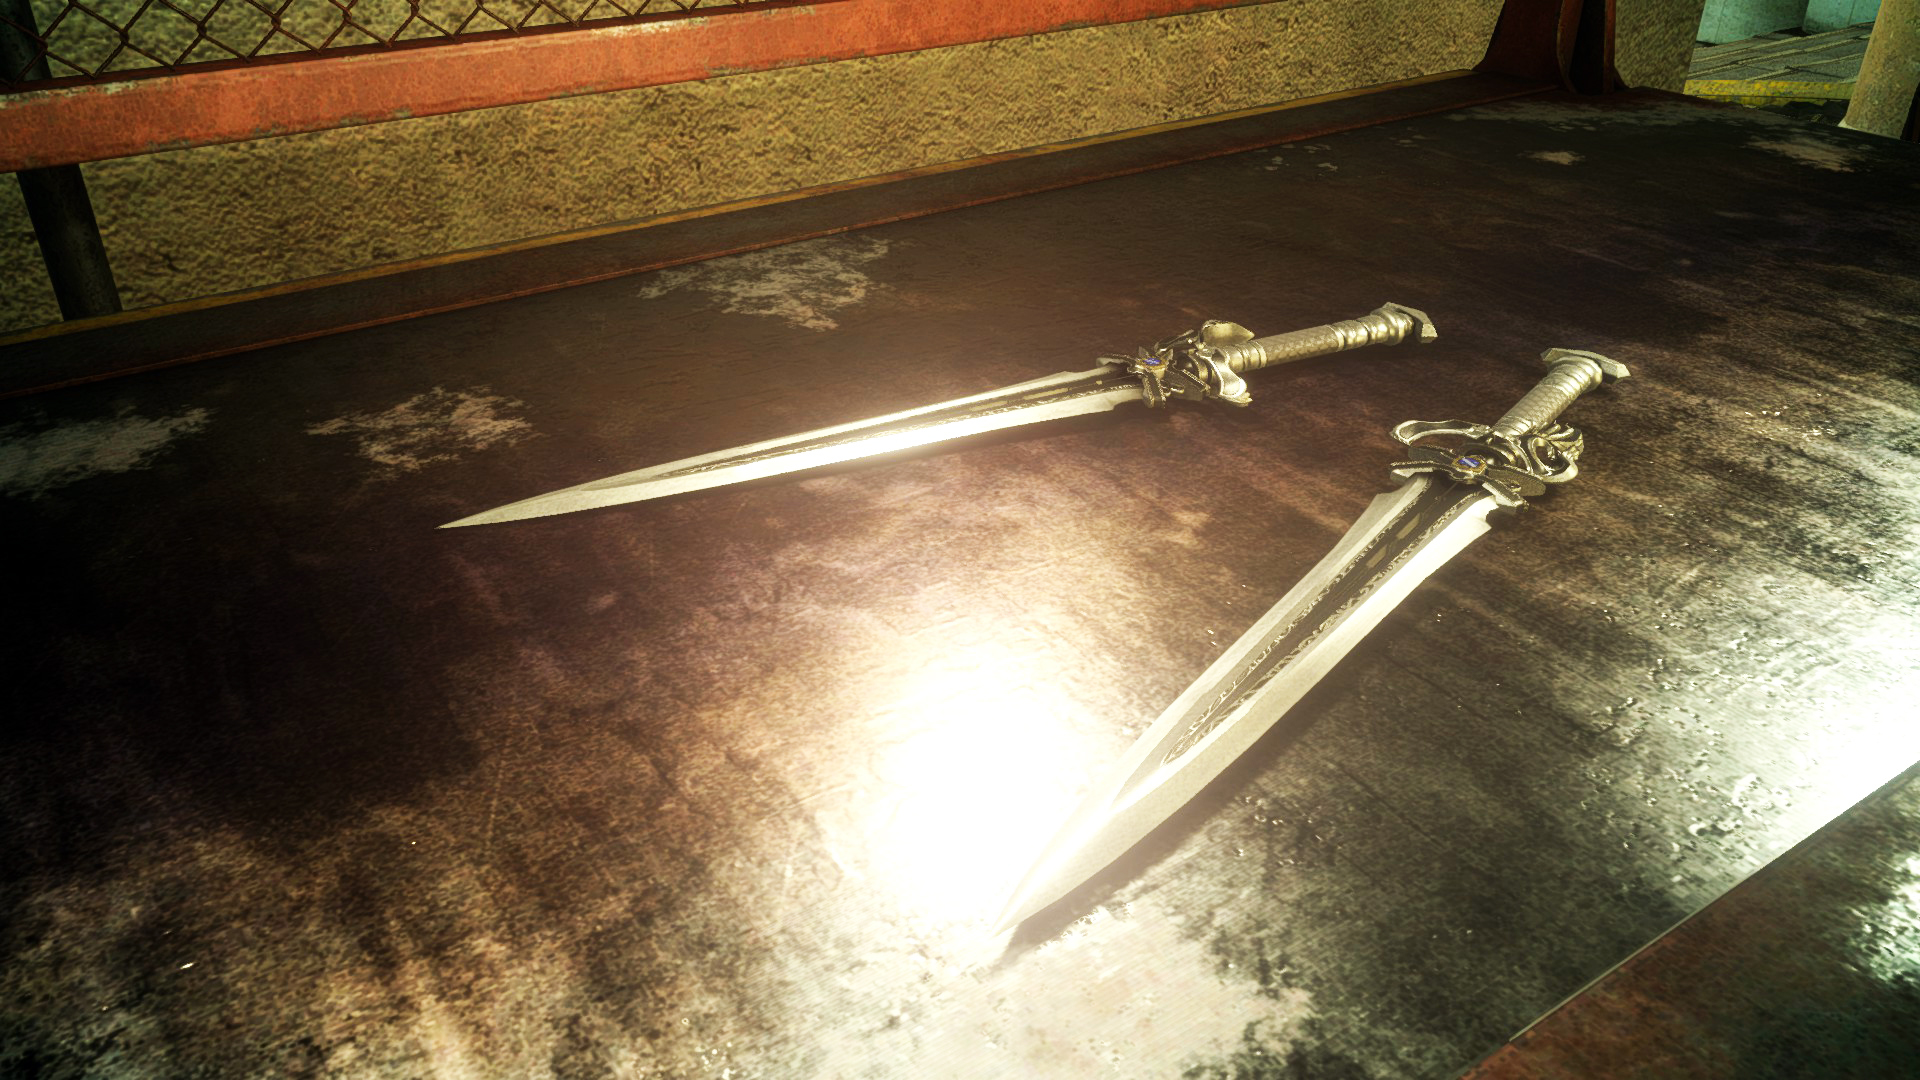
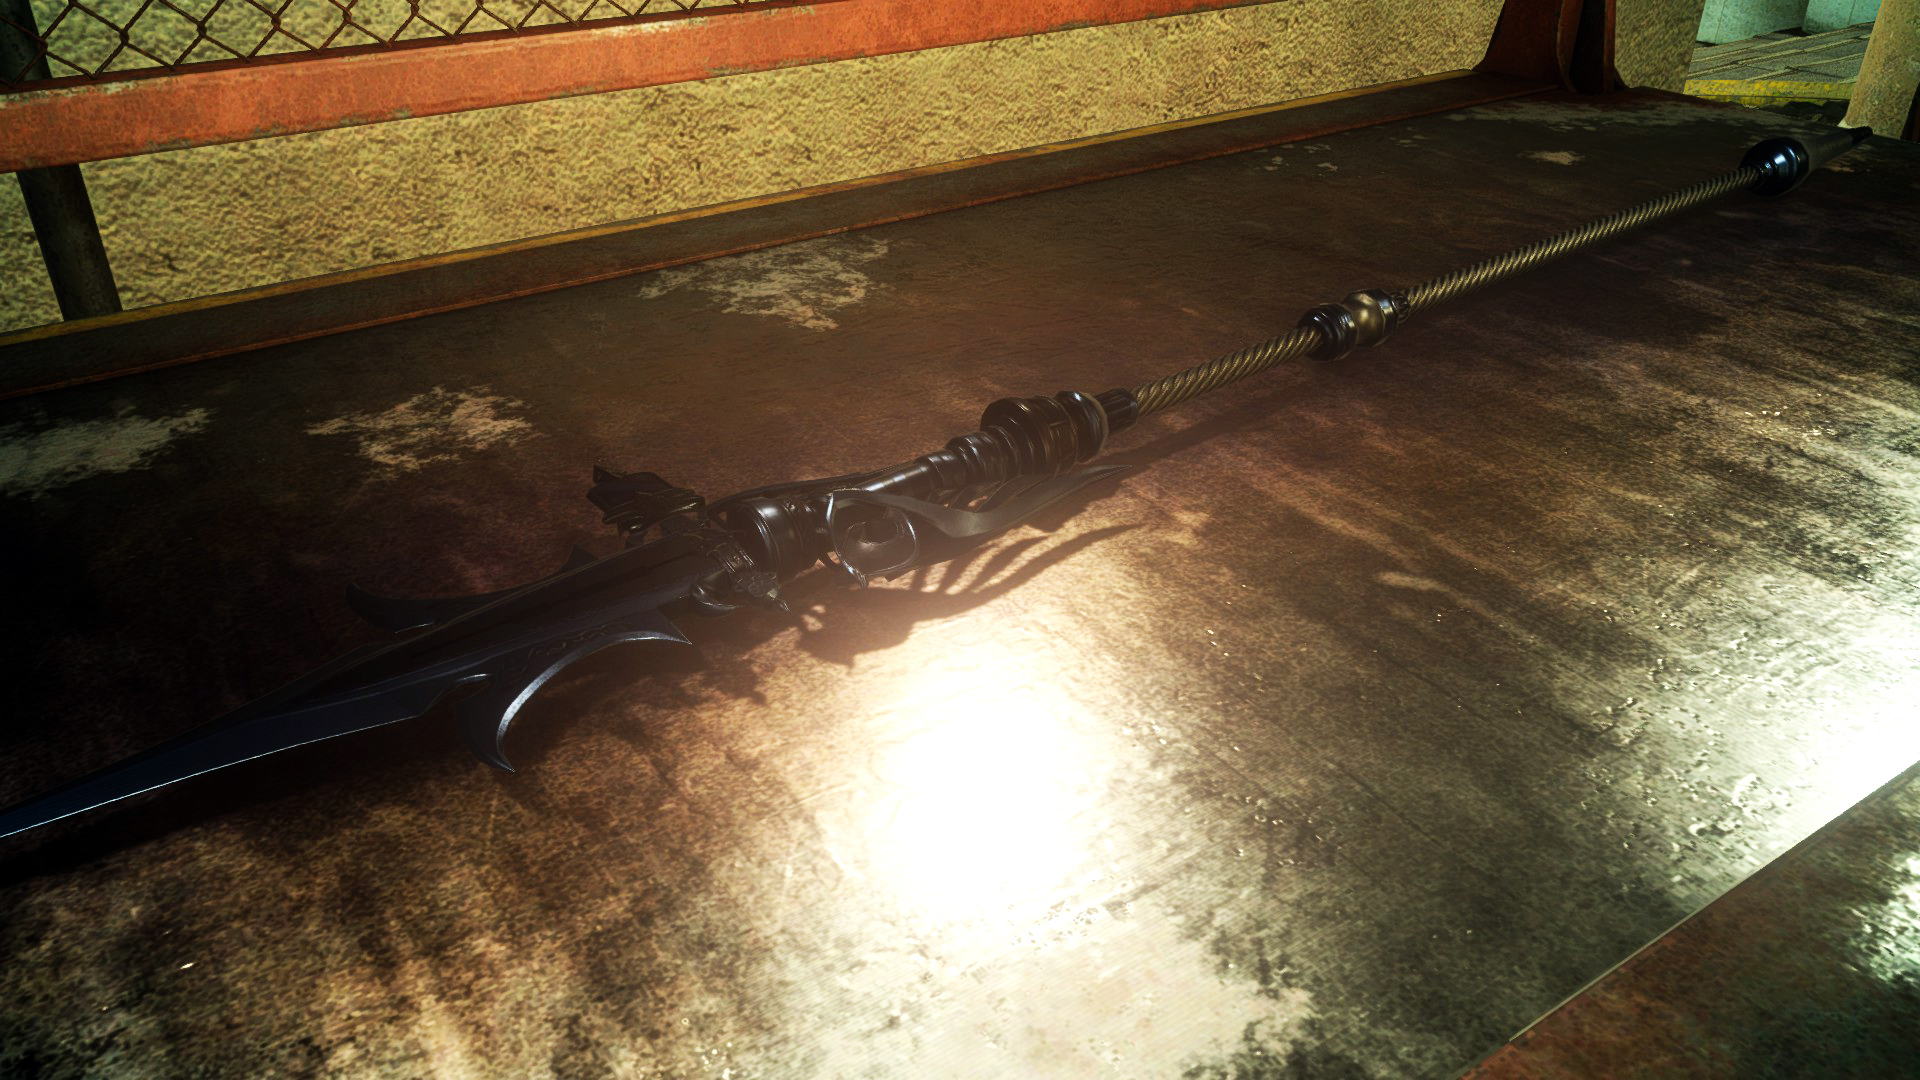
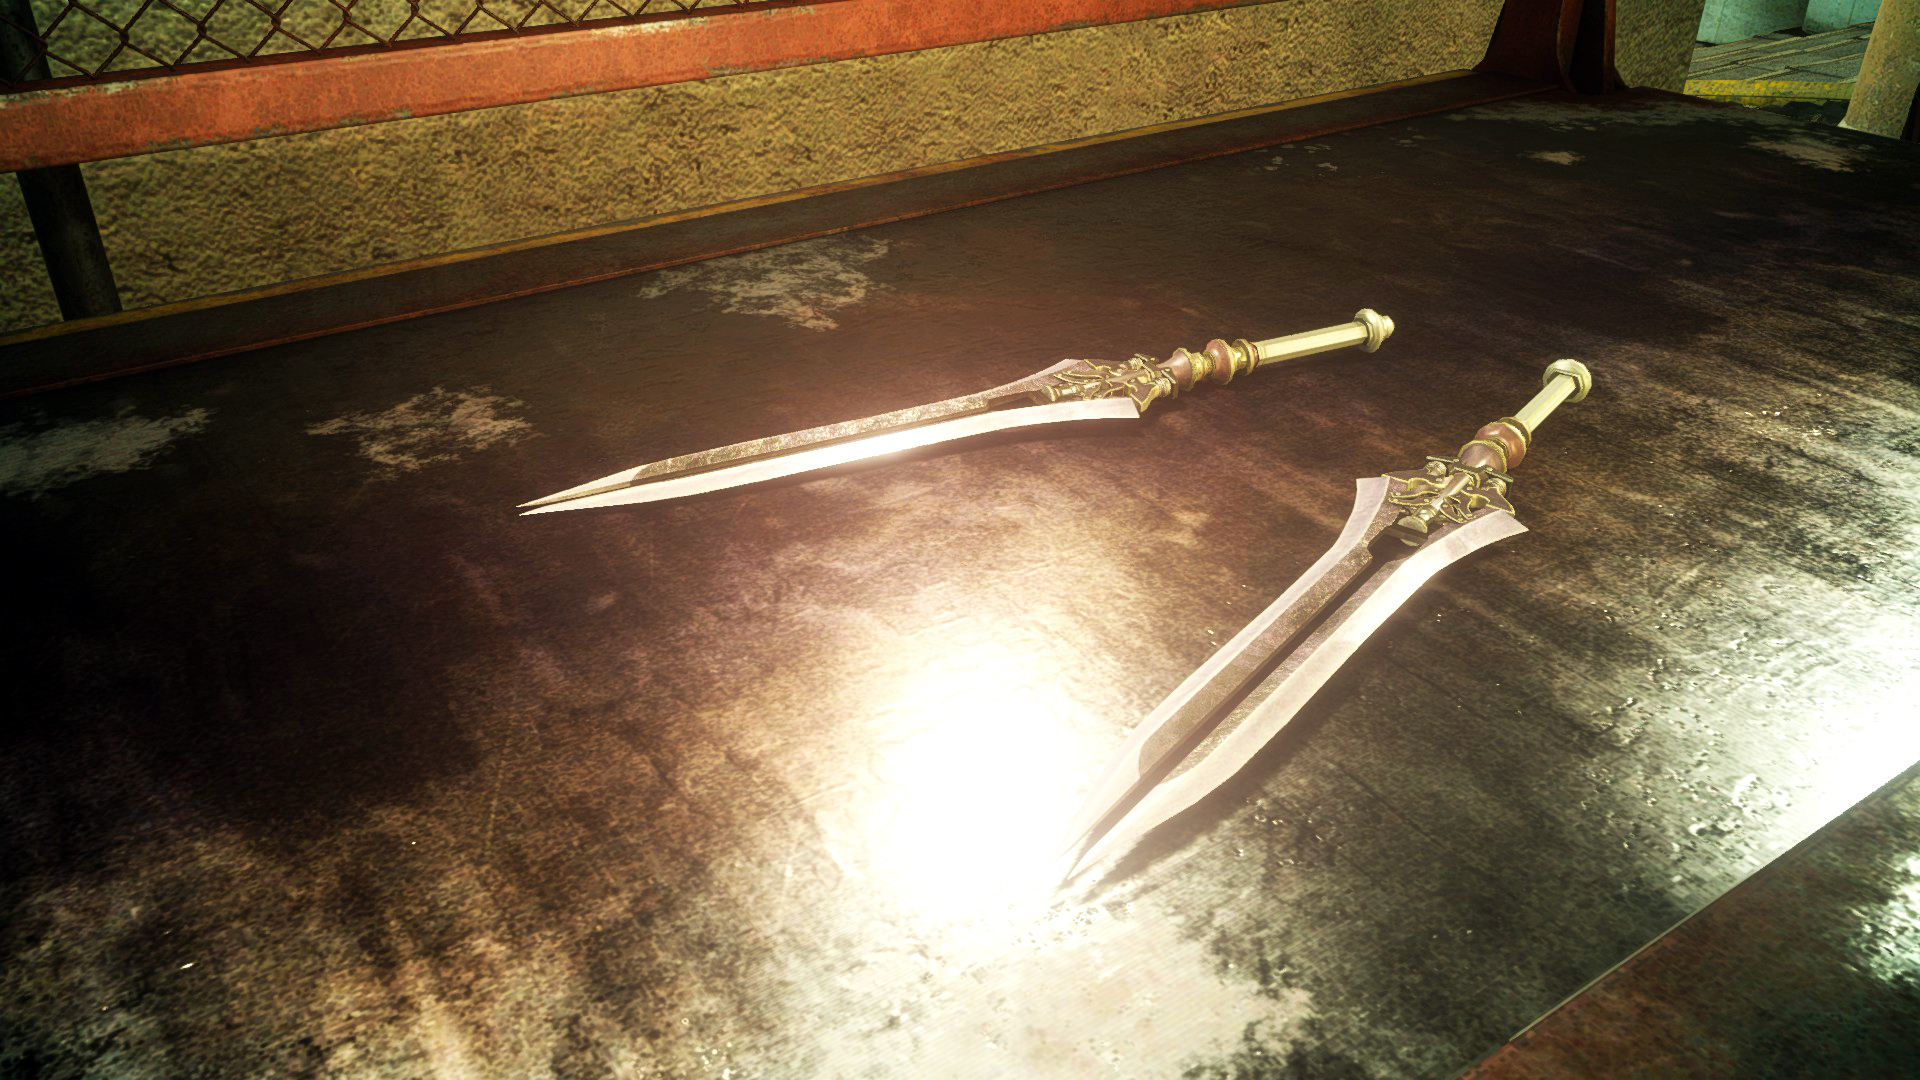
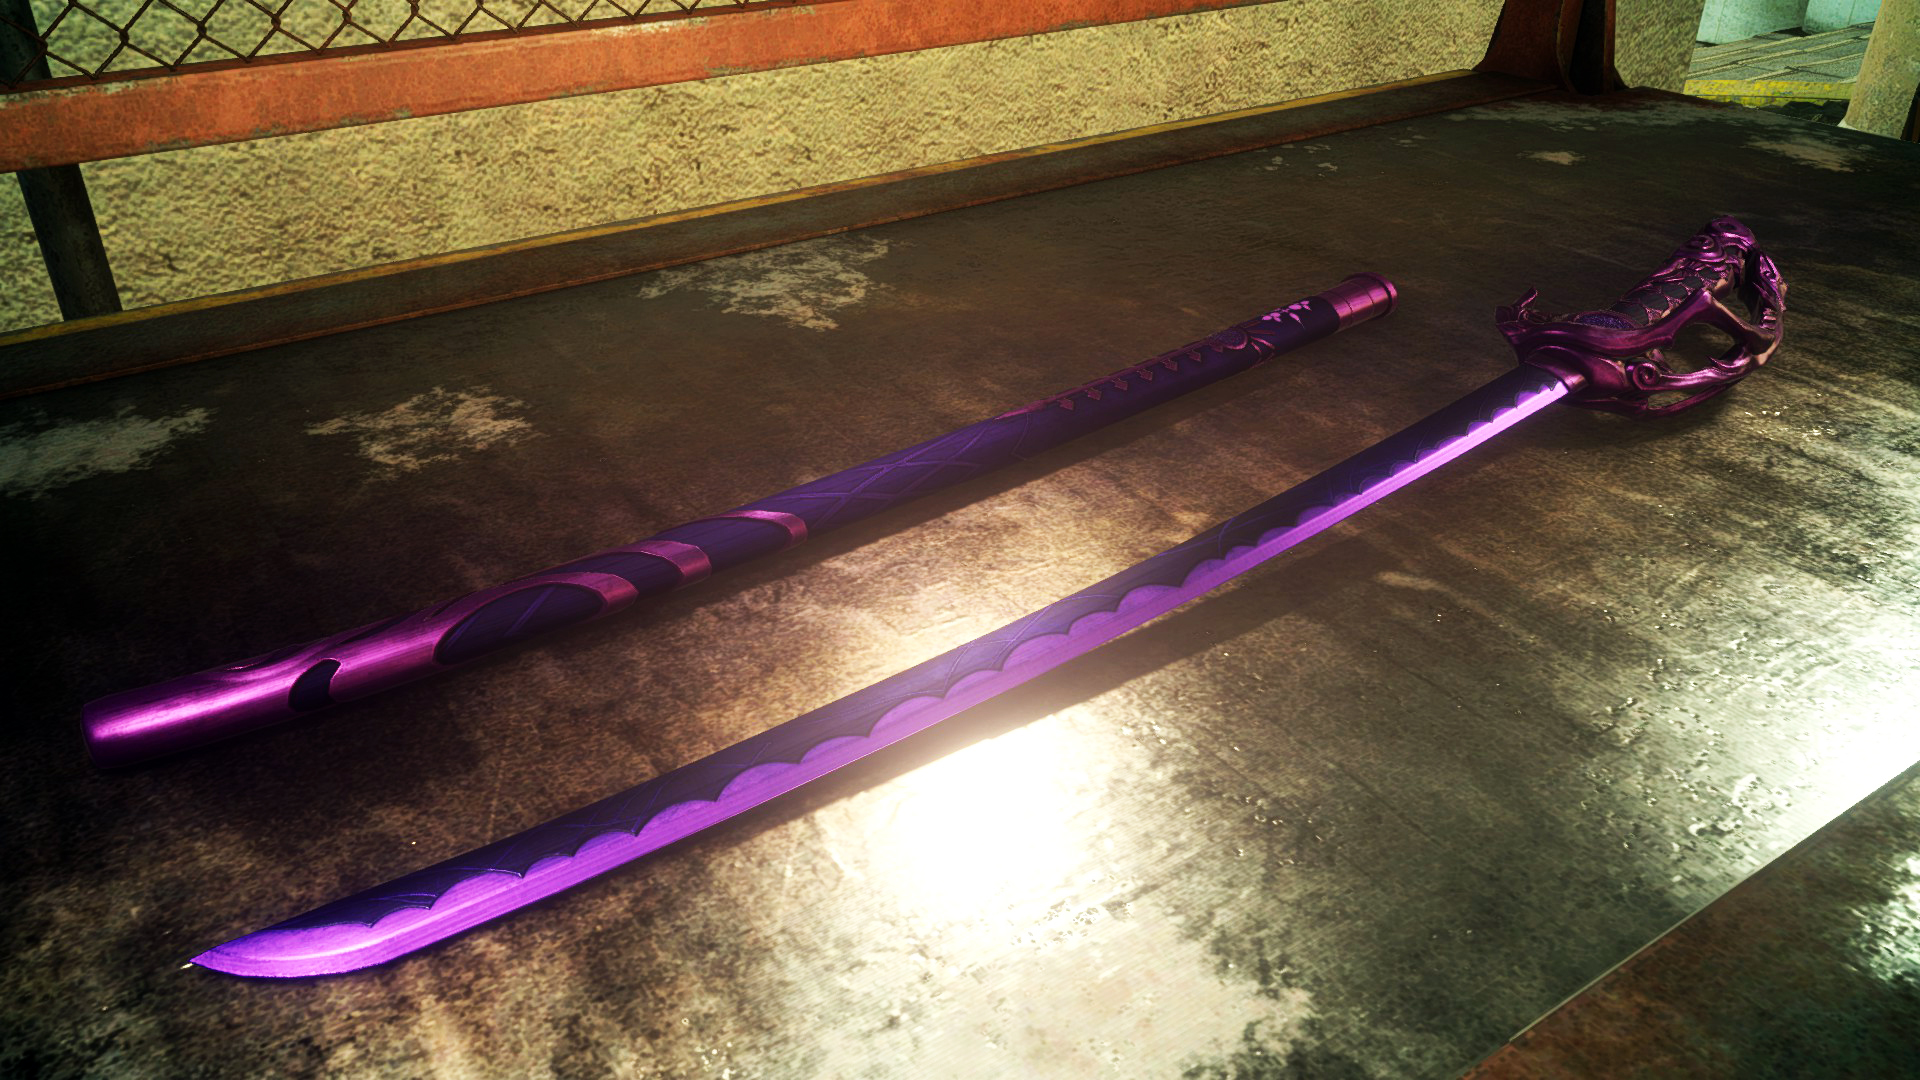
🖱️ Extra: Weapons Skins
I know that you want to know how they look on their Final Form :D
🖱️ Extra: Videos of Fight Examples with this Build
- If you still haven't beaten the game (either SP or MP), I advise that you actually do not watch these videos since they will contain end-game Spoilers (namely, bosses, not cutscenes).
- Put your mouse over the Boss name and use Mouse 3 (Clicking down on the Scrollwheel) and Steam will redirect you automatically to your web browser with the provided YouTube link.
- Either leave your mouse over the video so it doesn't hide back, or, simply click on the bottom right, over "YouTube" to open the respective video.
- I will also leave the link on the boss fight name, so you can Right Click on it and copy URL.
Paste it in a web browser and remove "steam://openurl/", it should give you the fully YouTube URL :)
Bahamut Lv99
Side Note: I usually never take the Aerial Sigil to this fight. The best way & secure to do this, is to use Untouchable Sigil and keep using your Corsesca with Double Penetrator X one or 2 hits depending how close he is then go back into defense. The battle takes longer, but you get out of it unscatched :)
But, due to Research Purposes, I went with the Aerial Sigil in this fight for you guys ^^
🖱️ Thank You / Credits
This small box was added @ 09th April of 2023
🖱️ Afterword
First of all, thank you for reading this guide! It's my first contribution to Guides, so, sorry for any mistakes in terms of formating the guide and so on.
I genuinely hope this increases your gameplay experience in Comrades, plus, I hope that this guide allows you to help out your friends and other persons that you decide to help randomly 😊
If this doesn't help you, comment here stating what’s your issue and I will do my best to help you out ^^
As my last thought, I know this is somewhat overrated, but English is not my main language so feel free to correct me on grammar mistakes.
Feel free to also discuss this build with me and tell me your feedback on how it could be improved if you feel there’s any room for improvement (just take in consideration that Bandit’s Blades are intended for further Material Farming and I know it could be something with better stuff on it).
- The "Don't sell these treasures" list! --Spoilers--★ 5 (821)49k views1.9k ♥1 minUpdated Mar 19, 2018
- "Chronological" story order for Final Fantasy XV (and some extras)★ 5 (843)48k views1.4k ♥2 minUpdated Apr 16
- How to Obtain the Real Power of Lucis Kingdom★ 5 (348)30k views783 ♥2 min
- 100% Achievement Guide + DLC (by THN)★ 5 (1k)30k views2.1k ♥40 minUpdated Jan 7, 2021
- FFXV Completionist Guide★ 5 (489)27k views1.4k ♥30 minUpdated Jul 24, 2018
- Random gameplay facts this game doesn't tell you★ 5 (571)25k views664 ♥7 minUpdated Jan 15, 2023





- Upgrading to PremiumTeam Fortress 2★ 5 (20k)1441k views11k ♥6 minUpdated May 11, 2022
- No More Room in Hell Official ManualNo More Room in Hell★ 5 (2.8k)569k views2.1k ♥29 minUpdated Apr 22, 2019
- NMRiH Community Hosting GuidesNo More Room in Hell★ 5 (526)351k views653 ♥1 minUpdated Aug 10, 2022
- How to 'Git Gud' Soon™MORDHAU★ 5 (2k)318k views3k ♥68 minUpdated Nov 16, 2024
- Лучшие кооперативные игры SteamPAYDAY 2★ 5 (1.5k)315k views2.1k ♥56 minRussianUpdated Apr 27, 2025
- Desert Eagle Heat Treated | Blue GemCounter-Strike 2★ 5 (1.6k)292k views1.5k ♥2 minUpdated Jan 16





This guide was created by its original author on the Steam Community. Are you the author and want it removed? Request removal.