[EN] How to install mods in Killing floor correctly
Introduction

In order to install mods for Killing floor, you need to open the root folder of the game and you need to find some website with mods for Killing floor.
The path to the Killing floor root folder looks like this:
D:\SteamLibrary\steamapps\common\KillingFloor
On the Internet, choose any mod (maps, weapons, characters). In the manual I will tell you in detail how to install each of the mods. Mods can also be installed from the Steam workshop, but unfortunately, up to 50 mods can be installed from the workshop. I will tell you about everything in detail in the manual.
Installing mods from the Steam Workshop
 Steam has a strict limit: no more than 50 subscriptions for the game. I.e. the first 50 modifications from the workshop will be installed and will work, and the subsequent ones will not.
It doesn't matter what mods you subscribed to (maps, music, weapons, characters, etc.), after 50 subscriptions they simply won't be installed and won't work either.
Unfortunately, there is no direct way to get around this limitation, but it can be done in the following way so that you can play with as many modifications as possible.
Installing Server Veterancy Handler v7 (ServerPerks)
You can download the Server Veterinary Handler from the Internet. The latest version is V7.50, if you download V7, there is not much difference.
This mod is necessary in order to be able to install their skins, weapons. It is best to use this mod if you want to play with custom skins for characters. If you want to play with the new installed weapon, then later in the guide I will tell you about the replacement of ServerPerks. Where the interface will not be changed and you will play the usual Killing floor, with a new installed weapon (mutators).
To be honest, I don't like this modification, because it replaces your interface during the game, and also has its own skills. In general, this modification allows you to replace the vanilla Killing floor with your custom one, where you can install your skins and your weapons.
Now I'll show you how the interface changes with the modification of the Server Veterancy Handler v7
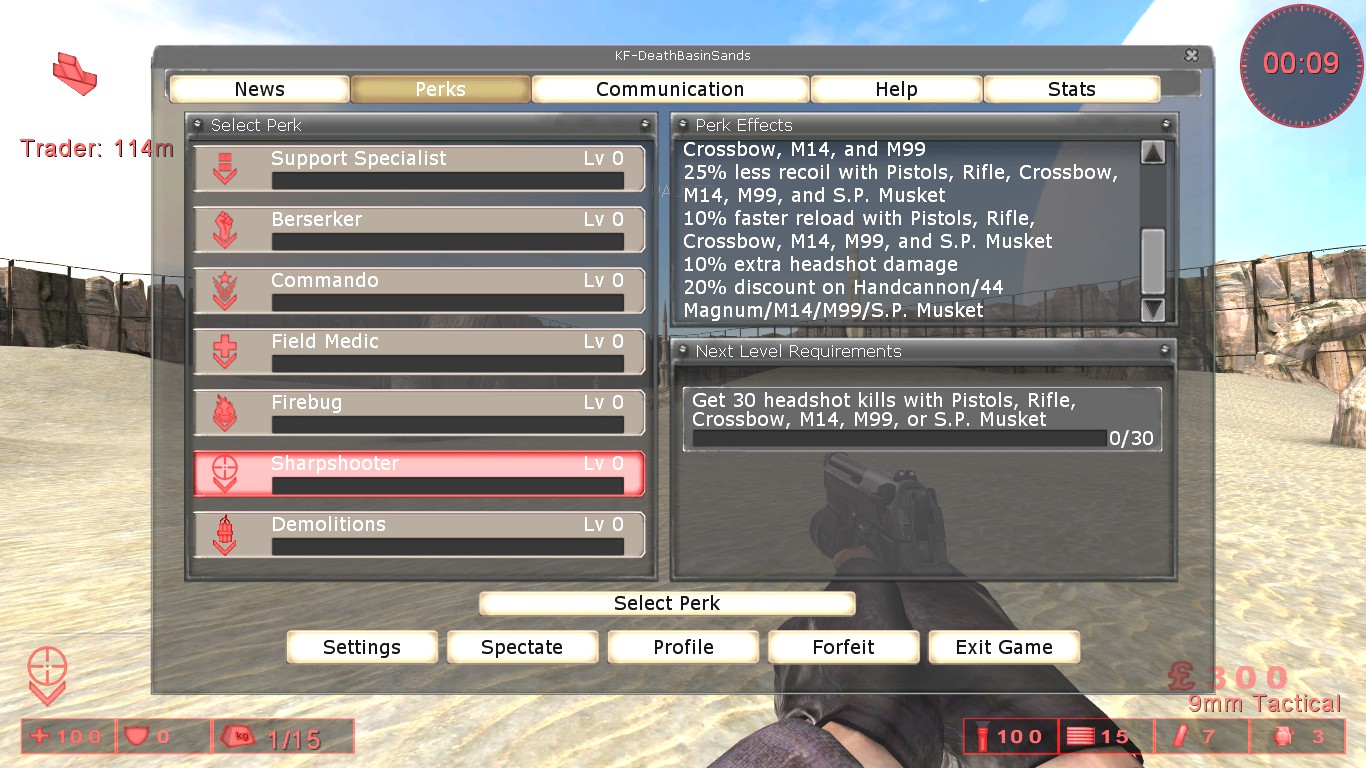
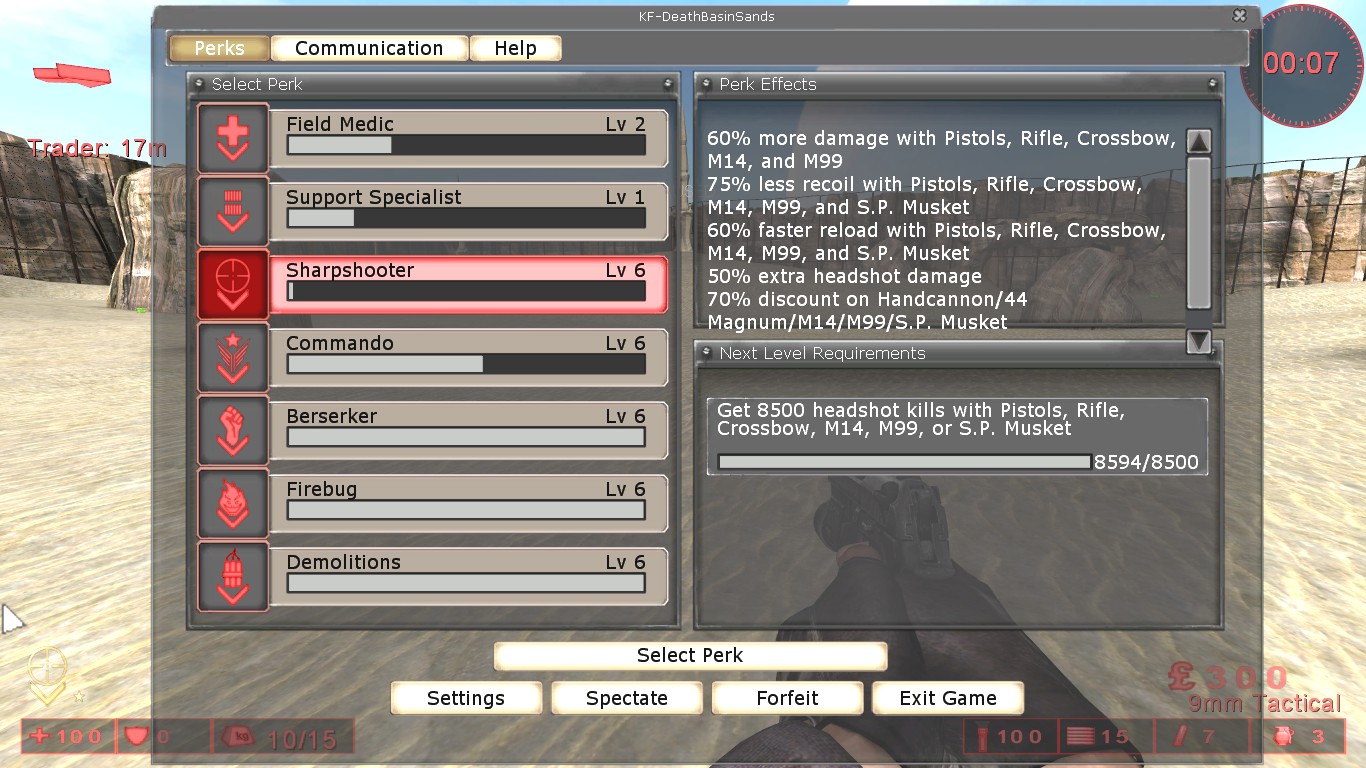
After you have subscribed in the steam workshop, or installed the mod yourself by downloading via Google drive from the link in the description in the manual, then you should have a ServerPerks.ini file in the System folder. In the future, you will enter text in this file to add weapons and to add skins.
Installing maps
Installing a new map for Killing floor from mods is the easiest, there is no need to connect any additional mods to make the downloaded map work.
In order to install a new map, you can select a map in the Steam workshop. Then subscribe to it. And a new map will appear in your game.
Or, if you do not want to fill out your subscriptions (because the maximum number of subscriptions in the steam is 50), and the map is only in the workshop, while it is not on any other sites, then you can use a special site called steamworkshopdownloader, (I can't attach a link because steam removes any links)
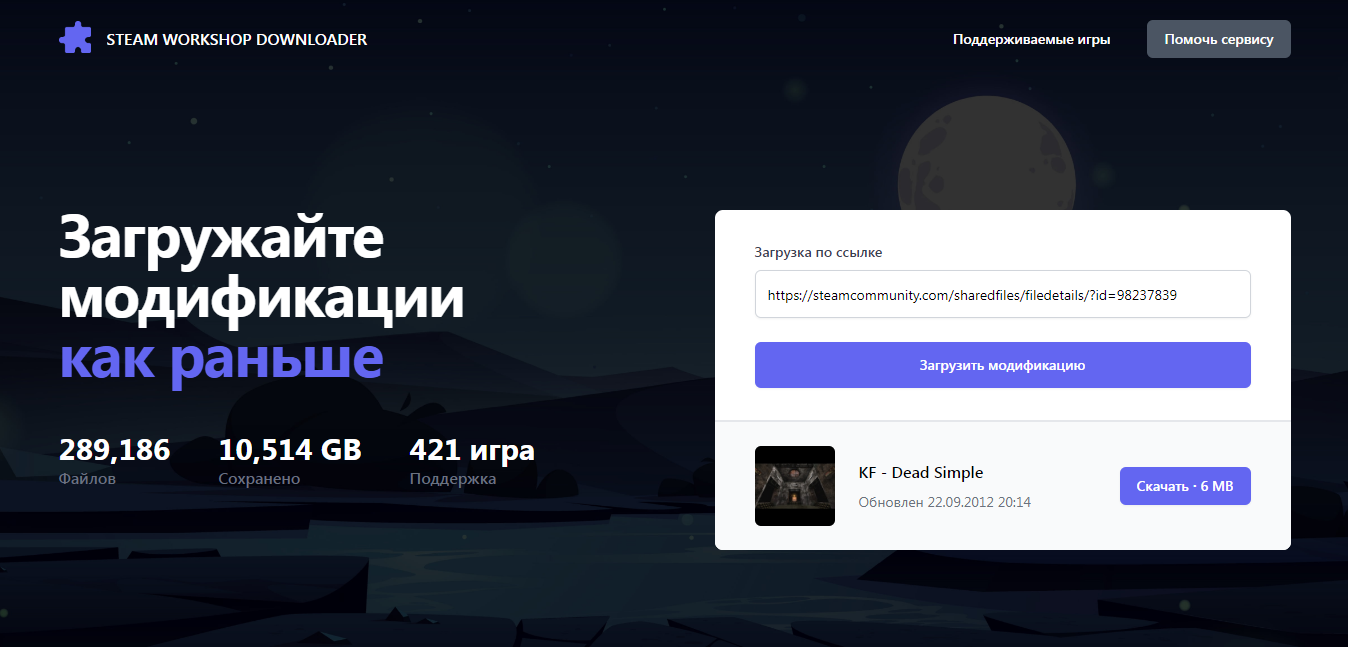 After that, the archive will be downloaded, which contains a file with the map, the file must be one and of the .rom format
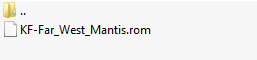 After that, we simply transfer this file to the Maps folder, which is located in the root folder of the game.
(D:\SteamLibrary\steamapps\common\KillingFloor\Maps)
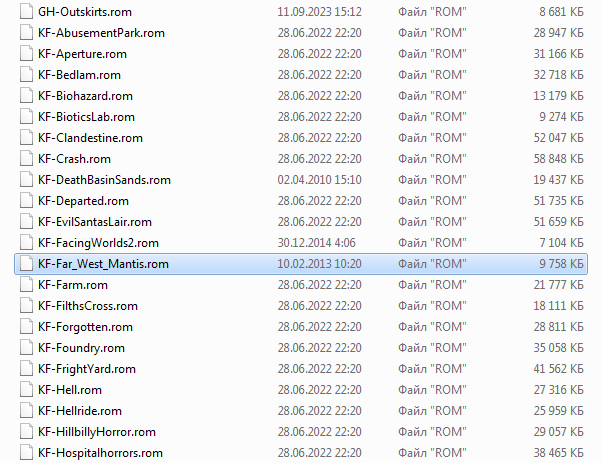
Unfortunately, in our case, this site is only suitable for downloading maps from the Steam workshop. Because if you try to download a mod for weapons or a skin from the Steam workshop via steam workshop downloader, then the wrong files are downloaded at all.
If you like some map from the Internet, also download and also transfer the file to the Maps folder.
Installing skins
To play with your installed skins, you will have to use a modification in killing floor - Server Veterancy Handler v7.
Download a skin for a character from any site, you will have an archive downloaded.
Each skin can be downloaded from the Internet in different ways:
Basically, the downloaded archive will consist of two folders: Animations and System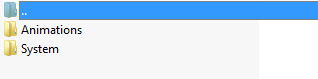
In this case, we simply move the files from each folder to the root folder of the game. (We go to each archive folder and transfer the file to the desired folder with the game, it is better not to transfer the folder and use a merge, because the folder in the archive can be called animations, in this case if you transfer the folder completely, then in the root file of the game you will have two folders animations and Animations, in connection with which the skin will not install and problems may arise).
We transfer files from each archive folder to the desired game folder.
Animations -> Animations
System -> System
 In this case, we just transfer it from the System -> System folder, the skin in the game will also work.
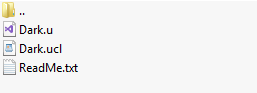 In this case, we transfer the first two files (with the format .u and .ucl) to the System.
*.u and *.ucl -> System folder.
On the site where you download the mod, there is a text, the text looks like this:
CustomCharacters=SeriousSam. Copy this text.
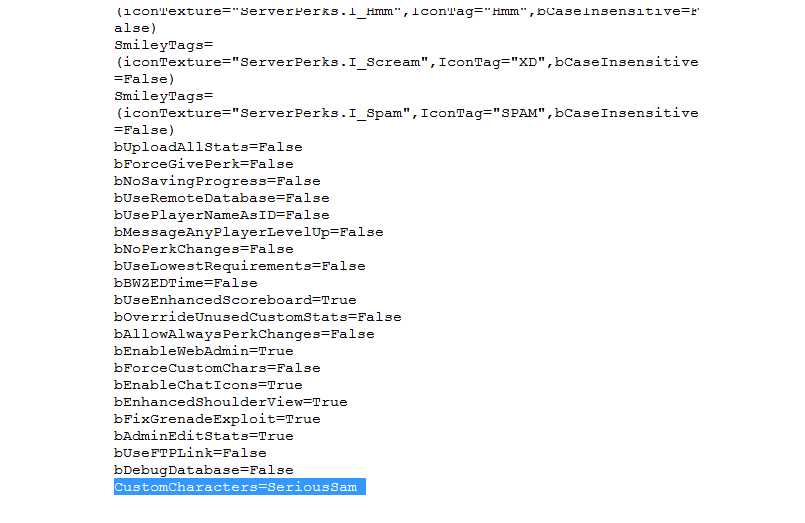
Also, the subsequent downloaded skins are installed in the same way, also add the necessary line at the very end.
After that, we go into the game. Select the game mode, go to the "Mutators" tab. We add the Server Veterancy Handler v7 and add the downloaded character (In my case, this is Sam).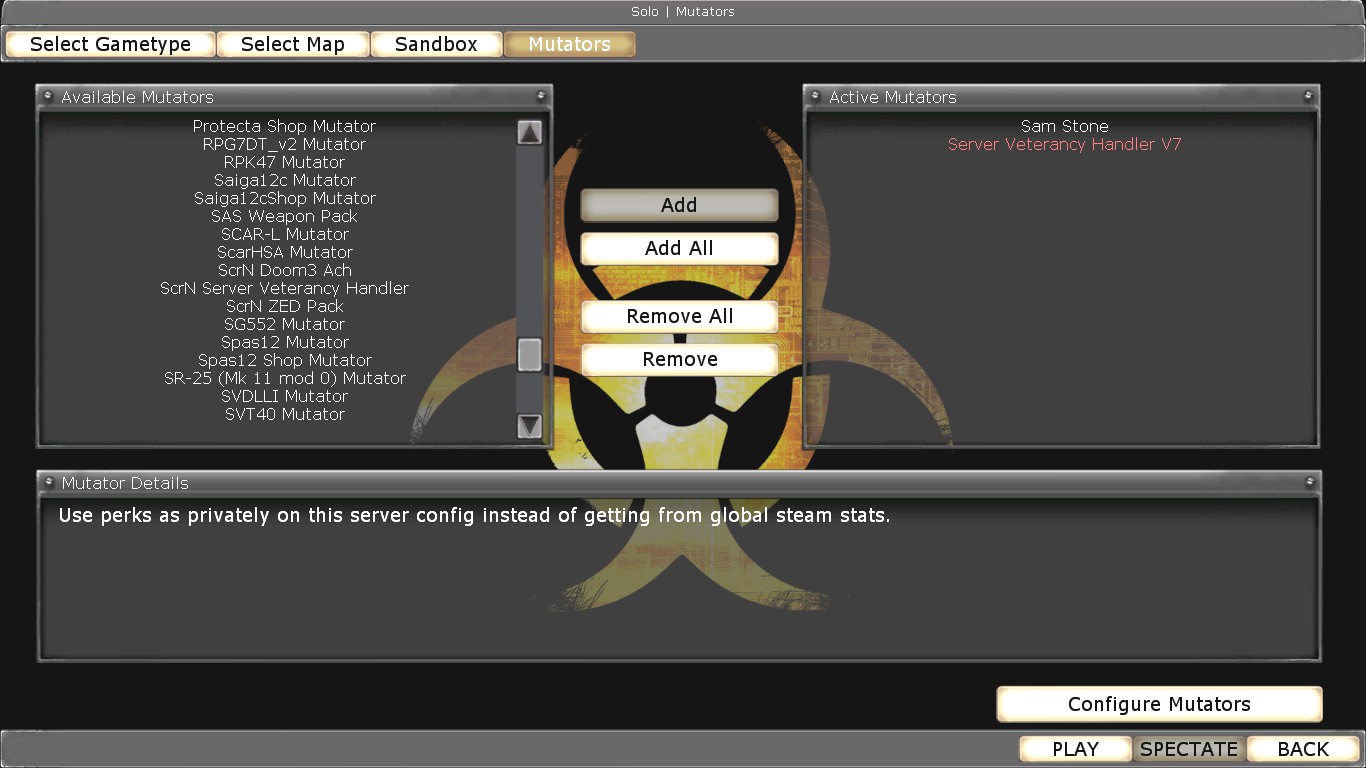
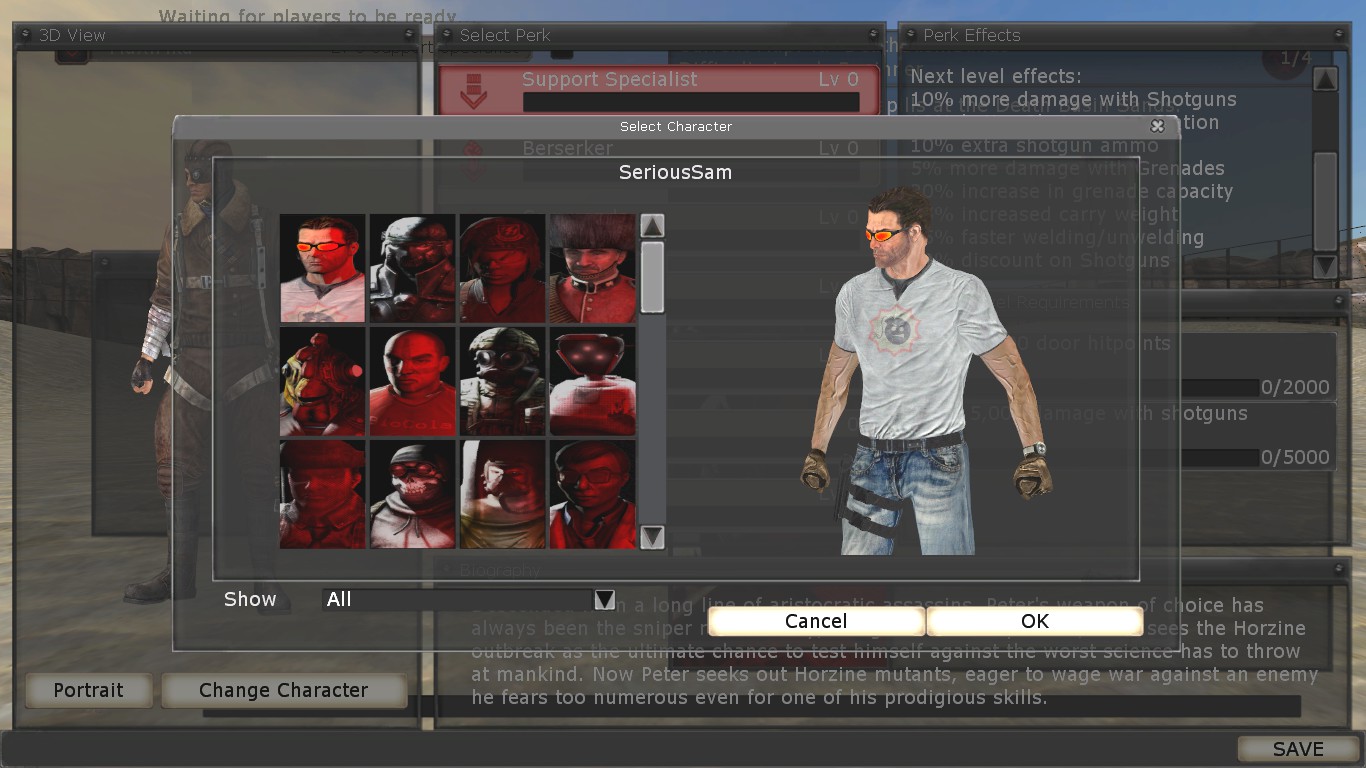
Some skins have their own voice acting, but these are very rare. Basically, the new characters will speak in standard phrases.
Installing weapons
Find a weapon mod on the Internet. Download it. Open the archive, there will be folders in the archive.
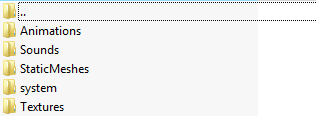
Transfer files from the archive to the root folder of the game. (Go to each archive folder and transfer files manually to each folder, do it exactly so that it does not happen that there will be two folders System and system in the root folder of the game, because problems may arise).
Animations -> Animations
Sounds -> Sounds
StaticMeshes -> StaticMeshes
System -> System
Textures -> Textures
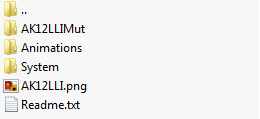
In this case, we move the first archive folder to the root folder of the game. And we transfer the files (Animations -> Animations, System -> System). We won't need the picture, we don't need to move it anywhere, we don't touch the Readme file yet either and we don't move it anywhere, it will be useful to us in the future when we add weapons to the merchant.
Go into the game, select the game mode and go to the "Mutators" tab. We see that we have new lines, this is our new added weapon. The first line means that the weapon will be available for sale at the dealer, the second line means that we will start the game with AK47 at the very beginning. Sometimes it happens that when installing a new mod for weapons, only the name of the weapon appears in the "Mutators" tab, without the word Shop. In this case, you will start the game with a weapon in your hands, but you will not be able to buy this weapon from a trader.
Fortunately, there are ways to add any weapon to the trader's shop.
A line for adding weapons to the trader
In the following sections, I will show you how to add any weapon to the merchant via the WeaponsWorkShop or ServerPerks mod.
So that we can add weapons to the trader. We need a line that the authors of mods indicate in the comments. The string looks like this:
V94LLImut.V94LLIPickup (V-94 weapon) or Beretta96FSDT.Beretta96FSDTPickup (Beretta pistol).
Note that the line for each weapon ends with the word Pickup.
After you have transferred the mod file to the root folder of the game (or subscribed to it in the steam workshop), you notice that there is nowhere the necessary line to add weapons to the trader.
Sometimes it happens that the authors do not add this line to the description of the mod and there is no ReadMe file in the archive that contains the necessary line. In this case, I'll show you where you can find this line.
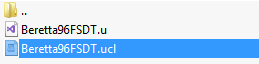
Take for example the Beretta 96 pistol. To find a line for it, you need to open the downloaded archive, open the System folder, you need to open the .ucl file[Downloaded archive with mod] -> System -> [weapon name].ucl
 Or if you have subscribed to a mod from the steam workshop, then go to the root folder of the game, then to the System folder and also look for the name of the mod with the format .ucl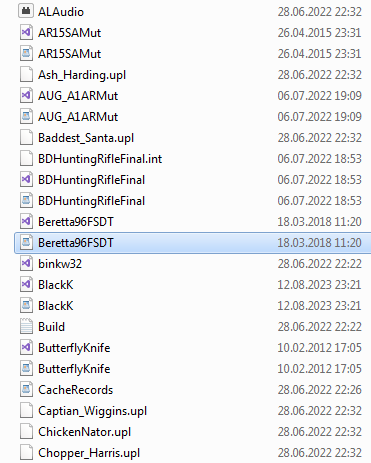
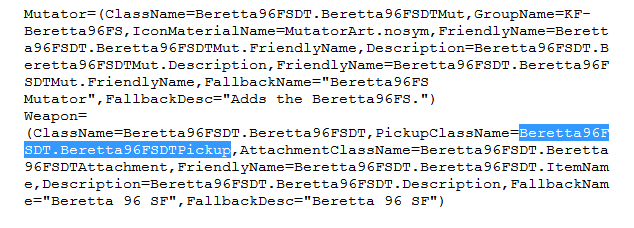
Next, I'll tell you how to add weapons to the trader through the mod.
Adding weapons to the trader shop (WeaponsWorkShop)
In order to add any weapon to the trader, in the usual Killing floor. Then you need to subscribe to the mod (Weapons WorkShop). This mod will automatically add weapons to the desired class.
https://steamcommunity.com/sharedfiles/filedetails/?id=147258902
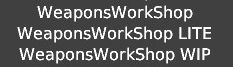 If there are any, then in the lower right corner you have a button "Configure modifications", the button will be active if you select one of the 3 lines, in our case we choose WeaponsWorkShop WIP. You should have exactly the same picture as in the screenshot.
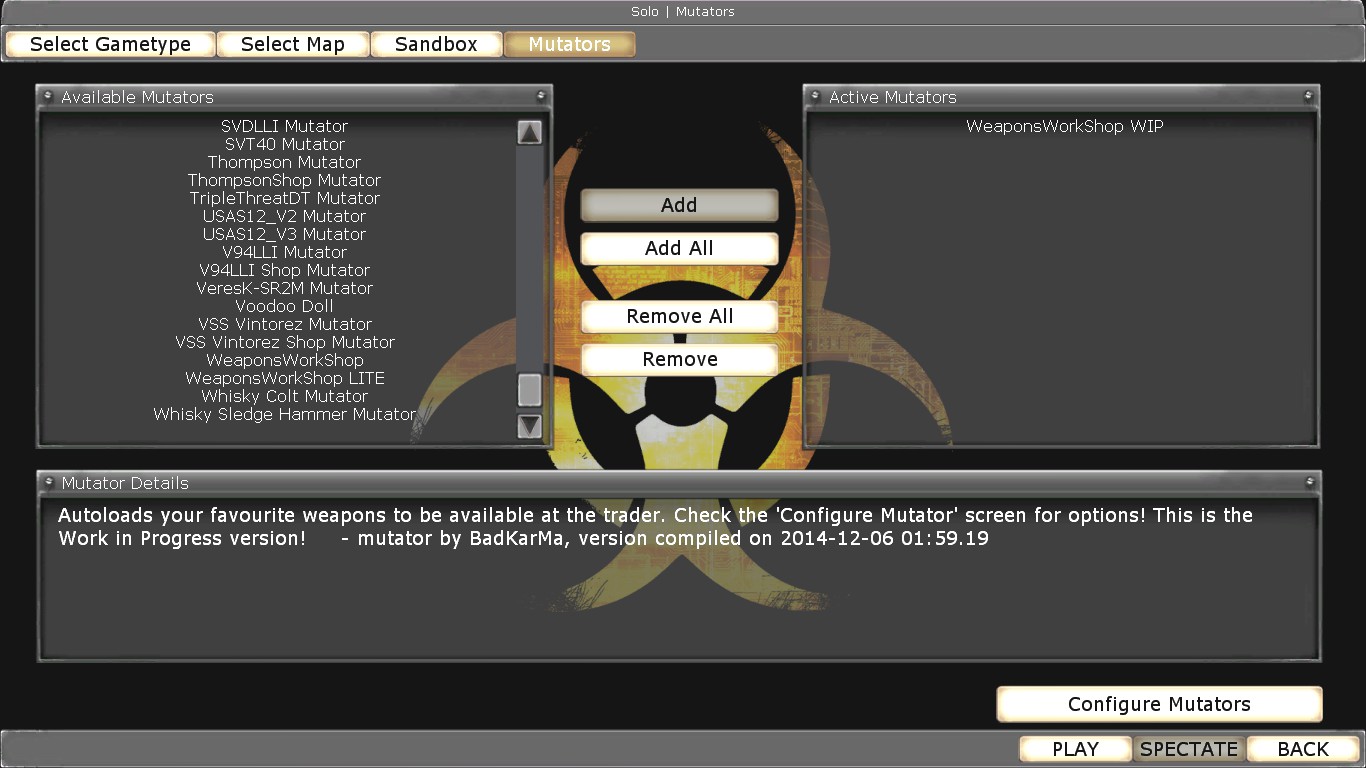 Click on the "Configure mutators" button.
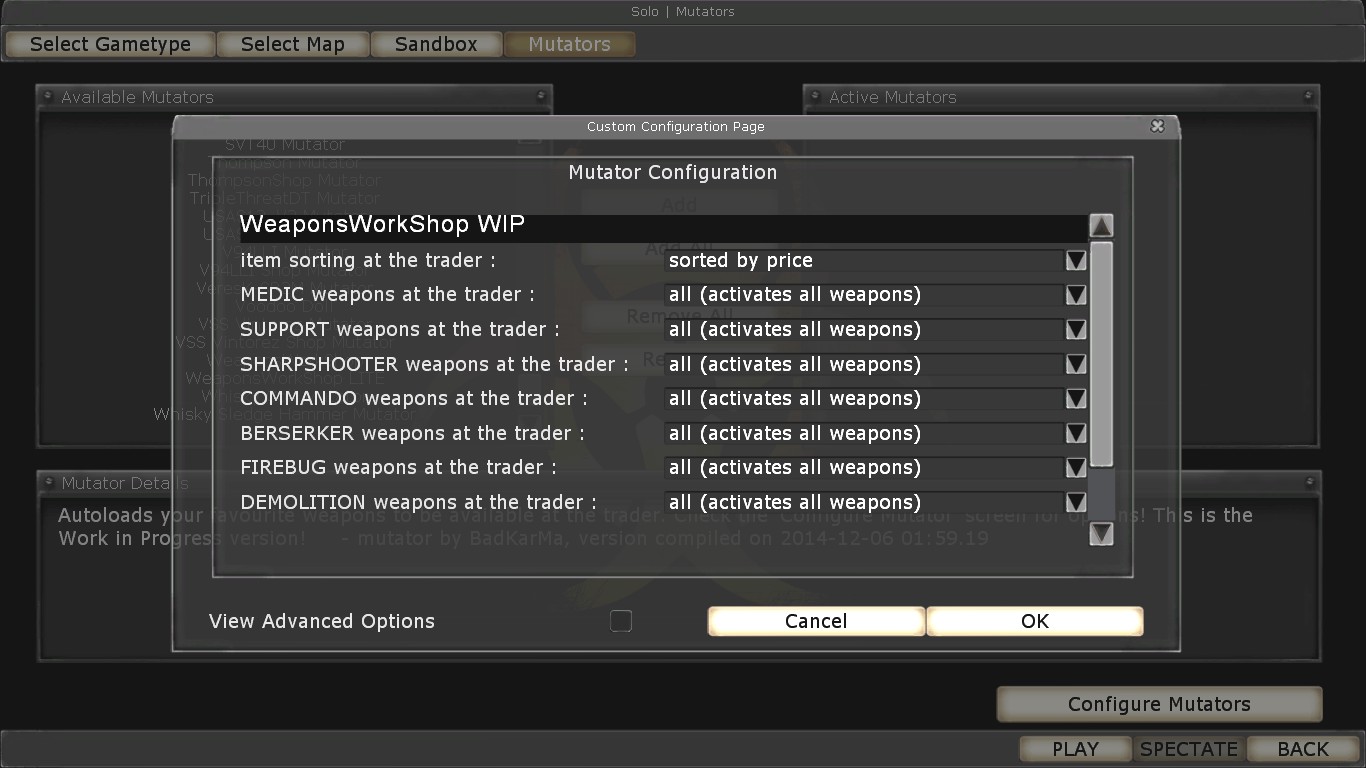 You can put a check mark on the line "View advanced options". More settings will be available to you. Now you can see the list of weapons.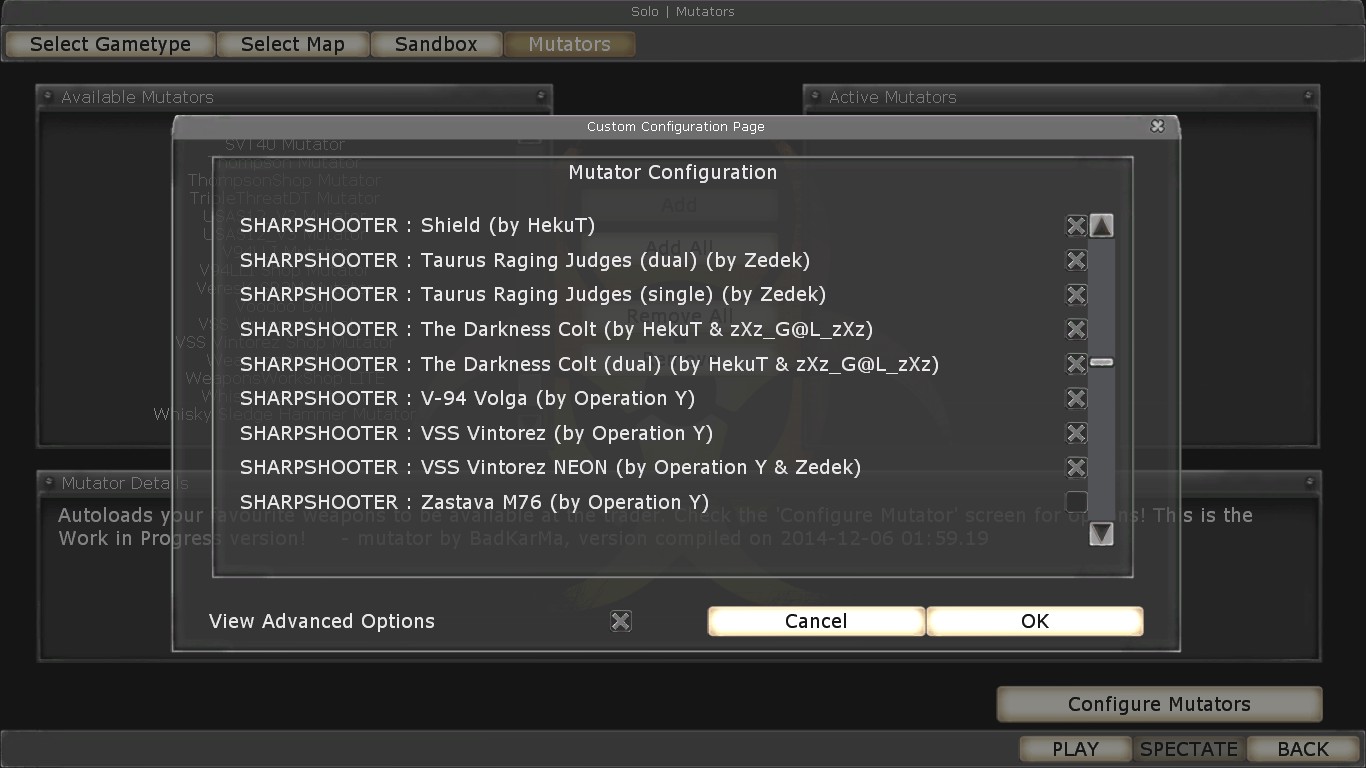
This list means that when installing/subscribing to a certain weapon that is in the list, it will appear in the trader shop. Let's say you downloaded or subscribed to a mod with a weapon called V-94, then you don't need to add anything to the "Active mutators" column in the mutators, just the same this mod will add V-94 to the trader shop, because V-94 is in the list (see the screenshot above).
To make it even clearer, I will give examples in the screenshots. As an example, I will take the installed mod for the V-94 weapon. That is, when they have already transferred the file to the game folder, or subscribed in the Steam workshop.
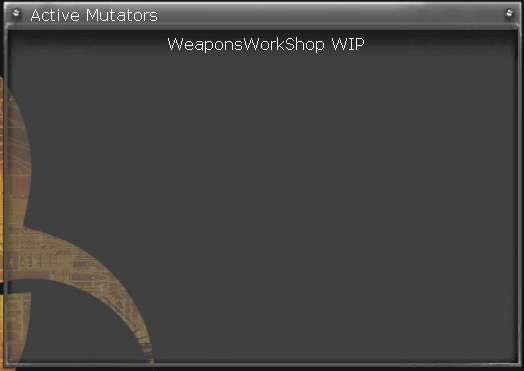
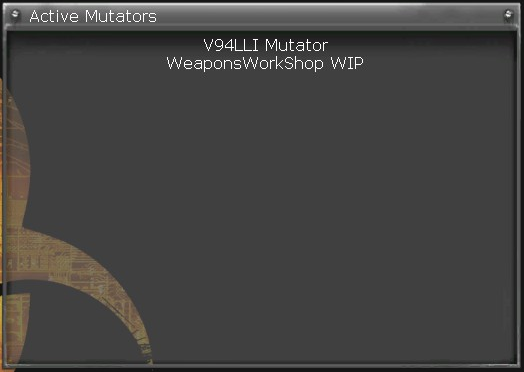
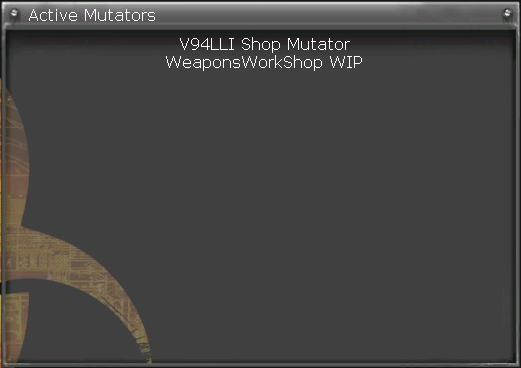
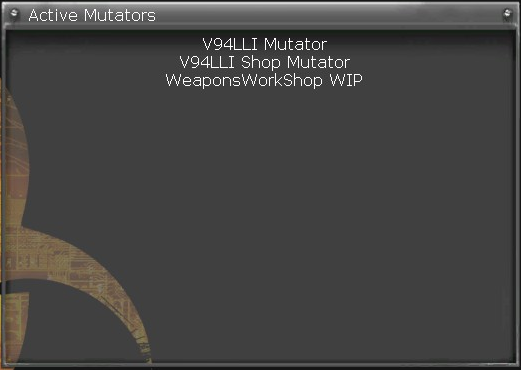
On every website or on every page of the steam workshop, with a mod for weapons, there should be a certain text written there, the text should end with the word Pickup.
For example, let's take a weapon that is not in the list and that does not have a mutator with the word Shop, let's take a VERESK SR2 M weapon. On the website from where I downloaded the mod, the description says: Code for ServerPerks: VereskSAMut.VereskSAPickup and from here the line VereskSAMut.VereskSAPickup will be useful to us. Copy it.
Go to the "Configure mutators" and scroll to the bottom. There will be a line "additional unsupported weapons:". We insert our text VereskSAMut.VereskSAPickup into an empty line and click OK.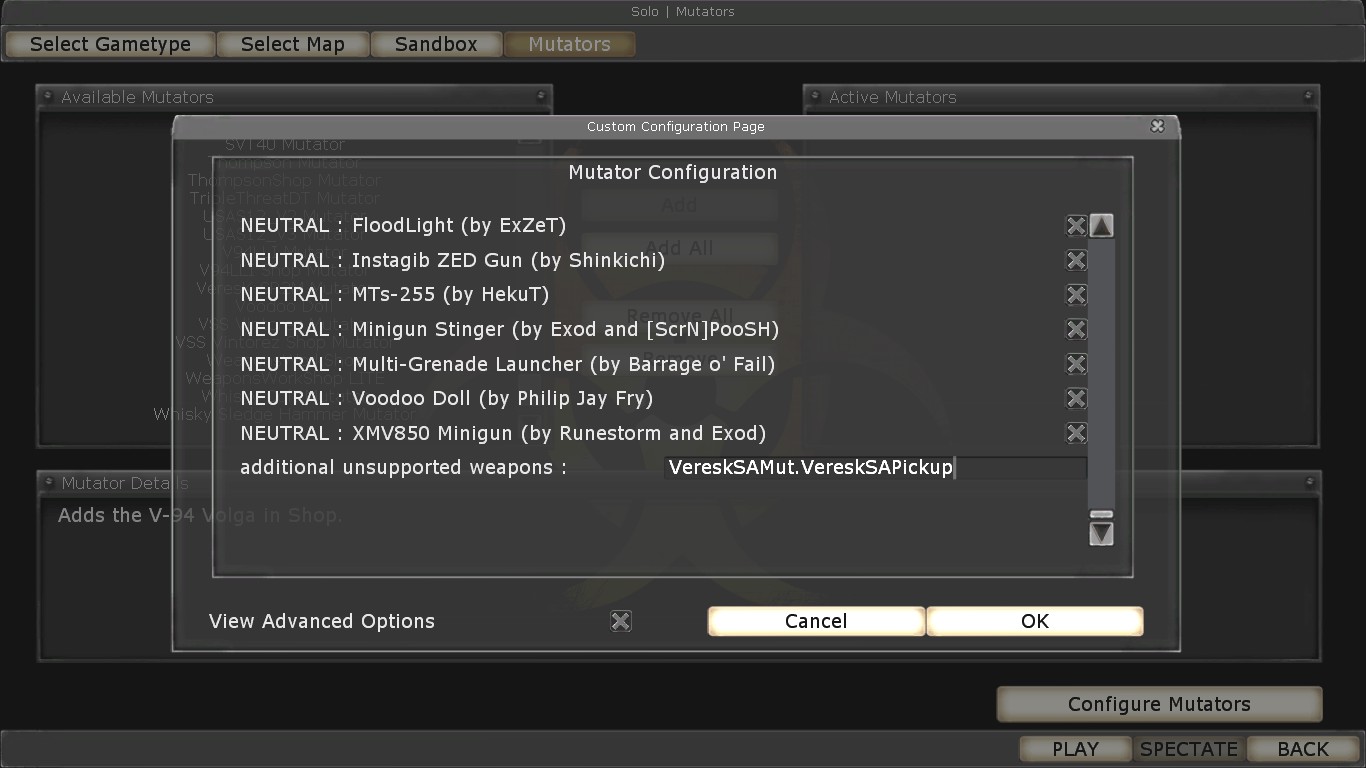
If you need to add several weapons, then just insert them into the line separated by commas without spaces. It should look something like this:
PP19VityazSAMut.PP19VityazSAPickup,VereskSAMut.VereskSAPickup
Maximum number of characters per line for weapons: about 1000.
Weapons from mods will be available for sale in the trader shop only with the mutator enabled: WeaponsWorkShop WIP
I like this mod because there is a very large list of weapons already added, and you can also add your own, which are not in the list. At the same time, this mod does not change the Killing floor in any way, it ONLY adds weapons to the trader shop.
Adding weapons to the trader shop (ServerPerks)
There is also a way to add weapons to the trader shop, it is to use ServerPerks.
On each page of the mod, or on each page of the Steam workshop, there is a comment such as: Code for ServerPerks: Beretta96FSDT.Beretta96FSDTPickup. This weapon is a pistol. The line for adding weapons to the merchant should ALWAYS contain the word Pickup at the end.
Copy the line Beretta96FSDT.Beretta96FSDTPickup
Go to the root folder of the game and open ServerPerks.ini
(D:\SteamLibrary\steamapps\common\KillingFloor\System\ServerPerks.ini)
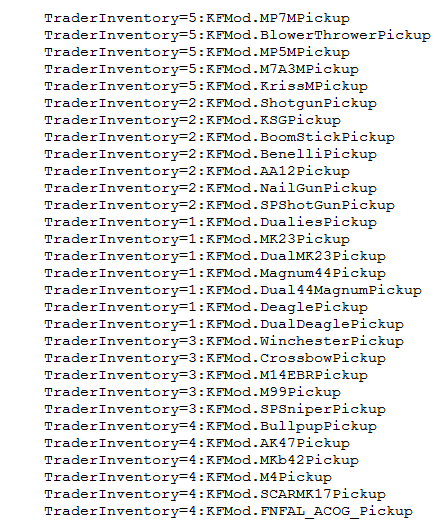 If you scroll down, you can see that there are explanations written there that are assigned to each digit. Don't believe these numbers! They are specified incorrectly!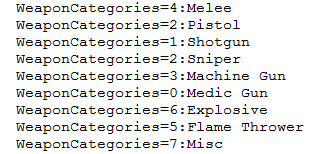
Do not change or edit these lines called WeaponCategories with numbers in any way, just use my list of weapon categories, my list is correct!
0 - Melee (melee weapon) - Katana, axe, etc.
1 - Pistol (pistol)
2 - Shotgun (shotgun)
3 - Sniper (sniper rifles) - Winchester, M99, M14...
4 - Machine Gun (machine guns, Thompson)
5 - Medic Gun (medic's weapon, light SMG)
6 - Explosive (Explosives, grenade launchers)
7 - Flame Thrower (flamethrower, any weapon with fire)
8 - Misc (miscellaneous)
These numbers will be useful to us to indicate the type of weapon when adding weapons to the trader shop.
To add a weapon to the trader's shop in the ServerPerks.ini file, add our line with the new weapon to the end of all TraderInventory lines.
The string will be composed as follows:
TraderInventory=[weapon category(digit)]:[copied line]
TraderInventory=1:Beretta96FSDT.Beretta96FSDTPickup
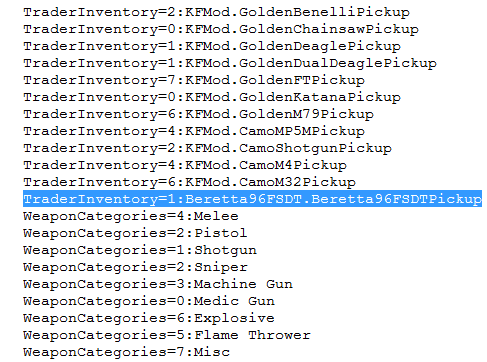 Now we go into the game and add only Server Veterancy Handler v7 to the mutators.
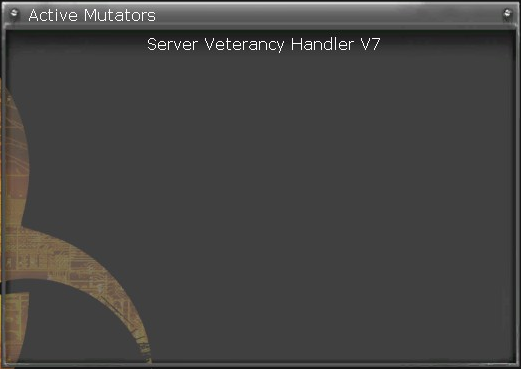 Then we start the game. We reach the trader and see that this weapon has been correctly added to the pistols.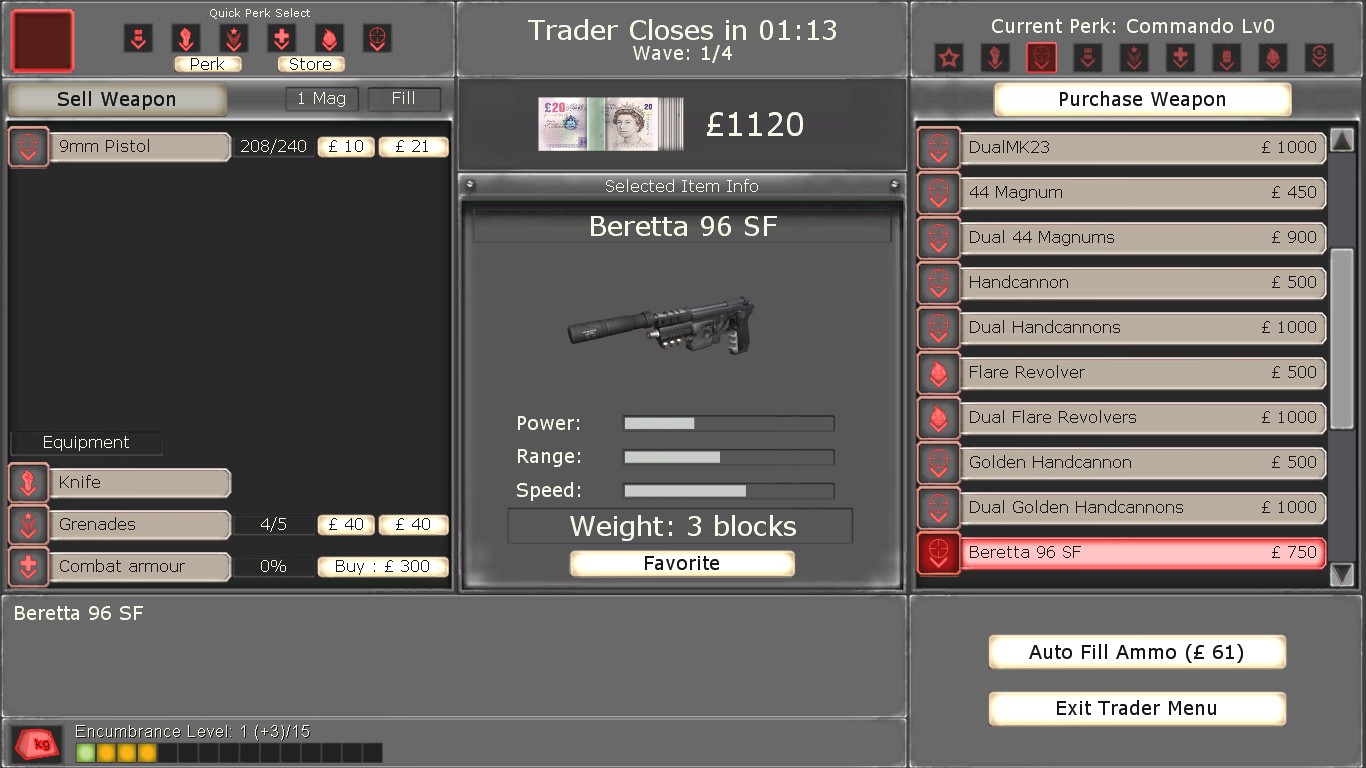
And if you want to add any weapon to the trader's shop. Then just follow my instructions.
Weapons from mods will be available for sale in the trader shop only with the mutator enabled: Server Veterancy Handler v7
Conclusion
In this guide, I have covered the topic of modifications in detail: how to download and install them correctly. Following my advice, you can easily enrich your gaming experience, making the game much more exciting. Mutators give the game a great variety and make the gameplay much more exciting.
If the guide turned out to be useful for you, I would be grateful for your assessment of the guide and for your feedback, you can leave it both directly in the guide and on my Steam page.
I really hope that this guide has benefited you and improved your experience in the game.
If you have any problems or have questions, you can write in the comments, I will definitely help you.
- How to fix technical problems, perk issues, achievement issues★ 5 (854)42k views1.1k ♥35 minUpdated Mar 24, 2020
- Получение достижений Killing Floor★ 5 (2.2k)20k views2.5k ♥62 minRussianUpdated May 11
- How To Be The Best Berserker Ever★ 5 (694)19k views727 ♥17 minUpdated Feb 2
- KNOWLEDGE IS POWER★ 5 (496)17k views563 ♥2 minBulgarianUpdated Dec 9, 2014
- Hell on Earth - Solo - All Maps★ 5 (1.3k)17k views1.6k ♥24 minUpdated Oct 5, 2025
- [Полное Руководство] Perks, Weapons & Anti-FP Tutorial★ 5 (1.2k)16k views1k ♥69 minRussianUpdated Jun 27, 2019




- Upgrading to PremiumTeam Fortress 2★ 5 (20k)1441k views11k ♥6 minUpdated May 11, 2022
- No More Room in Hell Official ManualNo More Room in Hell★ 5 (2.8k)569k views2.1k ♥29 minUpdated Apr 22, 2019
- NMRiH Community Hosting GuidesNo More Room in Hell★ 5 (526)351k views653 ♥1 minUpdated Aug 10, 2022
- Лучшие кооперативные игры SteamPAYDAY 2★ 5 (1.5k)315k views2.1k ♥56 minRussianUpdated Apr 27, 2025
- Desert Eagle Heat Treated | Blue GemCounter-Strike 2★ 5 (1.6k)292k views1.5k ♥2 minUpdated Jan 16
- Treasure Hunt Puzzle SolutionsTotal War: WARHAMMER II★ 5 (6.9k)281k views15k ♥3 minUpdated Aug 19, 2021






This guide was created by its original author on the Steam Community. Are you the author and want it removed? Request removal.