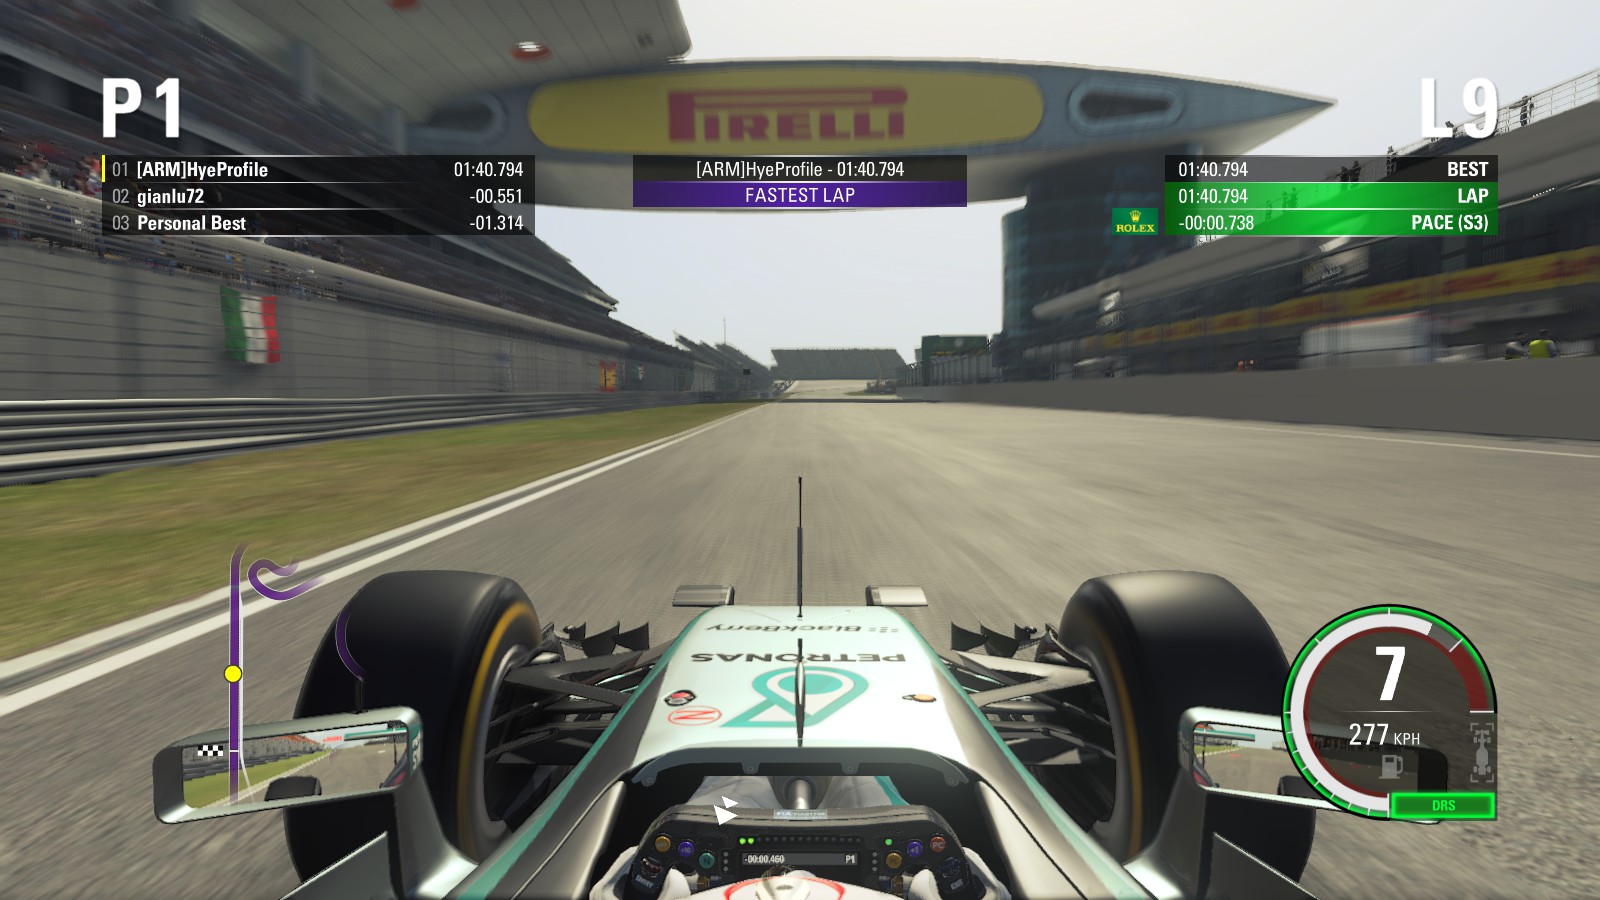
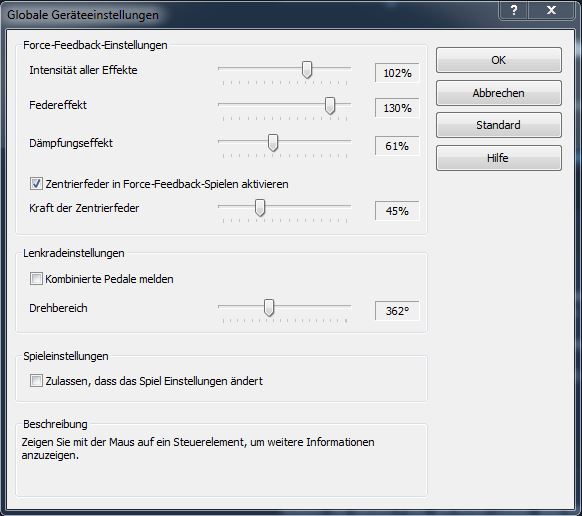
F1 2015 All Car Setups [DRY & WET]

F1 20154 · 66 ratings2.2k views123 favorites70 min readby [ARM]HyeProfileUpdated 2 Apr, 2020View on Steam ↗

Descriptions of Car Settings

Front Wing Aero
Increasing downforce will give the car better contact with the track surface, increasing grip and stability. The trade off for this is an increase in type temperatures and wear, as well as a reduction in top speed.

Rear Wing Aero
Increasing downforce will give the car better contact with the track surface, increasing grip and stability. The trade off for this is an increase in type temperatures and wear, as well as a reduction in top speed.

Differential Adjustment On Throttle
The differential is used to transmit power to the rear wheels, while allowing them to rotate at different speeds when cornering, due to the inside wheel travelling a shorter distance than the outer wheel. Adjusting the differential locking on throttle alters the difference between the two wheel speeds required to lock them at the same rotation rate. Increasing On Throttle locking will give a more lively rear end, suffering from increased oversteer. A more open differential will reduce oversteer, but will also reduce on throttle adjustability and, in some cases, corner exit traction.

Differential Adjustment Off Throttle
Increased Off Throttle locking can induce lift off oversteer and rear instability. However, setting the Off Throttle value too low will harm turn in, causing the car to push wide off throttle.

Front & Rear Camber
Camber angle defines how the wheel sits vertically. Negative camber is when the top of the wheel leans towards the body of the car. Adjusting camber angle will adjust the tyre contact with the track surface, this varies based on suspension travel. Adding negative camber can increase front end cornering grip, but can also contribute to increased tyre temperatures. In some cases an increase in tyre temperature may be the required outcome.

Front & Rear Toe
Toe defines whether the leading edge of the tyre points towards (toe in) or away (toe out) from the opposing tyre on the same axle. The front wheels on a F1 car tend to be set with toe in, with larger amounts providing a sharper turning response at the expense of front stability. Rear wheels on Formula One cars usually toe out, increasing stability, but reducing responsiveness.

[[b]Front & Rear Suspension[/b]
By increasing or decreasing the stiffness of the suspension the balance and grip characteristics of the car can be adjusted. A softer set-up will help generate more mechanical grip at lower speeds, but will sacrifice precision during high speed changes of direction. A stiffer set-up can be beneficial at high speeds, but can make the car slide around and be unpredictable at low speeds, impacting on corner exit traction.

Front & Rear Anti-Roll Bar
Anti-roll bars are used to control body roll and adjust chassis balance. Increased roll stiffness can decrease mechanical grip. Decreased roll stiffness can increase mechanical grip but harm high speed direction changes.

Front & Rear Tyre Pressure
In F1 cars part of the Tyre pressures can be used to adjust chassis balance in the same way as suspension and anti-roll bar stiffness. They can also be used to affect how tyre temperatures behave. Adjust pressure based on track and ambient temperatures. More Pressure in cooler conditions will allow the tyres to heat up quicker.

Weight Distribution Ballast
Adjust chassis balance by moving the position of a small amount of ballast. Moving it forward will promote understeer, rearward will oversteer.

Fuel Load
This section description is coming soon.

Australia (Albert Park, Melbourne) - Dry

Nominal values are best initial setups which provide good stability vs. speed. Values in parentheses () are values that the fastest users have used, so try to build up to those values as you get better and if car stability and tyre temperatures are not an issue.

Car Settings
Mercedes
Ferrari
Williams
Red Bull
Force India
Lotus
Renault
Sauber
McLaren-Honda
Marussia
Range of Values
Front Wing Aero
1 (3)
1 (3)
3 (7)
3
3
3
3
3
3
3
1 to 11
Rear Wing Aero
1
1
1 (7)
1
1
1
1
1
1
1
1 to 11
Differential Adjustment On Throttle
65% (75%)
65% (75%)
65% (75%)
65%
65%
65%
65%
65%
65%
65%
50% to 100%
Differential Adjustment Off Throttle
65% (80%)
65% (75%)
65% (75%)
65%
65%
65%
65%
65%
65%
65%
50% to 100%
Front Camber
-3.40 (-3.50)
-3.40 (-3.50)
-3.00
-3.40
-3.40
-3.40
-3.40
-3.40
-3.40
-3.40
-3.50 to -2.50°
Rear Camber
-1.90 (-2.00)
-2.00
-1.60
-1.90
-1.90
-1.90
-1.90
-1.90
-1.90
-1.90
-2.00 to -1.00°
Front Toe
0.13
0.13
0.10
0.13
0.13
0.13
0.13
0.13
0.13
0.13
0.05 to 0.15°
Rear Toe
0.13
0.13
0.34
0.13
0.13
0.13
0.13
0.13
0.13
0.13
0.20 to 0.50°
Front Suspension
6 (11)
()
()
()
()
()
()
()
()
()
Soft 1 to 11 Firm
Rear Suspension
7 (1)
()
()
()
()
()
()
()
()
()
Soft 1 to 11 Firm
Front Anti-Roll Bar
5 (11)
()
()
()
()
()
()
()
()
()
Soft 1 to 11 Firm
Rear Anti-Roll Bar
5 (11)
()
()
()
()
()
()
()
()
()
Soft 1 to 11 Firm
Front Tire Pressure
18.2 (17.8)
()
()
()
()
()
()
()
()
()
17.0 to 19.0psi
Rear Tire Pressure
18.2 (17.8)
()
()
()
()
()
()
()
()
()
17.0 to 19.0psi
Ballast
8 (7)
()
()
()
()
()
()
()
()
()
Forward 1 to 11 Backward
Fuel Load
()
()
()
()
()
()
()
()
()
()
5 to 100Kg (locked to 10Kg for 5 laps in Quick Race mode
Best Times
1:25.742 to 1:27.000

YouTube videos
1:25.742 https://youtu.be/3Cof-1lbyj8

Australia (Albert Park, Melbourne) - Wet

Nominal values are best initial setups which provide good stability vs. speed. Values in parentheses () are values that the fastest users have used, so try to build up to those values as you get better and if car stability and tyre temperatures are not an issue.

Car Settings
Mercedes
Ferrari
Williams
Red Bull
Force India
Lotus
Renault
Sauber
McLaren-Honda
Marussia
Range of Values
Front Wing Aero
7 ()
7 ()
7 ()
7 ()
7 ()
7 ()
7 ()
7 ()
7 ()
7 ()
1 to 11
Rear Wing Aero
6 (3)
6 (3)
6 (3)
6 (3)
6 (3)
6 (3)
6 (3)
6 (3)
6 (3)
6 (3)
1 to 11
Differential Adjustment On Throttle
75% (70%)
75% (70%)
75% (70%)
75% (70%)
75% (70%)
75% (70%)
75% (70%)
75% (70%)
75% (70%)
75% (70%)
50% to 100%
Differential Adjustment Off Throttle
80% (65%)
80% (65%)
80% (65%)
80% (65%)
80% (65%)
80% (65%)
80% (65%)
80% (65%)
80% (65%)
80% (65%)
50% to 100%
Front Camber
-3.40 (-3.50)
-3.40 (-3.50)
-3.30 (-3.50)
-3.40 (-3.50)
-3.40 (-3.50)
-3.40 (-3.50)
-3.40 (-3.50)
-3.40 (-3.50)
-3.40 (-3.50)
-3.40 (-3.50)
-3.50 to -2.50°
Rear Camber
-1.90 (-2.00)
-1.90 (-2.00)
-1.90 (-2.00)
-1.90 (-2.00)
-1.90 (-2.00)
-1.90 (-2.00)
-1.90 (-2.00)
-1.90 (-2.00)
-1.90 (-2.00)
-1.90 (-2.00)
-2.00 to -1.00°
Front Toe
0.15
0.15
0.13
0.15
0.15
0.15
0.15
0.15
0.15
0.15
0.05 to 0.15°
Rear Toe
0.50
0.50
0.50
0.50
0.50
0.50
0.50
0.50
0.50
0.50
0.20 to 0.50°
Front Suspension
2 (3)
2 (3)
2 (3)
2 (3)
2 (3)
2 (3)
2 (3)
2 (3)
2 (3)
2 (3)
Soft 1 to 11 Firm
Rear Suspension
2 (3)
2 (3)
2 (3)
2 (3)
2 (3)
2 (3)
2 (3)
2 (3)
2 (3)
2 (3)
Soft 1 to 11 Firm
Front Anti-Roll Bar
9 (7)
9 (7)
9 (7)
9 (7)
9 (7)
9 (7)
9 (7)
9 (7)
9 (7)
9 (7)
Soft 1 to 11 Firm
Rear Anti-Roll Bar
10 (7)
10 (7)
10 (7)
10 (7)
10 (7)
10 (7)
10 (7)
10 (7)
10 (7)
10 (7)
Soft 1 to 11 Firm
Front Tire Pressure
18.4 (17.8)
18.4 (17.6)
18.4 (17.6)
18.4 (17.6)
18.4 (17.6)
18.4 (17.6)
18.4 (17.6)
18.4 (17.6)
18.4 (17.6)
18.4 (17.6)
17.0 to 19.0psi
Rear Tire Pressure
18.4 (17.6)
18.4 (17.6)
18.4 (17.6)
18.4 (17.6)
18.4 (17.6)
18.4 (17.6)
18.4 (17.6)
18.4 (17.6)
18.4 (17.6)
18.4 (17.6)
17.0 to 19.0psi
Ballast
6 (7)
6 (7)
6 (7)
6 (7)
6 (7)
6 (7)
6 (7)
6 (7)
6 (7)
6 (7)
Forward 1 to 11 Backward
Fuel Load
()
()
()
()
()
()
()
()
()
()
5 to 100Kg (locked to 10Kg for 5 laps in Quick Race mode
Best Times
1:35.521 to 1:37.497

YouTube videos
1:35.521 https://youtu.be/a-NUg1BZlrE
1:36.060 https://youtu.be/qP93FPgjeJE

Malaysia (Sepang International Circuit) - Dry

Nominal values are best initial setups which provide good stability vs. speed. Values in parentheses () are values that the fastest users have used, so try to build up to those values as you get better and if car stability and tyre temperatures are not an issue.

Car Settings
Mercedes
Ferrari
Williams
Red Bull
Force India
Lotus
Renault
Sauber
McLaren-Honda
Marussia
Range of Values
Front Wing Aero
9 (3) higher values help thru turns 5 & 6, 7&8, & 14.
8(3, or 5)
8 ()
()
()
7 ()
()
2 (2)
()
()
1 to 11
Rear Wing Aero
7 (3) higher values help thru turns 5 & 6, 7&8, & 14.
6 (2, or 4)
9 ()
()
()
6 ()
()
3 (1)
()
()
1 to 11
Differential Adjustment On Throttle
55% (75%)
55% (78%, even 84%)
75% (80%)
()
()
75% ()
()
75% (75%)
()
()
50% to 100%
Differential Adjustment Off Throttle
65% (74%)
55% (78%,even 81%)
75% (80%)
()
()
75% ()
()
75% (80%)
()
()
50% to 100%
Front Camber
-3.10 (-3.50)
-2.80 (-2.90)
-2.80 ()
()
()
-3.00 ()
()
-3.50 (-3.40)
()
()
-3.50 to -2.50°
Rear Camber
-1.60 (-1.50)
-1.10 (-2.00)
-1.30 ()
()
()
-1.50 ()
()
-2.00 (-1.90)
()
()
-2.00 to -1.00°
Front Toe
0.13 (0.15)
0.09 (0.15, even 0.07)
0.09 ()
()
()
0.10 ()
()
0.15 (0.14)
()
()
0.05 to 0.15°
Rear Toe
0.35 (0.50)
0.29 (0.50, even 0.44)
0.38 ()
()
()
0.35 ()
()
0.50 (0.32)
()
()
0.20 to 0.50°
Front Suspension
3 (2)
6 (9)
5 ()
()
()
6 ()
()
2 (5)
()
()
Soft 1 to 11 Firm
Rear Suspension
4 (2)
5 (2, even 7)
5 ()
()
()
6 ()
()
2 (5)
()
()
Soft 1 to 11 Firm
Front Anti-Roll Bar
3 (8)
4 (8)
7 ()
()
()
6 ()
()
10 (7)
()
()
Soft 1 to 11 Firm
Rear Anti-Roll Bar
4 (8)
6 (8)
7 ()
()
()
6 ()
()
10 (7)
()
()
Soft 1 to 11 Firm
Front Tire Pressure
17.6 (18.0)
17.8 (18.0)
17.8 ()
()
()
18.0 ()
()
18.0 (18.0)
()
()
17.0 to 19.0psi
Rear Tire Pressure
17.4 (17.6, have seen 18.2)
17.6 (18.0)
17.8 (17.6)
()
()
18.0 ()
()
18.0 (18.0)
()
()
17.0 to 19.0psi
Ballast
5 (6)
6 (7, even 5)
5 ()
()
()
6 ()
()
5 (6)
()
()
Forward 1 to 11 Backward
Fuel Load
66Kg ()
()
()
()
()
()
()
()
()
()
5 to 100Kg (locked to 10Kg for 5 laps in Quick Race mode
Best Times
1:37.330 to 1:38.444
1:38.470 to 1:38.750
1:43.551
1:44.743
1:40.260 to 1:43.460

YouTube videos

Malaysia (Sepang International Circuit) - Wet

Nominal values are best initial setups which provide good stability vs. speed. Values in parentheses () are values that the fastest users have used, so try to build up to those values as you get better and if car stability and tyre temperatures are not an issue.

Car Settings
Mercedes
Ferrari
Williams
Red Bull
Force India
Lotus
Renault
Sauber
McLaren-Honda
Marussia
Range of Values
Front Wing Aero
()
()
()
()
()
()
()
()
()
()
1 to 11
Rear Wing Aero
()
()
()
()
()
()
()
()
()
()
1 to 11
Differential Adjustment On Throttle
()
()
()
()
()
()
()
()
()
()
50% to 100%
Differential Adjustment Off Throttle
()
()
()
()
()
()
()
()
()
()
50% to 100%
Front Camber
()
()
()
()
()
()
()
()
()
()
-3.50 to -2.50°
Rear Camber
()
()
()
()
()
()
()
()
()
()
-2.00 to -1.00°
Front Toe
()
()
()
()
()
()
()
()
()
()
0.05 to 0.15°
Rear Toe
()
()
()
()
()
()
()
()
()
()
0.20 to 0.50°
Front Suspension
()
()
()
()
()
()
()
()
()
()
Soft 1 to 11 Firm
Rear Suspension
()
()
()
()
()
()
()
()
()
()
Soft 1 to 11 Firm
Front Anti-Roll Bar
()
()
()
()
()
()
()
()
()
()
Soft 1 to 11 Firm
Rear Anti-Roll Bar
()
()
()
()
()
()
()
()
()
()
Soft 1 to 11 Firm
Front Tire Pressure
()
()
()
()
()
()
()
()
()
()
17.0 to 19.0psi
Rear Tire Pressure
()
()
()
()
()
()
()
()
()
()
17.0 to 19.0psi
Ballast
()
()
()
()
()
()
()
()
()
()
Forward 1 to 11 Backward
Fuel Load
()
()
()
()
()
()
()
()
()
()
5 to 100Kg (locked to 10Kg for 5 laps in Quick Race mode
Best Times

YouTube videos

China (Shanghai International Circuit) - Dry
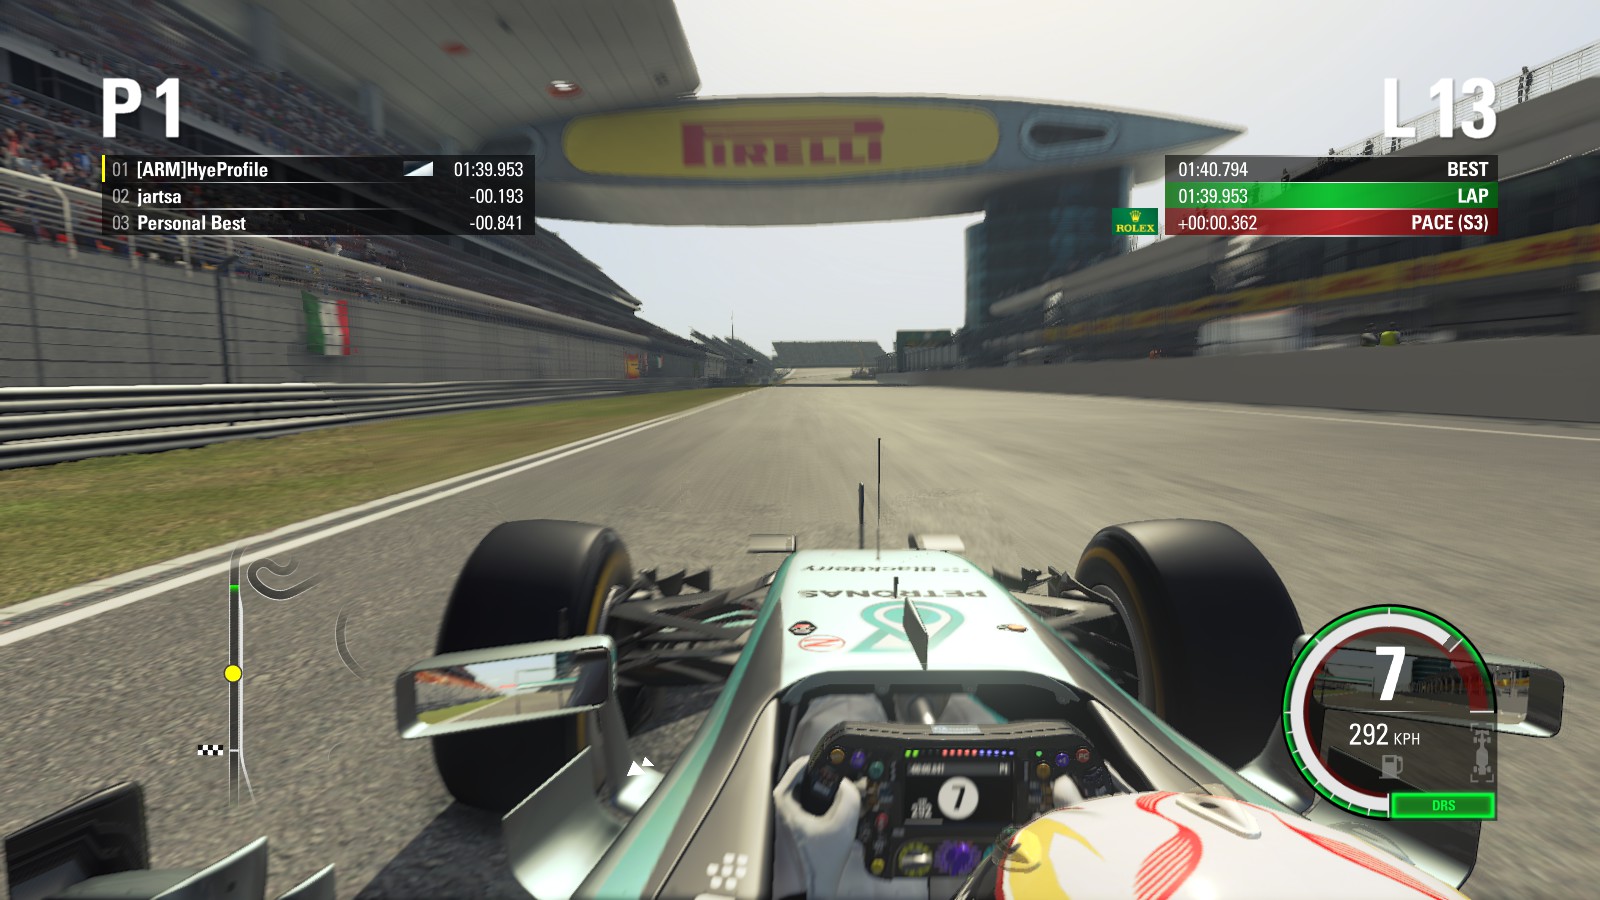
Nominal values are best initial setups which provide good stability vs. speed. Values in parentheses () are values that the fastest users have used, so try to build up to those values as you get better and if car stability and tyre temperatures are not an issue.

Car Settings
Mercedes
Ferrari
Williams
Red Bull
Force India
Lotus
Renault
Sauber
McLaren-Honda
Marussia
Range of Values
Front Wing Aero
4 ()
()
()
()
()
()
()
()
()
()
1 to 11
Rear Wing Aero
5 ()
()
()
()
()
()
()
()
()
()
1 to 11
Differential Adjustment On Throttle
55 ()
()
()
()
()
()
()
()
()
()
50% to 100%
Differential Adjustment Off Throttle
65 ()
()
()
()
()
()
()
()
()
()
50% to 100%
Front Camber
-3.20 ()
()
()
()
()
()
()
()
()
()
-3.50 to -2.50°
Rear Camber
-1.70 ()
()
()
()
()
()
()
()
()
()
-2.00 to -1.00°
Front Toe
0.13 ()
()
()
()
()
()
()
()
()
()
0.05 to 0.15°
Rear Toe
0.35 ()
()
()
()
()
()
()
()
()
()
0.20 to 0.50°
Front Suspension
3 ()
()
()
()
()
()
()
()
()
()
Soft 1 to 11 Firm
Rear Suspension
4 ()
()
()
()
()
()
()
()
()
()
Soft 1 to 11 Firm
Front Anti-Roll Bar
3 ()
()
()
()
()
()
()
()
()
()
Soft 1 to 11 Firm
Rear Anti-Roll Bar
4 ()
()
()
()
()
()
()
()
()
()
Soft 1 to 11 Firm
Front Tire Pressure
17.6 ()
()
()
()
()
()
()
()
()
()
17.0 to 19.0psi
Rear Tire Pressure
17.4 ()
()
()
()
()
()
()
()
()
()
17.0 to 19.0psi
Ballast
5 ()
()
()
()
()
()
()
()
()
()
Forward 1 to 11 Backward
Fuel Load
()
()
()
()
()
()
()
()
()
()
5 to 100Kg (locked to 10Kg for 5 laps in Quick Race mode
Best Times
1:38.100 to 1:40.900

YouTube videos

Screenshots

China (Shanghai International Circuit) - Wet

Nominal values are best initial setups which provide good stability vs. speed. Values in parentheses () are values that the fastest users have used, so try to build up to those values as you get better and if car stability and tyre temperatures are not an issue.

Car Settings
Mercedes
Ferrari
Williams
Red Bull
Force India
Lotus
Renault
Sauber
McLaren-Honda
Marussia
Range of Values
Front Wing Aero
()
()
()
()
()
()
()
()
()
()
1 to 11
Rear Wing Aero
()
()
()
()
()
()
()
()
()
()
1 to 11
Differential Adjustment On Throttle
()
()
()
()
()
()
()
()
()
()
50% to 100%
Differential Adjustment Off Throttle
()
()
()
()
()
()
()
()
()
()
50% to 100%
Front Camber
()
()
()
()
()
()
()
()
()
()
-3.50 to -2.50°
Rear Camber
()
()
()
()
()
()
()
()
()
()
-2.00 to -1.00°
Front Toe
()
()
()
()
()
()
()
()
()
()
0.05 to 0.15°
Rear Toe
()
()
()
()
()
()
()
()
()
()
0.20 to 0.50°
Front Suspension
()
()
()
()
()
()
()
()
()
()
Soft 1 to 11 Firm
Rear Suspension
()
()
()
()
()
()
()
()
()
()
Soft 1 to 11 Firm
Front Anti-Roll Bar
()
()
()
()
()
()
()
()
()
()
Soft 1 to 11 Firm
Rear Anti-Roll Bar
()
()
()
()
()
()
()
()
()
()
Soft 1 to 11 Firm
Front Tire Pressure
()
()
()
()
()
()
()
()
()
()
17.0 to 19.0psi
Rear Tire Pressure
()
()
()
()
()
()
()
()
()
()
17.0 to 19.0psi
Ballast
()
()
()
()
()
()
()
()
()
()
Forward 1 to 11 Backward
Fuel Load
()
()
()
()
()
()
()
()
()
()
5 to 100Kg (locked to 10Kg for 5 laps in Quick Race mode
Best Times

YouTube videos

Bahrain (Bahrain International Circuit) - Dry

Nominal values are best initial setups which provide good stability vs. speed. Values in parentheses () are values that the fastest users have used, so try to build up to those values as you get better and if car stability and tyre temperatures are not an issue.

Car Settings
Mercedes
Ferrari
Williams
Red Bull
Force India
Lotus
Renault
Sauber
McLaren-Honda
Marussia
Range of Values
Front Wing Aero
3 ()
()
()
()
()
()
()
()
()
()
1 to 11
Rear Wing Aero
1 ()
()
()
()
()
()
()
()
()
()
1 to 11
Differential Adjustment On Throttle
75 ()
()
()
()
()
()
()
()
()
()
50% to 100%
Differential Adjustment Off Throttle
75 ()
()
()
()
()
()
()
()
()
()
50% to 100%
Front Camber
-3.20 ()
()
()
()
()
()
()
()
()
()
-3.50 to -2.50°
Rear Camber
-1.70 ()
()
()
()
()
()
()
()
()
()
-2.00 to -1.00°
Front Toe
0.12 ()
()
()
()
()
()
()
()
()
()
0.05 to 0.15°
Rear Toe
0.29 ()
()
()
()
()
()
()
()
()
()
0.20 to 0.50°
Front Suspension
7 ()
()
()
()
()
()
()
()
()
()
Soft 1 to 11 Firm
Rear Suspension
5 ()
()
()
()
()
()
()
()
()
()
Soft 1 to 11 Firm
Front Anti-Roll Bar
4 ()
()
()
()
()
()
()
()
()
()
Soft 1 to 11 Firm
Rear Anti-Roll Bar
7 ()
()
()
()
()
()
()
()
()
()
Soft 1 to 11 Firm
Front Tire Pressure
18.2 ()
()
()
()
()
()
()
()
()
()
17.0 to 19.0psi
Rear Tire Pressure
18.2 ()
()
()
()
()
()
()
()
()
()
17.0 to 19.0psi
Ballast
7 ()
()
()
()
()
()
()
()
()
()
Forward 1 to 11 Backward
Fuel Load
()
()
()
()
()
()
()
()
()
()
5 to 100Kg (locked to 10Kg for 5 laps in Quick Race mode
Best Times

YouTube videos

Bahrain (Bahrain International Circuit) - Wet

Nominal values are best initial setups which provide good stability vs. speed. Values in parentheses () are values that the fastest users have used, so try to build up to those values as you get better and if car stability and tyre temperatures are not an issue.

Car Settings
Mercedes
Ferrari
Williams
Red Bull
Force India
Lotus
Renault
Sauber
McLaren-Honda
Marussia
Range of Values
Front Wing Aero
()
()
()
()
()
()
()
()
()
()
1 to 11
Rear Wing Aero
()
()
()
()
()
()
()
()
()
()
1 to 11
Differential Adjustment On Throttle
()
()
()
()
()
()
()
()
()
()
50% to 100%
Differential Adjustment Off Throttle
()
()
()
()
()
()
()
()
()
()
50% to 100%
Front Camber
()
()
()
()
()
()
()
()
()
()
-3.50 to -2.50°
Rear Camber
()
()
()
()
()
()
()
()
()
()
-2.00 to -1.00°
Front Toe
()
()
()
()
()
()
()
()
()
()
0.05 to 0.15°
Rear Toe
()
()
()
()
()
()
()
()
()
()
0.20 to 0.50°
Front Suspension
()
()
()
()
()
()
()
()
()
()
Soft 1 to 11 Firm
Rear Suspension
()
()
()
()
()
()
()
()
()
()
Soft 1 to 11 Firm
Front Anti-Roll Bar
()
()
()
()
()
()
()
()
()
()
Soft 1 to 11 Firm
Rear Anti-Roll Bar
()
()
()
()
()
()
()
()
()
()
Soft 1 to 11 Firm
Front Tire Pressure
()
()
()
()
()
()
()
()
()
()
17.0 to 19.0psi
Rear Tire Pressure
()
()
()
()
()
()
()
()
()
()
17.0 to 19.0psi
Ballast
()
()
()
()
()
()
()
()
()
()
Forward 1 to 11 Backward
Fuel Load
()
()
()
()
()
()
()
()
()
()
5 to 100Kg (locked to 10Kg for 5 laps in Quick Race mode
Best Times

YouTube videos

Spain (Circuit de Catalunya, Barcelona) - Dry

Nominal values are best initial setups which provide good stability vs. speed. Values in parentheses () are values that the fastest users have used, so try to build up to those values as you get better and if car stability and tyre temperatures are not an issue.

Car Settings
Mercedes
Ferrari
Williams
Red Bull
Force India
Lotus
Renault
Sauber
McLaren-Honda
Marussia
Range of Values
Front Wing Aero
6 ()
()
()
()
()
()
()
()
()
()
1 to 11
Rear Wing Aero
3 ()
()
()
()
()
()
()
()
()
()
1 to 11
Differential Adjustment On Throttle
65 ()
()
()
()
()
()
()
()
()
()
50% to 100%
Differential Adjustment Off Throttle
65 ()
()
()
()
()
()
()
()
()
()
50% to 100%
Front Camber
-3.40 ()
()
()
()
()
()
()
()
()
()
-3.50 to -2.50°
Rear Camber
-1.90 ()
()
()
()
()
()
()
()
()
()
-2.00 to -1.00°
Front Toe
0.12 ()
()
()
()
()
()
()
()
()
()
0.05 to 0.15°
Rear Toe
0.31 ()
()
()
()
()
()
()
()
()
()
0.20 to 0.50°
Front Suspension
9 ()
()
()
()
()
()
()
()
()
()
Soft 1 to 11 Firm
Rear Suspension
8 ()
()
()
()
()
()
()
()
()
()
Soft 1 to 11 Firm
Front Anti-Roll Bar
3 ()
()
()
()
()
()
()
()
()
()
Soft 1 to 11 Firm
Rear Anti-Roll Bar
4 ()
()
()
()
()
()
()
()
()
()
Soft 1 to 11 Firm
Front Tire Pressure
18.0 ()
()
()
()
()
()
()
()
()
()
17.0 to 19.0psi
Rear Tire Pressure
18.0 ()
()
()
()
()
()
()
()
()
()
17.0 to 19.0psi
Ballast
8 ()
()
()
()
()
()
()
()
()
()
Forward 1 to 11 Backward
Fuel Load
()
()
()
()
()
()
()
()
()
()
5 to 100Kg (locked to 10Kg for 5 laps in Quick Race mode
Best Times

YouTube videos

Spain (Circuit de Catalunya, Barcelona) - Wet

Nominal values are best initial setups which provide good stability vs. speed. Values in parentheses () are values that the fastest users have used, so try to build up to those values as you get better and if car stability and tyre temperatures are not an issue.

Car Settings
Mercedes
Ferrari
Williams
Red Bull
Force India
Lotus
Renault
Sauber
McLaren-Honda
Marussia
Range of Values
Front Wing Aero
11 ()
()
()
()
()
()
()
()
()
()
1 to 11
Rear Wing Aero
11 ()
()
()
()
()
()
()
()
()
()
1 to 11
Differential Adjustment On Throttle
()
()
()
()
()
()
()
()
()
()
50% to 100%
Differential Adjustment Off Throttle
()
()
()
()
()
()
()
()
()
()
50% to 100%
Front Camber
-3.40 ()
()
()
()
()
()
()
()
()
()
-3.50 to -2.50°
Rear Camber
-1.30 ()
()
()
()
()
()
()
()
()
()
-2.00 to -1.00°
Front Toe
0.14 ()
()
()
()
()
()
()
()
()
()
0.05 to 0.15°
Rear Toe
0.47 ()
()
()
()
()
()
()
()
()
()
0.20 to 0.50°
Front Suspension
[11i]()[/i]
()
()
()
()
()
()
()
()
()
Soft 1 to 11 Firm
Rear Suspension
11 ()
()
()
()
()
()
()
()
()
()
Soft 1 to 11 Firm
Front Anti-Roll Bar
1 ()
()
()
()
()
()
()
()
()
()
Soft 1 to 11 Firm
Rear Anti-Roll Bar
1 ()
()
()
()
()
()
()
()
()
()
Soft 1 to 11 Firm
Front Tire Pressure
()
()
()
()
()
()
()
()
()
()
17.0 to 19.0psi
Rear Tire Pressure
()
()
()
()
()
()
()
()
()
()
17.0 to 19.0psi
Ballast
()
()
()
()
()
()
()
()
()
()
Forward 1 to 11 Backward
Fuel Load
()
()
()
()
()
()
()
()
()
()
5 to 100Kg (locked to 10Kg for 5 laps in Quick Race mode
Best Times

YouTube videos

Monaco (Circuit de Monaco) - Dry

Nominal values are best initial setups which provide good stability vs. speed. Values in parentheses () are values that the fastest users have used, so try to build up to those values as you get better and if car stability and tyre temperatures are not an issue.

Car Settings
Mercedes
Ferrari
Williams
Red Bull
Force India
Lotus
Renault
Sauber
McLaren-Honda
Marussia
Range of Values
Front Wing Aero
7 ()
()
()
()
()
()
()
()
()
()
1 to 11
Rear Wing Aero
5 ()
()
()
()
()
()
()
()
()
()
1 to 11
Differential Adjustment On Throttle
75 ()
()
()
()
()
()
()
()
()
()
50% to 100%
Differential Adjustment Off Throttle
75 ()
()
()
()
()
()
()
()
()
()
50% to 100%
Front Camber
-3.30 ()
()
()
()
()
()
()
()
()
()
-3.50 to -2.50°
Rear Camber
-1.80 ()
()
()
()
()
()
()
()
()
()
-2.00 to -1.00°
Front Toe
0.12 ()
()
()
()
()
()
()
()
()
()
0.05 to 0.15°
Rear Toe
0.29 ()
()
()
()
()
()
()
()
()
()
0.20 to 0.50°
Front Suspension
6 ()
()
()
()
()
()
()
()
()
()
Soft 1 to 11 Firm
Rear Suspension
7 ()
()
()
()
()
()
()
()
()
()
Soft 1 to 11 Firm
Front Anti-Roll Bar
4 ()
()
()
()
()
()
()
()
()
()
Soft 1 to 11 Firm
Rear Anti-Roll Bar
4 ()
()
()
()
()
()
()
()
()
()
Soft 1 to 11 Firm
Front Tire Pressure
18.2 ()
()
()
()
()
()
()
()
()
()
17.0 to 19.0psi
Rear Tire Pressure
18.2 ()
()
()
()
()
()
()
()
()
()
17.0 to 19.0psi
Ballast
7 ()
()
()
()
()
()
()
()
()
()
Forward 1 to 11 Backward
Fuel Load
()
()
()
()
()
()
()
()
()
()
5 to 100Kg (locked to 10Kg for 5 laps in Quick Race mode
Best Times

YouTube videos

Monaco (Circuit de Monaco) - Wet

Nominal values are best initial setups which provide good stability vs. speed. Values in parentheses () are values that the fastest users have used, so try to build up to those values as you get better and if car stability and tyre temperatures are not an issue.

Car Settings
Mercedes
Ferrari
Williams
Red Bull
Force India
Lotus
Renault
Sauber
McLaren-Honda
Marussia
Range of Values
Front Wing Aero
()
()
()
()
()
()
()
()
()
()
1 to 11
Rear Wing Aero
()
()
()
()
()
()
()
()
()
()
1 to 11
Differential Adjustment On Throttle
()
()
()
()
()
()
()
()
()
()
50% to 100%
Differential Adjustment Off Throttle
()
()
()
()
()
()
()
()
()
()
50% to 100%
Front Camber
()
()
()
()
()
()
()
()
()
()
-3.50 to -2.50°
Rear Camber
()
()
()
()
()
()
()
()
()
()
-2.00 to -1.00°
Front Toe
()
()
()
()
()
()
()
()
()
()
0.05 to 0.15°
Rear Toe
()
()
()
()
()
()
()
()
()
()
0.20 to 0.50°
Front Suspension
()
()
()
()
()
()
()
()
()
()
Soft 1 to 11 Firm
Rear Suspension
()
()
()
()
()
()
()
()
()
()
Soft 1 to 11 Firm
Front Anti-Roll Bar
()
()
()
()
()
()
()
()
()
()
Soft 1 to 11 Firm
Rear Anti-Roll Bar
()
()
()
()
()
()
()
()
()
()
Soft 1 to 11 Firm
Front Tire Pressure
()
()
()
()
()
()
()
()
()
()
17.0 to 19.0psi
Rear Tire Pressure
()
()
()
()
()
()
()
()
()
()
17.0 to 19.0psi
Ballast
()
()
()
()
()
()
()
()
()
()
Forward 1 to 11 Backward
Fuel Load
()
()
()
()
()
()
()
()
()
()
5 to 100Kg (locked to 10Kg for 5 laps in Quick Race mode
Best Times

YouTube videos

Canada (Circuit Gilles Villeneuve, Montreal) - Dry

Nominal values are best initial setups which provide good stability vs. speed. Values in parentheses () are values that the fastest users have used, so try to build up to those values as you get better and if car stability and tyre temperatures are not an issue.

Car Settings
Mercedes
Ferrari
Williams
Red Bull
Force India
Lotus
Renault
Sauber
McLaren-Honda
Marussia
Range of Values
Front Wing Aero
4 (1)
3 (2)
4 (3)
()
()
()
()
2 ()
()
()
1 to 11
Rear Wing Aero
2 (1)
1 (1)
3 (1)
()
()
()
()
1 ()
()
()
1 to 11
Differential Adjustment On Throttle
70 (60)
70 (70)
70 ()
()
()
()
()
65 ()
()
()
50% to 100%
Differential Adjustment Off Throttle
63 (80 or 60)
75 (75)
65 (75)
()
()
()
()
70 ()
()
()
50% to 100%
Front Camber
-3.30 (-3.50)
-3.00 (-3.20)
-2.90 (-3.20)
()
()
()
()
-3.30 ()
()
()
-3.50 to -2.50°
Rear Camber
-1.80 (-2.00)
-1.10 (-1.70)
-1.60 (-1.70)
()
()
()
()
-1.80 ()
()
()
-2.00 to -1.00°
Front Toe
0.11 (0.15)
0.12 (0.12)
0.13 (0.11)
()
()
()
()
0.12 ()
()
()
0.05 to 0.15°
Rear Toe
0.26 (0.50)
0.38 (0.34)
0.13 (0.34)
()
()
()
()
0.31 ()
()
()
0.20 to 0.50°
Front Suspension
7 (11)
5 (3)
5 (4)
()
()
()
()
5 ()
()
()
Soft 1 to 11 Firm
Rear Suspension
7 (1)
5 (2)
5 (5)
()
()
()
()
6 ()
()
()
Soft 1 to 11 Firm
Front Anti-Roll Bar
7 (11)
6 (6)
6 (4)
()
()
()
()
4 ()
()
()
Soft 1 to 11 Firm
Rear Anti-Roll Bar
6 (1)
3 (3)
6 (4)
()
()
()
()
4 ()
()
()
Soft 1 to 11 Firm
Front Tire Pressure
17.6 (17.8)
17.8 (17.8)
18.2 ()
()
()
()
()
18.4 ()
()
()
17.0 to 19.0psi
Rear Tire Pressure
17.4 (17.8)
17.8 (17.8)
18.0 ()
()
()
()
()
18.4 ()
()
()
17.0 to 19.0psi
Ballast
6 (7)
5 (5)
7 (8)
()
()
()
()
()
()
()
Forward 1 to 11 Backward
Fuel Load
()
()
()
()
()
()
()
()
()
()
5 to 100Kg (locked to 10Kg for 5 laps in Quick Race mode
Best Times
1:15.000 (1:12.288)
1:15.000 (1:12.709 Options)
1:15.000 (1:12.436 Options, Mix 3, Brake Balance fwd)
1:14.441 has oversteer

YouTube videos
1:12.288 www.youtube.com/watch?v=dBfWteF70qA

Canada (Circuit Gilles Villeneuve, Montreal) - Wet

Nominal values are best initial setups which provide good stability vs. speed. Values in parentheses () are values that the fastest users have used, so try to build up to those values as you get better and if car stability and tyre temperatures are not an issue.

Car Settings
Mercedes
Ferrari
Williams
Red Bull
Force India
Lotus
Renault
Sauber
McLaren-Honda
Marussia
Range of Values
Front Wing Aero
8 ()
4 ()
()
()
()
()
()
()
()
()
1 to 11
Rear Wing Aero
7 ()
4 ()
()
()
()
()
()
()
()
()
1 to 11
Differential Adjustment On Throttle
75 ()
65 ()
()
()
()
()
()
()
()
()
50% to 100%
Differential Adjustment Off Throttle
73 ()
70 ()
()
()
()
()
()
()
()
()
50% to 100%
Front Camber
-3.50 ()
-2.90 ()
()
()
()
()
()
()
()
()
-3.50 to -2.50°
Rear Camber
-2.00 ()
-1.10 ()
()
()
()
()
()
()
()
()
-2.00 to -1.00°
Front Toe
0.14 ()
0.05 ()
()
()
()
()
()
()
()
()
0.05 to 0.15°
Rear Toe
0.50 ()
0.32 ()
()
()
()
()
()
()
()
()
0.20 to 0.50°
Front Suspension
2 ()
4 ()
()
()
()
()
()
()
()
()
Soft 1 to 11 Firm
Rear Suspension
2 ()
4 ()
()
()
()
()
()
()
()
()
Soft 1 to 11 Firm
Front Anti-Roll Bar
6 ()
5 ()
()
()
()
()
()
()
()
()
Soft 1 to 11 Firm
Rear Anti-Roll Bar
7 ()
6 ()
()
()
()
()
()
()
()
()
Soft 1 to 11 Firm
Front Tire Pressure
17.8 ()
18.0 ()
()
()
()
()
()
()
()
()
17.0 to 19.0psi
Rear Tire Pressure
17.8 ()
18.0 ()
()
()
()
()
()
()
()
()
17.0 to 19.0psi
Ballast
6 ()
5 ()
()
()
()
()
()
()
()
()
Forward 1 to 11 Backward
Fuel Load
()
()
()
()
()
()
()
()
()
()
5 to 100Kg (locked to 10Kg for 5 laps in Quick Race mode
Best Times
1:22.881
1:23.360

YouTube videos

Austria (Spielberg) - Dry

Nominal values are best initial setups which provide good stability vs. speed. Values in parentheses () are values that the fastest users have used, so try to build up to those values as you get better and if car stability and tyre temperatures are not an issue.

Car Settings
Mercedes
Ferrari
Williams
Red Bull
Force India
Lotus
Renault
Sauber
McLaren-Honda
Marussia
Range of Values
Front Wing Aero
4 ()
()
()
()
()
()
()
()
()
()
1 to 11
Rear Wing Aero
4 ()
()
()
()
()
()
()
()
()
()
1 to 11
Differential Adjustment On Throttle
80 ()
()
()
()
()
()
()
()
()
()
50% to 100%
Differential Adjustment Off Throttle
80 ()
()
()
()
()
()
()
()
()
()
50% to 100%
Front Camber
-2.90 ()
()
()
()
()
()
()
()
()
()
-3.50 to -2.50°
Rear Camber
-1.20 ()
()
()
()
()
()
()
()
()
()
-2.00 to -1.00°
Front Toe
0.12 ()
()
()
()
()
()
()
()
()
()
0.05 to 0.15°
Rear Toe
0.38 ()
()
()
()
()
()
()
()
()
()
0.20 to 0.50°
Front Suspension
5 ()
()
()
()
()
()
()
()
()
()
Soft 1 to 11 Firm
Rear Suspension
6 ()
()
()
()
()
()
()
()
()
()
Soft 1 to 11 Firm
Front Anti-Roll Bar
4 ()
()
()
()
()
()
()
()
()
()
Soft 1 to 11 Firm
Rear Anti-Roll Bar
7 ()
()
()
()
()
()
()
()
()
()
Soft 1 to 11 Firm
Front Tire Pressure
17.8 ()
()
()
()
()
()
()
()
()
()
17.0 to 19.0psi
Rear Tire Pressure
17.8 ()
()
()
()
()
()
()
()
()
()
17.0 to 19.0psi
Ballast
6 ()
()
()
()
()
()
()
()
()
()
Forward 1 to 11 Backward
Fuel Load
()
()
()
()
()
()
()
()
()
()
5 to 100Kg (locked to 10Kg for 5 laps in Quick Race mode
Best Times

YouTube videos

Austria (Spielberg) - Wet

Nominal values are best initial setups which provide good stability vs. speed. Values in parentheses () are values that the fastest users have used, so try to build up to those values as you get better and if car stability and tyre temperatures are not an issue.

Car Settings
Mercedes
Ferrari
Williams
Red Bull
Force India
Lotus
Renault
Sauber
McLaren-Honda
Marussia
Range of Values
Front Wing Aero
()
()
()
()
()
()
()
()
()
()
1 to 11
Rear Wing Aero
()
()
()
()
()
()
()
()
()
()
1 to 11
Differential Adjustment On Throttle
()
()
()
()
()
()
()
()
()
()
50% to 100%
Differential Adjustment Off Throttle
()
()
()
()
()
()
()
()
()
()
50% to 100%
Front Camber
()
()
()
()
()
()
()
()
()
()
-3.50 to -2.50°
Rear Camber
()
()
()
()
()
()
()
()
()
()
-2.00 to -1.00°
Front Toe
()
()
()
()
()
()
()
()
()
()
0.05 to 0.15°
Rear Toe
()
()
()
()
()
()
()
()
()
()
0.20 to 0.50°
Front Suspension
()
()
()
()
()
()
()
()
()
()
Soft 1 to 11 Firm
Rear Suspension
()
()
()
()
()
()
()
()
()
()
Soft 1 to 11 Firm
Front Anti-Roll Bar
()
()
()
()
()
()
()
()
()
()
Soft 1 to 11 Firm
Rear Anti-Roll Bar
()
()
()
()
()
()
()
()
()
()
Soft 1 to 11 Firm
Front Tire Pressure
()
()
()
()
()
()
()
()
()
()
17.0 to 19.0psi
Rear Tire Pressure
()
()
()
()
()
()
()
()
()
()
17.0 to 19.0psi
Ballast
()
()
()
()
()
()
()
()
()
()
Forward 1 to 11 Backward
Fuel Load
()
()
()
()
()
()
()
()
()
()
5 to 100Kg (locked to 10Kg for 5 laps in Quick Race mode
Best Times

YouTube videos

Great Britain (Silverstone) - Dry

Nominal values are best initial setups which provide good stability vs. speed. Values in parentheses () are values that the fastest users have used, so try to build up to those values as you get better and if car stability and tyre temperatures are not an issue.

Car Settings
Mercedes
Ferrari
Williams
Red Bull
Force India
Lotus
Renault
Sauber
McLaren-Honda
Marussia
Range of Values
Front Wing Aero
2 ()
()
()
()
()
()
()
()
()
()
1 to 11
Rear Wing Aero
2 ()
()
()
()
()
()
()
()
()
()
1 to 11
Differential Adjustment On Throttle
65 ()
()
()
()
()
()
()
()
()
()
50% to 100%
Differential Adjustment Off Throttle
65 ()
()
()
()
()
()
()
()
()
()
50% to 100%
Front Camber
-3.40 ()
()
()
()
()
()
()
()
()
()
-3.50 to -2.50°
Rear Camber
-1.90 ()
()
()
()
()
()
()
()
()
()
-2.00 to -1.00°
Front Toe
0.12 ()
()
()
()
()
()
()
()
()
()
0.05 to 0.15°
Rear Toe
0.31 ()
()
()
()
()
()
()
()
()
()
0.20 to 0.50°
Front Suspension
8 ()
()
()
()
()
()
()
()
()
()
Soft 1 to 11 Firm
Rear Suspension
8 ()
()
()
()
()
()
()
()
()
()
Soft 1 to 11 Firm
Front Anti-Roll Bar
4 ()
()
()
()
()
()
()
()
()
()
Soft 1 to 11 Firm
Rear Anti-Roll Bar
4 ()
()
()
()
()
()
()
()
()
()
Soft 1 to 11 Firm
Front Tire Pressure
18.4 ()
()
()
()
()
()
()
()
()
()
17.0 to 19.0psi
Rear Tire Pressure
18.4 ()
()
()
()
()
()
()
()
()
()
17.0 to 19.0psi
Ballast
8 ()
()
()
()
()
()
()
()
()
()
Forward 1 to 11 Backward
Fuel Load
()
()
()
()
()
()
()
()
()
()
5 to 100Kg (locked to 10Kg for 5 laps in Quick Race mode
Best Times

YouTube videos

Great Britain (Silverstone) - Wet

Nominal values are best initial setups which provide good stability vs. speed. Values in parentheses () are values that the fastest users have used, so try to build up to those values as you get better and if car stability and tyre temperatures are not an issue.

Car Settings
Mercedes
Ferrari
Williams
Red Bull
Force India
Lotus
Renault
Sauber
McLaren-Honda
Marussia
Range of Values
Front Wing Aero
()
()
()
()
()
()
()
()
()
()
1 to 11
Rear Wing Aero
()
()
()
()
()
()
()
()
()
()
1 to 11
Differential Adjustment On Throttle
()
()
()
()
()
()
()
()
()
()
50% to 100%
Differential Adjustment Off Throttle
()
()
()
()
()
()
()
()
()
()
50% to 100%
Front Camber
()
()
()
()
()
()
()
()
()
()
-3.50 to -2.50°
Rear Camber
()
()
()
()
()
()
()
()
()
()
-2.00 to -1.00°
Front Toe
()
()
()
()
()
()
()
()
()
()
0.05 to 0.15°
Rear Toe
()
()
()
()
()
()
()
()
()
()
0.20 to 0.50°
Front Suspension
()
()
()
()
()
()
()
()
()
()
Soft 1 to 11 Firm
Rear Suspension
()
()
()
()
()
()
()
()
()
()
Soft 1 to 11 Firm
Front Anti-Roll Bar
()
()
()
()
()
()
()
()
()
()
Soft 1 to 11 Firm
Rear Anti-Roll Bar
()
()
()
()
()
()
()
()
()
()
Soft 1 to 11 Firm
Front Tire Pressure
()
()
()
()
()
()
()
()
()
()
17.0 to 19.0psi
Rear Tire Pressure
()
()
()
()
()
()
()
()
()
()
17.0 to 19.0psi
Ballast
()
()
()
()
()
()
()
()
()
()
Forward 1 to 11 Backward
Fuel Load
()
()
()
()
()
()
()
()
()
()
5 to 100Kg (locked to 10Kg for 5 laps in Quick Race mode
Best Times

YouTube videos

Hungary (Hungaroring) - Dry

Nominal values are best initial setups which provide good stability vs. speed. Values in parentheses () are values that the fastest users have used, so try to build up to those values as you get better and if car stability and tyre temperatures are not an issue.

Car Settings
Mercedes
Ferrari
Williams
Red Bull
Force India
Lotus
Renault
Sauber
McLaren-Honda
Marussia
Range of Values
Front Wing Aero
5 ()
()
()
()
()
()
()
()
()
()
1 to 11
Rear Wing Aero
4 ()
()
()
()
()
()
()
()
()
()
1 to 11
Differential Adjustment On Throttle
74 ()
()
()
()
()
()
()
()
()
()
50% to 100%
Differential Adjustment Off Throttle
69 ()
()
()
()
()
()
()
()
()
()
50% to 100%
Front Camber
-3.40 ()
()
()
()
()
()
()
()
()
()
-3.50 to -2.50°
Rear Camber
-1.80 ()
()
()
()
()
()
()
()
()
()
-2.00 to -1.00°
Front Toe
0.10 ()
()
()
()
()
()
()
()
()
()
0.05 to 0.15°
Rear Toe
0.35 ()
()
()
()
()
()
()
()
()
()
0.20 to 0.50°
Front Suspension
9 ()
()
()
()
()
()
()
()
()
()
Soft 1 to 11 Firm
Rear Suspension
8 ()
()
()
()
()
()
()
()
()
()
Soft 1 to 11 Firm
Front Anti-Roll Bar
7 ()
()
()
()
()
()
()
()
()
()
Soft 1 to 11 Firm
Rear Anti-Roll Bar
7 ()
()
()
()
()
()
()
()
()
()
Soft 1 to 11 Firm
Front Tire Pressure
18.2 ()
()
()
()
()
()
()
()
()
()
17.0 to 19.0psi
Rear Tire Pressure
18.2 ()
()
()
()
()
()
()
()
()
()
17.0 to 19.0psi
Ballast
5 ()
()
()
()
()
()
()
()
()
()
Forward 1 to 11 Backward
Fuel Load
()
()
()
()
()
()
()
()
()
()
5 to 100Kg (locked to 10Kg for 5 laps in Quick Race mode
Best Times

YouTube videos

Hungary (Hungaroring) - Wet

Nominal values are best initial setups which provide good stability vs. speed. Values in parentheses () are values that the fastest users have used, so try to build up to those values as you get better and if car stability and tyre temperatures are not an issue.

Car Settings
Mercedes
Ferrari
Williams
Red Bull
Force India
Lotus
Renault
Sauber
McLaren-Honda
Marussia
Range of Values
Front Wing Aero
()
()
()
()
()
()
()
()
()
()
1 to 11
Rear Wing Aero
()
()
()
()
()
()
()
()
()
()
1 to 11
Differential Adjustment On Throttle
()
()
()
()
()
()
()
()
()
()
50% to 100%
Differential Adjustment Off Throttle
()
()
()
()
()
()
()
()
()
()
50% to 100%
Front Camber
()
()
()
()
()
()
()
()
()
()
-3.50 to -2.50°
Rear Camber
()
()
()
()
()
()
()
()
()
()
-2.00 to -1.00°
Front Toe
()
()
()
()
()
()
()
()
()
()
0.05 to 0.15°
Rear Toe
()
()
()
()
()
()
()
()
()
()
0.20 to 0.50°
Front Suspension
()
()
()
()
()
()
()
()
()
()
Soft 1 to 11 Firm
Rear Suspension
()
()
()
()
()
()
()
()
()
()
Soft 1 to 11 Firm
Front Anti-Roll Bar
()
()
()
()
()
()
()
()
()
()
Soft 1 to 11 Firm
Rear Anti-Roll Bar
()
()
()
()
()
()
()
()
()
()
Soft 1 to 11 Firm
Front Tire Pressure
()
()
()
()
()
()
()
()
()
()
17.0 to 19.0psi
Rear Tire Pressure
()
()
()
()
()
()
()
()
()
()
17.0 to 19.0psi
Ballast
()
()
()
()
()
()
()
()
()
()
Forward 1 to 11 Backward
Fuel Load
()
()
()
()
()
()
()
()
()
()
5 to 100Kg (locked to 10Kg for 5 laps in Quick Race mode
Best Times

YouTube videos

Belgium (Spa Francoeurchamps) - Dry

Nominal values are best initial setups which provide good stability vs. speed. Values in parentheses () are values that the fastest users have used, so try to build up to those values as you get better and if car stability and tyre temperatures are not an issue.

Car Settings
Mercedes
Ferrari
Williams
Red Bull
Force India
Lotus
Renault
Sauber
McLaren-Honda
Marussia
Range of Values
Front Wing Aero
3 (1)
()
()
()
()
()
()
()
()
()
1 to 11
Rear Wing Aero
4 (1)
()
()
()
()
()
()
()
()
()
1 to 11
Differential Adjustment On Throttle
77 ()
()
()
()
()
()
()
()
()
()
50% to 100%
Differential Adjustment Off Throttle
72 ()
()
()
()
()
()
()
()
()
()
50% to 100%
Front Camber
-3.40 ()
()
()
()
()
()
()
()
()
()
-3.50 to -2.50°
Rear Camber
-1.80 ()
()
()
()
()
()
()
()
()
()
-2.00 to -1.00°
Front Toe
0.10 ()
()
()
()
()
()
()
()
()
()
0.05 to 0.15°
Rear Toe
0.35 ()
()
()
()
()
()
()
()
()
()
0.20 to 0.50°
Front Suspension
9 ()
()
()
()
()
()
()
()
()
()
Soft 1 to 11 Firm
Rear Suspension
8 ()
()
()
()
()
()
()
()
()
()
Soft 1 to 11 Firm
Front Anti-Roll Bar
7 ()
()
()
()
()
()
()
()
()
()
Soft 1 to 11 Firm
Rear Anti-Roll Bar
7 ()
()
()
()
()
()
()
()
()
()
Soft 1 to 11 Firm
Front Tire Pressure
17.6 ()
()
()
()
()
()
()
()
()
()
17.0 to 19.0psi
Rear Tire Pressure
17.4 ()
()
()
()
()
()
()
()
()
()
17.0 to 19.0psi
Ballast
5 ()
()
()
()
()
()
()
()
()
()
Forward 1 to 11 Backward
Fuel Load
()
()
()
()
()
()
()
()
()
()
5 to 100Kg (locked to 10Kg for 5 laps in Quick Race mode
Best Times

YouTube videos

Belgium (Spa Francoeurchamps) - Wet

Nominal values are best initial setups which provide good stability vs. speed. Values in parentheses () are values that the fastest users have used, so try to build up to those values as you get better and if car stability and tyre temperatures are not an issue.

Car Settings
Mercedes
Ferrari
Williams
Red Bull
Force India
Lotus
Renault
Sauber
McLaren-Honda
Marussia
Range of Values
Front Wing Aero
4 ()
()
()
()
()
()
()
()
()
()
1 to 11
Rear Wing Aero
5 ()
()
()
()
()
()
()
()
()
()
1 to 11
Differential Adjustment On Throttle
75 ()
()
()
()
()
()
()
()
()
()
50% to 100%
Differential Adjustment Off Throttle
75 ()
()
()
()
()
()
()
()
()
()
50% to 100%
Front Camber
-3.50 ()
()
()
()
()
()
()
()
()
()
-3.50 to -2.50°
Rear Camber
-2.00()
()
()
()
()
()
()
()
()
()
-2.00 to -1.00°
Front Toe
0.10 ()
()
()
()
()
()
()
()
()
()
0.05 to 0.15°
Rear Toe
0.35 ()
()
()
()
()
()
()
()
()
()
0.20 to 0.50°
Front Suspension
6 ()
()
()
()
()
()
()
()
()
()
Soft 1 to 11 Firm
Rear Suspension
6 ()
()
()
()
()
()
()
()
()
()
Soft 1 to 11 Firm
Front Anti-Roll Bar
6 ()
()
()
()
()
()
()
()
()
()
Soft 1 to 11 Firm
Rear Anti-Roll Bar
6 ()
()
()
()
()
()
()
()
()
()
Soft 1 to 11 Firm
Front Tire Pressure
18.0 ()
()
()
()
()
()
()
()
()
()
17.0 to 19.0psi
Rear Tire Pressure
18.0 ()
()
()
()
()
()
()
()
()
()
17.0 to 19.0psi
Ballast
6 ()
()
()
()
()
()
()
()
()
()
Forward 1 to 11 Backward
Fuel Load
()
()
()
()
()
()
()
()
()
()
5 to 100Kg (locked to 10Kg for 5 laps in Quick Race mode
Best Times
2:03.351

YouTube videos

Italy (Autodromo Nazionale di Monza) - Dry

Nominal values are best initial setups which provide good stability vs. speed. Values in parentheses () are values that the fastest users have used, so try to build up to those values as you get better and if car stability and tyre temperatures are not an issue.

Car Settings
Mercedes
Ferrari
Williams
Red Bull
Force India
Lotus
Renault
Sauber
McLaren-Honda
Marussia
Range of Values
Front Wing Aero
3 ()
3 ()
()
()
()
()
()
()
()
()
1 to 11
Rear Wing Aero
2 ()
2 ()
()
()
()
()
()
()
()
()
1 to 11
Differential Adjustment On Throttle
84 ()
85 ()
()
()
()
()
()
()
()
()
50% to 100%
Differential Adjustment Off Throttle
80 ()
80 ()
()
()
()
()
()
()
()
()
50% to 100%
Front Camber
-3.50 ()
-3.50 ()
()
()
()
()
()
()
()
()
-3.50 to -2.50°
Rear Camber
-1.80 ()
-1.80 ()
()
()
()
()
()
()
()
()
-2.00 to -1.00°
Front Toe
0.10 ()
0.10 ()
()
()
()
()
()
()
()
()
0.05 to 0.15°
Rear Toe
0.35 ()
0.35 ()
()
()
()
()
()
()
()
()
0.20 to 0.50°
Front Suspension
9 ()
9 ()
()
()
()
()
()
()
()
()
Soft 1 to 11 Firm
Rear Suspension
8 ()
8 ()
()
()
()
()
()
()
()
()
Soft 1 to 11 Firm
Front Anti-Roll Bar
10 ()
10 ()
()
()
()
()
()
()
()
()
Soft 1 to 11 Firm
Rear Anti-Roll Bar
10 ()
10 ()
()
()
()
()
()
()
()
()
Soft 1 to 11 Firm
Front Tire Pressure
17.6 ()
17.6 ()
()
()
()
()
()
()
()
()
17.0 to 19.0psi
Rear Tire Pressure
17.6 ()
17.6 ()
()
()
()
()
()
()
()
()
17.0 to 19.0psi
Ballast
7 ()
()
()
()
()
()
()
()
()
()
Forward 1 to 11 Backward
Fuel Load
()
()
()
()
()
()
()
()
()
()
5 to 100Kg (locked to 10Kg for 5 laps in Quick Race mode
Best Times

YouTube videos

Italy (Autodromo Nazionale di Monza) - Wet

Nominal values are best initial setups which provide good stability vs. speed. Values in parentheses () are values that the fastest users have used, so try to build up to those values as you get better and if car stability and tyre temperatures are not an issue.

Car Settings
Mercedes
Ferrari
Williams
Red Bull
Force India
Lotus
Renault
Sauber
McLaren-Honda
Marussia
Range of Values
Front Wing Aero
()
()
()
()
()
()
()
()
()
()
1 to 11
Rear Wing Aero
()
()
()
()
()
()
()
()
()
()
1 to 11
Differential Adjustment On Throttle
()
()
()
()
()
()
()
()
()
()
50% to 100%
Differential Adjustment Off Throttle
()
()
()
()
()
()
()
()
()
()
50% to 100%
Front Camber
()
()
()
()
()
()
()
()
()
()
-3.50 to -2.50°
Rear Camber
()
()
()
()
()
()
()
()
()
()
-2.00 to -1.00°
Front Toe
()
()
()
()
()
()
()
()
()
()
0.05 to 0.15°
Rear Toe
()
()
()
()
()
()
()
()
()
()
0.20 to 0.50°
Front Suspension
()
()
()
()
()
()
()
()
()
()
Soft 1 to 11 Firm
Rear Suspension
()
()
()
()
()
()
()
()
()
()
Soft 1 to 11 Firm
Front Anti-Roll Bar
()
()
()
()
()
()
()
()
()
()
Soft 1 to 11 Firm
Rear Anti-Roll Bar
()
()
()
()
()
()
()
()
()
()
Soft 1 to 11 Firm
Front Tire Pressure
()
()
()
()
()
()
()
()
()
()
17.0 to 19.0psi
Rear Tire Pressure
()
()
()
()
()
()
()
()
()
()
17.0 to 19.0psi
Ballast
()
()
()
()
()
()
()
()
()
()
Forward 1 to 11 Backward
Fuel Load
()
()
()
()
()
()
()
()
()
()
5 to 100Kg (locked to 10Kg for 5 laps in Quick Race mode
Best Times

YouTube videos

Singapore (Marina Bay Street Circuit) - Dry

Nominal values are best initial setups which provide good stability vs. speed. Values in parentheses () are values that the fastest users have used, so try to build up to those values as you get better and if car stability and tyre temperatures are not an issue.

Car Settings
Mercedes
Ferrari
Williams
Red Bull
Force India
Lotus
Renault
Sauber
McLaren-Honda
Marussia
Range of Values
Front Wing Aero
11 ()
()
()
()
()
()
()
()
()
()
1 to 11
Rear Wing Aero
6 ()
()
()
()
()
()
()
()
()
()
1 to 11
Differential Adjustment On Throttle
80 ()
()
()
()
()
()
()
()
()
()
50% to 100%
Differential Adjustment Off Throttle
65 ()
()
()
()
()
()
()
()
()
()
50% to 100%
Front Camber
-3.50 ()
()
()
()
()
()
()
()
()
()
-3.50 to -2.50°
Rear Camber
-2.00 ()
()
()
()
()
()
()
()
()
()
-2.00 to -1.00°
Front Toe
0.15 ()
()
()
()
()
()
()
()
()
()
0.05 to 0.15°
Rear Toe
0.50 ()
()
()
()
()
()
()
()
()
()
0.20 to 0.50°
Front Suspension
11 ()
()
()
()
()
()
()
()
()
()
Soft 1 to 11 Firm
Rear Suspension
1 ()
()
()
()
()
()
()
()
()
()
Soft 1 to 11 Firm
Front Anti-Roll Bar
11 ()
()
()
()
()
()
()
()
()
()
Soft 1 to 11 Firm
Rear Anti-Roll Bar
1 ()
()
()
()
()
()
()
()
()
()
Soft 1 to 11 Firm
Front Tire Pressure
18.0 ()
()
()
()
()
()
()
()
()
()
17.0 to 19.0psi
Rear Tire Pressure
18.0 ()
()
()
()
()
()
()
()
()
()
17.0 to 19.0psi
Ballast
8 ()
()
()
()
()
()
()
()
()
()
Forward 1 to 11 Backward
Fuel Load
()
()
()
()
()
()
()
()
()
()
5 to 100Kg (locked to 10Kg for 5 laps in Quick Race mode
Best Times

YouTube videos

Singapore (Marina Bay Street Circuit) - Wet

Nominal values are best initial setups which provide good stability vs. speed. Values in parentheses () are values that the fastest users have used, so try to build up to those values as you get better and if car stability and tyre temperatures are not an issue.

Car Settings
Mercedes
Ferrari
Williams
Red Bull
Force India
Lotus
Renault
Sauber
McLaren-Honda
Marussia
Range of Values
Front Wing Aero
()
()
()
()
()
()
()
()
()
()
1 to 11
Rear Wing Aero
()
()
()
()
()
()
()
()
()
()
1 to 11
Differential Adjustment On Throttle
()
()
()
()
()
()
()
()
()
()
50% to 100%
Differential Adjustment Off Throttle
()
()
()
()
()
()
()
()
()
()
50% to 100%
Front Camber
()
()
()
()
()
()
()
()
()
()
-3.50 to -2.50°
Rear Camber
()
()
()
()
()
()
()
()
()
()
-2.00 to -1.00°
Front Toe
()
()
()
()
()
()
()
()
()
()
0.05 to 0.15°
Rear Toe
()
()
()
()
()
()
()
()
()
()
0.20 to 0.50°
Front Suspension
()
()
()
()
()
()
()
()
()
()
Soft 1 to 11 Firm
Rear Suspension
()
()
()
()
()
()
()
()
()
()
Soft 1 to 11 Firm
Front Anti-Roll Bar
()
()
()
()
()
()
()
()
()
()
Soft 1 to 11 Firm
Rear Anti-Roll Bar
()
()
()
()
()
()
()
()
()
()
Soft 1 to 11 Firm
Front Tire Pressure
()
()
()
()
()
()
()
()
()
()
17.0 to 19.0psi
Rear Tire Pressure
()
()
()
()
()
()
()
()
()
()
17.0 to 19.0psi
Ballast
()
()
()
()
()
()
()
()
()
()
Forward 1 to 11 Backward
Fuel Load
()
()
()
()
()
()
()
()
()
()
5 to 100Kg (locked to 10Kg for 5 laps in Quick Race mode
Best Times

YouTube videos

Japan (Suzuka) - Dry

Nominal values are best initial setups which provide good stability vs. speed. Values in parentheses () are values that the fastest users have used, so try to build up to those values as you get better and if car stability and tyre temperatures are not an issue.

Car Settings
Mercedes
Ferrari
Williams
Red Bull
Force India
Lotus
Renault
Sauber
McLaren-Honda
Marussia
Range of Values
Front Wing Aero
4 ()
4 ()
()
()
()
()
()
()
()
()
1 to 11
Rear Wing Aero
3 ()
3 ()
()
()
()
()
()
()
()
()
1 to 11
Differential Adjustment On Throttle
81 ()
81 ()
()
()
()
()
()
()
()
()
50% to 100%
Differential Adjustment Off Throttle
82 ()
82 ()
()
()
()
()
()
()
()
()
50% to 100%
Front Camber
-3.50 ()
-3.50 ()
()
()
()
()
()
()
()
()
-3.50 to -2.50°
Rear Camber
-1.80 ()
-1.80 ()
()
()
()
()
()
()
()
()
-2.00 to -1.00°
Front Toe
0.10 ()
0.10 ()
()
()
()
()
()
()
()
()
0.05 to 0.15°
Rear Toe
0.35 ()
0.35 ()
()
()
()
()
()
()
()
()
0.20 to 0.50°
Front Suspension
7 ()
7 ()
()
()
()
()
()
()
()
()
Soft 1 to 11 Firm
Rear Suspension
6 ()
6 ()
()
()
()
()
()
()
()
()
Soft 1 to 11 Firm
Front Anti-Roll Bar
8 ()
8 ()
()
()
()
()
()
()
()
()
Soft 1 to 11 Firm
Rear Anti-Roll Bar
8 ()
8 ()
()
()
()
()
()
()
()
()
Soft 1 to 11 Firm
Front Tire Pressure
17.4 ()
()
()
()
()
()
()
()
()
()
17.0 to 19.0psi
Rear Tire Pressure
17.2 ()
()
()
()
()
()
()
()
()
()
17.0 to 19.0psi
Ballast
7 ()
()
()
()
()
()
()
()
()
()
Forward 1 to 11 Backward
Fuel Load
()
()
()
()
()
()
()
()
()
()
5 to 100Kg (locked to 10Kg for 5 laps in Quick Race mode
Best Times

YouTube videos

Japan (Suzuka) - Wet

Nominal values are best initial setups which provide good stability vs. speed. Values in parentheses () are values that the fastest users have used, so try to build up to those values as you get better and if car stability and tyre temperatures are not an issue.

Car Settings
Mercedes
Ferrari
Williams
Red Bull
Force India
Lotus
Renault
Sauber
McLaren-Honda
Marussia
Range of Values
Front Wing Aero
()
()
()
()
()
()
()
()
()
()
1 to 11
Rear Wing Aero
()
()
()
()
()
()
()
()
()
()
1 to 11
Differential Adjustment On Throttle
()
()
()
()
()
()
()
()
()
()
50% to 100%
Differential Adjustment Off Throttle
()
()
()
()
()
()
()
()
()
()
50% to 100%
Front Camber
()
()
()
()
()
()
()
()
()
()
-3.50 to -2.50°
Rear Camber
()
()
()
()
()
()
()
()
()
()
-2.00 to -1.00°
Front Toe
()
()
()
()
()
()
()
()
()
()
0.05 to 0.15°
Rear Toe
()
()
()
()
()
()
()
()
()
()
0.20 to 0.50°
Front Suspension
()
()
()
()
()
()
()
()
()
()
Soft 1 to 11 Firm
Rear Suspension
()
()
()
()
()
()
()
()
()
()
Soft 1 to 11 Firm
Front Anti-Roll Bar
()
()
()
()
()
()
()
()
()
()
Soft 1 to 11 Firm
Rear Anti-Roll Bar
()
()
()
()
()
()
()
()
()
()
Soft 1 to 11 Firm
Front Tire Pressure
()
()
()
()
()
()
()
()
()
()
17.0 to 19.0psi
Rear Tire Pressure
()
()
()
()
()
()
()
()
()
()
17.0 to 19.0psi
Ballast
()
()
()
()
()
()
()
()
()
()
Forward 1 to 11 Backward
Fuel Load
()
()
()
()
()
()
()
()
()
()
5 to 100Kg (locked to 10Kg for 5 laps in Quick Race mode
Best Times

YouTube videos

Russia (Sochi Autodrom) - Dry

Nominal values are best initial setups which provide good stability vs. speed. Values in parentheses () are values that the fastest users have used, so try to build up to those values as you get better and if car stability and tyre temperatures are not an issue.

Car Settings
Mercedes
Ferrari
Williams
Red Bull
Force India
Lotus
Renault
Sauber
McLaren-Honda
Marussia
Range of Values
Front Wing Aero
5 ()
()
()
()
()
()
()
()
()
()
1 to 11
Rear Wing Aero
3 ()
()
()
()
()
()
()
()
()
()
1 to 11
Differential Adjustment On Throttle
89 ()
()
()
()
()
()
()
()
()
()
50% to 100%
Differential Adjustment Off Throttle
80 ()
()
()
()
()
()
()
()
()
()
50% to 100%
Front Camber
-3.40 ()
()
()
()
()
()
()
()
()
()
-3.50 to -2.50°
Rear Camber
-1.70 ()
()
()
()
()
()
()
()
()
()
-2.00 to -1.00°
Front Toe
0.10 ()
()
()
()
()
()
()
()
()
()
0.05 to 0.15°
Rear Toe
0.35 ()
()
()
()
()
()
()
()
()
()
0.20 to 0.50°
Front Suspension
9 ()
()
()
()
()
()
()
()
()
()
Soft 1 to 11 Firm
Rear Suspension
8 ()
()
()
()
()
()
()
()
()
()
Soft 1 to 11 Firm
Front Anti-Roll Bar
10 ()
()
()
()
()
()
()
()
()
()
Soft 1 to 11 Firm
Rear Anti-Roll Bar
10 ()
()
()
()
()
()
()
()
()
()
Soft 1 to 11 Firm
Front Tire Pressure
17.6 ()
()
()
()
()
()
()
()
()
()
17.0 to 19.0psi
Rear Tire Pressure
17.2 ()
()
()
()
()
()
()
()
()
()
17.0 to 19.0psi
Ballast
7 ()
()
()
()
()
()
()
()
()
()
Forward 1 to 11 Backward
Fuel Load
()
()
()
()
()
()
()
()
()
()
5 to 100Kg (locked to 10Kg for 5 laps in Quick Race mode
Best Times

YouTube videos

Russia (Sochi Autodrom) - Wet

Nominal values are best initial setups which provide good stability vs. speed. Values in parentheses () are values that the fastest users have used, so try to build up to those values as you get better and if car stability and tyre temperatures are not an issue.

Car Settings
Mercedes
Ferrari
Williams
Red Bull
Force India
Lotus
Renault
Sauber
McLaren-Honda
Marussia
Range of Values
Front Wing Aero
()
()
()
()
()
()
()
()
()
()
1 to 11
Rear Wing Aero
()
()
()
()
()
()
()
()
()
()
1 to 11
Differential Adjustment On Throttle
()
()
()
()
()
()
()
()
()
()
50% to 100%
Differential Adjustment Off Throttle
()
()
()
()
()
()
()
()
()
()
50% to 100%
Front Camber
()
()
()
()
()
()
()
()
()
()
-3.50 to -2.50°
Rear Camber
()
()
()
()
()
()
()
()
()
()
-2.00 to -1.00°
Front Toe
()
()
()
()
()
()
()
()
()
()
0.05 to 0.15°
Rear Toe
()
()
()
()
()
()
()
()
()
()
0.20 to 0.50°
Front Suspension
()
()
()
()
()
()
()
()
()
()
Soft 1 to 11 Firm
Rear Suspension
()
()
()
()
()
()
()
()
()
()
Soft 1 to 11 Firm
Front Anti-Roll Bar
()
()
()
()
()
()
()
()
()
()
Soft 1 to 11 Firm
Rear Anti-Roll Bar
()
()
()
()
()
()
()
()
()
()
Soft 1 to 11 Firm
Front Tire Pressure
()
()
()
()
()
()
()
()
()
()
17.0 to 19.0psi
Rear Tire Pressure
()
()
()
()
()
()
()
()
()
()
17.0 to 19.0psi
Ballast
()
()
()
()
()
()
()
()
()
()
Forward 1 to 11 Backward
Fuel Load
()
()
()
()
()
()
()
()
()
()
5 to 100Kg (locked to 10Kg for 5 laps in Quick Race mode
Best Times

YouTube videos

USA (Circuit of the Americas) - Dry

Nominal values are best initial setups which provide good stability vs. speed. Values in parentheses () are values that the fastest users have used, so try to build up to those values as you get better and if car stability and tyre temperatures are not an issue.

Car Settings
Mercedes
Ferrari
Williams
Red Bull
Force India
Lotus
Renault
Sauber
McLaren-Honda
Marussia
Range of Values
Front Wing Aero
3 ()
()
()
()
()
()
()
()
()
()
1 to 11
Rear Wing Aero
2 ()
()
()
()
()
()
()
()
()
()
1 to 11
Differential Adjustment On Throttle
92 ()
()
()
()
()
()
()
()
()
()
50% to 100%
Differential Adjustment Off Throttle
86 ()
()
()
()
()
()
()
()
()
()
50% to 100%
Front Camber
-3.40 ()
()
()
()
()
()
()
()
()
()
-3.50 to -2.50°
Rear Camber
-1.80 ()
()
()
()
()
()
()
()
()
()
-2.00 to -1.00°
Front Toe
0.10 ()
()
()
()
()
()
()
()
()
()
0.05 to 0.15°
Rear Toe
0.35 ()
()
()
()
()
()
()
()
()
()
0.20 to 0.50°
Front Suspension
8 ()
()
()
()
()
()
()
()
()
()
Soft 1 to 11 Firm
Rear Suspension
7 ()
()
()
()
()
()
()
()
()
()
Soft 1 to 11 Firm
Front Anti-Roll Bar
10 ()
()
()
()
()
()
()
()
()
()
Soft 1 to 11 Firm
Rear Anti-Roll Bar
9 ()
()
()
()
()
()
()
()
()
()
Soft 1 to 11 Firm
Front Tire Pressure
17.4 ()
()
()
()
()
()
()
()
()
()
17.0 to 19.0psi
Rear Tire Pressure
17.2 ()
()
()
()
()
()
()
()
()
()
17.0 to 19.0psi
Ballast
8 ()
()
()
()
()
()
()
()
()
()
Forward 1 to 11 Backward
Fuel Load
()
()
()
()
()
()
()
()
()
()
5 to 100Kg (locked to 10Kg for 5 laps in Quick Race mode
Best Times

YouTube videos

USA (Circuit of the Americas) - Wet

Nominal values are best initial setups which provide good stability vs. speed. Values in parentheses () are values that the fastest users have used, so try to build up to those values as you get better and if car stability and tyre temperatures are not an issue.

Car Settings
Mercedes
Ferrari
Williams
Red Bull
Force India
Lotus
Renault
Sauber
McLaren-Honda
Marussia
Range of Values
Front Wing Aero
()
()
()
()
()
()
()
()
()
()
1 to 11
Rear Wing Aero
()
()
()
()
()
()
()
()
()
()
1 to 11
Differential Adjustment On Throttle
()
()
()
()
()
()
()
()
()
()
50% to 100%
Differential Adjustment Off Throttle
()
()
()
()
()
()
()
()
()
()
50% to 100%
Front Camber
()
()
()
()
()
()
()
()
()
()
-3.50 to -2.50°
Rear Camber
()
()
()
()
()
()
()
()
()
()
-2.00 to -1.00°
Front Toe
()
()
()
()
()
()
()
()
()
()
0.05 to 0.15°
Rear Toe
()
()
()
()
()
()
()
()
()
()
0.20 to 0.50°
Front Suspension
()
()
()
()
()
()
()
()
()
()
Soft 1 to 11 Firm
Rear Suspension
()
()
()
()
()
()
()
()
()
()
Soft 1 to 11 Firm
Front Anti-Roll Bar
()
()
()
()
()
()
()
()
()
()
Soft 1 to 11 Firm
Rear Anti-Roll Bar
()
()
()
()
()
()
()
()
()
()
Soft 1 to 11 Firm
Front Tire Pressure
()
()
()
()
()
()
()
()
()
()
17.0 to 19.0psi
Rear Tire Pressure
()
()
()
()
()
()
()
()
()
()
17.0 to 19.0psi
Ballast
()
()
()
()
()
()
()
()
()
()
Forward 1 to 11 Backward
Fuel Load
()
()
()
()
()
()
()
()
()
()
5 to 100Kg (locked to 10Kg for 5 laps in Quick Race mode
Best Times

YouTube videos

Mexico - Dry

Nominal values are best initial setups which provide good stability vs. speed. Values in parentheses () are values that the fastest users have used, so try to build up to those values as you get better and if car stability and tyre temperatures are not an issue.

Car Settings
Mercedes
Ferrari
Williams
Red Bull
Force India
Lotus
Renault
Sauber
McLaren-Honda
Marussia
Range of Values
Front Wing Aero
4 ()
()
()
()
()
()
()
()
()
()
1 to 11
Rear Wing Aero
2 ()
()
()
()
()
()
()
()
()
()
1 to 11
Differential Adjustment On Throttle
80 ()
()
()
()
()
()
()
()
()
()
50% to 100%
Differential Adjustment Off Throttle
75 ()
()
()
()
()
()
()
()
()
()
50% to 100%
Front Camber
-3.40 ()
()
()
()
()
()
()
()
()
()
-3.50 to -2.50°
Rear Camber
-1.90 ()
()
()
()
()
()
()
()
()
()
-2.00 to -1.00°
Front Toe
0.12 ()
()
()
()
()
()
()
()
()
()
0.05 to 0.15°
Rear Toe
0.26 ()
()
()
()
()
()
()
()
()
()
0.20 to 0.50°
Front Suspension
9 ()
()
()
()
()
()
()
()
()
()
Soft 1 to 11 Firm
Rear Suspension
8 ()
()
()
()
()
()
()
()
()
()
Soft 1 to 11 Firm
Front Anti-Roll Bar
9 ()
()
()
()
()
()
()
()
()
()
Soft 1 to 11 Firm
Rear Anti-Roll Bar
8 ()
()
()
()
()
()
()
()
()
()
Soft 1 to 11 Firm
Front Tire Pressure
17.8 ()
()
()
()
()
()
()
()
()
()
17.0 to 19.0psi
Rear Tire Pressure
17.6 ()
()
()
()
()
()
()
()
()
()
17.0 to 19.0psi
Ballast
8 ()
()
()
()
()
()
()
()
()
()
Forward 1 to 11 Backward
Fuel Load
()
()
()
()
()
()
()
()
()
()
5 to 100Kg (locked to 10Kg for 5 laps in Quick Race mode
Best Times

YouTube videos

Mexico - Wet

Nominal values are best initial setups which provide good stability vs. speed. Values in parentheses () are values that the fastest users have used, so try to build up to those values as you get better and if car stability and tyre temperatures are not an issue.

Car Settings
Mercedes
Ferrari
Williams
Red Bull
Force India
Lotus
Renault
Sauber
McLaren-Honda
Marussia
Range of Values
Front Wing Aero
()
()
()
()
()
()
()
()
()
()
1 to 11
Rear Wing Aero
()
()
()
()
()
()
()
()
()
()
1 to 11
Differential Adjustment On Throttle
()
()
()
()
()
()
()
()
()
()
50% to 100%
Differential Adjustment Off Throttle
()
()
()
()
()
()
()
()
()
()
50% to 100%
Front Camber
()
()
()
()
()
()
()
()
()
()
-3.50 to -2.50°
Rear Camber
()
()
()
()
()
()
()
()
()
()
-2.00 to -1.00°
Front Toe
()
()
()
()
()
()
()
()
()
()
0.05 to 0.15°
Rear Toe
()
()
()
()
()
()
()
()
()
()
0.20 to 0.50°
Front Suspension
()
()
()
()
()
()
()
()
()
()
Soft 1 to 11 Firm
Rear Suspension
()
()
()
()
()
()
()
()
()
()
Soft 1 to 11 Firm
Front Anti-Roll Bar
()
()
()
()
()
()
()
()
()
()
Soft 1 to 11 Firm
Rear Anti-Roll Bar
()
()
()
()
()
()
()
()
()
()
Soft 1 to 11 Firm
Front Tire Pressure
()
()
()
()
()
()
()
()
()
()
17.0 to 19.0psi
Rear Tire Pressure
()
()
()
()
()
()
()
()
()
()
17.0 to 19.0psi
Ballast
()
()
()
()
()
()
()
()
()
()
Forward 1 to 11 Backward
Fuel Load
()
()
()
()
()
()
()
()
()
()
5 to 100Kg (locked to 10Kg for 5 laps in Quick Race mode
Best Times

YouTube videos

Brazil (Autodromo Jose Carlos Pace) - Dry

Nominal values are best initial setups which provide good stability vs. speed. Values in parentheses () are values that the fastest users have used, so try to build up to those values as you get better and if car stability and tyre temperatures are not an issue.

Car Settings
Mercedes
Ferrari
Williams
Red Bull
Force India
Lotus
Renault
Sauber
McLaren-Honda
Marussia
Range of Values
Front Wing Aero
()
()
()
()
()
()
()
()
()
()
1 to 11
Rear Wing Aero
()
()
()
()
()
()
()
()
()
()
1 to 11
Differential Adjustment On Throttle
()
()
()
()
()
()
()
()
()
()
50% to 100%
Differential Adjustment Off Throttle
()
()
()
()
()
()
()
()
()
()
50% to 100%
Front Camber
()
()
()
()
()
()
()
()
()
()
-3.50 to -2.50°
Rear Camber
()
()
()
()
()
()
()
()
()
()
-2.00 to -1.00°
Front Toe
()
()
()
()
()
()
()
()
()
()
0.05 to 0.15°
Rear Toe
()
()
()
()
()
()
()
()
()
()
0.20 to 0.50°
Front Suspension
()
()
()
()
()
()
()
()
()
()
Soft 1 to 11 Firm
Rear Suspension
()
()
()
()
()
()
()
()
()
()
Soft 1 to 11 Firm
Front Anti-Roll Bar
()
()
()
()
()
()
()
()
()
()
Soft 1 to 11 Firm
Rear Anti-Roll Bar
()
()
()
()
()
()
()
()
()
()
Soft 1 to 11 Firm
Front Tire Pressure
()
()
()
()
()
()
()
()
()
()
17.0 to 19.0psi
Rear Tire Pressure
()
()
()
()
()
()
()
()
()
()
17.0 to 19.0psi
Ballast
()
()
()
()
()
()
()
()
()
()
Forward 1 to 11 Backward
Fuel Load
()
()
()
()
()
()
()
()
()
()
5 to 100Kg (locked to 10Kg for 5 laps in Quick Race mode
Best Times

YouTube videos

Brazil (Autodromo Jose Carlos Pace) - Wet

Nominal values are best initial setups which provide good stability vs. speed. Values in parentheses () are values that the fastest users have used, so try to build up to those values as you get better and if car stability and tyre temperatures are not an issue.

Car Settings
Mercedes
Ferrari
Williams
Red Bull
Force India
Lotus
Renault
Sauber
McLaren-Honda
Marussia
Range of Values
Front Wing Aero
()
()
()
()
()
()
()
()
()
()
1 to 11
Rear Wing Aero
()
()
()
()
()
()
()
()
()
()
1 to 11
Differential Adjustment On Throttle
()
()
()
()
()
()
()
()
()
()
50% to 100%
Differential Adjustment Off Throttle
()
()
()
()
()
()
()
()
()
()
50% to 100%
Front Camber
()
()
()
()
()
()
()
()
()
()
-3.50 to -2.50°
Rear Camber
()
()
()
()
()
()
()
()
()
()
-2.00 to -1.00°
Front Toe
()
()
()
()
()
()
()
()
()
()
0.05 to 0.15°
Rear Toe
()
()
()
()
()
()
()
()
()
()
0.20 to 0.50°
Front Suspension
()
()
()
()
()
()
()
()
()
()
Soft 1 to 11 Firm
Rear Suspension
()
()
()
()
()
()
()
()
()
()
Soft 1 to 11 Firm
Front Anti-Roll Bar
()
()
()
()
()
()
()
()
()
()
Soft 1 to 11 Firm
Rear Anti-Roll Bar
()
()
()
()
()
()
()
()
()
()
Soft 1 to 11 Firm
Front Tire Pressure
()
()
()
()
()
()
()
()
()
()
17.0 to 19.0psi
Rear Tire Pressure
()
()
()
()
()
()
()
()
()
()
17.0 to 19.0psi
Ballast
()
()
()
()
()
()
()
()
()
()
Forward 1 to 11 Backward
Fuel Load
()
()
()
()
()
()
()
()
()
()
5 to 100Kg (locked to 10Kg for 5 laps in Quick Race mode
Best Times

YouTube videos

Abu Dhabi (Yas Marina Circuit) - Dry

Nominal values are best initial setups which provide good stability vs. speed. Values in parentheses () are values that the fastest users have used, so try to build up to those values as you get better and if car stability and tyre temperatures are not an issue.

Car Settings
Mercedes
Ferrari
Williams
Red Bull
Force India
Lotus
Renault
Sauber
McLaren-Honda
Marussia
Range of Values
Front Wing Aero
7 ()
()
()
()
()
()
()
()
()
()
1 to 11
Rear Wing Aero
8 ()
()
()
()
()
()
()
()
()
()
1 to 11
Differential Adjustment On Throttle
85 ()
()
()
()
()
()
()
()
()
()
50% to 100%
Differential Adjustment Off Throttle
80 ()
()
()
()
()
()
()
()
()
()
50% to 100%
Front Camber
-3.40 ()
()
()
()
()
()
()
()
()
()
-3.50 to -2.50°
Rear Camber
-1.90 ()
()
()
()
()
()
()
()
()
()
-2.00 to -1.00°
Front Toe
0.14 ()
()
()
()
()
()
()
()
()
()
0.05 to 0.15°
Rear Toe
0.29 ()
()
()
()
()
()
()
()
()
()
0.20 to 0.50°
Front Suspension
3 ()
()
()
()
()
()
()
()
()
()
Soft 1 to 11 Firm
Rear Suspension
6 ()
()
()
()
()
()
()
()
()
()
Soft 1 to 11 Firm
Front Anti-Roll Bar
5 ()
()
()
()
()
()
()
()
()
()
Soft 1 to 11 Firm
Rear Anti-Roll Bar
7 ()
()
()
()
()
()
()
()
()
()
Soft 1 to 11 Firm
Front Tire Pressure
18.0 ()
()
()
()
()
()
()
()
()
()
17.0 to 19.0psi
Rear Tire Pressure
18.0 ()
()
()
()
()
()
()
()
()
()
17.0 to 19.0psi
Ballast
9 ()
()
()
()
()
()
()
()
()
()
Forward 1 to 11 Backward
Fuel Load
()
()
()
()
()
()
()
()
()
()
5 to 100Kg (locked to 10Kg for 5 laps in Quick Race mode
Best Times

YouTube videos

Abu Dhabi (Yas Marina Circuit) - Wet

Nominal values are best initial setups which provide good stability vs. speed. Values in parentheses () are values that the fastest users have used, so try to build up to those values as you get better and if car stability and tyre temperatures are not an issue.

Car Settings
Mercedes
Ferrari
Williams
Red Bull
Force India
Lotus
Renault
Sauber
McLaren-Honda
Marussia
Range of Values
Front Wing Aero
()
()
()
()
()
()
()
()
()
()
1 to 11
Rear Wing Aero
()
()
()
()
()
()
()
()
()
()
1 to 11
Differential Adjustment On Throttle
()
()
()
()
()
()
()
()
()
()
50% to 100%
Differential Adjustment Off Throttle
()
()
()
()
()
()
()
()
()
()
50% to 100%
Front Camber
()
()
()
()
()
()
()
()
()
()
-3.50 to -2.50°
Rear Camber
()
()
()
()
()
()
()
()
()
()
-2.00 to -1.00°
Front Toe
()
()
()
()
()
()
()
()
()
()
0.05 to 0.15°
Rear Toe
()
()
()
()
()
()
()
()
()
()
0.20 to 0.50°
Front Suspension
()
()
()
()
()
()
()
()
()
()
Soft 1 to 11 Firm
Rear Suspension
()
()
()
()
()
()
()
()
()
()
Soft 1 to 11 Firm
Front Anti-Roll Bar
()
()
()
()
()
()
()
()
()
()
Soft 1 to 11 Firm
Rear Anti-Roll Bar
()
()
()
()
()
()
()
()
()
()
Soft 1 to 11 Firm
Front Tire Pressure
()
()
()
()
()
()
()
()
()
()
17.0 to 19.0psi
Rear Tire Pressure
()
()
()
()
()
()
()
()
()
()
17.0 to 19.0psi
Ballast
()
()
()
()
()
()
()
()
()
()
Forward 1 to 11 Backward
Fuel Load
()
()
()
()
()
()
()
()
()
()
5 to 100Kg (locked to 10Kg for 5 laps in Quick Race mode
Best Times

YouTube videos

This guide was created by its original author on the Steam Community. Are you the author and want it removed? Request removal.