Factorio expansion walkthrough
1. World generation
In this game, it is important to not disable enemies or pollution to get all achievements. However, if you are going for achievements, you should increase the richness of solid resources, frequency of uranium, and size of liquid resources, which reduces the number of times you need to explore and build to keep your various factories working.
Increasing the richness is also a great strategy for megafactory building if you feel like you want to do that. Otherwise your megafactory will always have you hunting more fields.
If you are going for steam achievements, also do not install any mods other than the three expansion mods.
You can view a preview of the world you are generating using the preview button. You should probably be doing this to make your playthrough more pleasant. There are two worlds to care about with this, because they contain enemies, and enemies are annoying, Nauvis and Gleba.
On Gleba, you should roll new seeds until you roll one where there is a strong purple and strong yellow zone right next to each other. This allows you to have a one farm base instead of a two farm base, which reduces headaches. It is even better if there are very few red dots around these two colour patches. Bright white dots in the patches indicate that they are indeed the right kind of patch. Yellow patches should be a bit bigger, because you need more of that crop.
On Nauvis, you want most of the map to be bordered by large lakes. This reduces the perimeter you will need to defend on the planet, which can halve the number of weapons you need to craft, and the number of times you need to attack biters. But also check that there are at least three copper and iron ore patches inside your hypothetical perimeter, one uranium patch and one cluster of purple oil patches. Otherwise, having the perimeter will just starve you of some needed ore.
Increasing water on the planet will make the lakes bigger.
Depending on playstyle, you will probably prefer a Nauvis with trees or with desert. But I think rerolling Gleba is a better move for fewer headaches.
When you start the game, immediately hit the escape key and save the map to a special name. I use the keyword "start". That way, if you want to do some speedrunning, you have the map right there. You also don't need to go through the map generator again. You can do this before the cutscene completes.
2. The first science pack
In my opinion, it is fun speedrunning the first few steps of Factorio. Though, to reliably speedrun this part, it is best that there are no enemies nearby, very few trees nearby, and that the coal, iron and copper starting ores are all very close together.
One of the first useful keyboard shortcuts is the "fast entity transfer". I assign this to right click. You can get all your salvage from the wreckage by right clicking all the rubble. I like to keep the wrecked ship around for art reasons.
Second, don't do the expected. Explore the map looking for a large rock outcropping, then mine it. When you hover your mouse over the rocky outcropping, if it is the right kind, coal will be one of the expected resources. This saves you about twenty minutes of setup.
Now, you need about two mining drills and two stone furnaces. Since you just mined a bunch of stone, you should have enough stone for about ten stone furnaces, but will be short on the iron needed for all the mining drills you need. To craft these items, open your inventory and click on the items on the right side of the inventory menu. I usually assign "craft 5" to right click, since craft 5 is generally more useful than craft 1.
Go to your iron patch and place both mining drills on the iron. Click on each to open their menus and use "stack split" to move half your coal into each. I assign right click to stack split as well.
Did you remember where the yellow arrows were pointing when you placed the drills? Place one stone furnace directly in the way of each of those arrows. Remember that there is a rotate button to rotate structures. You can rotate structures after they are placed.
These stone furnaces also need coal, but less. Stack split some coal into each.
Your next couple drills need to go on coal. If you don't have enough iron plates, "fast entity transfer" the iron plates out of you brand new furnaces.
But first, you'll need some wood. Chop down about twenty five trees. Make about five wooden chests. Place one of the chests in the middle of your coal patch. You'll be placing four coal drills around the wooden chest, each yellow arrow pointing into the chest.
Remember, you need coal to run drills. Use the rest of your starting coal to bootstrap these drills.
You will now be running out of stone, unless you decided to mine more than one rocky outcropping. You will also need some copper.
To finish the beginner setup I place one mine on the stone patch feeding directly into a wooden chest, four total on the iron patch and two on the copper patch, all feeding stone furnaces.
2.1 Electricity
In the expansion, some researches are locked behind random crafting activities. This may require you to jump through some extra hoops to do this next part. This guide ignores these hoops. Have fun!
For electricity, you should craft the following items. One offshore pump, one pipe to ground or about ten regular pipe, one boiler, two steam engines, about fifty small electric poles, about three labs, five or more inserters, and ten science packs. Set the science packs to craft last, because they take time, and you can build everything else first.
If you are trying for the lazy bastard achievement, only craft one electric pole, and don't craft the pipes. From this day forward, never do any hand crafting. Also, go back in time and craft fewer burner drills and stone furnaces.
For base planning purposes, you want the distance between your steam engines and your mines to be moderate, not small and not large. If your starting lake is unusually close to your ore deposits, you will want to build the steam engines on the opposite side of the lake. In all other cases, build on the same side of the lake. A good rule of thumb is about twenty power poles of length between the two locations. You can click and drag to place your power line. In this game, this is best done by clicking and then moving your character.
Place the offshore pump, then one of the pipes to ground. The reason to use pipes to ground is to allow navigation around the steam engines, and for future planning, as it makes it easier to draw more water in the future. The other pipe to ground you know has reached maximum extension when the guide lines turn green.
Next place the boiler right next to the pipe to ground. The boiler has two fluid connections of different types. You are connecting the one on the narrow side of the boiler. The steam engines go on the connection at the wide side. You are totally allowed to chain these buildings. Always put two steam engines on one boiler. Later you will connect additional boiler steam engine units directly next to your existing ones. I would plan enough space to put a total of six down.
Boilers are coal hungry. Start it up by putting a full fifty coal in the boiler.
Place your first lab about halfway between your ore patches and steam engines, right next to the power line. This area of your factory is going to get really busy, so it is nice if the area is clear on all four sides. You should also steel yourself for needing to move patches of your factory away from your labs.
One of the best techniques for labs is the "main plus two lines" technique. Place two labs on the "back" side of your main lab, with inserters going from the main lab to the auxiliary labs. The inserters will automatically fill the auxiliaries with science packs taken from the main lab. Most of the rest of the area around the main lab should be reserved for chests that will buffer our science packs, one type of science pack per chest.
Place the ten red science packs in the main lab, then set your first research to be automation. If the lab crackles with electricity, congratulations! You have done everything correctly up to this point.
2.2 Lazy production
Now it's time for the beginner version of automated science pack production. This first task is a great example of the "production triangle" technique. This technique generally requires three assembling machines, about six inserters, and some amount of transport belt. You will also need to place electric power poles down as needed afterwards.
Place two assemblers down right next to each other a short distance away from your labs. At the distance of one inserter, place a third assembler. The third assembler will feed gears into the other two, with one inserter each. Two inserters out the back of the first two assemblers should go onto a conveyor belt that heads towards the labs. This should lead to an "inserter, wooden chest, inserter" setup that heads into your main lab.
Now click on each of the three assemblers and give them the correct recipes. Then use "stack transfer," which I set to shift-click, to fill the red science assemblers with a full stack of copper plates each, and the gear wheel assembler with a full stack of iron plates. This will allow you to complete a couple researches before the gear assembler needs to be refilled.
At around this point, it is time to replace your burner mining drills with electric mining drills. You need to research them. Once researched, you will never want to use burner mining drills again. Though, replacing them all right away will be difficult.
It's time to expand our ore collection efforts. The eleven burner mining drills and six stone furnaces we have are just not enough at this point. But as we increase our collection, all the manual filling of coal and emptying of plates will become too much. It is time to build the ore line.
Different people have different ore line design philosophies. But they all have one thing in common. A big row of stone furnaces. Possibly two rows, on opposite sides of a belt.
The first thing we need to do is plan for the future need of stone brick. Delete the chest that is building up stone, and replace it with a stone furnace. You may want an inserter grabbing stone bricks out of the furnace and putting them in a new wooden chest.
This phase calls for around 200 belt segments, around fifty inserters, twenty stone furnaces, and a couple chests. To fully complete the setup, you will need the logistics research, and a couple splitters. Make sure you have the belts and inserters before deleting your old stone furnaces.
The line should be placed roughly between your copper and iron ore mines. If these patches are right next to each other, then you have the freedom of choosing which side the line goes on, but it should also be close to your coal.
This line can get quite long, over fifty units, depending on your design philosophy, so there should be a lot of space behind your initial line to expand away from the factory. Also, about ten power polls of distance between the line and the labs is a good idea.
Place the central conveyor belt. This one will contain both the copper and the iron plates that come out of the line. In lines on both sides, place the rows of stone furnaces. You need twice as many furnaces on the iron side, for starters. Later, copper demand increases. Another conveyor belt goes on the other side of each line of furnaces. Add the inserters.
For the ore belts, we will be using the "one item on either side of the belt" strategy. Place an electric mining drill on your coal patch. Drag a conveyor belt from the yellow arrow to the back of your line. You should use a splitter to divide the coal into two lines. Using a "T" configuration we will have one of the coal lines merge with a belt coming from your iron field. Do the same thing on the copper side. Now all you need is to put down some number of electric mining drills next to that belt. Once the electric mining drills are down, you can finally delete your old burner drills.
If the T intersection is correctly set up, you will see iron on one side of the belt and coal on the other.
What are the chests for? Place them next to the output line containing copper and iron plates. You can click on the inserters going into the chests and set the filter. This allows you to automatically stockpile a chest of copper and a chest of iron for construction purposes. No more right clicking on furnaces. Right click the chests instead.
There are three things you now want to do to finish this build. First, use a splitter to filter coal out of the end of either your copper or iron ore belts. Splitters have a simple filter ability. Drag a belt all the way from here, past your labs to your boiler. This should feed a chest with coal, then an inserter into your boiler. This eliminates the need to continuously fill your boiler.
Second, drag the iron copper plates line down to your red science pack manufacturing. You can use an underground belt to jump over the gear assembler. This is probably the simplest design. Now you can feed infinite copper and iron to this manufacturing unit.
Third, place an extra stone furnace next to your iron belt. This will produce a slow supply of steel as soon as you research steel. You should research steel early.
2.3 Misc. tips
This section exists as a grab bag of tips and tricks that are never mentioned in the rest of the guide. After a basic introduction to Nauvis, it seems the right time to introduce them.
1> If you click on a power pole, you see power network statistics and charts. In addition to being a fun bonus for stats nerds, if you look closely at some of the numbers, you can sometimes diagnose factory problems.
2> You can save blueprints to your game library or personal library, if you click on the upper right blueprint button while holding a blueprint. Any placed in a personal library will come back in time with you if you load a game. Though I usually save the game to a different slot for fear of losing work first.
3> One of the buttons in the upper right is the factoriopedia. Technically, the factoriopedia contains literally all the info you need to plan your production lines and layouts. If you can read it. Which maybe not.
4> There's also the factorio wiki, which contains copies of most the tips in this guide in a hyperlink format, and a few not in this guide. Though, the factoriopedia will be more up to date.
5> There are many keyboard shortcuts that can turn complex jobs into single click. Only the best four or so are introduced in this guide. Look up the shortcuts to change the tile paint area, quality, move entire inventory, mirror, pipette, build ghost, mass insert modules, copy and paste settings, open map, mine, shoot, pickup and drop items, inside the key remapper.
6> Many shortcuts can be assigned to the same key. You'll have to playtest to see if there are any side effects.
7> Many shortcuts also exist as buttons next to your hotbar. The most useful are the cut, copy, paste, deconstruct, blueprint, red and green wire buttons.
8> If you cut something, you'll take the thing's wire connections and module loadout with it. Very useful for moving buildings a short distance.
9> You can interleave different colors of underground belt. This is useful if space is super limited between two buildings, but you need to both input and output things. This will super help with spaceship queue design.
10> Buildings with productivity bonuses, and recipes with productivity bonuses stack additively with productivity modules. This reduces the value of productivity modules in these buildings. This affects foundries, biochambers, electromagnetic plants, pumpjacks and mining drills. In the late game, this affects plastic, asteroid chunks, scrap, steel, rocket parts, processing units, low density structure and rocket fuel. In postgame content, this affects research.
11> Liquids don't run out, they fall to 20% output speed. There is one exception on Aquilo. To prevent a mine from drying to 20%, you can use productivity modules. Once the mine is dry, you can recover it with speed modules. Using a speed-green module beacon is recommended for even better recovery. At that point, output is medium but infinite.
12> If you are trying for an achievement, pin the achievement. You can do this from the achievement menu. The pinned achievement can usually tell you if you failed it, or how close you're getting.
13> Cargo wagons are the only chest type that can accept inventory filters. They also have a larger size than chests, giving them niche uses in very advanced designs simply parked somewhere. Use those filters to allow cargo wagons to safely be filled with two or more item types.
14> Also, some other items slots can be filtered. Be aware of the slot filter shortcut key. Mainly useful on Gleba.
15> Flamethrowers have more range than both lasers and regular guns. Lasers backed up by guns is usually plenty for any enemy on Nauvis, but the range bonus can prevent the enemy from sniping. It used to be the case that the biggest spitters could overshoot your machine guns, but this appears to have been nerfed, leaving flamethrowers as the least popular weapon after teslas.
16> Lower tier assemblers produce more pollution. Upgrade early and often to reduce your pollution cloud size. By the time you get to space, you won't be using lower tier assemblers, even though pollution only matters on Nauvis.
17> There's a bunch of hand weapons you can throw at enemies, including robots if they are really giving you trouble. None of this guide's strategies include that, but a lot of people swear by throwing overlapping poison capsules at worms. This will make every other strategy for wiping out a base safer.
18> As soon as you get robots, you can have them deliver items directly to your inventory using your logistics tab. If you are not doing quality, this is especially useful for hand crafting. Have red, green, and blue chips, as well as iron gears, iron plate, steel plate and copper plate sent directly to you. And send wood and ore directly to the trash.
19> Alt mode. Probably mapped to the alt key. Overlays recipes on the assemblers. Most people play in alt mode permanently, though it hides some of the art.
20> Paving the ground makes you faster. However, it makes tanks faster less, and is a relatively expensive way to make you faster. Thus avoid during speedrunning. Refined concrete is the best.
3. Number two and military
Unless you had bad luck on selecting your map, you did not need military stuff before this point. However, the pollution coming off all your stone furnaces is large. They will attack soon.
The physical projectile damage research is OP. If you are really struggling with combat in this game, plan to research physical projectile damage early and often.
Best to research gun turret, military and military 2 right away. Make a machine gun for yourself, and then place an assembly machine next to your iron belt that produces ammo. Feed it directly into a chest.
Build a couple turrets at strategic points around your base and fill them with a little ammo. If you are really lucky, you won't need to do any more military stuff for a while.
So let's create green science packs before finishing military.
The green science pack recipe is about twice as complicated as the one for red science packs. It calls for about eight assemblers. The ideal ratio of green to red science is 6 green assemblers to 5 red assemblers. However, you are not likely to need more than 3 green assemblers unless you are using expensive research or an expensive research mod, or are playing multiplayer. In multiplayer, you can go a bit quicker, so having more green and red is a good idea.
Create a line of 3 green assemblers. Place them further away from your labs than the red science, in a bare area. On the other side, a single conveyor will hold both inserters and belt segments. This is possible by placing your inserter and conveyor assemblers on opposite sides of the belt.
The inserter assembler requires two auxiliary assemblers, a green chip assembler and a wire assembler, which you should build in a row, connected by inserters. Two of these four buildings also need gears. One of the four needs copper plate instead of iron plate.
Extend down the iron copper belt from your red chip manufacturing. An easy way to supply these three raw materials is to split the iron copper belt using a splitter into an iron belt and a copper belt. Fill the other side of the iron belt with gears, and weave the belt around the four assemblers that need it. The copper belt just goes to the wire assembler.
The excess gears from red science is enough for your green science, but it is simpler in the long run to build a new dedicated gear assembler.
Remember to research green science to finish the setup.
Once you have some green science going you should immediately research steel furnaces. Steel furnaces are a huge upgrade over stone furnaces and are a must have. You should also look into medium electric poles.
3.1 Military science
To start our military science we will build a steel manufacturing area. Use a pair of splitters to draw off some iron plate from near the exit of your plate manufacturing area. Using splitters to draw off resources when building new areas gives you better control over resource sharing. Splitters allow you to choose which area gets priority, and also can make sure neither area is completely starved of resources.
Merge this belt with a coal stream. Reserve a lot of space along the belt for steel producing furnaces. You only need a few at first, but demand climbs rapidly. The iron coal belt also has some other uses, so extend it a little past this area.
In addition to sending some steel into a construction stockpile chest, send some next to your ammo manufacturing assembler. You will build another assembler next to it and the copper iron belt, one that manufactures piercing ammunition. Once you start manufacturing piercing ammunition, you will never use regular ammunition again. It's just too superior. Delete the buffer chest for regular ammo and use an inserter to directly feed regular ammo to the piercing ammo assembler. You will want two outputs from the piercing assembler, one into a chest for your personal use, and one onto a conveyor belt.
You should only need one military science pack assembler. If you need two, this implies you are playing multiplayer. In which case, I would build a second piercing ammo assembler on the other side of your basic ammo assembler to ensure the base has enough ammo for all purposes.
Next, we change course entirely and dramatically increase our stone mining. Over at our stone mine, we are going to plop down about five electric stone drills. This will be sufficient to feed about two steel furnaces making stone bricks. This will not be enough for even one wall manufacturing assembler, but we don't need wall manufacturing at full capacity. Also, we still need a few extra bricks on the side, so divert some into a chest. We want two outputs from the wall manufacturer, as we want some wall in a chest for personal use.
Draw the belts from piercing rounds and walls towards the end of the iron coal belt. At that location, we are building two assemblers. One for grenades, which takes iron and coal, and one for military science packs. You should have one dedicated grenade manufacturer for each military science pack manufacturer, though you should only need the one.
Remember to research military science packs to get the recipe.
Now we go to war.
Go to your map. There is a toggle on your map to turn on and off pollution. Use it and see what happens. The red cloud of pollution coming from your factory is bad news, if it hits any biter colonies, as they will periodically invade. Best case, they slowly use up your ammo, and you need to find more iron ore deposits more frequently. That's the best case.
If the red cloud extends into the black fog of war on your map, manufacture and plop down a few radar. Radars passively deal with fog of war for you.
Assuming you've researched physical projectile damage one time, and have collected two stacks of piercing round ammunition, you should be able to handle the closest one or two biter colonies on foot. Though you might want to give yourself light armour and save the game.
Just run up to the colonies and shoot the base to death. Once you are done, place a machine gun turret into the middle of the dead base and put a little ammo in it. This is the "victory totem" technique, and it prevents biters from reestablishing a colony nearby. They like to establish a colony every ten or twenty minutes, with increasing frequency as the game goes on.
This technique won't work for larger bases, but the next best strategy requires cars, which requires engines, which is part of the next chapter.
4. chemical science
Chemical science is a much greater step forward than either of the first two science packs. We will need to go on several different quests to complete all the parts.
First, we need to chase numerous researches. You can go into the tech tree, find the blue science, and look at the various prerequisites. The two main ones we will be interested in is sulfur and plastic. Both of these have a common prerequisite of oil processing, which has the prerequisite of fluid handling. Research fluid handling and oil gathering immediately, and locate the oil patches on your map.
Oil patches are normally a far way away from the starting location, so you may need to save the game, explore, then load the game.
You will probably need to make several trips to and from the oil patch, so you don't need all the materials right away, but you will need about five pumpjacks, 200 pipe to ground, 50 pipe, 200 medium electric pole or 50 big electric pole, five turrets for security, one pump, some lights and about three oil refineries.
If you want to do it all in one trip, you will need to create a powerline from your base to the oil going one direction, and a mostly underground pipe from the oil to your base in the other direction. The pipe is likely to be longer than the maximum pipe length. That is what the pump is for. If the pipe is indeed too long, then halfway between, you will need a mini station, where your power line and pipe line intersect and you build a pump. I like to put a turret down here and a light for decoration. Neither of those two are strictly necessary.
At the oil field, you will need to put turrets down, because pumpjacks produce pollution, and can get attacked. I also put a few more lights down for decoration, as lights look particularly good in the remote wilderness.
If you put a radar down, you gain the ability to remotely examine your oil field by zooming in on the map. Of course, if the reason your field is not working is a power outage, then the radar won't work either.
The pipe should not make it all the way into your base. Your oil refineries should probably be built about twenty power poll lengths away from the rest of your base. This is due to the natural bulkiness of your oil processing setup, which require a clear square of space in front of your oil refineries.
Place the three oil refineries in a row, though mirror the middle one. The mirror key is almost as useful as the rotate key, when it comes to fluid handling buildings. In the near future the back of your refineries will be served with both a water pipe as well as the crude oil pipe. The front of the refineries will be quite messy with three fluids. But for now, there's just the petroleum gas fluid. connect the three petroleum gas outputs together, and send the resultant pipe a little closer to your base. This pipe will meet up with your coal and iron plate belt, which you should extend down to this location.
To make more progress, you will need to research sulfur and plastic.
Let's get the other subquests done while waiting for these researches.
You need a big line of chemical science assemblers. The ideal ratio is exactly two for each green science you have. They need three ingredients, which means two input belts, one of which will be grabbed with long handed inserters. Let's prepare one of the three ingredients now. A little distance away, create another line of assemblers of the same size. These will produce engines. Put some in a chest. Technically, you need slightly fewer engine assemblers than science pack assemblers, but the number is close.
The engine assemblers can be fed by a single belt of gears and pipes, which only need one assembler each. Both of these just need iron, so can be placed next to either the coal iron belt or the copper iron belt. Engines also need a fair amount of steel.
You may want to put both some pipes and gears into chests for personal use.
The next side quest is a bit of a departure from the normal. We come to the first point where blueprints and construction robots would be particularly handy, but they are not available yet. We will be creating a red green chip belt. This belt is quite versatile, and at least as useful as the copper iron belt, but it will require a very large quantity of copper and iron itself to create.
Hot tips. If you use the copy and paste tools in your hotbar, you will automatically create a blueprint complete with building settings in them. The buildings keep the settings even if you manually build them on top of the ghosts. You can manually build a ghost by clicking your pipette button on the ghost then the build button. (usually left click). If you have nearby buildings with the right settings, you can also use your copy settings and paste settings buttons to set the recipe of your building. Sadly this method does not configure modules. But it's great for setting up rows of production buildings, and also for setting requestor chests, for standalone production buildings.
For this purpose, you will either need to create a brand new plate manufacturing line, or upgrade the existing line with fast transport belts. To upgrade the line, manufacture about 200 fast transport belt segments, one fast splitter, and a few regular splitters. You may need to add extra furnaces to your line, but since you upgraded them to steel furnaces recently, you may not.
To add more ore to the ore lines, you add a splitter halfway down the line. This allows you to merge a second ore belt. Make sure all the ore is on the correct side of the belt. The coal you don't need to worry about.
To increase throughput in the output belt, starting halfway down, replace it with fast transport belts. at the end, the fast transport belt needs to meet a fast splitter. The split will be sent off to the side of your factory, so you can create a nice long double line of assemblers.
If you need even more iron and copper for your greedy chip factory, you should consider researching electric furnaces and plopping some mines down on some new ore patches. About halfway to your base, convert them to plates using a big line of electric furnaces.
Each segment of the chip factory will be a set of five assemblers in a double-u formation. Two copper wire assemblers with a green chip assembler in the middle. These will be facing the plate belt. On the other side, two red chip assemblers will face the output chip belt.
The inserters going into and out of the red chip assemblers should be normal. But the ones feeding the copper wire and green, and going from copper wire to green must be fast inserters.
One unusual inserter must come out of the green chip assembler. A belt sandwiched between the red chip assemblers will move some of the green chips to the inside side of the output belt.
One benefit of this setup is a third of the green chips are immediately consumed by red chip manufacturing, which significantly reduces the need for a fast or multi lane chip belt.
On the other side of the output belt is a plastic belt. To actually produce red chips, we need to put plastic on that belt.
Manufacture about five chemical plants. Three will immediately become plastic manufacturers. One will be a sulfur manufacturer. The sulfur manufacturer needs to get water as well as petroleum gas. The plastic needs coal and petroleum gas. In addition to the incoming coal iron line, you will need an outgoing sulfur plastic line. Of course, you will split the sulfur from the plastic when it gets closer to the base. The sulfur goes directly to the chemical science assemblers.
In the near future, you will add another chemical plant nearby that takes some of the sulfur and creates sulfuric acid. It uses the iron plates and the water. You will likely need only one of these, though larger factories may need two sulfur manufacturers. Because sulfuric acid is needed all over the place, always leave room for your sulfuric acid line to split when needed.
(cont'd)
chemical science continued
With sulfur, engines and the chip belt running next to your chemical science assemblers, you are done.
4.1 Hit and run tactic
This tactic is an early strategy for effectively killing larger bug bases. Though it does not work well with trees, cliffs and rocks.
Build a car. If possible, build an uncommon or rare car. Though, by the time you have the tools for this, you should be able to built tanks instead.
The range of an uncommon or rare car allows the tactic to work with more distance between you and the bugs.
Collect at least five stacks of piercing round ammunition, a bunch of repair packs, some machine gun turrets and some rocket fuel. Rocket fuel makes the car go faster.
Save the game.
When the car gets close to the enemy base, put down two turrets and fill them with ammo. This creates a safe zone. Drive close to the enemy base and slowly circle it while shooting into it. You don't need to shoot at the followers because your car is faster. Though, it is all over if you hit a rock.
Some upgrades:
Build a tank and put an exoskeleton, a battery and some solar panels in it.
Use uranium ammo. This more than doubles the rate of destruction.
When you reach this point in the game, the victory totems may not be enough to hold back the biters. You'll need a territory wall. Biters rarely attack walls, though they will if they can't path through. You should build turrets all along its length. Though you don't need the turrets areas to overlap. Always put one unit of space between turrets and walls.
After you get robots, you should build roboports in a ring around your territory. Add requestor chests to automatically supply them with small amounts of uranium ammo. Then you almost never have to think about biter invasions ever again.
5. Solar side quest
Highly recommended, even on a speedrun. The first part can be completed before you get chemical science. The second part requires sulfuric acid.
You want a dedicated solar panel assembler. This should be built next to your steel line, and also near your chip line and copper line. Dump them into a chest for the future.
You also want a dedicated accumulator assembler. This requires a plant that produces batteries from copper, iron and sulfuric acid, It also requires iron. Dump them into a chest for the future.
Early on, it is generally a good idea to build long rows of solar panels and accumulators instead of building more steam engines. Even if you only have solar panels, build a few rows. Once you have robots, this is a perfect opportunity to make a blueprint. In the center, place a roboport. Inside the service area of the roboport, place a grid of nine substations, and pack the region with solar panels and accumulators. I like to add circuits and coloured lights to report charge.
The ratio of solar panels to accumulators is about 1 accumulator to 1 solar panels. This actually asks for too many accumulators, but extra accumulators helps with power spikes. You need slightly fewer accumulators per panel on Vulcanus and Gleba, but the difference is small. You won't be using solar panels long on the other worlds. In space, the ratio is zero accumulators, because the daylight is perpetual.
If you do build solar panels, you lose out on one achievement. Steam all the way.
Solar panels are also necessary for space platforms. Accumulators mostly necessary. Though nuclear is almost as good an option. When founding a new planet, you always want to take a big stack of both. This makes starting a new base much easier. In the case of Vulcanus, this should be your main power source, but there is a second option.
6. Modules side quest
6.1 Quality levels
Level 0: No quality modules. This is the only choice if you are not playing the expansion. No expansion, no quality.
Level 1: Quality on modules only. Take your quality modules and put them in your module assemblers. In the expansion, tier three modules are locked behind ingredients found on other planets. This is annoying. But high quality tier two modules are the new tier three. In some cases, high quality tier two is better than low quality tier three.
At level 1, you should also stick quality modules in your solar panel and accumulator manufacturers from the previous quest. High tier solar panels are great for space platforms.
Level 2: Quality space platforms, personal weapons and armor.
This level is a bit more ambitious, and requires a fair amount of work to set up. However, space platforms see larger benefits from quality than regular factories mainly due to space constraints.
The greatest benefit is obtained with asteroid collectors, which are vastly superior, even at uncommon quality. However, uncommon quality assemblers, electric furnaces, chemical plants, beacons, cargo bays, and even engines and ore crushers are a good idea.
For this, you will need to secure a reliable source of uncommon low density structure. You can do this by filling most of your low density structure manufacturing with quality modules. You will need to do the same with your electric engine units and blue chip manufacturers, and at least a few of your steel manufacturers. Use electric furnaces.
For electric furnaces, you can obtain these by putting quality in the electric furnace manufacturer associated with your productivity science pack.
Beacons and assembly machine three will be hard, but if you don't manufacture either of these by hand, you can get some randomly with quality modules.
In terms of quality armor, here's a comparison of common power armor mk 2 and rare power armor.
common mk 2: Acid 70%, Explosion 60/50%, fire 70%, physical 10/40%, inventory bonus 30, equipment grid 10x10, 60 processing unit, 40 electric engine unit, 30 low density structure, 100 speed module, 100 efficiency module.
rare mk 1: Acid 60%, Explosion 40/40%, fire 60%, physical 8/30%, inventory bonus 32, equipment grid 8x10, 40 rare steel plate, 40 rare processing unit, 20 rare electric engine unit.
Although the rare mk 1 armour is slightly worse everywhere but inventory, the module requirement of the mk 2 is actually very expensive. mk 2 still appears to be the better deal.
The benefit of uncommon or rare armor components is comparable to that of the armor itself, though the components may be cheaper overall.
The benefit of a rare machine gun is very high. You can hit enemies from twenty percent further away.
The range benefit extends to cars. And uniquely, the health benefit for cars is a big deal.
Level 3: Quality on almost everything, especially big mining drills.
In terms of overall benefit, among items not discussed so far, mining drills and big mining drills have the biggest gain per quality level. Rare mining drills last 50% longer on the same ore patch. This stacks multiplicatively with the big mining drill bonus. Big mining drills last twice as long.
For reference, big mining drills require mining drills, electric engine units, red circuits and tungsten carbide.
Now lets look at all the other items.
Target common quality:
Pipes, tanks, conveyor belts, lights, combinators, rails, and most rail stuff have no appreciable benefit. Note that uncommon pipes are needed as ingredients.
Science packs have a large bonus, but the bonus is usually smaller than shooting for productivity instead.
Rocket parts. Rockets can't be made with quality stuff in the unmodded game.
Ingredients that go into liquids. This comes up in a couple areas.
Paving materials and seeds. These items effectively lose their quality when used.
Walls, ammunition and repair packs. The health and damage benefit is lower than the increased cost. However, some quality ammo for personal use might be good.
Car, tank and train fuel. Usually harder to set up than the payout, especially when working with nuclear fuel.
Fuel cells. No fuel value increase. However, note that fuel cells are ingredients in personal equipment.
Agricultural towers and captive biter spawners.
Anything made on a space ship. Space stations can manufacture quality, but it is a near universal mistake on a ship.
Target uncommon quality:
All weapon turrets for the range bonus. When used on a space ship (but not space station), rare is a better target.
All productions building not listed in rare. Both production speed and power efficiency improve, making these much better on your power grids.
Solar panels and accumulators not used on Nauvis. Ship quality over space. But keep rare for your space ships.
Medium electric poles, big electric poles, and accumulators. The decision to use uncommon power distribution also means you should switch out all of your blueprints, because the ideal spacing shifts dramatically. Nonetheless, may be fun.
Power plant stuff. Both types of nuclear and heating towers get decent gains worth considering. The reactors are painfully expensive though.
Rocket silos. Speed gain is very nice, though building more silos instead of quality silos is valuable given how start and stop rocket requests tend to be.
Inserters. Speed gain is nice, particularly in situations where speed is extra in demand, like Gleba and space ships. Target rare in those areas.
Robots and roboports sent to other planets. Though, due to unique circumstances, send rare robots and ports to Aquilo.
Radar.
Chests, but not tanks.
Gleba science, Fulgora science and Aquilo science, each for a different reason. See their chapters.
Target rare quality:
Beacons have two benefits. Very nice.
Pumpjacks, labs, but not biolabs, biochambers, recyclers and cryogenic plants are easy to get at rare quality. All production buildings on space ships (but not space stations)
Modules themselves. This is expensive, though.
Ship engines and cargo bays. Cargo bays on the ground can be uncommon.
Personal weapons, armor and armor modules, as well as tanks and spidertrons. Though rare spidertrons are a feat.
lightning rod and lightning collector. Given how science is produced on Fulgora, also target rare accumulators on Fulgora.
For purposes of personal prestige I make rare rocket silos, ship starter packs and cargo landing pads, but this is overkill. Small benefit.
(cont'd)
quality levels continued
Target epic quality:
Asteroid collectors (on space ships), big mining drills.
In order to set up all this quality, you will have to do something laborious. On all machines that output to a passive provider chest, you will have to output as well to a second active provider chest, and add a quality filter to both inserters. You can use typeless quality filters. They are faster to set up and are more copy pasteable. If the machine outputs to a belt, the belt needs an extra splitter that sorts out higher quality items to an active provider chest. In some rare cases you need to apply both these solutions to the same production facility.
All this extra active providing also means you will start to accumulate massive quantities of uncommon and rare ingredients in your storage chest field. You'll need a larger field, and you'll need creative ways to consume all these extra resources. On most planets, you will create a shadow uncommon item factory next to your regular factory. It will be smaller and mostly produce uncommon chips. That will help to keep the level of uncommon iron plates down while improving your number of rare chips of all three colours. This shadow factory will most likely be served entirely by your robot network instead of traditional conveyor belts.
Even so, you'll need to most likely send large volumes of uncommon things to a recycler for destruction eventually.
Additionally, you cannot manufacture uncommon things by hand.
Also, under no circumstances, put a speed module in a beacon which services a facility with quality modules. This is the exact opposite advice from productivity modules.
The total cost is steep. This will double, in the best case, the time it takes to set up your factory.
Level 4: Megabase hyperquality.
This level is only possible after you master Fulgora and start exporting large amounts of epic level tier three quality modules. You can raise your target quality levels by about one on everything with a couple notable exceptions.
You can't raise the target quality on rocket parts, ingredients for fluid recipes, and probably shouldn't even try for promethean science packs. Never put quality production on a space ship.
Even with these safeties, your factory expansion will slow. It will take twice as long for your factories to manufacture their own replacement parts.
6.2 Productivity levels
Level 0: No productivity.
This level is really shooting yourself in the foot. There are a couple situations where productivity is a no brainer. Namely,
Level 1: Productivity in key areas.
Put productivity modules in your rocket silos, labs, and if you have leftover, in your science pack production buildings. These three are the huge gain areas for modules. In the case of epic productivity level three modules, biolabs, rockets and assemblers would get 100% productivity. That means you would need one quarter as much factory to get the same science, and half as much factory to launch the same rockets. That's right, a resource savings approaching 75% of everything.
Because space ships and space stations both have a hard time getting reliable high volume resource streams, productivity modules should also be considered in many space buildings.
When building productivity in key areas, strongly consider putting beacons with a speed module in it next to these buildings. Both speed green and speed speed are good choices. Though green modules are less good when paired with productivity.
Next to a normal building, a rare speed module 2 in a rare beacon would roughly double speed and just over double power consumption. Next to a building with four productivity module 3 of any quality in it, the speed is increased 3.5 times, and the power consumption is increased 25%. A rare green module would roughly cancel the power increase of a rare speed module in the same beacon.
Consequently, a single speed module next to a productivity building is roughly like two and a half speed modules and two green next to a normal building. Benefits fall off when you add more speed modules.
Level 1a: Productivity in key areas, and random speed green beacons.
When should you use speed green beacons? Which as stated above roughly double building speed with no change in power consumption.
Never, ever, next to a building with quality modules.
Next to rows of buildings. For most buildings, so long as they have module slots, you will save something like 200 kw per building, and halve the real estate they occupy. This makes the most sense if you can serve eight buildings, one row on either side.
For larger buildings, you save more real estate. Additionally, larger buildings consume more power. Buildings from other planets in particular tend to have huge power consumption. Biochambers are 500kw, electromagnetic plant is 2.07 mw. Biochambers in particular benefit from not eating your nutrient supply to death.
For Larger buildings and high power buildings, you can shoot for rows of 3 or even 2.
If you are going with a quality build instead, you can substitute beacons with only green modules. This is most useful next to biochambers, electromagnetic plants, and foundries.
Don't overlap beacons. This reduces beacon effectiveness. Only overlap beacons next to productivity modules.
Tips for level 1a will be spread throughout later chapters.
Level 2: Productivity everywhere where quality is a bad idea.
This gives a much lower benefit. A good way to think about this is productivity modules affect the factory that comes before the module, but none of the factory after. A lot of your factory feeds into your rocket parts, for example. You can reduce the number of electromagnetic plants making chips, the number of foundries making plates, and the number of mining drills. If you instead put productivity in your mining drills, you will only be improving the efficiency of your ore patches and nothing else.
Level 3: Full productivity build.
This approach requires mostly not using quality modules. It also makes your factory demand a lot more power and produce a lot more pollution. But your ore patches will last longer.
Pollution is only a concern on Nauvis, and ore patches are not a concern on Gleba. Thus, these builds are less good on these planets.
Because you can put speed in beacons, and need smaller factories, and don't need to add a bunch of extra filtering inserters and active provider chests, a productivity build megafactory can expand in size faster than the quality build alternative. This appears to be extra true on Fulgora.
7. Trains side quest
You can actually start the trains side quest a lot earlier, but you probably don't want to. See the achievements section at the end if you want the "getting on track like a pro" achievement.
This is because it is easier just to drag a fast transport belt between your second and third closest ore patches and your main factory. That is all the ore patches you will need unless you make megafactories later in the game.
When the travel distances start getting longer, it is time to think with trains. They also have an important use on Fulgora.
7.1 Just build one or two dedicated routes
This option has poor scaling, but is much faster to set up. It's a good idea if you want to compromise between megafactory trains and no trains at all.
You still need to lay down a power line, and, once you start using robots, a line of roboports out to your remote mine.
You probably want to take the opportunity to drop a radar next to your remote mine. The mine itself should be filled with tightly packed rows of mining drills or big mining drills. If you are not using quality, putting cheap green modules in the mines by laying the drills with a blueprint is a good idea.
Blueprints with some walled turrets are a good idea if you are outside your perimeter. I maintain two blueprints, one with a couple lasers and uranium ammo fed machine guns, and one which also contains a roboport inside. As is true with all walled turrets, you want an air gap between the wall and the turret big enough for one inserter. This is because larger bugs can attack one tile over walls.
The train station itself will mostly be a large circle of track. If you place the stop outside the circle, you will need a rail signal inside the circle to tell the train whether it should park on the curved part or the straight part. If you place rail signals outside the circle, you need to place them in pairs, to let the track know that it is a two way track. However, rarely do you want signals on two way track itself. See the later sections.
Some parts of your train stop need to be built on straight sections of track. But notably, this does not apply to loading and unloading solid items. For your remote mines, generally you want a row of six steel chests per car that fill with your ore with fast inserters. On the other side six bulk inserters that will fill your train car.
Short trains are superior to long trains. You will probably standardise on either two car trains or three car trains.
When placing a station, you should see a train ghost. This helps with planning. When designing stations, also eventually put a real train down and have it stop at the station, to ensure proper alignment of all your inserters and pumps.
So that your mines wear down more evenly, you probably want to mix all your incoming ore together with a fast splitter, before it reaches the steel chests. You can split two input lines into two output lines. If you have three lines, you will need to get creative. Then, another splitter will create a left and right mini line in front of the six steel chests.
Once you have a mine station, you most likely want to grab it into a blueprint so that you can recycle the design on the next mine. This gives the next mine the same name. Giving stops the same name is a good way to allow a single train to serve multiple mines, however, you need to disable the stop using the circuit network if it doesn't have much ore in stock.
The home station can serve multiple mines per stop. However, you want separate stops for each ore type, probably just iron and copper. It is probably best to build steel chests on both sides of the track, doubling your storage size and unloading speed. Next to your locomotive, you probably want a chest that requests rocket fuel or nuclear fuel. How nuclear fuel works in a combustion engine is a great mystery for the ages, but it makes trains fast.
pulling from the chests, you again want splitters to mix the various outputs. With three cars and thirty six chests total, you can easily feed six outgoing express belts or even turbo belts. This is the real strength of train transport. It can replace about six belts with minimal work.
With oil transport, you want to replace each line of six chests with two tanks with two pumps going in or out of the train car. Overall, fluid transport is a weaker option than solid transport. Though, if you have a remote uranium mine, you should ship sulfuric acid out, and return with only one or two cars of ore.
After you place the train on the track you need to set the train's stop schedule. You want to add the remote mine and the home station. If you have one train serving multiple mines with different names, add all of them in a circle. If you don't want to get fancy with wait conditions, just add "wait for 30 seconds" to each stop. This general purpose wait condition is generally good enough. Waiting until a train is full or empty add risks you will need to check for.
Then make sure you are not standing on the track and hit the play button for one of the stops.
If you want to warp to or from a remote mine, you can board a train. This is useful to remember.
7.2 How not to crash
Automated trains don't really crash with each other, due to good underlying block section logic. However, this means your train networks are prone to jamming instead. Also, there's nothing stopping trains from hitting you, which is usually an instakill.
If you're wondering whether high speed trains are a good weapon against bugs, the answer is no. The bugs will almost never stand where you want, and the biggest enemies have impact damage resistance.
The easiest way to not collide is of course to just have a single train. But this is not a good option if you have two ore types.
You'll want to create a two lane main artery heading out from your base and into the wilderness. If you don't do this, you can only have one train at a time travel down the track, and you need to remember to use almost no signals on the track itself, as using signals creates new block sections which invites more trains onto the track. One train per block section. Learning chain signals would be required, as chain signals do not create new block sections.
A single tributary line can be used to serve two or three stations. Stations are big enough, generally, to hold an entire train. The judicious use of a single regular incoming rail signal will create one block section for the station, allowing it to store one train as others move down the tributary line.
A good intuition for regular and chain signals is the regular signal creates a block section in front of it, and the chain signal belongs to the next regular signal, creating a no stopping zone before the block section. For this reason all chain signals must always have regular signals in front of them. You can of course chain chain signals to create multiple no stopping zones.
If you do do this, then you have to design a couple types of complicated rail intersections. But once you do, you can just drop them down using blueprints.
Type 1: Artery to tributary line. The tributary line is a single two way track best used to feed a single mine. You can create a T intersection
You have one rail crossing. As a general rule, when two rails cross, you want on both rails a chain signal before the crossing and a regular signal after the crossing. The chain signal basically says, "do not enter me unless you can also leave me." Or, do not enter the intersection unless you can also leave the intersection.
You also have one merge, one split and one merge-split. The general rule is you put two signals down immediately before the merge or immediately after the split. This reduces the impact of each branch on the other branch.
Remember that for tributary lines, if they feed multiple mines, you need to use chain signals going into the line so that only one train uses the line at a time.
One of the mini lanes involved in both a split and a merge have no crossings on it. That means you only need one signal.
Applying all four rules, you should be putting down three normal signals and three chain signals.
Train length concern. With this simple design, don't place two T intersections closer together than one train length. The regular section following the chain signal section must be large enough to contain an entire train. Since you are not going to be making trains longer than six car lengths, that means about forty units of separation should be enough.
Type 2: Artery to artery. You only need this when scaling up your network to handle large numbers of mines. A T intersection is still a good design. When two arteries T off, you have four one way lines instead two one way and one two way.
This type gives you three rail crossings, three splits, three merges, and a maximum of three mini lanes with no crossings on them. All three rail crossings can overlap in the center of your intersection flower. Applying the same rules, this means you should have six normal signals and three chain signals.
High speed artery:
If you are using elevated rail, you can eliminate all of the intersections on your artery. This notably drops the number of chain signals down by two on a type one intersection and eliminates all the chain signals on a type two intersection.
Additionally, you should add regular rail signals every forty units or so down the entire length of your artery. Every section you add is one additional train that can fit on the line. Though, you do have to watch that not too many trains are on the line, because they will need to reserve multiple sections to travel at speed, and this creates a rush hour effect.
Type 1a or 2a: intersection with buffer station.
I like to pair a buffer station on the unused side of the T intersection. That's the straight side. This station serves a very special role. You can also create a separate blueprint just for this.
You should never put an artillery wagon on a regular ore train, for two reasons. First, the zone cleared around your mines will simply be way too large. You'll waste artillery shells, and invite extra biter attacks, targeted at your mines, no less. Second, the mass from the artillery wagon is too high and will slow the train down. Moving these attack points back to select intersections and using a single dedicated train is a good compromise.
With an artillery wagon deployed, you can likely keep the biters out of your pollution cloud with just one or two artillery cannons near your base. High quality cannons plus the range research are all you'll ever need.
The buffer station should be built on a piece of track parallel to the straight side of the T intersection. It needs one merge and one split, but you can simply put train signals on the side track. Given the simplicity of this station, you can also just make a blueprint that goes onto any section of track.
It cannot, however, be put as or past the last intersection on an artery, as the supply train will have no way to turn around. Unless you add a circle at the end of the artery.
In addition to hauling around an artillery wagon, you should haul around a supply wagon. An inserter coming out of the wagon can fill a green buffer chest by using circuit controlled filters. You can use a constant combinator to set how many items you want, and a decider combinator to emit that item (using the each special symbol) if there's less than that amount in the chest. The wagon itself can use inventory slot filters to control contents.
What items should you buffer? Ammunition, repair packs, wall sections, power poles and roboports. The power poles and roboports are for faster construction of new mines and faster repair in the event of a power falure. You don't need to buffer artillery shells.
The station needs to disable itself after every visit for a long period of time. A count-up timer is a suitable approach.
The entire intersection needs to be surrounded by walls and have turrets present. This is because it will be attacked by biters.
If you are really ambitious, you can also ship out some high temperature steam, which will keep your roboports, lasers and mines working for a couple minutes in the event of a power line break. One tank plus one normal quality turbine provides just under seven minutes of backup power. At rare quality, it's two thirds as many minutes. The almost six megawatt output is appropriate for seven laser shots per second, or handling the base drain of one hundred roboports, or running nineteen module free big mining drills.
If you want to deal with power spikes, it is better to add one extra turbine rather than any number of accumulators, but you do need one accumulator to act as a canary, detect the power outage and close the circuit breaker.
(cond'd)
how not to crash continued
Yes! But it is a fool's errand. You will halve the speed at which you can create new mines. Without access to your main roboport network, it will take you more than twice as long to source all the initial ingredients. Your field station will be at least twice as complicated in order to deal with the various things that can go wrong, and your circuit network conditions likely need to be three times as complicated overall.
7.3 A main station
At some point, if you keep doing the train thing, you will want to build a main station as a scalable solution. This is unlikely on other planets. Although Fulgora is the most likely to have trains, it has only one ore type, so can scale without a main station. Vulcanus is the second most likely to need a main station.
The main station should be out of the way of the main base, with thick rows of express or turbo belts transporting over the last mile. Let us imagine building the main station on the north side.
I build main stations in three sections, an incoming parking lot, and outgoing parking lot, and an unloading zone. The parking lots are simple. You only need ten parallel stations or so, all with the same name, each the length of one train. They all split from your main artery, and merge into a single feed line for your loading zone, and they can be packed close together.
Remember, each lane of parking lot or unloading zone needs a chain signal at the end, and a regular signal at the beginning
The parking lots are important. You need somewhere to stick your extra trains so they don't cause traffic jams or rush hour traffic. Having them right next to your unloading area also allows you to push multiple trains per minute through the zone.
The unloading zone is more complicated. With our station on the north side, I orient about ten parallel unloading lanes all facing down into the factory. The parked trains will be facing south, and the many conveyor belts will flow south out of the unloading area.
The unloading lanes themselves will be the same as they were when we just had one copper and one iron home station. You need about twelve tiles of space between adjacent lanes for the belts and steel chests, though you can get it down to ten with creative use of underground belts. Mixing the belts with splitters is important to ensure the chests are drained relatively evenly. You can do this south of the station.
I would create three lanes each for unloading copper and iron with the same name. These stops need to disable themselves when they are nearly full, so that the other stops get some action. One line for stone and one for coal. One for oil and one for uranium. For each unloading lane, it is safe to have two trains. If you have a very long main artery, three trains each is probably safe.
With three car trains, this setup gives you eighteen express or turbo belts each of iron and copper, and six each of coal and stone. This is about ten times as much as is needed for a normal Factorio factory. If, for some reason, your hungry factory needs even more stuff, I suggest building another home station at each of the other four cardinal directions rather than scaling the station further.
Behind the unloading zone, I usually add one extra loading zone for our buffer and artillery train.
The whole thing should be surrounded by walls. Psychologically, the large walled complex will prevent anyone from getting run over by trains. You should probably have the main artery come out of the area with elevated rails. If you don't like elevated rails for some reason, you can design an automated train crossing using a bunch of gates and circuit network combinators. But such crossings will never work perfectly, and will result in some traffic disruption.
Remember to add lights for decoration. Some of them can be connected to your circuits or signals to display valuable information, like ore storage level, or incoming trains. I like to use base two logarithmic metering, aka. mostly full, half of that, half of that, half of that, and half of that again. A chain of lights will have each of these conditions in a row.
You also need some defence turrets, as, even if the station is out of the pollution cloud and out of the way, the artillery wagon may attract an attack. This is unless the station is fully inside your walled perimeter.
8. Uranium side quest
Solar panels are amazing. You just manufacture an infinite number and then have robots cover the desert with them. They never get dirty, never need to be replaced, and have close to 100% efficiency.
But that's no fun.
There are three main designs of fission reactor, which I am going to call a single reactor, a double reactor, and a king sized reactor. After you build your first one, you will capture it in a blueprint so you can spam copies, like with the solar panels. Of course, the energy density is much better than solar panels.
Before we get to the three types, though, we need to set up our centrifuge area, and you should do this as early as possible, as it takes hours to produce the forty uranium 235 needed for the kovarex enrichment process.
Step one, find your nearest uranium deposit and run a sulfuric acid pipe out to it. Plop down, let's say ten mining drills. Your uranium industry needs about half that, but if you want the kovarex process started inside four hours, you need extra drills.
If you want to do kovarex on uncommon uranium, put quality modules in all the drills. This has exactly one use. See the biter farming side quest for more.
Step two, pick a random location between your base and your mine. Put down, lets say, five centrifuges. All of them will refine uranium ore and dump the results into multiple steel chests. Walk away. You need your dish to simmer for a bit.
That said, you can start manufacturing uranium ammo any time after reaching this stage. It only requires uranium 238 and piercing rounds, and uranium 238 is never in short supply. A single manufacturer will provide most likely all the ammo your base needs. Uranium ammo is twice as good and has no downsides.
If you want to cheese the demolishers on Vulcanus before getting missile turrets, put quality modules in the assembler, and export your uncommon ammo to space. About one stack is required per demolisher, with an extra stack to prime your turrets.
Okay, let's assume it's two hours later now.
Check the steel chests to see if you've managed to collect an entire forty uranium 235 or not by now. If so, delete half the centrifuges. We will place a new centrifuge that will be doing the Kovarex enrichment process forever. Put the forty U235 into it. This is a catalytic process, so we will be taking uranium out, moving it a short distance, and putting it back in. Three inserters and a steel chest is a good idea. When taking u235 out of this chest for other purposes, disable that inserter arm if the amount of u235 in the chest is less than forty.
I would also be very paranoid, and decorate the entire area with turrets. You don't want some biter coming along and destroying your initial supply of forty u235.
After the Kovarex is running, you have secured a nearly infinite supply of both types of uranium. Running out is exceptionally unlikely. You should manufacture uranium fuel cells and nuclear fuel. Notably, the nuclear fuel is only for cars, trains and tanks. It makes vehicles faster. If you want quality personal equipment, put quality modules in the uranium fuel cell manufacturer. This allows for quality portable fission reactors.
8.1 Single reactor
If you are just playing around with nuclear, or building a space ship with supplemental nuclear, you want a single reactor. Single reactors are half as fuel efficient as double reactors, but it's not like you are going to run out.
Next to the reactor you want a passive provider chest and a requestor chest. The arm taking fuel from the requestor chest should be set to override stack size of one. This arm should be disabled by circuit network unless the temperature of the reactor is less than 600, the steam in a random steam tank is less than half full, and there is no fuel already in the reactor. One decider combinator should be able to handle all three conditions. This prevents fuel waste, particularly important on space ships.
I replace the temperature icon with the thermostat icon.
The reactor needs four heat exchangers to reach maximum capacity. In space, you're only going to need the one. Each heat exchanger should be paired with two steam turbines. This is exactly the same as how it worked with the old steam engines and boilers. You will also want to add one steam tank per heat exchanger to create a nice, big power buffer. At least two tanks in space.
You will need between zero and eleven heat pipes to connect up all the heat exchangers, depending on design. You should build near a body of water to supply fresh water. Each reactor should have a dedicated offshore pump.
8.2 Double reactor
If you are supplying a normal, not megafactory, with power in place of solar, you want a twin reactor. Twin reactors require twice as much fuel, and produce four times as much power.
Twin reactors are created by placing two reactors directly next to each other, such that each is sharing three heat connections with the other. In order to get the fuel savings, both reactors must be running at the same time.
This means you need to add synchronization logic to the two fuel inserters. Read the contents of both chests and emit a checkmark when both chests have nuclear fuel cells in them. This requires an extra combinator, and both wire colors. Add the check mark as a fourth condition to your arms.
Because both the reactors will be producing double power, you will need eight heat exchangers each. That's sixteen turbines and eight steam tanks.
For reference, one heat exchanger, two turbines, and one steam tank has the same stats as 166 solar panels (on Nauvis) at noon and five bonus accumulators. Though the accumulator capacity is effectively multiplied by almost a hundred to almost 2.5 gigajoules collectively. This scales evenly with quality, except for accumulator capacity. On Vulcanus and in space above most planets, solar panels are more powerful than on Nauvis.
8.3 King sized reactor
This one requires four times as much fuel, and emits twelve times as much power. It's the way to go for megabases. All four reactors must be built in a square with each other. The area around the reactors becomes squishy, and you'll need to work to pack everything in.
You don't want the heat pipes to become too long. I would use the rule of thumb that they should not exceed length 20. But since you need 48 total heat exchangers, that means you will need multiple double sided lines of heat exchangers.
The four conditions we established should still be enough to prevent fuel waste, mostly due to using 48 steam tanks as a buffer. However, you probably need to increase the trigger temperature from 600 degrees to something like 750 to make sure heat travels all the way down your heat pipes. You will also need to check your supply chests individually, requiring at least one extra combinator.
If you are linking your steam together with pipes, you can reduce the number of steam tanks. If you do this, reduce the trigger point to something like 10000 steam.
You can also add an enable switch, in the form of a constant combinator which emits a power symbol, so that the reactor does not start burning fuel before you have all the pipes and whatnot built. Add the power symbol as an extra condition. Save the blueprint with the combinator disabled.
All of these reactor designs have slightly more turbines than they need for the heat exchangers. But consider these two facts. If every heat exchanger gets exactly two turbines, then pipes are optional. Also, steam turbines plus steam tanks make better accumulators than accumulators do. As long as you're willing for the power to only go one way.
You probably should not build reactors on any other planets. Solar is way better on Vulcanus. Gleba has heating towers, and Fulgora has nearly infinite power. It's not the worst idea as backup on Aquilo.
9 Space age
Note that you can do the first half of the robots side quest at this point, and enable blueprint use.
To get to space you want to fill out three more production lines. Two of which can crowd around your labs, so move them a bit farther away if needed. We already ended up with most of the basics, so all three should be quick to set up.
Next to your red green chip belt, put a row of assemblers. Also run a sulfuric acid line next to this row. This will manufacture blue chips for you. You will probably need to more than double your red green production for this. Two assemblers to start with, but leave space for four.
In a clear area of your factory, put a row of assemblers, and feed them with copper, plastic and steel. These will make low density structure. You probably need lots of these. Start with four, but a row of eight may be needed. This is going to crank up your need for steel, copper and plastic.
Next to your old engine manufacturing line, create another, smaller engine manufacturing line. You can also just extend the existing one. This smaller manufacturing line will feed another line making electric engine units, which will feed a third line making flying robot frames. The numbers required are about two, two, and three. You'll also need about two new battery manufacturers.
The electric engine units require lubricant. This requires that we improve our oil refineries with advanced oil processing if we haven't done so already. This is a good idea for the plastic and sulfur as well, because advanced oil processing increases petroleum gas production.
In the free square in front of our oil refineries, build three cracking plants. One for heavy oil to light oil, and two for light oil to petroleum gas. Be prepared to move these plants around until all the pipes lay out nicely. The light oil crackers will likely work better if you mirror one of the two. Both crackers need water.
We don't need heavy oil for anything other than lubricant, We also have only one use for light oil. Also add a lubricant plant somewhere in the square. plop down a lubricant oil tank right outside the lubricant plant and a light oil tank somewhere. We will use the fill levels of these tanks to control the cracking plants. Turn off the heavy oil cracker when the lubricant tank is less than half full, and the light oil crackers when the light oil tank is less than half full. You can do this by connecting a wire between the tanks and the crackers, and setting the activation condition in the crackers.
If we don't build the crackers, then the entire advanced oil production area shuts down every time we fill up on either lubricant or light oil. So they are important.
Examine your layout of plants, and consider if there is space for a beacon next to the refineries. It is best if the beacon hits some of your plants as well. Since all of these buildings are candidates for production modules, a speed-green beacon is a good idea.
Since we are here, we should manufacture the main thing from light oil. This calls for about two plants that produce solid fuel from light oil, and about three assemblers that produce rocket fuel. On any other planet, you need less rocket fuel. The rocket fuel demand is high on Nauvis, because this is where you will build your space platforms. Just send the rocket fuel into a chest for now. Rocket fuel also makes cars faster.
After you send your lubricant line over to your electric engines, you now have four new products. rocket fuel, flying robot frames, blue chips, and low density structure. Send everything but the rocket fuel next to a row of three new utility science pack assemblers. The ideal ratio is seven utility science pack assemblers for every six green science pack assemblers. However, a lot of researches don't need utility, so demand will be uneven. Using the same number as green is fine.
Supplying three utility science pack assemblers will severely tax your factory's resources. You probably need to beef up your copper and steel plate production. But we have a couple other things to get going on first.
To build your rocket silo, you need concrete. You also want to put some of your electric engines in a box.
Place an assembler next to a water pipe, and feed it with stone bricks. Very unusually, this recipe needs iron ore. You will need to divert some of your ore line. Concrete is not a high demand item, so creating permanent infrastructure for this is overkill. You can just fill a chest with iron ore. move the iron ore to your inventory, then put the iron ore in a chest next to your concrete plant. In the near future, we'll get robots to do this.
After the concrete has manufactured, you can build and place the silo in a relatively central location in your factory. This area should be reasonably bare for the future addition of a blue-green beacon and more rocket silos. The central location is to minimize robot flight times when we use the rockets in automatic mode. Place three chests next to the silo. These will contain rocket fuel, low density structure, and blue chips.
Unfortunately, you can't have robots automatically deliver to these chests, even though this chests are prime candidates for that, because that feature is locked behind space science. So you'll need to drag over some conveyor belts. For now.
For your first space deliveries, you want to build a huge stockpile of space platform foundation. That requires steel and copper cable. Lots of both. Build an assembler for that.
While waiting for the space platform foundation, and also maybe the electric engine units and the concrete, let's build the last science pack worth packing. Productivity science pack.
This one is a bit more resource light than the last science pack, and it also is only needed for some researches, making demand uneven. I would actually only build two to get started, even though it should have the same number as utility science.
Build another assembler triangle in a clear area. The number of rail units the science pack needs is insane, so you'll need fast inserters for sure. Next to the rail, manufacture iron stick from iron plate.
You need two dedicated productivity module producers next to your chip belt. If you put quality modules in them, you'll develop a growing stockpile of high quality productivity modules for free. Use the common quality filter on the inserters to keep the belt clear of high quality modules.
Next to your rail assembler, add one that produces electric furnaces. A line of stone and stone brick needs to be led to these assemblers, as well as a line of steel. If you put red chips on the steel belt, both assemblers will start working. You should put some electric furnaces in a box for personal use. High quality ones, preferably.
You probably need to double your stone production for this.
9.1 Space science
Welcome to space age! We need to build a space platform starter pack. Grab all the space platform you have collected and craft one starter pack by hand. You'll need some processing units.
Stick it directly into the rocket. Assuming you put inserters from your fuel, chip and low density chests into your rocket silo, the rocket would have built while you weren't paying attention. Add these inserters now if you need to.
Push the launch button. Choose an inspiring space station name. This one won't be going anywhere.
Go to your map. A new surface navigator should have appeared in the upper left of your map screen. As soon as the platform is built you can click on it. Enjoy the new soundtrack. Though we won't be listening for long.
Using the pipette tool, select some of the space platform foundation. Increase the size of your paintbrush, and paint ghost foundation in a large square. If you click on the platform hub, you will now see an automated request for more foundation.
Navigate out of your map. Put a new chest next to your silo and put all the foundation into it. Use a fast inserter to fill the rocket from the chest. For one item payloads, it doesn't matter if you set automatic mode on your rocket or not. The rockets will auto fire until all the demanded foundation, and then some, has been delivered. This is what we want, at least for foundation. For other items, we'll probably want fine grained control over our rocket launches. At this point, rocket launches are relatively expensive.
Go fix up any supply problems in your factory while waiting for all the space platform to go up.
Now comes the fun part. We can save the game, design our station, save the blueprint and load the game if we want. Blueprints always work in space. Whether this is a good idea depends on if you're experiencing any time pressure. Maybe from biters or something.
First things first, disable automated requests at the hub, to give yourself more control.
As a space station, we should probably build a ring of asteroid collectors on all four sides. This is where we will get iron, ice, and carbon from. Four is probably sufficient. We will be using ghost construction, which works similarly to normal construction. You access it from your inventory. This is how inventory always works when you are in the map.
You'll need three asteroid crushers. One each for iron, carbon and ice asteroids.
To get the asteroids to the crushers, the sushi belt is probably the best solution. Build a belt ring around the hub. Inserters from the collectors to the belt, inserters from the belt to the crushers, and inserters from the crushers to the belt.
Without thinking too hard, you can tell that a belt like this is going to jam up when it fills up with random junk. Some system must be set up to limit items on the belt. Probably the easiest is an inserter that junks excess items to space.
Build an inserter between the belt and the edge of the platform. You can cut a fissure in the platform for this purpose. Be warned that there's a rule that platforms and space must be fully connected to themselves and that underground belts and pipes don't work through fissures. Use the deconstruction planner to delete foundation.
Add a constant combinator and set how much of every item you want on the belt. 20 is a good choice to start with. A decider combinator should get an input wire from the combinator, and another coming from the belt. Set the belt to "read contents, entire belt." Using the each special symbol, send the items you want to exhaust to the inserter, and set the inserter to set filter mode.
Other buildings. We need at least one electric furnace to smelt iron plates. You can store these on the belt, or the hub. If you store them in the hub, connect a wire from the hub to the output inserter to disable the inserter when too many plates are stored.
We need at least two assemblers to craft the science packs. The ideal ratio is three space science assemblers for every five red science assemblers. The recipe is also super efficient, so you don't need to worry about productivity.
Do the same storage limiter trick as for iron plates.
Now place a dozen or so solar panel ghosts, and a five or so accumulators. Our initial design is complete.
Go back to Nauvis and acquire, then place the needed items into the rocket. You'll probably need three launches, with the conveyor belt being the biggest launch. As soon as the items arrive, they will be built automatically. Once the solar panels arrive, you can inspect for bugs in the design.
We are not done.
We should build one cargo landing pad. Only one can ever be built on a planet. On Nauvis, this should be very close to our main science lab. But far enough away that some chests can be built in between. Add a request to the cargo landing pad for space science.
This is smarter than making a trash request from the space station. Trash requests are unstable and can easily result in spilling problems.
10. Robots side quest
Robots come in two levels. You could have actually completed the first level well before getting space science.
For speedrunning, robots are essential, as they enable blueprint building.
For not speedrunning, robots are essential, as they automate some of the more mundane tasks, and allow you to copy paste parts of your factory.
10.1 Level 1
Grab large stacks of red chips, green chips, and flying robot frames. Manually craft both robot types. 50 of each is good for starters.
You will also need 10 roboports. This needs many gears and steel.
The main goal of placing roboports is to cover almost everything in a continuous, uniform service area. That's the orange colour you see when placing them. If you are an OCD type player, you will be compelled to create a perfect grid of roboports. Perfect grids prevent coverage holes, so there's some benefit. There's just one problem. There's always something in the way of perfect roboport placement.
The green colour is the construction service area. It's far enough out that the robot network is capable of self expanding.
open one of the roboports, and put both stacks of robots inside.
Your factory has now gained five cool abilities.
- If your factory contains any repair packs in yellow, red or green chests, the factory can self heal from damage.
- If any buildable item is in a yellow, red or green chest, ghosts and blueprints will be automatically built.
- If you set logistic requests from your inventory, those items will be sent to your inventory from yellow, red and green chests.
- Logistic requests also have a maximum value. Setting the maximum value causes those items to be trashed from your inventory. They can only go into yellow chests.
- Rockets can now work in automatic mode. In automatic mode, requested items will be automatically sent to space. However, only one item type at a time, and an entire rocket load. This load can be as much as ten stacks.
To make use of these abilities, you should immediately craft fifty red chests, and all the stockpile chests you have in your factory, make them red.
You should also allocate a yellow chest field near the center of your factory. However, this is more for level 2.
10.2 Level 2
So you just started beaming down space science. What's the first thing you should research?
To get started, we should probably automate robot production. Near both your flying robot frame belt and your chip belt, place two assemblers that feed a joint chest with both types of robot. You can use circuit conditions to stop filling at half full. Ideally, this chest will also be right next to a roboport, because we are going to inject robots on demand directly into the network. Connect a wire between the port and the inserter. We'll be using the set filter mode. In this case, we'll set filters to blacklist. In the roboport, we want to change the signal of the available logistic bots to be logistic bots, and available construction bots to be construction bots.
What happens if available bots falls to zero? The inserter stops blacklisting them, and inserts a few.
When you research the second level of robot network, you get three superpowers. These superpowers are blue chests, purple chests and green chests.
Purple chests immediately send everything inside to yellow chests. They love being empty. These chests are absolutely mandatory for quality based builds where you want to build the factory fast. If you want to go slow, or don't bother with quality, purple chest importance depends on your design style.
For purple chests to work well, you need to make your field of yellow chests bigger.
Especially for Gleba, it is useful to note that blue and green chests can behave like purple chests if you check the "trash unrequested" check box.
Green chests have the powers of both red chests and blue chests. For now, note that green chests should contain your more important stockpiles of resources. Blue chests will not automatically be able to access the contents of green chests unless you check the "request from buffer chests" checkbox. Green chests cannot request from other green chests, as that would create a circle.
If you don't want anything accessing your stockpile, except for inserters, then just use a regular steel chest.
Green chests also allow you to collect a stockpile using robots, but keep the stockpile accessible to robots. This is most useful in moving export goods closer to your rockets.
However, the big superpower is the blue chests. Let's look at some patterns.
The hermit manufacturer. Place down a new assembler. Give it any recipe you want. Next to the assembler, we will place a blue chest and a red chest, and put some inserters in between. Now copy settings from the assembler, and paste them to the blue chest.
So long as red or yellow chests contain the recipe ingredients, the recipe ingredients will move directly into your blue chest. This is probably the fastest you have set up a new assembler so far. This pattern is also a good idea if the ingredients per second and the product per second are both slow. If either the ingredients or product per second is fast, doing this puts a lot of strain on your robot network.
Examples of slow recipes include most of the science packs, the science labs, engines, and flying robot frames. Some of these, like engines, are easier to set up with rows because you want to produce large quantities.
Although less good, this pattern is also useful for manufacturing higher quality items. Most of your higher quality raw ingredients are not on conveyor belts. They're all in red and yellow chests. You need at least some higher quality manufacturing to prevent gigantic oversized stockpiles of uncommon plates.
Using the pattern a lot allows you to reduce conveyor belts, reserving belts only for high throughput needs. This can clean up and simplify your factory.
The remote manufacturing hub.
In this recipe, we need one of the expensive combinator, the selector combinator. Some fast inserters and two assemblers. We start with the hermit manufacturer pattern, but build two assemblers on either side of the chests. Connect wires from the assemblers to the combinator and have the assemblers send us their ingredients. The combinator turns that into stack size, and sends that to the blue chest. The blue chest will be put into "set requests" mode.
The remote manufacturing hub allows you to manufacture whatever you want, whenever you want, even if you are on a different planet. Along with builder robots, this allows you to do most of the maintenance and expansion of your factory remotely. You still probably want a tank or spidertron to do work in the wilderness.
To deal with recipes where you are also missing the raw ingredients, it's nice to build multiple copies of this pattern. Three on Nauvis, and two each on Vulcanus, Gleba and Fulgora.
For this pattern, never use purple chests. You will inevitably set a recipe, maintain one of your other factories, and come back with the chest completely filled with items. Using a red chest is a safety feature.
To free up space in the red chests, simply click on some of the stacks of items while in map mode. This may depend on your key mapping.
Whether you decide to set the blue chest to trash unrequested is up to you. The blue chest will hoard stacks if you don't, which improves responsiveness, but may starve other assemblers of ingredients needlessly.
A more advanced version of remote manufacturing is "rare demand automatic stockpiling." This pattern ensures that you always have a small amount of everything you need to expand your factory, and fill occasional requests for space platforms. You should only add recipes for which your factory provides the raw materials reliably. Otherwise, this pattern will jam and stop working. This pattern has a useful lifespan, because as you advance towards megafactories, more and more of your items will be manufactured in dedicated assemblers.
For this pattern, we start with the remote manufacturing pattern, but one assembler only. Then we add a countup timer. The countup timer is used in a lot of patterns, so remember the technique. Connect the decider combinator's input to its own output. The combinator's cycle time will be set with the condition. Use T is less than 5000 for a basic timer. The combinator has two outputs. T set to input value, and T set to constant value of 1.
We almost definitely need to use a timer for this pattern because changing assembler recipes without a timer tends to glitch. For this reason, patterns that change recipes are to be avoided.
Use a constant combinator to decide which, and how much of each item to manufacture. You should avoid dependencies, but in the event you do add a dependency, give the ingredient item a larger item count than the product item. One wire needs to come from a nearby roboport set to report available items. The available items is all the things in red, yellow, purple and green chests, minus some of the current logistic requests.
These wires go into a combinator that subtracts the supply value from the demand value, using the each meta symbol. Then into a selector combinator set to pass through only the highest value.
Now we want two behaviours that are different based on the value of T. Add a new combinator whose condition is the exact opposite of the timer. Probably T >= 5000.
Be very careful with wire color now. We need to isolate feedback from the assembler. Change one of the timer's outputs to output everything at input value. Now it is a universal persister, though it turns off every now and again. The other combinator takes the signal from the selector combinator and passes it through using the everything symbol. Connect the output of the second combinator to the input of the timer, and, using a different wire color, the output of both to the assembler.
Using a different wire color, the assembler will send its ingredients to the stack size combinator. This assembler needs to be set both to set recipe mode and also read ingredients mode. It is a miracle that both modes work at the same time.
10.3 Space savers
Any other patterns based on this theme? There are a handful that come up when exploring other worlds, and maybe one space saver to use. Let's use it for tier two modules and tier three belts.
For tier one modules, you should always have dedicated manufacturing. For tier two, you have a two to one ratio to tier 1 based on ingredients and speed. So you can in theory just use one assembler for multiple tier 2. Let's merge four recipes together, those for common tier two green, common tier two speed, uncommon tier two green and uncommon tier two speed.
We start with our "rare demand automatic stockpiling" pattern and delete some parts of it. Delete the constant combinator, the arithmetic combinator and the connection from the roboport. Delete the stack size combinator as well. We will be using custom blue chest requests. Remove the read ingredients mode from the assembler for safety.
Add to the blue chest requests for two stacks of all the recipe ingredients. Add a bank of four decider combinators, one per recipe. Each combinator will have multiple conditions. For each recipe ingredient, confirm there is at least one stack of the recipe ingredients already in the requestor chest. This will be one tier one module and common red and blue chips for half the recipes, one tier one module and uncommon red and blue chips for the other half. Also make sure that there is, let's say, less than two stacks of product in the passive provider chest. This will be four conditions.
The output will be the desired recipe set to value 1, or higher, if you want a priority system. The higher quality modules should probably have higher priority. Send these values to the remaining selector combinator.
This pattern variant has a limited useful lifespan as we will eventually be importing all our modules from other planets. But we will modify the pattern precisely to make modules on other planets.
For belts, let's use a very simple time share system. Let's build three assemblers, and next to each, three decider combinators.
One of the assemblers needs to be connected to lubricant. For this assembler you need an input chest and an output chest. You also need a garbage inserter going from the output chest to the input chest. Set the filter on the garbage inserter to blacklist your desired products.
Each decider combinator needs two or three conditions. First, there must be lest than, lets say, ten stacks of that product in the output chest. Second, a time window. The first combinator can make express belt, and have time window less than 2000. The second can make express underground belt and have time window between 2000 and 4000. The third can make express splitters, and have a time window greater than 4000.
But you don't have any fast belt manufacturing. The second of our three assemblers will have its output chest be the input chest for express belts. Be careful with the trash inserter. Also blacklist gears. Change all the recipes to the fast belt stuff in the second assembler.
Do the same for the third assembler, but for normal belt stuff. Note that you can import extra belt from your green science pack manufacturing, as you will be making too much.
All three input chests should be requestor chests, that will request the missing ingredients.
This pattern also has a limited useful life. It is quickly obsoleted by turbo belts. But timesharing is an easy switch style that may help on spaceships later.
11. Interplanetary travel
Time to create a space ship. Craft a new space platform starter pack and send it up. Like last time, pipette the foundation and paint a bunch. Set the rocket in automatic mode, and wait for all the extra foundation to be sent up. You probably want to manufacture a second rocket to speed things along. A second rocket is also necessary so that you always have at least one silo in automatic mode. It's bad to not have that. On any planet.
We should also prepare our routine exports. Nauvis will mostly be exporting starter supplies for new factories, and this ship will be carrying them. Conveniently, we also need some of those for ship construction, so importing entire stacks is not wasteful.
Click on the hub and add the following imports to the middle area. I use one category per planet, so the first category will be Nauvis imports. When creating an import, always check the import from planet at the bottom. It defaults to Nauvis, and is sometimes wrong.
Common:
1 stack express belts, express underground belts, space platform foundation and repair packs.
1 single lamp, tank, pipe, underground pipe, express splitter, cargo landing pad, offshore pump, and each type of combinator.
With the 1 single import, the rocket will still send up a full stack. We are avoiding multiple stacks.
Uncommon:
Substitute common if you are not doing quality.
1 stack blue chips, steel, concrete, electric engine units and 1 single pipe. Note that these are rocket silo ingredients.
1 stack refined concrete.
1 stack solar panels, accumulators, both types of robots, uranium ammo, inserters, fast inserters, medium electric poles, and substations.
1 single cargo bay, roboport, tier 3 assembler, electric furnace, chemical plant, refinery, beacon, long inserter, bulk inserter, big electric pole, pumpjack, electric mining drill, gun turret and radar.
1 single of each type of tier 2 module and each type of chest.
Make sure that your factory production is high enough to actually produce entire stacks of those things. Then, let's look at the things we need in small quantities.
4 uncommon asteroid collectors, 4 asteroid crushers, 3 thrusters and 2 pumps.
While packing these things in your rocket you may want to also add any nice rare items you have in your factory. You don't have to go searching through the factory for them. In map mode, zoom on your rocket, and use ghost placement to place ghosts of them in your rocket.
Consider, rare tier 2 modules, rare solar panels, rare accumulators, rare cargo bays, uncommon thrusters and rare beacons.
If they don't exist, they will remain ghosts.
11.1 Ship design
For our first ship, we probably want a fast ship with lots of cargo space that visits all the planets and does all our interplanetary trade. This goal is a lot easier to reach than you might expect, but we can only get a little way there at our current technology level. Having just the one trade ship makes many things way simpler.
When we upgrade the ship, which we will be doing more than once, you should save the game, do the upgrades, blueprint the entire ship, and bring the updates back in time. This is because you don't want to interrupt trade. It will kill your science rate.
If you are doing multiplayer, then create an extra ship, put the upgrades there, then either decommission the first ship or blueprint over the changes.
First thing's first, disable automatic construction imports. You might also want to temporarily suspend the Nauvis import category to prevent excessive deliveries from design mistakes.
The basic design is very simple for ships. guns mostly at the front, asteroid collectors mostly at the front, engines at the back.
Like the space station, you will want a sushi belt. It's just a really good start for your logistics. You will also want a horizontal row of cargo bays. In fact, you may need to build one or two now, given all our imports.
If you are using quality, you will want to map convenient keys to increase quality and reduce quality. For example, you have only uncommon cargo bays on board. If you build a common ghost, nothing will happen.
Directly above the hub, I like to put a turret ball. The turret ball can safely extend past the front edge of the platform, because it always does a good job protecting itself. At least one turret must be close enough to the hub for your best inserter to feed ammo to it. Set the filter to common ammo. Never use uranium in space.
The other turrets can all take ammo out of the first turret. Ten turrets is probably good for a mid speed ship, assuming you've researched weapon damage a couple times.
The row of cargo bays should extend three or four to the left and right of the hub. Three for most ships, and four if you are building a really huge ship. These cargo bays define the width of your ship, either 32 or 40. Don't extend the ship even one unit past the cargo bays, as that will make your ship slower. For our trade ship, we will want lots of rows of space for trade goods. Either use quality bays, or tack a couple extra bays above or below the line of bays.
For the asteroid collectors, put two on the front, with non-overlapping areas. Then put two on the sides near the front. This will create a wide net at the front of the ship, which maximizes your asteroid collection while moving.
The sushi belt needs to jump over the cargo bays to reach the asteroid collectors at the front.
Next, put a beacon down behind the hub. Leave enough space for a row of assemblers between the beacon and the hub. This marks our main production area for the ship. As we upgrade the ship, the production area will get larger and we will need more beacons. It should be either speed speed or speed green.
At the back side of the beacon, put down three chemical plants. The sushi belt will actually go between the chemical plants and the beacon.
One produces water from ice. The left one should produce thruster fuel and the right one should produce oxidizer.
Behind these, put your main thruster. Directly attach a fuel pump to the left input and an oxidizer pump to the right input. We will be doing fancy things with these two pumps later.
Then we create a downward facing V with the rest of our thrusters, ideally until we reach the edge of the platform. However, there's no way you'll get enough fuel for that many thrusters before we upgrade the ship once. All the thrusters on the left need to be supplied with fuel. I recommend creating a chain of tanks and pipes, one tank per extra engine. Symmetrically, all the thrusters on the right side need oxidizer.
Nothing can be built behind engines, so this V is the back of your ship.
You'll need two vanguard turrets protecting the back left corner and the back right corner of the ship. They'll be supplied by the sushi belt.
What goes around the rest of the beacon?
One assembling machine next to the hub. One inserter going in, one coming out, and one coming from the sushi belt. It will manufacture machine gun ammo. You will also need about three furnaces and three ore crushers processing each type of ore.
Like before, our sushi belt and hub both need to be item limited to not stall. But we can be more elegant than the solution used in the space station.
Like before, choose a spot on the belt and select read contents all belt. Your wire reach will be a little taxed at points. You can use any wire compatible building as a bridge, but I recommend using lights for this.
Start by creating three decider combinators that will measure asteroid chunk quantity. If the quantity is less than a limit, say 40, then emit the chunk as a symbol. These symbols will be sent to your asteroid collectors. Put the collectors in set filter mode.
The inserters leaving the smelters should control iron plate volume, the ones leaving the crushers should control ice, iron ore and carbon.
We will need to snake the belt next to the hub twice. There should be some bare patches left where you can do it. At one location, we will be taking things out of the hub, and at the other, putting things in.
Never exclusively put anything in the hub which is an essential supply for the ship. In this case, iron plates. You need those for ammo. For this, we should create two separate conditions on the in going inserter. It should get a filter if the amount inside the hub is less than your chosen amount, probably two stacks of ice and carbon and five stacks of plates, and also the amount on the belt is higher than a limit, probably half the max on the belt. This will require at least two constant combinators and at least two deciders. Probably three.
For the inserter leaving the hub, we currently only need machine gun ammo. Set a low limit, like 15.
Spam solar panels over the remaining available space on the ship, and put some accumulators in the tight spots. The ship should start collecting ammo now. You can watch it for a while to see if there are any errors.
Q> Should you use any laser turrets on the ship? No. Laser turrets are slow, and need lots of power. This is the opposite of what we need in our current ship. If you do use lasers, use target filters to restrict them to only the smallest class of asteroid. Lasers don't work against larger targets. To improve the chance the lasers ever fire, set the machine guns to prioritize medium asteroids. But don't make them exclusive.
11.2 Fancy armor
Before going to space it comes highly recommended to give yourself some power armor MK.2. Or at least some power armor. Once crafted, right click on it to open up your empty module grid and marvel at it. The actual key depends on your keybinds.
You should put at least a roboport in there, a couple exoskeletons and a power source. The power source can be twelve solar panels and two batteries, or a mister fission and one battery. Three of the planets could also use a shield generator, and one a personal laser defence.
Fancy armor is a better choice than giving yourself a car or tank.
With the roboport, you can now build blueprints in the wilderness with no preexisting factory. The main thing you will use it for is mining junk really fast using the deconstruction planner. All you need is a stack of construction robots in your inventory.
12 Vulcanus
There is a default order to visit the planets in. That default order is the one laid out in this guide. However, you can do Fulgora first, if you are not afraid of constantly running out of ore. A lot of people do.
For Vulcanus, you need to defeat at least one, maybe two demolishers to secure a tungsten ore deposit. This is what the uranium ammo on the ship is for.
If you haven't done so already, research the planet.
Save the game and put yourself on the ship. You can't take any inventory with you. Only your armor and guns. Plop down a buffer chest and mass-transfer all the items to it.
On the ship itself, you need to create a trade route to actually go anywhere. We will be putting two destinations down. For wait conditions, waiting for 60 seconds is a very safe choice if you don't want to do anything fancy. The 60 seconds gives the ship time to recover fuel and ammo. At the final destination, we want to hold position for a bit, so additionally add the wait conditions "player present" AND "player not present". Delete these when you are done your first supply delivery. Click the play button on that destination.
Hopefully your weapons are actually working. In which case, you will see a space ship go to war with mindless rocks.
Add a wait condition specifically to wait at Nauvis until your hub inventory of ammo exceeds 400. This is for the eventuality that the ship stops working properly.
When you arrive, you want to send down items to the surface. Shift-click, or use whatever key you set to beam down your cargo landing pad, and your construction robots. Then beam yourself down.
If you do it in the opposite order, there's a tiny chance you can kill yourself with a space to ground missile.
The cargo landing pad needs no power to function, and contains a free short range radar. You can place it and pick it up as much as you want. If you set requests in the cargo landing pad, then you should move it with the cut tool.
It is always best to pull items down rather than use capacity limits on the ship. Capacity limits are unreliable, even if they superficially look like they do the same thing.
But, for your first drop, just shift-click to send down all the items you think you'll need full stacks of. Which is most things. Don't misclick. But if you do, you can sometimes recover by quickly clicking on the drop slot at the bottom of the menu.
Since we're setting up our cargo landing pad, why don't we have some fun, and request all the materials needed to build a rocket silo, more modules, if you are pursuing a quality or productivity build, more quality uranium ammo, more robots, and more solar panels. The ship will need to go back to Nauvis for most of these. If you are happy with your inventory, delete the passenger conditions from the ship, and hope it doesn't destroy itself.
12.1 Exploring
Check the map, and plan out where your factory will go. For your purposes, cliffs are bad and open areas are good. The red warning zones will get you attacked and killed. If you want, you can immediately kill a demolisher with two dozen turrets filled with ammo in a ball. When doing this, you can fill them from an ammo chest using a chain of inserters. But delete the power source, so they don't move ammo during the battle itself.
When choosing which demolisher to kill, choose the one with the tungsten ore patch (purple) in its territory. There will probably be exactly one such demolisher you can kill right away. Bad luck if there's zero.
Demolishers have two nasty abilities, both of which they don't always use, which is interesting. You may need to save and load not to have all your turrets and ammo wiped out with a bad attack.
Fire one bullet at the demolisher to get its attention and run. Try to stay out of the slowing cloud, and hope that when it uses the lava eruption ability, it does not hit in the middle of your turrets.
They heal very fast. If the battle is not over inside five seconds, you did it wrong.
Mine the remains with your robots.
If you don't like this strategy, here's the alternate weapons that can work on demolishers. Uranium tank shells, poison capsules, for a tiny edge, rocket launchers from Gleba, and electric turrets from Fulgora. If your robots don't immediately burn out, the physical projectile ones might help. Railguns too. Manually targeted artillery works too.
To get a better view on the situation, I suggest putting a radar at the four corners of your map. On this planet, you only need about two solar panels and two accumulators to power it.
Run around the part of the map where you plan to put your factory and deconstruct everything. Your inventory will quickly fill up with junk. Start your yellow chest field and put the junk in there.
If you don't want to wait for all that deconstruction to happen, you don't have to. You can put some substation-accumulator-solar panel blueprints down off to the side, build your roboport grid, and put the robots in there. Then your factory will do all the deconstruction for you. This planet needs fewer accumulators than solar panels due to the short day night cycle.
12.2 Leaving
The various recipes you need to set up on this planet are simple, powerful and compact. Thus, the remainder of this planet can be done fast, if not too many cliffs get in the way.
To bootstrap your industry, you need five foundries, which require green chips, steel plate, refined concrete and lubricant. You got a bunch of ore from the deconstructed surface features, so you can just make steel here, but it is at least as easy to import chips, steel and concrete from Nauvis at first. Especially concrete.
To get the lubricant, we bring three things together in a bare area. Sulfuric acid from geysers, a line of calcite, and a line of coal. We'll put two of these in the back of a line of three oil refineries for now. But there's an improved catalytic recipe later, which we should switch to at the earliest opportunity.
Like on Nauvis, you want a bare square in front of the refineries for the three fluids. You want the crackers, the rocket fuel, and the lubricant facilities. All about the same as on Nauvis, except you need a third as much rocket fuel.
In a plant to the side of your refineries, you need to do acid neutralization to get steam. That steam eventually goes into the refineries, but some of it goes into steam condensation for the crackers, and concrete.
Sadly, acid neutralization only works on this planet. It would have niche uses elsewhere. The power potential of the steam is very high, but you don't need more power on this planet.
Next, we start shoving our tungsten ore into a tungsten carbide assembler, next to a carbon plant. If we are using quality, we will be going out of our way to also produce higher quality tungsten carbide. This means quality in coal mining and quality in the carbon plant, and parallel assemblers making uncommon and rare tungsten carbide, which also requires quality in the tungsten drills.
After manufacturing the first foundry, manufacture all later foundries in the first foundry. This gives you 50% bonus foundries.
The main use of foundries is the 50% bonus you get on everything.
Now things get trippy. We will be pumping lava into two of our new foundries. This creates stone and molten metals. The stone is mostly a waste product. Put it on a conveyor belt and send it back into the lava.
Rescue some stone by making stone brick, possibly with quality modules. You can enrich your stone brick very easily by making more stone brick and sending most of the low quality stuff to the lava.
This enrichment strategy is also useful for some iron goods. After we produce plates, produce iron stick from the low quality plates, and send most of the low quality sticks to the lava.
You can put productivity, but not quality, in a fluid recipe. However, all you'd be saving is a tiny bit of low value calcite.
There are six useful recipes for the molten metal we can use, and all but one are optional. You can do a lot of alternate recipes.
First, the low density structure. You only need low quality low density structure on this planet. This defeats the main utility of this overall bad recipe. I recommend just burning your extra copper plate in a regular assembler. One is often enough.
Copper plate is needed for batteries and solar panels. If you only want high quality batteries and solar panels, dump the low quality copper in the lava. If you don't want to manufacture solar panels and batteries locally, use the low density structure recipe to eliminate the copper plate recipe.
The copper wire recipe is slightly better for productivity and slightly worse for quality than the electromagnetic plant version. But you can just dump the extra low quality in the lava.
The steel recipe is bad for uncommon quality, but relatively good for rare and above. It's also highly productive and fast.
Iron gear wheels is bad for quality and good for productivity and speed. I'd use it. Dump the extra common in the lava.
You also need iron plates.
I arrange all of these around a beacon with a green module in it. Foundries are power hungry. Given the number of foundries, you may want to arrange them around two beacons. The first group, the lava consumers, can have a speed green beacon. Save space for another foundry that will not use quality. See the turbo belt section.
For chip manufacture, you can set up two parallel lines. One will work at common quality, and one at uncommon quality. You can always use more uncommon quality chips.
Run the common wire and plate over to your common green chip factories, probably two. The wire and green chips to the red chip factories, three, then the green and red to the blue chip factory.
You can put a splitter anywhere along the wire and plate belt and use the output priority mode to divert the extra to the lava.
Build the same six factories but uncommon. Your foundries will now continue producing wire and plate until your uncommon chip factories stop working.
To get red chips you need plastic. Even though you are burning some common plastic in low density structure, you probably need both a common and uncommon plastic plant next to your coal line. In the future, we will replace our plastic and carbon plants with cryogenic plants, which produce quality at much better rates.
Assuming you collected the rocket silo ingredients in you cargo landing pad by now, you should have everything you need to launch yourself back into space if you want. Leave at least one unit of the remote manufacturing hub behind. If you want to never return, consider leaving a tank or spidertron with a roboport inside behind. It can take over demolisher hunting.
12.3 Vulcanus exports
Tungsten plate is made out of nothing but tungsten ore and molten iron. You probably need two foundries. If you put quality modules in the foundries, then you should have more than enough high quality plate. Tungsten plate is mainly in demand at low quality.
Right next to the rockets next to the speed beacon, I put the main consumer of tungsten plate, Vulcanus science packs. These science packs will also get rid of some of our low value low quality tungsten carbide. Draw a molten copper pipe out there.
Go ahead and create the Vulcanus import section on your spaceship. We know we'll want ten stacks of science packs, ten stacks of low quality tungsten plate, and ten stacks of calcite. It's not great to export calcite, but we are a ways away from the space production solution to that.
Eventually, some amount of other qualities of tungsten plate will be in demand. You can add these now or later.
Let's briefly look at our foundry foundry. If we are targeting uncommon foundries, we are most of the way to stable production. You probably already built the refined concrete plant to make uncommon refined concrete from the uncommon concrete we imported for the rocket silos. Now add a concrete from molten steel foundry that consumes some of those uncommon bricks we've been collecting. And stop your rocket silo ingredient imports.
Build a new foundry for big mining drills somewhere. What does it need?
Electric engine units, regular engine units, and regular mining drills. All of the raw ingredients for these are available at uncommon quality. It is probably best to produce a bunch at uncommon quality, and when there is enough to export, switch to slower rare quality.
When switching to rare quality, switch over the electric engine, the engine and the mining drill assembler too.
As soon as you have big drills, replace literally all your other drills. It doubles your ore.
Go ahead and put a stack of foundries and drills at both uncommon and rare on your spaceship imports.
Disable the drills import from Nauvis, obviously.
Over on Nauvis, it's probably time to import all these exports. Only import small amounts of foundries and drills. The space ship can drip feed all the buildings we need slowly over time.
Go ahead and start some of the Vulcanus researches. Probably start with coal liquefaction so you can increase the efficiency of that part of your factory.
Take a Vulcanus break and replace your mining drills. If some are not in range of your robot network, extend it.
12.4 Turbo belts
Turbo belts are very optional. However, you want them. We only need a single foundry to make them, too. Put it on a corner of a speed green beacon, because we will need a lot of chests.
Send a belt of normal gears to the first chest. We need all the normal gears.
The second chest is a requestor chest. Collect all the other belt types, including splitters and underground. This is to sop up all the obsolete belts that may be lying around. Though note that due to a special trick, express underground belts are not fully obsoleted.
Also have this chest collect green, red, blue chips, iron and tungsten plates. I hope you remembered to create stockpile boxes for these kinds of things.
Both of these input chests should use bulk inserters. You might actually want more chests for tungsten and gears for more speed.
Two output boxes are needed, one red and one green. The red box should be filtered to take turbo products. The green box, blacklist turbo products. The green box should go to another green box that is used as an input. There is a chance that the green box will collect too many recipe ingredients, so you may want a garbage handling plan B. Using a rare green box can help. Sending the recipe ingredients back into the chest that requested them also helps.
Like with other recipe switching designs, we need a timer. A fast timer, as these recipes are dangerously fast. Maybe 2000 ticks.
A constant combinator will determine how much stuff we want in the three chests. Something like 200 for all belt types not turbo, then 2000 for turbo belts, 1000 for underground turbo belts, and 250 for turbo splitters.
Next we want a bias constant combinator, to make the circuit think there are more of the higher tier belts. 1 normal belt, 50 underground belt and splitter, 100 everything fast, 150 everything express, 200 everything turbo.
Add the bias combinator to both sides of the equation. The decider combinator takes the number of items in the chests, and if that number is less than the requested amount, it passes the number of items in the chest through, using the each special symbol.
The selector combinator needs to be set to ascending mode. It will effectively select the item with the smallest number in the chest.
We need only one more combinator like in the "rare demand automatic stockpiling" pattern. When the timer reaches max, we switch recipe to whatever the selector combinator says.
We should also export tier three speed modules from here, but tier three speed modules are low priority, so we'll revisit a pattern for this in the Fulgora chapter.
13. Gleba
Ah, the planet of headaches.
If you are still importing rocket silo ingredients to Vulcanus, stop now. Those are now for Gleba. Same with things like solar panels and robots.
First check that all the stuff you need is on board the ship. It is close to the stuff you needed for Vulcanus, but you don't need pumpjacks and refineries. You do need, notably, a couple big mining drills. Foundries are optional on Gleba, and may actually be a hindrance.
Add a new stop to your trade ship after Vulcanus. Why does it have to be after Vulcanus? Because Nauvis always has to be the stop after Gleba, because of spoilage.
Add your three conditions, time passed, passenger present and passenger not present.
Start Gleba the same way. Send down your cargo landing pad and construction robots. Don't, however, just deconstruct everything. You don't need all that spoilage, and you might accidentally destroy a perishable resource.
If you want to radar the area, you will need many more solar panels and accumulators. Possibly ten each, per radar. However, this is not a planet that needs expansion. The radar is for enemy tracking.
Locate the area with bright yellow and magenta regions right next to each other with only a few nearby red dots you rolled during map generation. That is the center of your farm. You'll eventually be placing exactly one artillery cannon there, near the center, but off the valuable yellow and magenta land. The cannon will be a lot less busy than the several on Nauvis.
First, we will plan where the factory goes. The factory should be built on a highland area near the farm area. A fair rectangle of space needs to be available. Don't put solar panels there. We can put the solar panels farther off.
Although the number of solar panels is the same, your solar field will produce one eighth the power as Vulcanus. Enough to get started only. Then it becomes backup power. Prolific use of green beacons will help.
Find a stone ore patch and stick one or two big mining drills on it. Feed most of the stone directly into landfill manufacturing. You need some stone brick for some concrete. Some of the landfill will need to be high quality for high quality biochambers.
We need to do a tech tree bootstrapping run. Collect the following items into you inventory. Several stacks of spoilage. You can deconstruct a bunch of the normal trees. Avoid the yellow and magenta zones. green chips, steel, landfill, and several stacks of iron plate.
Build one assembler for the bootstrapping, set to the nutrients from spoilage recipe.
Now we place thirty minutes on the clock and run fast. All these steps need to be completed inside the thirty minutes to clear out some of the tech tree.
Clear out one of the nearby red spots. Eggs will be dropped on the ground. Make sure to pick them up. You want at least ten.
Move to a yellow and magenta zone a little ways away from your designated farm area. and harvest exactly one Jellystem tree, exactly one Yumako tree, exactly one copper stromatolite, and exactly on iron stromatolite.
Come back and start up the nutrient assembler.
Manufacture exactly one biochamber by hand, and place it next to the first assembler. You should put either green or quality modules inside. Set it to the biochamber recipe and manufacture as many as you can. You can also manufacture two or three agricultural towers by hand.
Once the biochamber is done with the biochambers, you can have it process all your yumako and jellynut fruit. You may want to make another biochamber to help out with this. If your biochambers have quality modules, you should put an output chest next to them, otherwise they'll stall frequently from full output.
Once the fruit are all processed, use the biochamber again, to turn the fruit into bioflux.
All of the bioflux and leftover fruit that you produced was just to open the tech tree. You can let it all spoil.
13.1 Planning
On this planet, it is worth it much more to plan out your factory ahead of time. Let's divide the factory into three sections. Your farm. Next to your farm, but at least a few power polls away is your biofactory. It will need to be at least four beacons in size, with ample space in between for high speed conveyor belts. Though six beacons may be a more reasonable size, in a rectangle. On one side of this area will be a mini area for your heating towers. Either behind or to one side of the biofactory will be the traditional factory, which will contain lots of assemblers and furnaces in the hermit pattern, as well as your rocket silos. Remember to use green beacons or speed beacons.
Assuming we want to go fast in our design, the biofactory is going to have a single, long main turbo belt snaking its way between the beacons. We will need to massage the contents of this belt at points on its journey, because our production is going to vastly exceed the contents of a single turbo belt. This belt will start at the head of the biofactory, closest to the farms, and end in a field of chests in front of your two or three heating towers. At no point are we allowing the product to slow. We want the lifetime of the product on the belt to be less than a minute.
We also want to plan a special short path from near the head straight to the heating towers. This will be the defended path. This path starts after all of your nutrient manufacturing and contains pentapod eggs. You'll collect the starting eggs later.
For the defended path, I recommend a few lasers for backup and at least a couple machine guns that can see the entire path. Go ahead and put a piercing round ammunition assembler inside your traditional factory.
At the end of the path, the eggs go into a special eggs requestor chest that feeds directly into one of the heating towers. The requestor chest minimizes the chance that eggs somehow end up in a less defended area of your factory.
The first third or so of your biofactory will be dedicated to producing four products. Yumako mash, jelly, bioflux, and nutrients. Although you will want multiples of each, they cannot be arranged in neat lines, because they require each other's outputs. Yumako mash and bioflux are in competition for which you need more of. We'll plan for only two nutrient chambers.
Don't crowd the biochambers too densely around the beacons. Most biochambers are going to require many inserters and space for chests. Setting a limit of eight biochambers per beacon is reasonable.
The first thing we do is build the backup nutrient producer, which is not a biochamber. It should not be placed next to a beacon. It uses the nutrients from spoilage recipe.
This backup nutrients line will feed only four biochambers, which should also be able to take nutrients from the main belt. The number of inserters is already climbing. In the future, you can use circuits to turn off this backup most of the time.
Note that at the end of the backup nutrient line, you must have an inserter removing spoilage to an active provider chest. I use the any quality spoilage filter.
It is a nice to have that the yumako and jellynut biochambers feed directly into the bioflux, and that the bioflux feed directly into the nutrients from bioflux biochamber. However, in all four cases, you will also need arms on the main belt, both taking in extra material and depositing extra material. For these first four, it is a good idea to run the belt both behind and in front of the four so that all four can dump material before and collect material after the other three.
In the case of nutrients, you will need at least three output inserters.
On Gleba, quality is a better idea than normal. I would put quality modules in all four of these buildings.
In addition to these four, in the starting build, I would add one extra yumako biochamber, and one extra bioflux biochamber. They go further down the line.
Ideally, all the yumako and jellynut biochambers should be closeish together at the front of your biofactory, as they need to be supplied with another belt. The farm produce belt. The end of this belt also needs an active provider chest taking spoilage away. Any yumako or jellynut biochambers after the first three we planned also need the ability to dump mash and jelly on a backup belt, because the main belt will be full at times. We will slowly merge the main belt and backup belt together so that only one belt arrives at the heating towers.
At the one third mark down the snaking belt, the belt should meet up with the defended path. You will want two egg biochambers here. Also, this is a good point to filter all the seeds out of the belts, though you can place the seed filter later.
Use two splitters to remove all qualities of seeds after all your fruit biochambers from your main and backup lines each. These splitters need to appear before the lines pass any heating towers.
One of the two egg biochambers should make uncommon quality eggs. This will be the second biochamber down the defended path. Both should have quality modules in them. It consumes uncommon quality nutrients, and in fact, may require all the uncommon quality nutrients your factory produces. You should add a requestor chest to collect any high quality nutrients that leak. Set it to trash unrequested to get rid of spoilage. This biochamber's output arm must go before its input arm, as the reaction is catalytic.
The first biochamber actually feeds a steel chest. Use two inserters, so that it can take out of the same box. The box feeds the defended path. You should stockpile a large number of eggs in the box, about two stacks, so that the arms can use the spoiled first removal policy, which keeps the eggs in the box fresh.
The arm feeding the defended path should be controlled by filter. A decider circuit should blacklist low quality pentapod eggs when there are not two full stacks in the box.
Given that the second biochamber needs all the uncommon quality nutrients, you should put the common nutrient filter in all of your biochambers going forward. This requires a special keyboard shortcut configurable with your key remapper. Assign the filter while holding a common nutrient ghost in your hand.
After these two biochambers, you will likely need three more on the defended path, also with access to the main belt. The two producing uncommon science packs will not likely be working constantly, but there will be points where enough eggs are produced for both. The biochamber biochamber should be set to rare biochambers, and it will need most of the rare nutrients your factory produces. Adding a requestor chest for it is a good idea.
Unlike most quality science packs, uncommon gleba science packs are about four times as valuable as common ones, instead of two times as valuable, because their shelf life is doubled.
Rare is too hard to produce, though, so uncommon is the way to go.
These three last biochambers need a trash chest because they don't output onto a belt that goes to an incinerator. Use an active provider chest and an inserter that whitelists any quality spoilage. The other output inserter should blacklist the same. Keep this in mind for all the other biochambers too.
And that's the first third of the biofactory.
(cont'd)
planning continued
If you are running out of iron and copper for more biochambers, you should add that to the second half of the middle third of your biofactory now. If you're really short on biochambers, just place one for each iron and copper, and remove the two science pack biochambers for now. We can start up the path immediately after building one heating tower and our farms.
The low quality biochamber for each iron and copper should have a recipe swap set on them. When starting out, you can swap recipes manually. But you will need to periodically check for stalls. The iron and copper recipes should be used exactly when there's no iron or copper bacteria left in the bacteria chest. However, you'll need some safety, like an activation delay timer, because the other recipe takes bacteria out of the chest.
The iron and copper cultivation recipes are better. You should use them normally. They require never running out of iron and copper bacteria. The shelf life is one minute, so failures are common.
One of the two recipes it is safe to provide by constant combinator, instead of logic. You can experiment to find out which.
Behind each of these biochambers should be three inserters moving output into a requestor chest for the correct type of bacteria and back into itself. An arm blacklisting common bacteria should move all the other stuff into a passive provider chest and an arm blacklisting common ore should move stuff further into an active provider chest. You can create a belt to carry away the ore to your traditional factory, but due to low volume, this is just clutter.
Quality iron and copper is easy on this planet. You should take advantage.
Build two more copies each of copper and iron biochamber, but at uncommon and rare quality levels. These chambers should only ever use the cultivation recipe. They will instead request their starter bacteria from spillover from the lower biochambers. Remember to put quality modules in these biochambers.
Like with other high quality biochambers, add requests for the high quality ingredients that leak.
In the first half of the middle third of our biofactory, we mainly put priority buildings that are required to launch a rocket. This is so they don't get starved out by other buildings. One plant should produce biofuel, one bioplastic, one biosulfur.
Remember, high quality rocket fuel is usually a mistake under any circumstance.
The plastic and sulfur are for your blue chips and low density structure for the rocket, produced in your traditional factory.
Foundries are not recommended on this planet, because you can produce a lot of high quality ore, and don't need much low quality ore, and have an infinite supply. If you do use, producing the low density structure by foundry is not a bad idea.
And that's the middle third of the biofactory.
In the final third of our biofactory, we will put everything else we want to manufacture. We don't want much here now. We want biolubricant for our traditional factory.
And that's the third third of the biofactory. It's mainly reserved space.
13.2 Farm and fire
Before we reach the incinerators, we want to split all our higher quality stuff off into a side area, using a splitter filtering on quality. This is where we will buffer our leaked quality items. In long rows of passive provider chests, have them filled with inserters that collect nutrients, bioflux, yumako mash and jelly. These chests should have an inserter moving any quality spoilage from one chest to the next, with the final chest putting spoilage back on the belt.
The final line should only contain quality spoilage, though you can use another splitter to make sure and feed other stuff back to the beginning of the loop. The quality spoilage returns to the main belt.
You can check to see if the loop ever fills up with other products that you accidentally placed on the main belt.
Also before we reach the incinerators, we should consider whether to use recyclers or carbon biochambers. The answer to both is probably no. If you put leftover nutrients in a recycler, you will double the fuel value. If you put spoilage in the carbon biochambers, and they are backed by a green beacon, you will also double the fuel value, but slowly.
You're probably going to be burning plenty of stuff for electricity already, especially if you're using green beacons.
Each burner should be surrounded by a half ring of about eight buffer chests, fed by fast inserters. Bulk inserters from the chests into the burner. Some of the early chests will fill up entirely with bioflux and reduce their efficiency. This is acceptable. Use buffer so that the spoilage inside does not get moved out by robots.
A final requestor chest should request any additional spoilage garbage that is collecting in your colony.
We will be designing the burners with overburn overhead. So, out the back will be a short length of heat pipe feeding only three heat exchangers and only six turbines. Each turbine pair should have two steam tanks for an extra good steam buffer.
If you're worried about uneven consumption resulting in uneven power production, connect the heat pipes of your two or three burners together.
Just the first burner should be enough for now.
Right before the first burner, you should add a couple opportunistic buffer chests. We'll want spoilage of various qualities for later.
Take out your three agricultural towers, it's time to do some farming.
Where should you put them? Two on yellow, one on magenta. While they are in your hand, you're looking for a placement that maximizes the green tiles. There will always be at least a few green tiles where these crops are already growing. You can wiggle the towers around to see if the number of green tiles goes up or down. Ten green tiles is a good start for jellynut, and fifteen collectively is good for yumako.
Once placed, you will lose two of these tiles. One if you plan very well. You need a seed requestor chest, probably best to request entire rows of common and uncommon seeds to create a solid seed buffer, and a turbo underground belt. You also need an electric pole or substation.
If the agricultural towers are close to the front of your biofactory, then you don't need to do anything else. However, circuit network conditions can add a minute of freshness to your fruit, which passes down to bioflux and nutrients. This is valuable.
To make sure only the freshest fruit is processed, only produce the minimum amount of fruit you need. Connect a wire between your fruit belts, and your towers. If the total amount of fruit on the belts and in the towers is high, turn off the towers.
When we scale production later, it's not the green tiles that are interesting, but the yellow tiles. Useful to keep in mind.
Remember that you can shift+click to force build buildings on water. Or on trees.
Only agricultural towers produce pollution on this planet. It's like there's an infinite ability to absorb other pollutants here. That's why your artillery cannon should be nearby.
You might run out of seeds, especially for jellynuts. This is very random chance, as you only produce about 3 seeds for every hundred fruit processed. Each tree producing fifty fruit. If this happens, it will happen early. What you do is you run a little ways off your main farm and harvest five or six trees. Manually force feed your processing plants with the fruit. You can stick the extra fruit in your agricultural tower inventory. You can also search your factory for high quality seeds.
This is why you never let any seeds leak to the incinerators.
13.3 Traditional factory
No matter how good your design, Gleba is a much bigger risk for overfilled yellow chest fields. This is because bad things happen if the Gleba factory stops, not only because of more trash production. Allocate a particularly big one, ideally between your biofactory and your traditional factory. We'll do some things to mitigate this risk later.
Start with a bunch of furnaces producing iron and copper plate and steel at various qualities using the hermit pattern. You should only need about sixteen, with more at lower quality.
A small amount of concrete is needed if you want to export heating towers, though total demand is very small.
What other things do you need to produce? Green red and blue chips, with the usual ratio of two, three, one, and low density structure. That is enough to get into space, assuming you imported rocket silo materials like last time.
Then some artillery shells, piercing round magazines, rocket turrets and rockets. This planet will be your main exporter of rocket turrets.
Stack inserters. Stack inserters are highly specialized inserters that we will mostly be using on Gleba and space platforms. They require special care when placing.
To use stack inserters on Gleba, only use them when they are going onto a belt. Only use them when the belt is busy. This generally means only the main belt, or the backup main belt. Never have them be the only output inserter. You add the extra inserter, then whitelist the main output. This will usually be low quality nutrients, low quality jelly, low quality yumako mash, or low quality bioflux. If you have space for two extra inserters, or in the case of nutrients, started with two extra inserters, you can also add the second main product. Which is usually the uncommon version of the above.
The other output inserter should blacklist the main product. Now the belt is half as busy. Most useful with nutrients, jelly and yumako mash.
For defence, machine guns are relatively lame on this planet. So are lasers. So are walls. Thus, you want to back up your machine guns with lasers, and back up both with missile launchers. Use walls for decoration. You don't actually need much defence compared to Nauvis, but it can feel overwhelming if it took you a long time to set up your ammunition production.
Surround your factory with pillboxes whose non overlapping attack ranges don't leave any corridors into the factory. You'll probably only need around eight. You also probably don't need to protect your solar panels. Depending where you built them, if they are on high ground and a long way from your farm, they'll probably never get attacked.
For the pillboxes, I usually include one missile launcher, and a pair each of machine guns and laser turrets. They need to be close enough to a roboport to receive ammunition in their requestor chests. Add lights for decoration.
It is wise to add a couple backup turrets right next to your artillery cannon just in case.
Put your science packs in a buffer chest right next to your two rocket silos.
After you set up science pack exports on your trade ship, and imports on Nauvis it's time to scale production a little. Before we scale, you may want to override the minimum payload for this science pack. Otherwise, they might keep going bad on you. Even the uncommon ones we are producing.
On Nauvis, also used spoiled first priority for inserters for Gleba science packs. It increases the odds older science packs actually get turned into science.
13.4 Scaling
At your remote manufacturing hub, you should manufacture some artificial yumako and jellynut soil. This is dangerous if you are low on seeds, so be careful. once ready, put them in your inventory.
With soil in hand run to your farms. Any tile next to your agricultural towers still yellow means you can plant an extra tree by using this soil. Setting the cursor size to exactly three is logical.
Ideally, we've expanded our tree capacity to about thirty yumako and twenty jellystem.
This means we can double our production. For this first expansion target four yumako, two jellynut, three bioflux and two nutrient chambers. Remember that only the first four buildings need the bootstrap nutrients. Also add one uncommon bioflux. I think it's in demand for some reason.
Monitor the system carefully. If the belt starts backing up, it will back up now. You could have a jam where buildings are trying to put items on the belt, but never have enough space to do so.
At this expansion, we likely need that second furnace. Also, stack inserters are a good idea now. Follow the limit instructions above.
After we do this scaling, it's a good idea to start the carbon fiber stuff, which is needed for the rocket silos. Carbon fiber will also have some export demand.
It is a waste make common quality rocket turrets. It's just too easy to do quality on this planet. But you will need common exports, especially for the post game science. You need two chambers for carbon fiber, You can feed the output of one into the input of the next. The first one needs spoilage to make carbon, which is rarely on your main belt. You'll need a requestor chest even for common quality. I would do three versions, at each common, uncommon and rare quality levels. Even so, I still put quality modules in all six buildings. Remember to add requestor chests to request leaked items.
These go in the reserved space at the end of your biofactory.
After we build the second nutrient biochamber, there will be way too much common nutrient. One thing you can do is put a stack inserter next to the main belt, and wire it to the belt section after. If there's any nutrient after the stack inserter enable the inserter. Also give it the common nutrient filter. This removal has the benefit of evening out flow of nutrient as well.
The results of this removal can be send on a private belt straight to the incinerator.
This will still probably not be enough fruit, so it's time to do a second expansion.
For the second expansion, I would probably add a second jellynut tower and a third yumako tower. Try to keep them all close to the front of your biofactory.
For this expansion, let's try three jellynut, six yumako and five bioflux biochambers. We probably do not need to increase nutrients, even for the egg factories. At this production level, we will wildly be overproducing common fruit, but should be approaching fill on uncommon, which is the real goal.
After scaling, delete the stack size override on the space platform. We also need to go to Nauvis to make an emergency change to our labs.
They all need spoilage trash bins. Also, the storage chest you put the Gleba science packs in also needs a spoilage trash bin. Hopefully you don't need to bulldoze too many buildings for this.
Also request a row of each quality spoilage from space and a stack of depleted uranium fuel cells. Send these straight into an active provider chest. We're not importing these. We're clearing trash from the ship.
For the other exports, I recommend uncommon and rare stack inserters, rare and epic missile launchers, common carbon fiber. You need rare or epic carbon fiber only for a couple pieces of armor equipment. Eventually, you will need common bioflux, but this is a terrible time to start exporting that.
13.5 Ship upgrade
With Gleba science, we can finally make our first space ship upgrade. This upgrade is notable for quadrupling our ship fuel supply. We can switch to piercing round ammunition, which is very optional, and we can add foundries from Vulcanus. Which is also very optional.
If you want the Gleba science to flow, then we cannot simply drydock the ship for all the changes. We'll need to save the game, make our upgrade, save the upgrade to a blueprint, then load the game.
After we are finished the upgrade, reduce the wait time at each planet to thirty seconds. Combined with a speed goal of 300 or more, most routes will have 50 second travel time.
We will be drydocking at Nauvis, but pick up a stack of quality stack inserters first.
First, we need to make space for our Vulcanus foundries. We'll be stretching the ship vertically for this. Use the cut tool to cut everything at the beacon and below, and paste it about twelve tiles lower, just enough to turn the one beacon into two, and have enough space in the middle for foundries. We'll only be foundrying iron, as we don't need much copper.
Place three foundries, one making molten iron, one iron plate and one steel.
While making these foundries, instead of directly filling them from the belt and directly emptying them to the belt, let's create queues. This will smooth out consumption and production. Only the molten steel needs an input queue, and it needs 2. One for iron ore and one for calcite.
You can take the queue for calcite from the belt, but it is just as easy to take the iron ore queue from the asteroid crusher. Queues on spaceships should be mostly made out of underground belt sections, because this maximizes length and minimizes footprint. You'll need to take some iron ore off the queue and put it on the sushi belt at some point. You can decide its condition yourself, but it will need one. At the same belt intersection is where you can add the calcite, as queues can handle two items.
Queues should be built with stack inserters, except for asteroid chunk queues.
Consider also adding a metallic asteroid queue, as this is the most important asteroid type for your weapons.
We need one queue for copper ore going to a furnace. Switch to the advanced crushing recipe to enable copper. You take an iron hit, but this will be perfectly compensated for by the foundries.
After changing to the advanced recipe, you need to monitor overfill of both materials. Which you can do by using a circuit connection to monitor the amount of stuff in either queue. If there's an overfill condition on copper, as in the copper queue is mostly full and iron queue is mostly empty, dump some copper onto the main belt.
Your crusher still needs an output arm onto the main belt, because the crusher can also produce asteroid chunks. Blacklist the materials that you are now queueing. You can play with these blacklist item filters as an alternative for having arms dump items on the belt from the queues. This arm must not be a stack inserter. It will jam itself.
Your other two crushers, one we'll keep the same, but switch the ice one to the advanced recipe. Since we are handling the big items, iron plate and iron ore, by queue, we don't super need to use stack inserters for the sushi belt at the moment.
The furnace for copper ore can use a stack inserter.
Also, the output inserter for the hub can become a stack inserter.
Switch the two fuel recipes to the advanced versions. Coincidentally, they now require calcite, which we get from advanced ice ore processing.
Also coincidentally, they require twice as much water. You may want to queue ice, straight from the crusher.
But also keep putting ice on the sushi belt. Consider turning off the crusher when the belt is dangerously high on both calcite and ice.
Put some calcite in your hub, for export. You need to add the calcite to the constant combinators controlling the input arm. Once done, delete the calcite import instruction from Vulcanus.
Our weapon assembler will need to split in two. One for regular ammo, one for piercing ammo. The queue for iron should go to the regular ammo, though you should allow excess plate into the hub. The queue for steel should go to the piercing ammo. But you can also place the copper plate on this queue. There's no pressing need to store either of these in the hub itself.
Storing regular ammo in the hub is an option for providing supply to the piercing ammo, but you can just feed fresh regular ammo into the piercing ammo manufacturer and increase the max amount of ammo in the hub to something like four rows. Remember to change your regular ammo filters to piercing, and change the wait condition at Nauvis to piercing as well.
The piercing ammo is faster at taking out asteroids, which is great, because our ship is going to go faster. Request the necessary engines to finish your engine V. This should be a total of seven engines for our 32 unit wide ship.
Snake the sushi belt to the edge of the ship in one spot. We need to bring back that inserter that threw stuff into space from the space station design. The inserter has to keep copper and iron ore below dangerous levels as well as ice and calcite. We don't know which of these four will be overproduced, but can't stop production unless we still have supply of the partner material.
In the case of copper ore, we really don't want any on the belt, so the constant combinator can set copper ore to 1. The decider combinator needs a double condition, the value in the constant combinator has to be greater than zero, and the value on the belt has to be at least the constant combinator value.
At this point, the ship should be flyable again, and faster. But let's make a couple more fancy improvements.
We're going to go somewhere cold and dark. Let's add supplemental nuclear. Use as a base the single nuclear recipe from the side quest above, but we'll only build one heat exchanger and one turbine and two tanks, to conserve space. Whenever power demand is low, or the ship is somewhere warm, the turbine will automatically shut down and solar panels will provide everything. That means the nuclear reactor will almost never be running. Nonetheless, import a stack of nuclear cells from Nauvis. This is a literal year's supply.
The stack inserter that is putting ammo on the belt has to have its logic changed to put both ammo and nuclear cells on the belt, which we can do by playing with its filters. You'll need to add a constant combinator and decider combinator for this.
We only need a single cell on the belt at a time, though the stack inserter will automatically put four stacks of four down. Not a problem.
Finally, let's start feathering our engines. This upgrade makes the ship faster by making the ship slower. By conserving fuel. To do this, we need to put some combinators between the engine pumps and the hub. If wire reach is a problem, add a lightbulb.
Let's read ship speed as the speed symbol, and we'll create a ship's heartbeat with the heartbeat symbol. The combinator for the heartbeat will simply add 20 heartbeat and persist the heartbeat, so long as the heartbeat is less than 500.
An arithmetic combinator will add the symbols together and output the star symbol.
Now we choose our speed limit. Let's say 300. If the ship hits 300, no fuel will hit the engines. We use the condition on the fuel pumps: star is less than 300. The closer the engine gets to 300, the more fuel starved it will get, slowing it down more.
But, fuel starving makes thrusters more efficient. You can expect to hit 150% efficiency if you succeed in getting the fuel level below half in the engines. If the fuel doesn't fall like that, you need to reduce the speed limit.
(cont'd)
ship upgrade continued
If you want to go faster, you should replace your engines with some rare engines. Rare engines thrust 50% harder at max, but consume more fuel. You can set the speed limit a little higher and they will still be more efficient due to greater starvation.
Double thrust would translate into a 41% total speed increase. This is the square root formula that accompanies quadratic resistance, which is what we get in space, apparently. If your ship is slow, there is a strong linear term, so you'll get better speed increases.
I always put two lights next to the engine pumps for visual feedback. Turn them off when the pumps turn off. You can also use lightbulb color to give other info prettily. Such as speed. Set the green color parameter to speed. For later, set the red symbol to the damage symbol.
We will mess with the feathering system more in the next upgrade.
We also want one upgrade to our science pack station.
In addition to giving it a once over to make sure everything is working well, make the ice asteroid crusher also produce calcite and put some in the hub to supplement Nauvis. Remember, you need to handle the case where too much calcite is produced, which can stop your ice supply.
14. Fulgora
I assume you know how to do all the ship things now for starting a new planet. But, we're going to create sunglasses.
Because of spoilage, we want our ship flying directly from Gleba to Nauvis. This means we will fly to Fulgora from Nauvis, then from Fulgora to Gleba, then from Gleba to Nauvis again. That's three new stops.
When we get to Fulgora, you will be terrified of all the lightning. Though, part of the reason you have fancy armour is to make things like lightning strikes much more survivable. Still, it is a very bad idea to build things or use robots at night in areas with no lightning protection.
For reasons, metal trains and metal train tracks are completely immune to lightning strikes, but everything else is not. If we decide to connect multiple islands, we can transport infinite resources with a couple trains. Elevated rail is particularly useful for that purpose.
There are three types of islands on Fulgora, big islands with no ore, small islands with a million ore, and medium islands with 100,000 ore. Possibly affected by your map generation settings.
You can't build on a small island, and you can't start on a big island.
There's not really anything to scout on this world, except finding medium islands best suited for settlement, nice and square, few cliffs next to lots of vault islands. Also, a single radar will need something like twenty five solar panels.
If you do decide to leave radars about the place, power them with a lightning rod and an extra couple accumulators. Five should do.
Mine a vault. This is connected with an achievement, gives you building materials, and is necessary to advance. There's a vault on all the small islands.
Once you've decided on your island, you want to manufacture about twenty lightning rods by hand. You need stone brick for this, so plop down some solar panels in a place protected by a preexisting lightning attractor and a couple electric furnaces. When done, clear the island of surface features and put your own lightning rods in place. Make sure they're all connected with substations, and put a bank of accumulators somewhere out of the way.
Quality is considered a trap on this planet. And in a way it is. Without quality, you get low density structure and blue chips for free, and can fly back to space in half an hour if you brough your own rocket silo (ingredients).
Of course, Fulgora science packs are just a little bit harder than that.
14.1 The quality owl
One of the greatest rewards of Fulgora is tier three legendary quality modules. Only skip this if you don't like quality and want to win the game instead.
To get your legendary tier three quality modules, we want to take all the scrap on Fulgora and recycle it into higher quality stuff until there's nothing left at common and uncommon levels. This will, notably, require a lot of tier two uncommon modules.
This is what the owl design is for. For visual shorthand, the owl has two big eyes, which we will mark with green beacons, a nose bridge between those eyes, and a rather complicated beak. Each of the eyes will be dedicated to a different quality level, but everything starts at the beak.
Place big mining drills on some scrap, fill them with quality modules and send it to a region below the owl's beak. Run the scrap through two banks of recyclers, also with quality modules, sending two turbo belts of scrap up to the owl's beak.
First, use stack inserters to pull most of the common iron gears off the two paths. We'll recycle them separately, as the most common, and least desirable of all the scrap items. The iron from the recycled gears will join the return path for the common eye.
Second, use two splitters to leaklessly remove all the holonium ore from the two belts and send it all sideways out of the way. It is the most valuable resource, and should never see any recycler. A ways away, some of the common and uncommon holonium will be collected into requestor chests, each requesting some of the same quality holonium. The line should then end in an active provider chest, so that it can be collected indefinitely.
The requestor chests will each serve a holonium solution plant with productivity modules in it, two common and one uncommon. That's for later.
Save some space around the beak for what is going to become a complicated web of belts.
In the middle of the beak, a splitter sorts the two belts into common quality, down the left eye, and others. A second splitter will divide the others into uncommon quality, down the right eye, and a higher quality belt, that we'll send travelling away from the owl, to avoid clutter. Mirroring this, a second splitter will merge the return line for the left eye into the feed line for the left eye. The uncommon eye's second splitter can be reused for this.
Now we reach the bridge. This is the area between the eyes. It will feature a long row of passive provider chests. Just in case, let's put some of everything into these chests. You never know. If larger quantities are needed, we can buffer them in buffer chests later. Such as for rocket ingredients. Because we only want small amounts buffered in the bridge, a single row of chests can serve both eyes. The inserters passing the goods into the chests need wire connections to their chests that disable the inserters when the contents are too high. I suggest 1000 for common and 500 for uncommon.
The items that need to be buffered are: gears, solid fuel, concrete, ice, steel plate, battery, stone, advanced circuit, copper cable, processing unit, and low density structure.
We also need to buffer: plastic, electronic circuits, iron plate, copper plate, iron sticks, refined concrete and accumulators. These seven will be added from the side feeds in the beak.
All these materials can safely leak, which is why inserters are fine, though use a stack inserter when you want less leak, like for instance on batteries and accumulators.
At this point, the flow has reached the top of the owl. Running over the top and outer side, we want assemblers that massage the material into better material for recycling.
What massages do we want to apply? After holonium ore, which we already removed from the recycler, plastic and batteries are the most valuable. We don't want to recycle them poorly. In addition, steel should never reach the recyclers, because steel will gum them up and make them run slow. A similar concern exists for copper and steel plate.
Rather than recycling a good, it is best to manufacture it into something else then recycle it. This is always true for things that recycle into themselves like plates, and true for high productivity recipes. High productivity recipes include anything manufactured inside a foundry or electromagnetic plant, due to the built in 50% productivity bonus, as well as steel, low density structure and blue chips, after you research their productivity researches.
However, steel is not a recyclable recipe, so it doesn't count.
If you don't have a high productivity recipe available, or only recipes with large amounts of other ingredients, then the goal is to search instead for a really fast recipe, because these items recycle really fast.
This is what we will do with steel. Steel chests. Then recycle those. Use a splitter to capture all the steel right at the end of the line, turn it into steel chests, then throw those back on the line. You can use the other side of the splitter.
We will also do this with iron chests, but we have three other things to do with iron first.
For copper plate, we want to turn all of it leaklessly into copper wire, after the buffer chest of course. There's actually a series of four electromagnetic plant recipes we want on this line, each feeding into the next. Copper wire, green chips, red chips and blue chips. Though, we have to actually run our setup for a bit before we can add all these, so that we can manufacture electromagnetic plants to begin with.
Some of the iron should be turned into iron sticks, in the common eye. When we mirror everything in the uncommon eye, this is most likely unnecessary, as some of the iron sticks will be uncommon. We will manufacture refined concrete with some of the iron sticks.
Both of these materials should go on a bypass line to the beak, so that the various qualities have a chance to be buffered before recycling.
For batteries, we want to turn a lot of them into accumulators. Like the iron sticks, these need to go on the bypass line to skip the recyclers the first time around.
Total, that's five recipes that go into electromagnetic plants, four that go into regular assemblers, six that feed into the recycling loop and three that go to the bypass line.
For a lot of these recipes, you can reduce leak by buffering the ingredients in a chest. For green chips, for example, both an iron plate steel chest and a copper wire steel chest are useful. Reduce the chest capacity to only two or three slots. Consequently, a lot of these building should be built three tiles away from the belt.
All of these buildings, with the possible exception of iron stick, should be mirrored on the uncommon eye. Remember, the point is quality increase, so they all need quality modules.
At the lower left corner of the common eye should sit a bunch of recyclers. As many as six, not counting a bonus recycler for the gears. Though, at first, things will go slow, as the system needs time to warm up. Same at the lower right corner of the uncommon eye. In fact, after the best quality modules are in place, the right eye might be slightly busier than the left eye.
Under the eyes is the return feed. The return feeds need to be split by quality, and in the case of the left eye, merged with the output of the gear recycler. Common quality merges back into the common quality junk path in the nose. But! this merge has the potential to jam the eye. A circuit solution is called for.
The belt segment just before the splitter on the side coming from the mines must be connected to a wire. This wire will conditionally turn off the belt segment. I suggest measuring the contents of the return feed line in all belt mode. Using a selector combinator find the number of unique items on the belt, and an arithmetic combinator to add that value to all other values. Turn off the belt segment if any number is greater than a threshold value.
(cont'd)
the quality owl continued
If the eye still jams, you should make the return line longer, possibly with an underground belt detour.
The same return line on the uncommon eye has the same tendency to jam, so will need the same circuit trick. The higher quality return line from the left eye should merge with the return feed from the right eye. Since the splitter that merges with the initial junk feed filters on quality, we don't need a quality split on this side.
The higher quality line is destined for active provider chests, so there's no urgent need to do anything with it, though eventually you probably want to make the contents nicer. You probably want to buffer then recycle most of the rare gears. There's just too many of them. One more green chip and red chip electromagnetic plant at rare. You definitely do not need more rare blue chip. In fact, if you are short on red chip, you can recycle some rare blue chip.
Also, what are you going to do with rare ice and solid fuel on this planet? Recycle most of that.
14.2 What to do with holonium
Holonium solution is mainly used to make holonium plates. You should do this in a foundry with the best quality modules you have in it.
Fill one passive provider chest with common plates. Quality stuff goes in the active provider chest.
Grab 150 plates and manufacture one electromagnetic plant. Put the plant down, and manufacture a bunch more. We're already in plant debt of 12 with our quality owl setup, and we are just getting started.
It would be nice to have quality plants, but you just don't have enough quality plates, nor will you for quite a while.
Let's create two beacons out of the way a little bit. A speed beacon next to our rockets, and a green beacon for a bunch of electromagnetic plants. You can easily just put everything in hermit mode, because absolutely nothing in this part of the factory has high volume input or high volume output.
On the speed side, you can put the electrolyte solution electromagnetic plant. Also, the science pack electromagnetic plant. Normally, you shouldn't manufacture high quality science packs, but this recipe demands a lot of liquids. That changes the equation in favor of higher quality. Probably uncommon in this case. You still fill such plants with productivity modules, though.
On the green side, we want one superconductor plant. One is often enough, but a second for exports. It is a valuable export at only low quality, but put quality modules in for some local uses. Then, we want three supercapacitor plants. They are not a valuable export, and we have no use for low quality supercapacitors at all. Immediately recycle all the common supercapacitors you produce.
You might think that it is therefore a good idea to manufacture uncommon supercapacitors, but I don't think the economics for that are actually good. We need to wait until the huge plate demand for electromagnetic plants can be moved to the rare tier. And that is in the far future, when everything has tier 3 modules in them.
All the uncommon supercapacitors will be used by your science pack plant, leaving rare supercapacitors and above for other Fulgora local purposes.
Oh, looks like we need an oil industry.
In another bare area, pump heavy oil out of the ocean. Crack some of it to light oil and some to petroleum gas. Pipe some of it to your electrolyte plant.
Add one assembler for rocket fuel and one plant for water, and two for sulfur and its acid.
The oil industry load is very light, so I wouldn't worry about overloading these plants.
After you connect up the many pipes needed, the whole thing should come to life. Note that electromagnetic plants have two way connections, so fluid can pass through them.
You should switch the electromagnetic plant producing electromagnetic plants to uncommon, and look at manufacturing for yourself some rare lightning collectors. Set up at least a couple other plants to improve your supply of quality modules.
14.3 Tier three chips
This section will not cover tier three productivity modules because biter farming is a pain. Biter farming is needed for the post game science packs, so tier three productivity modules are introduced in that section.
Given the way we designed Vulcanus and Gleba, both of them are overproducing high quality chips. Let's go to those planets and make the overproduction situation even worse. Upgrade all the chip plants to electromagnetic plants. Because of the power draw, always place these plants next to a green beacon.
The ratios are different. Instead of three wire, two green, three red and one blue factory, the new ratio is one wire, one green two red and one blue plant. Despite the fact that there is spillover quality material, the ratio remains the same at the uncommon level.
Add three new electromagnetic plants to both worlds, producing uncommon module 1, uncommon module 2 and uncommon module 3, of the appropriate type. We'll change the recipes later, but this will get production started. Because of our quality owl, doing rare as baseline is better on Fulgora.
Add uncommon module 3s to the export list of the trade ship.
Now we go to Nauvis and stop producing these types of chips. Nauvis will now focus exclusively on productivity chips.
Let's also take the opportunity to upgrade Nauvis. Delete the entire line of assemblers creating your red green chip belt. We will create a new blueprint that we'll spam in its place. It's a lot thicker than the original line, so you'll need more space.
Arrange around a green only beacon two copper wire, two green chip, and three red chip plants. Put the red chip plants in a line, and drag a future plastic belt next to them on one side. You should dump some copper wire from both copper plants onto this belt as well. The copper plants should directly feed the green chip plants, but remember you need to trash higher quality copper wire. The red chip plants can take green chips off the same belt they put red chips on. This belt can go on the other side from the plastic belt.
The wire and green chip plants need to be served by a future copper and iron plate belt which you can run on the outside of the setup.
After you add modules or module ghosts to this setup, copy and paste at least two copies. Also, add one copy to the side, but upgrade all its recipes and filters to uncommon. The uncommon one can delete one copper wire plant and replace it with a requestor chest. This unit won't be supplied by belt, but rather requestor chest.
For the regular units, connect up the plastic and the copper wire belts using splitters. Also use splitters to connect up the outgoing chip belts.
It may take time for you to import all twenty seven electromagnetic plants, so let's do other upgrades first.
On Nauvis still, delete your long lines of steel furnaces. We'll be replacing them with two beacon setups of foundries.
The first beacon, a speed beacon, will contain the molten and copper ore foundries, with productivity modules inside. Just one each will produce more than enough for all the other foundries. The other beacon, a green beacon, will have a ring of eight foundries around it. You may need two such rings to replace a particularly long line of furnaces.
Almost half should produce copper plate, and almost half should produce iron plate. At least one or two should produce steel. Just a couple such foundries, and you can delete your entire long line of steel producing furnaces. Drag a belt from the steel foundries all the way out to where your steel furnaces are, delete all the steel furnaces, and connect the new belt to the old belt.
These foundries in particular are going to free up many modules for you, if you were using modules in your furnaces. For this reason, the foundry upgrade is also useful shortly after completing Vulcanus, around the time you replaced all your mining drills.
Foundries should not be used to process high quality ore. If you have quality modules in your drills, use a splitter to divert quality to a handful of remaining furnaces. Remember to keep some for concrete.
On Gleba, you will likely be approaching a crisis where you have too much plastic and/or seeds. If you hover the mouse over any smart chest, you will see which resources you have way too many of at the top of the list. For many of these resources, like uncommon plastic, the solution is simple. Build more uncommon red chip factories, because you never have too many uncommon red chips. If that doesn't work, because you built an uncommon plastic biochamber or some mistake like that, you need to add an emergency garbager.
Place down a recycler near a roboport. The requestor chest for this recycler will have a wire coming from a selector combinator set to stack size. The selector combinator gets from a decider combinator each signal that is above some absurd number. Such as 100, 000. The decider combinator gets the number of items available to robots from the roboport.
This emergency garbager is inefficient, but will do for now.
To prevent seeds from needing to be emergency garbaged, when we remove seeds from the main belt, we can put them in two chests based on quality. The common seeds can go in a passive provider chest, with another inserter that puts the seeds back on the main belt if the passive provider chest is almost full.
But before we do this, let's manufacture large stockpiles of artificial turf in our remote manufacturing hub. It's only when we don't feel like producing any more turf that this seed control becomes a good idea.
Back on Nauvis, replace the remaining chip and module assemblers with electromagnetic plants. This is an important efficiency step, because plants contain productivity bonuses, which affect all the factory that came before them.
Consequently, if you only want to do one, replace your module and blue chip assemblers, and not your red, green and wire assemblers.
On your three planets other than Nauvis, you may notice that module production is very, very slow. Your uncommon module 1 may be spinning away happily, but your uncommon module 2 will be sitting idle almost every time you look at it. This is common in smaller factories. If the problem is red chip availability, or blue chip availability, you should fix up your factory to produce more and better chips. Those plants may also have stalled out due to full output chests. full output chests are common for blue chips on both Vulcanus and Gleba.
But your uncommon chip line should have been unaffected. The problem is most likely just that the uncommon lines are slow. Plastic is often the limitation.
There's not much you can do about an uncommon plastic shortage at this time, though a solution is found on Aquilo. So leave it for now.
Nonetheless, we can, in fact, produce more modules. I recommend the following.
(cont'd)
tier three chips continued
Create one new electromagnetic plant, and set it to produce rare tier one modules. Create another, and set it to rare red chips.
Create a bank of decider combinators. Each of these will have one recipe that they output, which they will output a priority value of. The uncommon tier two module will have priority value 2 the rare priority value 3 and the epic, priority value 4. These combinators will have stacks of input ingredients as their conditions. Red and blue chips of the appropriate quality, and a stack of one particular module.
For the tier three modules, you also need a half stack of a guest ingredient.
By requiring stacks, we are ensuring that there is always enough raw material to produce a batch. At 100 required ingredients, the batch size is 20. This ensures we will always get a decent productivity bonus, because productivity resets when changing recipes.
Add one extra recipe to the tier 3 module collection. Rare blue chips, and give it priority 1. Rare blue chips will need about 400 rare green and 40 rare red, to make a batch of 20. Don't do this on Fulgora. Remember to add a sulfuric acid pipe connection.
The requestor chest for the tier two module and tier 3 module plants now need to request the ingredients for all these recipes, in an amount strictly greater than our chosen stack sizes. If the plants are facing each other across the chest, then the chest can share resources. This is a good idea.
Add the usual timer, set to about 10000, to limit the number of times the recipe changes, and before that, the usual selector to choose the recipe of highest priority, and after that, the combinator that changes the recipe when the timer is up. All three must be done separately for the two plants.
We'll do uncontrolled production, so set the output chest to be an active provider. When we eventually get too many uncommon tier three modules, well recycle them all to potentially get more rare tier two modules. But that is a very long way off.
14.4 Ship upgrade or new ship
At this point, you need to decide if you want to upgrade your trade ship to reach all planets, or if you want a new ship. Both plans have merit, even for speedrunning.
The plan for the new ship, either way, is about the same.
If you are trying for the speedrun achievement, the final upgrade will also be applied to this ship. If not, the final upgrade will be applied to the second ship we create, which is this one if this one is the second ship. Otherwise we will create a second ship later.
For the second ship, we'll change the route slighly, to a giant teardrop, to eliminate the extra trips to Gleba and Nauvis. Nauvis -> Fulgora -> Aquilo -> Gleba -> Vulcanus. It still needs to go to all the planets, as each one exports something Aquilo needs.
For the first ship, we'd instead change the route to asymmetric glasses. Nauvis -> Vulcanus -> Gleba -> Nauvis -> Fulgora -> Aquilo -> Gleba
If we're upgrading the first ship, then when building our final ship, we can drop Vulcanus from the route, since the trade ship will instead be supplying stuff to Aquilo.
Add at least two extra cargo bays. This is particularly important for a five planet trade ship. Two cargo bays per planet is a good rule of thumb. Don't widen the ship. Put the extra cargo bays near the edge of the ship. You'll probably have to delete a couple solar panels or move your nuclear reactor. Oh well.
This second upgrade can probably fit around just the two beacons we have already on the ship. But, if you feel like not spending time fighting for space, you can add a third beacon for the new buildings, by splitting one of the beacons into two horizontally. Just remember that it is really convenient for the weapons manufacturers to be right next to the ship hub.
If you don't want to fight the squish, you can collapse two of the manufacturers into one. A timer can divide the machine gun ammo assembler into two recipes, say 0-1000 it does basic ammo, and from 1000-4000 it does piercing ammo. You will need two extra decider combinators to not only set the recipe, but set no recipe if the hub has reached the ammo limit.
This is only a good move if you have researched physical projectile damage many times. Remember that this is a fast ship, and fast ships go through lots of asteroids. You can make sure the assembler is fast enough by stuffing it with speed modules.
Add another assembler in this high value real-estate zone. And also a rocket turret. Set the rocket turret as close as possible to the ship's center line. Which, you may note, is impossible with an odd width turret and an even width ship.
This is your rear turret. It is important that the rear turret covers the entire ship, to catch stray big asteroids that may try for your engine V.
The turret ball at the front of the ship needs to be split open. The ten or so turrets you have in the ball will still be plenty, assuming you have continued investing in physical projectile damage. But they will make way for a single or double row of rocket turrets. You need at least three fore turrets. If you have researched stronger explosives many times, then this is enough. Start researching those right away if you haven't started.
If you are behind on explosives research, use a double row of about five.
It is very important to set all the missile turrets to only hit the four types of big asteroid, and the machine gun turrets to only hit the small and medium. Weapon effectiveness is super affected by asteroid size.
Since you are definitely adding supplemental nuclear in this upgrade, you can add a couple lasers, set to only hit small. You can disable some of the machine guns from hitting small asteroids to increase the odds the lasers actually fire, but never do it for all of them.
It is time to set the carboniferous asteroid crusher to the advanced recipe. Both carbon and sulfur are going to go on the same queue, to feed a pair of chemical plants. These plants produce coal from carbon sulfur and water, and explosives from almost the same ingredients. A private queue will move the coal from one plant to the other.
The queue for carbon needs to pass by your left fuel plant, and remember that you need backup options if your carbon and sulfur unbalance.
And you want to put extra carbon in the hub for export still. This is most valuable on Aquilo.
With iron and explosives, you already have everything you need to feed your rocket assembler. Just gotta add the queues, and make sure the iron queue passes the missile assembler. And move everything around to make room.
Q> Should I make explosive rockets? Absolutely no. Explosive rockets are three times as expensive, and three quarters as powerful.
But they explode, you might say.
This is valuable to you only if they explode in a big crowd of asteroids. This only comes up when you are about a tenth of the way to the shattered planet or further. Don't worry about crowd control for now.
The asteroids around Aquilo are mostly ice. This will starve your ship of its most valuable asteroids. Thus, also add a fourth asteroid crusher and set it to recycle ice asteroids. Turn off the crusher when the ice asteroids on the belt are significantly less than the belt max, say twenty less. You may want to increase the max for ice asteroids at the same time.
This has a tendency to make the other asteroids grow endlessly under some conditions. So you'll have to add a dump rule to your space inserter. Dump the other types when they are significantly above the belt max. Say twenty over.
Endeavor that the new crusher places asteroids on the opposite side of the belt from the asteroid collectors. This helps belt balance, and therefore capacity slightly.
You can't put modules in crushers that use the recycle recipe. Well, you can, but you can't put the only useful ones in, productivity. This is important to remember for later station designs.
This crude, but sound design will do for the trade ship. We'll look at a refined variant for the Aquilo space station.
We should add a high density asteroid field slowdown thingy to our engine feathering. This will prevent the ship from taking any damage if your rocket launchers are all overwhelmed.
To start with this, set the inserter feeding the rear turret to override stack size one. Connect a wire from it to a new decider combinator that turns the exploding rocket signal into about 250 explosion symbol. The inserter should report contents in pulse mode.
Another combinator will do countdown persistence. If the explosion symbol is greater than zero, persist the signal and subtract 4 signal.
Another combinator will turn explosion into star. An arithmetic combinator adding to zero will do it.
If the rear launcher fires off a missile, the speed limit for the ship will fall to half, but only for a second. If it fires off a bunch of missiles, the speed limit will fall below zero, hard killing fuel to the engines, for a number of seconds roughly equal to the number of missiles launched. The settings above are dangerously slow if you've never researched weapon speed. Best for missile launchers that can fire two or more in a second.
If the asteroids lay off, the ship will soon return to normal operation.
Although this system is immediately responsive because engine fuel is already being feathered, the ship is unlikely to stop entirely. Both residual fuel and the ship's inertia will last longer than the few seconds of pause in most cases.
If your explosive damage is lagging, you may feel safer by lowering the speed limit during trips to Aquilo. To do this, set the hub to report both the source and destination planet. Add a decider combinator that outputs 50 star when it detects the Aquilo symbol as greater than zero.
If you are worried that you won't have enough ammo, you can add a wait condition to Fulgora. Check that you have 1000 rockets on board before departing.
(cont'd)
ship upgrade or new ship continued
15. Aquilo
Before you leave Fulgora, you should upgrade your armor. At the very least, Fulgora is where you pick up tier three batteries. If you don't already have a mister fission portable nuclear power generator, don't leave for Aquilo. That one will require an import from Nauvis. Not important on Aquilo is personal shield generators and laser defence systems. But upgrade your personal roboport, and maybe give yourself a toolbelt.
For Aquilo, you want to bring the best robots and roboports. Probably rare quality. This is despite the fact that you will avoid using them. Because the planet actively drains robot batteries. You also need miles of heat pipe, and at least one heating tower, heat exchanger and turbine, and rare pumpjacks. This is in addition to all the normal stuff.
What you don't need to bring is any drill. There will be nothing to drill.
If you don't want to setup Aquilo space station, also import low density structure and blue chips at low quality.
If you do or don't want to setup Aquilo space station, you need to import common holonium plate to make just about everything, including the science, and common refined concrete in large quantities.
For the stage two of Aquilo, you will additionally need tungsten carbide, carbon fiber, and tungsten plate.
15.1 Aquilo space station
Aquilo space station is a time sink. It is quite expensive all on its own, and it forces you to build extra production buildings on Aquilo. Aquilo is the worst planet for building additional production buildings, which you will find out when arriving.
What you get. Aquilo gains the ability to produce its own blue chips and low density structure sufficient for rocket launches. The small trickle of higher quality chips will help with other production, but is relatively negligible. You also get plates and red and green chips of various qualities, to operate your remote manufacturing hub with. Most useful for making pipes.
For speedruns, skip this section for sure.
You should also consider skipping all the quality parts of this section, if you don't want to provide random stuff for your remote production hub. The low quality blue chips are the only thing that is valuable to Aquilo exports. And will probably remain so forever. And quality is hard in space.
For this station, we are going to essentially copy our upgraded ship, but we'll be making several key changes.
First, we want one thruster. Why does a space station need multiple thrusters? We will be constructing the fuel plants, but they'll all be deleted, except for the water plant, once we arrive. For this reason, build the plants away from your beacons so they don't get in the way. Also, probably delete the feathering system. We will use manual monitoring and the pause thrust button during the trip instead.
We will not be using supplemental nuclear. Where would we even get the fuel from? Instead, we will turn the station into a giant ball, ignoring the small width rule. Use the best solar panels and accumulators you can get.
The station should be ringed with asteroid collectors, at least eight. Even when parked, it seems asteroids mainly come from the front at Aquilo, so prioritize the front and sides of the station for coverage. Lower quality, uncommon collectors is plenty for the station.
The turret ball at the front of the ship can shrink. Once parked, only a couple machine guns are needed, and only one missile turret. You can, of course, just keep a bunch extra if you really want to.
Behind your hub, you need more turrets, because of the round shape of the station. Probably two machine guns per side, for full coverage. You still need the your rear missile turret behind the hub. With the design outlined here, the entire station should still be inside the turret's range, assuming it's at least uncommon quality. Especially since we are replacing the engine V with a rounded rear bulge.
Since we're making the area of the station bigger anyway, we can consider the industry for the station to be a three beacon problem. The beacon at the front needs to be green-green, because we'll be playing around with quality (optional). The rear beacon needs to be speed-speed, because we will also be using some productivity. A third green beacon off to one side will create extra space for extra buildings.
Consider deleting one wing of your cargo bays, and attaching them to the other wing. This frees an entire side of your hub for more buildings, and there are a bunch that could use direct hub access.
The rules for building placement are thus: Any power hog, like a foundry or electromagnetic plant, must be touching a green beacon. Any building with productivity in it needs to be touching a blue beacon. All other buildings should preferably be touching a green beacon, but if they have quality, must not be touching a blue beacon.
Rapid weapon fire is not needed on a station, so you can get away with a single time share assembler doing everything. 1000 time units for regular ammo, 3000 for piercing, and another 3000 for rockets. Just put a couple speed modules in the assembler.
For our foundries, we will now have a full six. The copper plate furnace is not enough. We will add molten copper and a wire and plate foundry. The four non molten foundries can have quality modules in them.
We want all four foundries to run perpetually, but to prevent the starvation of weapons manufacture, consider slowing steel production somehow, and halting wire production if the copper queue to the weapon assembler is empty.
Note that using quality modules even on a space station is a huge risk, because we will halve the amount of iron available to our weapons manufacturers. Researching both types of weapon damage, and also asteroid productivity mitigates this problem.
We also need to be careful with our weapon manufacturer queues. The foundries need two output inserters. A stack inserter that filters for low quality only, and a regular inserter that outputs to a line that heads directly for the hub.
The following long list of trade goods will be stored in the hub. Iron, copper, and steel plate, copper wire and green chips. All five at various quality levels. Carbon and ice.
Add one electromagnetic plant next to the hub which we will use for upcycling extra iron and copper plate. It will be a recipe switcher, which we can set to common and uncommon wire, and common and uncommon green chips. You can adapt the system we created for tier three module production as a starting point. Only produce the products when both ingredients exceed a trigger threshold, such as 400 units. Deprioritize common copper wire.
Add one assembler next to the hub which will upcycle steel plate to steel chests. This will dump the chests directly into a recycler. You can use time share recipe switching to move it between quality levels of steel.
Both these upcycles, filled with quality modules, will help to control the amount of plates in the hub, keeping them at reasonable levels. But there's a huge risk of unsustainable product growth. Have an inserter remove from the hub anything that is taking up more than one row, except for ammunition. You probably want your three rows of missile and piercing round ammunition still. You can use a constant combinator to add negative ammo to your combinator that selects the filters.
In this station, we don't want the foundries to ever stop. They should produce infinite plate, and if Aquilo is not asking for it, the infinite plate should undergo quality upgrading. The weapon manufacture should stop as normal when full. This also means we don't actually need any inserters removing copper and iron ore from our queues in the event of unbalance. You can delete those and their logic circuits.
Despite the fact that we are trying for quality, still put productivity in your metallic asteroid ore crusher. You'd need about five extra buildings to deal with all that, and your net productivity of quality items will only fall very slightly. Consider that good recycling can sometimes produce 25% as much of the next quality tier as it destroys in items, and your foundries will double your items even without productivity modules.
For our ice asteroid recycler, we will now be splitting it into two. Add a carbon asteroid recycler. Each recycler will need two conditions. Both the level of metallic asteroids is low, and the ice or carbon asteroids are high.
You no longer need to space metallic asteroids from your sushi belt, but you may suddenly need to space ice asteroids. However, this is unlikely, because your factory will never stop processing metallic asteroids, eventually draining the belt of all asteroids. Still, you may want to increase the belt limits for asteroids, particularly given the sushi belt is longer now, since it stretches to a big circle.
Okay, that's actually a lot of changes from the previous ship design.
It's probably best to load all items into the ship from Nauvis, even ones produced on other planets. Also taking a load of rocket silo ingredients is a good idea. Remember that the ship will actively try to space anything more than a complete row.
(cont'd)
aquilo space station continued
15.2 Purposefully stranding yourself on Aquilo
No, spidertrons won't work. Although spidertrons are nuclear battery powered and can hold portable roboports, who's going to put the first construction robots into the spidertron?
Once you arrive from either ship, you will notice that Aquilo is very cold. Absolutely everything fun frosts over before you can turn it on. There's also not enough space for a broad layout. Even your robots seem to run out of battery constantly.
Things that work are solar panels, accumulators, substations, and heating towers. You can use solar panels only for bootstrapping.
First, place down your cargo landing pad, and get all your stuff and things. You'll probably want to build some factory on two of the four sides of the pad, so it can go in a corner, but try not to squish it.
If you can't place the cargo landing pad, or any later buildings, note that you can use force building to do so. Force building I assign to shift+click. There is also super force building, but that is for a different scenario. Force building will automatically allocate ice under any offshore areas. For automatically allocating concrete, which you need to put on ice and under most buildings, you need to prime the force build by manually putting down some of the concrete type you want to use. I always use refined concrete, as it is more fancy.
Using only force build on this planet makes sure you use ice and concrete exactly when you need to. And not when you don't.
You'll most likely want an import rule for carbon right away.
Close to your oil patches, put down your heating tower. You should have a route from the cargo landing pad to the heating tower to ferry emergency carbon to your tower. Use a circuit condition that the heating tower is less than 550 degrees.
Of course, this path will be frosted for now. Manually insert all the carbon you have into the heating tower.
This heating tower can take a max of about two heat exchangers and five turbines. If we need more power than that, we'll need to add a reactor or extra heating tower.
Ideally, the turbines and steam tanks will grow away from the factory, to not use up your more valuable real estate. Growing towards the water is okay, but you wont' have a huge amount of ice platform to start with.
To setup bootstrapping, you will need an offshore pump, a pumpjack, a tank, and three chemical plants. The first will perform ammonia separation, and the second will turn oil and ammonia solution into solid fuel. The third will turn ice into water for the heat exchangers.
It is now time to plan out the factory. You want approximately six beacons, though three of them will be in a combo pack in one corner of your factory, next to your rockets. Lots of space between these four corners. In the middle, a modest field of yellow chests. You could also put the cargo landing pad right in the middle.
One of the corners will be near the oil, and it will be used for your oil mini factory.
One of the corners will be used for the extra production buildings that come with using the Aquilo space station, and includes your remote manufacturing hub. This corner must be close to your cargo landing pad.
The other two corners will have many cryogenic plants in them.
Get your heat pipe ready. Heat pipe needs to touch literally everything important. Kitty corner is acceptable. Heat pipe must also form a fully connected network. This means that all pipe connections much jump over the heat pipe, and long handled inserters and underground belts are much more important here than normal. You'll also want to space out your buildings more, so you don't have to fight for space.
Unless you are going to blueprint and then take the blueprint back in time, don't overbuild heat pipe in advance, as you need large amounts of fuel to warm heat pipe. Especially don't build any extra before priming the power production.
Start by building your heatpipe around all the bootstrap buildings. If possible, you should have two power networks. One which connects solar panels to the five bootstrap buildings and nothing else, and one which covers all buildings, except those solar panels. These solar panels should fill a useless leg of your island up. You'll probably need the copper wire tool to cut wire for this. This bootstrap network can also cover the inserters that move carbon and solid fuel into the heating tower.
Add a wire to stop putting solid fuel in the tower when the tower reaches 950 degrees.
If your bootstrap power network covers one of the steam turbines, then the main power network does not need to cover any of the same buildings, other than the steam turbines. This can make it easier to split your network in two. However, it might be convenient to completely remove the bootstrap network power isolation if things get too complicated.
You can put green modules in all the bootstrap buildings to make them work faster.
Once the heating tower passes 500 degrees, you will start collecting steam. Use multiple steam tanks. It is safe for now to build the four corners and the main power network, so long as you have a decent buffer of both ammonia and ice ready.
Before that though, consider turning some of your extra ice into ice platform. Leave the assembler to spin as you work on phase two.
15.3 High quality solution
You need two other mined resources. Our most valuable and perishable resource, cheddar cheese, I mean lithium, goes to the cryogenic plant corner with only one beacon. Later, the fluoride goes to a coolant plant next to the rockets. This second corner will have at least a couple productivity filled cryogenic plants, which will not operate properly without speed beacons.
The slowdown from eight productivity modules is 120%. Only in cryogenic plants will you ever actually see a building hit the lower speed limit of 20%.
Start by dragging lines of heat pipes out to these mines, the lithium mines first. You can use force building to build the underground pipes right over the ocean. Force build some accumulators to get power in the area. Include at least one tank as a fluid buffer. Use your highest quality pumpjack on the lithium.
Put a radar down at each of your mining sites to start exploring the ocean. You could, after all, conceivably run out of lithium.
Start by using a chemical plant to refine lithium. But switch to cryogenic plants at the earliest convenience. All those module slots make the cryogenic plants way better whether you use productivity or quality.
Given that refined lithium is a half fluid recipe, you might be tempted to make lithium at two different quality levels. This is probably a mistake.
Unique to the eight module cryogenic plant is a special quality strategy. When equipped with legendary tier three quality modules, the cryogenic plant produces reasonable amounts of all quality levels from common ingredients. 50% common, 25% uncommon, 12.5% rare, and 6.25% each epic and legendary. This applies to the cryogenic plant recipe as well.
That means, you start producing 25% uncommon lithium. Then you produce 25% uncommon cryogenic plant. Then you recycle all your common cryogenic plants, further increasing your uncommon lithium supply, by about 1% after factoring in other uses.
Combined with the fact that most of your microprocessors and fusion power cells need to be common, and all of your foundation and fluoroketone should be common, don't manufacture uncommon or rare refined lithium.
You will need one electric furnace to make lithium plate. When you have enough lithium plate, manufacture one cryogenic plant in an assembler, then plop down the cryogenic plant, fill it with productivity modules, and make more.
This recipe requires import of blue chip, refined concrete and superconductors. The lithium refinement requires import of holonium.
As your most demanded resource, you will probably eventually need two lithium refining cryogenic plants. If you used quality modules in them, then you most likely need two lithium plate furnaces. Put a passive provider chest in between to buffer different qualities, and blacklist common quality if there is less than a stack.
At the other corner of your factory, add a plant next to your blue module beacon that is speeding up your rockets. Fill it with productivity modules, and feed it with fluorine. You'll need to run an ammonia pipe out there, and deliver spare solid fuel and lithium by robot.
Fluoroketone is mainly used as a non destructible coolant, so your cooling plant will be way more busy than your new fluoroketone plant. However, some recipes do destroy it. You'll want a tank for both substances, and disable this plant when the hot fluoroketone tank is half full.
Next door to this plant, you want fluoroketone cooling. This plant does not take either productivity or quality, but extra speed or green from beacons is welcome.
Across from fluoroketone hot will be your top consumer of fluoroketone cold. The Aquilo science pack plant. This one will, like all science packs, take productivity modules instead of quality. Even with the eight module slots, productivity still increases value about twice as much.
Instead, the fact the recipe can be served by other cryogenic plants raises the possibility that you can cheaply manufacture uncommon science packs.
For lithium plate, we have already established that common plates have much greater demand. We can even out this demand by manufacturing uncommon science packs. We also have very high demand for common ice. What happens if we put quality modules in an ammonia separation cryogenic plant?
Build an ice plant next door to the science pack plant, touching the other corner's module. We'll put a row of buffer chests in between. One chest will hold uncommon ice, and another chest will hold rare ice. A third buffer chest will hold common ice. Set the buffer chests to trash unrequested items, and request that quality of ice to mostly fill the buffer chest. This allows the chests to use the storage chest field as an external buffer, which we really need for ice management at the moment.
Move the ice platform manufacturer next to this plant, and have it take common ice from the plant directly, but only if the buffer chest is more than half full. This will help us control the two unstable elements of ammonia and ice better.
If either the ammonia tank or the ice chests fill up completely, it will stall production of the other, which in turn will stop power production and the factory will freeze if you don't notice in time. Which will require a laborious restart process.
After the new separator is established, delete the old separator. Feed the water plant with common ice from the buffer chest, possibly using a long conveyor belt.
An active provider chest is also required. Feed it with the epic and legendary ice. Next to the science pack plant, request both uncommon and rare lithium plate. Have a combinator decide which of two recipes is executed by the science pack plant, uncommon or rare. You can experiment with a constant combinator which recipe is the default.
The rare recipe should trigger when there is a thousand rare ice and three hundred rare lithium plate, and keep running until one of the two run out completely. The output chest will need to have a way to trash ice and lithium plate.
On to the oil industry. The oil industry is almost completely optional, but if you are using the Aquilo space station, then you need to manufacture plastic for red chips and low density structure. You may also want home grown electric engine units for niche purposes.
To set up a complete oil industry, you need a new pumpjack, a refinery, a lubricant plant, two crackers, a rocket fuel assembler, and two cryogenic plants, one for coal and one for plastic. Maybe they can all fit around one beacon, except for the pumpjack.
With the exception of plastic, they likely should all have productivity modules. The plastic needs quality, so you can turn the high quality green chips from the space station into high quality red chips.
For the rocket fuel, connect a wire to a roboport, and turn off the fuel manufacturer if rocket fuel is below a few rows. Maybe 1000. Feed it with some of the solid fuel from oil, possibly by belt.
The water plant should be creating enough extra for all the oil industry needs. You can always add a speed module.
To finish balancing our ammonia and ice, let's create another cryogenic plant that produces rocket fuel from ammonia. This plant will only be active if the ammonia tank is very full, about 24000 or above. It will intercept the solid fuel headed for the heating tower and turn it into rocket fuel from ammonia. This plant will also be sensitive to robot network availability. It will send to an active provider chest if there is less than 2000 rocket fuel. Otherwise, it will fork the fuel directly into the heating tower.
Also consider upgrading the solid fuel from ammonia recipe to be made by cryogenic plant.
In terms of relative efficiency, solid fuel from ammonia and solid fuel from light oil are very close together, in terms of crude oil usage. However, the sheer simplicity of it makes the ammonia version attractive.
(cont'd)
high quality solution continued
For higher quality red and blue chips, you probably want another plant, which changes recipe based on supply of raw ingredients and is supplied by robots. We've seen this pattern before. You also want one additional assembler to act as your remote production hub, and a recycler for upcycling whatever we want. This corner is already very busy.
15.4 Aquilo exports
For our remaining products, we probably want to plop down cryogenic plants on the corner of any green beacon that still has space in hermit mode. You probably added a few extra here and there to get all the main buildings covered.
These hermits should all have quality and they should produce quantum processors, rail guns, fusion reactors, fusion generators, and fusion fuel. Start with the quantum processors and rail guns if you are running out of quality modules. The fusion stuff is for endgame content.
All of these collectively require more imports. Tungsten carbide, carbon fiber, tungsten plate, as well as increased quantities of holonium, superconductors, and blue chips.
If you want to upgrade your armor's mister fission to a mister fusion, you'll need appropriate quality supercapacitors as well. This triples your power supply, but is a bit logistically difficult to make on any particular planet. The mister fusion recipe is the sole reason why you want quality on fusion fuel. If you ever decide you don't need any more mister fusions ever again, this plant should change to productivity and move next to a blue beacon.
This is not as unlikely as it sounds. After you have put your legendary spidertrons down on each planet, of which you only really need one, and given yourself a legendary mister fusion or two, you have run out of possible uses for mister fusions.
You can temporarily coopt one of these plants to make yourself a personal rail gun. This OP weapon cannot be equipped in any vehicle, so it's just a personal toy. It may even work on demolishers.
Exporting from this planet will additionally be a small amount of cold fluoroketone, which also requires a barrel making assembler and a barreling recipe. You'll want to build a small stockpile on Nauvis, for burst use.
If you want foundation, which is required for megafactory building on Vulcanus and Fulgora, then you'll need to import common stone as well. Alternatively, you can export lithium plate. There's no clear winner for efficiency.
Use the quality trick for the cryo plants, rail guns and fusion parts. Just recycle the common and uncommon ones, and get back some of their ingredients. Then export the rare and epic tiers.
Eventually you'll upcycle enough stuff to higher tiers to make one off high tier items. But that's a problem/bonus for future you.
15.5 Speedrunning the edge of the solar system
I assume you only built the first half of the Aquilo base mentioned above, and imported all your low density structure, blue chips and some of your rocket fuel from other planets. You only used belts and inserters you brought with you, but it is still all functional somehow.
Put two of the new railguns on your current ship, both pointing dead forward, one to the left of your weapon ball, and one to the right of your weapon ball. Because we've been working to keep the ship narrow, this will be enough.
You'll only run into a couple dozen oversized godzillas on the trip to the edge of the solar system, but you do need to fit in a manufacturer. It surprisingly only requires steel, explosives and copper wire. Add an adjacent manufacturer for the wire.
Your uranium backup power is now your uranium main power. To handle the power spikes of the rail gun, put down an extra heat exchanger, and bring the turbine count to four.
Filter the railguns to only hit huge astroids, all four types.
Now fly.
Monitor the flight as it goes, with the hub menu open but dragged to the bottom of the screen. If one of your railguns fires, check for other monsters in the area. If so, power down the engines to give the guns a chance to reload.
Don't worry if one of the big rocks strafes the side of your ship. The really important stuff is all near the center line, anyway. Keep flying so long as you still have fuel and power.
When you arrive at the edge, you probably got a speedrun achievement. Congratulations. Save the game to a special slot to brag to your friends, and reaload an earlier save.
16. Biters side quest
If you want postgame content, it's not actually time to go visit the edge of the solar system. We go all the way back to Gleba, then Nauvis, before making a pit stop on Fulgora and another on Aquilo.
But first, factory upgrades.
At Vulcanus, replace your plastic and carbon plants with cryogenic plants. Never will you be short on quality again. You may want to do the same on Nauvis, depending on demand for quality plastic. This simultaneously removes the need for quality coal.
Replacing the steam condensation and acid neutralization is also possible, but less game changing. On Nauvis, you may want to consider replacing battery production for the quality bonus.
Now on to the main mission.
At Gleba, we put low quality bioflux in a buffer chest next to the rockets. We also start manufacturing capture bot rockets. These work in any rocket launcher weapon. We have limited use for high quality capture bots. Don't accidentally fire them. On the ship, we import one stack of each quality capture bot and one stack minimum of bioflux.
At Nauvis, we import all this stuff, on stack at a time, two for bioflux. It is ideal that there be a huge clear space near both your rocket silos and your cargo landing pad, but since we weren't planning this part, I understand if this is not an option. Nonetheless, the defence strategy outlined below will assume this is your setup.
Now to make the spidertron. If we want a rare spidertron, we need a rare fish. Because you've been accidentally accumulating a huge amount of spoilage on Nauvis, I assume this step will run without flaw.
Next to a green beacon, we'll put down two biochambers, an assembler, and a recycler. The assembler will make nutrients from spoilage, and the first biochamber will make uncommon nutrients from uncommon spoilage.
The second will breed uncommon fish. You can fill it with speed modules, so long as the energy consumption stays low. Quality modules don't fit. Another speed beacon next to the buildings which do not take quality is a good idea.
A chest will sit between the recycler and the fish breeder, supplying both with fish. Put a common filter on the one going to the recycler. Put quality in the recycler. When the fish breeder starts working, add an uncommon filter, if there's extra fish in the box.
Eventually, you'll get rare and even epic fish. Stop the whole area from producing when you feel you have enough fish.
At your remote production hub, make some rare or epic exoskeletons and portable fission reactors. Make sure you're importing rare or epic rocket turrets. You probably already have rare or epic radar.
These rare portable fission reactors is the reason we stuck quality in our uranium fuel cell assembler way back.
This should allow you to manufacture at least one rare or epic spidertron. And at most five, one for each planet.
Keep in mind you have a time limit. Fish expire after many hours.
Once done, you can load up the spidertron equipment grid mostly however you want. Lots of defence lasers and shields will make this next part easier. One roboport is also a must.
Load one stack of capture bot rockets into a missile slot, and one stack of construction robots into the trunk. Activate the remote driving mode.
Squiggle over to the smallest bitter colony you can find and fire capture bot rockets at all the biter and spitter spawners. Only ever use low quality capture bots for firing.
Defeat everything else with your defence lasers by standing next to it.
Immediately upon capturing a spawner research captive biter spawners.
If you can research captive biter spawners inside ten minutes, you can merge the previous and next steps into one.
Squiggle back to your base.
Let's prepare a manufacturer. This manufacturer needs to consume fluoroketone, so supply it from a fluoroketone unbarreling plant. A requestor chest can request the other ingredients, including a stack of capture bot rockets and tons of uranium. Only manufacture low quality.
In the huge bare area between your rockets and importer, we will construct a walled pen. The walls don't do much. They are for decoration and psychology. Put eight ghosts of captured spawners in two close packed rows. Low quality only! Higher quality is asking for disaster, and has no benefit.
Between the two rows, will put two interleaved belts, such that they occupy truly minimal space. Possibly express and turbo. Make sure they're both belt types that are easy to access on this planet in case of destruction.
Let's assume the bioflux belt is a red belt. Feed bioflux into the belt, using spoiled first priority from the importer. Probably don't use a stack inserter.
This belt enters the pen using underground belt, it will feed two of the captured ghosts, then jump underground to the next four. Then underground again to the final two. It will end in an active provider chest fed by a fast inserter that filters on spoilage.
Let's assume the output belt is turbo. It starts with an underground belt segment to get eggs from the first four, jumps to the next four, then out of the pen. Don't install the output inserters just yet. We'll hold off. Eggs don't expire if we leave them in the spawners.
Load up another stack of capture bot rockets, and a freshish stack of bioflux. Fresh bioflux is very hard to reliably get on Nauvis, and will likely require a lot of tuning of things like import volume.
Recapture the biter nests, and fill them with bioflux. They will start producing eggs five at a time. Grab 80 eggs and squiggle back.
Manufacture only eight low quality captured biter spawners. Any more and you will have a ticking time bomb sitting in one of your inventories somewhere. You can then delete the entire production area.
Why eight? Eight is enough for a very healthy tier three module industry. We won't need to expand for quite some time. Expanding, as you may note, is an ordeal.
Sprinkle some defences around your new pen, making sure every last inch is covered by at least one machine gun and at least one laser. We also want the rocket silos to be covered. And a third area where will put down almost a dozen buildings.
This third area should, if possible, sit directly between your pen and rocket silos.
Add one rocket turret which takes capture bots as ammo. Make sure your entire pen is in its range. Regular weapons will refuse to target formerly captured spawners, so you'll need your spidertron as a permanent sentinel if you need to rocket away the problem. But you can recapture them automatically.
In the third area, we want many recyclers, a row of four electromagnetic plants, and a regular assembler. A green beacon is, of course, important for the plants, but optional for the recyclers.
Feeding into the area, have a buffer chest feed common biter eggs into three recyclers with quality modules in them. We need the chest to be a buffer chest to supply common eggs to space later. When you add the inserters to take eggs from the spawners, we will set the inserters to blacklist eggs when there are more than a few stacks in the chest. Remember to recycle spoiled first. On the other side of the recyclers will be a ring belt to hold eggs of higher quality. You should add a dedicated recycler to recycle any common eggs that end up on the belt, and another that recycles eggs of each quality if there are too many on the belt. You can use "each is more than ten" rule in a decider combinator.
The row of electromagnetic plants will produce various quality levels of tier three productivity module. Except common. Having all four simplifies things, even though the epic one will almost always be idle.
The regular assembler can produce uncommon biolabs.
Uncommon biolabs are a huge upgrade to regular labs. They double your science merely by existing. Using them will require a redesign of your lab area, so you should use the opportunity to move your labs into the country and supply them using only robots.
(cont'd)
biters side quest continued
If you don't have uncommon kovarex process going yet, you probably want to start it, so that you safeguard your uncommon uranium supply. You can recycle common uranium to reach the forty minimum needed if you don't already have forty.
Make sure you have a couple plants building your supply of uncommon and rare tier two productivity modules. Remember that you are importing tier three modules of all other colors at this point, so don't need your other module producers anymore.
This is probably still your strongest planet for red and blue chips, but also make sure supply of quality versions of those is healthy.
To deal with oopsie scenarios, have the buffer chest request every type biter egg, or add a blue chest that requests from buffers and requests higher quality eggs.
You can also add trash unrequested to the buffer chest to deal with any spoilage on the incoming line. Otherwise, you'll need a splitter and additional chest to get rid of spoilage. Spawners may have bioflux spoil inside them.
16.1 The final upgrade
If you have one trade ship, start a new ship. If you have two trade ships, this is an upgrade to the Aquilo supplier. This was discussed during the last upgrade. Remember that the trade routes are a little different in the two variants.
Because this ship is going to be massive with production facilities, You might finally want to create a 40 unit wide ship.
You can alternatively just make it pencil shaped.
This is at least a four beacon problem, however, we will not be tempting fate with quality, like in the Aquilo station, so things are simpler.
All six foundries should be built, like in the Aquilo station.
You may also want to build Three cryogenic plants. One right next to your hub for the final science pack, one will be out of the way and almost never run. It will be part of the power plant upgrade. One is an upgrade for your explosives.
This ship is now going to be spending most of its time shooting asteroids at high speed. Consequently, you should build more weapon assemblers. I recommend a full suite of regular ammo, piercing ammo, 2 rockets, and one railgun ammo. It is still too early for exploding rockets.
Sadly, these producers can't likely all be put next to the hub. But hub placement can be replaced with longer queues, so long as the building does not swap recipes.
We are breaking one of our golden rules, and putting asteroid chunks in the hub. Specifically, promethean asteroid chunks. Put them on the sushi belt first, then put them in the hub. For this reason, use top quality cargo bays, and consider adding up to twenty.
Add an import for biter eggs to Nauvis, and quantum processors to Aquilo.
On the return trip to Aquilo from deep space, add a condition that you don't leave without a full stack of quantum processors. This prevents a possible inability to get rid of promethium chunks at Nauvis.
On Nauvis, don't leave while you still have promethium chunks in the hub. Also don't leave unless you have most of your stacks of ammo.
Pick up one tesla turret from Fulgora in case of biter egg hatching, though your weapon ball will still be mostly sufficient for that. The tesla should only target big biters. The machine guns and lasers should target big biters, but some of your machine guns will need to prioritize asteroids while others prioritize big biters.
On Aquilo, pick up six or eight rail guns, one fusion reactor and two fusion generators. High quality is better in all cases.
The rail guns go in a row at the front of your ship, with allowed gaps for the front part of your weapon ball, and your front facing asteroid collectors. You'll likely need two belts serving rail gun ammo to either side of the weapon ball.
Since we won't be stopping at any point during the cannonball run, a big fat front facing cone of destruction should be enough, with overlapping weapons preferred.
You probably don't need to upgrade the weapon ball at all, with three to six rocket turrets and ten machine guns still being sufficient, so long as you've been researching their damage.
For the power plant, the fusion reactor is like a ten times energy denser version of the fission reactor. Place the fusion reactor somewhere where there's space, and the two generators next to it in an L shaped chain. Pay close attention to input and output directions. You can't use pipes or tanks for plasma. You will need a return pipe for hot fluoroketone, a plant that cools it, and a tank for cold fluoroketone.
Import some canned fluoroketone, and fill the tank halfway with a temporary assembler.
You still need solar panels, as the generator needs startup power.
Don't build the tesla until the generator is in place, as the tesla has the world's worst idle drain.
Since the ship is larger, make sure your vanguard turrets are still sufficient for full ship coverage. You can increase their quality to fix this problem.
Let's add a freezing system to our engine's ship feathering.
Connect the input arms for the rail guns to the input arm for the vanguard rocket turret. We will use either rockets or railgun ammo to generate the damage symbol. Using the any special symbol. All the inserters for railguns need to be override stack size 1, but only the first inserter in the chain needs to be monitored for contents, pulse mode.
Add a second decider combinator that produces a different symbol next to the damage symbol producer. We'll produce frost, about 10, 000 for each detected weapon fire. Another combinator will persist frost similarly to the one for damage, but it will only reduce frost by 1 each tick.
For frost, let's do exponential half life. To do this, we'll need to output flame symbol, more if we are not on the shattered planet route, and more if we are not heading towards the planet. One flame symbol by constant combinator, one by the condition the shattered planet symbol is not 2, and one by the condition the shattered planet symbol is zero.
This gives more flame if we are not on the danger route, and less if we are.
A chain of two arithmetic combinators must multiply frost by flame, then divide the result by negative two thousand, output as frost. You may need to tune the division through much experimentation, so that frost builds up enough and fades fast enough as well.
Our frost volume will be way too high to directly turn it into star, and cause our engines to be perpetually off. Have an arithmetic combinator divide it by 2000 and output that as star.
Since the railguns now produce damage symbol, you'll also have to rethink how much damage slows the ship. All stuff to mess with.
If you added the caution combinator, "50 star if Aquilo is on the route", delete it. Our frost system is the new caution system.
What does frost do? It very slowly slows down the ship as you advance towards the shattered planet and face more heat. The farther you go, the more heat you'll get. Because we are draining frost faster when heading away from the shattered planet, the platform will slowly speed up again.
Add a fly condition or three to the shattered planet. These conditions are called fly conditions because if they trigger, the ship turns around, even before you arrive.
Trigger if your hub fills up with several rows of promethium chunk. We want an amount below the limit we set for how many chunks to put into the hub. We'll also harvest almost as much promethium on the return trip, and inevitably fill the sushi belt to max. Remember to add a chunk filter for the asteroid collectors.
Also trigger (or) if you are low on any type of ammo.
Because of your biter import rule, on many trips to deep space, you will be able to process some of the promethium chunks right away and won't collect any until very deep in.
Now it's time to fly! Probably.
17. To infinity and beyond
Now what?
Congrats on beating the game, now go play something else.
Or, you can build a megafactory. In the expansion, you have five different planets to megafactory. The old megafactory goal of launching 1 rocket per second is gone in the expansion, leaving only faster and faster science as a megafactory goal. You can also try to create huge stockpiles of legendary quality stuff.
If you want to megafactory from a new game, my recommended settings are death world with richer ore, and larger liquid resource patches.
Or, you can fly all the way to the shattered planet. You'll need to upgrade your ship further for this.
Or, you can install some mods. There are at least two total overhaul mods to try, sea block, and planetorio, that both radically change the entire game. Both mods likely changed their names, as the original concepts were based around one planet, and would need radical revision. Which I believe has been done.
There are also over a dozen extra planets to mod in, including a mod package that installs only the nicest behaving ones for you.
There are also industry overhaul mods. These are of variable quality, and variable compatibility with the expansion. The three bob/angels/aai are best played together, giving a super classic mod experience. Though, pick and choose subcomponents. Angels petro, ore and smelting are the best, and bob's inserters are the worst. There's also krastorio, and pyanodons.
Then there are revolutionary standalone mods to consider. The top four are factorissimo, dectorio, resource spawner overhaul, and alien biomes. Alien biomes does not add any planets. It add biomes to Nauvis.
Or, you can 100% the achievements. Most achievements are pretty self explanatory, and you can get nearly all of them following this guide. Here are a few that may need special attention:
Golem:
Wear armour with very, very good shields. Stand in front of a train. May need some trial and error.
Get off my lawn:
Nowhere in this guide does it tell you to ever build in a demolisher's territory. Break this rule.
Getting on track like a pro:
Follow the very first bits of this guide, but as soon as you can, build some rail, some engines and a locomotive, and put the locomotive on the rail.
Solaris:
Delete your steam power. Wait very long into your factory's life to build nuclear.
Rush to space:
Don't research either production or utility science packs. Don't even research them. As in the researches for them. Until you get this achievement.
Pyromaniac:
You have several weapons that can start forest fires. Forest fires are bad. Smokey says don't start forest fires.
Lazy bastard:
This one is hard. There are instructions for how to do it in this guide, but pin the achievement to see if you fail accidentally and restart if so.
No hand crafting is also a fun mod if you like this achievement.
Steam all the way:
This high pollution gameplay strategy means you have to be more on the lookout for biters, and need more coal than normal.
Raining bullets:
Should be easy.
Logistic network embargo:
Consider combining this one with the rush to space achievement. This one you will get first.
So long and thanks for all the fish:
Send fish to space
Today's fish is trout a la creme:
Look at the system we set up for rare and epic spidertrons and give it a think.
No room for more:
Turn some of your spare power armors into mech armors on Fulgora. If you're lucky, or started with legendary power armor, you'll get legendary mech armor. Fill it with cheap components, such as legendary night vision goggles or legendary solar panels or legendary battery mk. 1.
Keeping your hands clean:
This can be a real struggle, as it means you need to leave biter nests in your pollution cloud untouched until you make a trip to Vulcanus and then back.
Turn the water quantity on Nauvis way up and reroll until you get an island, which still has the necessary amount of ore on it. Peninsulas are okay, but rush to wall off the mainland access. There must be no biters on your island. You can play with map scale to grow or shrink your island, and increase your ore.
Express delivery:
Don't use quality. Ignore all the quality stuff in this guide. Use the level 1 quality and productivity strategies.
Use the island map from keeping your hands clean.
Import rocket part ingredients from Nauvis, like you did with rocket silo ingredients. Ignore those sub parts of the guide.
Set target hours to hit various milestones. Rocket from Nauvis in under eight hours. Land in Vulcanus in under ten.
Each planet can be done in two hours, except Gleba. But your spaceship may also eat an hour each upgrade, if you have trouble supplying the spaceship parts.
It is hard to say which researches are not important. You may want to set up double research, especially if you are not putting research assemblers next to speed beacons and using uncommon tier 2 productivity modules.
License
I swear the steam character limit is 1000 short just to spite me. I feel like I'm writing twitter stories.
- Factorio: How to Build a Main Bus★ 5 (6k)231k views15k ♥15 minUpdated Aug 31, 2025
- Factorio: Observations, Tips, Tricks, & Efficiency★ 5 (3.2k)111k views7.1k ♥85 minUpdated Aug 4, 2020
- Blueprints for early, mid and lategame (updated)★ 5 (757)83k views2.4k ♥3 minUpdated Sep 3, 2022
- Factorio - Everything To Do With Smelting: Belt & Bot Based★ 5 (629)80k views1.6k ♥16 min
- Factorio Builds★ 5 (1.1k)63k views2.7k ♥5 minUpdated Jun 7, 2021
- High-Level Strategy for New Players★ 5 (880)62k views2.8k ♥43 minUpdated Oct 15, 2025
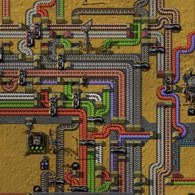

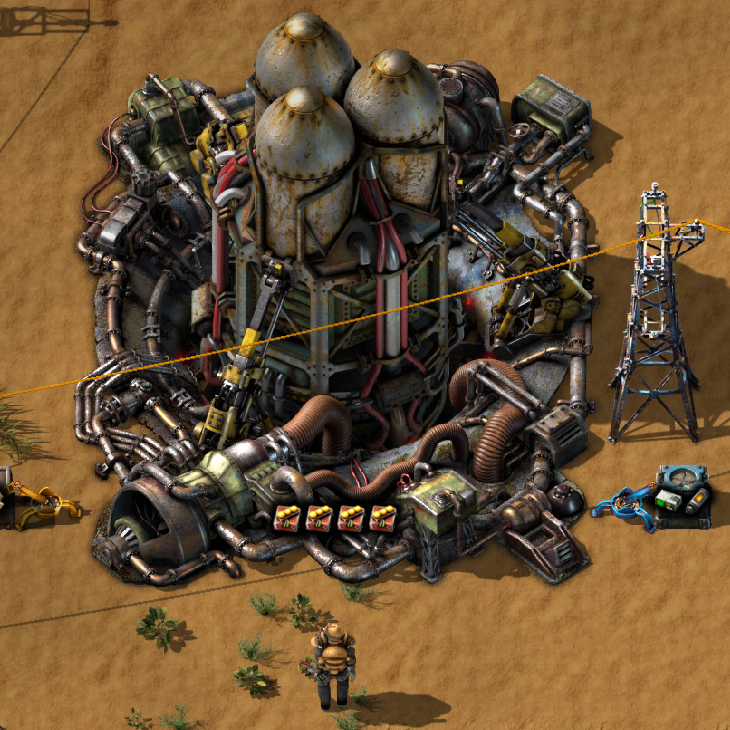
- Upgrading to PremiumTeam Fortress 2★ 5 (20k)1441k views11k ♥6 minUpdated May 11, 2022
- No More Room in Hell Official ManualNo More Room in Hell★ 5 (2.8k)569k views2.1k ♥29 minUpdated Apr 22, 2019
- NMRiH Community Hosting GuidesNo More Room in Hell★ 5 (526)351k views653 ♥1 minUpdated Aug 10, 2022
- ULTIMATE GUIDE FOR GAME DEV TYCOONGame Dev Tycoon★ 5 (5.8k)326k views10k ♥4 minUpdated 23 Jan, 2014
- How to 'Git Gud' Soon™MORDHAU★ 5 (2k)318k views3k ♥68 minUpdated Nov 16, 2024
- Лучшие кооперативные игры SteamPAYDAY 2★ 5 (1.5k)315k views2.1k ♥56 minRussianUpdated Apr 27, 2025






This guide was created by its original author on the Steam Community. Are you the author and want it removed? Request removal.