Overview
Detailed illustrated guide with images, features and crafting resources/requirements for all crafted items in the game.
Intro

My goal here was to create a visual, easy to use and to navigate guide that provides you with as much info as possible without too many words.
Please, let me know if you think I succeeded to achieve this goal. 😉
_________________
UPDATE 11-Dec-17 :
I added all the stats that are different in SURVIVAL MODE (lowered carrying capacities of bags and belts, winter clothing features, fewer rare skins required for huts).
As far as I know, for now this guide is the only crafting guide for the survival mode of Far Cry Primal. 🙂
• WEAPONS and EQUIPMENT
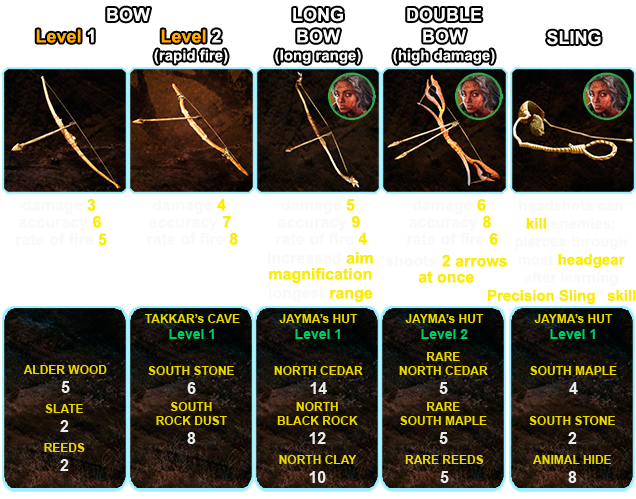
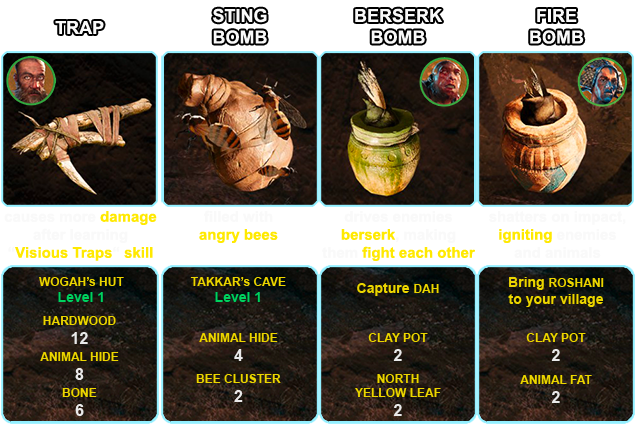
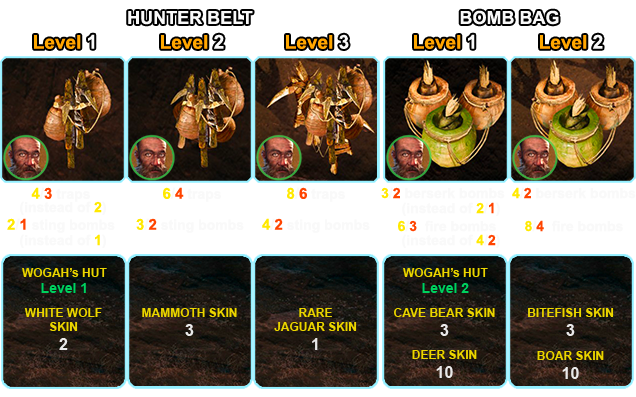
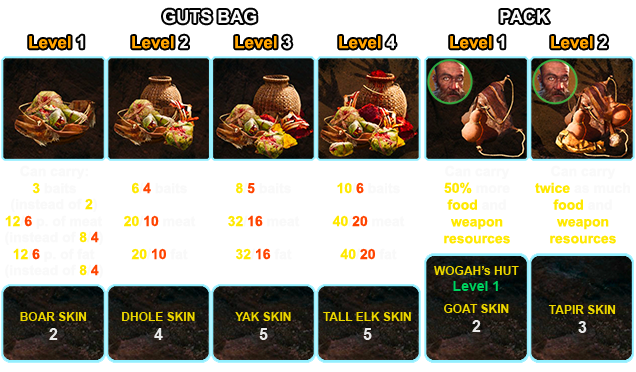
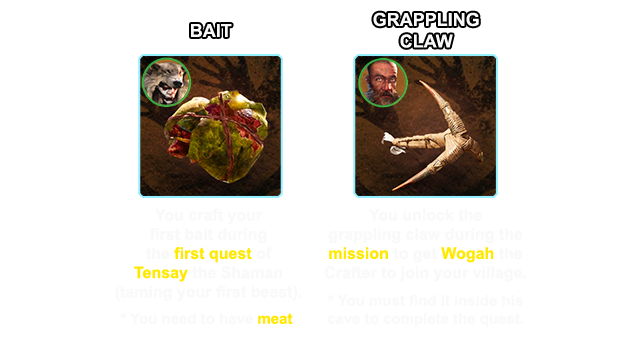
- Right below every icon of any craftable item you can see its detailed features, and below the features there is a list of all crafting resources and conditions needed to unlock the item.
- Red digits in item’s features represent lowered carrying capacities of bags and belts in survival mode.
- If some character is needed to unlock an item, you can see his/her image in the corner of item’s icon.
- The guide is organized in a way in which right below each weapon there is a belt/bag to carry weapons of this category.
- To make navigation easier, all items are listed in the Guide Index on the right.
Bows, Sling:
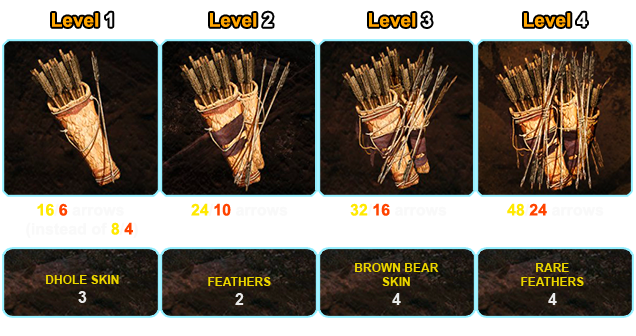
Arrow Quiver:
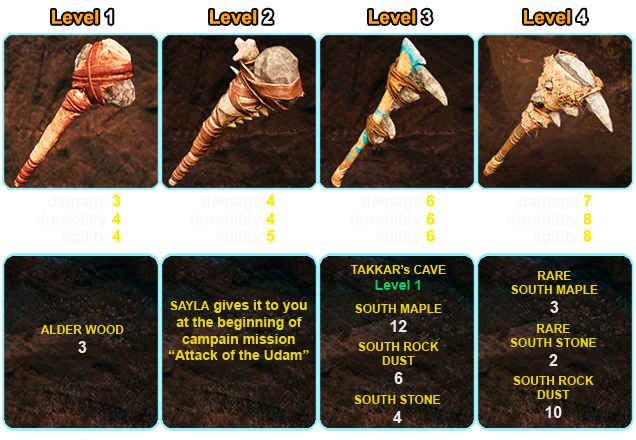
Club:
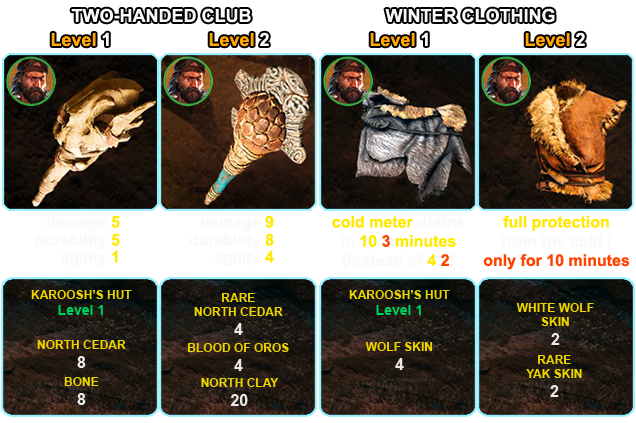
Two-handed Club, Winter Clothing (Karoosh’s upgrages):
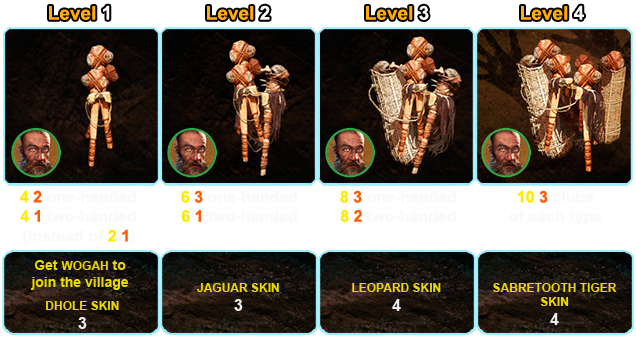
Club Belt:
* For Apex Edition owners: the numbers of Blood Shasti clubs (for all belt levels) in survival mode are the same as in normal mode: 2-4-6-8-10. (Therefore, they’re greately suited as torches in caves.)
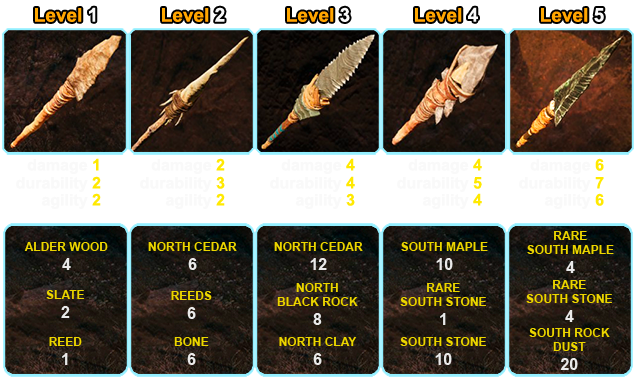
Spear:
Spear Belt:

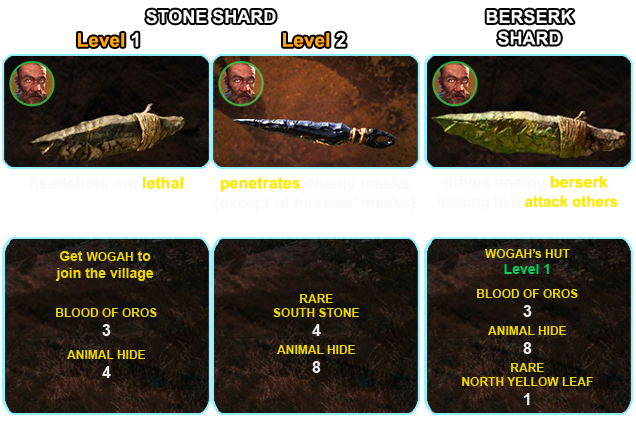
Throwing Shards:
Throwing Shards Belt:

Trap, Bombs:
Hunter Belt, Bomb Bag:
Guts Bag, Pack:
Bait, Grappling Claw:
• CHARACTERS’ HUTS
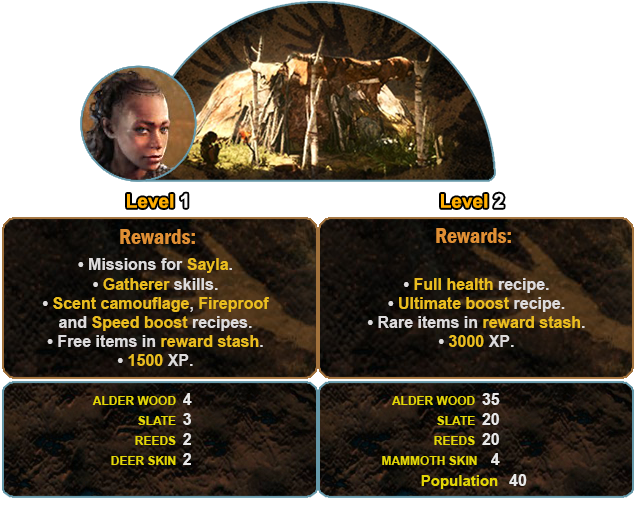
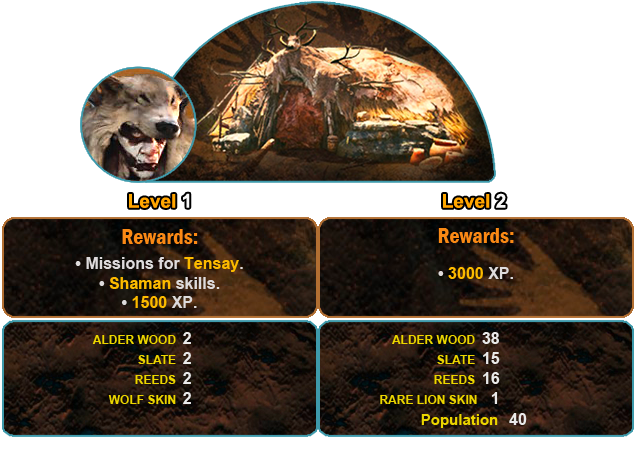
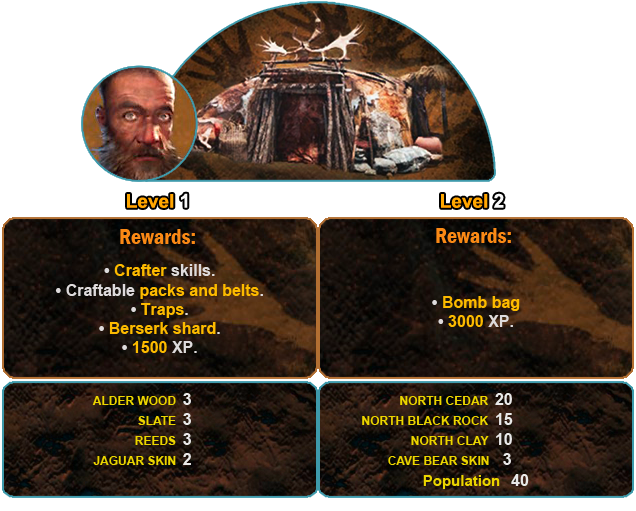
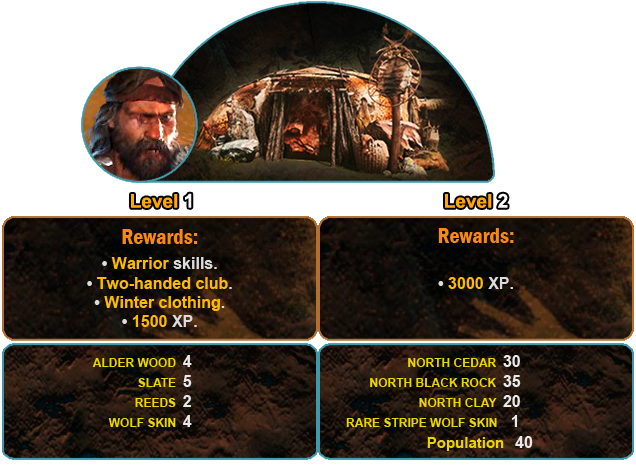
- Below an image of a character and his/her hut you can see the rewards for building/improving this hut, and below the rewards there is a list of all required crafting resources and conditions to build/improve the hut.
- In every case where fewer skins are required to build/improve a hut in survival mode, that number is displayed as “/red digit“.
- Again, to make navigation easier, all huts are listed in the Guide Index on the right.
TAKKAR’s CAVE :

SAYLA’s HUT :
TENSAY’s HUT :
WOGAH’s HUT :
JAYMA’s HUT :

KAROOSH’s HUT :
DAH’s HUT :

ROSHANI’s HUT :

• Summarized Resources List
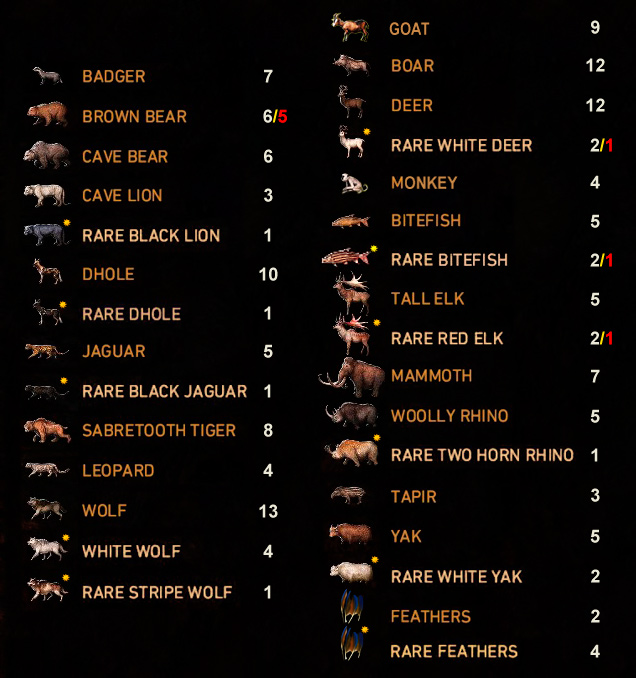
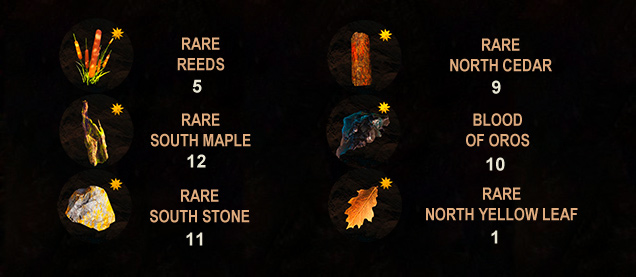
Other resources are required in large numbers and very common, you gather them all the time anyway (to craft disposable weapons, for example).
There is a secret loot sack near your village that doesn’t show on the map. And there is good reason for that – it is REPLENISHABLE sack that gives you one random rare skin + one random rare resource EVERY time you save and reload the game! So it’s kind of a huge cheat, since now you can farm rare skins and resources indefinitely and don’t even bother to go out and search for them… So click on the link below only if you’re REALLY lazy. 😉
– Link to the screenshot –
Last word
Thank you all for reading my guide, I’d really appreciate your comments and any constructive criticism (and of course, likes and subscriptions :)).