Fortified OPLAN (Hints, Characters, Structures, Weapons, Enemies)
⭐ Opening & Introduction


Before anything, if this guide helps you, I'd like you to rate it positively.
Remember that you can always give an award if you feel like doing so.
I understand people hate when authors put stuff like this right off the bat, but this guide took me a while to finish and the least I can (probably should) ask is an honest rating to help other people find this.
Thank you very much, enjoy the reading and I hope this guide helps you.
_______________________________________________________
✍ Guide Credits
My goal with this guide is to give some pointers about Fortified and help people choose whatever character they like the most or maybe shed some light on something they may have missed or not understood.
Remember: This guide is merely my opinion. Don't take it as a fact, I might have missed something here and there or you might have a different perspective from me, in that case you'll probably have other applications for the same weapon, structure or character.
http://steamcommunity.com/sharedfiles/filedetails/?id=2555082930 http://steamcommunity.com/sharedfiles/filedetails/?id=321647347 http://steamcommunity.com/sharedfiles/filedetails/?id=505739685 http://steamcommunity.com/sharedfiles/filedetails/?id=482075212 http://steamcommunity.com/sharedfiles/filedetails/?id=729779266
📚 Table of Contents
- Hints and Tips:Here you'll find basic and overall advises on the game based on my experiences. They may or may not help you.
- Characters:In this section I'll describe and give my opinion on the characters of Fortified, also showing what pieces of structures and weapons are available for what characters and which ones are unique to each.
- Martian Mob:This part of the guide will show the types of enemies that you'll fight throughout the game.
- Structures Storehouse:In this section I'll state my opinion on several structures of the game. This section of the guide is divided in several subsections (Wall, Floor, Turret, Troops, Expendable) for convenience's sake.
- Weapons Wardrobe:In here you'll know what weapons are available for your characters to use to blast the Martians to kingdom come.
🔰 Hints and Tips: Basics and overall
_______________________________________________________
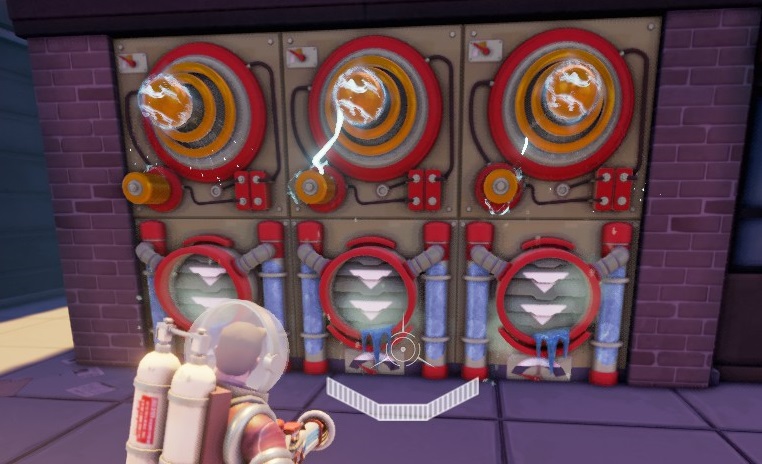
Structures like Tesla Coil have a "bubble" area of activation, so it can be triggered even by airborne enemies or when set on a higher than usual place.
_______________________________________________________
Freezing enemies like Exterminator also has the excellent benefit of cancelling their attacks which can save your skin or your partner's.
_______________________________________________________
- 1 (Z) will order your troops to go to a launching pod and stay there. Pressing it another time will send to a different pod if there's more than one in the map.
- 2 (X) will order your troops to stay with you, very useful if you need a lot of firepower in a specific place for that moment or is hunting a problematic Martian.
- 3 (C) will order your troops to stay where you are currently targeting.
- 4 (V) will order your troops to go back to their original spawn.
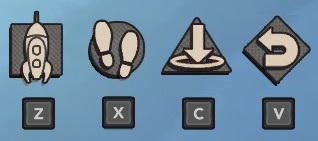
Understanding the quirks and pros of this can help you defend different points of the map or prevent you from having to run all the way back to kill a single enemy attacking the launching pod.
_______________________________________________________
Sometimes it's best if you blast it right away and go crazy on the Martians, but it's always good to save it up and keep it at ready only if something goes really bad, like having enemies swarming your launching pods or losing a co-op partner on Hard or Insane.

Judging the situation when to use is crucial to prevent a defeat.
_______________________________________________________
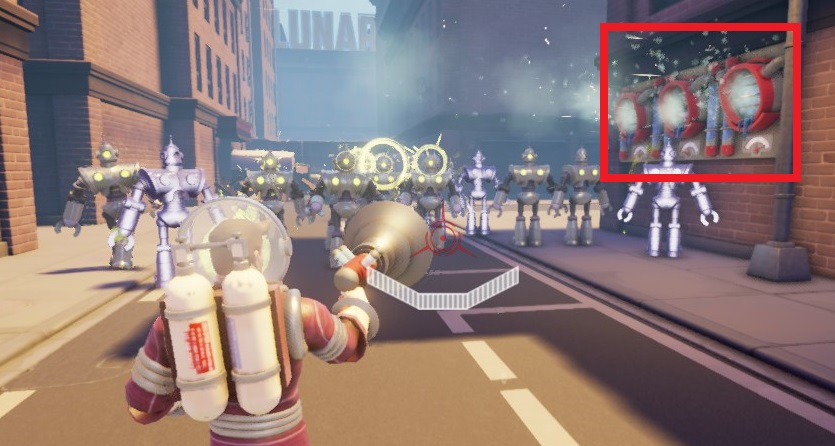
Drones won't be affect by that, though.
🗺️ Hints and Tips: Mini-map
Fortified's mini-map is straightforward with no catches or anything that is counterintuitive. Since this game has no items or drops at all there aren't many things to worry about here other than the position of enemies, you and maybe your co-op partners.
One of the most important features of the mini-map is showing where enemies will come from and when the new enemy spawns will be activated.
Keeping an eye on the mini-map is something you should make a habit since it really helps to know if an Annihilator is coming or if something got past one of your killzones. You really don't want to know when the alarm of a launching pod getting destroyed rings, especially on Insane.
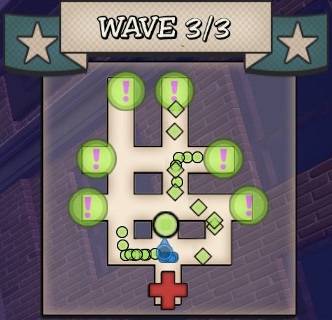
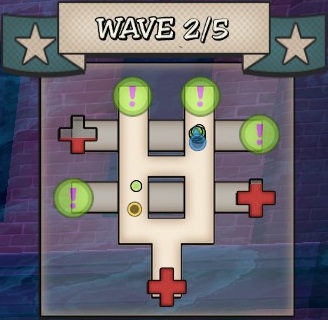
The mini-map of Fortified.
Red cross(es) - Launching pod and its current health. Losing a single one (in maps with more than one) means game over regardless of the health of other launching pods.
Blue dot with ring - You.
Yellow dots with rings - Co-op partners.
Small blue dots - Troops (yous only, partner's troops won't show in your mini-map).
Green dots (small) - Drones, Invaders.
Green dots (medium) - Disruptors.
Green dots (big) - Annihilators, Barricades.
Green dots (huge) - Juggernaut, Stalker.
Green diamond (small) - Raiders.
Green diamond (medium) - Flying Saucers, Exterminators.
🗪 Hints and Tips: Co-op
Another thing co-op does is share the income from kills between players, so you won't have as much money to build everything you'd want, so planning is even more essential than before.
_______________________________________________________
Teaching someone how to play and new tactics is one thing, pushing and forcing people to play the way YOU want them to is a completely different thing. It's also one thing ask your partner(s) to bring one thing and another if you just say "bring x and y". I might sound like someone's parent, but saying the word "please" does wonders to make people cooperate with what you might have in mind.
_______________________________________________________
On co-op you have the possibility to work around the flaws of each character depending on the one you choose or your partner picked. Combining the firepower of The Rocket Scientist with the support of The Spaceman often result in excellent and easier matches.
On the similar vein combining things like The Agent with The Rocket Scientist with one building Amplifiers, Attractors and Cryonic Dampener and the other R2 Rockets to destroy enemies also works quite well.
_______________________________________________________
_______________________________________________________
What do you think it matters the most? Killing more enemies or actually helping your team by keeping enemies under control and prevent something big like an Annihilator or an Exterminator from reaching the launching pod?
Think about it.
♾️ Hints and Tips: Invasion Mode
Invasion Mode is Fortified's survival, endless, game. Here you'll fight all types of aliens (including bosses) but there's a catch: every wave you'll receive three random (dis)advantages. Whether you'll get something that can benefit you or the aliens it's purely luck based. So sometimes you might get only beneficial traits or, unfortunately more commonly, only disadvantages to screw you over.
As I mentioned in the Introduction of this guide, I won't be detailing in full strategies for this since I have zero interest in endless or survival games of any tower defense game I've ever played. I'll state the traits and quirks of this mode, though.
_______________________________________________________

Enemies will explode after dying that can harm players and troops like Raiders.

Some enemies of the current wave will be bigger than usual, they'll be stronger and harder to kill accordingly.

Every enemy on the wave will move and attack faster.

Self-explanatory. Enemies will deal more damage and will be able to kill players and down troops a lot faster.

Very obnoxious and dangerous Martian advantage. The next wave will be constantly bombarded by alien airstrikes (much like Stalker's) that will instantly kill players if it hits and down troops. I've dealt with this disadvantage only after Wave 5.

Martians will never be lifted by anything like Blast Vents, Rifle's secondary fire or Exhaust with Heavy Fumes.

Dangerous. Drones will suicide bomb themselves on the launching pod like Raiders if they reach it.

Every Martian in the wave will have shield.
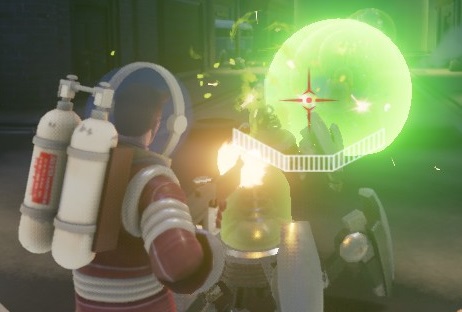
Shields aren't particularly strong, but will surely get in your way since every single enemy will have it. Slow firing weapons and structures will get the worst from it.
_______________________________________________________

Weapons will deal significantly more damage to all enemies.

Heroic Power gauge will recharge faster when killing enemies.
The launching pod will become more resilient during this wave.
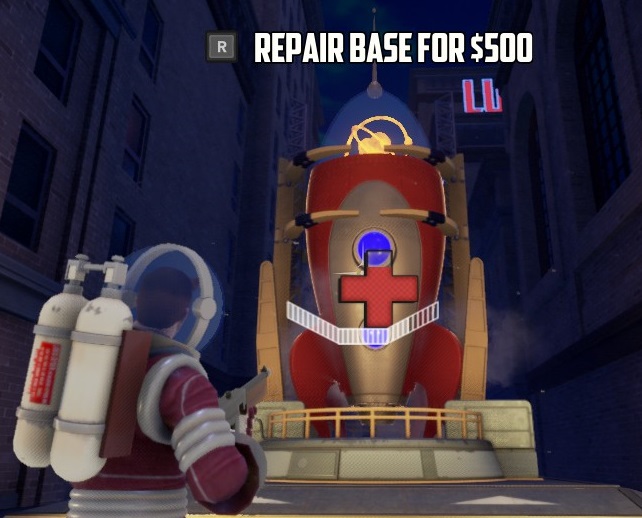
You can use money to repair the base in order to help you get to higher waves. Every $500 used will recover something around 10% of the launching pod's health.
👑 Hints and Tips: Difficulty levels

Available from start.
- If a player dies they must wait 5 seconds to respawn.
- Infinite time between waves to prepare. Next wave must be triggered manually.

Available from start.
- If a player dies they must wait 15 seconds to respawn.
- 15 seconds of break between waves to sell structures.
- Martians are stronger, can take more hits and are faster than they are in Normal mode.
- Launching Pods are more fragile and will be destroyed quicker by aliens.
- Heroic Power meter recharges slower.

Must be unlocked by finishing the game on any difficulty first.
- If a player dies they WON'T respawn at all until the next wave.
- Only 5 seconds of break between waves to sell structures.
- Martians are even stronger and can take more hits than they do in Hard.
- Launching pods will be destroyed REALLY fast by Martians.
- Heroic Power still recharges slower.
_______________________________________________________
Unless you absolutely know what you're doing, avoid using risky weapons like Cryo Blaster or Flamethrower too.
_______________________________________________________
_______________________________________________________
_______________________________________________________
Having one or two of these things ready can really prevent some situations from getting out of hand or help you get out of some hairy ones. Putting two Exploding Barrels and detonating to wipe a small group of Invaders, Drones or Raiders can be an effective tactic.
Setting a Nitro Mine close to your killzone or to help create cluster of enemies for your explosive weapons is also a good idea when you learn how to do it quickly.
💬 Characters of Fortified!

Before I start detailing characters one by one there are a number of things that I should point out. All characters are basically the same in terms of movement speed and endurance, most of them have access to the same weapons except for the last ones which are exclusive.
One of the major differences between one character to another is the fact one may have access to a structure or a weapon the other doesn't, or at least the unlock criteria (character level) may vary a lot. And if you're planning going solo this will be a huge difference in gameplay.
Heroic Powers are unique to each character and is definitely the biggest difference between them. Learning and knowing when to use them is definitely what will make you a great player in this game.
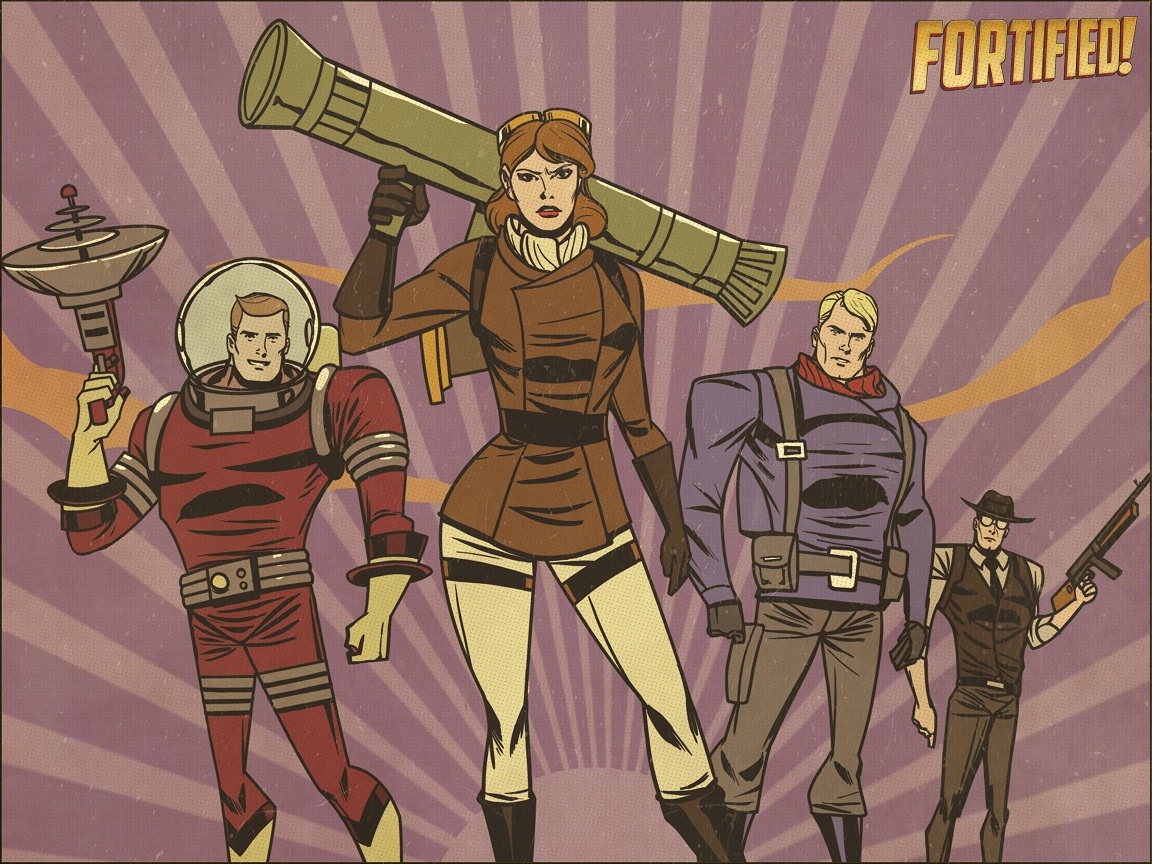
Our daring heroes are ready to defend the Earth from the Martian scum.
⠀⤷ The Captain


 "Waiting your orders, sir."
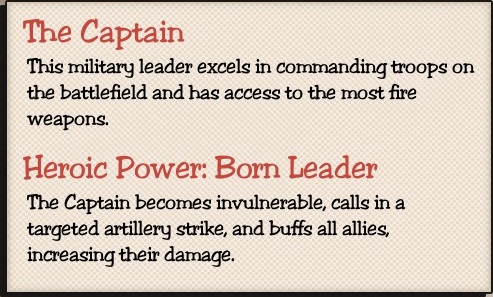
Born Leader is The Captain's Heroic Power and will give a boost to his allies, troop structures or co-op partners and can be very powerful if you rally your built troops and attack or defend a certain spot.
The Captain lacks good options for ice damage having only Shotgun with Frozen Slugs early on and TNT Launcher with Liquid Trinitroluene later and in terms of structure only Flamethrower Units with Icethrower modifier will deal ice damage. Additionally, his distinct lack of wall structures can also put him in a delicate situation with the troop structure limit.
Lastly if you're going focused on troop structures keep in mind the limit is 12 of them for all players, so this limit can be reached quite easily on co-op games.
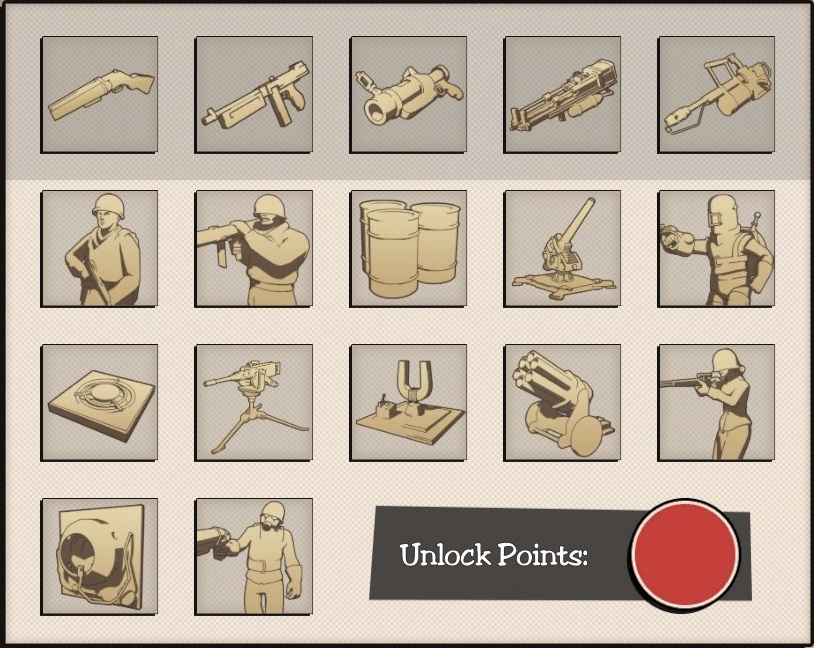
The Captain's armory
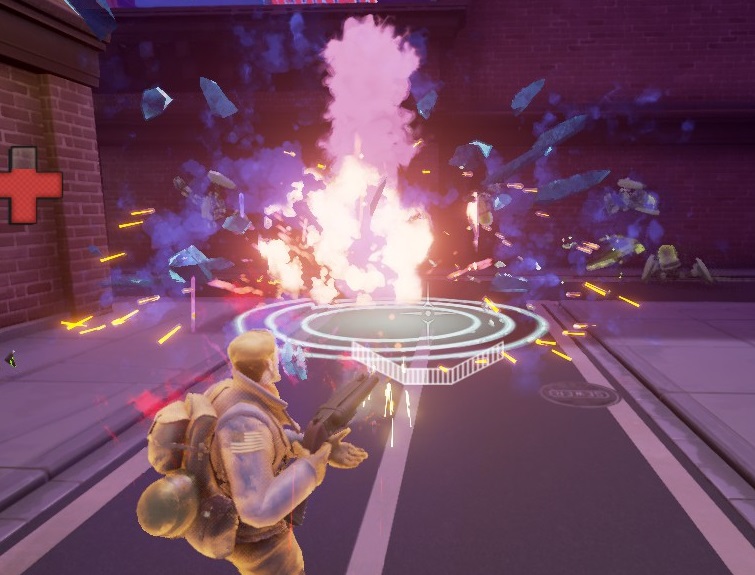
Born Leader will buff troops and players alike. The airstrike is not always easy to aim, but is very powerful.
⠀⤷ The Rocket Scientist

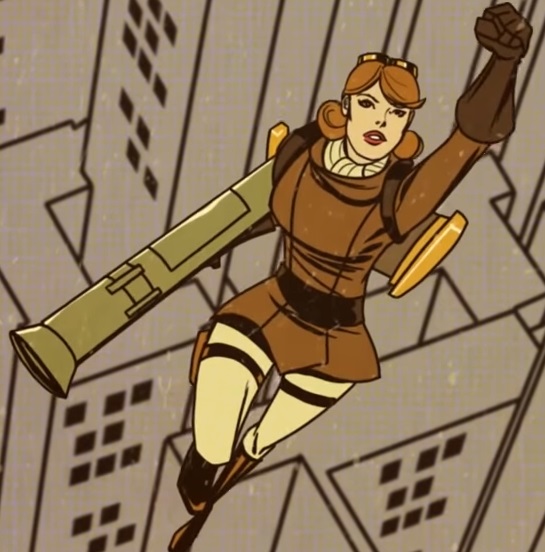
 "Ready for takeoff!"
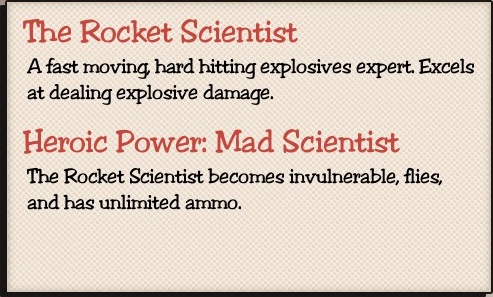
Mad Scientist is Rocket Scientist's Heroic Power and will keep her floating high enough to hover over most obstacles and infinite ammo to boot (and the usual invincibility). With that you can spam any gun haphazardly, especially if its secondary fire eats a lot of ammo, and clear anything that's unnecessarily close to the launching pods.
Rocket Scientist's fatal flaw is her lack of ice damage. Her only weapon with that type of damage is TNT Launcher (it must have the Liquid Trinitroluene modifier) and her only structure with ice damage is R2 Rocket, with Liquid Nitrogen Bomb modifier, which will cost whooping $1200 to build.
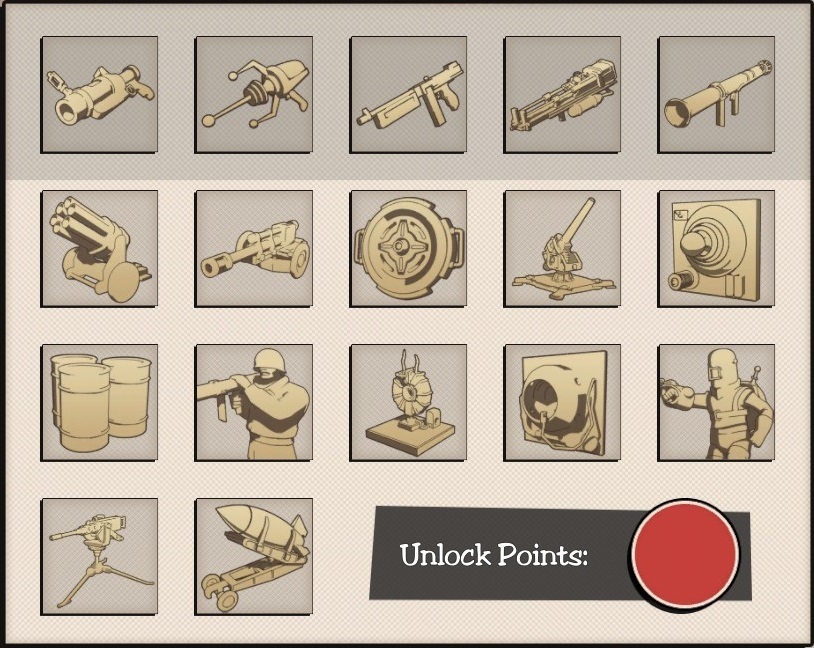
The Rocket Scientist's armory.
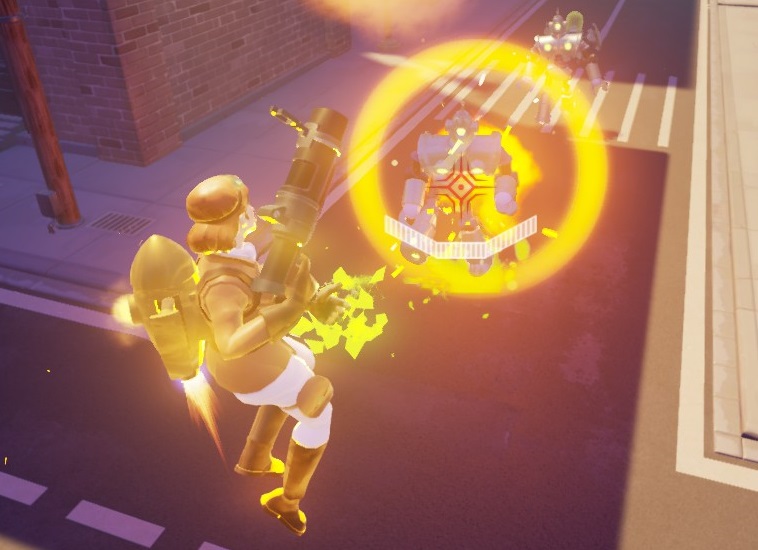
Mad Scientist gives you mobility and infinite ammo. All you need to turn the tide of a bad battle.
⠀⤷ The Agent


 "My sources tell me there's another wave coming."
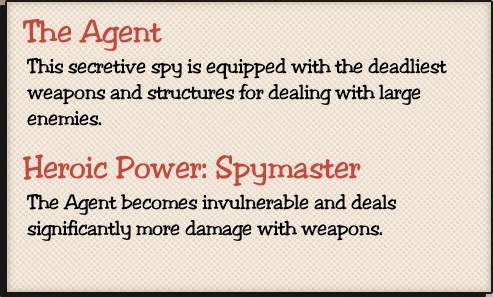
Spymaster is The Agent's Heroic Power. It turns him into a very powerful killing machine, you can use it with a fast firing weapon like Rifle (with Spread Muzzle) to clear the small trash or use it with Death Ray and focus on problematic targets like Annihilators, Exterminators in a blink of an eye.
The Agent main flaw is his lack of good crowd attack structures, depending on your preference of weapons he'll have to rely on Sticky/Nitro Mines to handle large groups of Drones and Invaders. Man In Black is a good option too, but still pretty limited. But his biggest problem is that none of his troop structures have anything to handle flying enemies (his lack of Ground+Air structures in general), so you'll have to make do with Anti-Air Cannons.
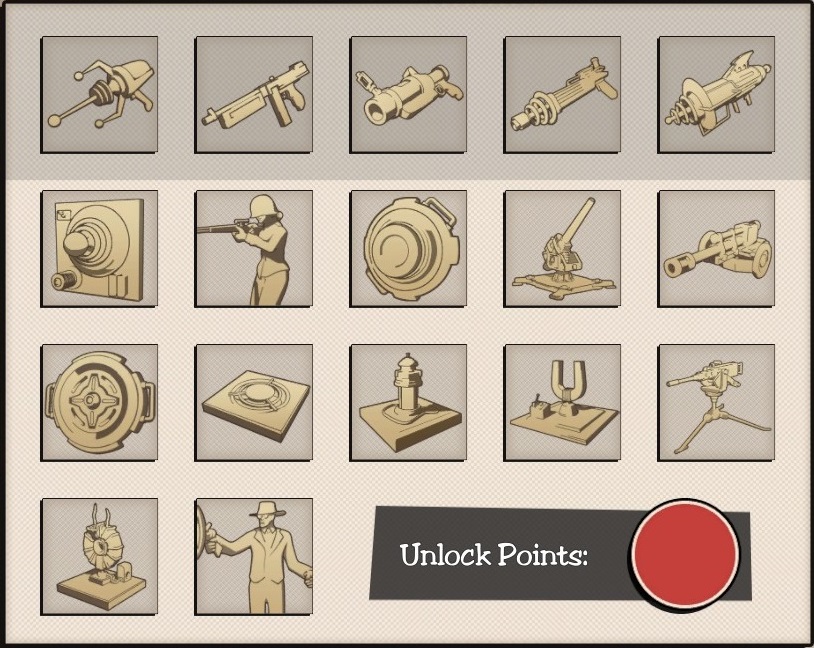
The Agent's armory.
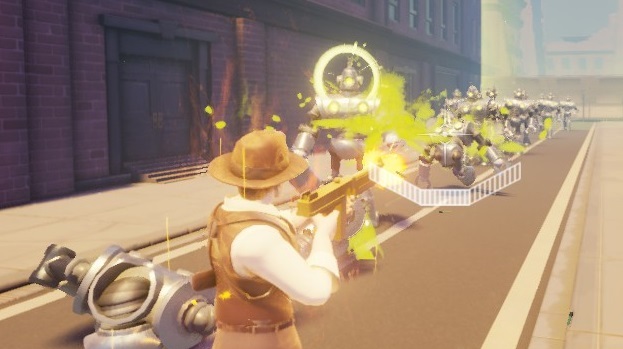
Spymaster will give you a sharp attack boost to quickly mow down anything that you decide to shoot. Be it groups of smaller enemies or tough ones.
⠀⤷ The Spaceman

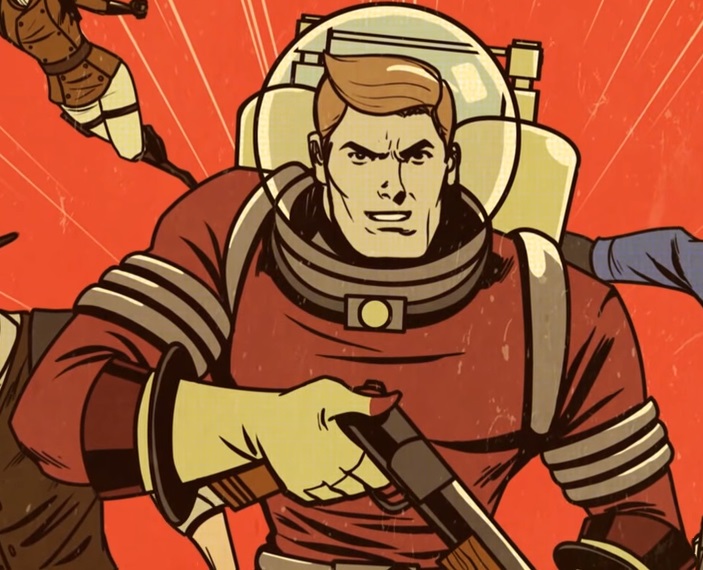
 "I'm ready for you, Martian scum!"
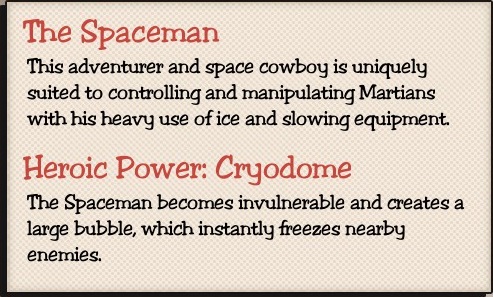
Activating The Spaceman's Heroic Power will give him the Cryodome which will keep anything close to him frozen and vulnerable to anything (also giving him invincibility like all characters). This may sound unimpressive when compared to other Heroic Powers, but Cryodome can easily bring an entire lane, or chokepoint, to a standstill while your structures do the heavy job or while you hold the Martians so your friends can help you.
A major flaw of The Spaceman is his lack of raw firepower since his Heroic Power doesn't give him any form of damage boost. This is even more noticeable in co-op games when enemies become more resilient. His lack of fire elemental weapons can also be a hindrance in certain situations.
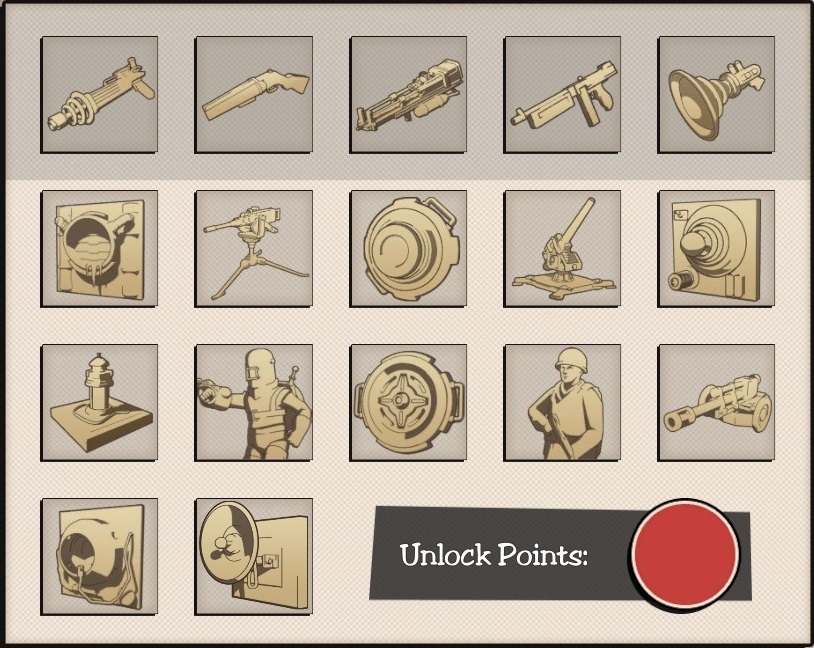
The Spaceman's armory.
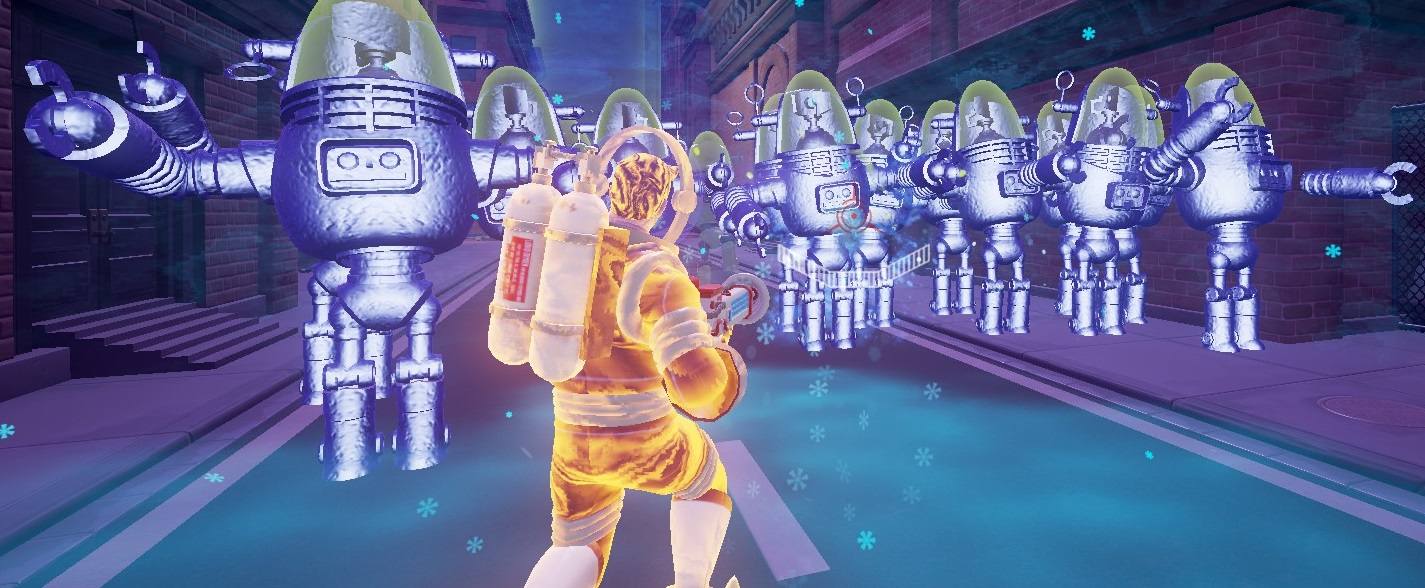
The Cryodome can stall dozens of enemies while it's active.
👾 Martian Mob
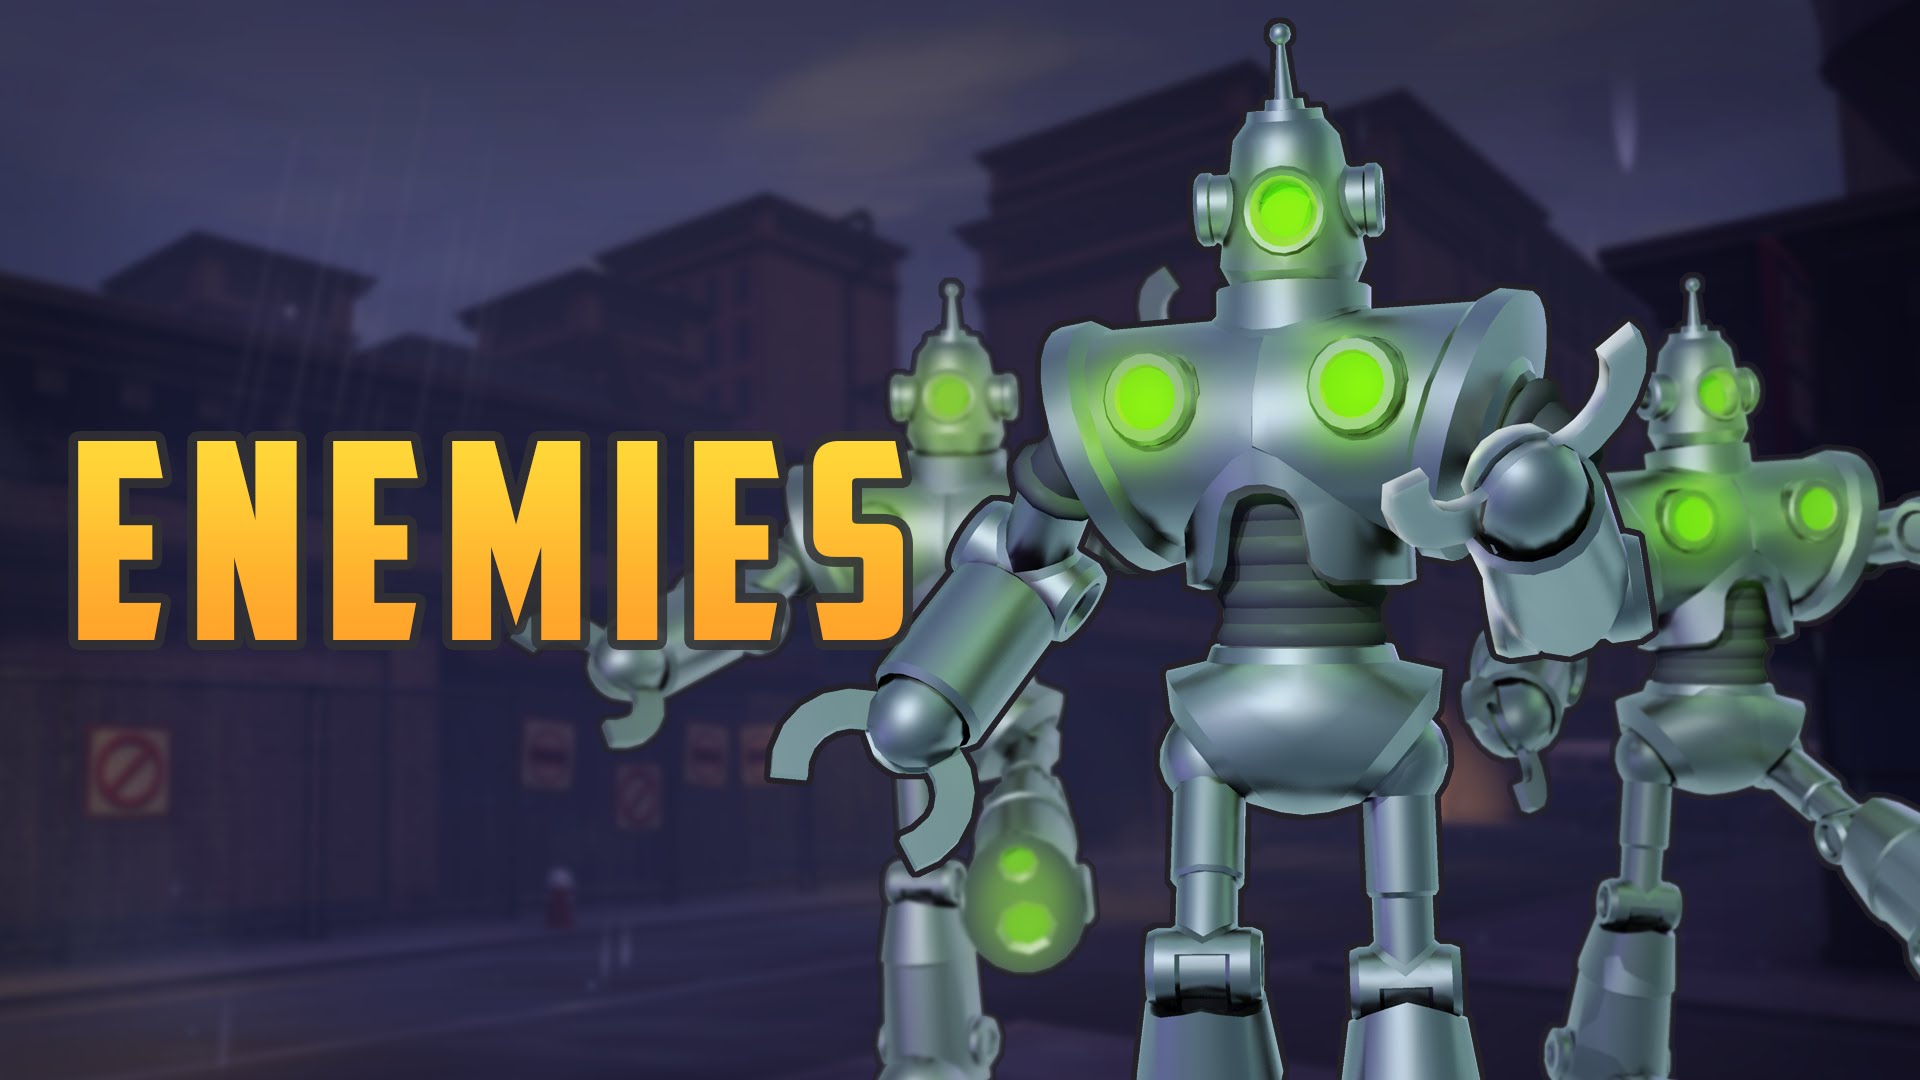 They DON'T come in peace.
Ground:
- Drone
- Invader
- Disruptor
- Annihilator
- Barricade
Flyers:
- Raider
- Exterminator
- Flying Saucer
Bosses:
- Juggernaut
- Stalker

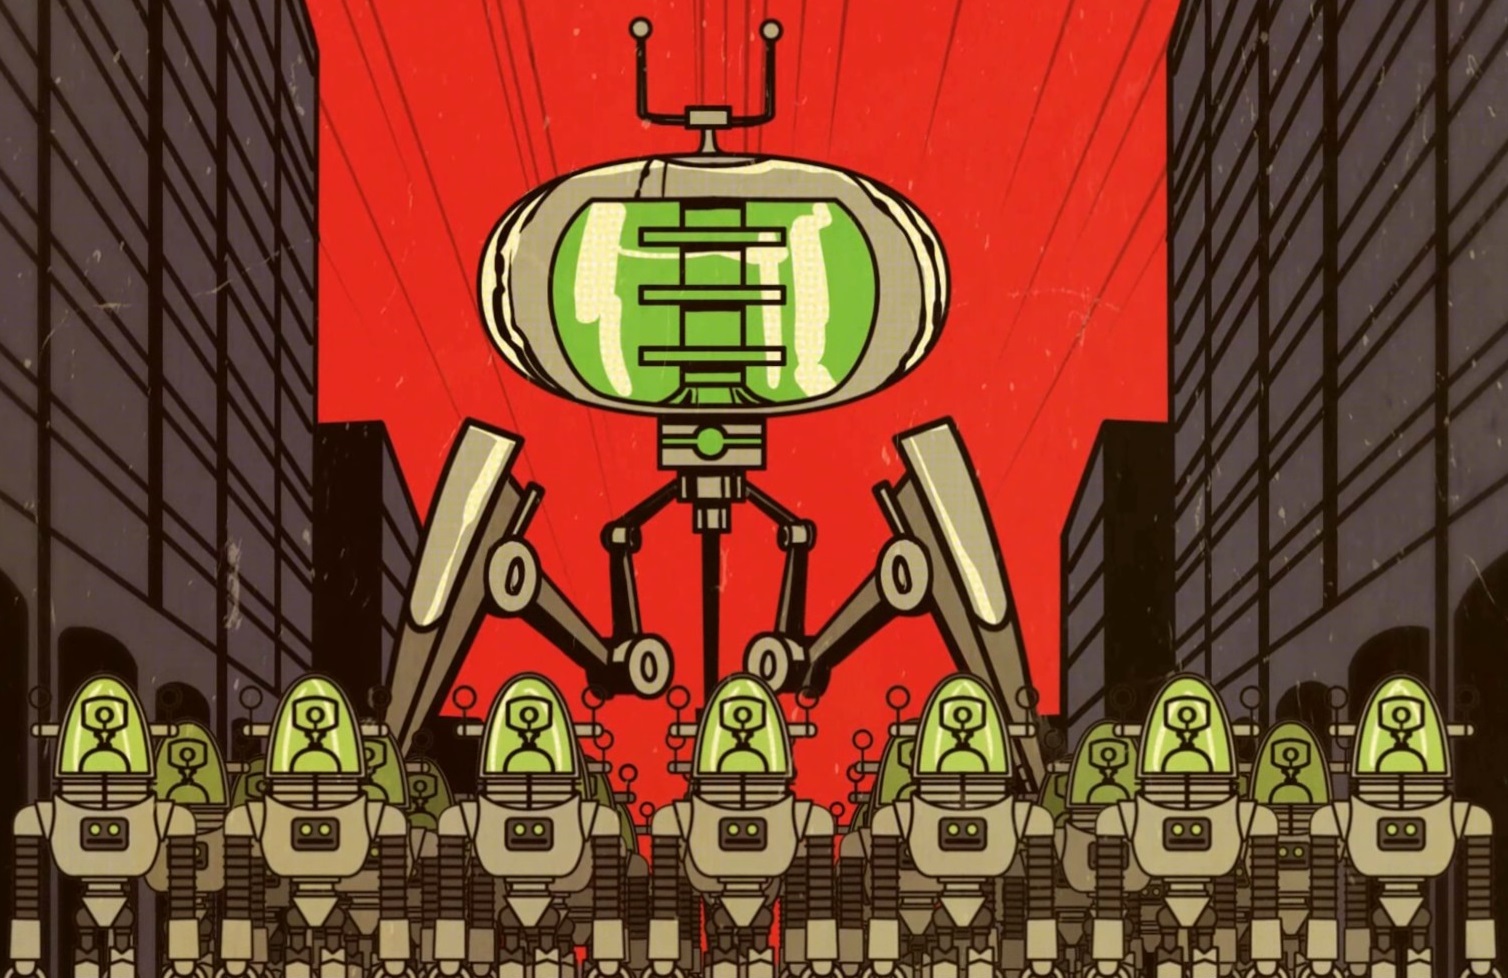 The invasion won't go down gently. But where would be the fun in that?
⠀⤷ Martians [Ground]
- Drone
- Invader
- Disruptor
- Annihilator
- Barricade

Drones are the most basic type of Martian you fight, they are small, fast, and you don't feel all that great killing them because they're so annoying. You'll be fighting these things in the whole game, so get used to them from Easy Street.
Drones excel in one particular area: pestering the living crap of you. It's not unusual to see one or another slipping through your defenses and triggering the alarm of a launching pod under attack. While one doesn't do a lot of damage, five or ten of these things certainly does.
Area hitting weapons and structures tend to do a good job at keeping groups of Drones in check. Tesla Coil, Nitro Freezer, Rifle Infantry (with Overwatch) tend to be good early options against groups of these pests.
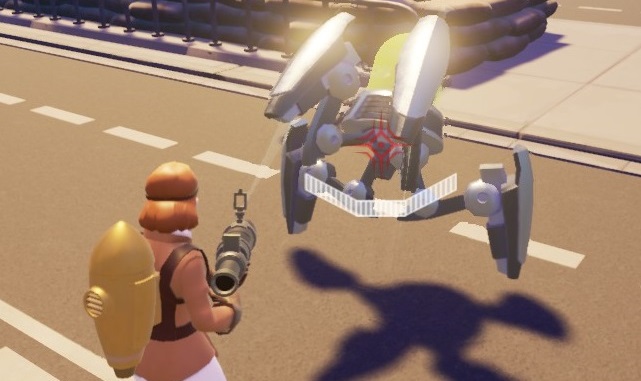
Small, numerous and very annoying.
_______________________________________________________

Invaders are another basic type of alien. They appear in large numbers and will also attack players and troop structures on sight from a respectable range. Invaders are considerable tougher to kill compared to Drones, so watch out for that.
Just because Invaders are common they shouldn't be underestimated. An Invader can kill a player in three blasts and I've died to a single attack of these things on Insane (still not sure if it was a glitch of something like getting hit in the back, etc), so don't ever try to get fancy and go fight large groups of them or else you'll know how a person about to get shot by a fire squad feels like. Their AI also have very good aim and will lead their targets, so you can't just hold right of left to dodge them.
All in all they shouldn't be too hard to kill if you apply similar tactics you use against Drones, but never underestimate them, especially on Insane where you don't get to respawn until the next wave if you die.
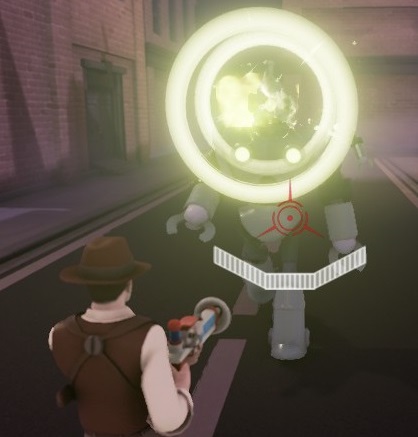
They make their strength in groups but even in small numbers they can cause problems.
_______________________________________________________
Disruptor is a type of enemy I have a very strong dislike towards to as they cause a lot of trouble whenever they show up. These things can take more damage than Invaders and in certain levels they attack en masse. While troop structures like Rifle Infantry, Rocket Trooper and Tesla Troopers won't be affected, any other wall, floor or turret structure will.
The jamming wave of Disruptors affect a very large area and its cooldown is disproportionately short, so don't think you can put a single structure for them to jam and think the others will kill them quickly.
Long range structures like Anti-Tank Gun, Heavy Mortar are the best turrets against them. Any other wall or floor structure will be jammed by them before they can do any significant damage. Keeping troop structures to soften them is a good idea, but since they can take more damage than Invaders it's always wise to have a backup plan.
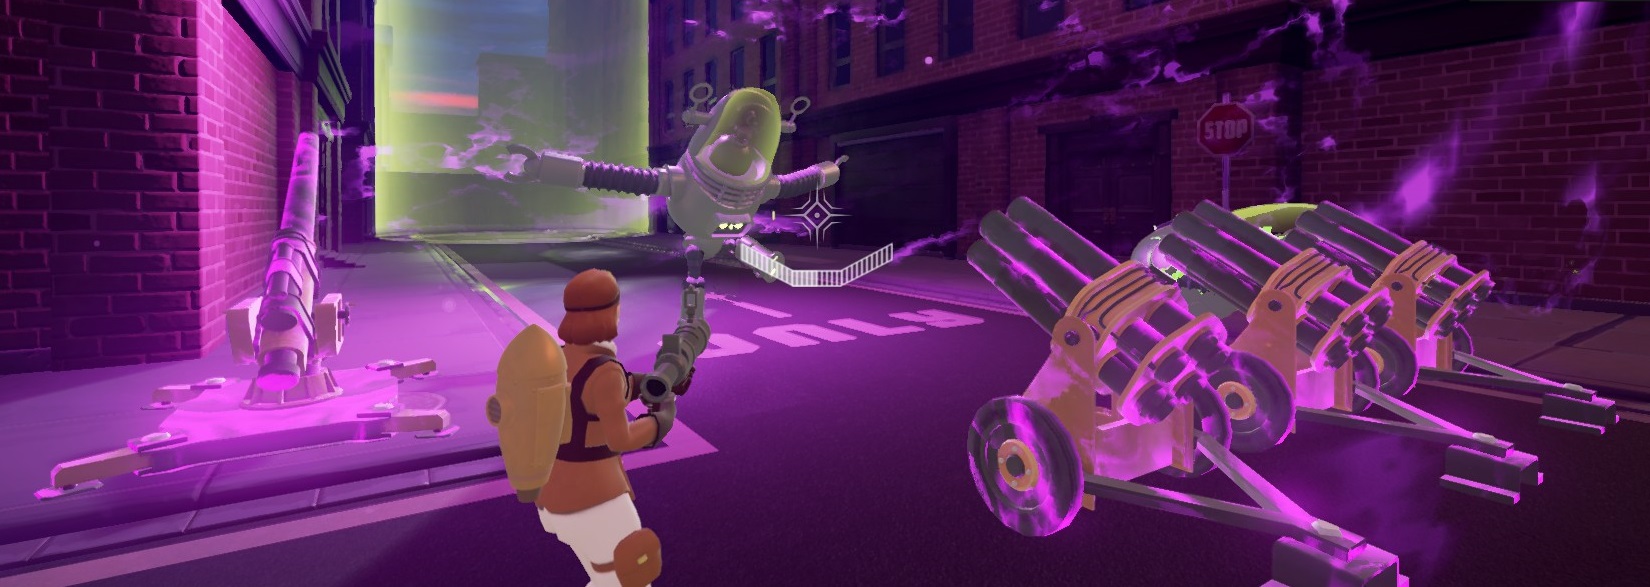
Make these things a priority target as they WILL cause problems if they get close to your structures.
_______________________________________________________
Annihilators are extremely dangerous enemies, nearly every time I see a large circle icon popping up on the mini-map I tend to make a b-line to intercept it, and they don't even attack you directly.
Why are they so dangerous? First of all, they are the fastest Martian type, a character sprinting is barely able to keep up with one, second, if they bump into you while they're rolling you'll be stunned and be helpless for good 5 seconds, even if you have your Heroic Power active, which is more than enough to be a huge problem. And lastly, but no least, they are freakishly strong and one of them can do a serious number in any launching pod if you let them attacking for a few seconds.
Any ice damage source is an excellent way to counter a rolling Annihilator and worst case scenario completely freeze them while they're attacking your launching pods. Always consider having one reliable ice damage source whenever you fight these things.
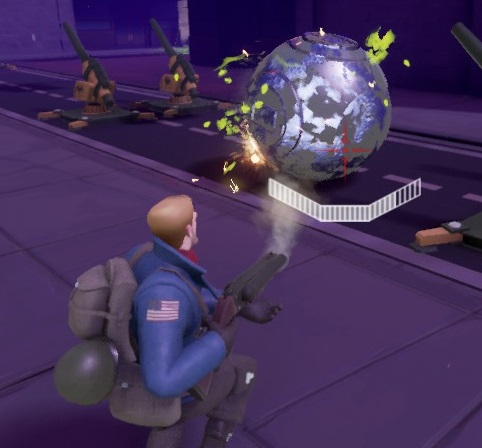
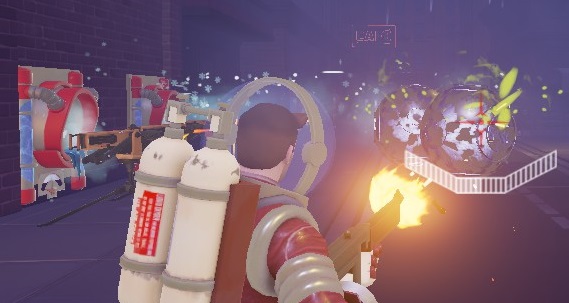
You cannot freeze them while they're rolling, but ice will considerably slow them. If an Annihilator is attacking your launching pods ice attacks will completely freeze them, however.
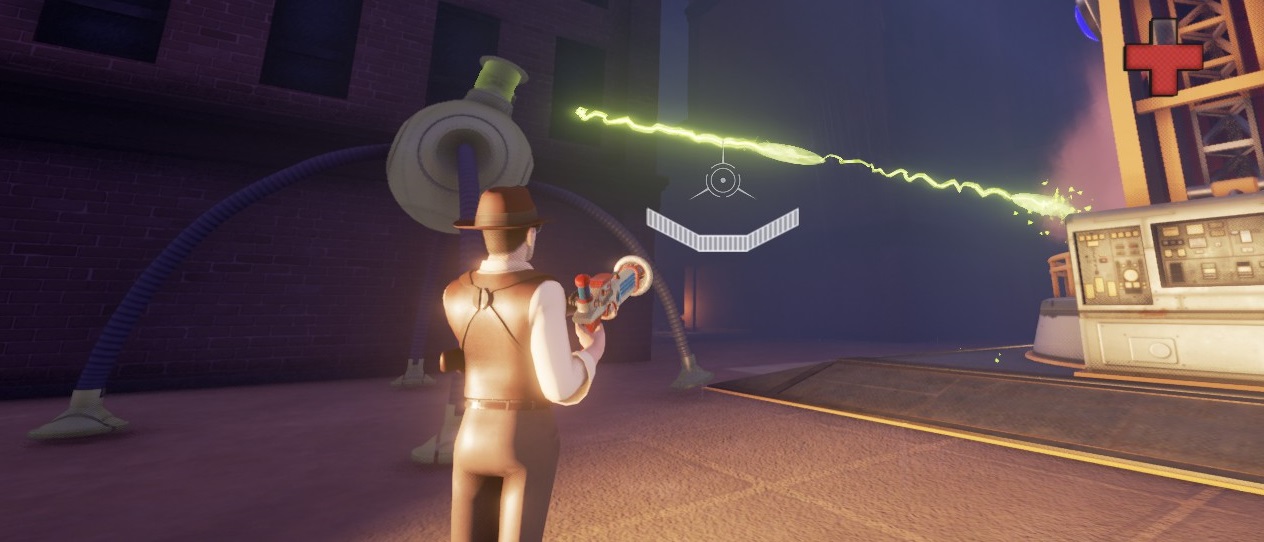
Annihilators can demolish launching pods extremely quickly, NEVER take these guys lightly.
_______________________________________________________
Barricade Martians are annoying enemies that will never attack you or your troops and even touching them won't cause any harm, other than being slightly pushed aside at times.
The biggest problem of this alien is that most structures cannot harm it reliably and even troop structures tend to waste too much time killing a single one quickly. Barricades would be another priority target but the saving grace is that these things are very slow.
You can use things like Cryonic Dampener or Nitro Mines to screw with them and keep them from reaching your launching pods while you handle other enemies but never rely solely on your structures to take them out.
Few weapons can get through their front shield ones being Flamethrower from The Captain and Cryo Blaster from The Spaceman. Structures like R2 Rocket from The Rocket Scientist, Nitro Freezer and Orbital Ray from The Spaceman also works well against them.
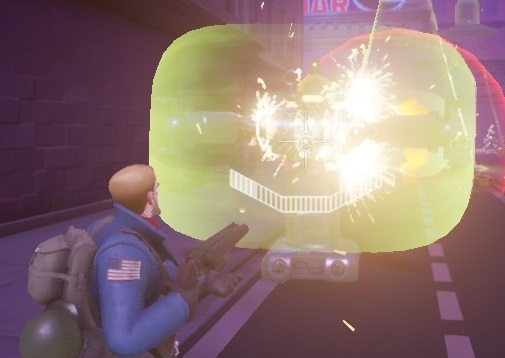
No, shooting their "feet" won't work. Firing in their front is just wasting bullets and time...
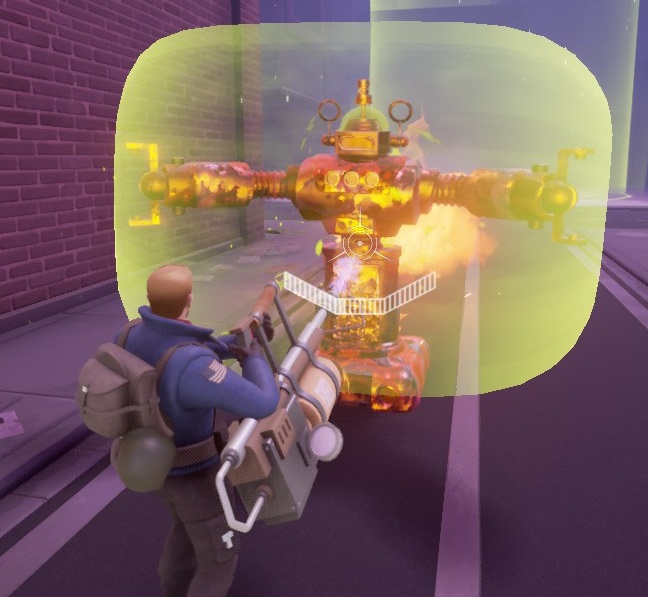
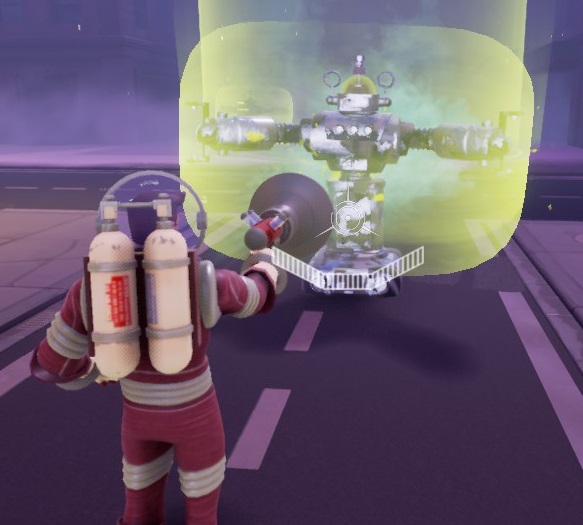
Unless you use weapons like Flamethrower and Cryo Blaster.
⠀⤷ Martians [Flyers]
- Raider
- Exterminator
- Flying Saucer
Raiders are the usual "suicide bomber" enemy every Action-Tower Defense game must have and they're just as unpleasant and annoying to deal with. Raiders aren't particularly sturdy or fast, but they pop up in such large numbers that it will more than make up for those flaws.
The biggest trait of Raiders is their only method of attack: exploding in your face or at your launching pod. In any case you don't want to be close to one when it dies as it can quite possibly take you with them and a single Raider can do that, put their numbers in the equation and you might understand how problematic they can be. If you let two or three Raiders get to a launching pod and self-destruct there you'll realize how powerful these things actually are, so try not to ignore a single one.
Anti-Air Cannons are naturally good at dispatching them, but on co-op matches it takes more than one shot from them to do the job. Rocket Troopers with Maverick Missiles would be good but they have the dumbest habit of killing Raiders while they're looming over their faces and that will knock them out. Worst case scenario you can always blast your Heroic Power and forget having to worry about their explosion radius.
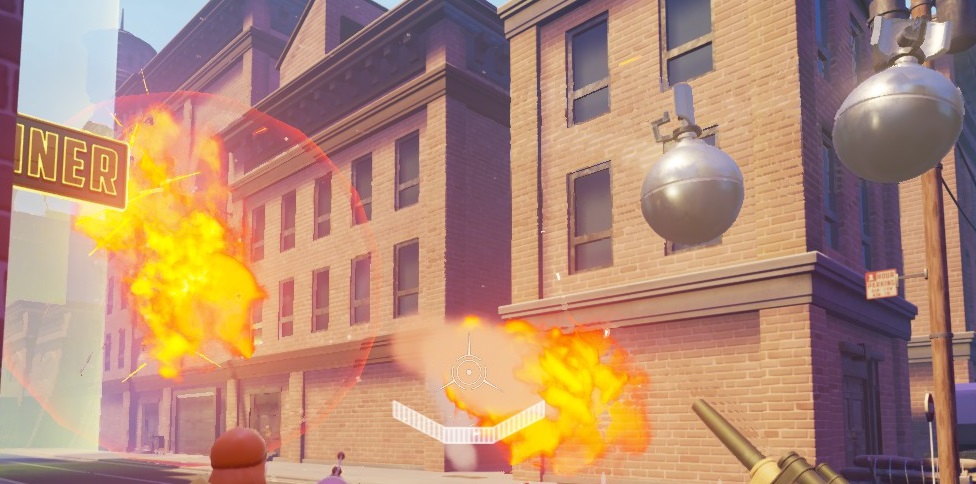
Staying too close to a Raider when it explodes, by your gunfire or anything from your structures or your friends, can and might instantly kill you, so watch out.
_______________________________________________________
Exterminators are very dangerous flying enemies. Tougher than Raiders and with a very nasty ranged attack that they'll use on any unfortunate player that gets too close to one. For some reason they'll ignore troop structures and leave them be even if they're shooting one.
These killer saucers will "latch" their laser on any player and will kill them in a few seconds, you can either try to escape by breaking their line of sight, running far enough or better (and much easier) freezing them with one of your weapons. Exterminators, like Annihilators, can cause serious damage to launching pods in a short time, so watch out for them.
Any weapon that doesn't have limited range like Cryo Blaster or Flamethrower is good at dispatching these things from a safe distance. Guns like Grenade Launcher can be useful, but you'll have to judge the distance and angle to hit them. As for structures, Rocket Troopers with Maverick Missiles does a wonderful job and Anti-Air Cannons can be a good option since, you know, they're flyers.
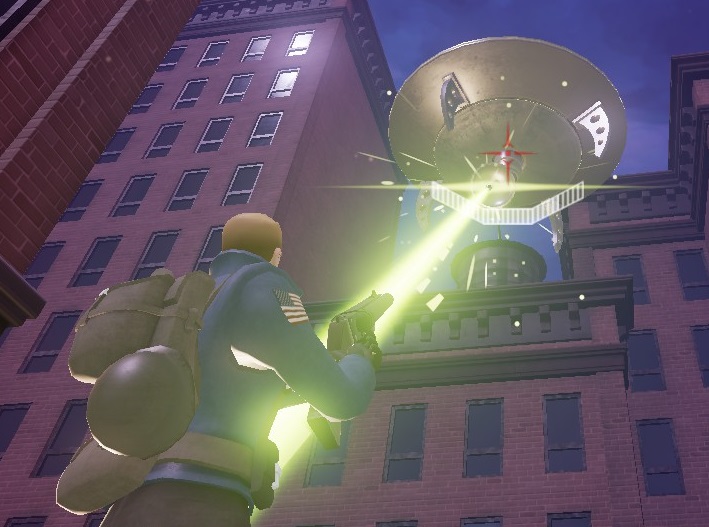
It's extremely difficult to shake Exterminators off once they start firing at you and that beam kills you in a few seconds, so try to stay as far as possible from these things.
_______________________________________________________
Flying Saucers are weird enemies that will chase players if they get close enough, they're not fast but they are annoying. They are the only enemy that will never attack any launching pods ever.
The method of attack of these enemies are also weird. At first you'd think they only pull you upwards with their tractor beam but if you take too long to kill them you'll find that they can instantly kill your character all of sudden. Be careful when fighting enemies around them as getting pulled by one amidst intense gunfire can bring more problems than you thought.
The same strategies applied against Exterminators tend to work with Flying Saucers. Cryo Blaster has enough range to hit them without having The Spaceman under the tractor beam and The Captain can even let himself get purposefully abducted so he can easily roast a Saucer with his Flamethrower.
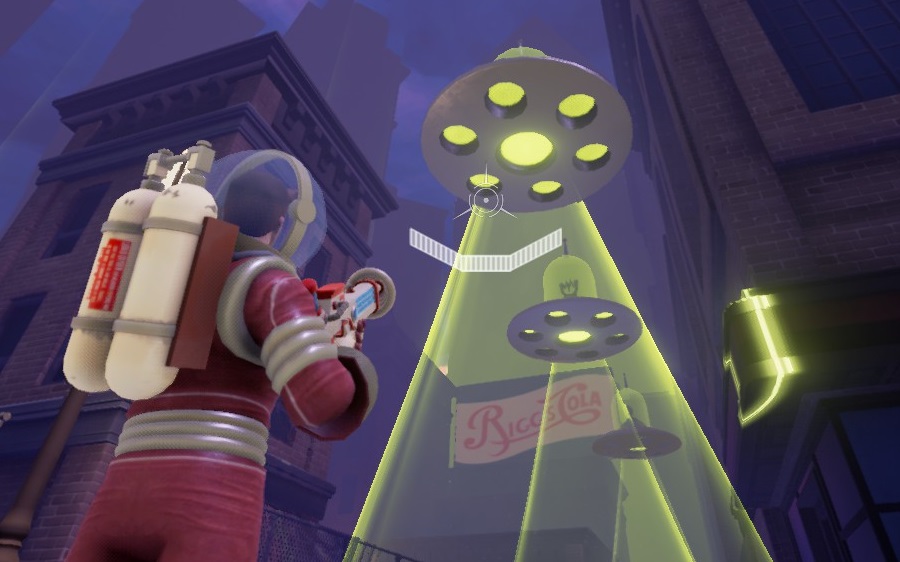
You don't want to get a ride from these guys.
⠀➥ Martians [Bosses]
- Juggernaut
- Stalker
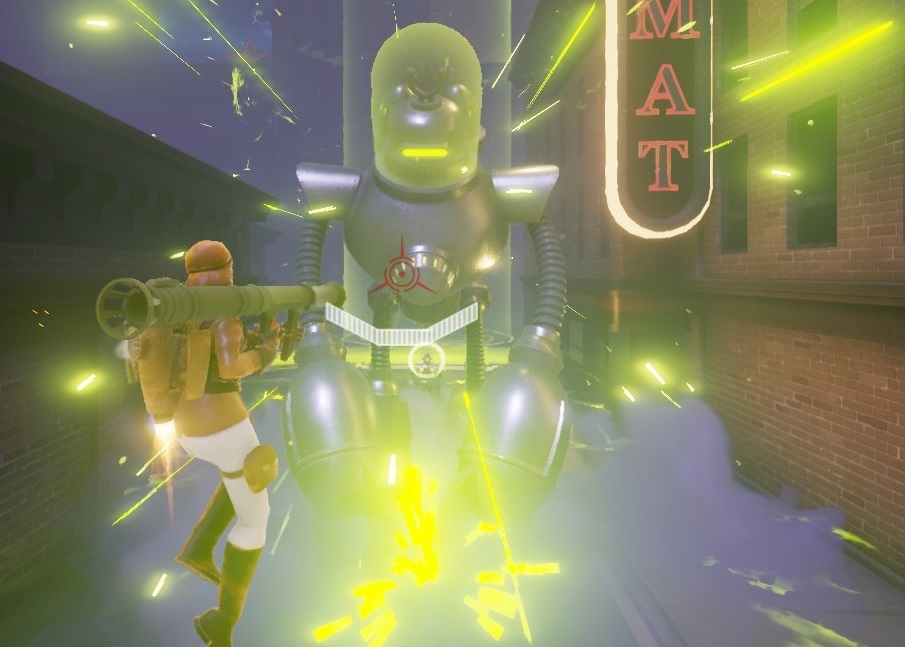
He isn't called Juggernaut for nothing.
Juggernaut is the first boss you face and he's here more or less to tell you to make a good killzone that serves for him and the enemies in the map otherwise he'll just slowly walk to your launching pod and demolish the thing is a few blows.
He's big, tough and comes with A LOT of backup, he has a shield that will sharply reduce any damage dealt to him and whenever you break it the Juggernaut will not be amused and will tell you that by charging a very large area attack to tell you to back off. He's very vulnerable during that phase and once he finishes that attack his shield will regenerate and you'll have to wear it down again.
Anti-Air Cannons with Sky Scrapper is a good option in the map he appears, Invasion Square, since you have to deal with a lot of Flying Saucers and Exterminators there as well, but they need to be placed in the central area of the map, where the Juggernaut will walk to.
Once the Juggernaut steps close to your defenses, whatever they may be, try to keep him there by breaking his shield. Whenever that happens he'll stop on his tracks and leave himself wide open to every turret or troop you may have. Use that time to bring this hulking thing down.
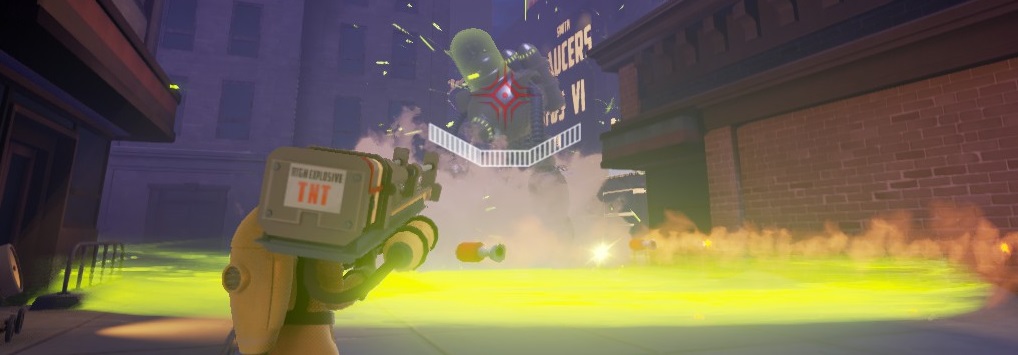
Three guesses to what happens if you get caught in that, and the first two don't count.
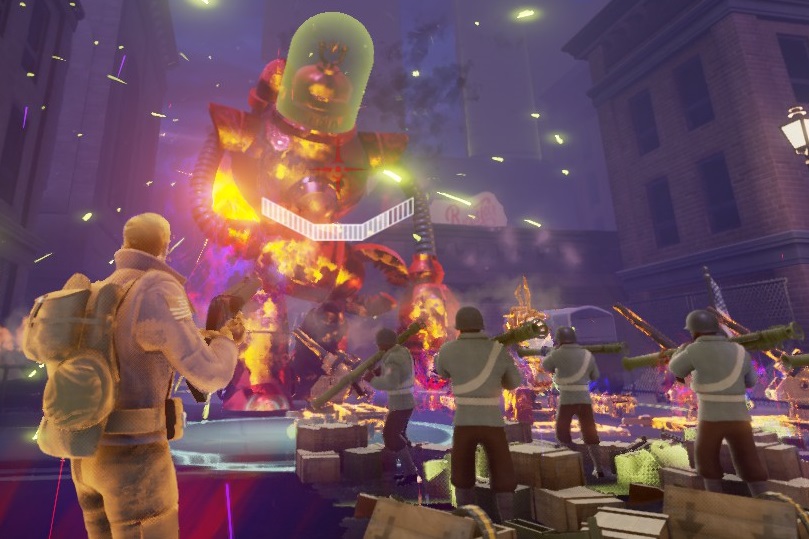
Use everything at your disposal to bring him down.
_______________________________________________________
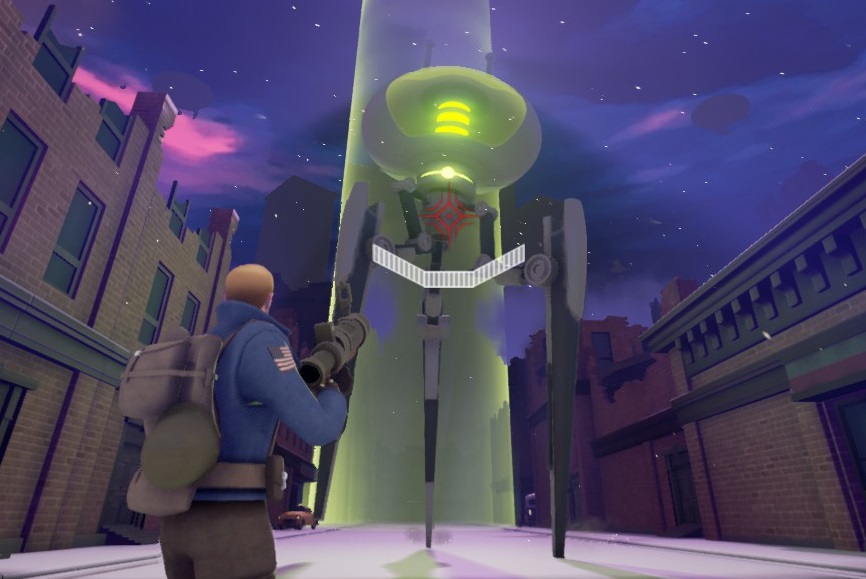
The Stalker approaches.
Scared of this thing? You should be. The Stalker is another boss and is quite dangerous. As you might guess if he reaches your launching pod, he'll destroy it in a couple of seconds, so it's imperative that you destroy it before it gets there.
In terms of attack the Stalker can call an airstrike that will fall on the marked spots of the map, simply fire directly at you several times and your friends and also send some Disruptors even after you kill every enemy in the field just to pester you since they'll move to other launching pods.
Some tactics used against the Juggernaut works against the Stalker like having Anti-Air Cannons built or rallying all of your troops to fight beside you to kill it. On the plus side, the Stalker tends to ignore your troops for the most part and will hit them only with airstrikes if you happen to be too close to them (or lead them there while trying to dodge).
When fighting the Stalker try to keep a safe distance from him as his barrage of blasts can be difficult to dodge and they hurt a lot. If you have Heroic Power don't hesitate to use it.
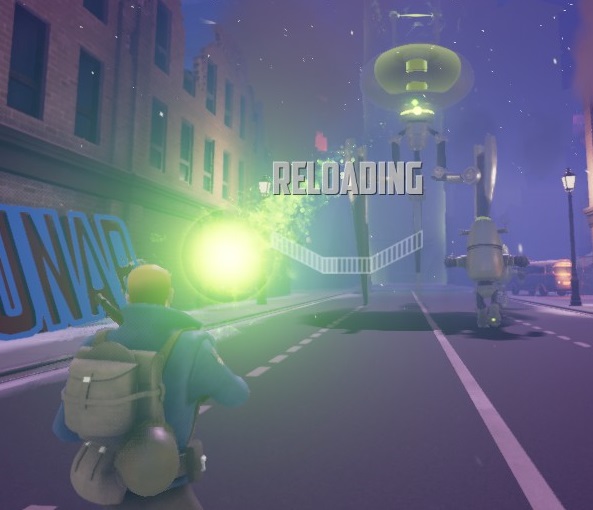
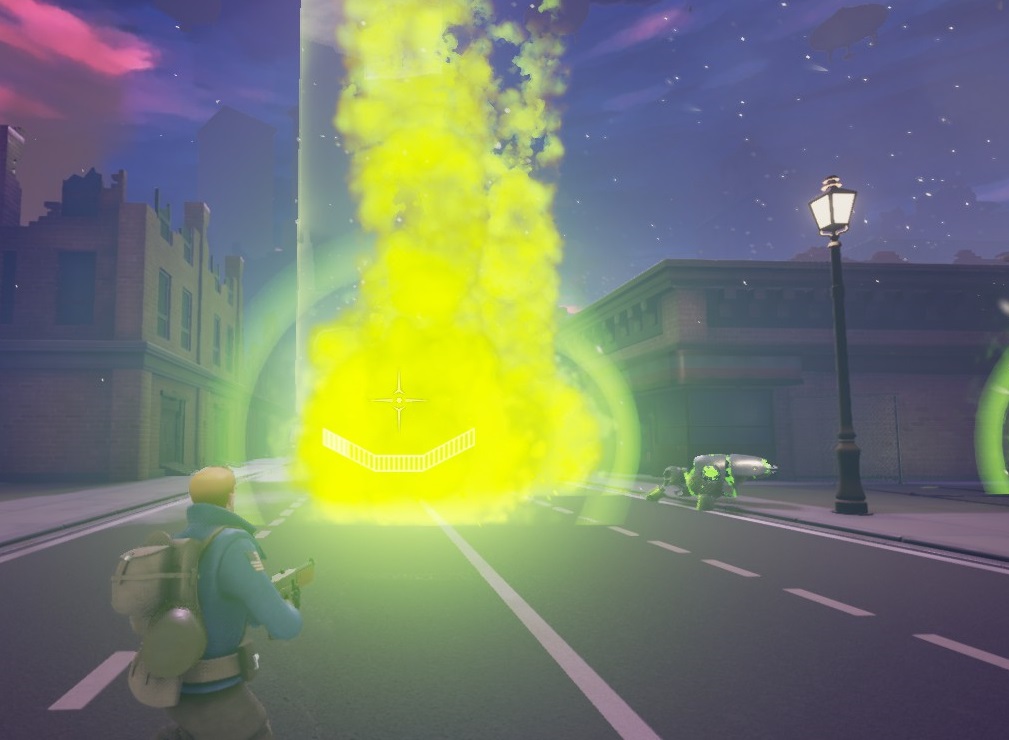
Left: The Stalker attacking - Right: Airstrike
🔧 Structures Storehouse
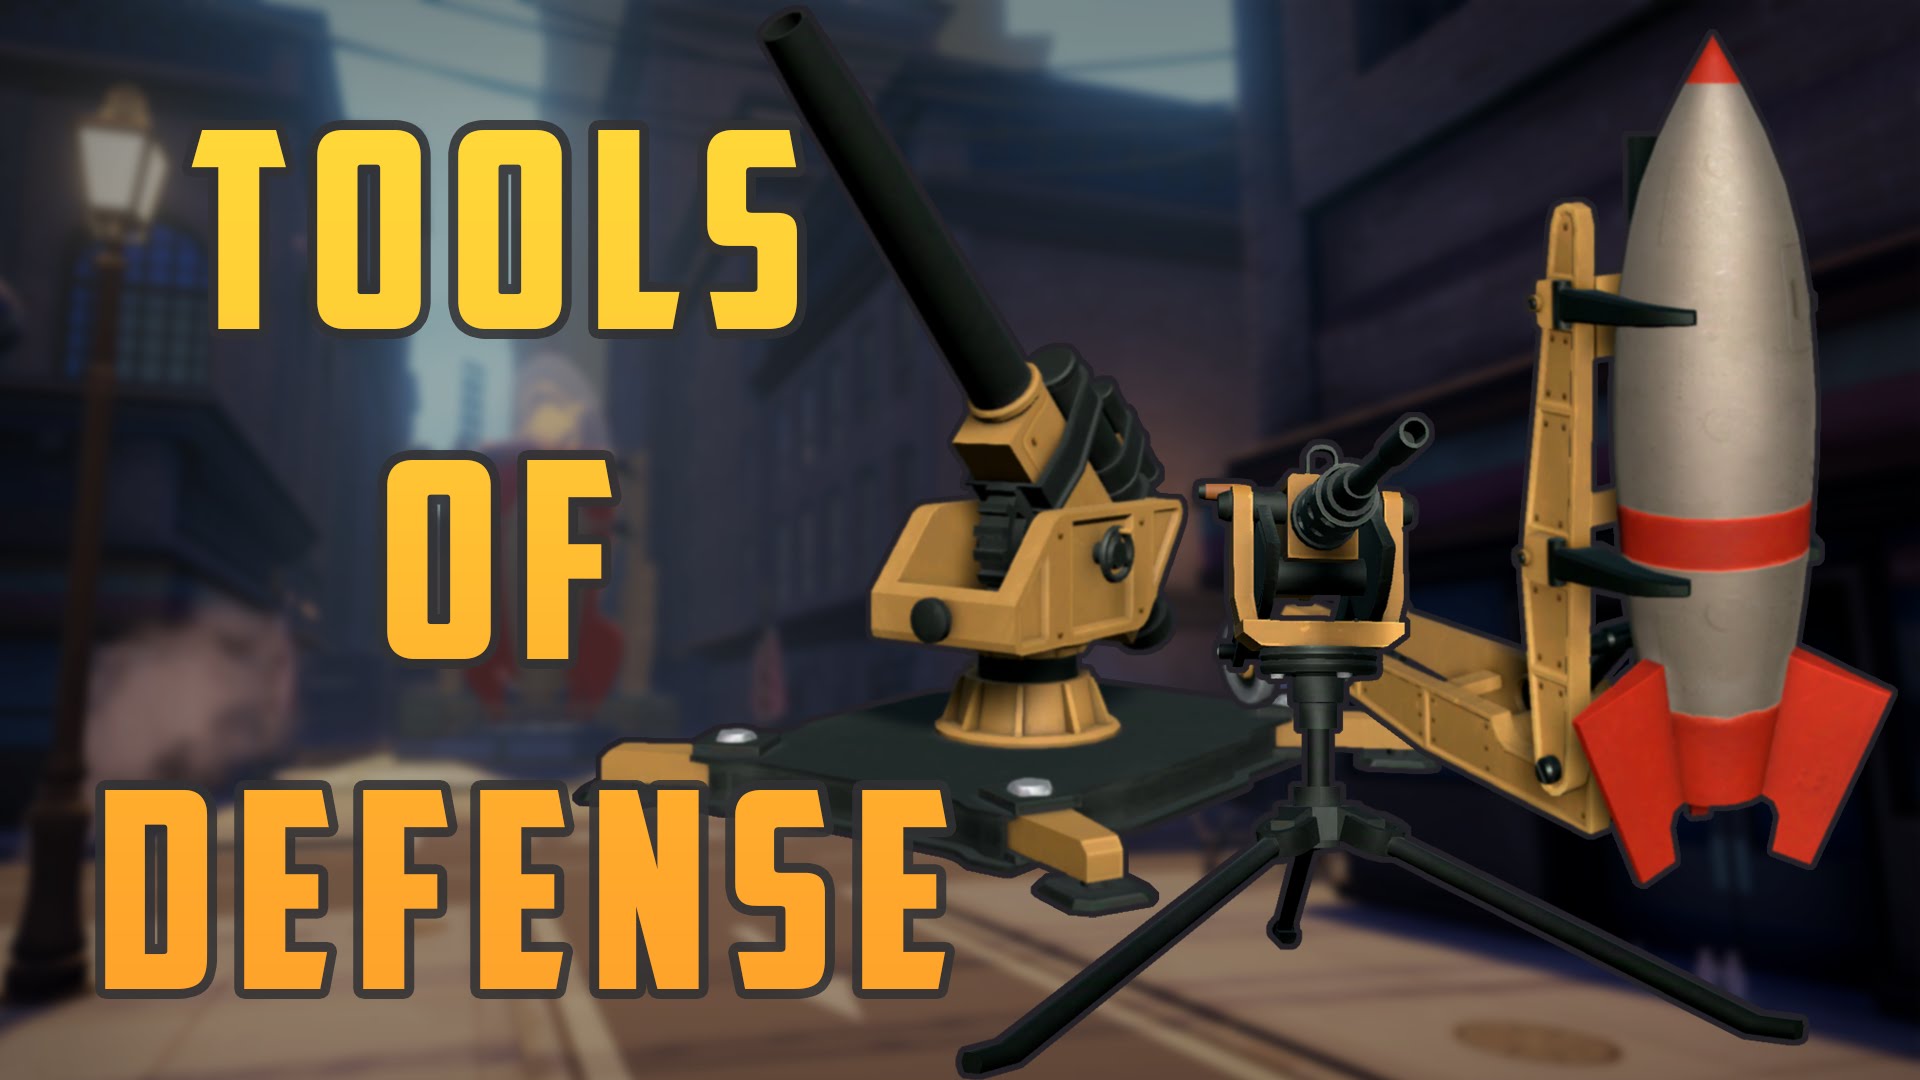
Nearly every structure, but the first, must be unlocked with Unlock Points earned by leveling up the respective character. Modifiers must be unlocked as well, but both modifiers (thanfully) cost a single Unlock Point, so you don't have to worry about picking which modifier to unlock, especially since you can use only one per map.
_______________________________________________________
The Agent
The Rocket Scientist
The Spaceman
The Agent
The Spaceman
The Agent
The Rocket Scientist
The Agent
The Spaceman
The Spaceman
The Rocket Scientist
The Agent
The Spaceman
The Agent
The Rocket Scientist
The Agent
The Spaceman
The Rocket Scientist
Keep in mind most aggressive enemies will actively seek to attack them and if a troop gets hurt enough they'll have to recover in their original spawn point which can be dangerous if you send them far away to cover another spot. Otherwise they are mostly reliable and will handle medium sized groups of most common Martians well.
A big advantage of troops is that Disruptors cannot jam/stun them, so they can be a good option to help killing them. Worst case scenario they can be used as meat shields to stall enemies for a short while.
The Spaceman
The Rocket Scientist
The Agent
The Rocket Scientist
The Spaceman
Disruptors will attempt to jam them just like any other structure, but this won't be a problem if you can set it off manually (i.e: shooting it) like the Explosive Barrels or the Sticky Mines.
The Rocket Scientist
The Spaceman
The Agent
The Spaceman
($1000 with Cheaper Parts)
⠀⤷ Structures [Wall]
- Blast Vent*
- Exhaust
- Tesla Coil
 Cost: $500
Available to: The Captain
The Rocket Scientist
The Agent
The Spaceman
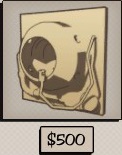
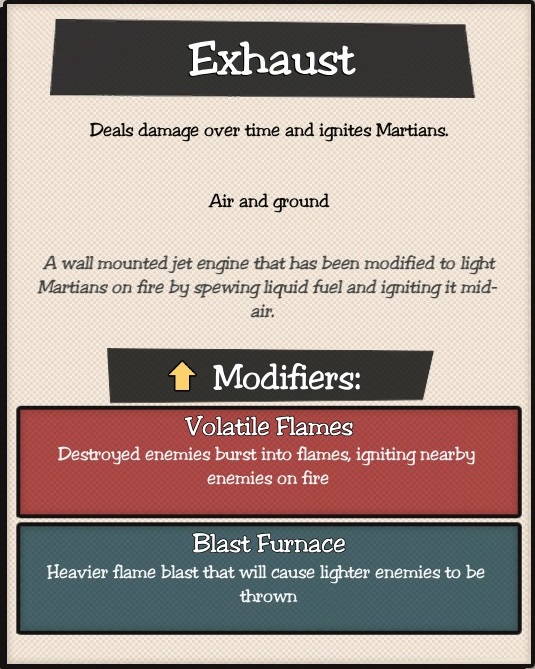
Exhaust is a structure that will spill fire on enemies that goes in front of it, it deals a moderate amount of damage and can be a good supplement for your killzone if you have money to spare.
Volatile Flames causes enemies that die after getting hit by it to explode dealing some damage to anything surrounding it.
Blast Furnace will knock stuff like Drones, Invaders and Disruptors away if they are hit by the Exhaust's flames which can be good to stall them for a little longer.
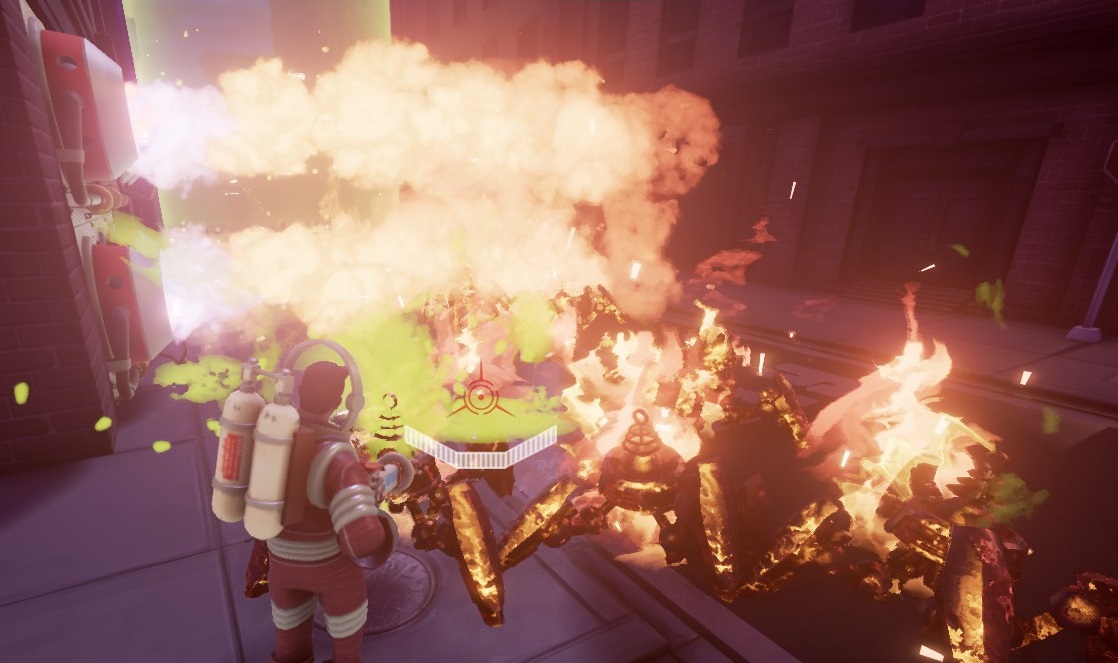 Exhaust is a bit expensive, but has respectable damage for a wall structure.
_______________________________________________________
 Cost: $300
Available to: The Captain
The Rocket Scientist
The Agent
The Spaceman
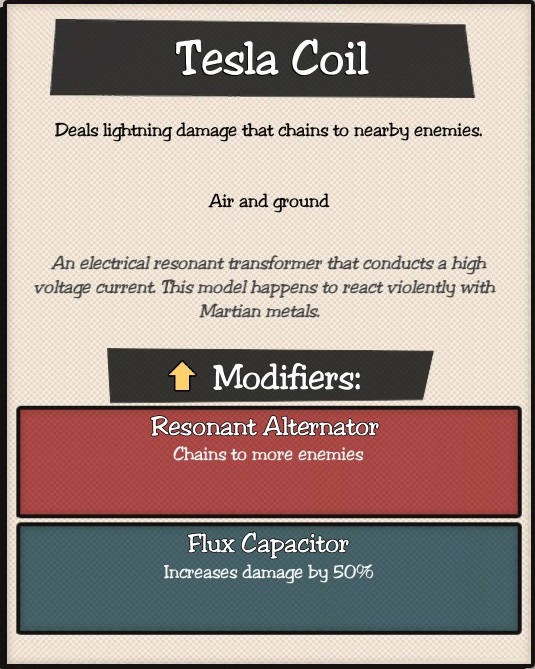
Tesla Coil is a cheap and mostly reliable wall structure that will fry enemies that goes near it, it has a bubble of activation instead of a straight line, so it can hit enemies of all heights and even ones flying low like Raiders if you put it close to the ground or a bit higher than usual.
Resonant Alternator can be useful if you're facing lots of enemies at once, but keep in mind the Tesla Coil by itself doesn't do a lot of damage unless you create a cluster of them in a certain point.
Flux Capacitor increases the Tesla Coil punch which is good if you use it with an Amplifier nearby and/or anything to decrease the defense of enemies like Attrators or Cryonic Dampeners.
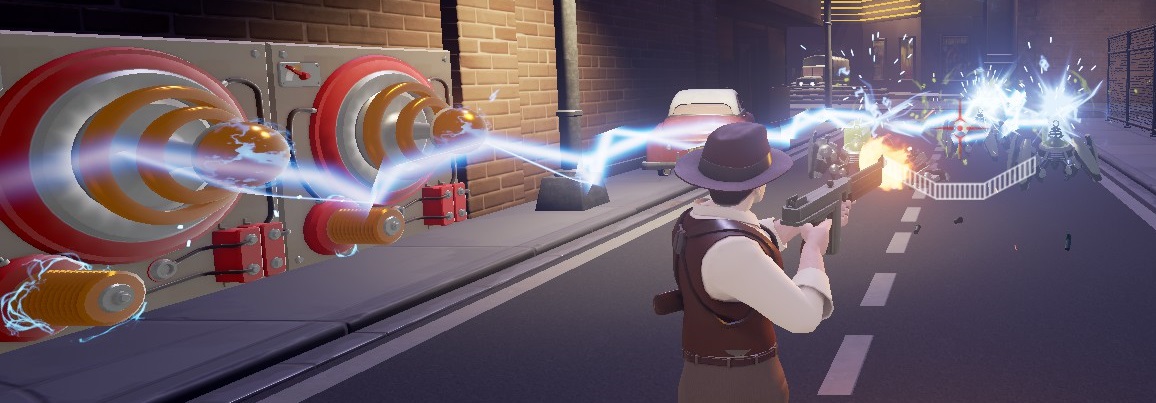 Tesla Coils are cheap and having enough of them will easily fry a good number of Drones, Raiders and Invaders. Watch out for tougher enemies, though.
⠀⤷ Structures [Floor]
- Amplifier
- Attractor
- Blast Vent
- Cryonic Dampener
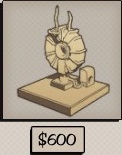
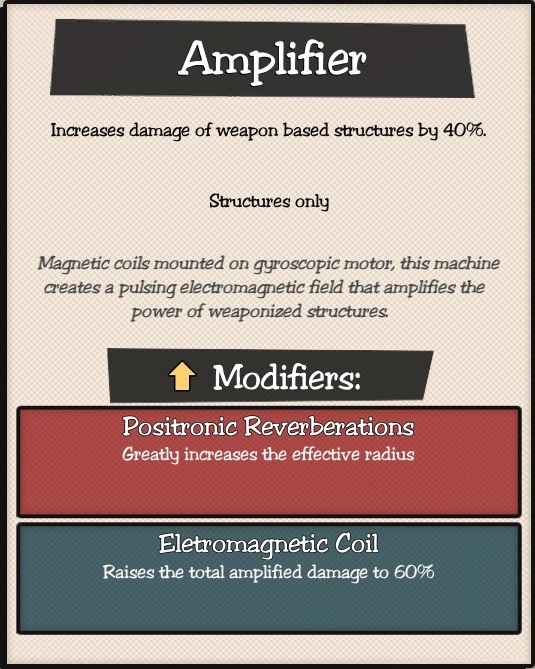 Cost: $600
Available to: The Captain
The Rocket Scientist
The Agent
The Spaceman
Amplifier is a very useful floor structure, even if a bit expensive, and will increase the strength of wall structures and turrets but, as just mentioned, not any troop (manned) structure. Structures under the effect of an Amplifier will bear an alluring yellow aura.
Positronic Reverberations increases the range of this structure a lot which can be useful to use if you're planning to spread some turrets here and there and the normal range just isn't enough for you.
Electromagnetic Coil further enhances the boosting effect the Amplifier normal gives which is good if you intend to create a tight killzone.
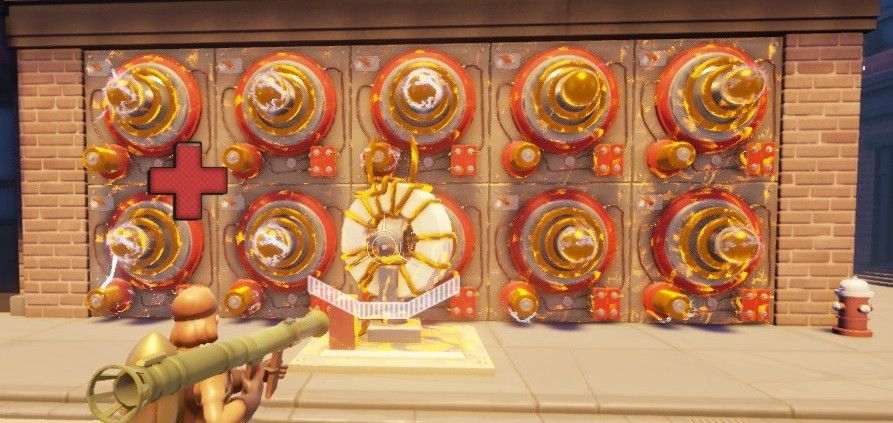
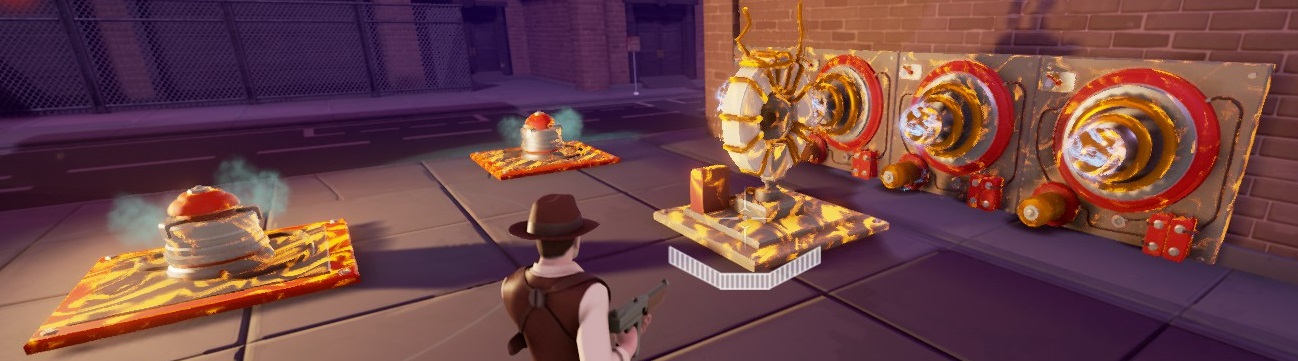
Examples of setups for Amplifier.
_______________________________________________________
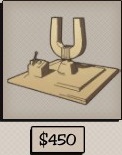
 Cost: $450
Available to: The Captain
The Rocket Scientist
The Agent
The Spaceman
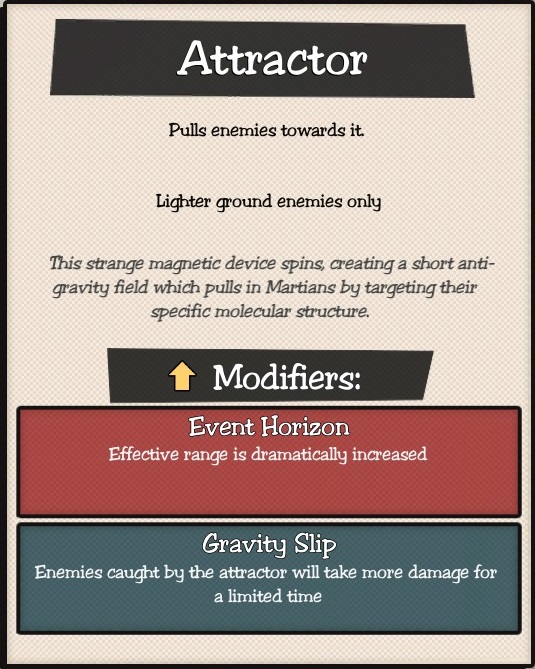
Attractor is an odd floor structure, it activates twice before having to recharge and each magnetic pull has a few seconds of delay. This structure is useful to lump groups of enemies and quickly dispose of them with heavy area attacks. Keep in mind spacing is very important for this structure as you don't want two Attractors pulling enemies away and creating separate groups.
Event Horizon increases the effectiveness of this structure by pulling enemies from a farther range and possible creating larger groups of enemies.
Gravity Grip acts as defense debuff and will cause all enemies pulled by the Attractor to take more damage for a short while. Very useful to have if you put it close to other wall structures or turrets.
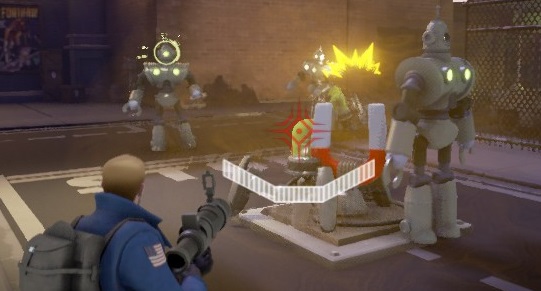
Get them together and blow them up all at once with some nice explosives.
_______________________________________________________
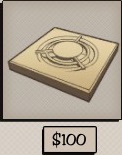
 Cost: $100
Available to: The Captain
The Rocket Scientist
The Agent
The Spaceman
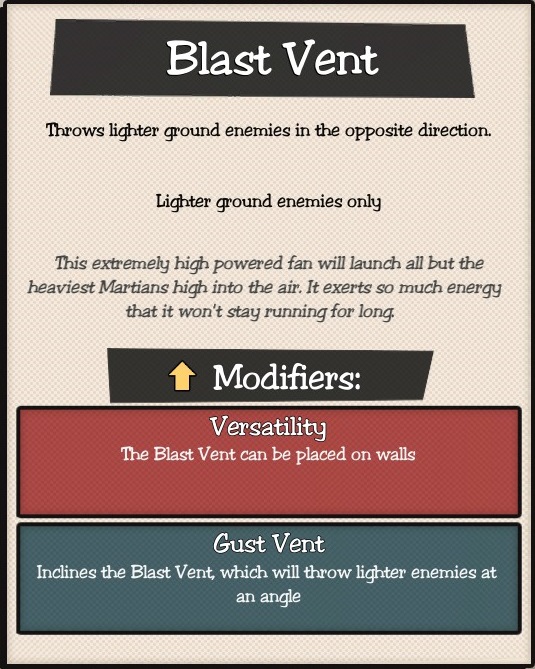
Blast Vent is a very cheap floor structure and will blow enemies upwards, or at an angle with the right modifier, to stall them. It can only activate once before it has to recharge for a few seconds to blast off something again.
Versatility allows you to put them on walls which can be a cheap and somewhat good way to stall small groups of enemies.
Gust Vent will make the Blast Vent to be inclined and anything that goes near it will be blown away instead of upwards possibly increasing the effectiveness of this floor structure in stalling enemies.
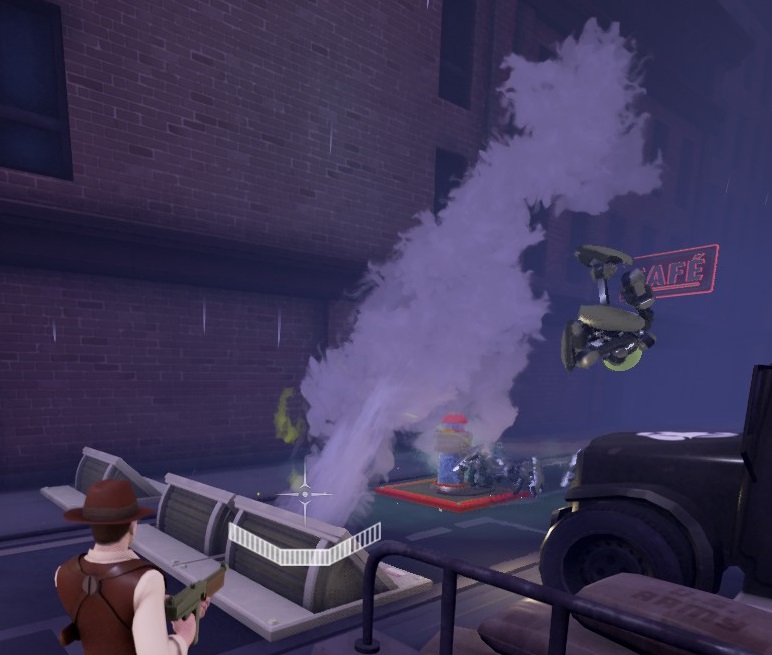
Stuff like Drones, Invaders and even Disruptors (as long as they don't jam it) will be thrown by the Blast Vent.
_______________________________________________________
 Cost: $400
Available to: The Captain
The Rocket Scientist
The Agent
The Spaceman
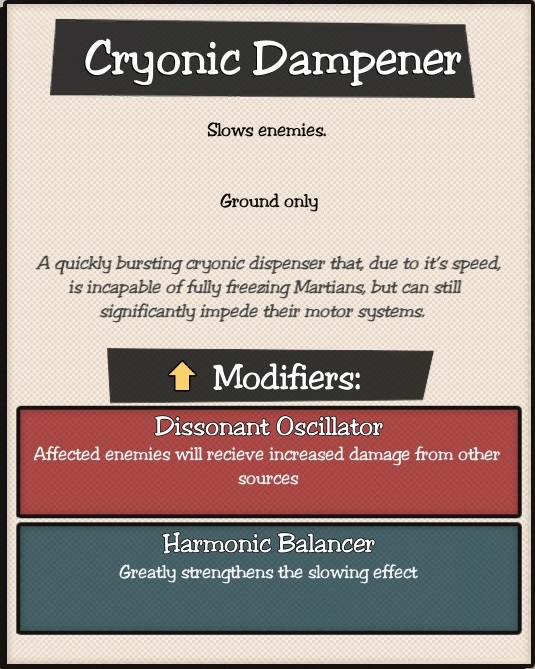
Cryonic Dampener is a very useful floor structure that considerably slows anything going over it and is particularly good at creating cluster of enemies. It's not recommended to put one right next to the other as, from what I could see during tests, enemies that thaw will gain few seconds of immunity to slow before they can be affect by the Cryonic Dampener again.
Dissonant Oscillator causes enemies to lose some of their resistance when they are affect by this structure which is pretty useful if you set it when you have other structures, like Tesla Coil, set to deal more damage.
Harmonic Balancer strengthens the slowing effect of the Cryonic Dampener which can be great if you want to build more time for yourself or keep enemies taking fire from your structures for longer.
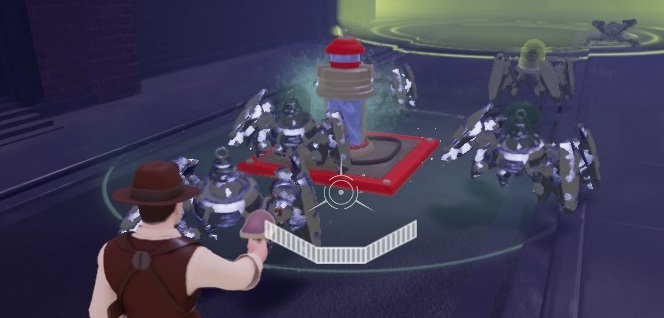
Learn where to set this structure and you'll be able to handle several enemy spawn points as long as they don't spew flying enemies.
⠀⤷ Structures [Turrets]
- Anti-Air Cannon
- Anti-Tank Gun
- Auto Turret
- Heavy Mortar
 Cost: $500
Available to: The Captain
The Rocket Scientist
The Agent
The Spaceman
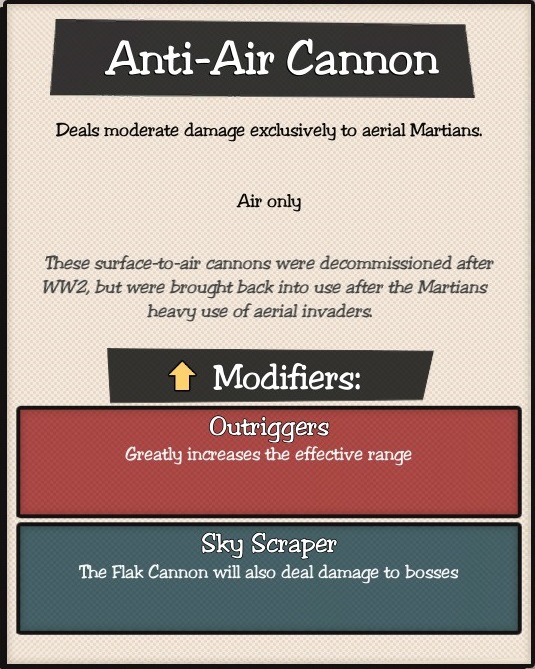
Anti-Air Cannon is exactly what it says, an anti-air structure that will aim specifically at anything that tries to fly or hover above your defenses. There's a couple of problems with this turret, though, it's pretty expensive, without a modifier it doesn't have a very good range and it fires very slowly. So it's up to you to use it or something else to help you. They don't pack enough punch to reliably kill Exterminators either, so that's another thing to keep in mind.
Outriggers upgrades the range of this turret into what I think it should be its default range. This more or less helps the Anti-Air Cannon to cover its fire rate deficiency, but you'll still need a lot of these things if you plan to rely solely on them to handle flying enemies.
Sky Scrapper is a modifier useful in Invasion Mode or maps like Invasion Square or The Final Battle as bosses will pop on them and anything that helps fighting bosses is always welcome.
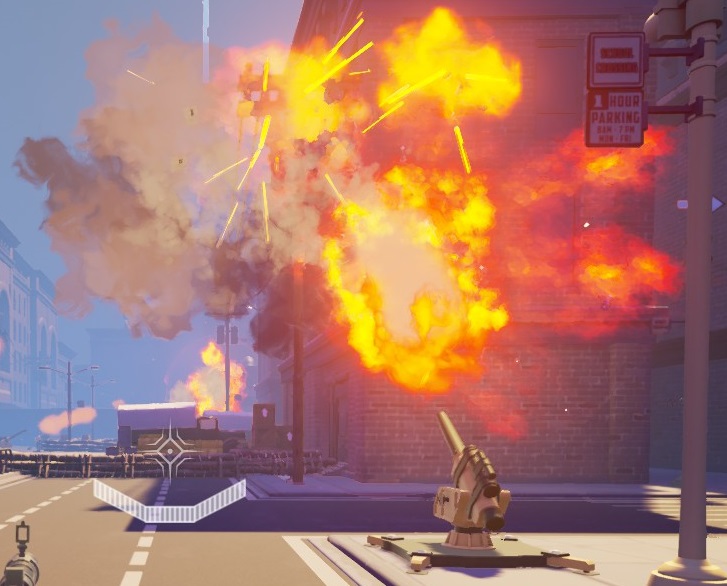
Anti-Air Cannon has its uses, but without the Outriggers modifier the range of this structure is dangerously short for a tool of this use.
_______________________________________________________
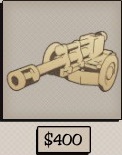
 Cost: $400
Available to: The Captain
The Rocket Scientist
The Agent
The Spaceman
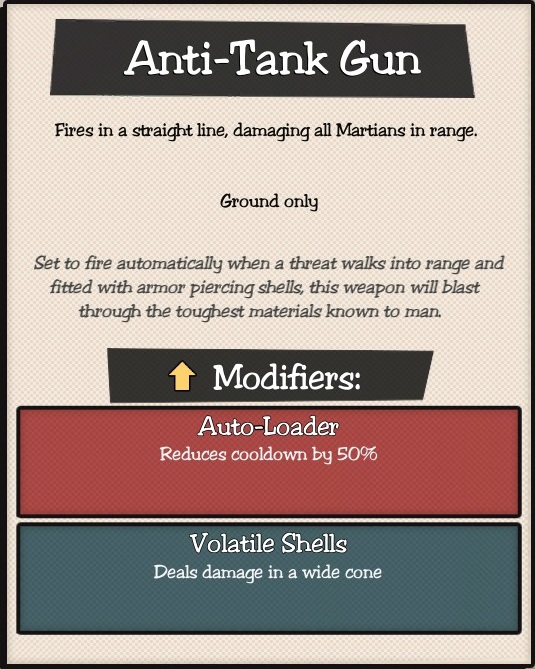
Anti-Tank Gun is a really cool looking turret that fires slowly but each shot packs a mean punch and can hit enemies lined up, or in a short, but wide, range. It's not very expensive, but you'll need to have about three or when side-by-side to help you cover most sections of maps.
Auto-Loader increases the fire rate of this turret while keeping its original range. While it doesn't turn the Anti-Tank Gun into a machine gun the lowered cooldown makes this turret more useful and better at handling groups of enemies.
Volatile Shells trades its normally long range for a short, but wide, ranged burst. Putting the Anti-Tank Guns in narrow spaces, one behind the other is a good way to take advantage of this modifier.
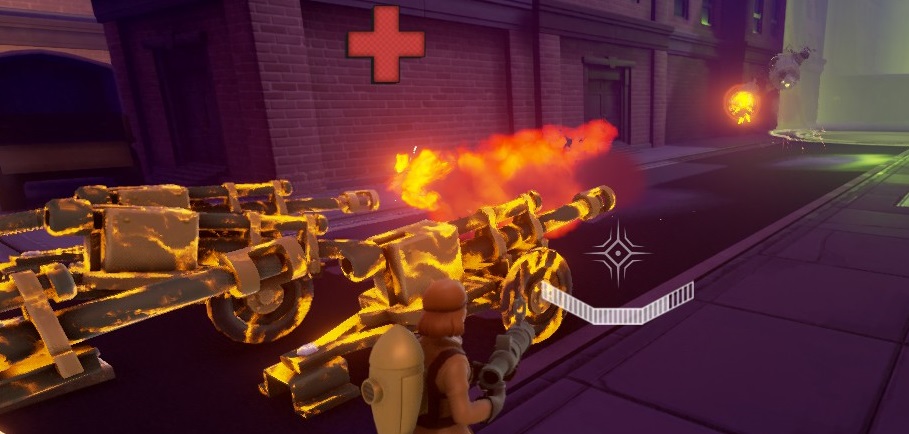
Anti-Tank Gun is very powerful, but just as slow.
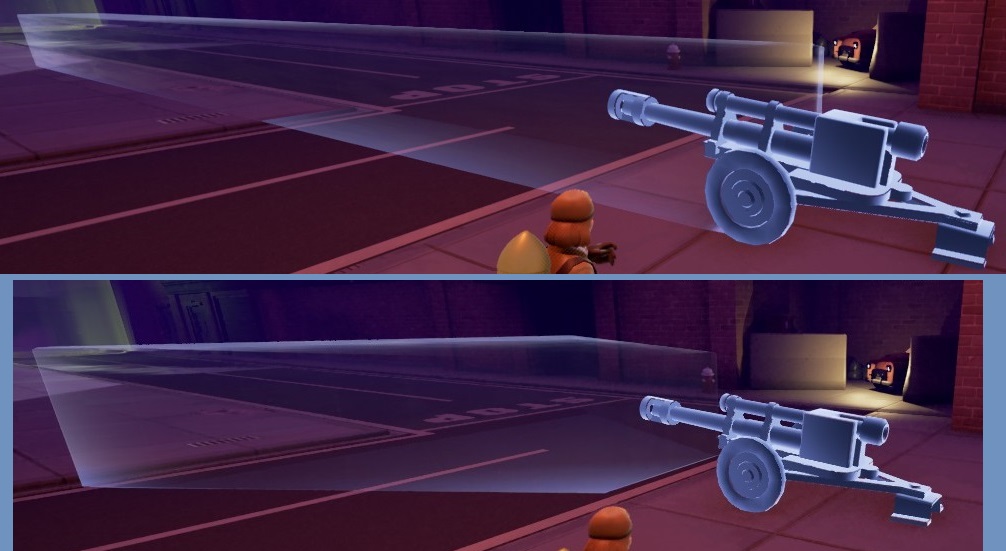
Comparison of range between the normal and wide.
_______________________________________________________
 Cost: $250
Available to: The Captain
The Rocket Scientist
The Agent
The Spaceman
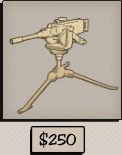
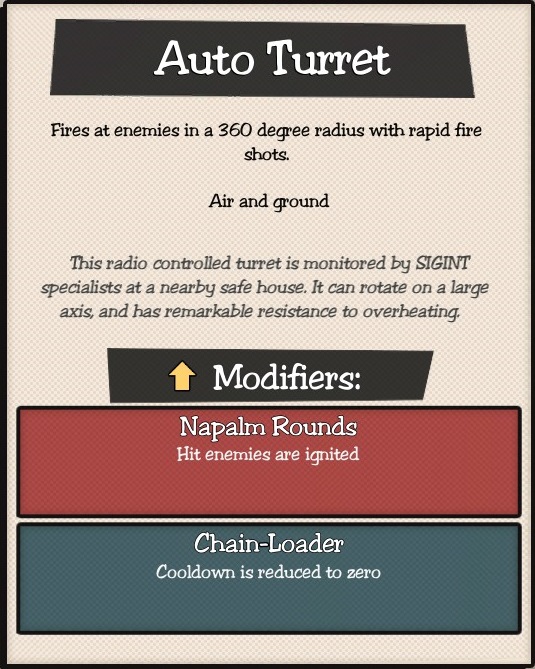
Auto Turret is a very cheap turret and for that price you can basically put lots of these things in every corner of the map, but don't expect them to do any killing. Auto Turrets are very weak on their own and without modifiers they are hardly worth the $250 to deploy them on the field.
Napalm Rounds gives the Auto Turrets a bit more of damage and the chance of igniting enemies, but still nothing impressive.
Chain-Loader will remove the necessity of the Auto Turrets to stop firing and cooldown for a moment, but as I've been mentioning, even a half dozen of these things is barely able to bring down a single Invader quickly.
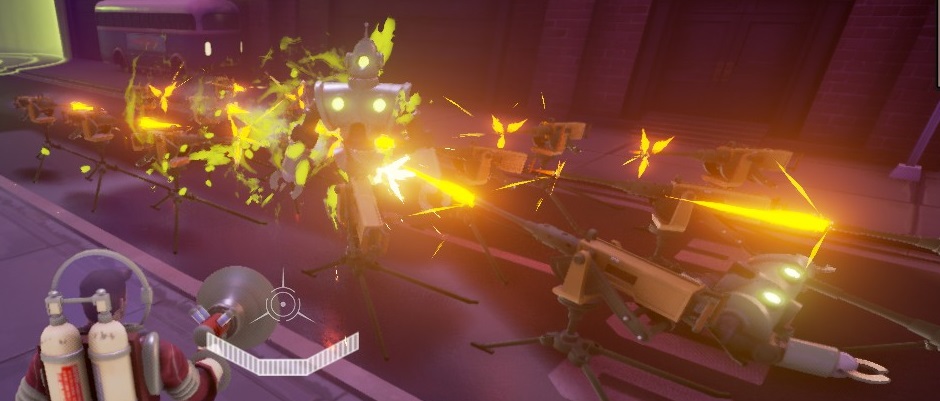
Auto Turrets are weak but cheap, use them to wear down enemies instead of having them to do the killing.
_______________________________________________________
 Cost: $450
Available to: The Captain
The Rocket Scientist
The Agent
The Spaceman
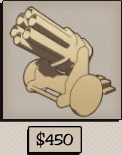
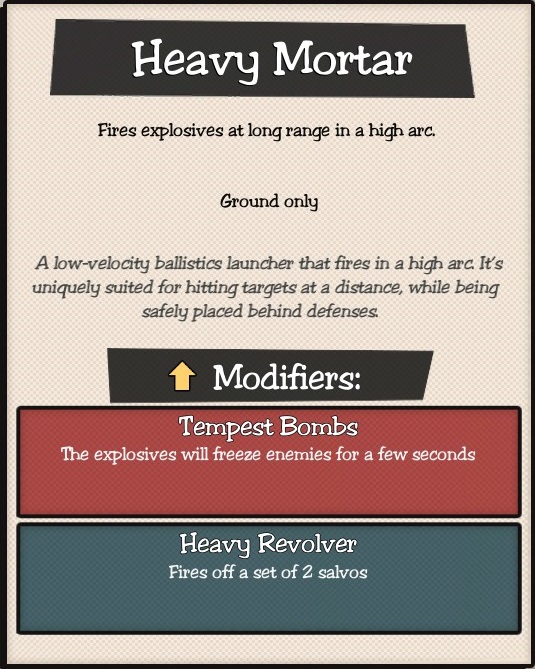
Heavy Mortars is a very long range turret that will fire whenever an enemy gets close to its firing range, the mortars deal respectable damage to enemies but are pretty delayed, so keeping enemies in place somehow increases the chance of the mortars hitting their mark.
Tempest Bombs causes a blizzard similar to the Freeze Ray's secondary fire to stick where the mortar exploded which can be a decent support cover fire depending of the positioning of your Heavy Mortar turrets.
Heavy Revolver will double the firepower of this turret making it fire twice before having to reload. As long as you know how to keep enemies in the position for the mortars this modifier will be very useful and powerful.
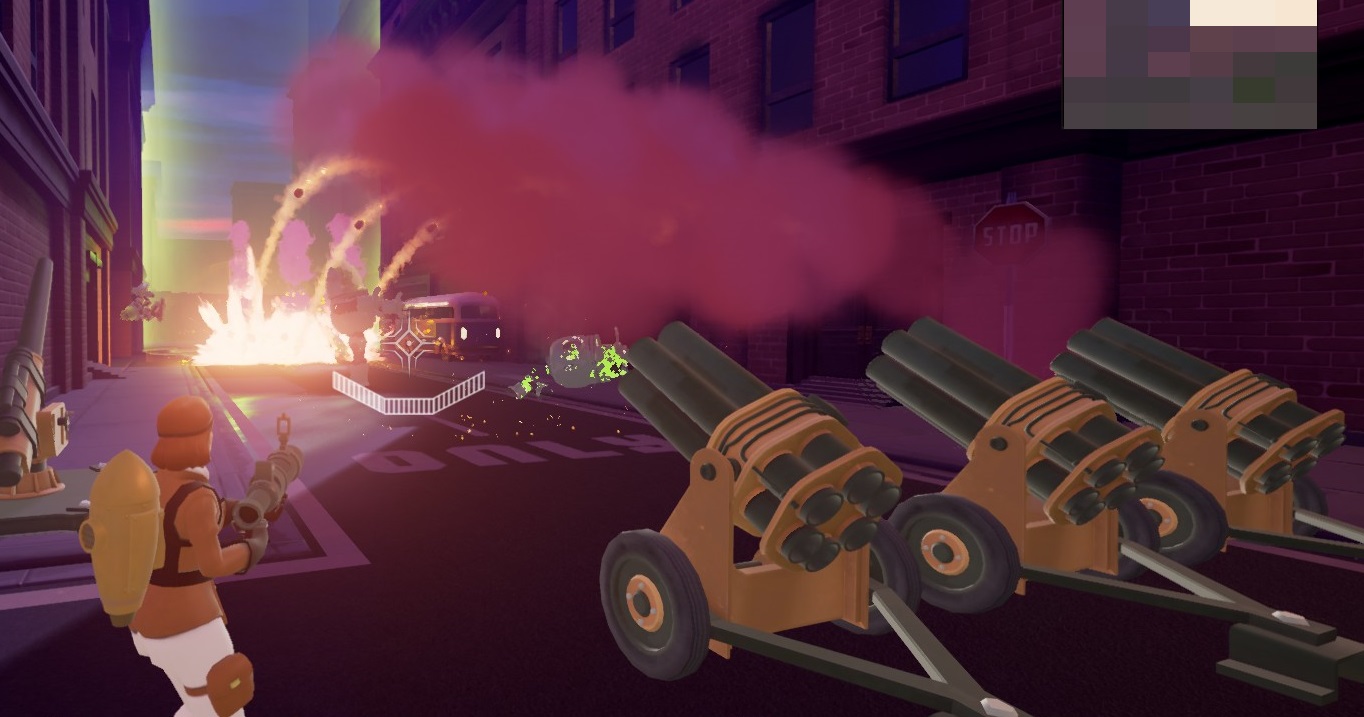
Putting Mortars side-by-side or spacing them from each other is your choice to get the best result out of this structure.
⠀⤷ Structures [Troops]
- Rifle Infantry
- Rocket Trooper
- Sniper Unit
- Tesla Trooper
 Cost: $350
Available to: The Captain
The Rocket Scientist
The Agent
The Spaceman
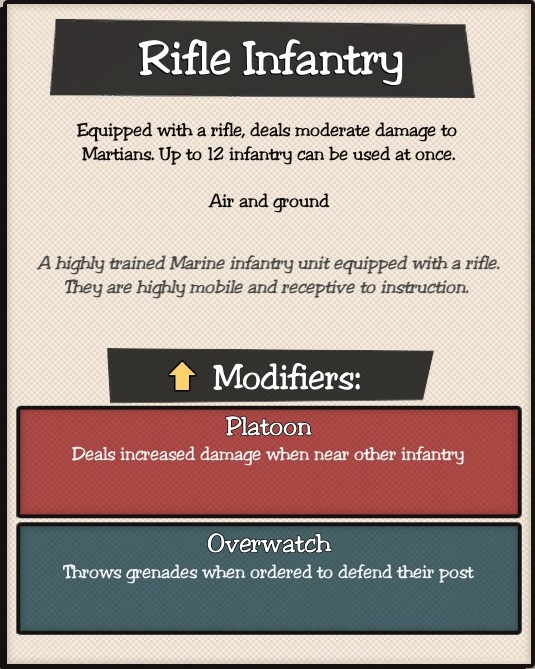
Rifle Infantry is a well balanced troop structure. It's a jack-of-all-trades troop that can handle a decent group of most basic enemies like Drones, Invaders and Disruptors when put in sufficient numbers, especially when using Overwatch as modifier.
Platoon is a useful modifier if you plan to have all Rifle Infantries following you or covering a specific part of the map.
Overwatch will cause the Rifle Infantry to throw grenades as long as you don't move them from their base.
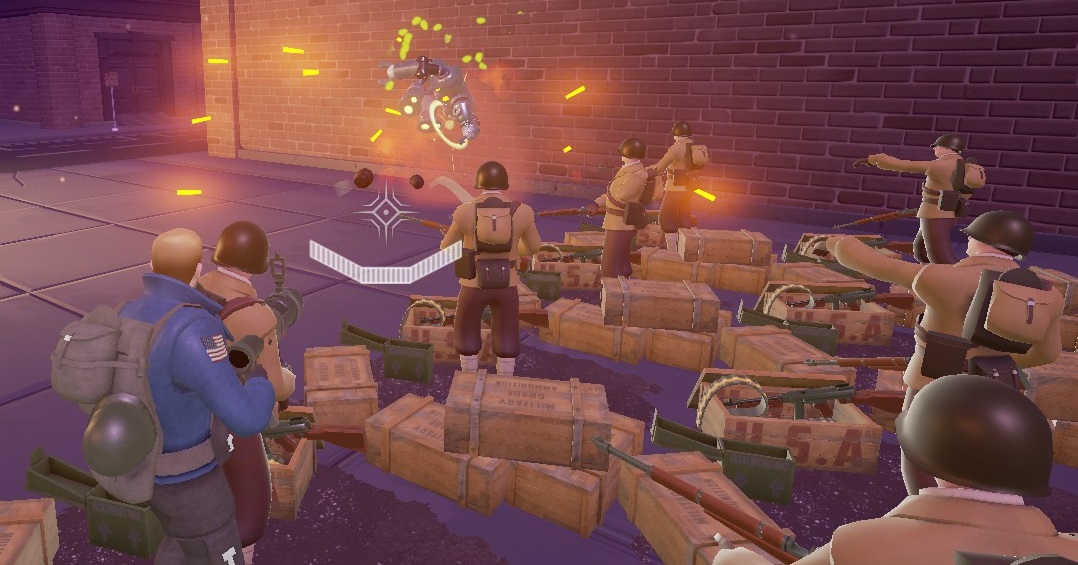
Rifle Infantry on Overwatch throwing grenades.
_______________________________________________________
 Cost: $500
Available to: The Captain
The Rocket Scientist
The Agent
The Spaceman
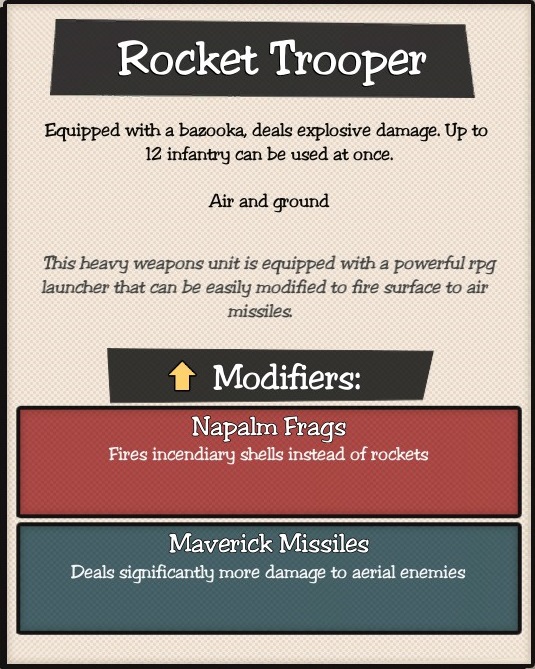
Rocket Trooper is a surprisingly versatile troop structure. They fire slowly but every shot packs a punch much better than the Rifle Infantry's and they also have better range as well.
Patch 1.1 changed its price from 400 to 500 to build which makes this troop less viable in several situations.
Napalm Frag gives the Rocket Trooper a bit more of damage as each rocket will leave a pool of fire that will deal damage to enemies that goes over it.
Maverick Missiles is a very useful modifier in case you don't want to use Anti-Air Cannons, or want to have your Rocket Troopers to move from spot to spot. Just keep in mind that if you keep them stationary to counter Raiders, they have the worst habit of blowing them up right on their heads, knocking them out temporarily.
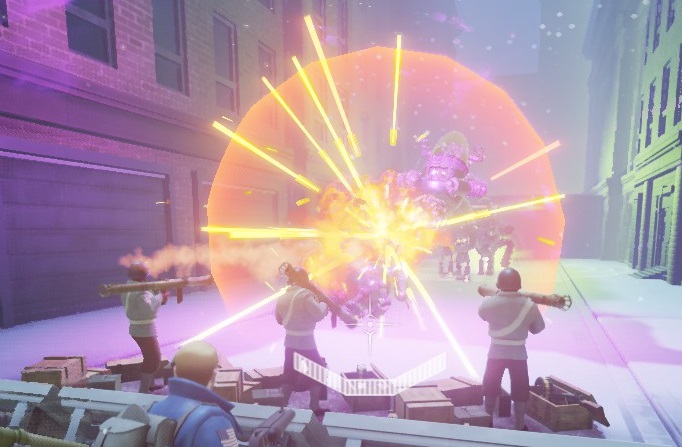
Rocket Troopers fires slowly, but are reliable allies to hold enemies in different enemy spots when set in groups.
_______________________________________________________

 Cost: $600
Available to: The Captain
The Rocket Scientist
The Agent
The Spaceman
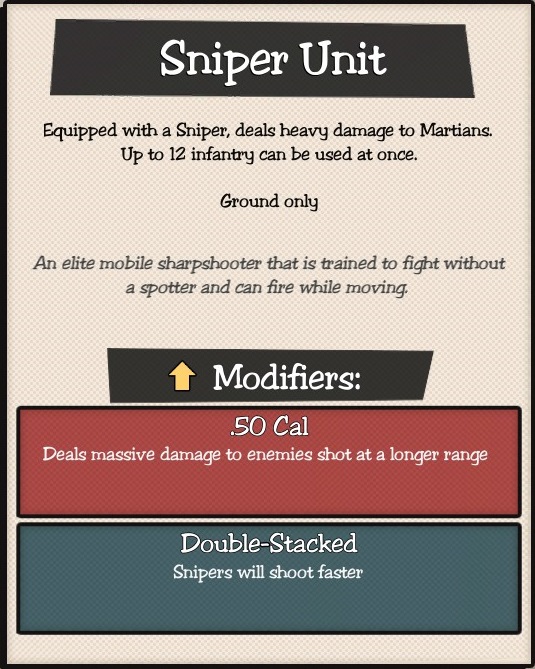
Sniper Unit is a powerful, long range troop structure that fires at any non-aerial Martian (contrary to what you might think), Snipers have a long delay between each shot, significantly longer than the Rocket Troopers.
Patch 1.1 gave it a much needed buff to its fire rate and it's rather easy to notice especially with Double-Stacked. However it also slightly increased the price from $550 to $600.
.50 Cal is an excellent modifier if you plan not to move your Snipers or keep them near the launching pod, or have them to use to launch a preventive strike on the aliens from afar.
Double-Stacked increases the fire rate of Snipers which is good as Sniper Units will down anything up to Invaders in Normal Solo mode in a single shot. This is particularly powerful in case you're going to keep them around while killing.
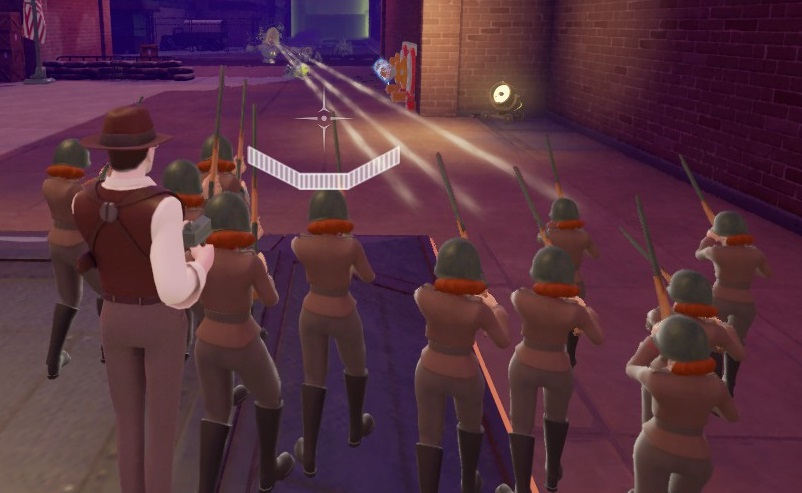
The Sniper Unit can shoot at stuff really, really far and will basically never miss their mark.
_______________________________________________________
 Cost: $500
Available to: The Captain
The Rocket Scientist
The Agent
The Spaceman
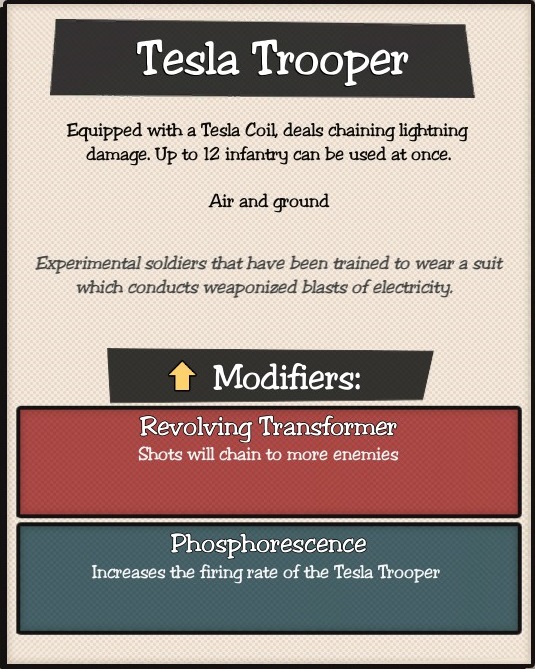
The Tesla Trooper is a decent troop structure. They have a pretty good damage and are good to be used as backup allies rather than staying stationary soldiers since none of their modifiers give them any advantage for that. Versatility is the main strength of this troop, even more than Rifle Infantry.
Revolving Transformer gives them the ability to hit more enemies per discharge. Phosphorescence improves their fire rate. Between one or the other it's up to you to decide which one is better or suits your needs for the map if you bring them with you.
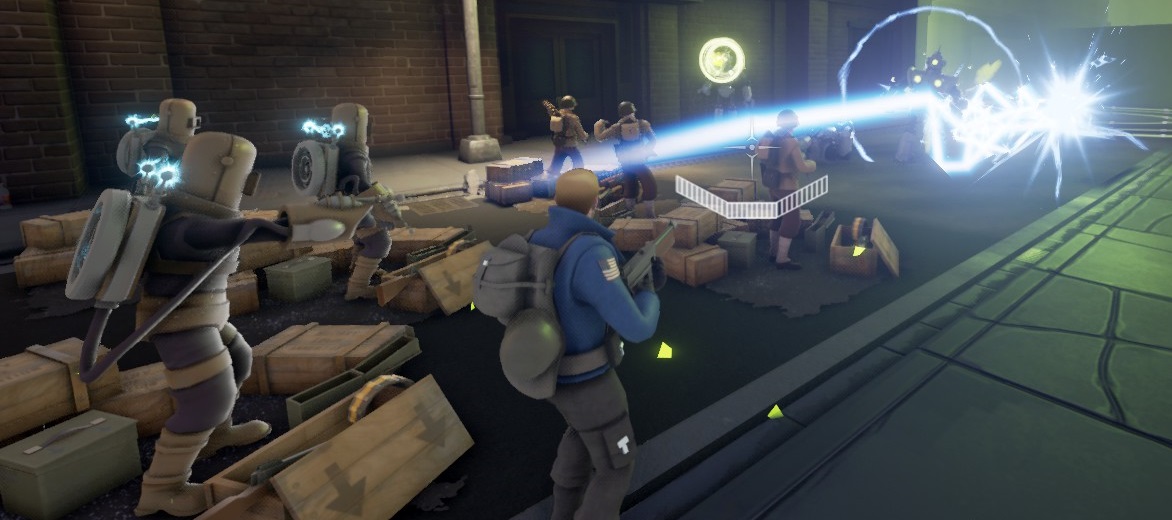
Tesla Troopers are surprisingly effective against medium groups of enemies.
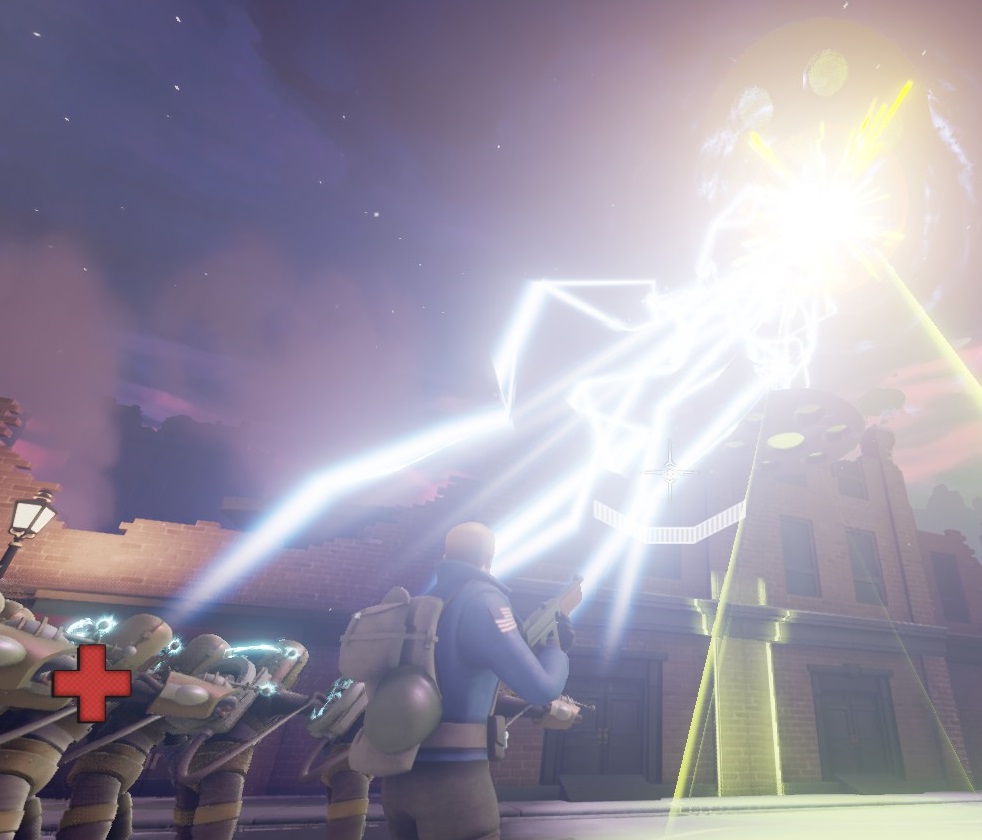
They can shoot at airborne enemies as well. That Saucer picked a really bad route.
⠀⤷ Structures [Expandables]
- Explosive Barrels
- Nitro Mine
- Sticky Mine
 Cost: $10
Available to: The Captain
The Rocket Scientist
The Agent
The Spaceman
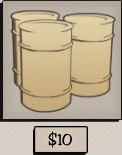
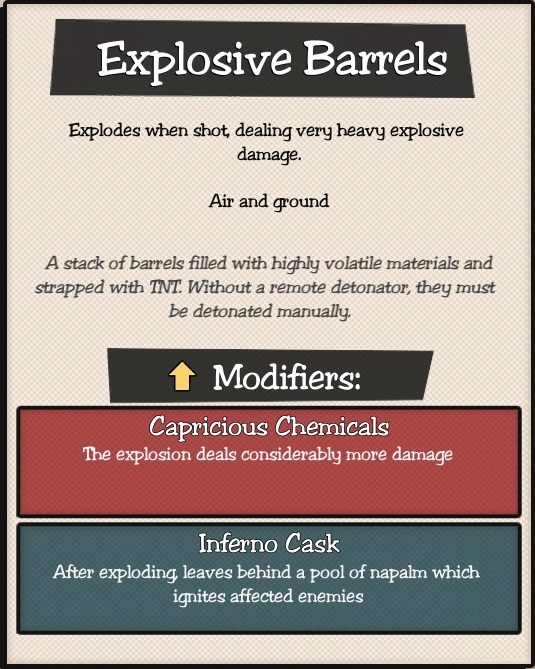
Explosives Barrels are extremely cheap and can be very powerful when used correctly. You can put a small group of three of them and use as a smart bomb to get rid of a problematic enemy or fill a lane with them and explode cleaning most of the small trash, you can even hit flying stuff like Flying Saucer and Exterminators you know its range. Just beware that they have the same structure build limitations as any other: you cannot set them too close to enemies or where you cannot build any structures.
Capricious Chemicals increases the explosion strength of the Explosive Barrels and on solo its more than enough to one-shot Invaders, Drones and Raiders. Other targets may survive but will still be severely damaged.
Inferno Cask leaves a short lived pool of fire that will damage enemies walking over it, so even if something explodes the barrels prematurely the Martians will take damage from it.
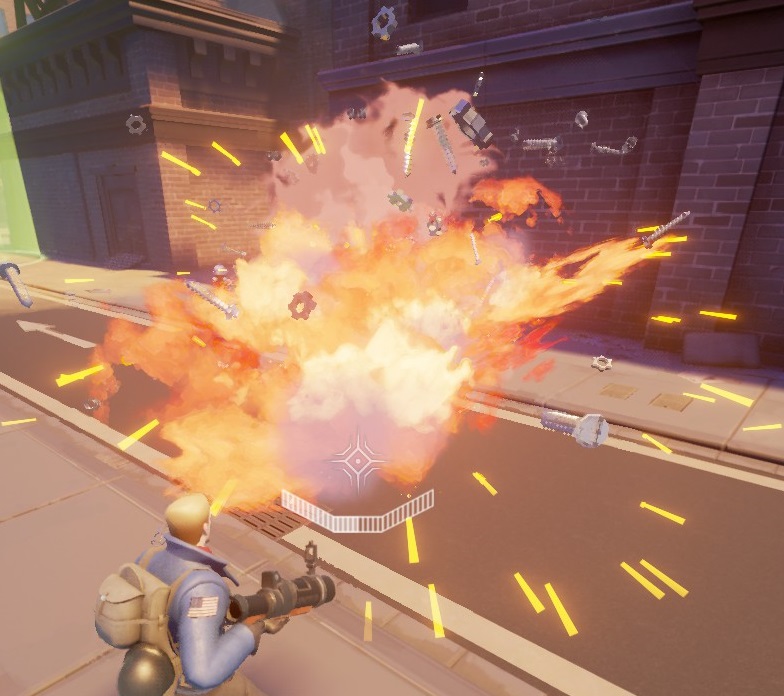
Put two or three of these around and get rid of a group of pesky aliens.
_______________________________________________________
 Cost: $20
Available to: The Captain
The Rocket Scientist
The Agent
The Spaceman
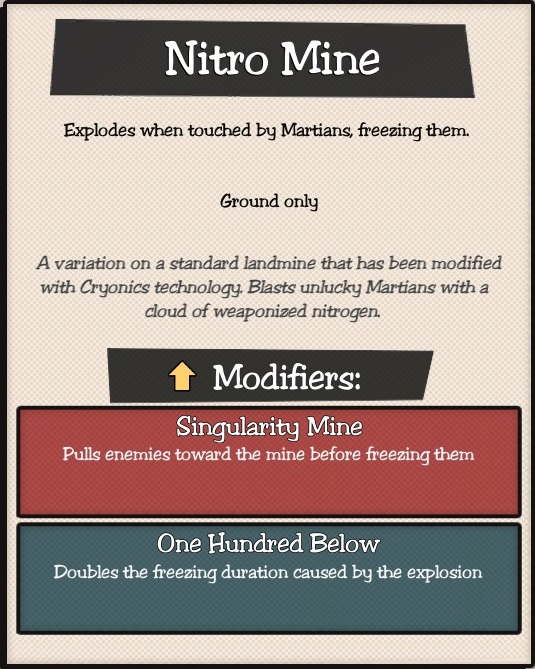
Nitro Mine is another cheap and useful tool to have around and they don't deal damage, but freeze enemies in place as soon its triggered. Its blast radius isn't as great as Explosive Barrels, but still useful since they are cheap and can either have modifiers to pull enemies close to it or to keep them frozen for longer.
Singularity Mine will cause the Nitro Mine to pull enemies towards it more or less like an Attractor before exploding and freezing enemies.
One Hundred Below will upgrade the freezing effect of the Nitro Mine, but don't use it with anything with fire damage or else enemies will thaw and you'll waste the Nitro Mine.
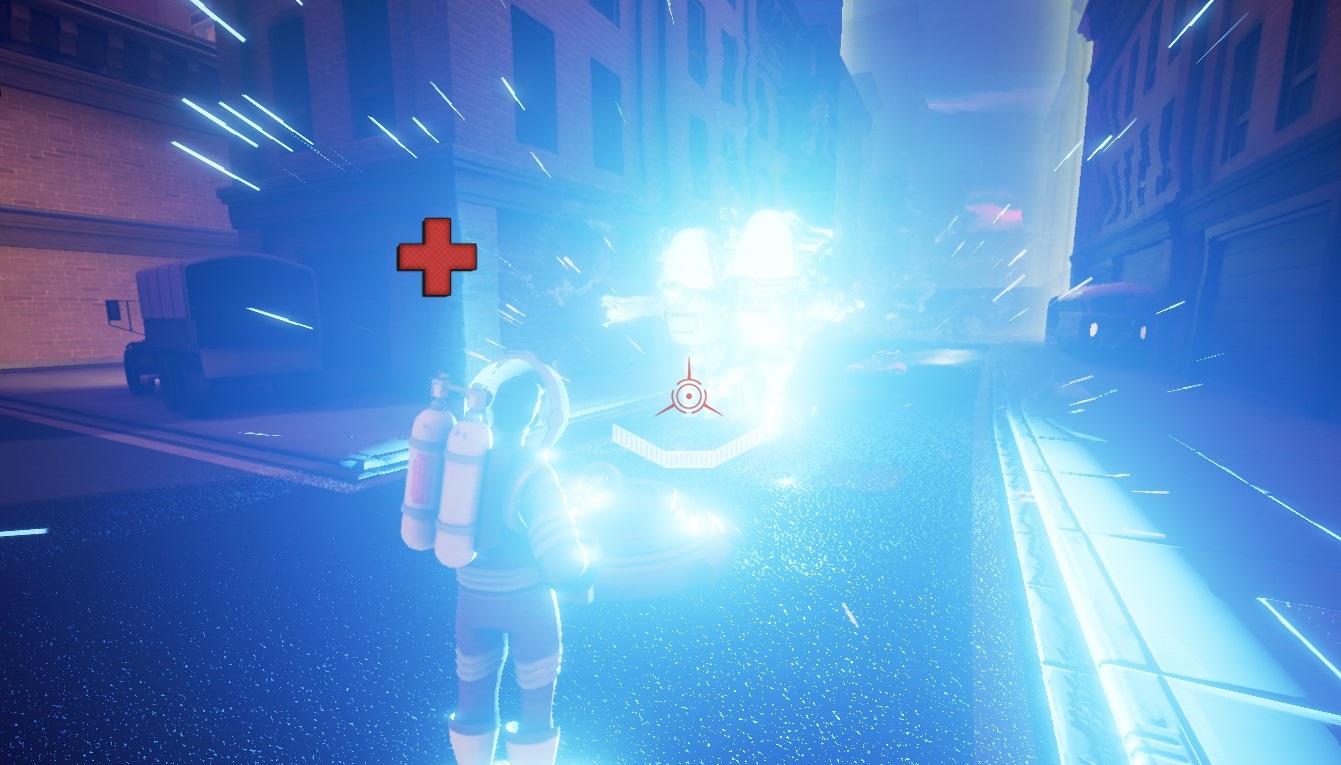
Nitro Mines are great to keep enemies in front of your structures for extra damage.
_______________________________________________________
 Cost: $30
Available to: The Captain
The Rocket Scientist
The Agent
The Spaceman
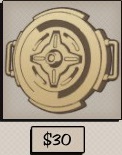
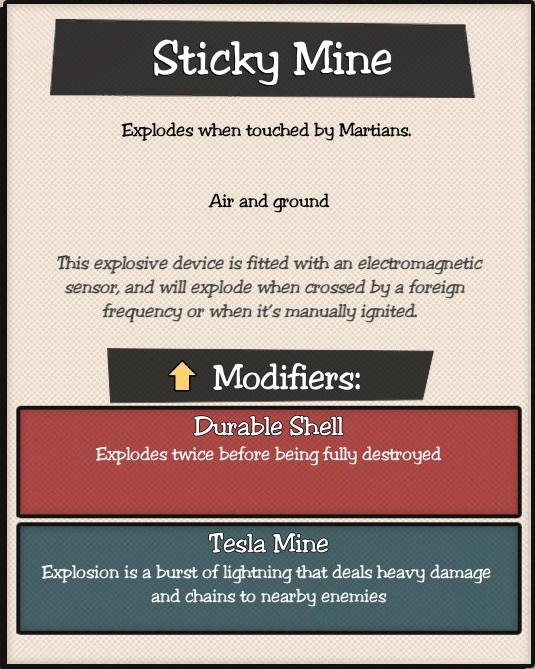
Sticky Mine is the most expensive expandable structure (which isn't saying much) and although it's not as powerful as the Explosive Barrels it can carry modifiers to make it just as or be more versatile as you can set them on walls as well.
Durable Shell will double the power of the Sticky Mine as it'll be able to detonate twice before vanishing, good to take care of groups of pesky Drones and wound any other stuff, sometimes a lot.
Tesla Mine gives the Sticky Mine an effect akin to Tesla Troopers and Tesla Coils.
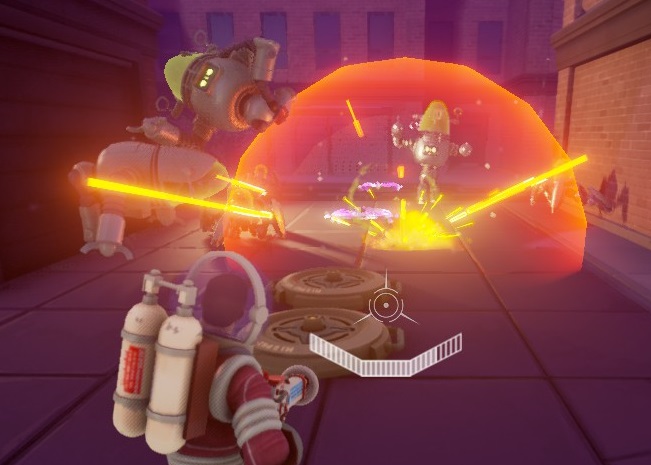
While not as powerful as Explosive Barrels the Sticky Mine packs a decent punch and can wound several Martians.
⠀➥ Structures [Unique] {Part 1}
- Flamethrower Unit
- Man In Black
 Cost: $600
Available to: The Captain
The Rocket Scientist
The Agent
The Spaceman
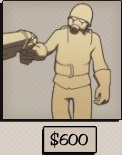
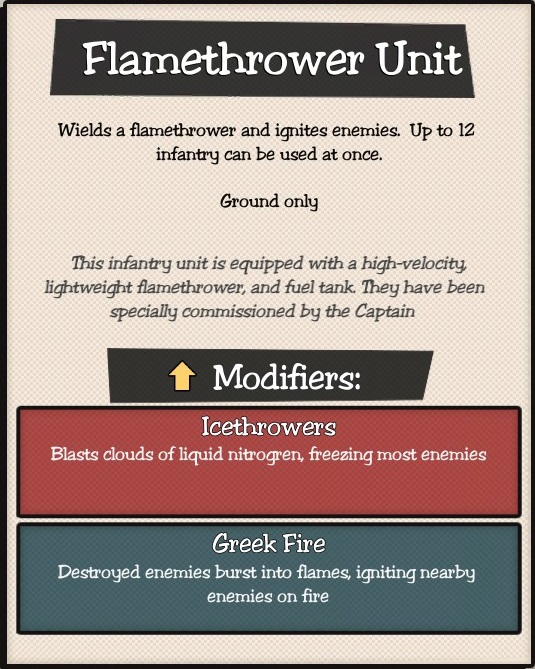
Flamethrower Unit is a troop structure exclusive to The Captain and works as you expect and with a modifier in another way you would expect less. They have good base damage but are a bit expensive to build. Flamethrowers are better left in their post as they'll cover a better area rather than focusing their attack on a single enemy if left ordered to follow or cover you (unless that is your intention).
Icethrower turns Flamethrowers into an ice based damage structure, great to slow down some enemies and stall Annihilators, putting one of these in the front to slow enemies for other structures tend to be a good tactic.
Greek Fire increases their damage potential by exploding enemies if they kill one. This makes them very effective in killing groups of Drones and Invaders without too much trouble.
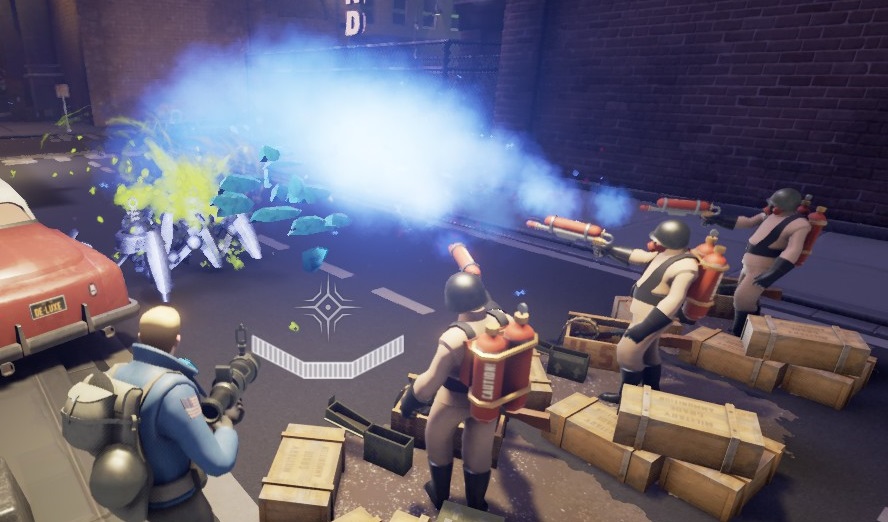
Having them equipped with Icethrower can trade raw attack power for some support to other structures or you.
_______________________________________________________

 Cost: $600
Available to: The Captain
The Rocket Scientist
The Agent
The Spaceman
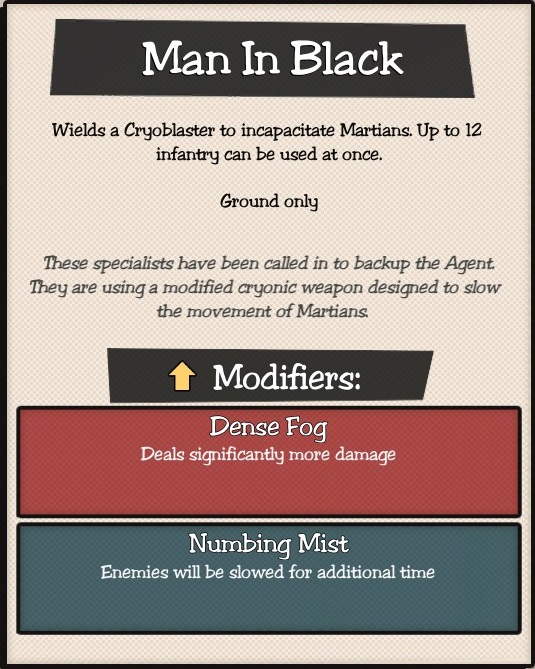
The MIB is The Agent's exclusive unit and they come armed with a Cryo Blaster, although they aren't nearly as powerful as The Spaceman himself for obvious reasons. Men In Black, much like Flamethrowers with Icethrower modifier, can act to support structures unit while dealing a good deal of damage.
Dense Fog powers them up to deal more damage which can make them pretty strong while keeping their slowing properties.
Numbing Mist increases the time enemies will stay slowed after they get out of the Men In Black's reach, you can use this putting some structures ahead and on their back while they're still slowed down.
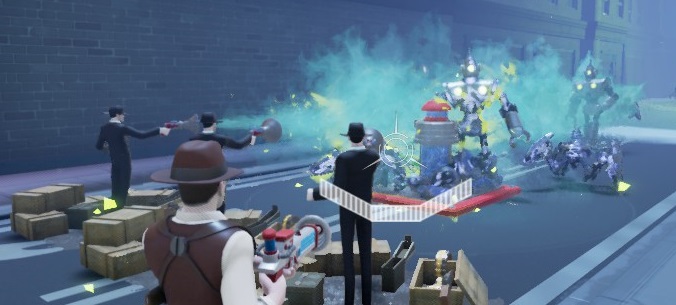
Remember: they can't hit airborne enemies.
⠀➥ Structures [Unique] {Part 2}
- Nitro Freezer
- Orbital Ray
- R2 Rocket
 Cost: $300
Available to: The Captain
The Rocket Scientist
The Agent
The Spaceman
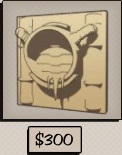
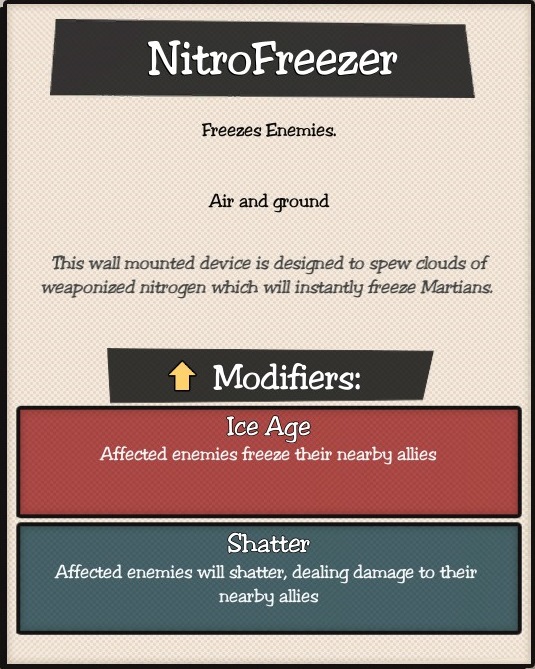
Nitro Freezer is my favorite wall structure of the game and the sole reason The Spaceman is my favorite character. It slows enemies considerably and kills small trash like Drones and Invaders reliably and on top of that is very cheap, so you can put them in several places to aid your friends or troops as well.
Ice Age increases this structure's crowd control and capability of stalling enemies, it can be good against tougher enemies that won't be killed by it, even with this modifier Drones will almost always die to it and large groups of Invaders can be stalled for a considerable time by two Nitro Freezers.
Shatter increases the strength of this structure by making enemies do a small area damage if they die while affected by the Nitro Freezer. This is a good alternative for those looking for a more aggressive option against groups of enemies like Raiders.
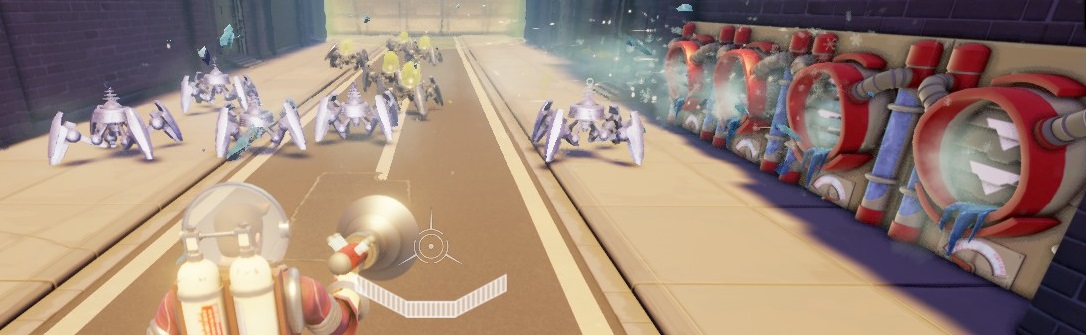 Nitro Freezer can deal with small trash like Drones and even Invaders handily.
_______________________________________________________
 Cost: $600
Available to: The Captain
The Rocket Scientist
The Agent
The Spaceman
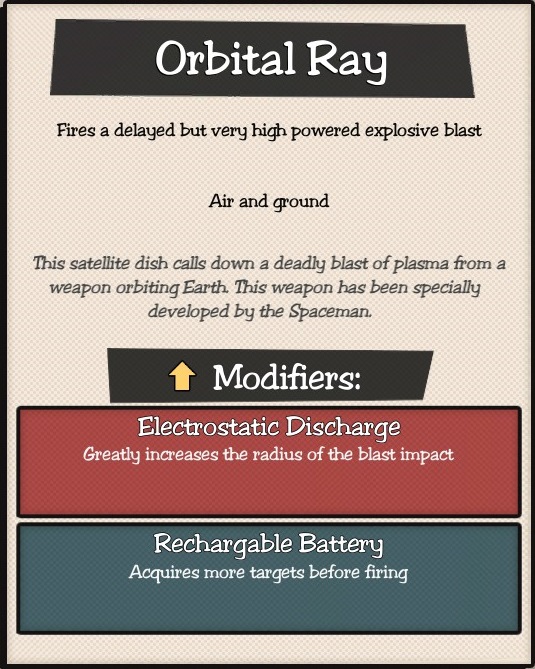
Orbital Ray is an curious structure that will fire a powerful laser down to the target it locked down. The blast is somewhat delayed and if the target dies before the laser is fired the structure won't fire, but will still enter in the cooldown state.
Electrostatic Discharge will increase the blast radius of the laser, if you can cluster enemies together then this modifier becomes very useful.
Rechargeable Battery should increase the number of targets the Orbital Ray locks on before firing, but from what I've tested there isn't a big change since it seems that the structure always fires after catching at least 3 Martians.
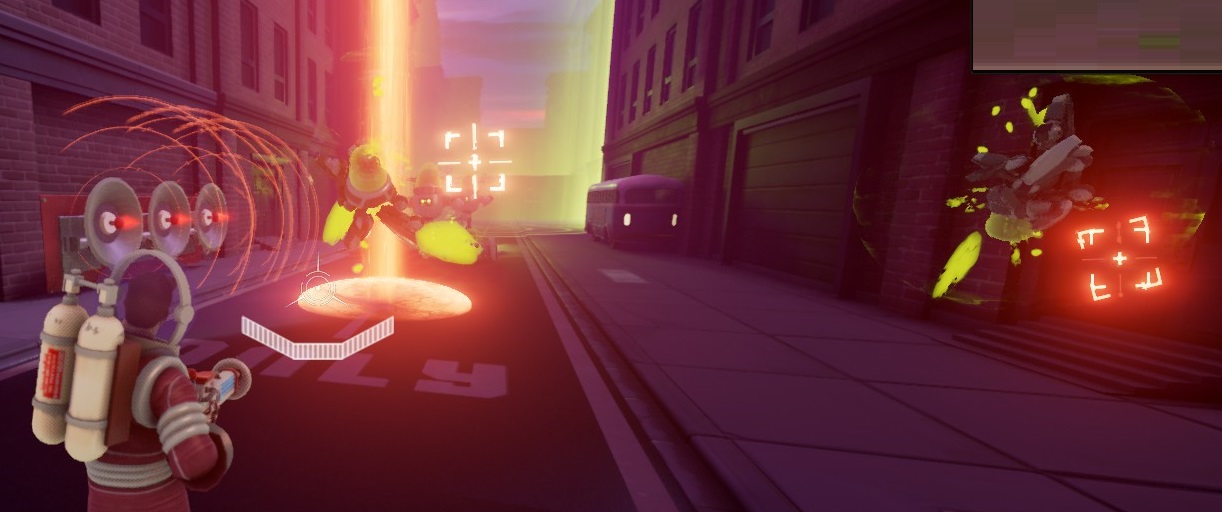
The Orbital Ray is powerful, but to get the best out of it use The Spaceman's ice and freezing weaponry to keep enemies in place for it.
_______________________________________________________
 Cost: $1200 ($1000)
Available to: The Captain
The Rocket Scientist
The Agent
The Spaceman
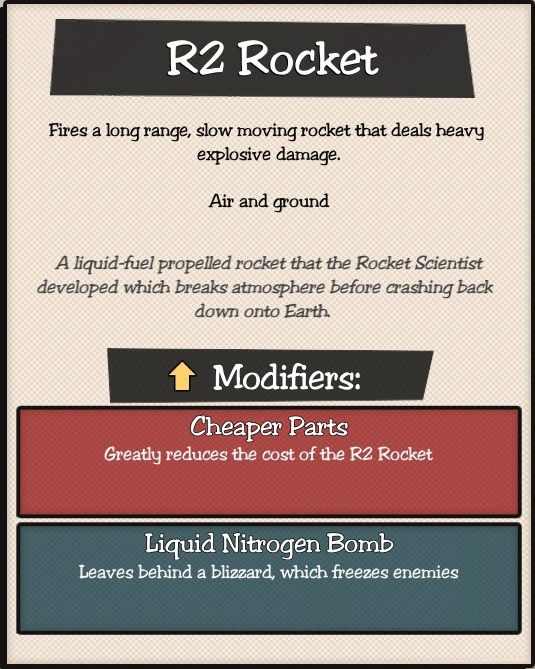
R2 Rocket is probably one of the most damaging structures of the game and it has a VERY large area of activation, entire maps if they're small enough, and has a very large area of effect as well. Unfortunately it's also by far the most expensive structure of the entire game and Fortified is a bit stingy with money as it is and it also has a very, very slow fire rate (about 8 seconds of cooldown), so the practicality of this structure may vary a lot. On the plus side this is one of the few structures that can wreck royally Barricade aliens, so there's that.
Cheaper Parts cuts structure's cost in $200, $1000 is still a lot of money especially in co-op, but makes setting more of these structures a bit (emphasis on "bit) more viable.
Liquid Nitrogen Bomb gives this structure an ice effect that will freeze enemies hit by it for a short while. Since the blast radius of this thing is enormous this can work to your advantage. It'll leave a blizzard where it landed as well just like Freeze Ray's secondary fire.
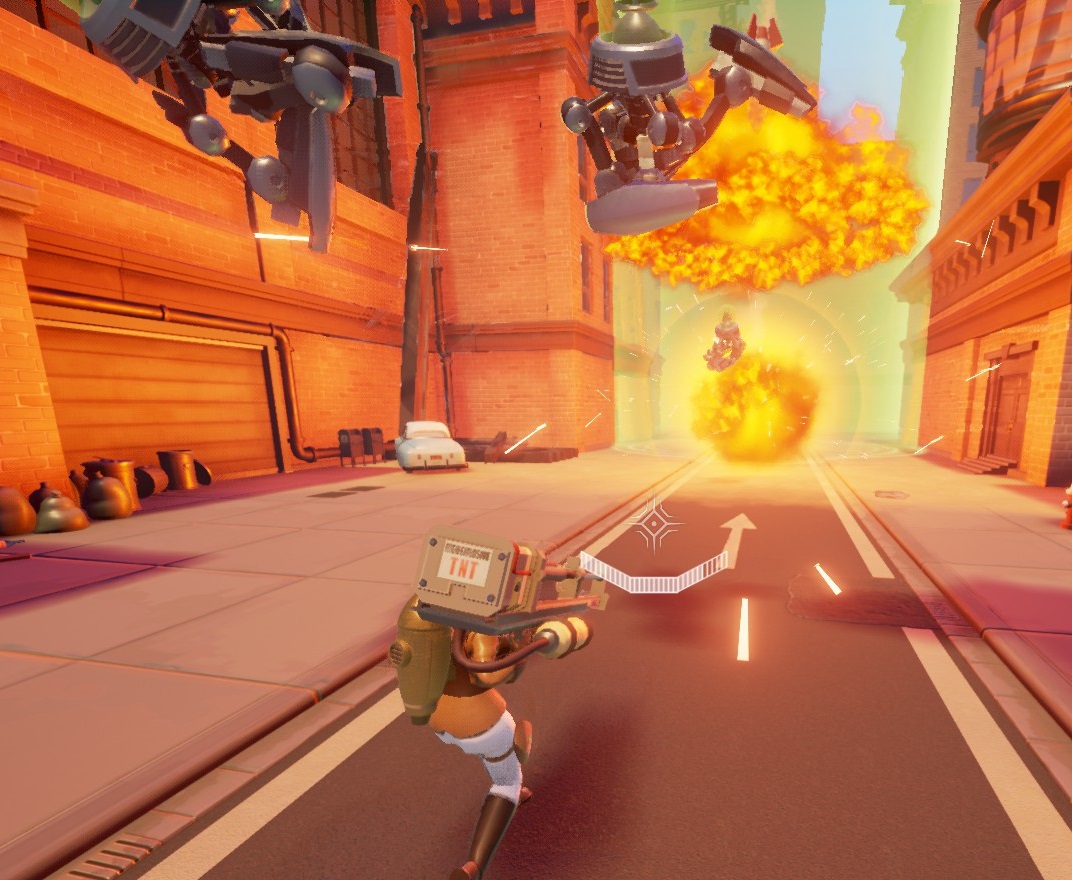
R2 Rocket will prioritize strong enemies instead of groups. If an Annihilator is on the map it'll fire at it instead of a large group of Invaders or enemies beating a launch pod which can be quite annoying.
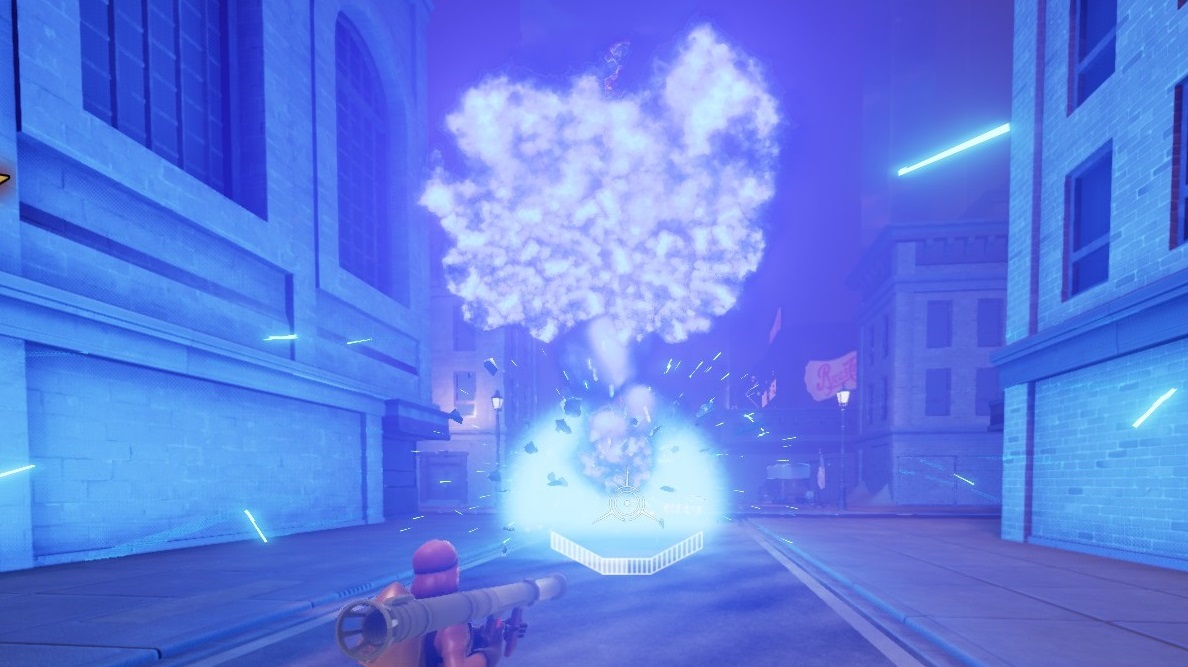
You can't deny that blue explosion looks really cool (no pun intended).
📦 Weapon Warehouse
Every weapon has a primary and secondary fire mode with the secondary being almost always powerful but very ammo consuming.
Like structures most weapons must be purchased with Unlock Points earned by leveling up and so does every modifier unlock (one point for both modifiers as well).
_______________________________________________________
The Spaceman
The Rocket Scientist
The Agent
The Agent
The Rocket Scientist
The Agent
The Spaceman
The Spaceman
The Rocket Scientist
The Spaceman
⠀⤷ Weapons [Normal] {Part 1}
- Freeze Ray
- Grenade Launcher
- Phase Pistol
 Reload time: 3 seconds (est.)
Available to: The Captain
The Rocket Scientist
The Agent
The Spaceman
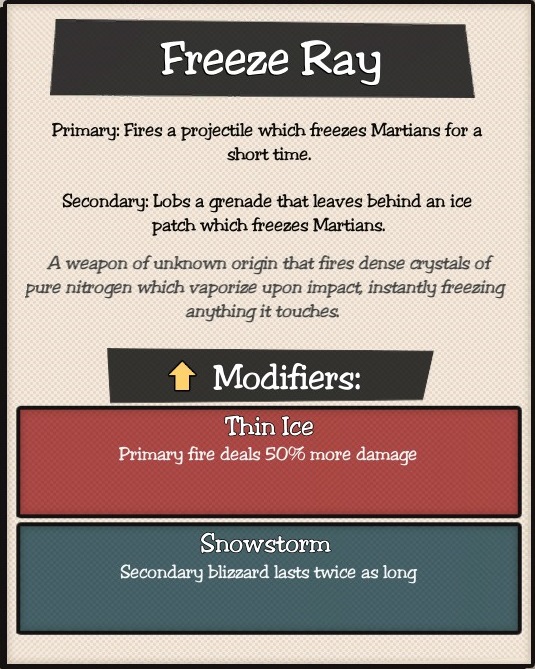
Freeze Ray is a good weapon that helps a lot due to its ice element, it can freeze any type of enemy and slow down considerably rolling Annihilators also having a decent damage output. The secondary fire will create a blizzard that will freeze enemies once and can help you in crowd control to some degree.
Thin Ice strengthens the primary fire which is good considering this weapon naturally has decent ammo and normal damage.
Snowstorm prolongs the effect of the secondary fire, you can use this to help you protect separate spots or give your troops or co-op partners some support.
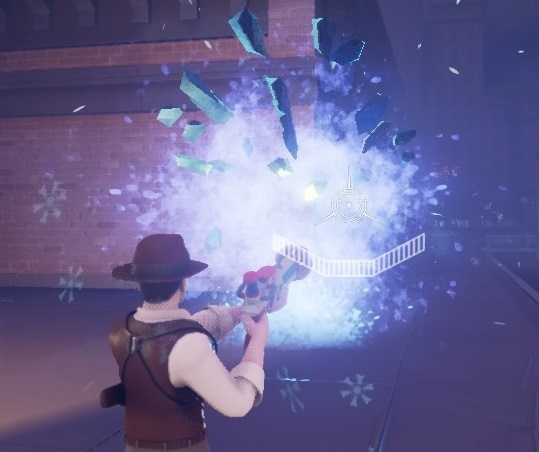
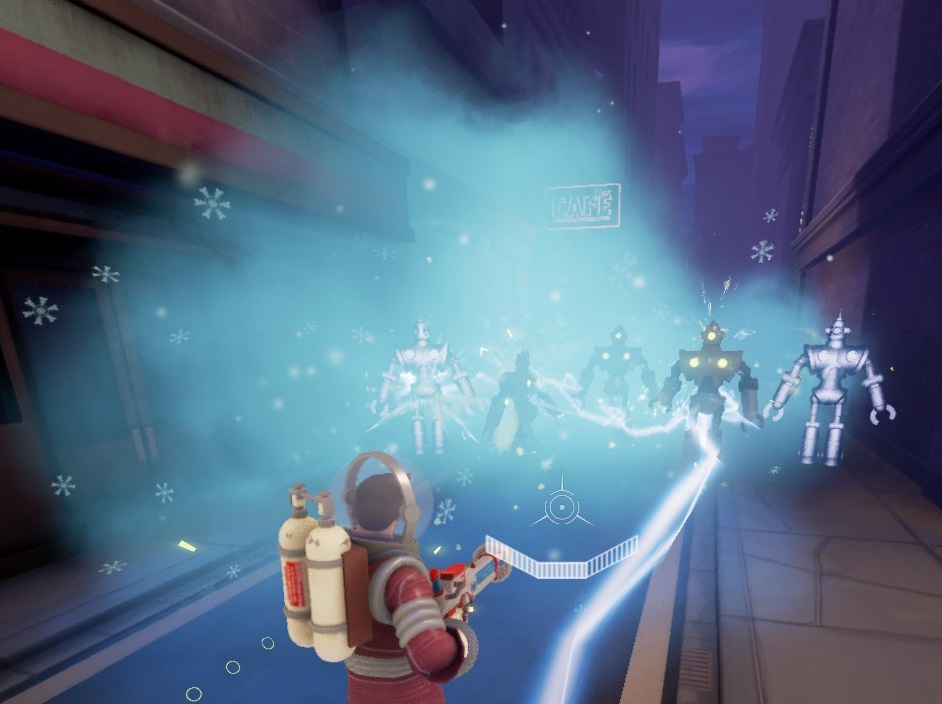
Left: Thin Ice - Right: Snowstorm
_______________________________________________________
 Reload time: 3 seconds (est.)
Available to: The Captain
The Rocket Scientist
The Agent
The Spaceman
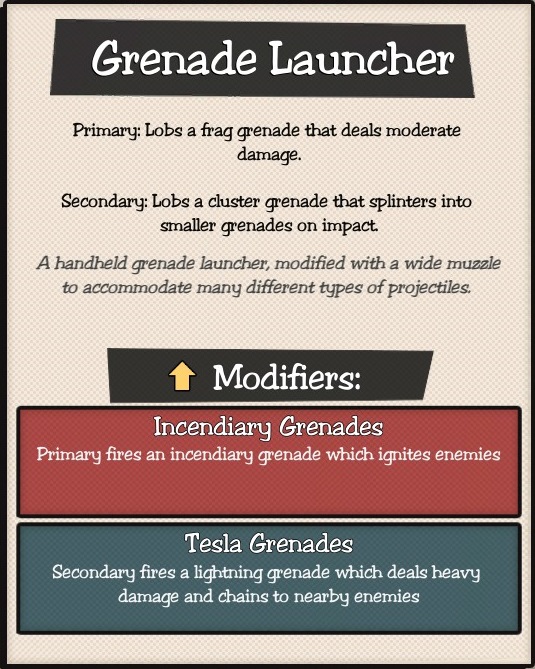
Grenade Launcher is a weapon that will fire shells affected by gravity, so you need to compensate aiming higher than usual if you intend to hit far away targets. The primary fire is the usual explosive round, it'll explode shortly after bumping on anything. The secondary works in a similar vein and will burst into four smaller grenades.
Incendiary Grenades increases the power of the primary fire of this gun and is quite useful. It also increases the blast radius and enemies ignited will take a bit more damage as well.
Tesla Grenades turns the secondary fire into something more or less like Shotgun's secondary fire, a lightning ball that will damage whatever it hits and the damage will jump to another target. On the paper this modifier sounds great, but the Tesla Grenade doesn't do as much damage as you'd think and eats way too much ammo (half of the "magazine").
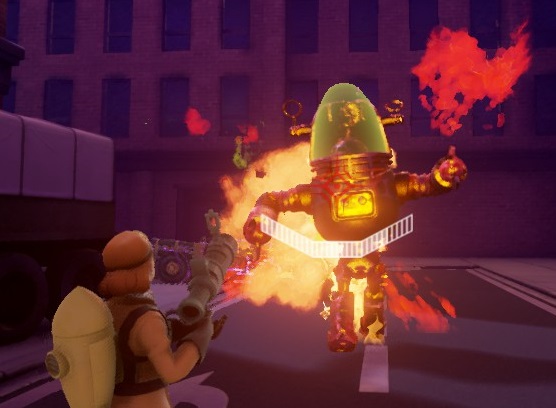
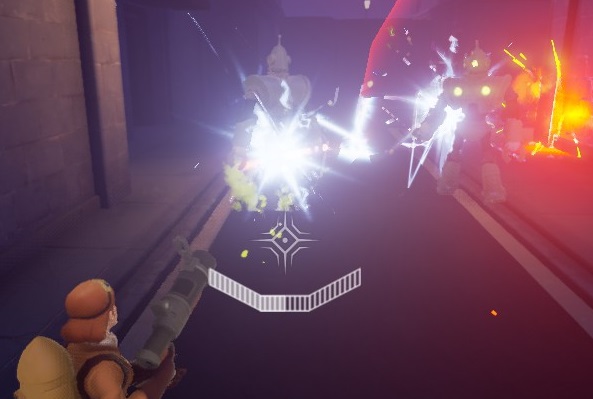
Left: Incendiary Grenades - Right: Tesla Grenades
_______________________________________________________
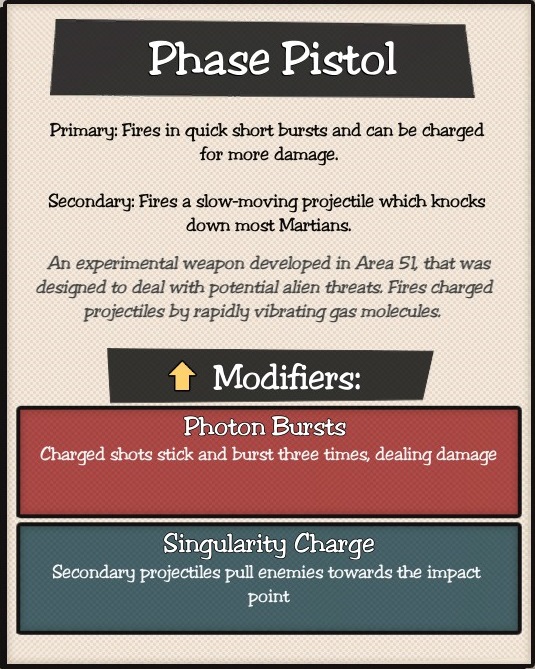
 Reload time: 3.5 seconds (est.)
Available to: The Captain
The Rocket Scientist
The Agent
The Spaceman
Phase Pistol is the basic firearm for The Agent and The Rocket Scientist and is another gun without any elemental modifiers, you can shot the primary fire normally with quick clicks or hold the fire button and charge for bigger damage.
Photon Bursts will give this weapon some crowd control capability as the three bursts caused by a charge shot has decent strength, about the same strength of the charged shot itself.
Singularity Charge will cause the secondary fire to mimic the Attractor structure with more or less the same efficiency so this can be useful if you carry a good area damage gun along like the Grenade Launcher.
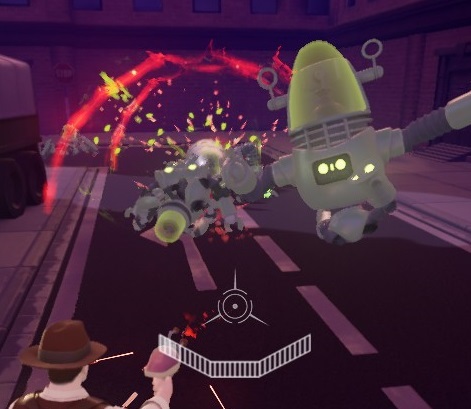
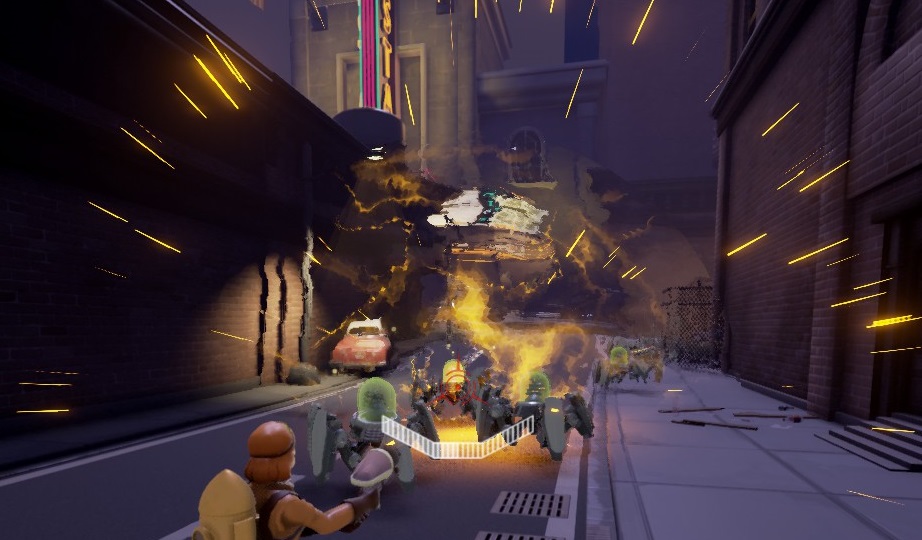
Left: Photon Bursts modifier - Right: Singularity Charge
⠀⤷ Weapons [Normal] {Part 2}
- Rifle
- Shotgun
- TNT Launcher
 Reload time: 3 seconds (est.)
Available to: The Captain
The Rocket Scientist
The Agent
The Spaceman
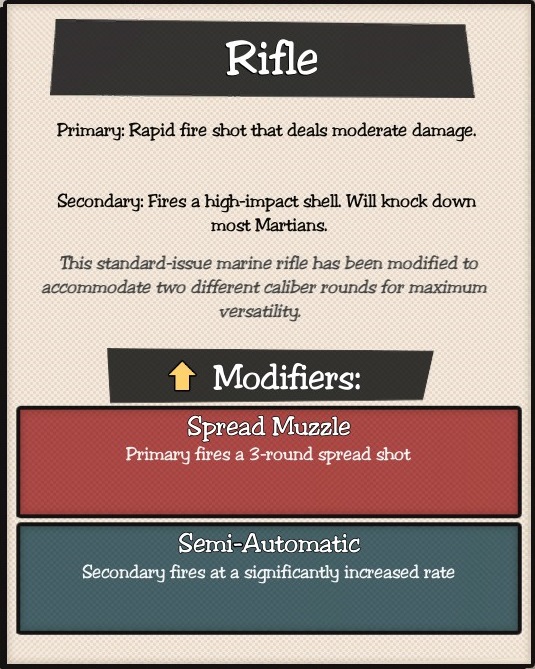
Rifle is simple gun, but can be effective if you use with the right modifier. It doesn't have any elemental damage to it, but it's raw firepower and general usage makes it a good weapon to carry along anything else.
Spread Muzzle turn the modest damage of the Rifle into something much more respectable, you can use it to wound several enemies at once or get in close and fire away dealing thrice as much damage as you used to.
Semi-Automatic is a good tool to carry to knock Invaders, Disruptors and most aliens, off your back or simple so they can take more fire from your troops or structures.
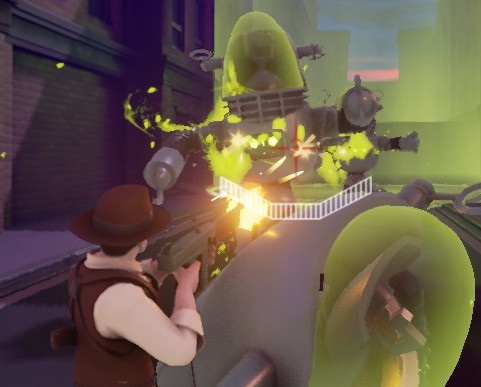
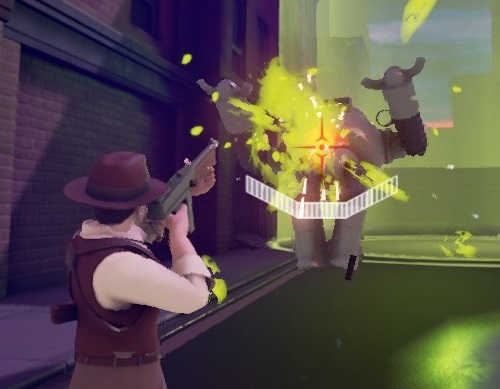
Left: Primary Fire with Spread Muzzle - Right: Secondary fire knocking back a Disruptor
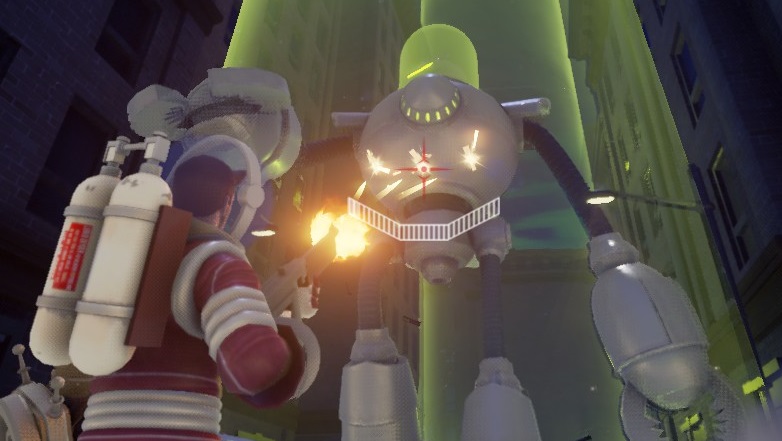
The bigger your target is, the easier is to take full advantage of Spread Muzzle.
_______________________________________________________
 Reload time: 3 seconds (est.)
Available to: The Captain
The Rocket Scientist
The Agent
The Spaceman
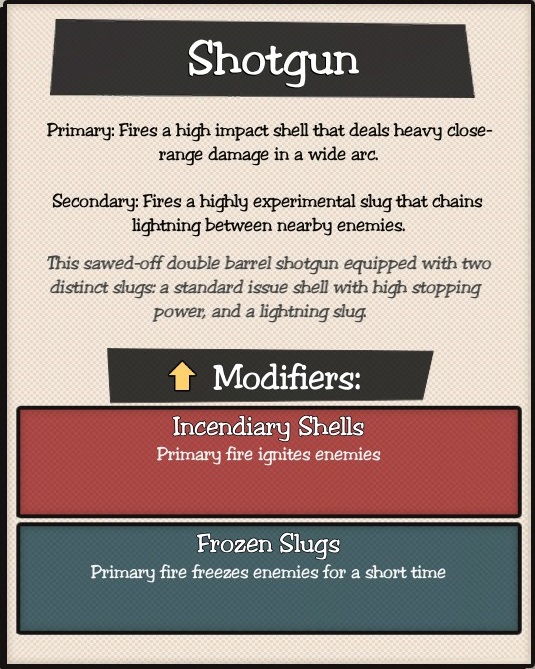
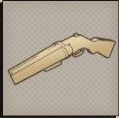
Shotgun is a basic firearm that The Captain and The Spaceman starts with. The primary fire has very low fire rate and you need to be a bit close to deal serious damage, but will knock lighter enemies around and is reliable and versatile being able to have either fire or ice damage. The secondary fire will fire a single projectile, slower than usual, that deals some damage to the enemy hit and will cause the damage to jump to another one close to it.
Incendiary shells give this weapons more firepower (pun intended) and enemies set on fire will take a bit more of damage.
Frozen Slugs has a good chance of freezing enemies solid. Not every pellet has the freezing effect but if you shot even at a good distance you might freeze enemies hit by it.
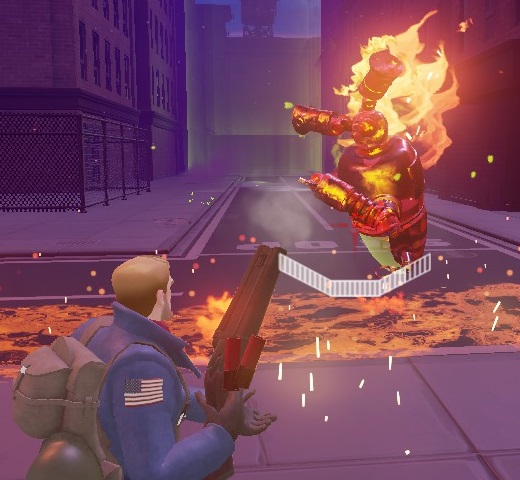
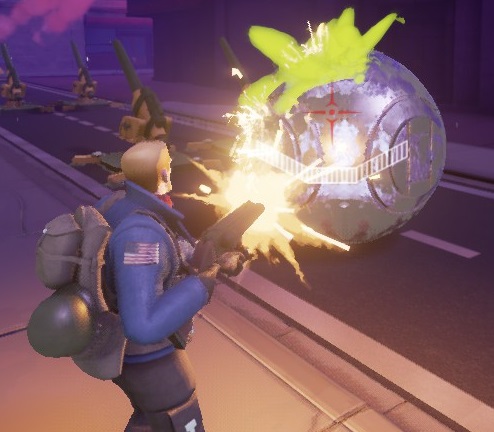
Left: Incendiary Shells - Right: Frozen Slugs
_______________________________________________________
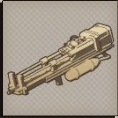 Reload time: 4.5 seconds (est.)
Available to: The Captain
The Rocket Scientist
The Agent
The Spaceman
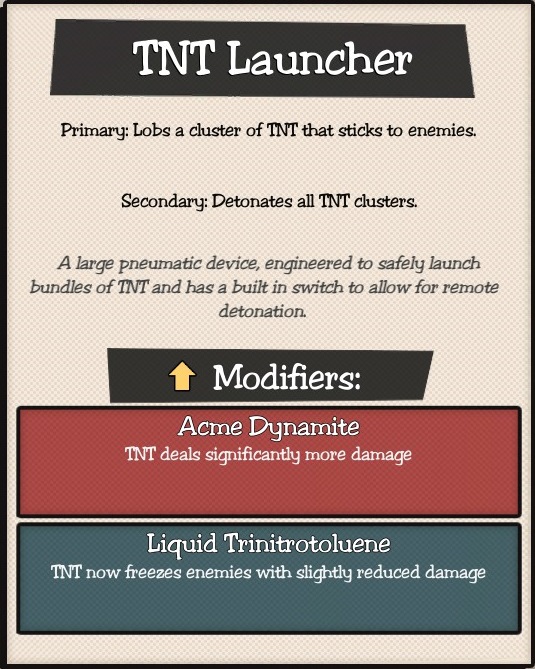
The TNT Launcher is an odd weapon at first. Its primary fire launches explosive charges that will stick to enemies and the secondary will detonate them (so will reloading or firing when you're out of ammo). You can either detonate after firing once or after unloading the entire "clip". Hitting the charges with another explosive source will also detonate them.
Acme Dynamite increases the raw firepower of this weapon, nothing to astonishing level, but still better than nothing.
Liquid Trinitroluene swaps a bit of damage for ice and freezing. A good option in case you need one (and Rocket Scientist's ONLY ice weapon damage).
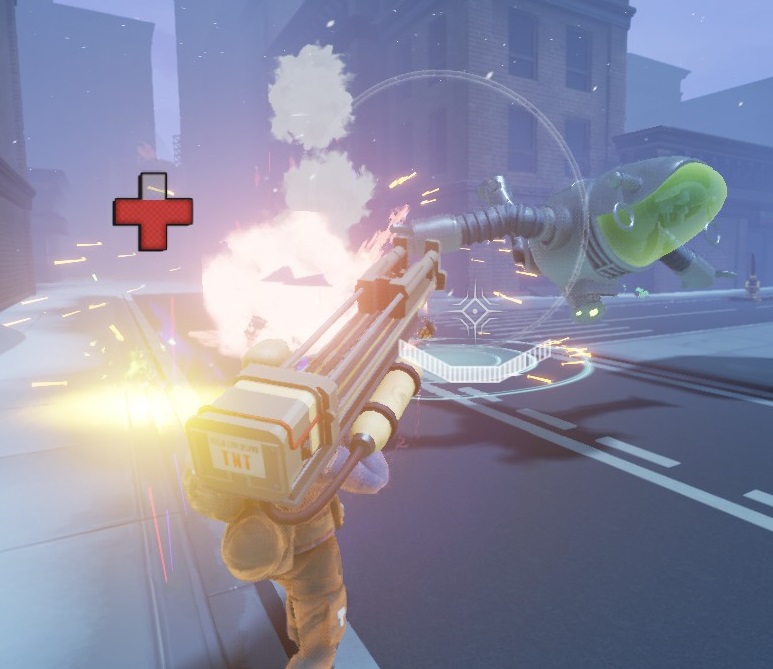
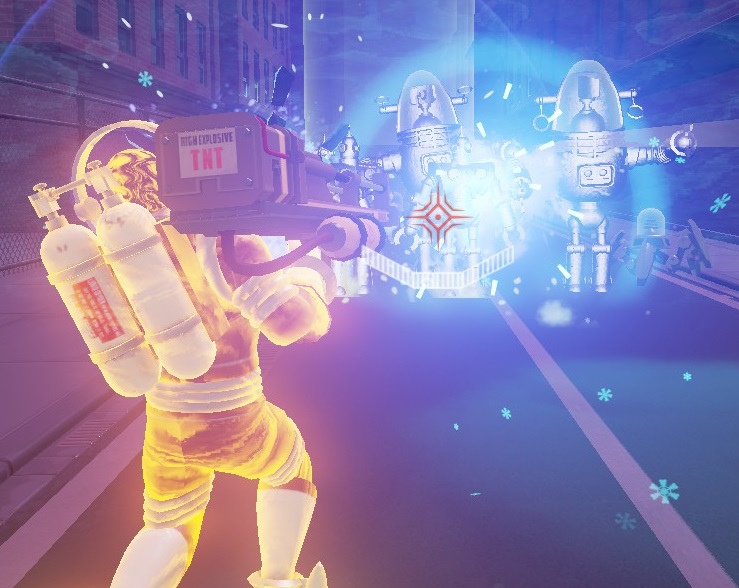
Left: Acme Dynamite - Right: Liquid Trinitroluene
⠀➥ Weapons [Unique]
- Bazooka
- Cryo Blaster
- Death Ray
- Flamethrower
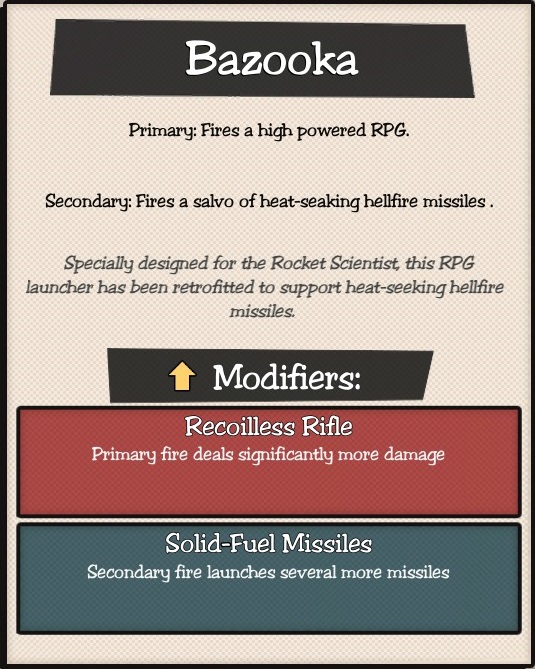
 Reload time: 4.5 seconds (est.)
Available to: The Captain
The Rocket Scientist
The Agent
The Spaceman
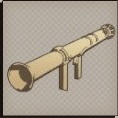
This thing has some of the strongest weapon damage of the game and that can be further enhanced with its modifiers. But the Bazooka is slow firing and has a long reload time, so aiming your shots is recommended (unless you're with Mad Scientist active). The secondary fire launches a set of homing missiles at the enemies, the homing has weird properties and sometimes it may do an almost 90º turn to hit enemies while other it'll simply fly ahead.
Recoilless Rifle increases the strength of the primary fire to the point where, on solo matches, it can one shot Drones and Invaders.
Solid-Fuel Missiles makes the secondary fire from this weapon to fire five cluster missiles instead of three. The Bazooka has only enough ammo for firing two of them but if you have Heroic Power you can go crazy with it.
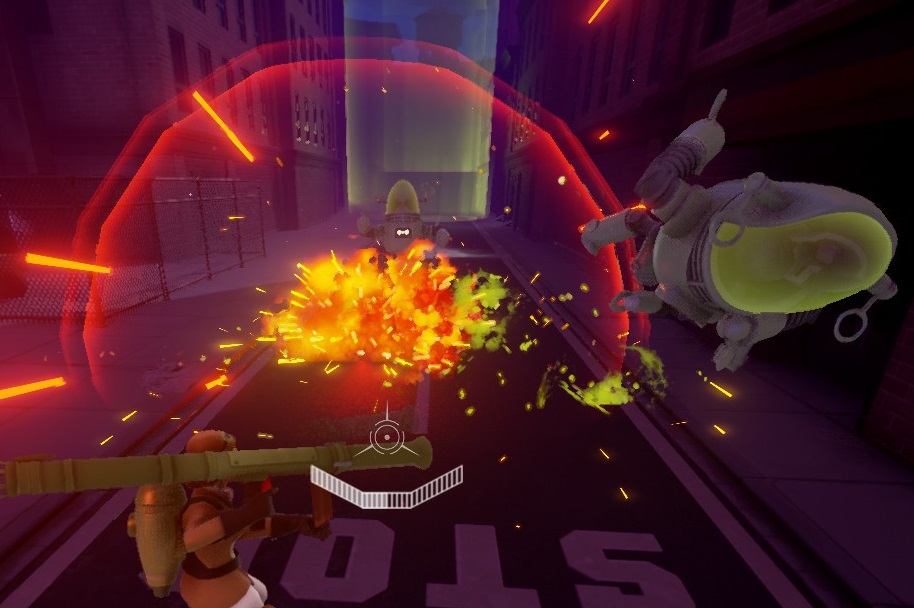
It's a freaking Bazooka. Enough said.
_______________________________________________________
 Reload time: 4.5 seconds (est)
Available to: The Captain
The Rocket Scientist
The Agent
The Spaceman
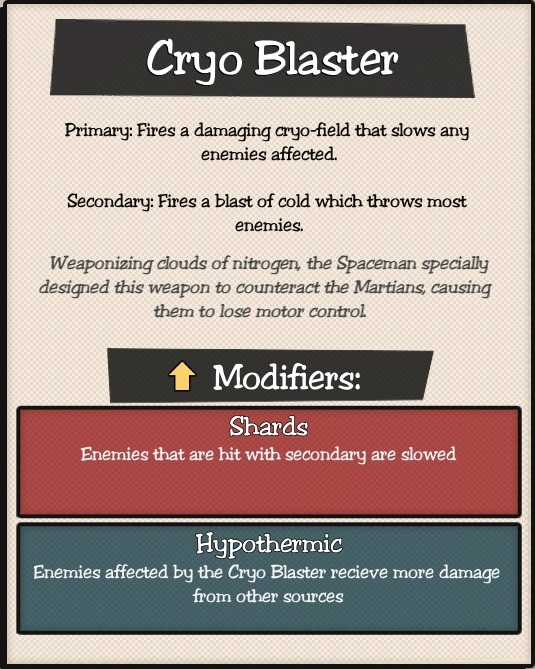
Cryo Blaster is basically an ice flamethrower. Curiously it has better range than The Captain's unique weapon but the damage is a bit lower. The secondary fire of this weapon will fire a short ranged sonic boom that will knock enemies away, it has good width so you can use to stall groups of Invaders and Disruptors.
Shards causes enemies hit by its secondary fire to be briefly slowed, so you can more or less act as an mobile Cryonic Dampener, but watch out as the secondary fire of this gun has very poor fire rate.
Hypothermic decreases the defense of enemies, using this while you're close to your troops and structures can be very effective since the Cryo Blaster itself has a pretty decent damage.
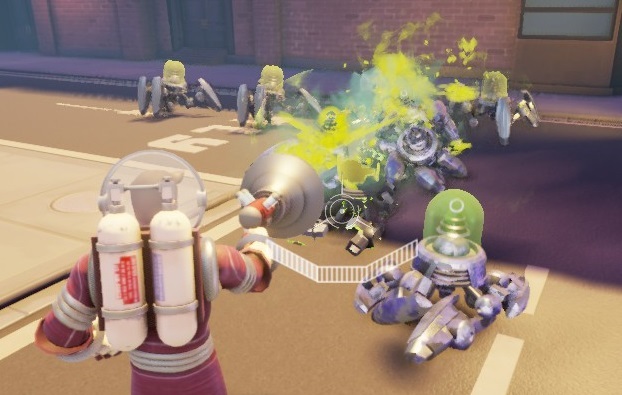
Cryo Blaster's primary fire has no problem in handling the smaller enemies, but trying to use it against Exterminators, Raiders or Invaders tend to end poorly.
_______________________________________________________
 Reload time: 3 seconds (est.)
Available to: The Captain
The Rocket Scientist
The Agent
The Spaceman
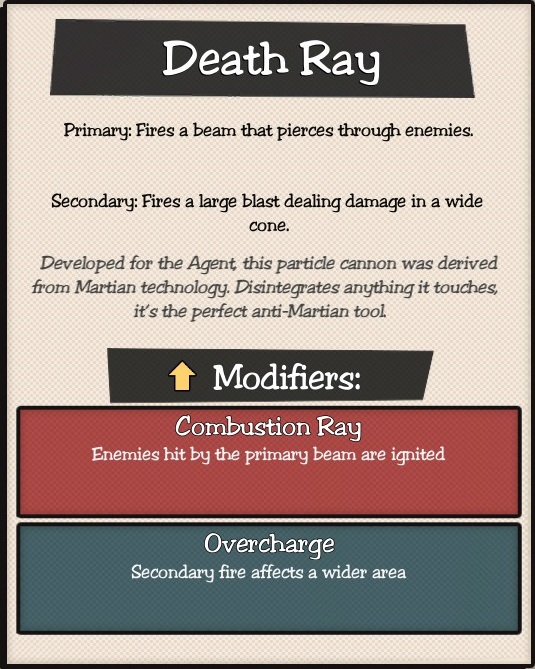
Death Ray is here to put emphasis on The Agent's ability to slaughter Martians. This weapon is very powerful and has the ability to either get one target with its primary fire or groups of them with the secondary (with a short range wave burst). The secondary fire eats half of this weapon's clip, so watch out.
Combustion Ray is a good modifier to hit enemies lined up, although you'll need to have good aim to take advantage of this thing properly.
Overcharge increases the area of effect for this weapon's secondary fire, it's a good something if you plan to fight a lot of enemies, but beware of its short range which makes going for groups of Invaders quite risky.
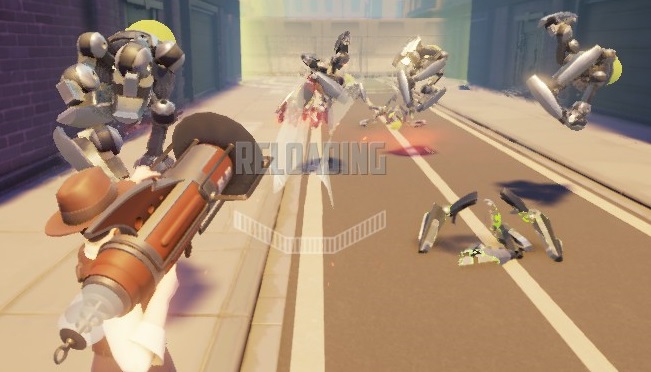
Death Ray's secondary fire doesn't have a lot of range but is good to sweep and knock small trash.
_______________________________________________________
 Reload time: 4 seconds (est.)
Available to: The Captain
The Rocket Scientist
The Agent
The Spaceman
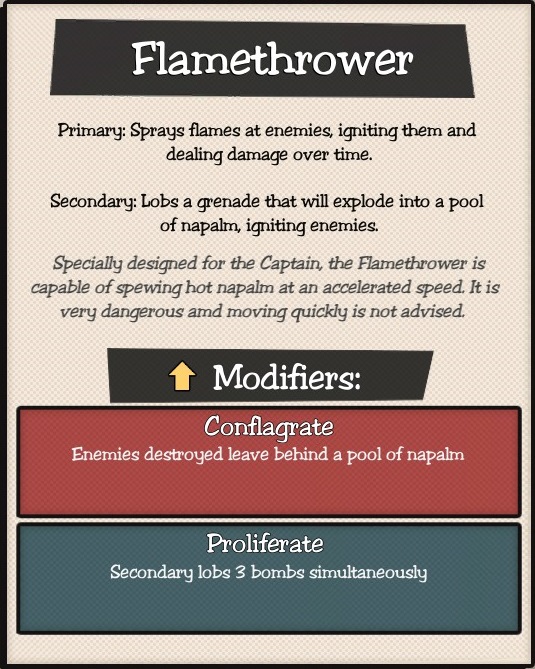
Flamethrower is a powerful weapon, but a bit difficult to use. The primary fire is the usual burning spewing stuff that will destroy anything that gets too close, the range of this is shorter than it looks and The Captain will walk significantly slower when firing, so me extremely careful. The secondary fire launches a fireball that will leave a pool of fire where it lands.
Conflagrate causes enemies killed by this weapon to leave pools of fire like some fire based structures like Explosive Barrels and Exhaust does. When used on enemies that are numerous like Drones this modifier can be very helpful.
Proliferate makes the secondary fire launch three fireballs, side-by-side, which helps cover a wider area with it. Remember the Flamethrower has only enough ammo for two charges of the secondary fire.
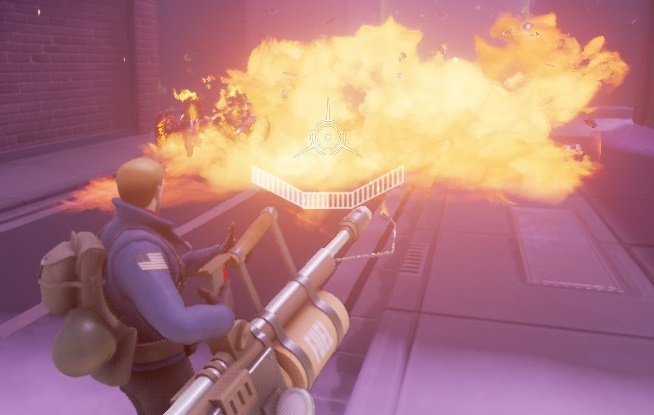
Alien BBQ coming right up.
🙇 Closing

Here it ends. Thank you for reading and I hope this helped you even if a little. Please do not forget to rate this guide so more people can find it.
http://steamcommunity.com/sharedfiles/filedetails/?id=2555082930 http://steamcommunity.com/sharedfiles/filedetails/?id=321647347 http://steamcommunity.com/sharedfiles/filedetails/?id=505739685 http://steamcommunity.com/sharedfiles/filedetails/?id=482075212 http://steamcommunity.com/sharedfiles/filedetails/?id=729779266

- Upgrading to PremiumTeam Fortress 2★ 5 (20k)1441k views11k ♥6 minUpdated May 11, 2022
- No More Room in Hell Official ManualNo More Room in Hell★ 5 (2.8k)569k views2.1k ♥29 minUpdated Apr 22, 2019
- NMRiH Community Hosting GuidesNo More Room in Hell★ 5 (526)351k views653 ♥1 minUpdated Aug 10, 2022
- ULTIMATE GUIDE FOR GAME DEV TYCOONGame Dev Tycoon★ 5 (5.8k)326k views10k ♥4 minUpdated 23 Jan, 2014
- How to 'Git Gud' Soon™MORDHAU★ 5 (2k)318k views3k ♥68 minUpdated Nov 16, 2024
- Лучшие кооперативные игры SteamPAYDAY 2★ 5 (1.5k)315k views2.1k ♥56 minRussianUpdated Apr 27, 2025






This guide was created by its original author on the Steam Community. Are you the author and want it removed? Request removal.