Gee's Ultimate Grenade Guide
Introduction
The aim of this guide is to teach you practically everything I know about grenades after a combined 1000 hours in Insurgency and Day of Infamy.
Broadly speaking, this guide has two parts. The first is a rigorous and exhaustive look at the systems and mechanics of the grenades and their throwing in DOI. This is necessary if you’re to master their usage. The second is a principled look at how grenades can be used effectively.
An issue is that there’s pretty much no official documentation about many aspects of the game, so all of this information is taken from the poor game information and experience.
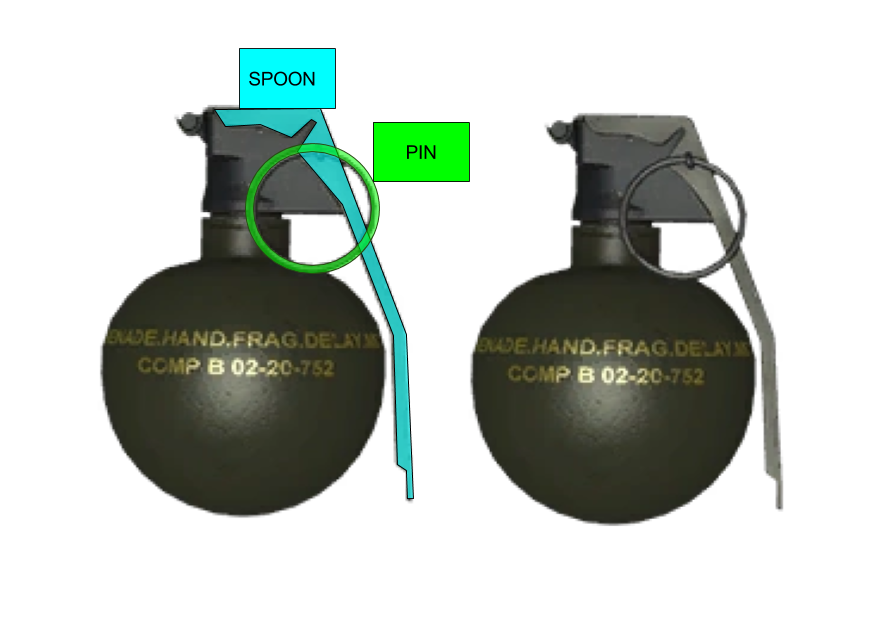
The pin is the thing which keeps the spoon in place. All grenade throws begin with the removing of this safety. The timer fuse for the grenade only begins once the spoon is removed, and it’s on this point that Left Click is different to Middle and Right Click. With a Left Click, the spoon is automatically removed. With the Middle/Right Click, the spoon is only removed upon the throw or when Left Click is clicked (while holding down Middle/Right Click). In dot point form:
- The pin is always removed when a mouse button is clicked (and this is reversible).
- If Middle Click is used an underhand grenade throw is initiated, otherwise an overhand throw is initiated.
- Depending on which mouse button is clicked the spoon may be released immediately after the pin is removed (Left Click) or may be released when the player chooses to release it (Right/Middle Click) – thus controlling when the fuse begins.
Spoon and pin grenades
We’ll start with this type of grenade, since it’s the easiest to explain and probably the one that is most familiar to you.
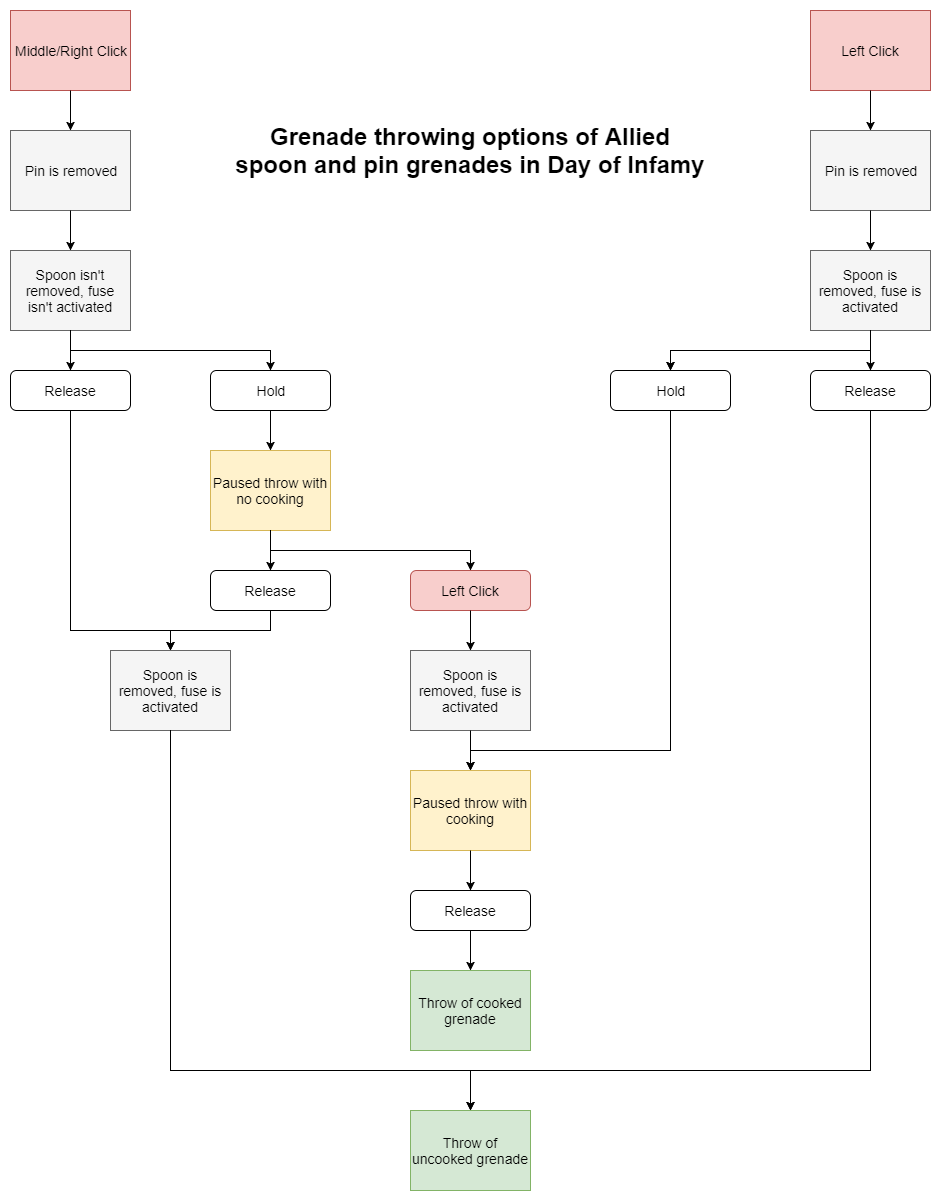 Let’s unpack this flowchart.
 - Red boxes are new clicks.
- White boxes are options of what you do after the click.
- Grey boxes are actions that the player initiates as the result of that click.
- Yellow boxes are paused states.
- Green boxes are outcomes.
- Pin removal: visually obvious left hand reaches across to pull ping; sound is a quiet smooth metal sliding.
- Spoon release: visually unobvious (unobservable if the right hand is offscreen) thumb releases spoon; sound is obvious “ching!”
The diagram teaches you two things. Firstly, that underhand grenade throws can be cooked. Secondly, that Right Click (and Middle Click) allows you to pause a throw indefinitely. If you’re waiting for something to occur, then a paused throw without cooking can be useful.
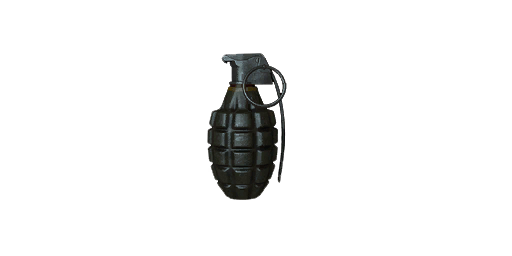
The American explosive hand granate grenade (while writing this I legitimately accidentally wrote “granate”, we German now boiz). Smoke
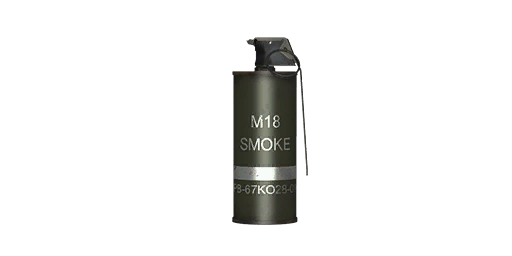
The American smoke. The model for the grenade has M18 written on it, so I’m not sure while it’s only called “Smoke”. No. 36 Mills Bomb
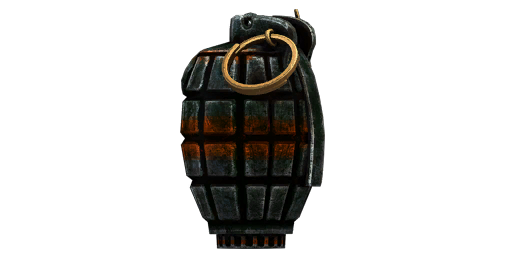
One of two Commonwealth explosive hand grenades. You can use this or the No. 69 impact grenade. This grenade has the shortest fuse time of all grenades – 3 seconds.
German stick grenades
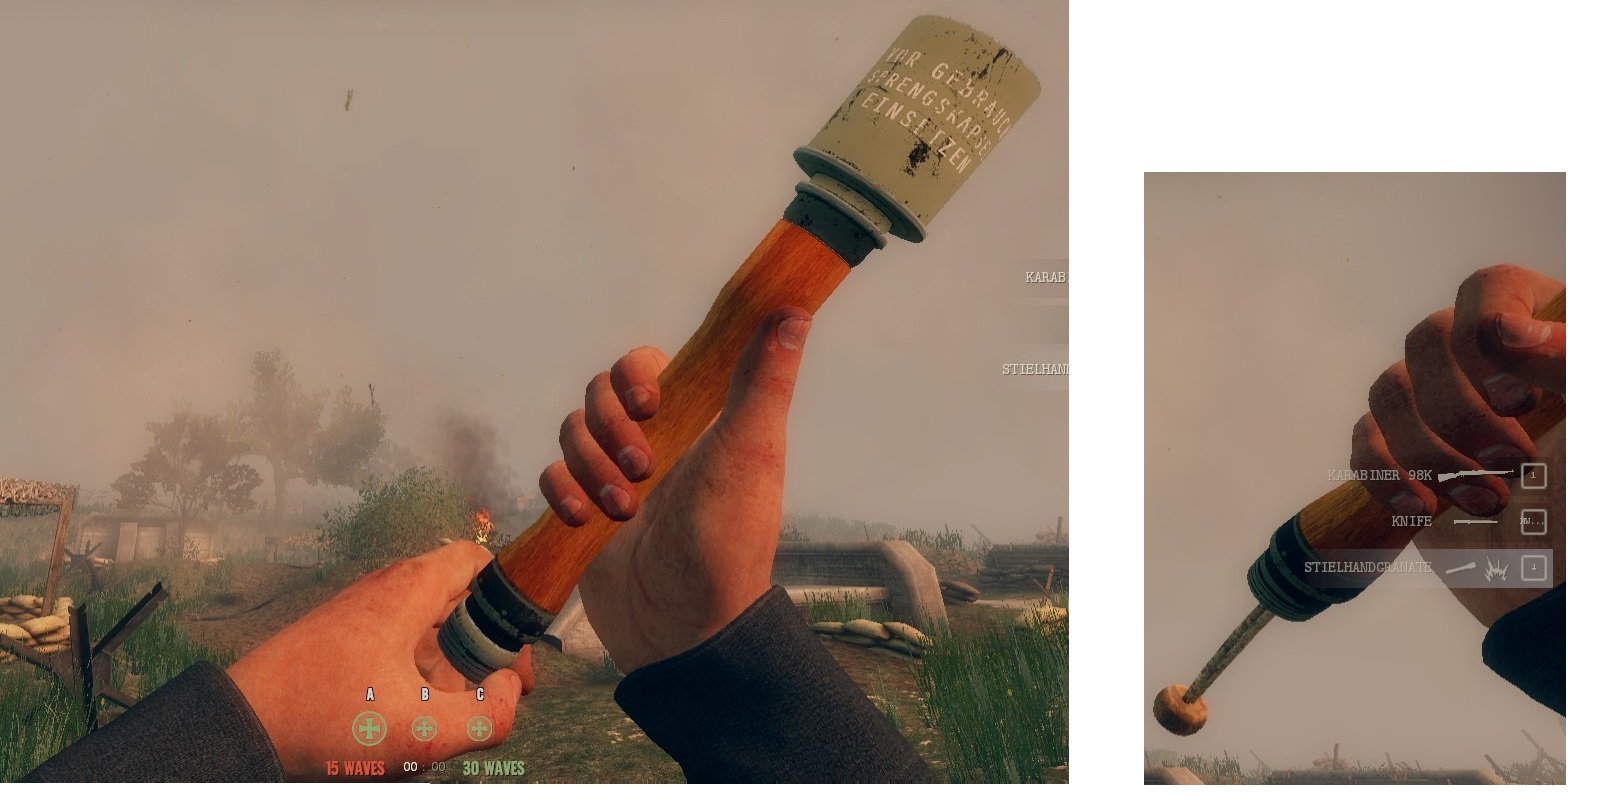
As you’re about to see, this results in a really weird flowchart.
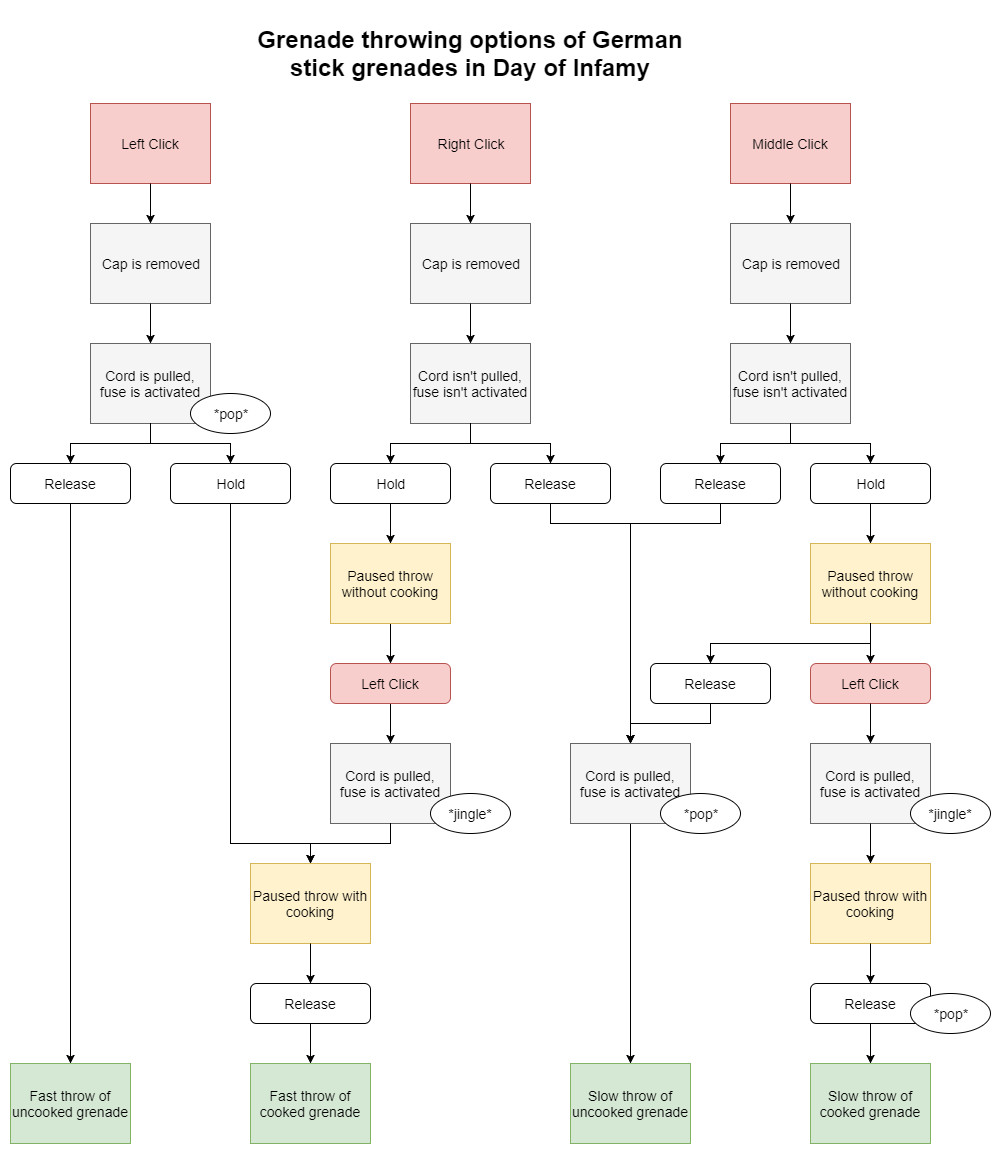
The cues for each action are as follows:
- Cap removal: visually obvious left hand gripping the bottom of the grenades; sound is of a screw cap being removed
- Cord pull: visually is sometimes obvious, sometimes literally impossible; sound depends on which throw you’re doing, but there’s a jingle like some keys and a pop like flicking a cap off
In the next section I’m going to go into detail about what’s going on, but let me condense the above diagram for you.
- Usage is pretty much the same as spoon and pin grenades.
- The major difference that’s worth remembering is that there are slow throws: an increased time delay between releasing the mouse and the grenade leaving the hand. While the timing is different, the distance of the throw is the same.
What makes no sense at all is that this behaviour is inconsistent depending on the type of throw you’re doing. Let’s consider the three situations:
Firstly, we have the situation which makes sense. It’s the tap of Right Click or Middle Click. The cap is removed, the right hand is brought back and then the left hand also comes back to pull the cord.
Secondly, we have a situation which is a bit weird. It’s the cooked Right Click throw. If you hold down right click as in the previous situation, you pause the throw with the fuse unactivated. If you tap Left Click, you activate the fuse without bringing your left hand across. I have no idea how the cord was supposed to have been pulled, but there you have it. Importantly for you, this does not result in a slow throw. Since the cord is pulled, there is no reason for the left hand to come across again (even though it didn’t come across the first time).
Thirdly, we have the situation which doesn’t make sense and is inconsistent with the previous two situations. It’s the cooked Middle Click throw. Using the logic of the second situation, an underhand throw of a cooked grenade should be a fast throw - because its fuse has been activated and so doesn’t require the left hand pulling the cord. But for whatever reason, the left hand will reach across for this throw. This means that all underhand throws, regardless of cooked or uncooked, are slow throws.
And then my final “what the hell” is the sounds. Why are the sounds for pulling the cord while the throw is paused a jingle, while the cord pull on a non-paused throw is a pop? Was ist das?
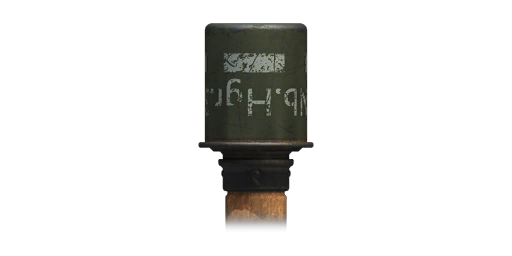
The German smoke. 5s fuse. Stielhandgranate
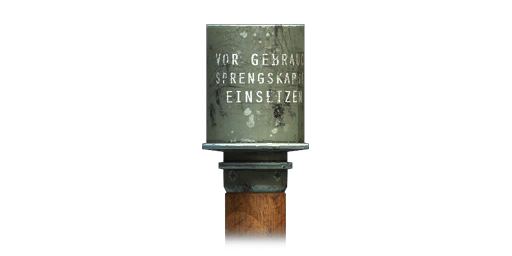
The standard German explosive grenade. 5s fuse. Splitterringgranate
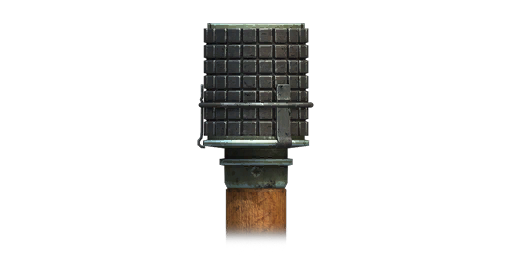
It’s the Stielhandgranate, but it has a larger explosive radius and damage. Its appearance is notable for the shrapnel pieces on the head. The explosion is very different to the Stielhandgranate. Visually, many flecks of white hot shrapnel are thrown outwards. Aurally, the explosion includes what sounds like shrapnel pieces flying about and bouncing off of each other (ie. a zinging). I don’t know if the flecks of shrapnel are merely a visual addition to the explosion or if they reflect actual particles that can damage people. This grenade is unique in that you can carry a maximum of only 2, while you can carry 3 of the others. 5s fuse.
Impact grenades
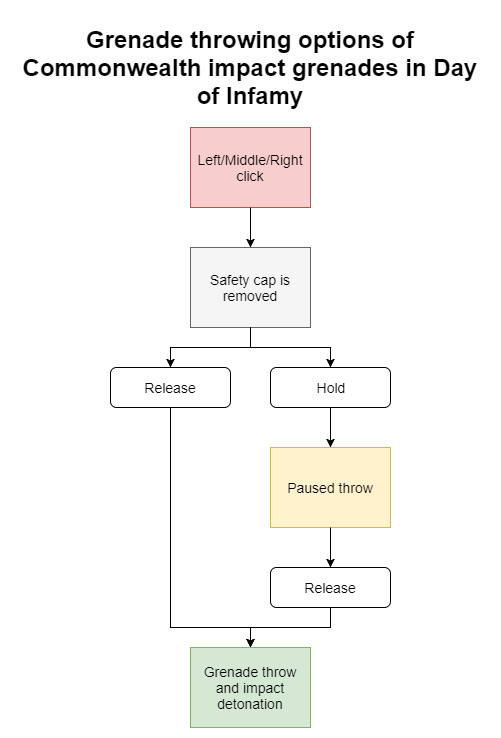
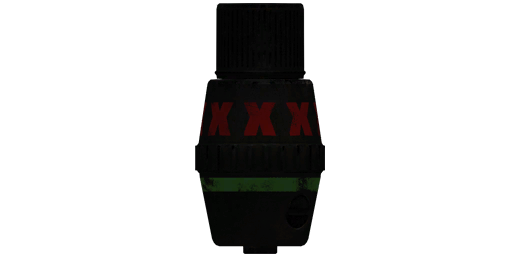
The explosive grenade with the smallest radius and least damage. No. 79 Smoke Grenade
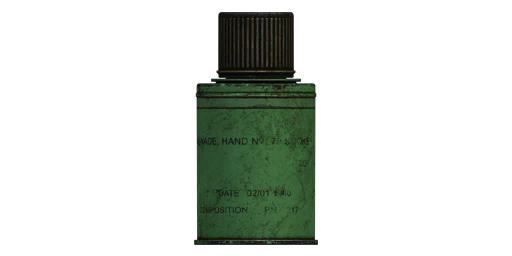
The Commonwealth smoke grenade. Smoke spreads quite rapidly. No. 77 WP Grenade
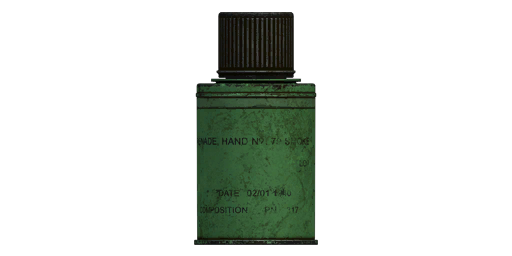
Like the No. 79, but with smoke that injures and possibly kills. Smoke and white phosphorous can be differentiated by the presence of floating glowing specks in the WP (this is also true for Commonwealth incindiary fire support). Additionally, WP emits a harsh and rather static-like sound while smoke sounds more fluffy. WP can be used like a smoke grenade in a pinch. Note that the image above is taken from the wiki, and I don't know where they've taken this image from. Either way, the 77 does look different to the 79. The 79 is a dark green, while 77 is slightly brighter.
Grenade qualities and comparison
The largest explosive grenade is certainly the Splitterring, while the smallest is certainly the No. 36 Impact. What I don’t know is if there’s any difference among the other grenades.
Contrary to popular belief, I do not believe that there is a difference in throwing distance between grenade throw distances of stick grenades and the others. I did some basic testing and there wasn’t any difference in terms of throw distance, although their rolling characteristics are a bit different. So as far as I’m aware, all grenades have the same arc when throne.
Impact smokes are great because they their smoke expands very quickly.
It’ll be important to remember that German grenades have the potential to be a slow throw, while all other grenades and Germans grenades thrown with a fast throw have the same throwing speed.
As for the No. 36 Mills and No. 69 Impact, I don’t think one is objectively better than another. If you’re familiar with grenades, you can get them to hit a precise location. In this respect, the tradeoff between explosive power and impact detonation can often be worth it. But, like most things, it depends on your playstyle.
How to be a good grenadier
This has its most satisfying usage with impact grenades. My favourite is Crete B, where the attacking Germans can be upstairs across the street/fountain from the B building. Watching the grenade soar in through the window and a body come flying out makes you feel like Kobe.
My advice is to practice with grenades, especially in coop where you can find grenades all over the ground.
But let’s say you want to throw out a door into the distance – you have to expose yourself to throw. In this situation, it’s about minimising exposure. You can start the throw animation without having exposed yourself, and lean only when the grenade is about to leave your hand.
I think smoke usage is deserving of a guide all of its own, but I will say that it’s often better to forego accessories such as bayonets and straps, which might come in handy if the particular situation arises, for a smoke grenade which is always handy.
- You can kill yourself with what is now your own grenade.
- You can kill the enemy with that grenade and it counts as your kill.
- The grenade has reduced damage on teammates since it now counts as team damage from you against them.
Fun fact: you can catch grenades in mid-air! It’s ridiculously difficult, but it can be done. If you manage to catch an impact grenade, it’ll drop out of your hands and explode at your feet.
Cooking isn’t complicated, but it’s rarely used. I think the two main reasons are that cooking a grenade means you can’t shoot, and that people aren’t confident with cooking. The first reason shouldn’t be a threat if you’re throwing grenades properly (as I’ll explain later). The second reason is fair, and can be fixed by practicing.
Where I think cooking is the most important is underhand throws. If you underhand throw over a wall, then that grenade doesn’t spend much time in the air – which means it spends more time on the ground, which means that an enemy has more time to chuck it back.
- The explosive you select first at the equipment selection screen is the one that is brought up first when you press 4.
- The Heavy Kit gives you two of the grenades that you pick in the first slot.
- If you have a Light/Heavy Kit and are carrying one grenade, you can pick up an additional grenade of a different sort off the ground.
- If you have the Heavy Kit and you’ve equipped the same grenade to both slots (for a total of three grenades) and they’re all the same grenade, you can still pick a grenade of a different sort from the ground.
- The Heavy Kit does not allow you to carry 3 different grenades.
- If you’re carrying two different grenades, you can hold grenade you want to swap in your hand while you pick up a different grenade to drop the grenade you’re holding.
You know how you can drop your grenade by picking up another, right? If you have 2 or 3 of that dropped grenade, that number of grenade is “contained” in the single grenade that can be picked up. So if someone else comes along and picks it up, they get the 2 or 3 that you dropped even though it looks like just one dropped grenade. If that person has 3 grenades (of a single type, but different to the one that is being picked up) already, they can have 3 of each grenade for a total of 6. (Note: there may be other conditions that need to be met to allow this to happen, I haven't done extensive testing - only found that sometimes I have 6 grenades)
How to be a professional grenadier
The previous section was about being a respectable grenade user. This section is about high level grenade usage. Hold onto your butts boys, because we’re about to get technical.
DOI runs on the Source Engine, so grenades abide by the laws of physics as they are defined by Source.
Unfortunately, the variation of bouncing characteristics doesn’t help you in the skill you should use. Bouncing grenade to get them into a location is basically just the CQB version of throwing from cover. You’re in a room, the enemy’s in a different room and both of you are waiting for the other to peek. Unprofessional grenadiers will try and use the grenade like a rock and hit the enemy in the face front on. A professional grenadier will aim at a doorframe or a wall to bounce the grenade into the enemy’s room. This technique is extremely effective as an attacker against camping defenders.
The place where this will annoy you the most are stairways. If a grenade lodges itself into a stair, then the explosion can easily fail to hit someone higher up because there is no line that can be drawn between that player and the explosion that doesn’t pass through a stair. This is also observable on places where the ground is rough (eg. Dunkirk C, Bastogne A). Very slight differences in ground geometry can prevent an explosion from reaching a place that should look easy to reach.
The lesson is that landing a grenade in a room doesn’t guarantee that you’ll even hit someone in that room, since it might land next to a table leg or behind a couch.
- Velocity of throw: for our purposes, this is fixed (since we assume you’re looking 45 degrees up in the same direction). Think of throwing as like a robot throwing doing the same action over and over.
- Velocity of player: this is variable. In game, you can change your movement speed as well as your jump.
- Velocity of grenade: when velocity of throw and of player are added together, that becomes the velocity of grenade when the grenade leaves the hand
The easiest way to increase throw distance is to just hold down Forward while you throw. Your forward velocity is added to the velocity of the throw, resulting in a further throw.
You can also jump while throwing. This results in the jump’s vertical velocity being added to the throw, resulting in a higher arc. The timing requires some practice, as you need to have the grenade be thrown (leave your hands) as you’re moving upwards. I feel like the jump throw is most effective near the apex of the jump.
You can do the above two movements together to further increase throw distance. As the throw animation pans out, you move forward and then jump at the right moment. The player velocity then has the horizontal and vertical component, which results in a throw with large distance
The usefulness is pretty obvious – longer throws which means you can throw from further back which means that you’re in less danger. That’s true, but where I find these most useful are for underhand throws. Sometimes, overhand throws just roll too much. Underhand throws travel less distance, but follow a nice round arc to get there. That means they don’t roll as much. By using an underhand forward jump throw, you can have the distance without the roll.
Now for the secret technique: the sprint throw. If you’ve tried to throw while sprinting, you’ve probably failed. What normally occurs is this: you’re sprinting, you tap to Throw but the throw doesn’t begin, so you hold down Throw and your sprint stops and the throw begins. I’m here to tell you that there is a way of beginning a throw without stopping the sprint. In fact, there are two ways.
Method 1 (recommended): as you’re sprinting, you need to hold down Left Click for a very specific amount of time. You need to hold down Throw long enough to start the throw, but release immediately when this throw begins. If you hold it down too long the sprint will cancel.
Method 2: as you’re sprinting, tap Right Click and the throw will activate. Now you’re probably thinking this sounds far easier. Well sonny jim, think back to the flowcharts I made. What happens to German stick grenades if you just tap Right Click? Answer: it results in a slow throw. If you’re combining the sprint and jump for the maximum possible throw distance, then the timing is completely different. For this reason, I recommend Method 1. This messy slow throw business also affects the other jumps throws – especially my favourite underhand jump throw. Since underhands for stick grenades have a totally different timing, you need to learn that different timing in order to execute an underhand jump throw.
If we’re doing a moving throw, then our timing will vary the location. If we’re doing a jumping throw, then our timing will vary the velocity of the grenade. Our aim will vary the direction the grenade is thrown in. The spin of the grenade is apparently random. In other words, it’s rarely the case that one grenade throw is the same as another.
I’m relatively certain that what we perceive as “random bounce” is in fact the variables changing how the grenade makes contact with the object. The slightest variation can produce very different bounce outcomes. This is because bounce not only depends on the speed of the grenade and where the grenade hits an object, but also on the rotation of the grenade. This is also the reason why stick grenades appear to be more random – their shape is far more capable of producing variable bounce.
If you can find a way to remove/minimise this variation which produces what we perceive as randomness, then you can have predictable grenades trajectories. In other words, if you can throw a grenade which has the same grenade velocity from the same location, then you can have a grenade which follows a determined trajectory.
How to be an elite grenadier
What happens when you put all of the knowledge above together into one throw?
My favourite example is Crete B stairs, which usually has defenders camping the top. As an attacker, there’s an easy nade through a window that will land at the top of the stairs and blow any campers to smithereens. To use this grenade you have to know that it exists – it’s quite unlikely you’ll find this sort of thing just randomly.
In this section I’m going to teach you the principles behind calculated nades, but not calculated nades themselves. If I were to do that, that’d go into a separate guide about map tricks.
Minimising the variation for the first two can be easy. You just find an “anchoring point”. An anchoring point is a location which will ensure that you’re at the same spot every time. It’s a fancy way of saying “corner”. What’s important to note is that the anchoring point doesn’t have to be a literal corner of a building or something like that. Any piece of geometry which you can lodge yourself into is an anchoring point.
Aiming can be done a few ways. You can use your outstretched hand (particularly the thumb as it’s the lowest) to align with something, or you can use a corner of the screen to align with something, or you can even use part of the HUD (eg. compass, objective marker).
The process of constructing a calculated nade is usually to find an anchoring point which is within range of the place you want to hit, and then experimenting with different aims to find that perfect nade. It’s a time consuming process. But if you find a nade that follows a specific trajectory, bounces at a specific location to roll along and land at exactly the place you want it to – you can make it happen every time. The only trouble is that the spin in always variable, which means the bounce is variable, which means it's better to have calculated nades that don't bounce at all.
It’s worth noting that sprint jump calculated nades are still possible. In this case, you have to make sure that the jump throw is as close to the same location as you can get. Naturally, there’s a relatively large amount of variation here. But if you’re aware of the problem of variation, then you can pull of long distance calculated nades – the pinnacle of grenade skill.
The other use for cooking is to make it explode along a trajectory before it comes to rest. Let’s say you’ve got a nade which goes through a window and passes by a staircase (I’m looking at you, Foy C), but ultimately comes to rest at the bottom where it wouldn’t be able to clear the staircase. What you want is for the grenade to explode as it’s passing by the staircase. This allows you a bit more leeway with your calculated nades, as all you need is a good trajectory rather than a good place for the grenade to become stationary. But your internal clock needs to run pretty well.
Conclusion
http://steamcommunity.com/sharedfiles/filedetails/?id=1201480859
- All Weapon Skins / Cosmetics and How To Get Them [WIP]★ 5 (249)13k views302 ♥6 minUpdated Dec 21, 2017
- Complete Unit Showcase★ 5 (317)11k views300 ♥26 minUpdated Feb 17, 2022
- Next Level Gore Setting for DOI★ 5 (176)8.5k views283 ♥1 minUpdated Oct 29, 2025
- Obscure Tips n' Stuff★ 5 (220)8.3k views145 ♥2 minUpdated Oct 18, 2017
- Fix Bayonets! How to Master the Pokey Stick★ 5 (187)7.1k views162 ♥21 minUpdated May 26, 2017
- Wibble's Brutal Class Guide For Newbies★ 5 (260)6.3k views221 ♥15 minUpdated Mar 29, 2017



- Upgrading to PremiumTeam Fortress 2★ 5 (20k)1441k views11k ♥6 minUpdated May 11, 2022
- No More Room in Hell Official ManualNo More Room in Hell★ 5 (2.8k)569k views2.1k ♥29 minUpdated Apr 22, 2019
- NMRiH Community Hosting GuidesNo More Room in Hell★ 5 (526)351k views653 ♥1 minUpdated Aug 10, 2022
- How to 'Git Gud' Soon™MORDHAU★ 5 (2k)318k views3k ♥68 minUpdated Nov 16, 2024
- Лучшие кооперативные игры SteamPAYDAY 2★ 5 (1.5k)315k views2.1k ♥56 minRussianUpdated Apr 27, 2025
- Desert Eagle Heat Treated | Blue GemCounter-Strike 2★ 5 (1.6k)293k views1.5k ♥2 minUpdated Jan 16





This guide was created by its original author on the Steam Community. Are you the author and want it removed? Request removal.