General Game Improvements
Locating The Configuration Files
These files are located under your user Documents folder within Windows.
C:\Documents\My Games\Sherlock Holmes - The Devil's Daughter\SH8Game\Config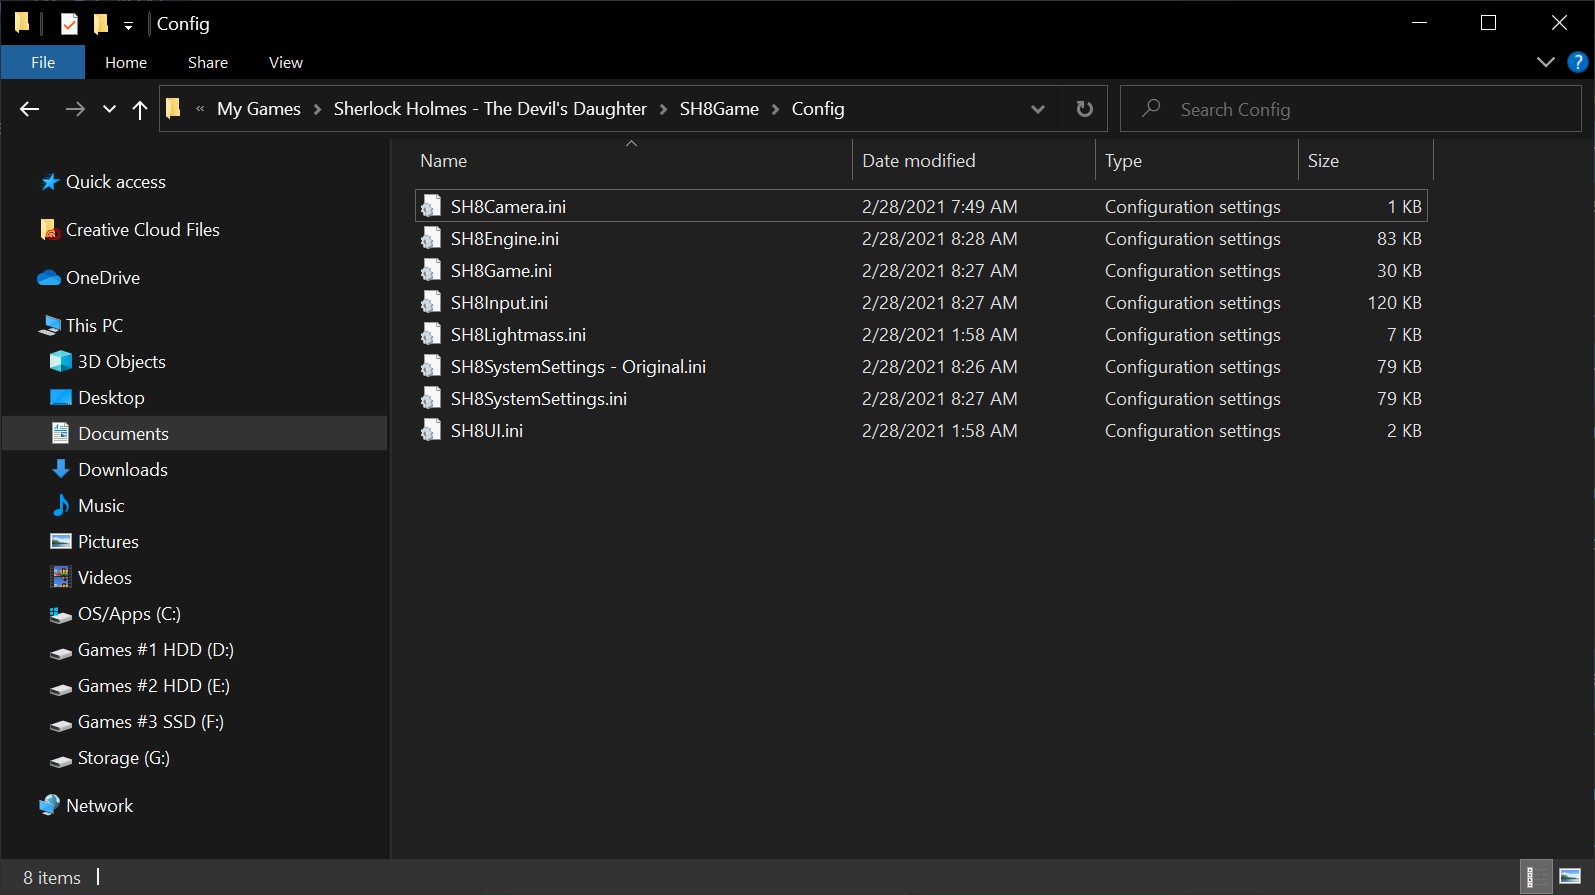
A preview of my system specifications:
CPU: AMD Ryzen R7 3700x (Fixed to 3.6GHz)
RAM: 32GB of DDR4 G.Skill Trident Z @3200MHz
GPU: GTX 1080 Ti | +50% Core Voltage | +117% Power Limit | +50Mhz Core | +280MHz Memory
Storage: 2x 4TB HDDs, 1x 1TB HDD, 2x 1TB NVME SSDs.
I play on a 4K 60Hz display.
Disabling Mouse Smoothing & Reducing Controller Smoothing
By default the game has mouse smoothing enabled. This causes the mouse movements to not correspond 1:1 with users inputs and as its name implies, it smooths out and adds the effect of speeding up and slowing down when turning Holme's view in game. Personally, I don't care for this feature on my mouse in any game therefore I disabled it. If you'd like to feel how this is for yourself look no further. However, being as though this is a mostly slow paced single-player game, it's nice to play with controller and have the smoothing effect add to the cinematic experience. With that being said, I reduced the smoothing effect for the first person view, but only for the controller, as I stated before, I hate mouse smoothing.
Click on the file named SH8Game.iniOn your keyboard press CTRL+F. This will open up a window called Find.
In the section to the right of Find what: type Rotation.
Ensure that the Direction is set to Down.
Click Find Next.
Then close the Find window.
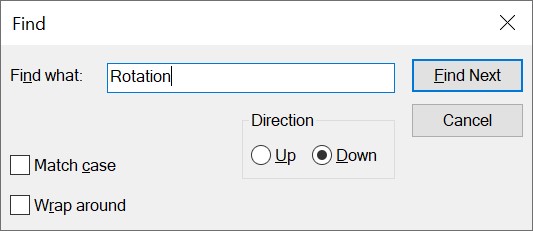 Here we can see the default values for the mouse smoothing. There are separate values for both third/first person as well as separate values for both the mouse (yellow) and controller (green).
For controllers, I recommend slightly reducing the smoothing value for the first person perspective by changing it's value to 20.
Raising The Max Value For Your Smoothed FPS & Unlocking It
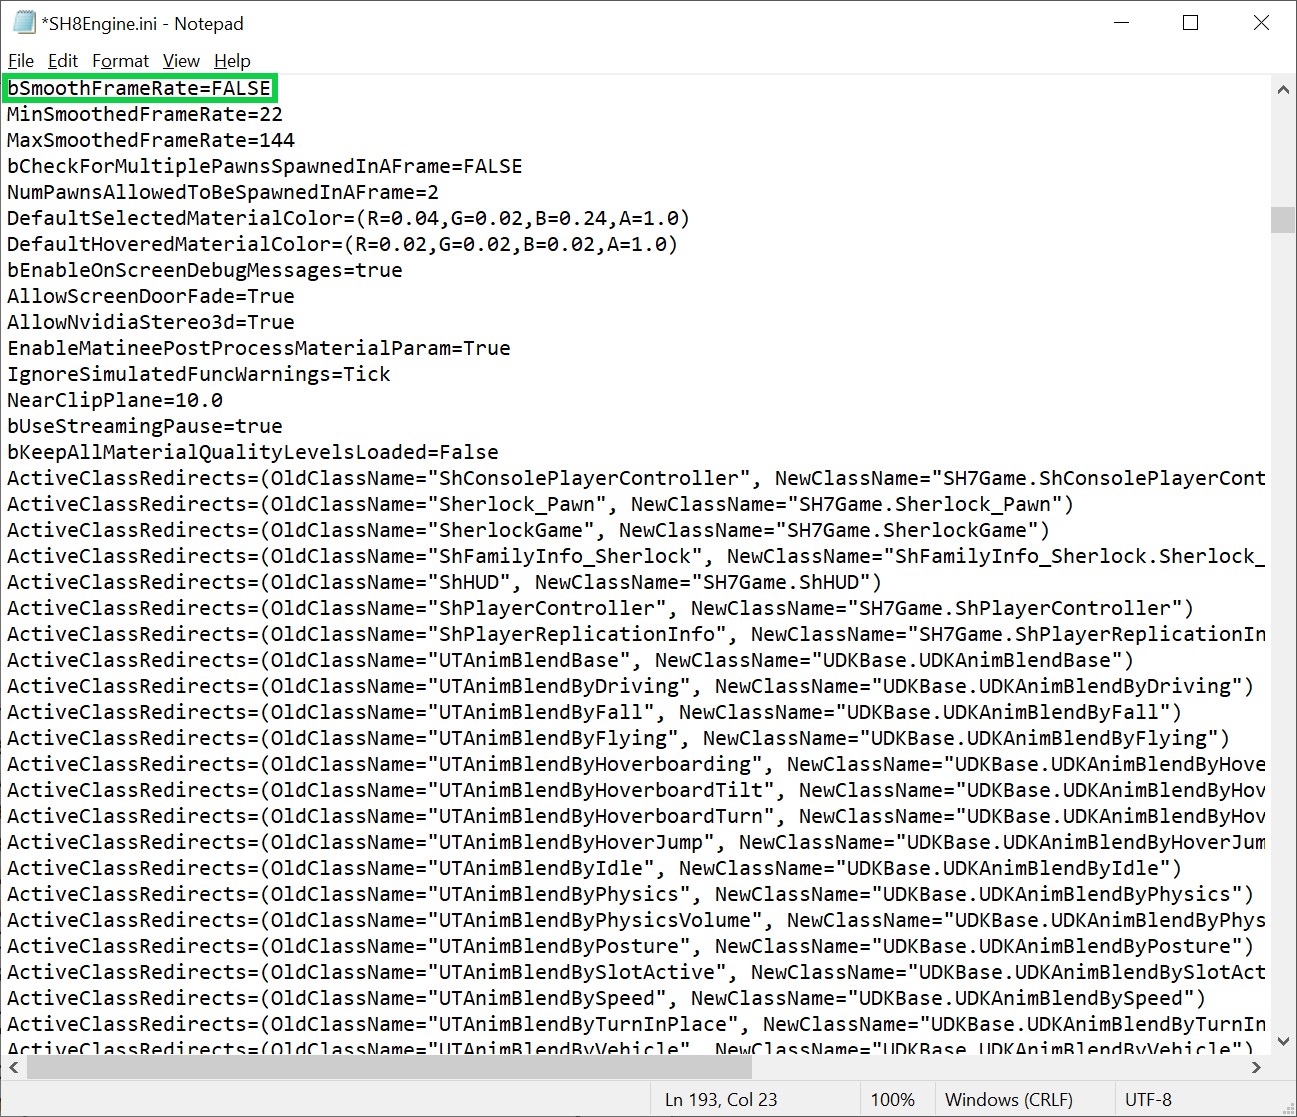
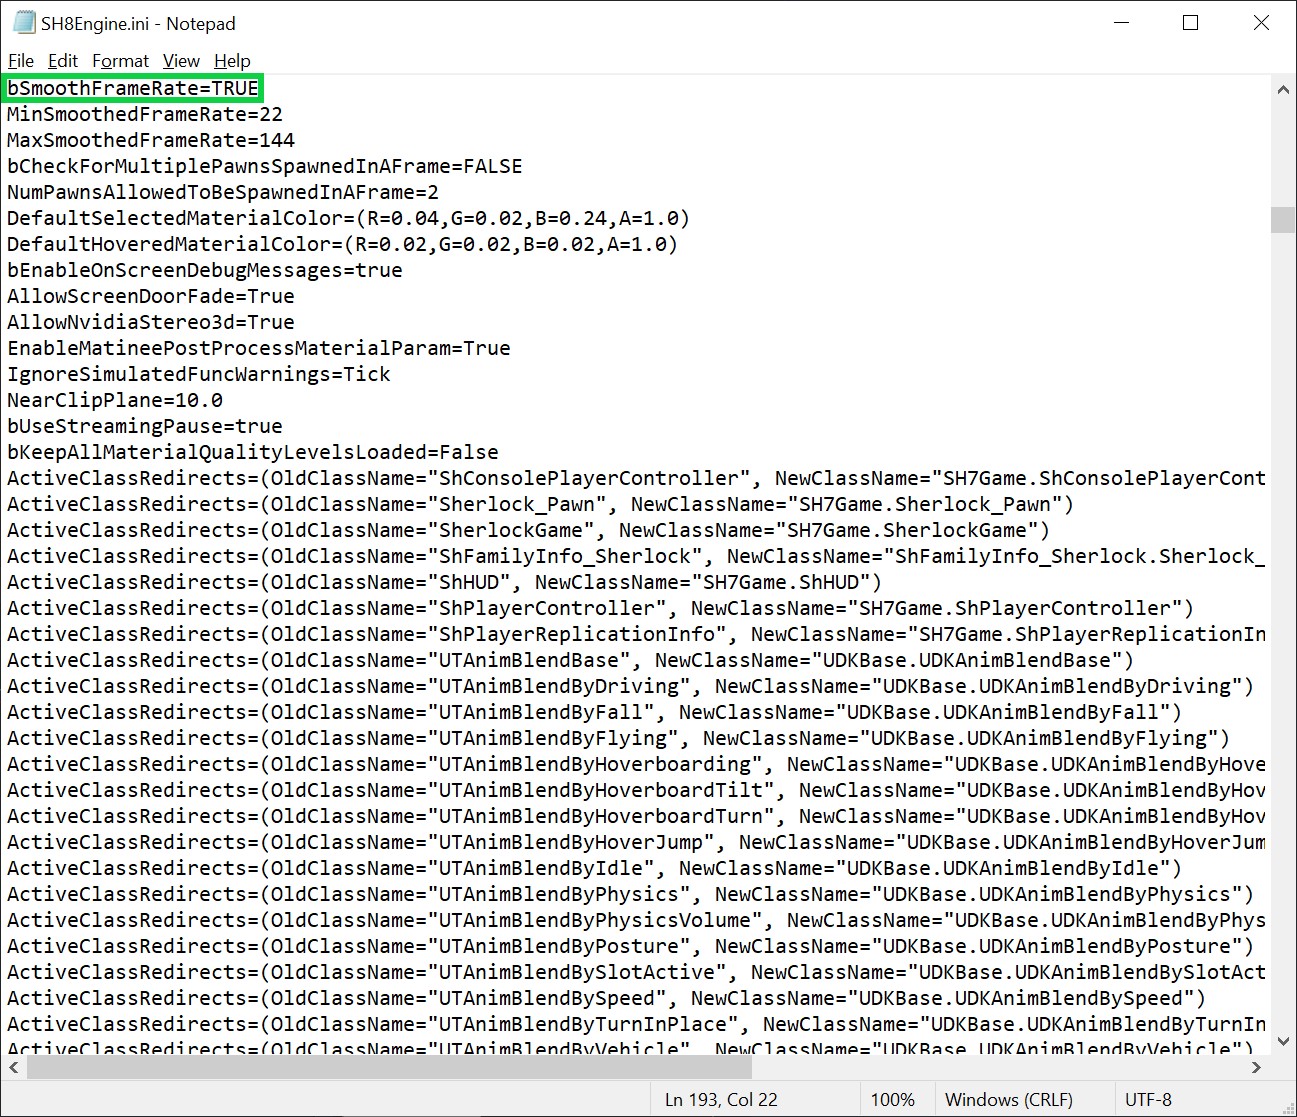
For those with high refresh rate monitors this isn't ideal.
To resolve this, click on the file named SH8Engine.ini.
On your keyboard press CTRL+F. This will open up a window called Find.
In the section to the right of Find what: type MaxSmooth.
Ensure that the Direction is set to Down.
Click Find Next.
Then close the Find window.
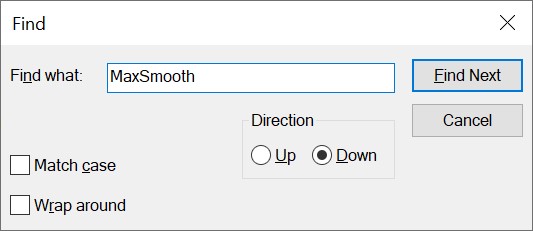 Here we can see the default value for MaxSmoothedFrameRate (62).
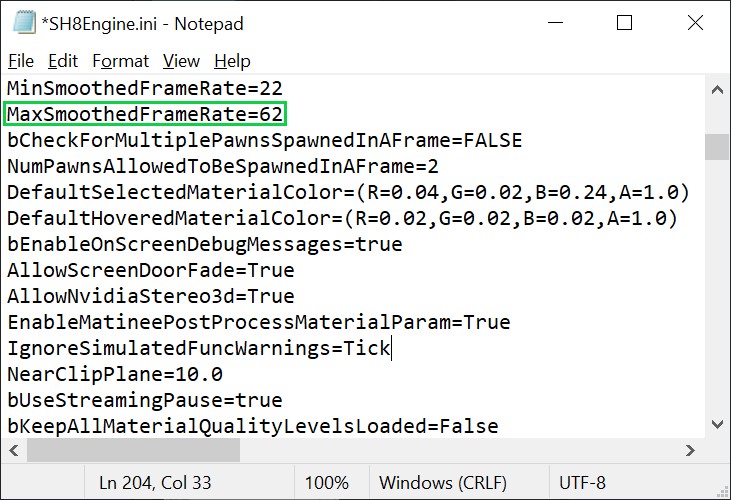 Change it's value to your desired FPS. I set mine to 144.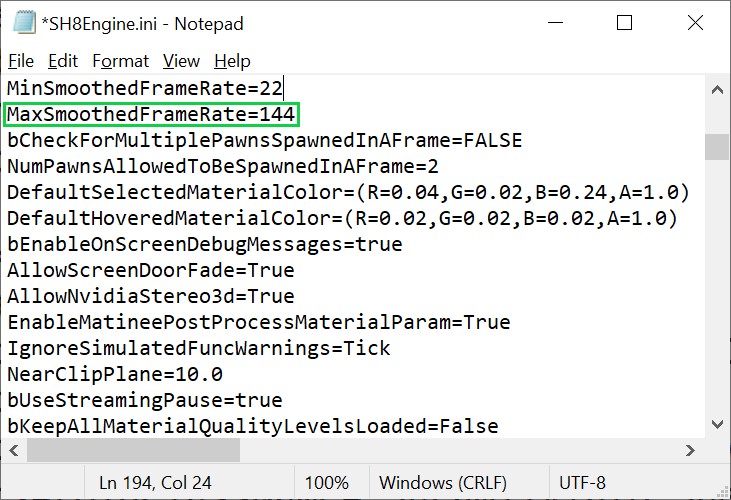
Improving The Third Person FOV (Field Of View)
Here, we can see that the default value for the field of view is 85.
Personally, this field of view is a tad bit too low for comfort and I've changed mine to 100.
I don't advise going higher than 120. And unfortunately I've yet to come across a parameter that will allow us to adjust the First Person FOV. That would've been a treat!
Default FOV - 85
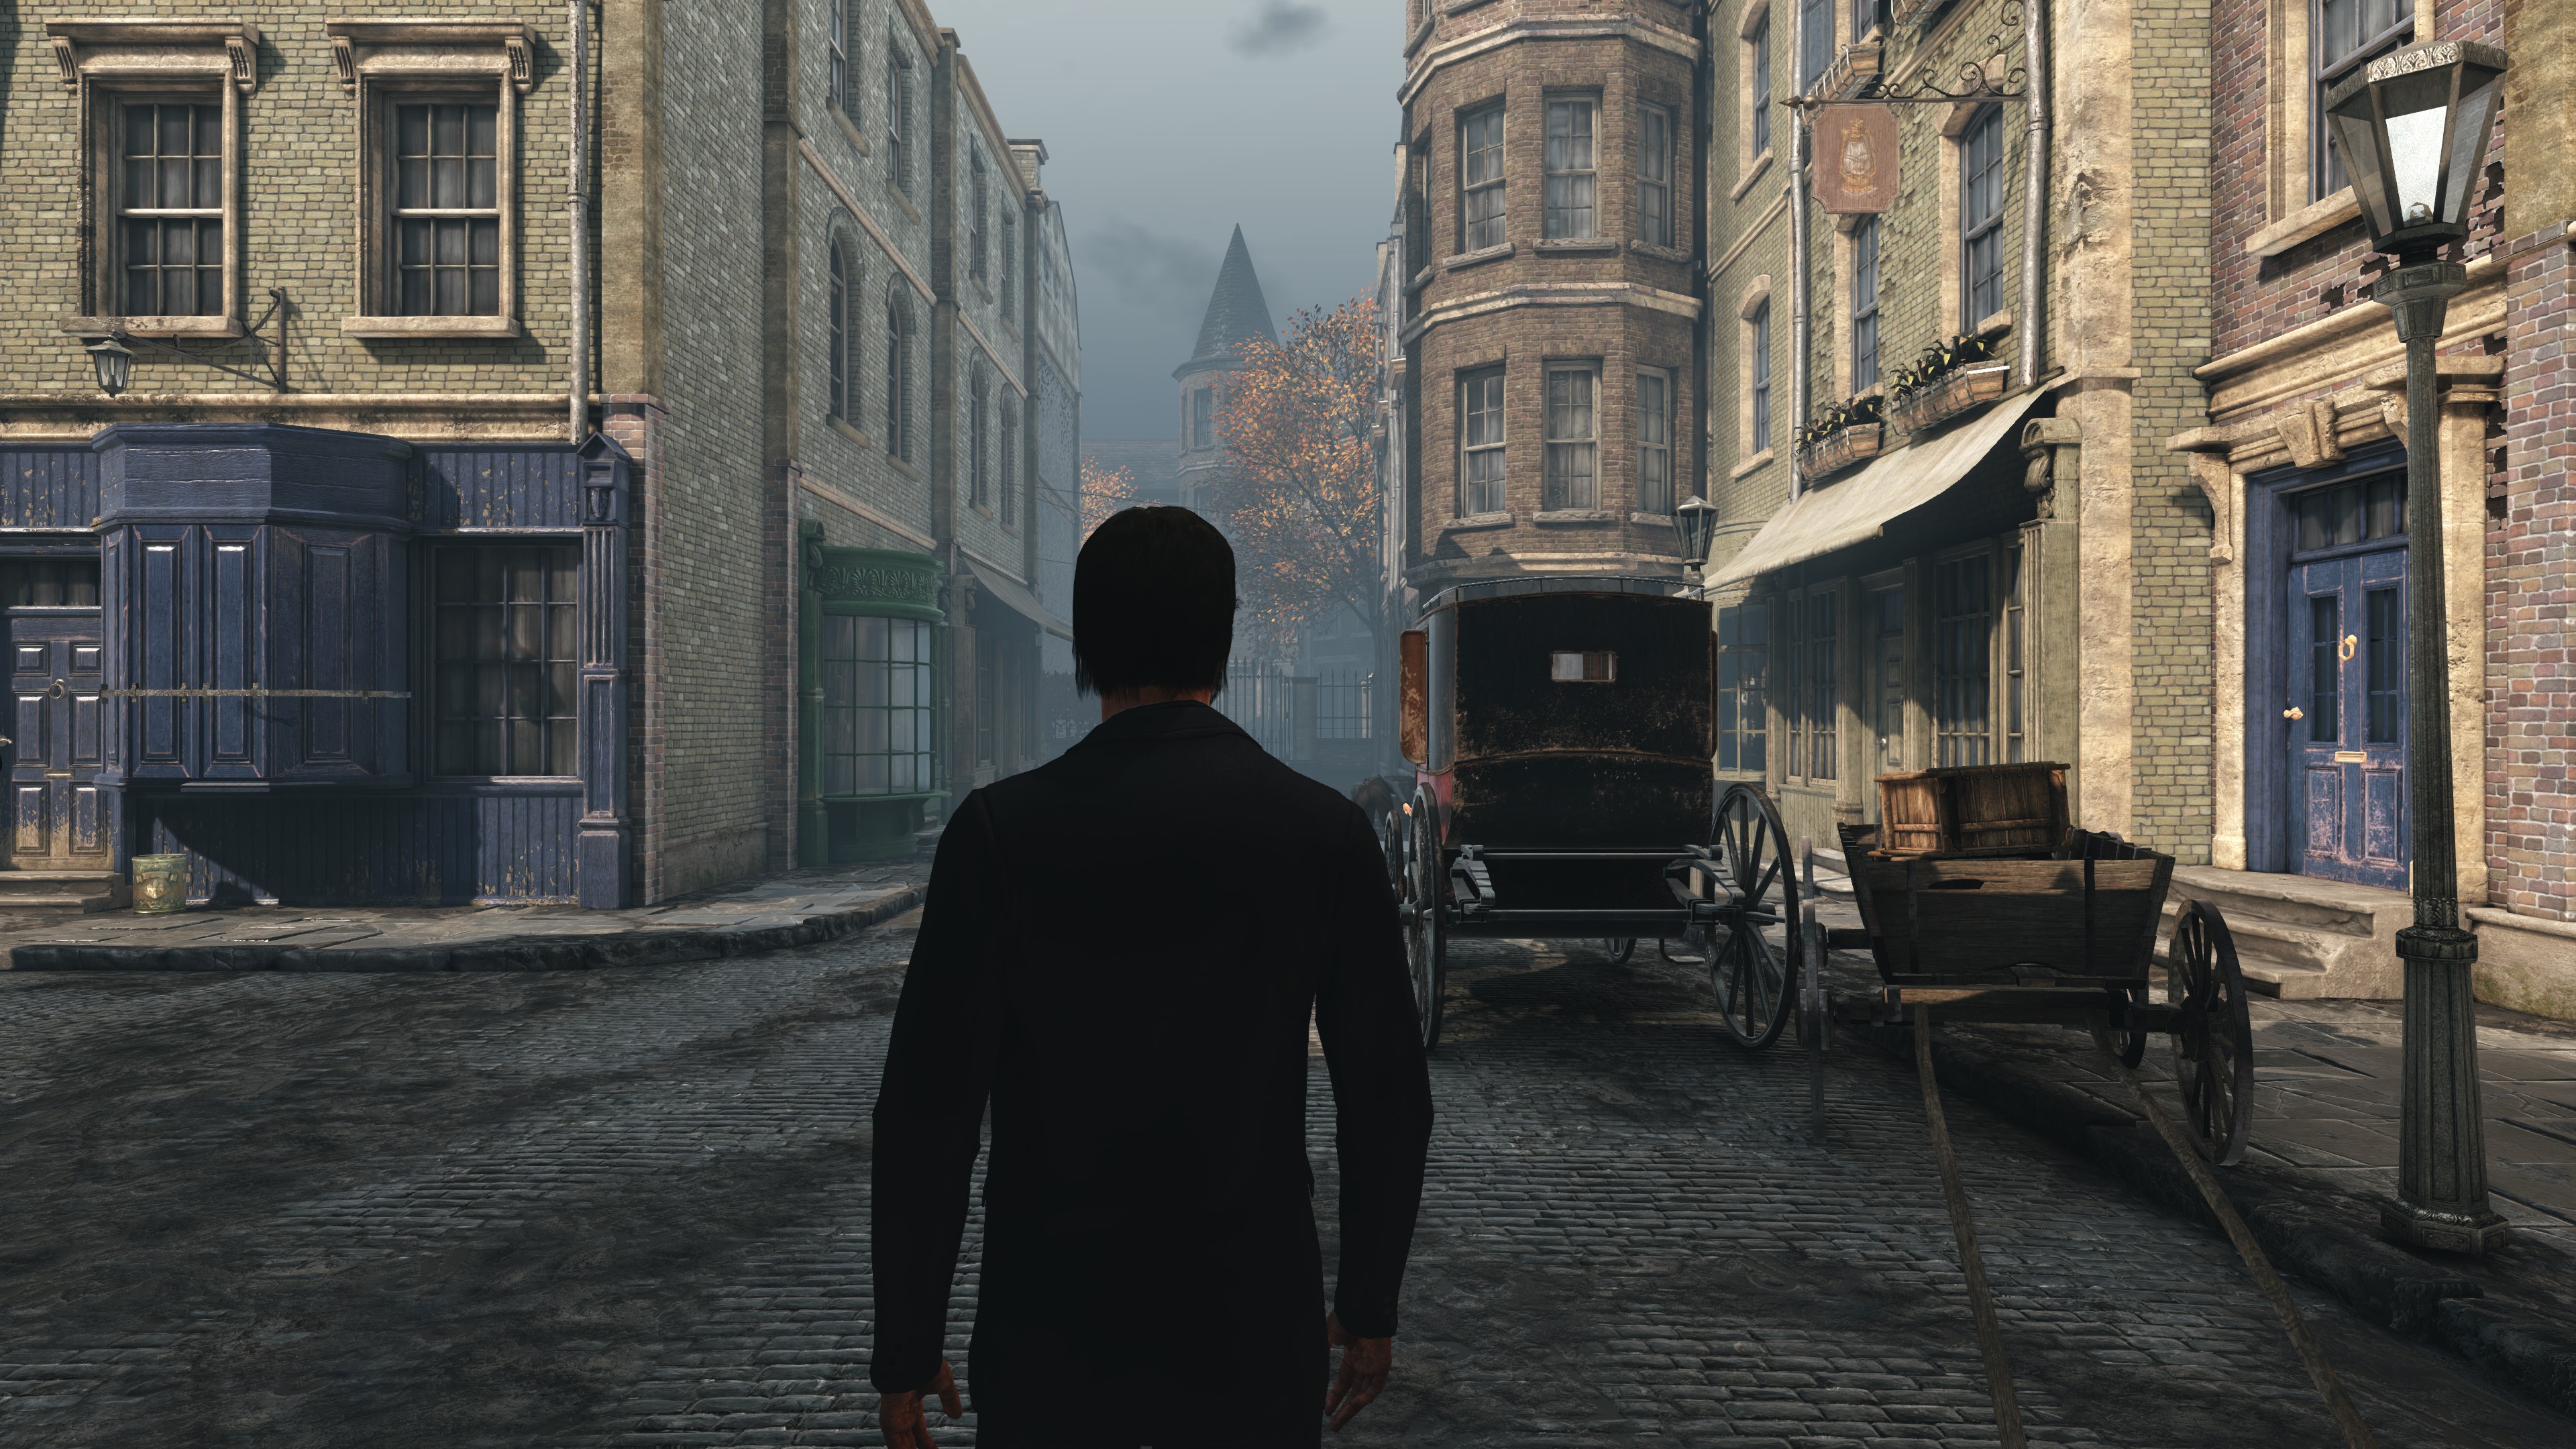
Custom FOV - 100
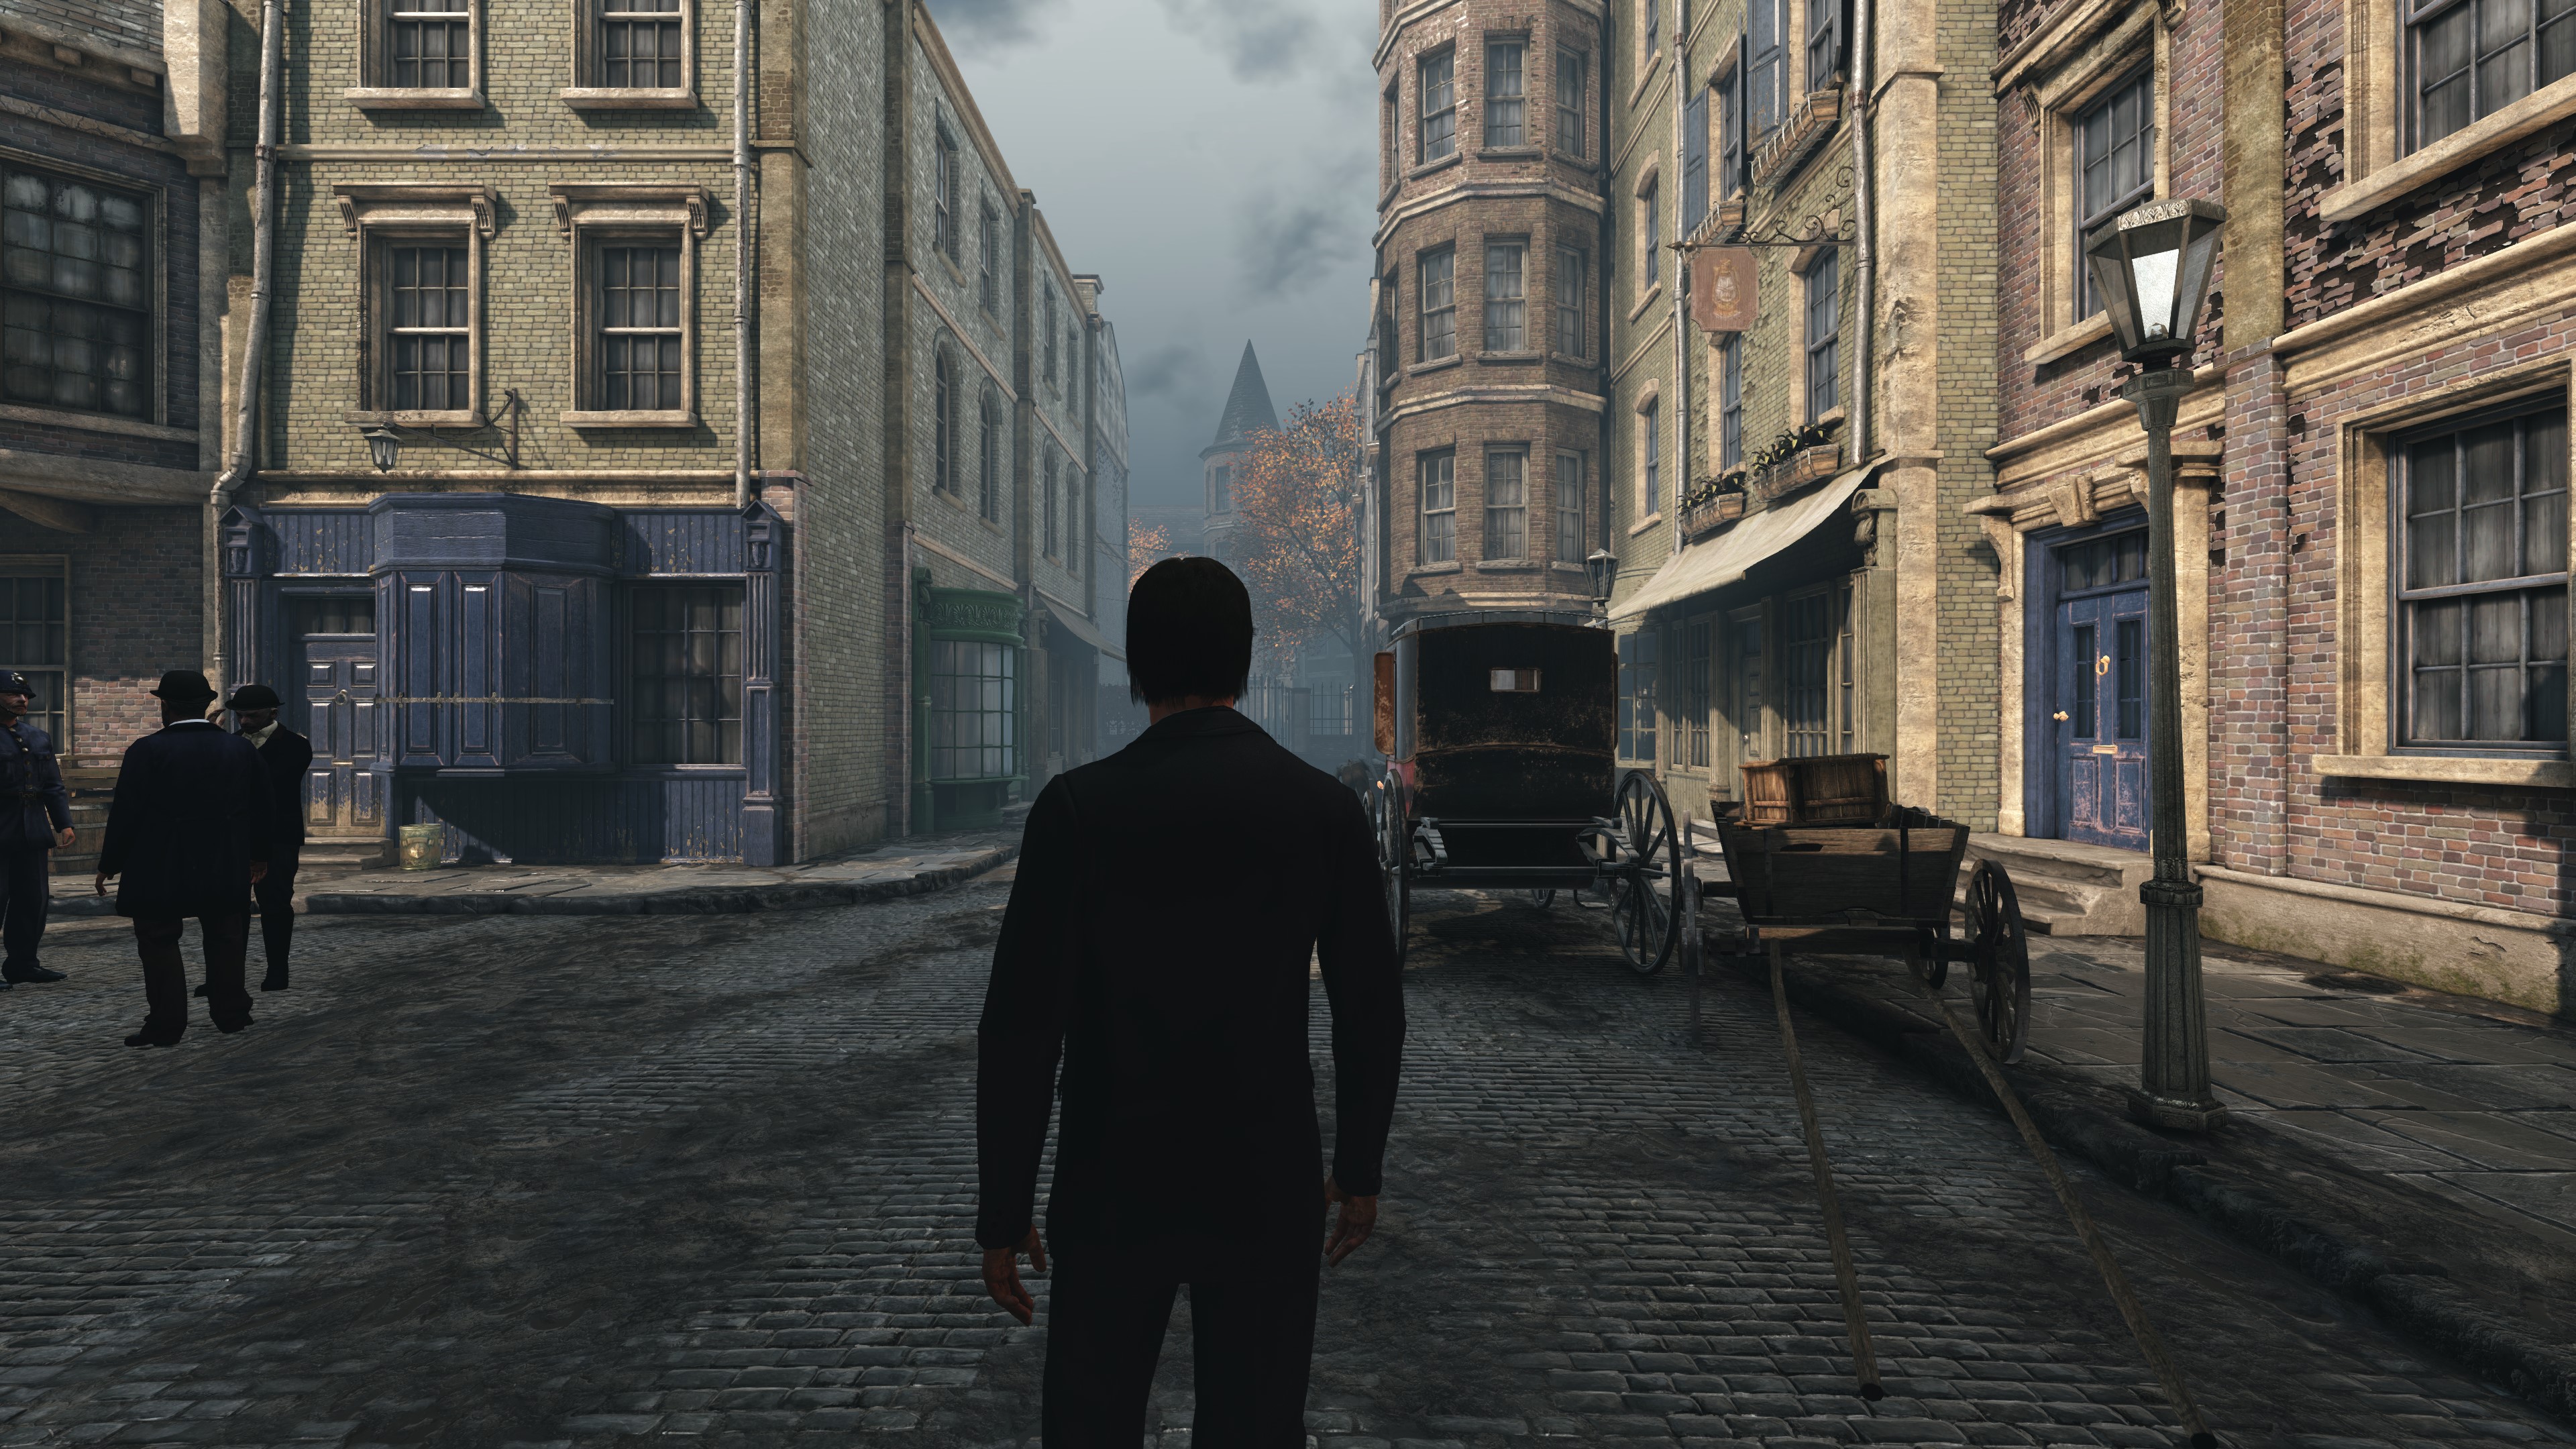
Custom FOV -120
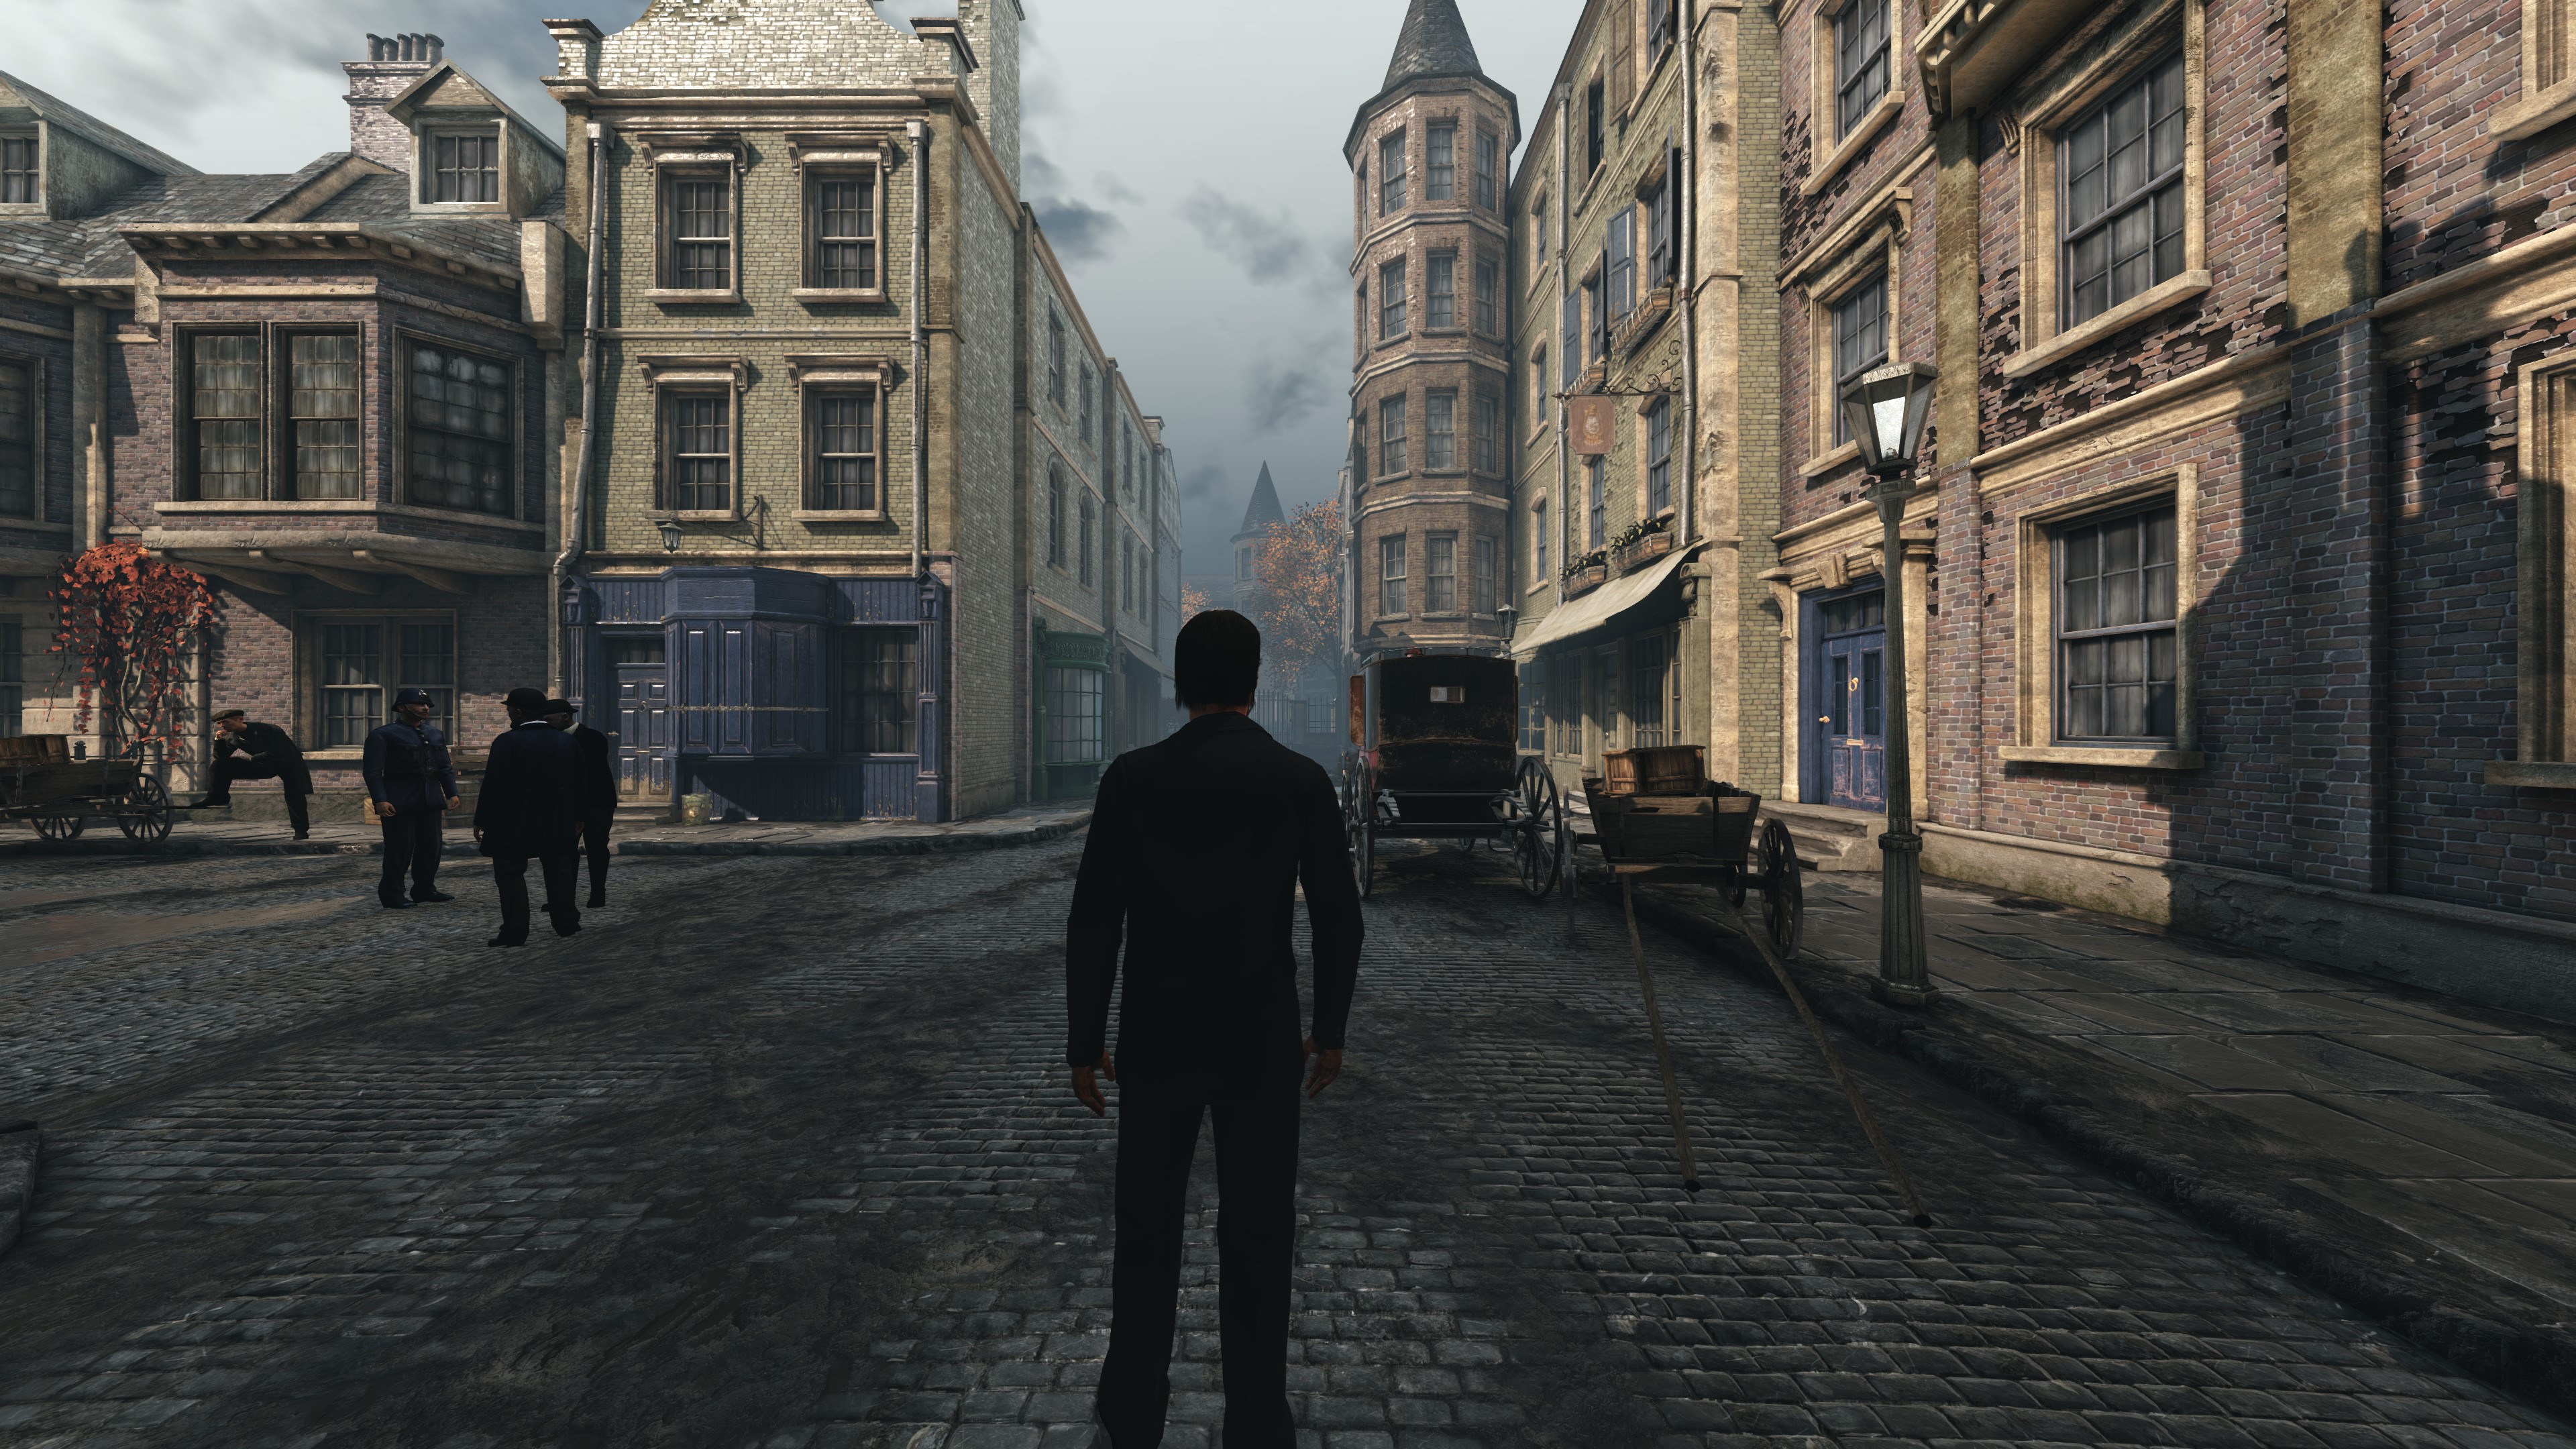
Default FOV - 85
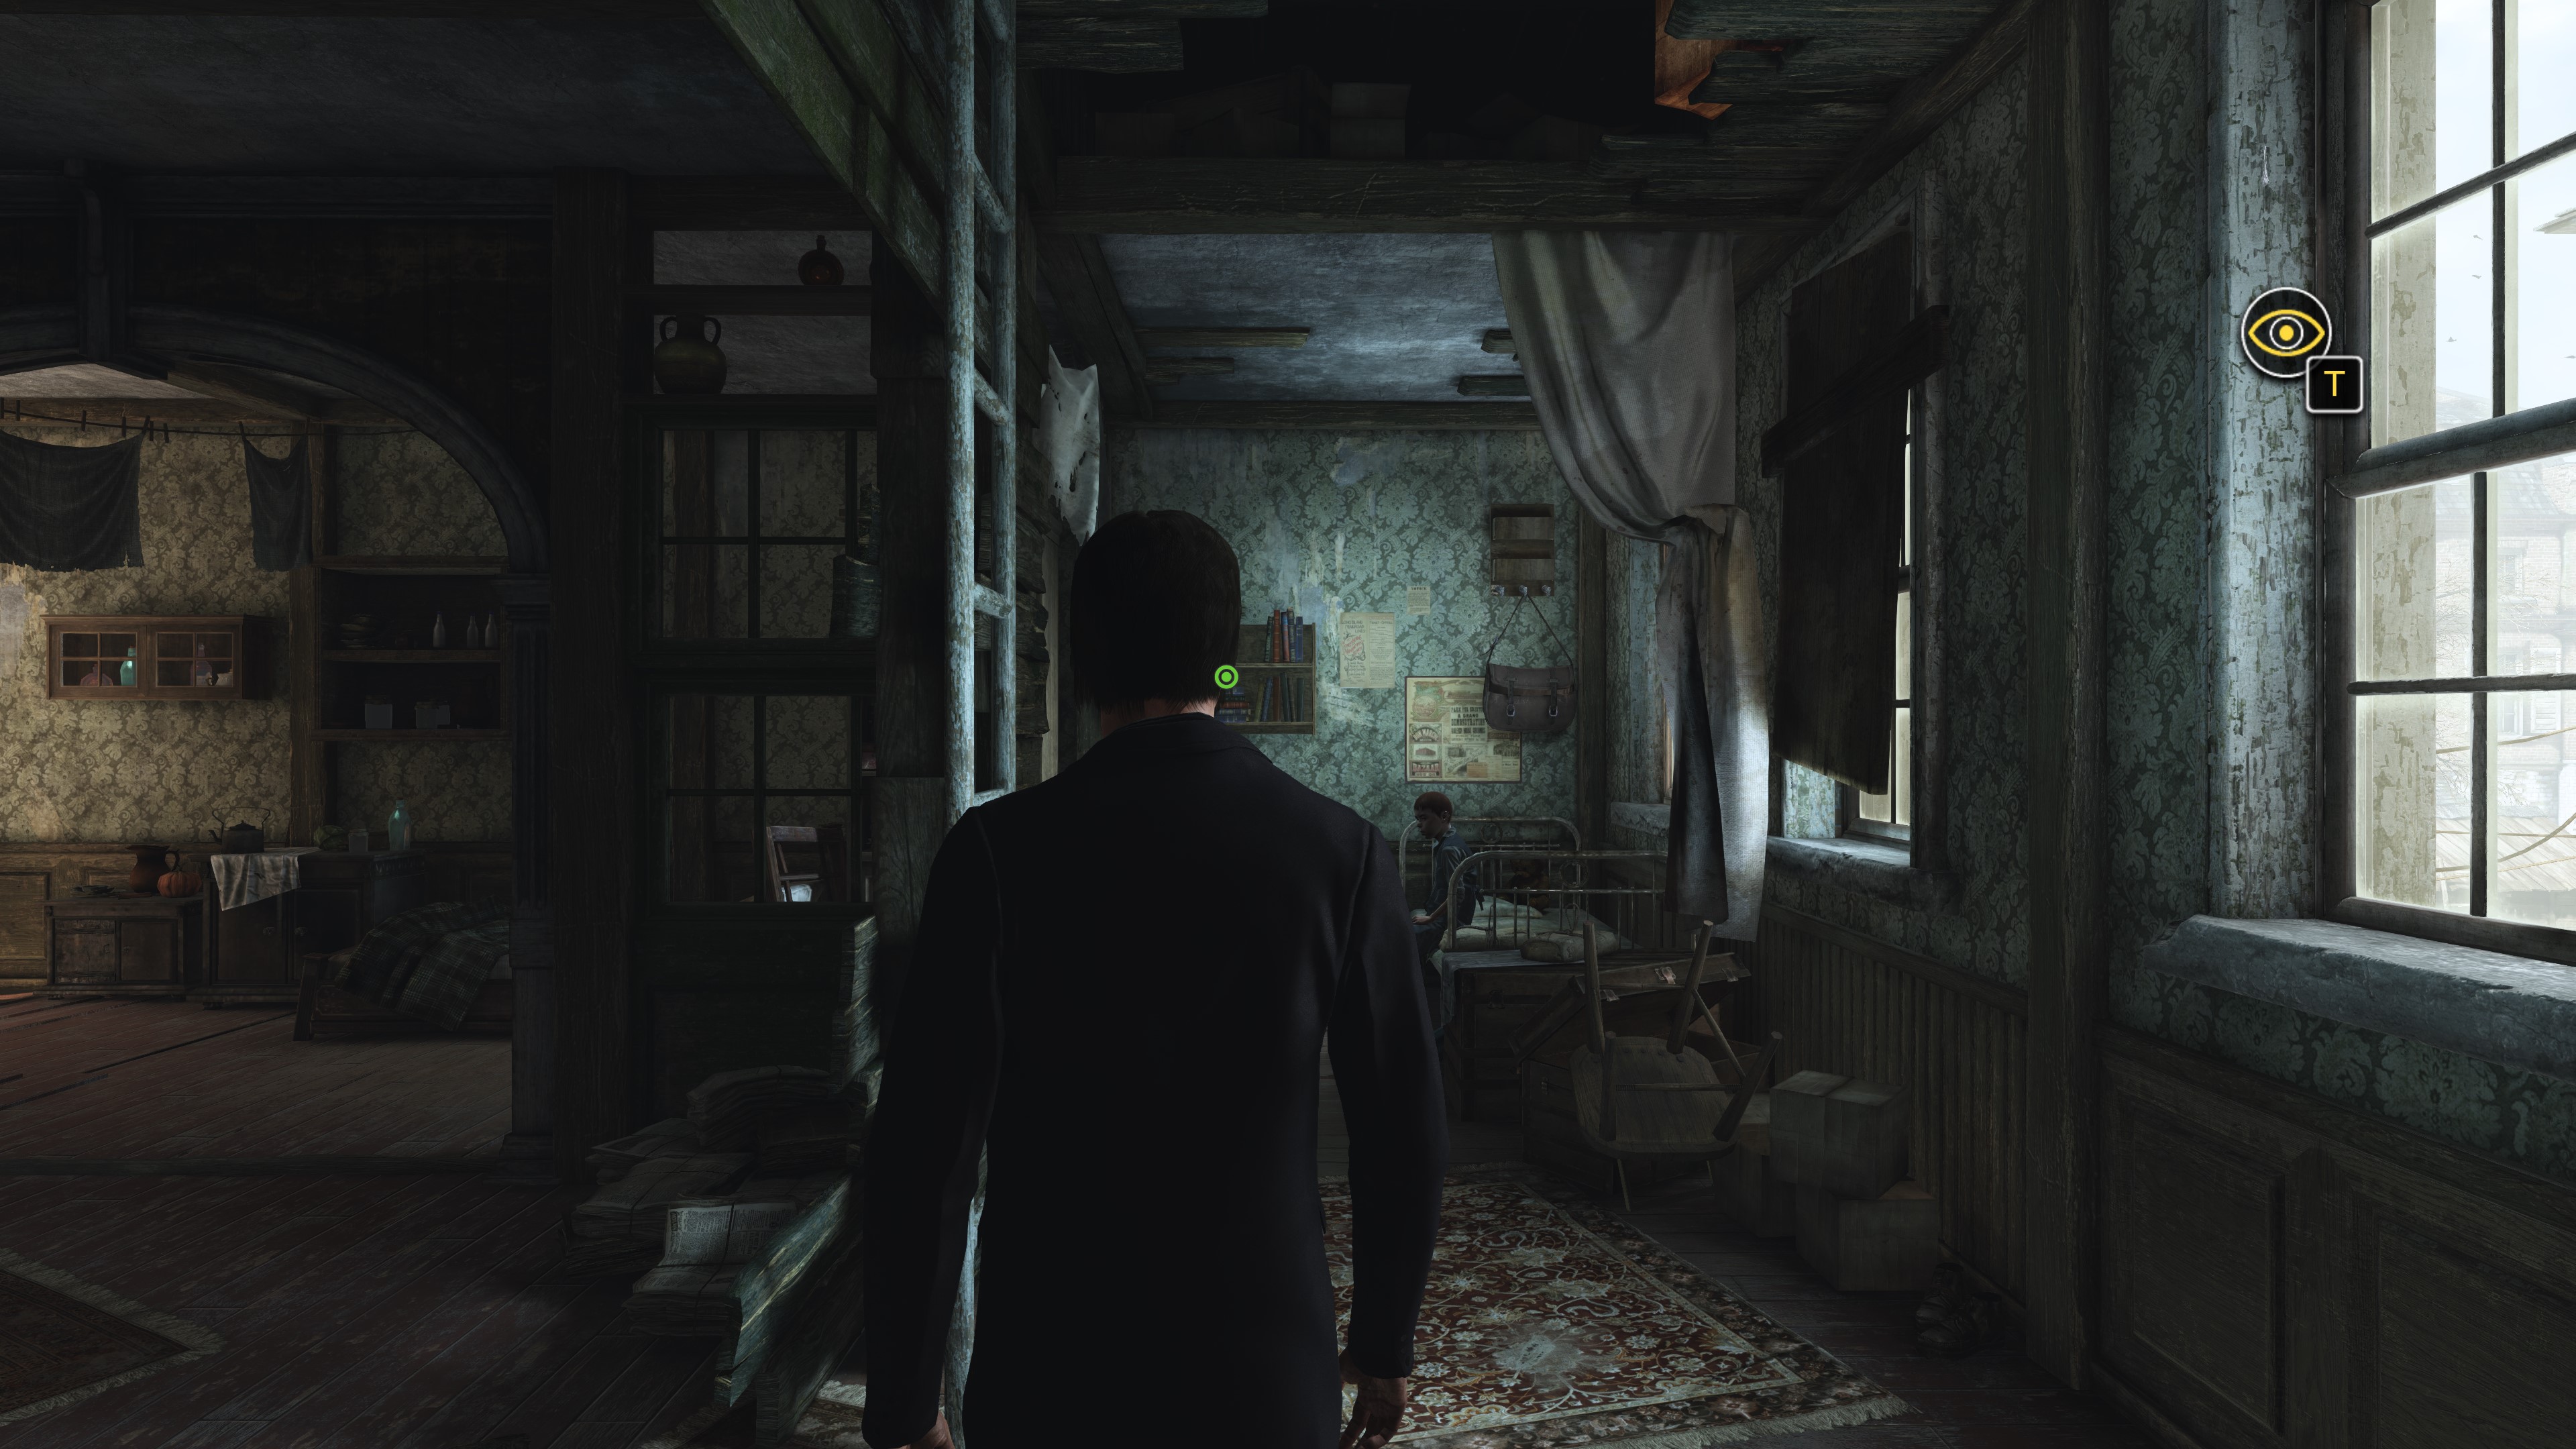
Custom FOV - 100
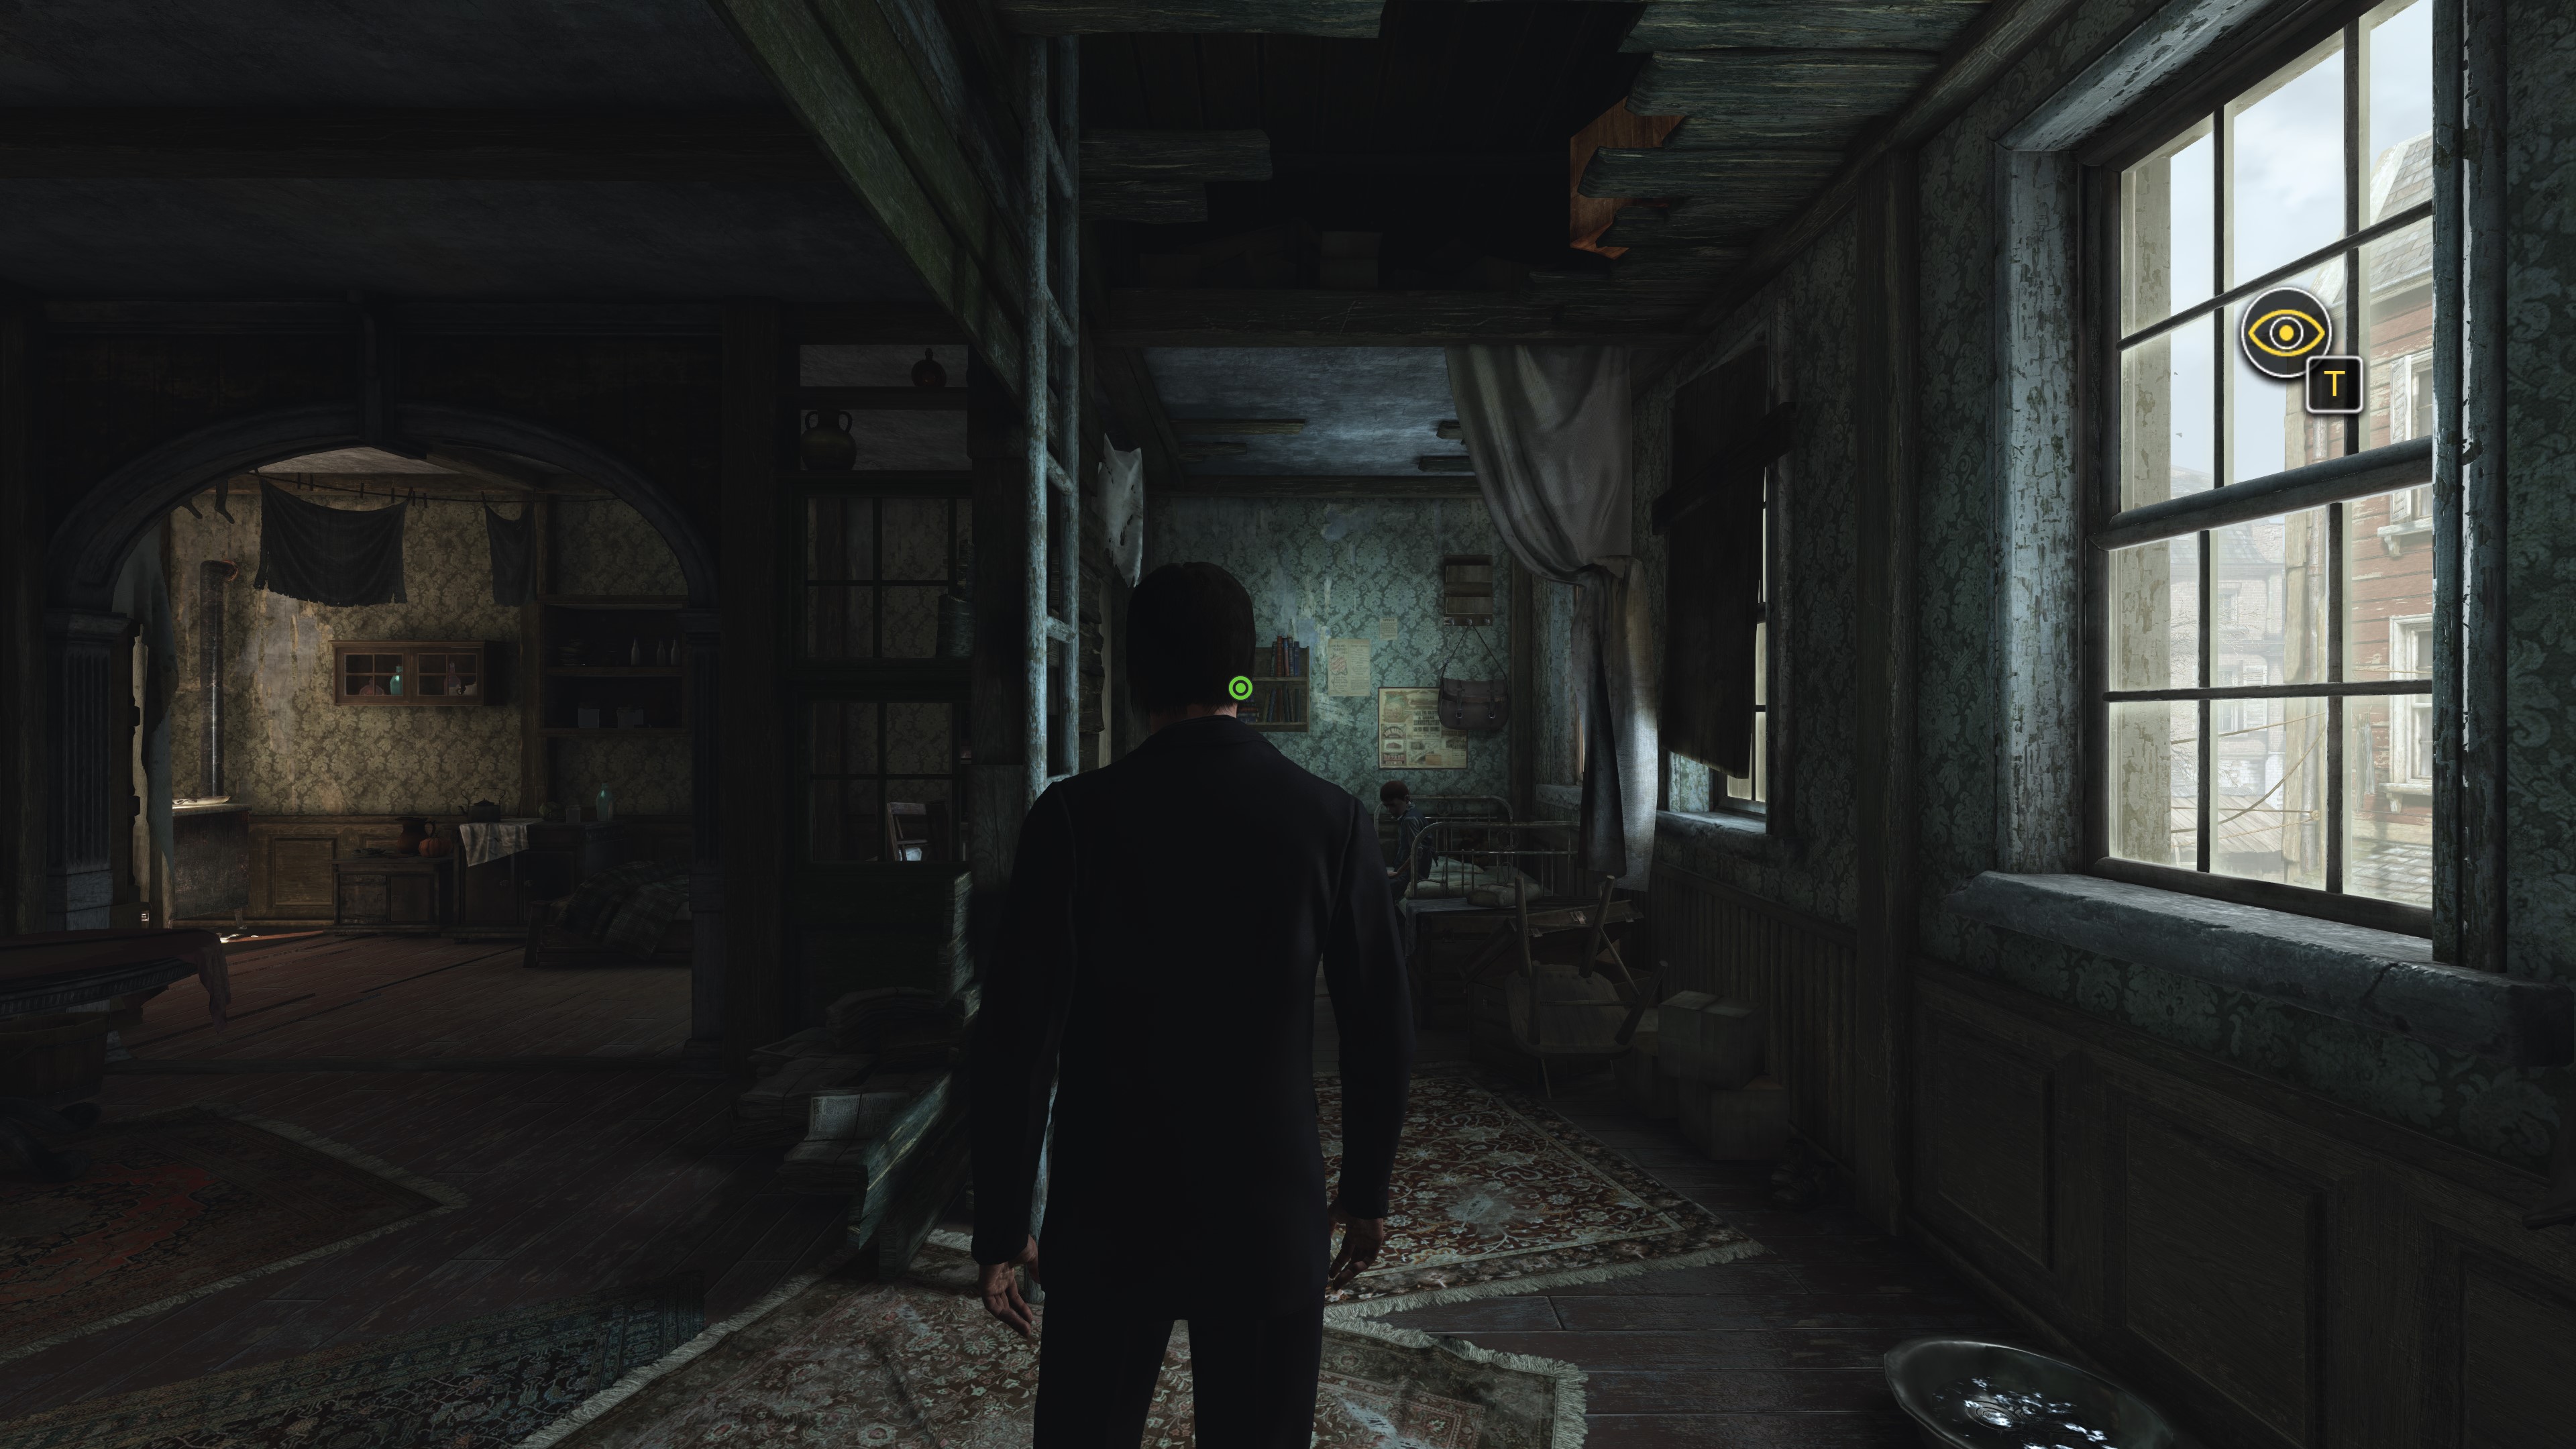
Custom FOV - 120
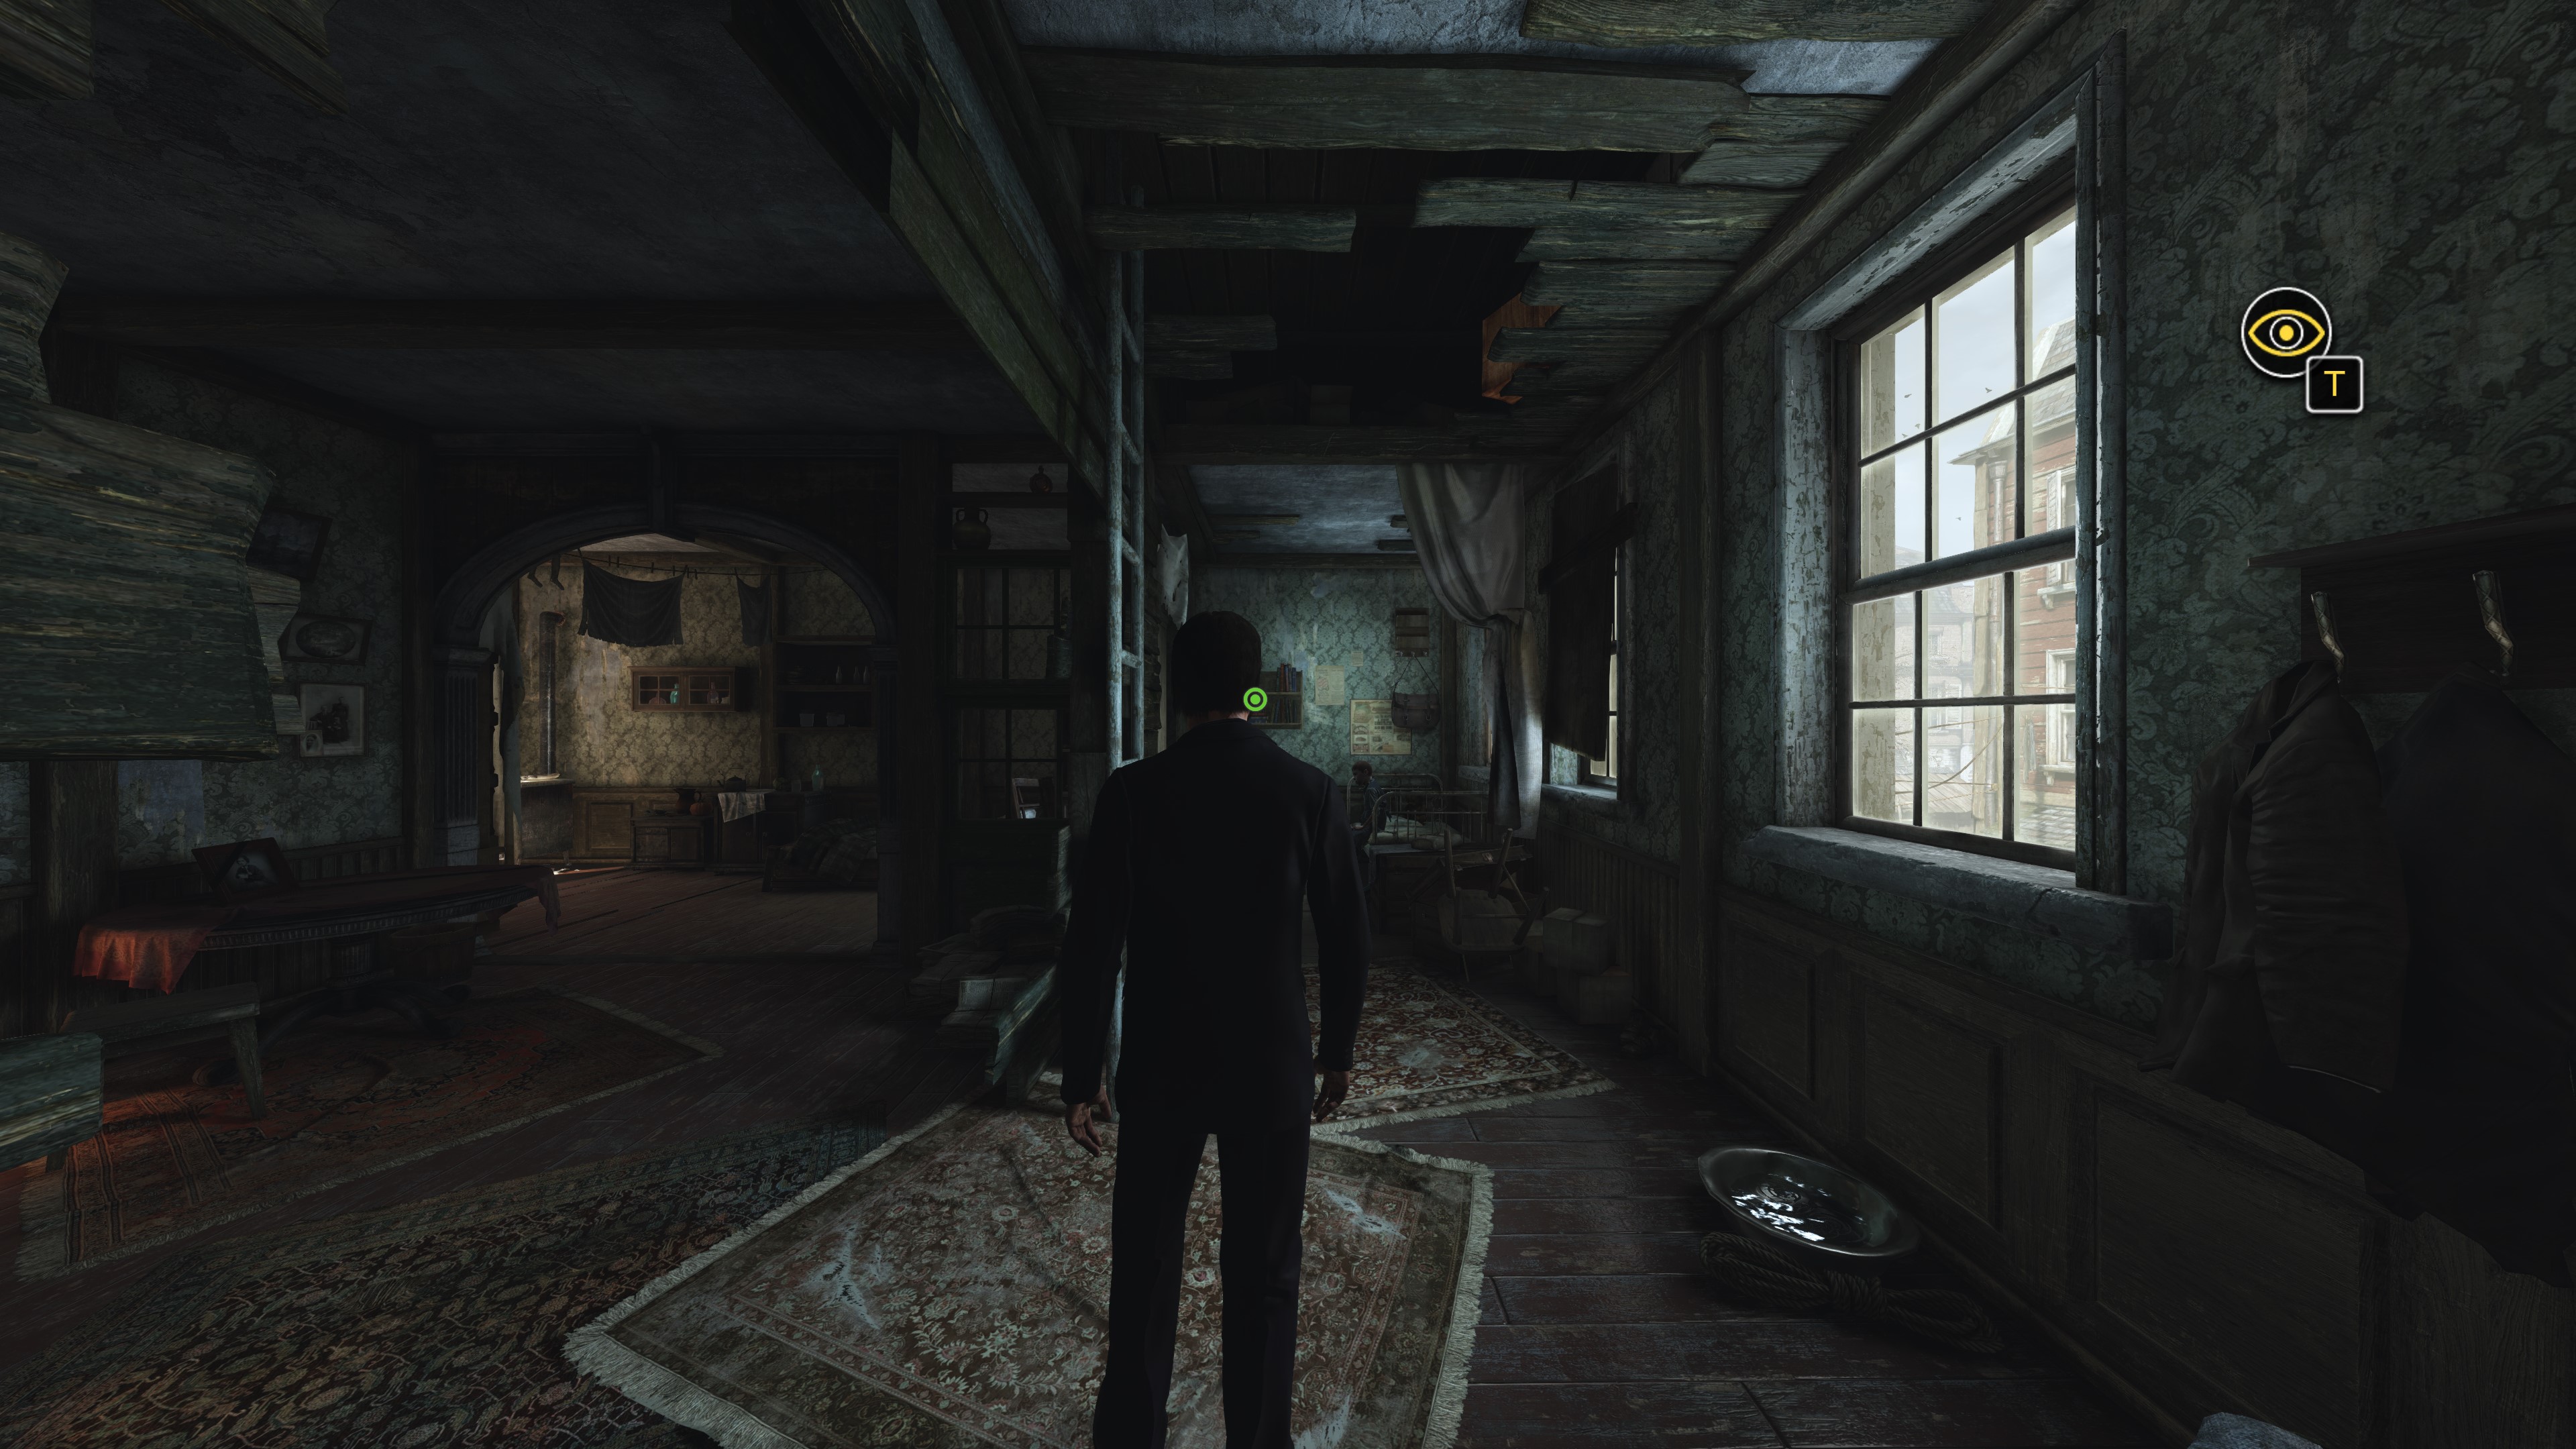
Significantly Improve Your Games Performance
The DOF (Depth Of Field) effect within the game is used well but it's default setting is quite taxing on GPUs and isn't configurable within the games graphics settings. To mediate this, we'll be lowering the DOF effect.
Click on the file named SH8SystemSettings.iniOn your keyboard press CTRL+F. This will open up a window called Find.
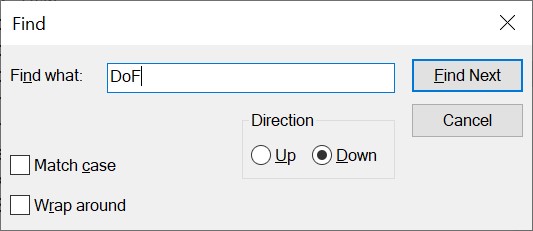
In the section to the right of Find what: type DoF.
Ensure that the Direction is set to Down.
Click Find Next.
Then close the Find window.
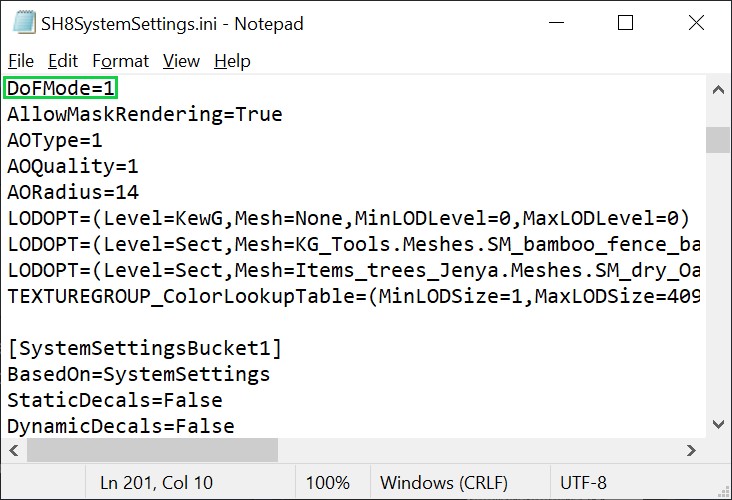
 Here we can see the default value for Depth Of FIeld (1).
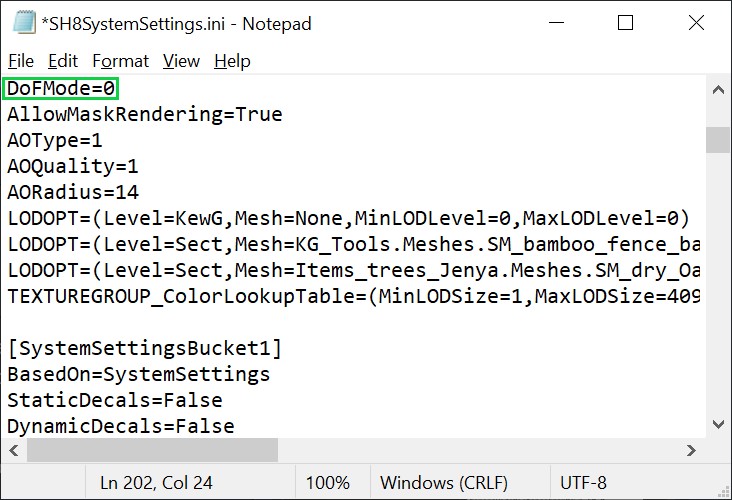
 Change this value from 1 to 0.
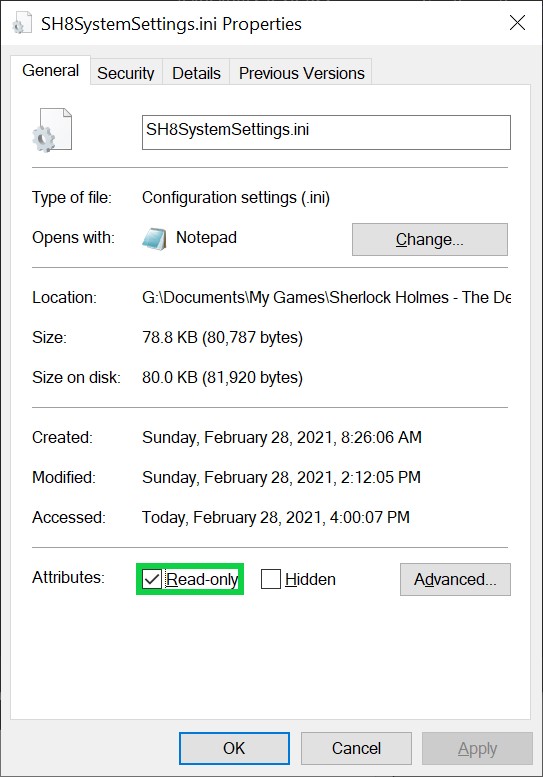
 Now, in order to ensure any and all changes made to this particular file stay the same and aren't automatically altered by the game, we're going to "lock" the file from making any additional changes. (Don't worry this can be undone later).
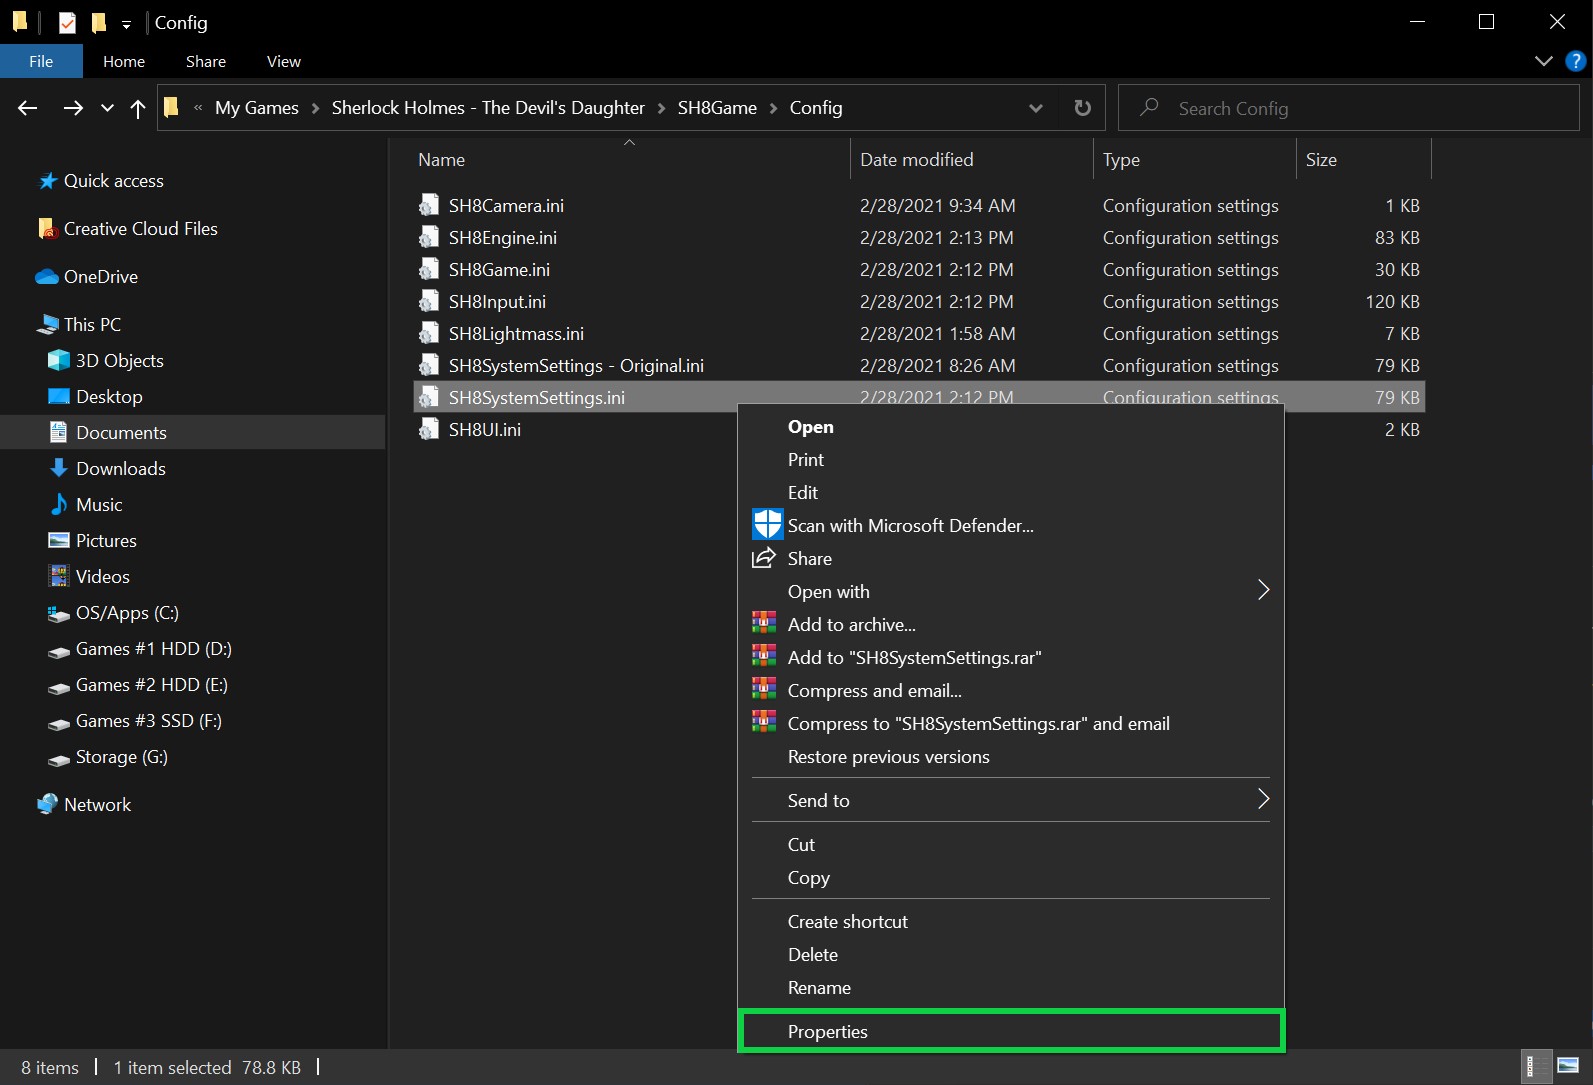
 First, right click on the file SH8SystemSettings.ini and select properties.
If you want to change the audio or video settings later, you'll need to uncheck Read Only and can change the settings in-game or right there within the file itself. Then re-check the Read Only box again when you're done. Finally, check the box that say Read Only, click Apply, then Ok. Now, you're done. But remember, if you wish to make future edits to this file you must first remove it's Read Only state, simply by un-checking the box and clicking Apply again.
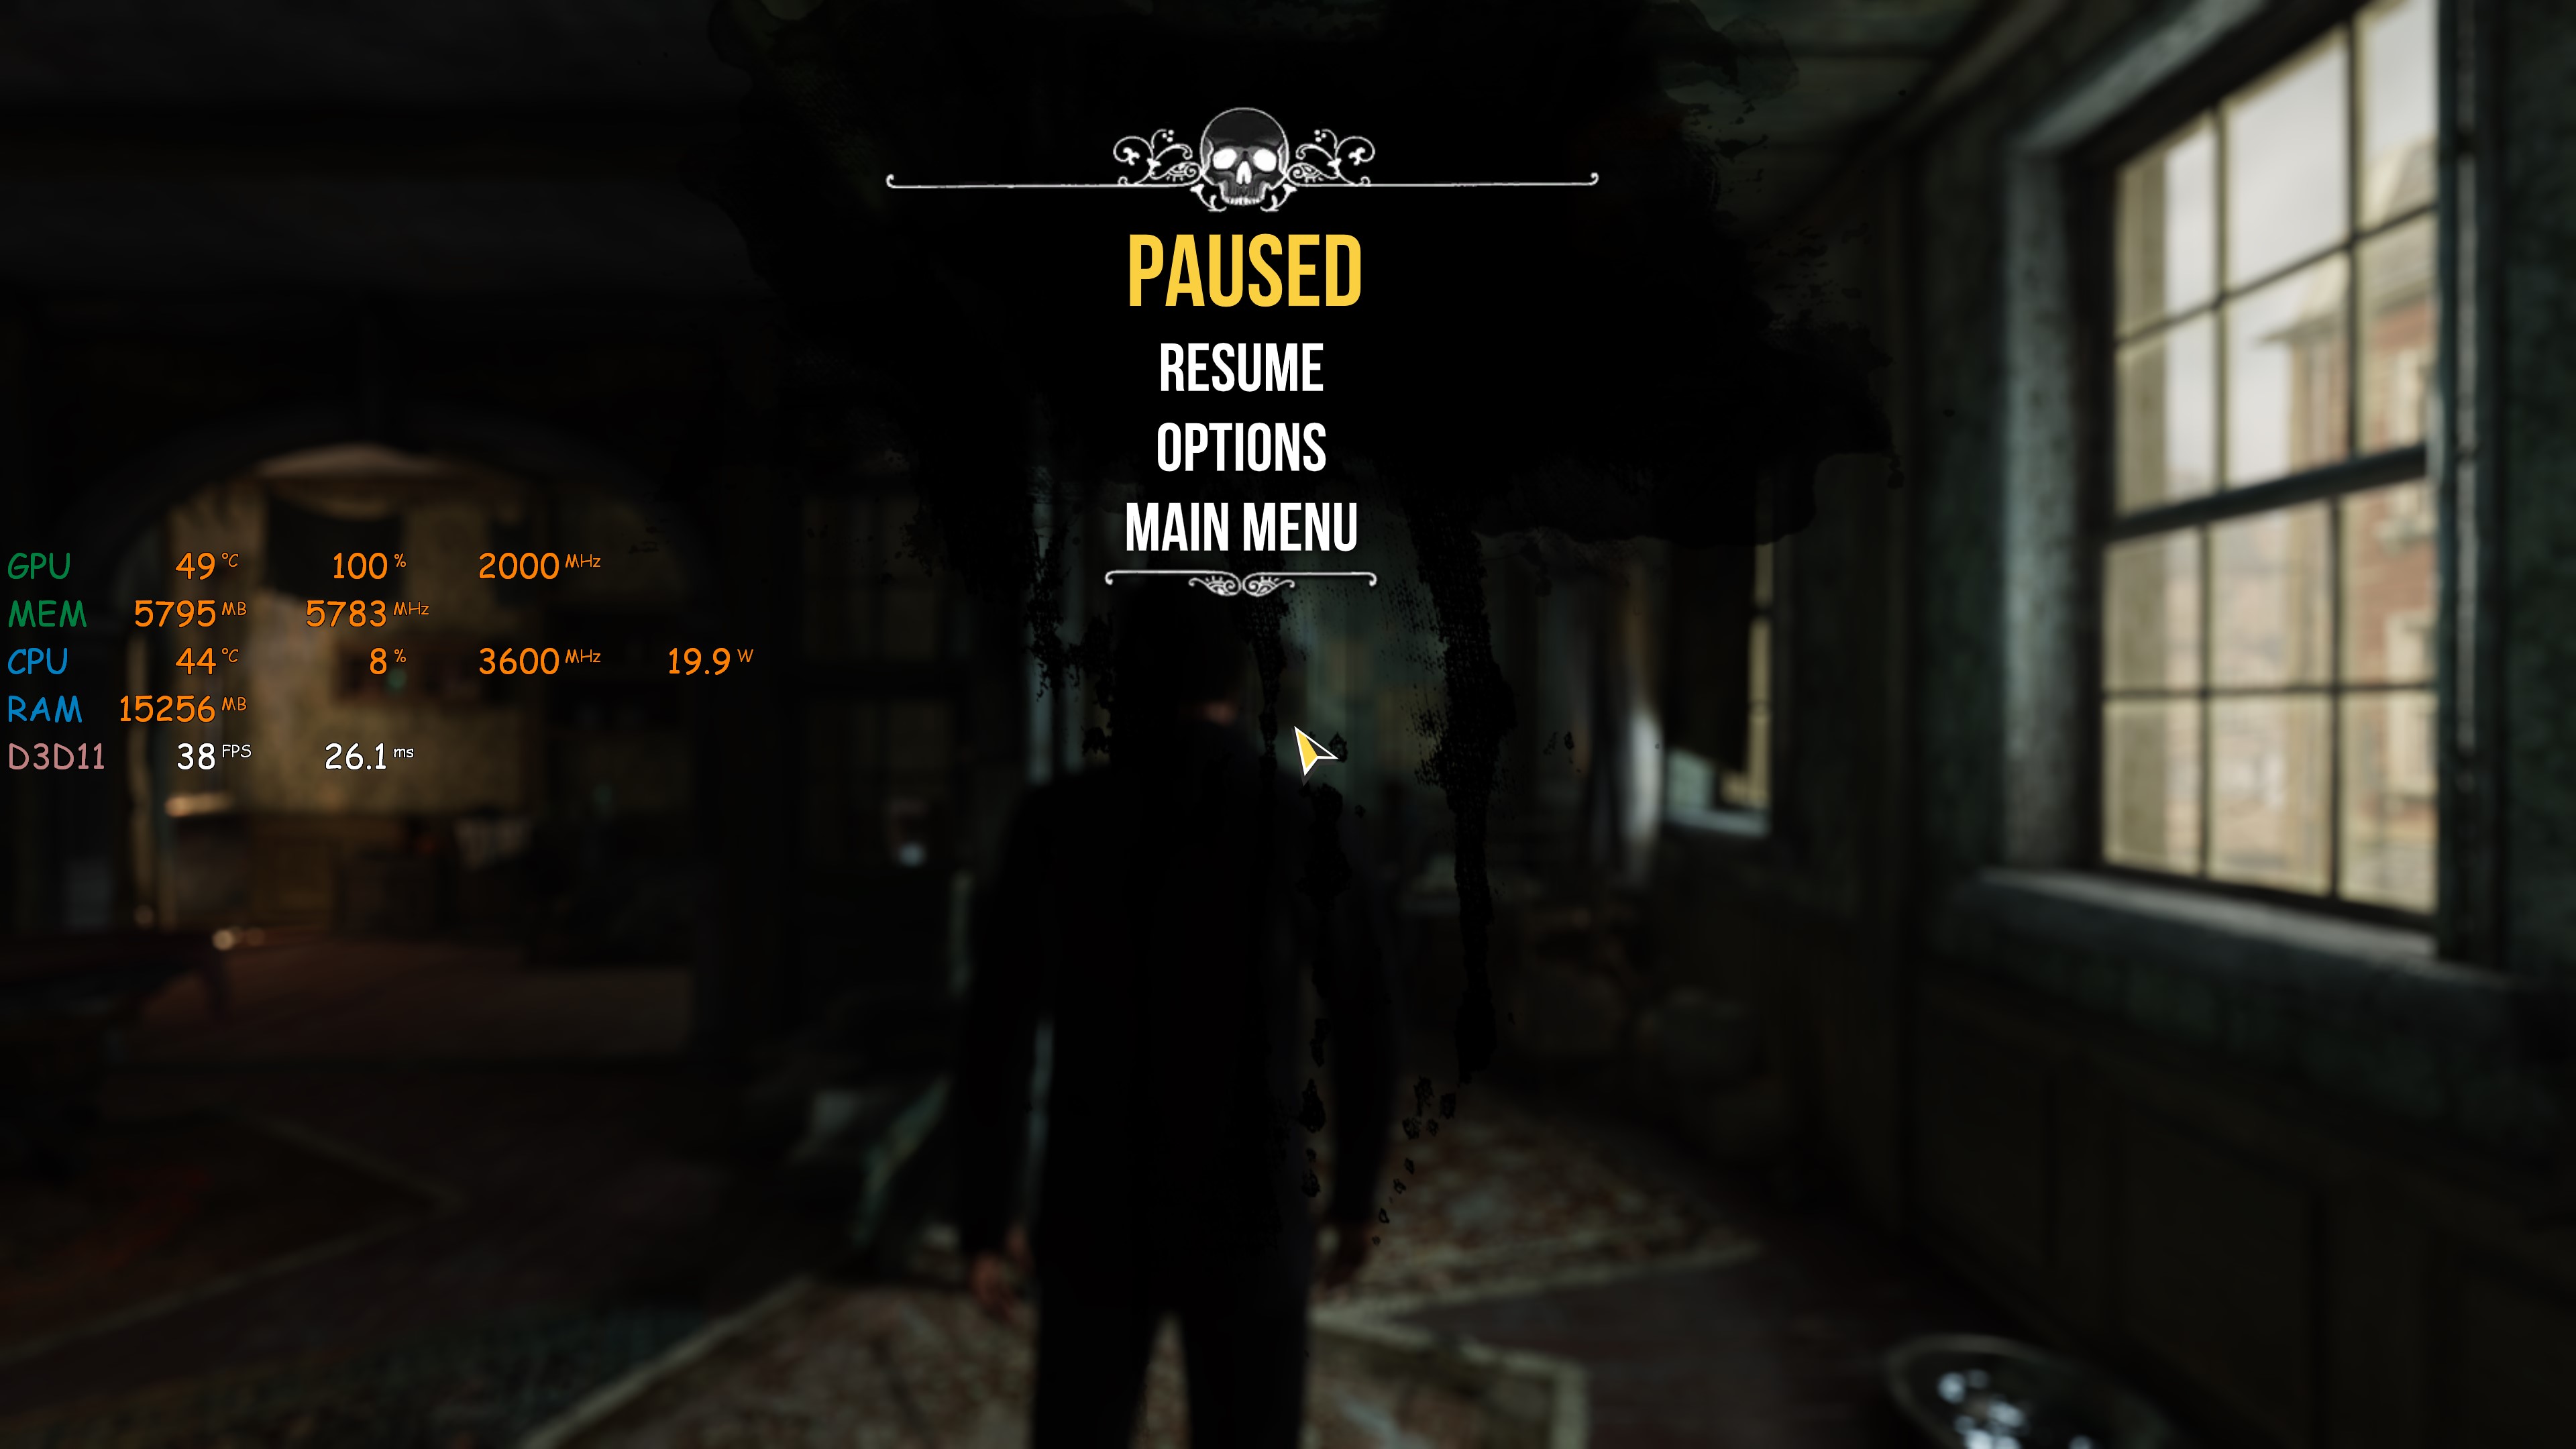
 Thanks to RivaTunerStaticsServer's performance overlay, we can see a simplified overlay of my systems usages. Specifically were looking at the first line, "GPU" (Graphics Processing Unit). Its utilization is sitting at 100% along with that low frame rate (38fps) with the default DOF effect.
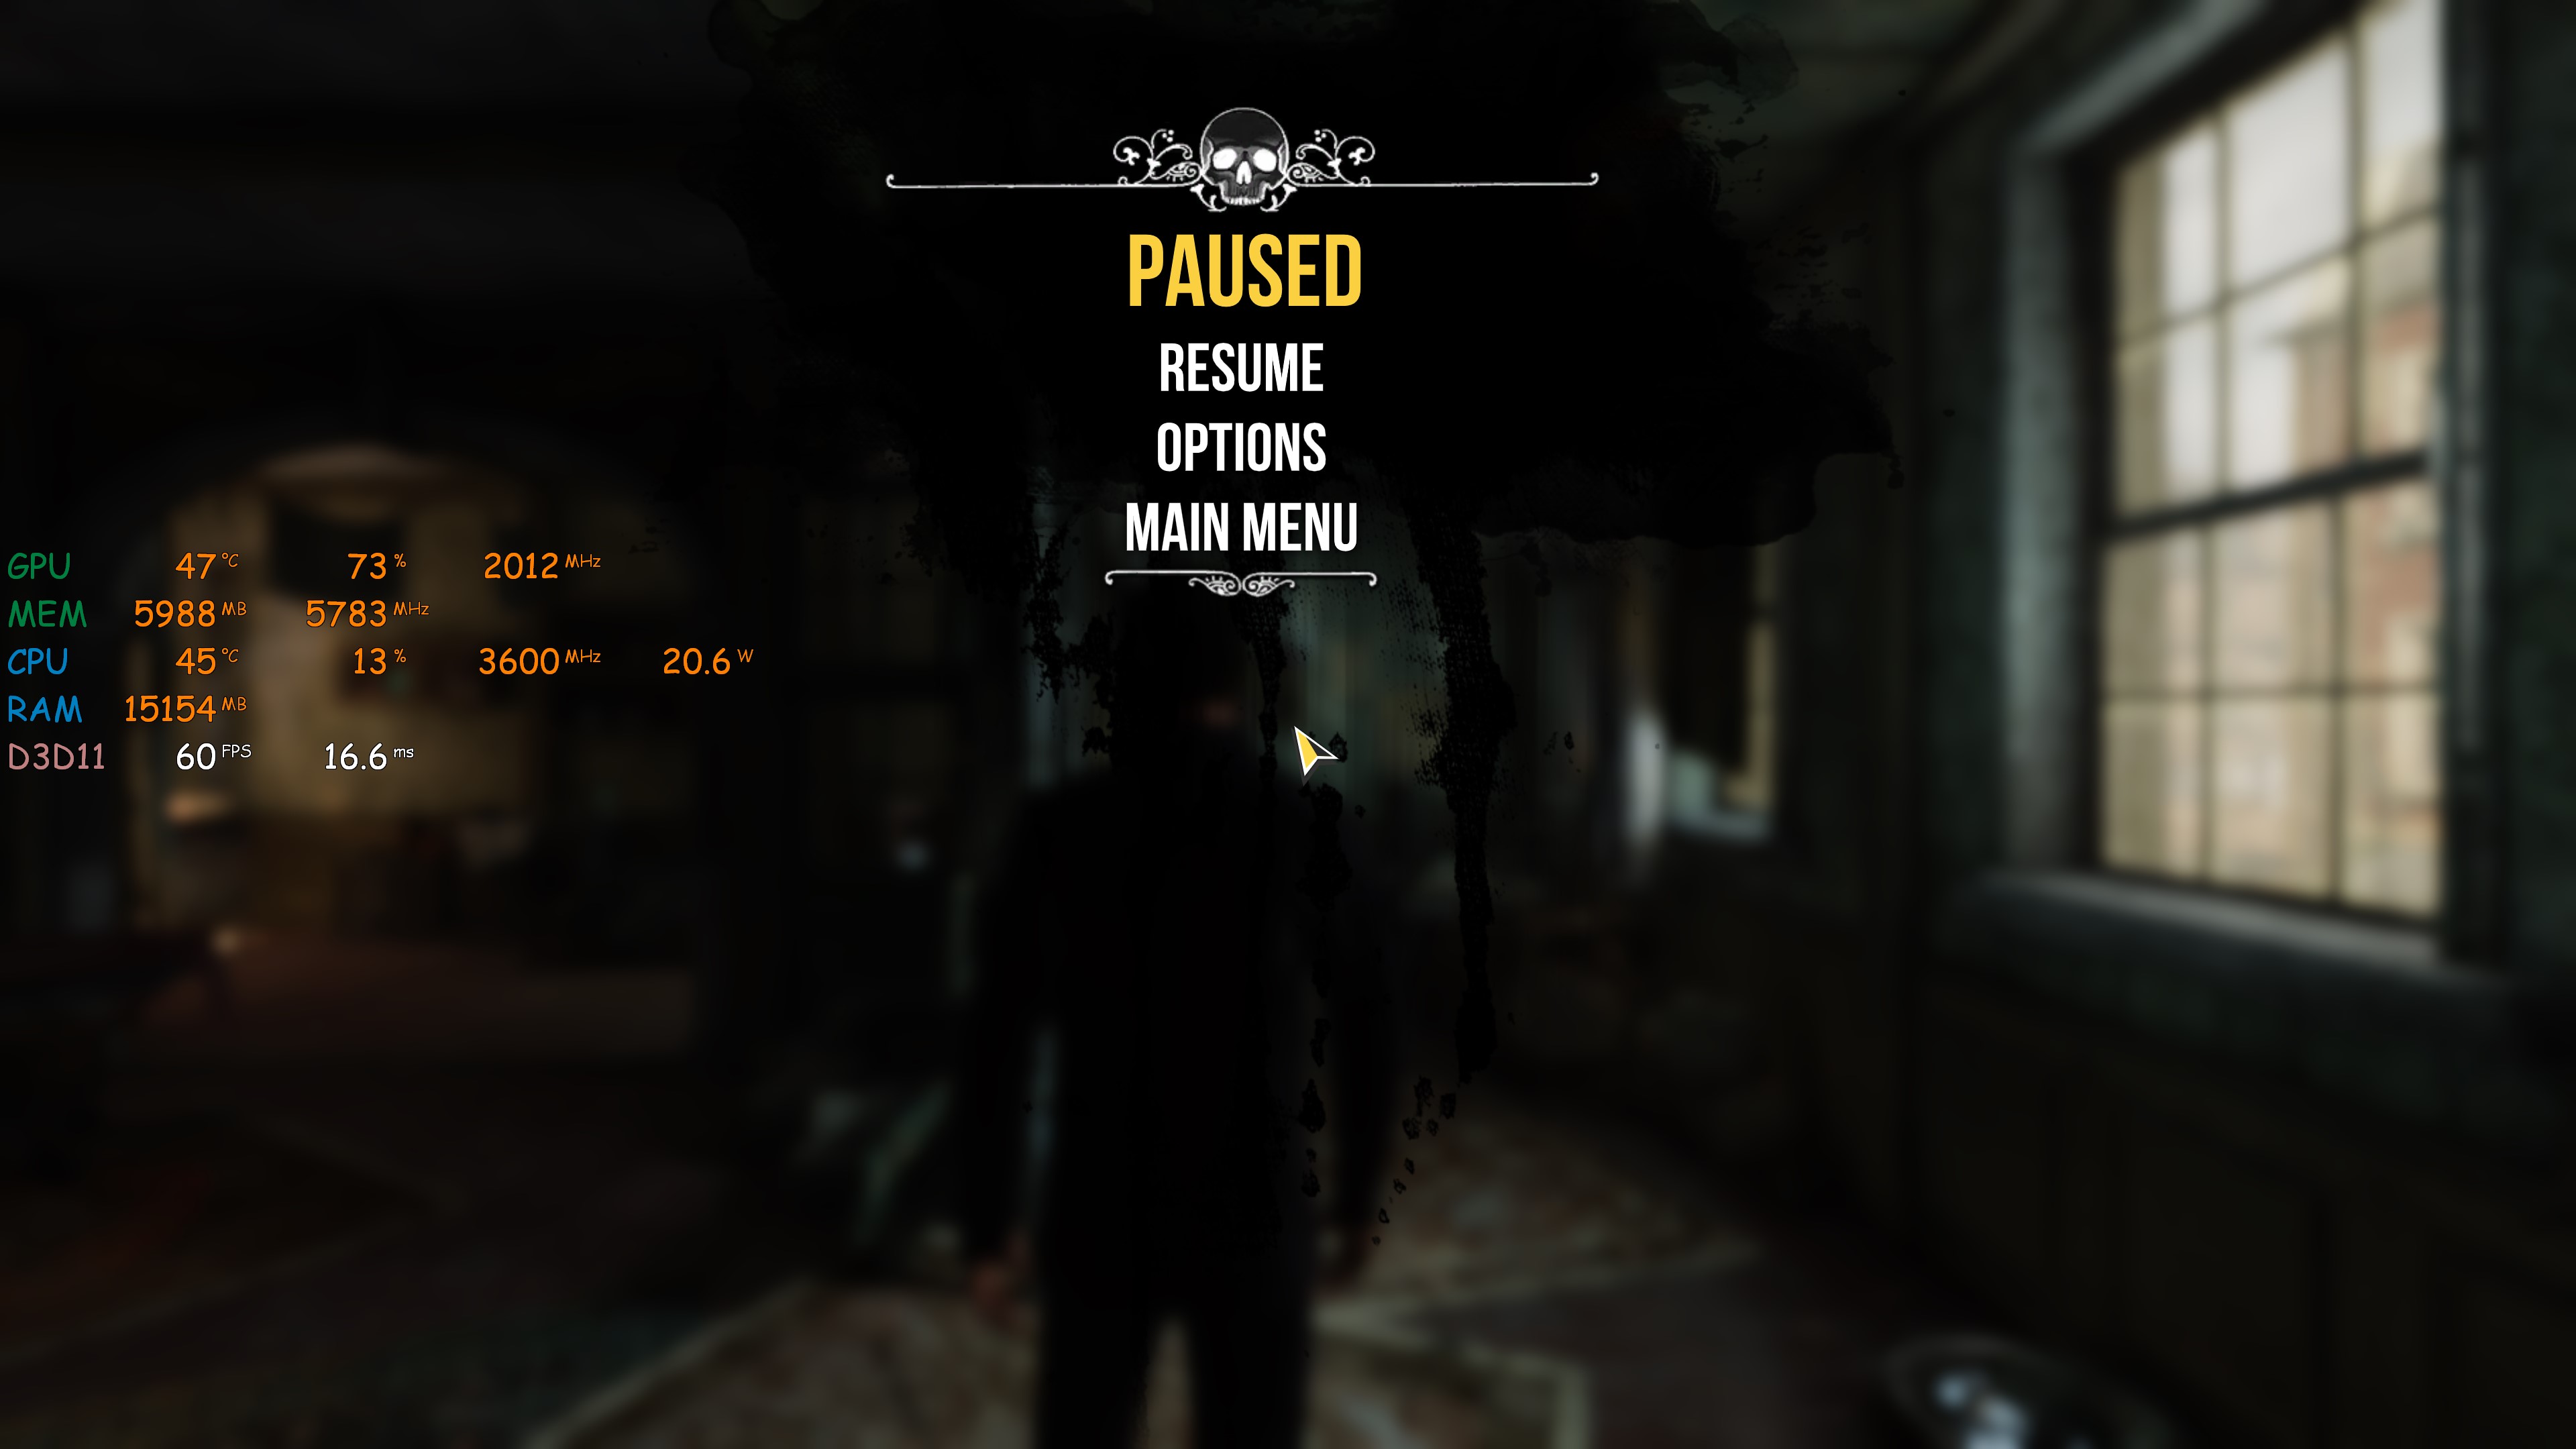
 With the DOF effect quality reduced, we can clearly see just how much of a demand that the default DOF setting had on my GPU. Along with the deduction in utilization we also see a bump in frame rate to prove it. In this current scene there was about a 27% difference in GPU usage by lowering the DOF effect.
  In fact, with my FPS unlocked we can see just how much of a difference lowering the DOF effect improved my overall performance. From 38fps (Default DOF) to 80FPS (Reduced DOF). Now, my GPU is at a high usage for the right reasons, it's driving a high frame rate at 4K with all of the in-game graphic settings set to maximum quality.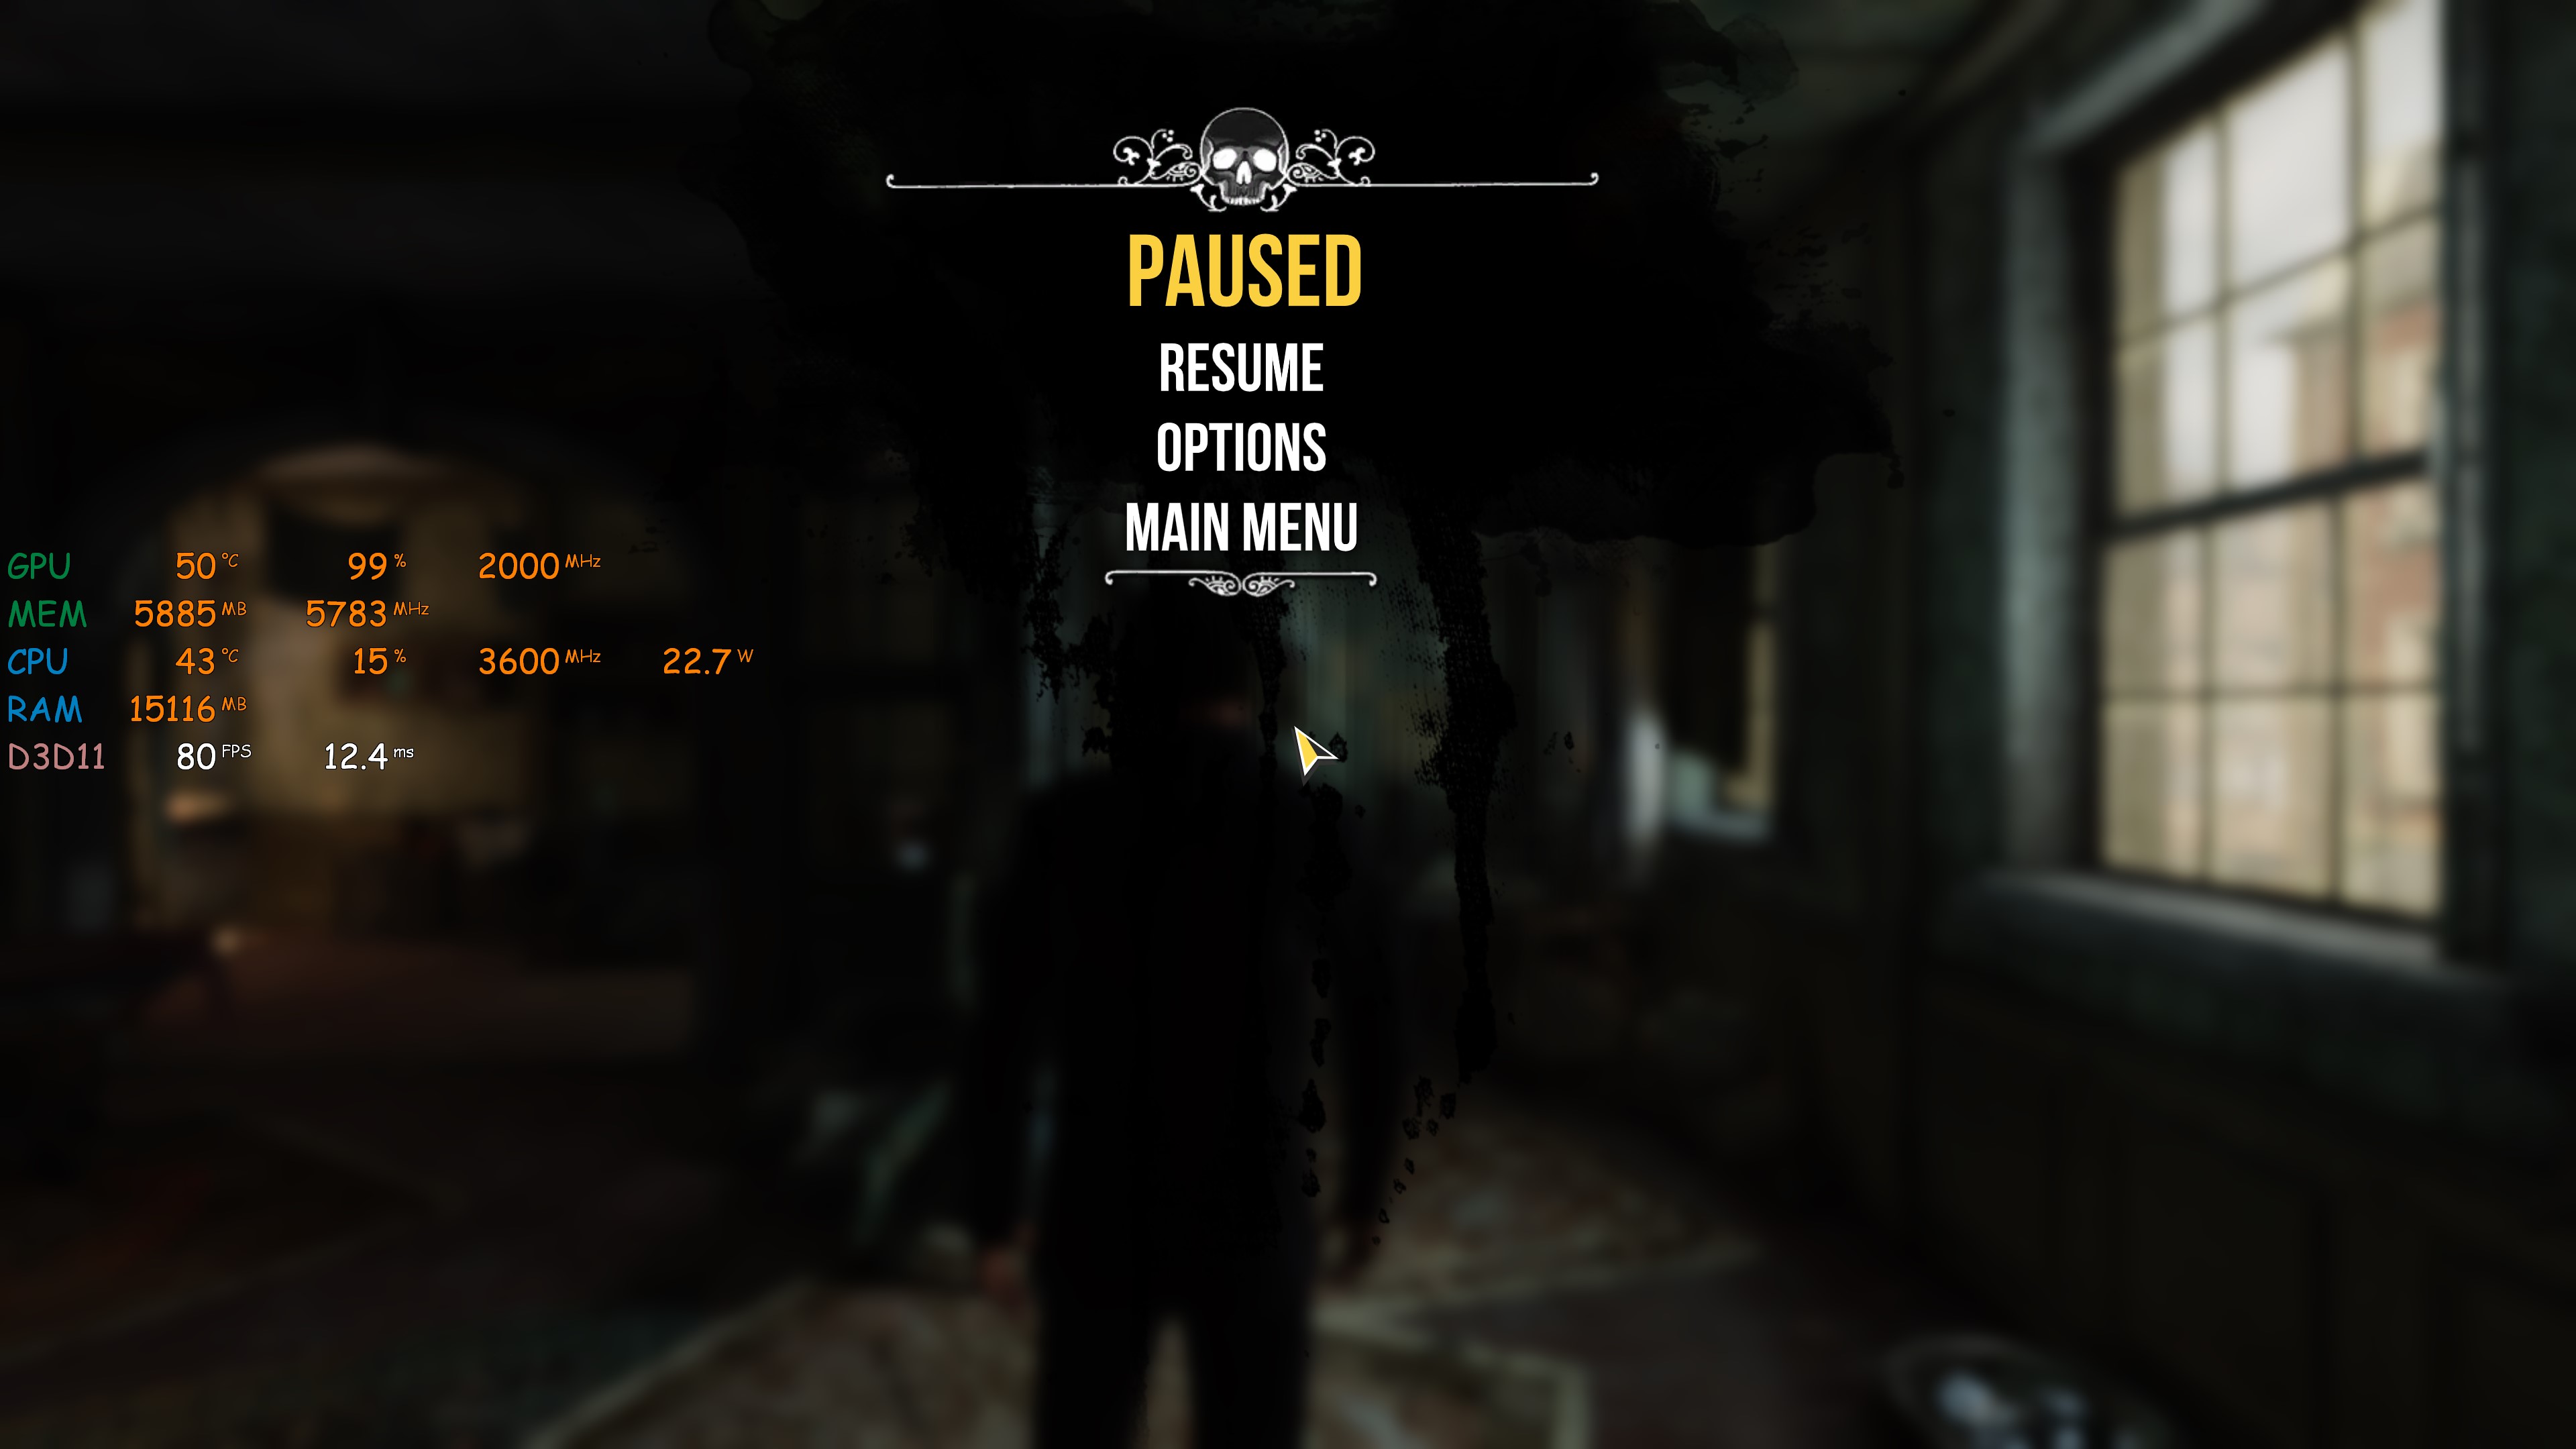
Ultra Wide Resolutions
For an even more cinematic experience I recommend creating a custom resolution within your displays properties/GPUs control panel. I use an Nvidia GPU so I'll be showing you step by step on how to do so for Nvidia cards. With Radeon (AMD) card, the process with similarly done within the Radeon software.
First off, here are the ultra-wide resolutions (21:9 Aspect Ratio) that I recommend per user display resolution:
1080p users (1920x1080) you'll want a custom resolution of 1920x810
1440p users (2560x1440) you'll want a custom resolution of 2560x1080
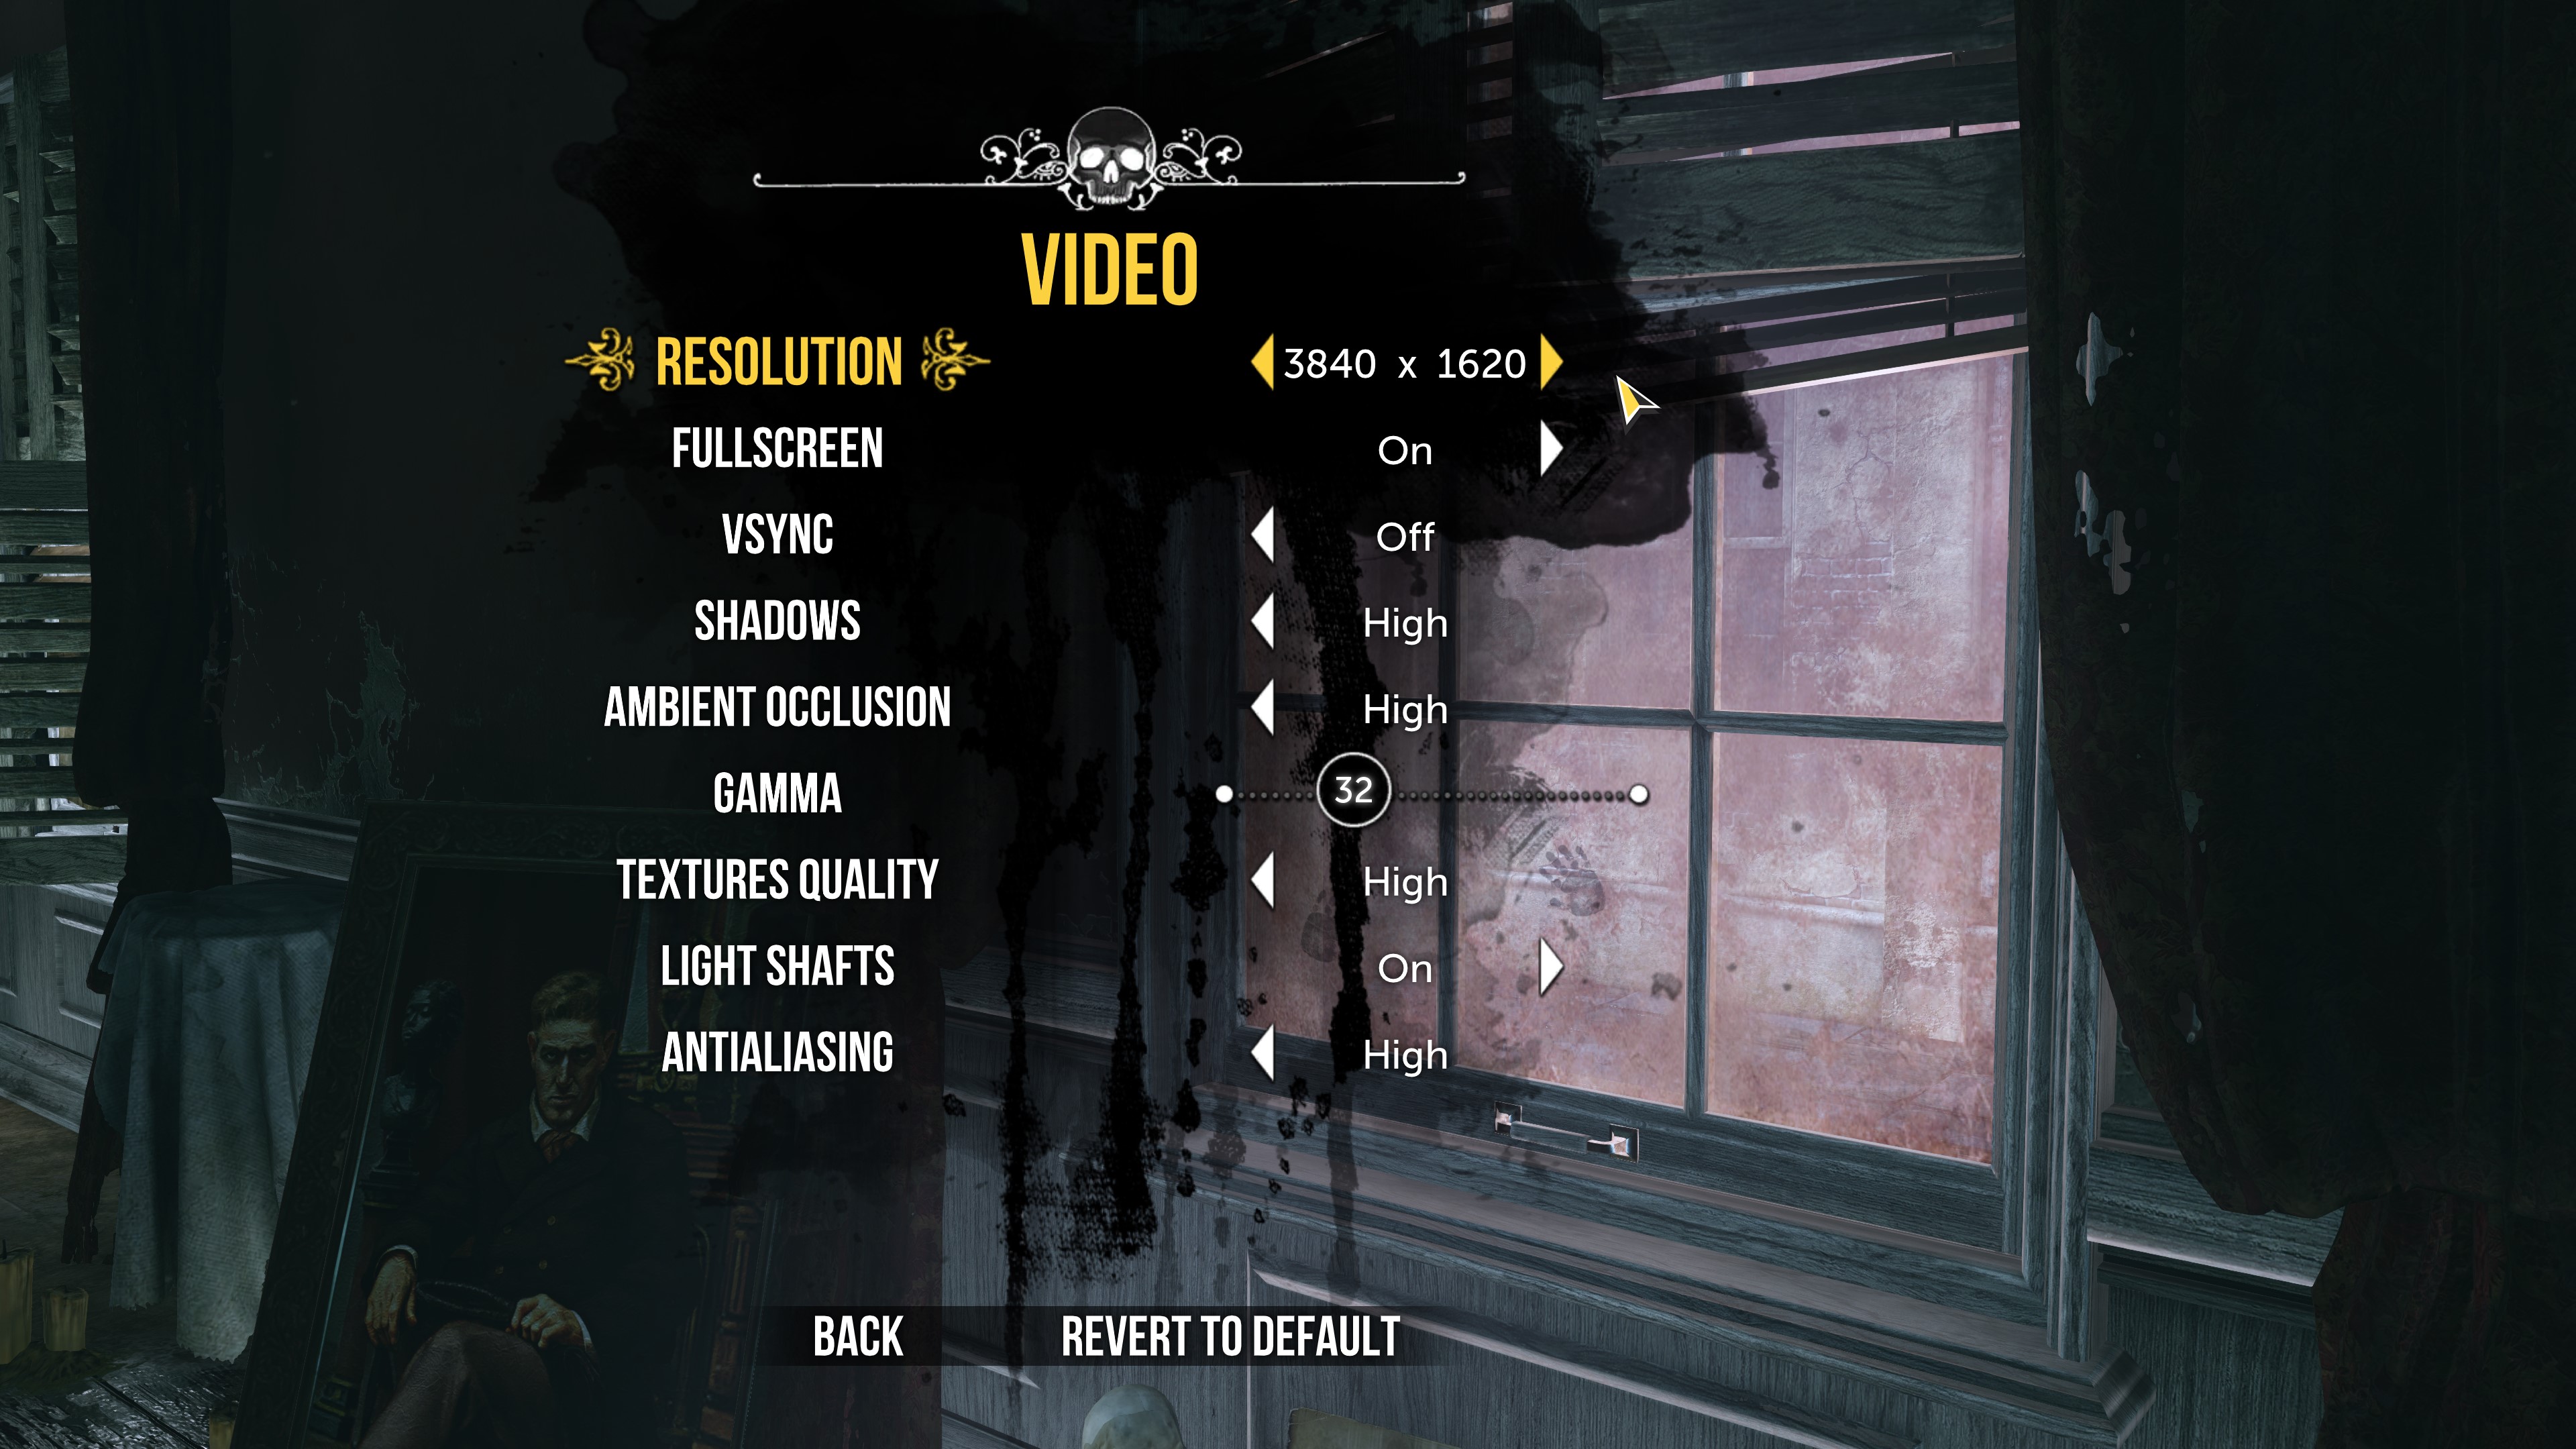
2160p users (3840x2160) you'll want a custom resolution of 3840x1620
Here, select Aspect Ratio.
Set Perform scaling on: to Display.
Check the box next to Override the setting mode set by games and programs.
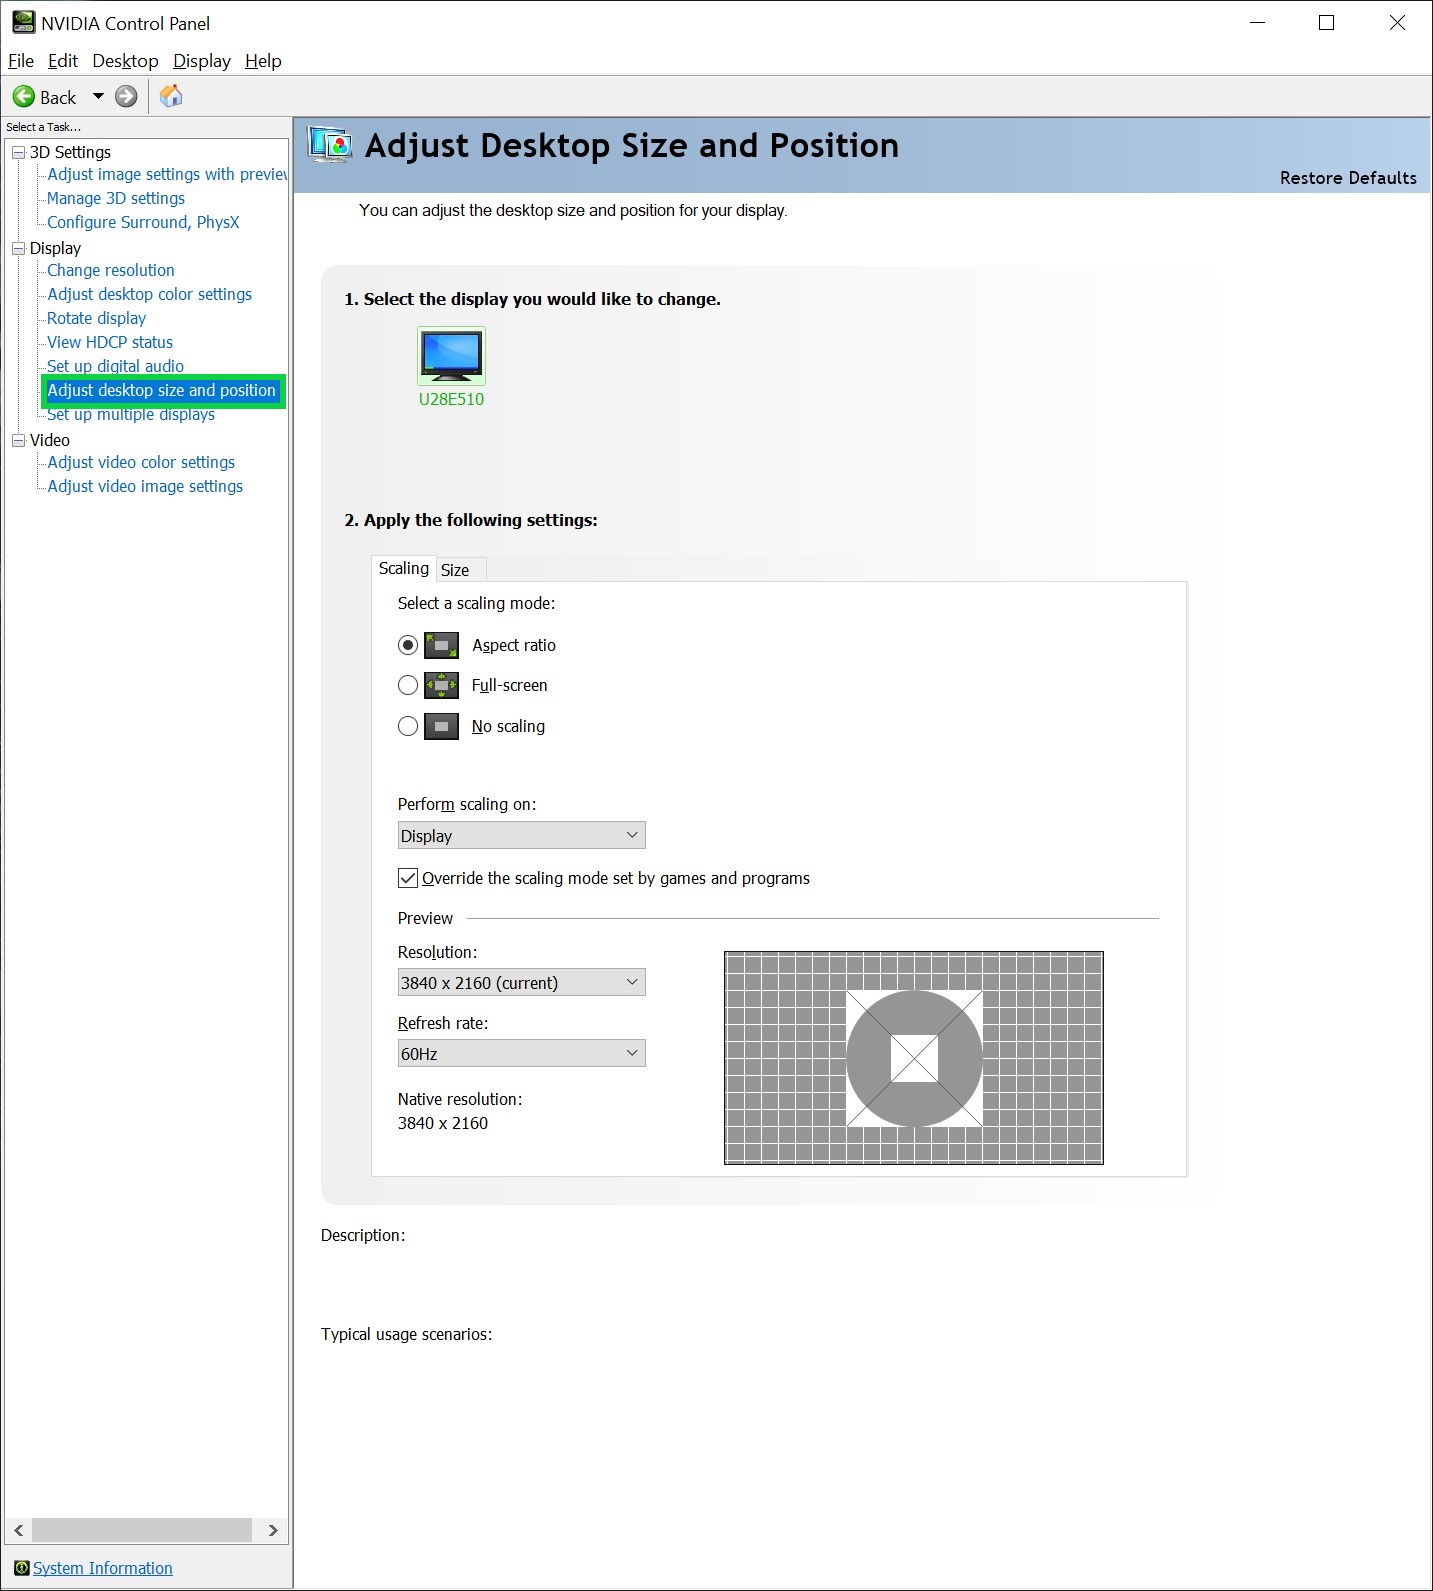
Click Customize.
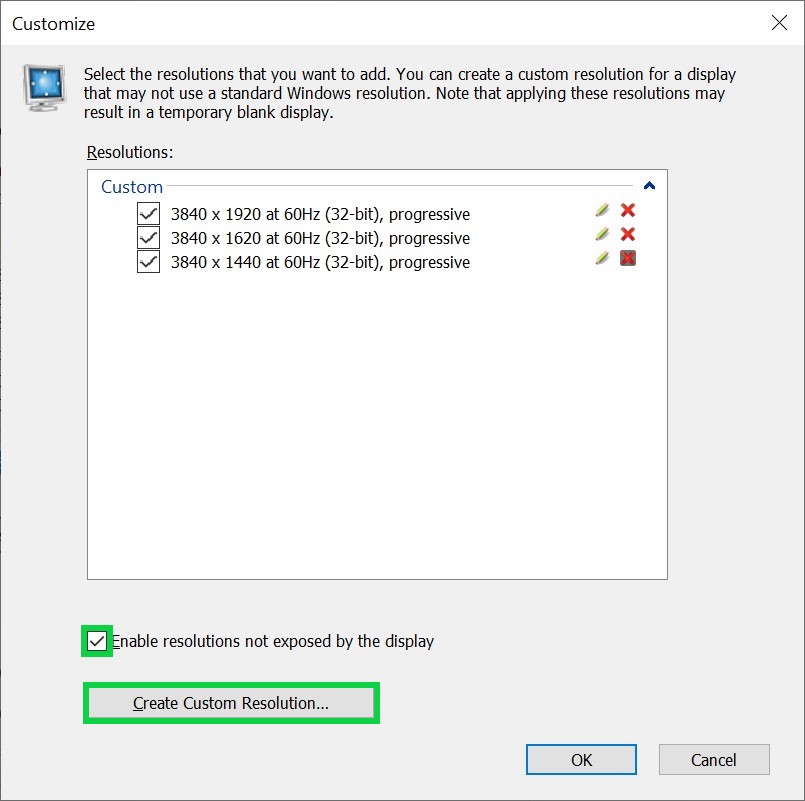
Check the box next to Enable resolutions not supported by the display.
Click Create Custom Resolution.
Change Vertical lines: to 810 if you have a 1080p display.
__________________ to 1080 if you have a 1440p display.
__________________ to 1620 if you have a 2160p display.
Click Test, doing so will cause your display to temporarily go black (This is normal). Your display should return to it's normal state within a few seconds. If it doesn't press the ESC key on your keyboard. Doing so this will prematurely revert any change you've made as the application will automatically revert after 30 seconds if no options are selected. Now click Ok.
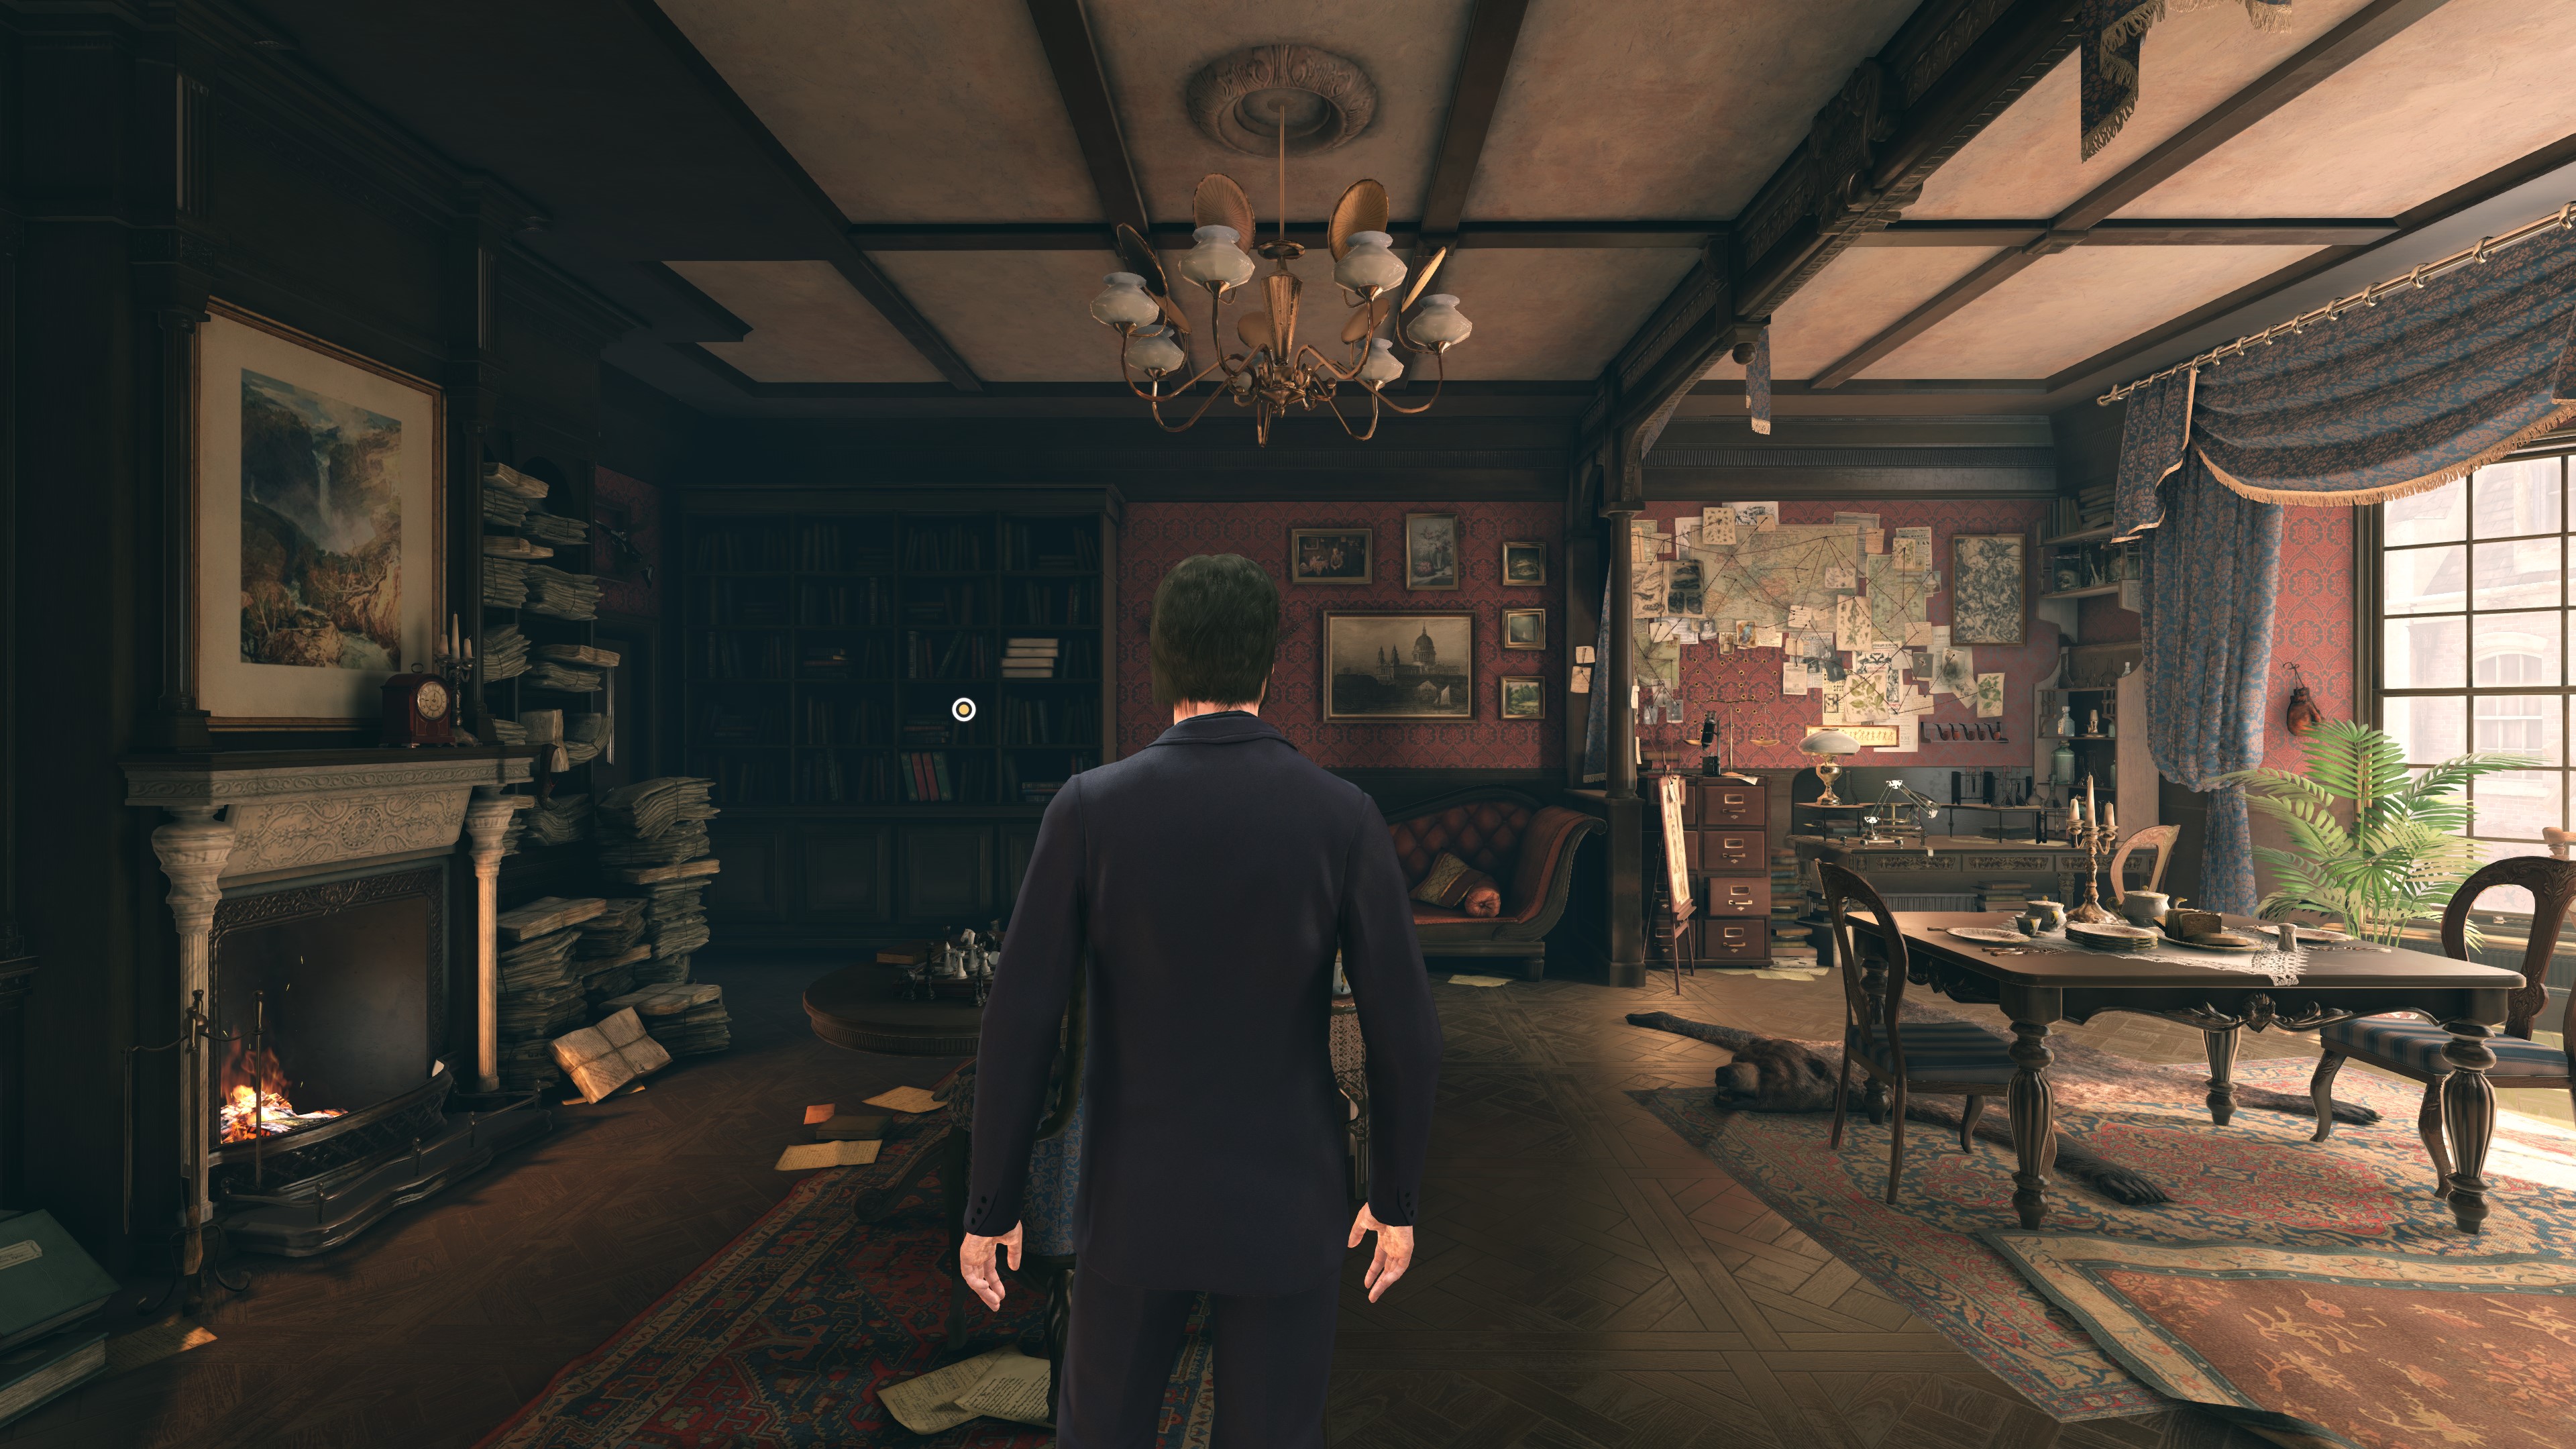
 16:9 Aspect Ratio
 21:9 Aspect Ratio
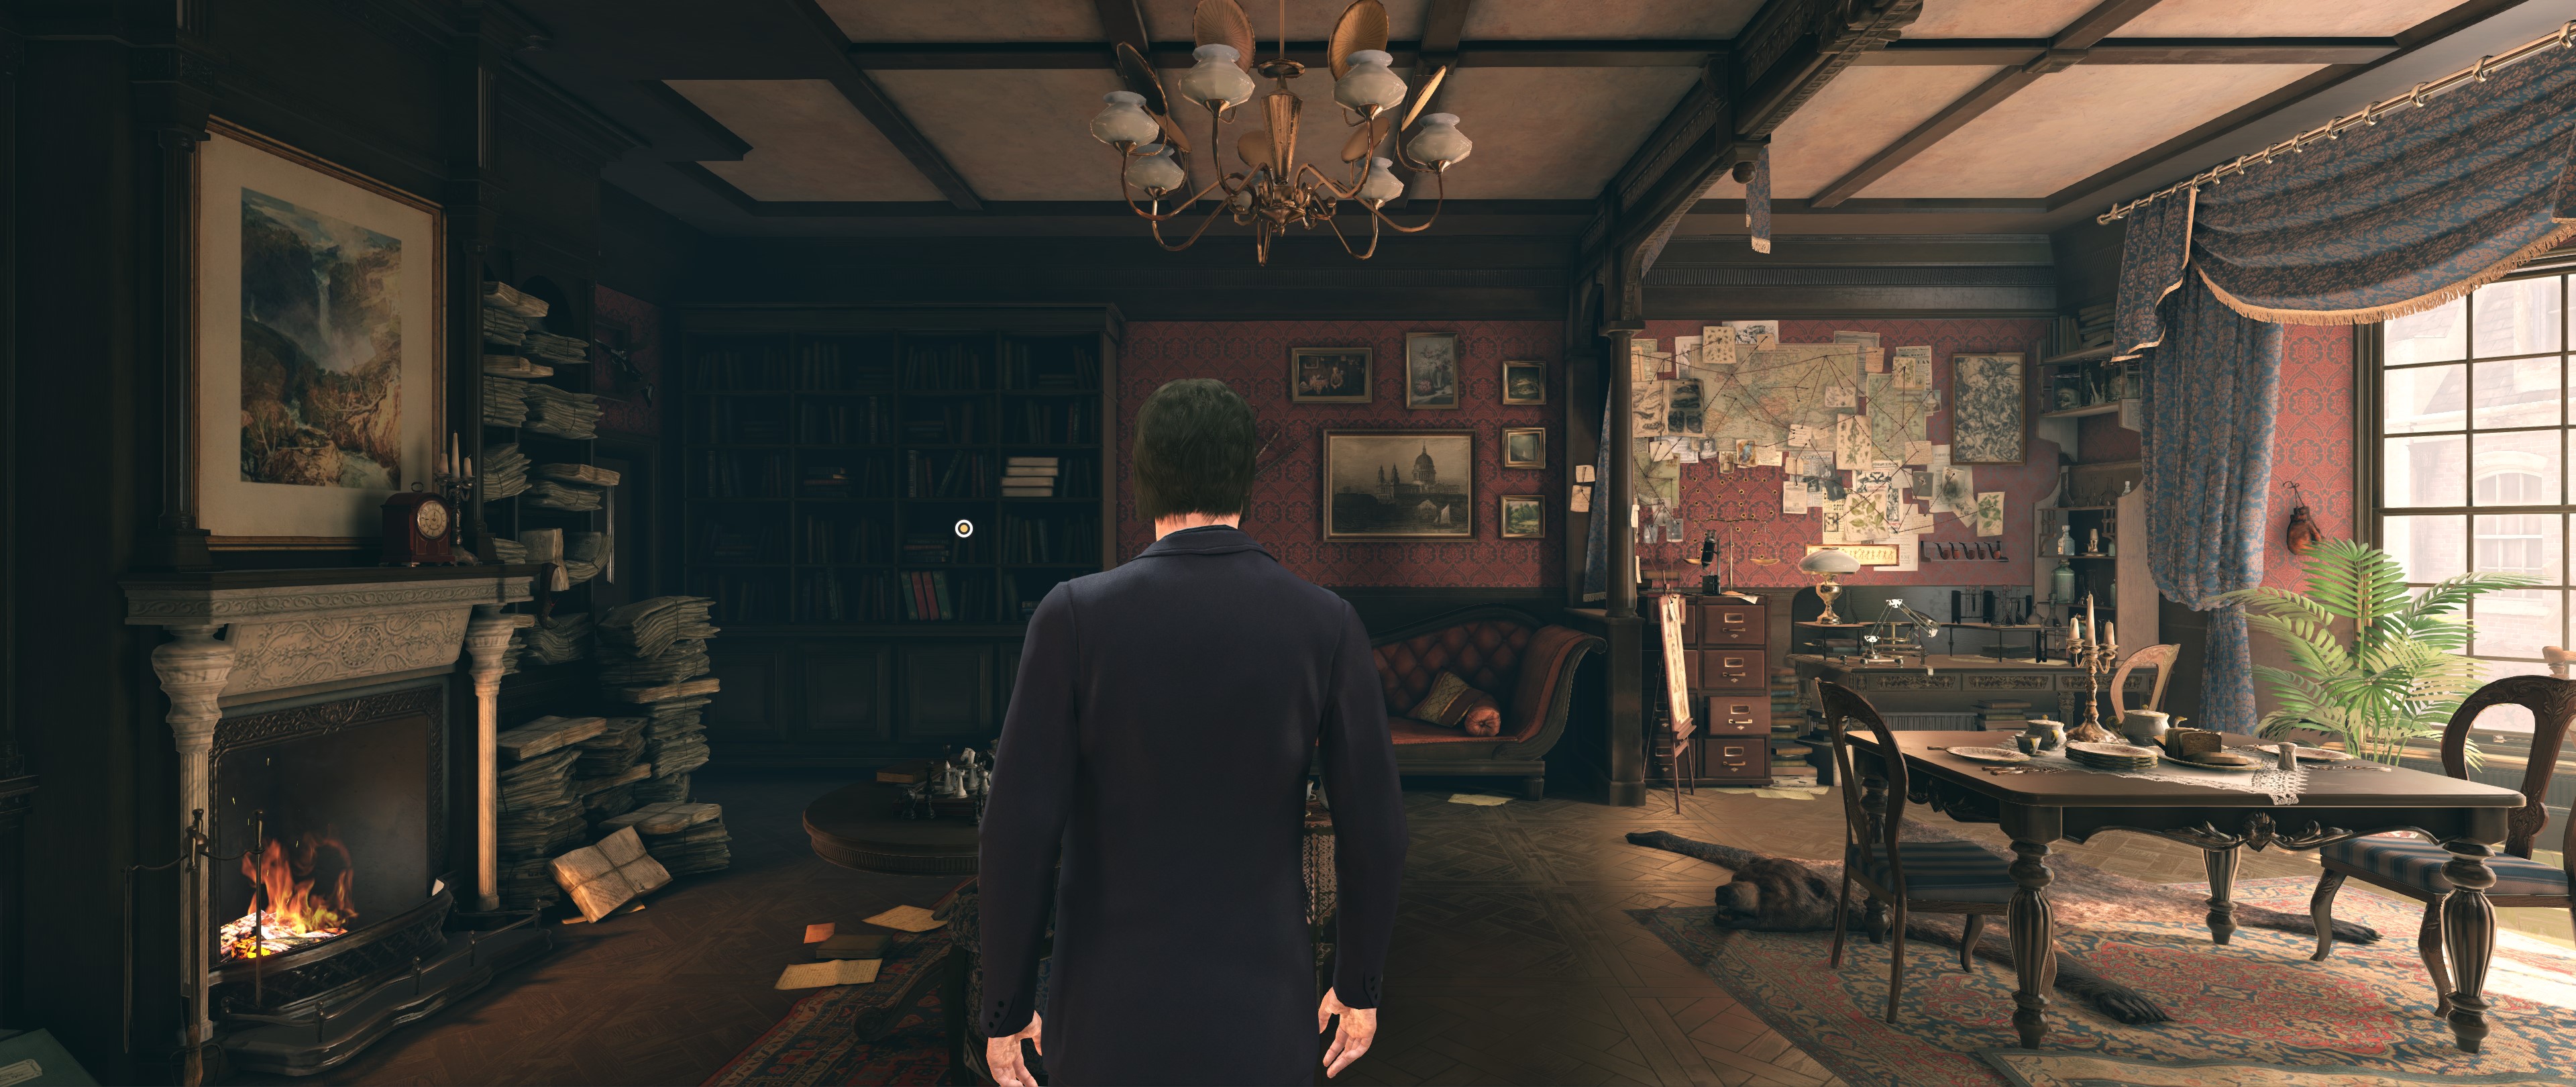 Now as you can see, with this game, even though it does in fact support 21:9 displays, the game itself still operates in a typical widescreen manner. The UI does conform to this aspect ratio as seen below.....
but doing so won't further increase your field of view as is done with games that truly support ultra wide displays. Doing so does however improve performance as you're rendering less pixels on screen. And for titles that do natively support the 21:9 aspect ratio, you'll receive both benefits of an increased peripheral view and a performance boost. But with this title, it's simply black bars. And do note that cut-scenes will appear with black bars along the left/right sides of your screen too. BUT WAIT.....There's A Trick Around This! Lets go back and edit our FOV one more time. This time, we're going to set it to 120. Now take a look at the view.
See what I mean now.....
Here is an example of a game (Battlefield V) that fully supports the 21:9 aspect ratio. Now you can visibly see the advantage of playing with an ultra wide resolution.
16:9 (3840x2160)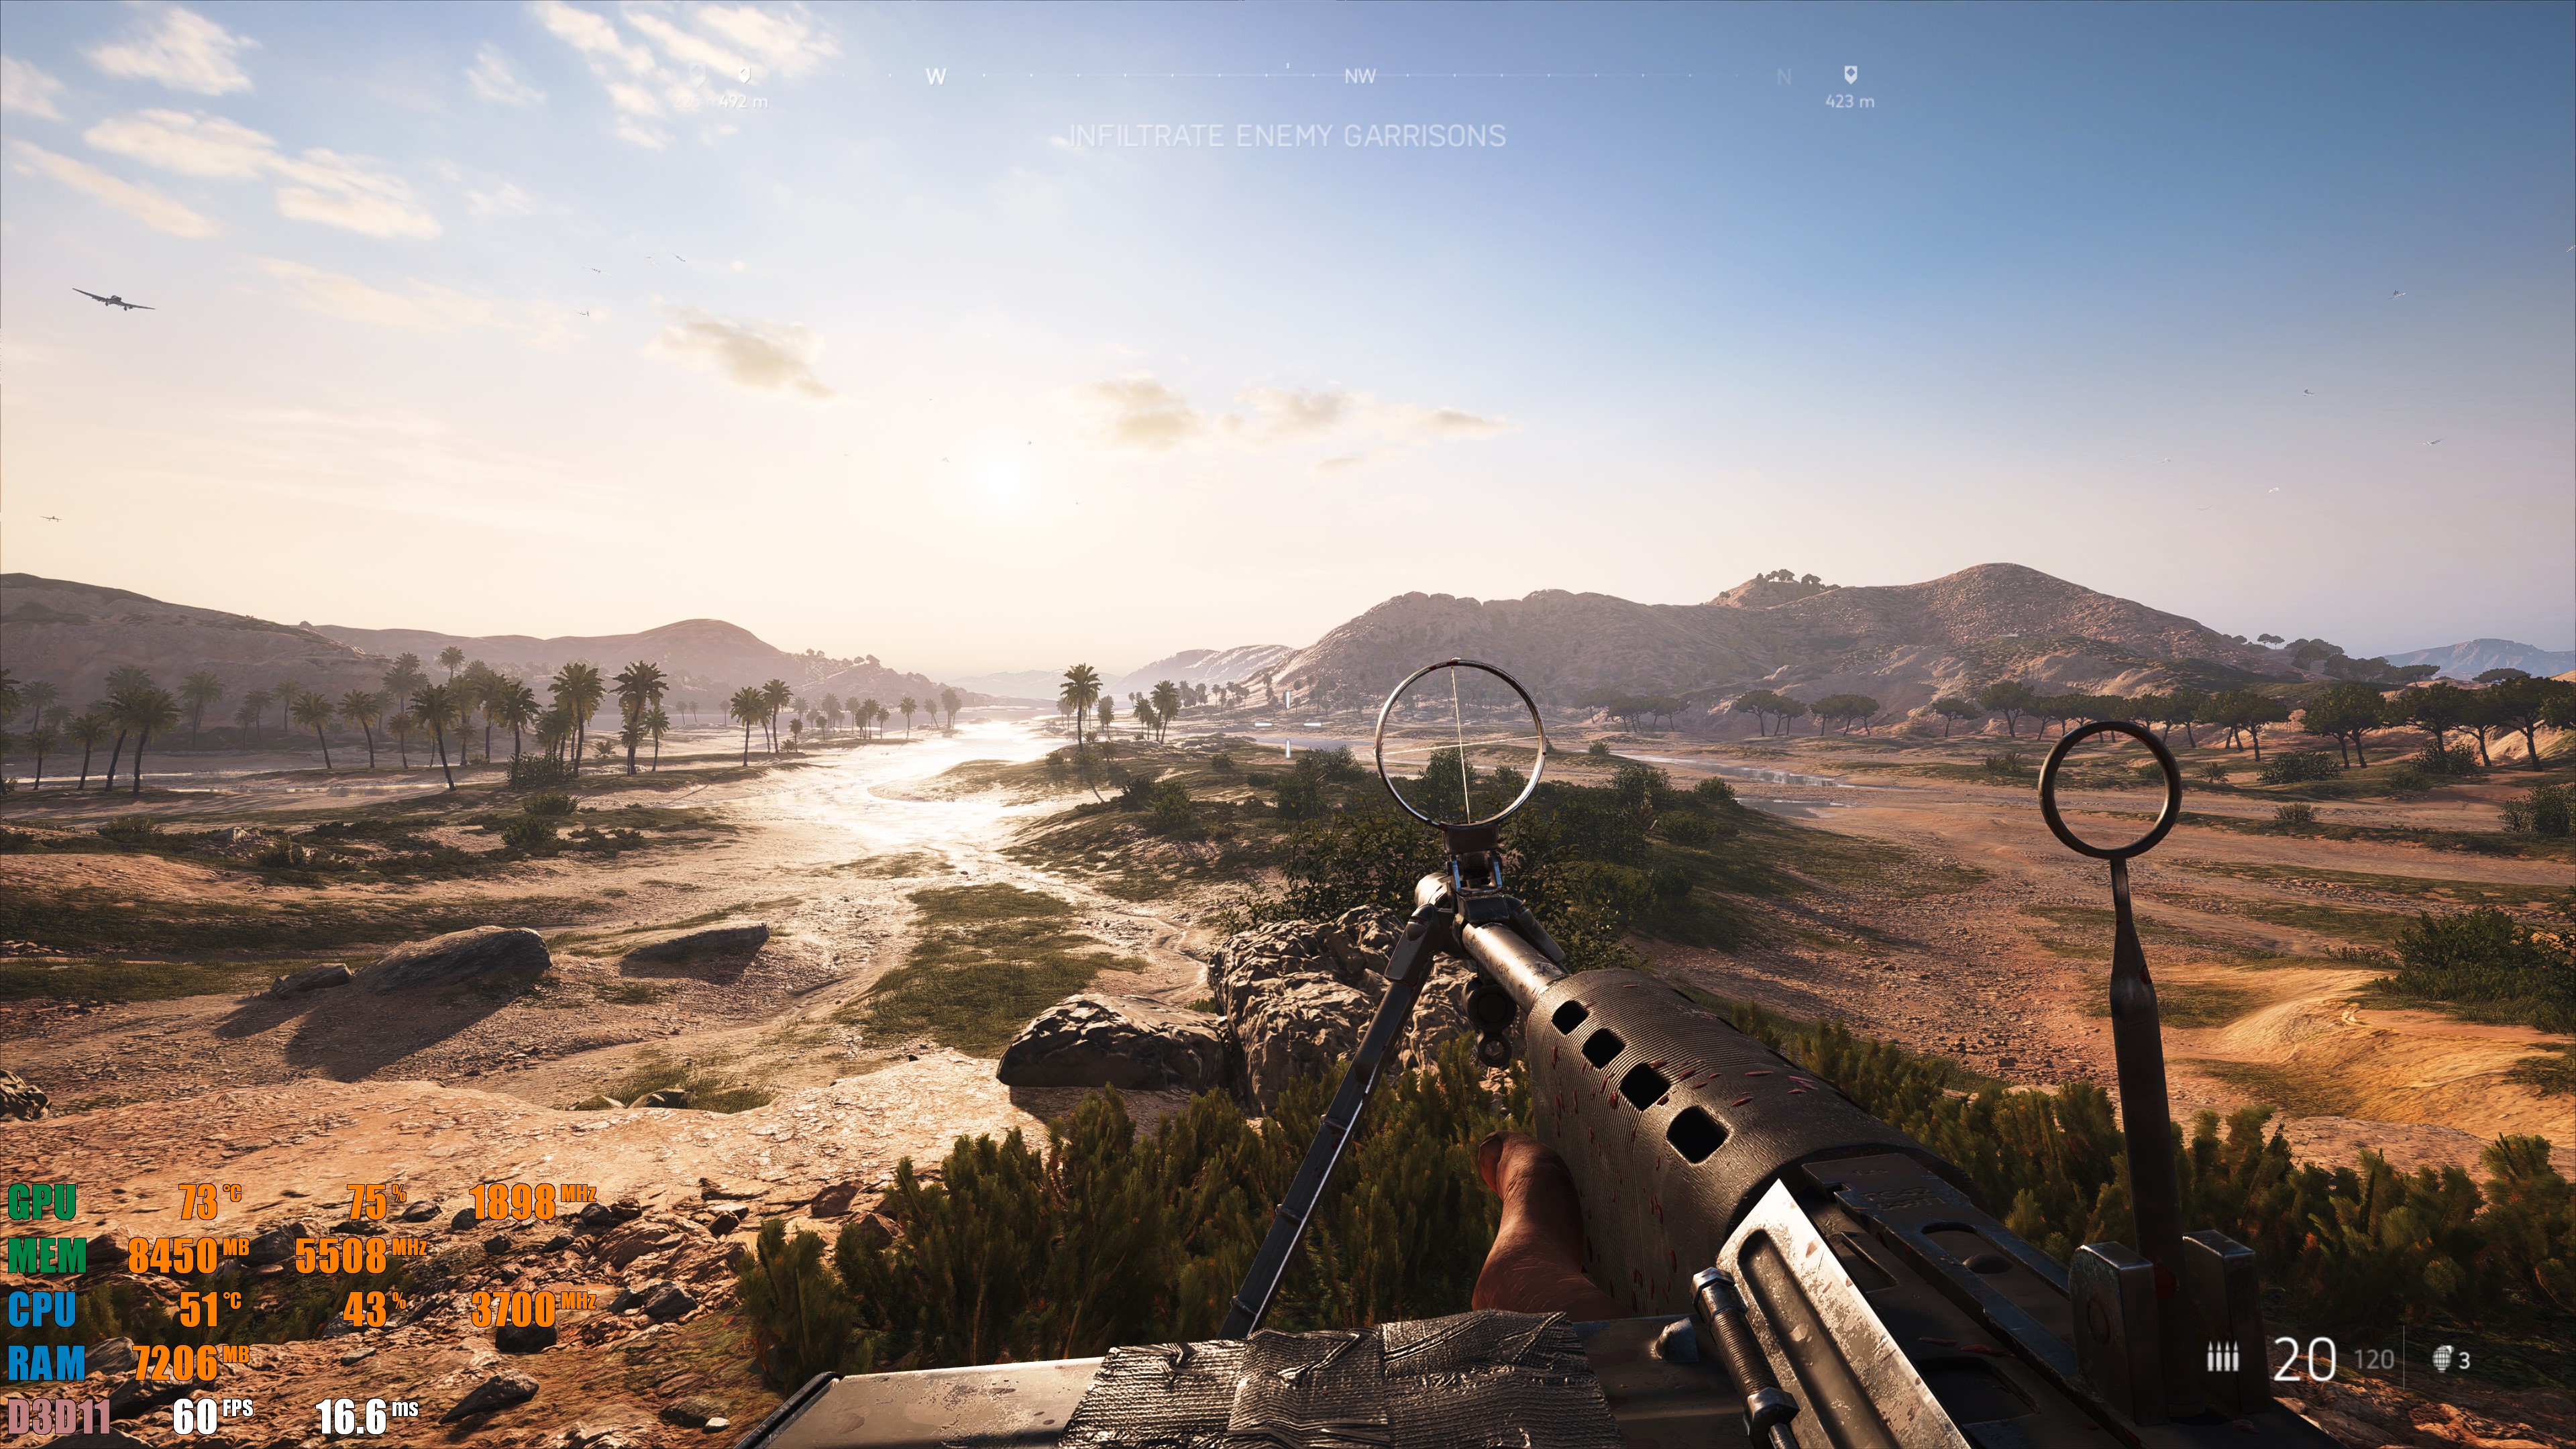 21:9 (3840x1620)
 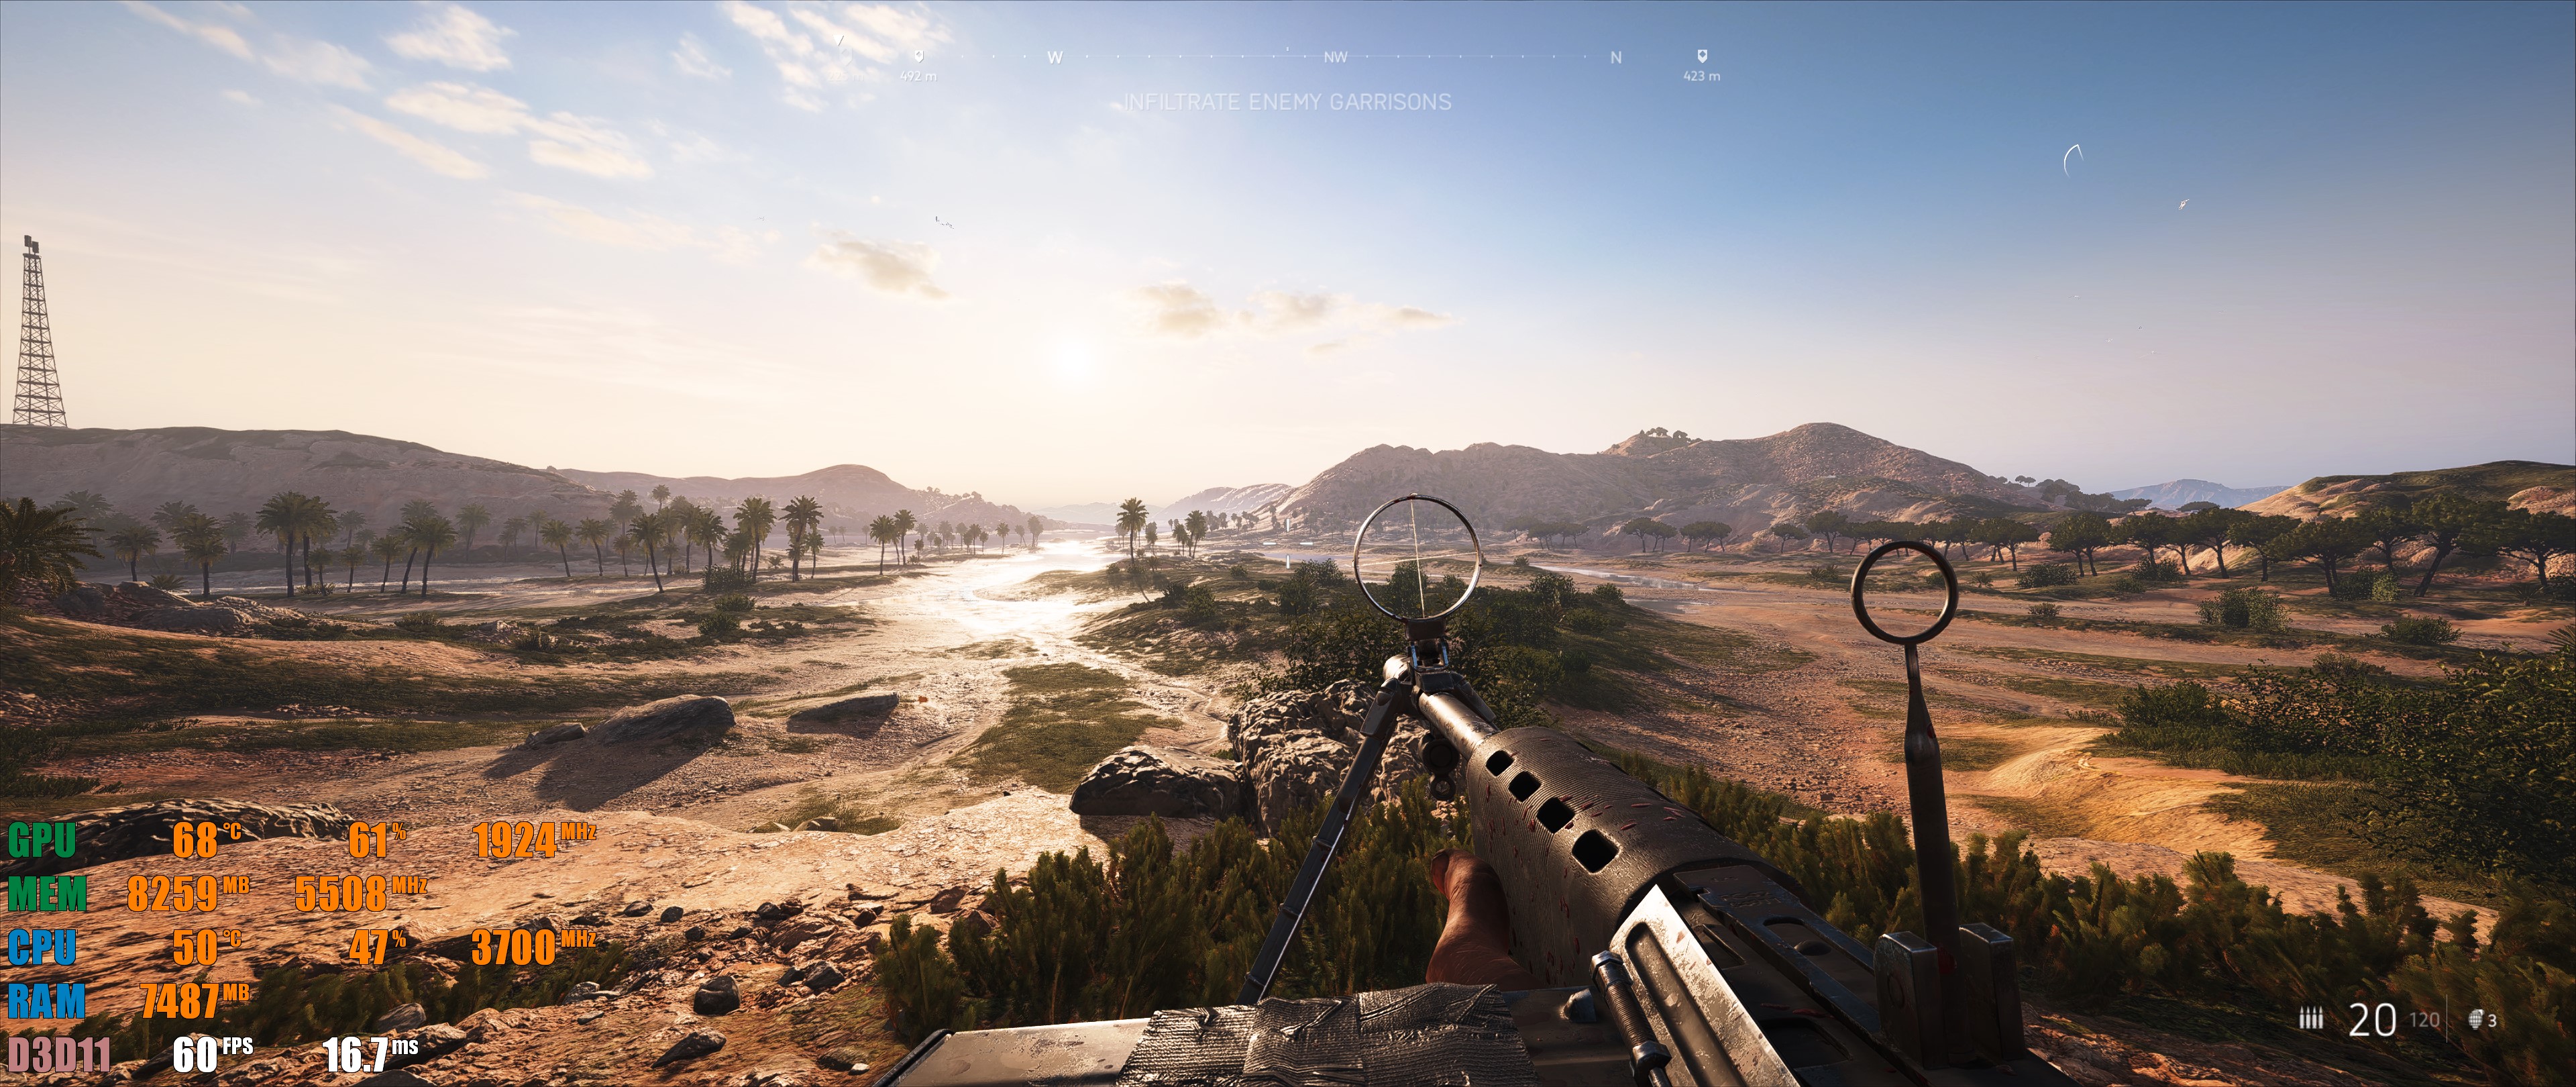 21:9 (3840x1920)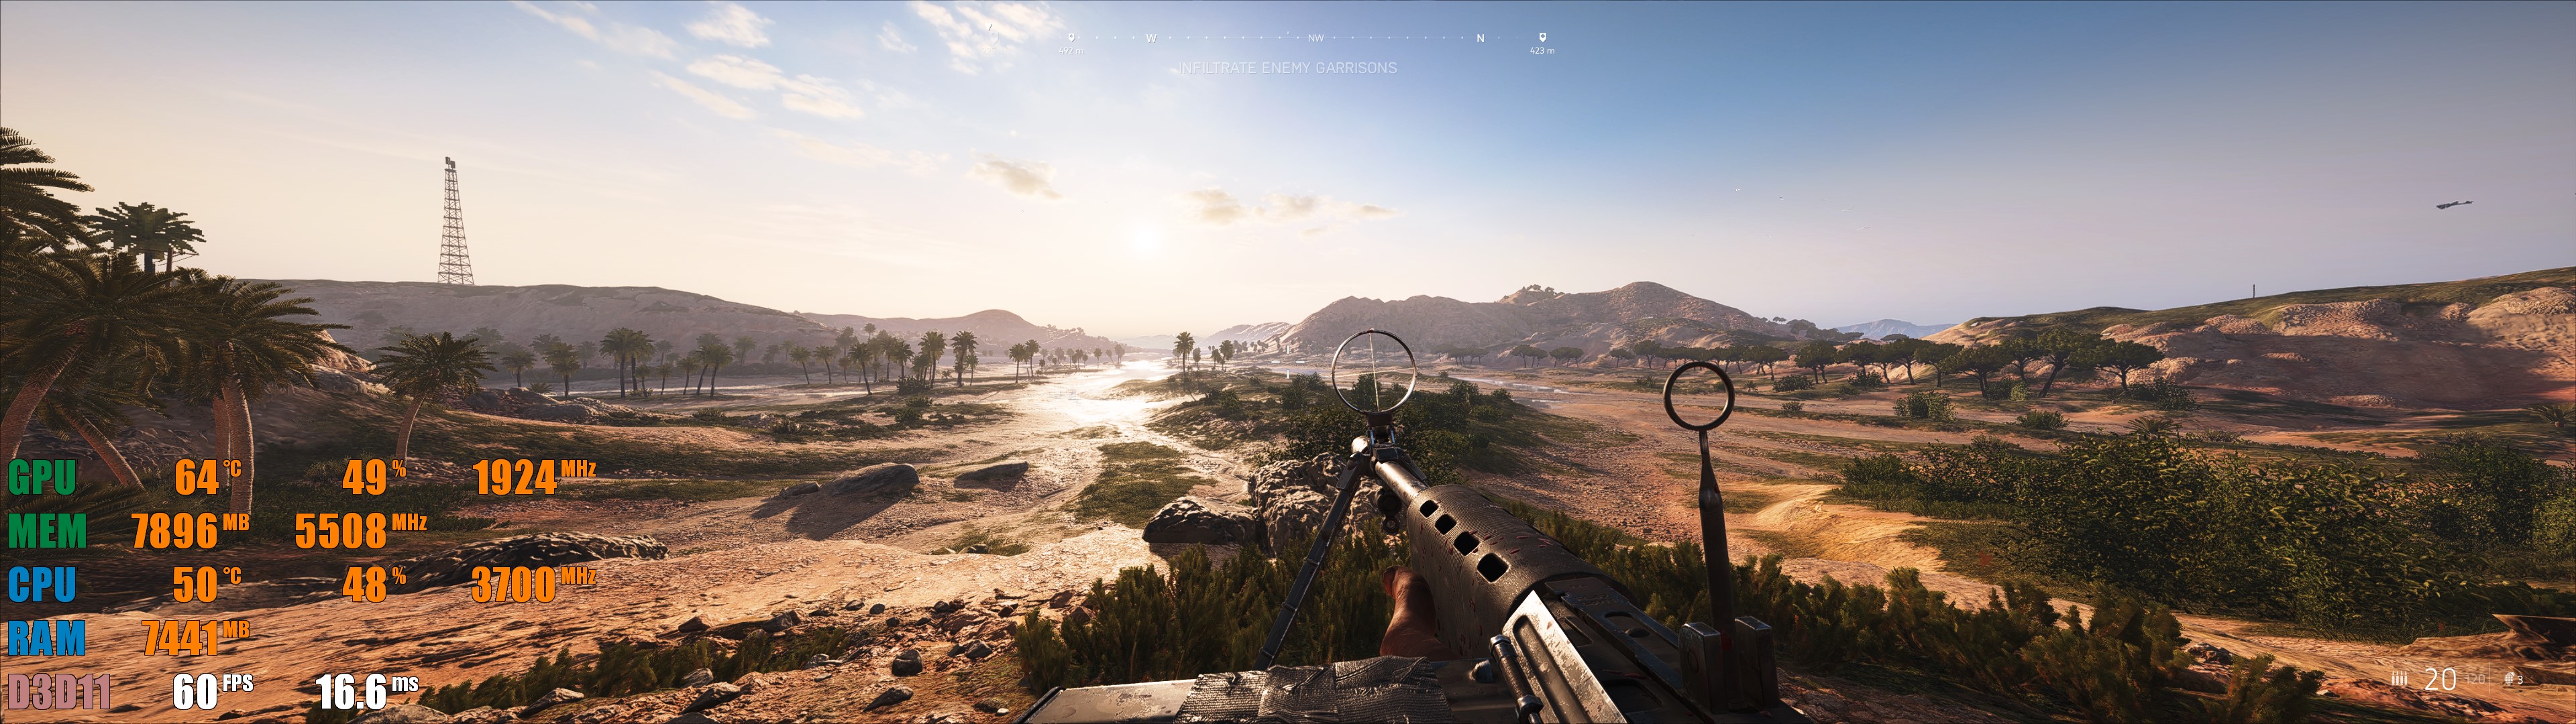
Again, with the performance overlay, and as I just mentioned above, you can see the decreases in GPU usages, temps, and and improvement in FPS (I had it capped to 60 here but if it wasn't you'd see significant bumps in performance across the three different resolutions).
More Tweaks To Come
I'm currently playing around with manually increasing certain values correlated to graphics settings found within these .ini files but this will mainly be trail and error so I'll return to this section at a later date when I've learned which settings are worth bumping up in quality or reducing/disabling completely....I'm looking at you Bloom. But unlike a lot of games I've played, the Devs actually implemented Bloom pretty well in this title.
This is also my very first time doing any of this so if any of you are more well informed about these settings and would like to contribute, shoot me a message! Thanks and I hope these tweaks helped some of you!
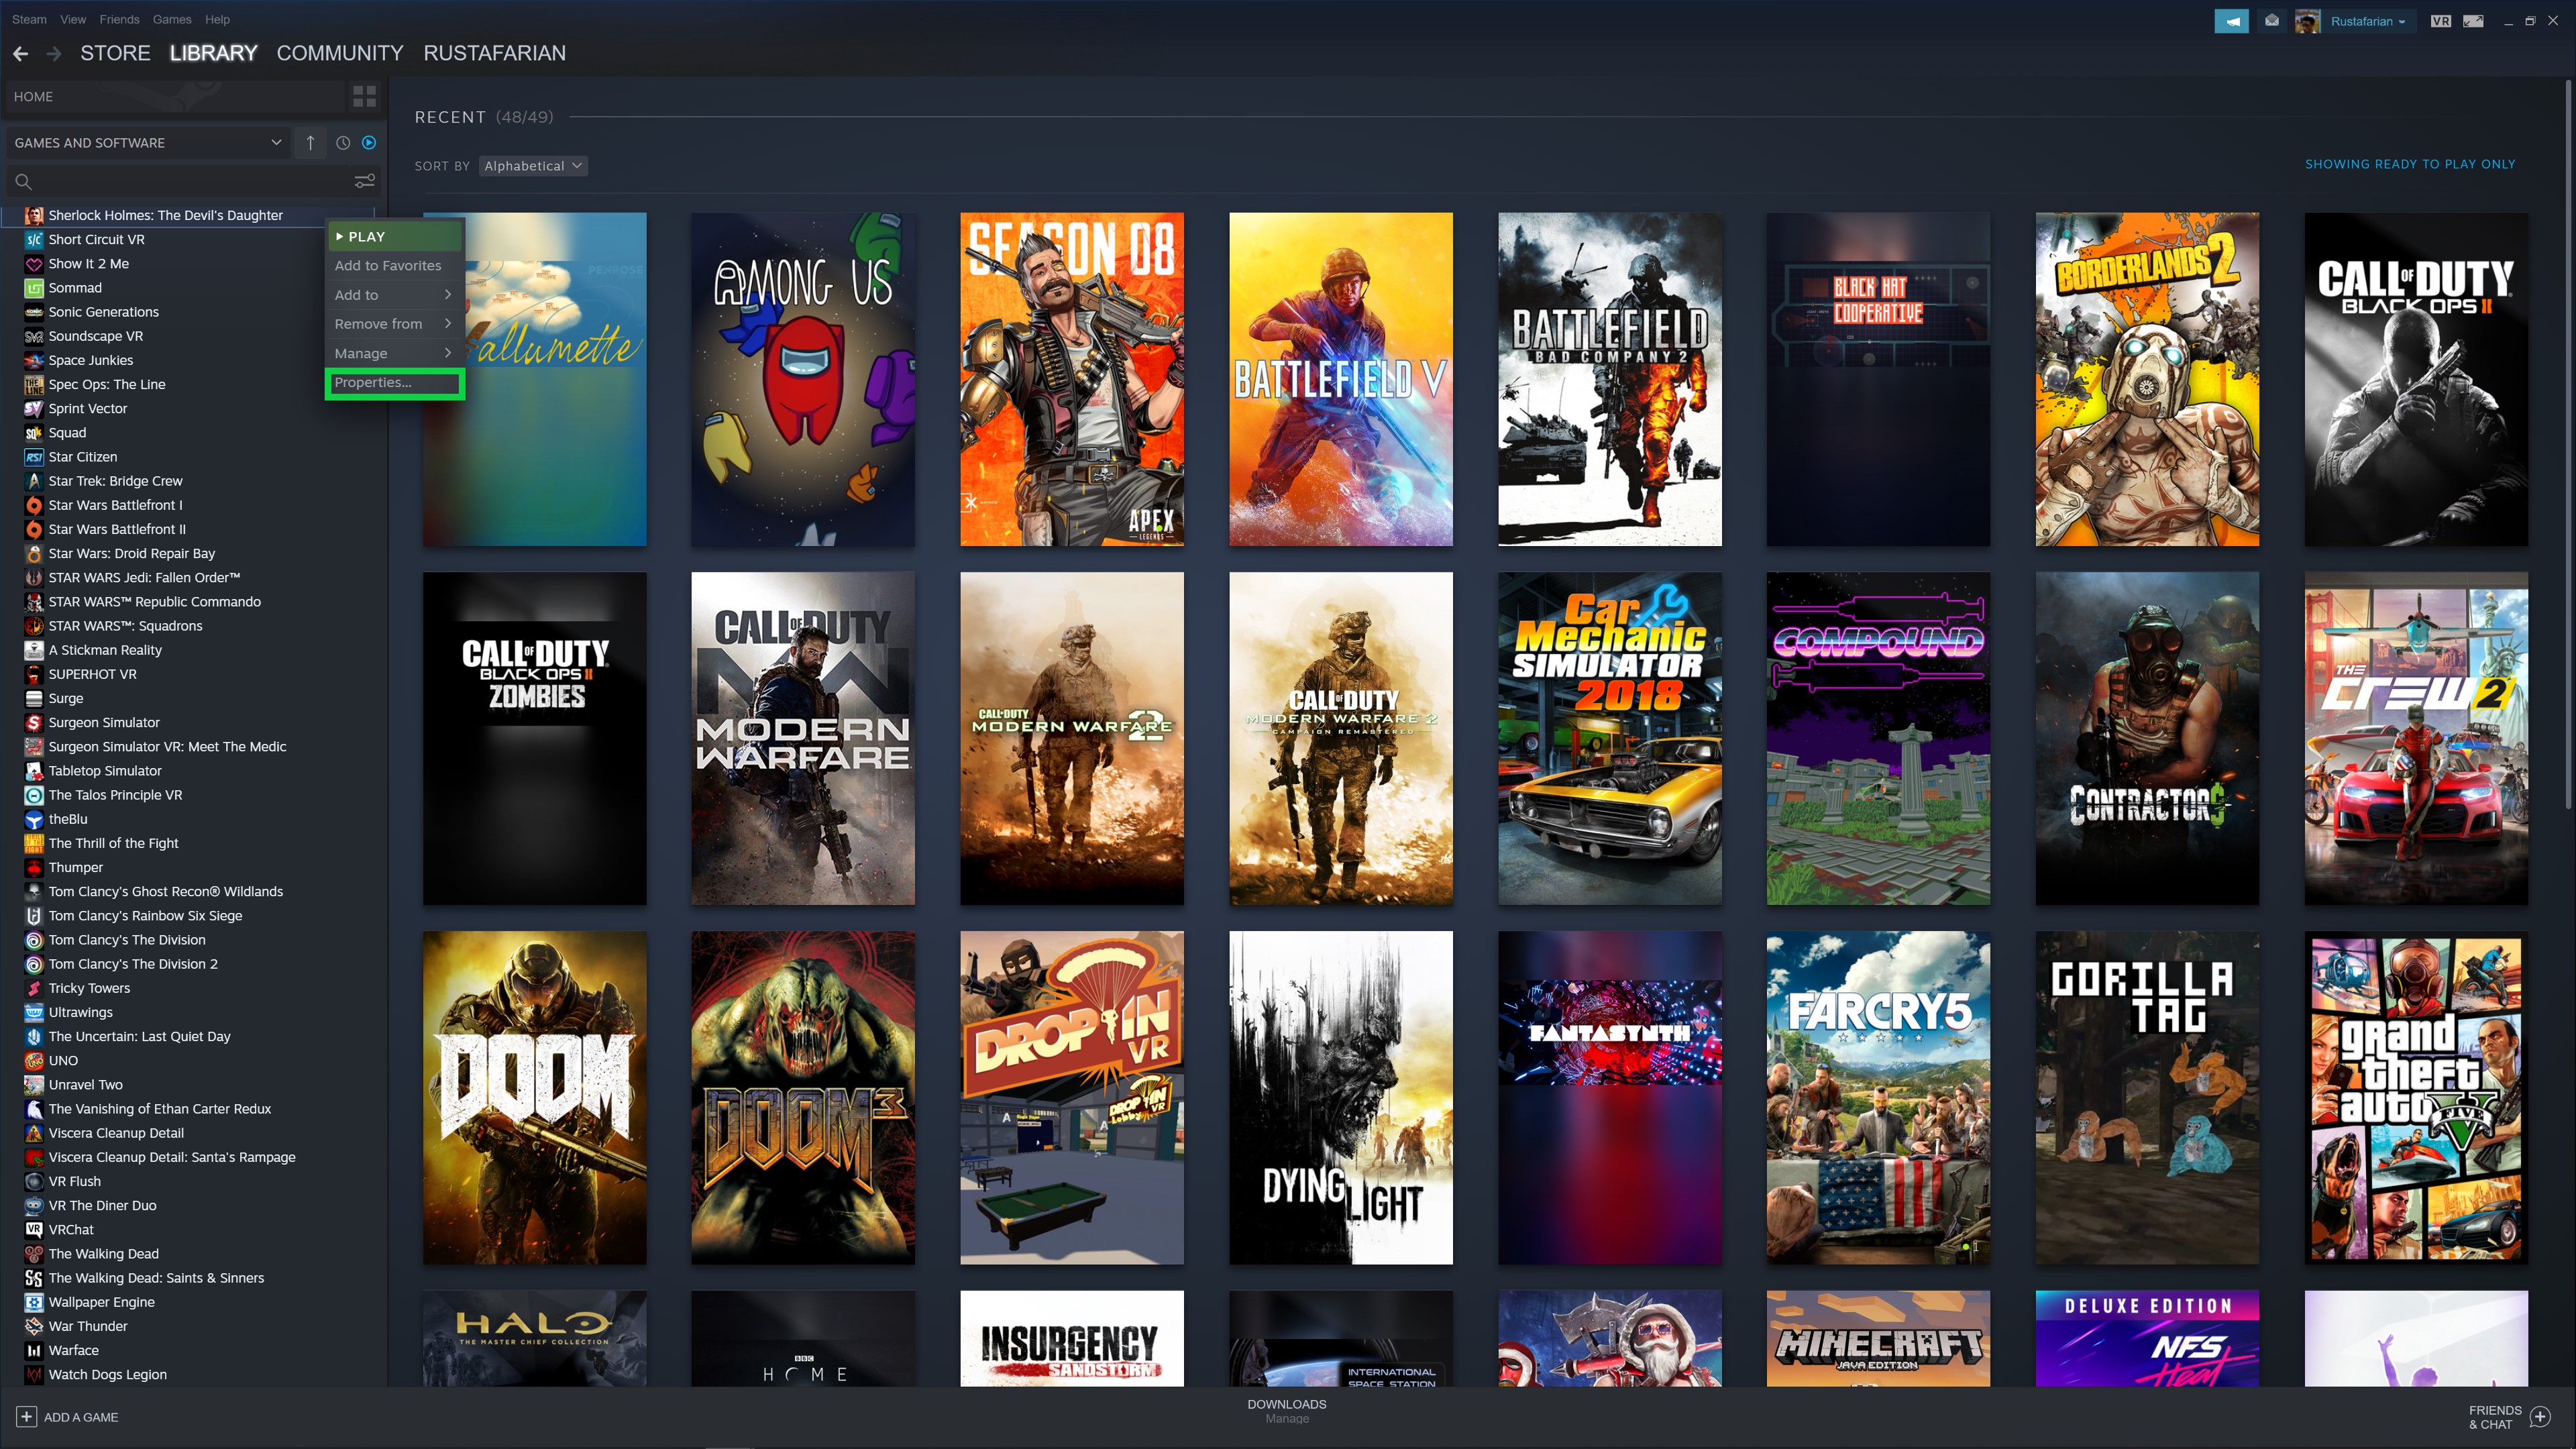
Click on Properties.
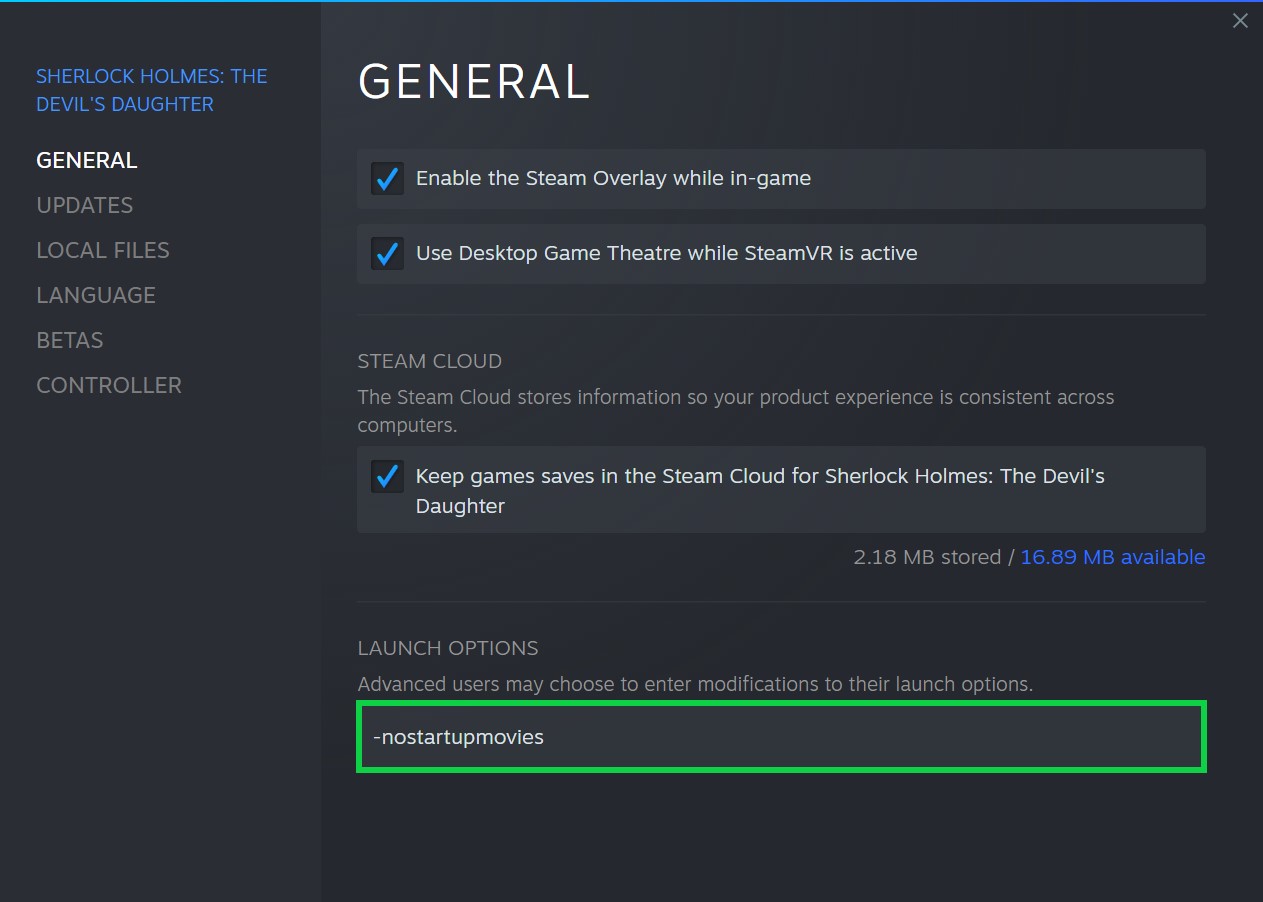
Under Launch Options type -nostartupmovies.
- Прохождение + достижения★ 5 (407)13k views471 ♥17 minRussianUpdated May 17, 2019
- Shoe Shine Guide★ 4 (64)5.8k views34 ♥1 minUpdated Mar 11, 2020
- Sherlock Holmes: The Devil's Daughter Guide★ 3 (47)4.2k views48 ♥13 minUpdated Mar 18, 2021
- win10系统游戏换衣服&切场景卡顿解决方法★ 4 (125)3.6k views122 ♥1 minSimplified ChineseUpdated Mar 23, 2021
- Found good guide2.8k views16 ♥1 min
- [全靠星星]的成就详细解法★ 4 (115)2.6k views90 ♥1 minSimplified ChineseUpdated Jun 13, 2016




- Upgrading to PremiumTeam Fortress 2★ 5 (20k)1441k views11k ♥6 minUpdated May 11, 2022
- No More Room in Hell Official ManualNo More Room in Hell★ 5 (2.8k)569k views2.1k ♥29 minUpdated Apr 22, 2019
- NMRiH Community Hosting GuidesNo More Room in Hell★ 5 (526)351k views653 ♥1 minUpdated Aug 10, 2022
- ULTIMATE GUIDE FOR GAME DEV TYCOONGame Dev Tycoon★ 5 (5.8k)326k views10k ♥4 minUpdated 23 Jan, 2014
- How to 'Git Gud' Soon™MORDHAU★ 5 (2k)318k views3k ♥68 minUpdated Nov 16, 2024
- Лучшие кооперативные игры SteamPAYDAY 2★ 5 (1.5k)315k views2.1k ♥56 minRussianUpdated Apr 27, 2025






This guide was created by its original author on the Steam Community. Are you the author and want it removed? Request removal.