GOAT Sorter - Inventory Manager Guide
First time Setup
Scripts are loaded inside a Programmable Block that you place In-Game!!!
DO NOT, UNDER ANY CIRCUMSTANCES INSTALL IT SERVER SIDE, your game will throw errors!
now to the actual installation part:
- Make sure that you enabled In-Game Scripts inside the world settings!
- Place down a Programmable Block In-Game
- Open the Control Panel of the PB and Click the Edit Button.
if the Edit Button is greyed out, that means you dont have In-Game Scripts Enabled! - Click on Browse Scripts and search for GOAT Sorter
- Double Click on the Script to install it
- Click Ok and the script will boot up
- the script will prompt you to build a LCD screen tagged with !StatusScreen, only normal LCD panels like the Text Panel, LCD Panel, Wide LCD Panel, Transparent etc work, perhaps in the future we will support mutli panel LCD screens for the Status Screen.
Basic Sorting and Item Categories
(sorted by personal preference)
- Ores
- Ingots
- Components
- Tools
- Ammo
- Consumables
- Foods
- Ingredients
- Seeds
- Misc
To sort these items into containers, add the Category to the name of your desired container.
Example Cargo Container Names:
You can add or change Categories how ever you want, for that read part: The Custom Data
any undefined Item (modded items that dont have a clear category) will be added to the Misc category, which you can then later change in the custom data of course.
line 144.
this will balance single type containers, meaning that if you have 2 Containers tagged with Ores, they will now try to balance themselves so that they have the same amount of items.
THIS ONLY WORKS WITH SINGLE TAGGED INVENTORIES!!!
meaning, if you have a container named Container Ores Ingots it wont work!
if we allowed that, it would make things much more complicated for us...
especially because of the fact that keens rounding function is broken...
[Stock] Container
by adding [Stock] to the name of a Cargo Container, the script will populate the custom data of the container with a list of known items.
Changing the number after the = sign will store the amount inside the container.
There are also modifiers to alter the behaviour of the Item to be Stocked.
Examples:
Can be Combined with other Modifiers, you just need to add P after the other Modifers.
Note: the custom data will show the defined Item names and Categories that are written in the Custom Data of the Programmable block, so if you changed a item name, the old name in the Stock container will be updated to the new one while also keeping the set amount.
Example:
!!!NEW!!! [Stock] Group via LCDs
With Version 1.2 of GSIM, the Script features a new way of [Stock] configuration that allows you to manage a whole group of Inventories as 1 Stock Container.
First thing you need to do is to add [Stock] to the name of a normal LCD Screen.
once the Display of the LCD updates, you can start editing the Text portion of the LCD screen.
(not the custom data)
In the Text section, you will see the new Stock Configuration, there you have to define which containers / inventories you want to be managed by this Stock LCD.
You can either write all Individual Container names,
or Group your containers before and write G:Container Group Name instead of all Individual names.
NOTE:
The LCD needs to be on the same Grid as the Cargo containers, otherwise it wont work properly
once you defined the managed containers, the script will convert the given strings into the container ID, with a position relative to the LCD screen and the current name of that container.
Example after Conversion:
Balance > Will Balance all Items across all listed containers relative to their volumes.
this means, Large Cargo Containers will have more items than Small Cargo Containers.
Color goes from 0-4:
0: Bar uses Screens Foreground Color
1: Green to Red
2: Red to Green
3: Foreground Color to Red
4: Foreground Color to Green
*If colorblind Colors are enabled, Red and Green will be replaced with the defined Colors
[Locked] Ignore Cargo Containers
Usefull if you want to keep Items stored without the Script touching those items.
Note: Assemblers and other machines that have "Automatic Push/Pull" enabled are still able to take out items of that Container, nothing we can really do there :/
[Hidden] Hide Items from AutoCrafting Counter
Example:
[P:<number>] Priority System
By adding [P:<number>] to the name of either a [Stock] or Type container, you can set its Priority.
Default Priority for non Priority defined containers is 0, and higher numbers have higher Priority.
Example:
higher Priority will be filled first (until quota is matched)
so if you want to put Ice in a Cargo Container as backup for something else, make sure that you give it a Priority higher than 100.
Docking Priority
the script that has the higher priority set in the custom data of the Programmable Block that runs GSIM will take over and the one with the lower Priority will be paused untill it disconnects from the grid.
these are the default values which will be assigned at the first start of the script:
If the priority is the same on both sides, none of the Scripts will be Paused!
Regarding [No GOAT], if 2 grids dock via a connector that has [No GOAT] in its name, none of the scripts will be paused!
[No GOAT] Ignoring Connected Grids
By Default, the script sorts and manages connected grids, meaning if a ship connects to a station running the Script, non tagged containers will be emptied out, stock containers will be filled, O2/H2 generators and Reactors will be filled as well.
but if you dont want that you can add these tags to the name of either one of the connectors.
If the Connected grid has GSIM Installed, Docking Priority will decide which Script will Pause
If the Connected grid has GSIM Installed, Both Scripts won't be Paused!
Remember, you can add these tags to both sides of the Connector!
You can also add or change these tags inside the Script Configuration part.
Example:
The Custom Data
The Custom Data is a big part of this Script.
It stores all the Information about the Item Names, Item Categories, Crafting Blueprints, and some Internal things to be able to show them on LCD Screens like Oxygen, Hydrogen and Power levels.
Changing the Name will change the referenced item on the Autocrafting Screen, Inventory Screen, Stock Container and other places where you would reference or see the item.
meaning, if you change SteelPlate to Plate, it would show up as Plate on the Autocrafting Screen, Inventory Screen and even in the custom data of a [Stock] Container.
this works retroactively for Stock Containers and Autocrafting Panel so you wont have to re-adjust those values.
But for Inventory screens (not autocrafting) you would have to define the newly used name to display that item again.
Changing the Item Category to either one that already exists, or a new one,
will make it so that it gets sorted and listed under the new defined category.
for example: Changing the category of Algae from Ingredients to Ores, would store and list them under Ores
you can add your own gasses if you want to display them on a Inventory LCD screen.
Example: DeuteriumGas, from the Life'Tech-Powers (Multilingual) Mod and another example for water, this works if you have some sort of water tank mod installed so you are actually able to store water
[AutoCrafting] based on Priority!
Autocrafting allows you to automatically assemble or disassemble Items by a defined amount.
to get started, place down a LCD screen and add [AutoCrafting] (case sensitive!) to the name of the LCD screen.
only Single display LCD screens, that allow you to press F on them to open the Text section should be used. that way its easier to configure the LCD screen. (Text Panel, Wide LCD Panel, Corner LCD)
those LCD screens can be rotated using the rotating function. (very usefull for a horizontally placed wide LCD screen).
once the script cycled through a whole script cycle, the screen will show items that the script knows how to craft.
you can change the wanted numbers, by pressing F on the LCD panel to get to the EDIT Text screen.
here just change the number after the / to what you want the script to craft.
If in any case you want to access the text section outside of the screen F interaction trigger, you can do this by looking in the control panel of the AutoCrafting screen and change its content from app to text and images, then you can press the Edit Text button and adjust your values. the script will switch back to App once it cycles through.
WARNING: you can only have 1 [AutoCrafting] screen per GSIM instance, or else AutoCrafting WILL BREAK!!!
for that just add AD after the wanted number (without a space)
Examples:

That way you can display all craftable items but the secondary LCD screens cant be used to adjust the AutoCrafting values, you can ONLY do that on the main panel.
You can reverse this Priority System inside the Script Settings under "Adjustable Settings and Tags for Machines" category.
The Priority can be reversed inside the Script settings.
just set ReverseCraftingPriority to true
so dont be surprised if you hear your assemblers do the "pling" sound every script cycle while items are needed.
first one is, if the inventory fills above 95%
second one is, if the assembler has items in its input but nothing queued.
Item Learning / Modded Items
The Script features a Learning Mode which will pause the normal Script execution so it can concentrate on fast and efficient Item Learning without you having to wait for a full script cycle.
In order to bring the Script into Learning mode,you just need to write learning toggle into the script argument field and then press Run
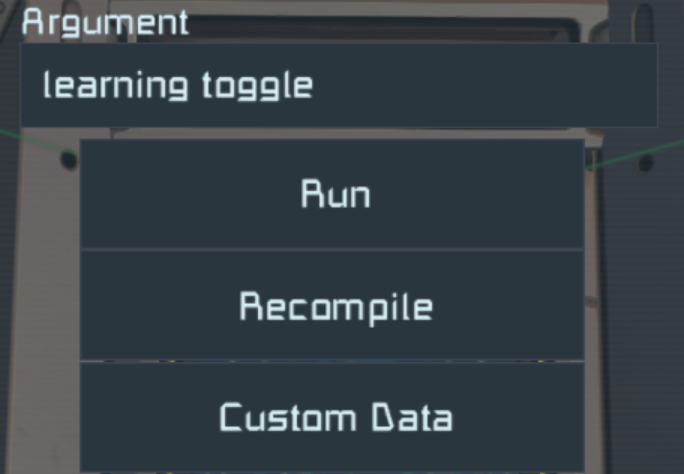
the script will show you that its in learning mode via the text screen of the programmable block (not the LCD screen)
assemblers will turn on "show on hud" and will have "is learning" in their name once they are ready to learn items.
once in learning mode, you just need to head to the production tab,select a assembler that has "is Learning" in its name and then queue 1.000 of the item that you want to learn by holding ctrl + shift and left click on that item.
the script will empty the queue and the output once it successfully learned the item.
then you can start learning a new item.
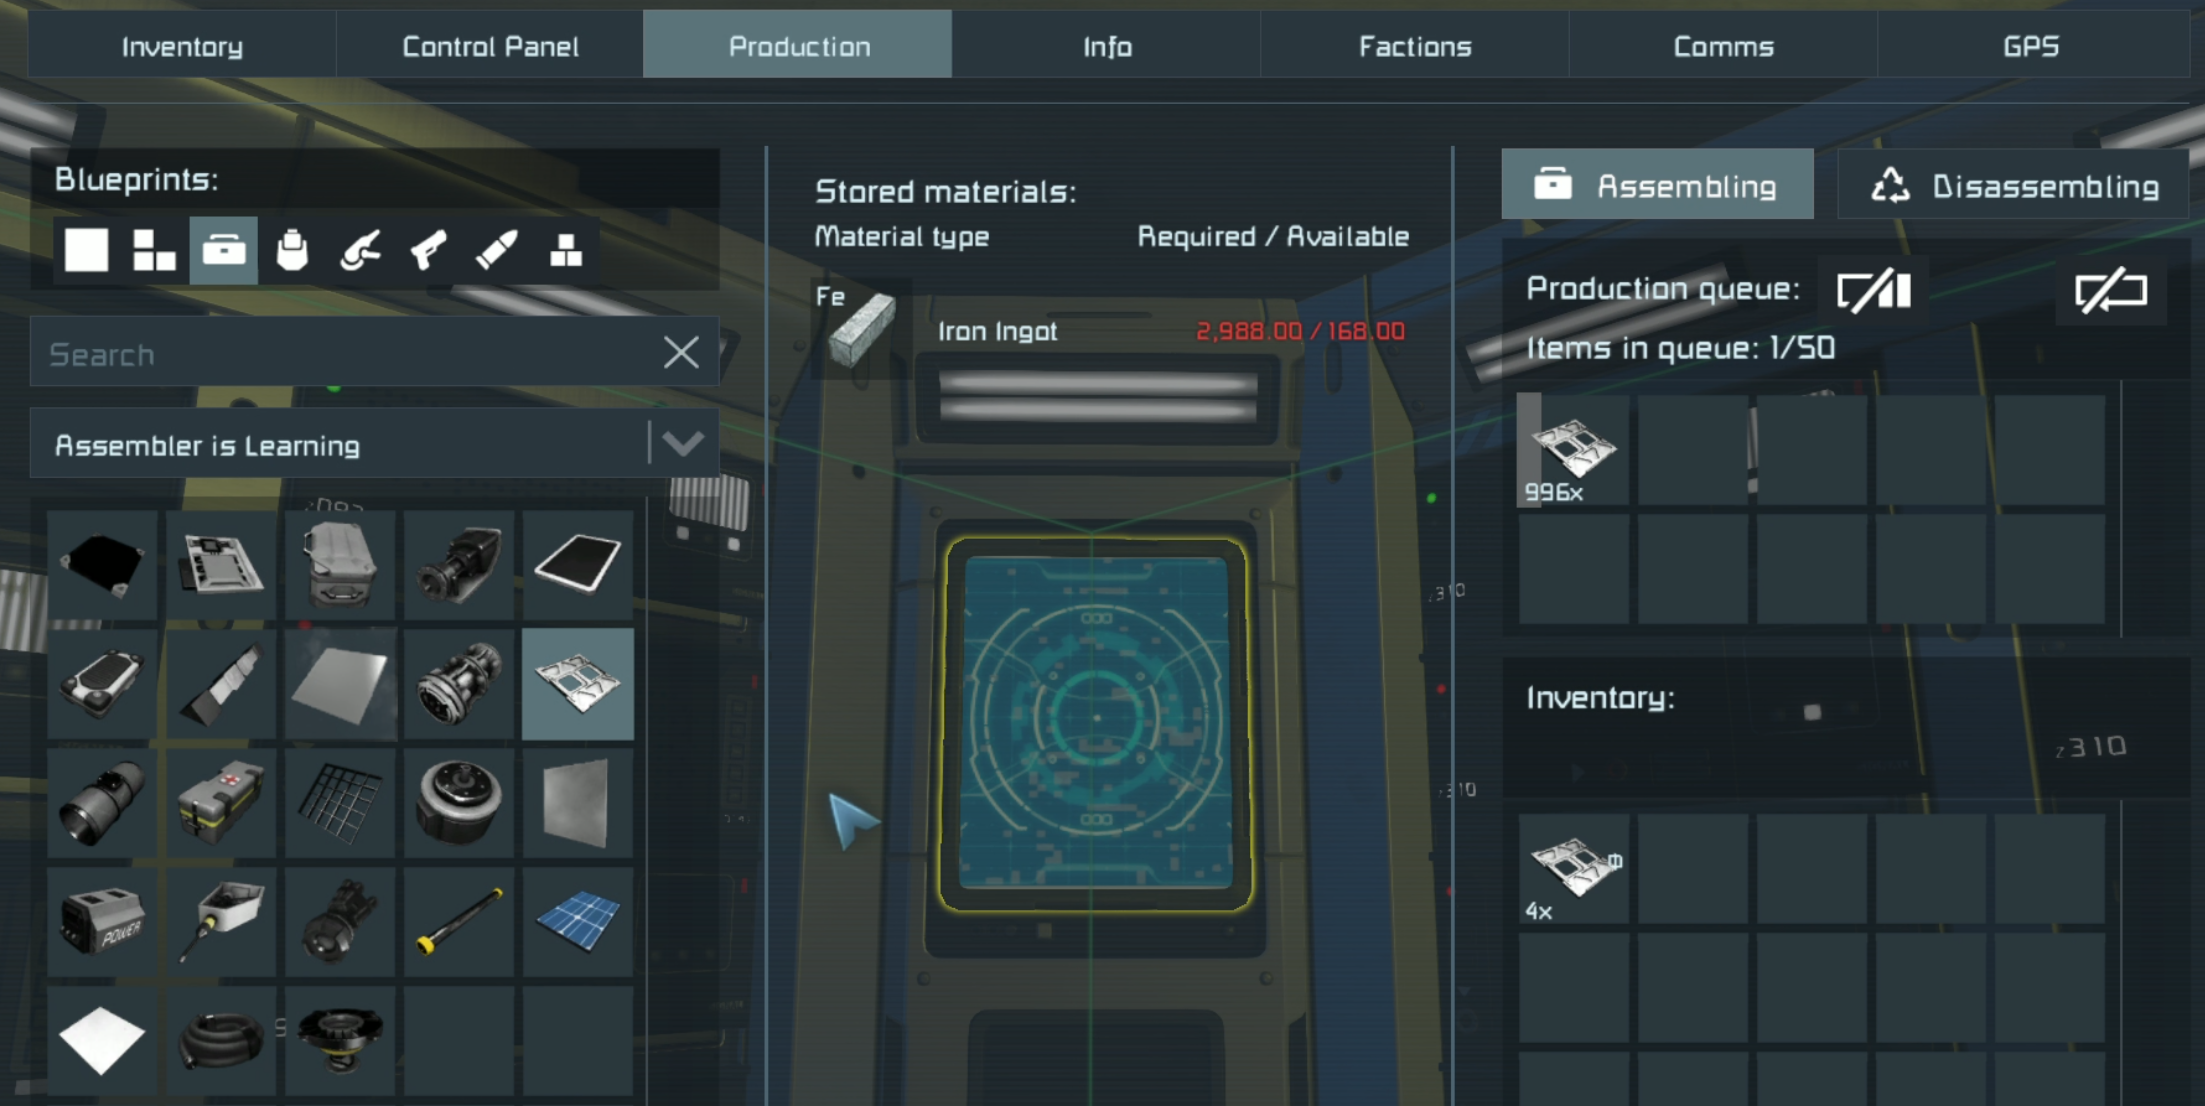
The Learning process works by the Script looking at the Queue of the Assembler, and what lies in the Output of that Assembler.
In order to turn Off Item Learning, just run the same Script Argument again. learning toggle
Alternatively, the script resumes normal execution after 300 seconds as a safety measure.
Only learn one Item at a time in 1 Assembler.
After the Script learned that item, it will empty out the queue and empty out the Output.
Another very important thing is, that the OUTPUT of the assembler NEEDS TO BE EMPTY AFTER EVERY LEARNED ITEM!!
or else you'll run into item blueprint mismatches, meaning the script will craft the wrong item for what you actually want.
If the Output wont get emtpied by the script, you might not have the needed type container and or space left in the needed type containers.
Alternatively, if you want to directly have every Item listed / Available on the AutoCrafting screen,
Run the PB with the addAllKnownItems argument.
This will also add all modded items if you have the GSIM Integration mod installed.
Modded Items however need to be Learned manually!
Refinery Management
The Script has 2 Refining Modes.
First one is Quota Refining,
this will refine the required Ingots to fullfill the wanted quota on the AutoCrafting Screen.
By that we mean that it ONLY refines the amount of Ore, that is needed for the wanted amount!
Quota Refining always comes before Automatic Refining as long as a quota of a Ingot is NOT fulfilled (and ore for that Ingot is available)
The Second one is Automatic Refining.
We Compare your Stored amount of Ingots with Each other and their corresponding yield factors and then decide what to refine.
we recommend leaving Ingot quotas at 0 to let the Script refine everything depending on your needs!
Changing a Ingot quota will make it so that the script prioritises this Ingot before the Automatic refining kicks in no matter how much of the other Ingots you have.
this also works with modded ores that yield more than one ingot, but important is that the script knows the yield rates of that ore. for that use the ore learning process.
so dont be surprised if you hear your refineries powering down and back up again, this is normal.
Another thing is the fact that the script only Refines Ores that are stored inside either a [Stock] or a type container (like Ores), we had to do it this way otherwise the script would want to refine Ores and or Scrap that arent reachable. for example inside a ejector system that is locked behind a outgoing sorter.
We also Support Scrap from the AwwScrap mod, meaning that this Scrap will be refined first before the general refining mode starts.
So in order to tell the script what it can get from refining modded Ores,
you need to run it with learningOre toggle in the argument field.
The Script will then switch to the Ore Learning mode which will Automatically add 100 of unknown Ore to a Eligable Refinery to let that Refinery process the Ore.
Once the Refinery is done, the script will look at the output of the Refinery to see what came out of 100 Ore and that information will be added in the custom data of the PB running the Script.
so its basically Fully Automatic!
the refinery learning should stop itself once there is no ore left to learn.
alternatively you can run learningOre toggle again to stop the ore learning.
the learned values will only be added once the learning process has been stopped!
dont recompile the script, otherwise the learned data will be lost!
Reactor, O2/H2 Generator and Irrigation System Handling
By default, the script Groups and Balances Reactors, O2/H2 Generators and Irrigation Systems with their needed Items.
GSIM basically treats those Machines like a [Stock] LCD Group set to Balance with the only difference that it doesnt need a LCD for configuration and that the amount is relative to machine volume.
This saves a lot of Performance and Script space because we can re-use a already existing feature.
Since its easier for us to make a universal configuration, that fills all the machines relative to each other, you only get 1 number to configure your wanted amount.
The amount is relative of 1.000 Liter of volume.
Meaning, by default, normal 1 large block sized reactors, that have a volume of 1.000 Liter, they will get filled with 25 units of Uranium, and a Large grid Large Reactor gets filled with 200 units of Uranium because it has 8 times the volume of a normal Reactor (8.000 Liters).
25 Uranium per 1.000 Liter of Volume.
2500 Ice per 1.000 Liter of Volume.
If you want to fill specific Reactors, O2/H2 Generators and or Irrigation Systems with Custom amounts,
Use the [Stock] System for them. Both the normal [Stock] and the LCD [Stock] group systems can work.
Note: The Script Deactivates "Automatic Push/Pull" for these Managed Machines.
That way they wont pull and or steal too many Items from your grid.
If you want to Exclude a Machine from Script Managing,
and perhaps want to enable "Automatic Push/Pull"
just add the [Manual] tag to the Machines name.
Inventory screens can display informations about the Reactors, O2/H2 Generators and Irrigation Systems Stock Group.
for Reactors the Stock reference name is Reactors and for the Gas generators its GasGenerators
Example [Inventory] Display
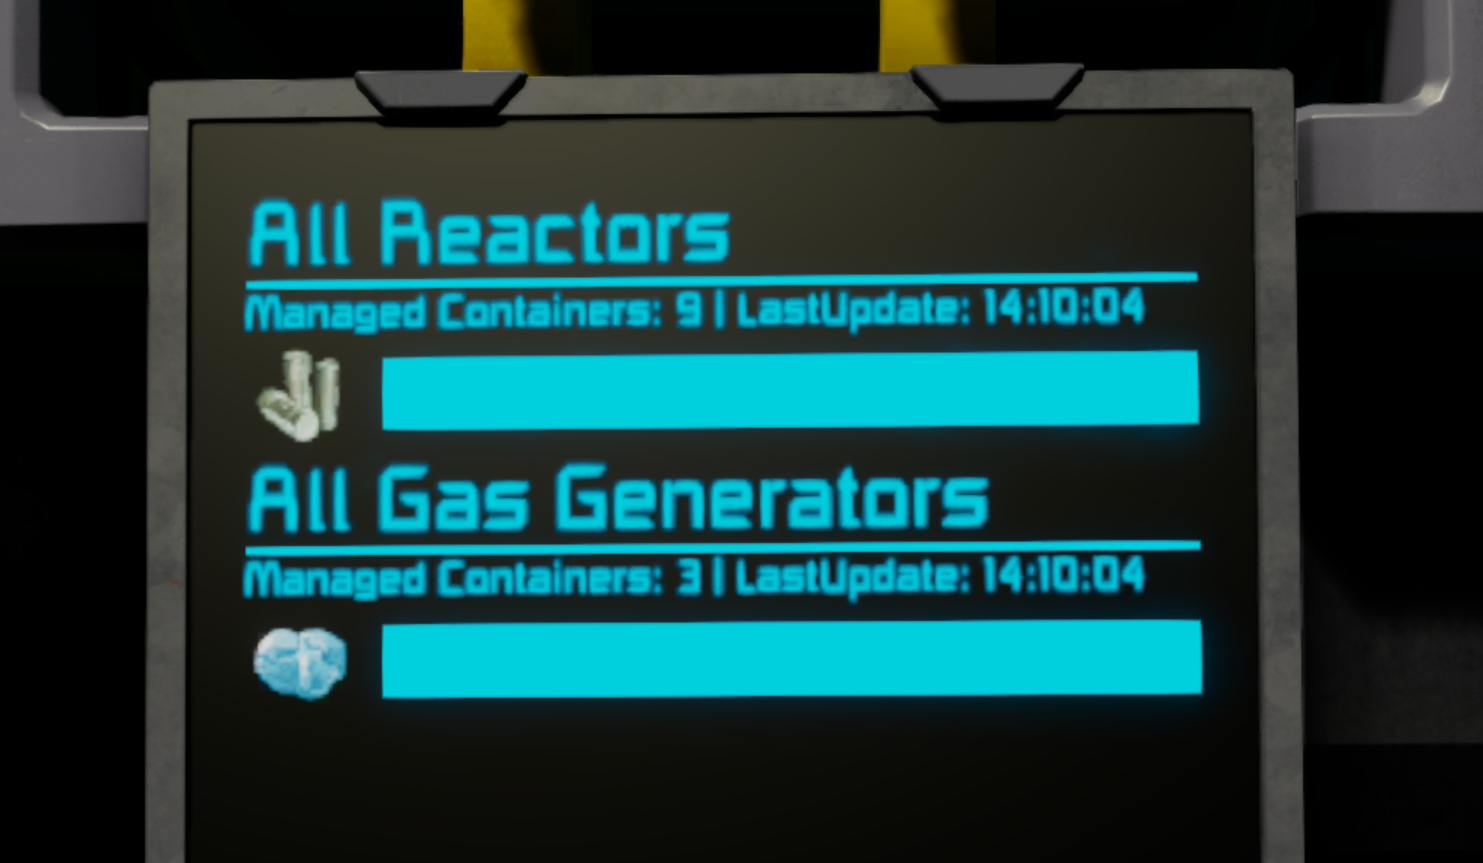
The Refilling happens so fast, that we can only explain it as "Magic"
Just make sure that the conveyor path is available between the managed container and the gas tanks.
Bottle Refilling happens once every Script Cycle.
so if you want to put Ice in a Cargo Container as backup for something else, make sure that you give it a Priority higher than 100.
[Manual] Exclude Managed Machines
like Assemblers, Refineries, O2/H2 Generators, Reactors
so that you can use them manually
you just need to add !GSIM-Manual or [Manual] to the name of that block / Machine.
that way the script wont use this machine for things like Autocrafting, Ore Refining or balanced fuel filling etc.
It also allows you to enable "Automatic push / pull" again because usually the script turns it off so that these machines wont steal or overfill themselves with items.
[ContainerLevel] Screens
that is placed next to a Inventory with [ContainerLevel]
You create a nice looking display that shows you your fill level of that Inventory.
this works for all Storage Containers and Gas Tanks.
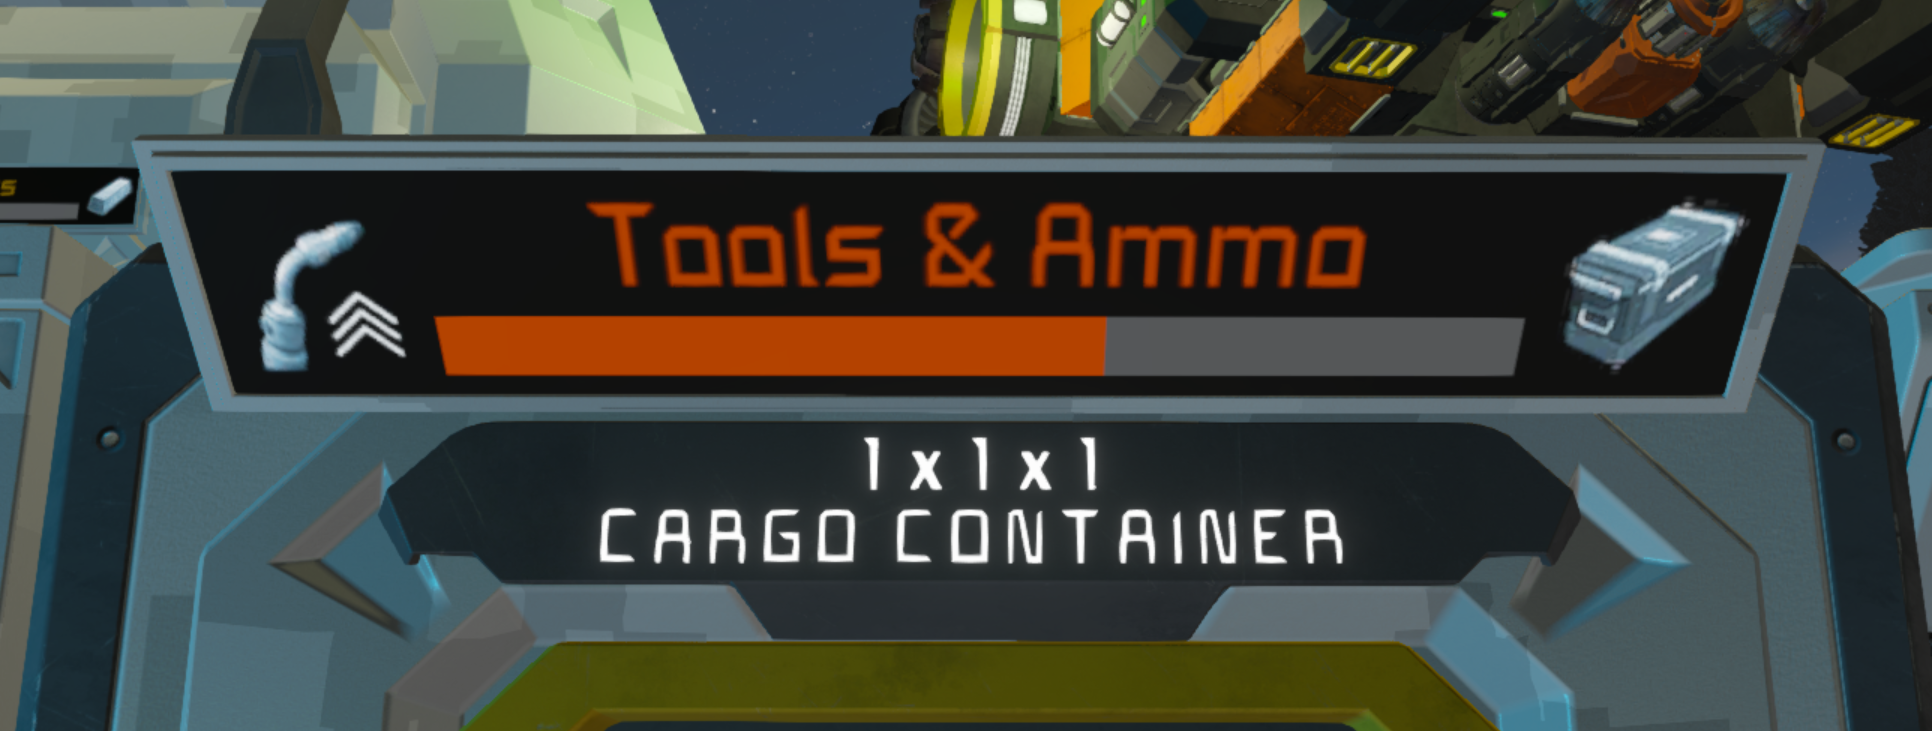 you can change the settings of those screens by walking to them and pressing F on them.
there you can find things like which container it should show the level of and you can change the style for these screens.
there are 6 styles in total, just change the style= number to a number between 1 and 6
[Inventory] Screens
You can create custom Inventory Screens to display your desired items on a LCD Panel.
you can set these up in 2 ways,
The first way is to use a Interactable LCD screen where you can press F on when you stand in front of it, just add [Inventory] to the name of that LCD screen, then you can go into the edit text section by pressing F of on the screen to set your things to show.
the second way is to add the universal [GOAT] tag to a multi panel LCD screen and then adjust the things inside the custom data of that screen.
for multi panel screens you have to start by defining your LCD screen and what exactly to show, this follows the same rule like Automatic LCDs 2
Configuration is the same between [Inventory] and [GOAT] Available ways to Configure Inventory Screens:
you can use any of these images listed on this Sprite List[github.com]
Command Arguments
The Following Command Arguments can be used for the script.
in order to use them, just write the argument in the argument field and press the run button.
or place down a button panel, cockpit or timer and add the PB running the script to the hotbar with the run option and define the argument there.
This is very Usefull if you removed a Mod where the Script learned Items from.
That way you wont loose Items that can still be Crafted.
WARNING, will include all Items if you dont have assemblers on your grid that are able to craft that Item.
sub grid assemblers only count if you enabled the use of production blocks on sub grids.
making every known Item Appear on the AutoCrafting screen without the script having to see that item first. If the GSIM Integration mod is installed, modded items will be added as well!
the translation depends on the set game language or server language if you use it on a server.
WARNING!!! This command only works if the GSIM Integration is Installed
Frequently Asked Questions
Q1: HELP, the Script keeps crafting X Item even though its quota is already fulfilled!
A1: this is a Item recipe error, meaning, the script needs A,
but thinks in order to get A it has to craft B.
take a loot at your [AutoCrafting] screen and check which Item has a Construction Icon next to its Icon and check if the amount number goes up or not.
if the number doesnt go up, you have to re-learn that item via the Learning method.
Guide section > Learning Items / Modded Items.
Q2: My Programmable Block Keeps Overheating / Damaged / uses too much Performance
aka PB Limiters or "how to slow down script"
A2: Turn on AutoThrottle and set the AutoThrottleTotalMs to the limit of the server,
or keep it at 0.5 which is the default value for most PB Limiters.
This will slow down the Script but will prevent it from getting Stopped by PB Limiters.
Q3: How to Refine X in X Refinery and Y in Y Refinery
A3: Either use Sorters and Prevent Ore from going to Refineries where you dont want your specific Resources to be refined in which will cause the [StatusScreen] to show a Warning but you can ignore it,
Or use [Manual] with [Stock] on your Refineries and set the Ores that you want to refine in those Refineries to =10000
Q4: The Script cant Autocraft my Recipes that take too long because the queues get cleared constantly.
A4: we currently remove all assembler queues to then re-queue them with the correct priority of items needed.
sadly, this breaks recipes that take longer to craft.
the only way to currently somehow fix this is to increase "MinCycle" which you can find in the misc settings category of the script configuration but this doesnt help in every sittuation.
we do want to rework autocrafting in the future to better support items that have a longer crafting time. one option could be to be able to disable the queue clearing and priority autocrafting but we will have to see what we can do.
for now, either increase the MinCycle amount or use a !GSIM-Manual tagged assembler.
Q5: How can I store X (Ice for example) in a seperate container?
A5: you can achieve this in 2 ways:
either by using [Stock] and set Ice to =All
or the better way: change the Category of Ice in the Custom data to a new category, for example set its category to Ice and add Ice to the name of a Cargo Container.
[LogScreen] Crashes and Issues
Script actions and crashes will show up there.
If you have Issues, be sure to Join Our Discord Server[discord.gg]!
!!!NEW!!! GSIM Integration Mod
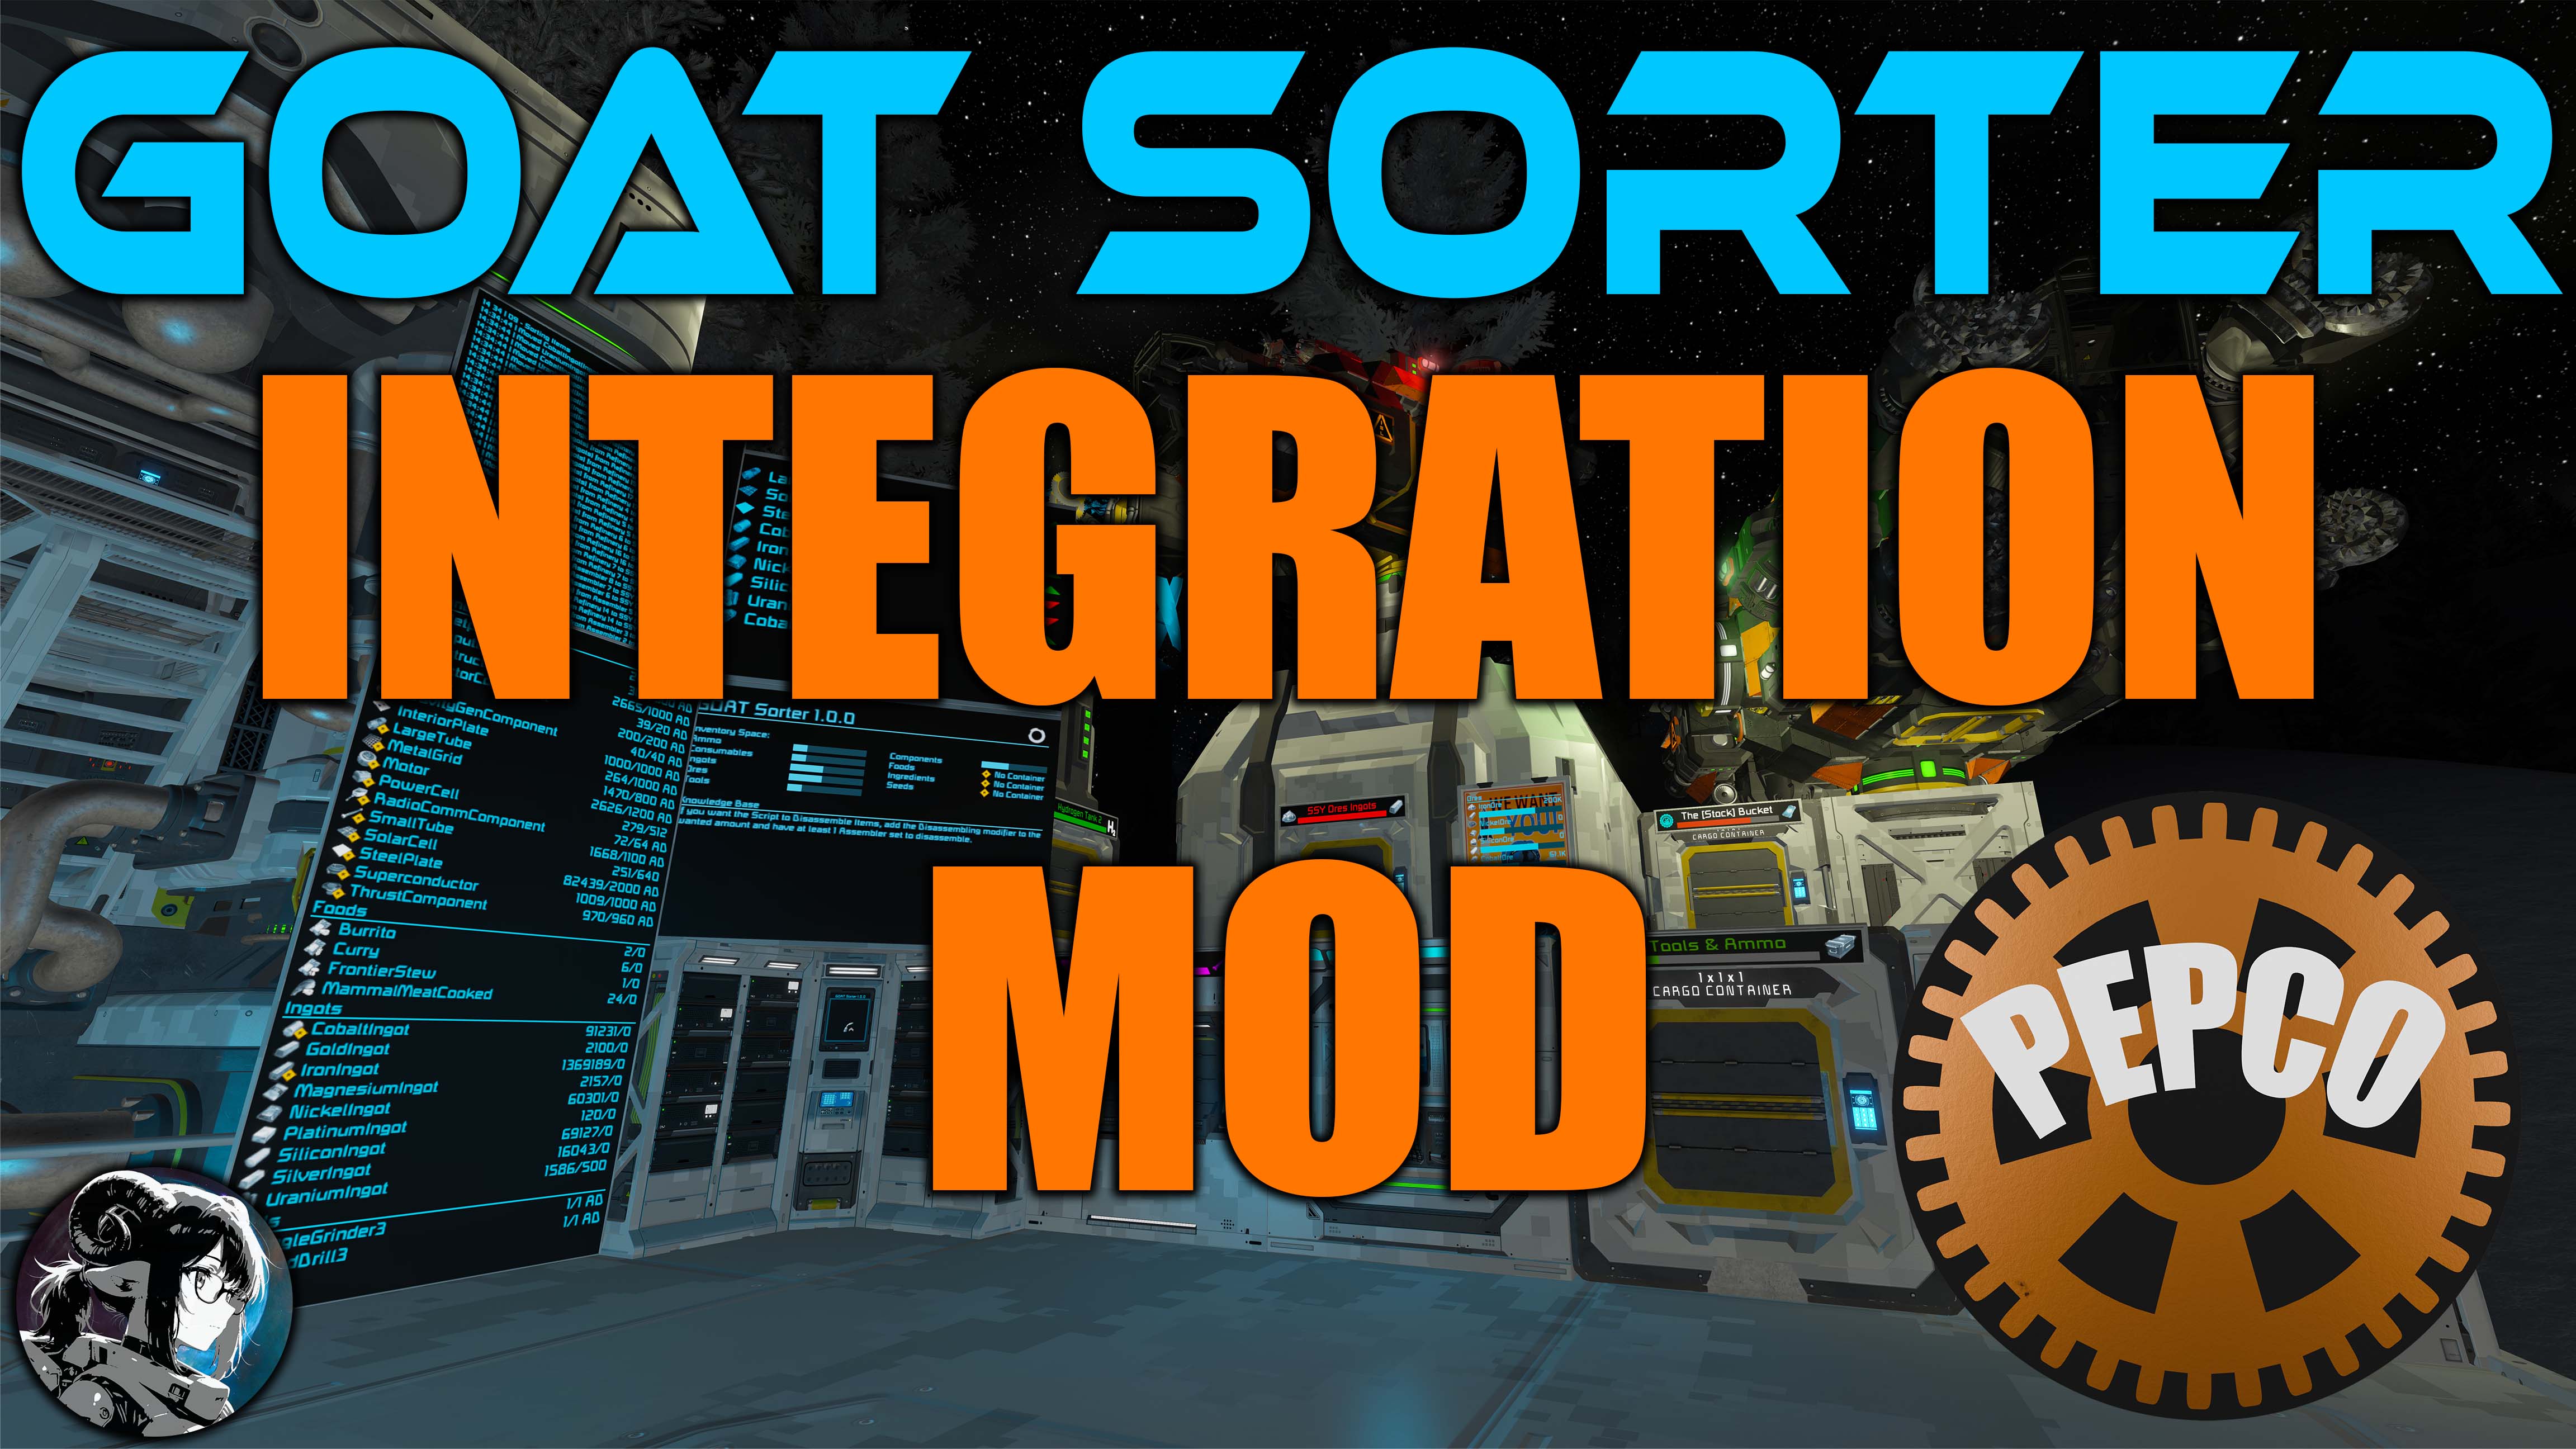 With the help from Uzar we managed to create a mod, that allows GSIM to almost fully Automate all Item Recipe Learning by exposing certain Informations to Programmable blocks, that are usually not available for them.
This essentially means, that manual Item Learning is a thing of the past (with some minor exceptions)
The mod is called GSIM Integration and if you have that mod added to your game, GSIM will actually be able to see how to craft an Item without the need to Learn it and will directly add a newly seen Item, that is also craftable for you to the AutoCrafting screen!
If you want to directly have all Items on your AutoCrafting screen, just run the PB with the addAllKnownItems argument.
This Integration mod also allows automated Translating of item names depending on what language your client (or server, if you play on one) is set to.
by running the PB with the translateItemNames.
This Mod also gives you direct access to the Edit Text button while the content of a LCD screen is set to "Apps"
this mod is optional, and GSIM works without it.


- Upgrading to PremiumTeam Fortress 2★ 5 (20k)1441k views11k ♥6 minUpdated May 11, 2022
- No More Room in Hell Official ManualNo More Room in Hell★ 5 (2.8k)569k views2.1k ♥29 minUpdated Apr 22, 2019
- NMRiH Community Hosting GuidesNo More Room in Hell★ 5 (526)351k views653 ♥1 minUpdated Aug 10, 2022
- Лучшие кооперативные игры SteamPAYDAY 2★ 5 (1.5k)315k views2.1k ♥56 minRussianUpdated Apr 27, 2025
- Desert Eagle Heat Treated | Blue GemCounter-Strike 2★ 5 (1.6k)292k views1.5k ♥2 minUpdated Jan 16
- Treasure Hunt Puzzle SolutionsTotal War: WARHAMMER II★ 5 (6.9k)281k views15k ♥3 minUpdated Aug 19, 2021






This guide was created by its original author on the Steam Community. Are you the author and want it removed? Request removal.