GTA III Pickups, Hidden Packages, Rampages and Unique Stunt Jumps Maps
Info
Here's some maps I made (by extracting it from the game and tweaking a bit) that have the numbered locations of all Hidden Packages, Rampages and Unique Stunt Jumps (with height indications!), and all Pickups (Weapons, Health, Armor, Police Bribes and Adrenaline).
The Pickups map is essensial for new players because instead of saving and reloading the game everytime you die or get busted, or spending a lot of money buying items, you can just travel around the map and get all the stuff that you need for free!
And because the water is white the maps are more print friendly!
Remember!: as you complete missions, some gangs will become hostile and very dangerous, so try to do the side activities early!
Leave a comment if you find an error, typo, something I missed, or a suggestion, or any other thing.
(The ingame map is a bit off center in some places, for example at the Cedar Grove houses, so I placed them as if the map was centered)
Changes:
24/10/2022 - Fixed colors, added Baseball Bat Pickups, rearranged Collectibles order based on the Hideouts as the starting location per island, added descriptions and rewards.
04/11/2022 - Added Ingame screenshots of Rampages and Stunt Jumps with descriptions and tips.
21/11/2022 - Added Ingame screenshots of Hidden Packages.
26/11/2022 - Added descriptions to Hidden Packages of Portland.
04/04/2023 - Added descriptions to Hidden Packages of Staunton Island.
24/06/2023 - Added descriptions to Hidden Packages of Shoreside Vale.
The Pickups map is essensial for new players because instead of saving and reloading the game everytime you die or get busted, or spending a lot of money buying items, you can just travel around the map and get all the stuff that you need for free!
And because the water is white the maps are more print friendly!
Remember!: as you complete missions, some gangs will become hostile and very dangerous, so try to do the side activities early!
Leave a comment if you find an error, typo, something I missed, or a suggestion, or any other thing.
(The ingame map is a bit off center in some places, for example at the Cedar Grove houses, so I placed them as if the map was centered)
Changes:
24/10/2022 - Fixed colors, added Baseball Bat Pickups, rearranged Collectibles order based on the Hideouts as the starting location per island, added descriptions and rewards.
04/11/2022 - Added Ingame screenshots of Rampages and Stunt Jumps with descriptions and tips.
21/11/2022 - Added Ingame screenshots of Hidden Packages.
26/11/2022 - Added descriptions to Hidden Packages of Portland.
04/04/2023 - Added descriptions to Hidden Packages of Staunton Island.
24/06/2023 - Added descriptions to Hidden Packages of Shoreside Vale.
Pickups
There are free Weapons, Health, Body Armor, Police Bribes and Adrenaline placed throughout the city.
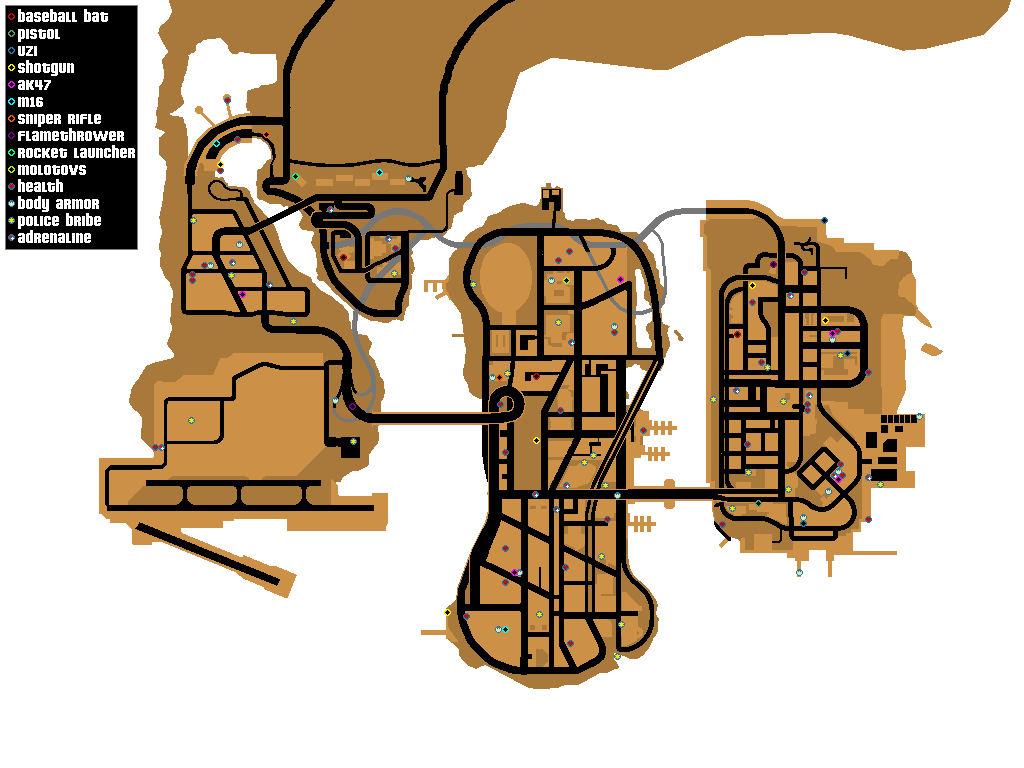
Item descriptions
Health: Restores player's Health to 100%
Body Armor: Adds an extra 100% Hit Points to the player
Police Bribe: Reduces the player's Wanted Level by 1 Star
Adrenaline: Slows down time
Item descriptions
Health: Restores player's Health to 100%
Body Armor: Adds an extra 100% Hit Points to the player
Police Bribe: Reduces the player's Wanted Level by 1 Star
Adrenaline: Slows down time
Hidden Packages
Hidden Packages are located all over the city, collect them for easy access to weapons and armor.
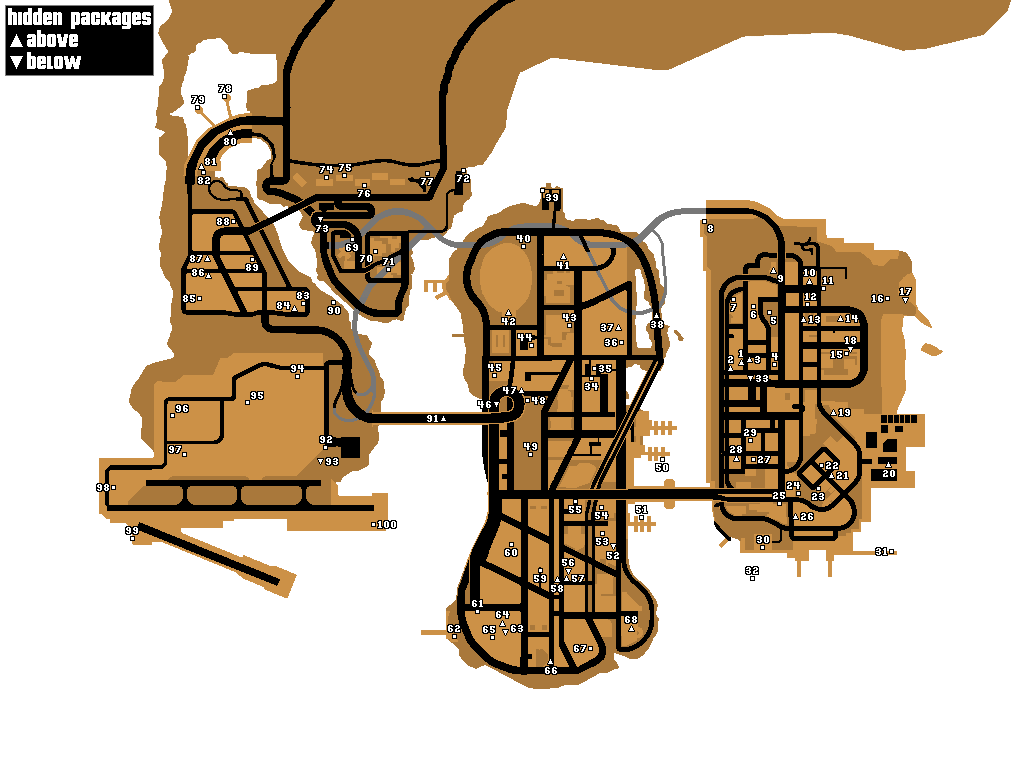
Rewards
Each Hidden Package earns you $1,000 and every 10 Packages you get a Weapon or Item delivered to all Hideouts, collecting all of them will reward you an extra $1,000,000.
They add to the 100% game completion.
Special Rewards
10 Packages: Pistol
20 Packages: Uzi
30 Packages: Grenades
40 Packages: Shotgun
50 Packages: Body Armor
60 Packages: Molotovs
70 Packages: AK47
80 Packages: Sniper Rifle
90 Packages: M16
100 Packages: Rocket Launcher & $1,000,000
Rewards
Each Hidden Package earns you $1,000 and every 10 Packages you get a Weapon or Item delivered to all Hideouts, collecting all of them will reward you an extra $1,000,000.
They add to the 100% game completion.
Special Rewards
10 Packages: Pistol
20 Packages: Uzi
30 Packages: Grenades
40 Packages: Shotgun
50 Packages: Body Armor
60 Packages: Molotovs
70 Packages: AK47
80 Packages: Sniper Rifle
90 Packages: M16
100 Packages: Rocket Launcher & $1,000,000
Rampages
Rampages are challenges that task the player with destroying various targets with a certain weapon or in a specific way before the time runs out and without dying or getting busted.
Every Rampage has two locations, if you fail a Rampage, the icon will respawn at the second one and if you fail it again it will spawn back in the first location and repeat.
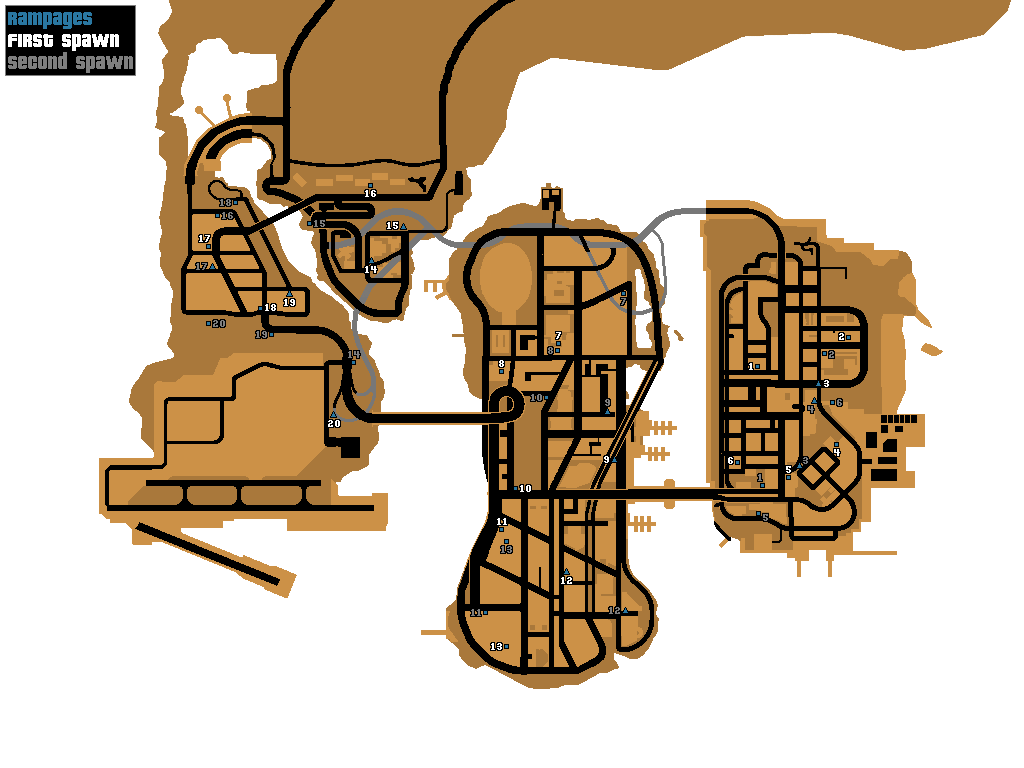
Rewards
Each subsequent completed Rampage will reward you with a higher amount of money in increments of $5,000 (the first Rampage will reward you $5,000; the second $10,000; and so forth)
Completing all of them will reward you an extra $1,000,000.
They add to the 100% game completion.
Every Rampage has two locations, if you fail a Rampage, the icon will respawn at the second one and if you fail it again it will spawn back in the first location and repeat.
Rewards
Each subsequent completed Rampage will reward you with a higher amount of money in increments of $5,000 (the first Rampage will reward you $5,000; the second $10,000; and so forth)
Completing all of them will reward you an extra $1,000,000.
They add to the 100% game completion.
Unique Stunt Jumps
Unique Stunt Jumps are an activity that the player can complete with a vehicle, using a ramp to jump over something or to land in a specific spot.
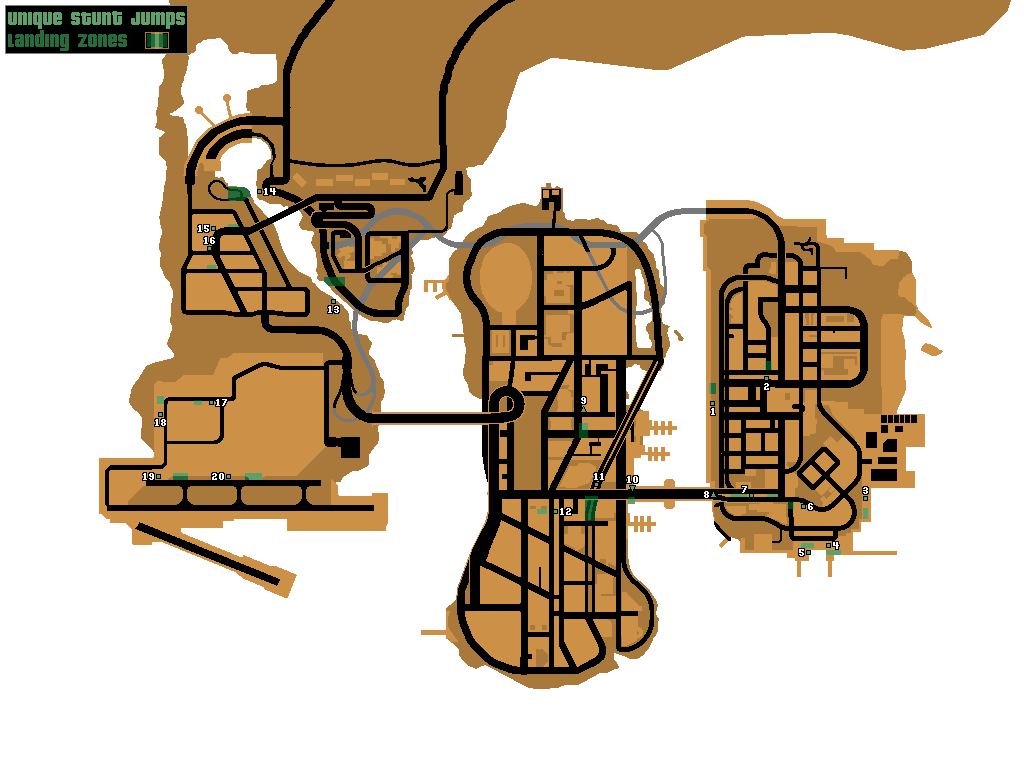
Rewards
Each subsequent successful Stunt Jump will reward you with a higher amount of money in increments of $5,000 (the first Stunt Jump will reward you $5,000; the second $10,000; and so forth)
They add to the 100% game completion.
Rewards
Each subsequent successful Stunt Jump will reward you with a higher amount of money in increments of $5,000 (the first Stunt Jump will reward you $5,000; the second $10,000; and so forth)
They add to the 100% game completion.
Hidden Packages Locations - Portland
Hidden
Package
Package
Location
Description
1
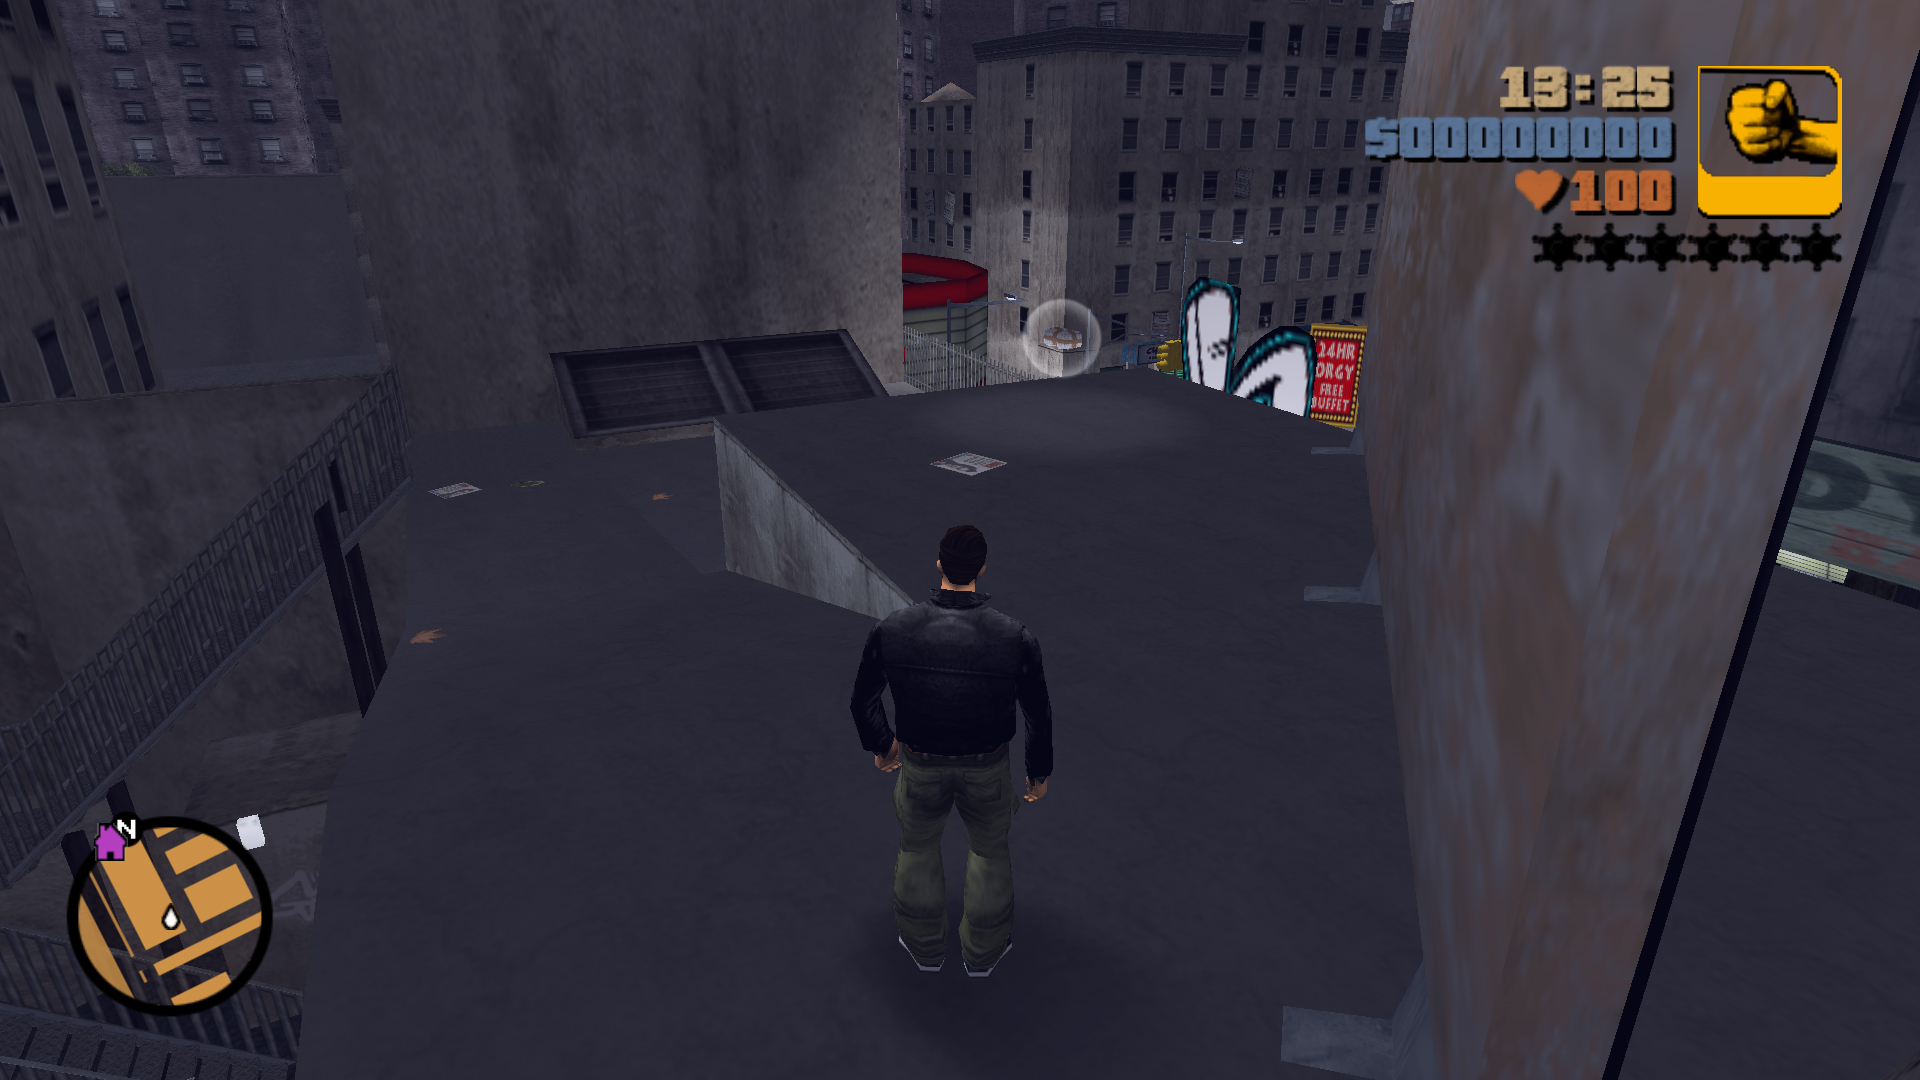
On the rooftop of Luigi's Club behind a billboard, the alley has stairs to access the roof.
2
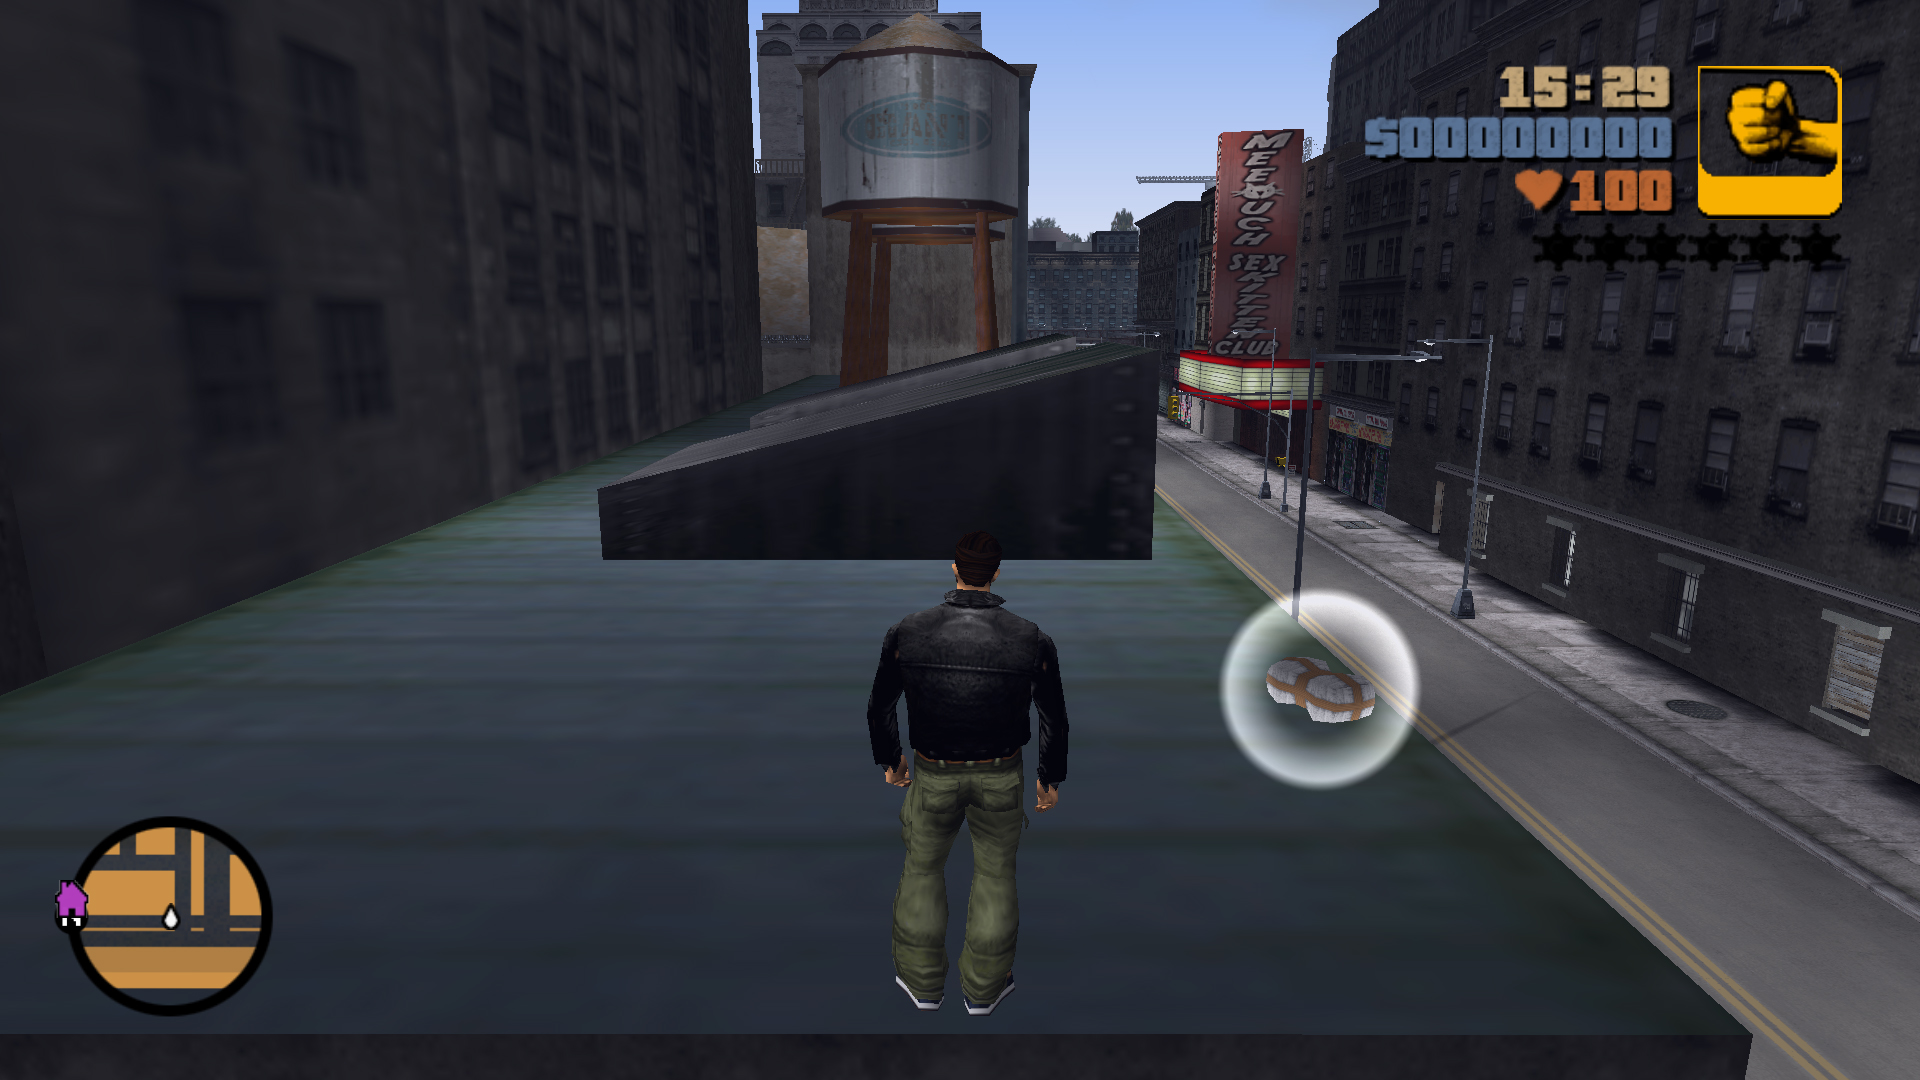
From the roof of Luigi's Club, go south along the rooftops and jump onto the blue roof with water towers, the package is on this roof at the west corner edge of the building.
3
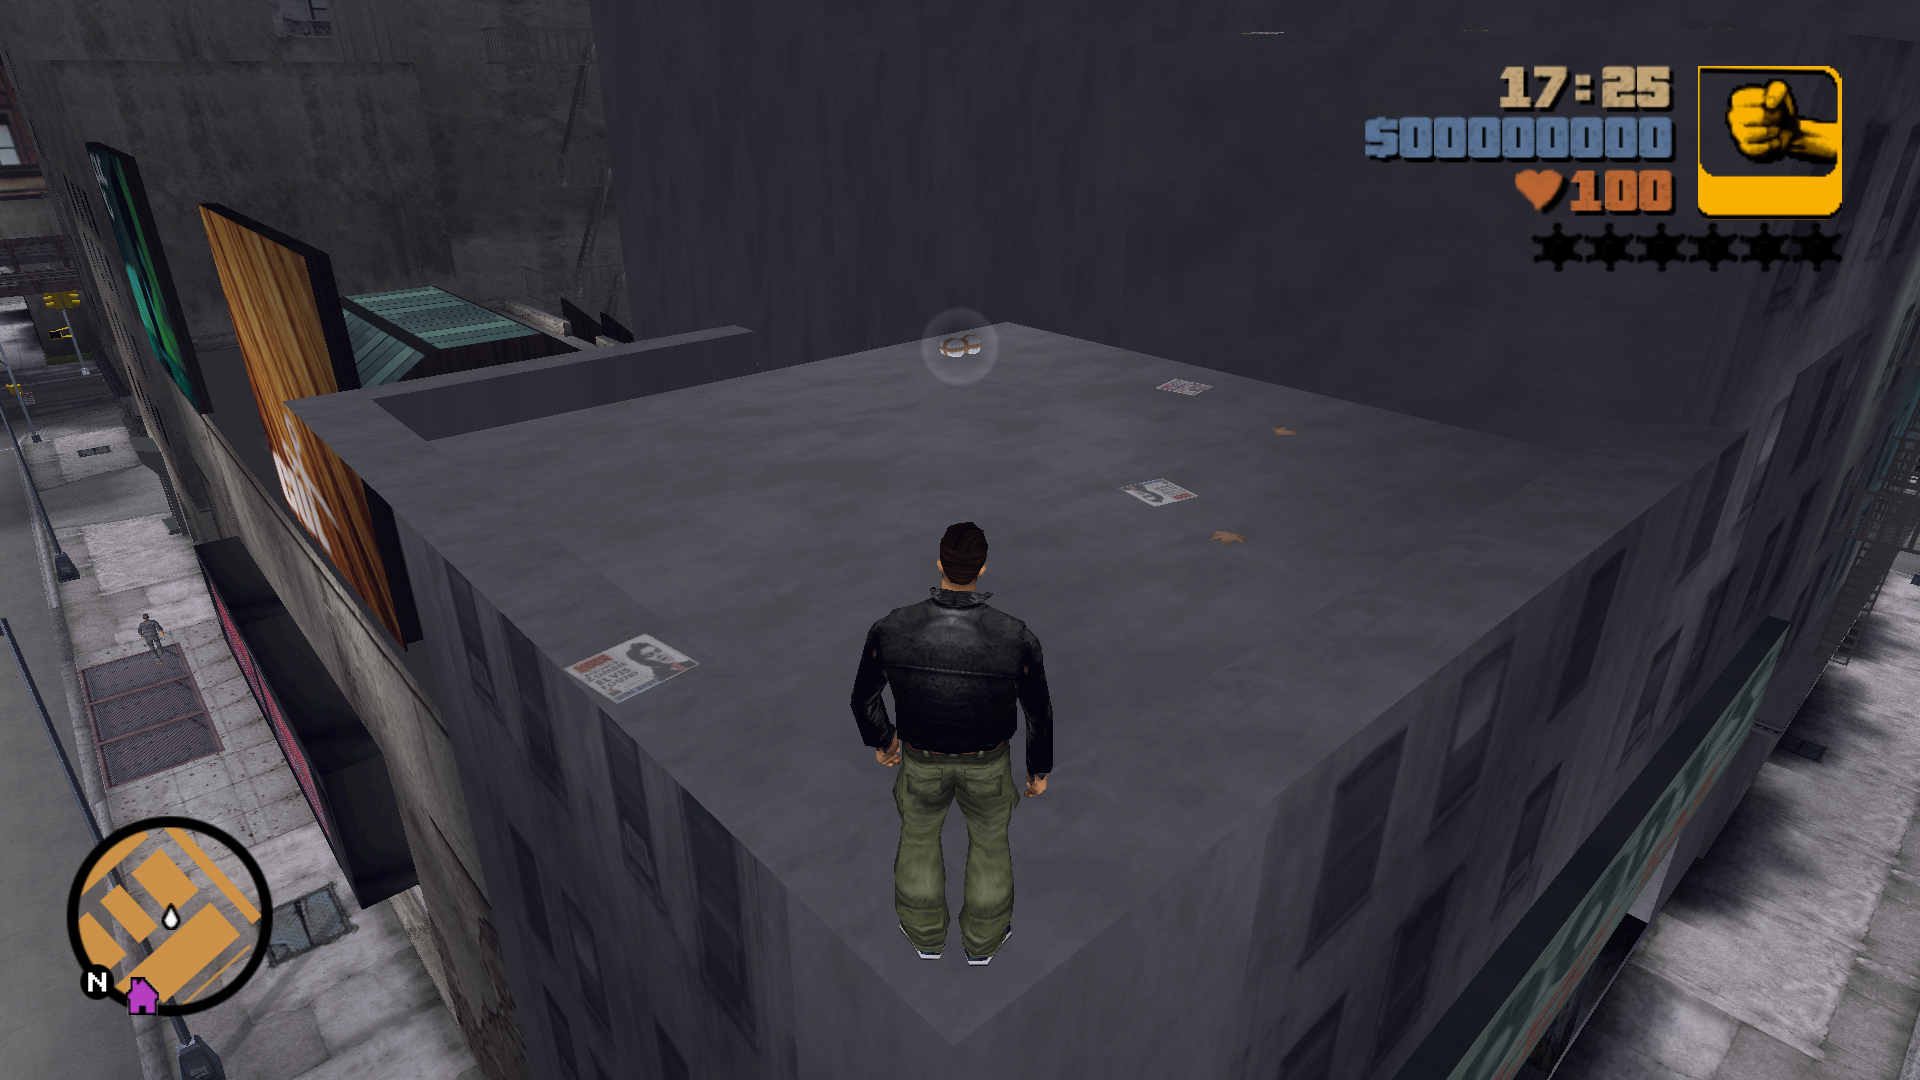
The block in front of Luigi's Club has an alleyway with stairs to access the roof, the package is at the very top.
4
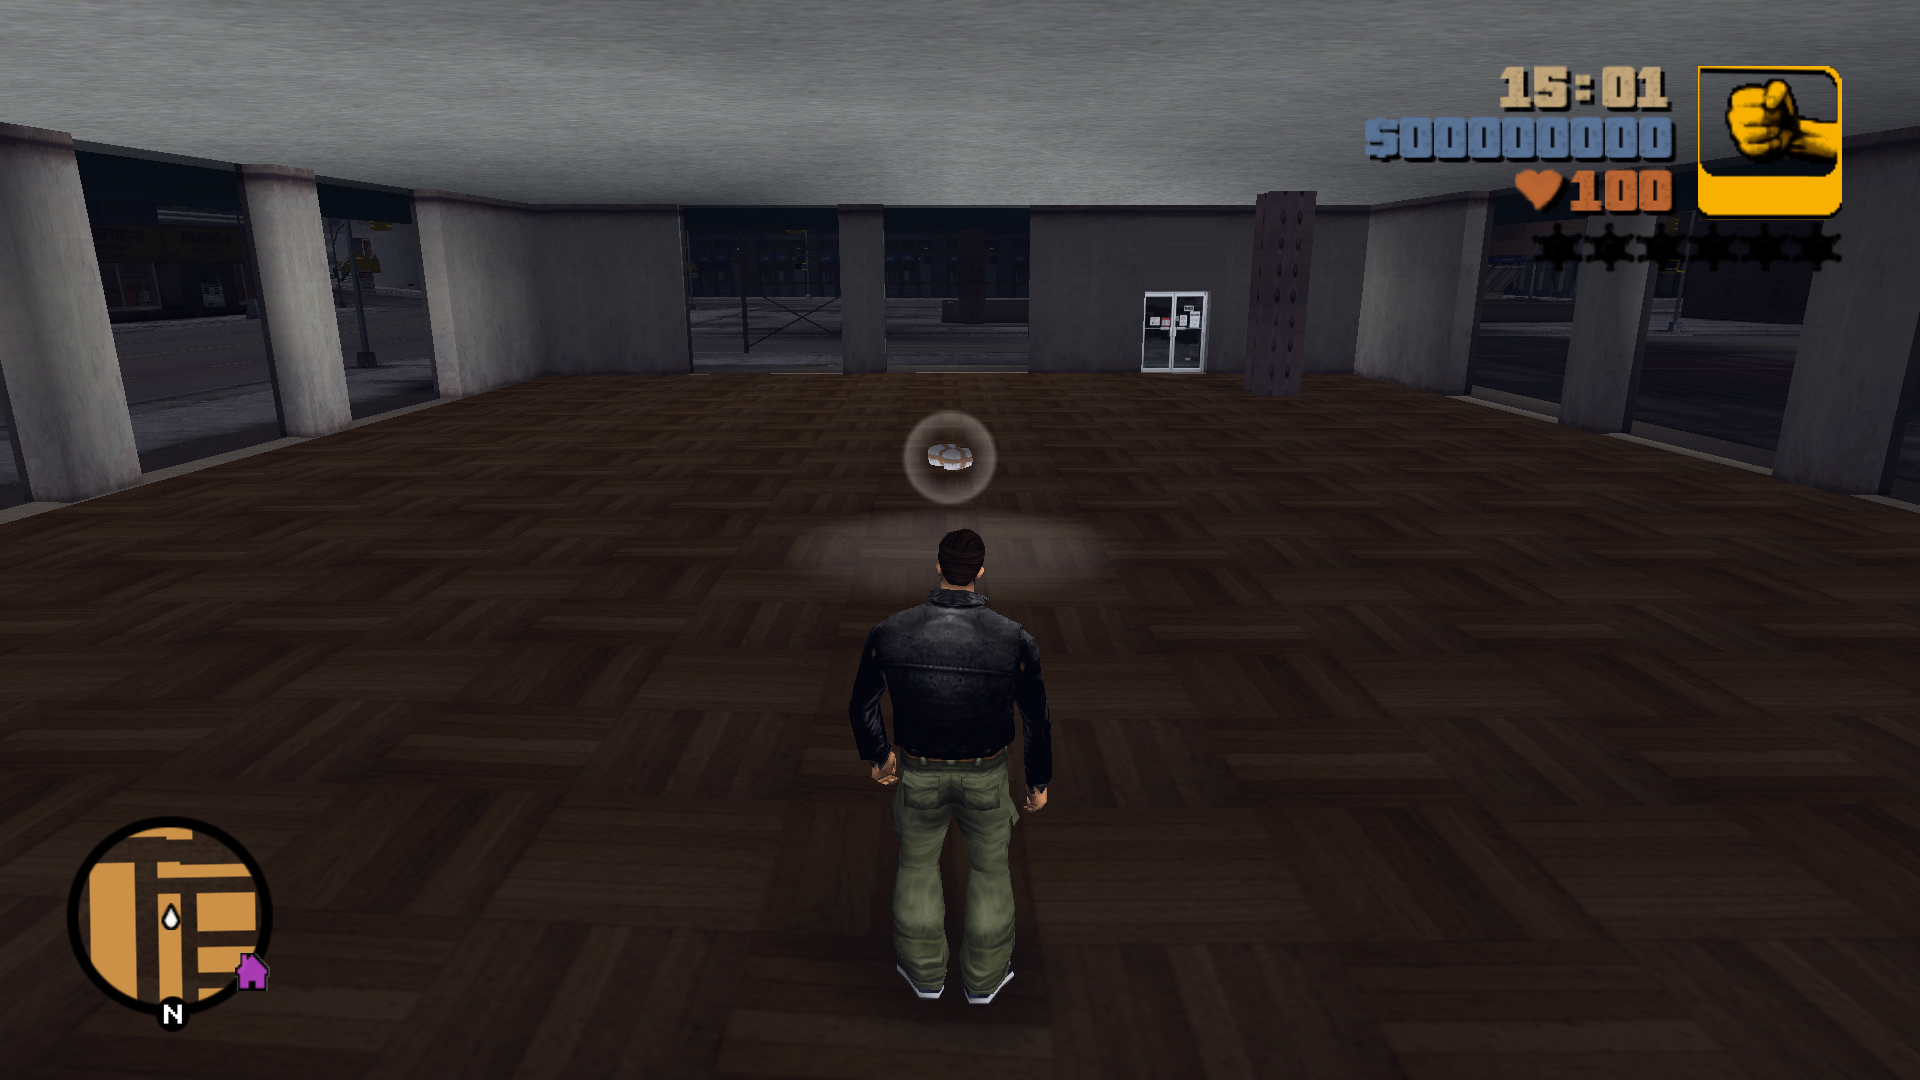
Inside the building under construction with the glass, break it to get in.
5
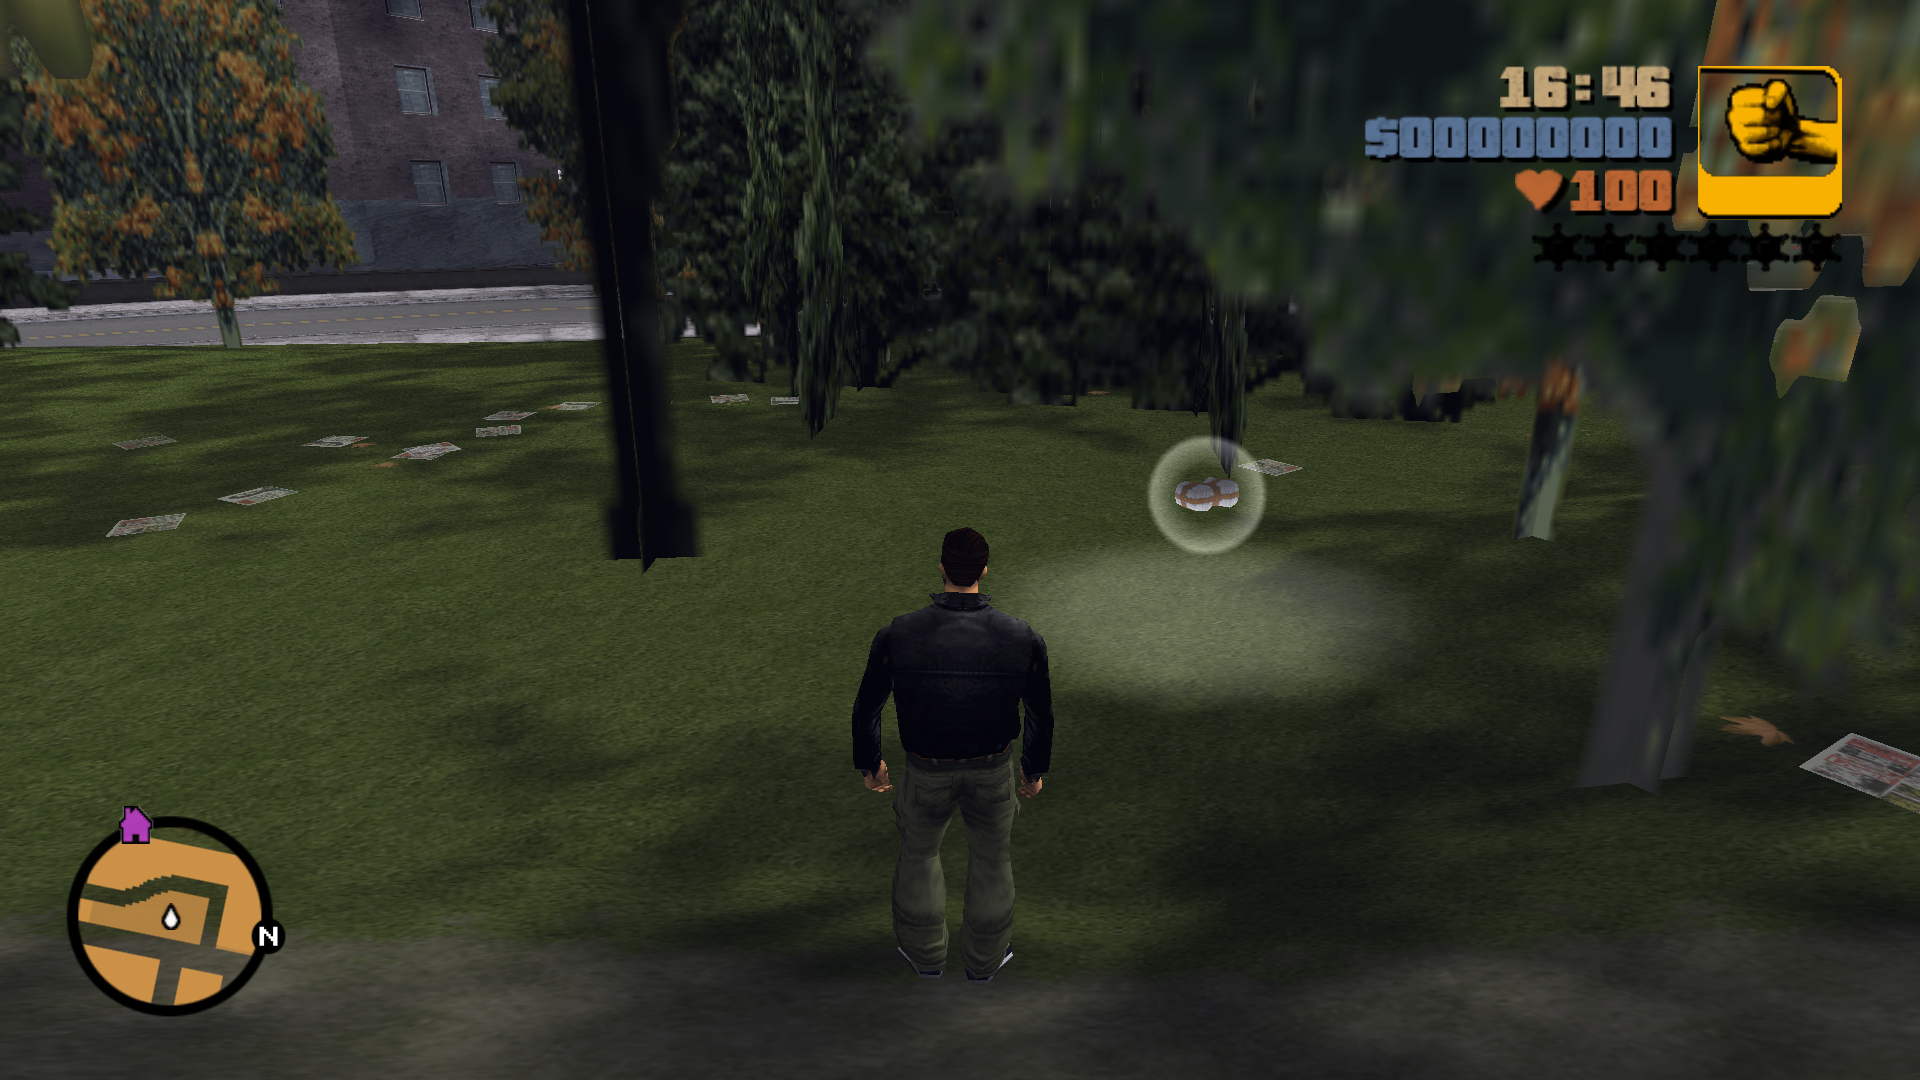
In the middle of the grassy terrain between the trees.
6
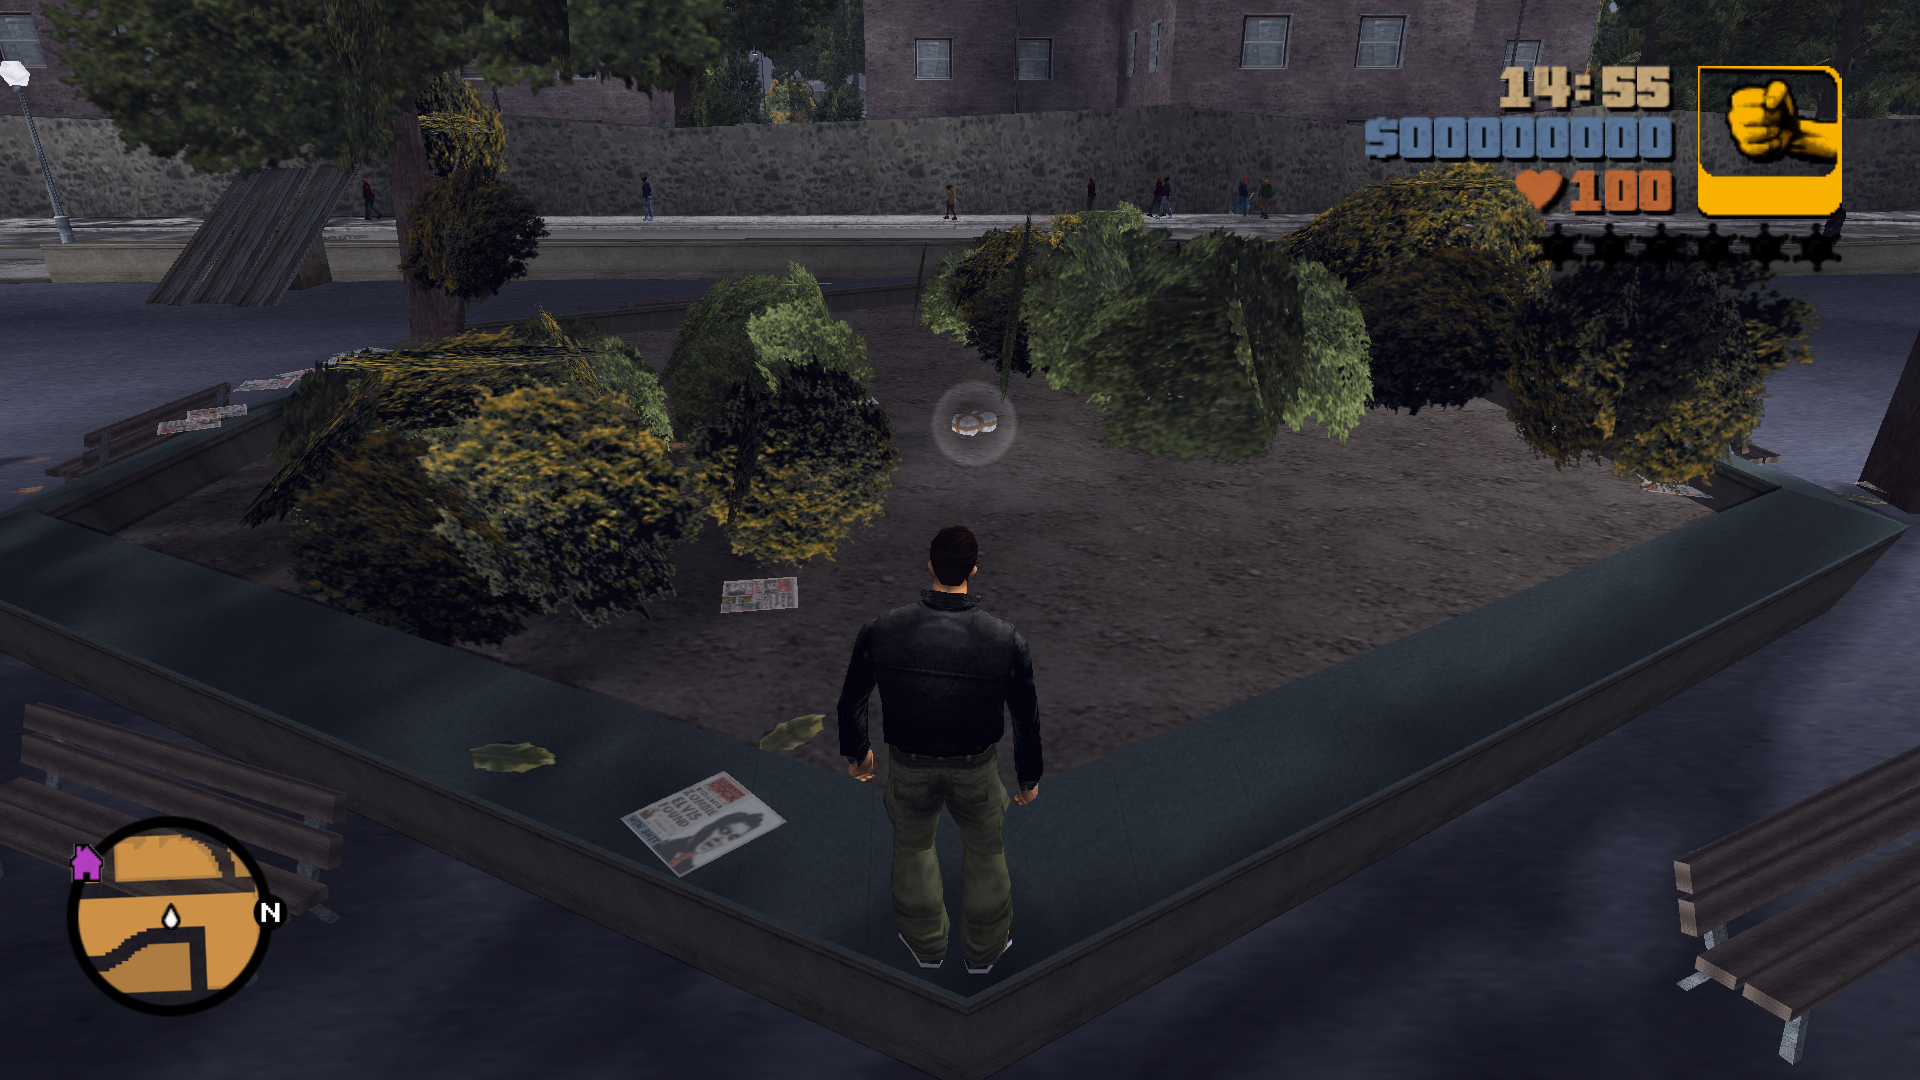
In the space between the apartments with public phones, trees and benches; the package is in a raised circle with bushes and a tree.
7
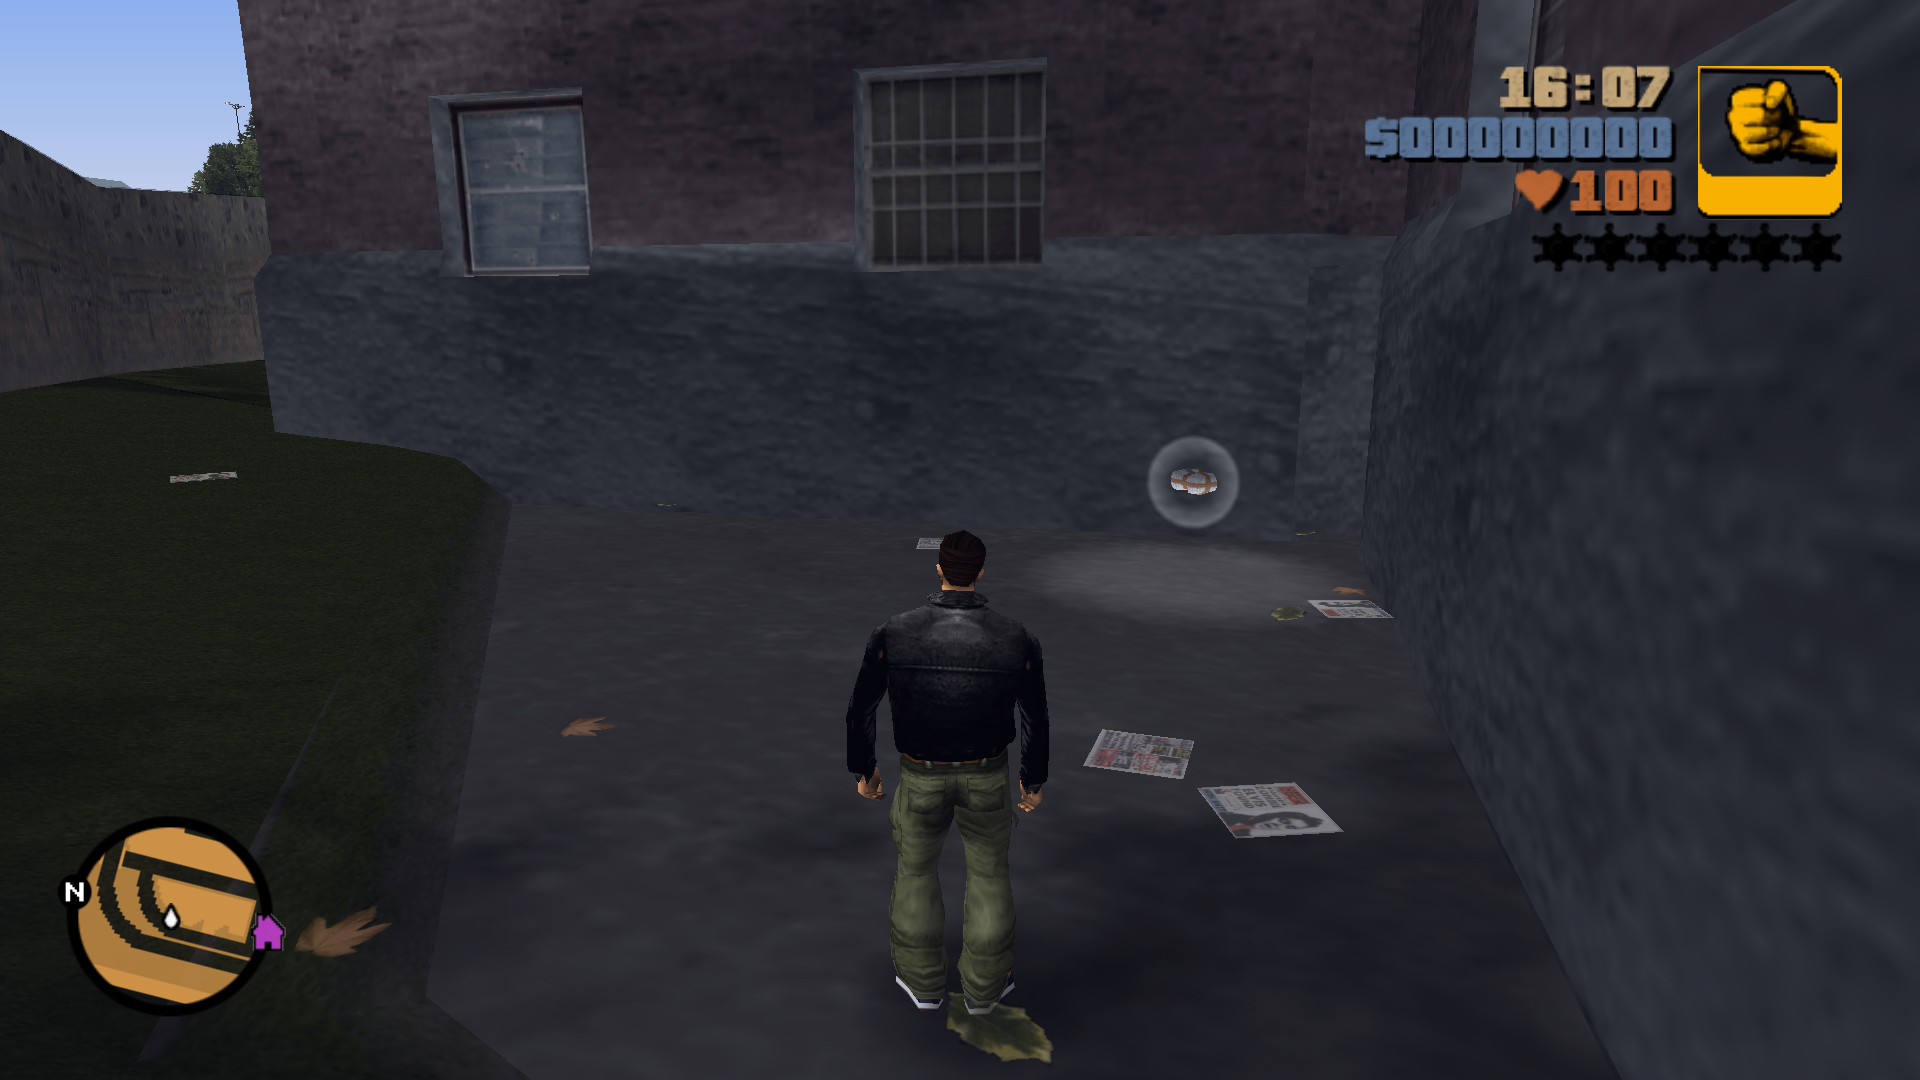
At the back of the northwestern apartment tower, the entrance is on the west side, go left at the plank ramp and around the building.
8
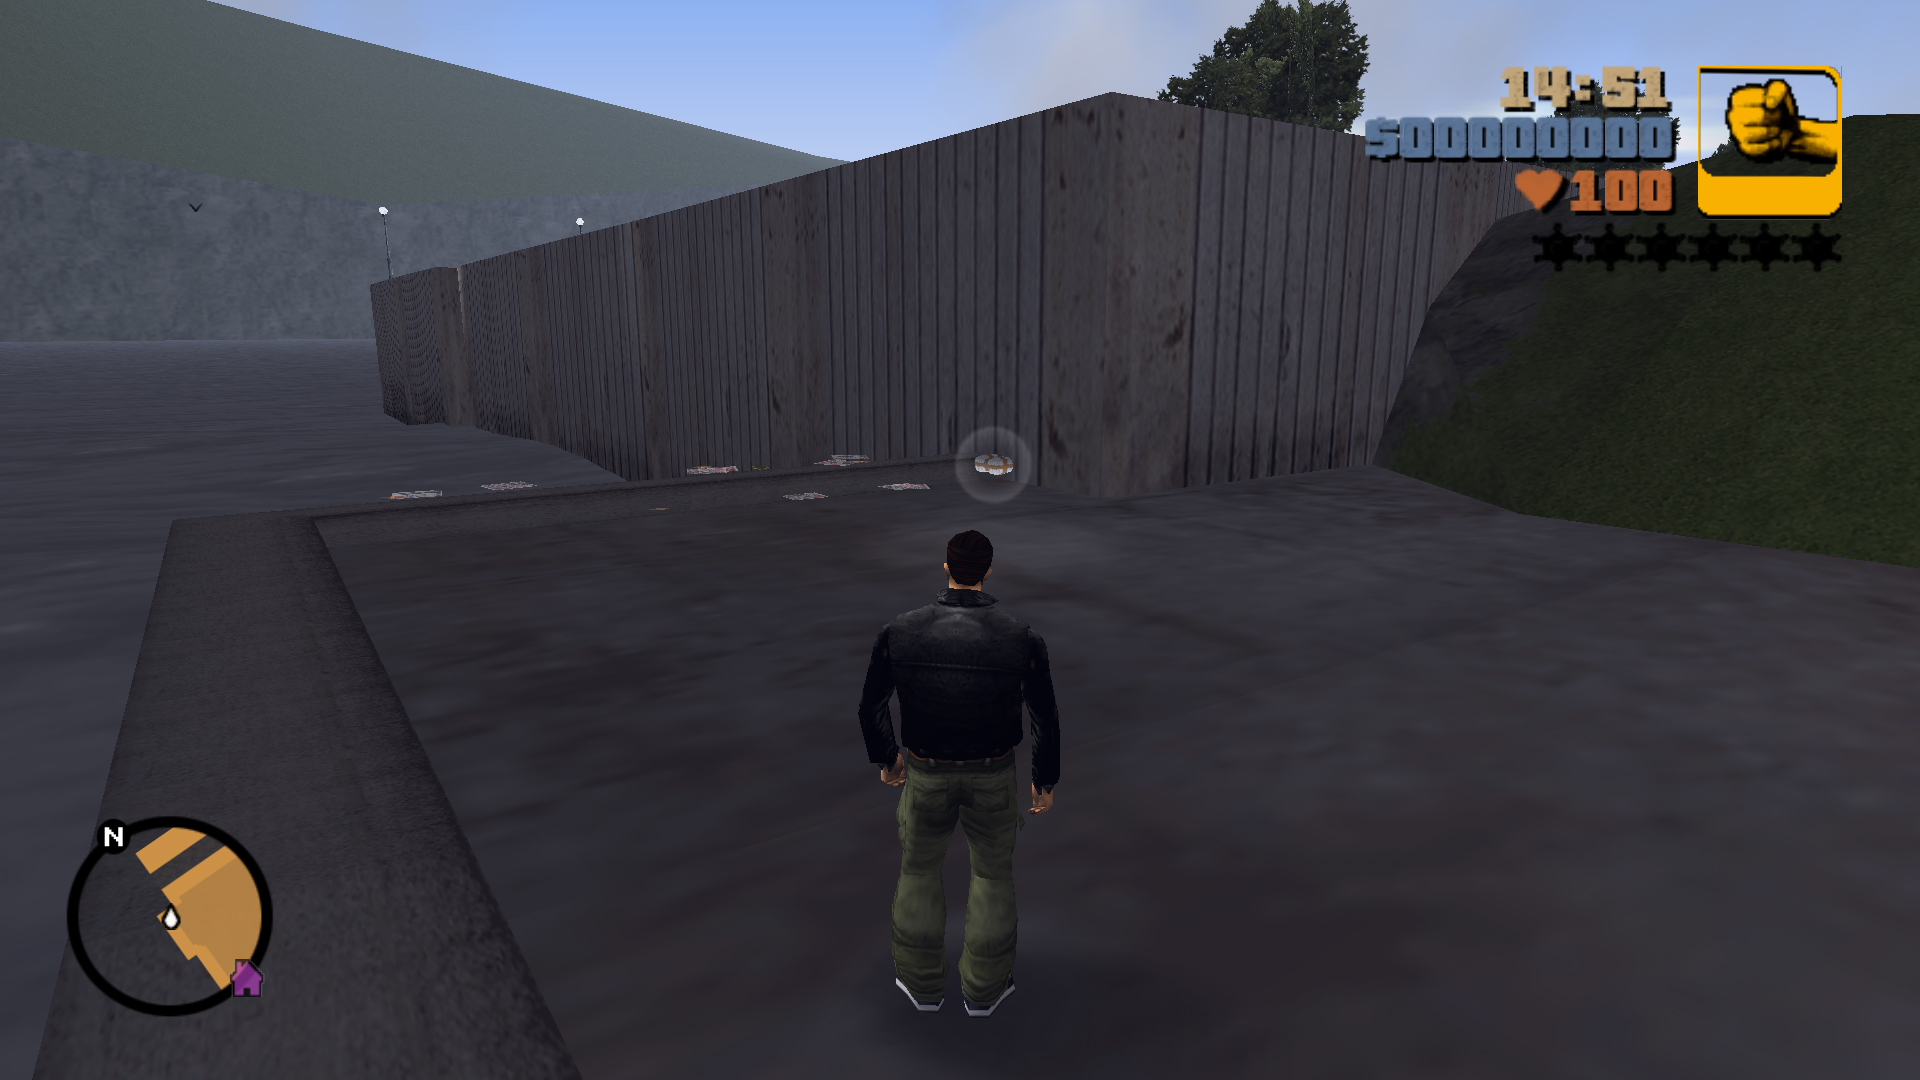
At the north of the western shore before the tunnel entrance.
9
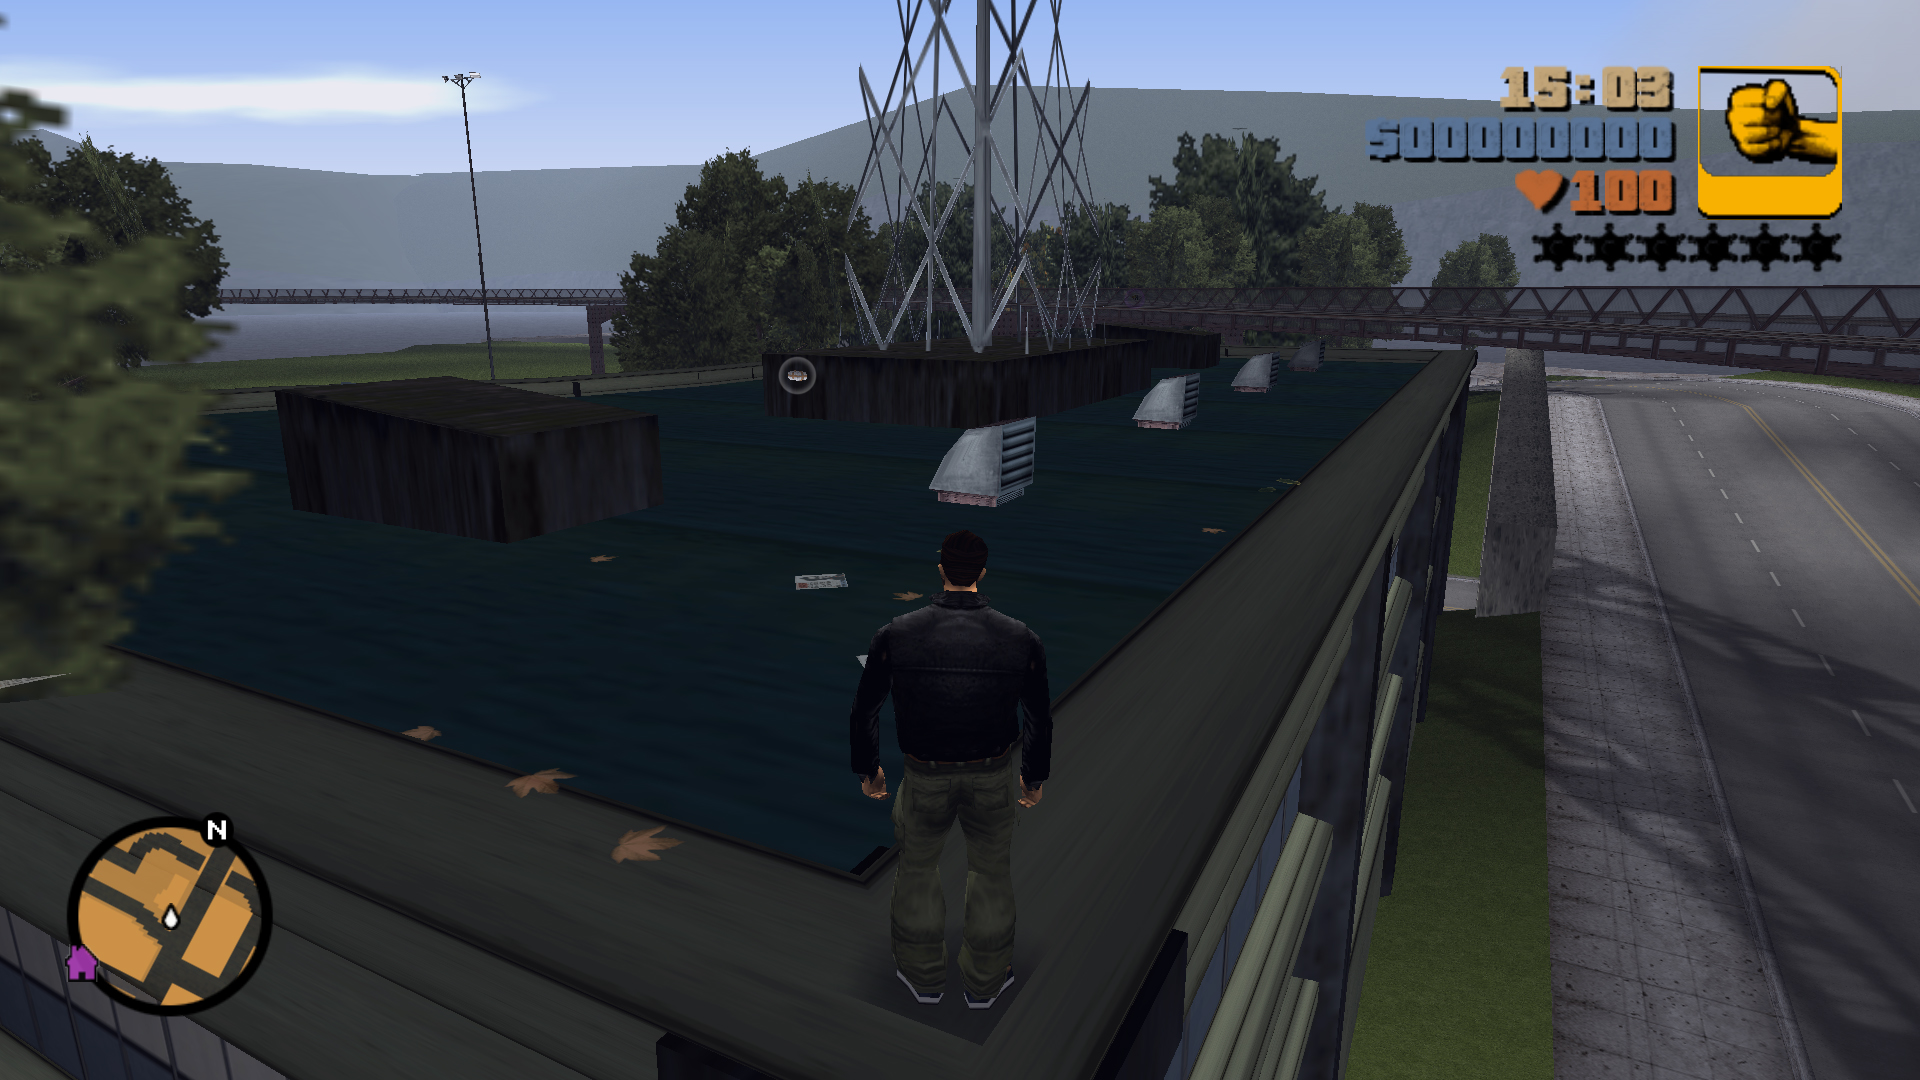
On the roof of the Head Radio building, to the south there's stairs access to the Elevated Train station, go forward on the tracks and drop down on the roof.
10
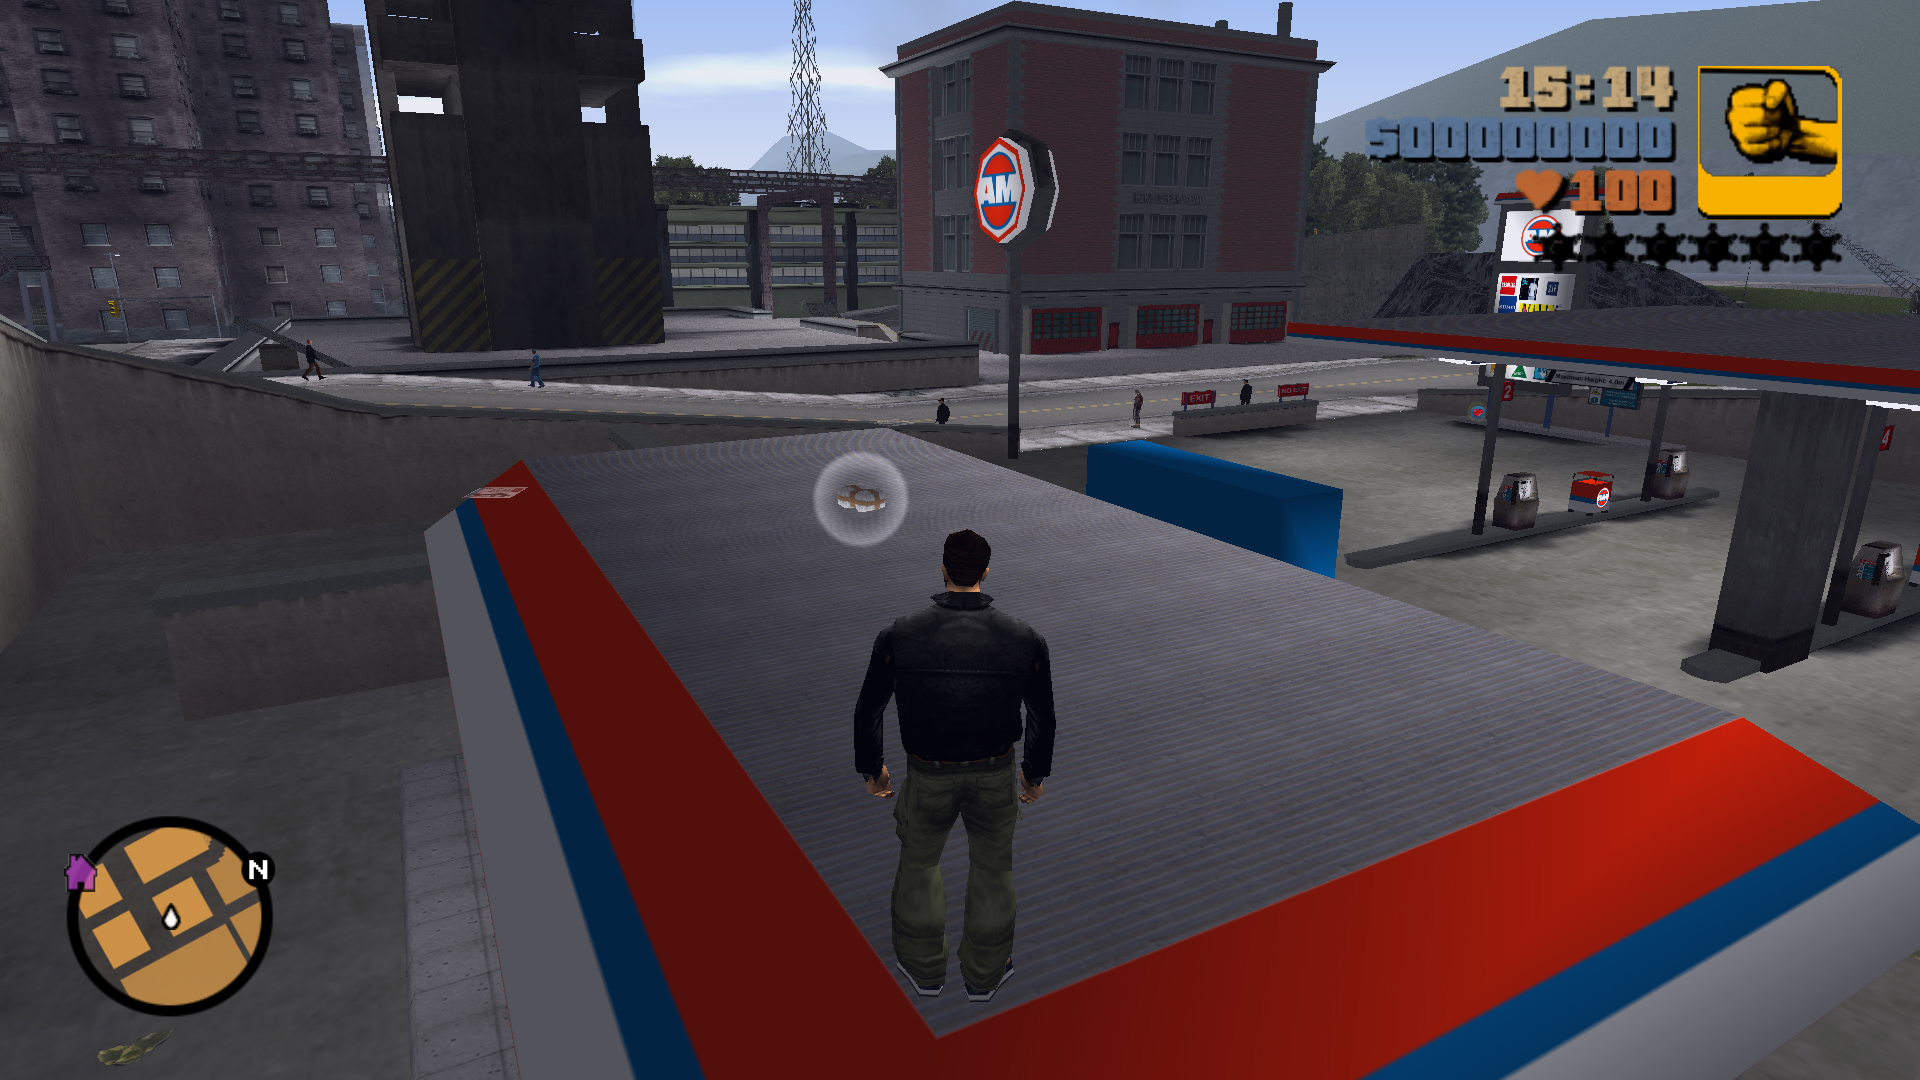
On top of the gas station building, get on the outer walls of the station and go along them, drop down on the structure at the southeast corner and jump across to the building in the middle.
11
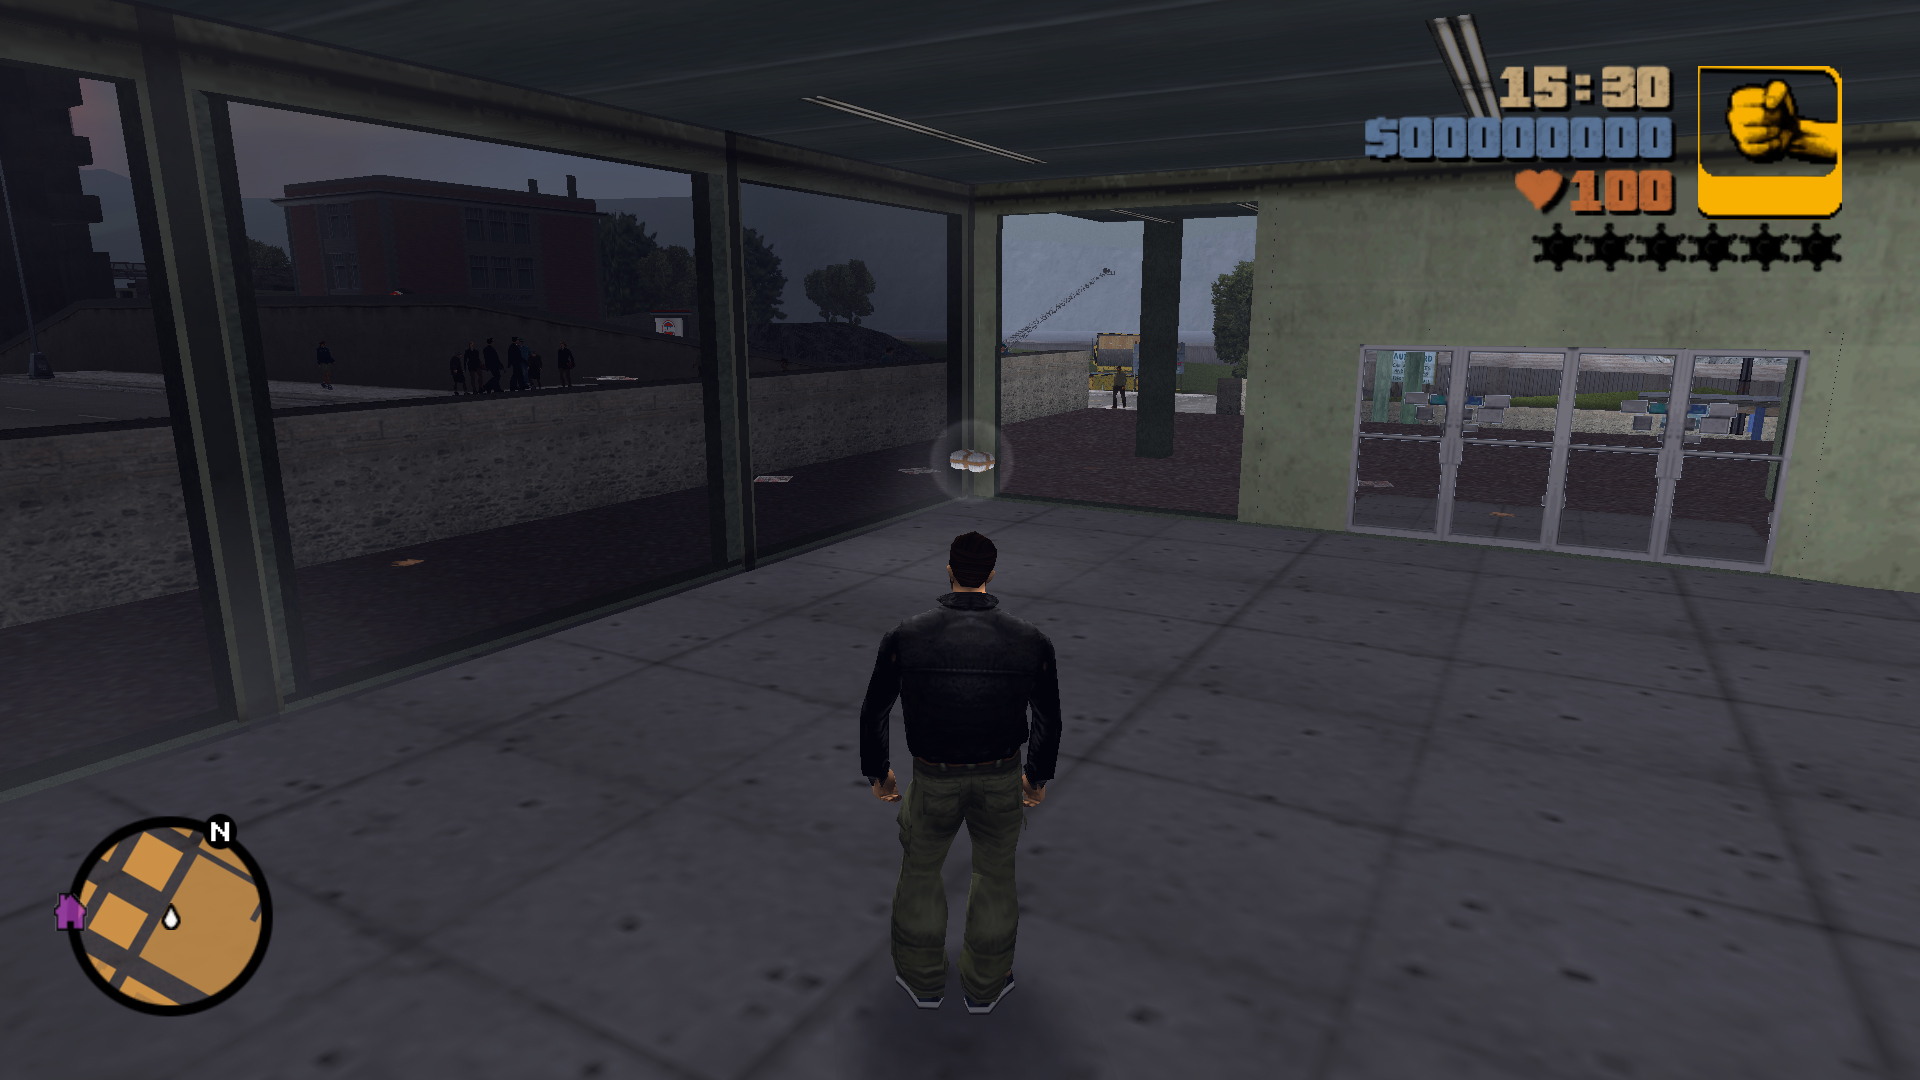
Inside the car dealership.
12
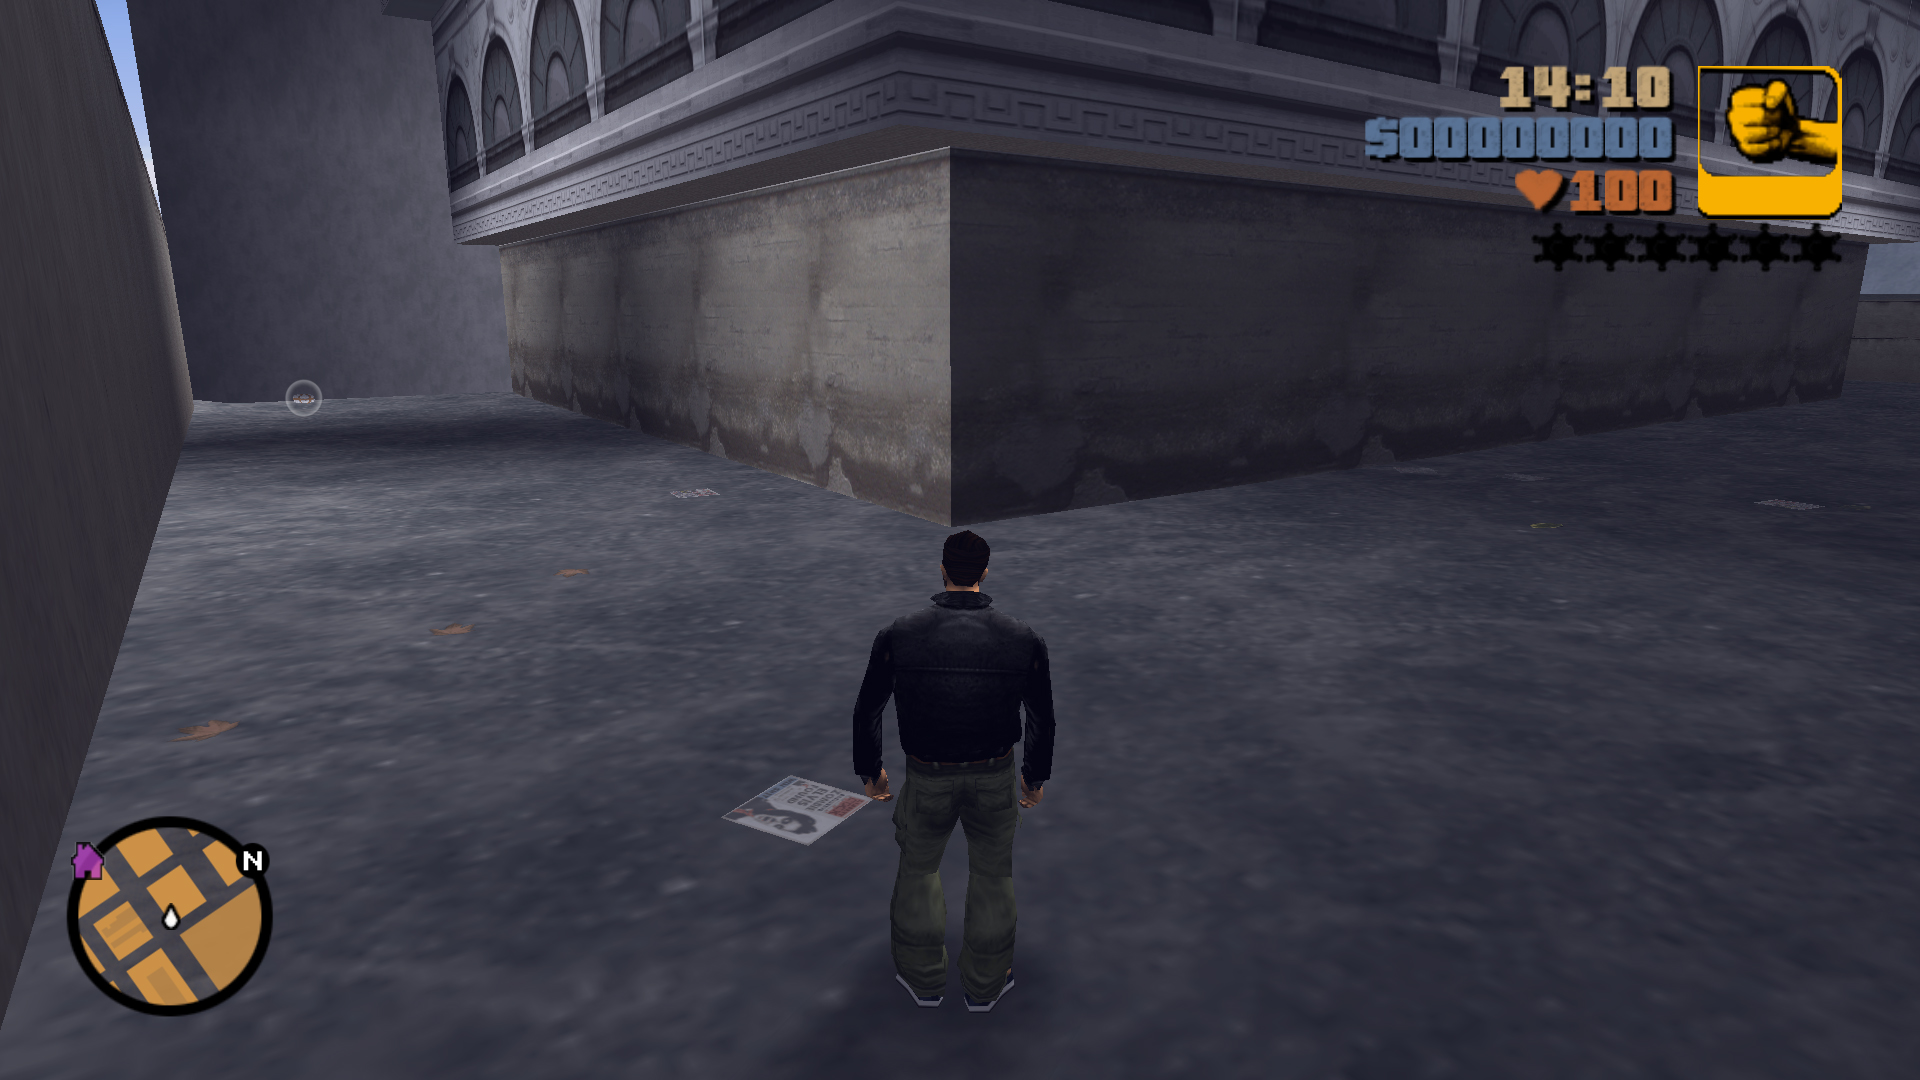
At the end of an alley in the block south of the gas station.
13
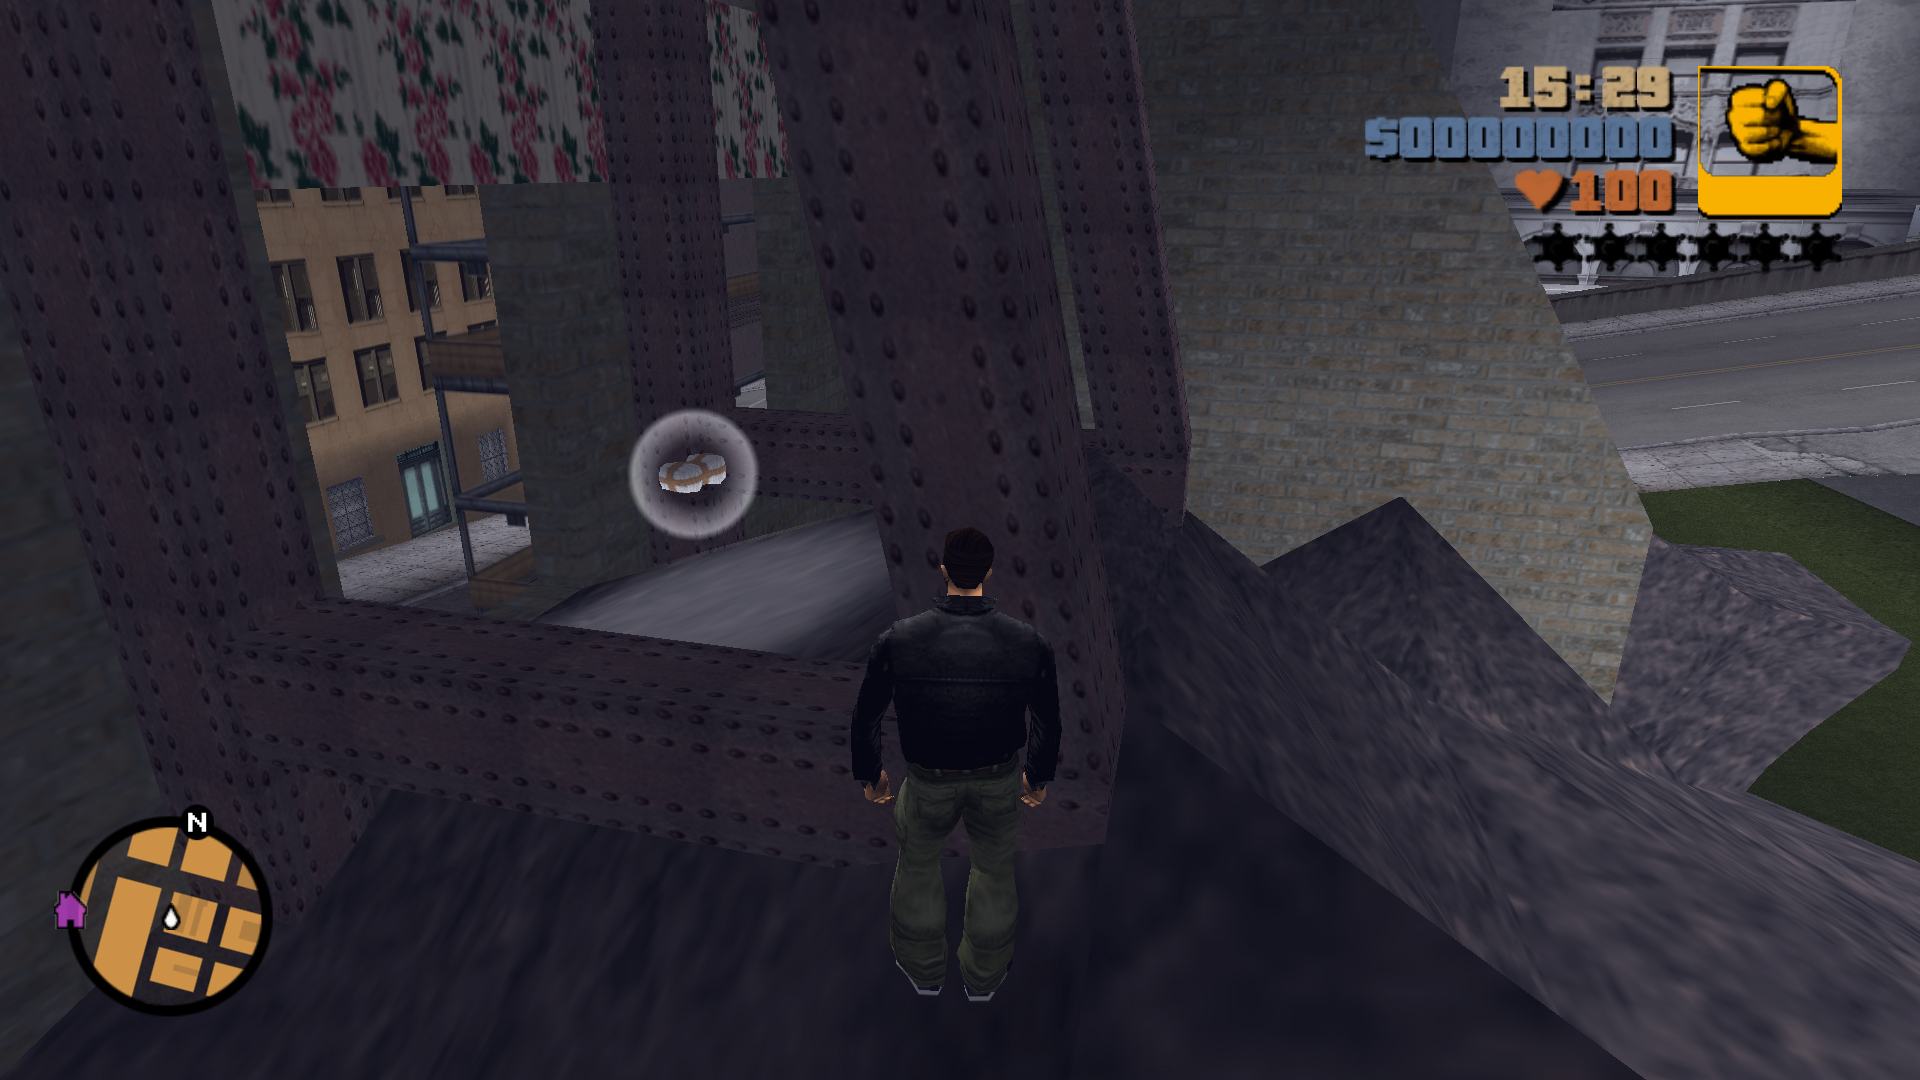
In the destroyed building, behind a window.
14
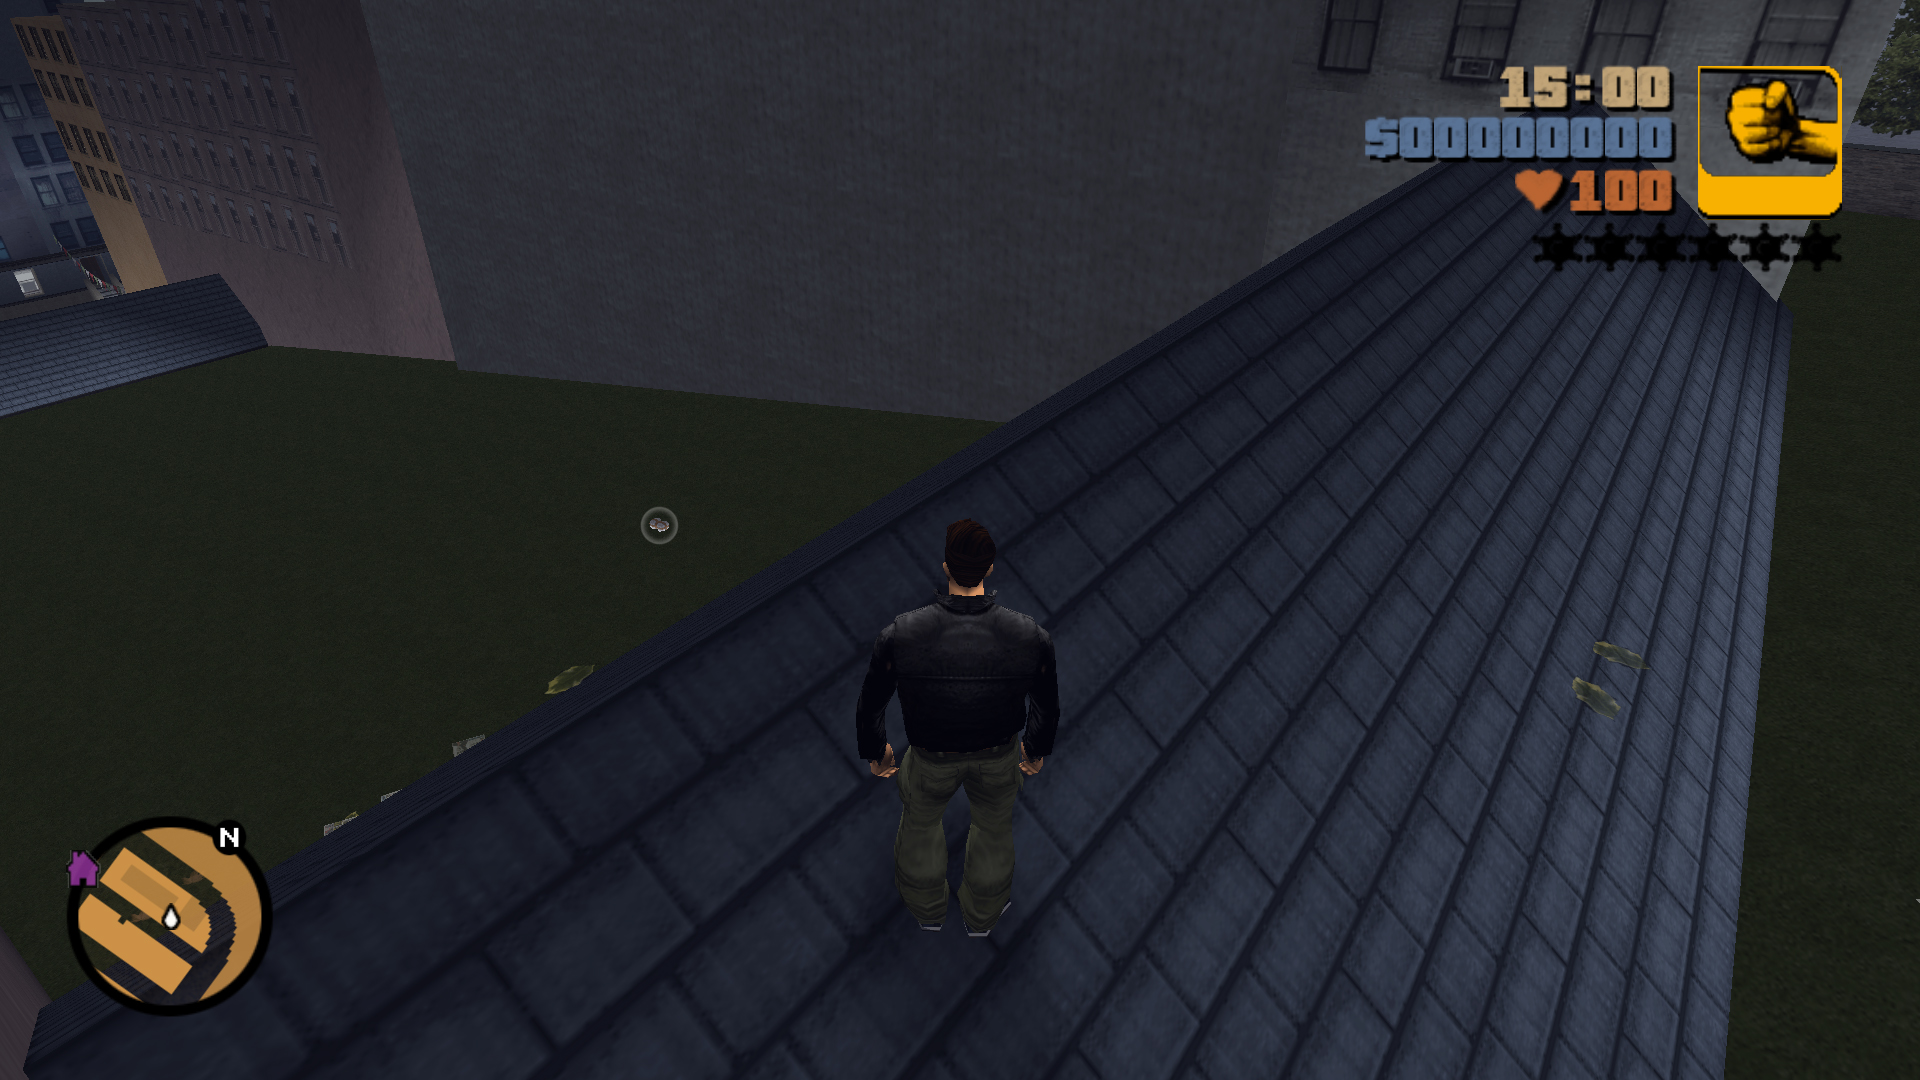
Behind a small park with benches, you can go over the blue roof and drop down on a hidden path between the buildings.
15
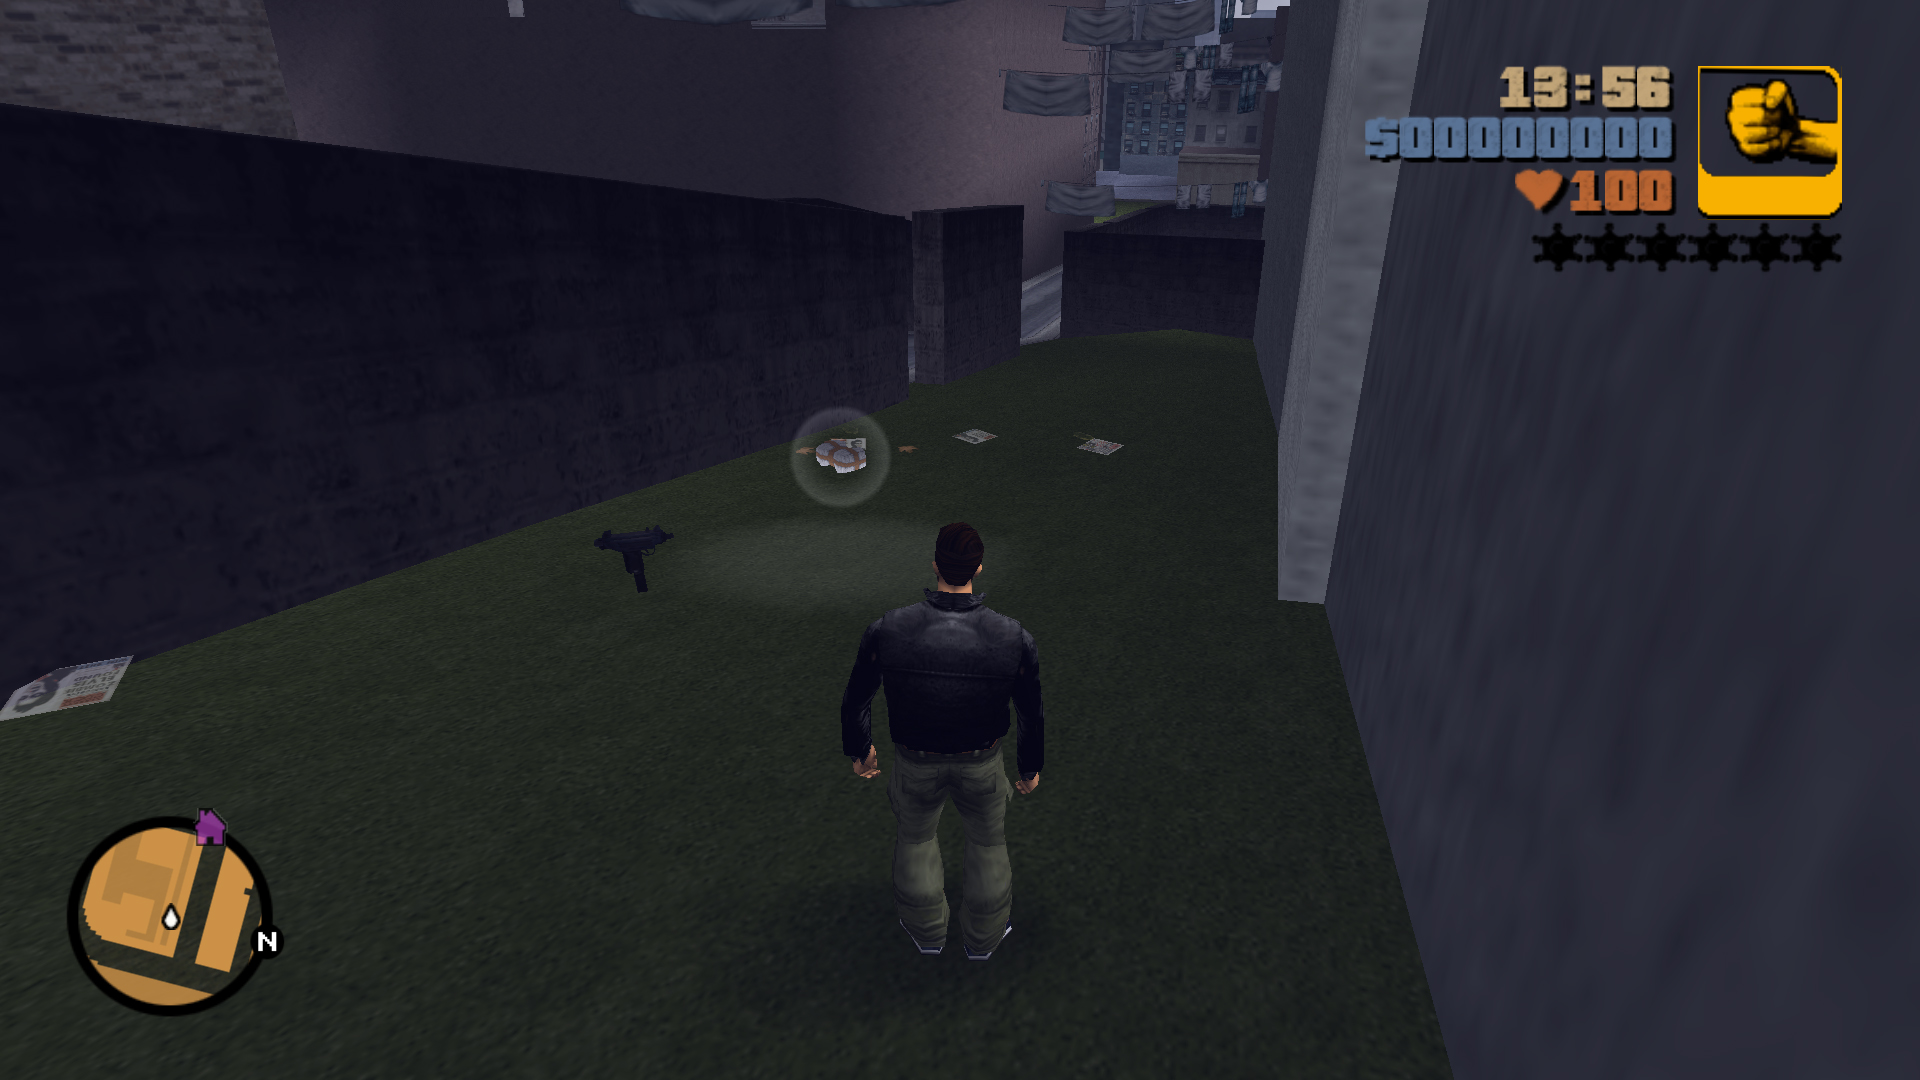
In an alleyway that cuts across the whole block, the package is behind some walls.
16
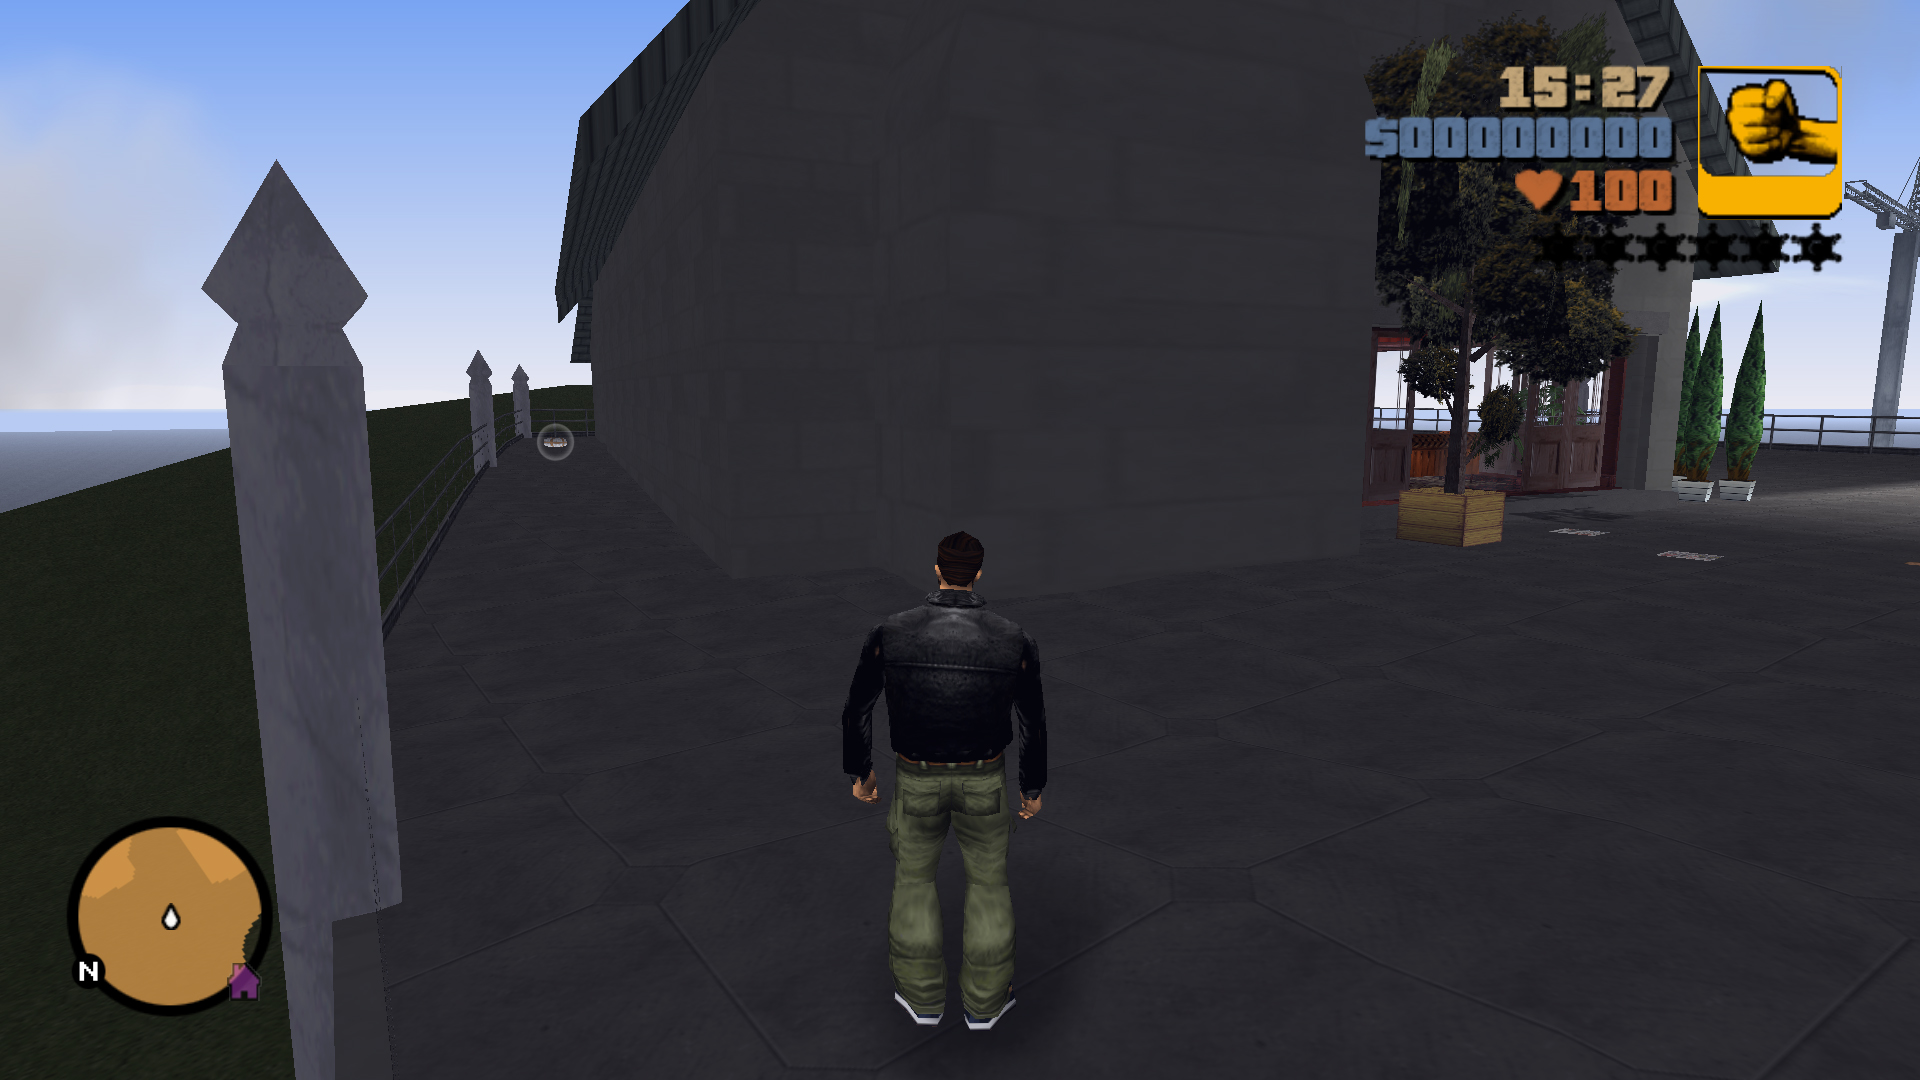
At the north side of Salvatore's mansion.
17
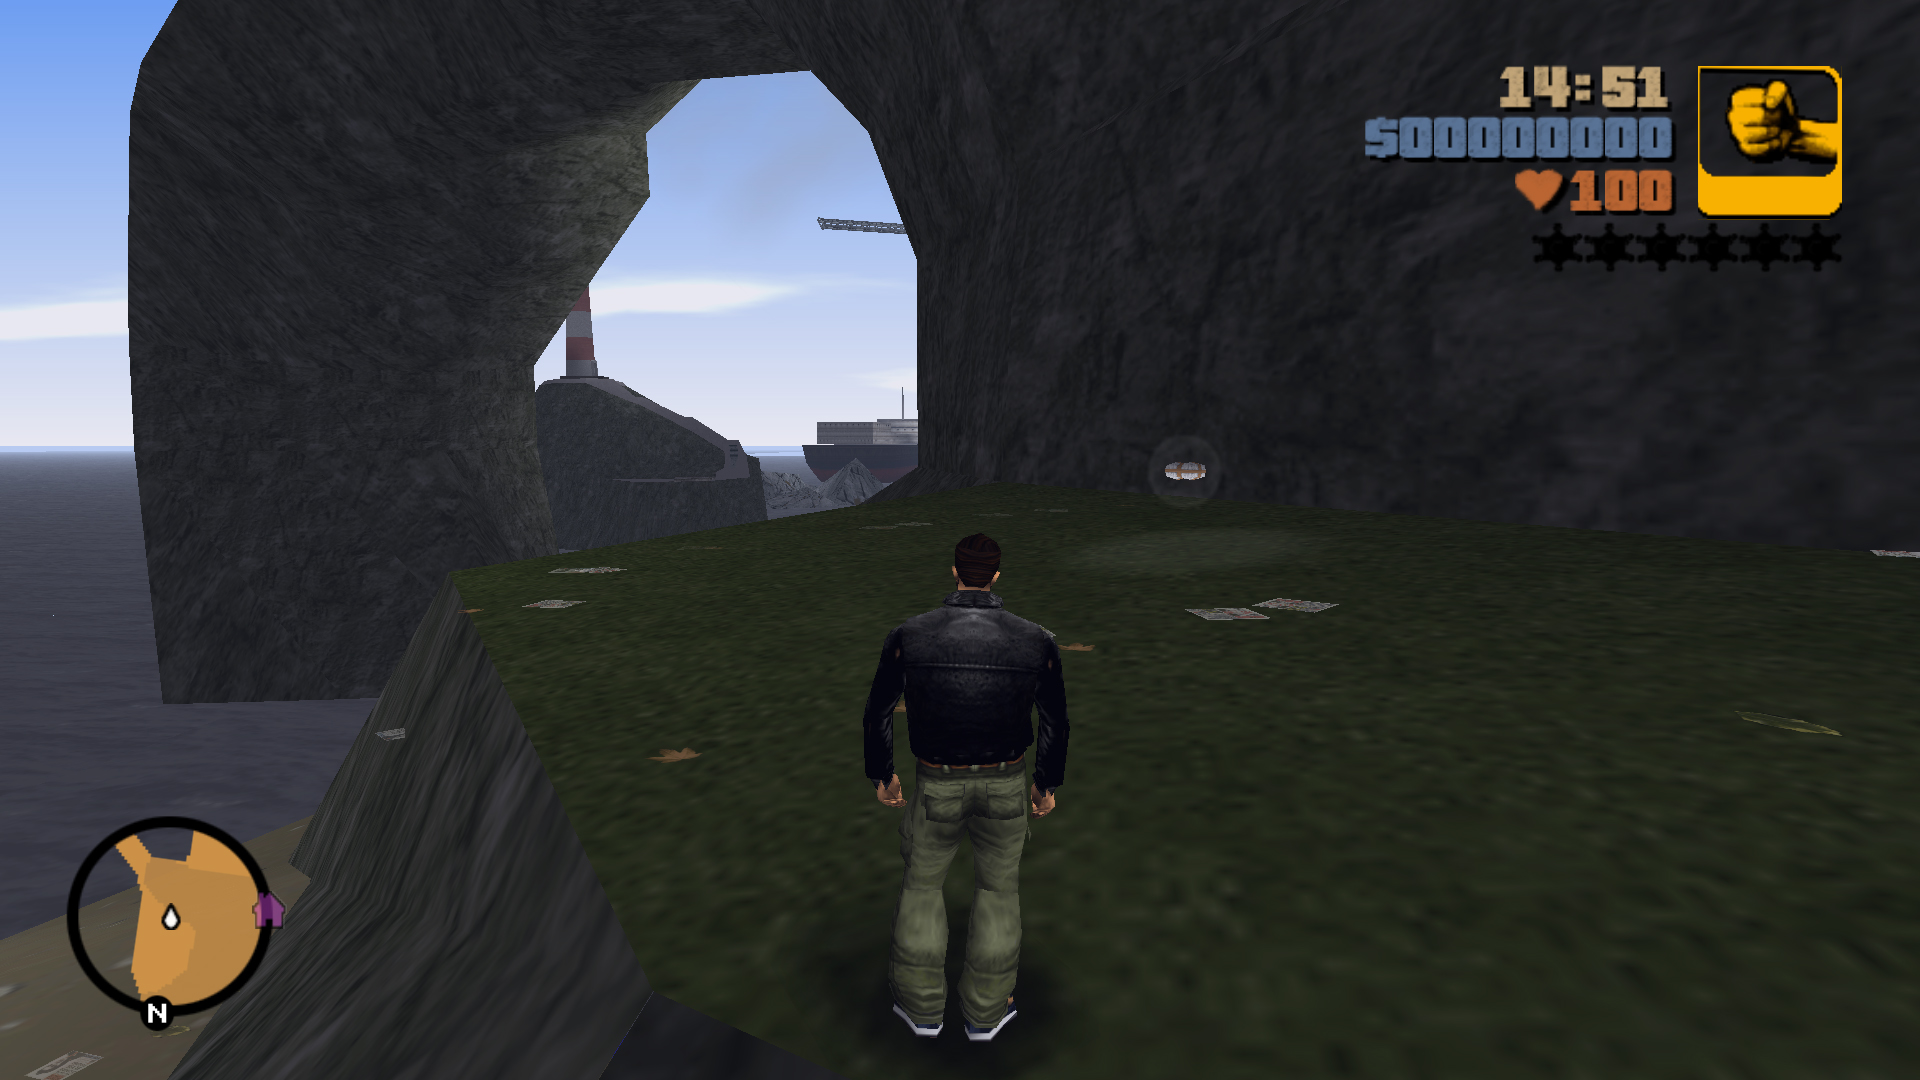
Down at the northern part of the beach on a grassy ledge.
18
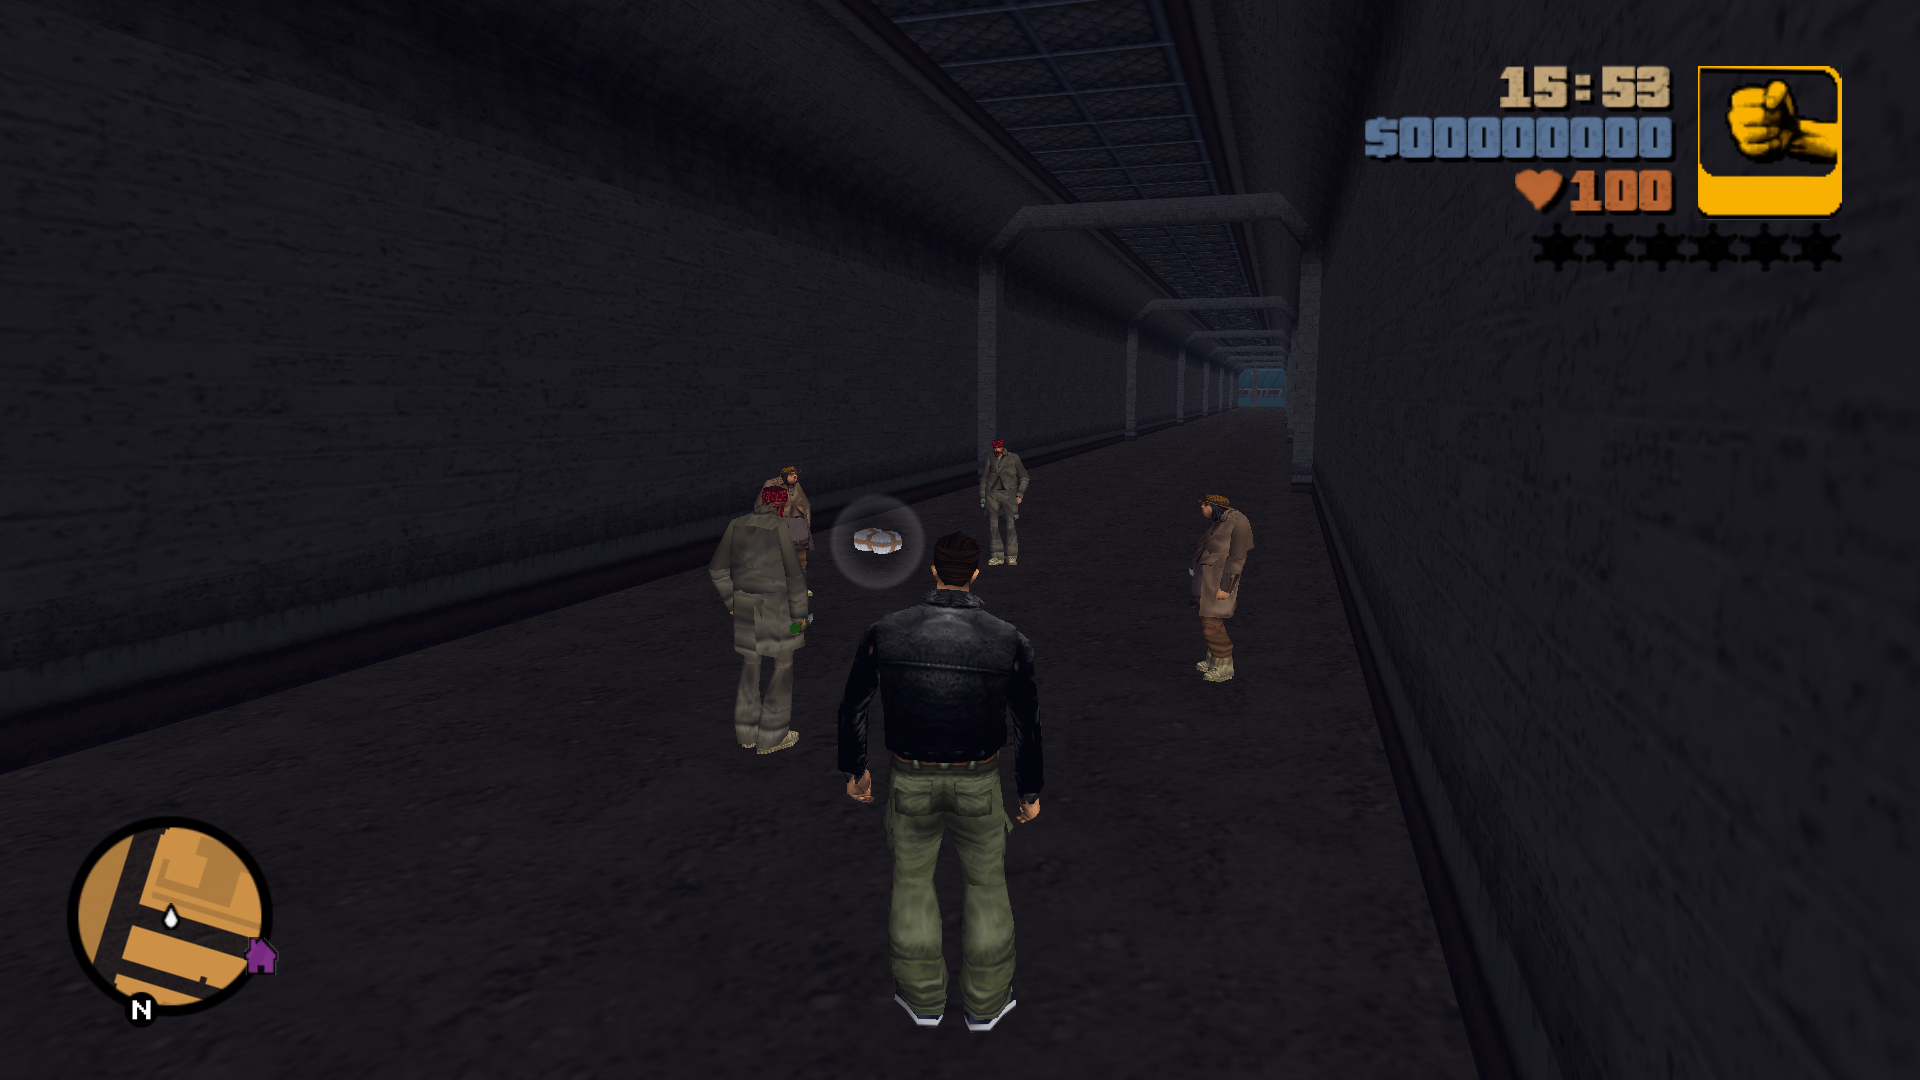
Halfway in the tunnel next to some homeless people with molotovs. Use the tunnel entrance behind 8 Ball's Bomb Shop.
19
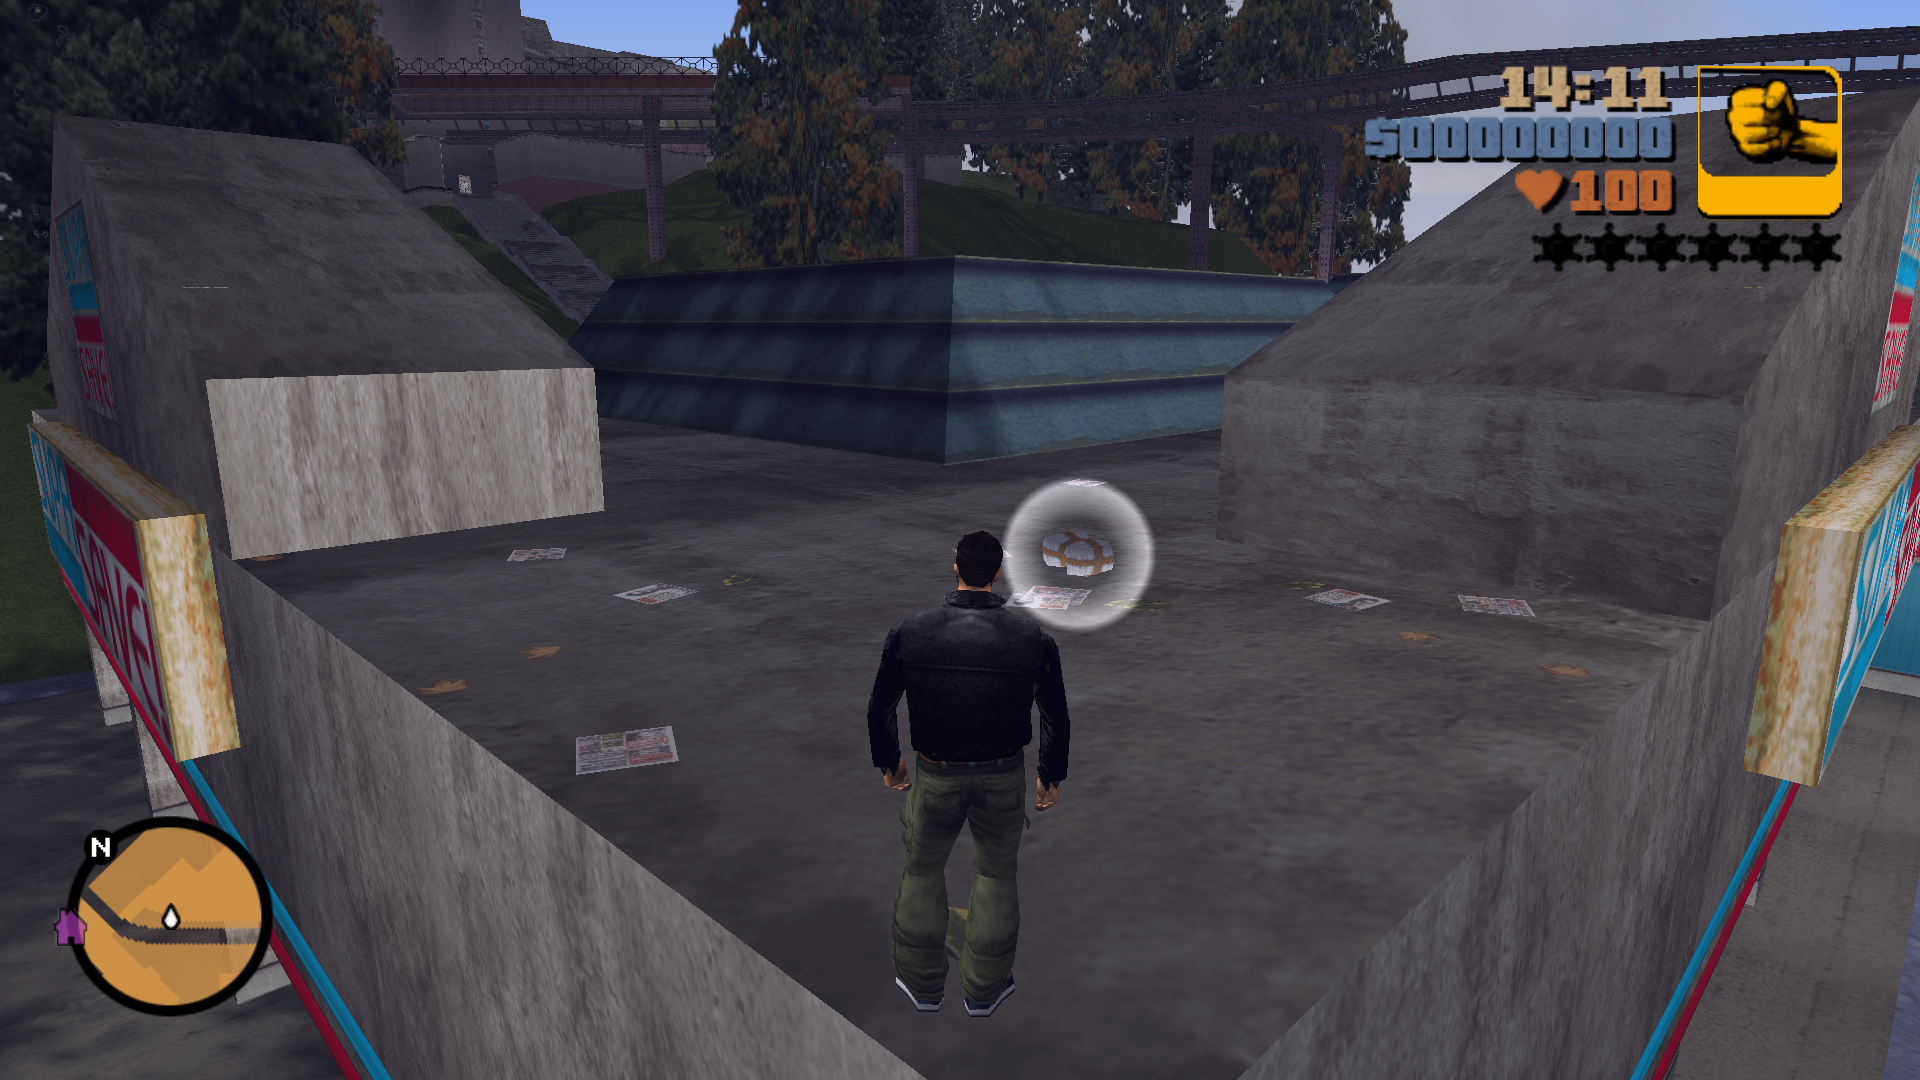
On the roof of the Supa Save, you can get up using a ledge of the other tunnel entrance to jump on; dropping down from the Elevated Train tracks or jumping with a car from the street using the sidewalk ramp.
20
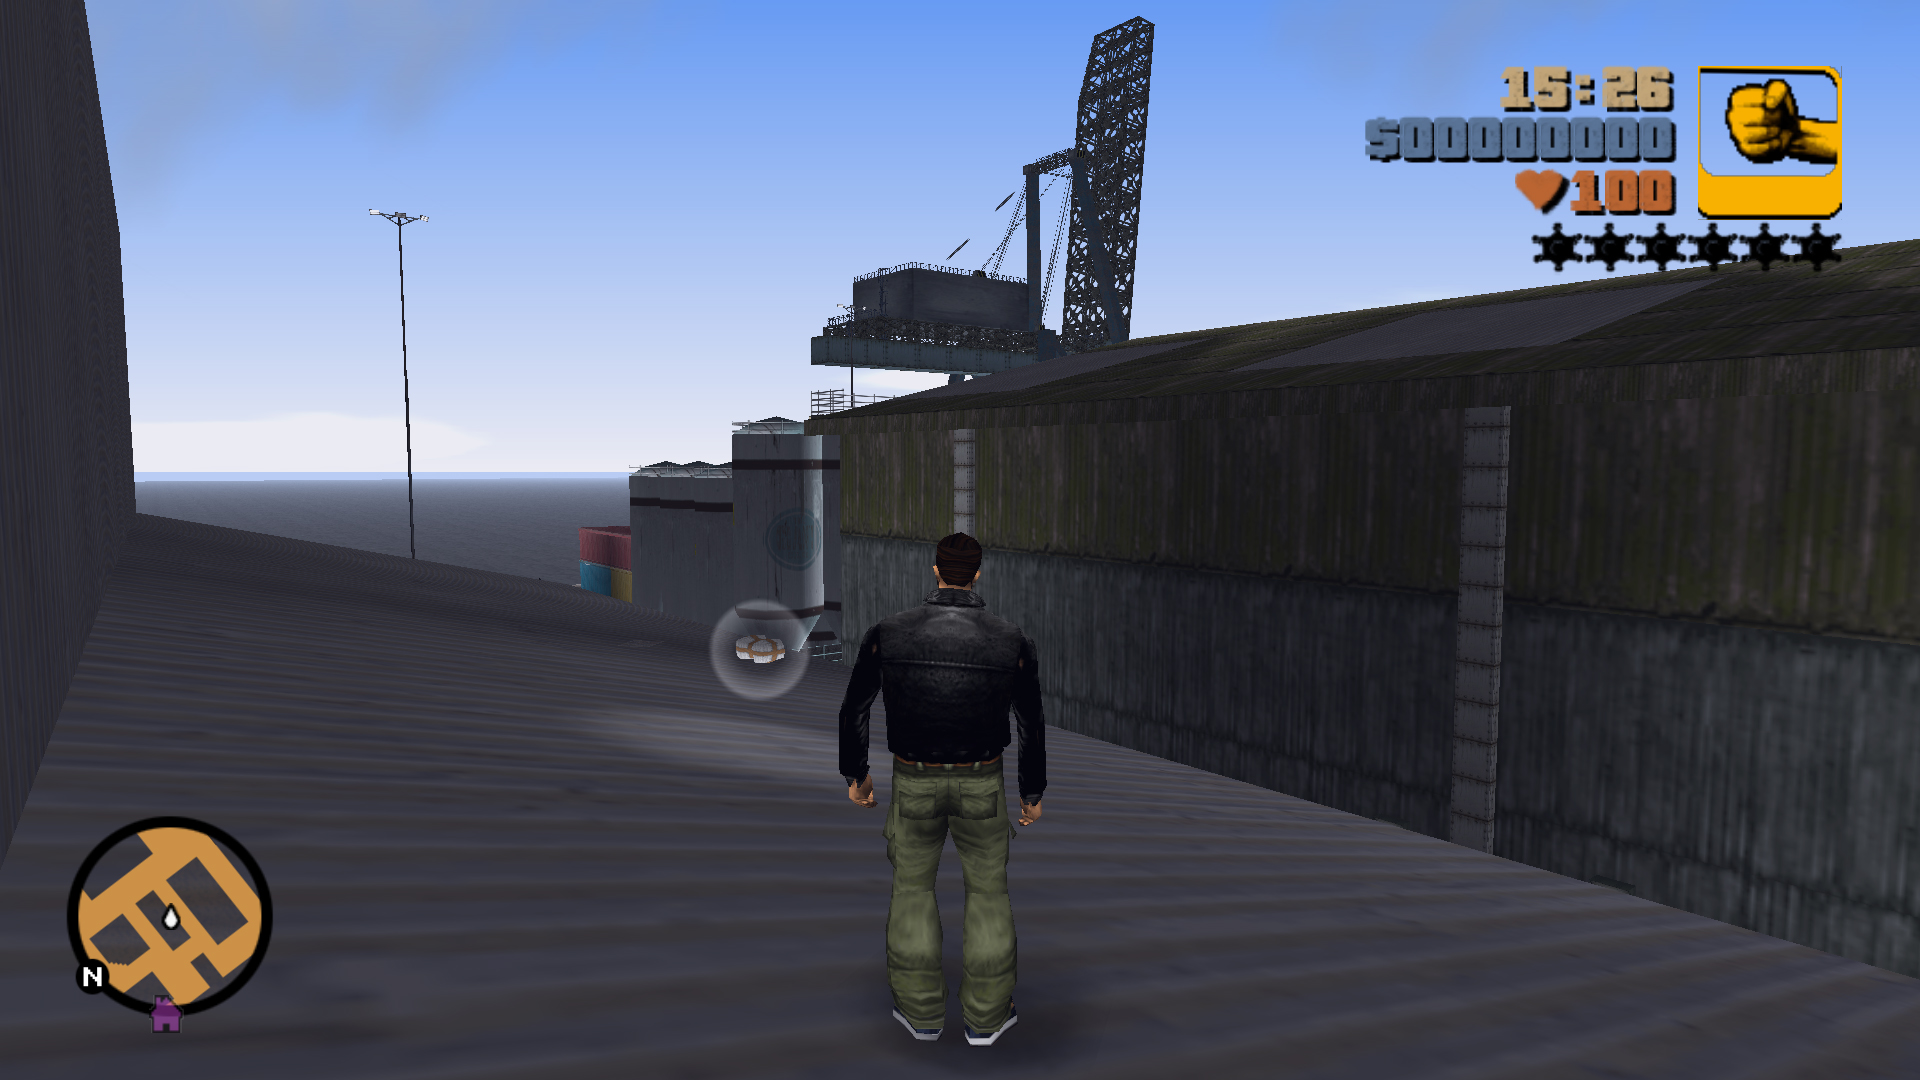
On the lower roof of the Portland Harbor garages, the building across has stairs at the southeast corner, climb them to get on the roof of that building, then jump across to the lower roof of the garages.
21
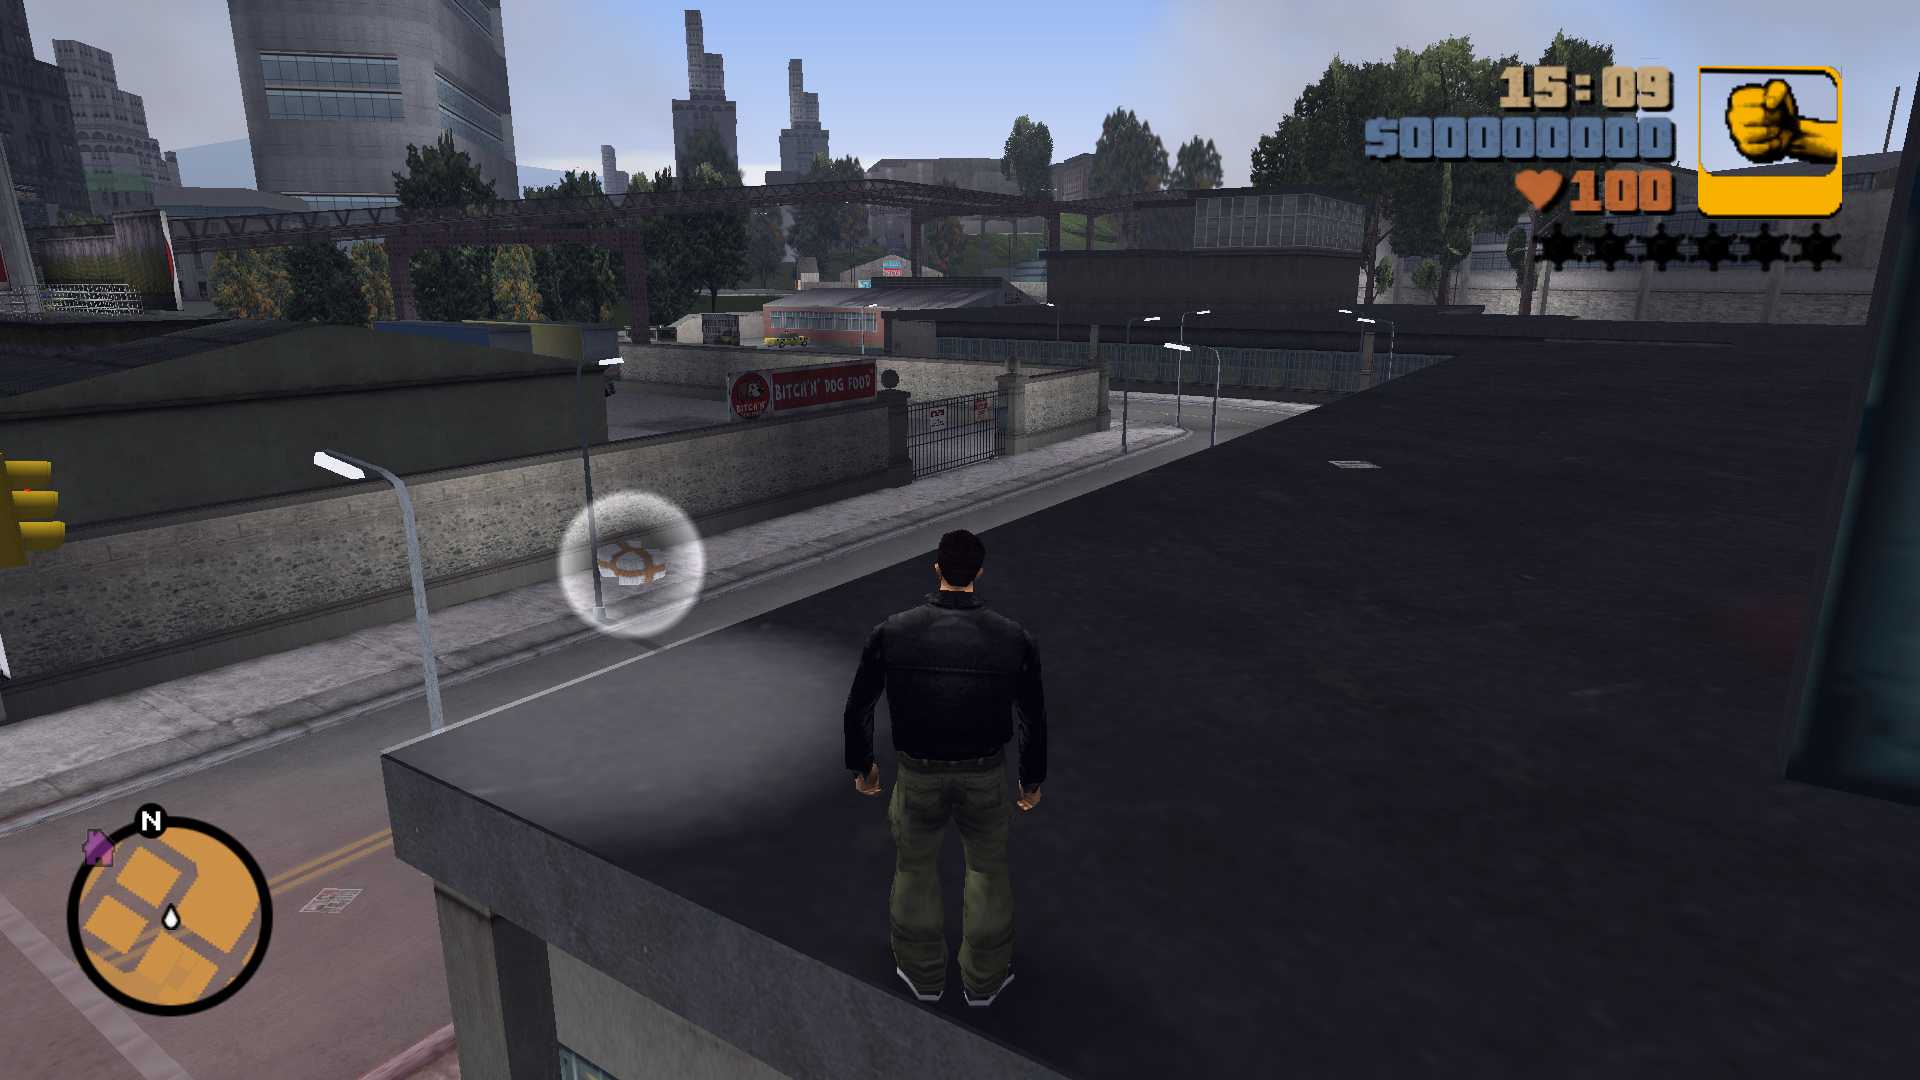
On the roof of Liberty Pharmaceuticals in Trenton, get up on the Elevated Train tracks (use the station in Saint Mark's) and go along them until you are over the Taxi depot in Trenton, get on the girder at the south side of the tracks and jump across to the roof of the other building, go along the edge of the roof to the west until you find a lot of Pickups, the package is on the edge of that corner.
22
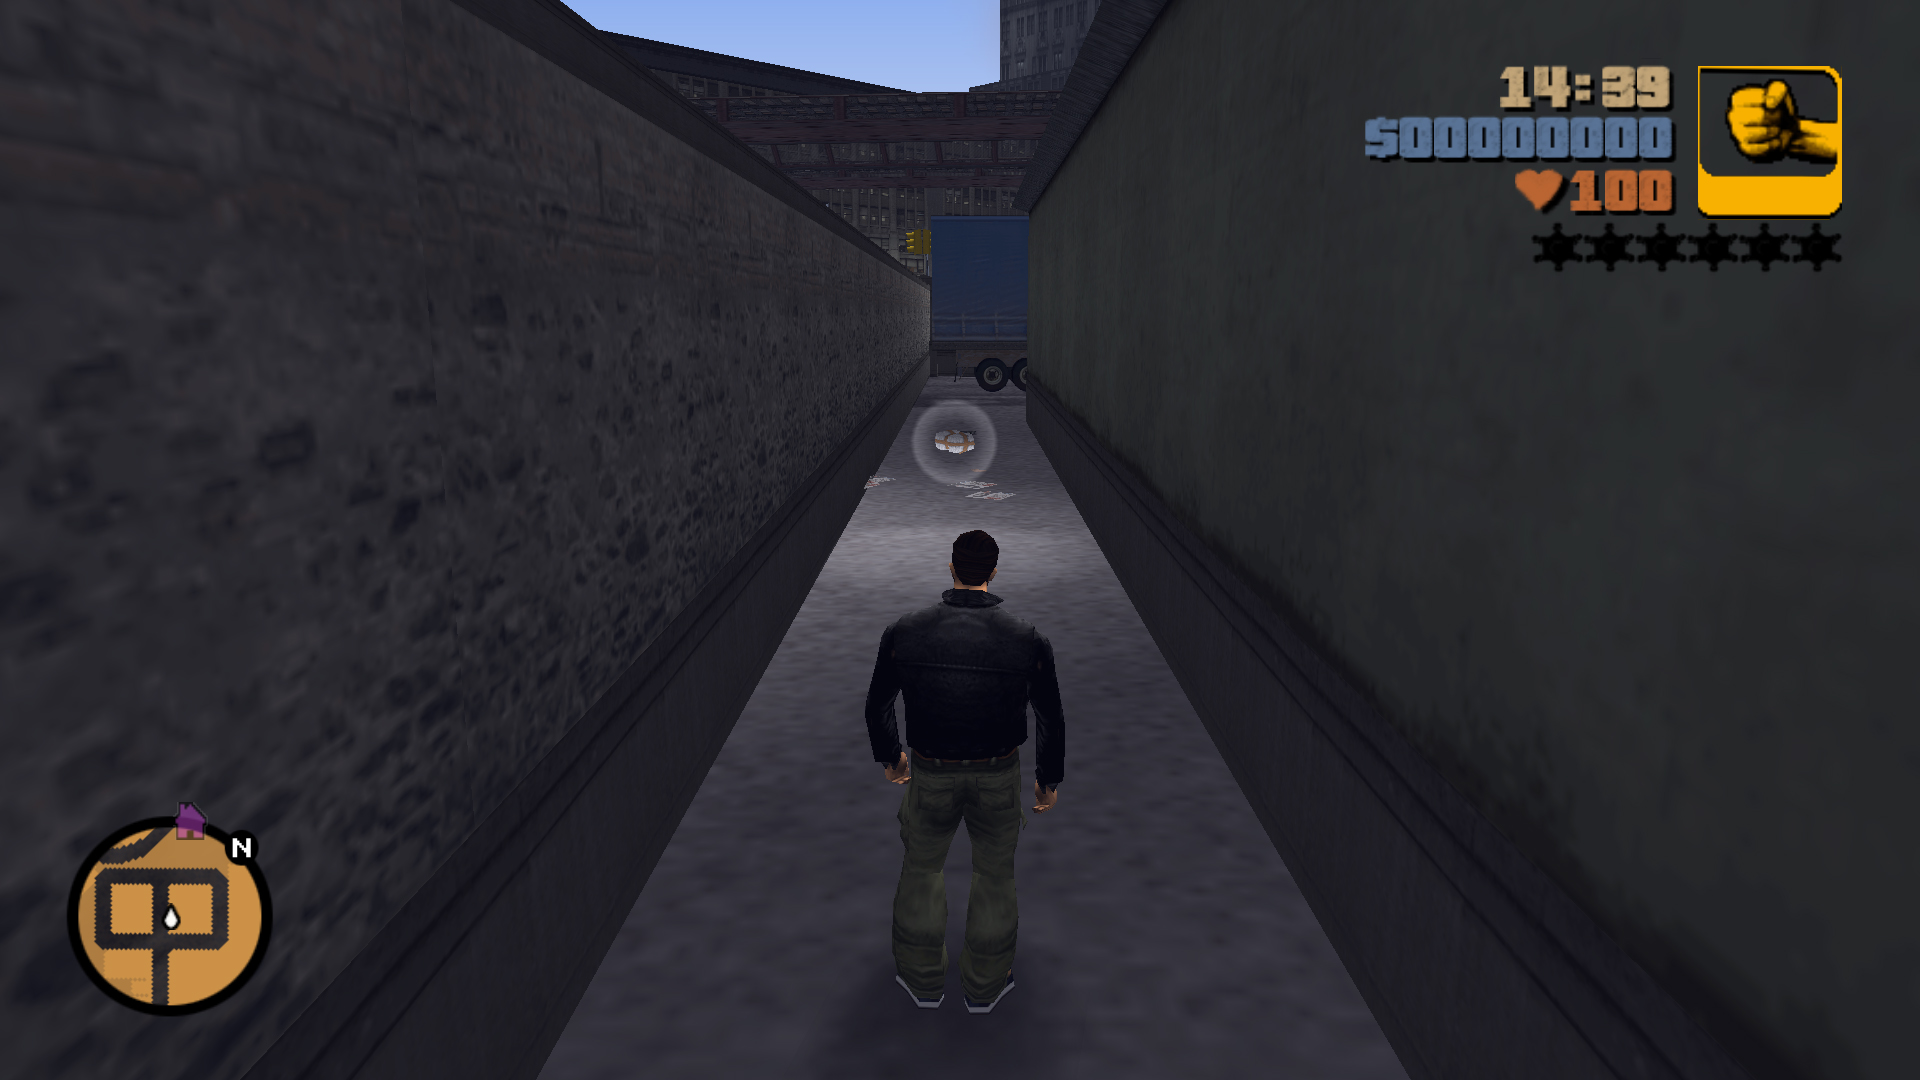
Inside the Dog Food factory, the gate will open when you are close, the package is between the southwest wall and the factory.
23
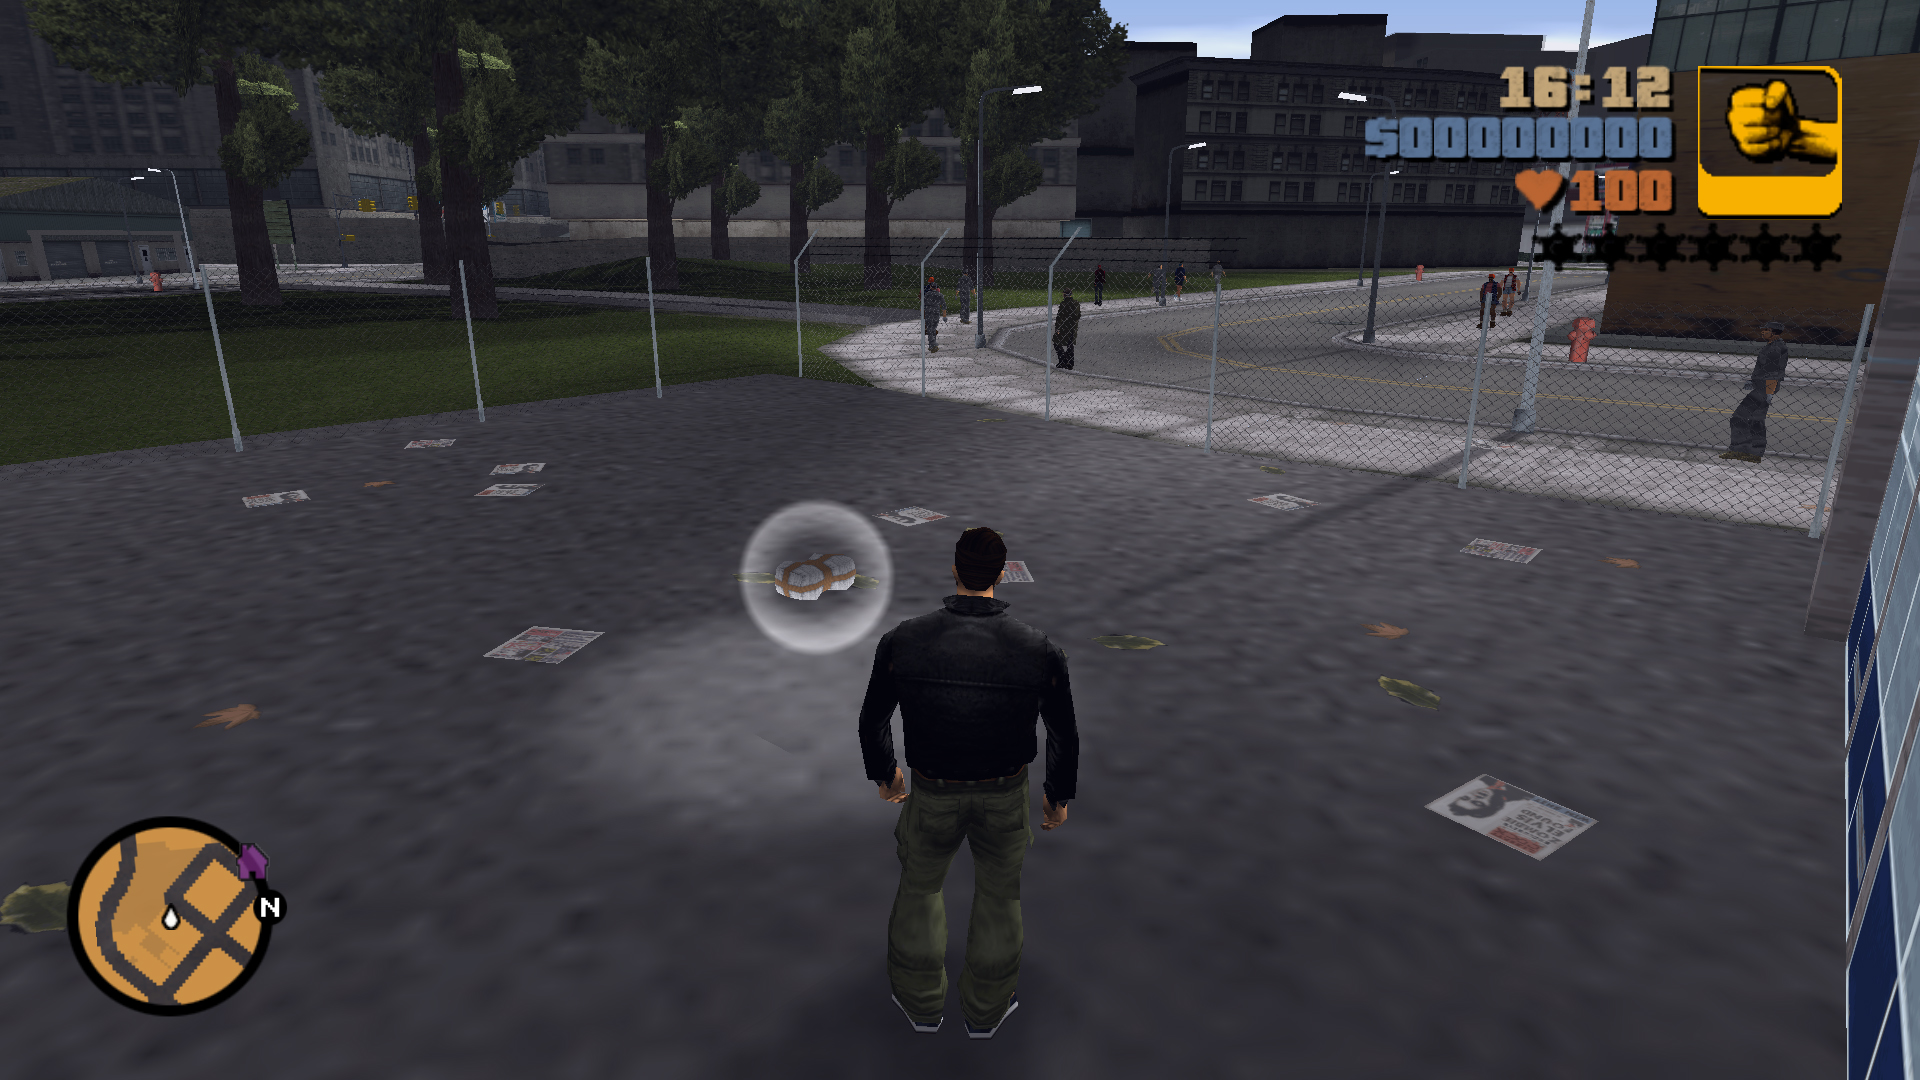
In the fenced area in front of Joey's Garage, in the west corner.
24
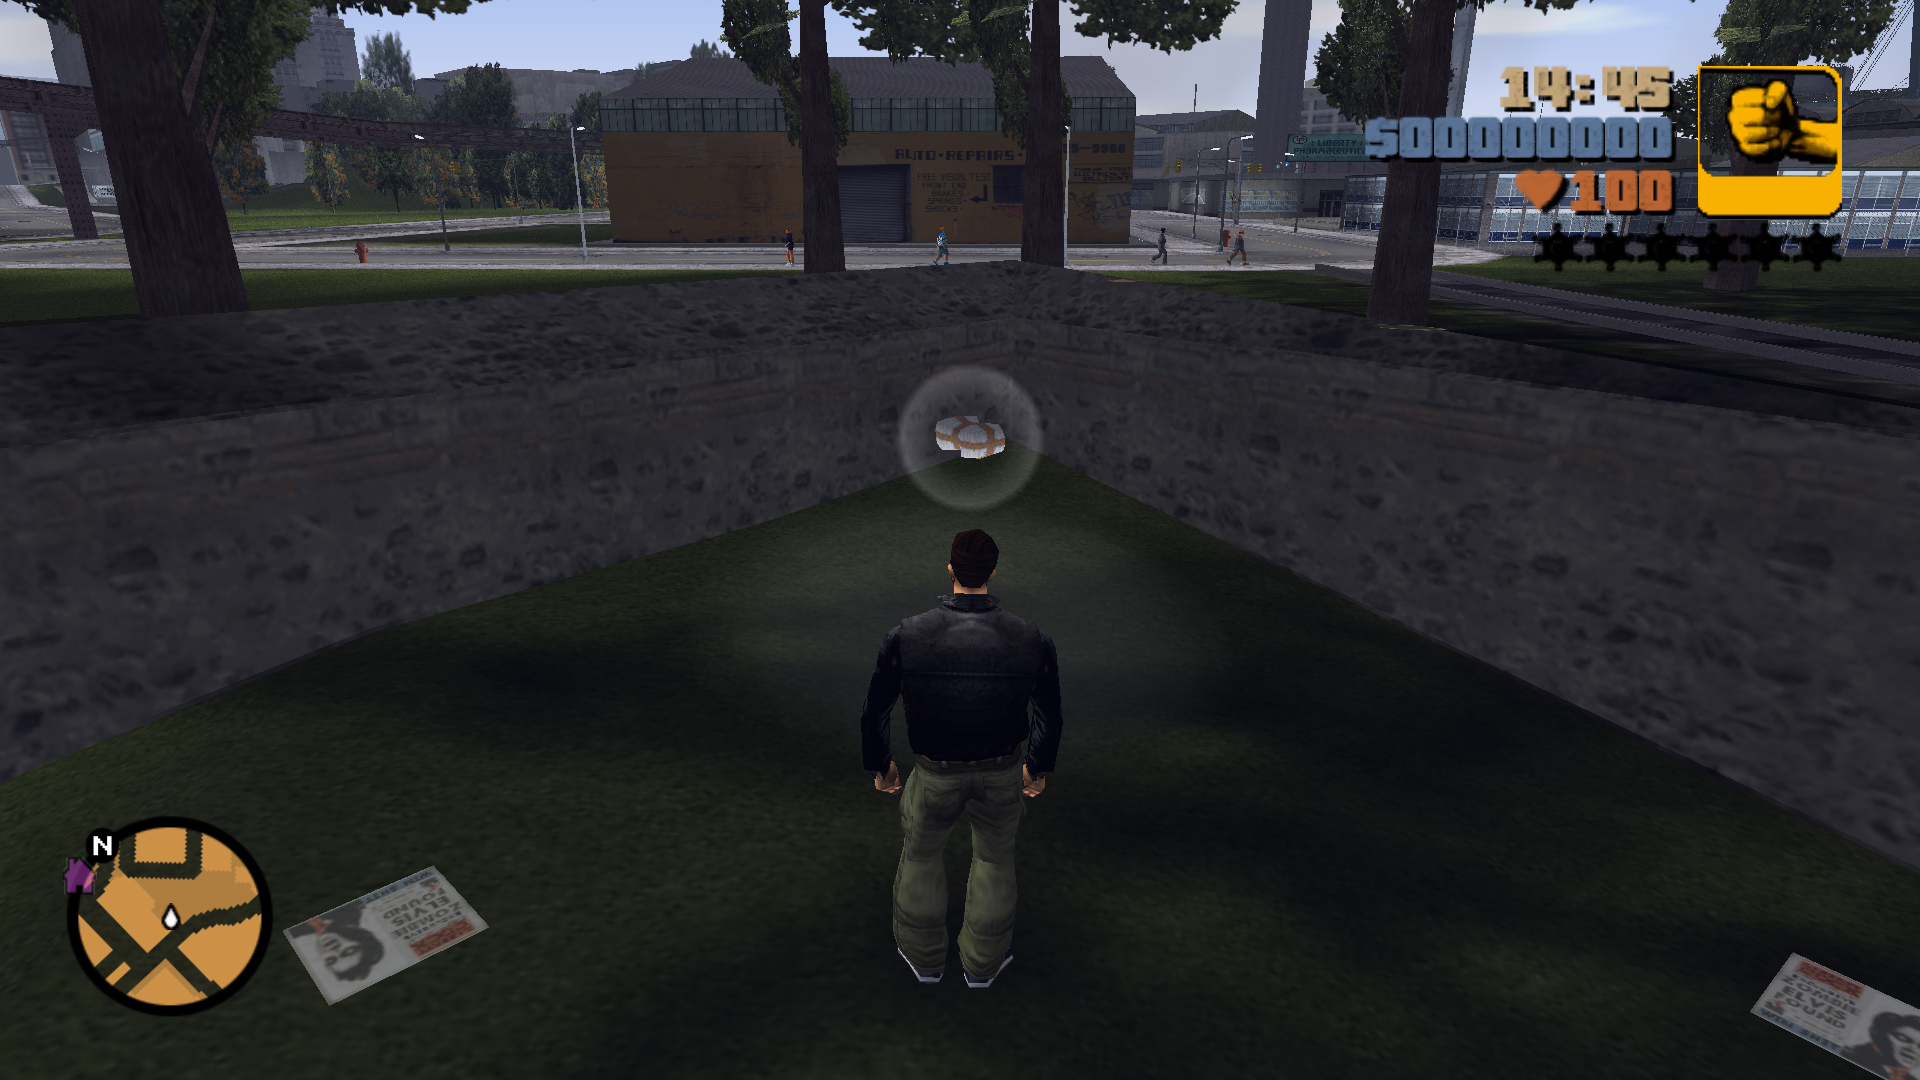
In the walled off backyard at the end of an alley next to a park, you can go through the alley entrance to the north between the buildings or you can jump over the walls from the park.
25
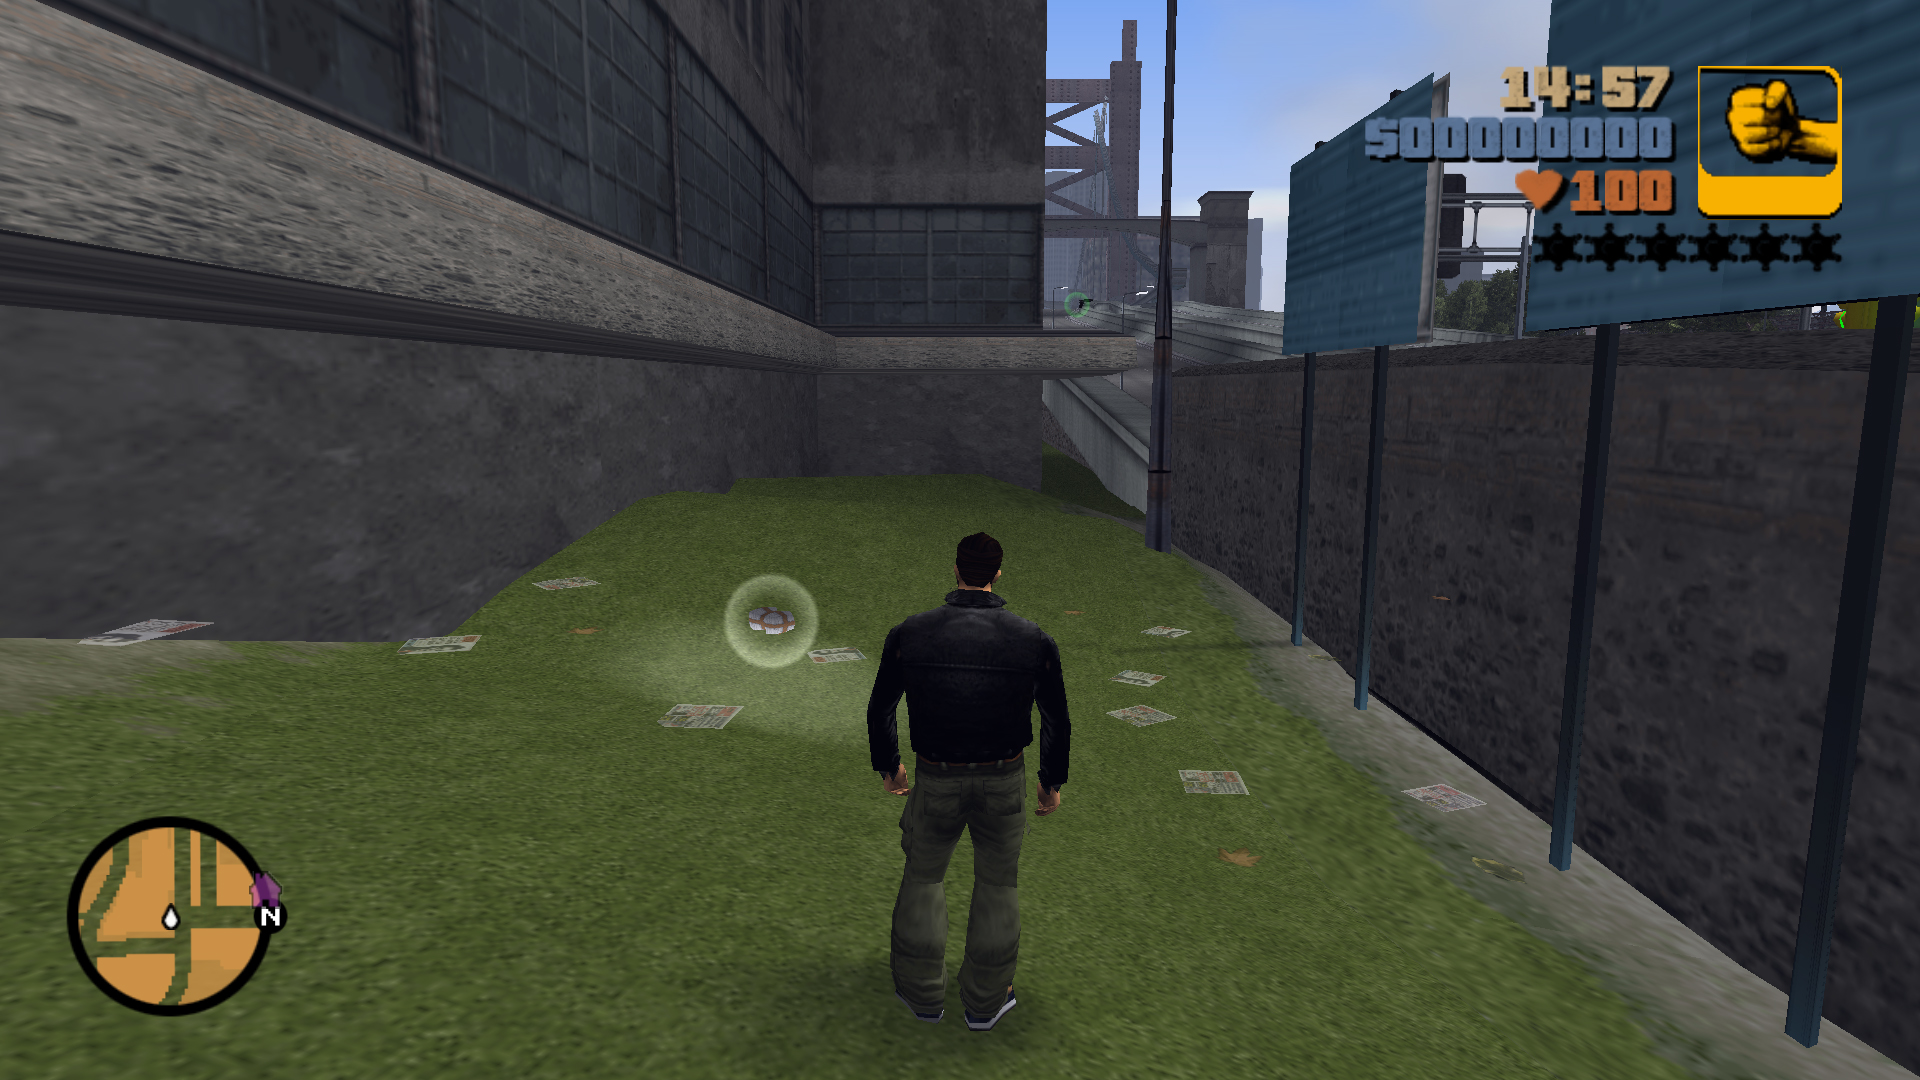
In a walled off area behind some billboards next to the Bridge, you can go through the gap between the Bridge's lanes, turn left when the Bridge starts rising off the ground, turn left again and go forward between the Bridge and the building; or you can go around the walls to the south where there's an opening into an area with some garages, to the right there's a small path between the building and the wall, go through and turn left.
26
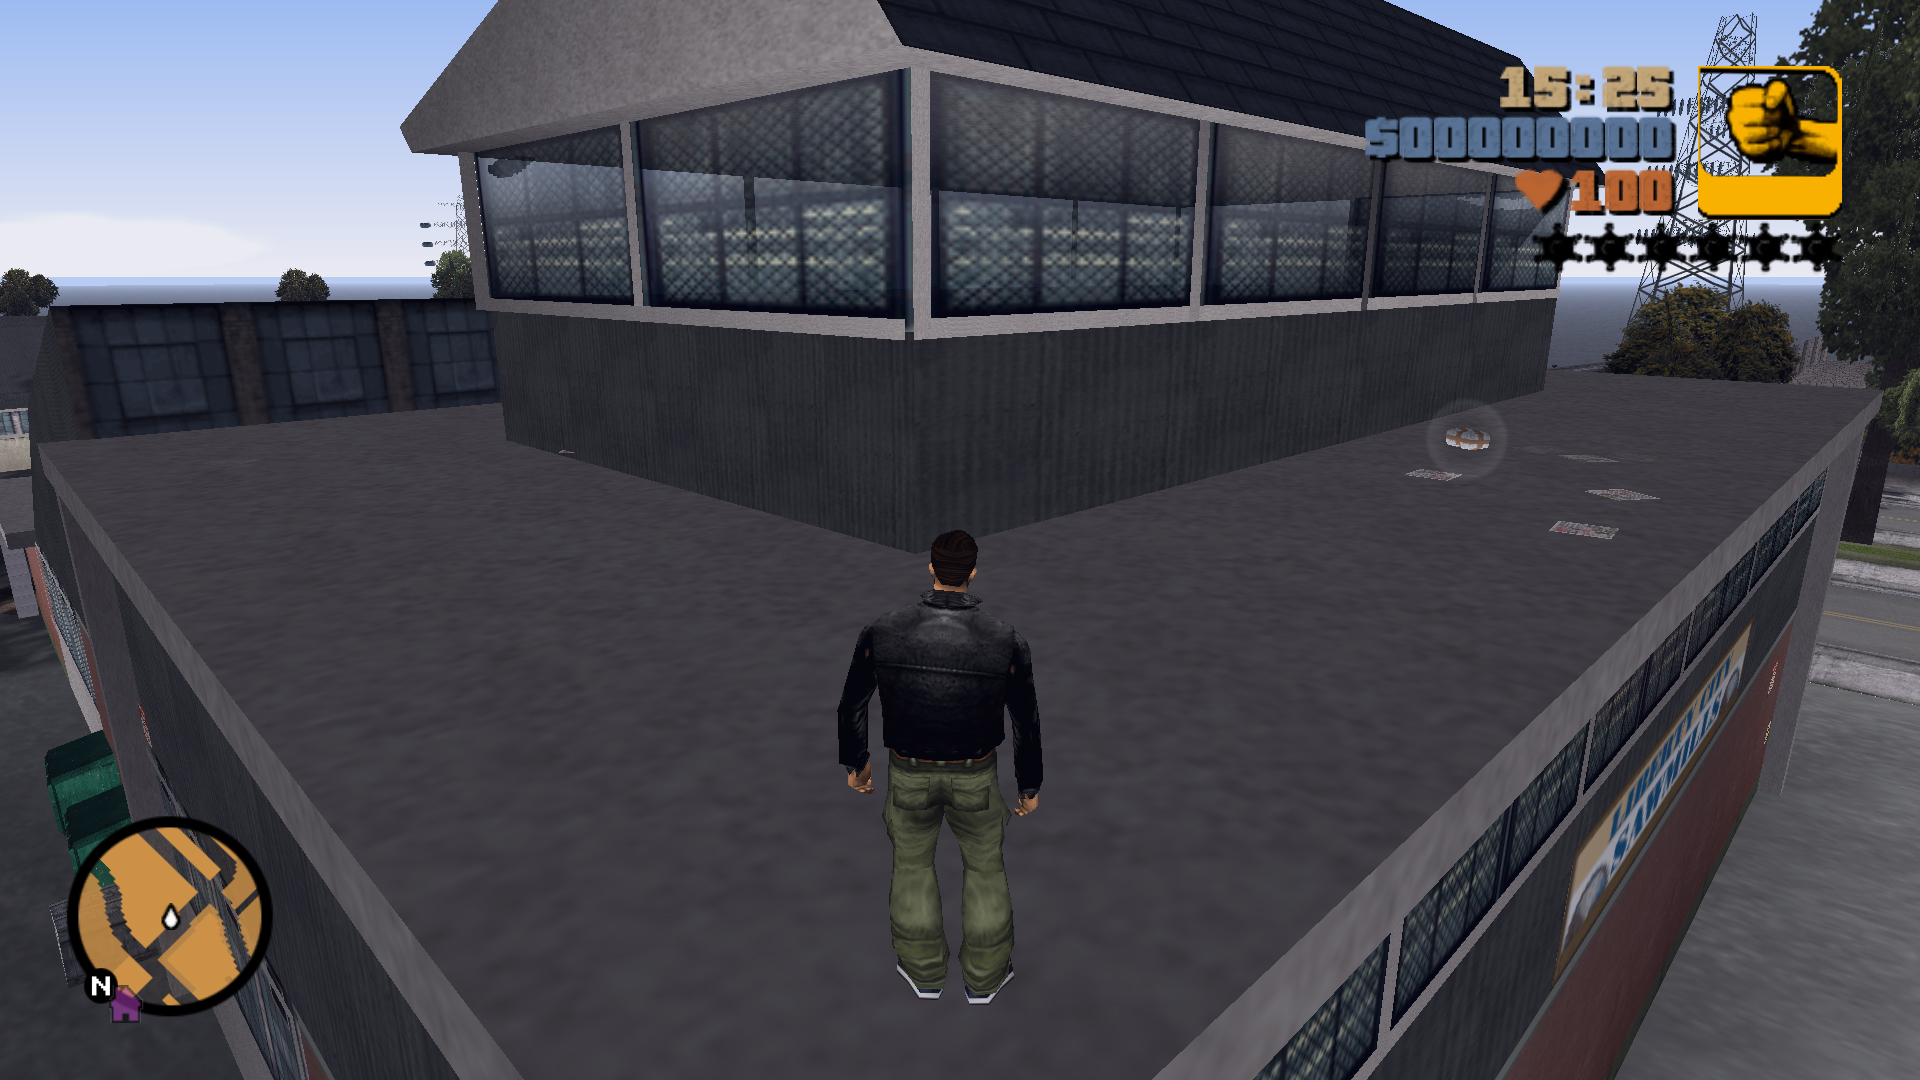
On the roof of the Sawmill buildings, to the southeast there's a locked gate, to the right at the Bus Depot there's a shorter wall you can climb on and use to jump over the Sawmill's wall, then get on the roof using a sand pile, continue along the roofs, go up the green slope and behind the small tower is the package.
27
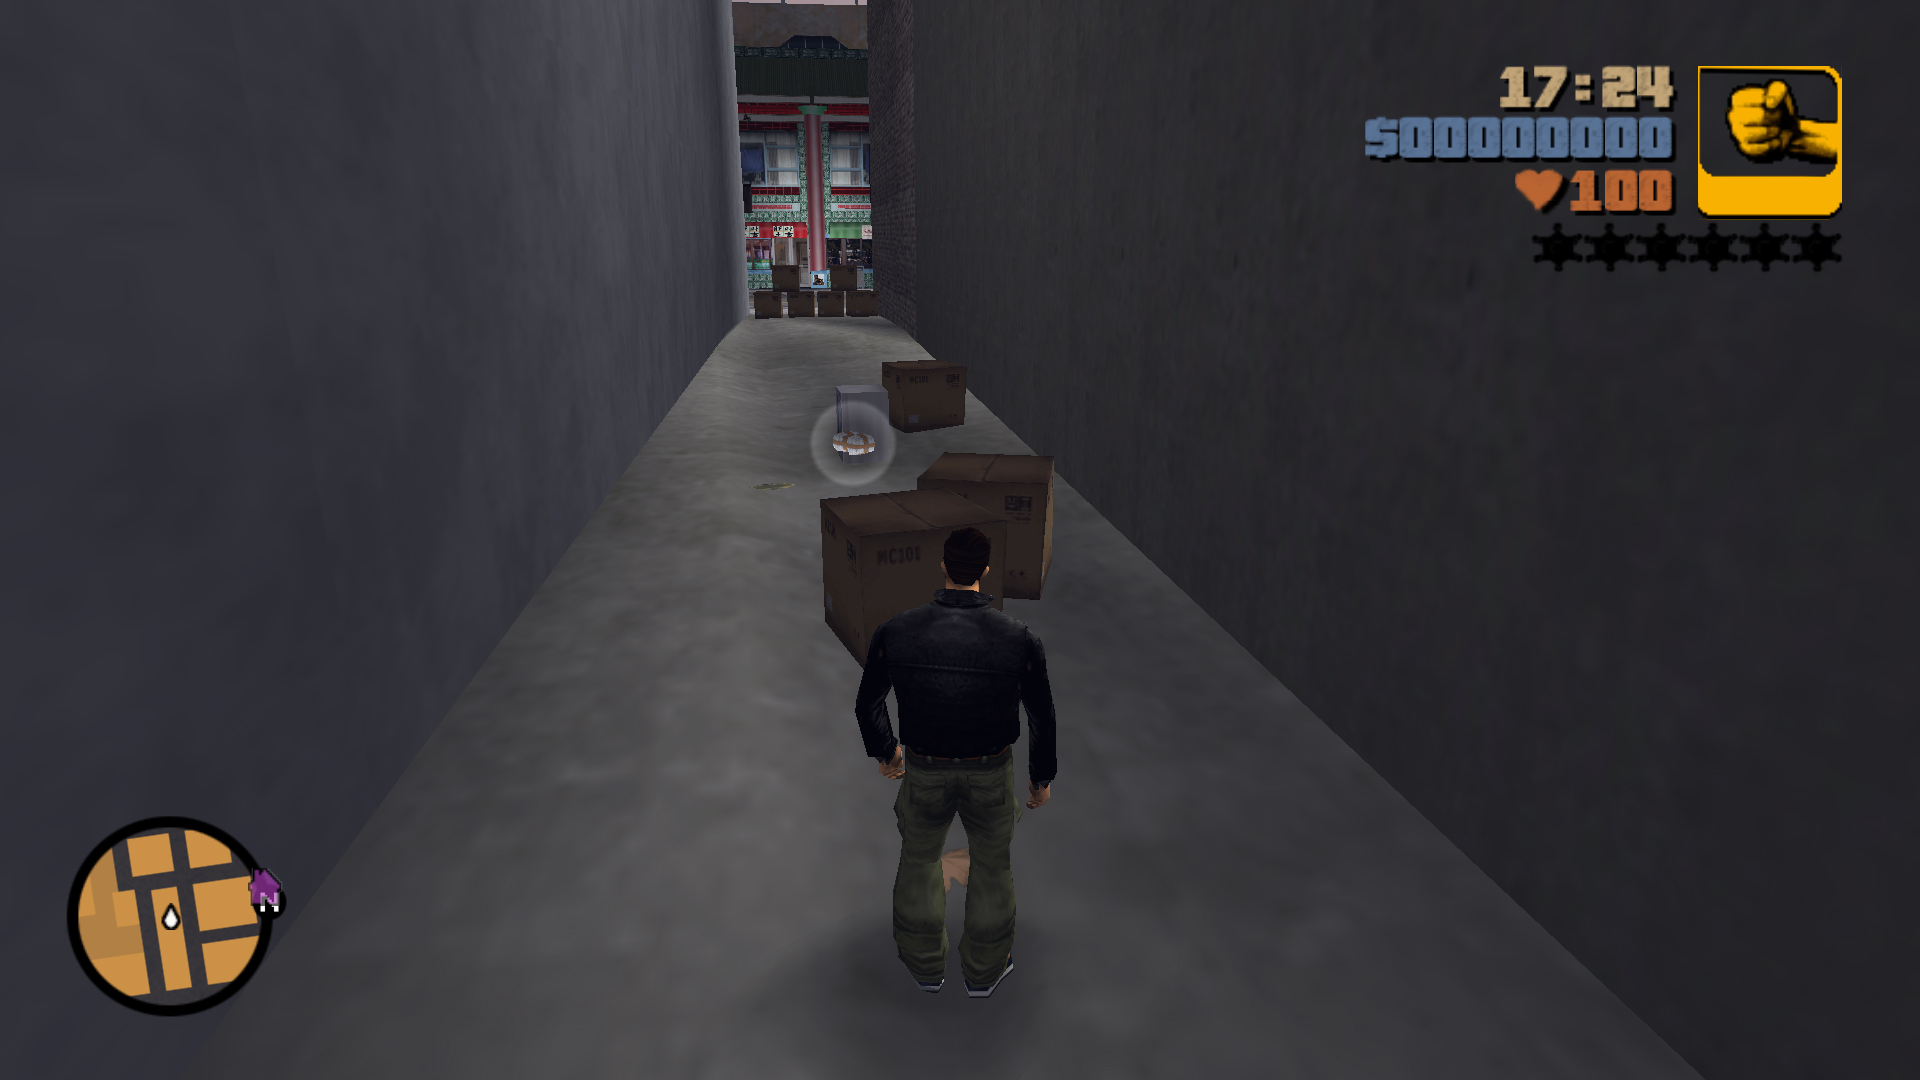
In an alleyway in front of a park in Chinatown.
28
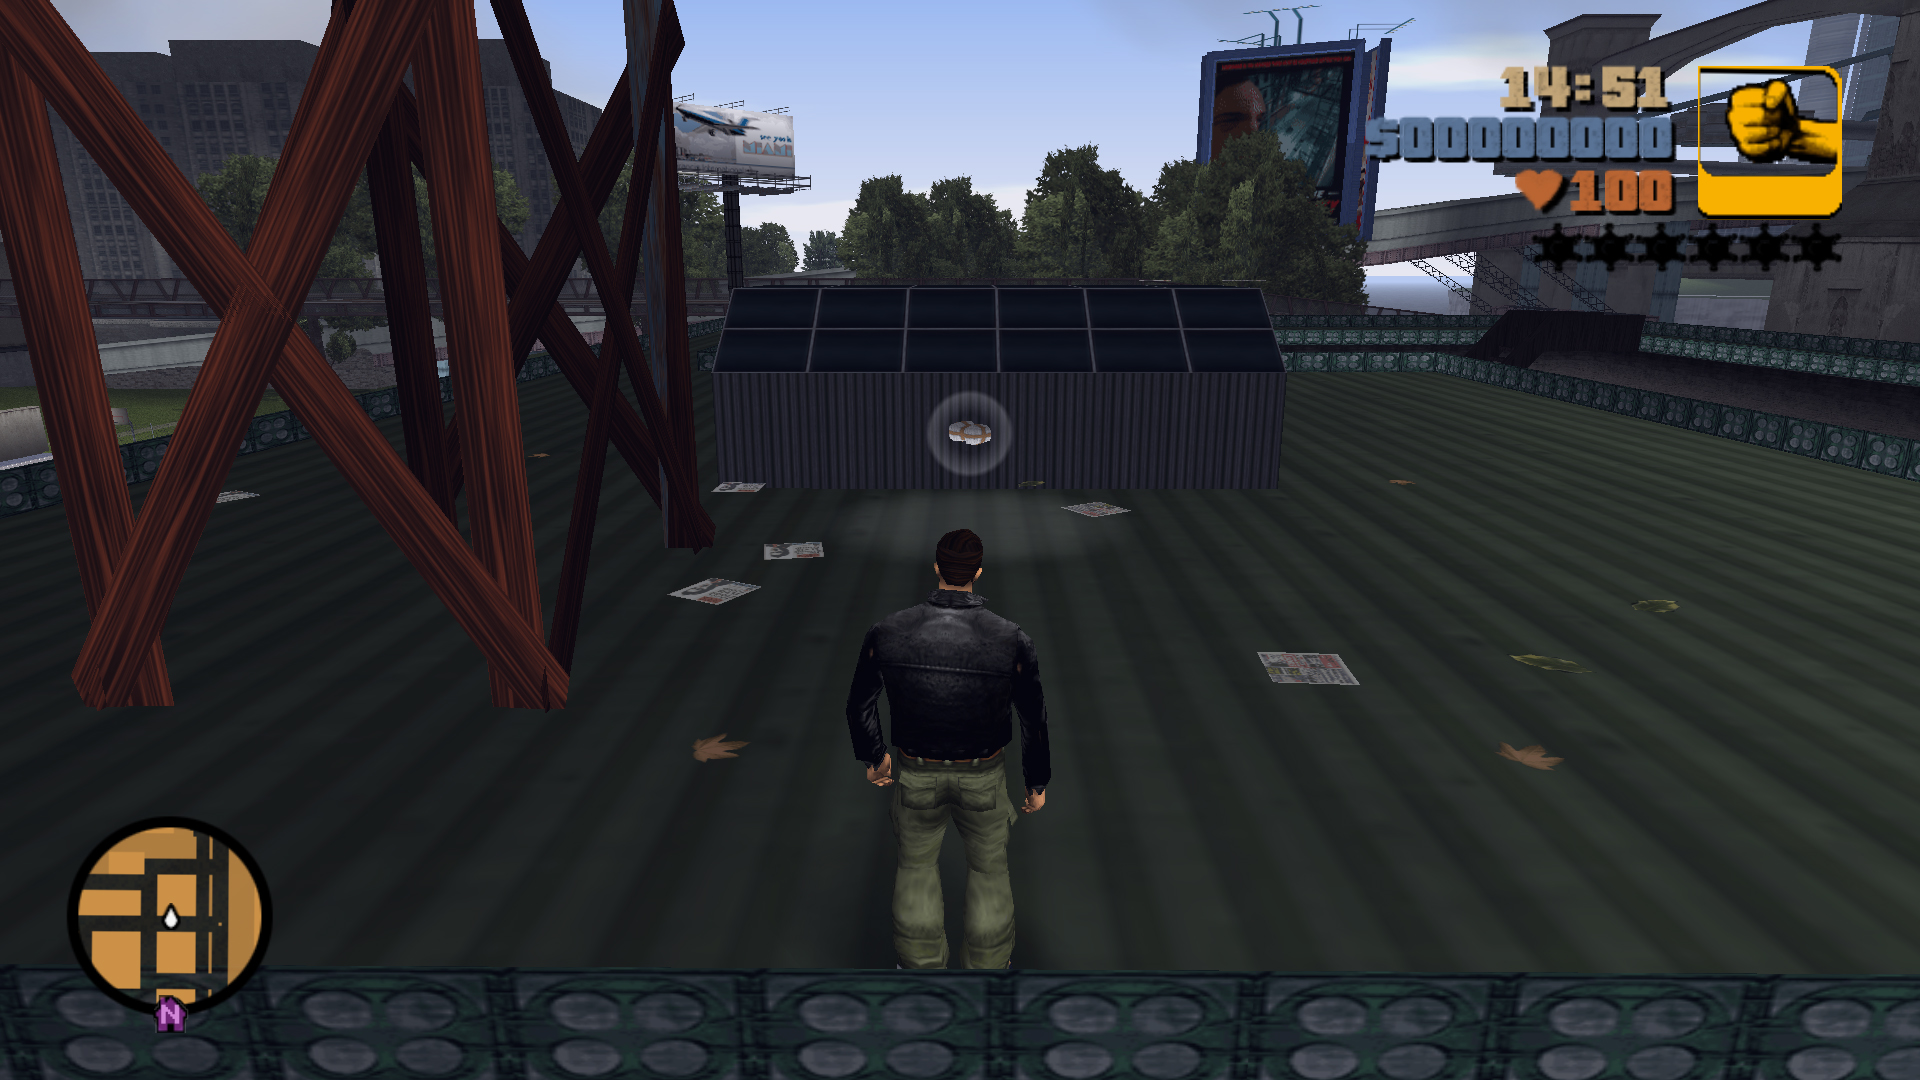
On the roof of the big restaurant building, the alley has stairs to access the roof, the package is at the northeast side of the rooftop next to a water tower and skylights.
29
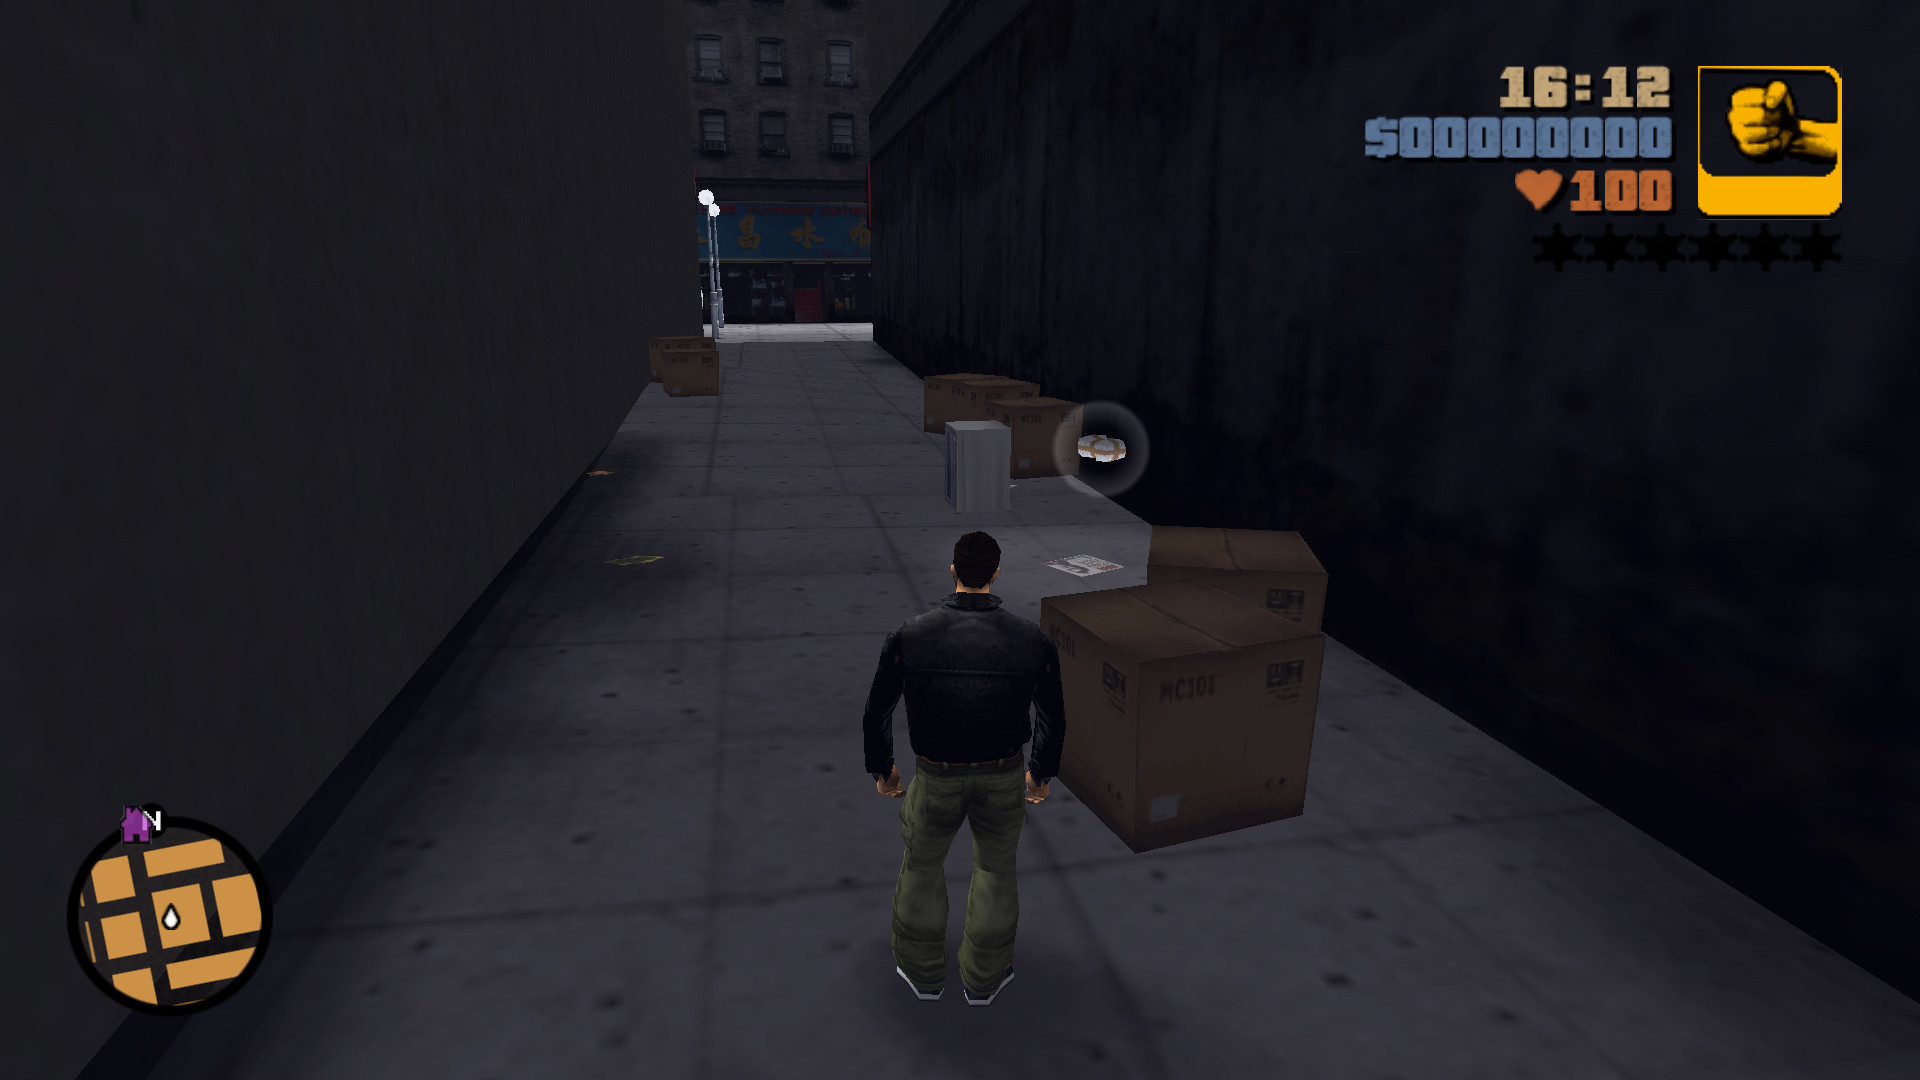
In an alleyway connecting the pedestrian walkway and the street. (Make sure to steal a Triad Fish Truck for the next package)
30
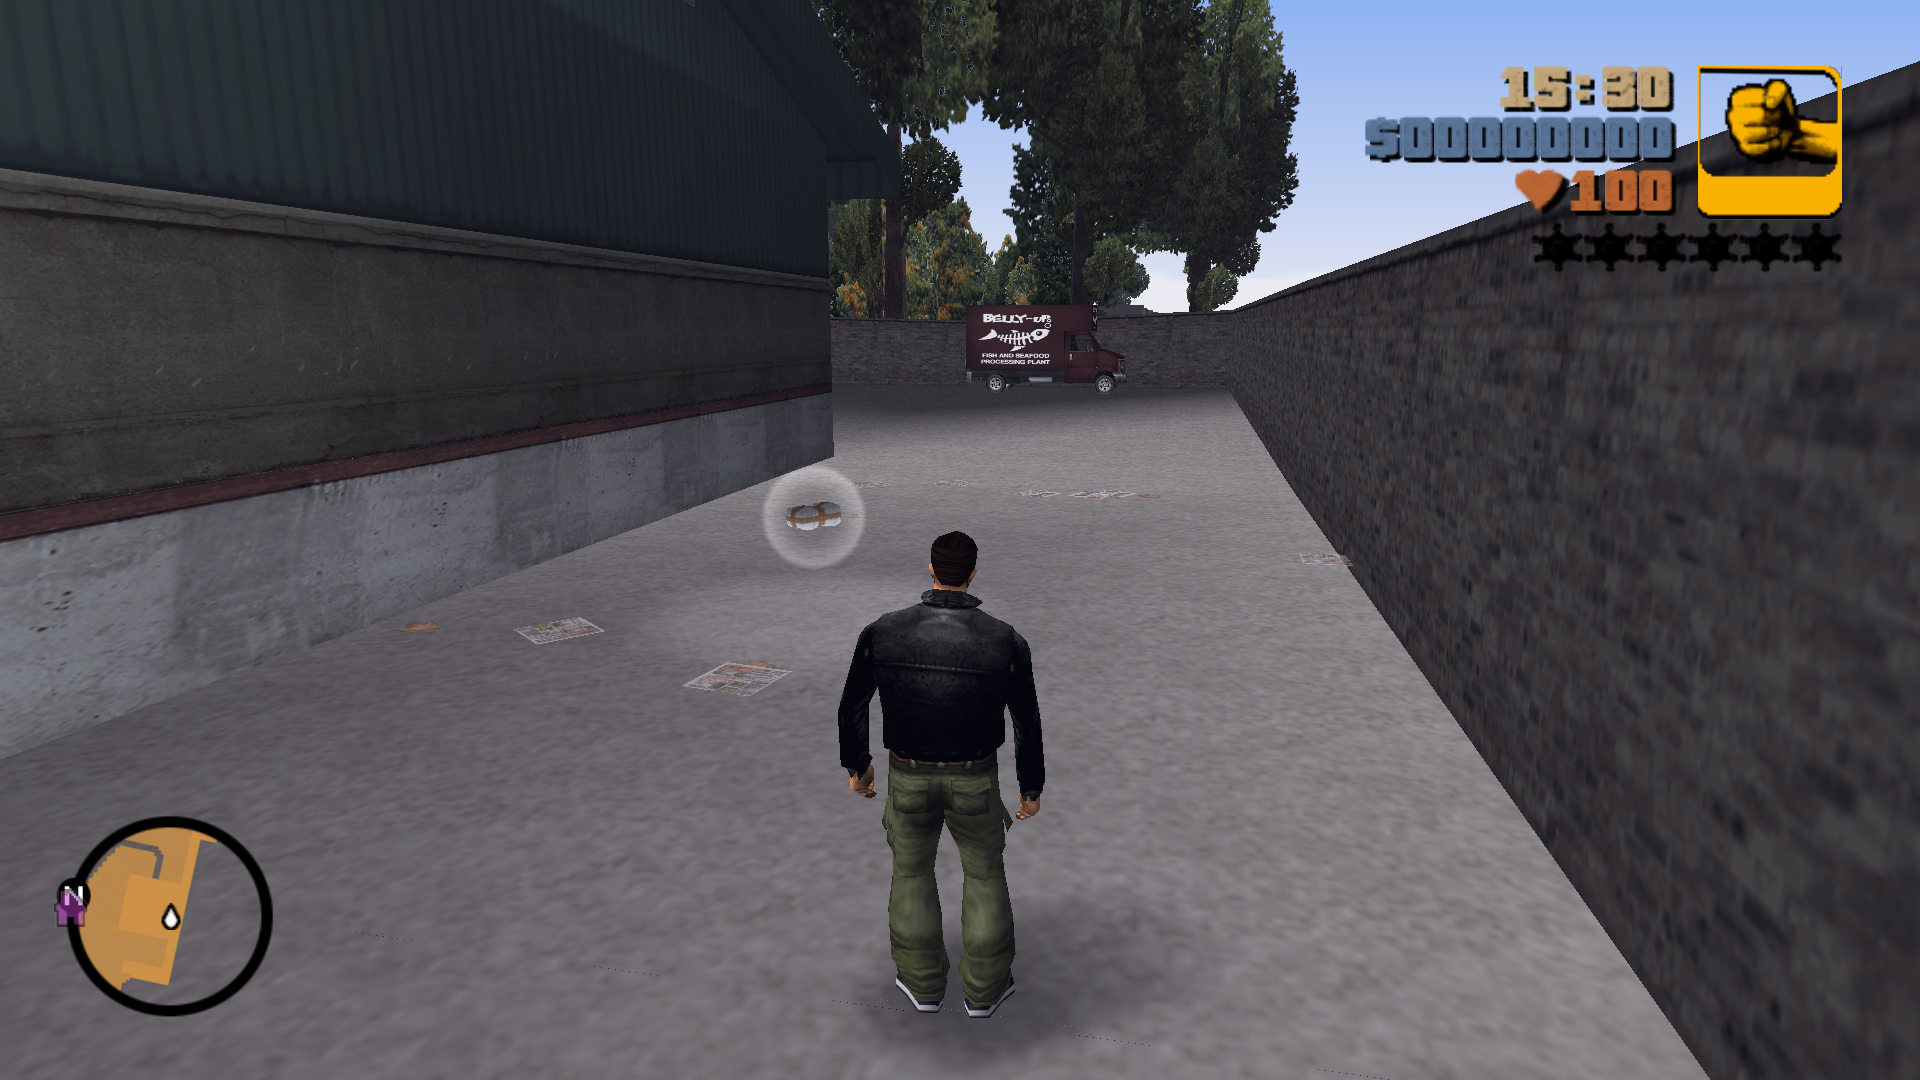
Inside the Triad Fish Factory, the gate will open if you are inside of a Triad Fish Truck, the package is between the factory and the south wall.
31
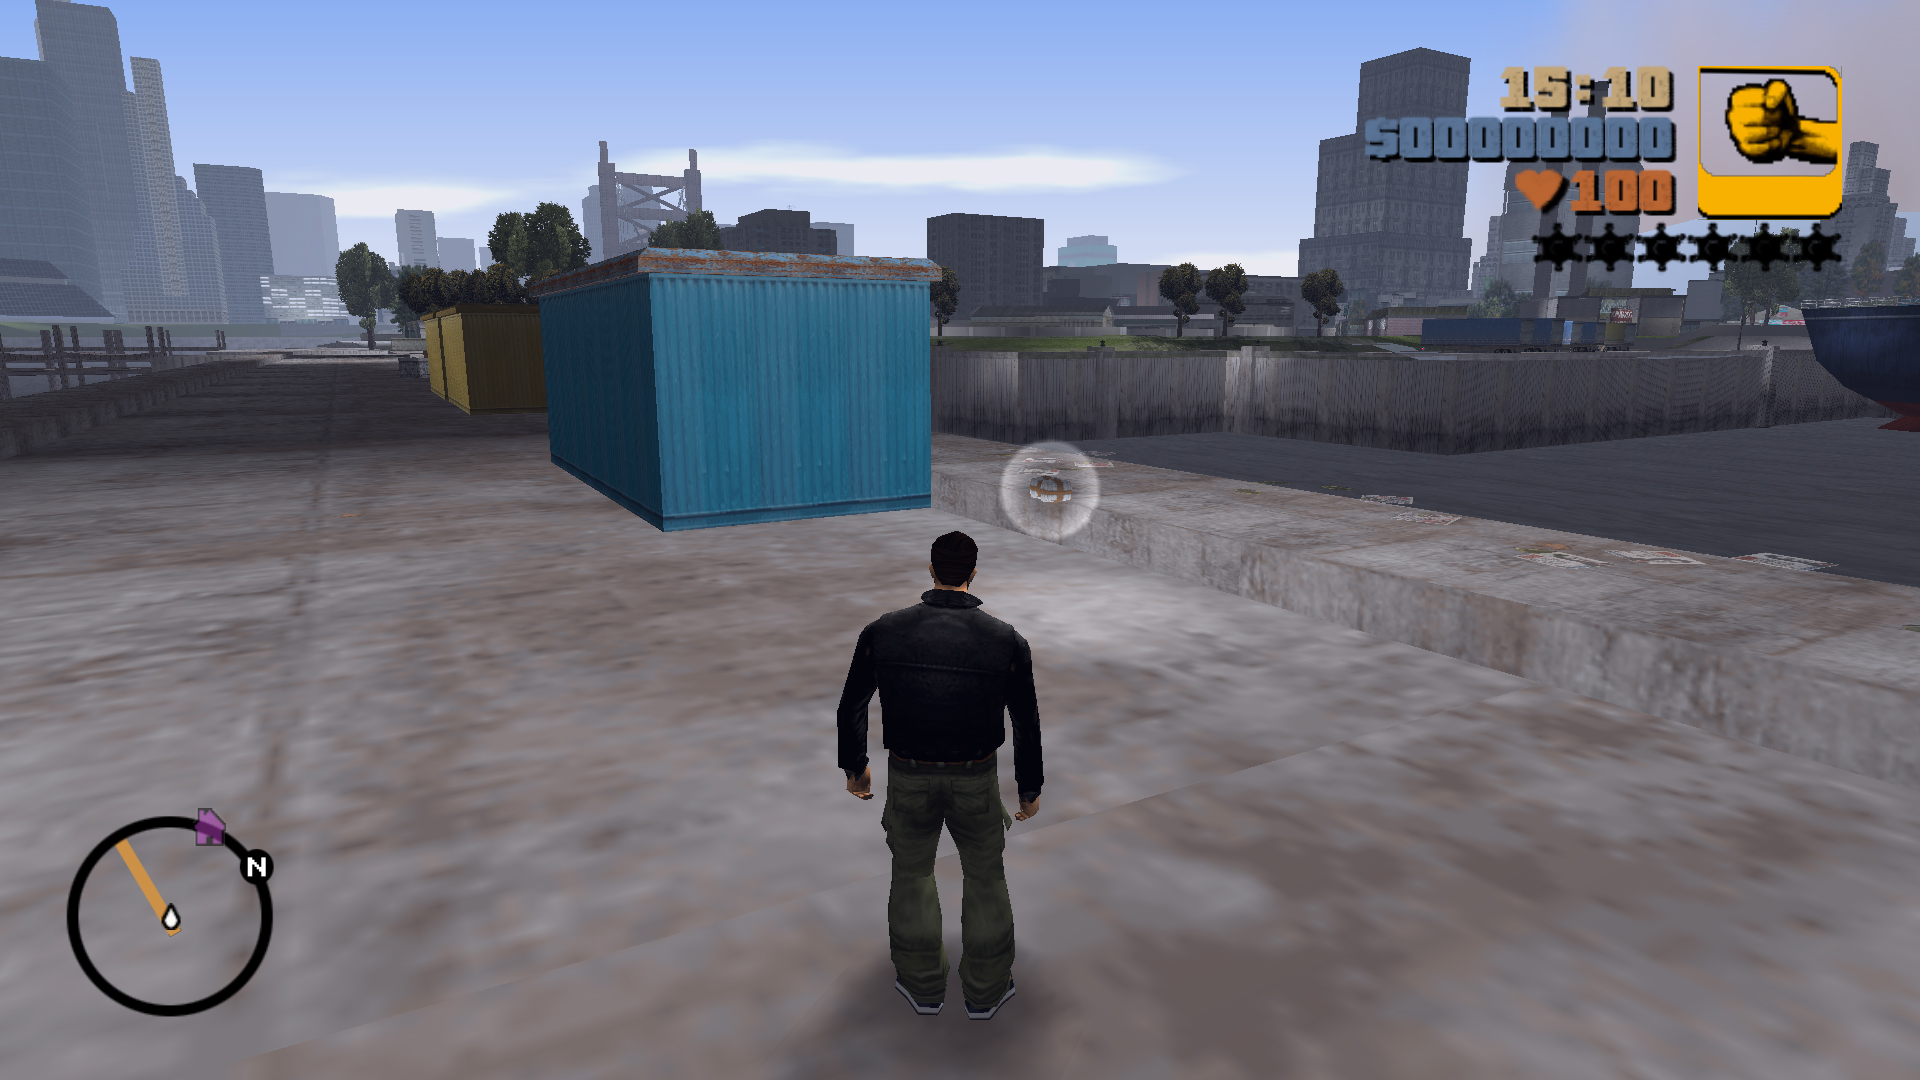
At the end of the pier behind the containers.
32
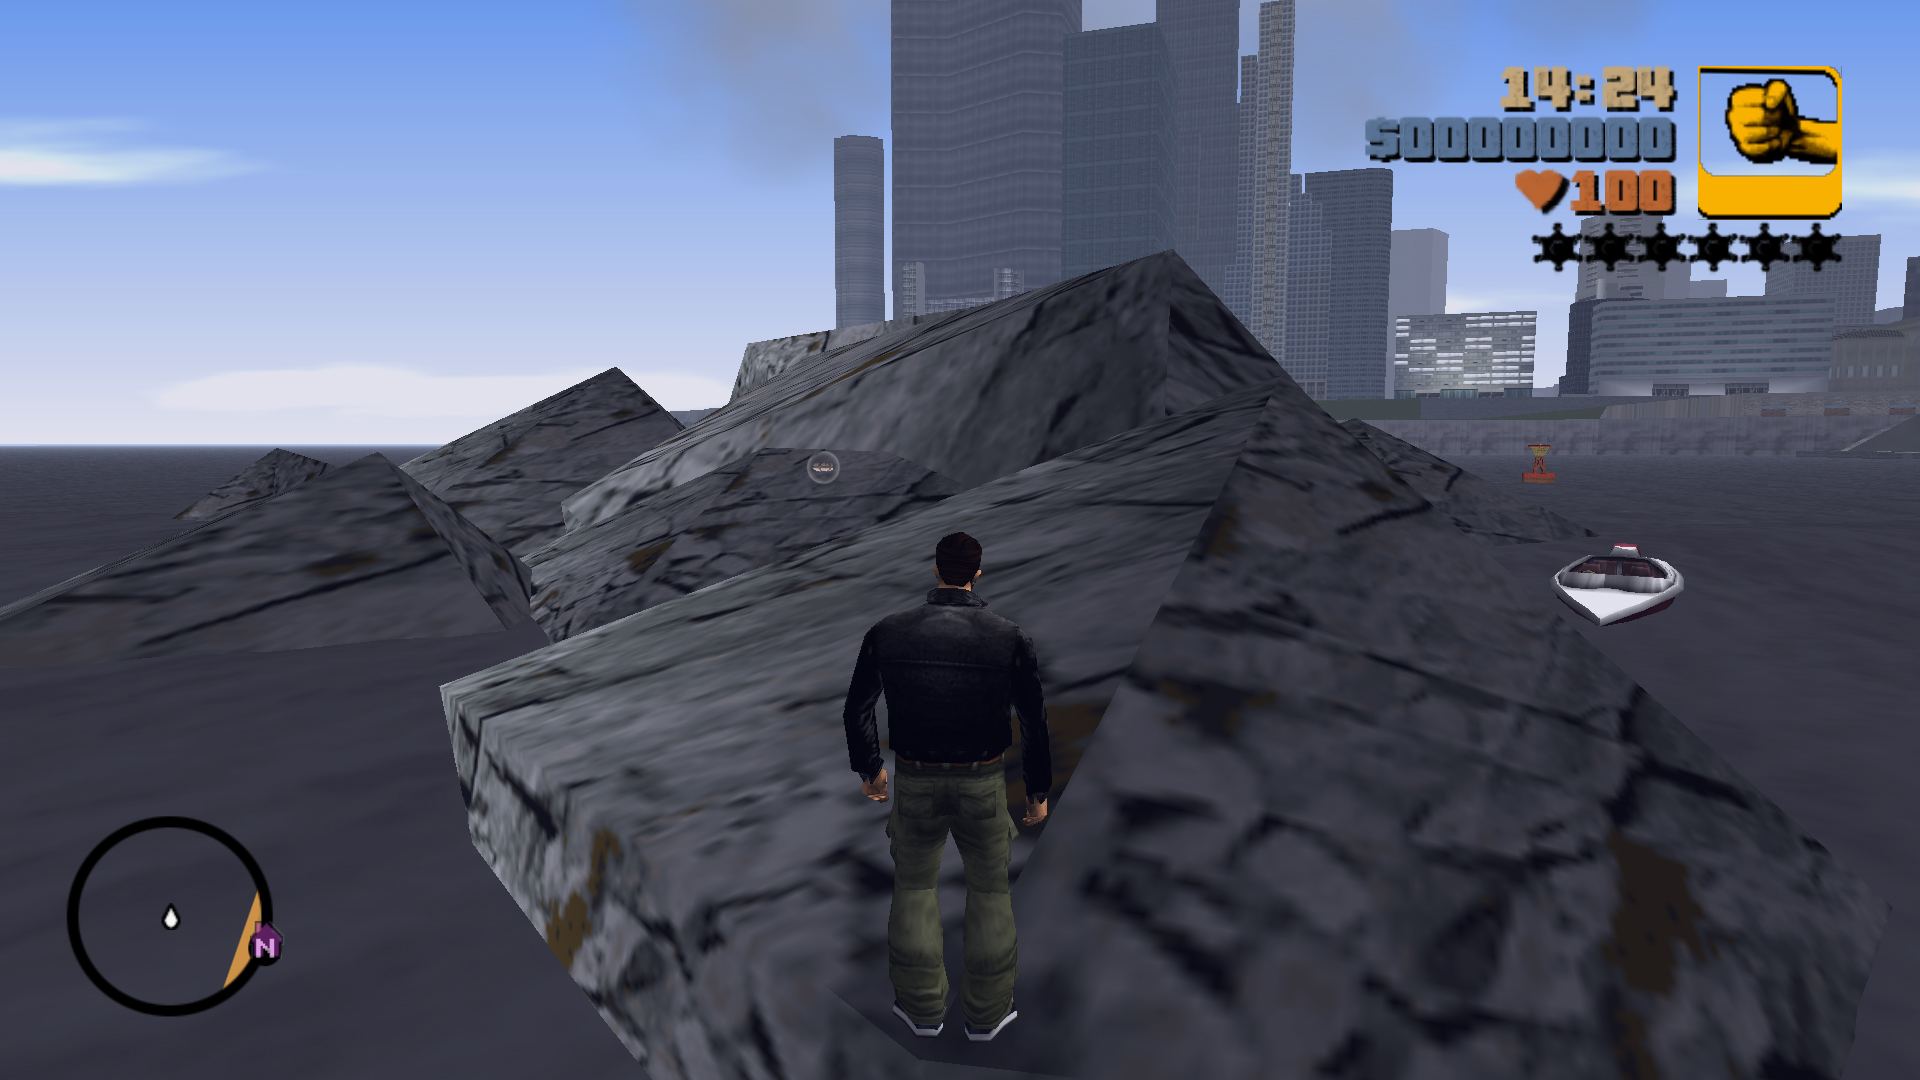
On a rock formation in the sea, south of Portland, to get this package you need a boat, which can be obtained in the second island.
33
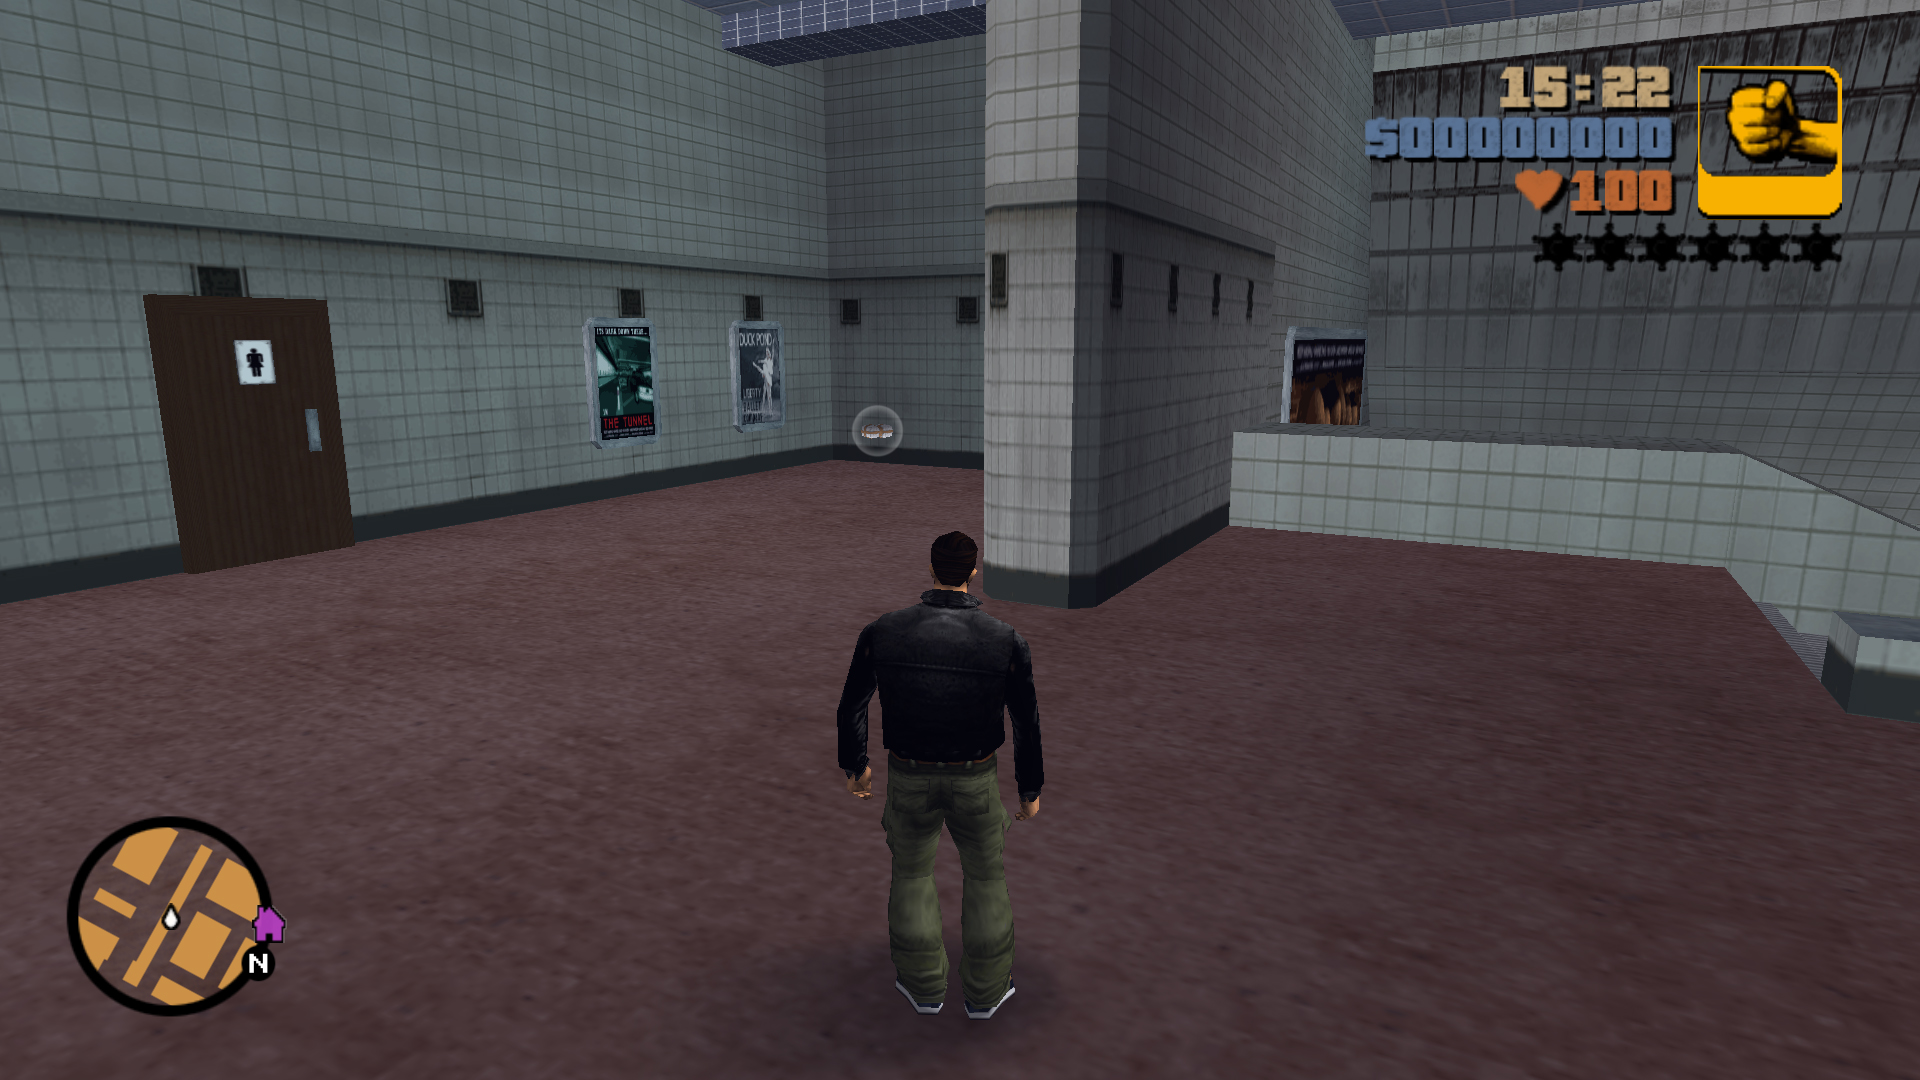
In the Subway next to the bathrooms down the escalators, once you unlock the second island, the Subway will become available.
Hidden Packages Locations - Staunton Island
Hidden
Package
Package
Location
Description
34
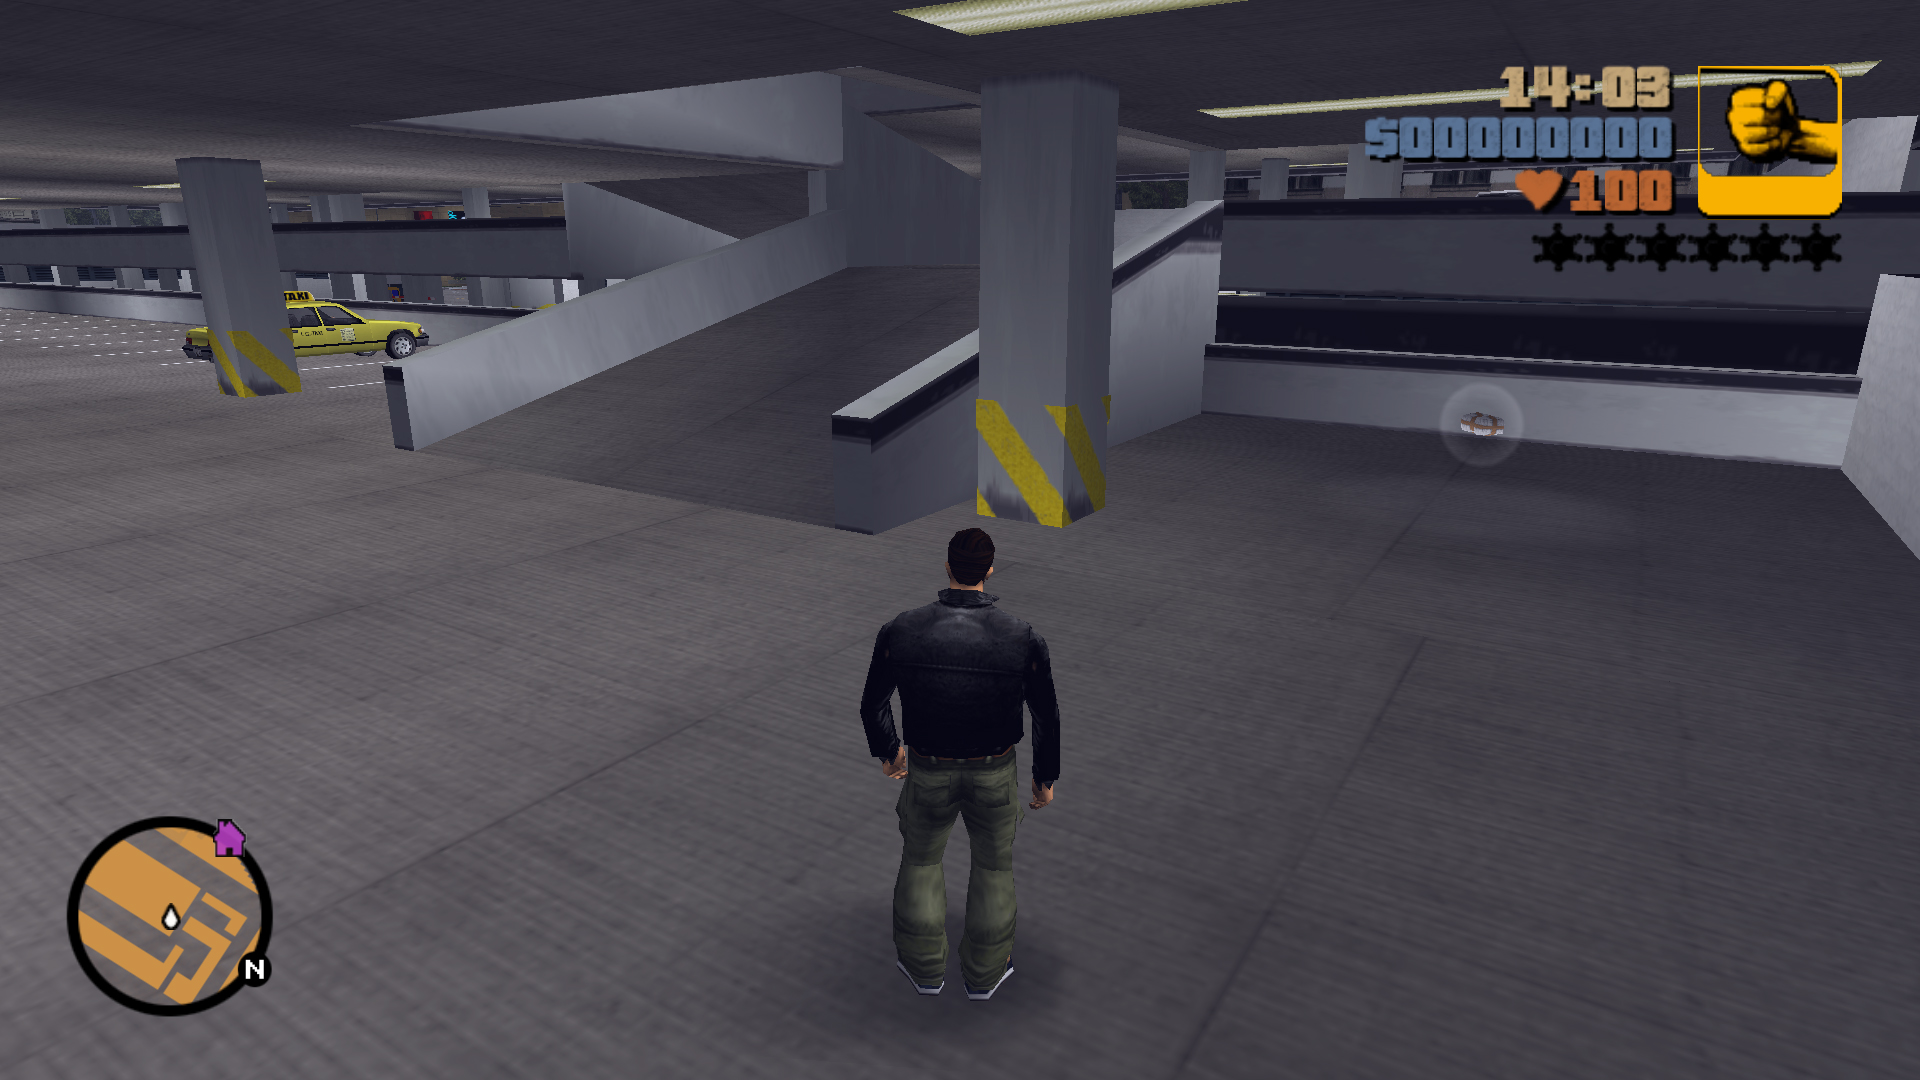
Inside the multi-story car park, behind the northern ramp to the 2nd floor.
35
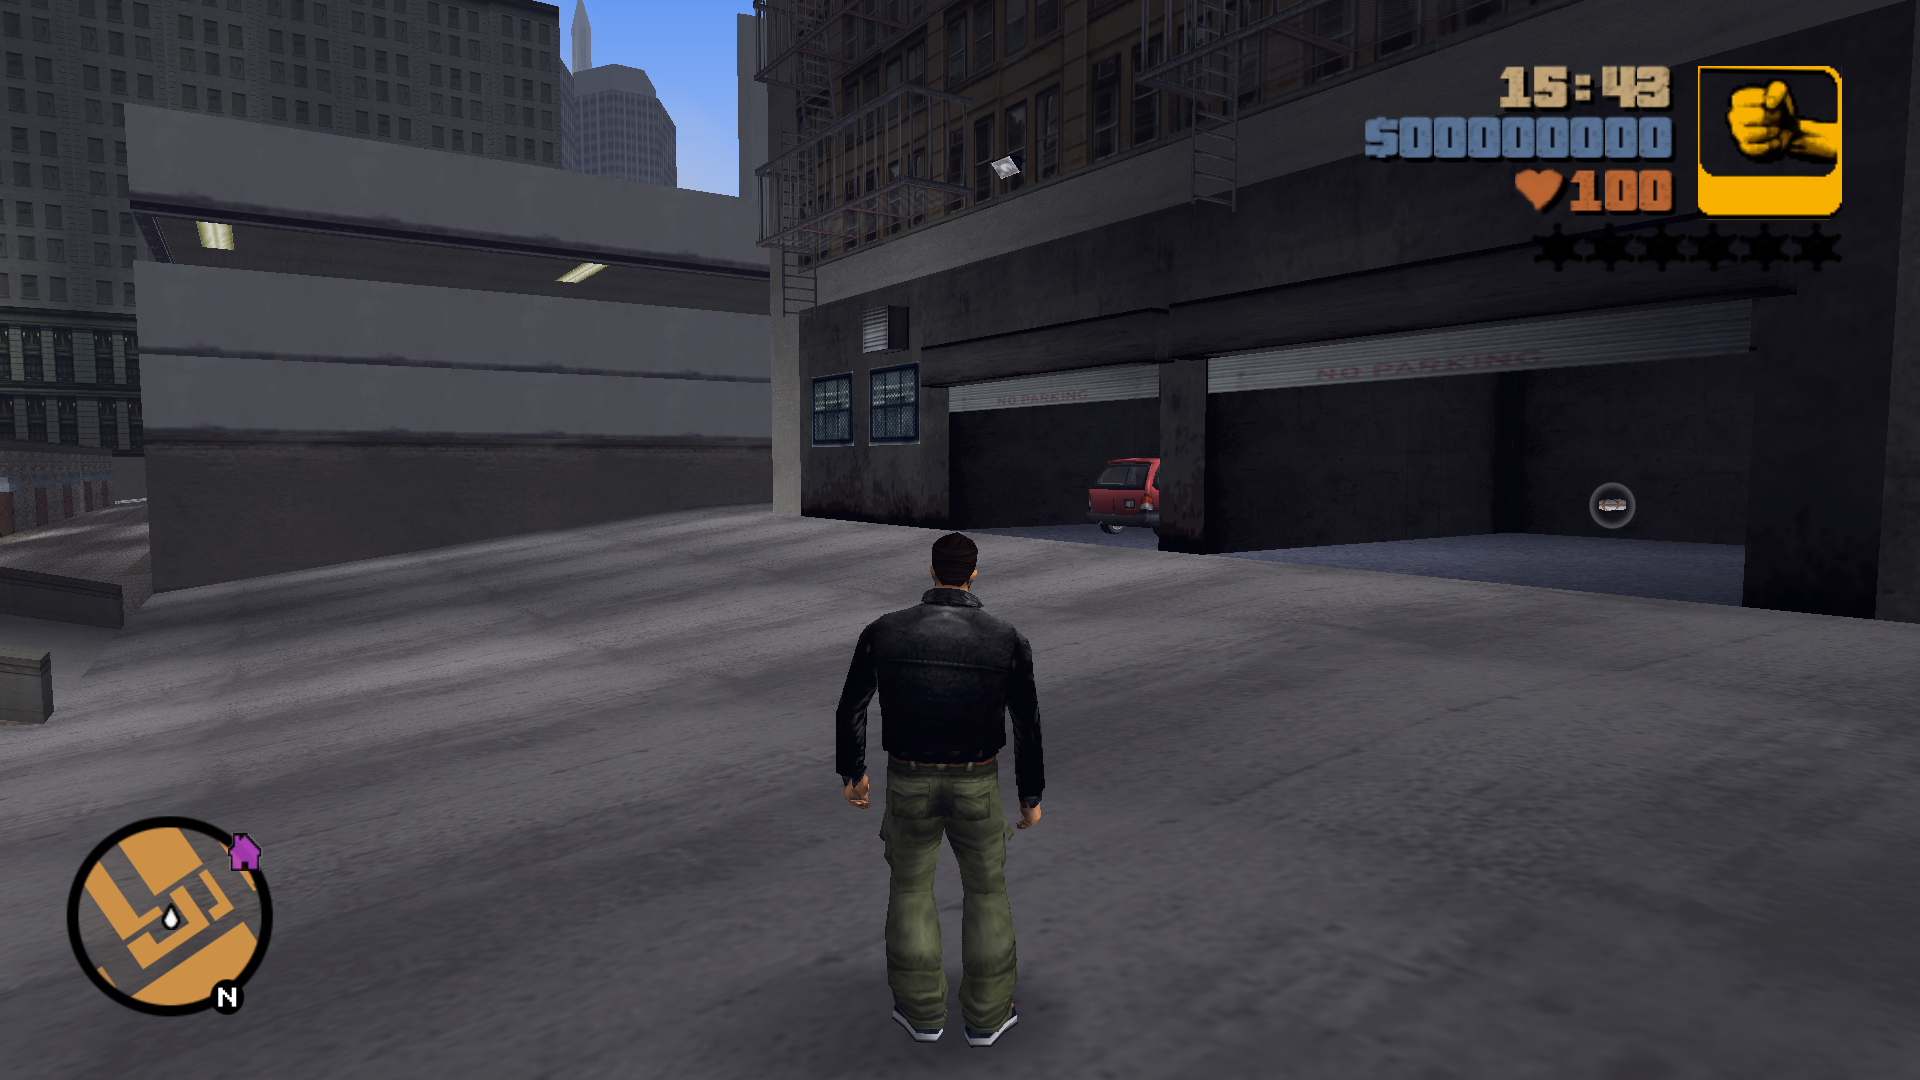
Inside the alleyway with the Spray Shop and Bomb Shop, in one of the garages.
36
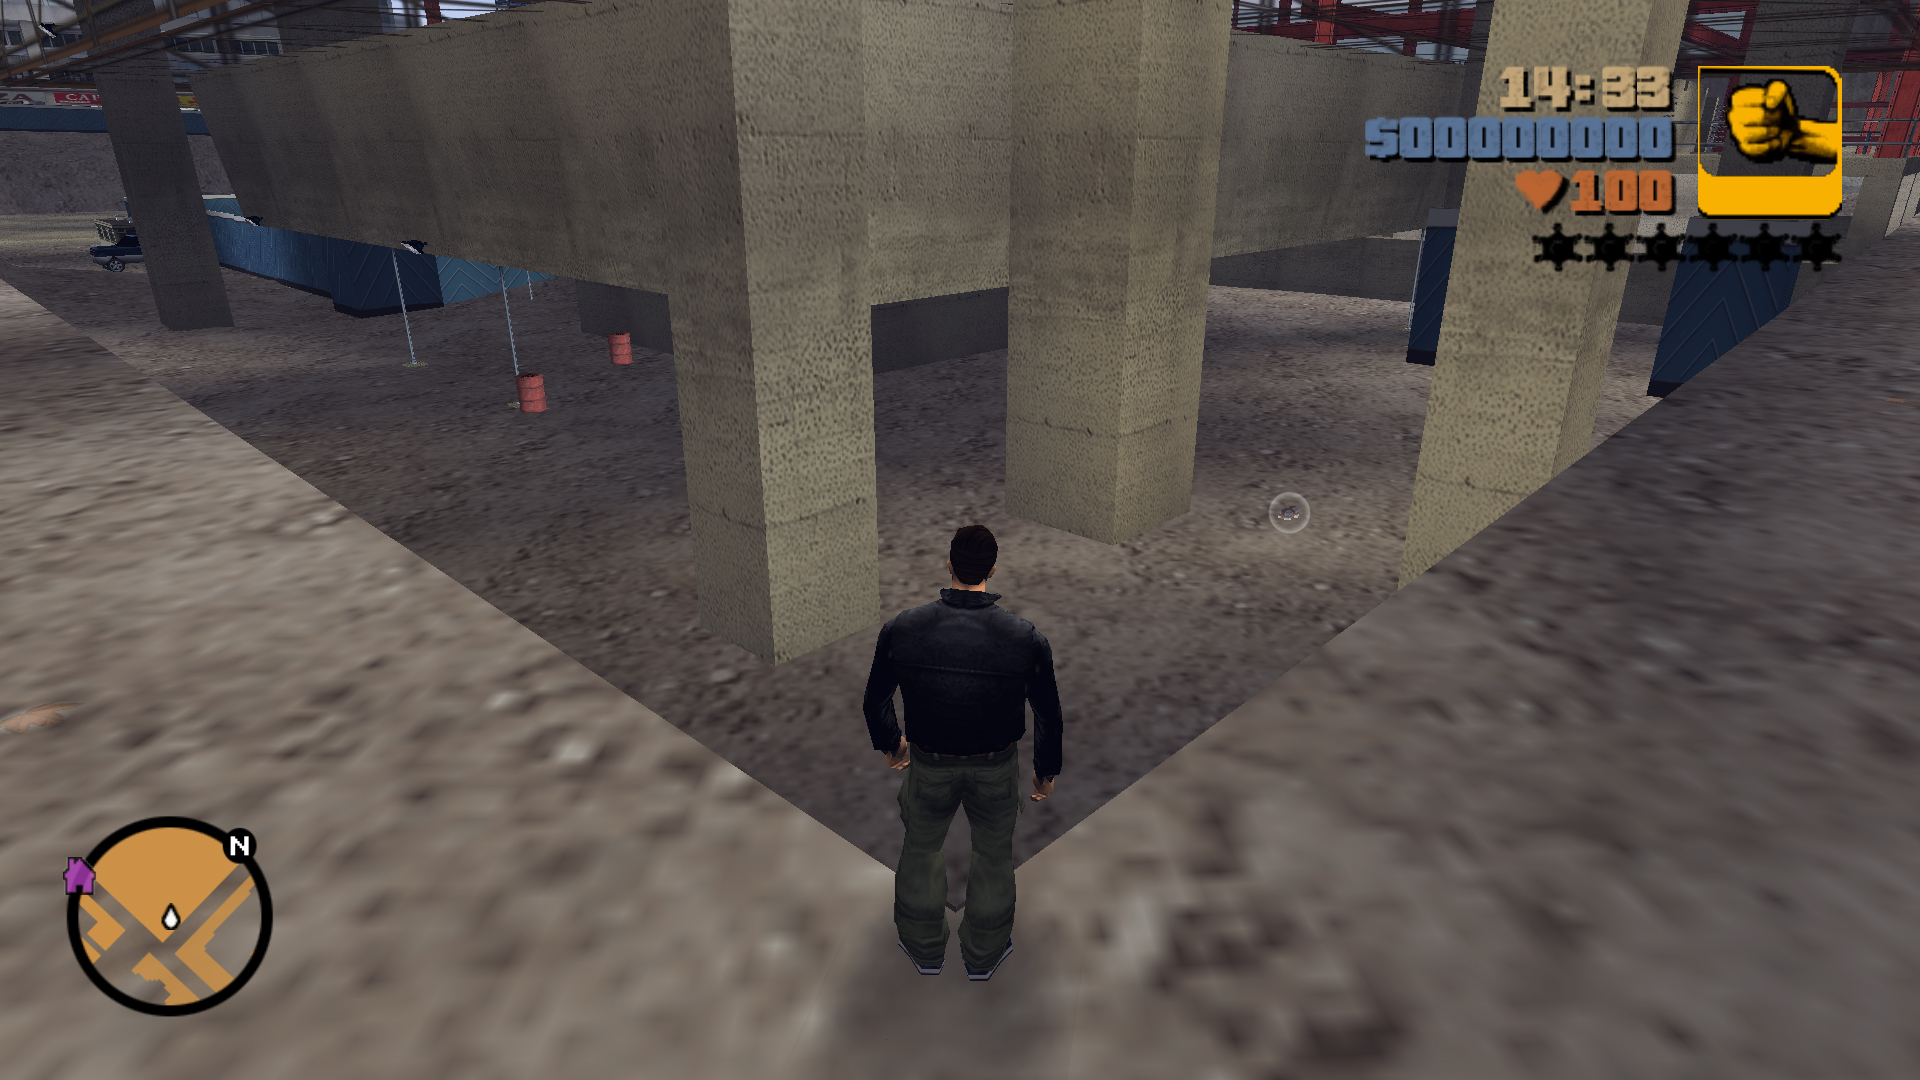
In the southeast corner of the excavated section under the southern building under construction.
37
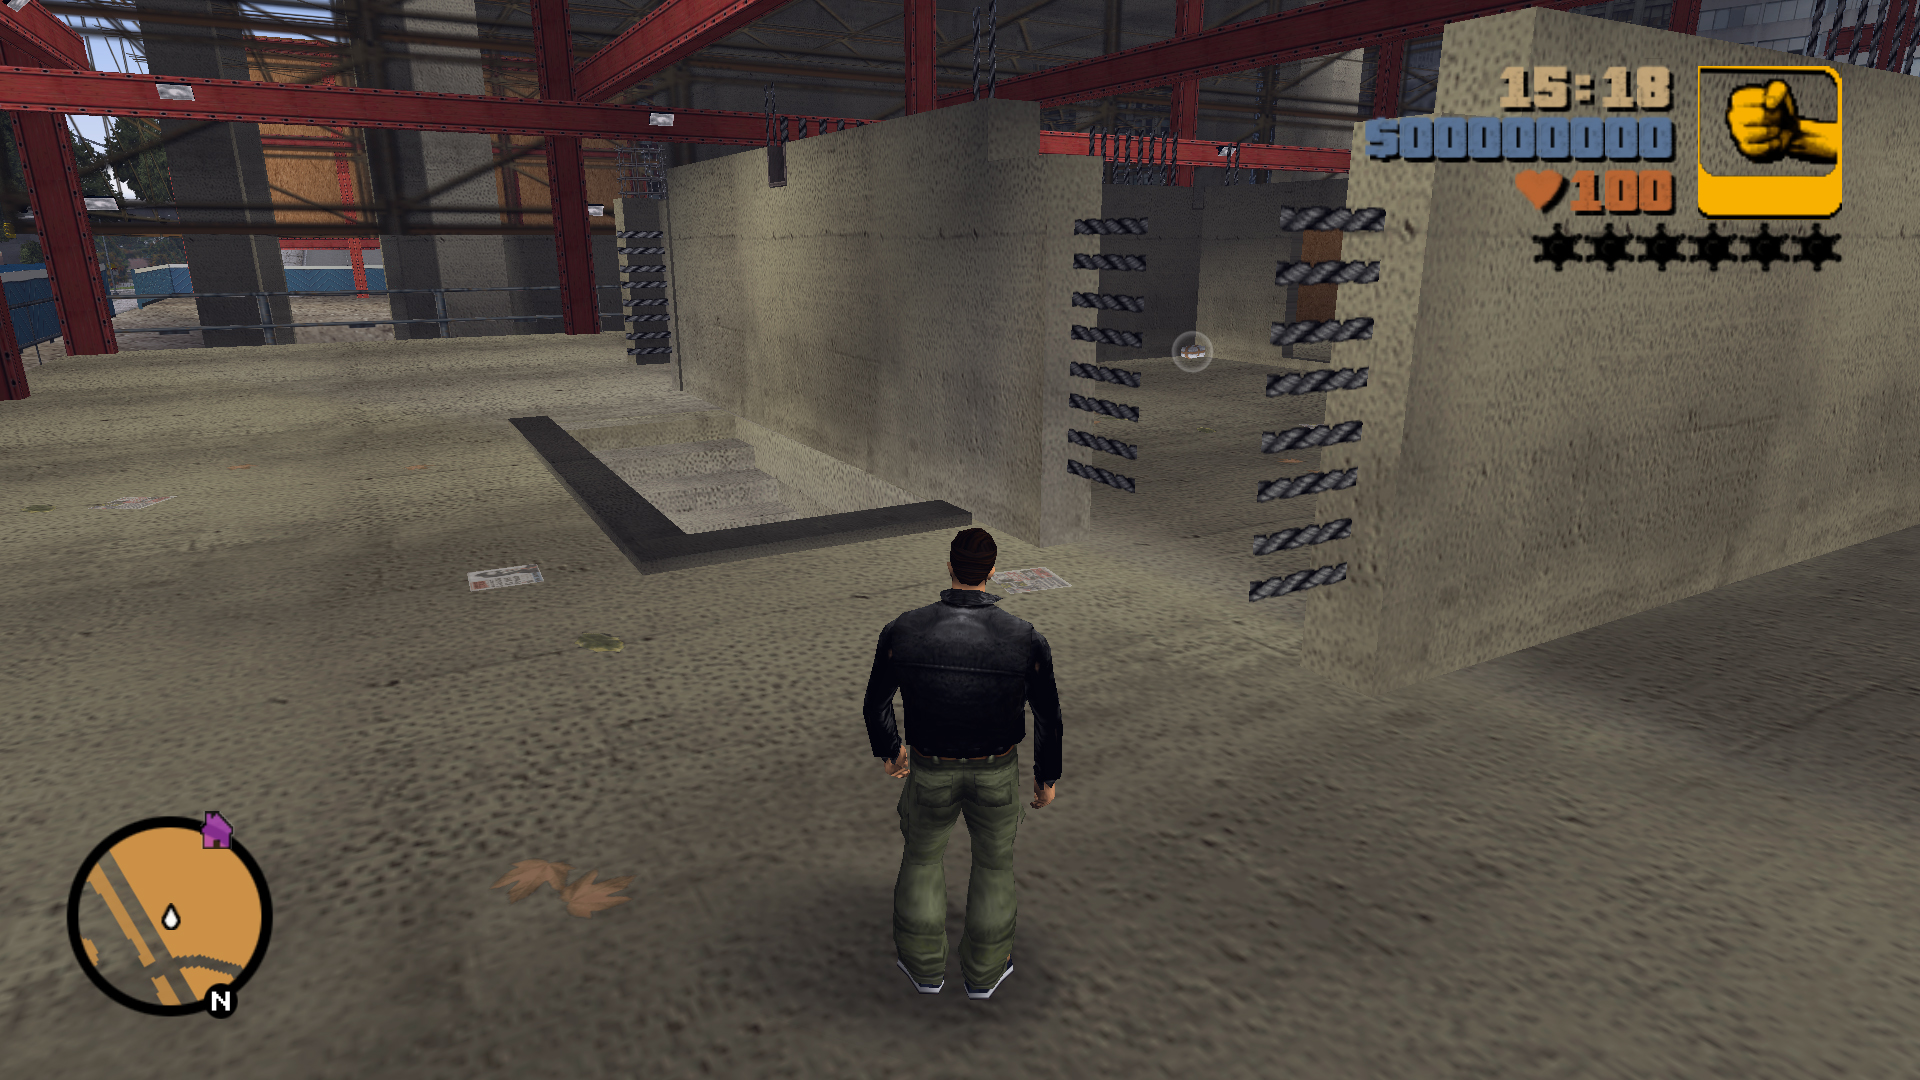
On the 2nd floor of the northern building under construction, go up the short stairs with the wooden panel, go past the columns and climb the stairs in the second concrete block to get to the 2nd floor, the package is in the center of an unfinished room that's next to the stairs.
38
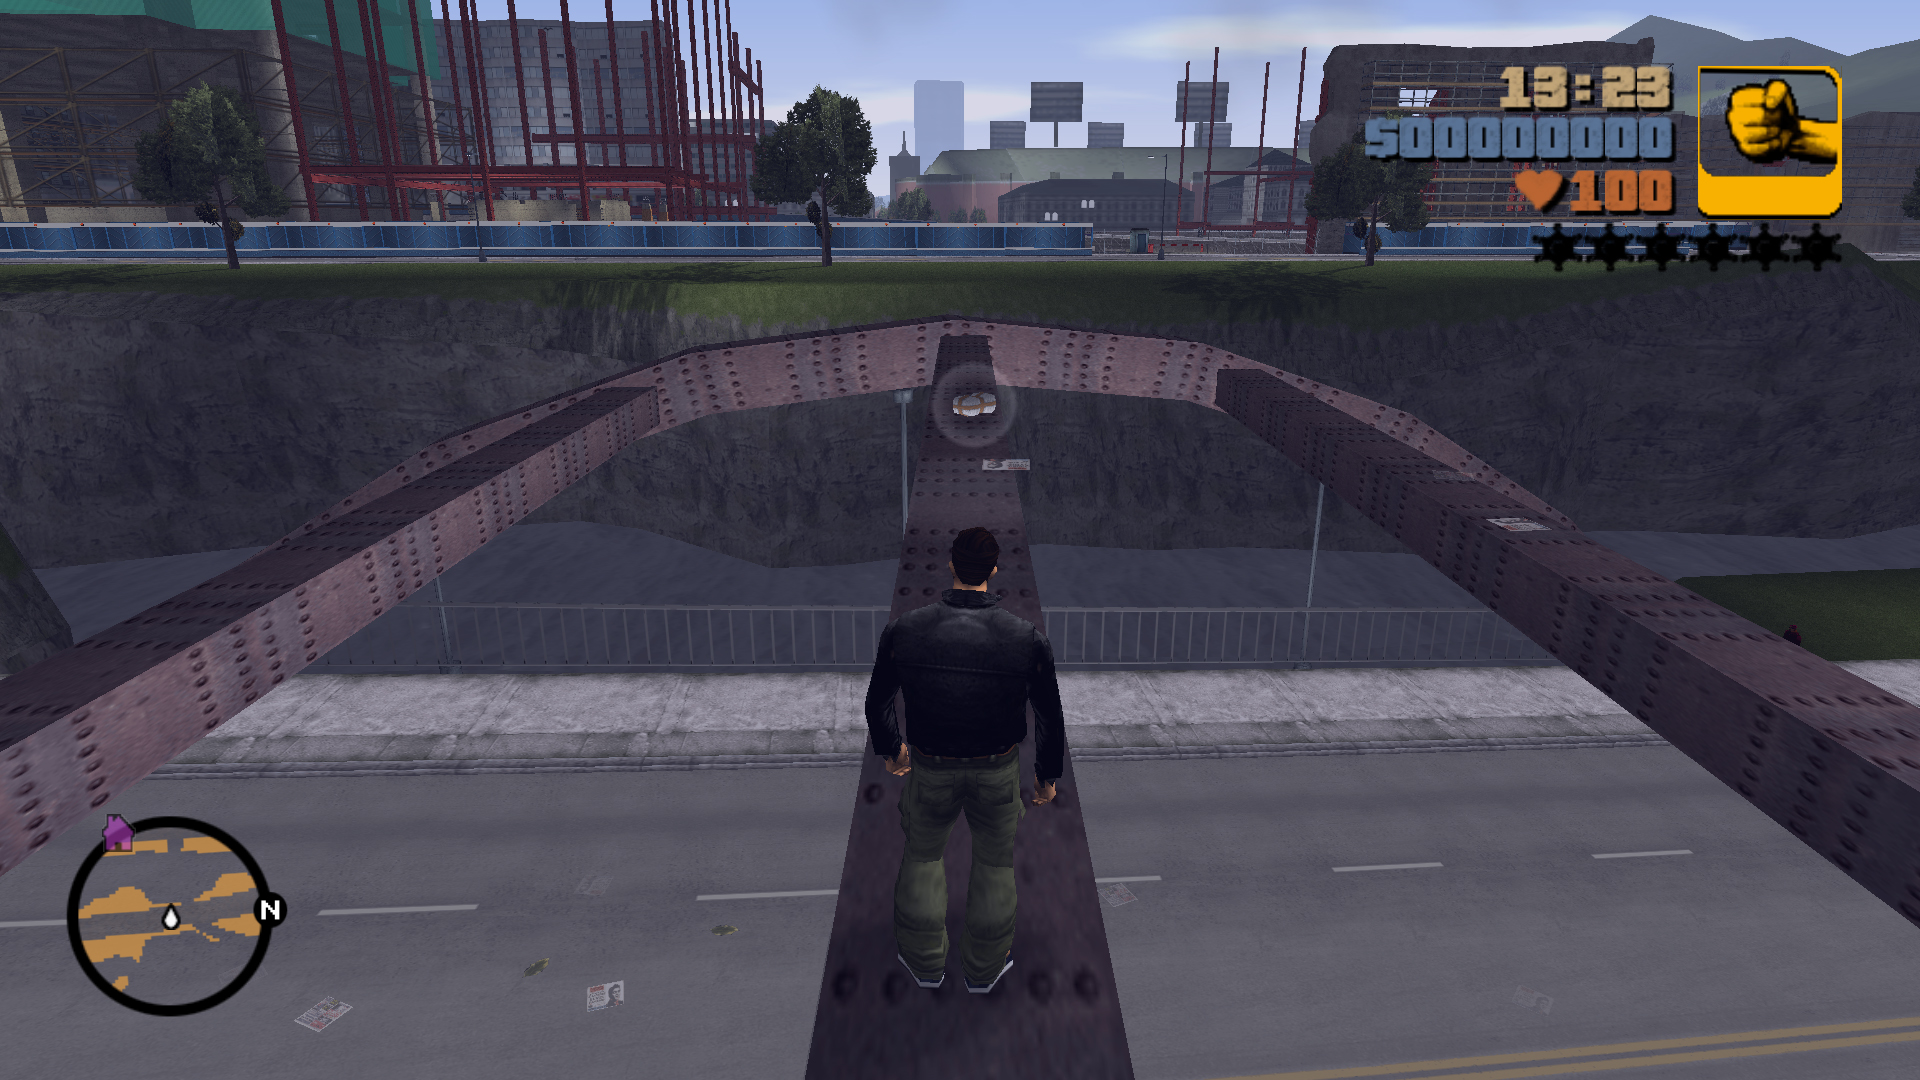
On the girder in the middle of the bridge's arches.
39
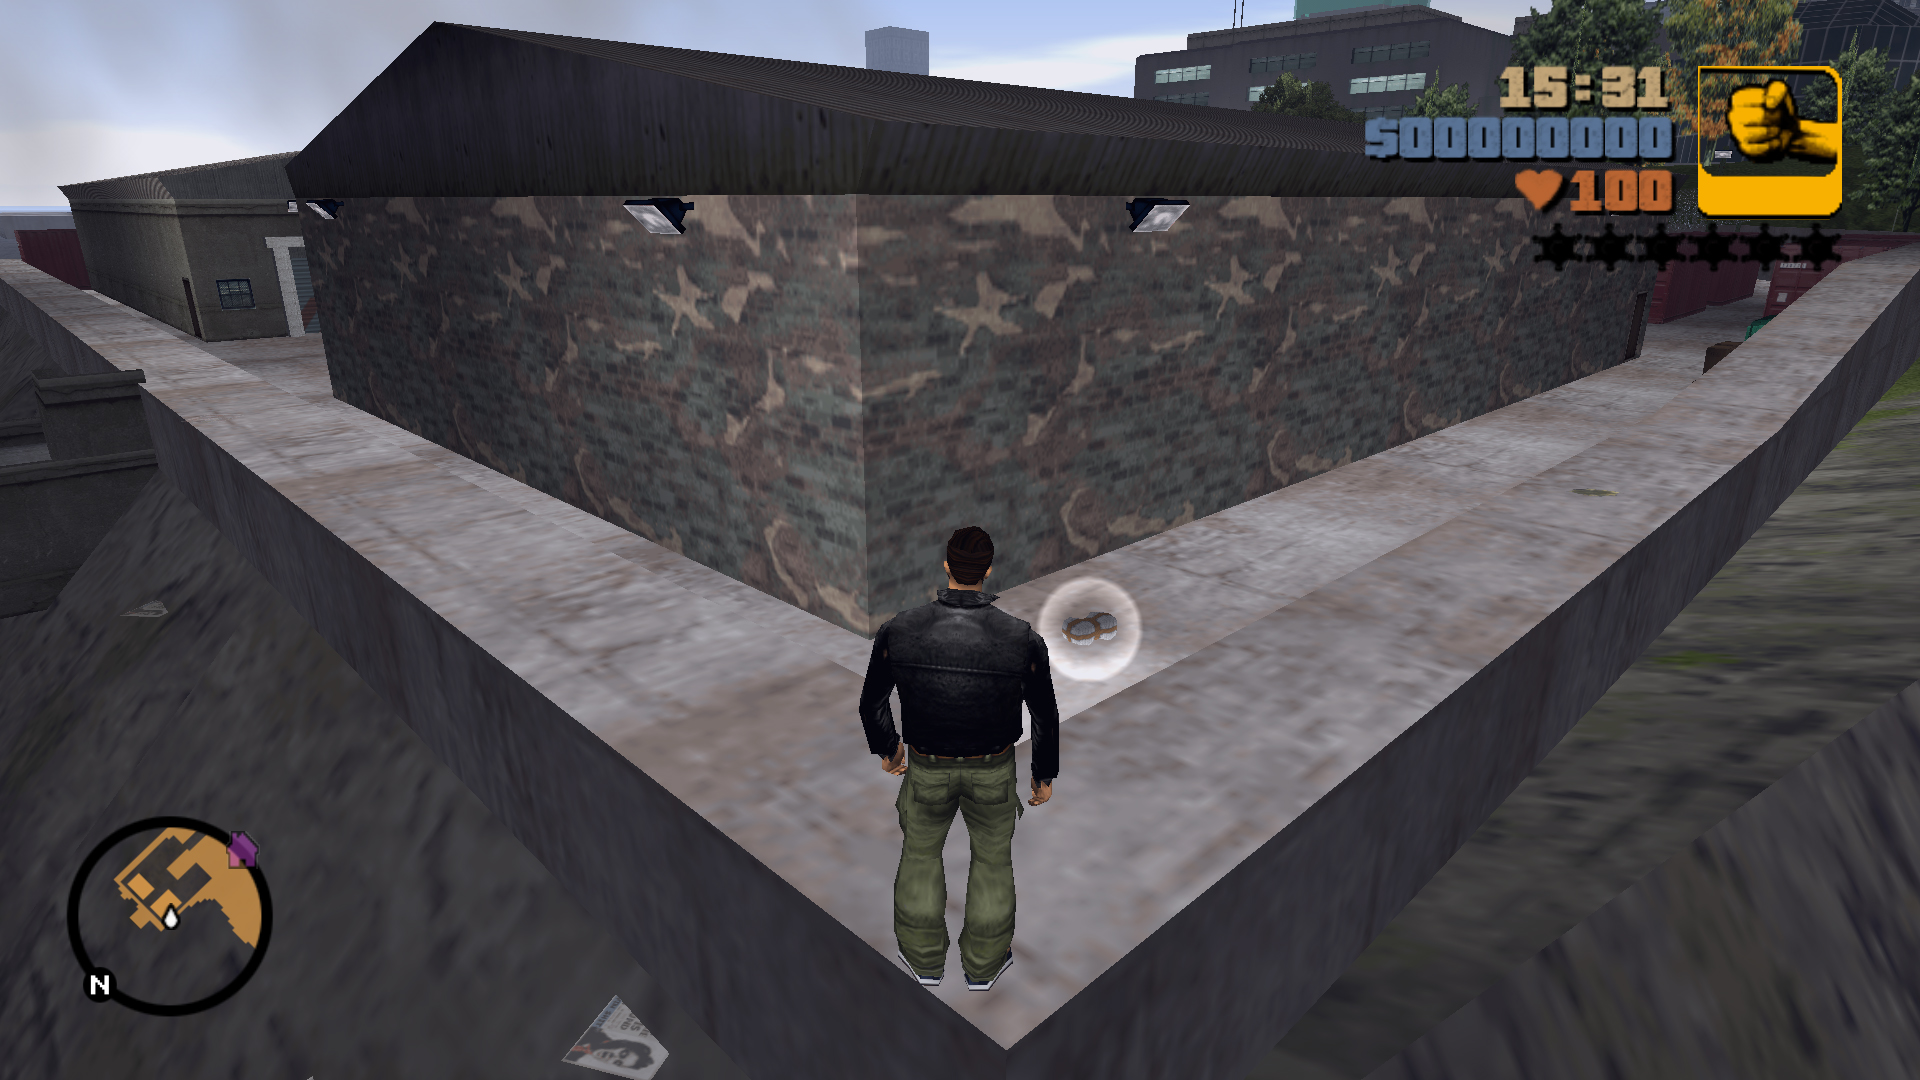
At the back of a warehouse in the Military Gun Shop, the gate will open after you complete the mission "Arms Shortage" (or if you drive a Tank or Army Truck) but you can simply walk around the building to the right and the package is in the corner.
40
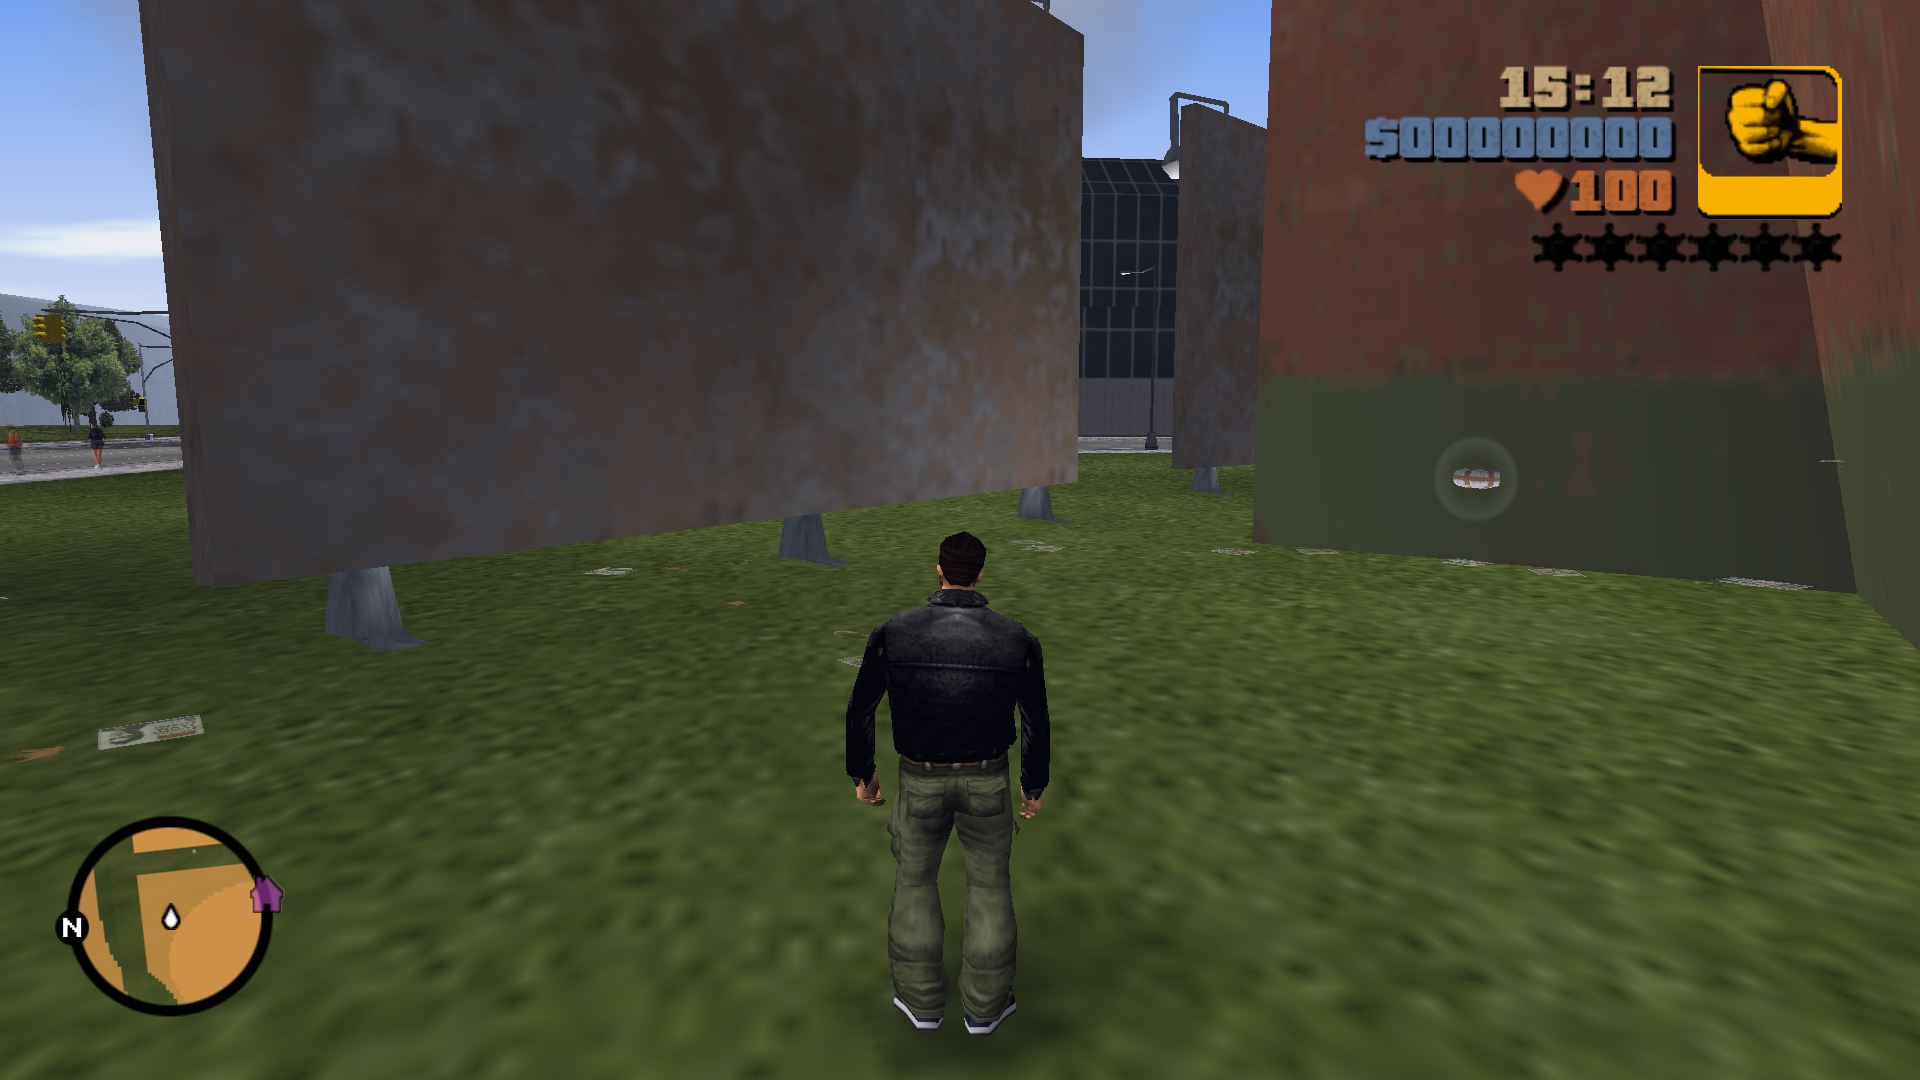
At the northeast of the Stadium's exterior behind the billboards.
41
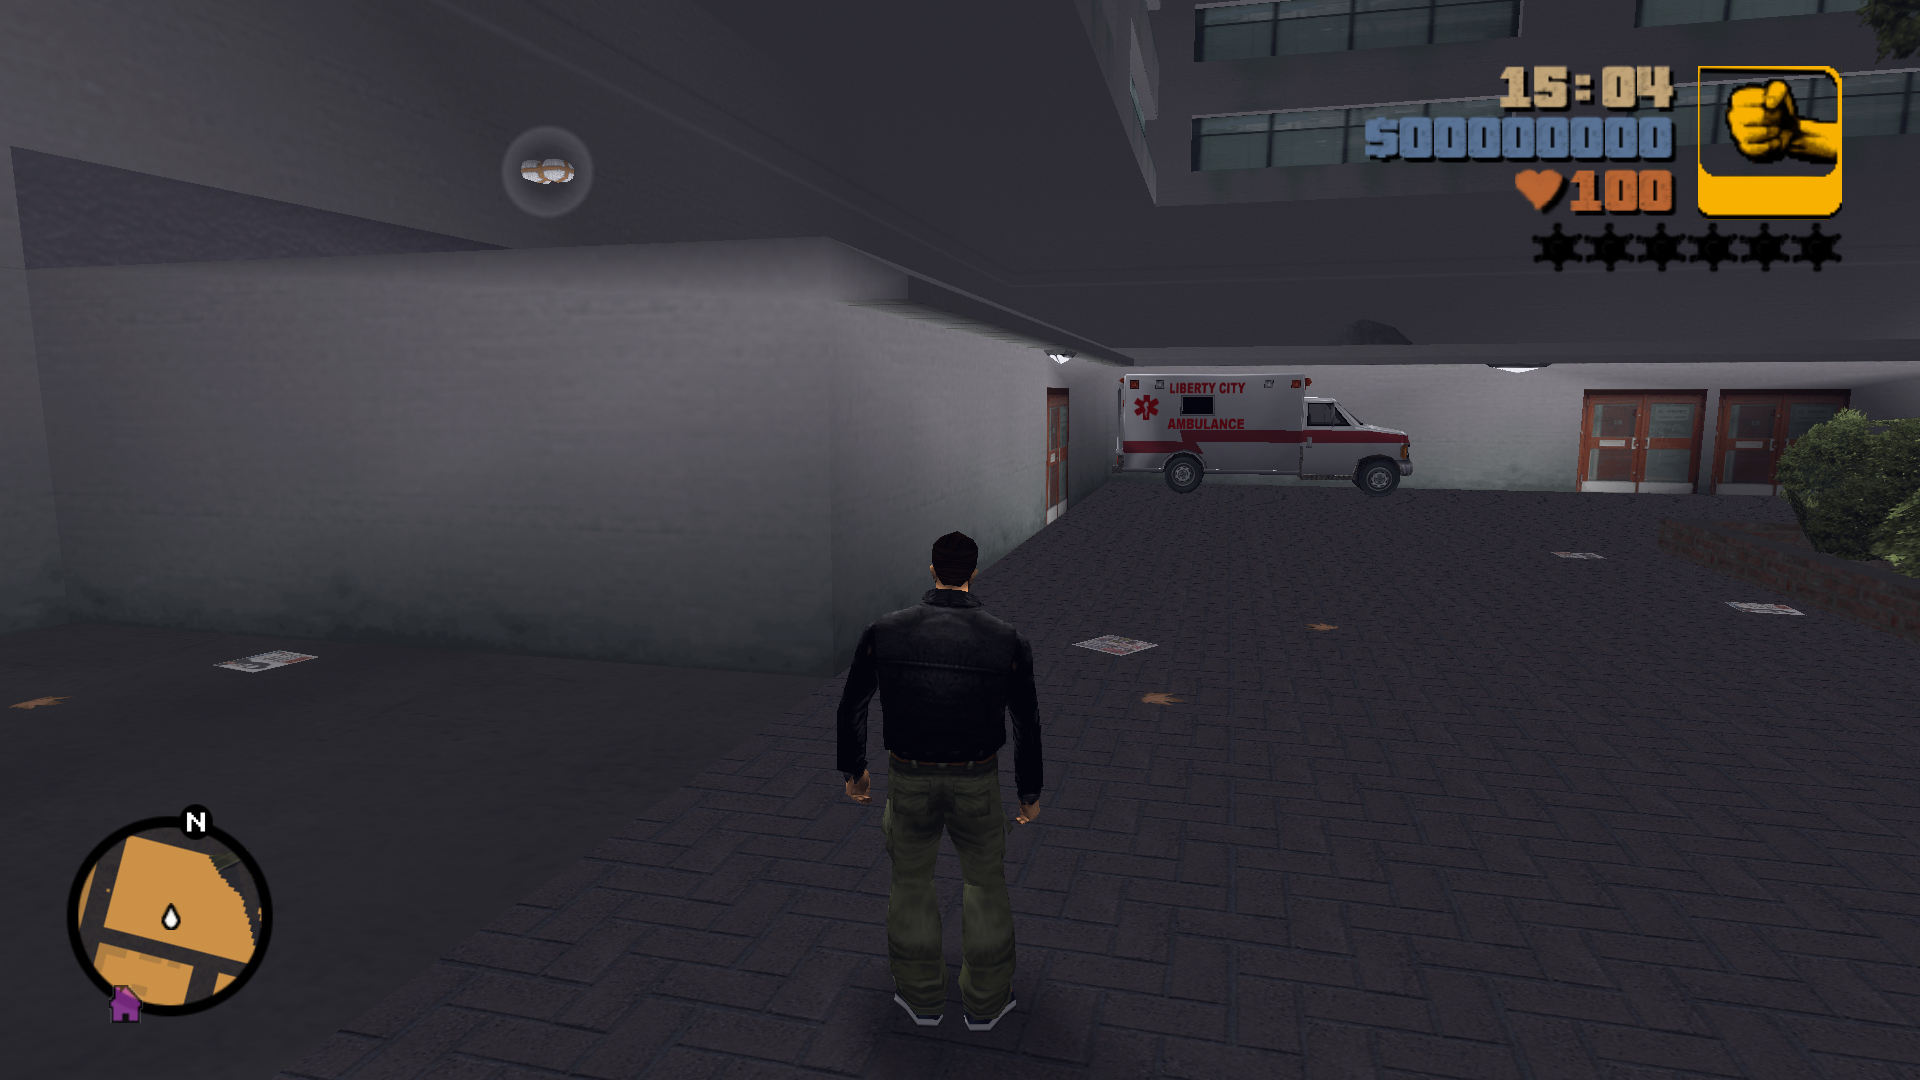
On the roof of a section of the Hospital, use an Ambulance or another tall vehicle to get on.
42
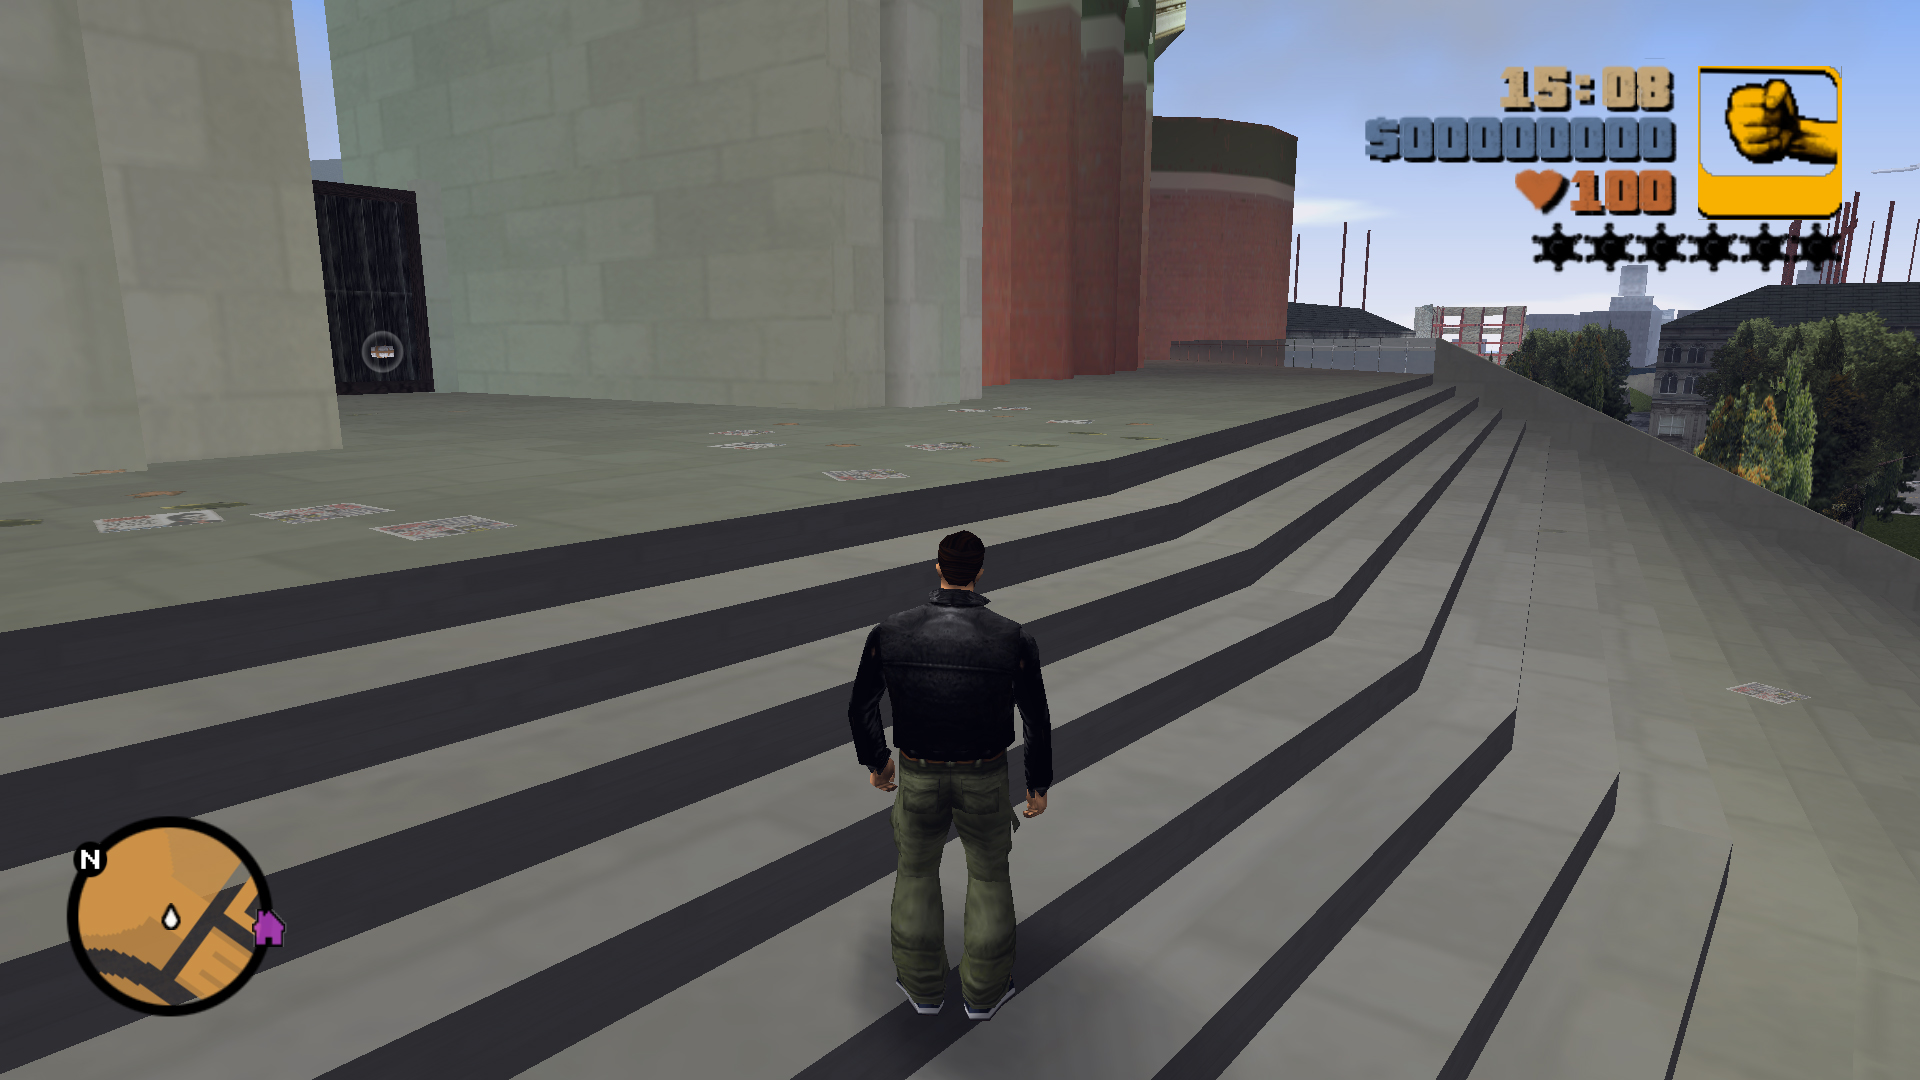
In front of the Stadium entrance gate, up the stairs.
43
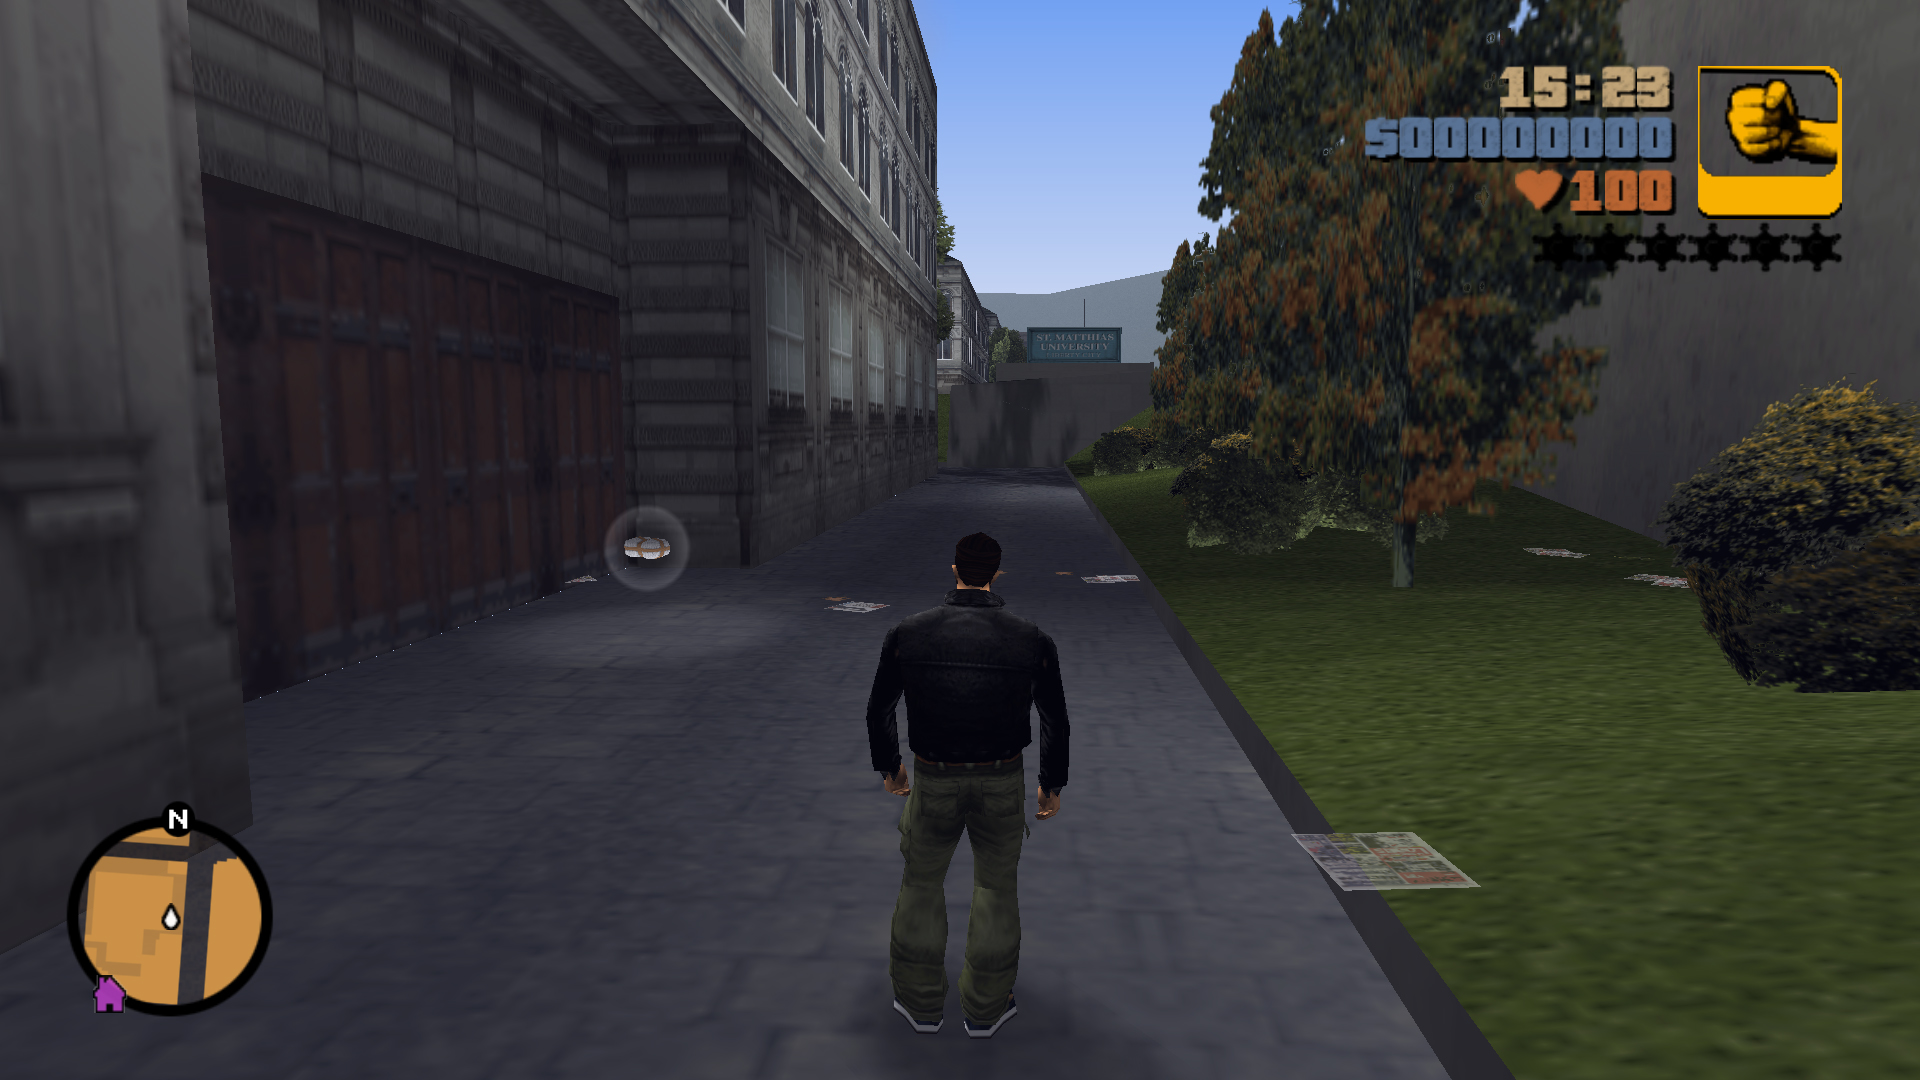
In the southern block of the university, at the eastern side path next to the street in front of a door.
44
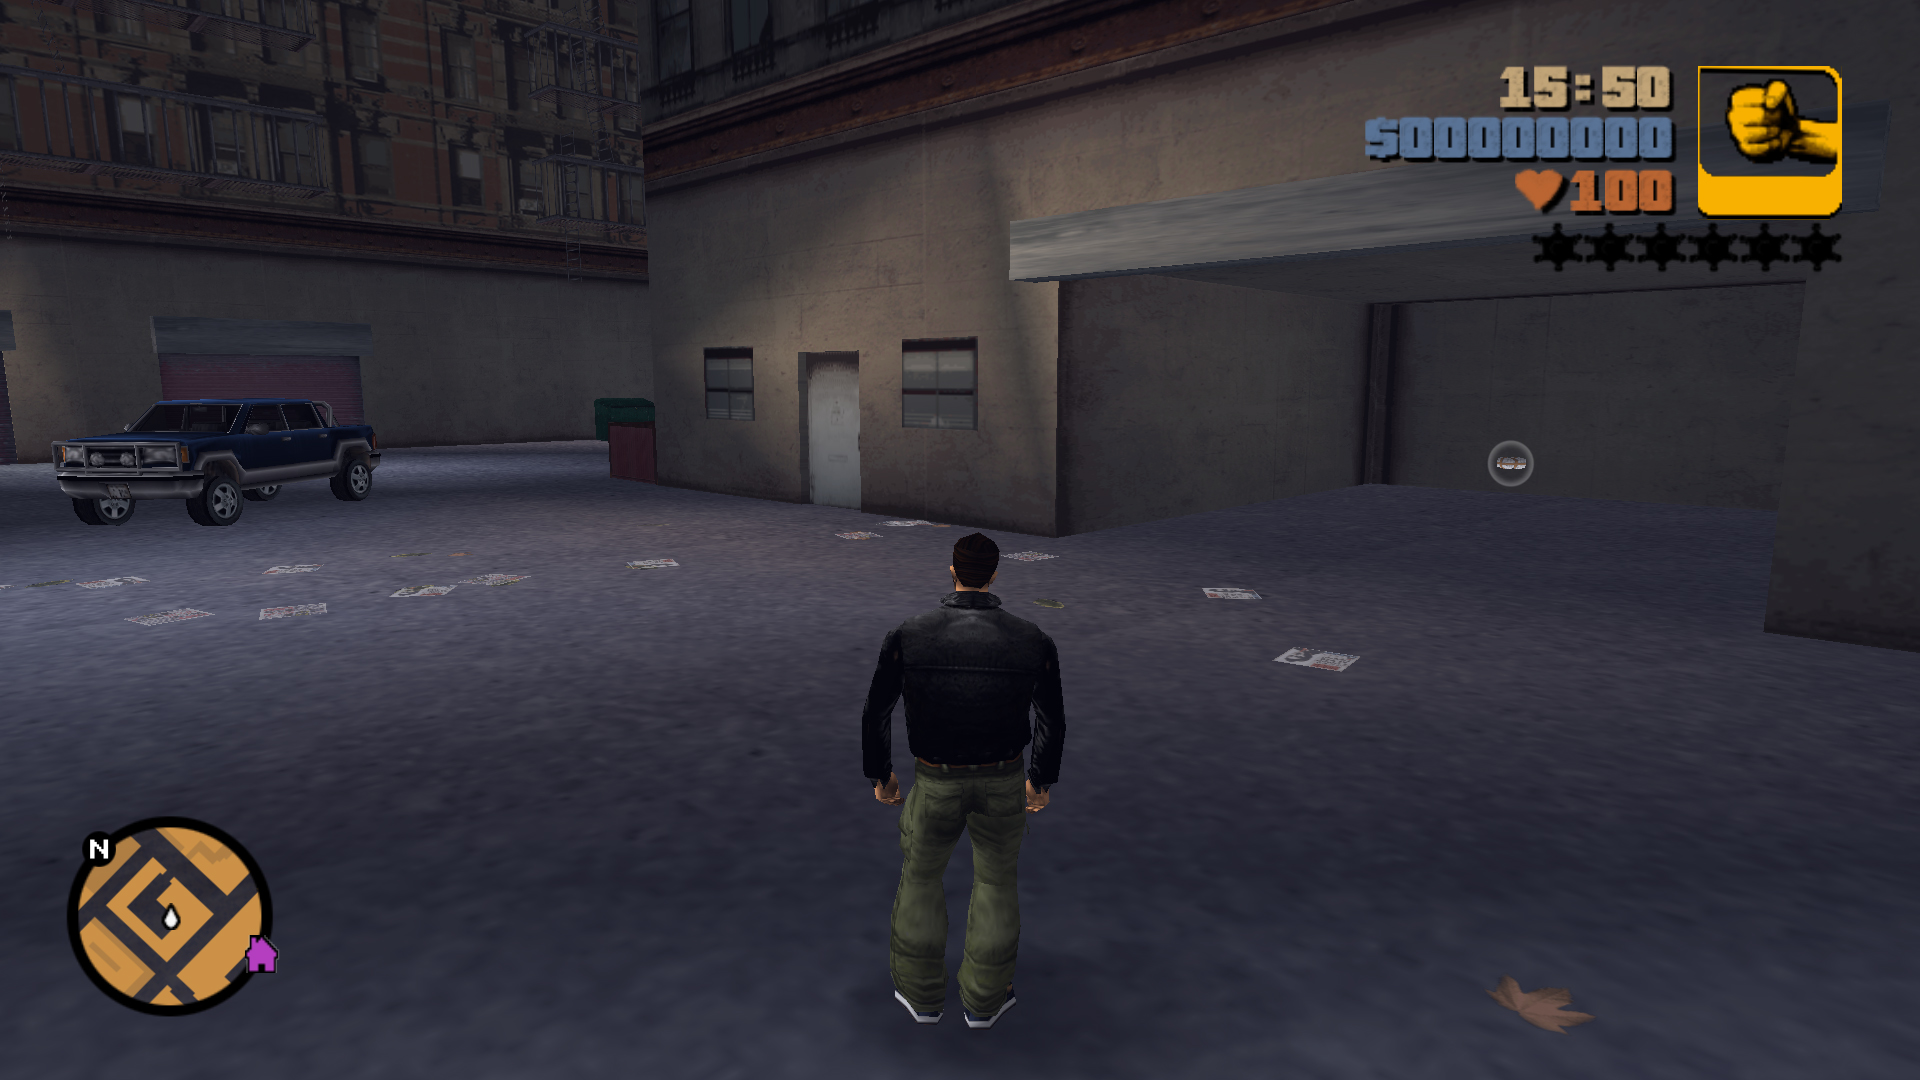
Inside the gated off alley, in one of the garages, the gate will open if you drive a Cartel Pickup Truck.
45
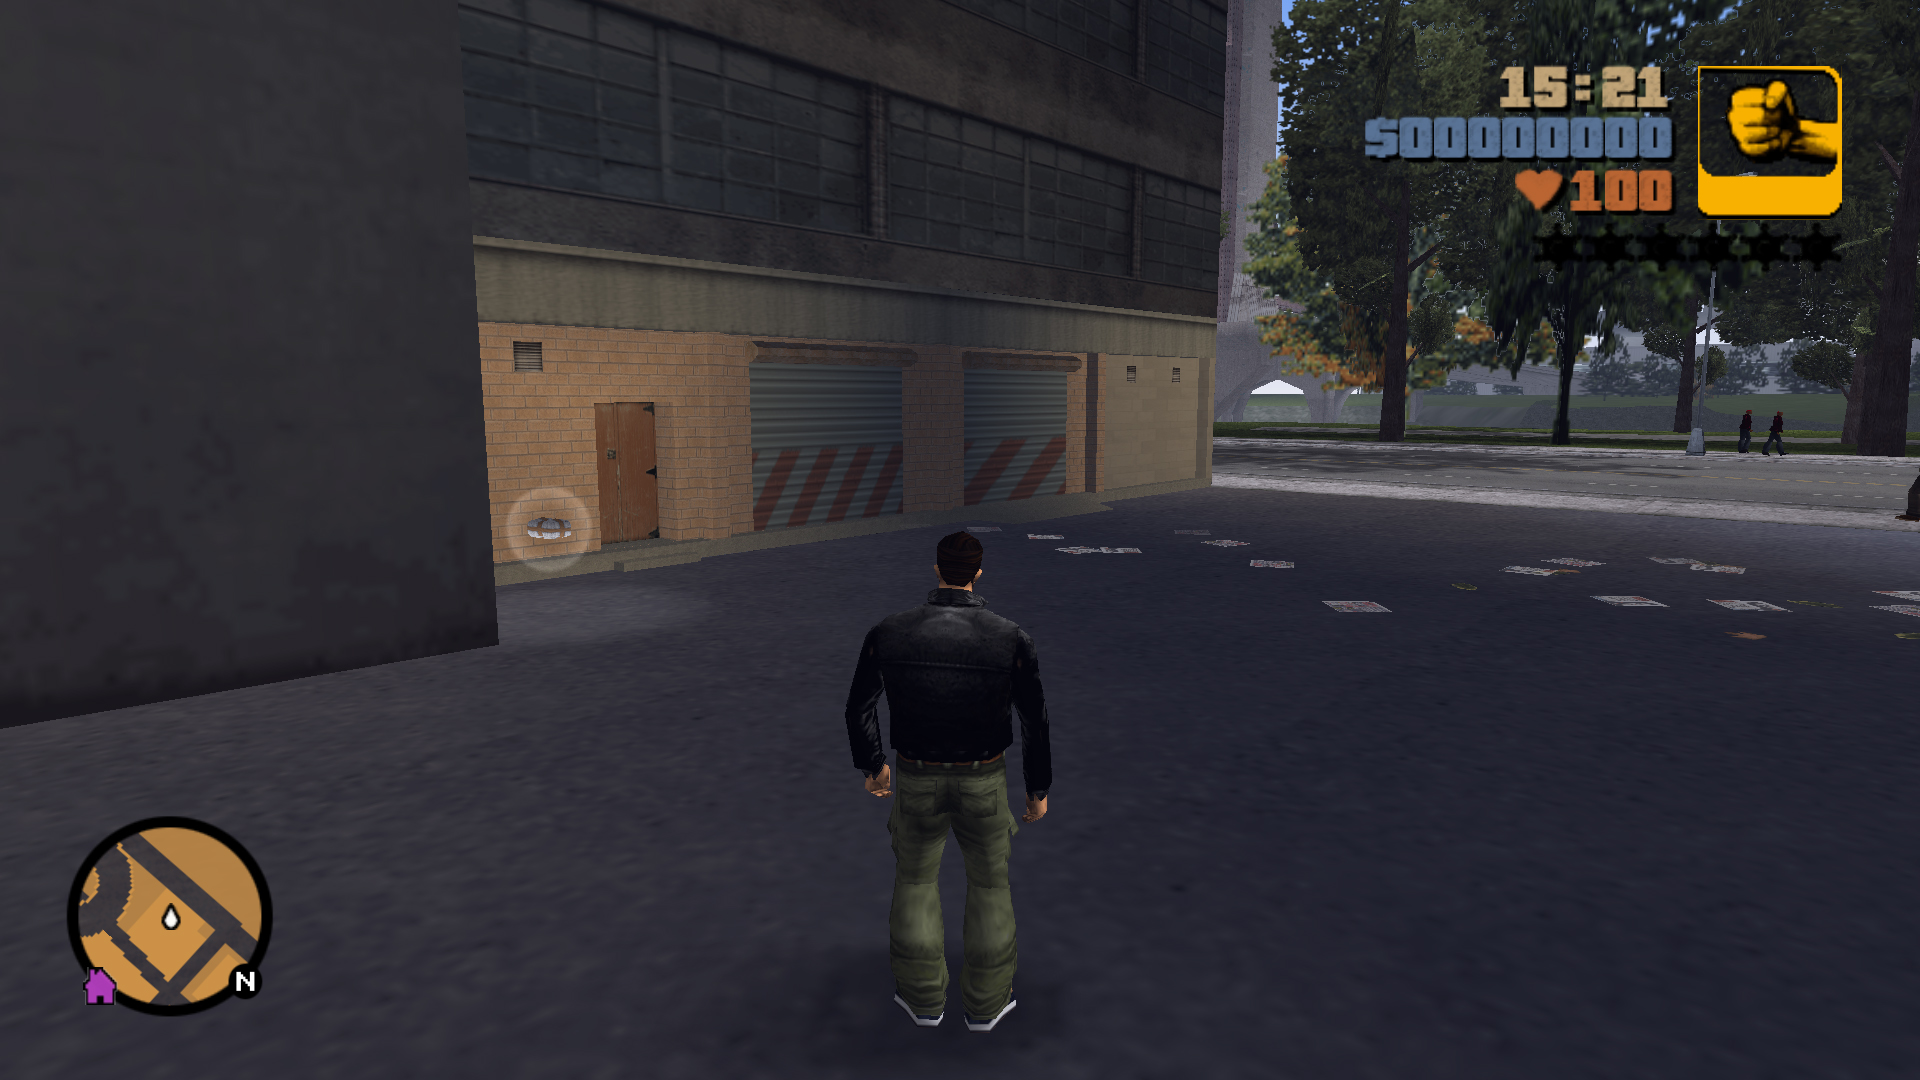
In the entrance of the alleyway next to the Fire Station.
46
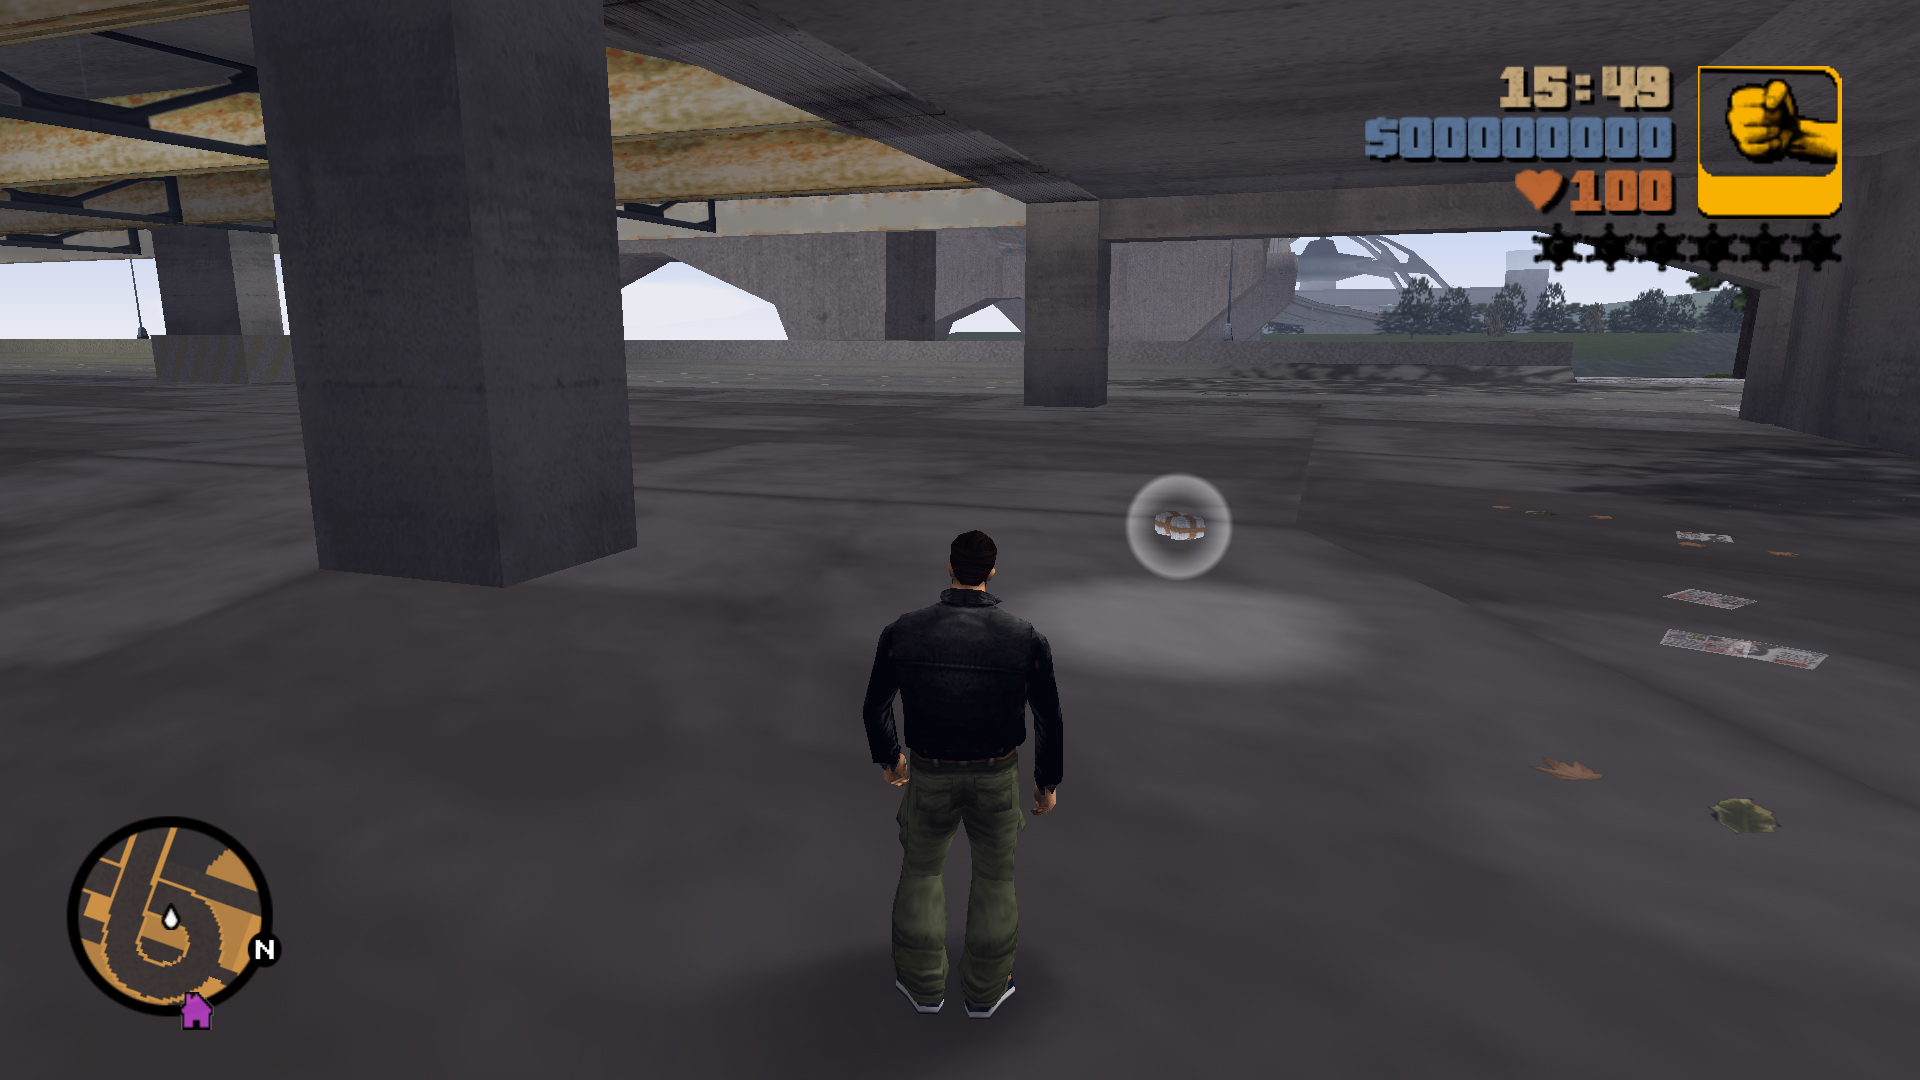
In the underground space below the Shoreside Vale Bridge entrance, next to the lower shore highway.
47
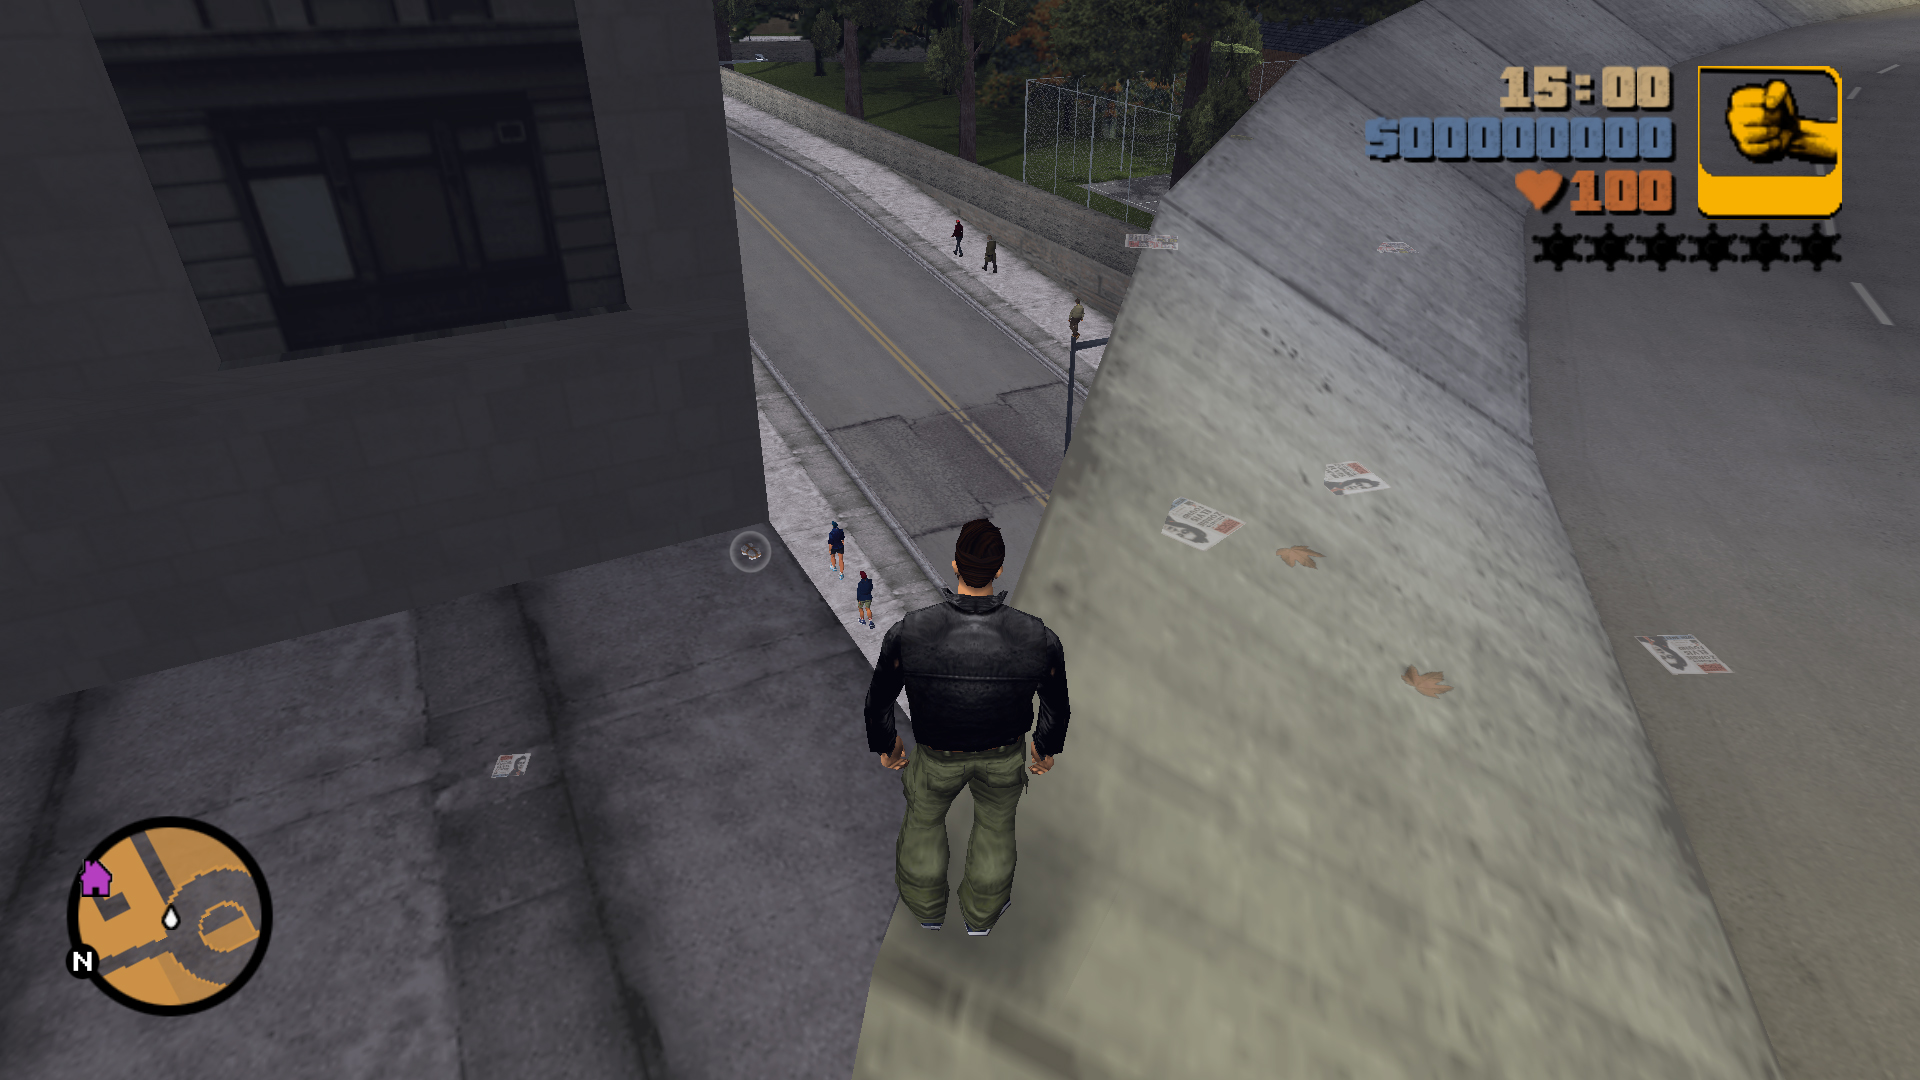
On the roof of Uncle BJ's shop, use the Shoresive Vale Bridge rising spiral road to drop down onto the roof.
48
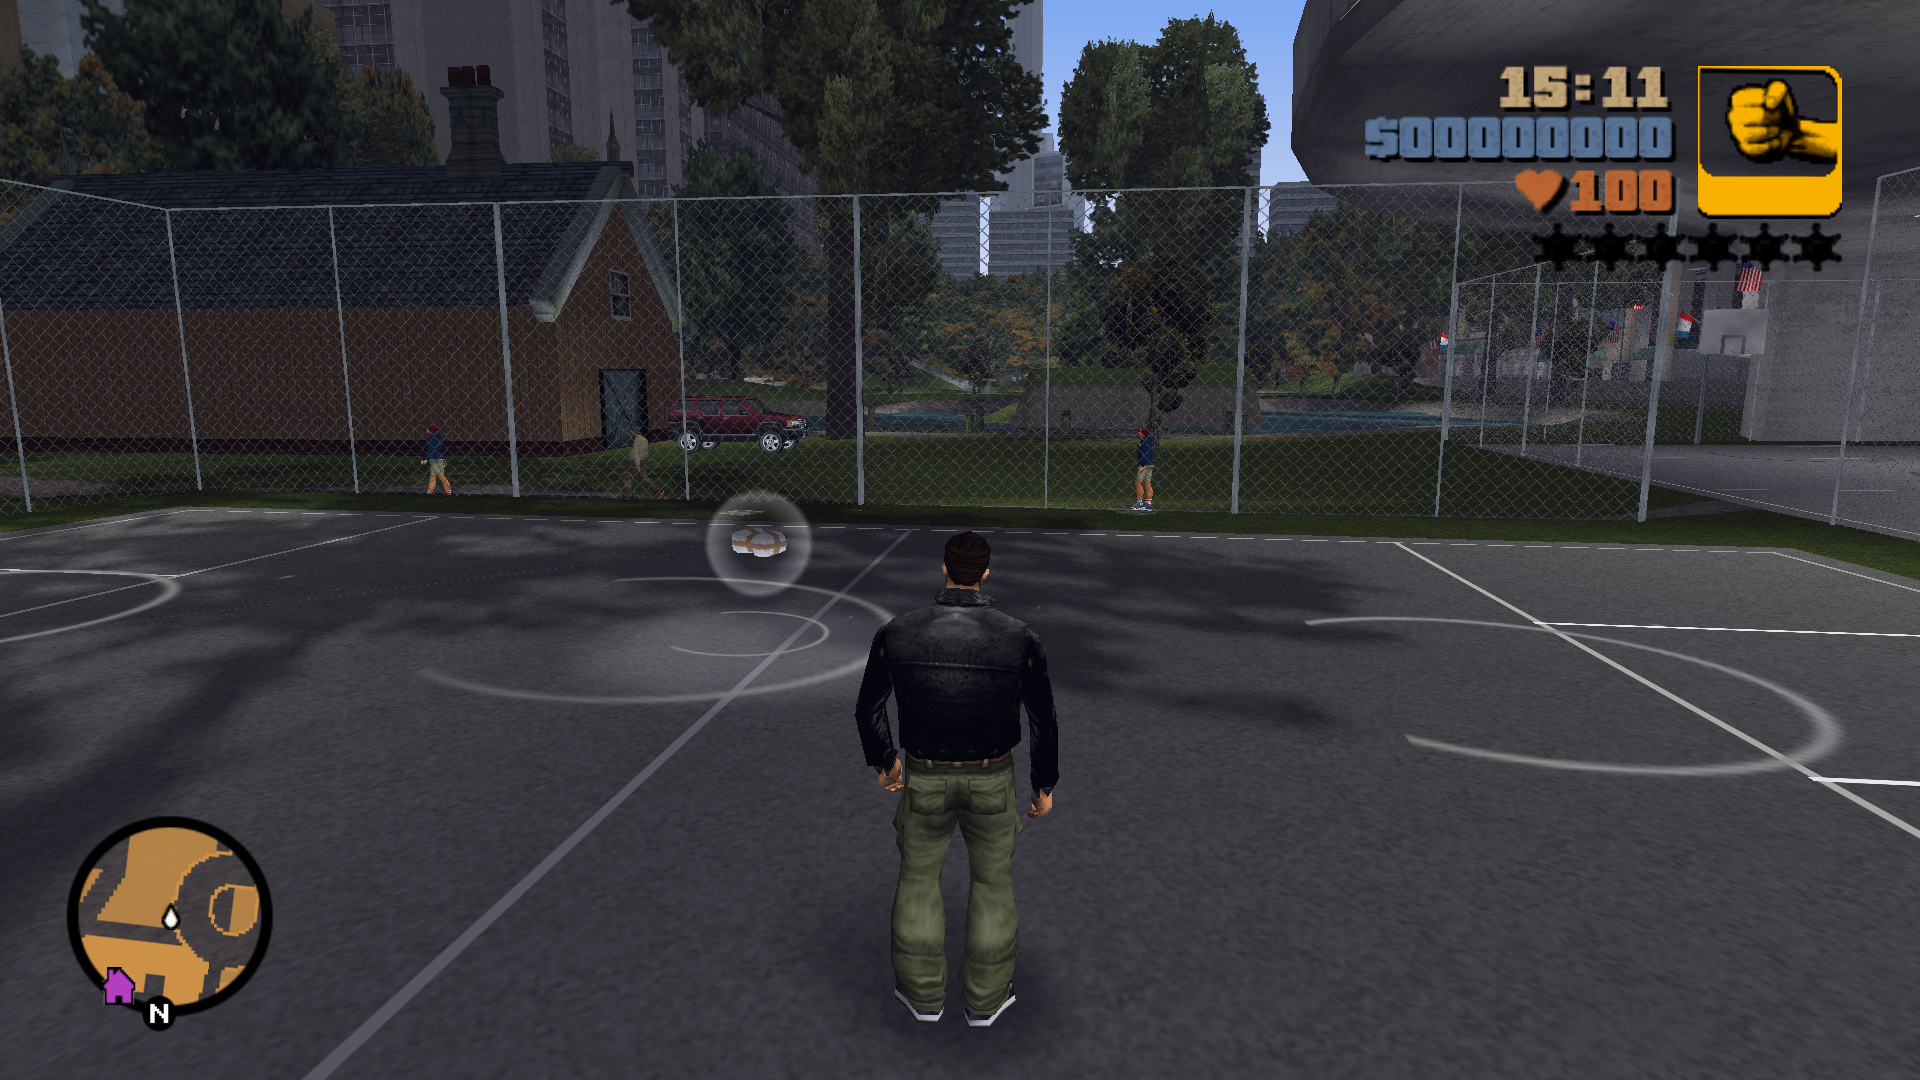
In the basketball court at the north of the Park.
49
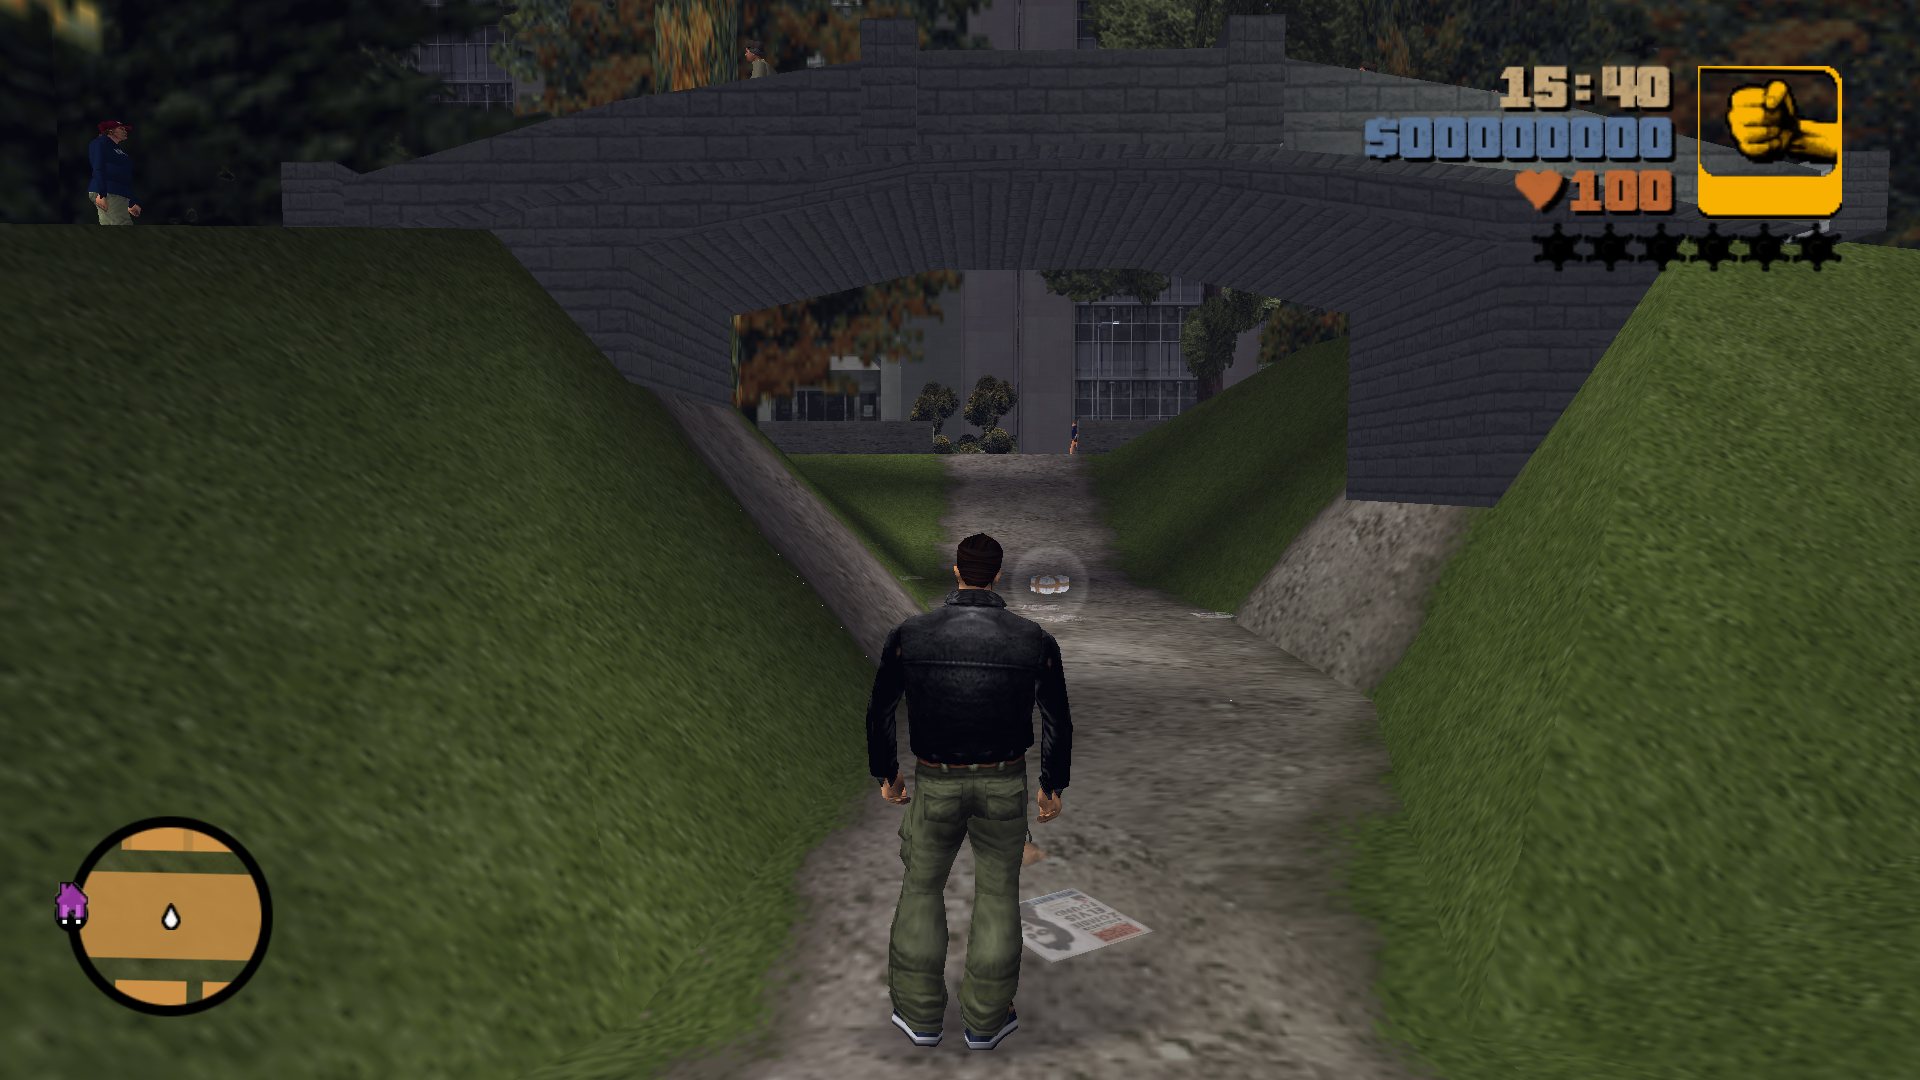
Under the pedestrian bridge in the middle of the Park.
50
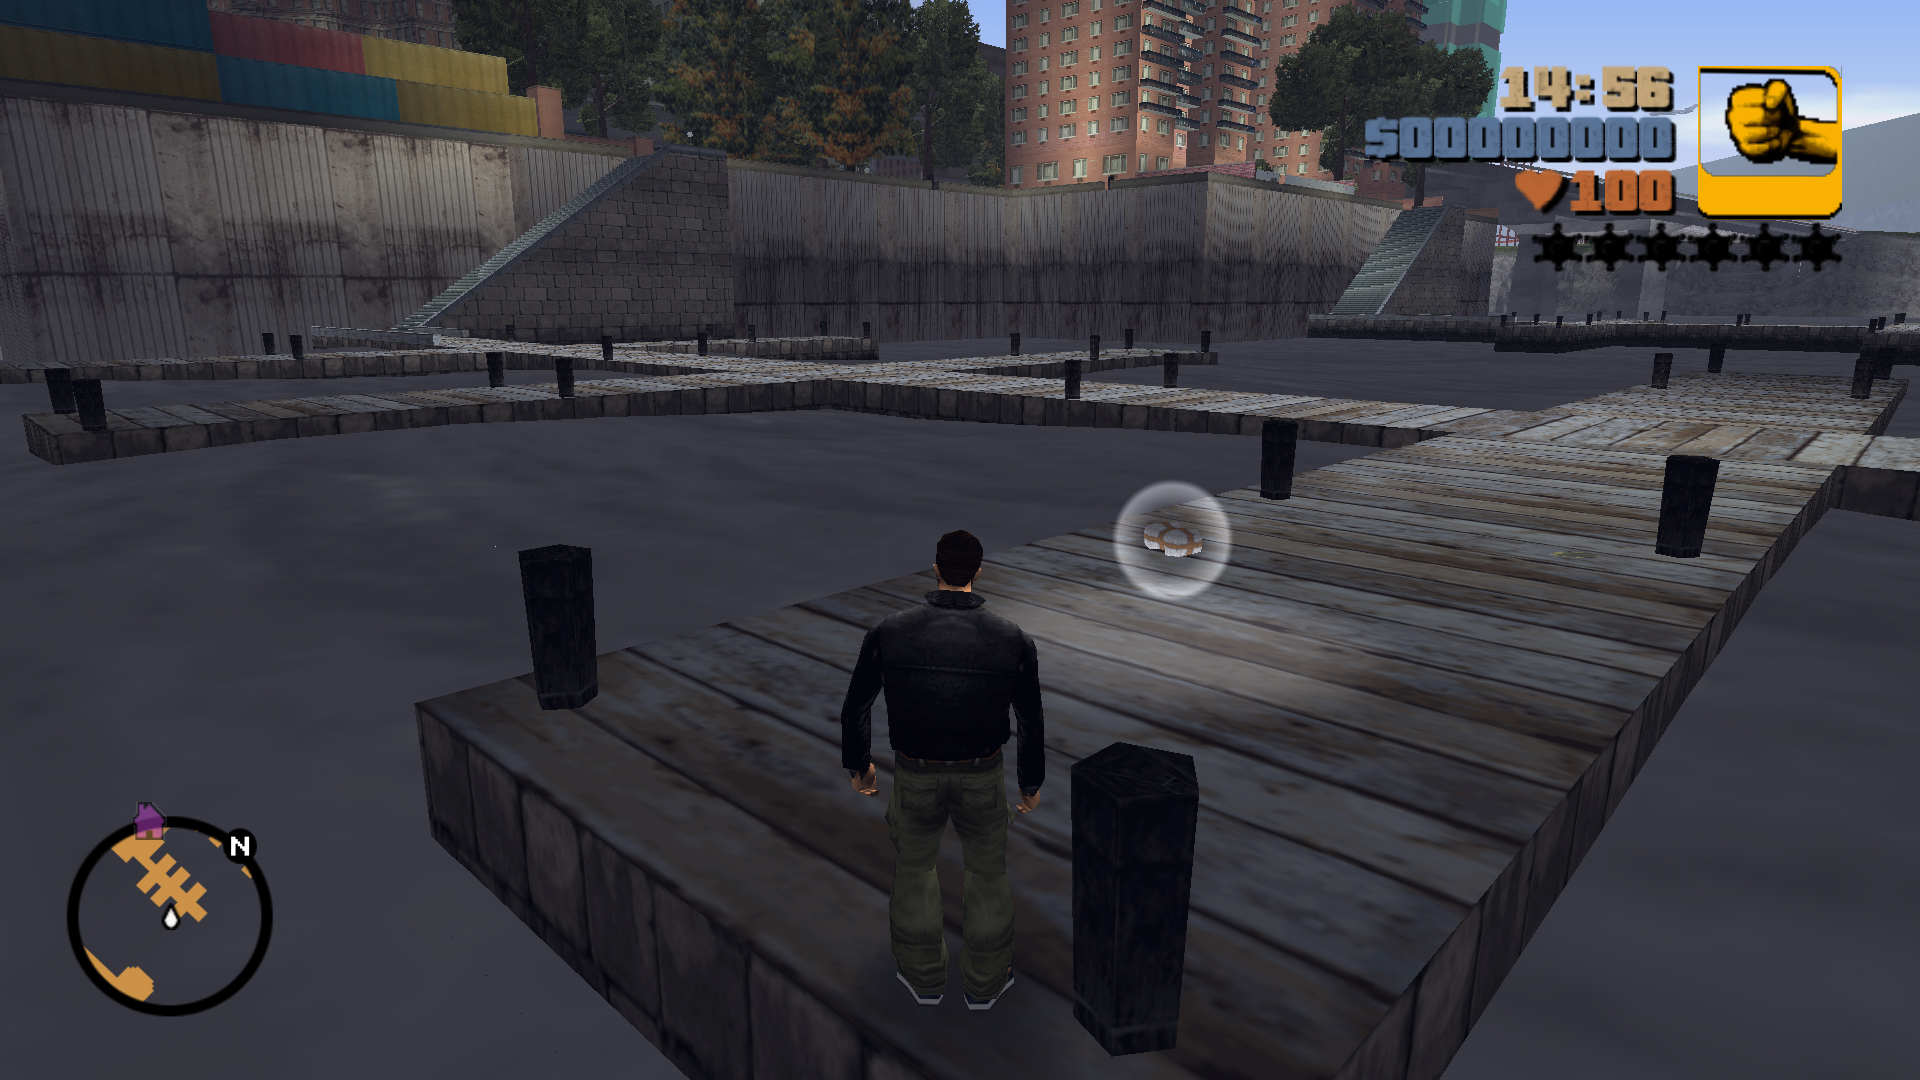
On the dock north of the Portland Bridge.
51
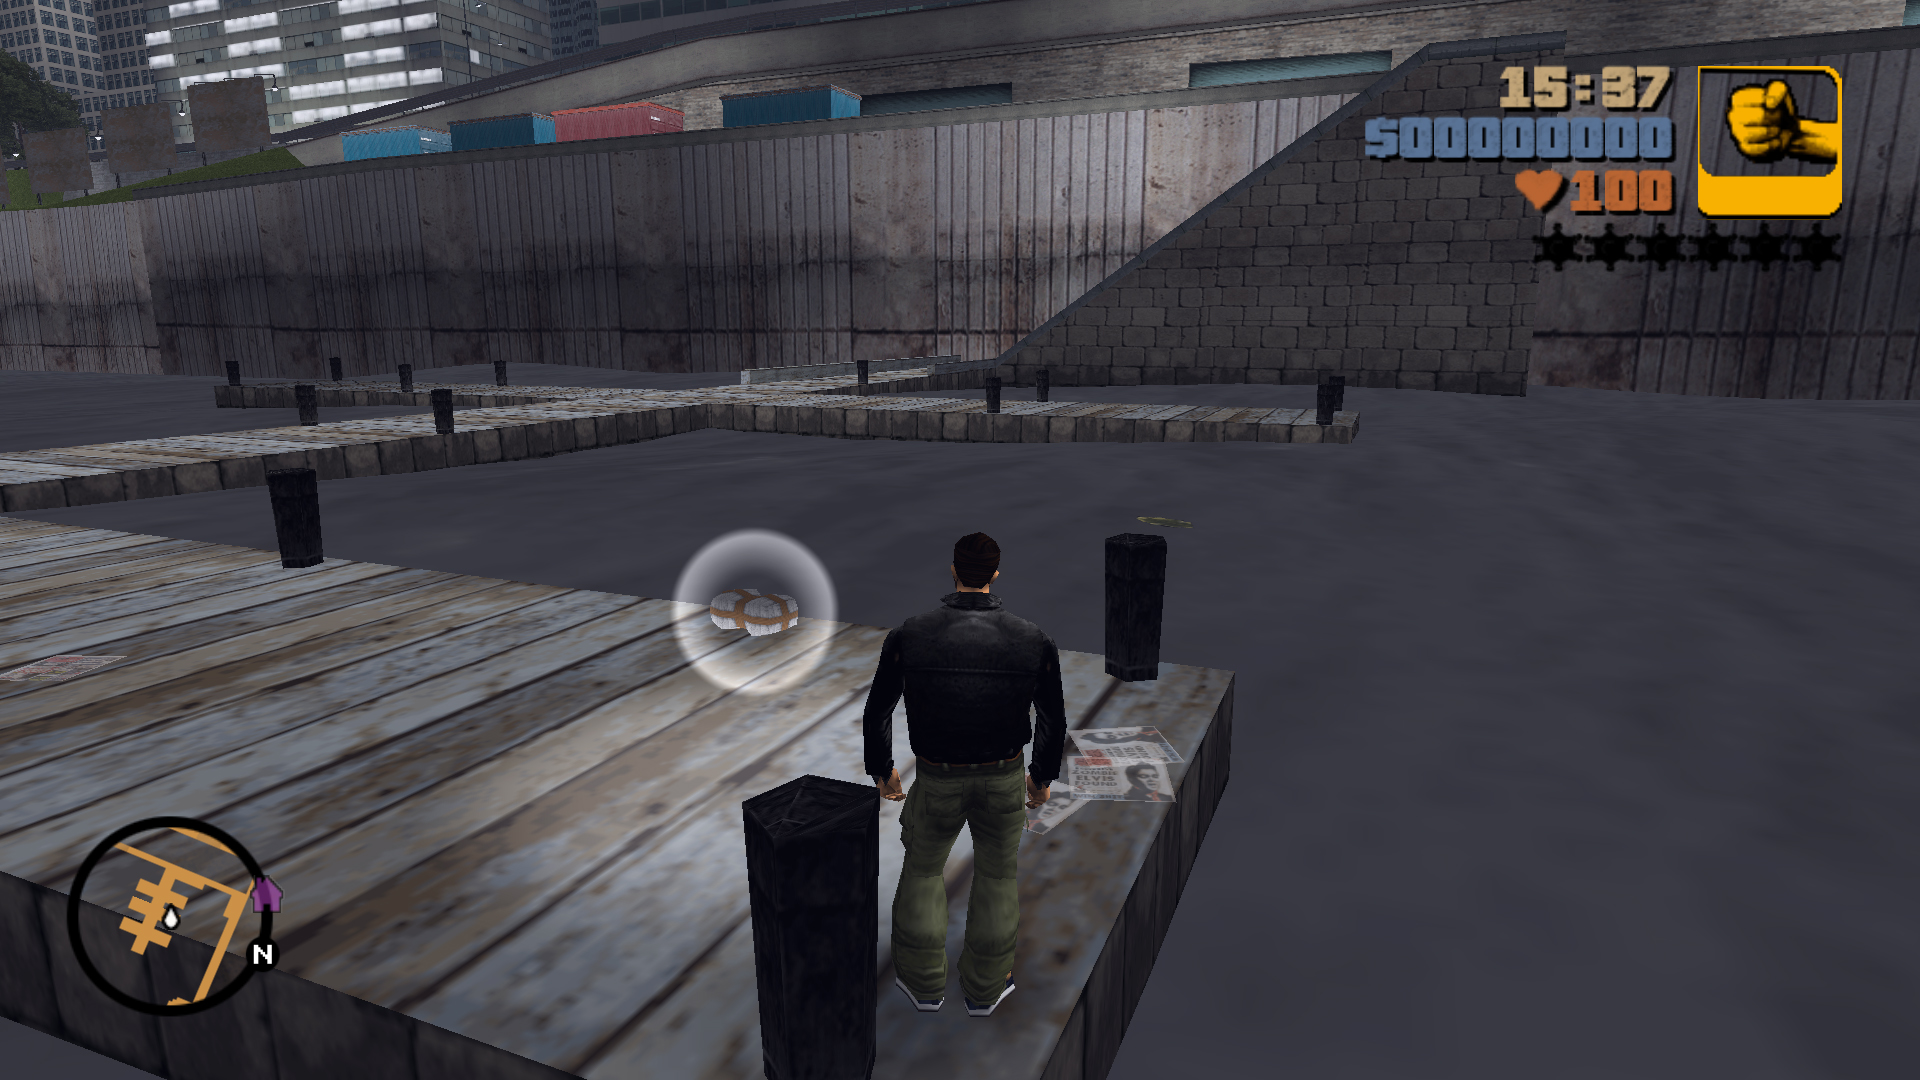
On the dock south of the Portland Bridge.
52
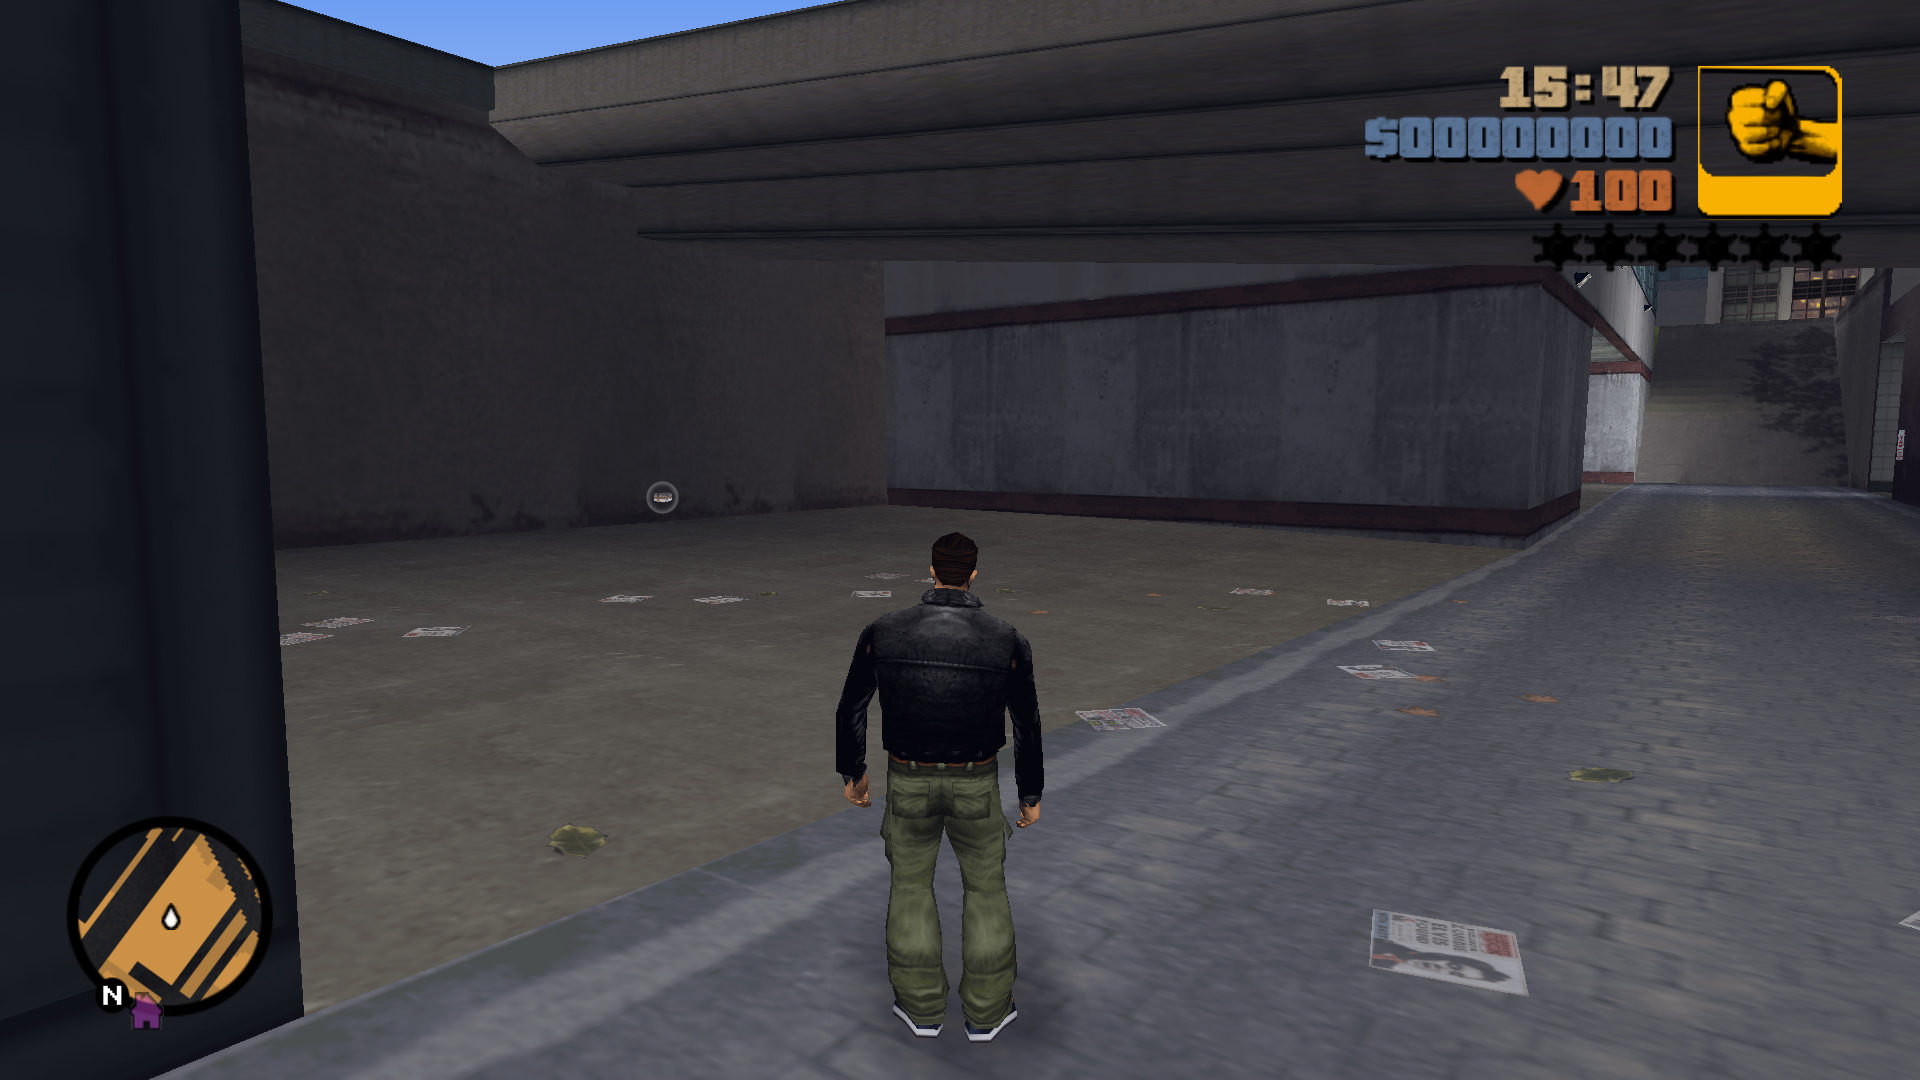
In the lower passage of the Police Station, under the small bridge that connects the parking lot and the highway.
53
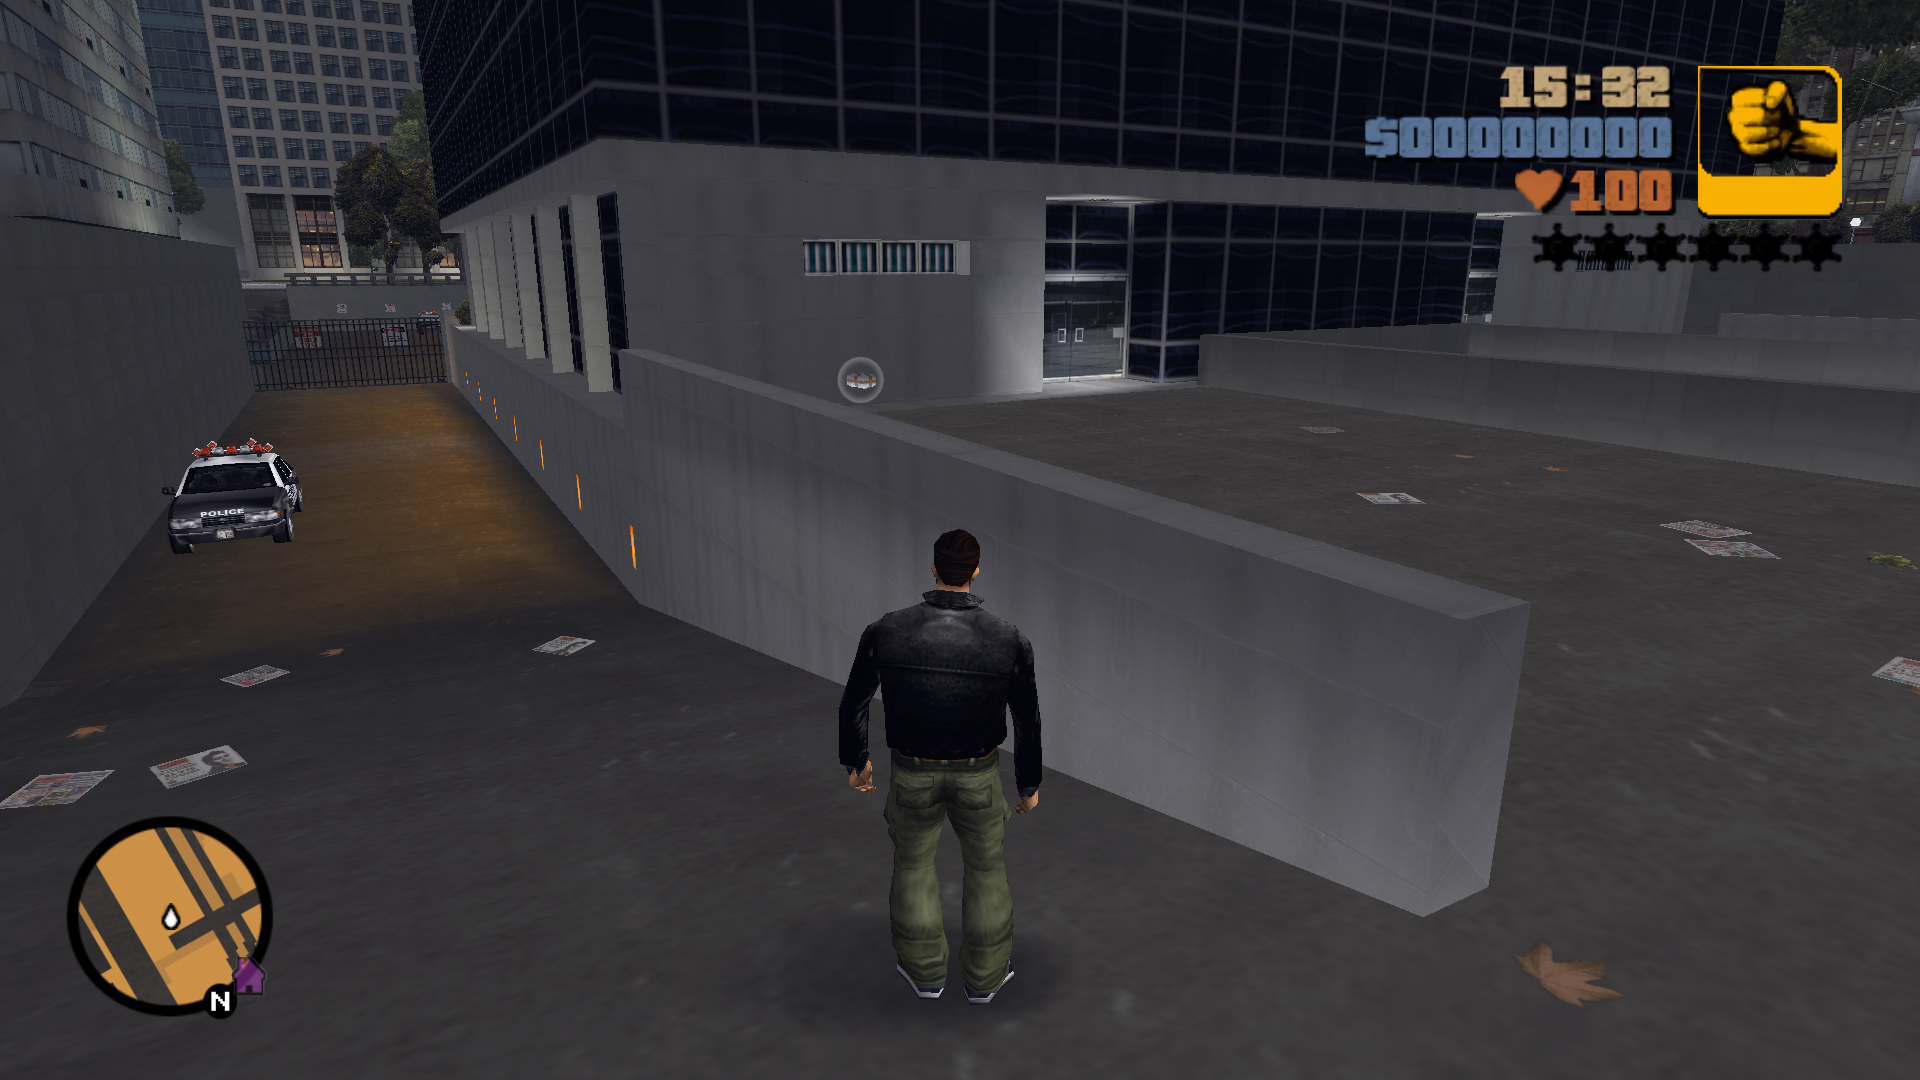
At the back of the Police Station, you'll need a Police vehicle to make the gates open or you can jump down from the building's entrance platform.
54
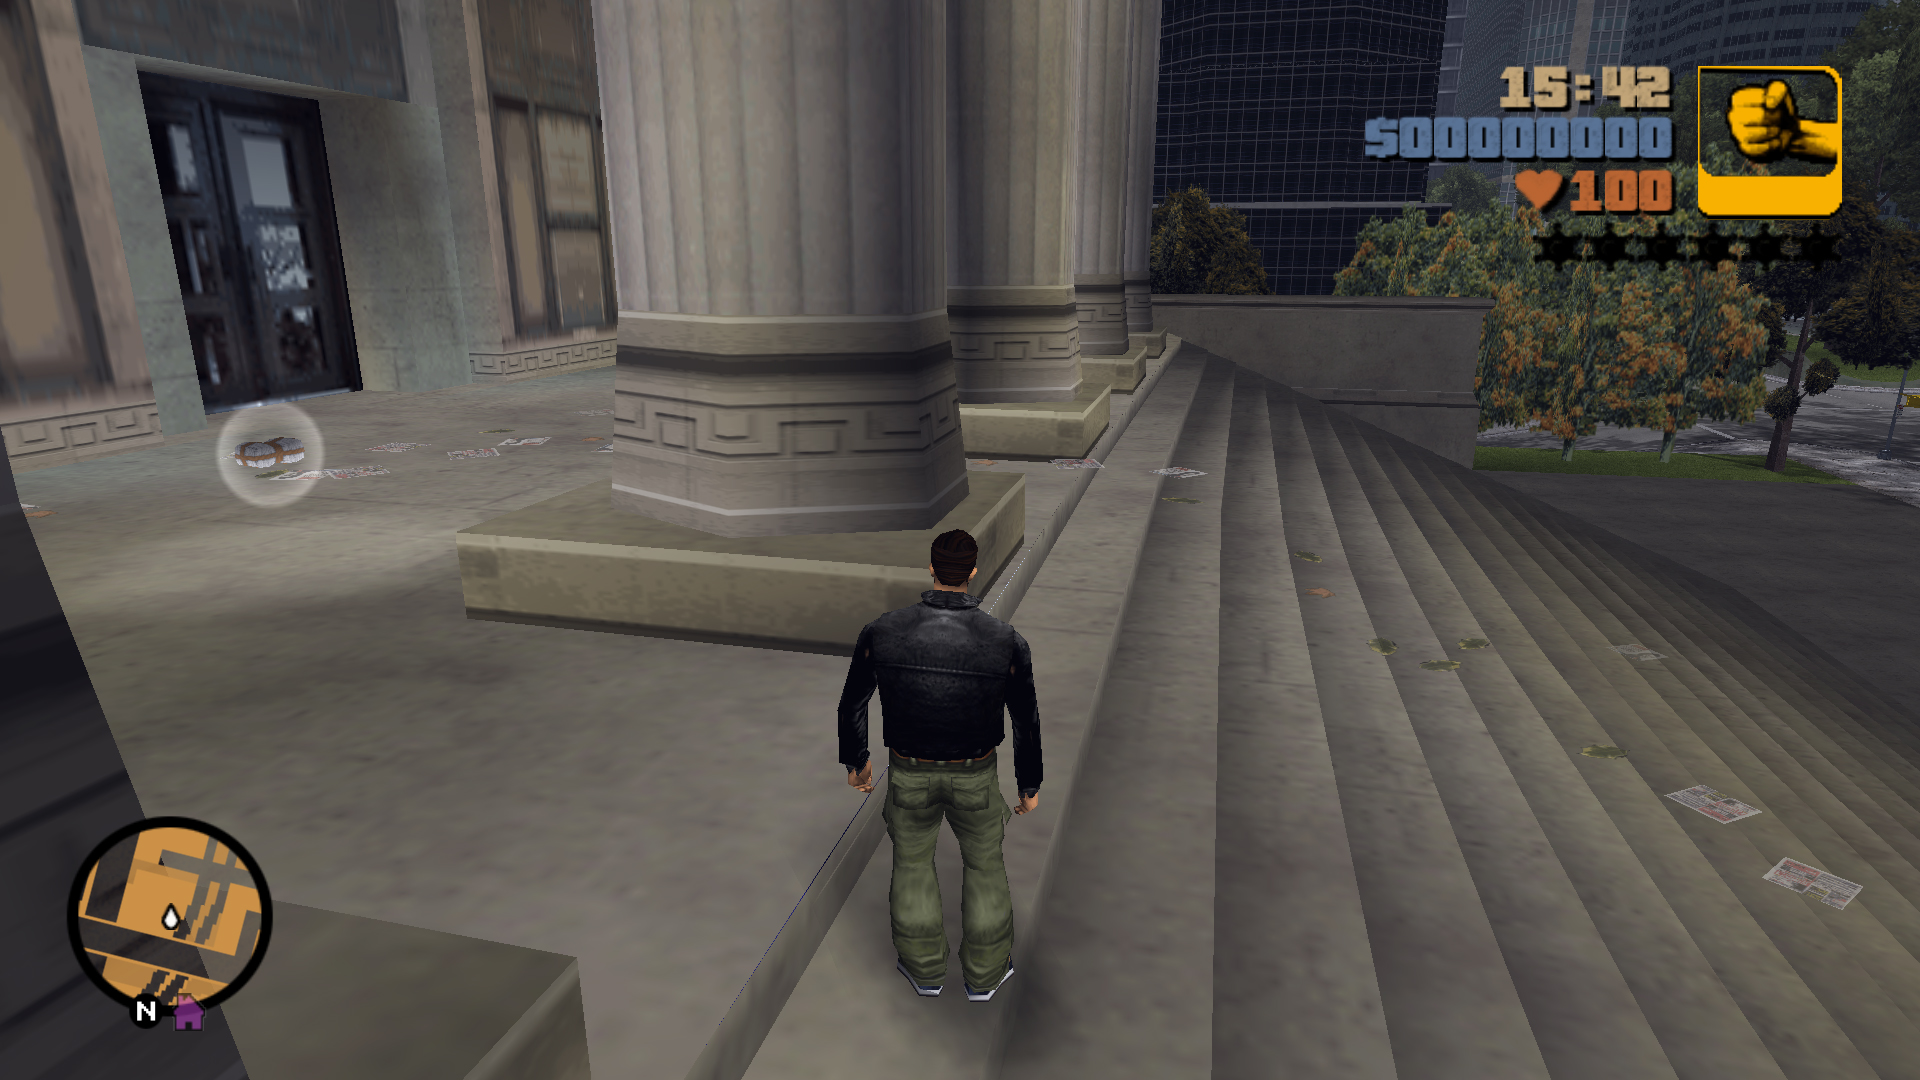
At the City Hall, up the stairs, behind the columns.
55
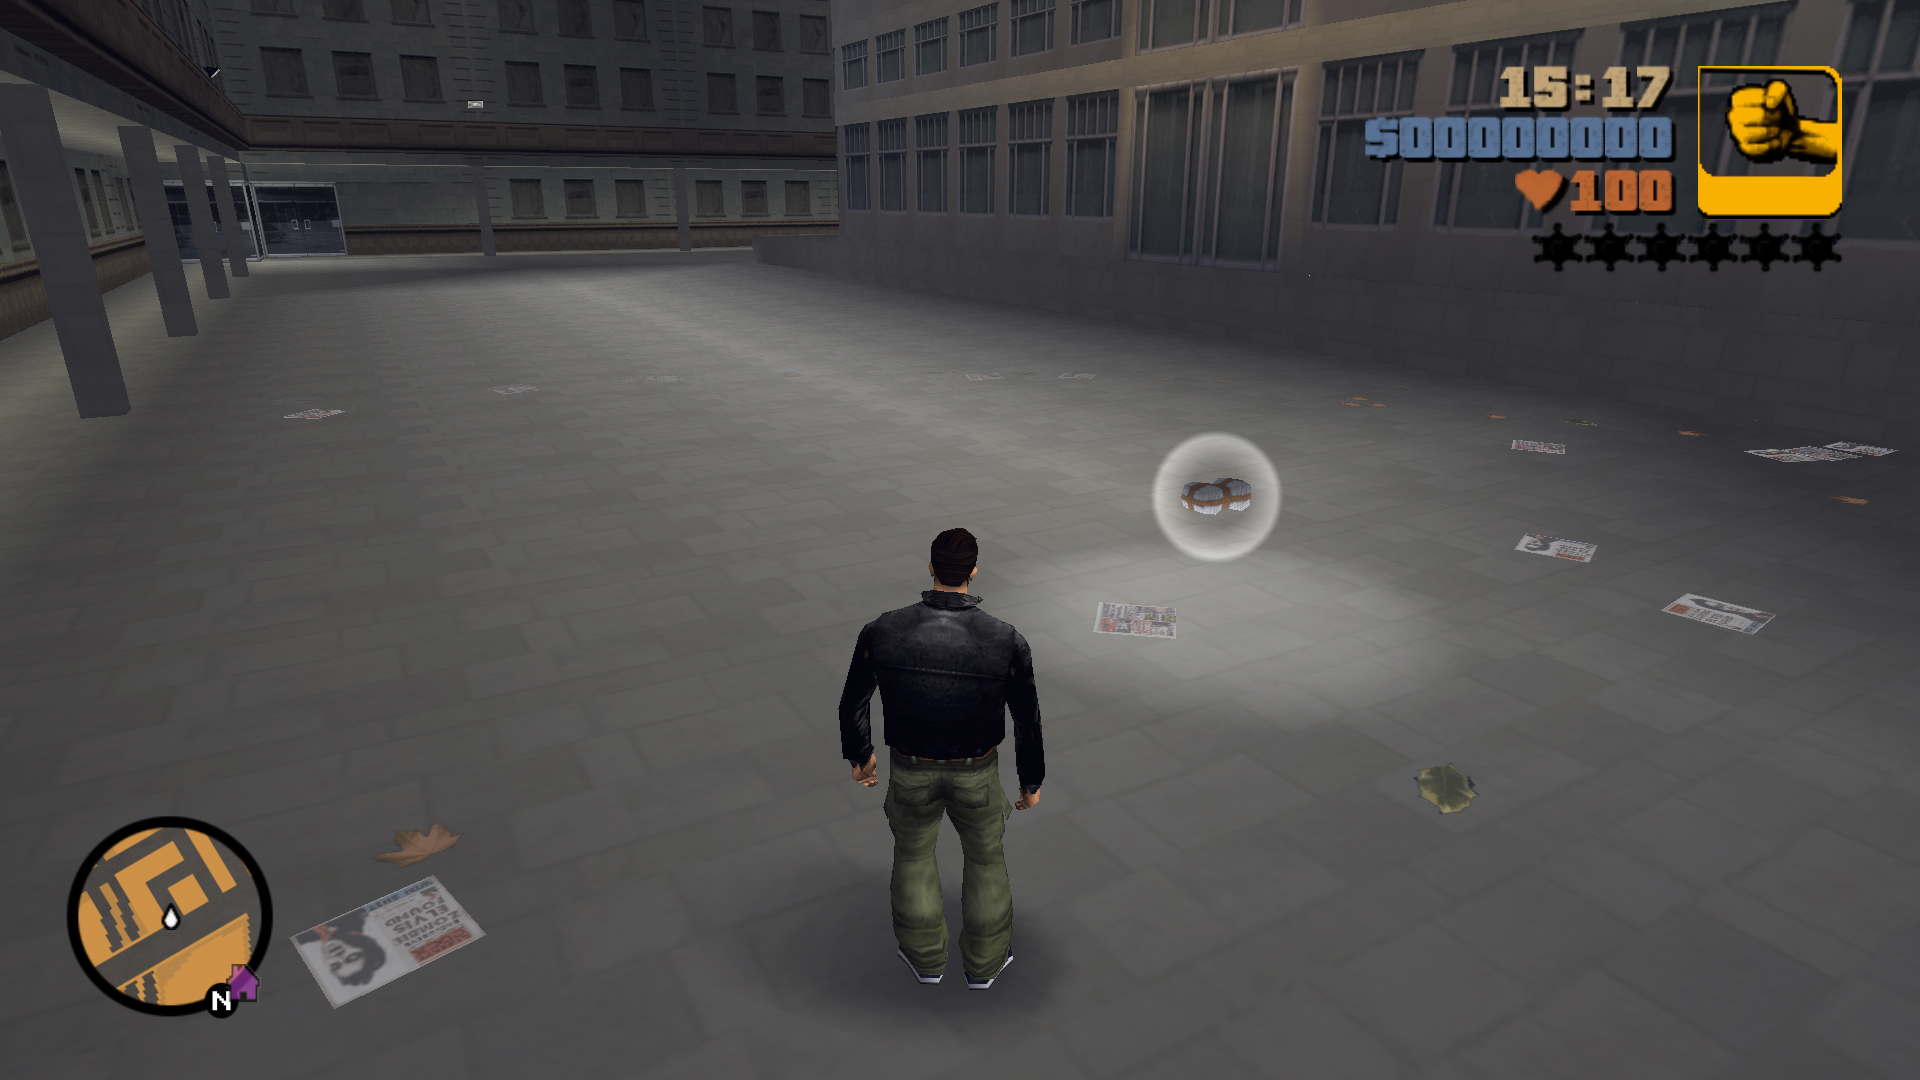
At the end of an alley next to the Portland Bridge wall.
56
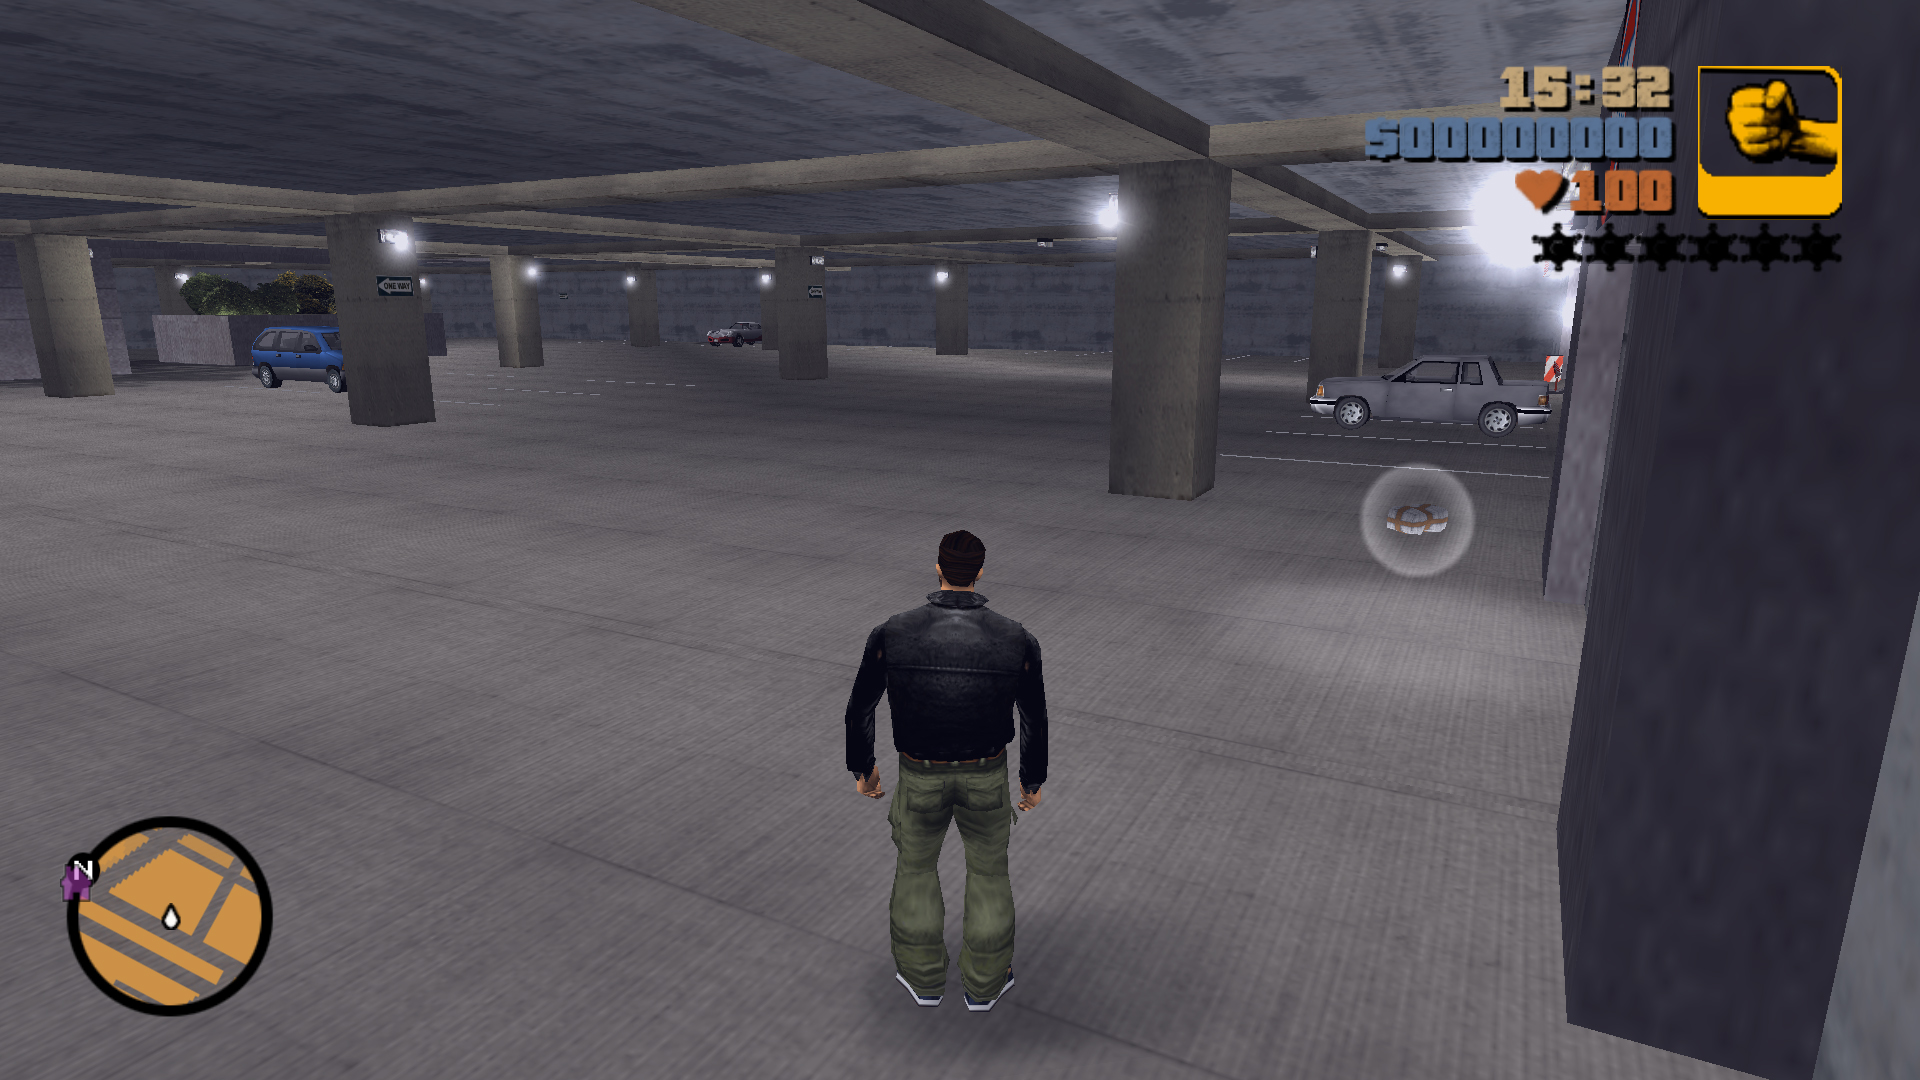
In the underground parking lot below the AM building, next to an elevator. The parking lot entrances are in the front and back of the building.
57
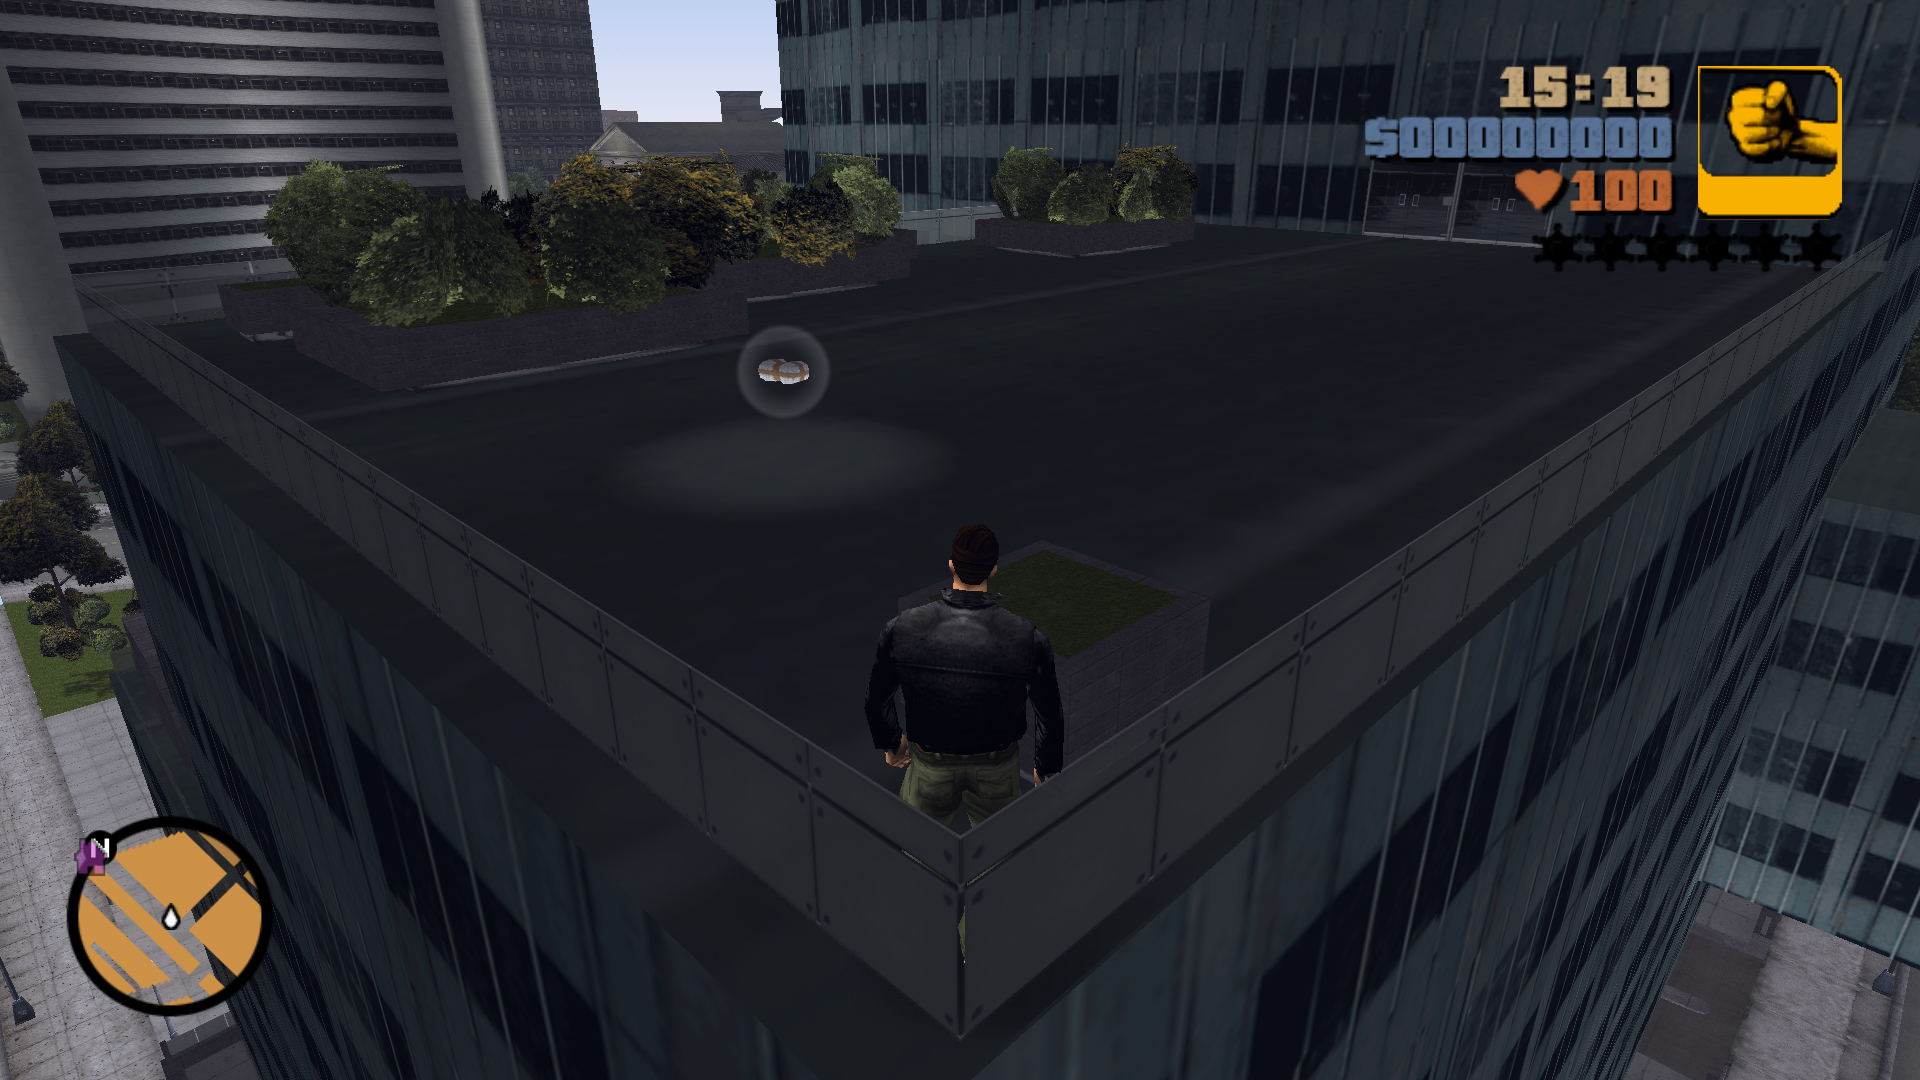
On the roof at the top of the lower section of the AM building, up 3 stairs. The first stairs are at the southwest corner of the building on a short platform with glass railings.
58
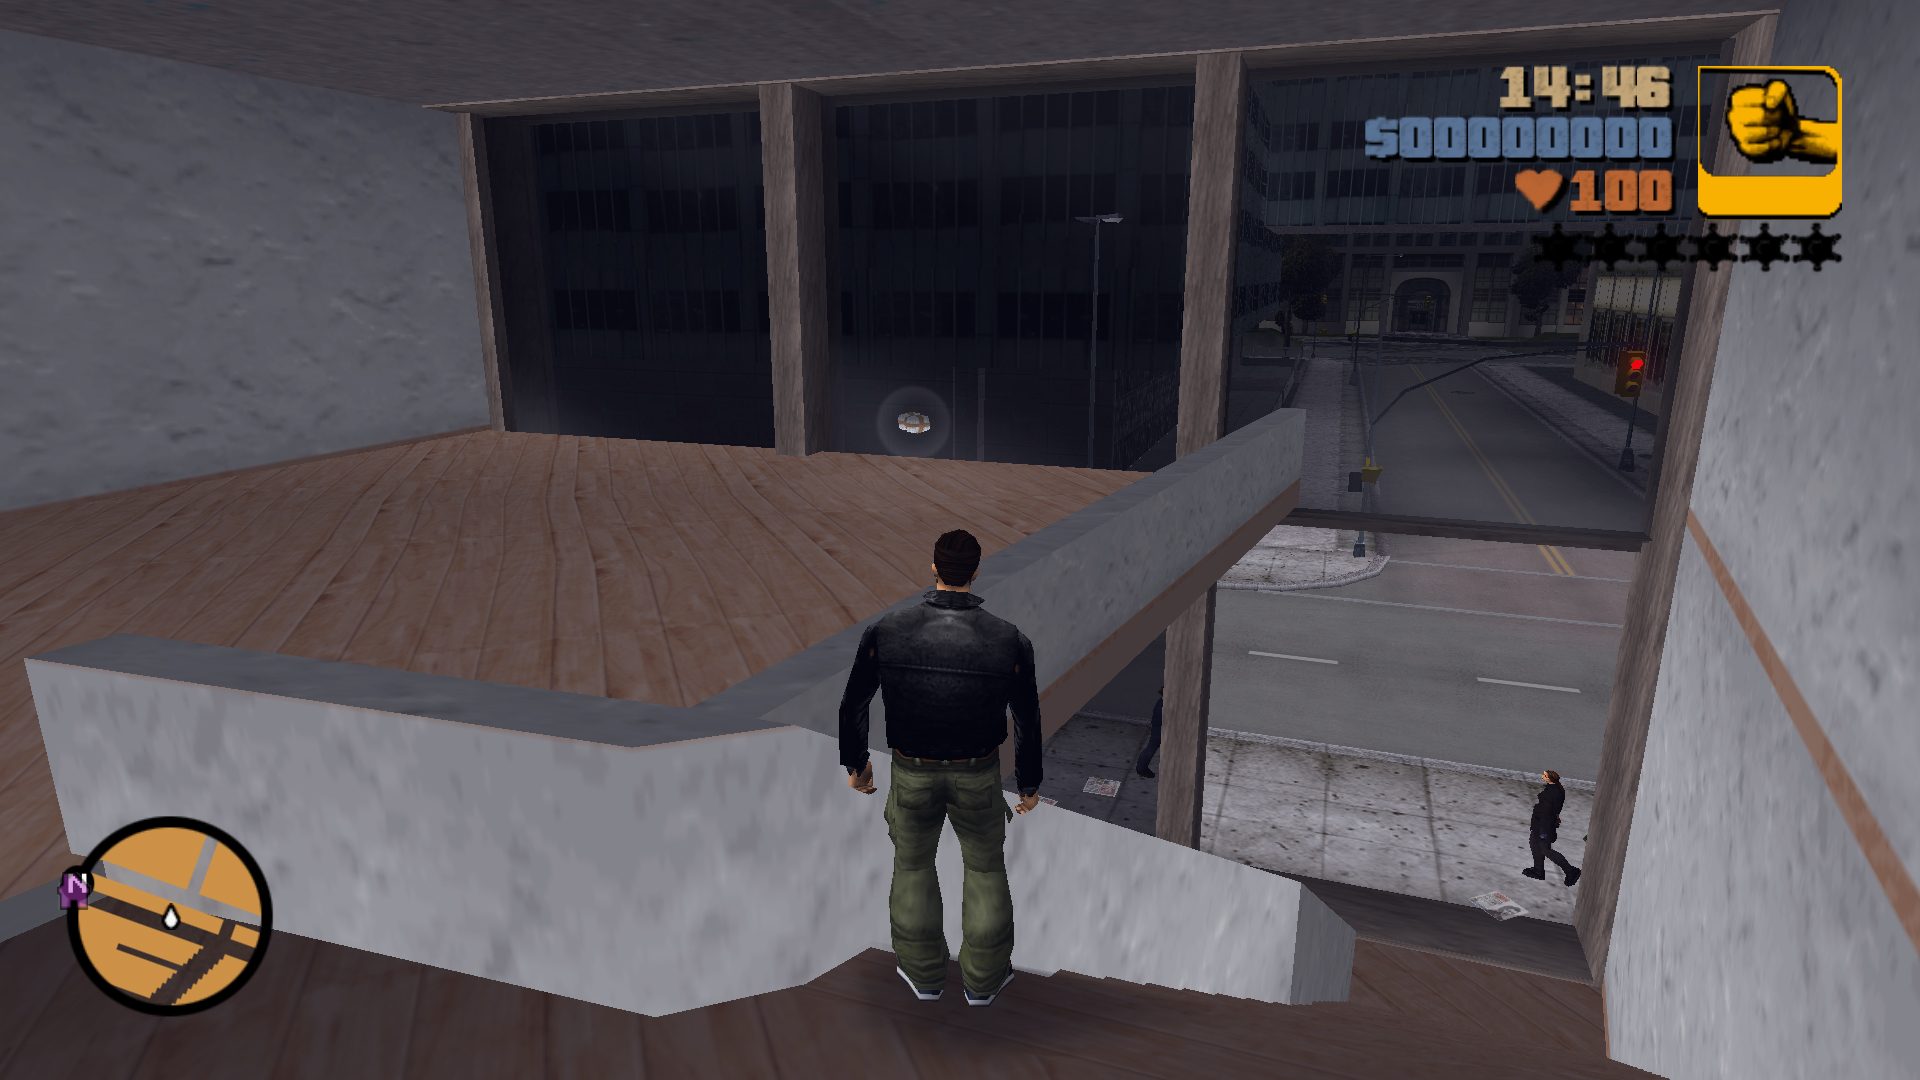
On the 2nd floor of an empty building covered by glass, southwest of the AM building. Break the glass to get in.
59
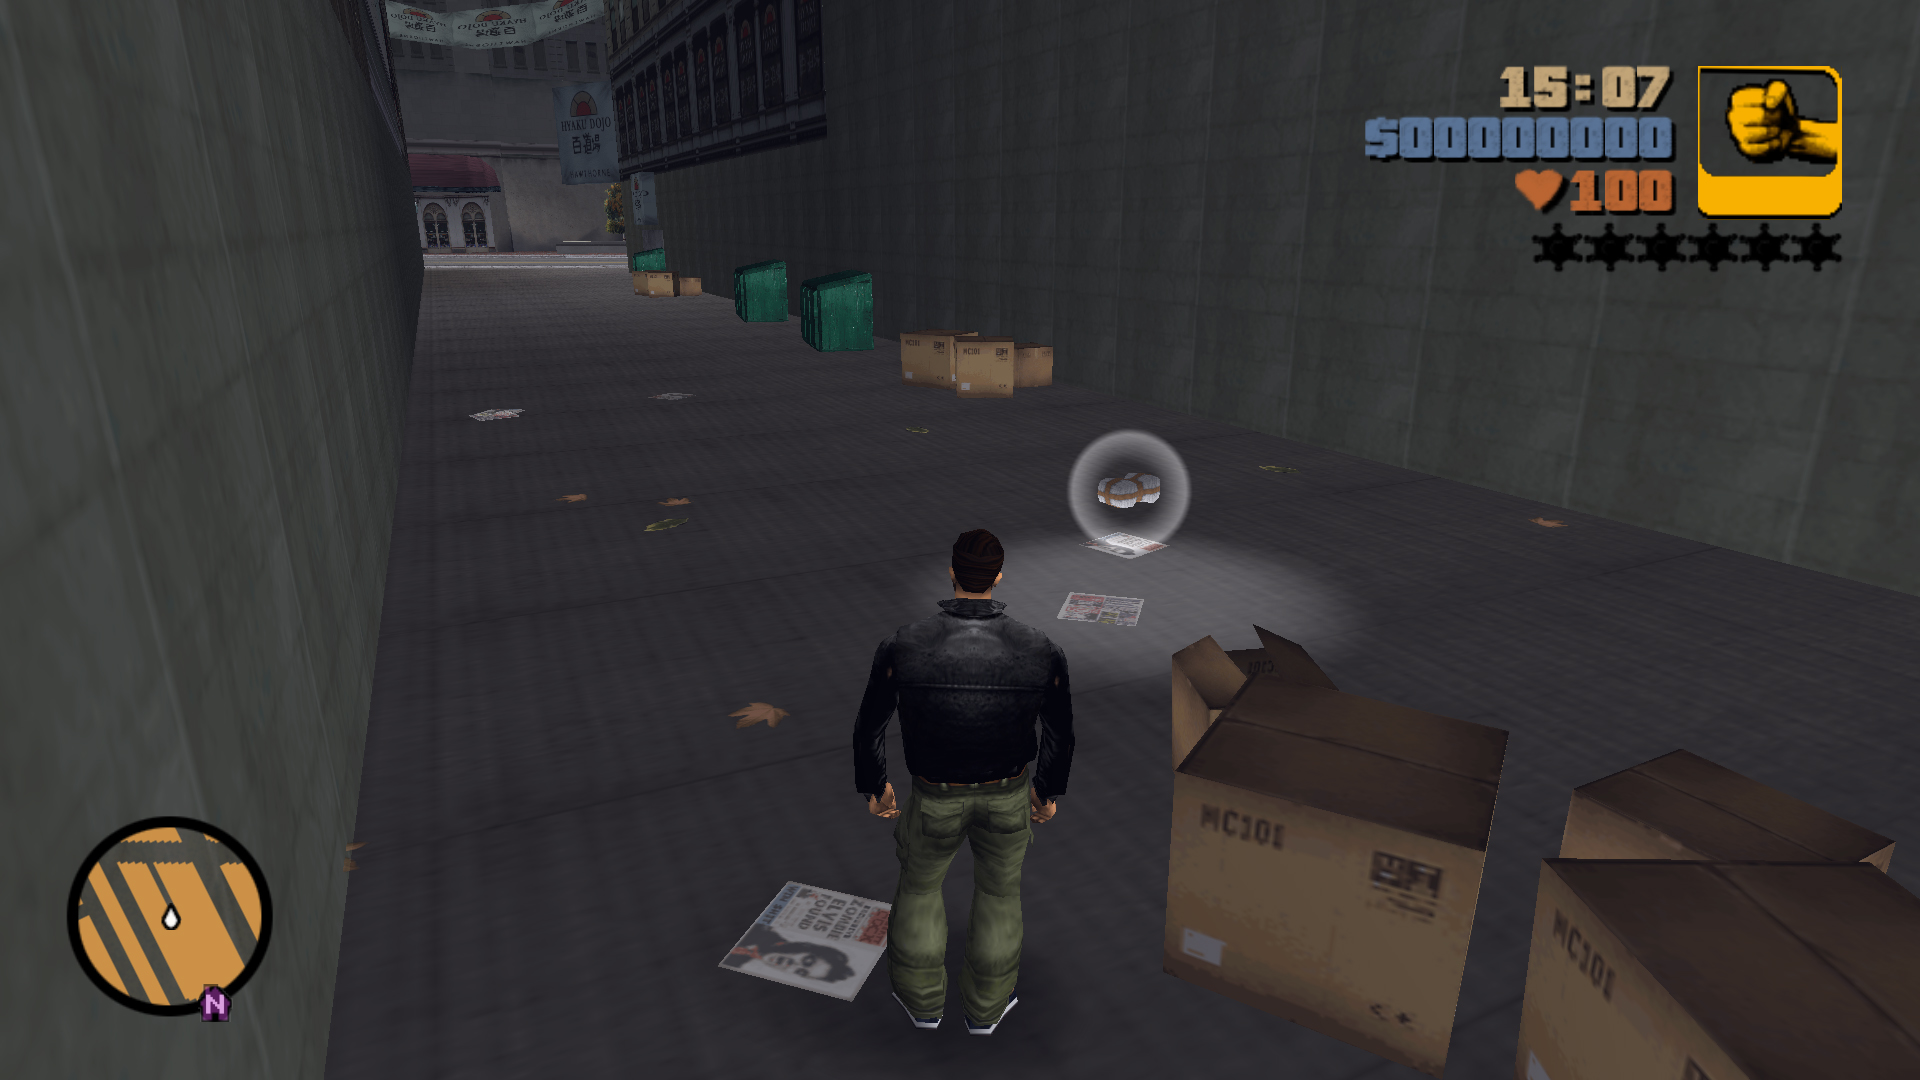
At the end of an alley with a dojo.
60
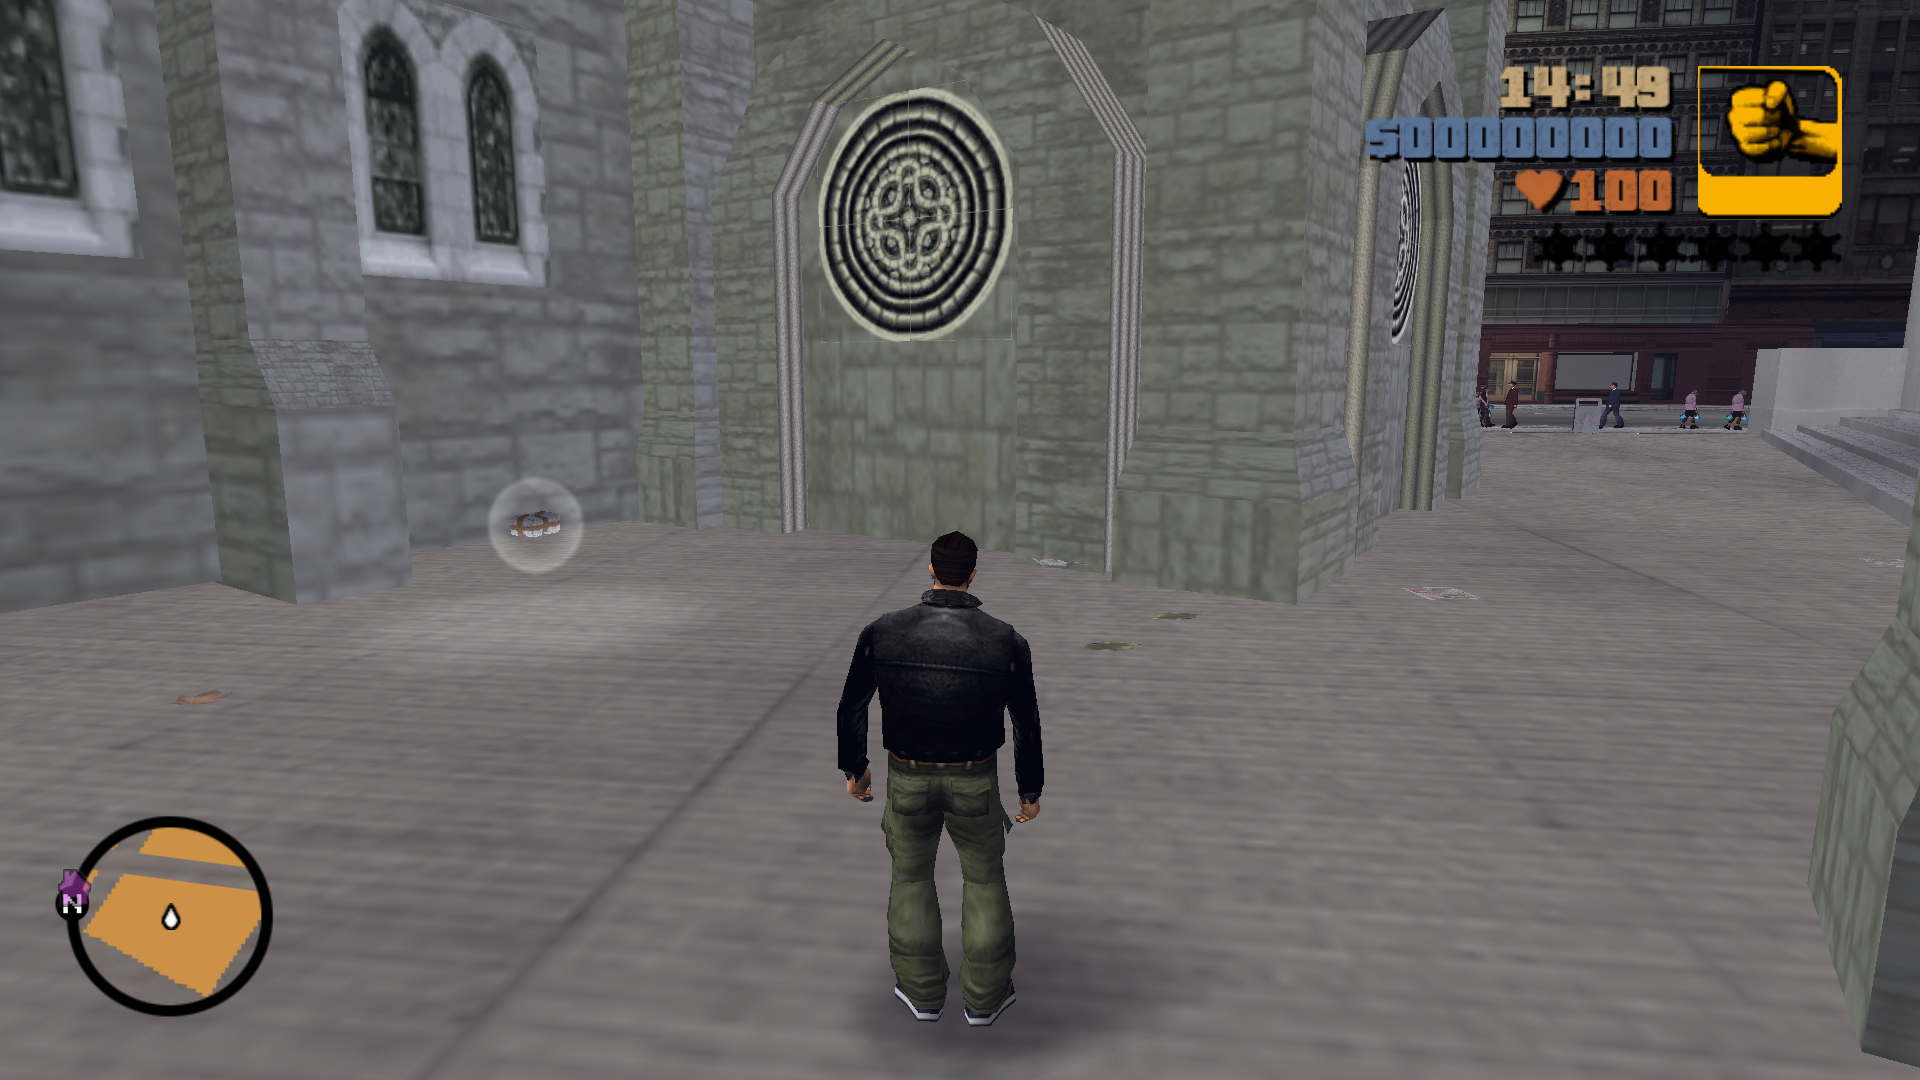
In a nook at the southeast corner of the Cathedral.
61
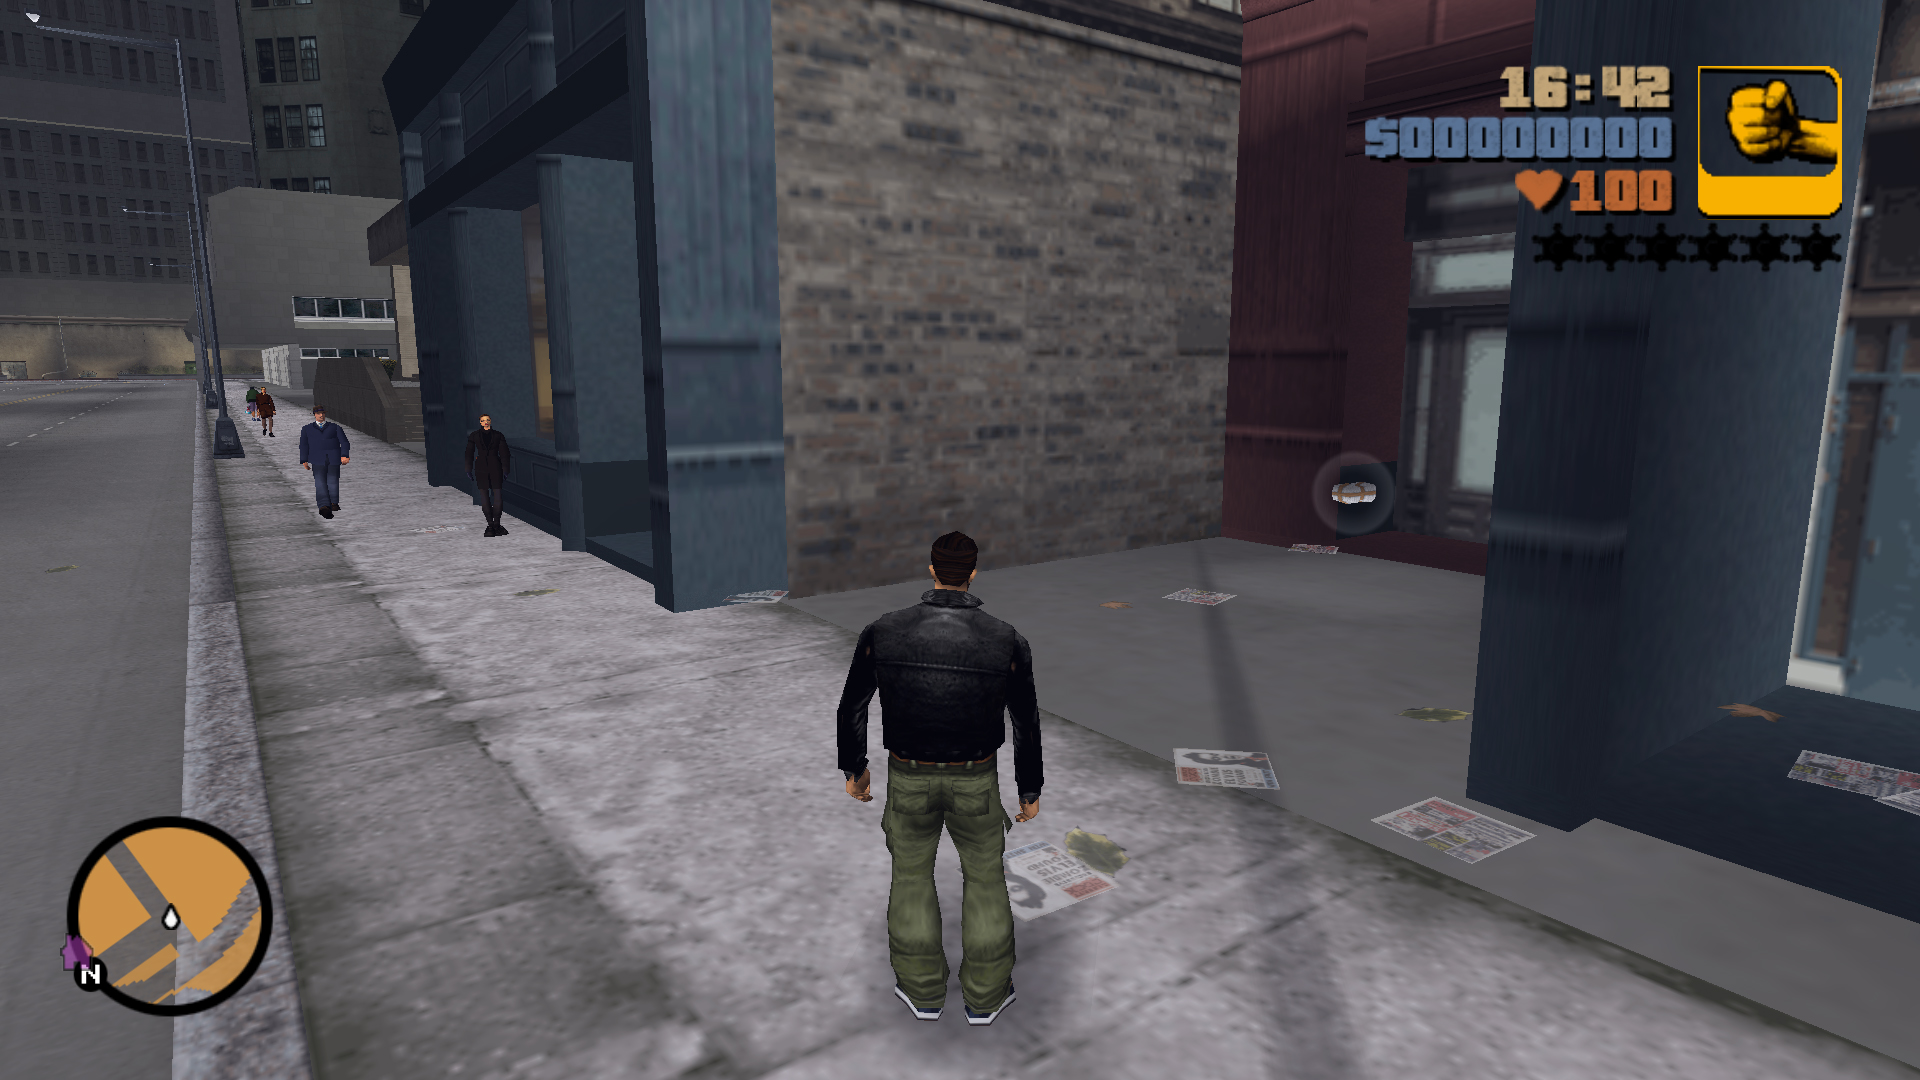
In a small niche between the stores.
62
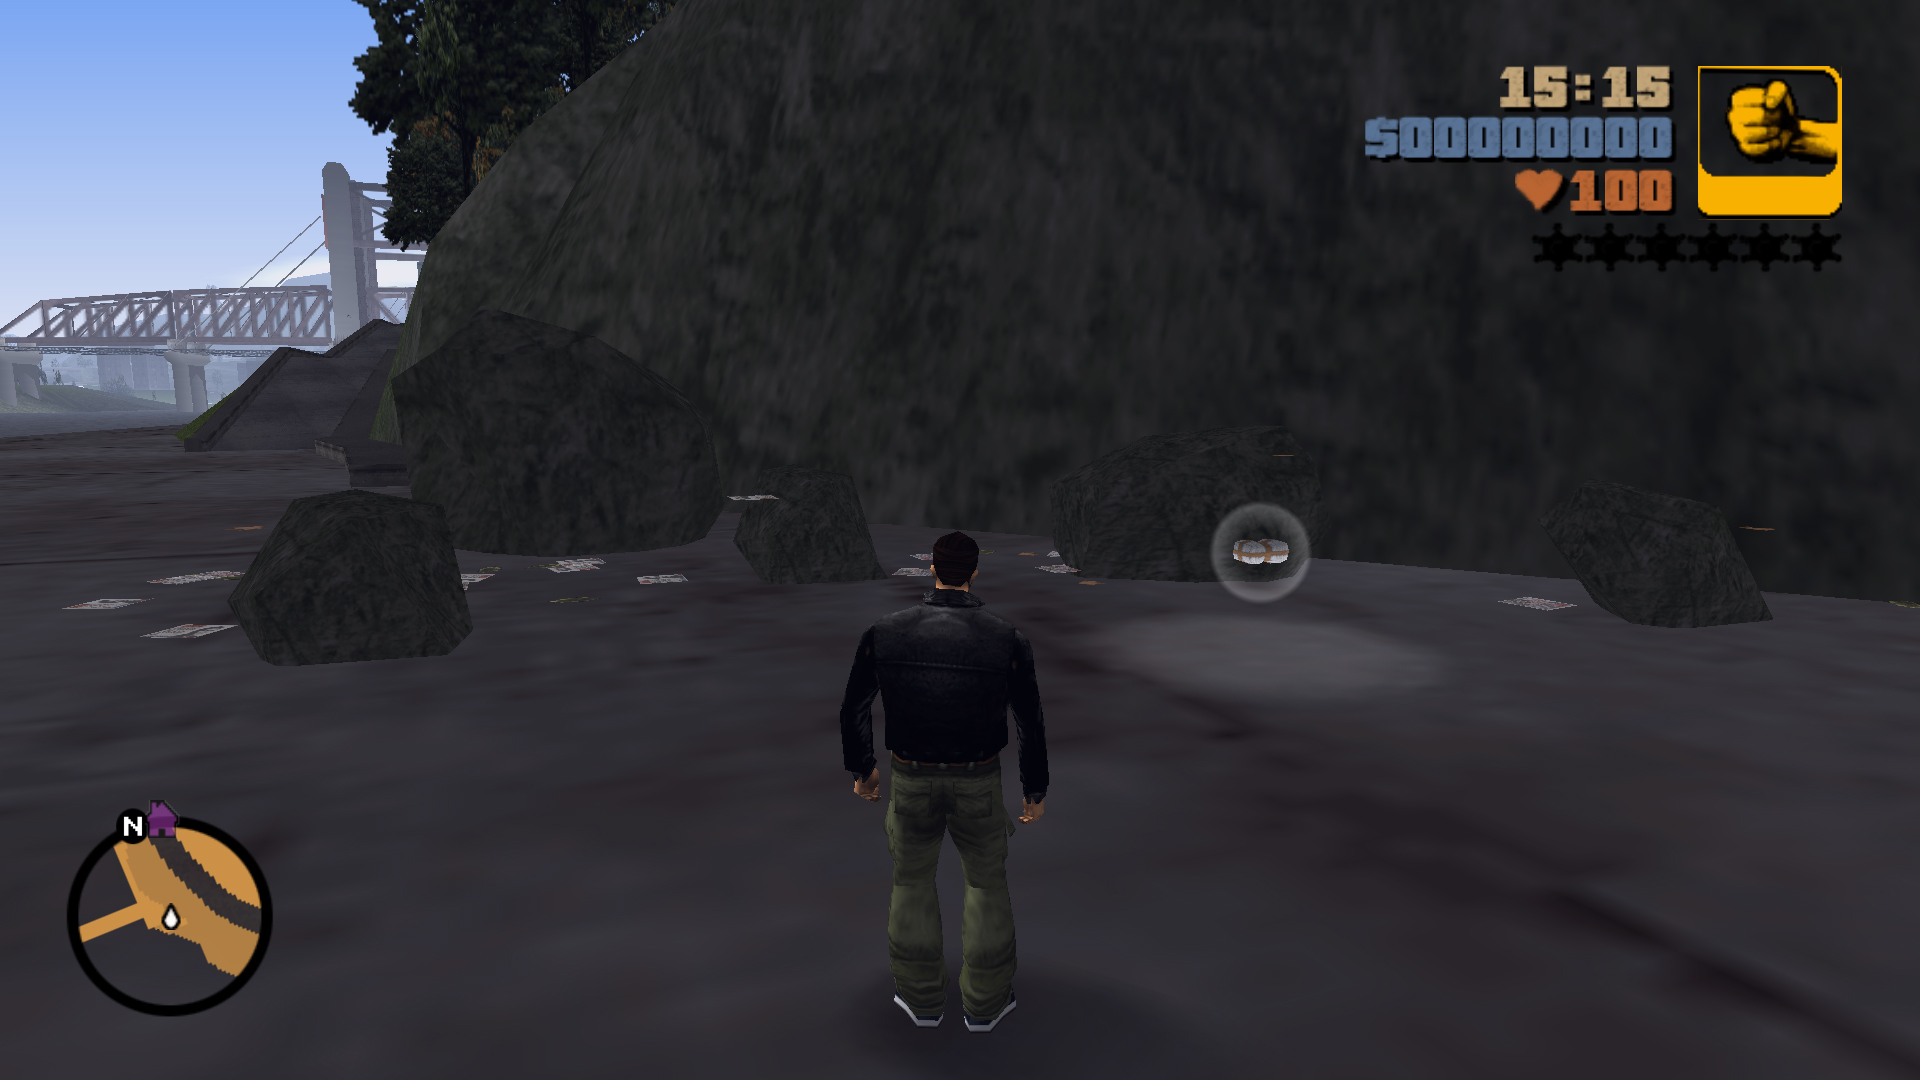
Behind some rocks down at the fallen dock.
63
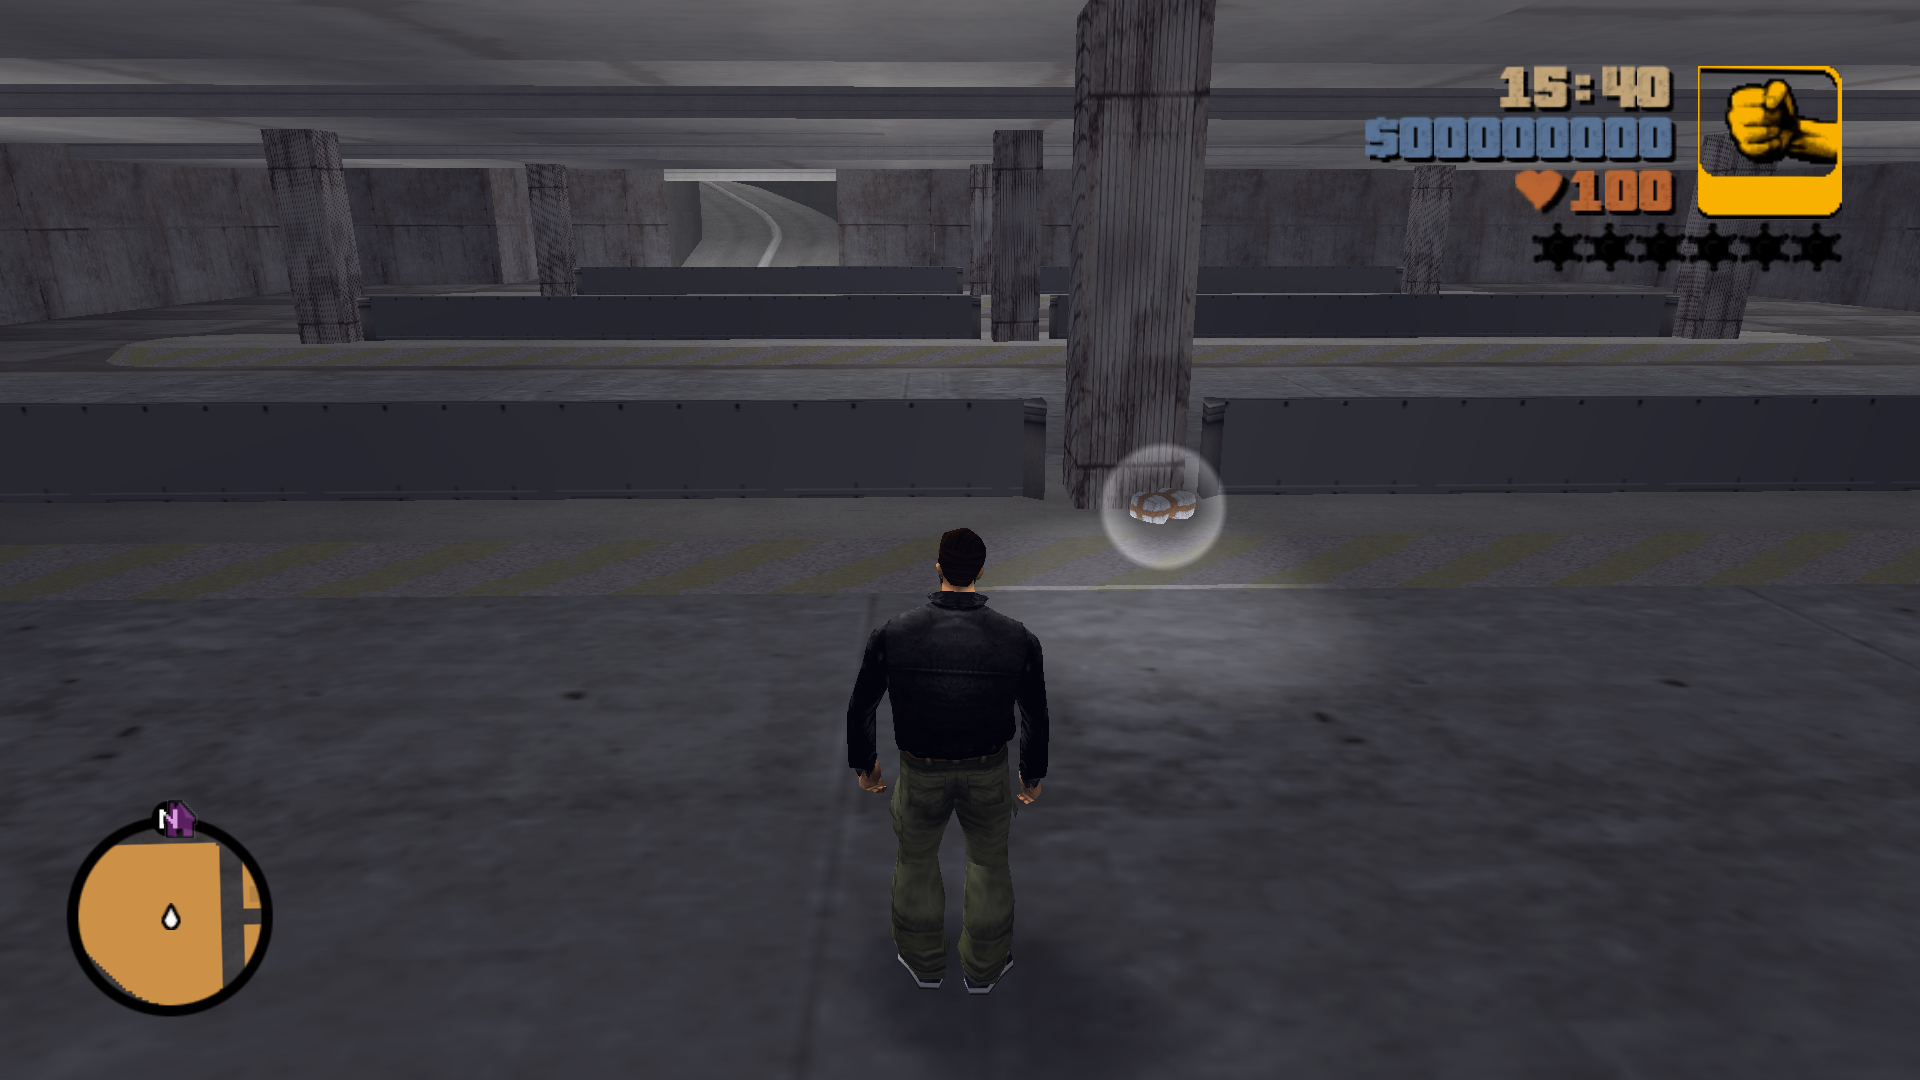
At the back of the underground parking lot, the entrance is in an alley to the left of the brown building with stairs.
64
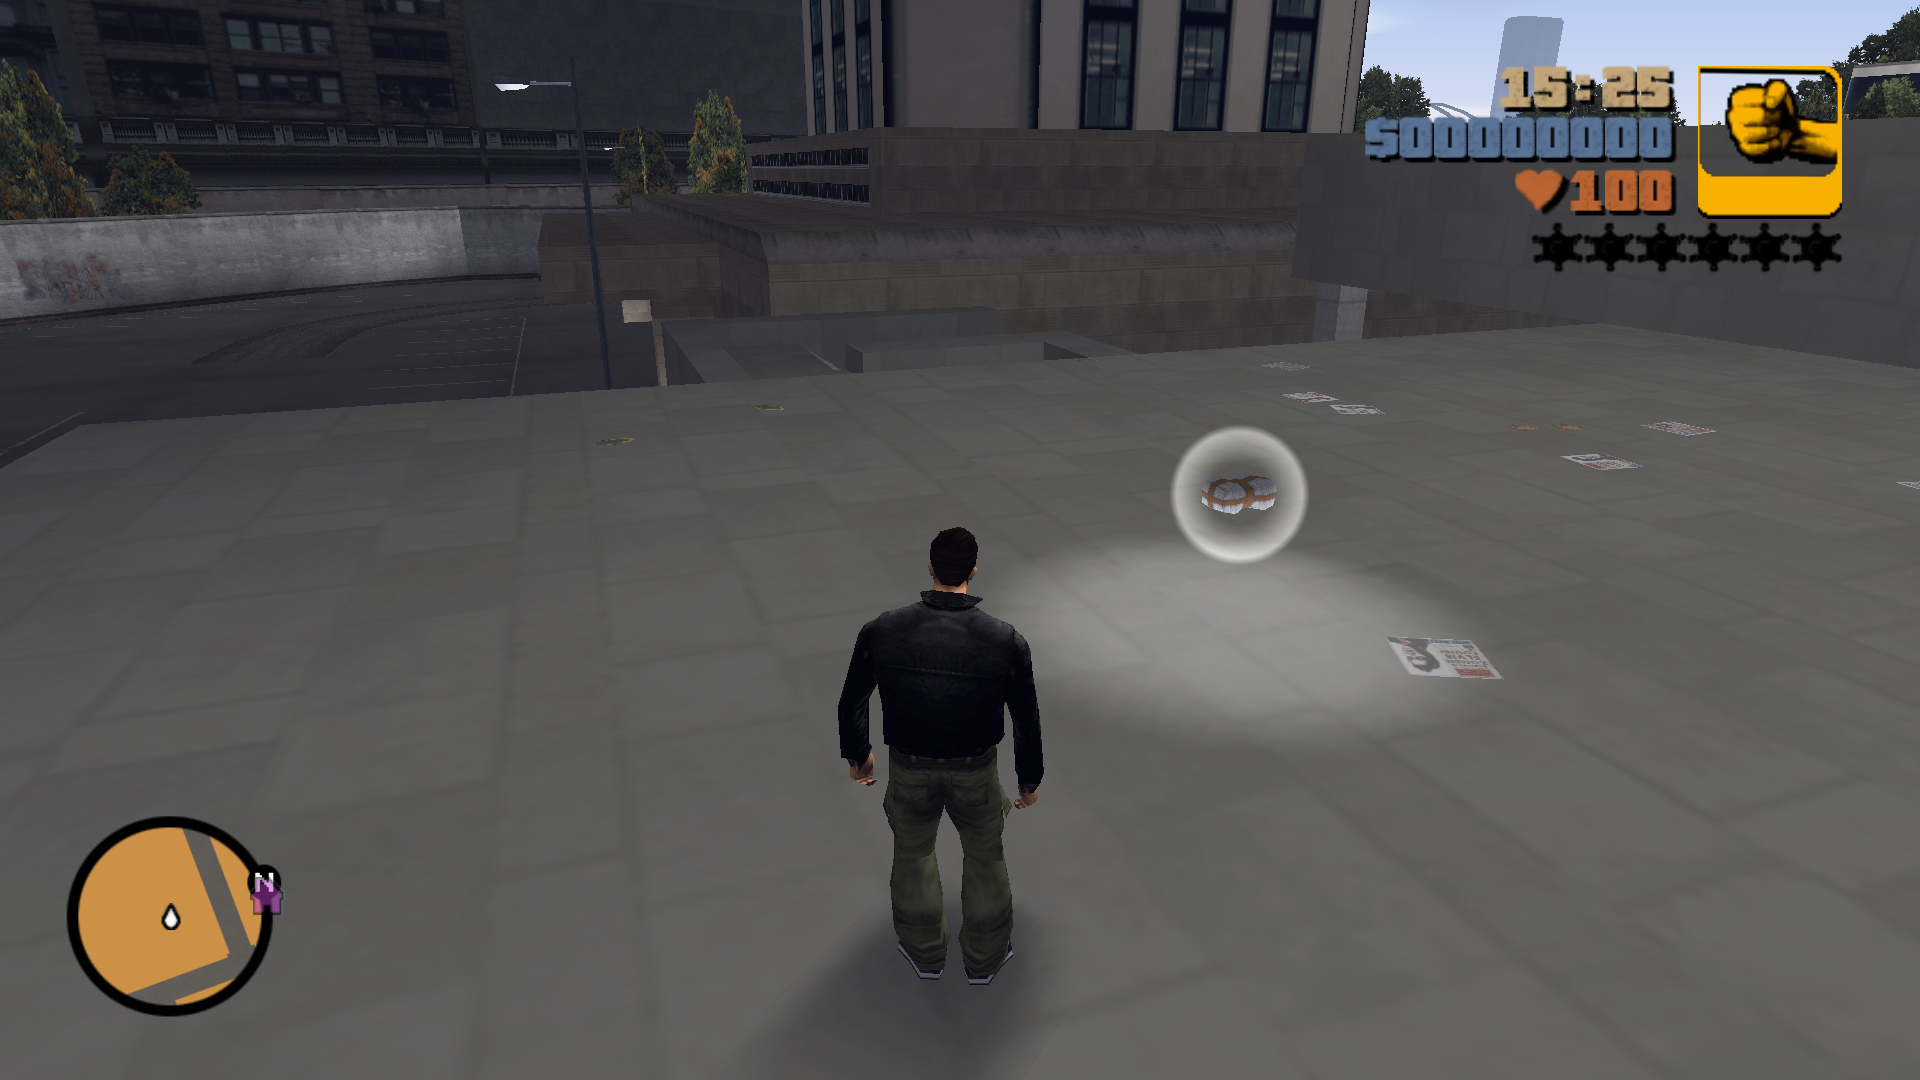
On the back roof of the building east of the brown building. At the end of the alley there's stairs that take you up to a platform, hop on the raised edges and jump onto the roof.
65
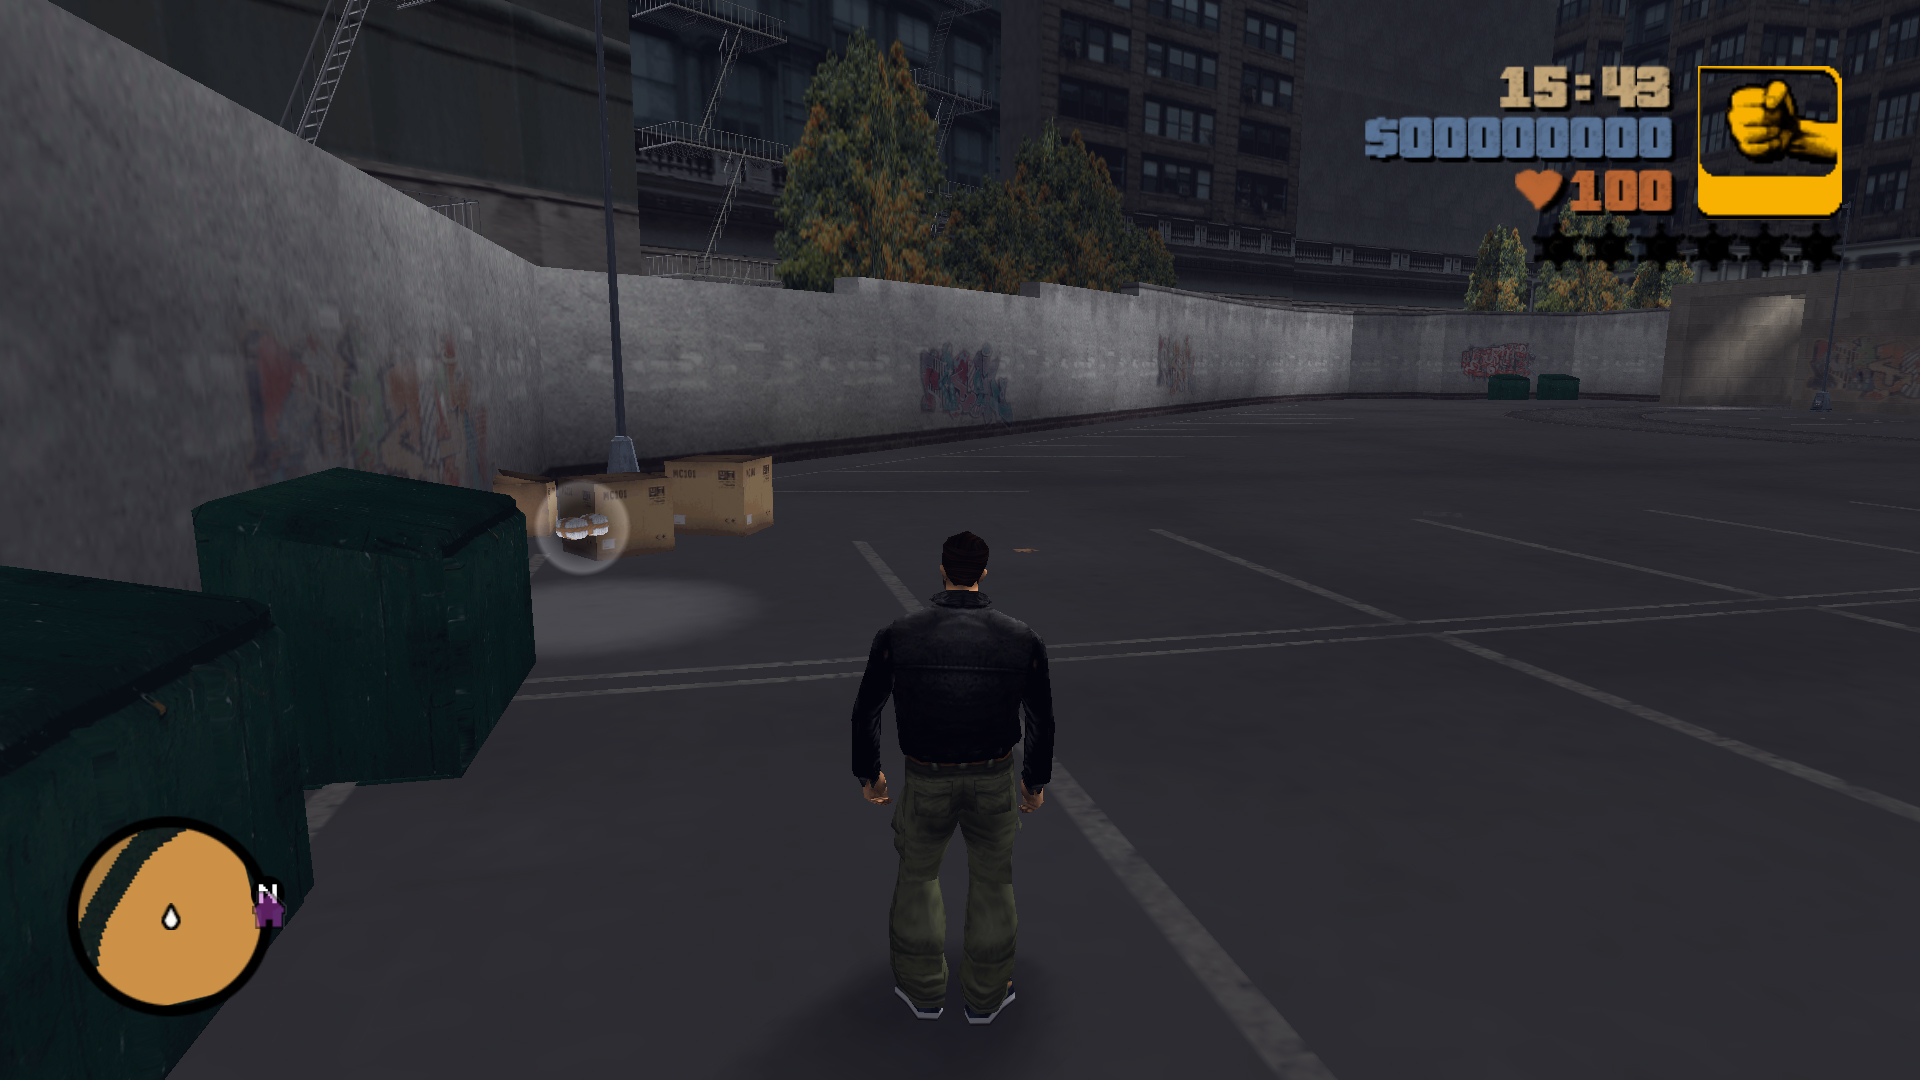
Between a dumpster and some boxes in the aboveground parking lot alleyway in the middle of the block.
66
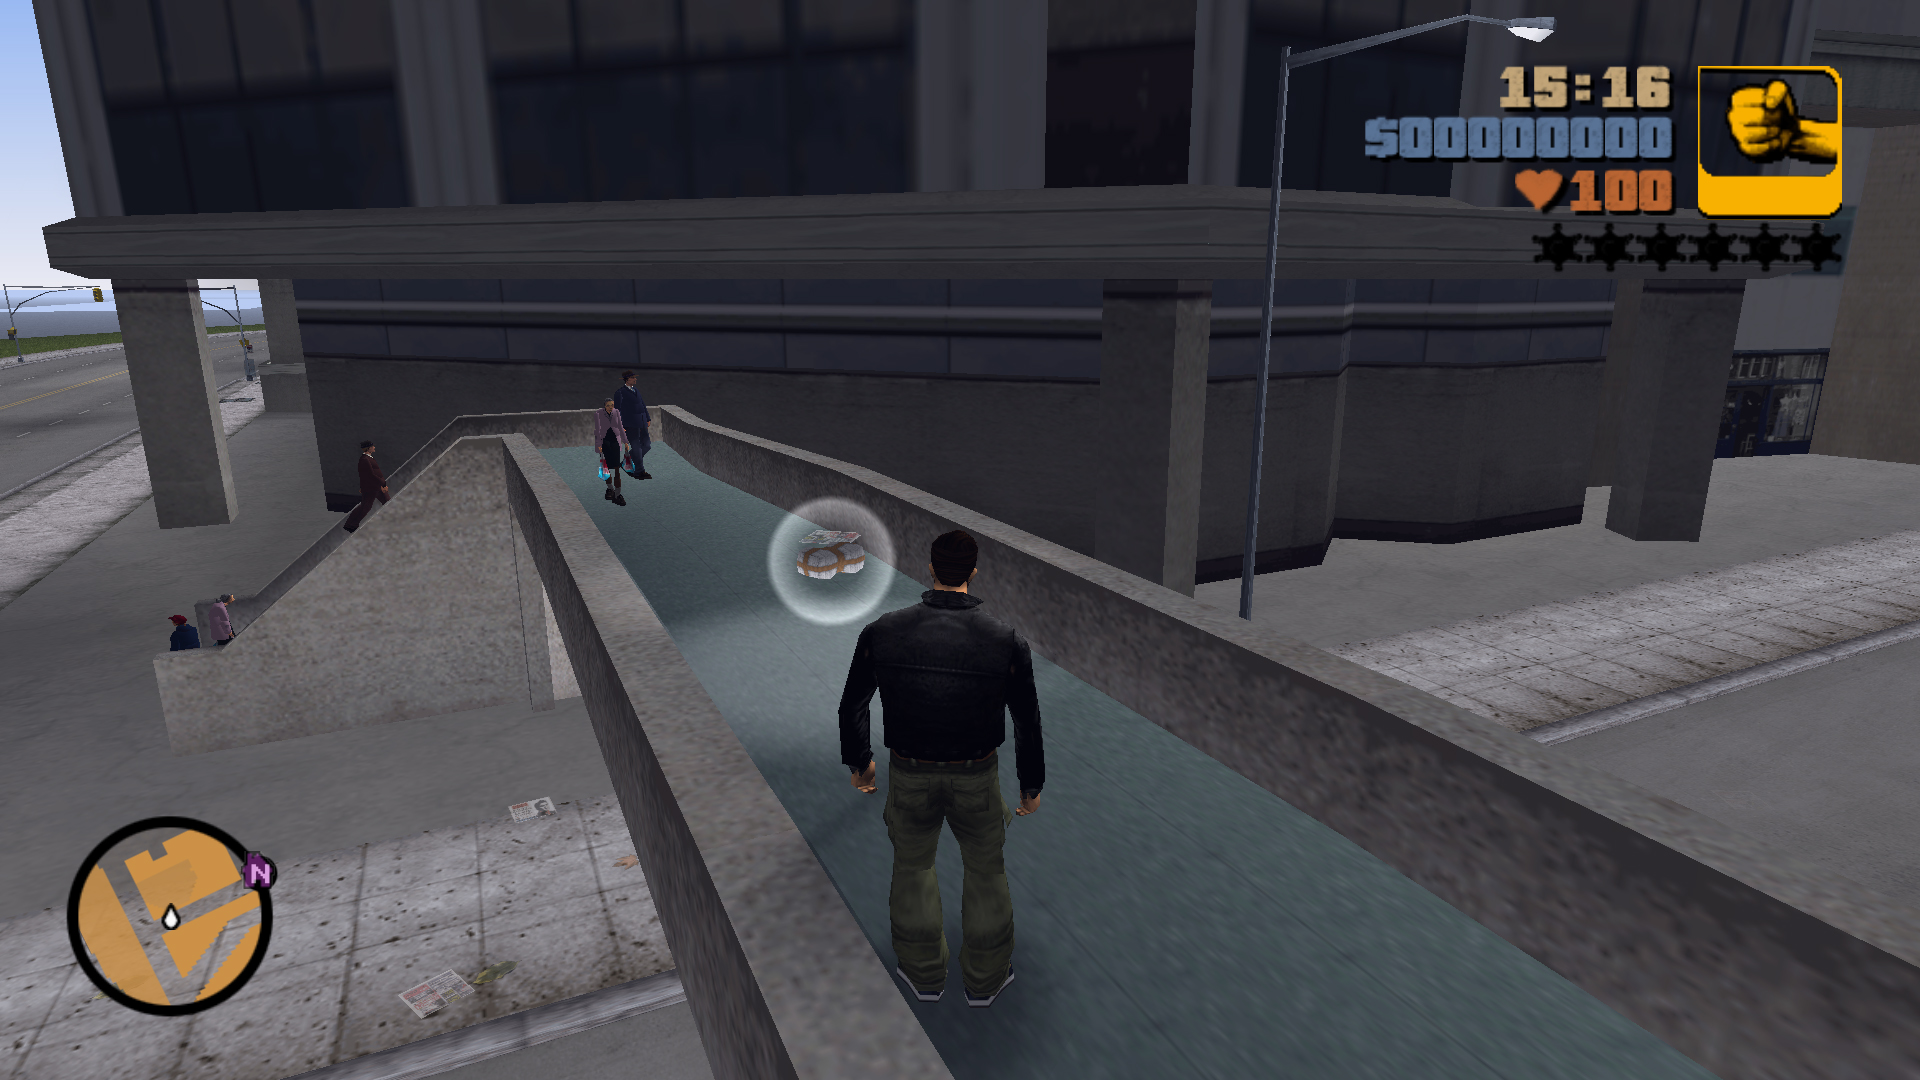
On the pedestrian overpass.
67
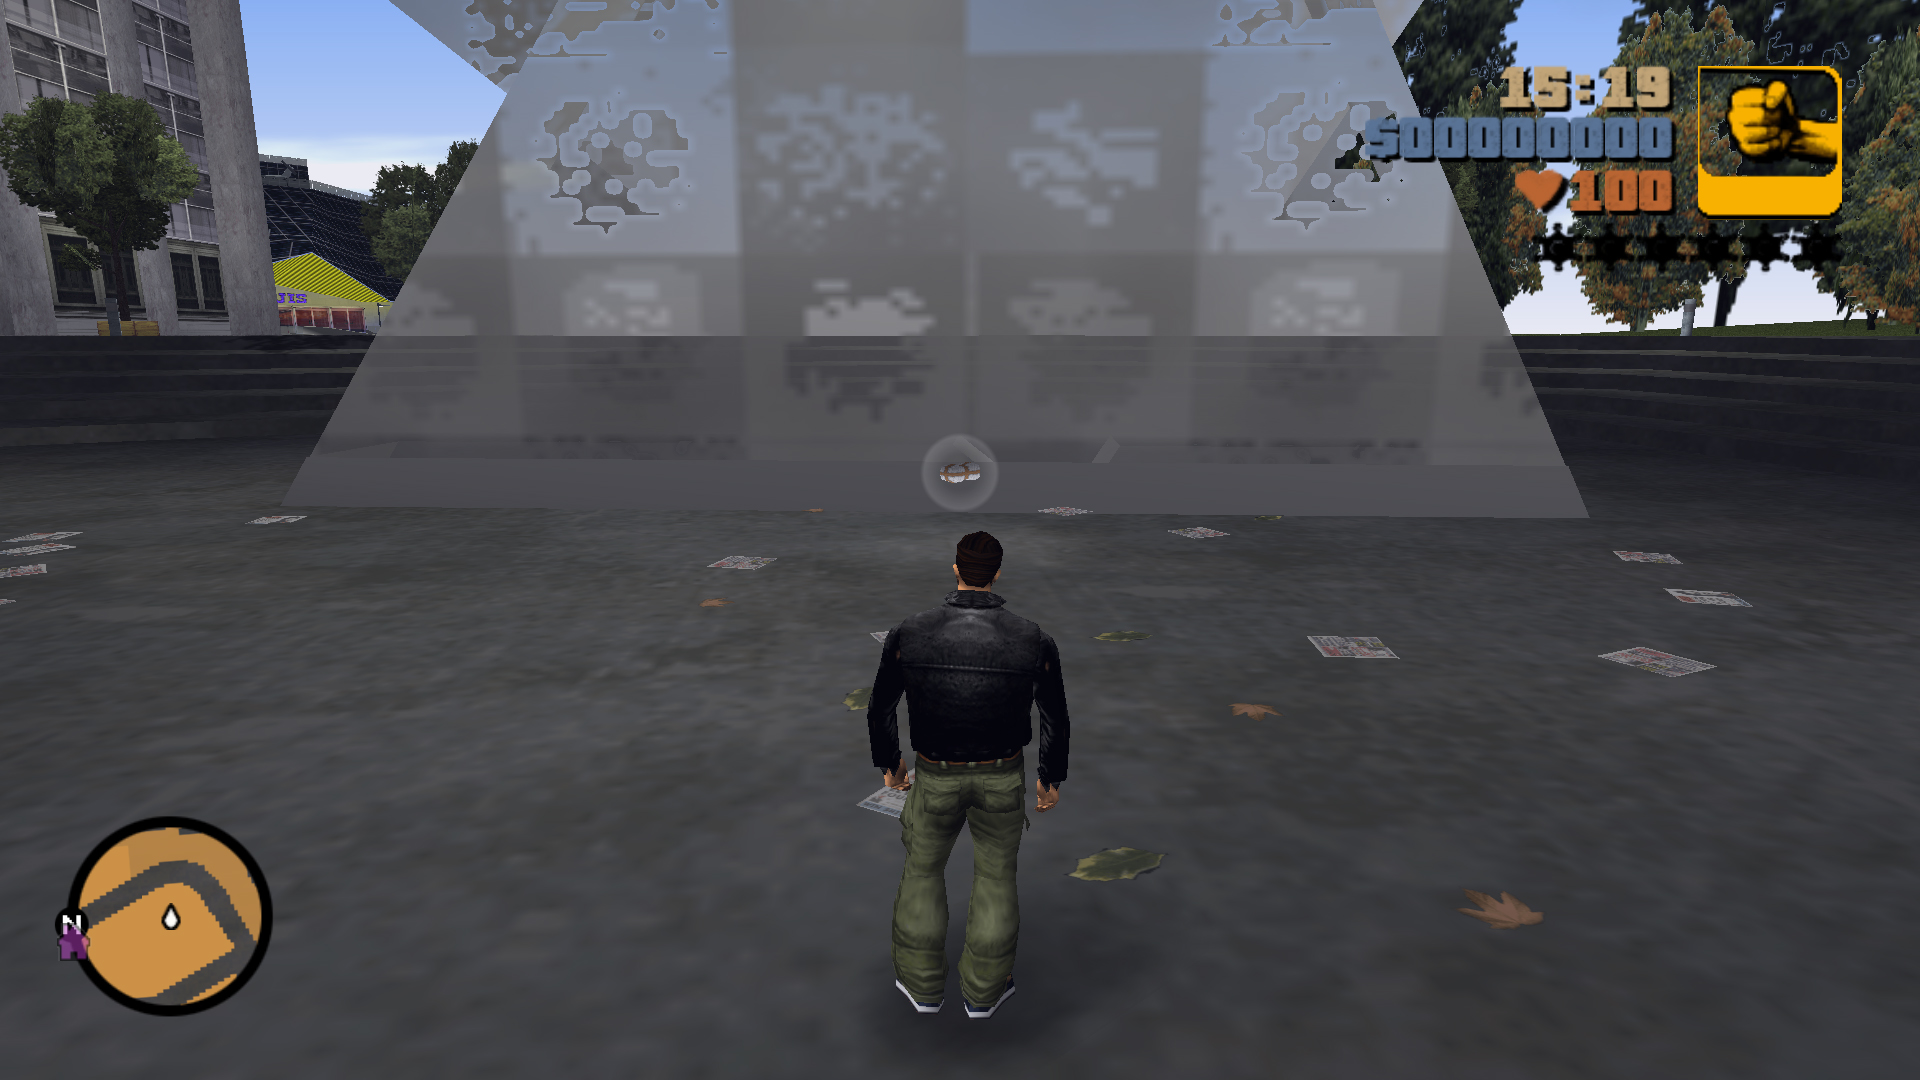
Behind the star sculpture.
68
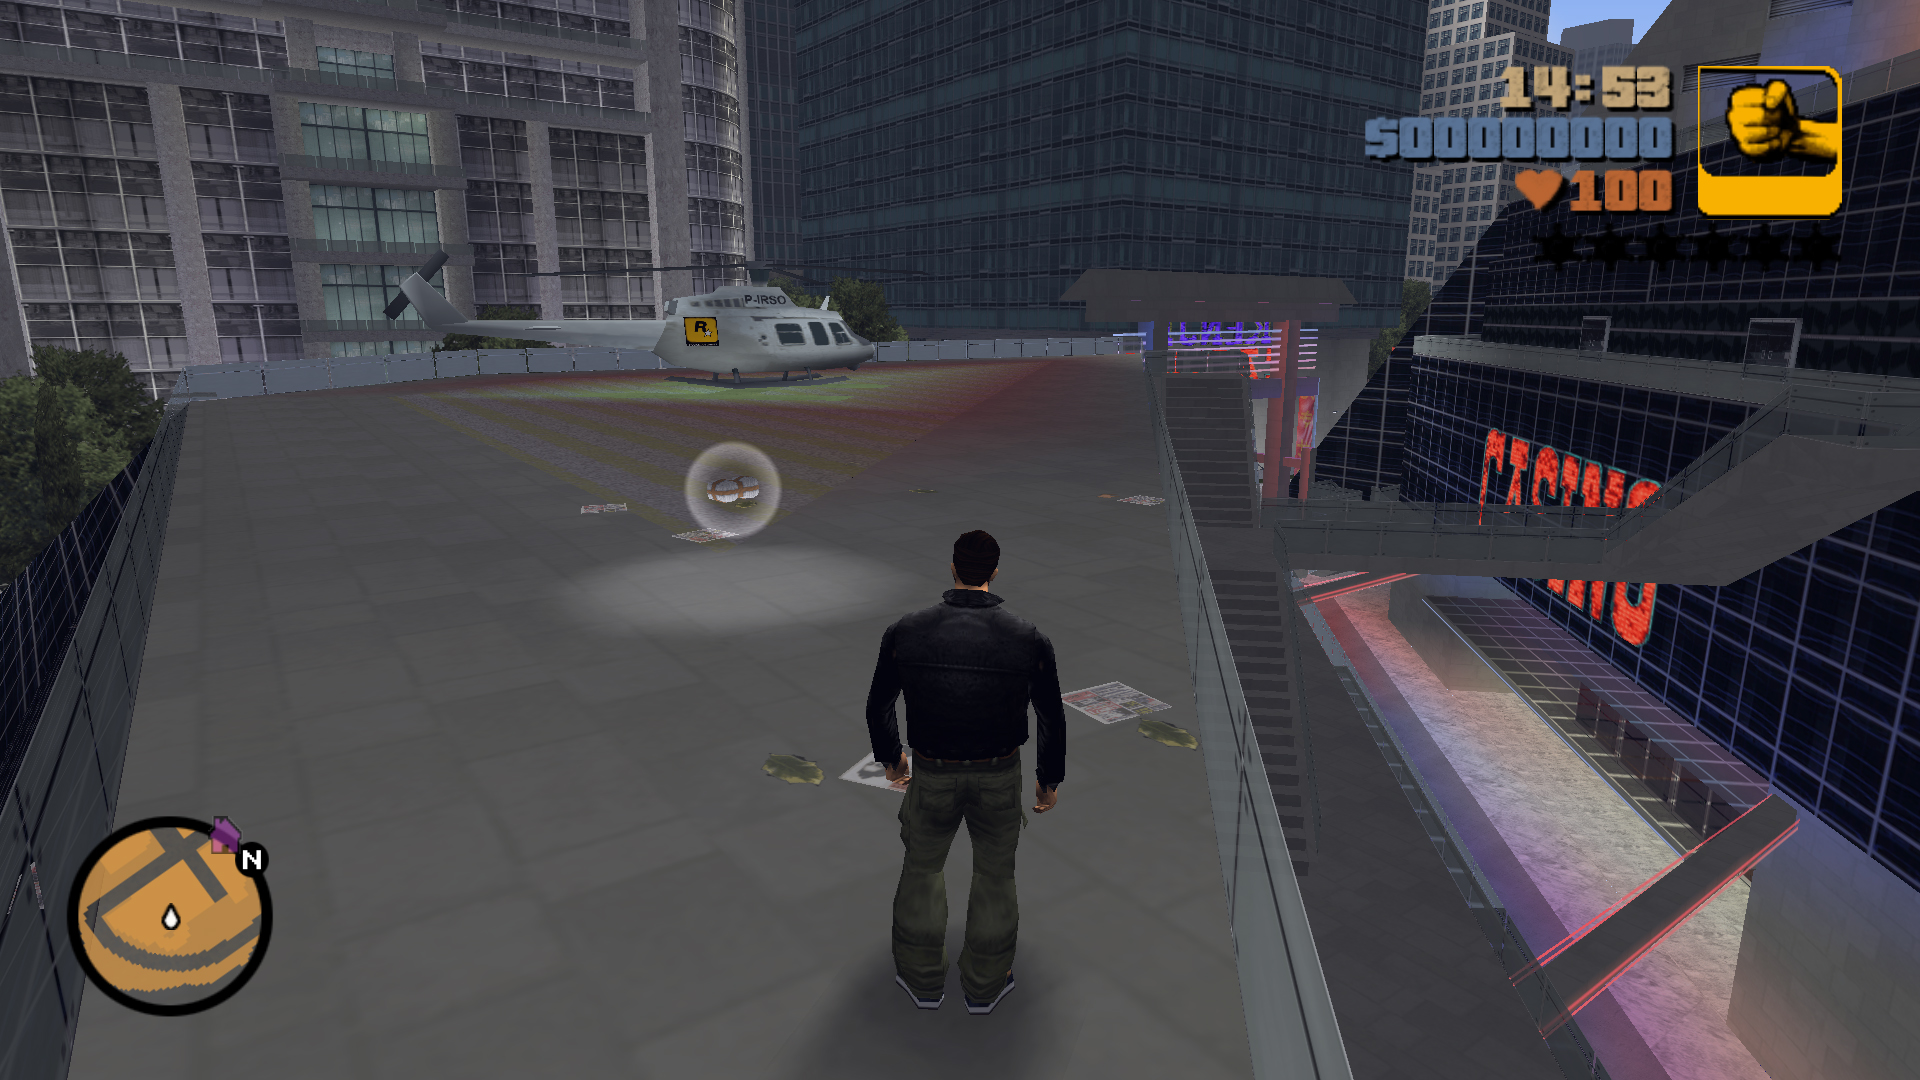
On the roof with the helicopter of Kenji's Casino, up 2 flights of stairs.
Hidden Packages Locations - Shoreside Vale
Hidden
Package
Package
Location
Description
69
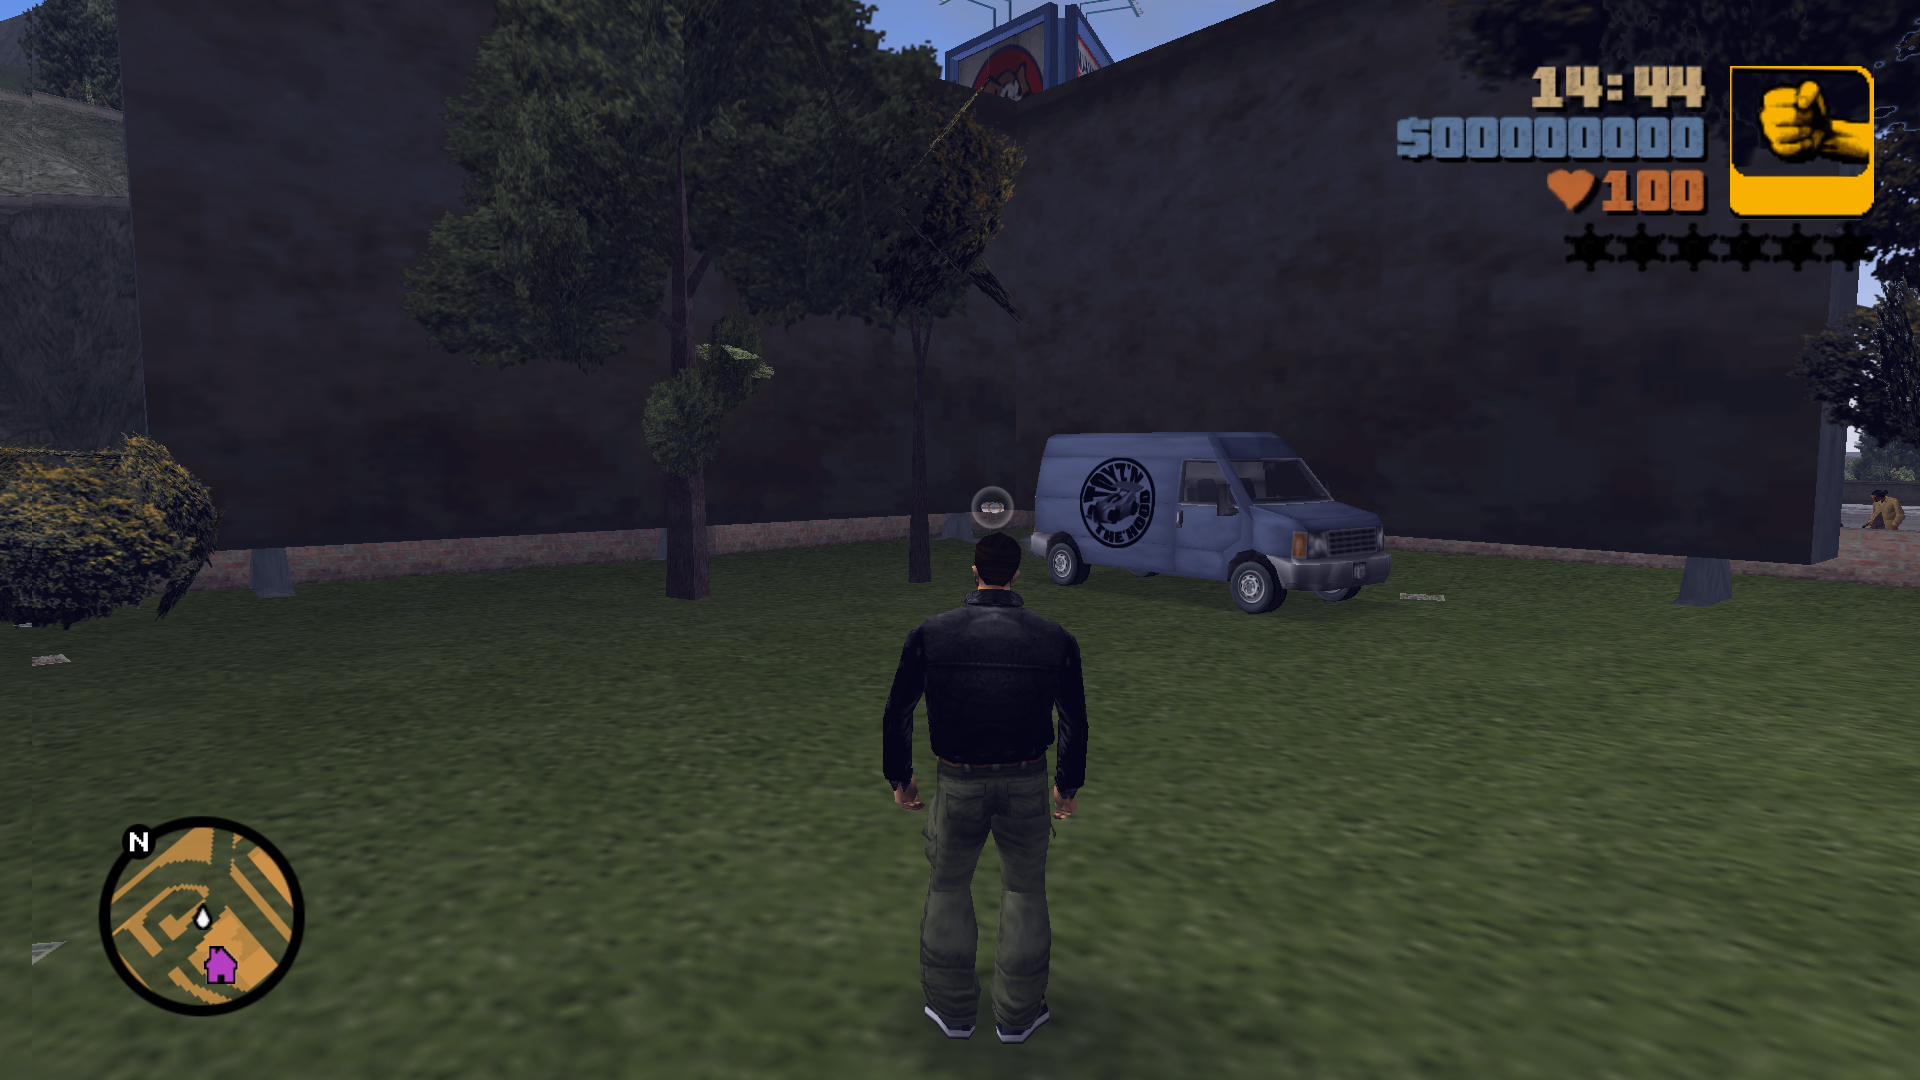
At the back of your Safehouse apartment, behind the billboards, next to a RC Van.
70
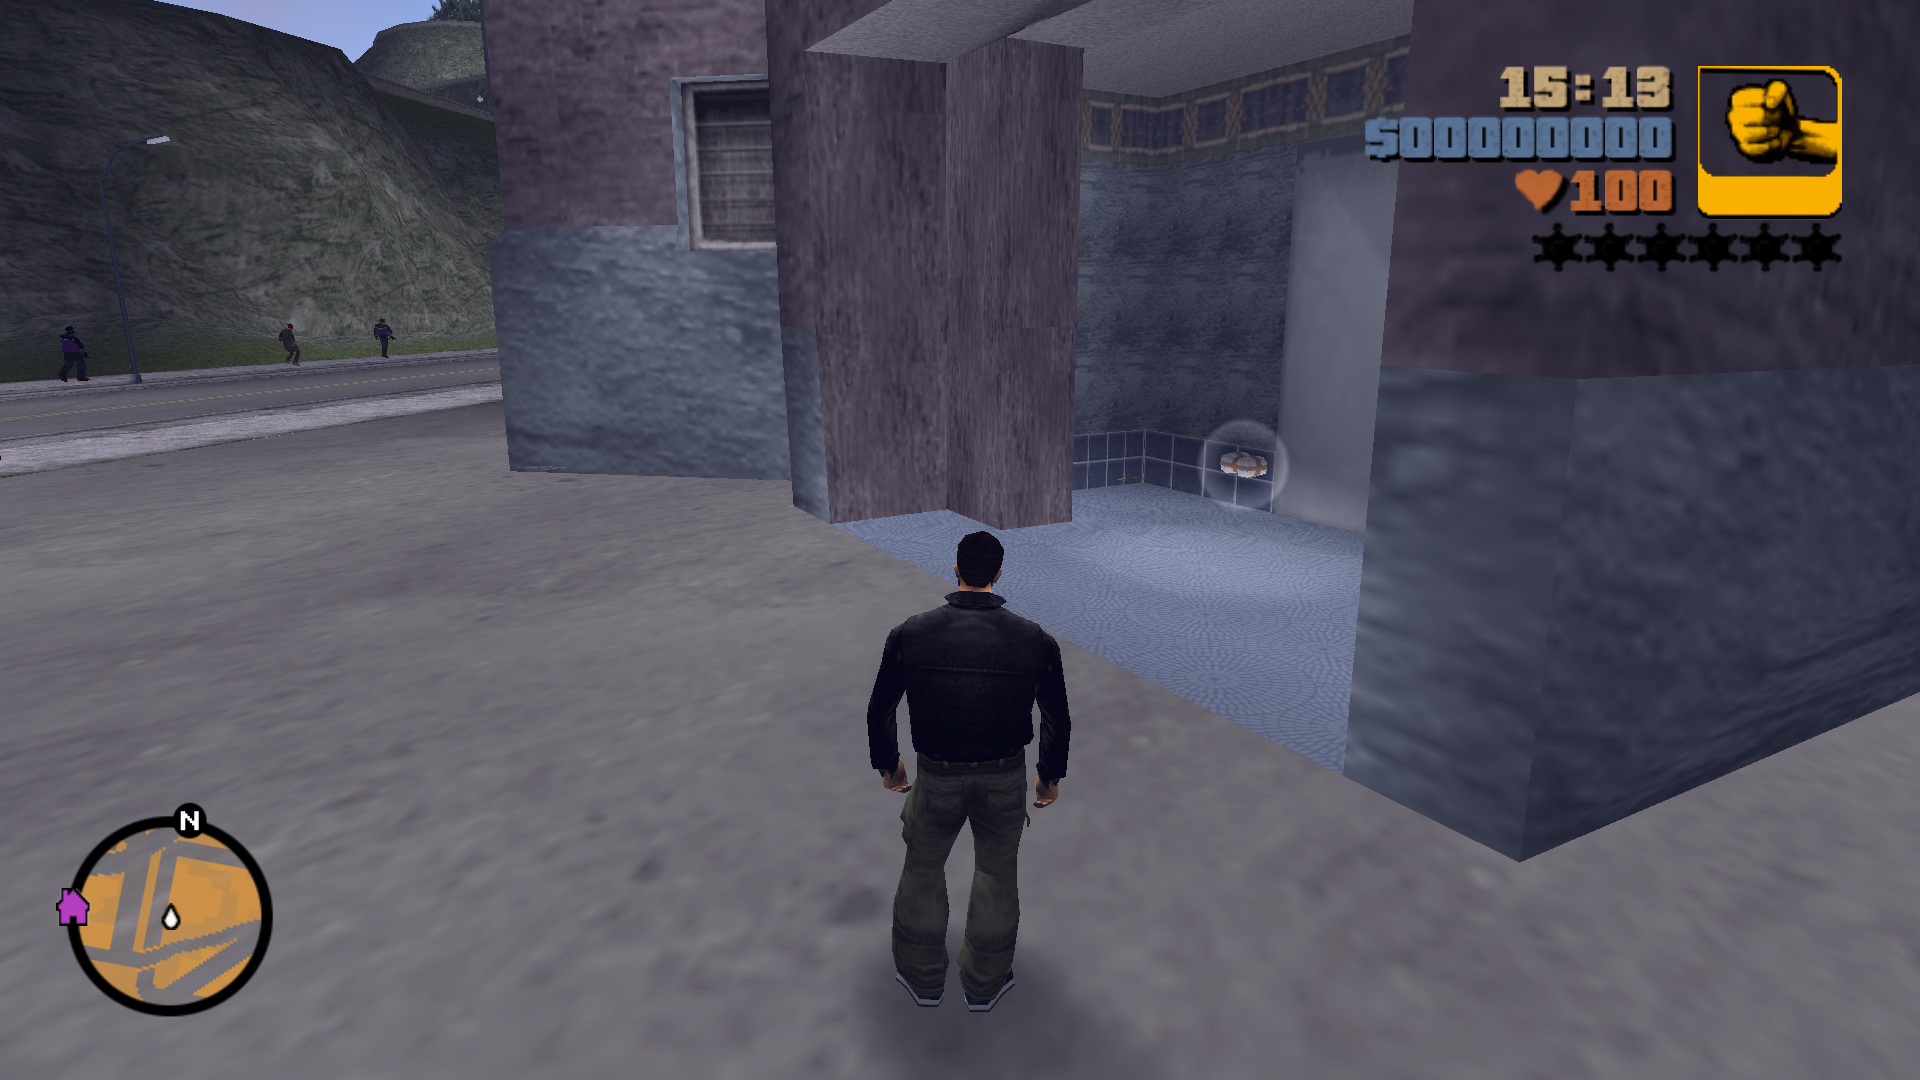
In the entrance of the apartment tower, in front of the door.
71
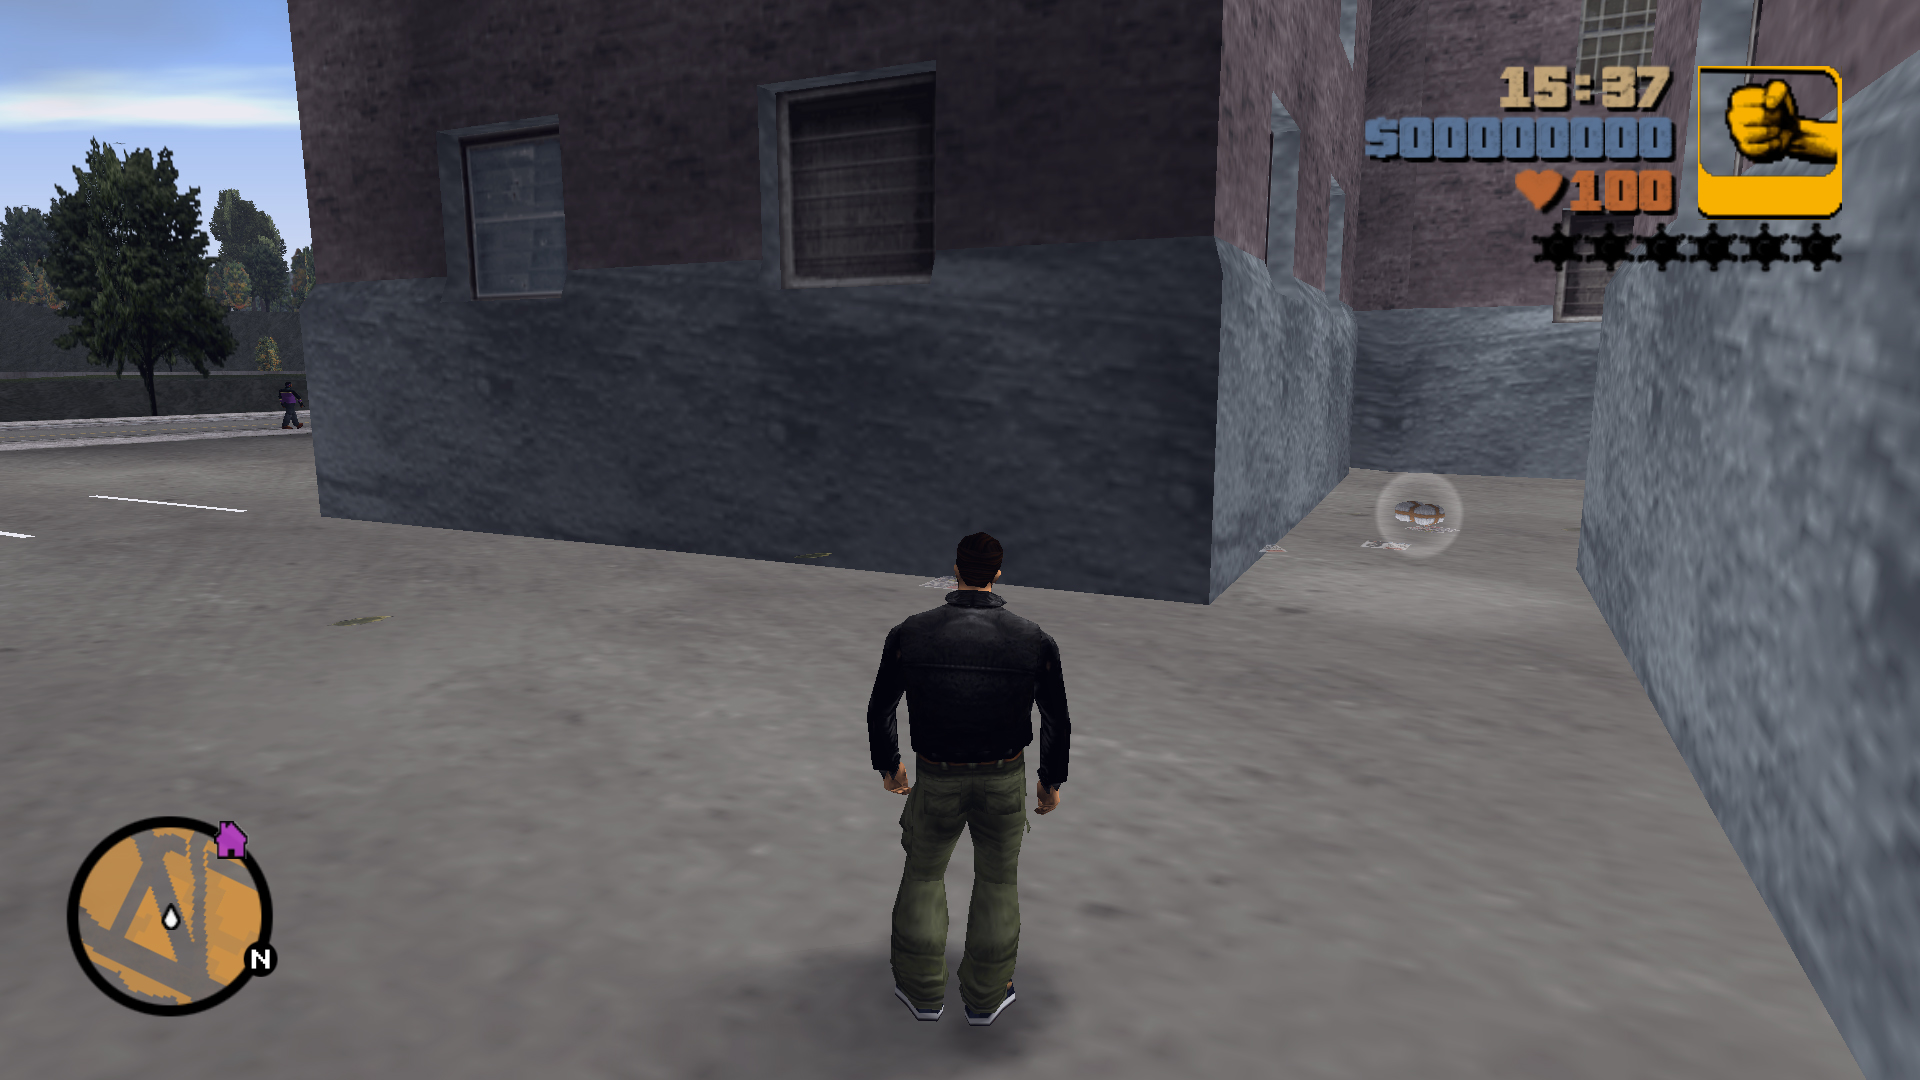
In the alleyway between the south apartment towers.
72
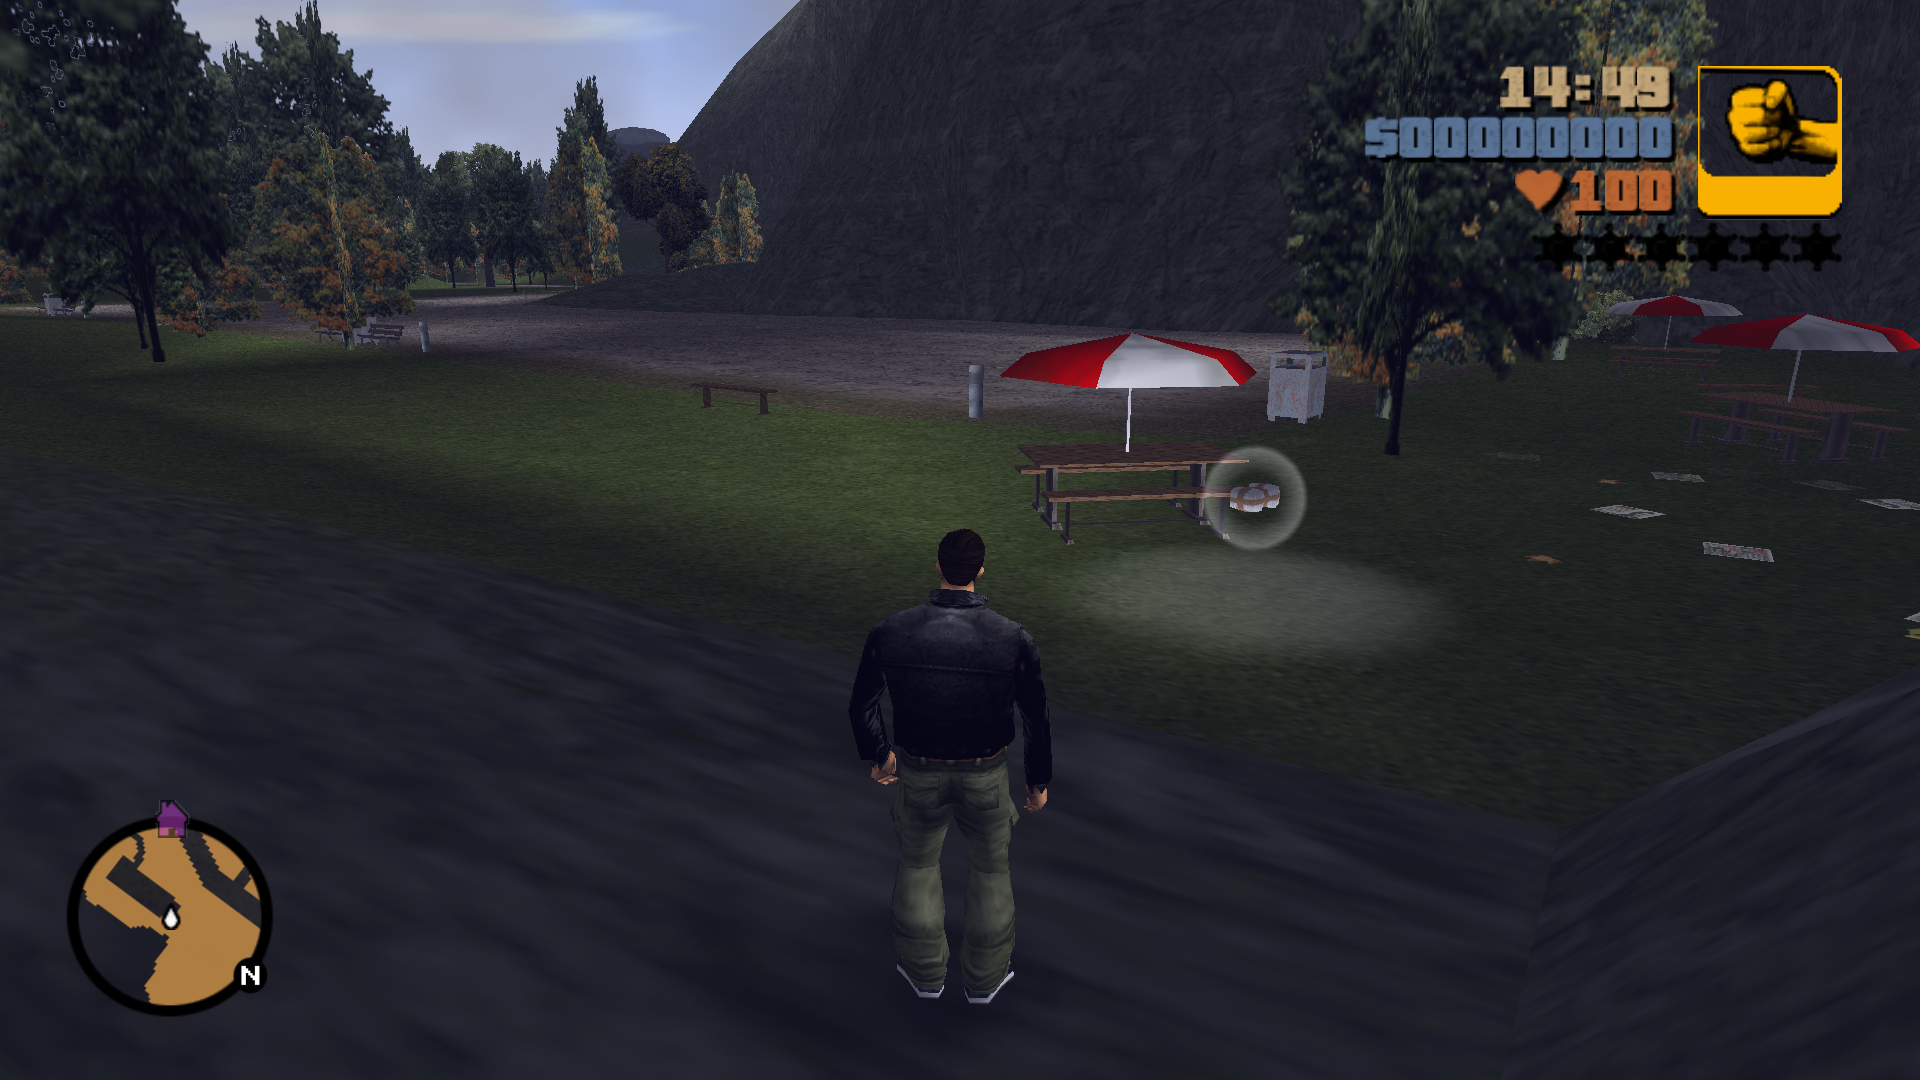
In a park at the end of a dirt road, behind a picnic table with a parasol, close to the shore.
73
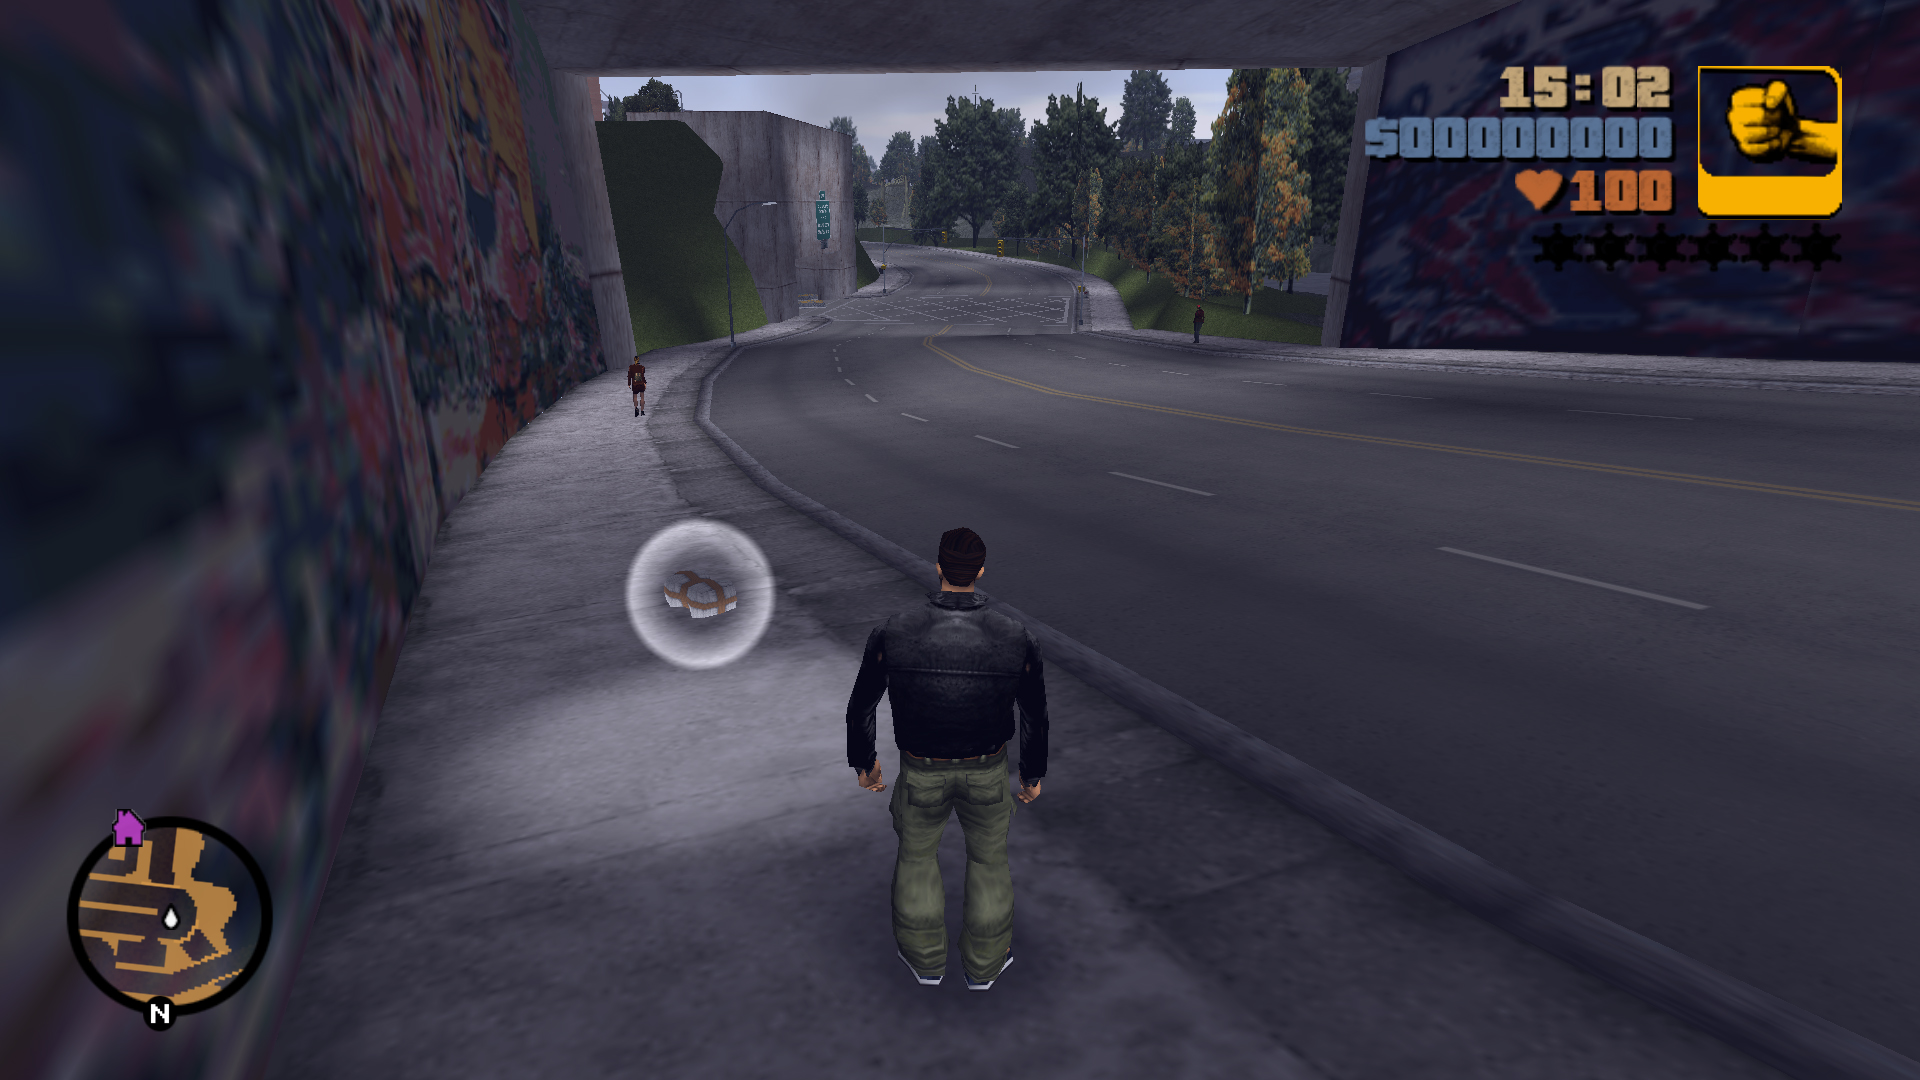
In the sidewalk of the street under the rising zigzag road, between the bridge and the Tunnel entrance.
74
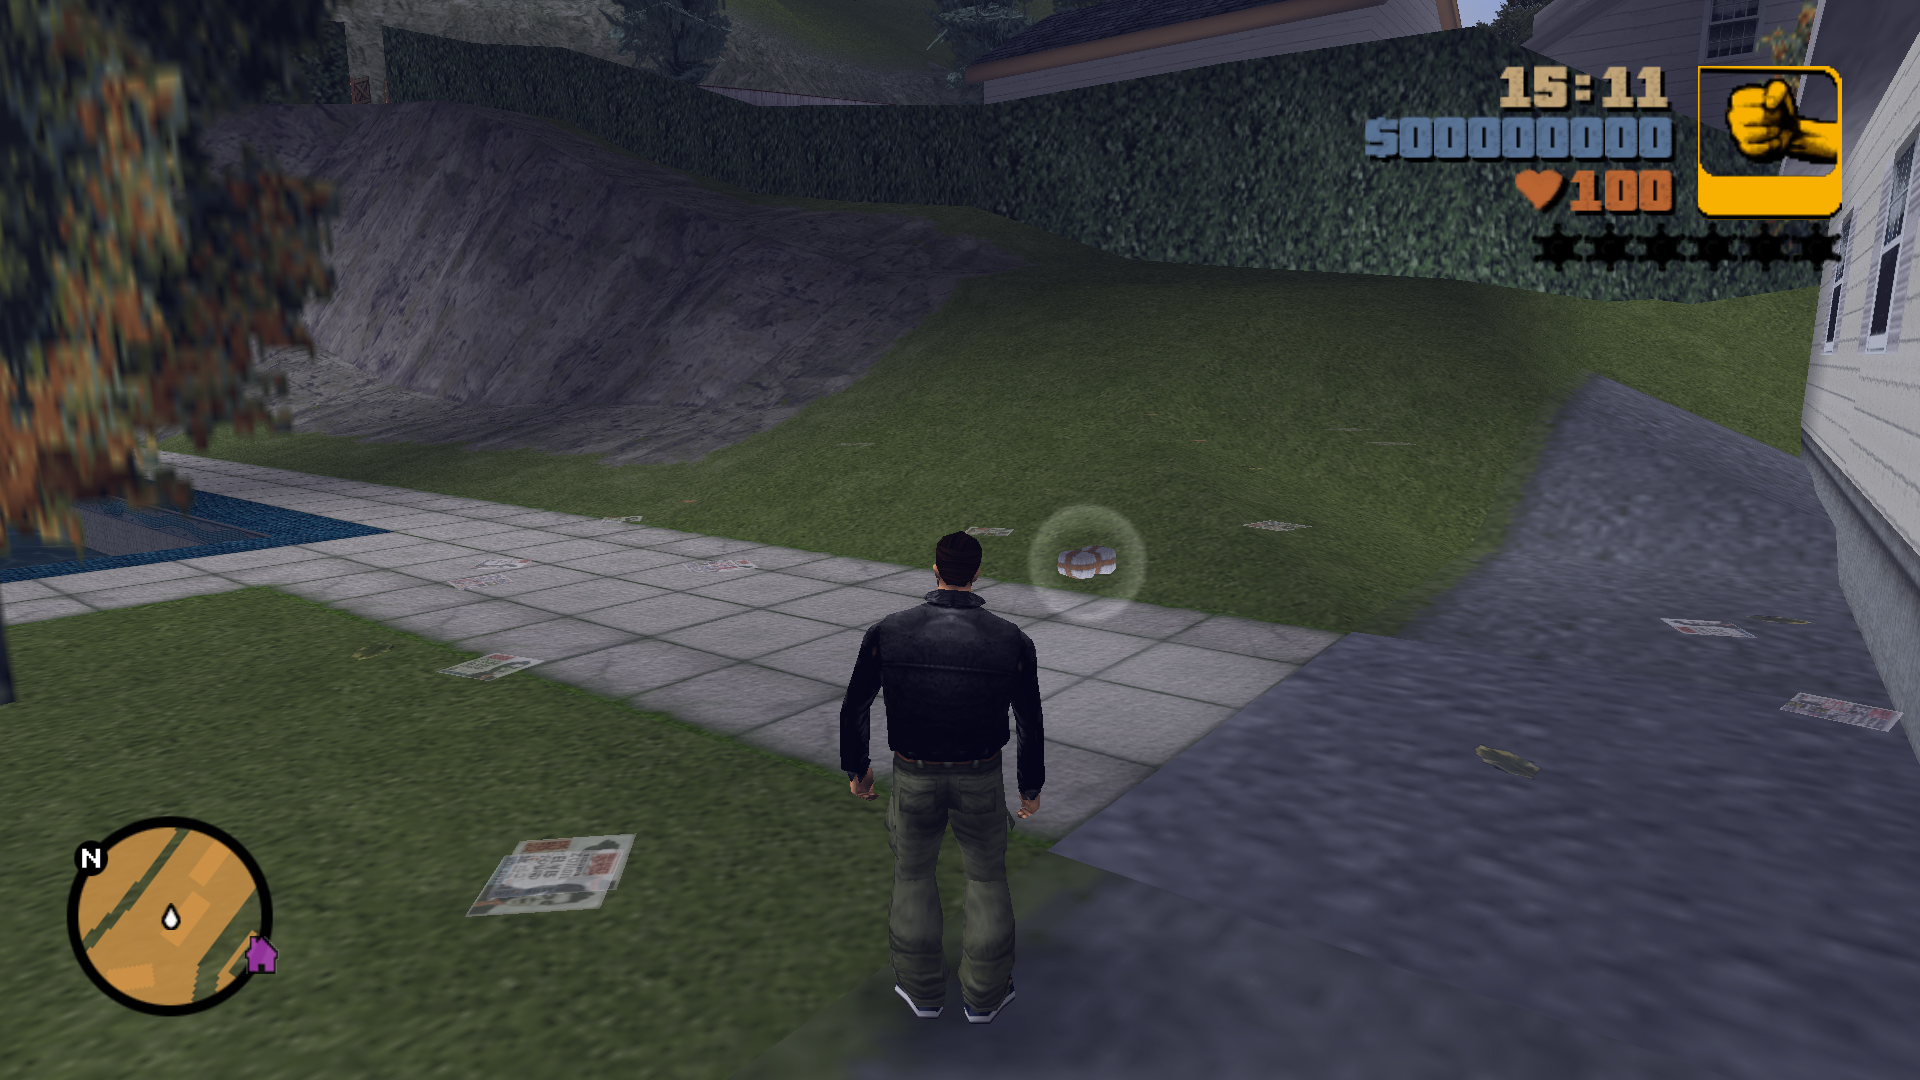
At the north side of the west white house, at the back of the house in front of the pool.
75
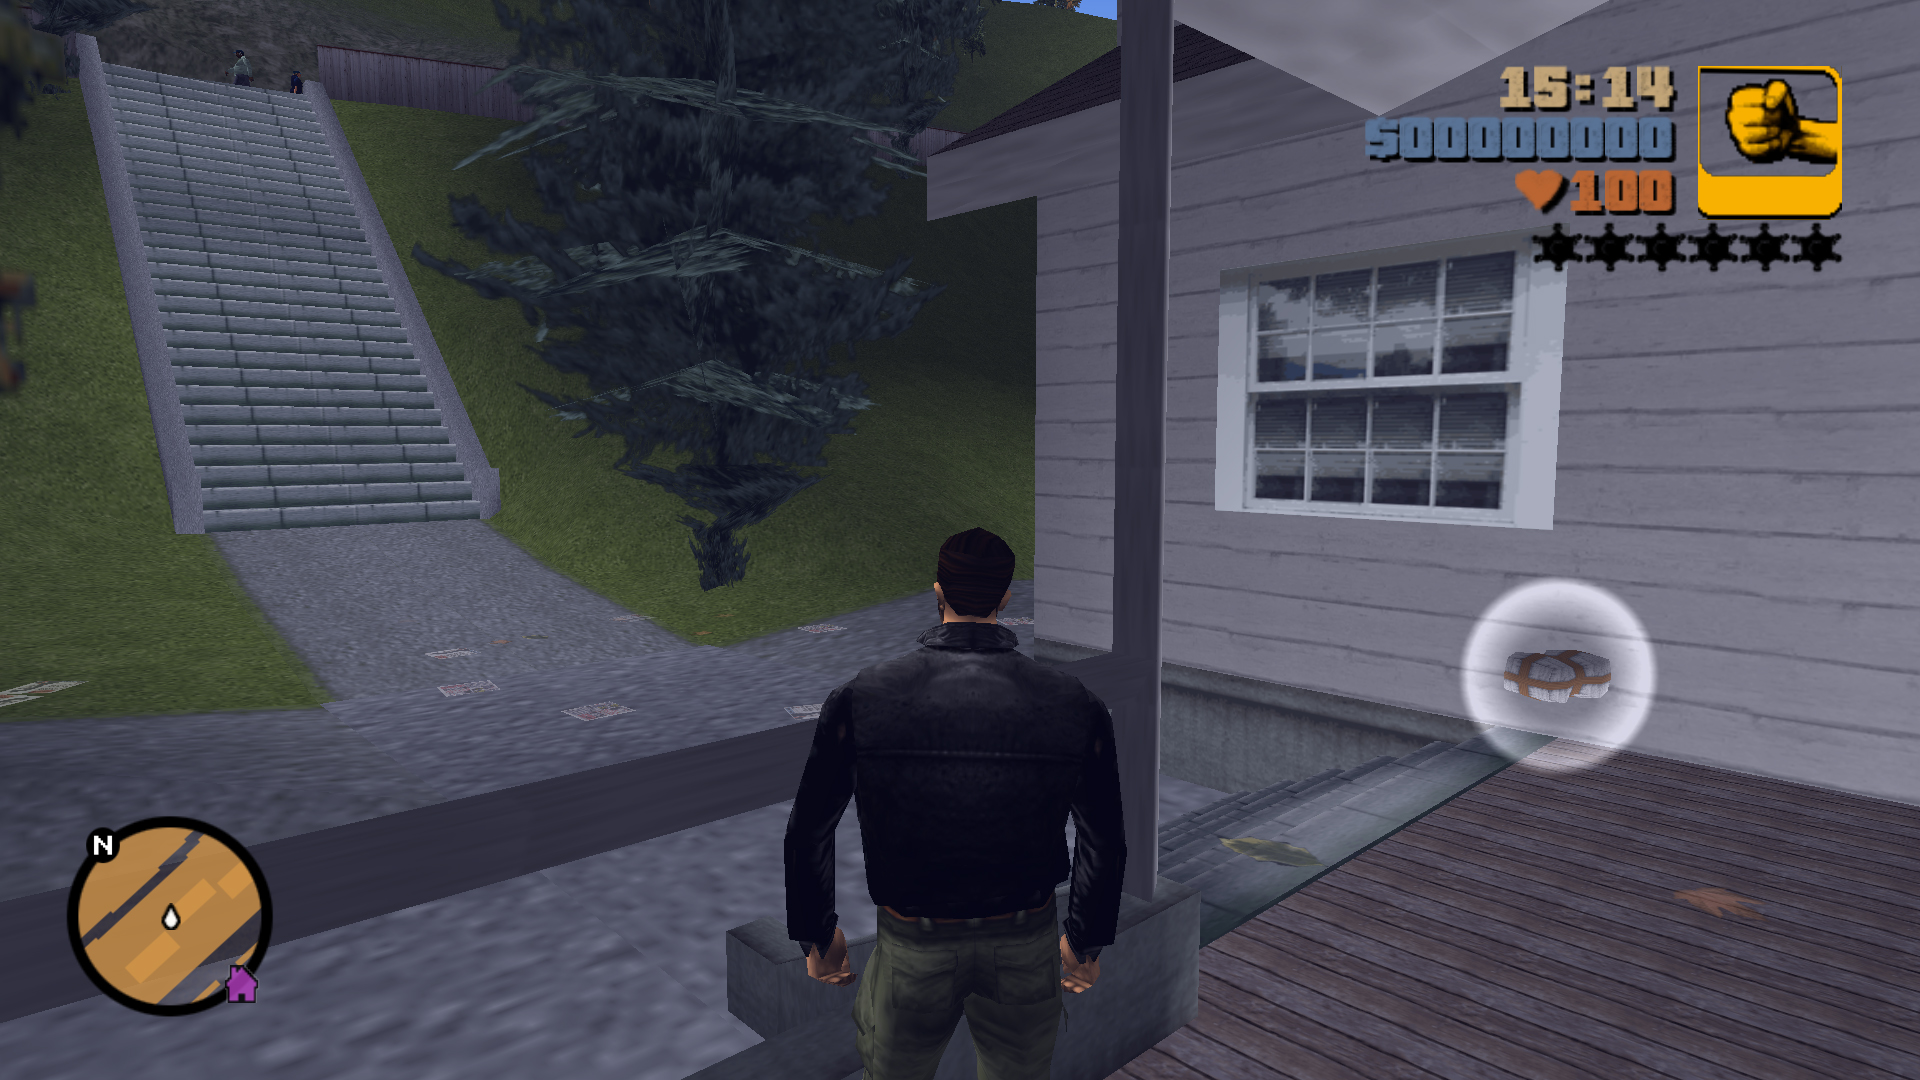
At the north side of the white house next to the previous house, on the porch in front of the door.
76
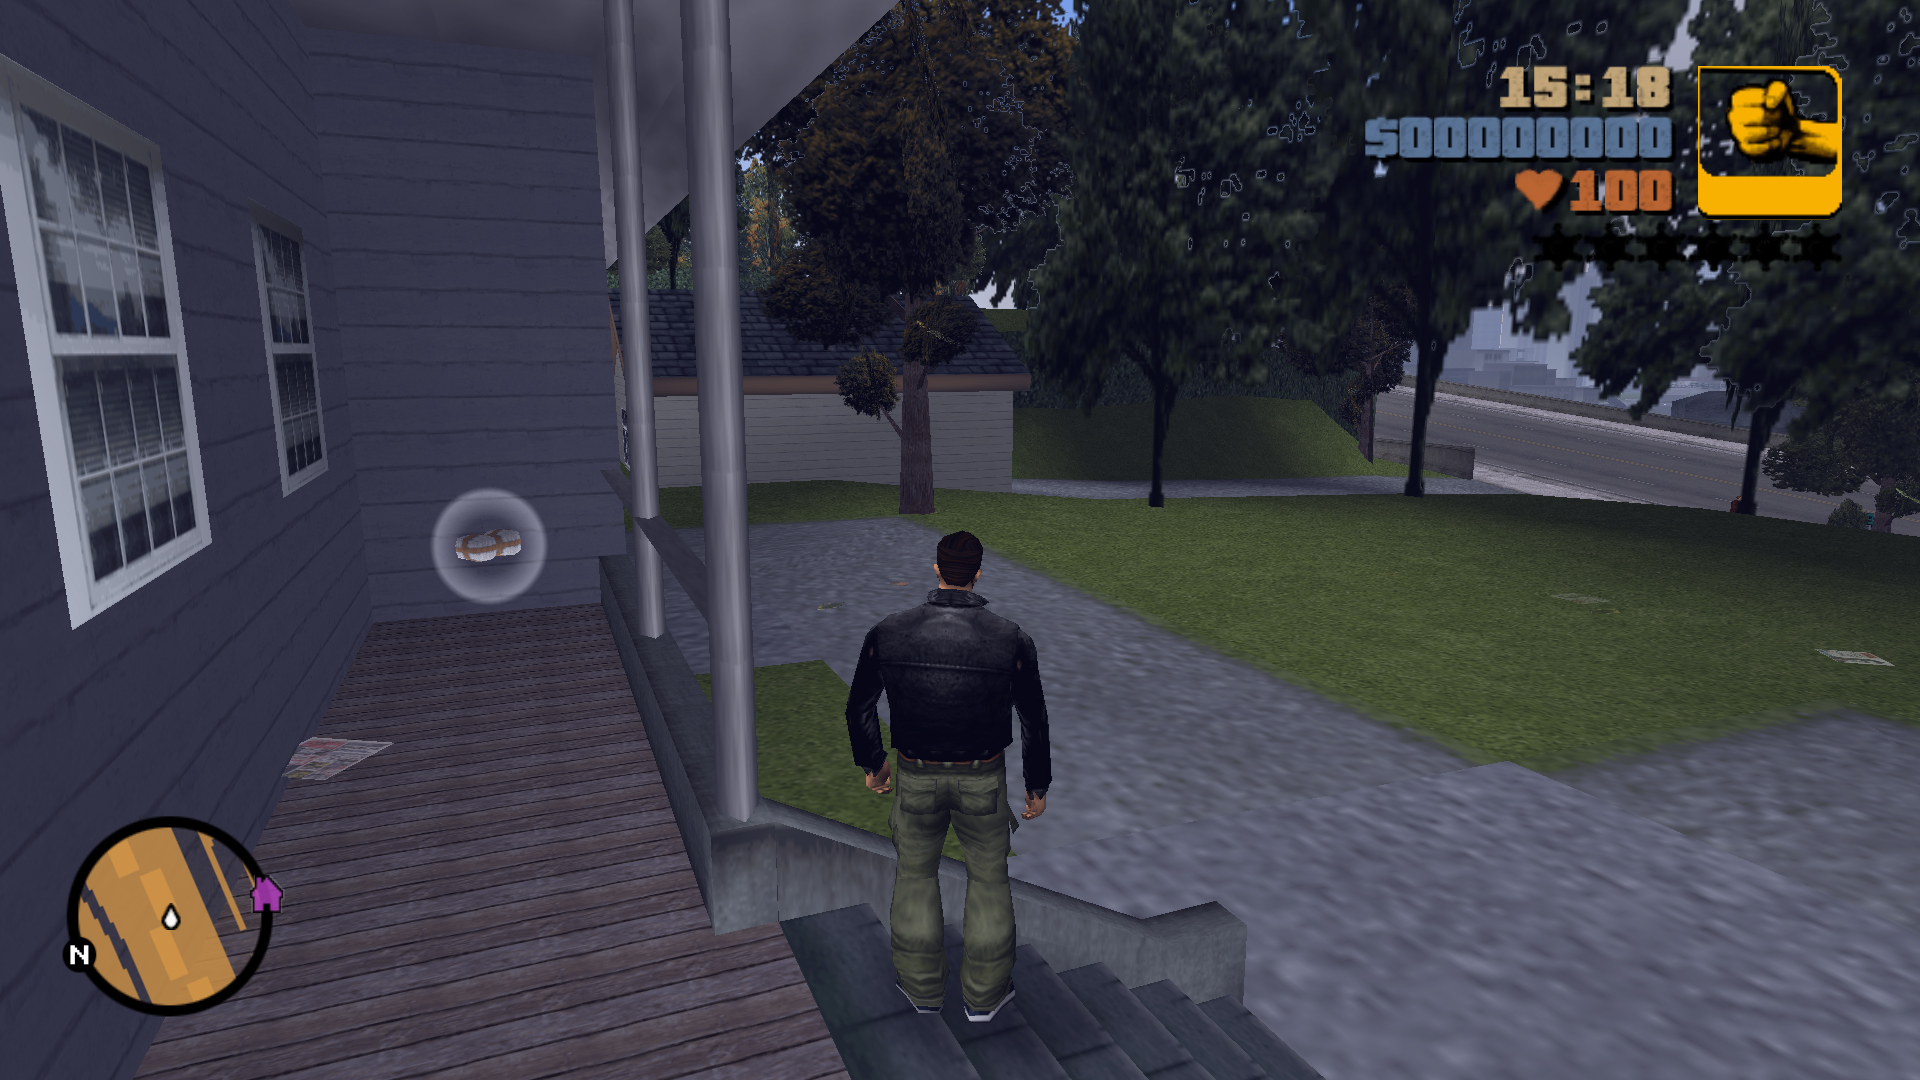
At the south side of the violet house, on the porch next to the door.
77
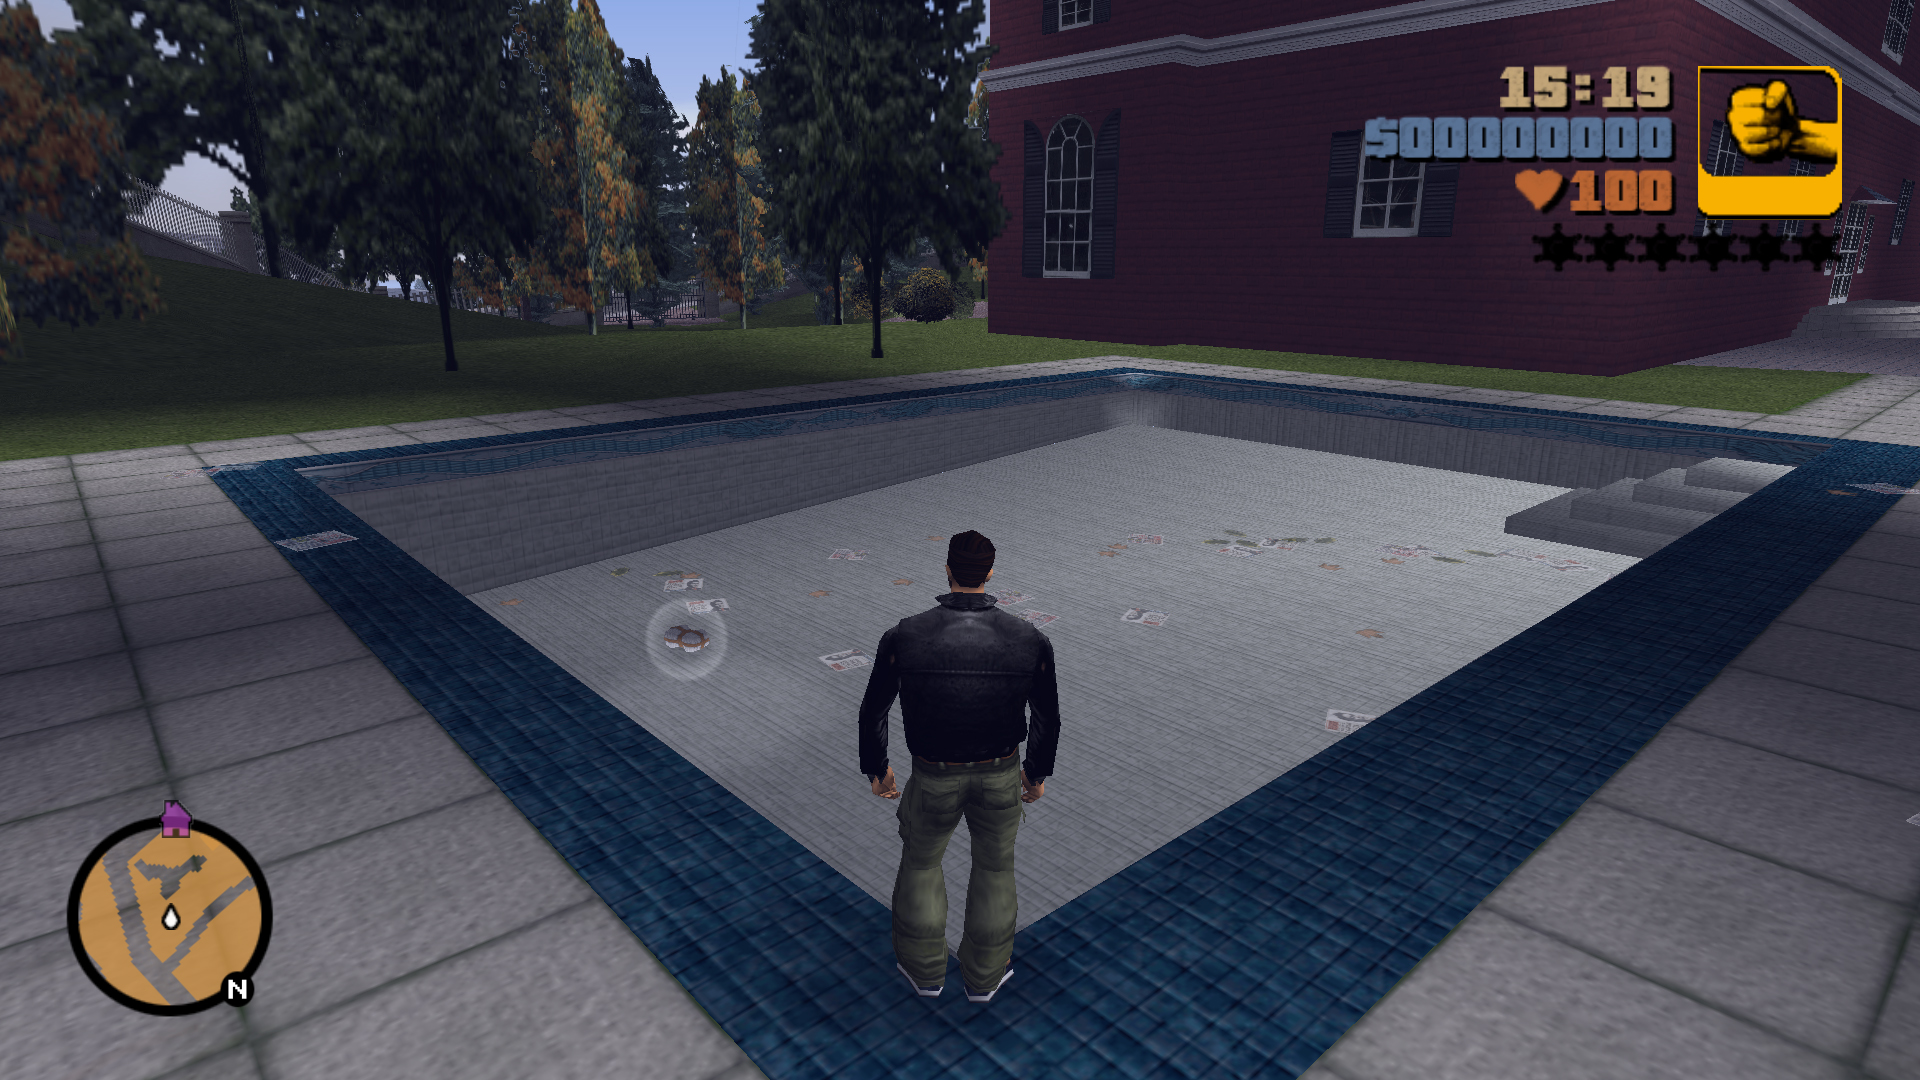
At the east side of the last house, in the empty pool, the gate will open if you drive a Cartel Pickup Truck.
78
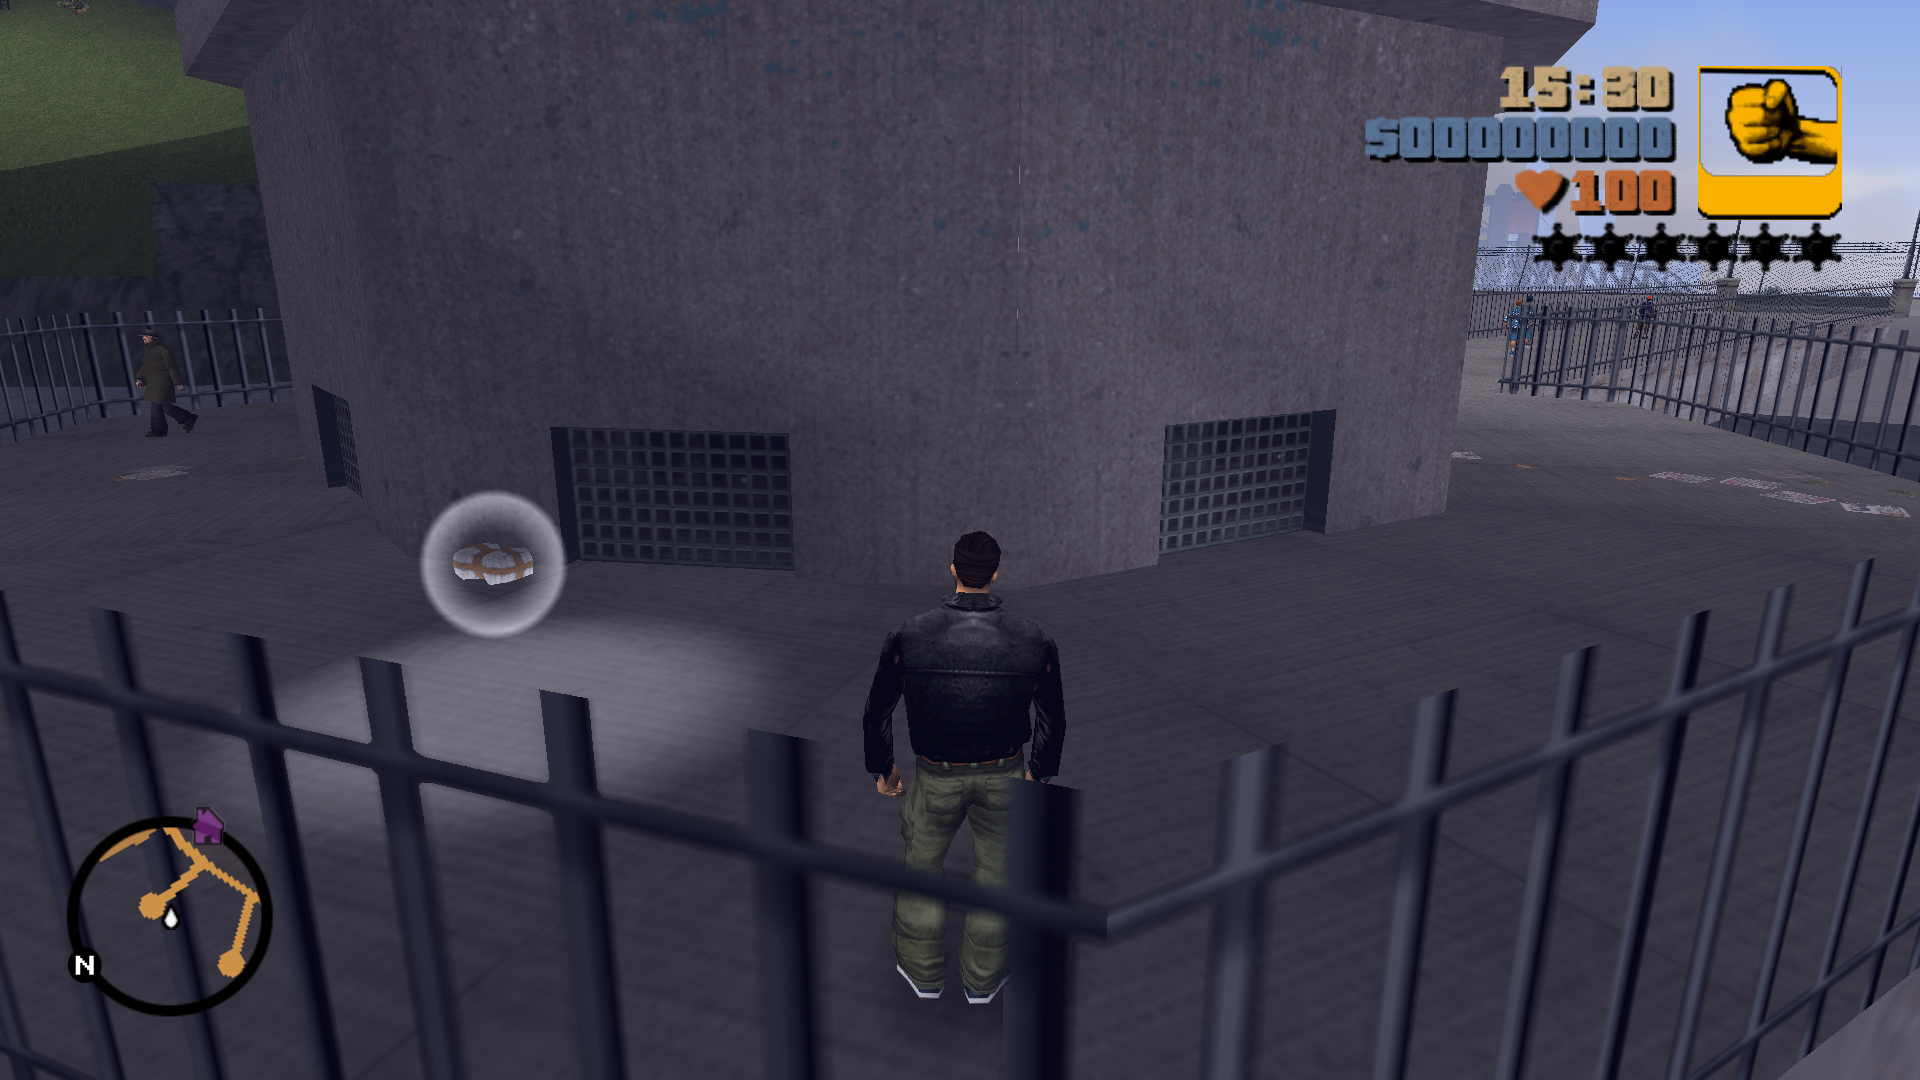
Behind the east intake tower of the Dam, connected by a small bridge.
79
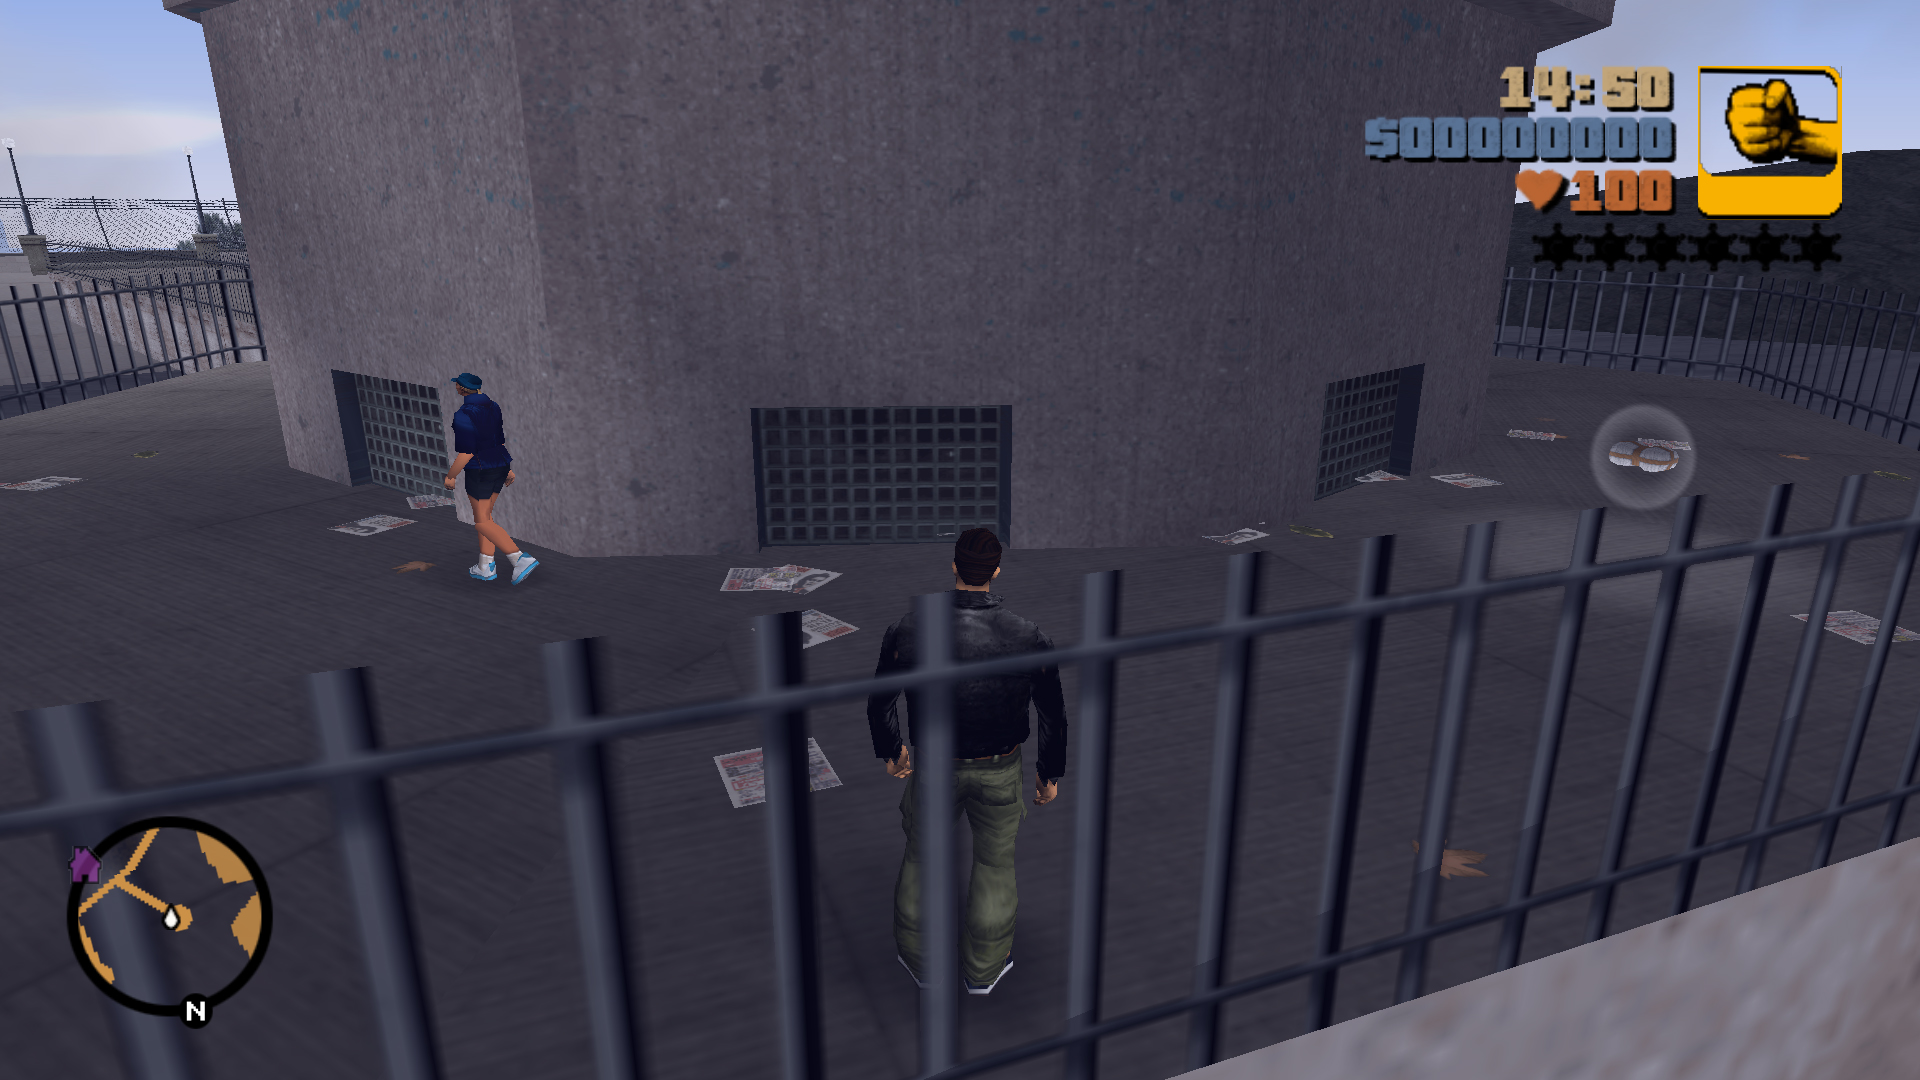
Behind the west intake tower of the Dam, connected by a small bridge.
80
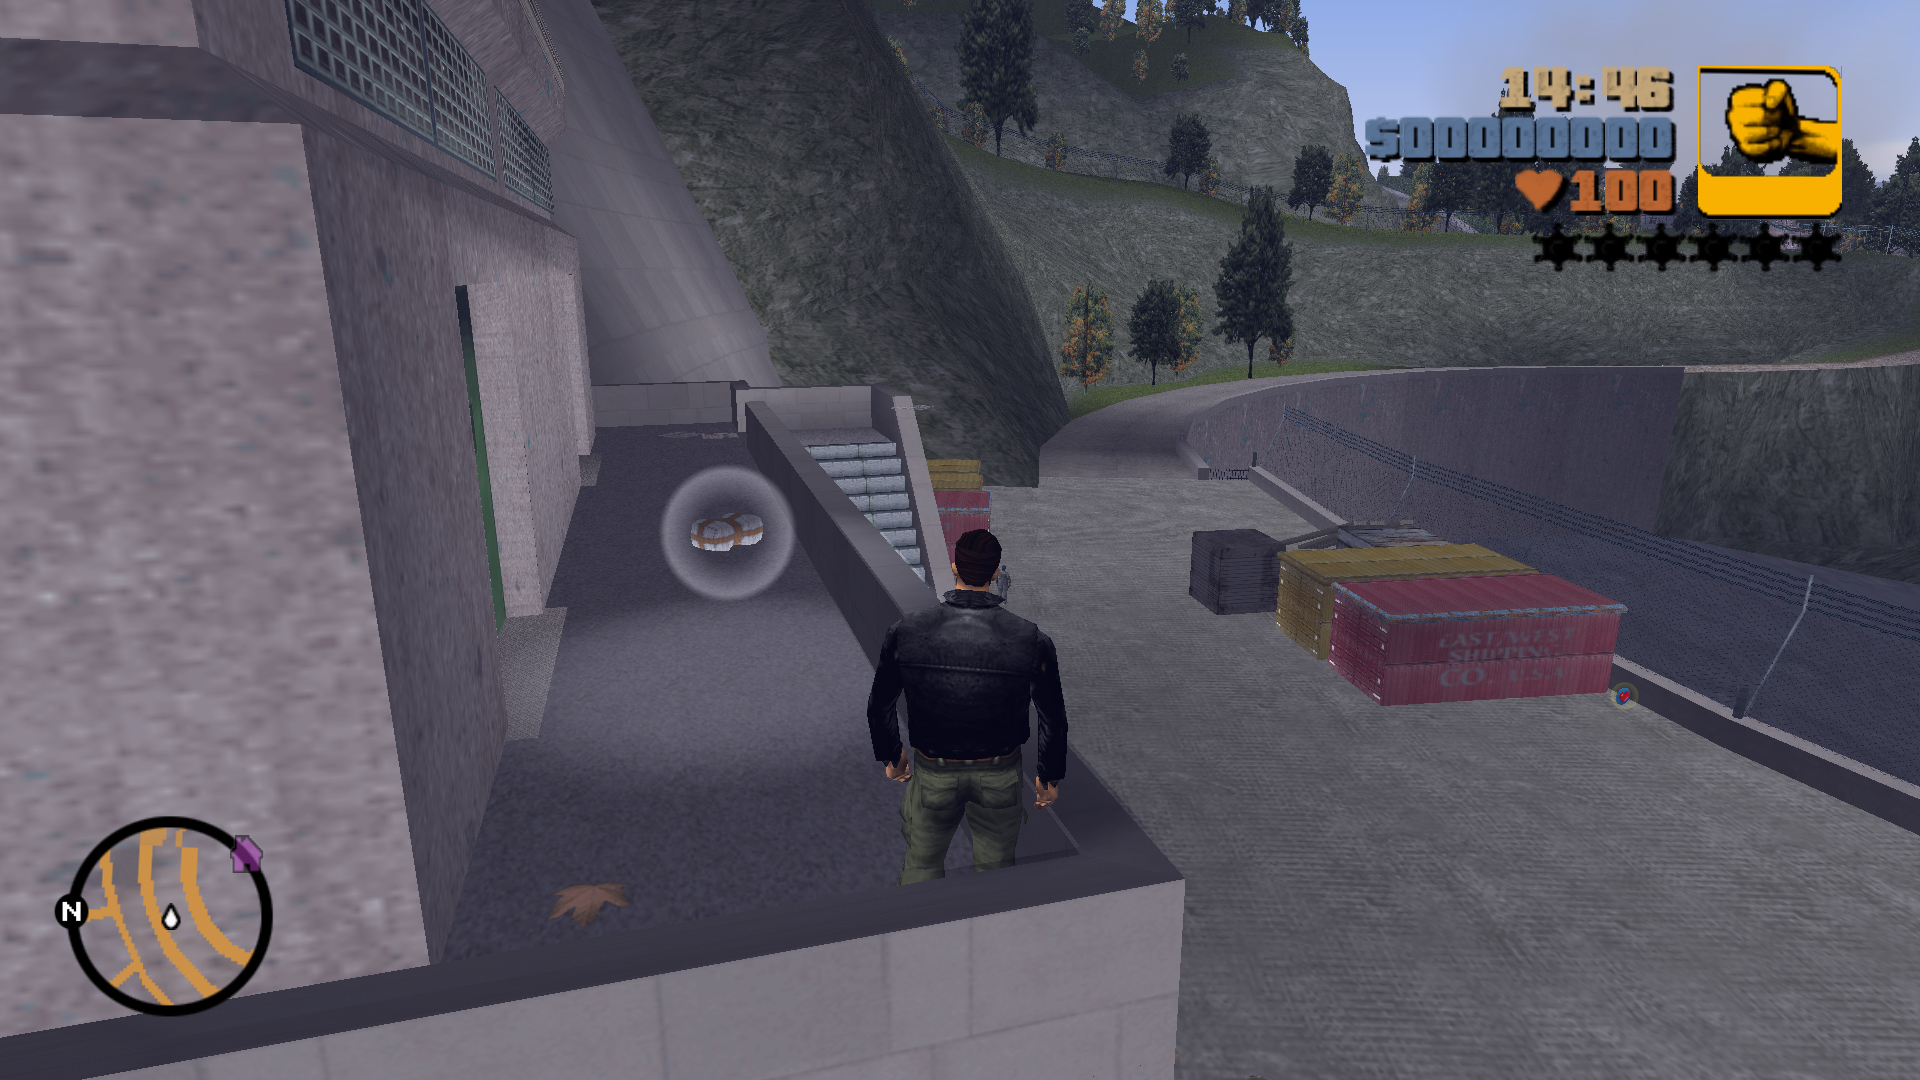
On the east raised platform with green doors at the lower section of the Dam, up the stairs.
81
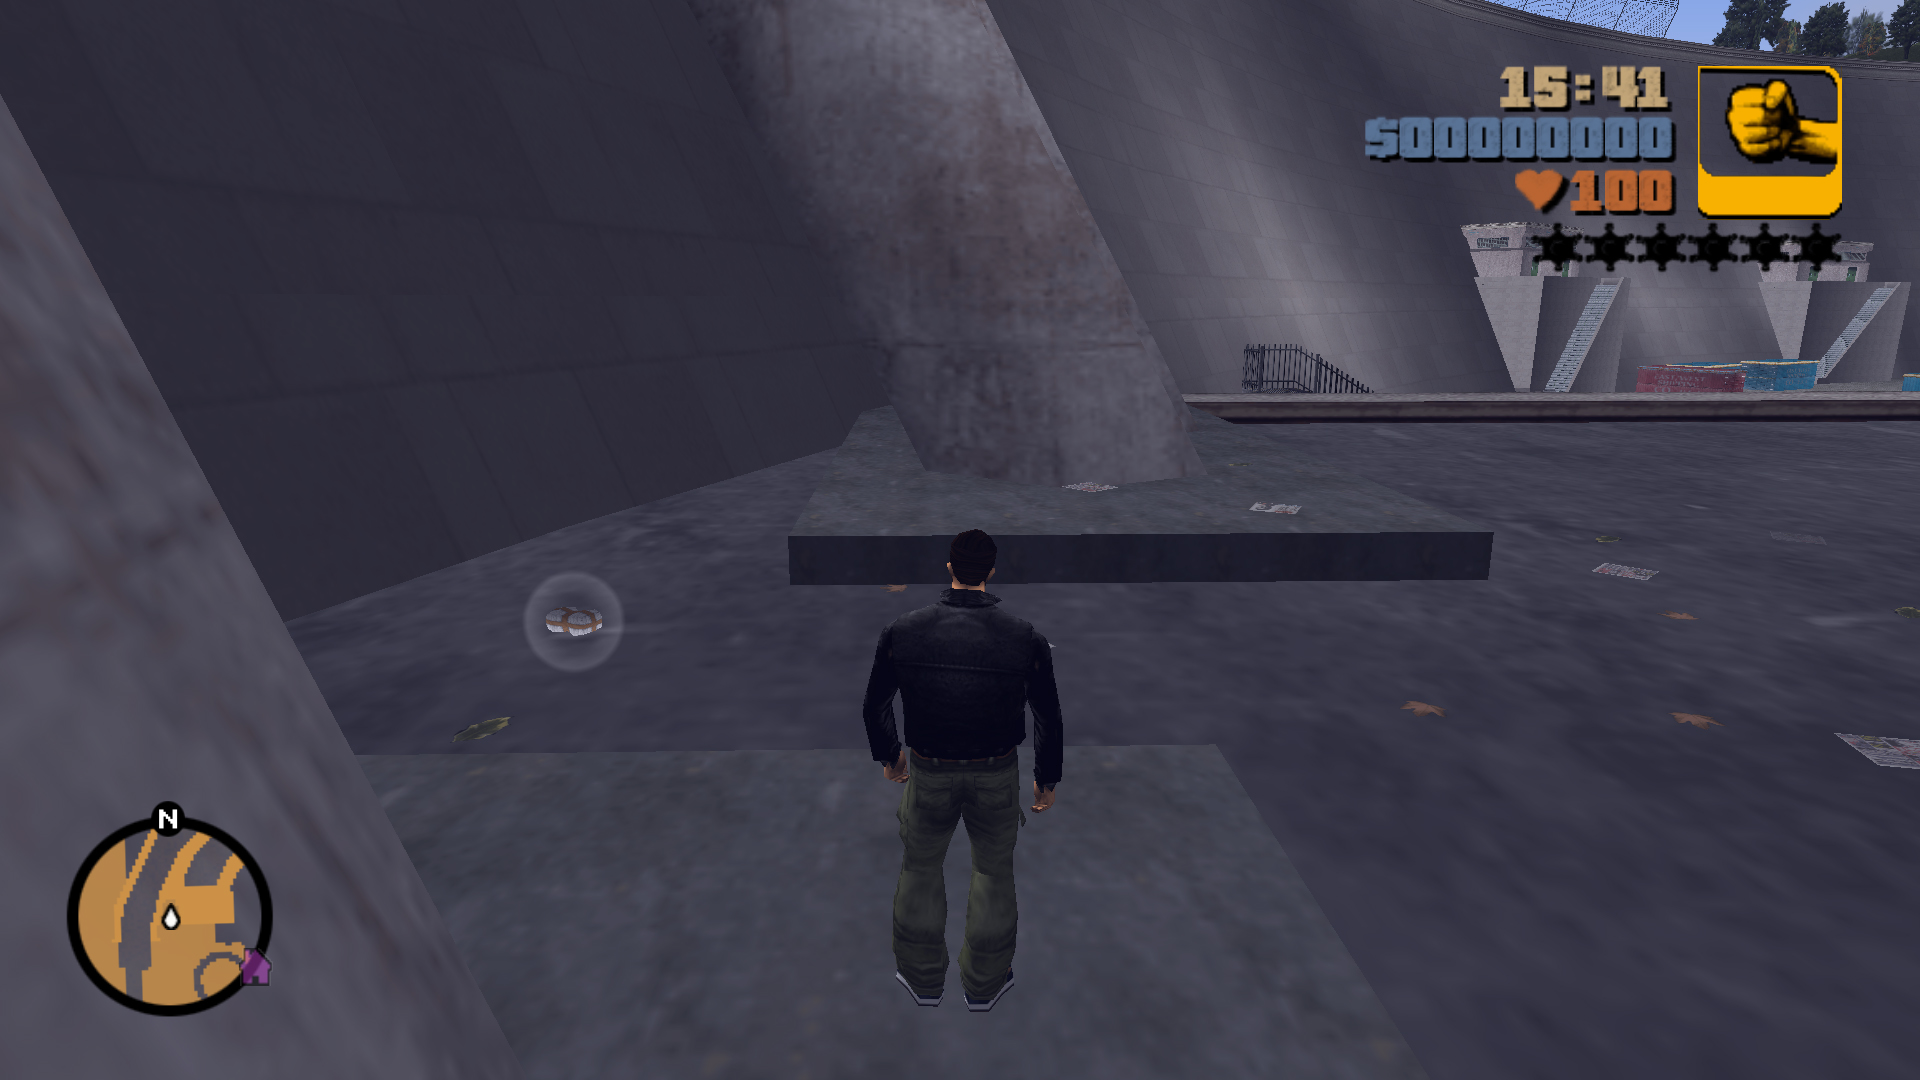
On the roof of the building in the lower section of the Dam, between the pipes, there's stairs at the east side of the building.
82
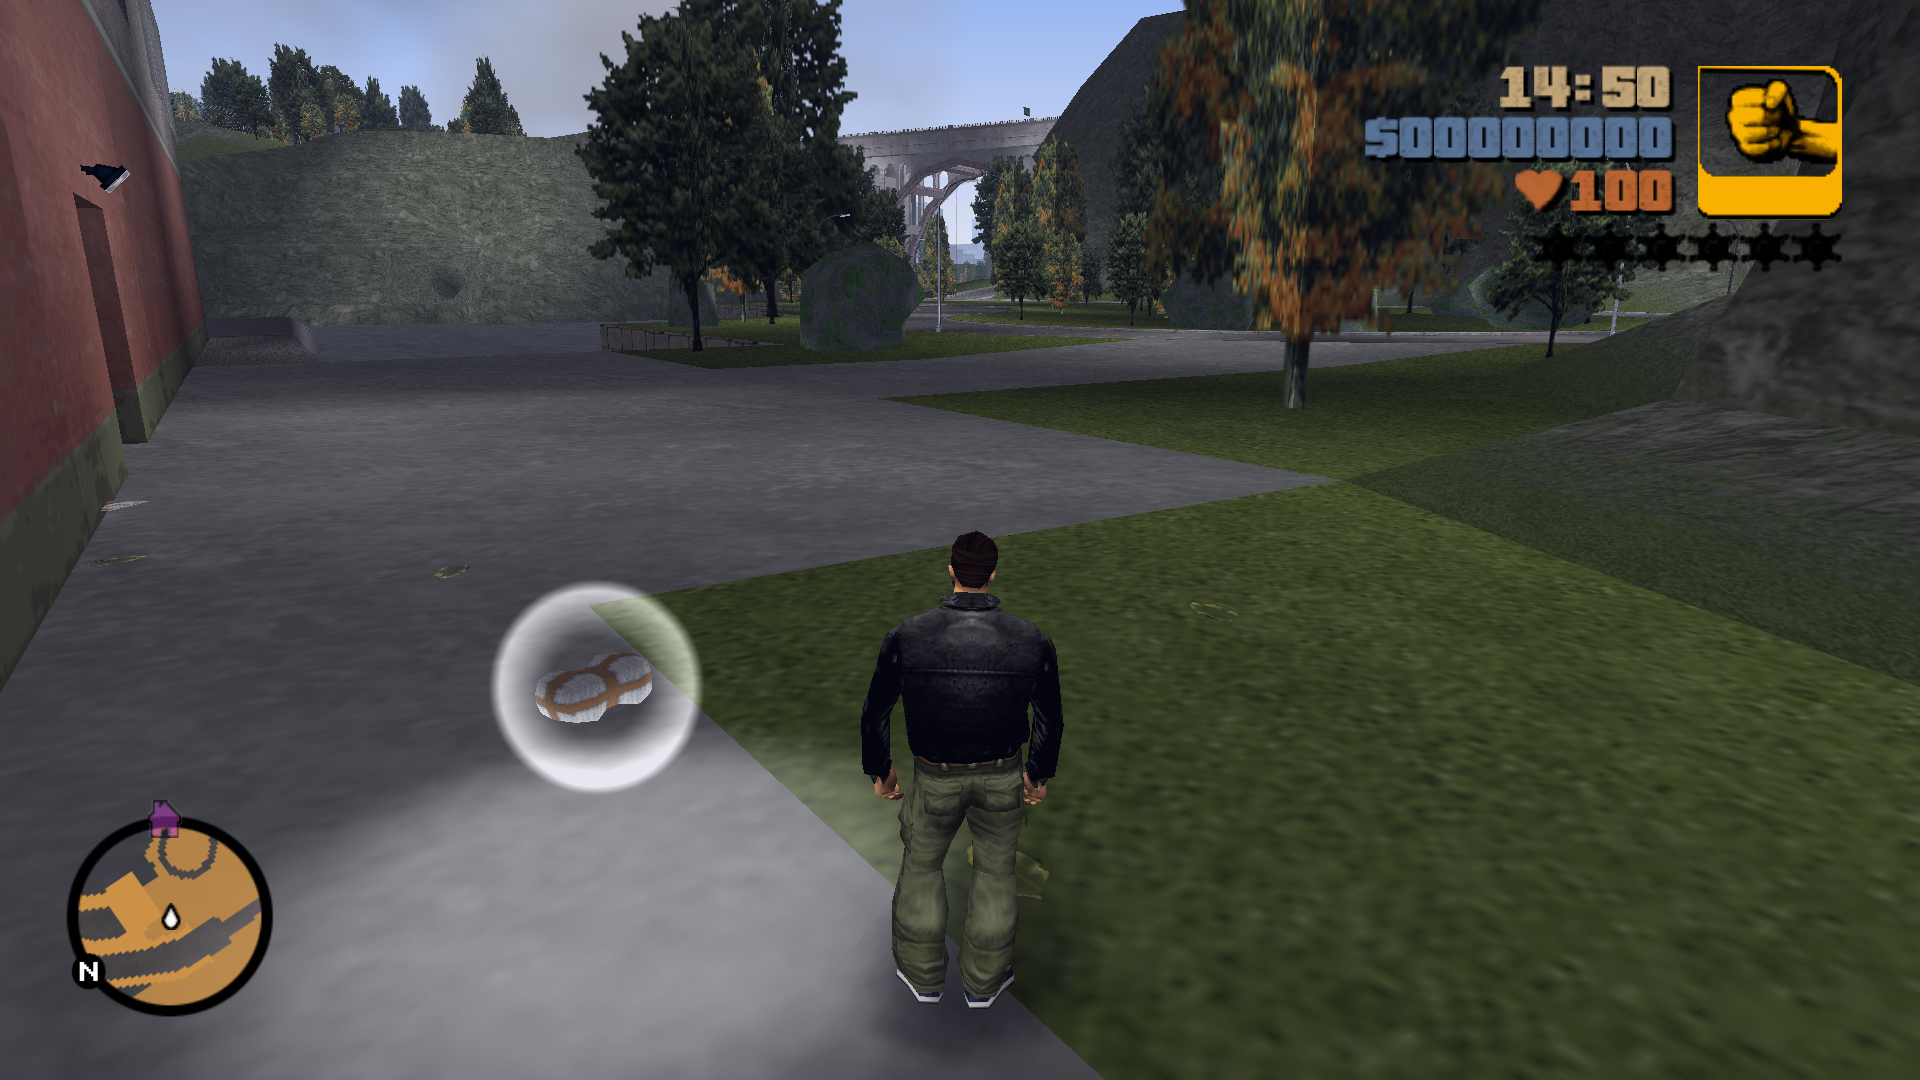
Down at the ground in the west side corner of the Dam building.
83
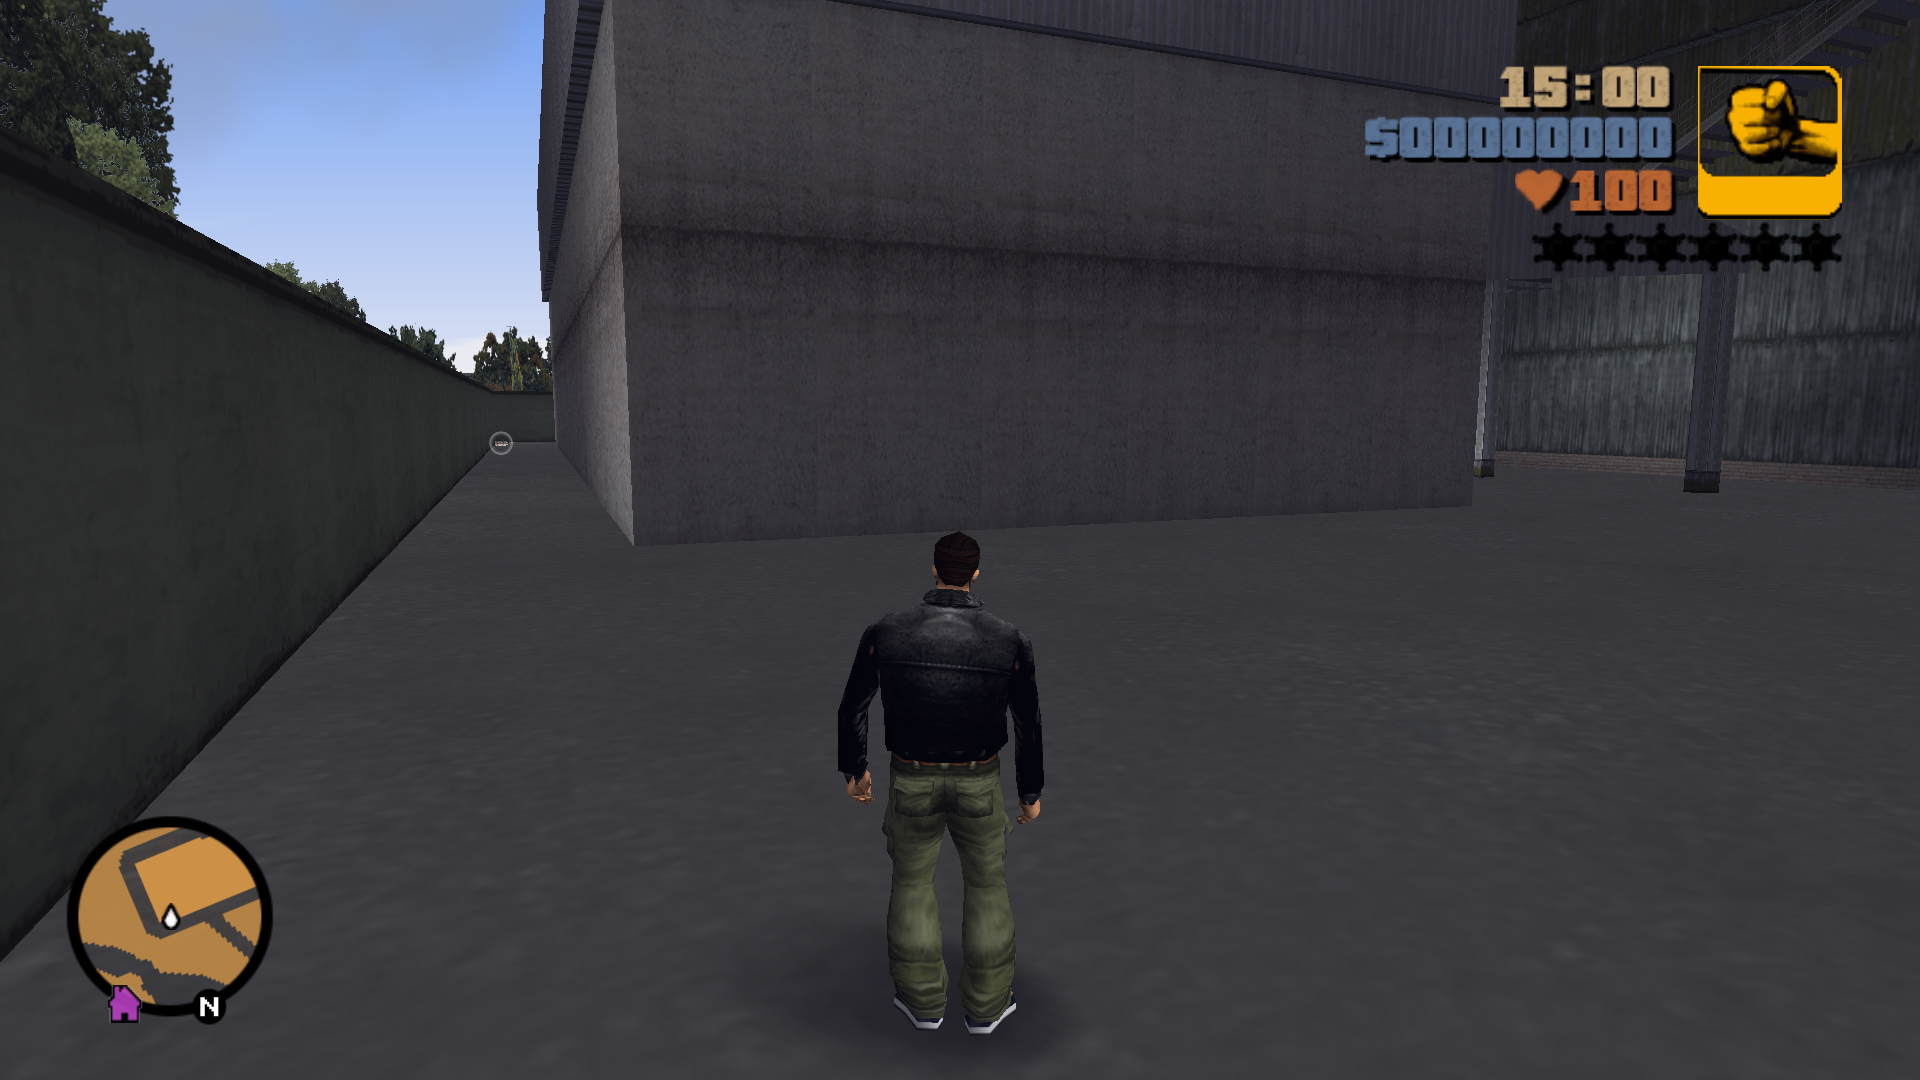
At the back of the building with garages, between the outer wall and the building.
84
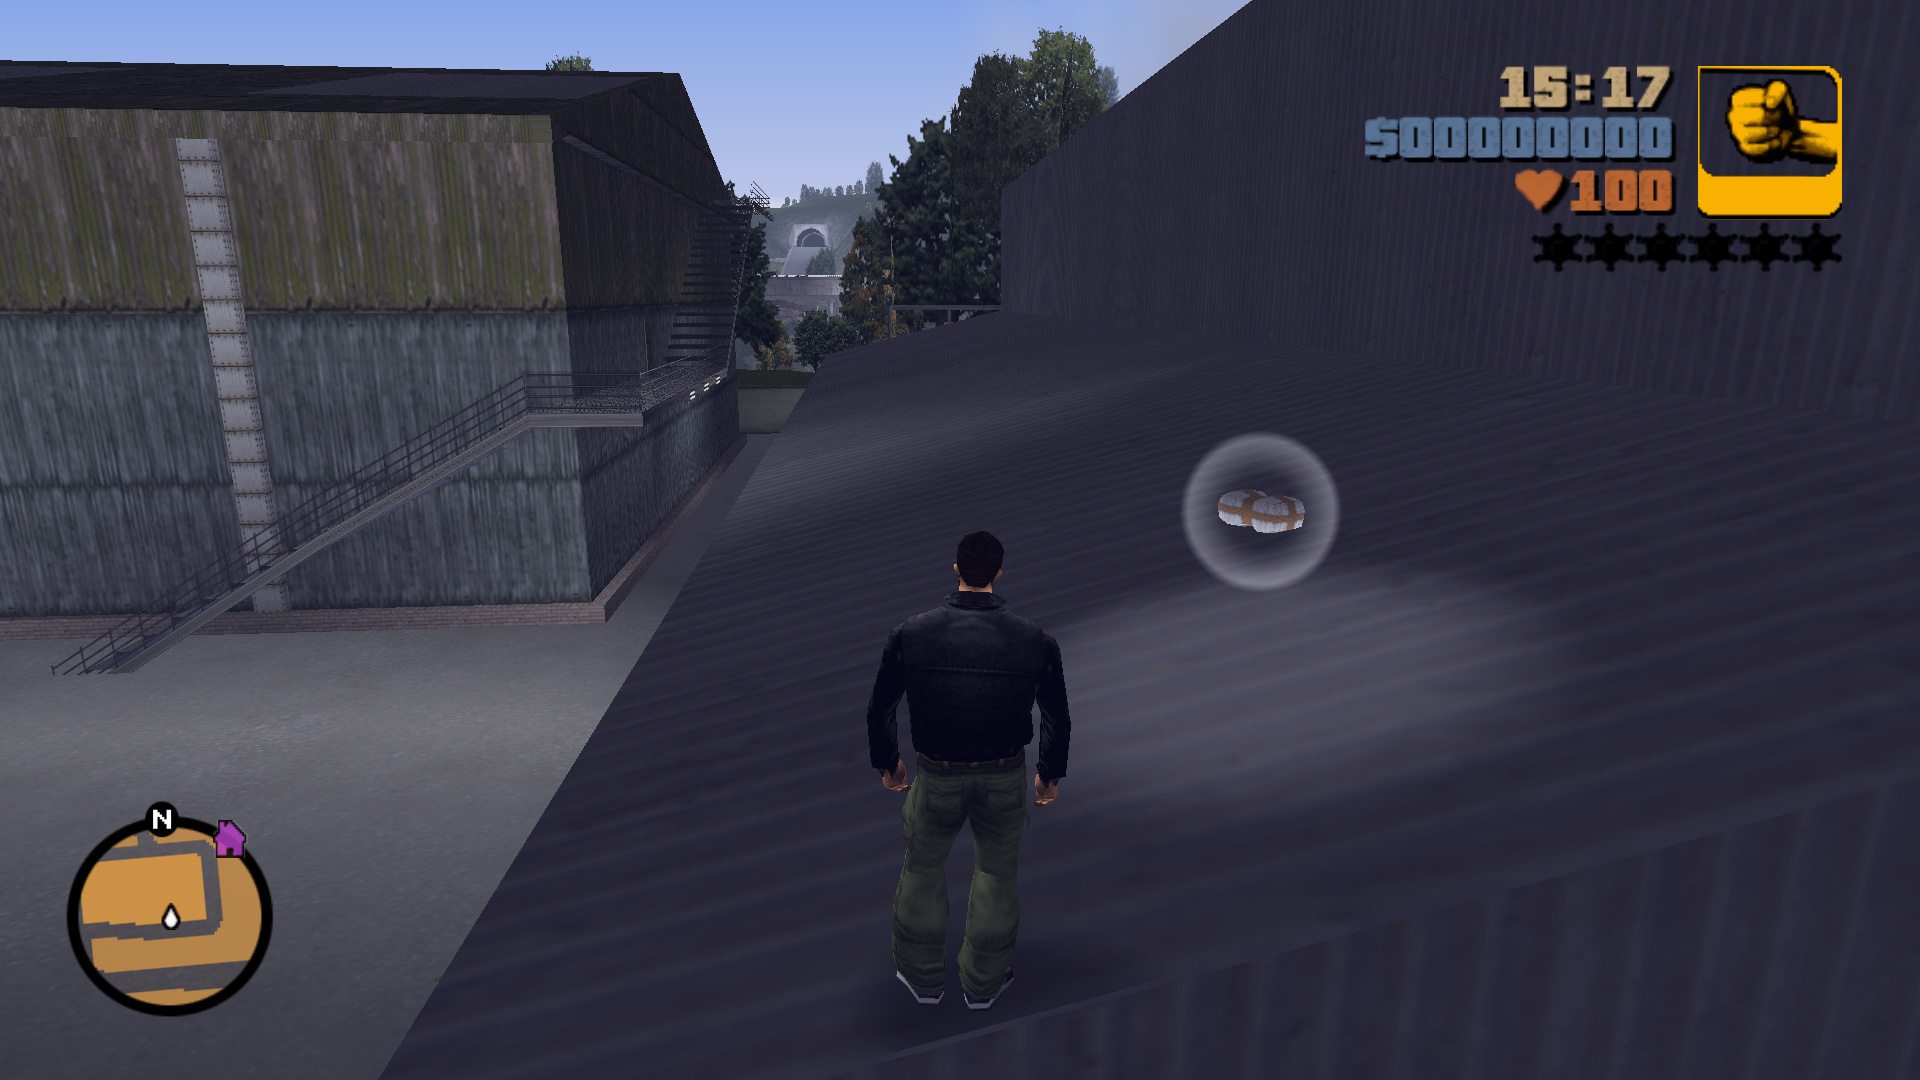
On the lower roof of the building with garages, the warehouse next to it has stairs that go up to the roof, climb them and jump across.
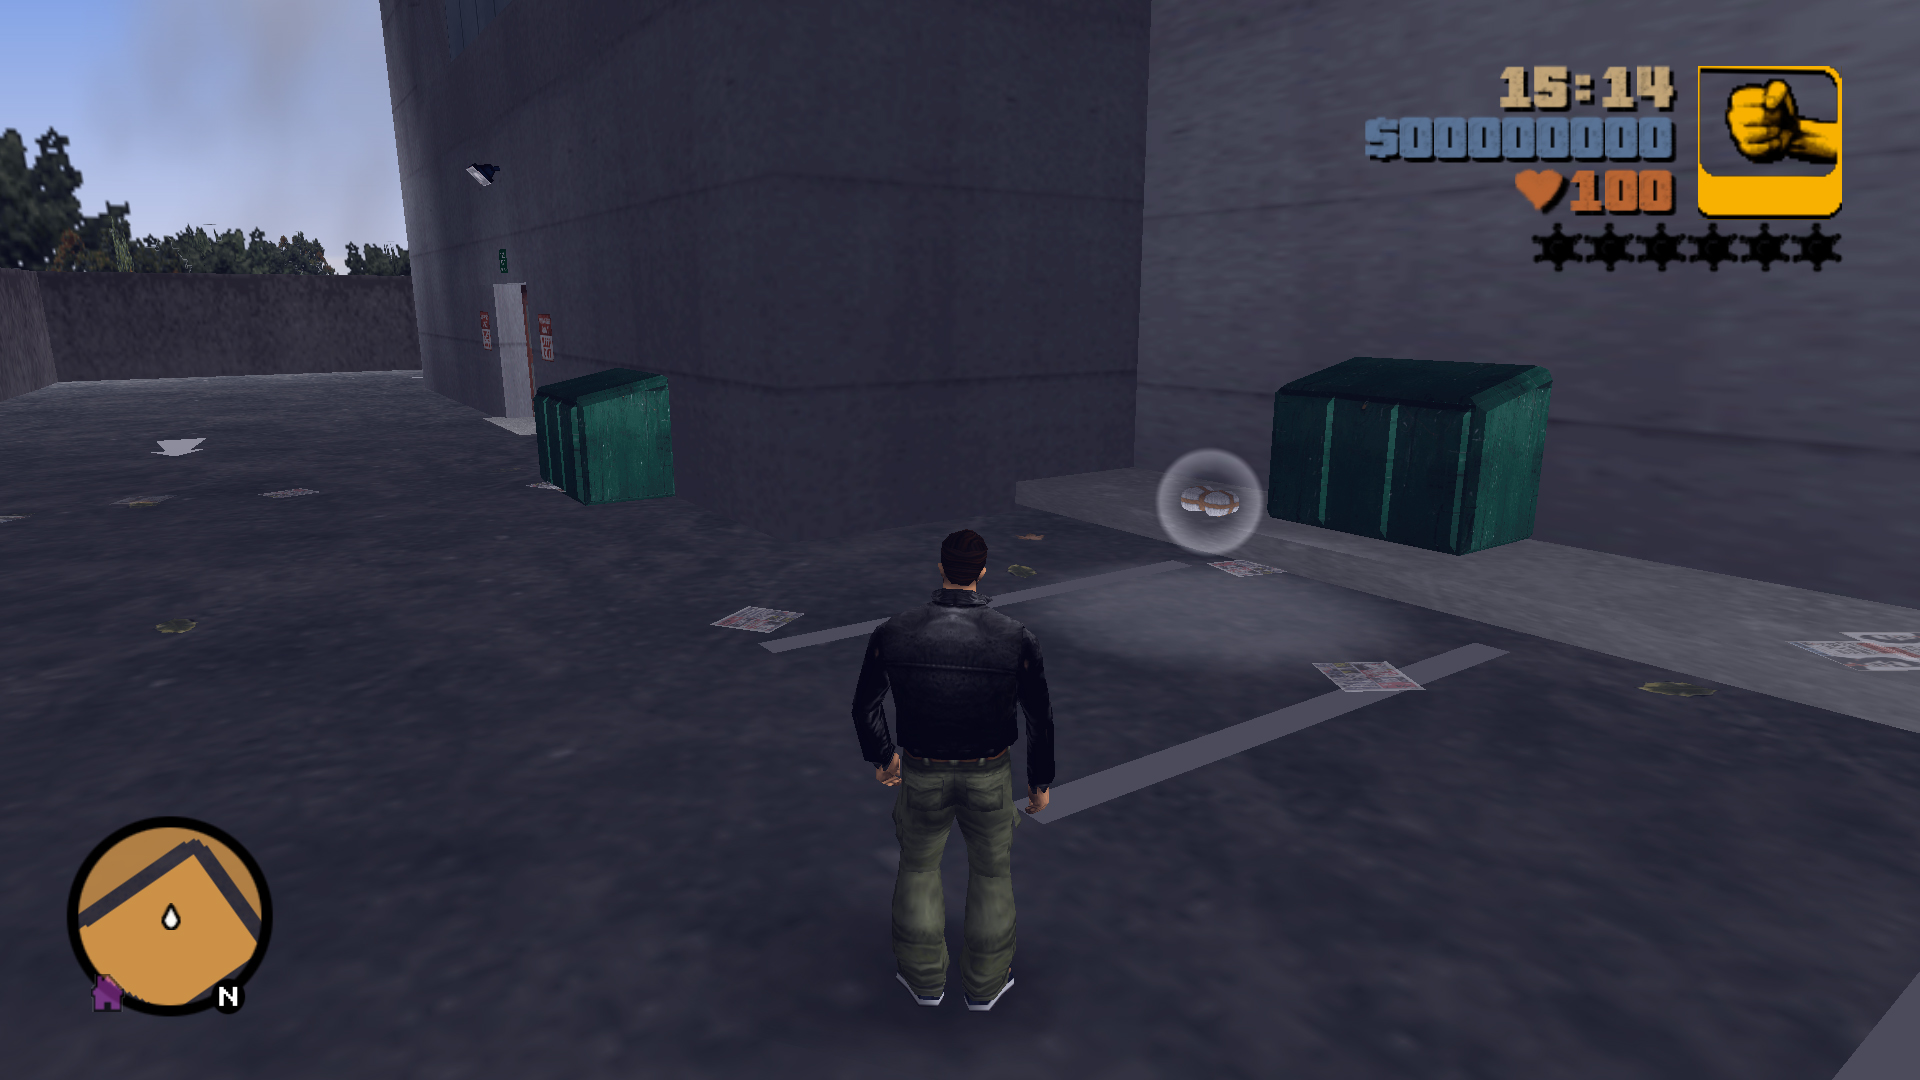
85
At the back of the Hospital, in front of a dumpster.
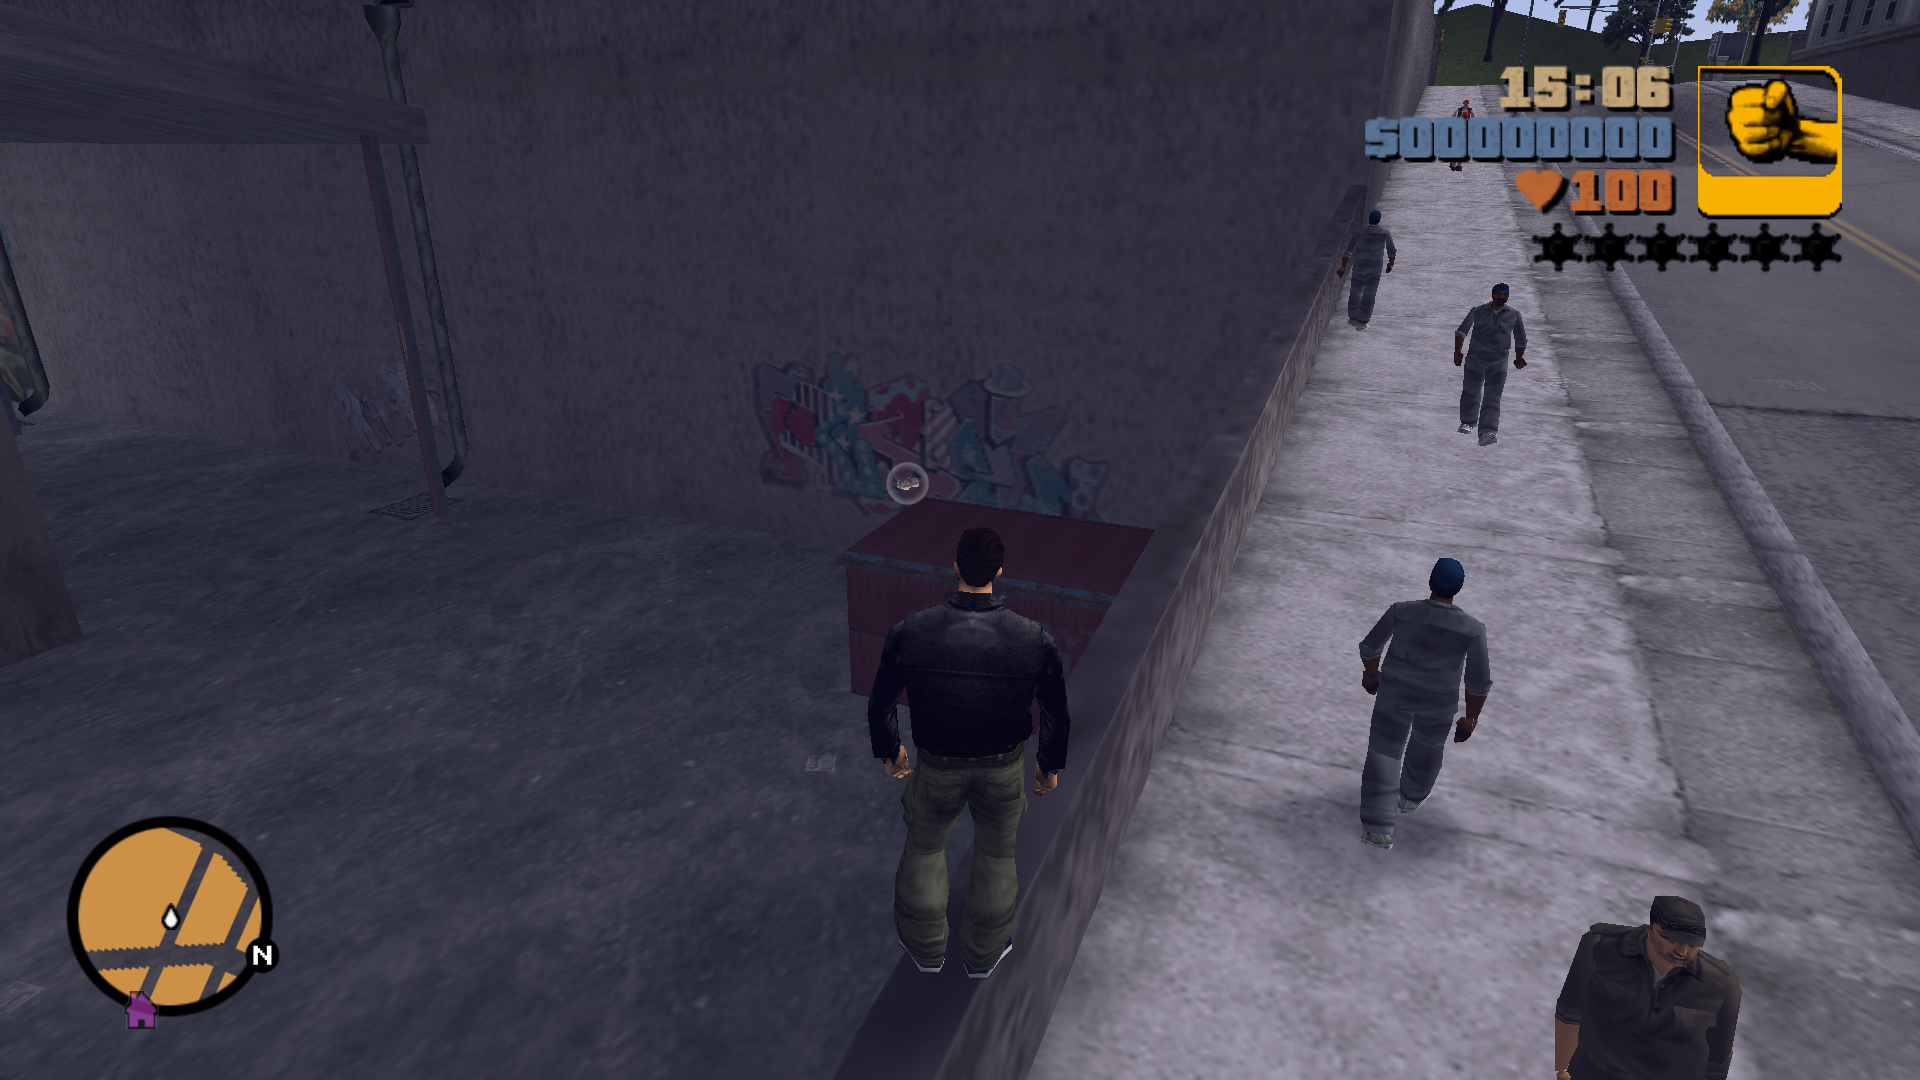
86
On top of a container at the back of a warehouse west of the Hospital, to get on, go to the street to the north and jump down onto the container.
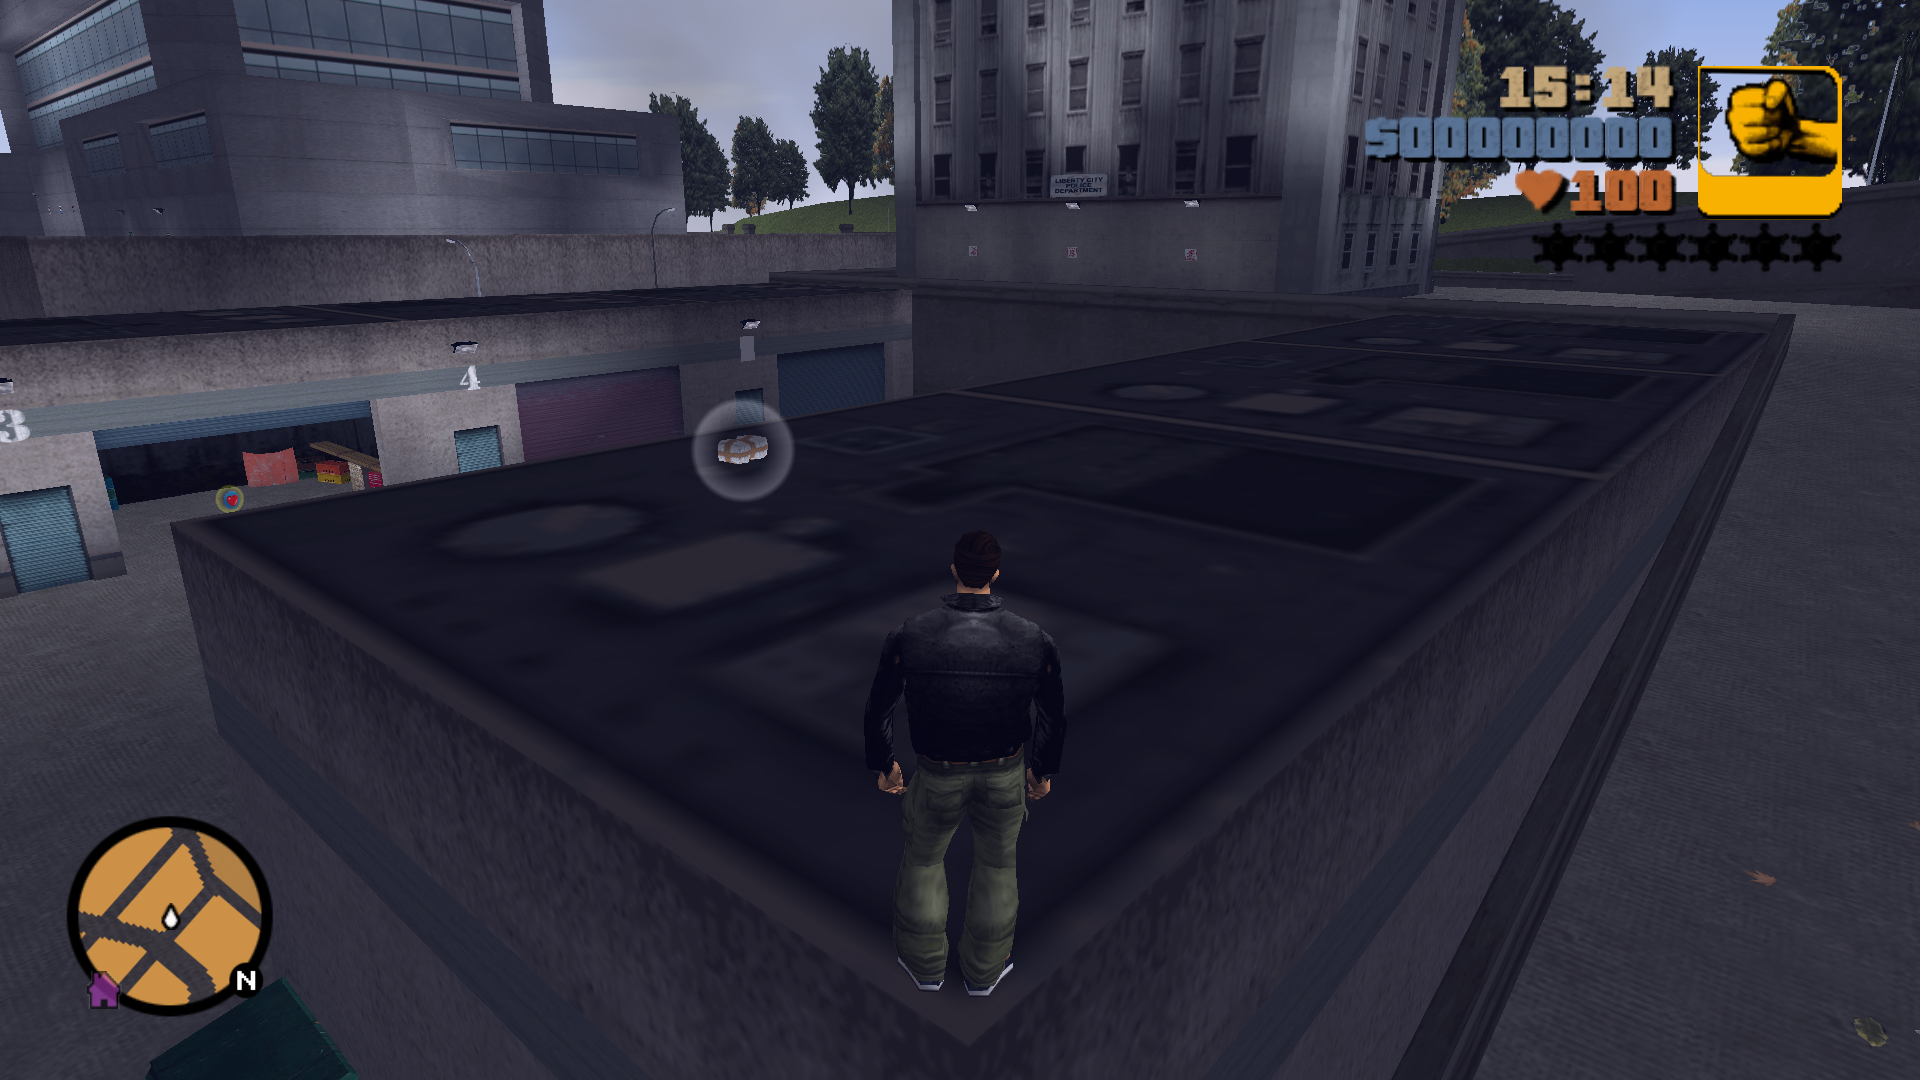
87
On the roof of the north garages at the back of the Police Station, jump on the railing at the top of the ramp to get on the roof.
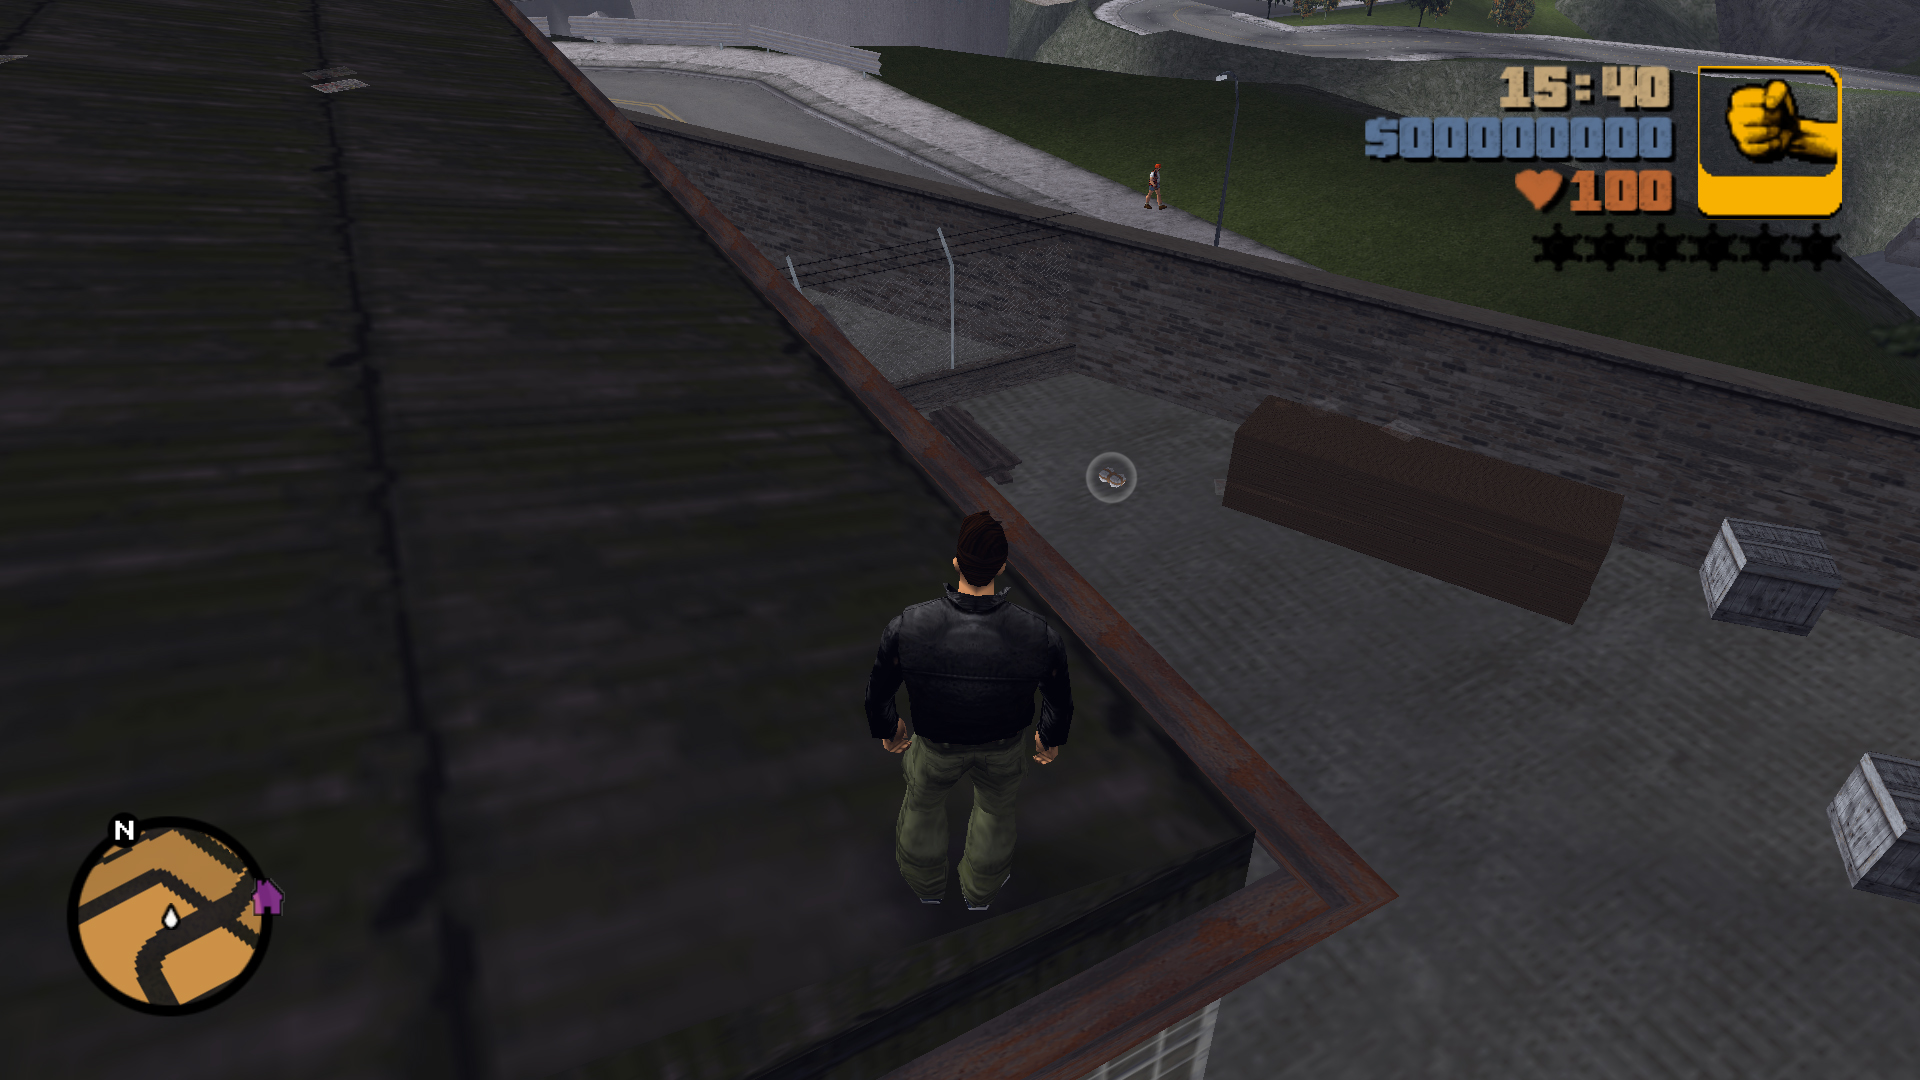
88
In the fenced off area at the back of the Import/Export garage, you can get there by using the ramp of Stunt Jump 15 to get on the outer wall of that section, dropping down on the roof of the garage, go across to the other garage and drop down to the floor in the corner past the fence.
89
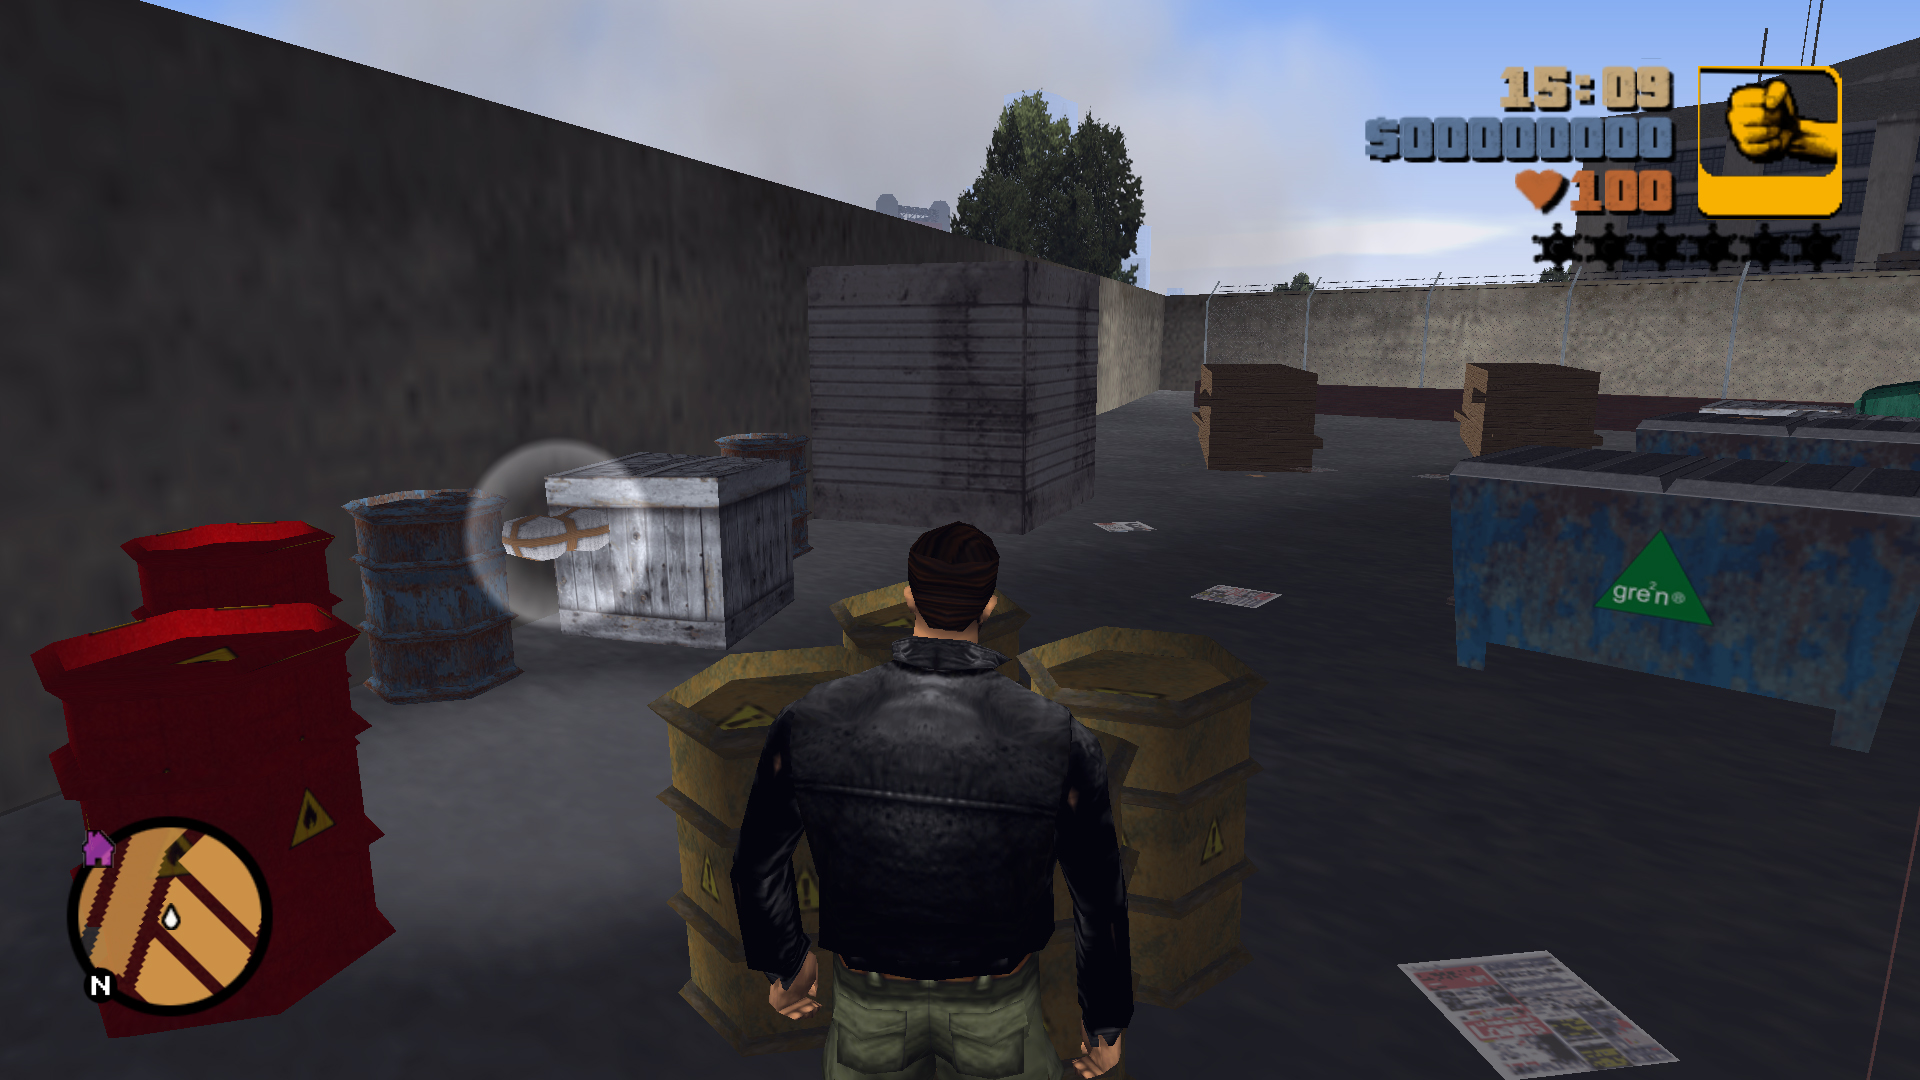
In a fenced area at the back of the red Liberty Farmaceuticals building, the entrance is to the southwest, then in the southeast corner there's an opening in the fence.
90
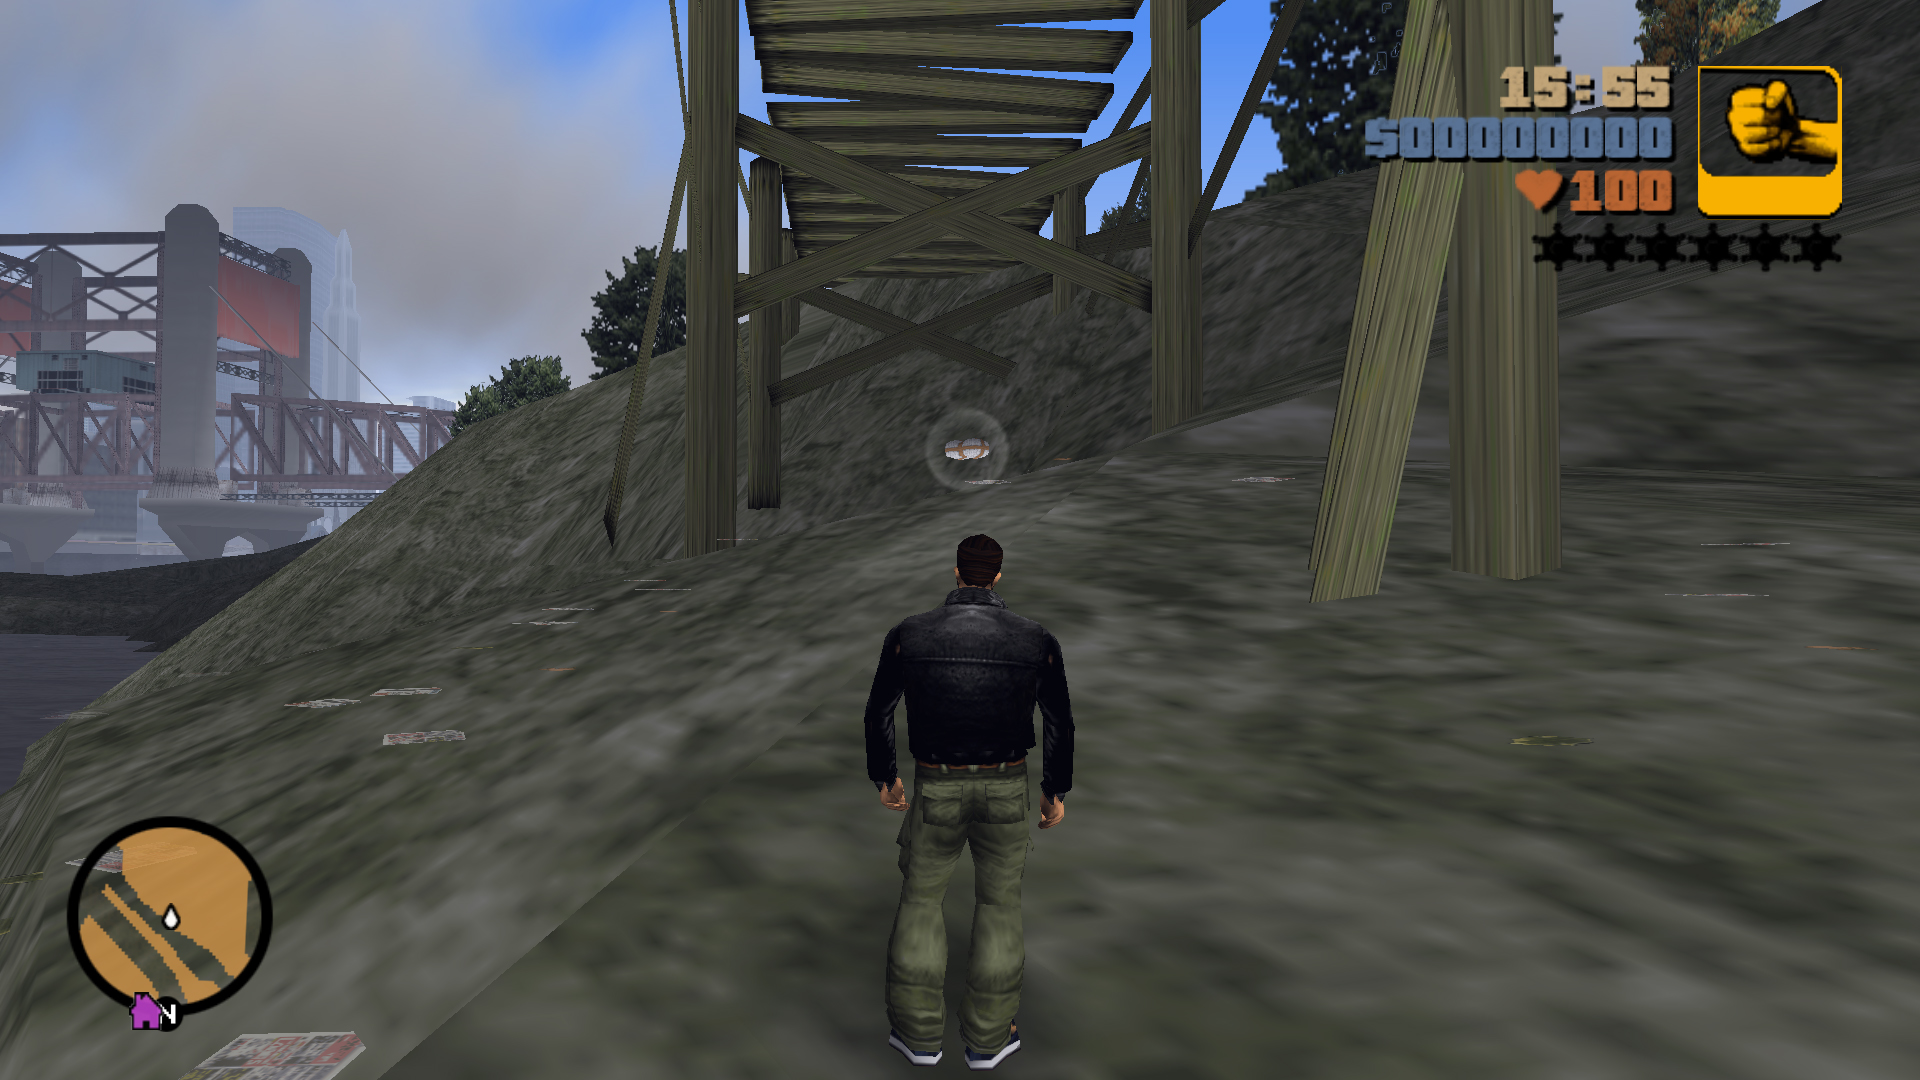
Under the broken wooden ramp.
91
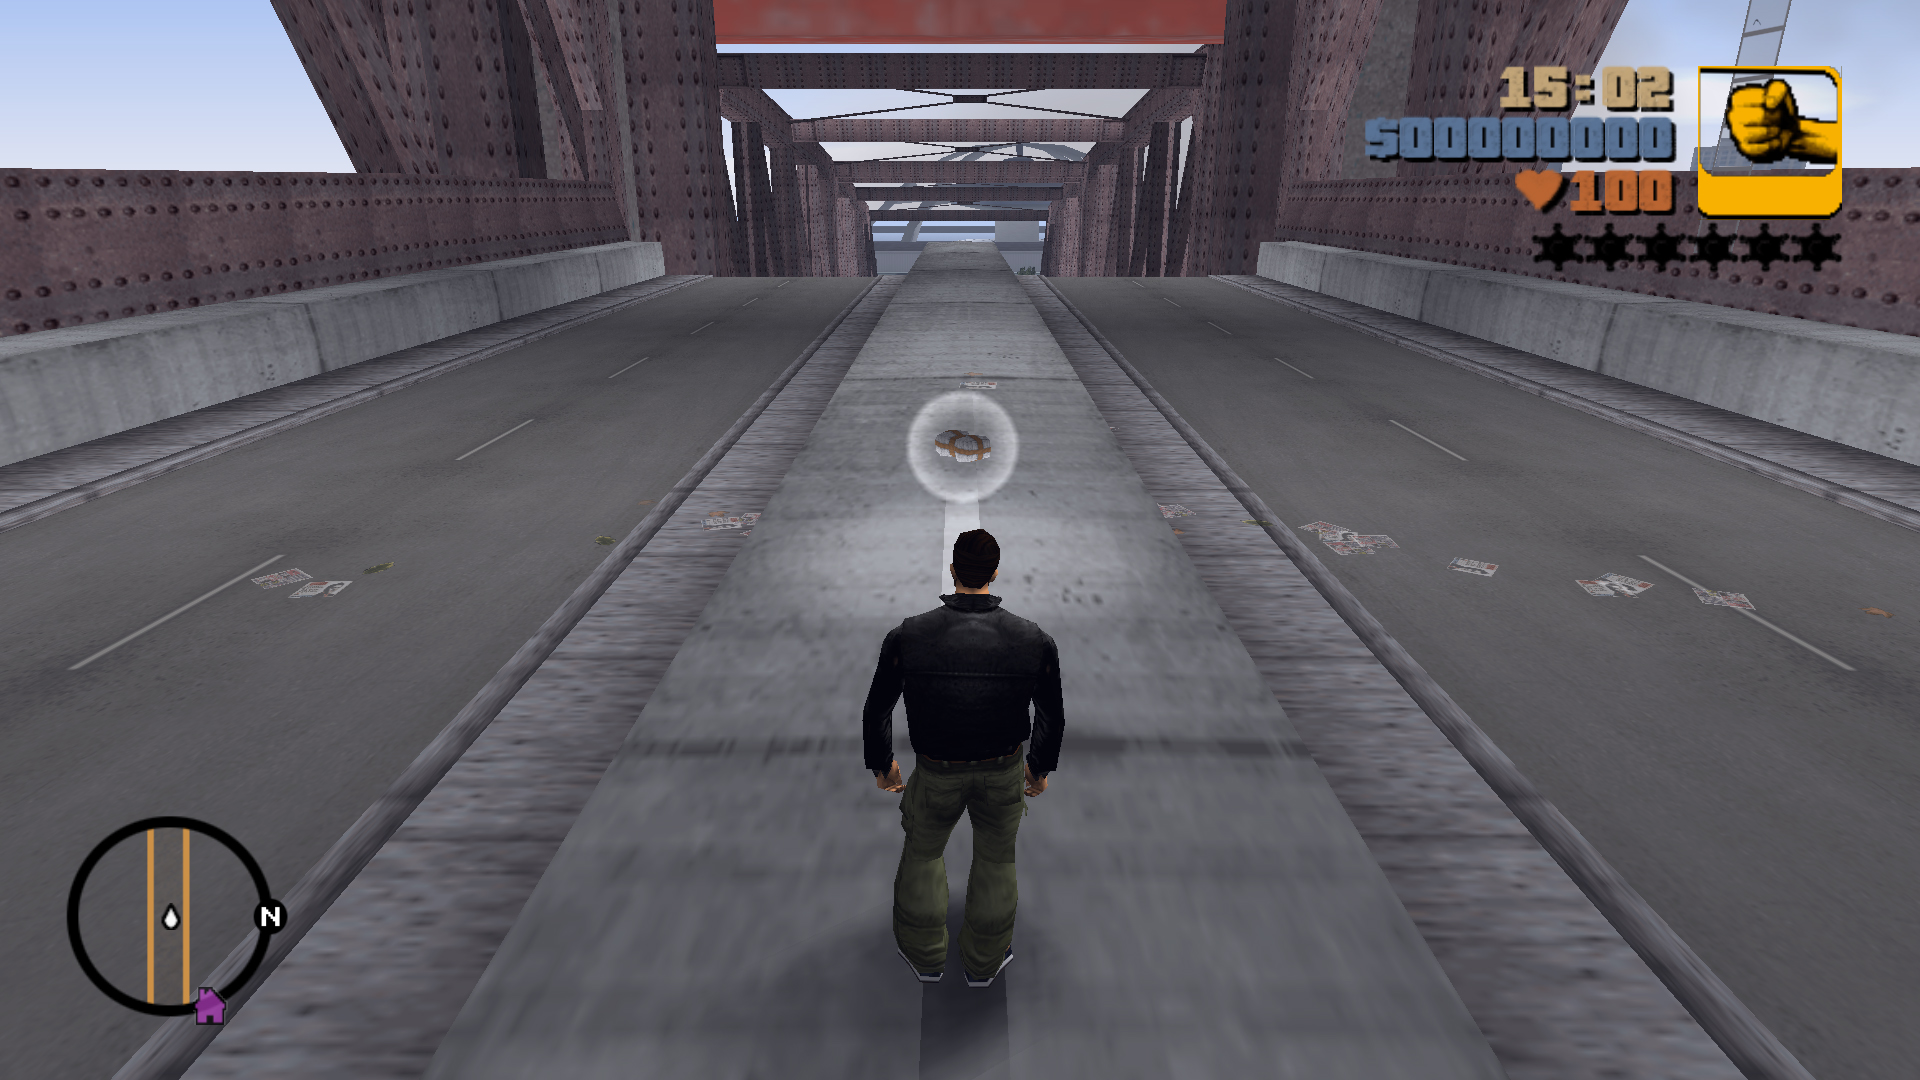
On the moving part of the Lift Bridge, in the middle of the barrier that separates the lanes, the package is reachable at the peak of the lift, you'll need a car to jump on the barrier.
92
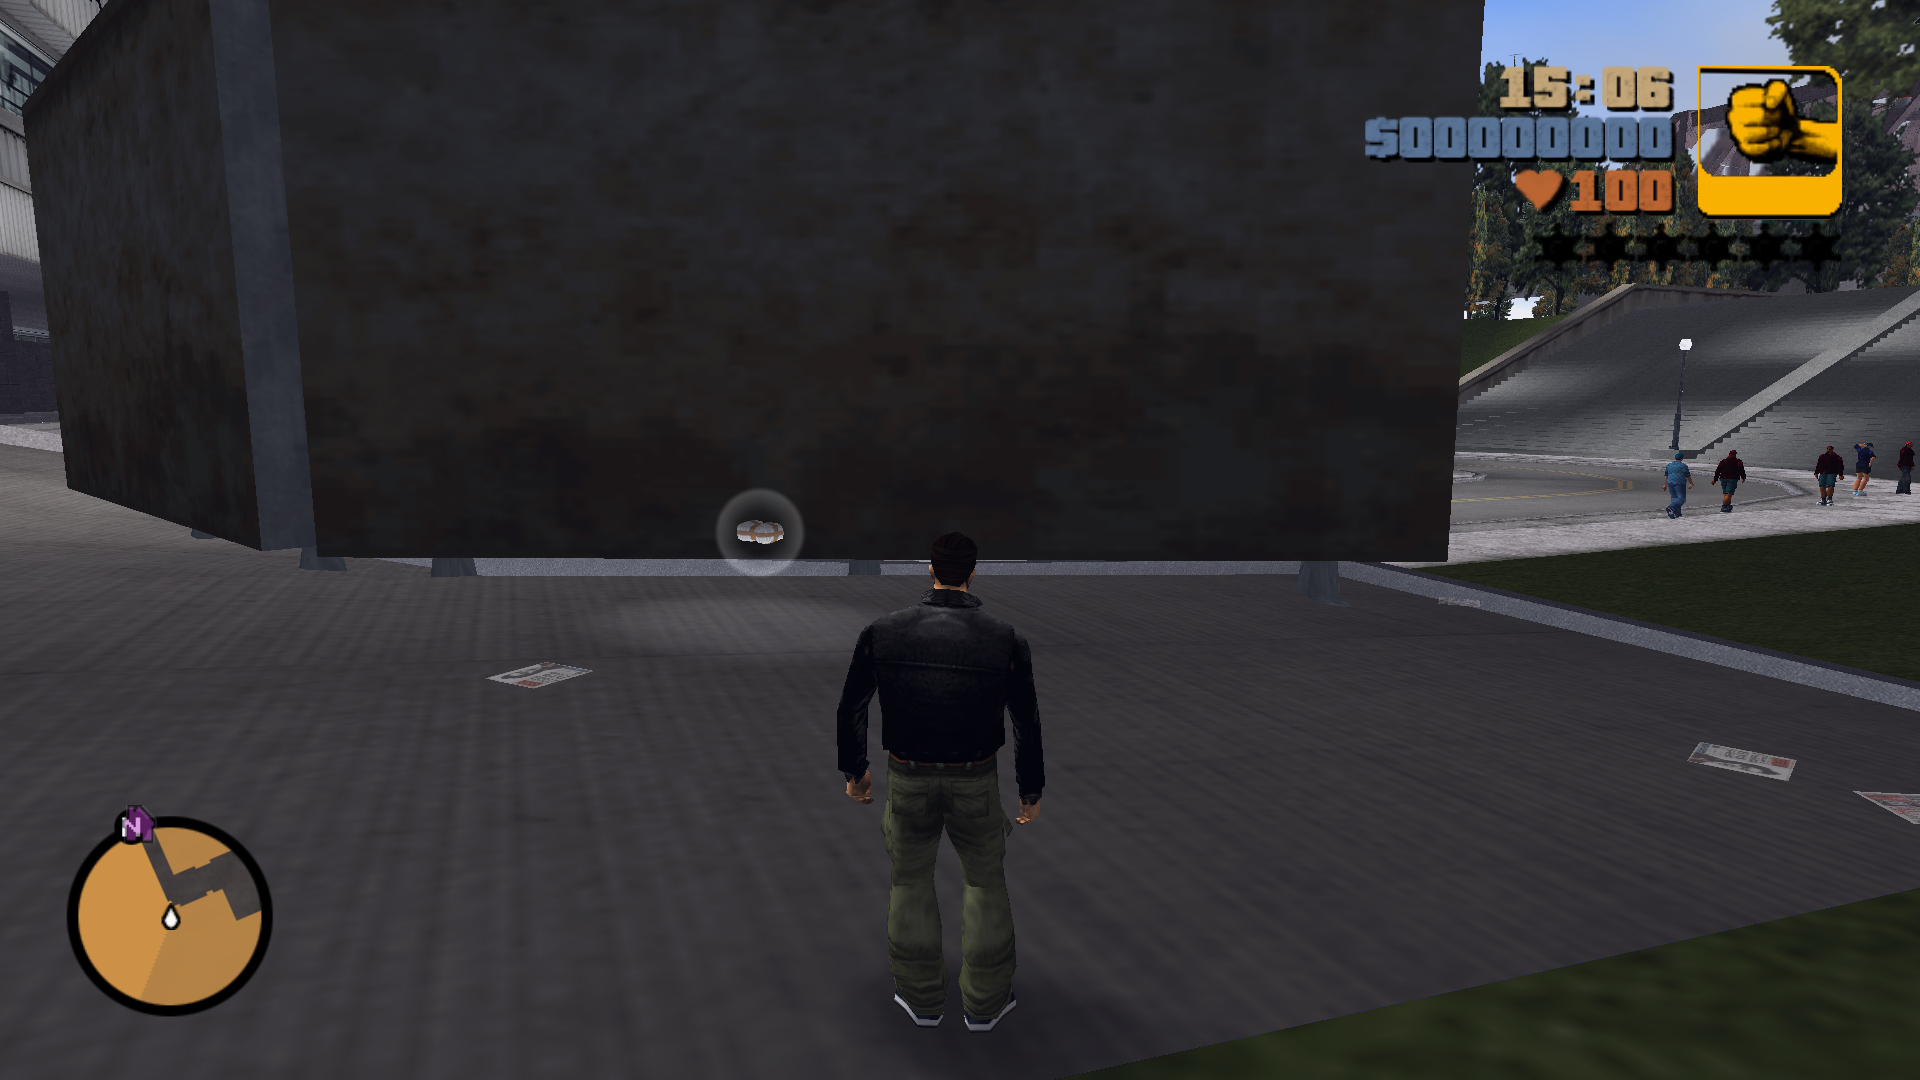
Behind the billboards at the end of the road in front of the Airport.
93
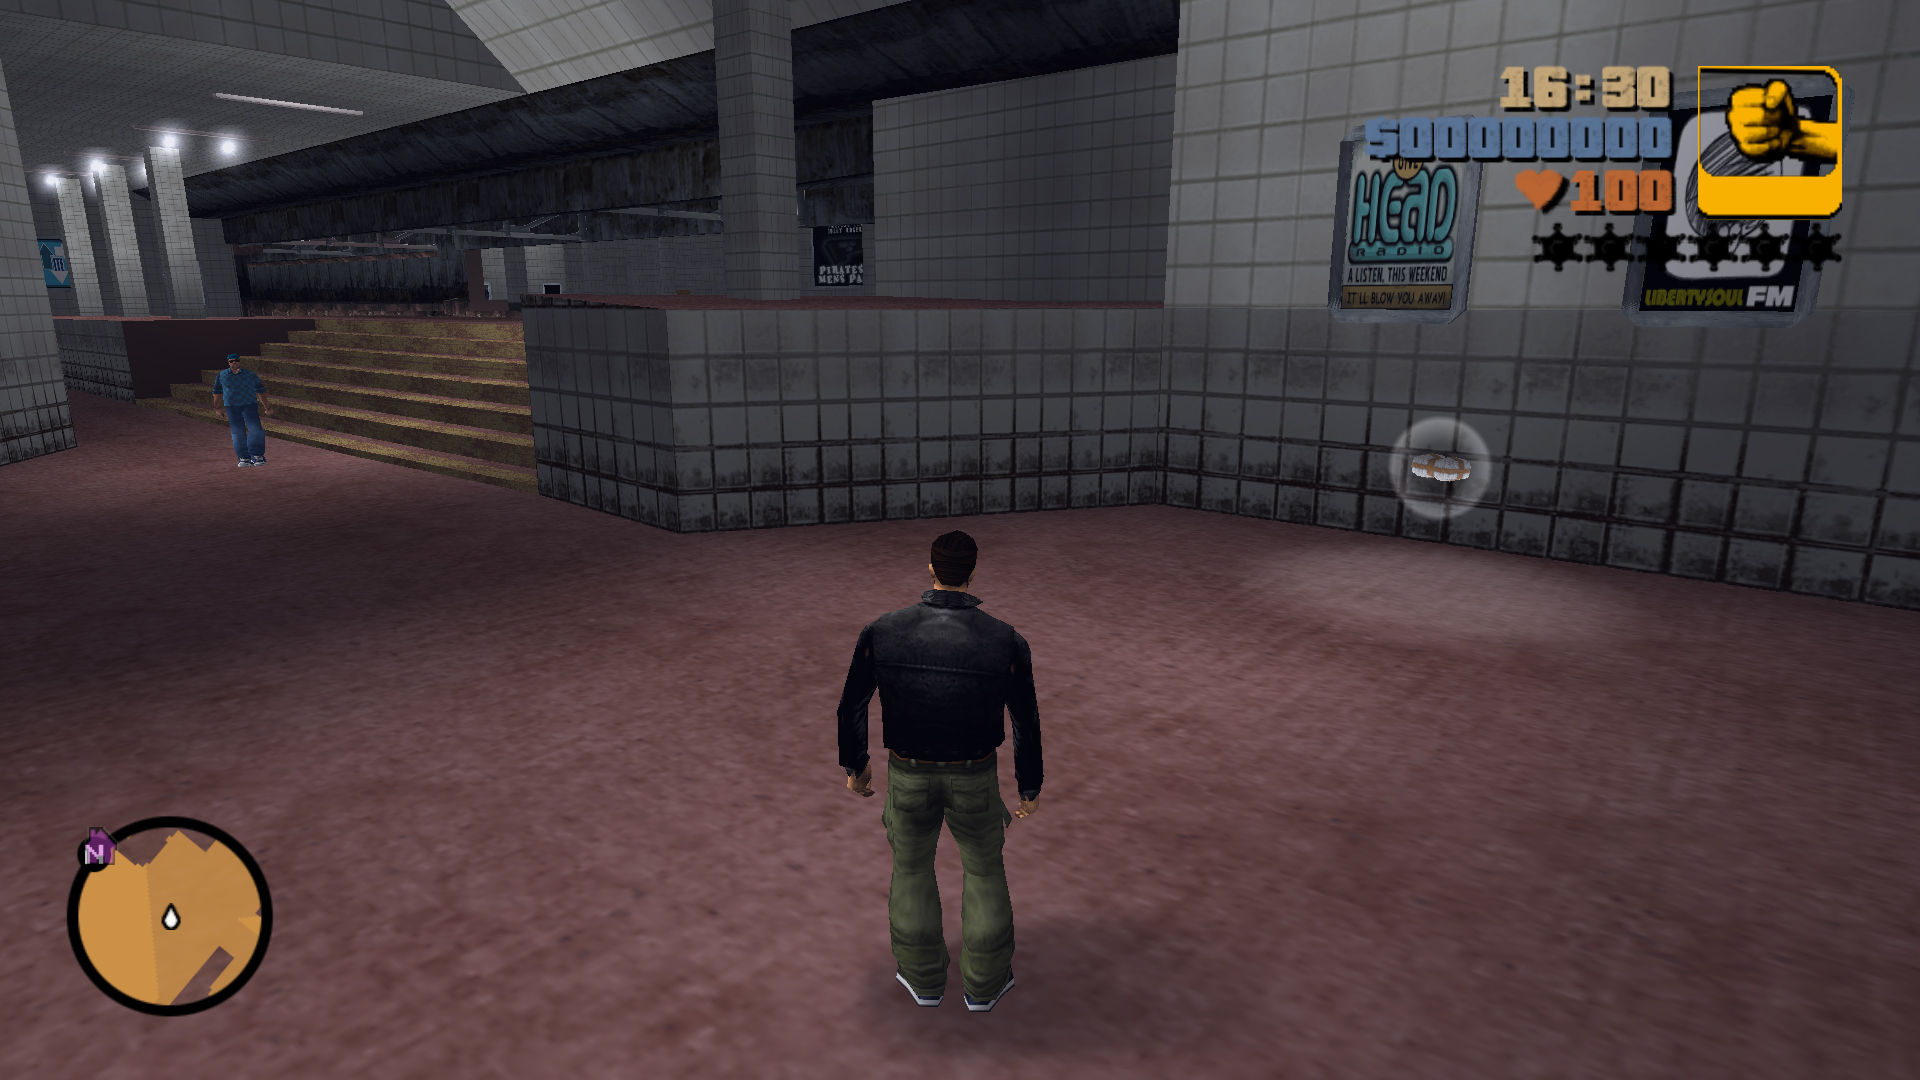
In the Subway, the entrance is next to the monument to the southeast of the Airport up the stairs, at the Subway entrance, go down two sets of stairs and turn left towards the bathrooms, go past the bathrooms and keep going forward, go down some stairs and the package is in the corner.
94
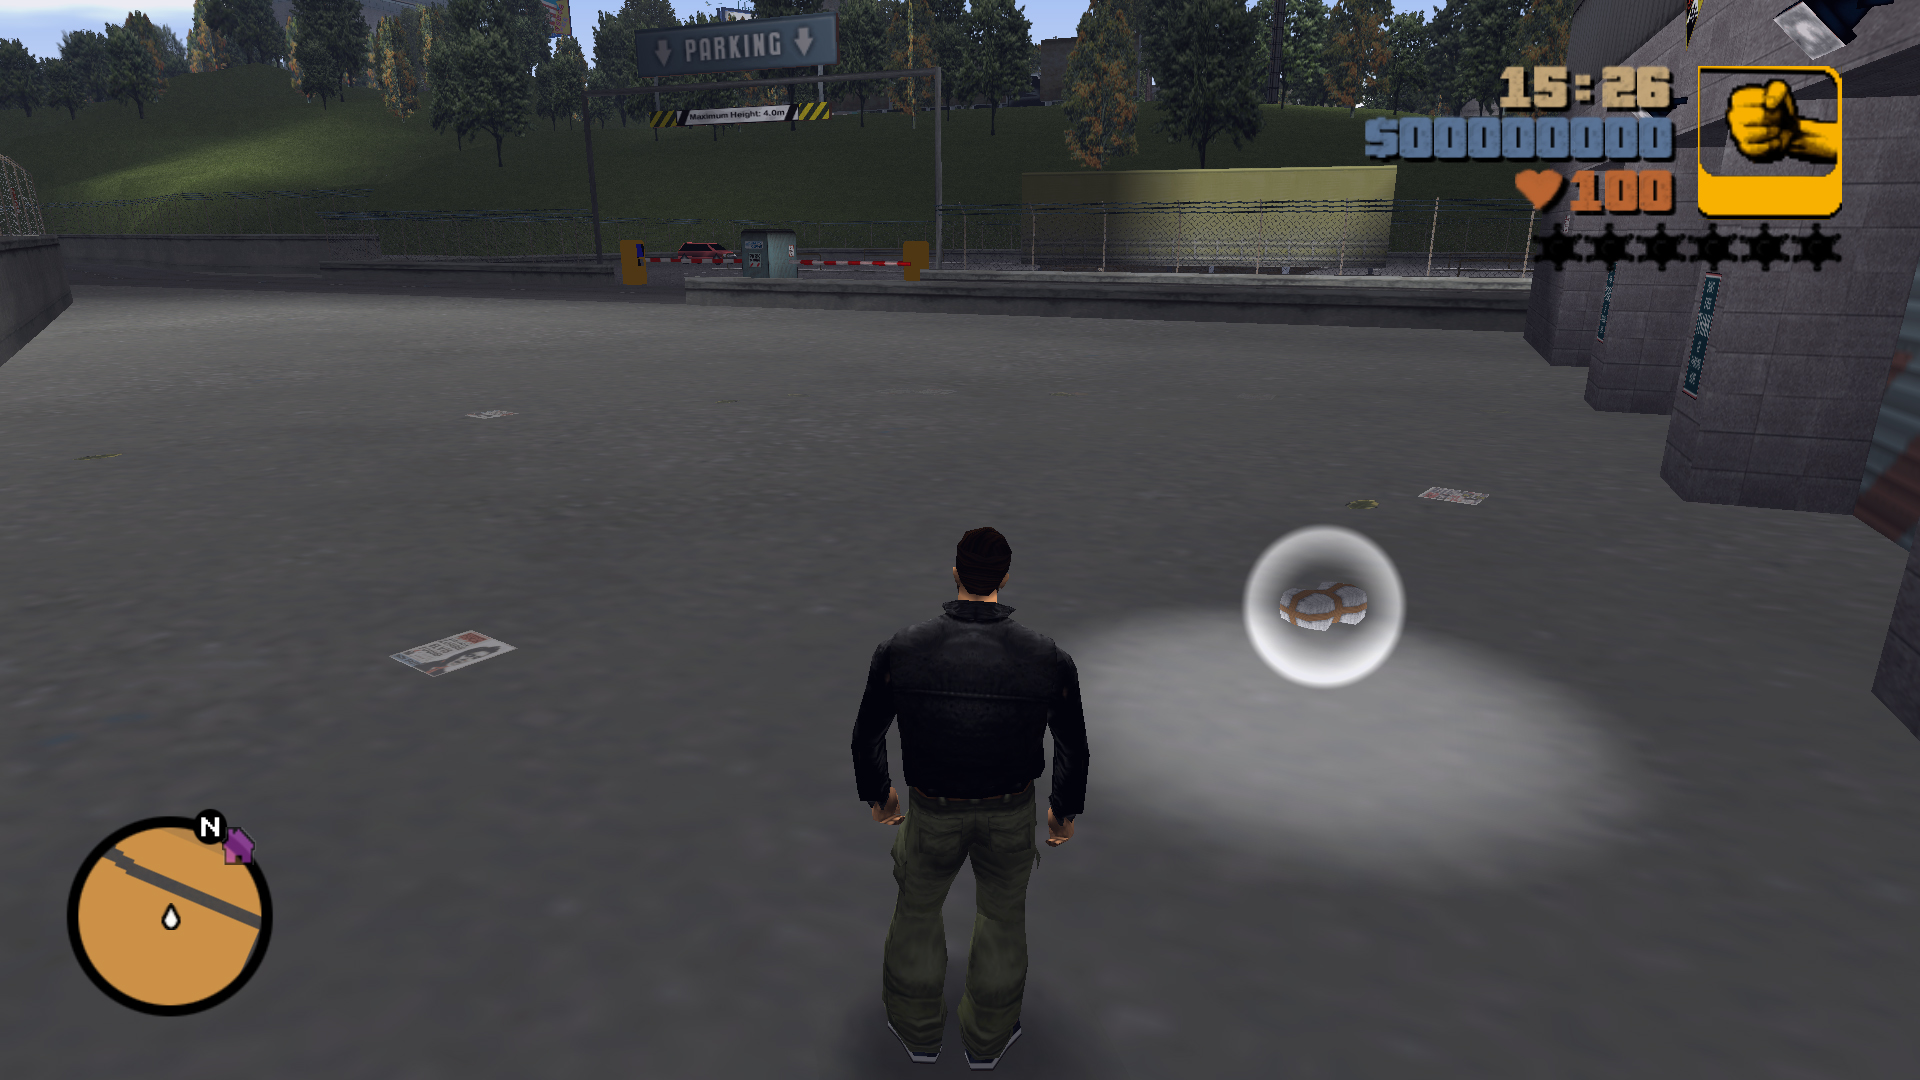
In the corner of the Airport's Fire Station garages, in front of the parking lot.
95
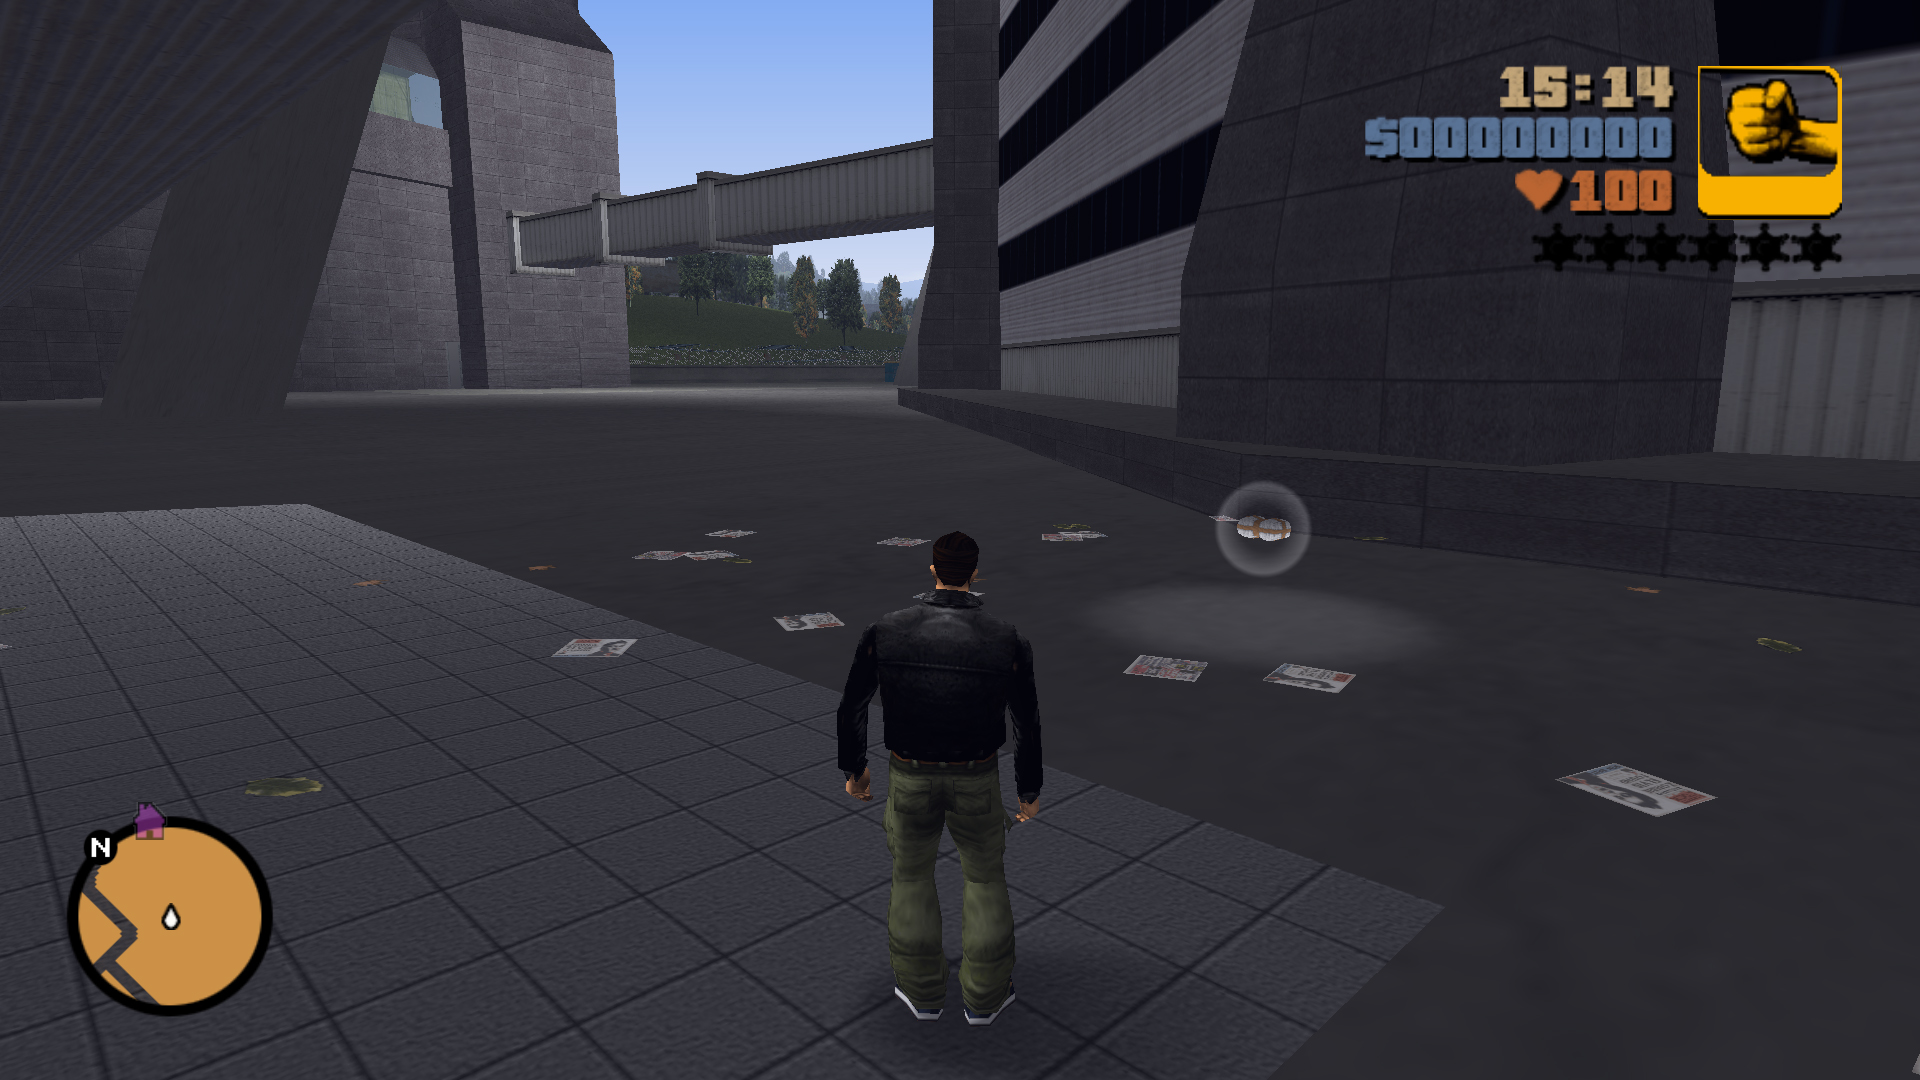
A little west of the Airport's Fire Station garages there's an opening in the fenced wall, go through it and turn right, go around the circular building until you reach a green wall with glass and the package in front of it.
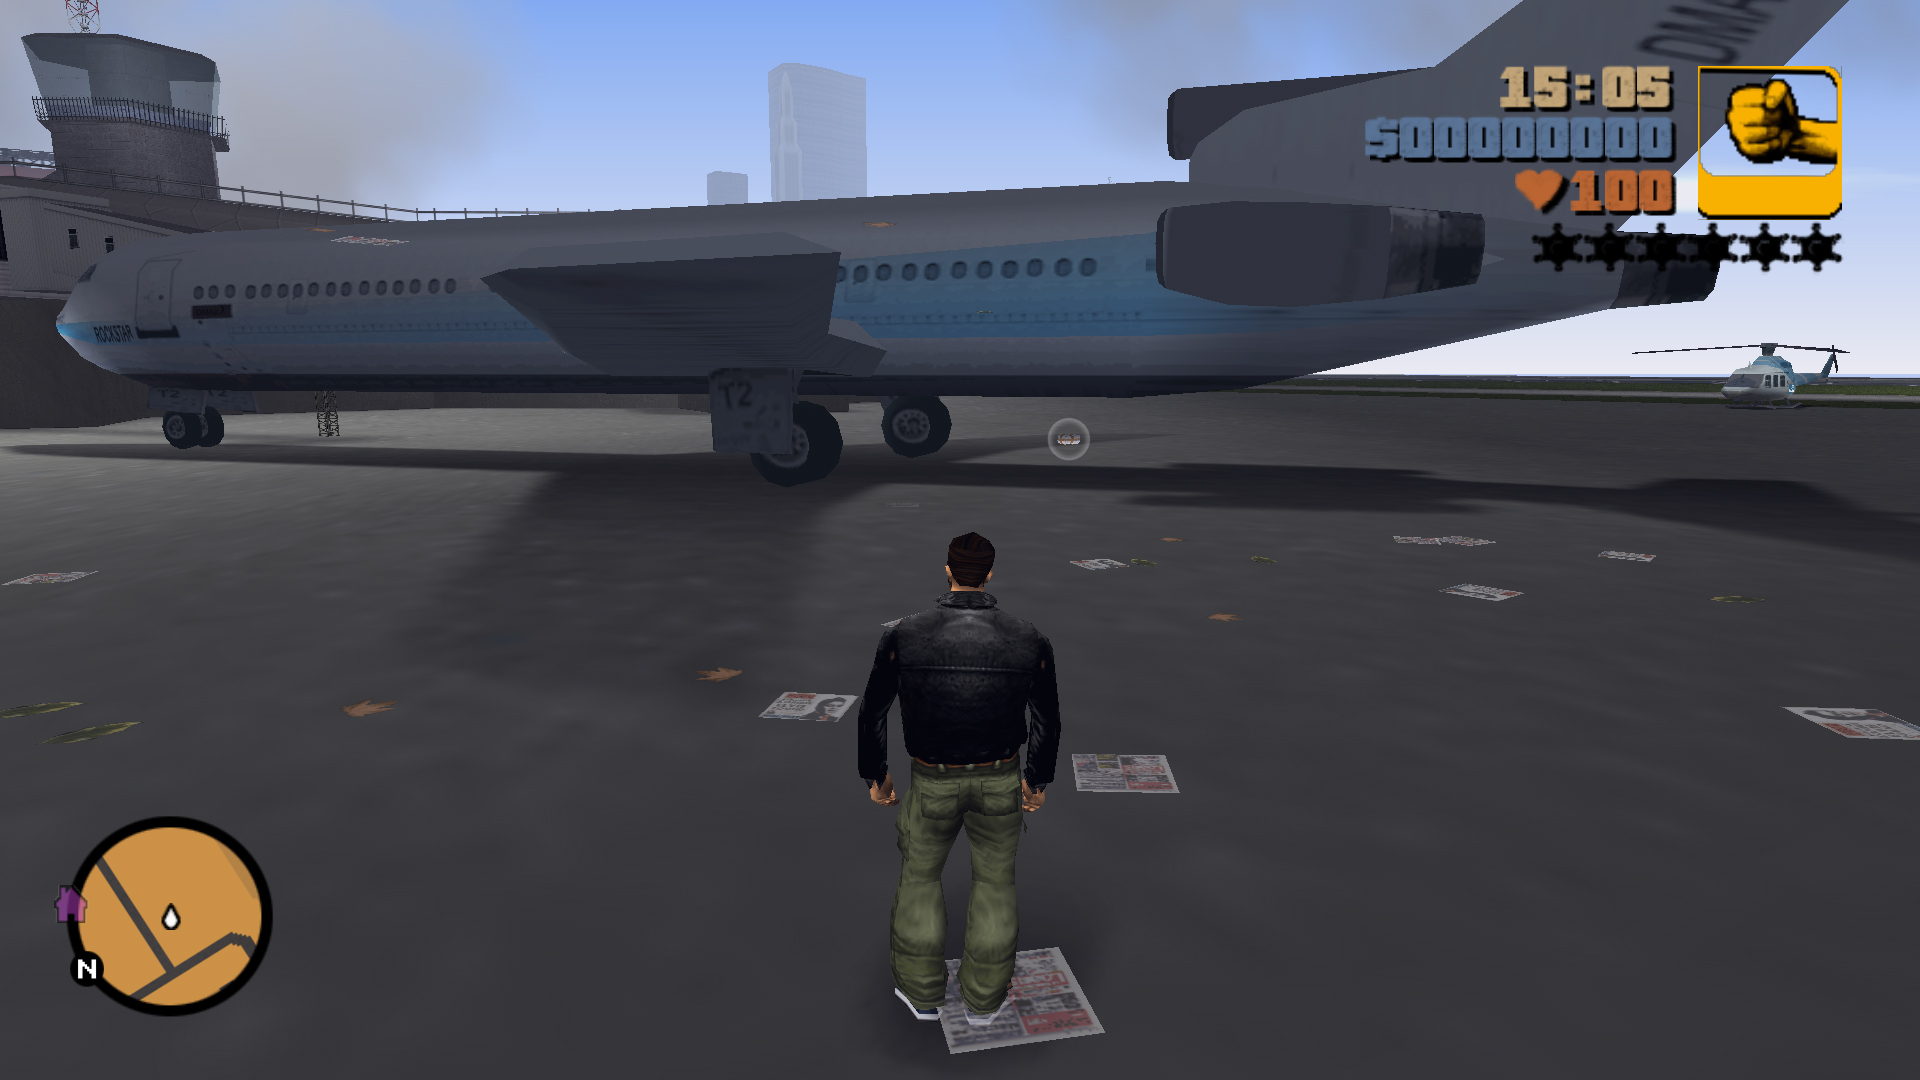
96
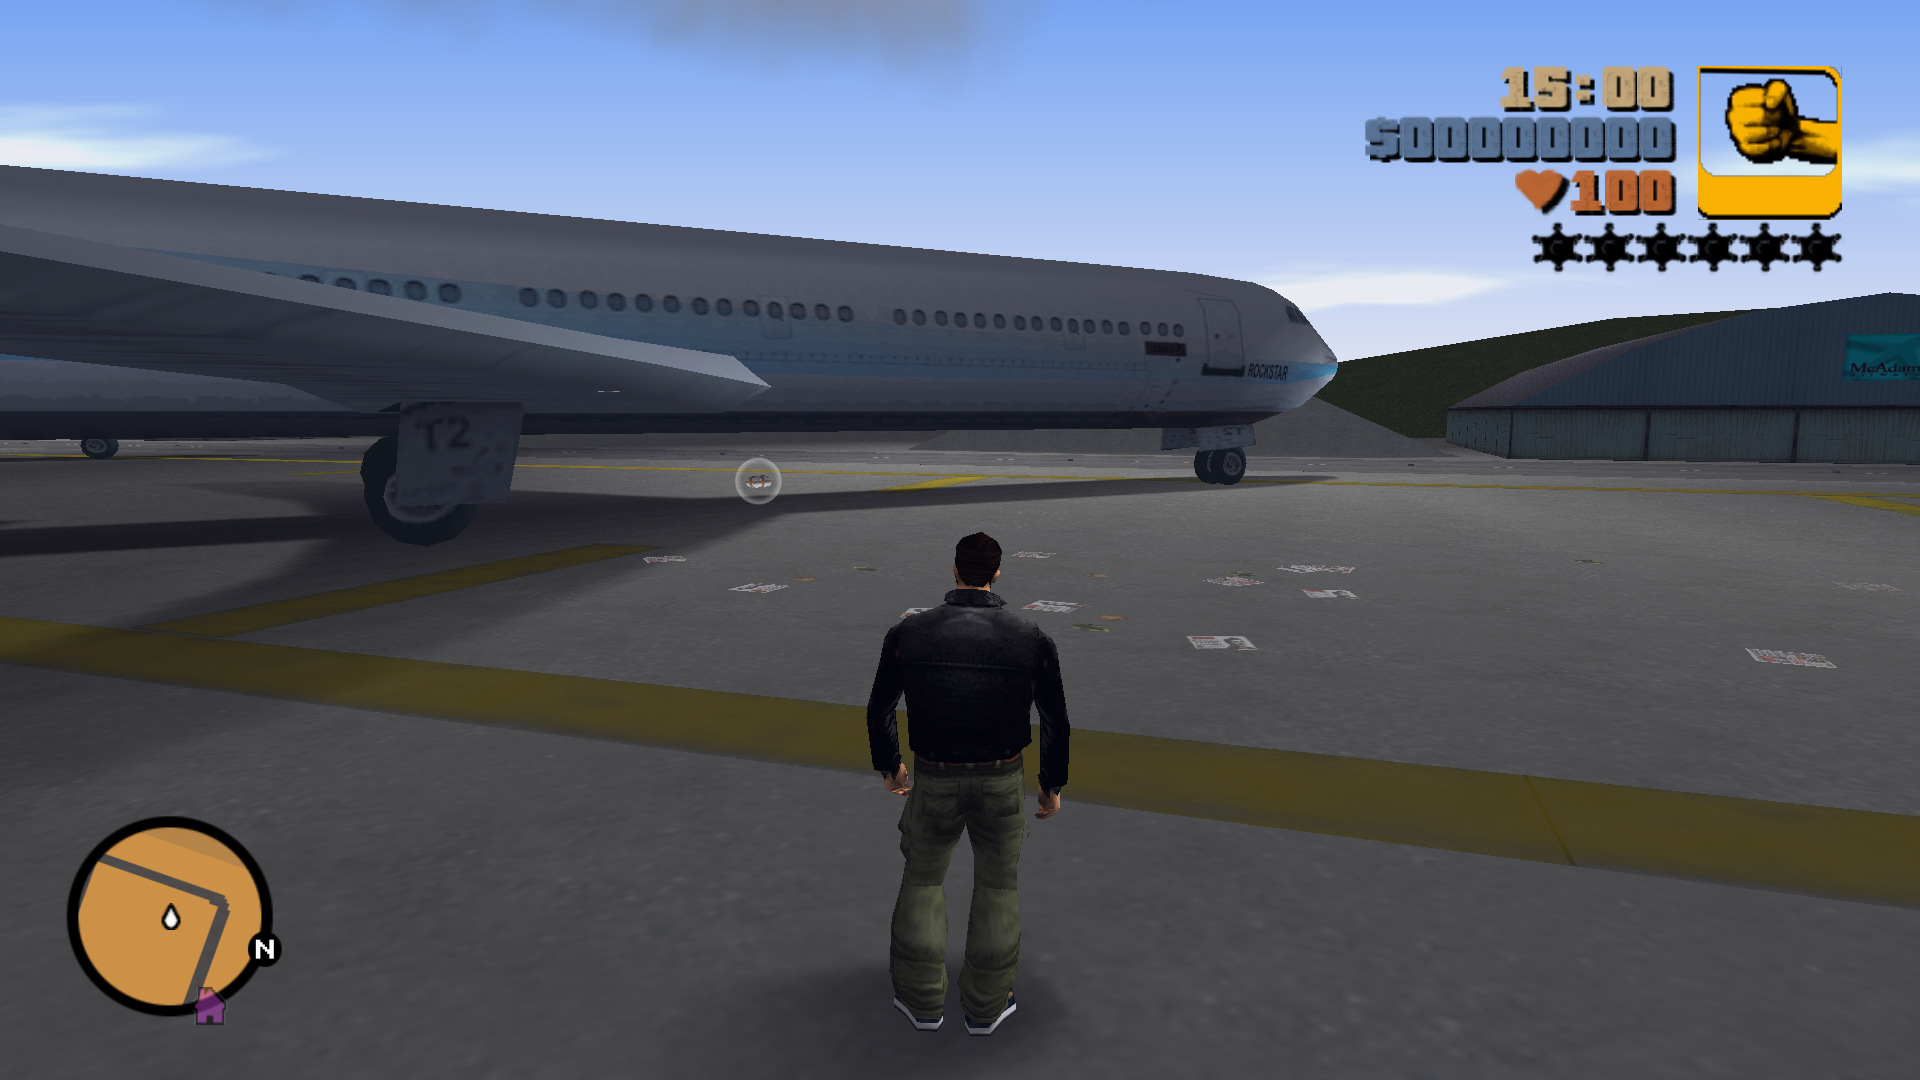
Under a plane that's close to a small blue hangar.
97
Under a plane that's close to some helicopters.
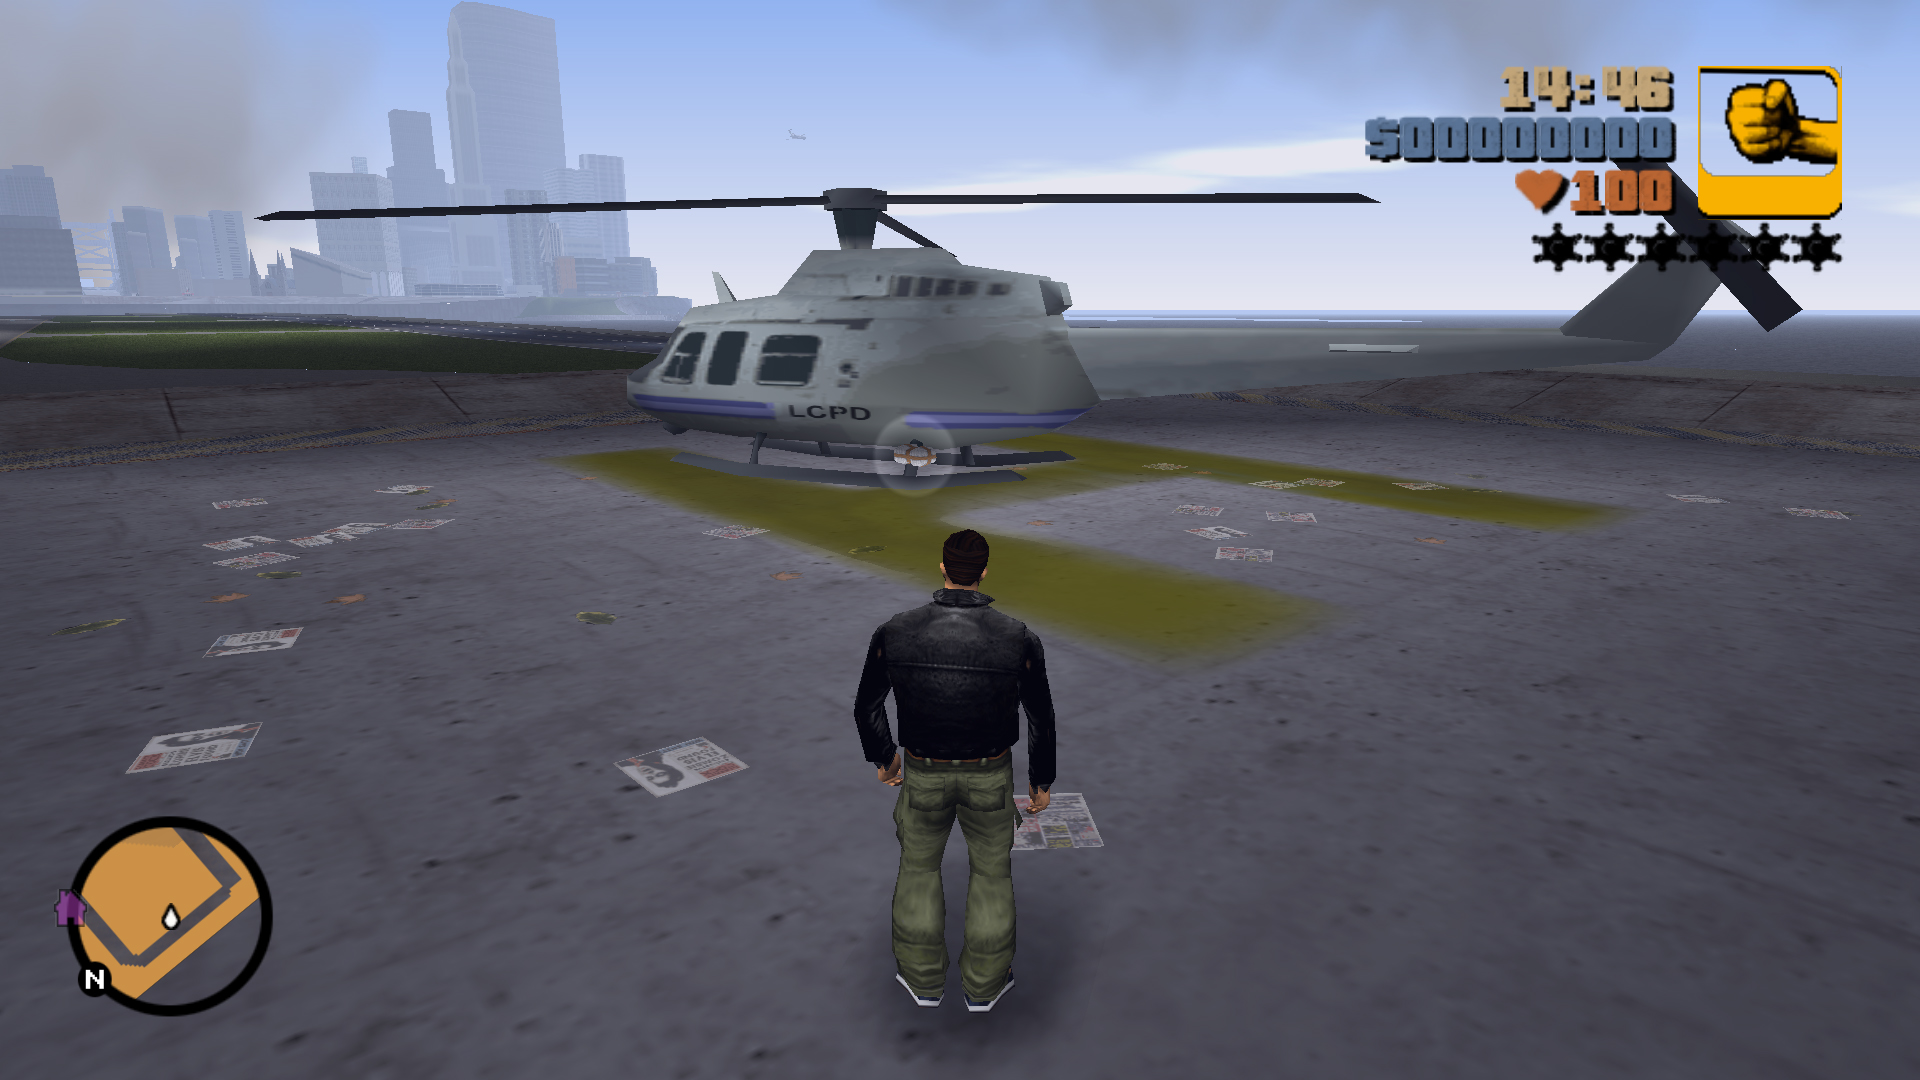
98
On the helipad next to a helicopter.
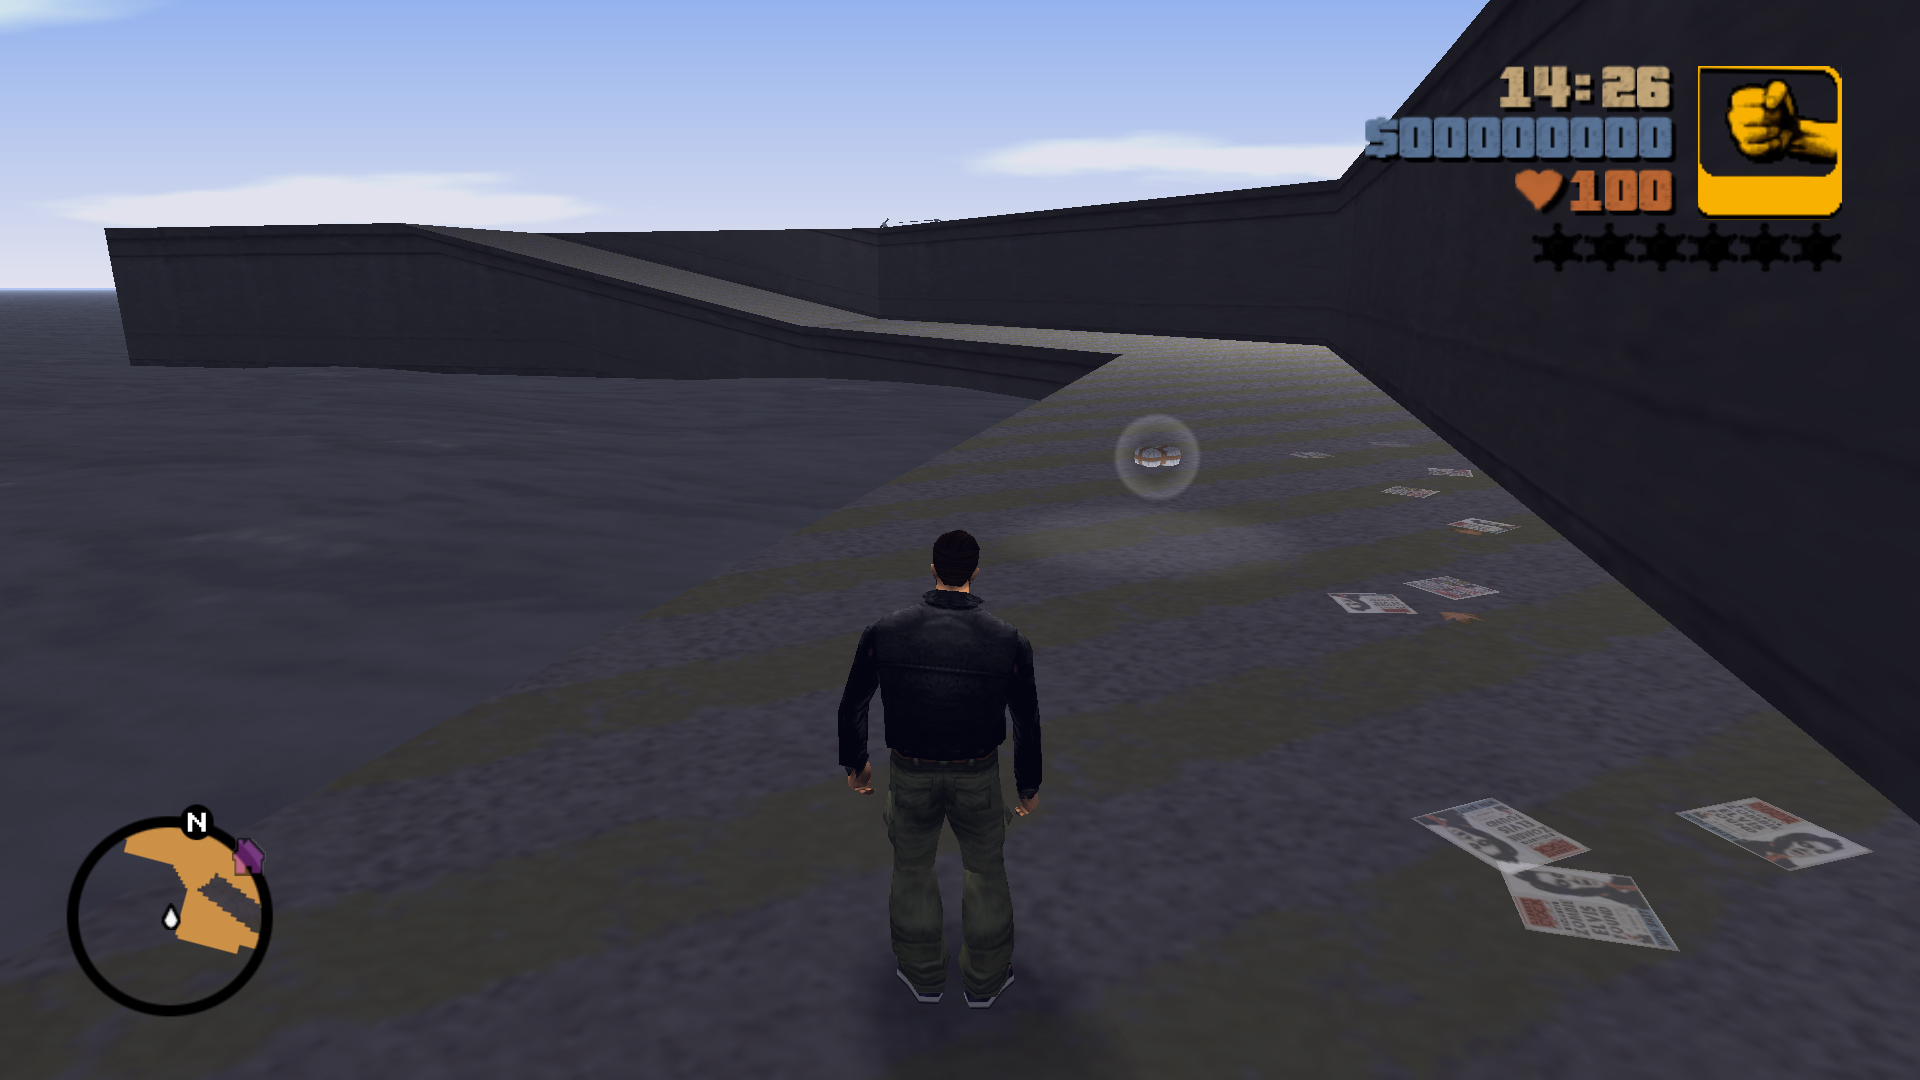
99
On a lower platform next to the shore.
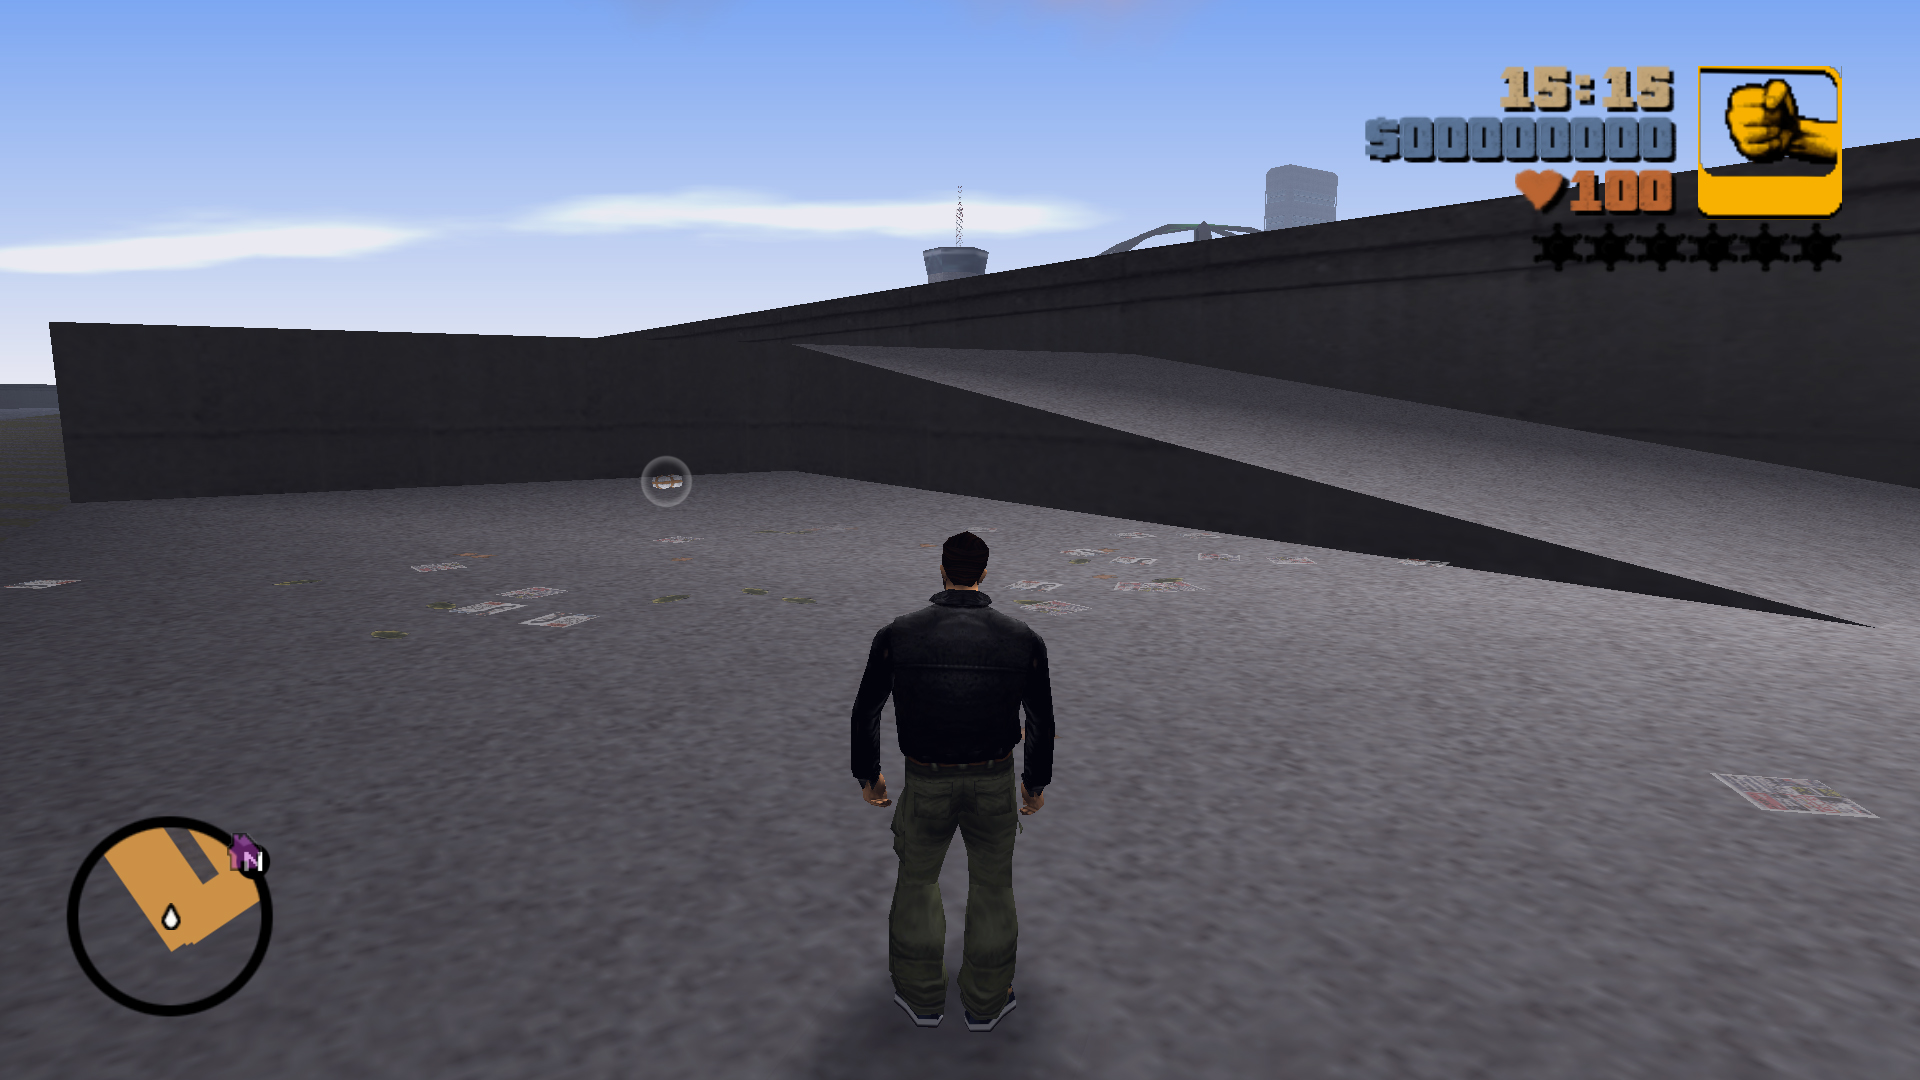
100
On a lower platform at the side of the runway next to a ramp.
Rampage Locations
Rampage
Locations
Objective
Weapon
1
First Location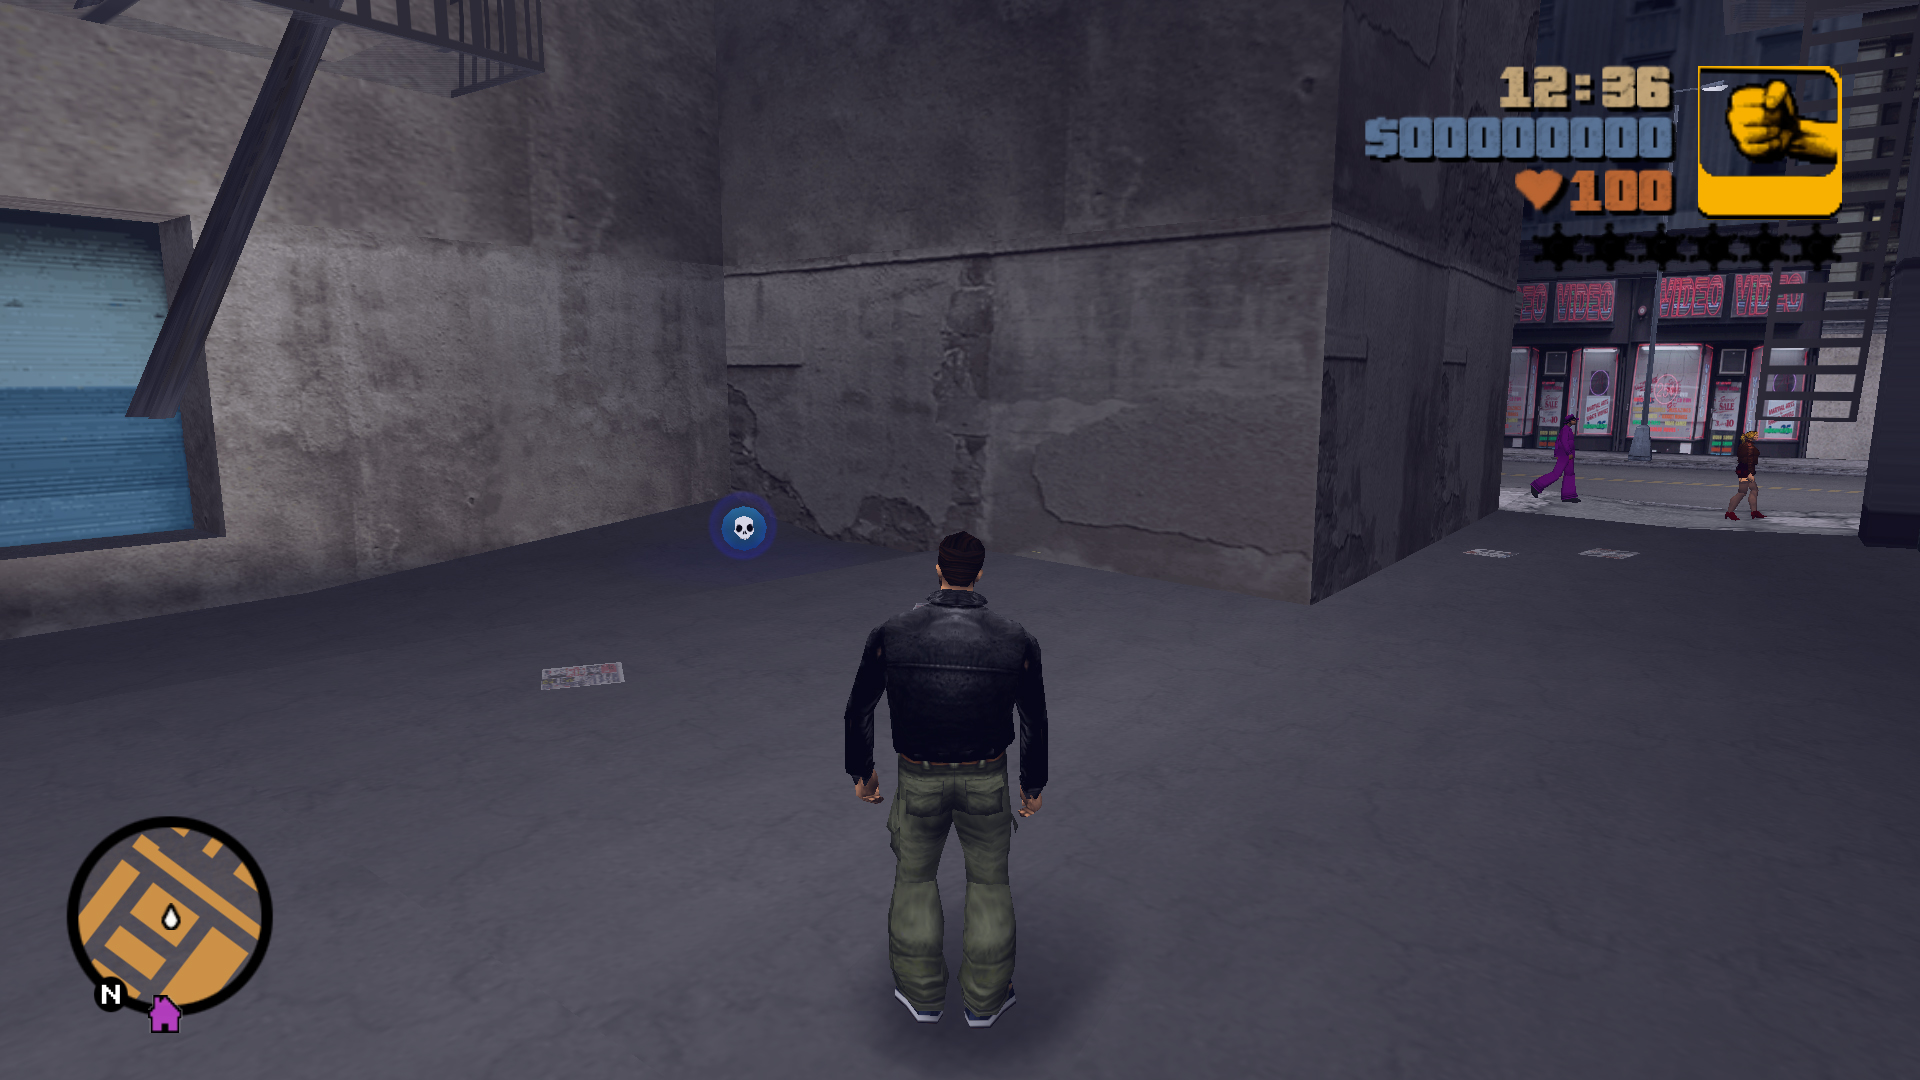
Second Location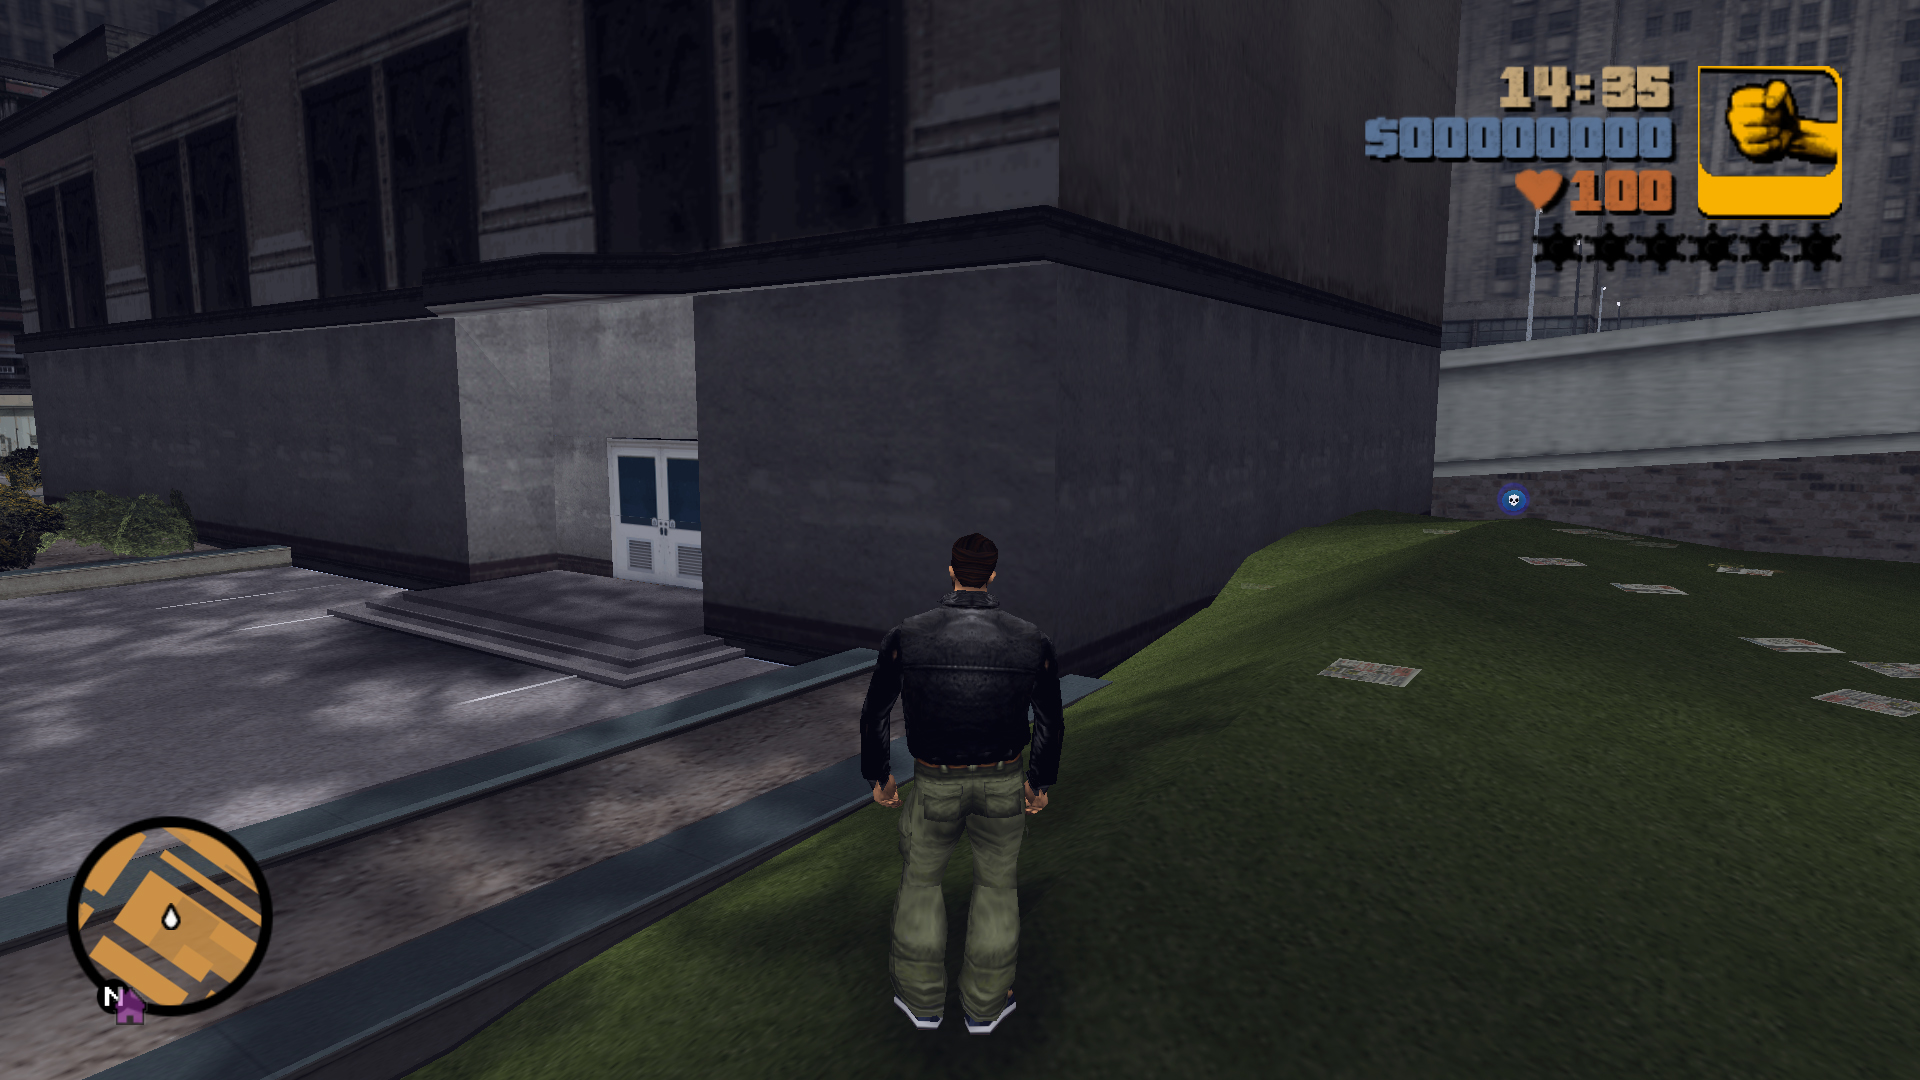
Second Location
Murder 30 Diablos in 120 seconds
M16
2
First Location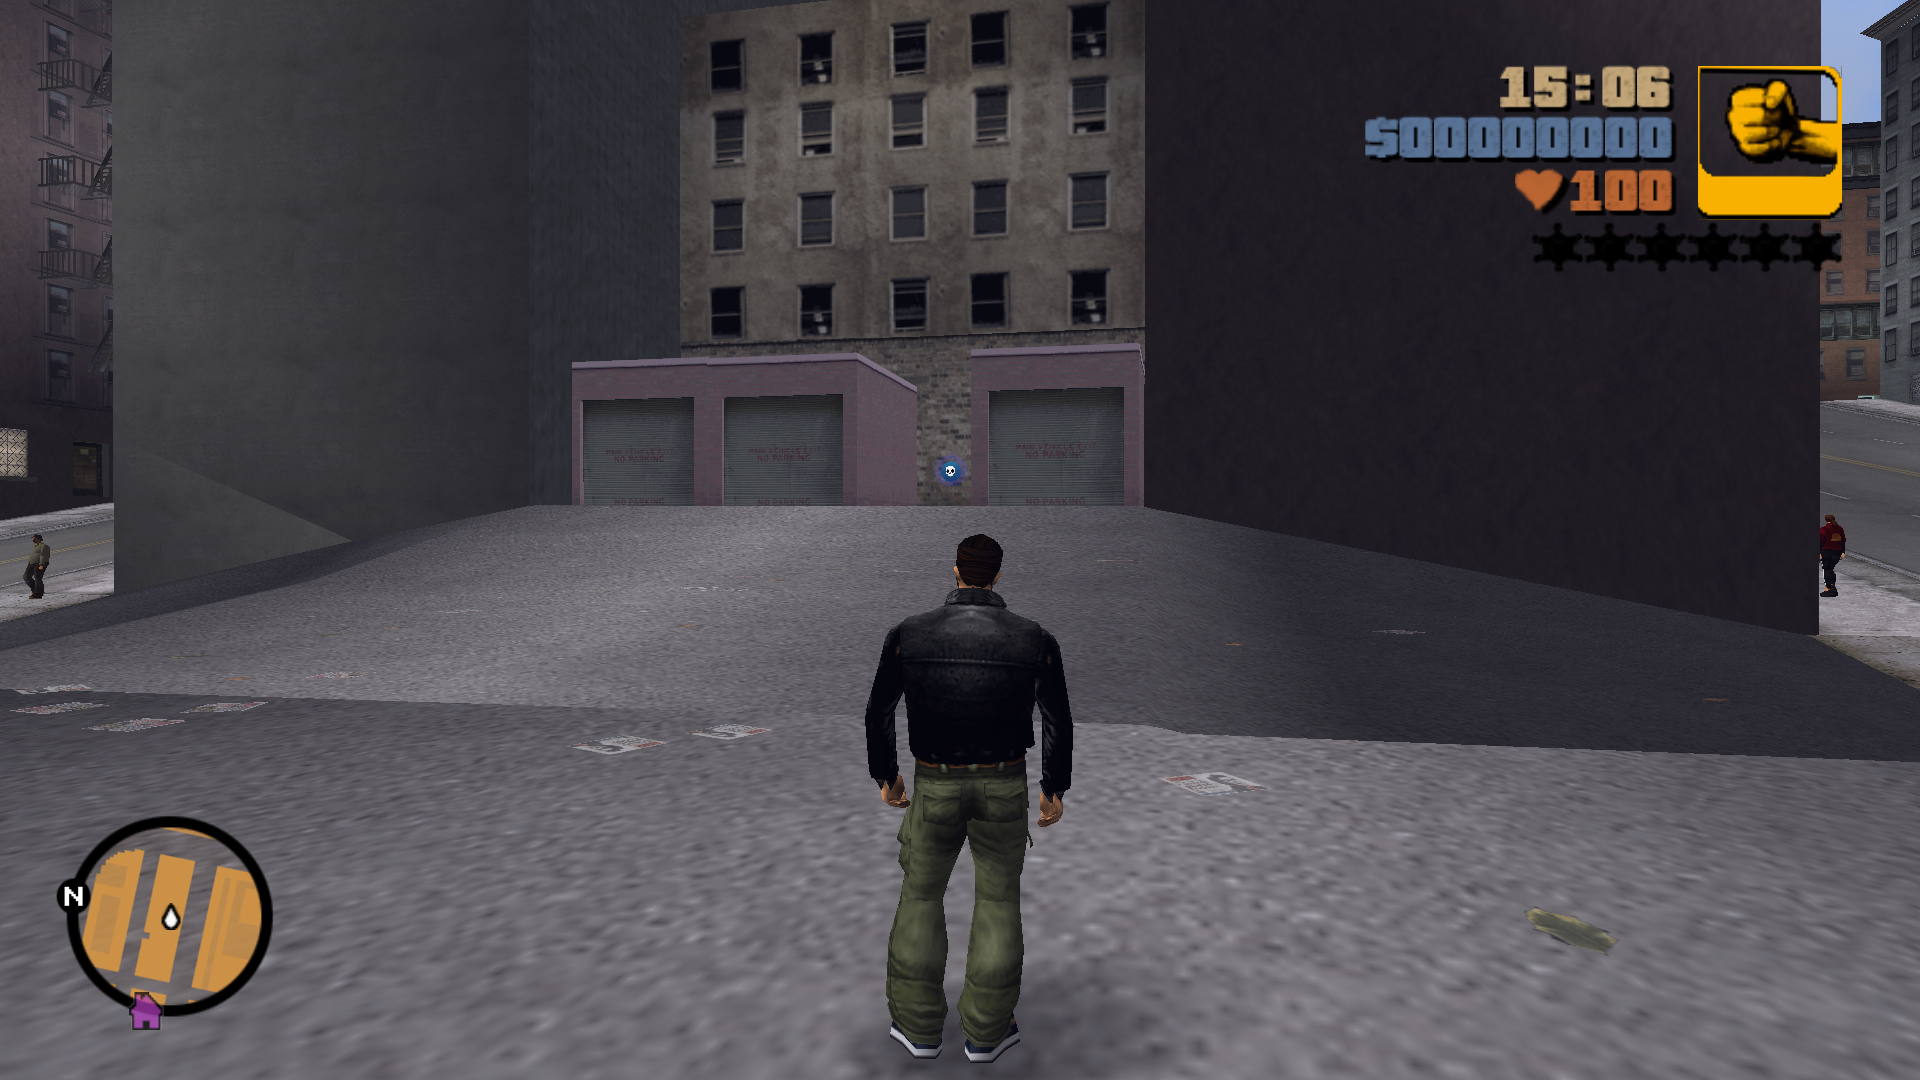
Second Location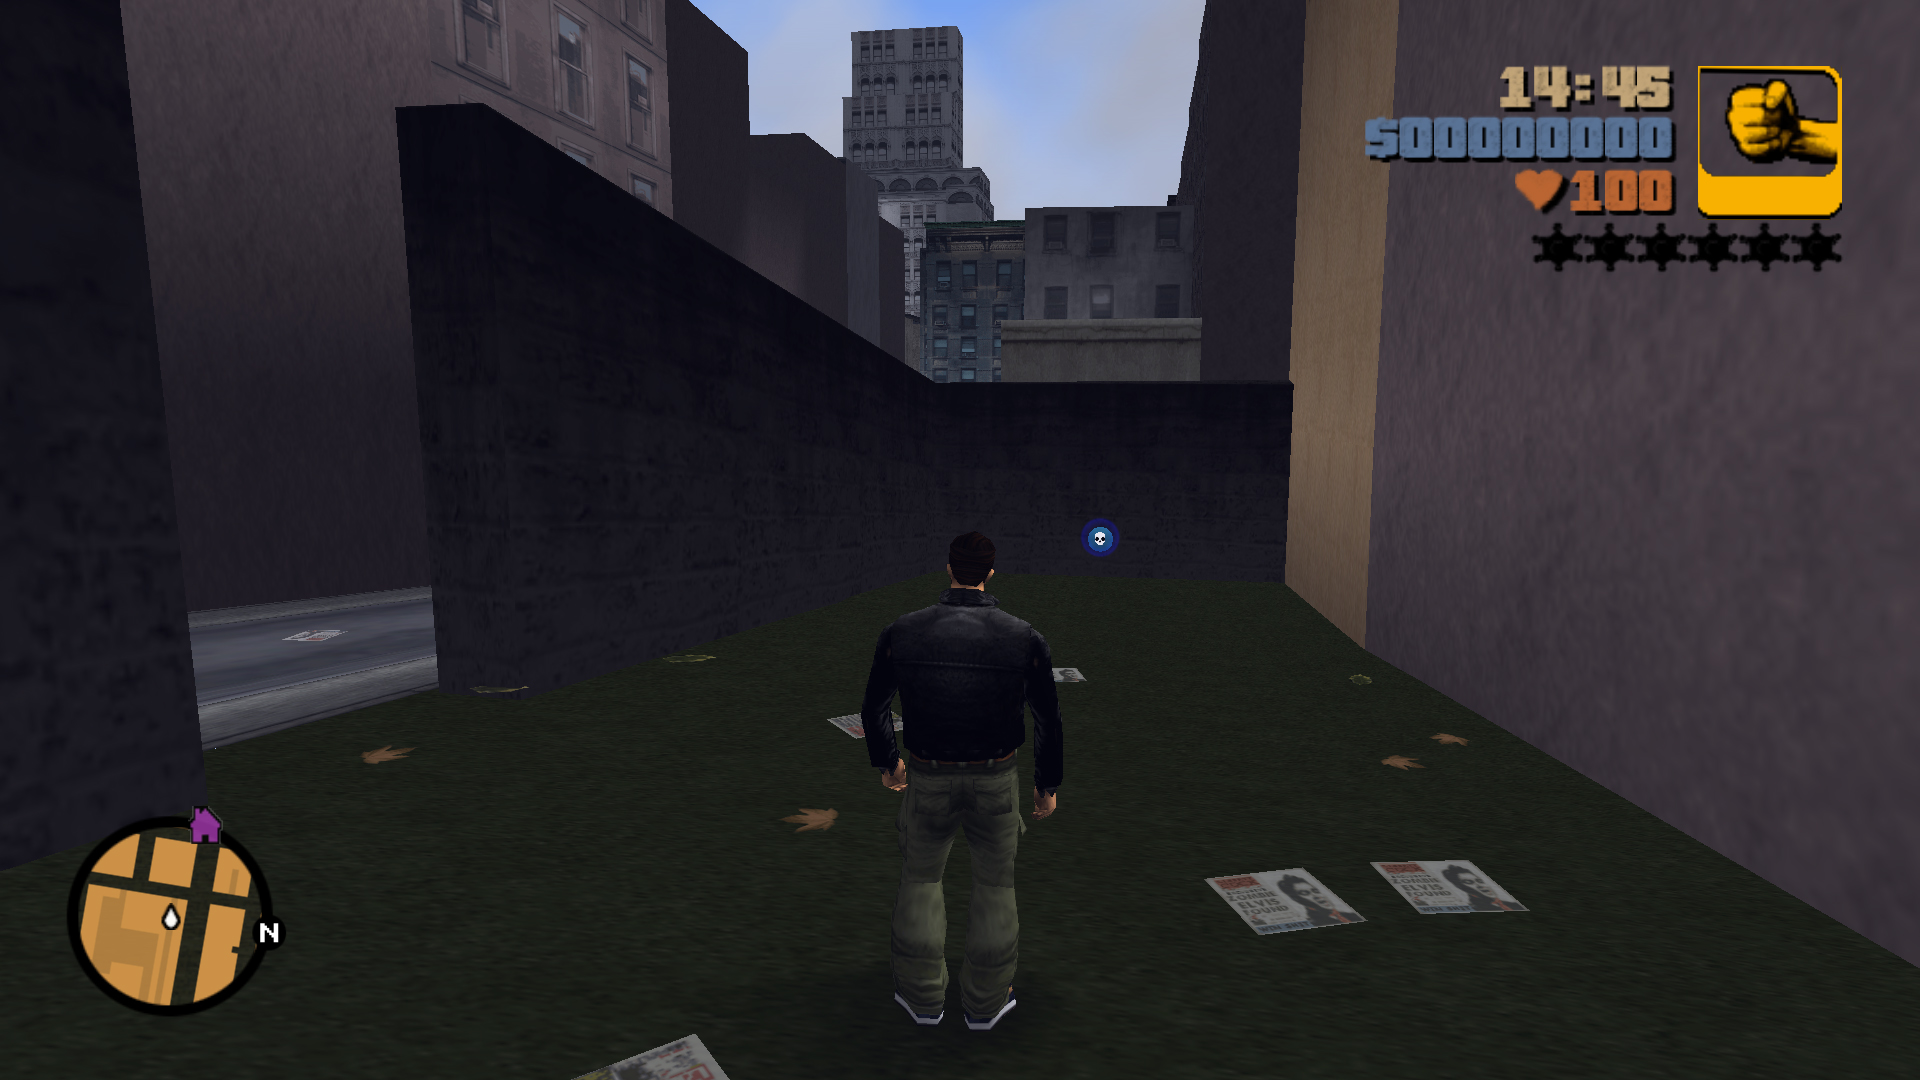
Second Location
Kill 20 Mafia in 120 seconds
AK47
3
First Location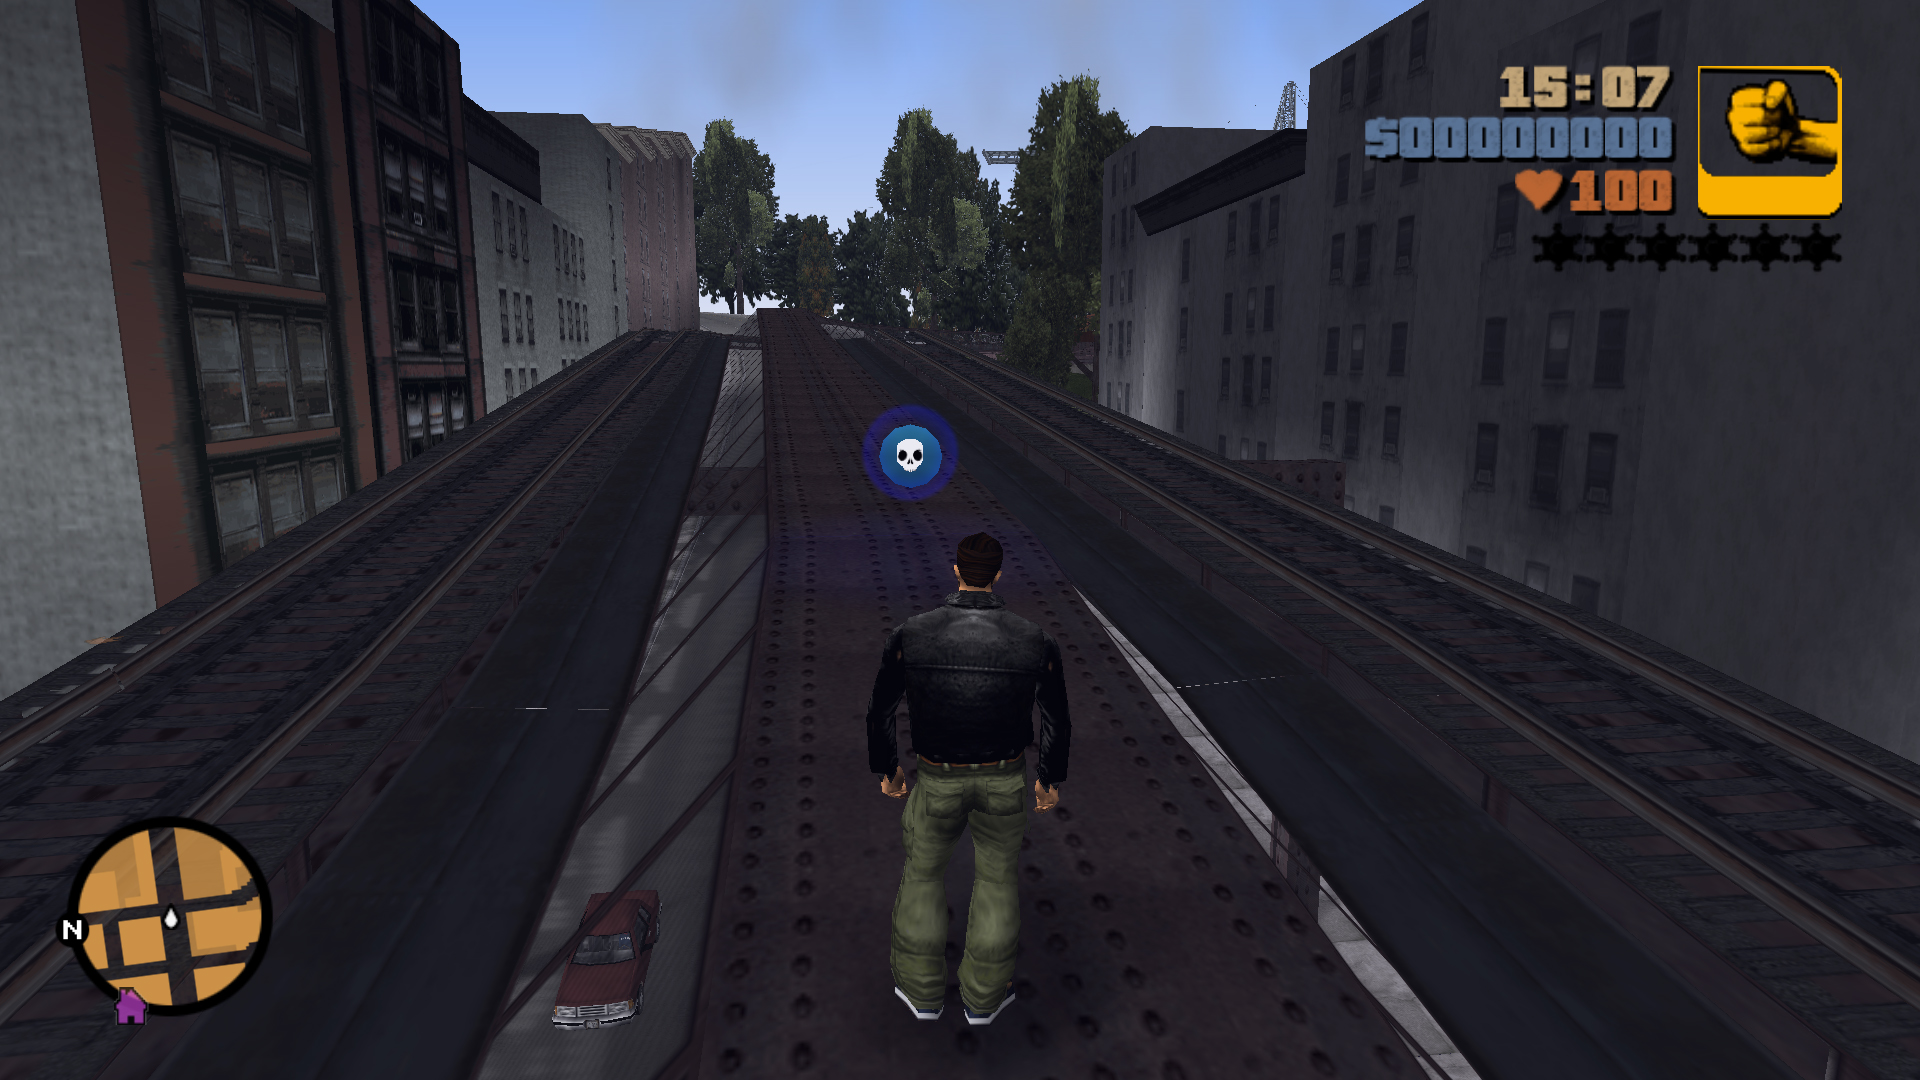
Second Location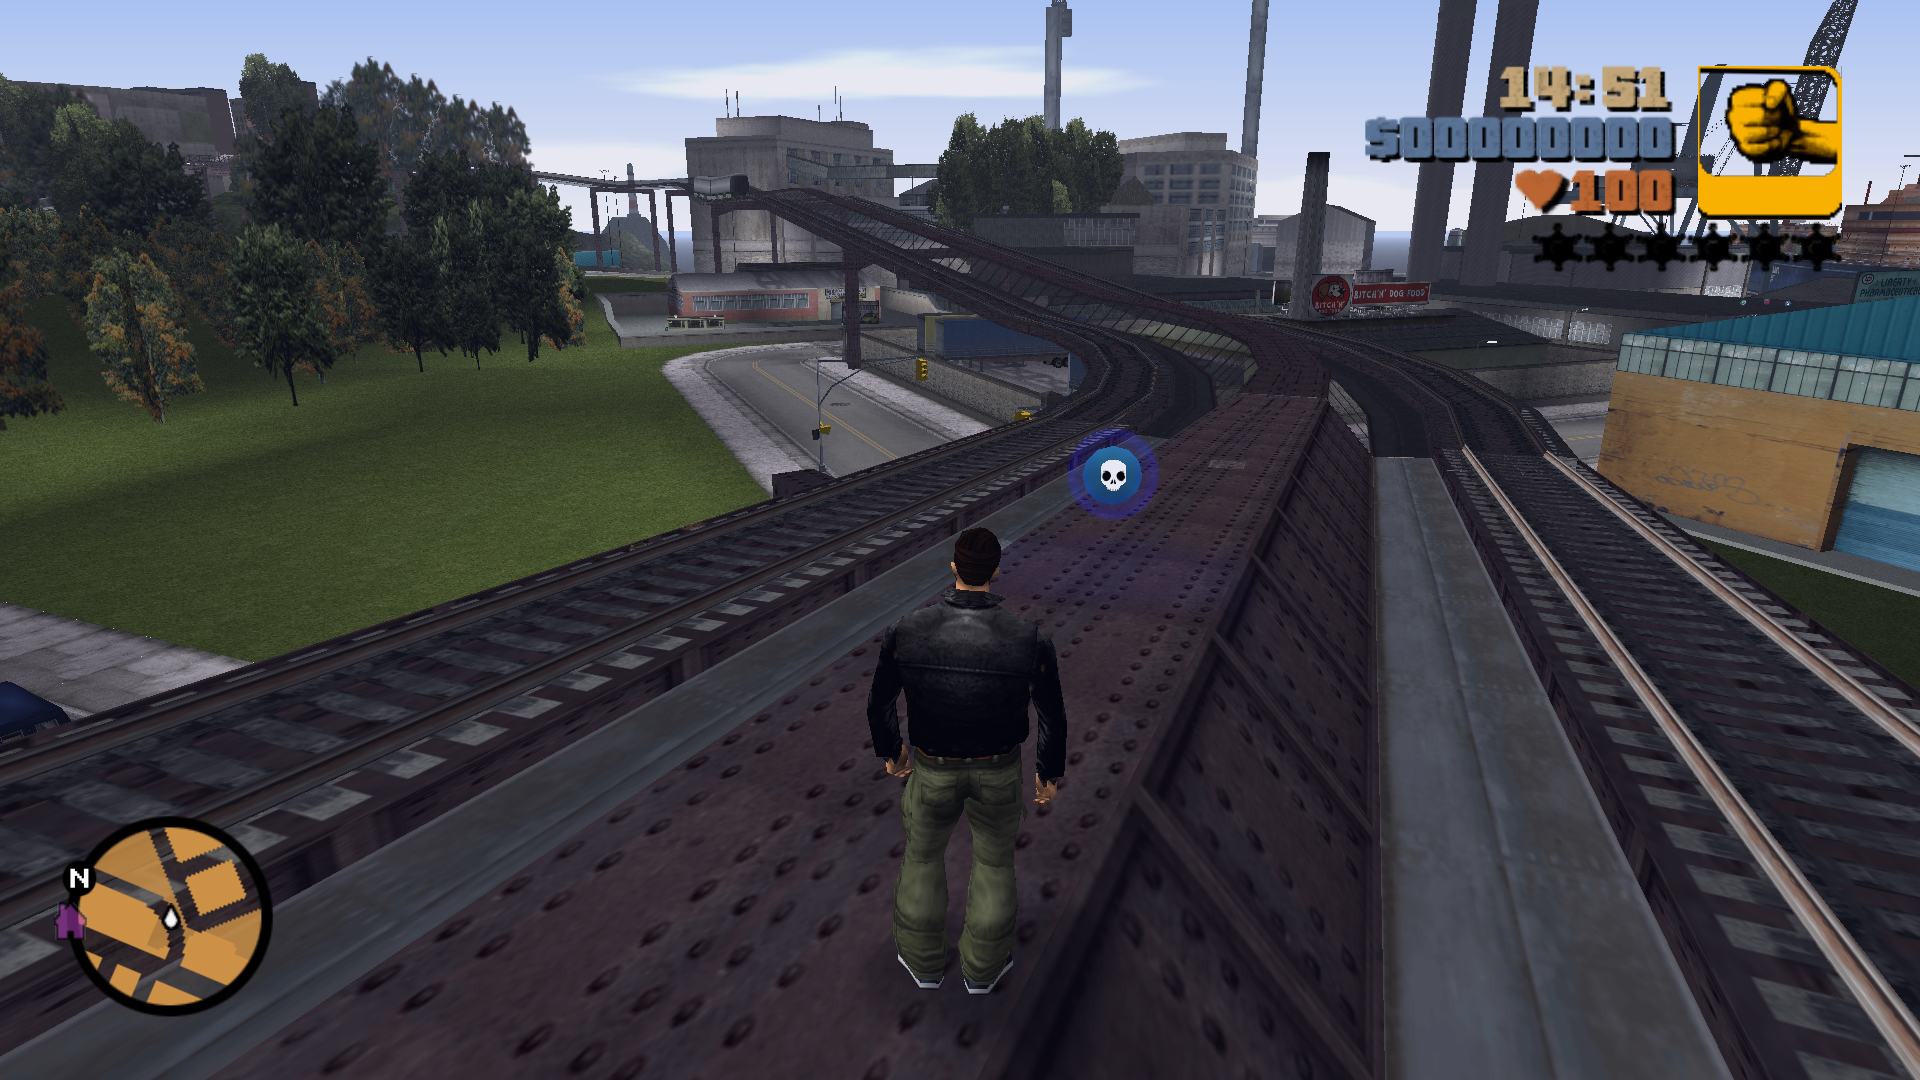
Second Location
Destroy 10 vehicles in 120 seconds
Grenades
4
First Location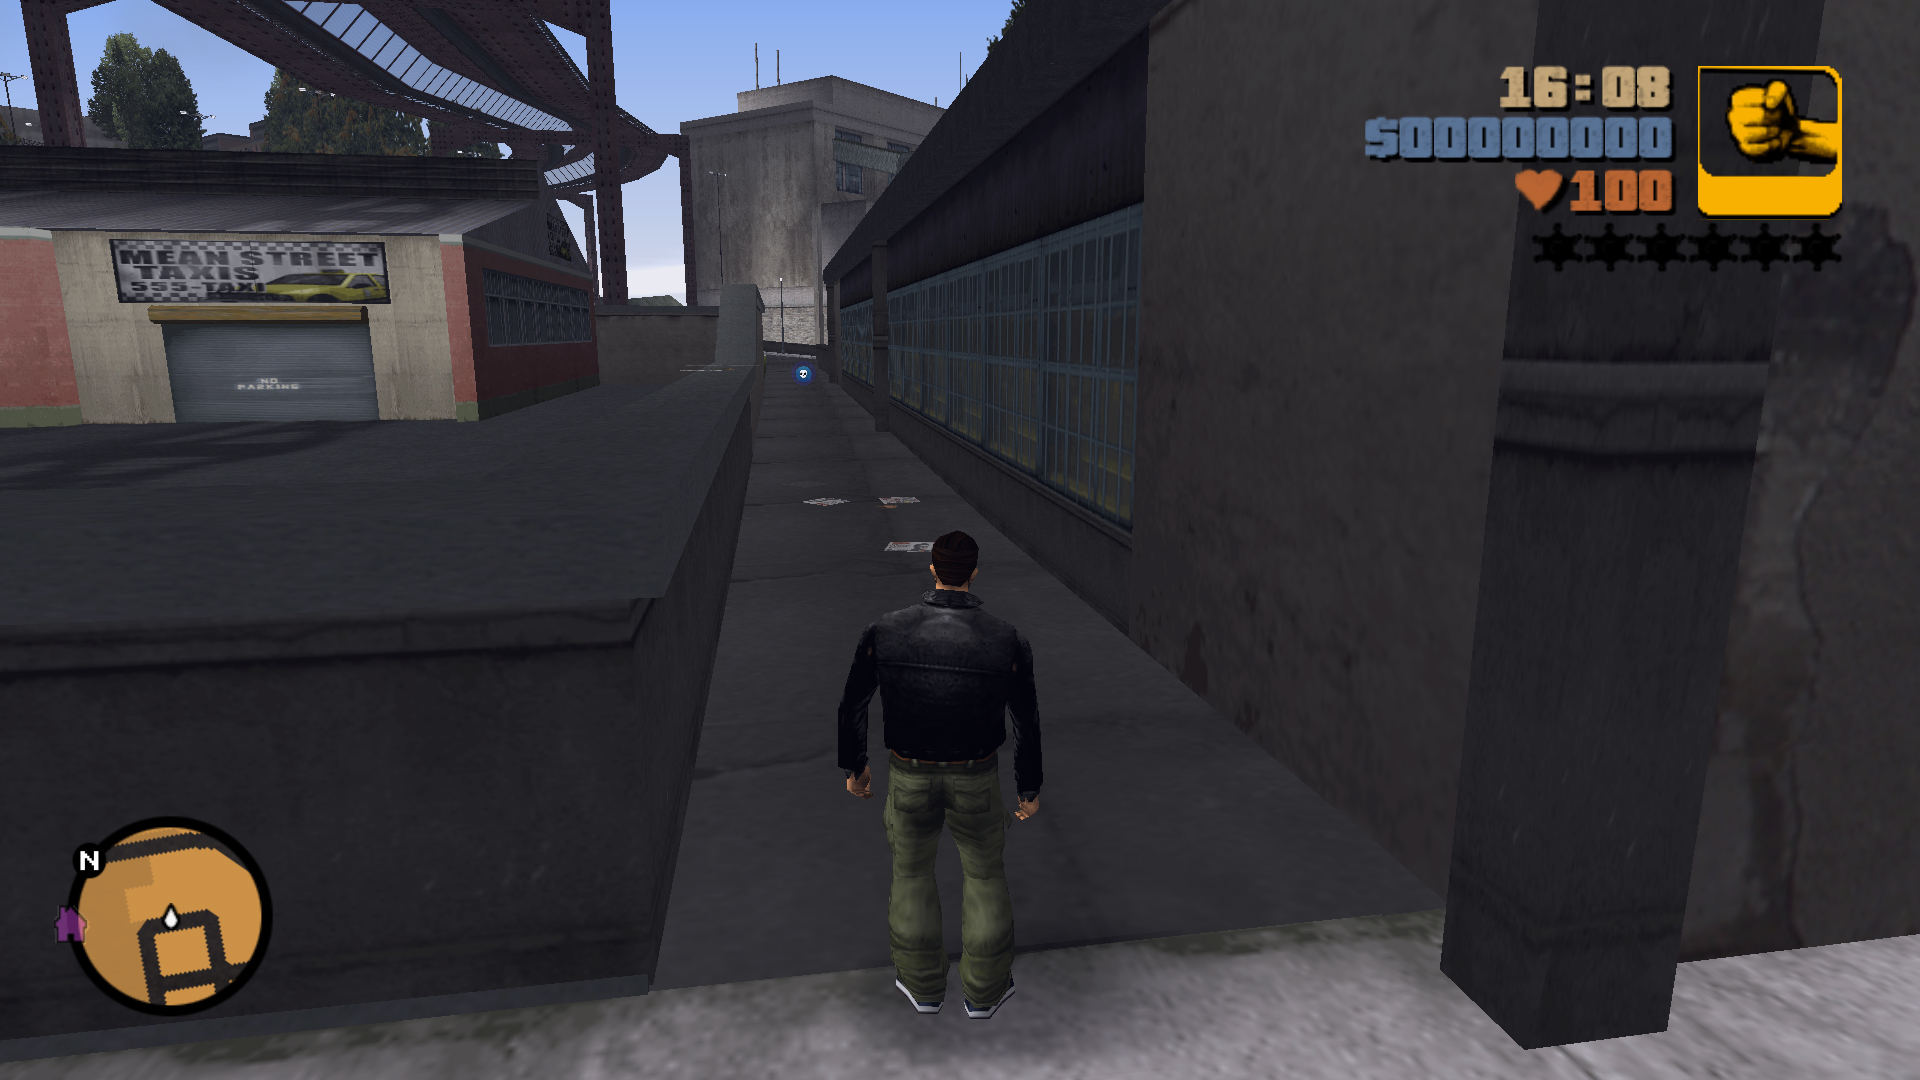
Second Location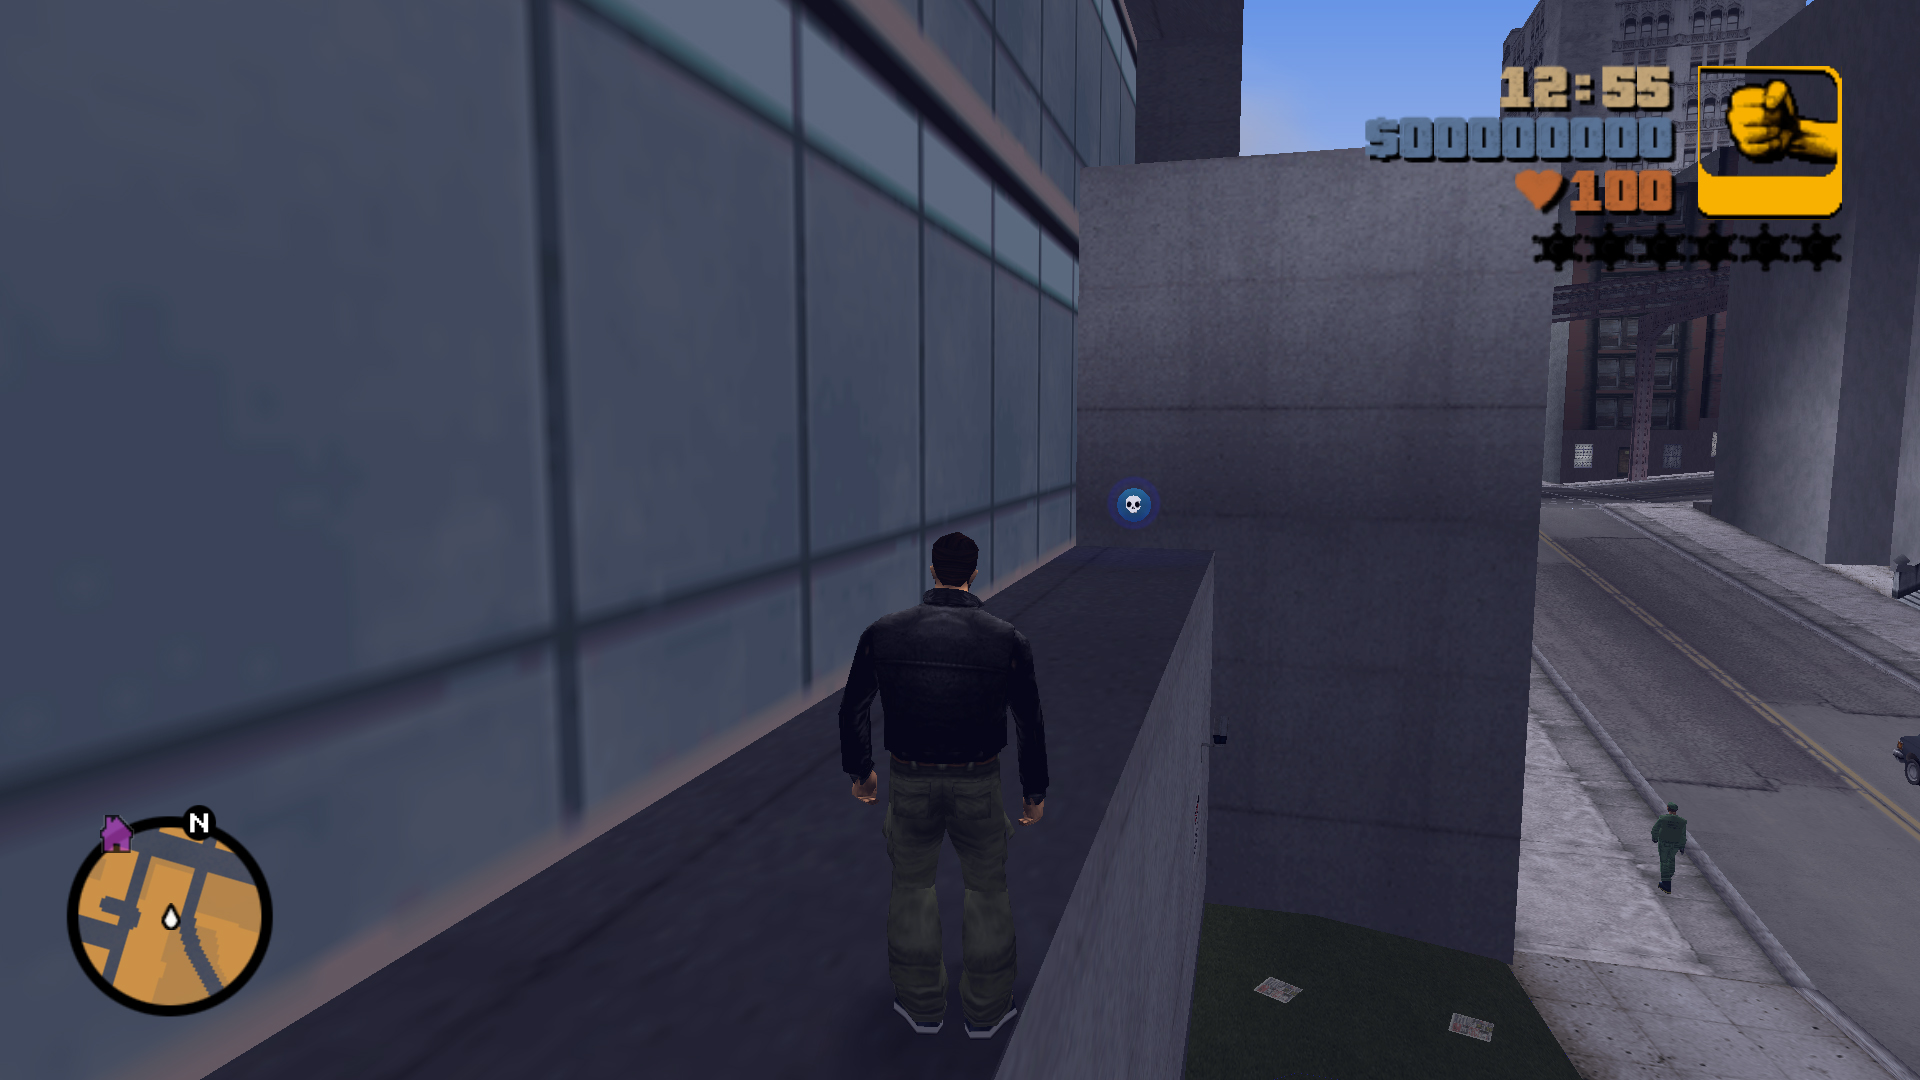
Second Location
Kill 20 Triads in 120 seconds
Shotgun
5
First Location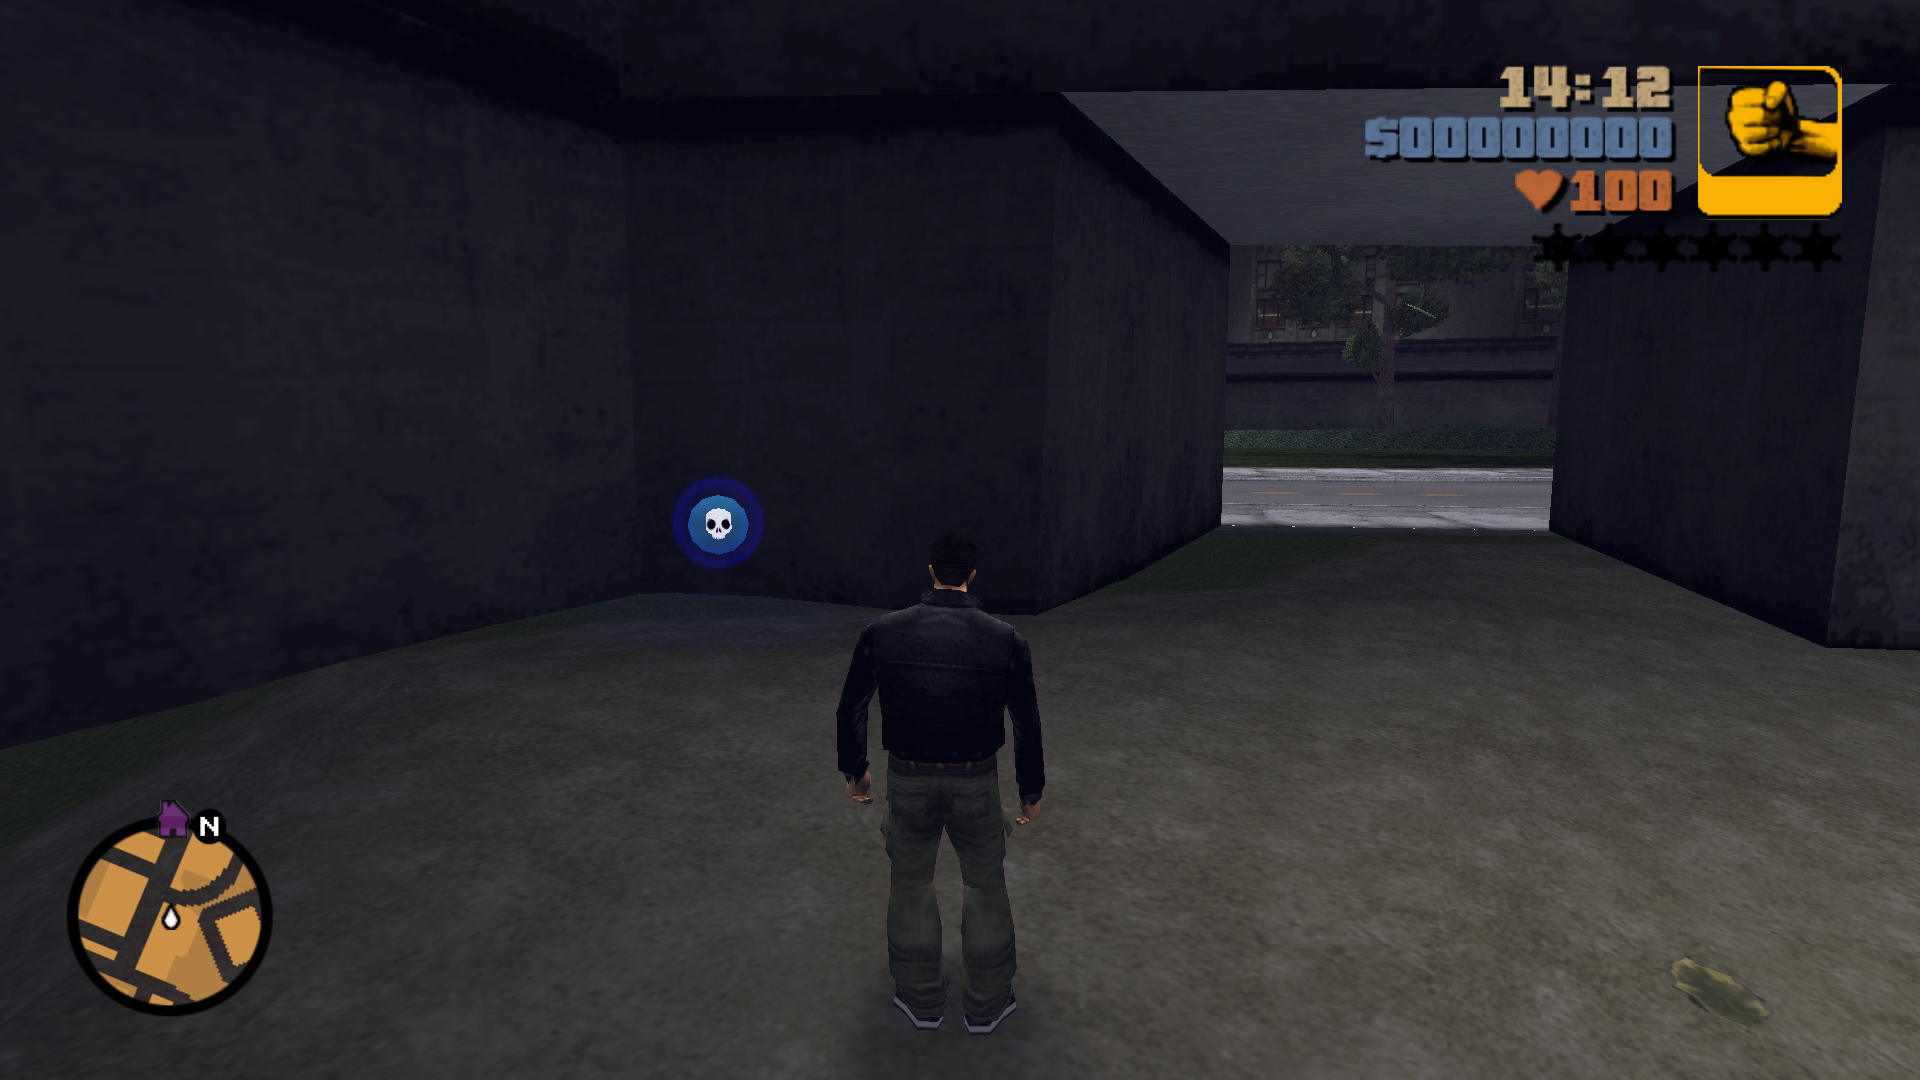
Second Location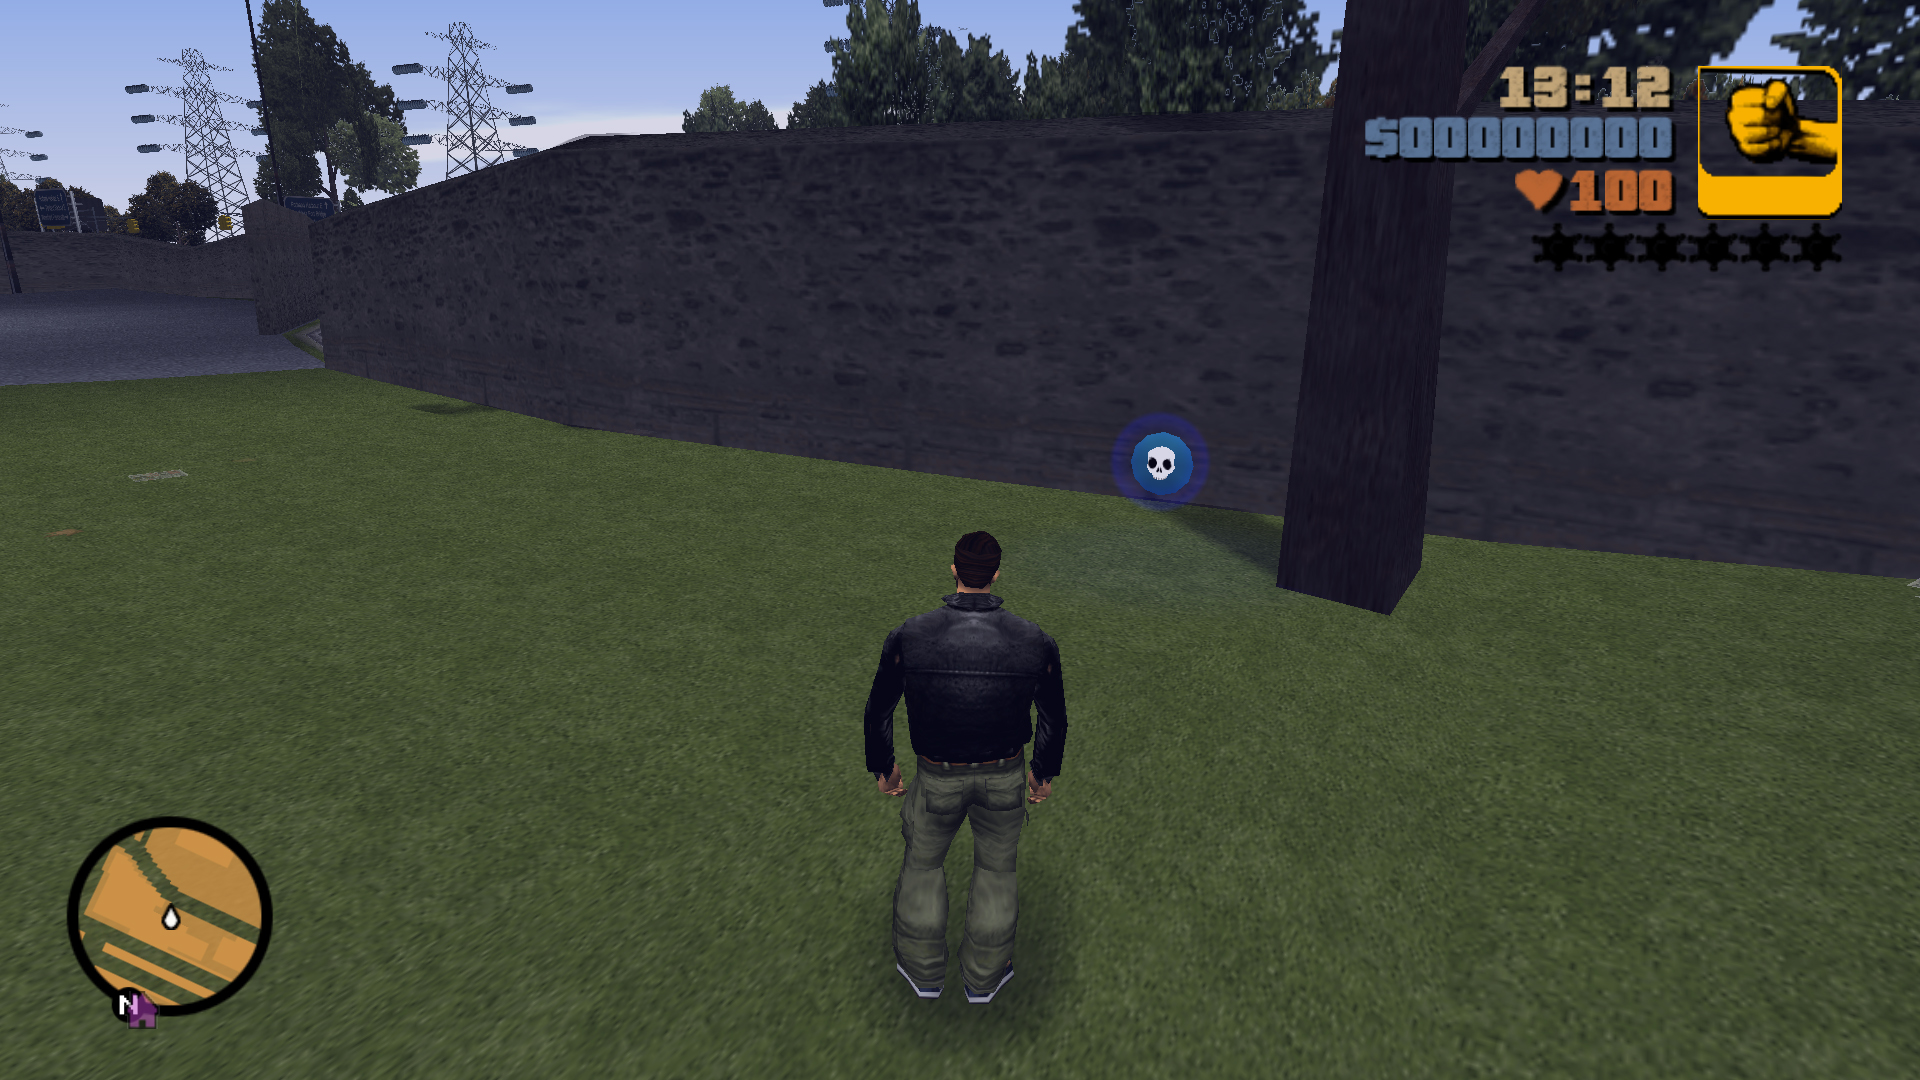
Second Location
Destroy 13 vehicles in 120 seconds
Rocket Launcher
6
First Location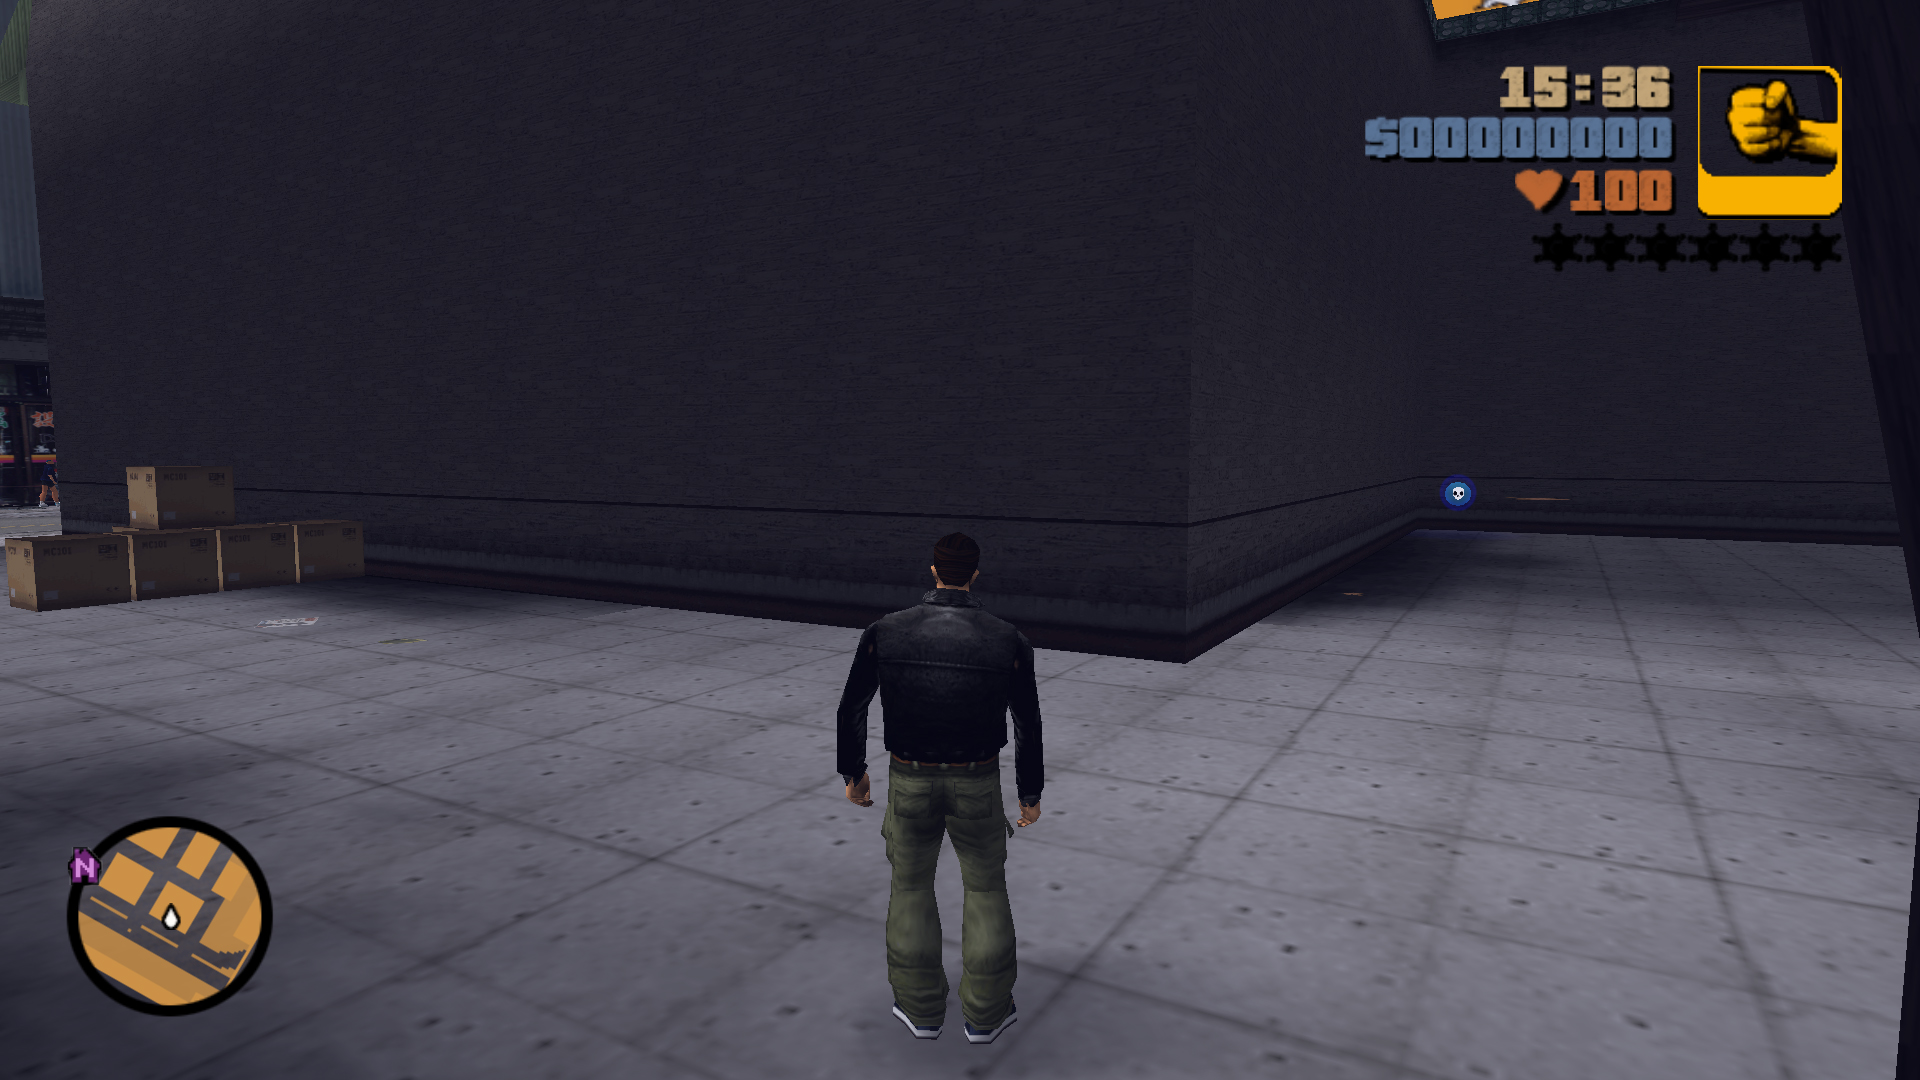
Second Location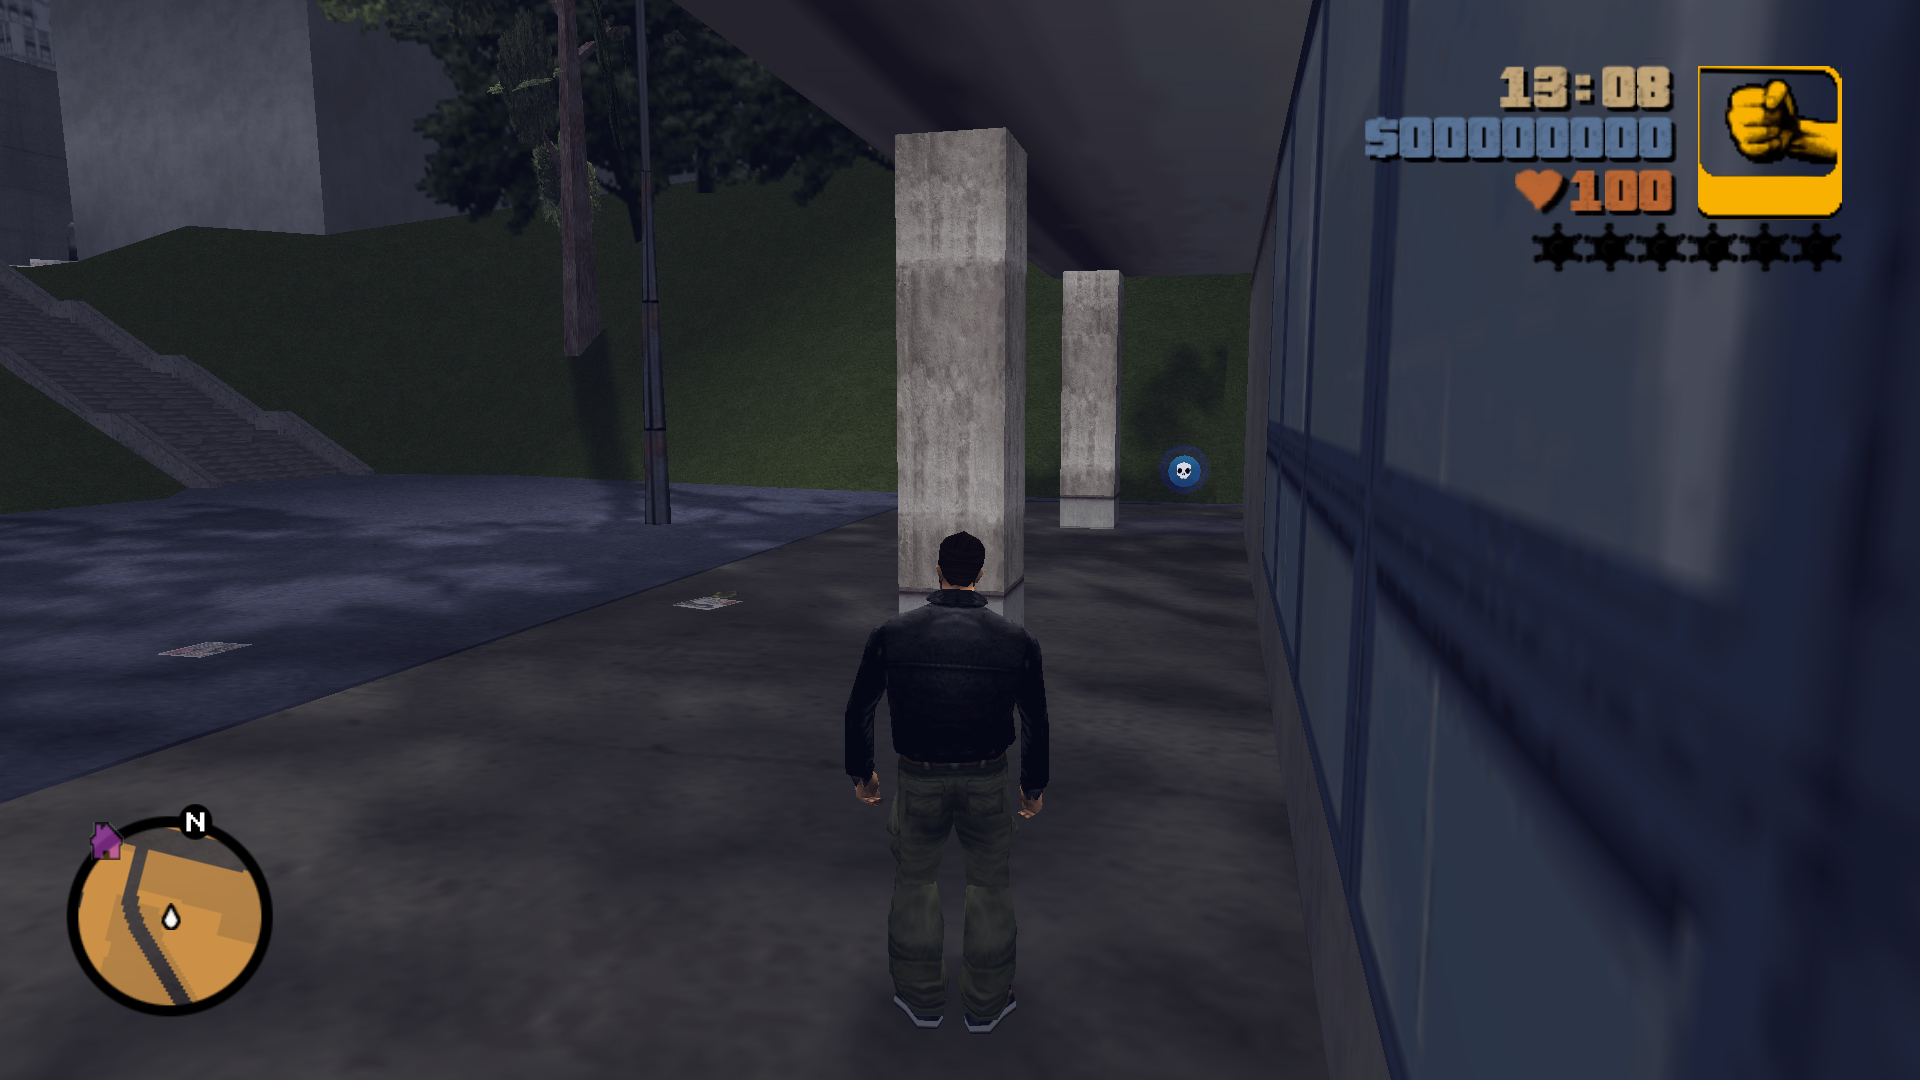
Second Location
Kill 25 Triads in 120 seconds
Uzi
7
First Location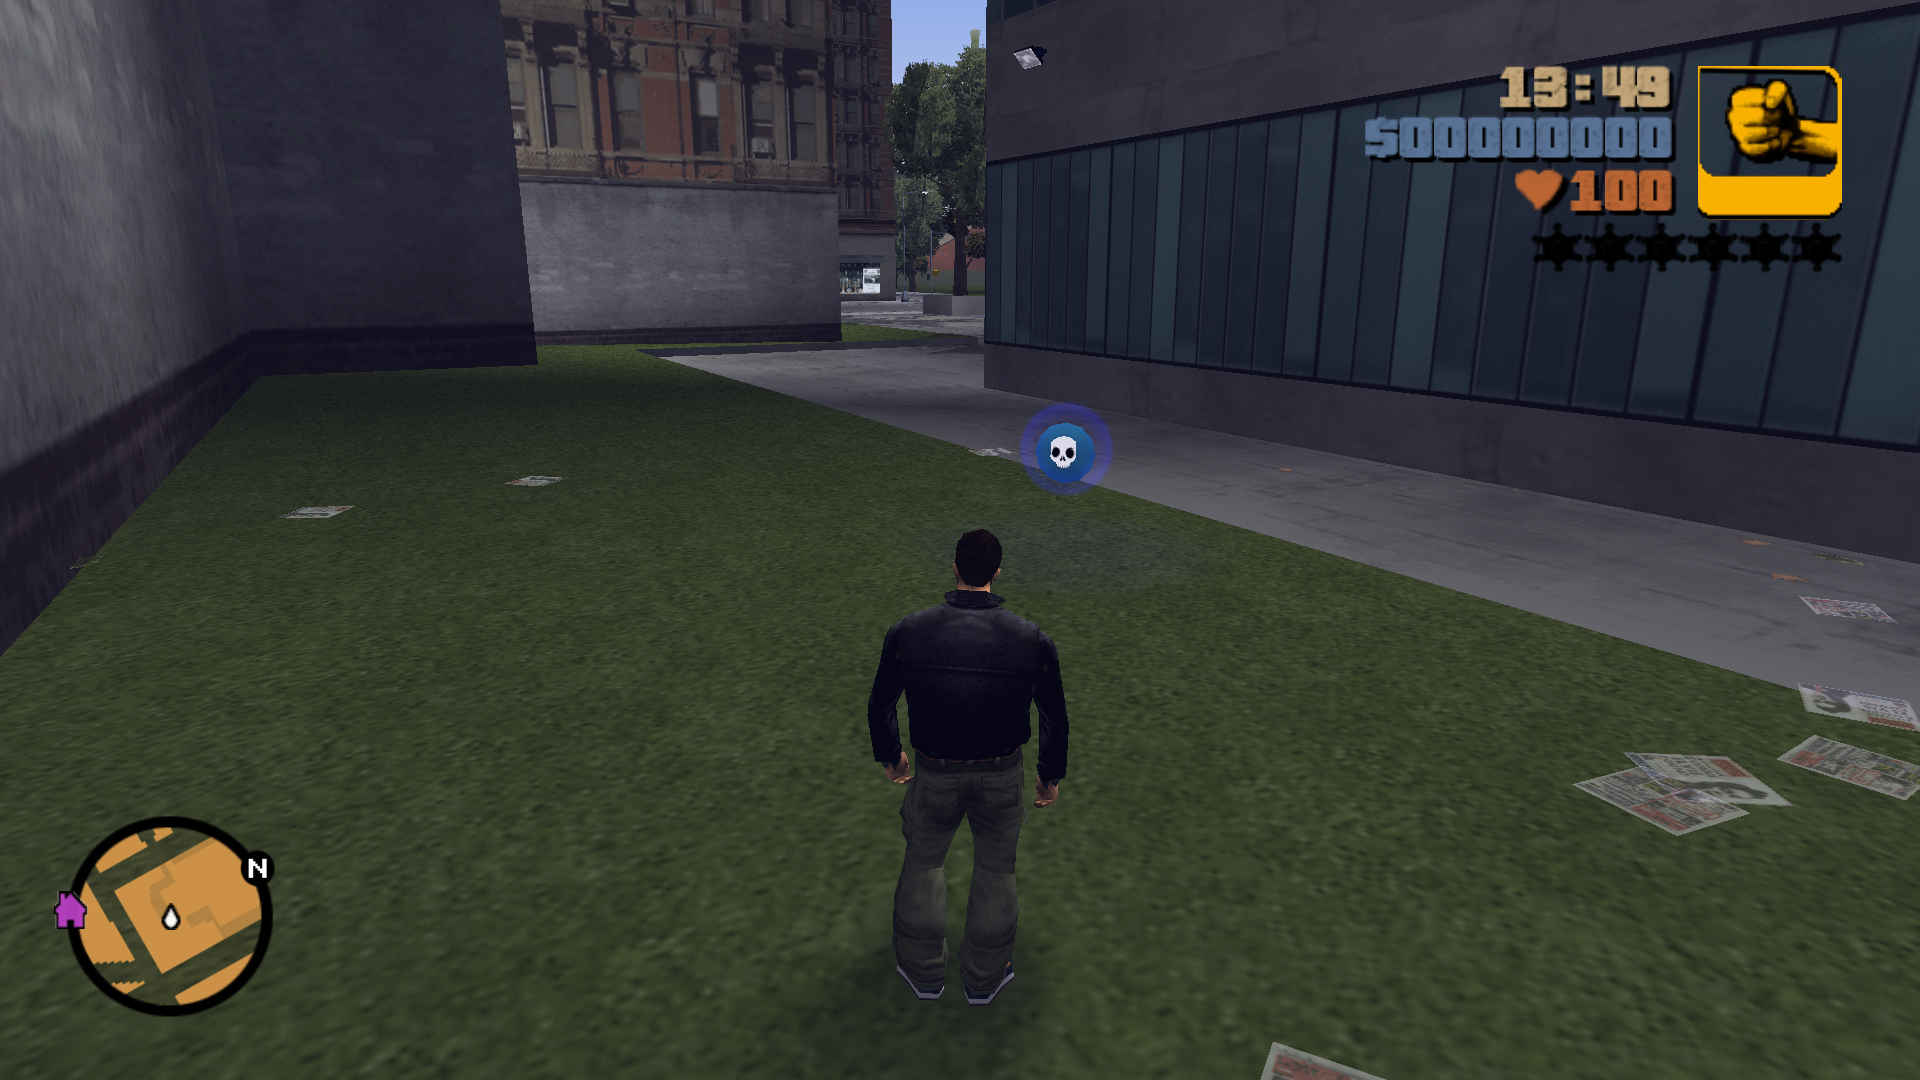
Second Location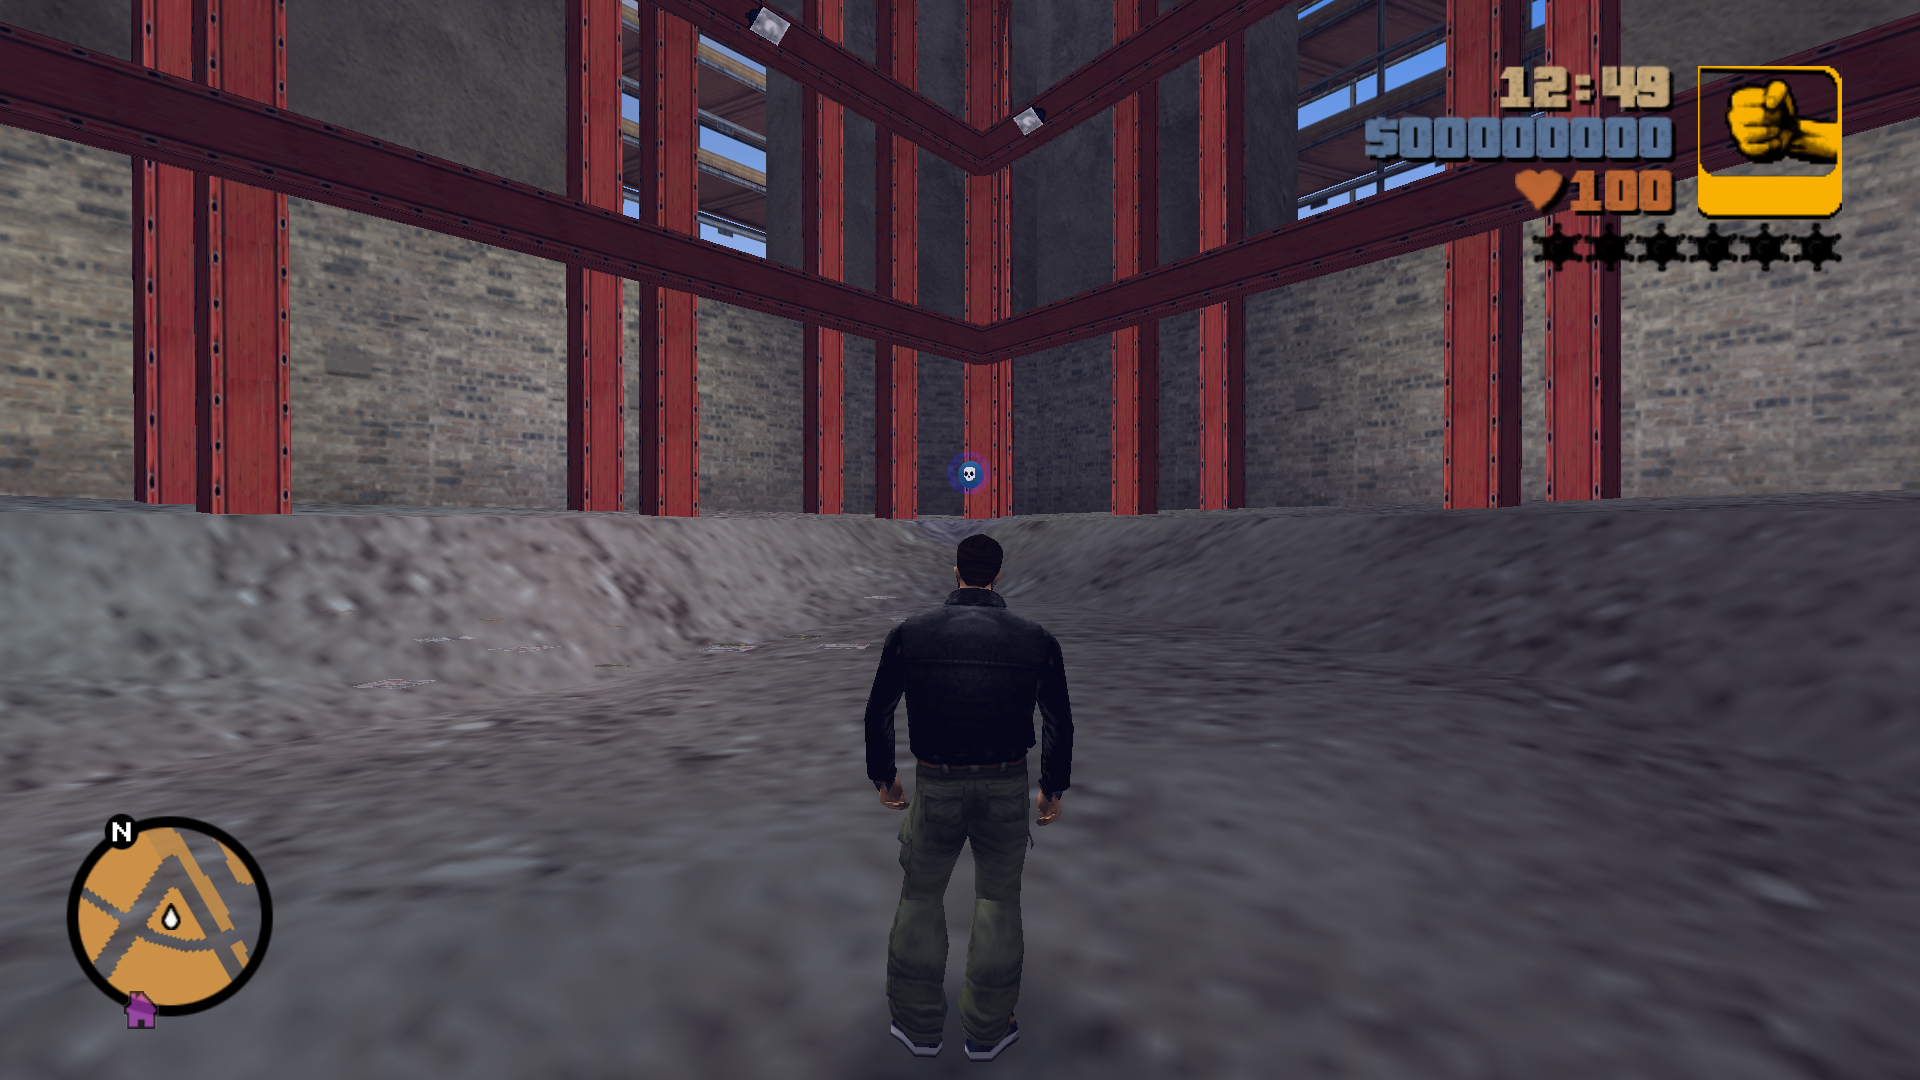
Second Location
Destroy 15 Vehicles in 120 seconds
M16
8
First Location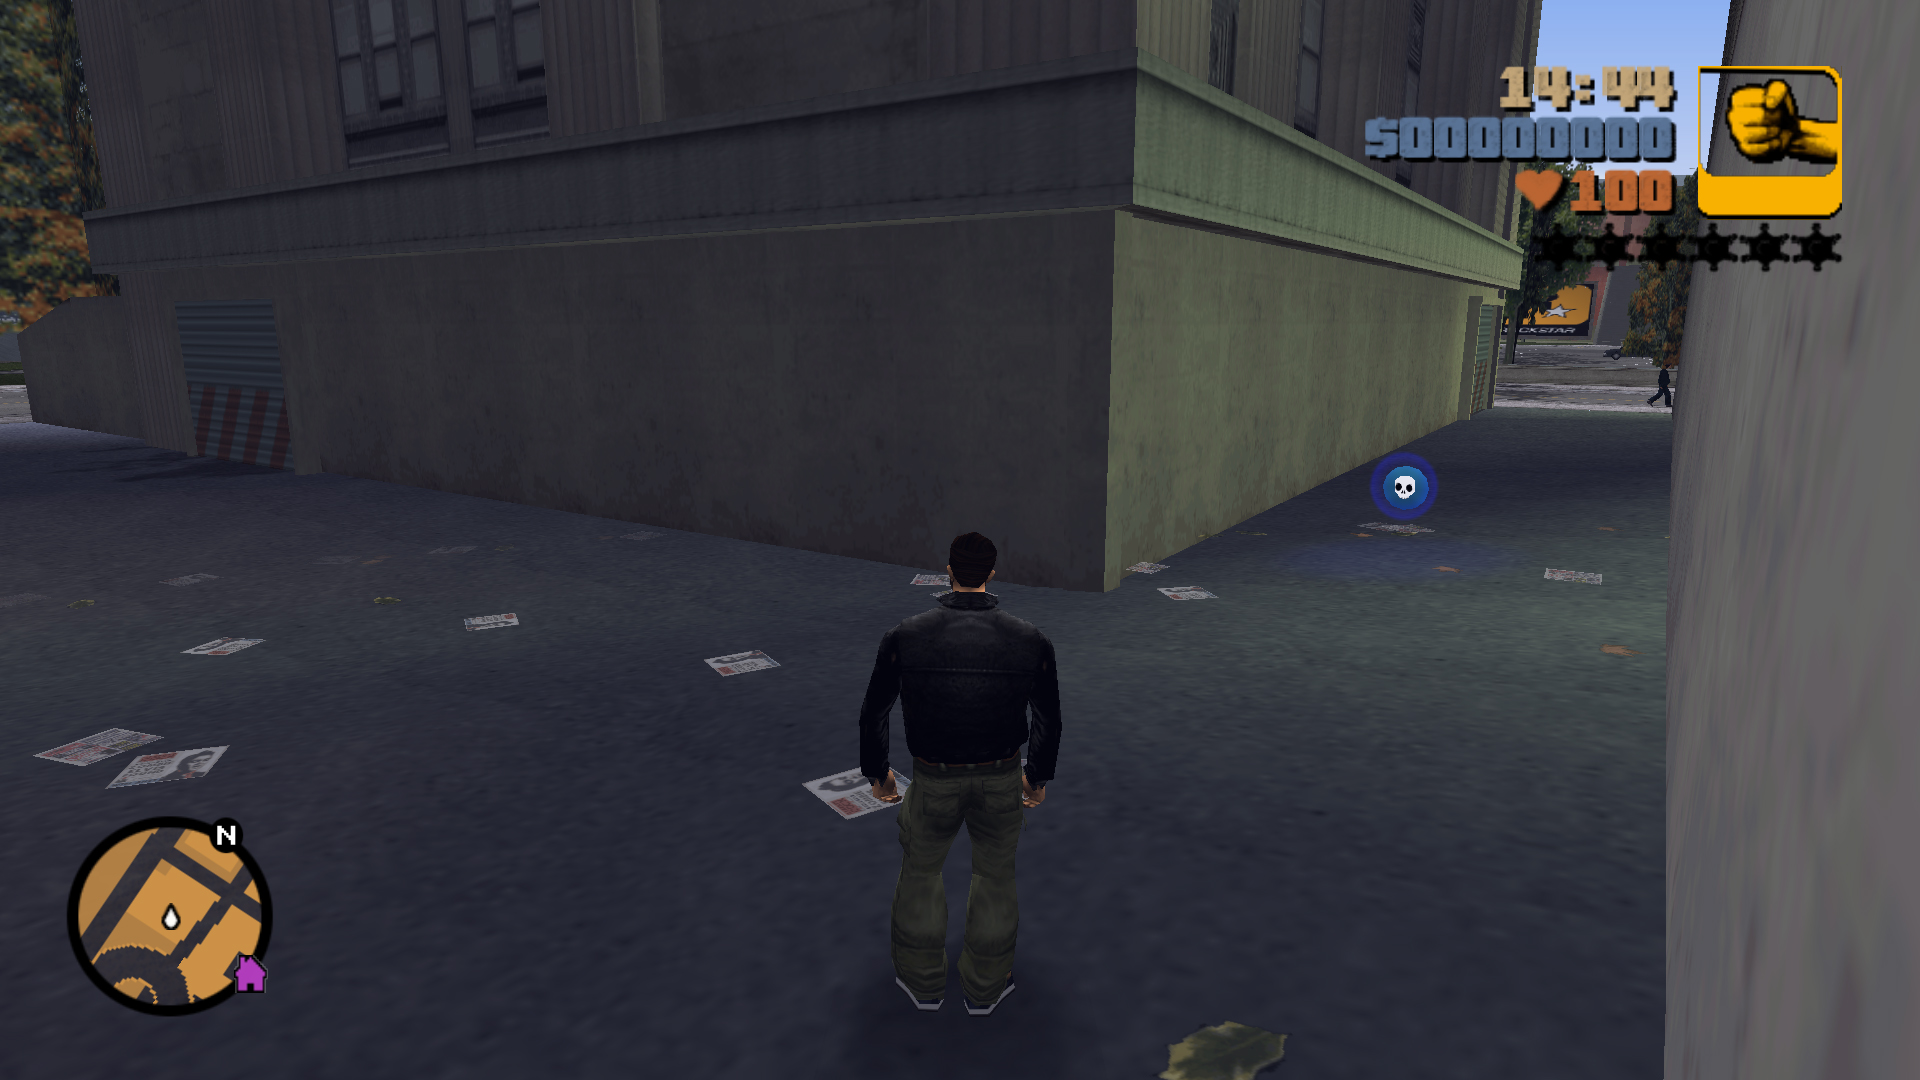
Second Location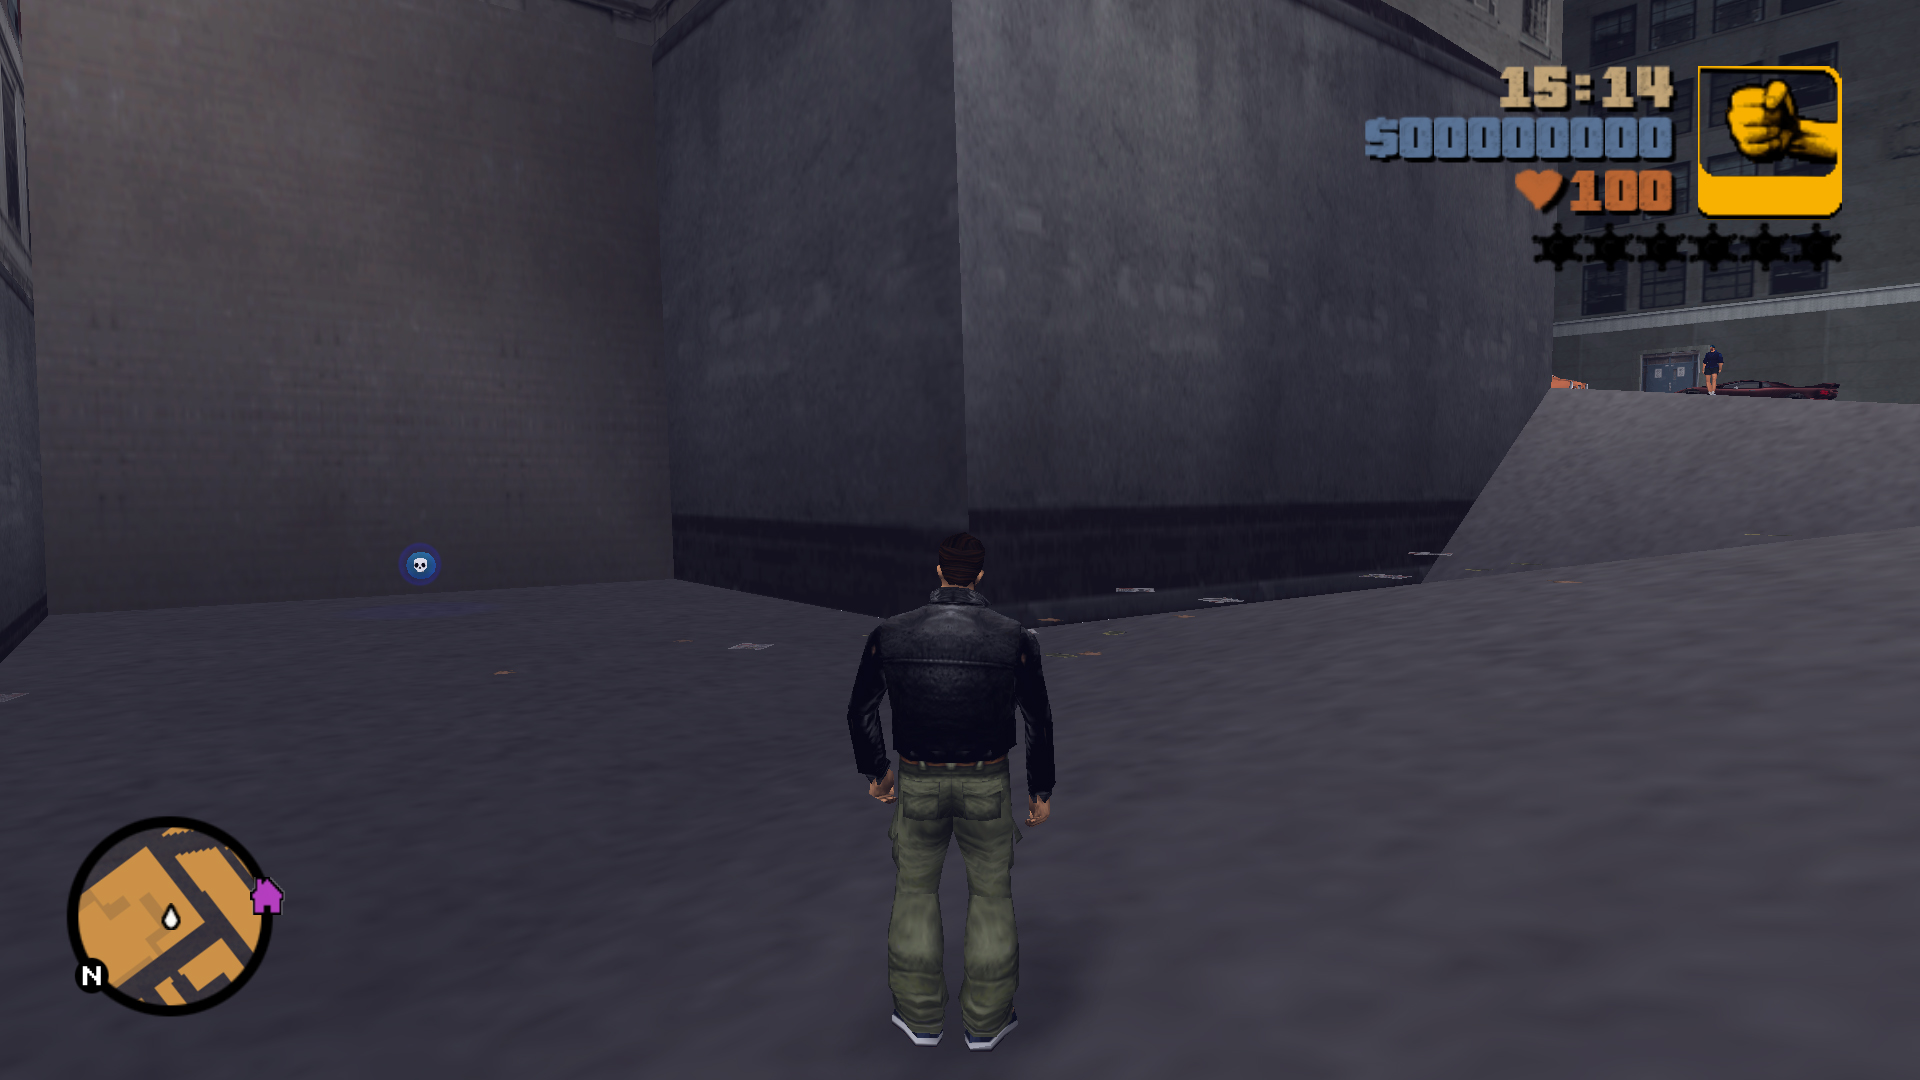
Second Location
Destroy 25 Yardies in 120 seconds
Grenades
9
First Location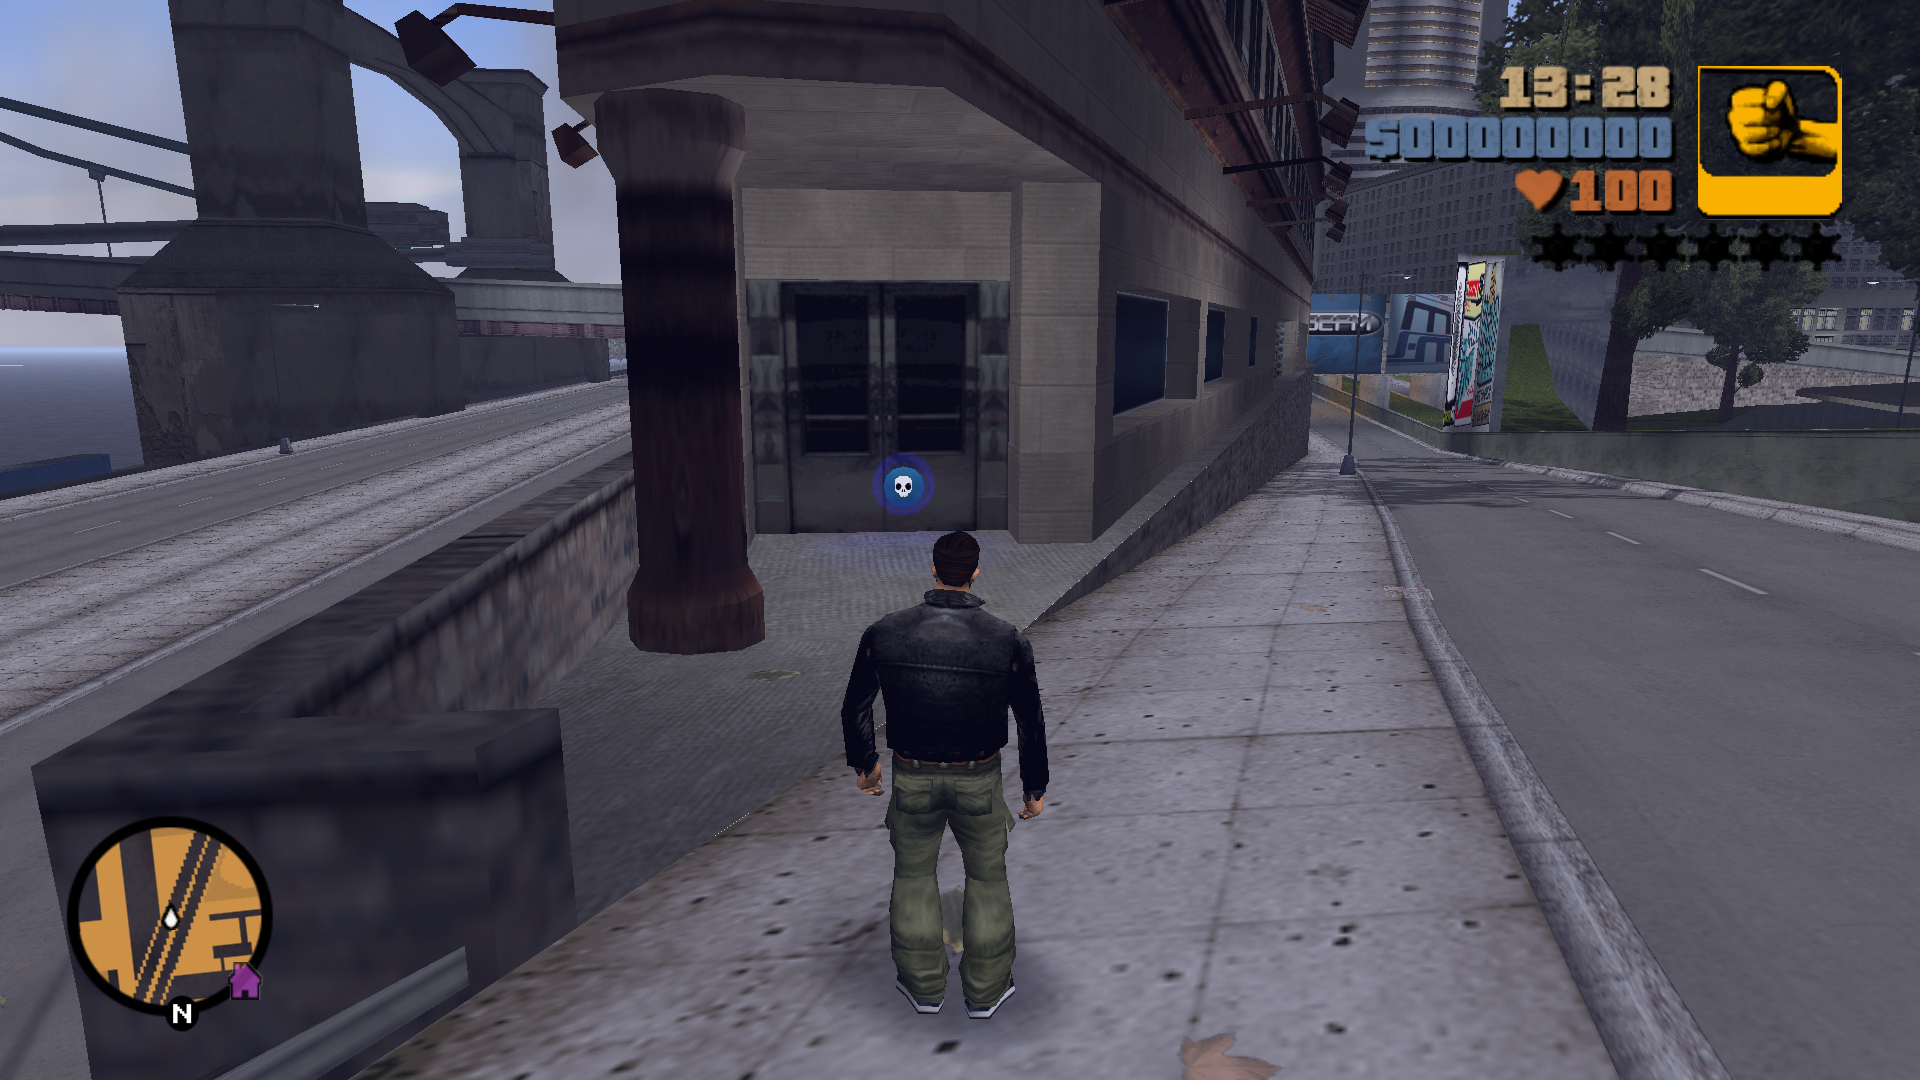
Second Location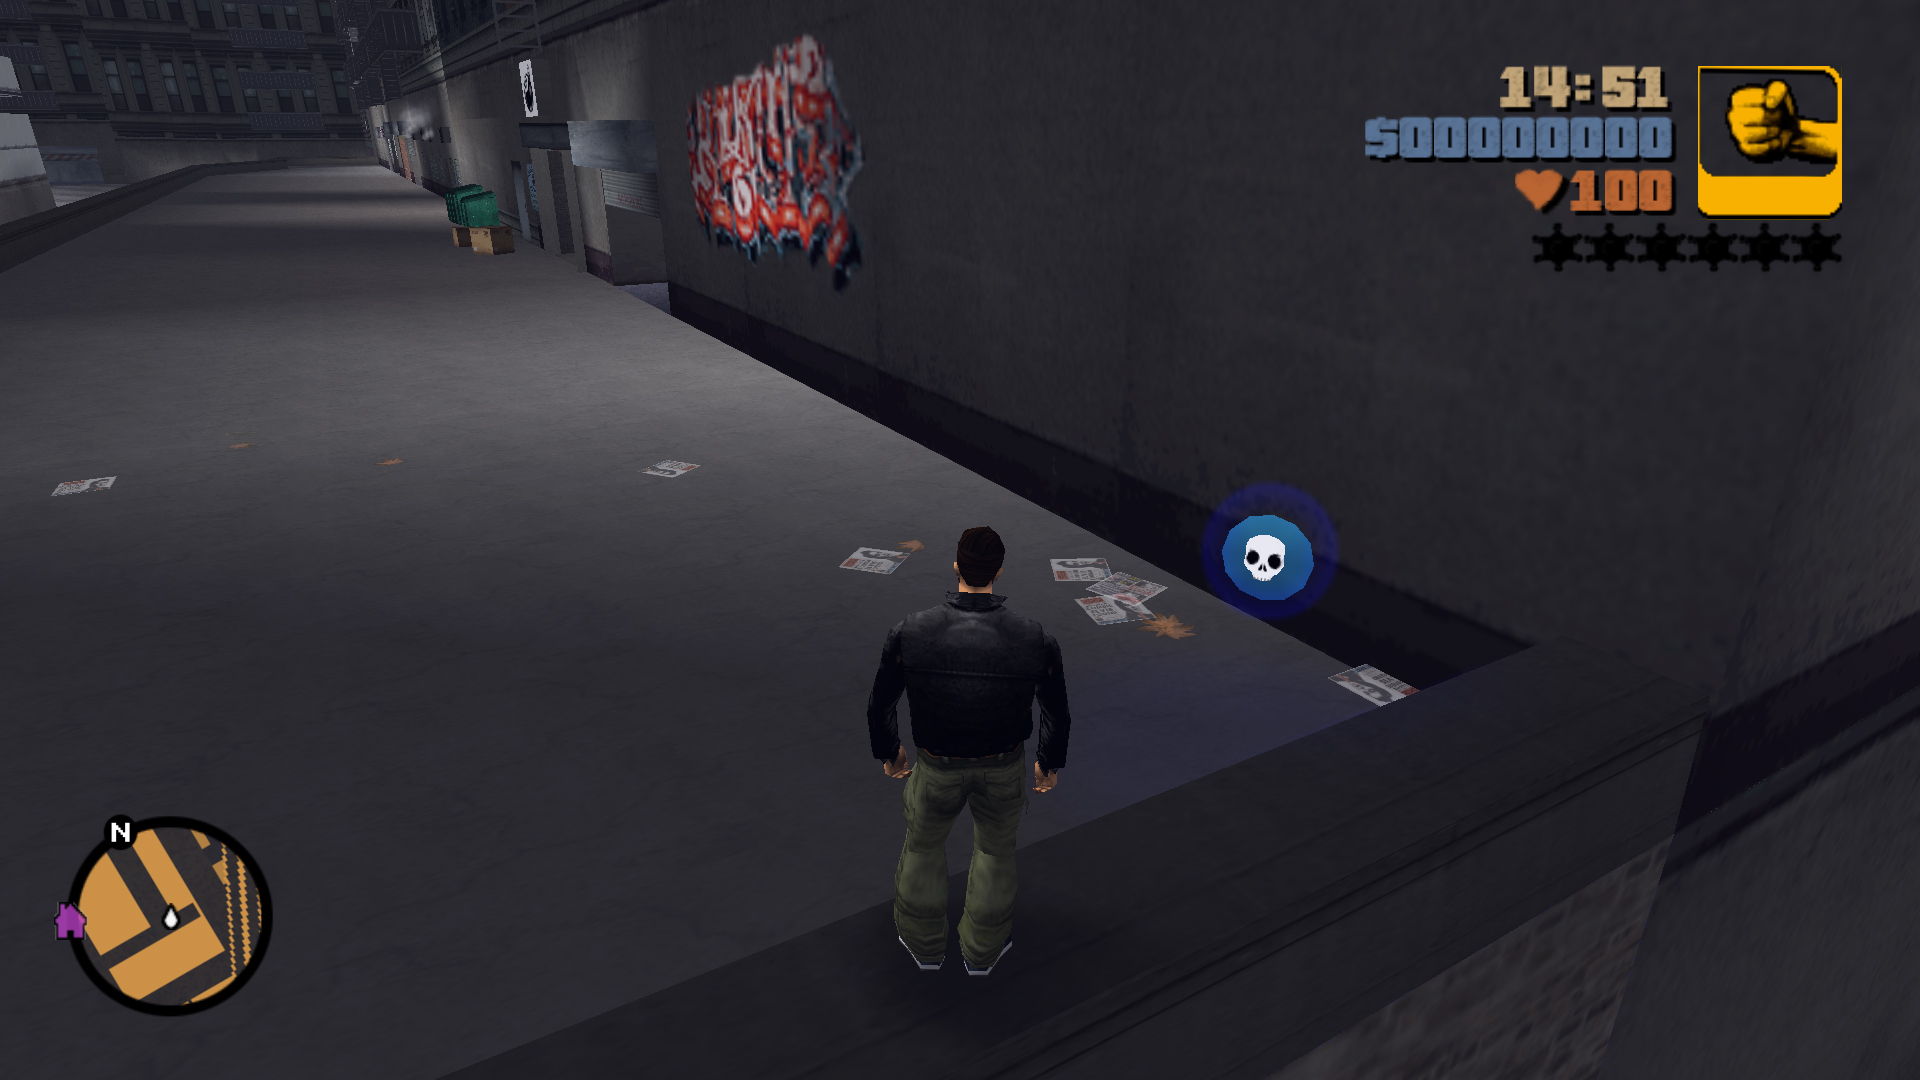
Second Location
Torch 16 Yakuza in 120 seconds
Molotovs
10
First Location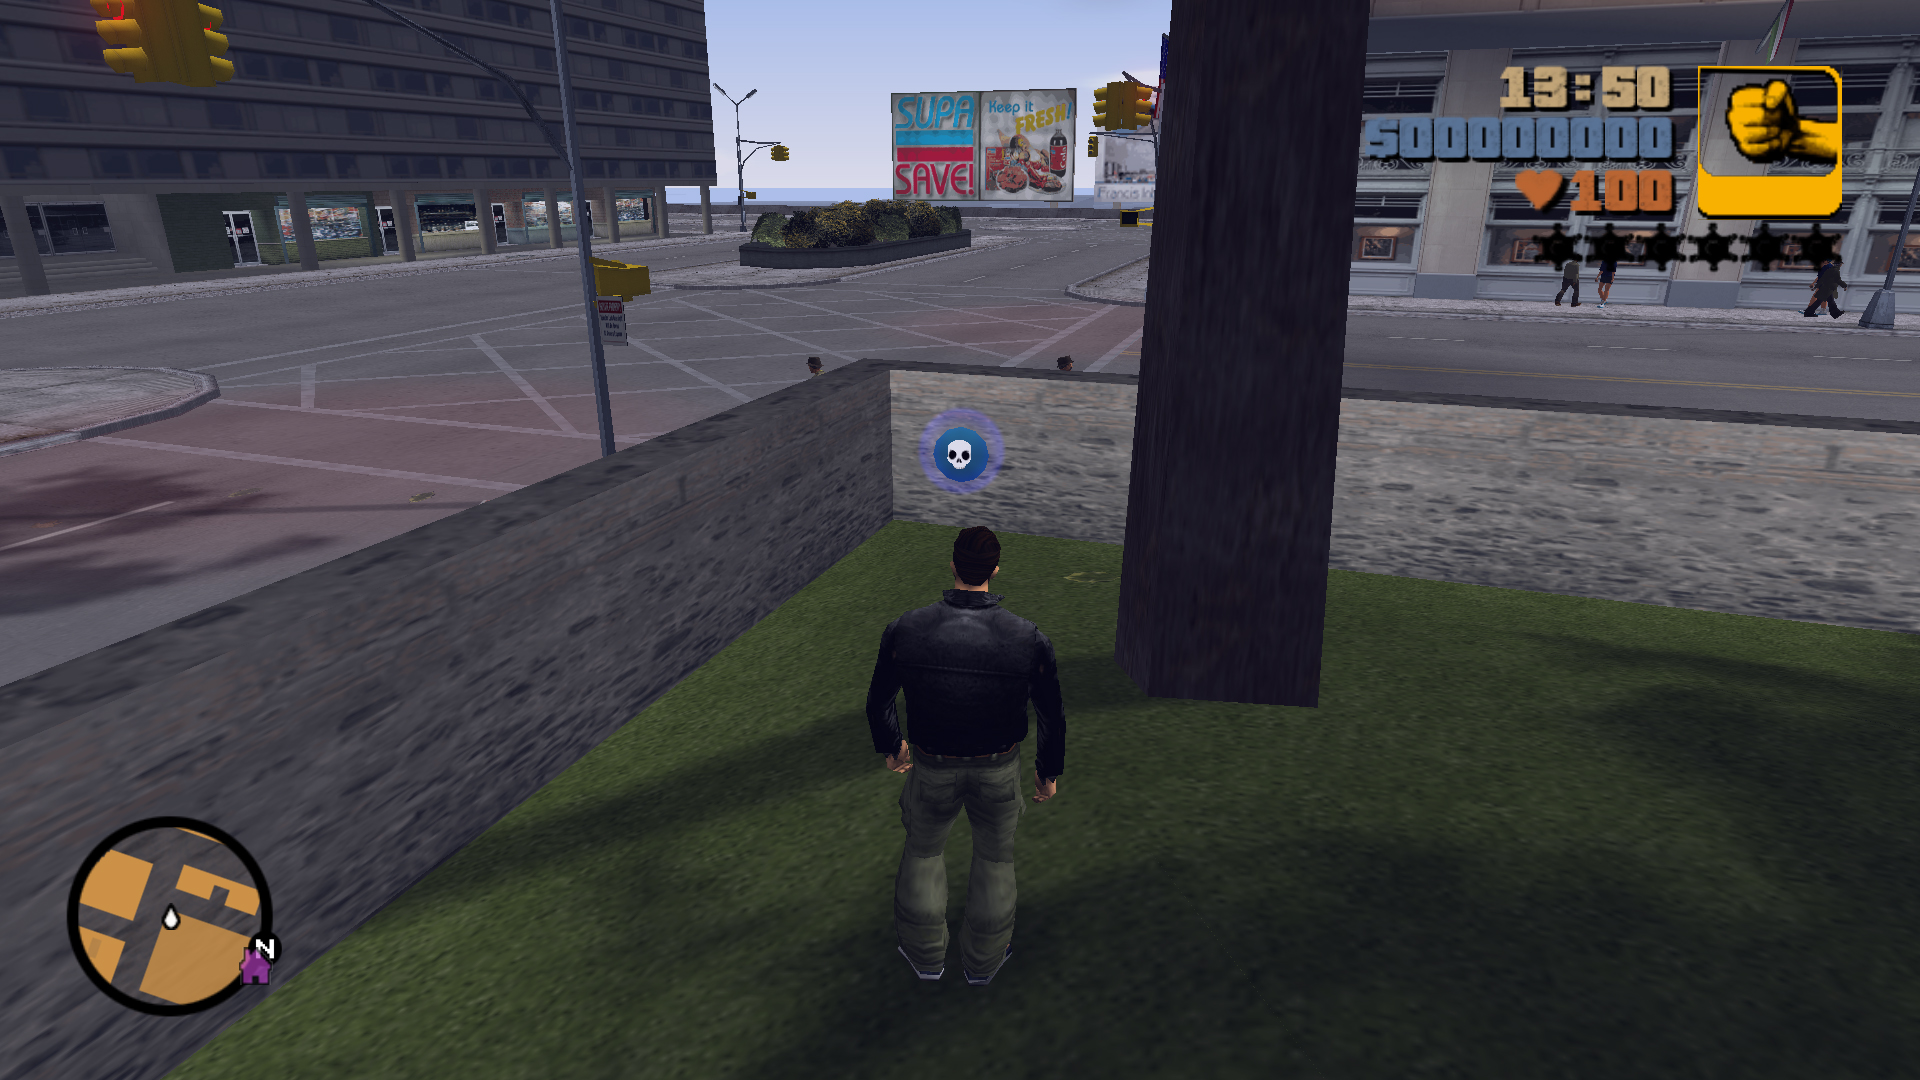
Second Location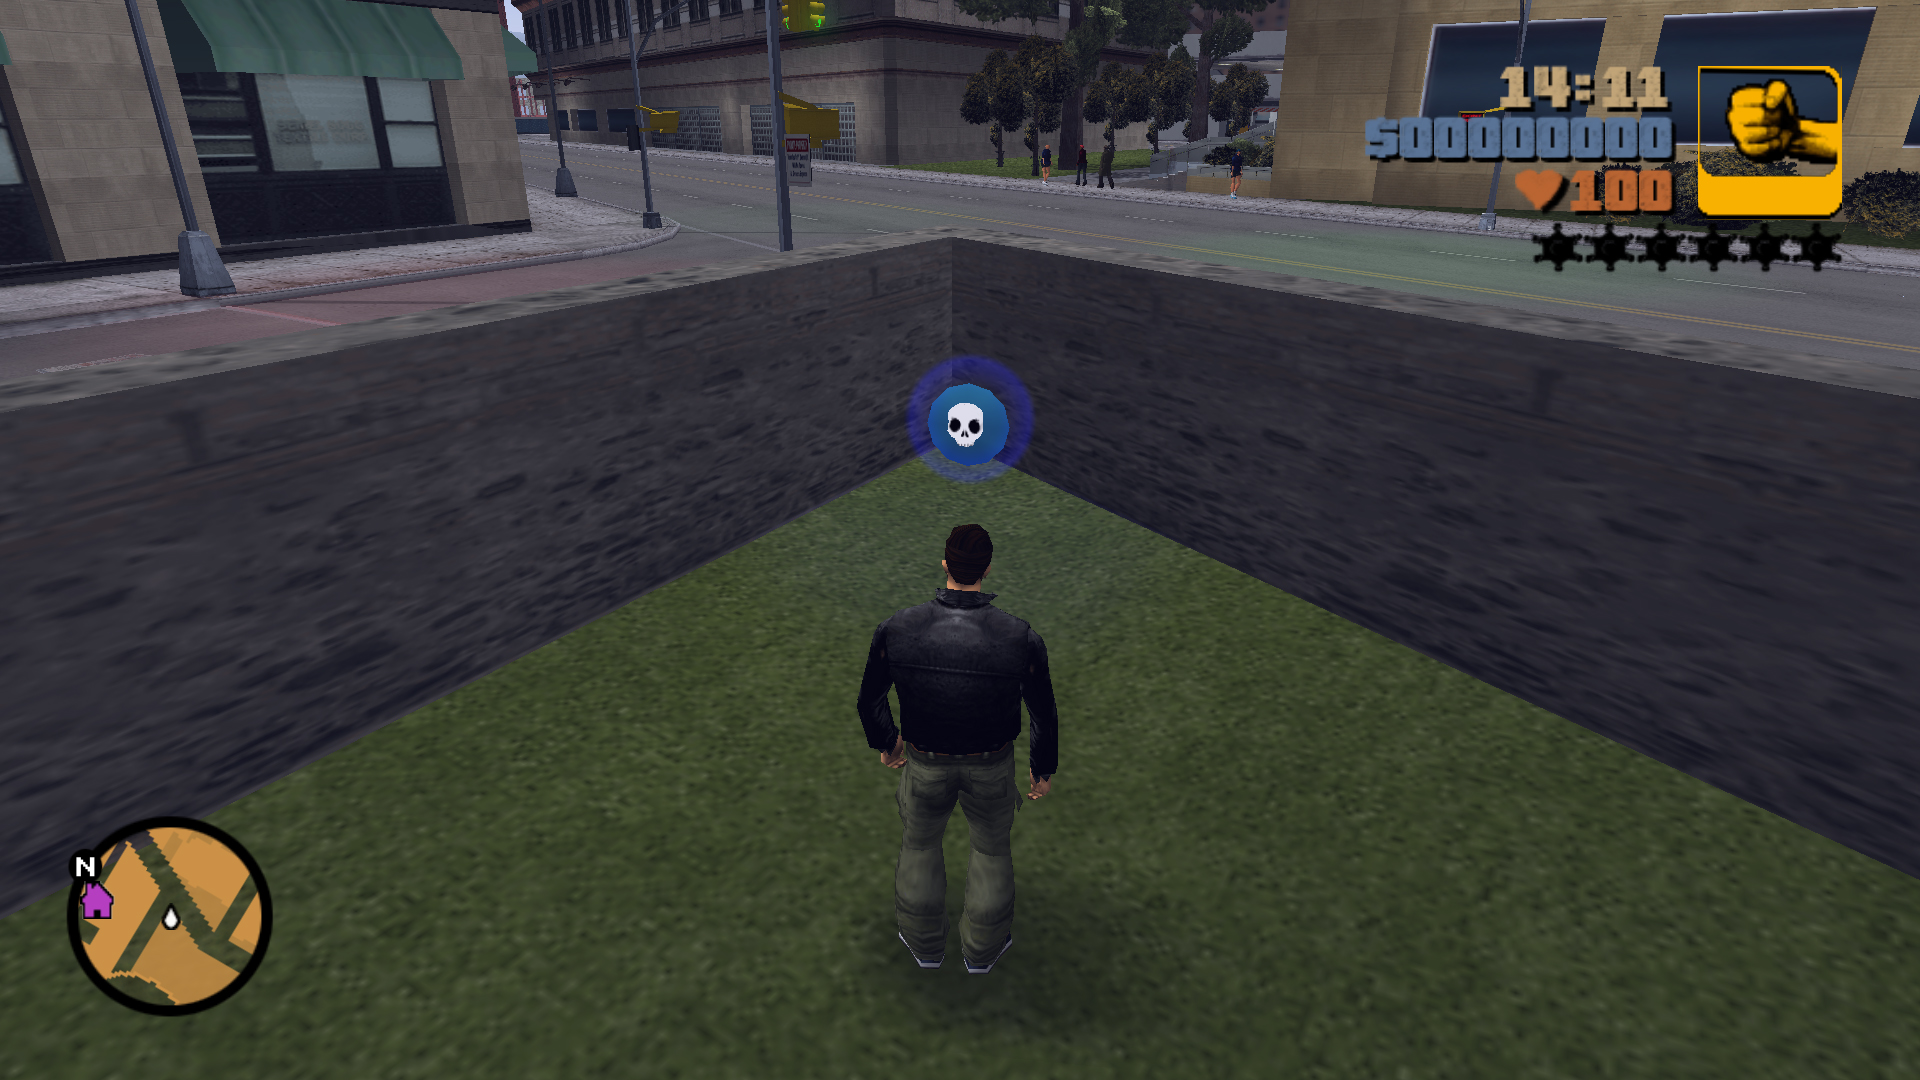
Second Location
Destroy 8 vehicles in 120 seconds
Shotgun
11
First Location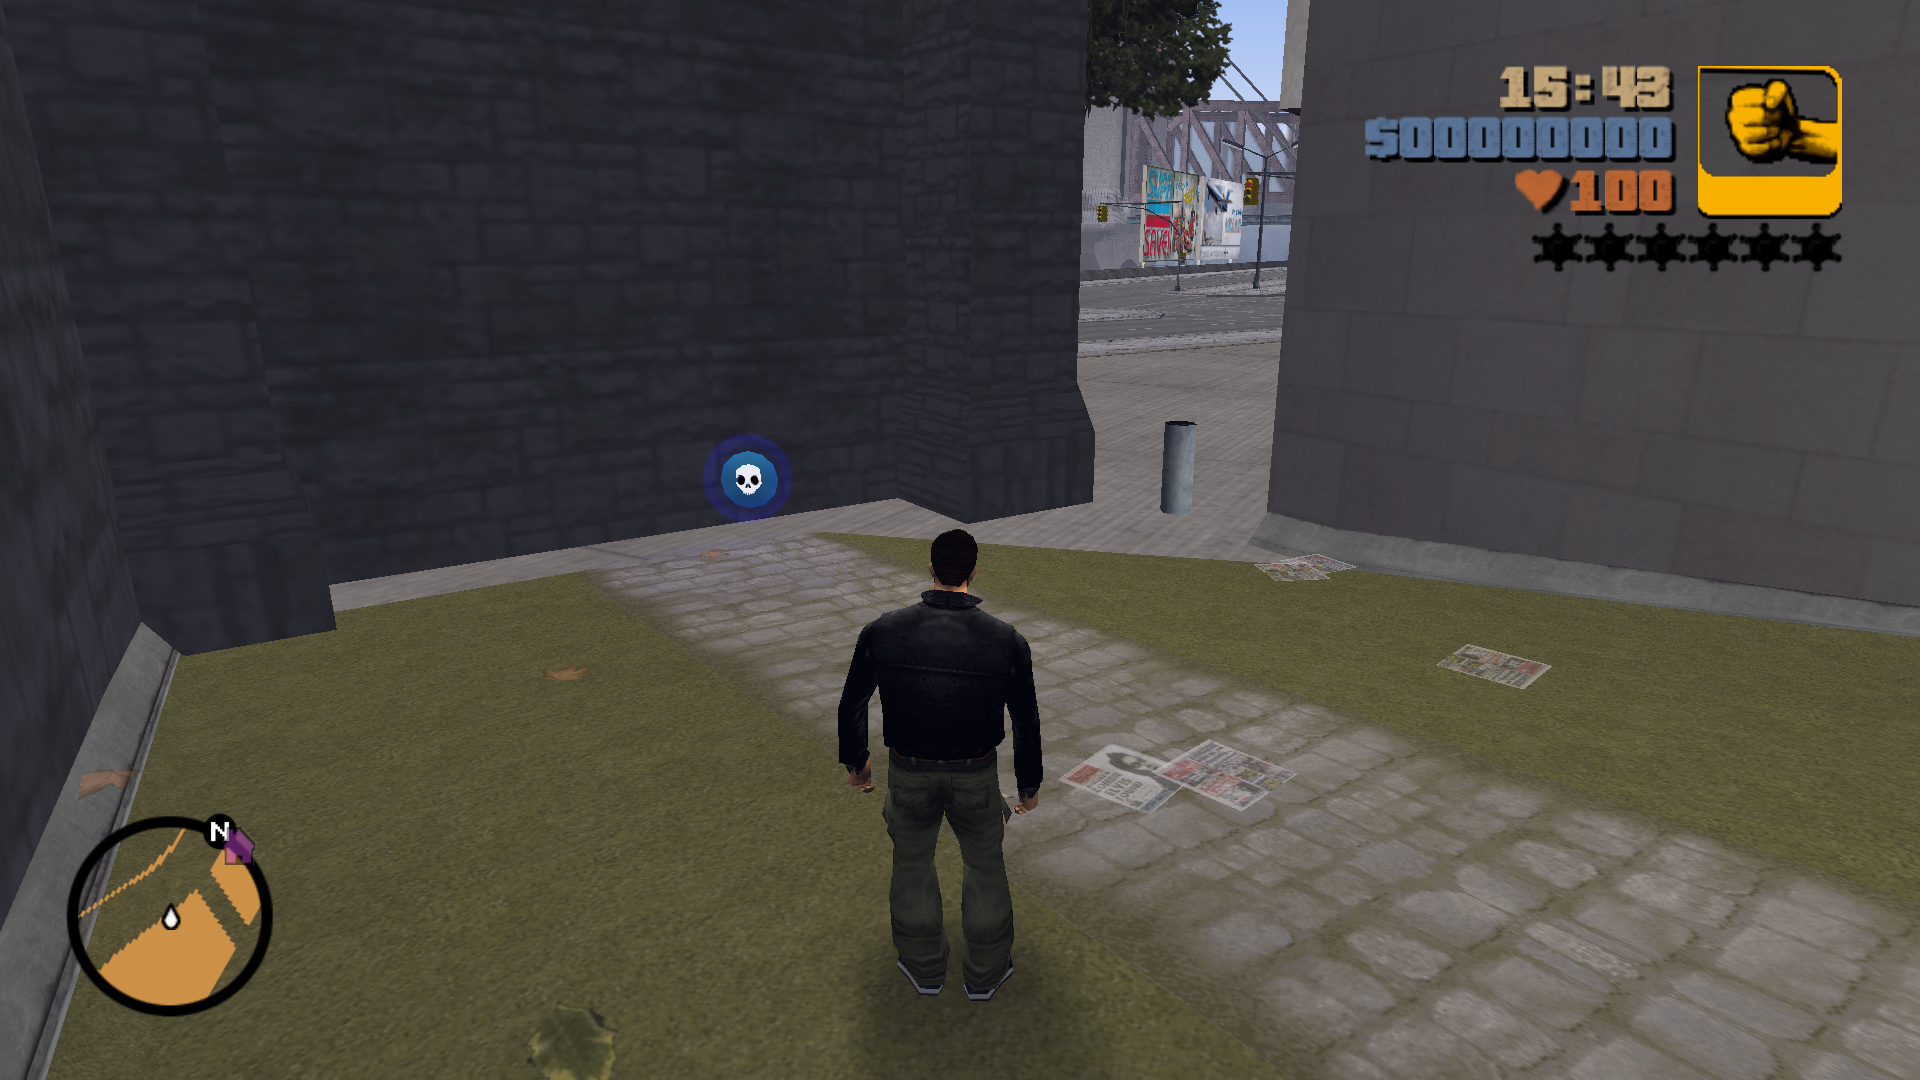
Second Location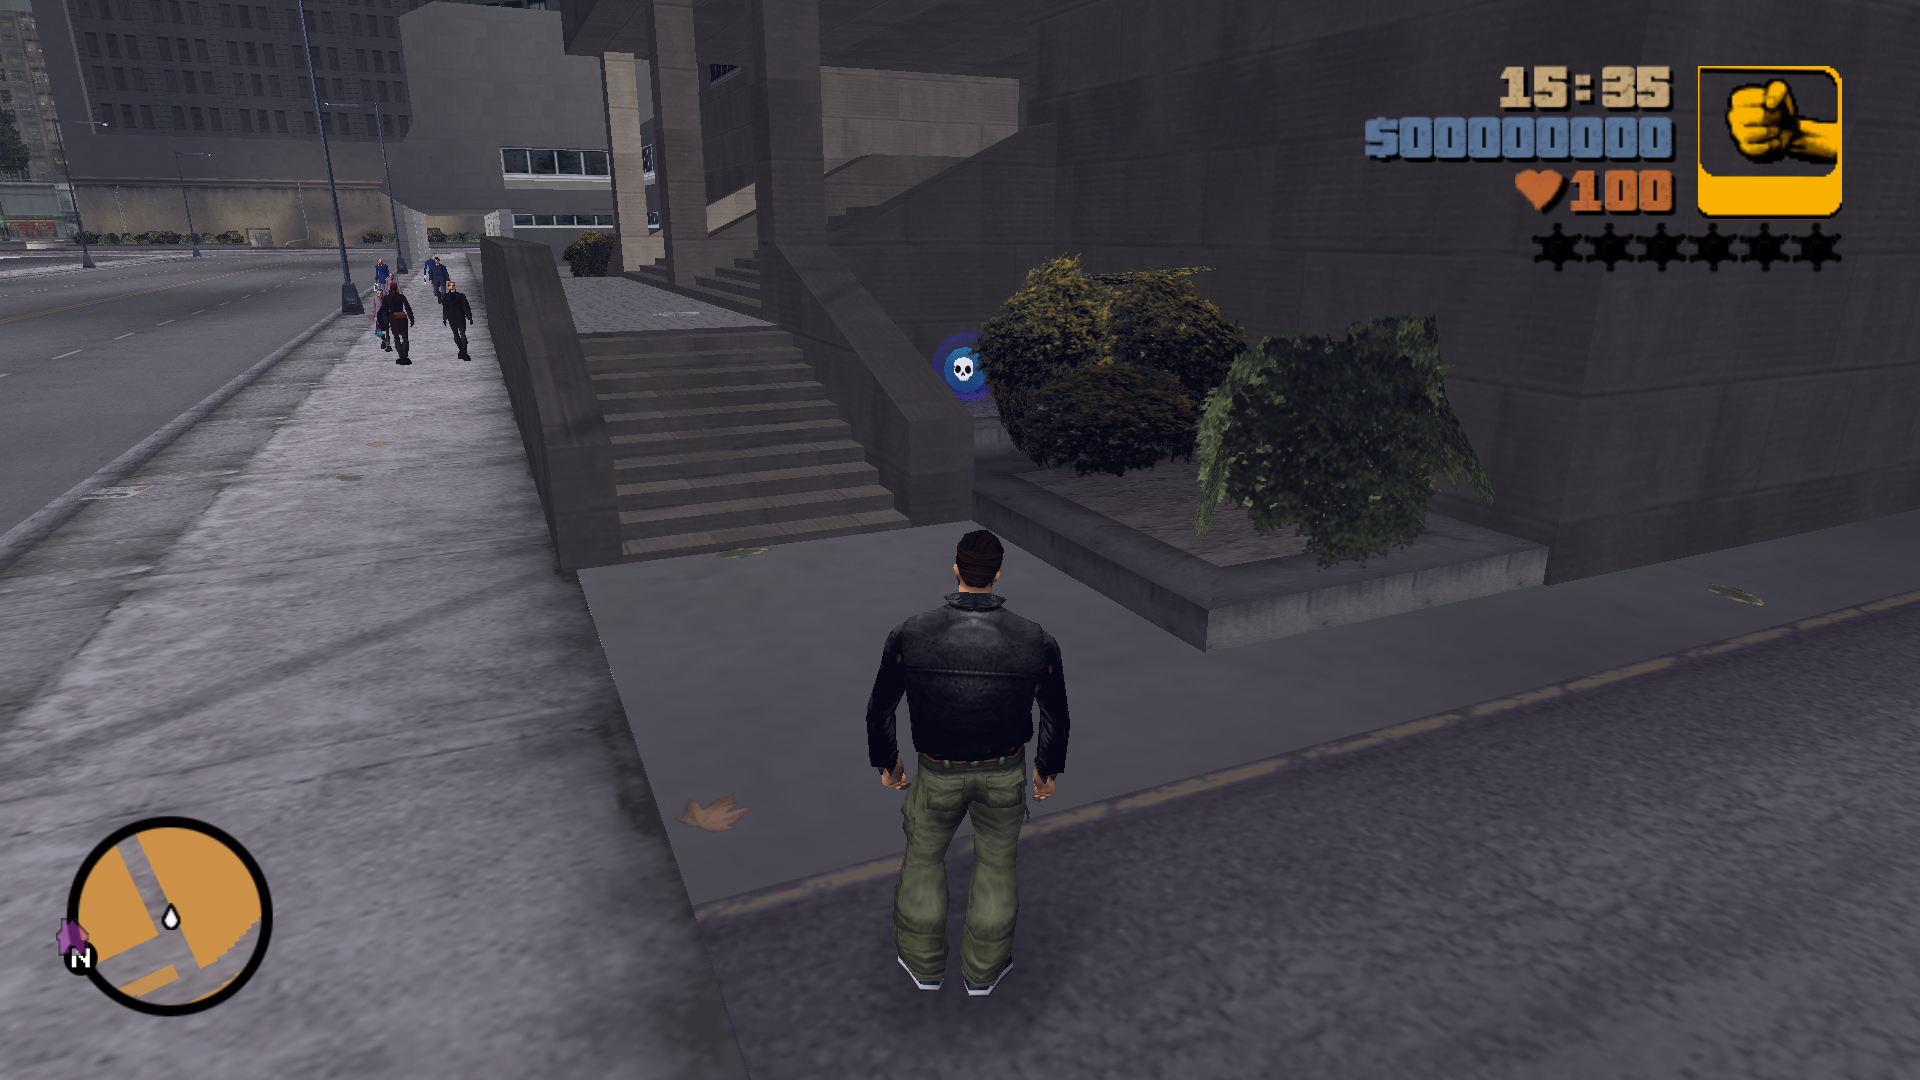
Second Location
Annihilate 30 Yadies in 120 seconds
Rocket Launcher
12
First Location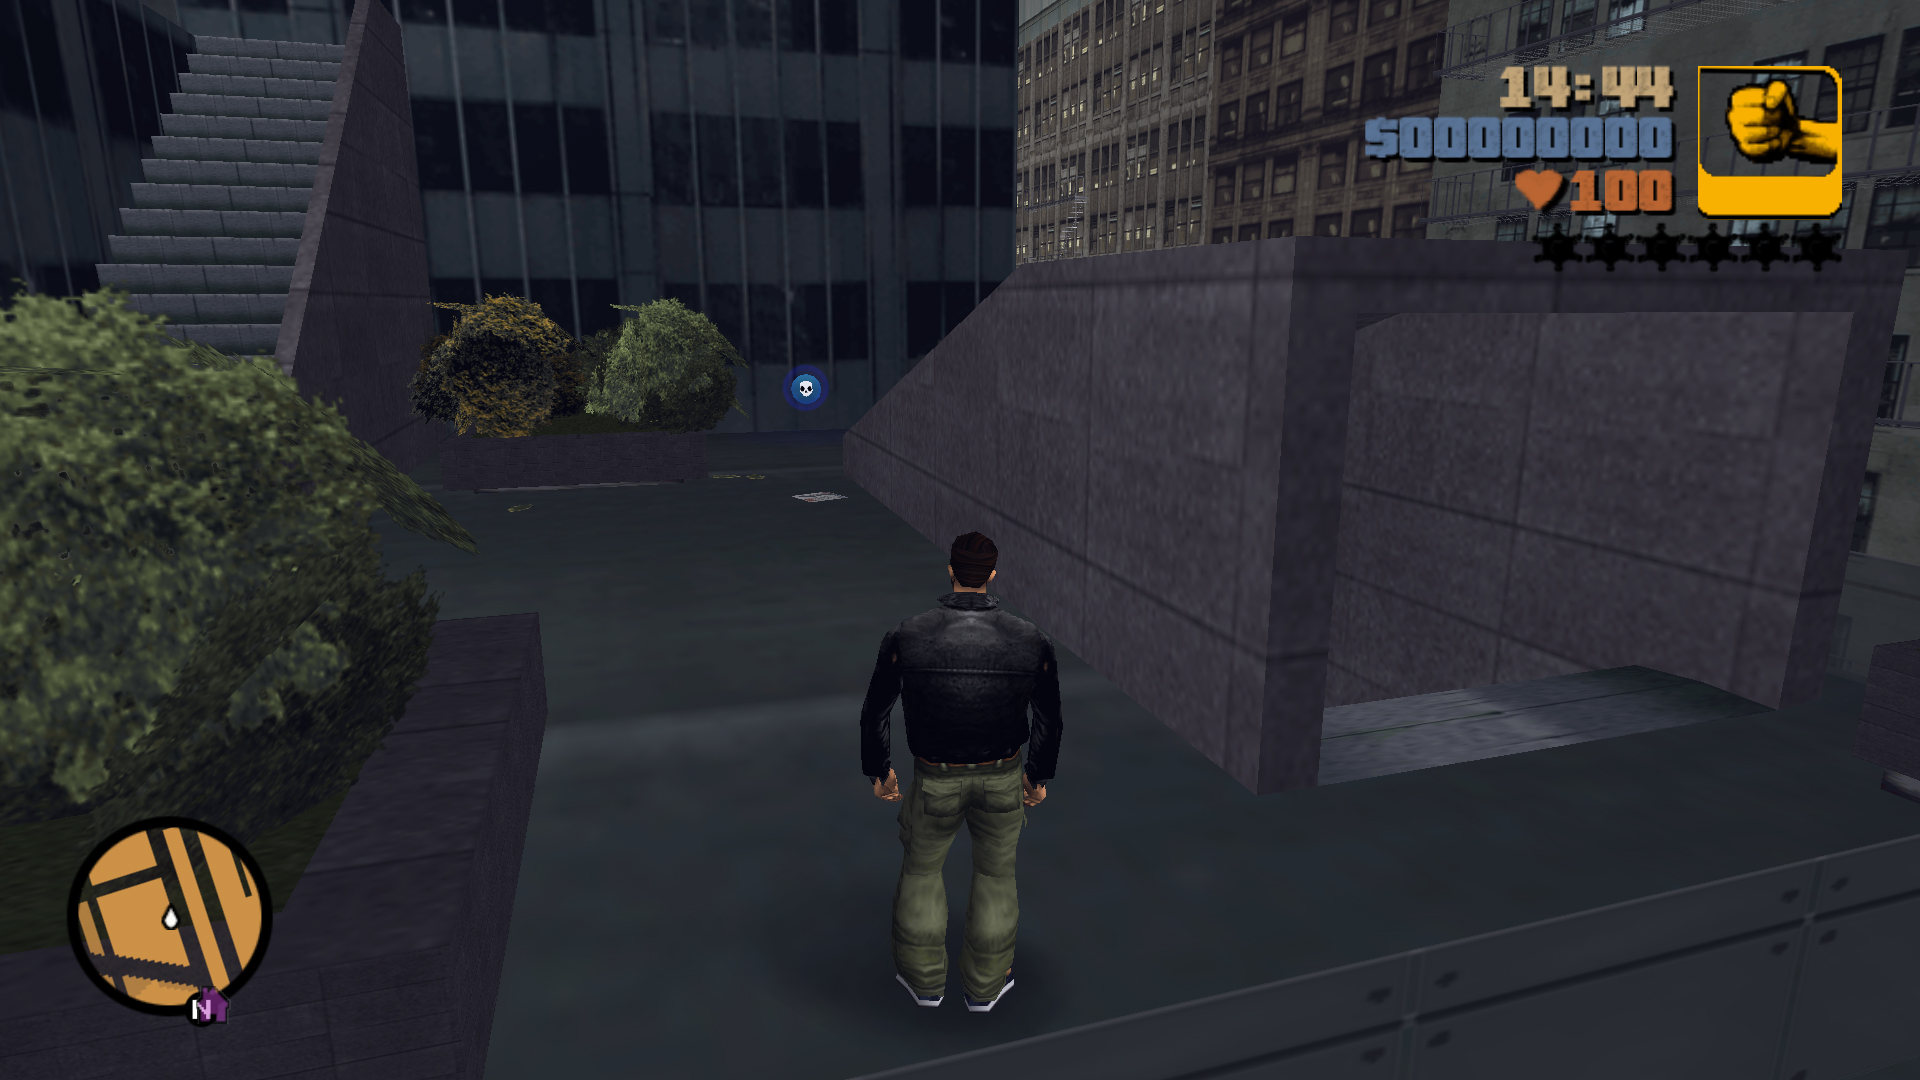
Second Location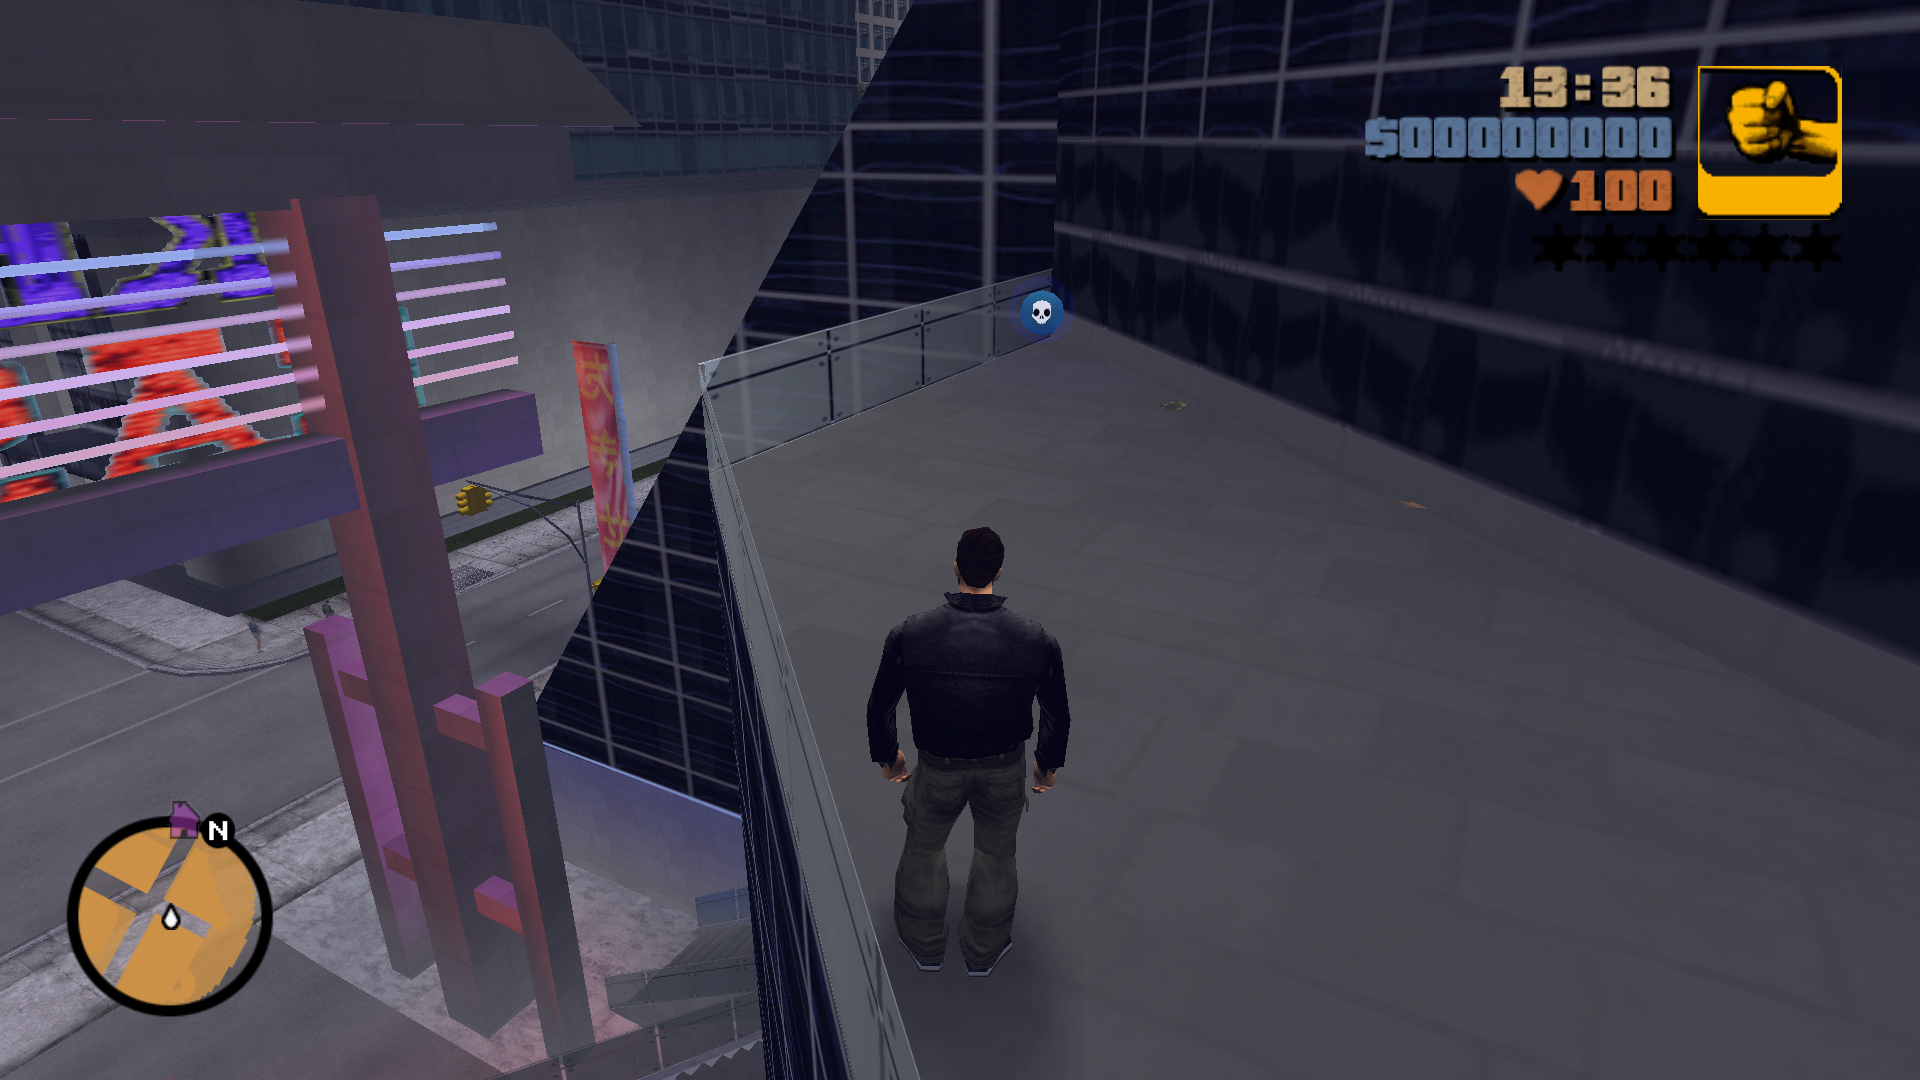
Second Location
Pop 17 Yadies heads in 120 seconds
(Only headshots count)
(Only headshots count)
Sniper Rifle
13
First Location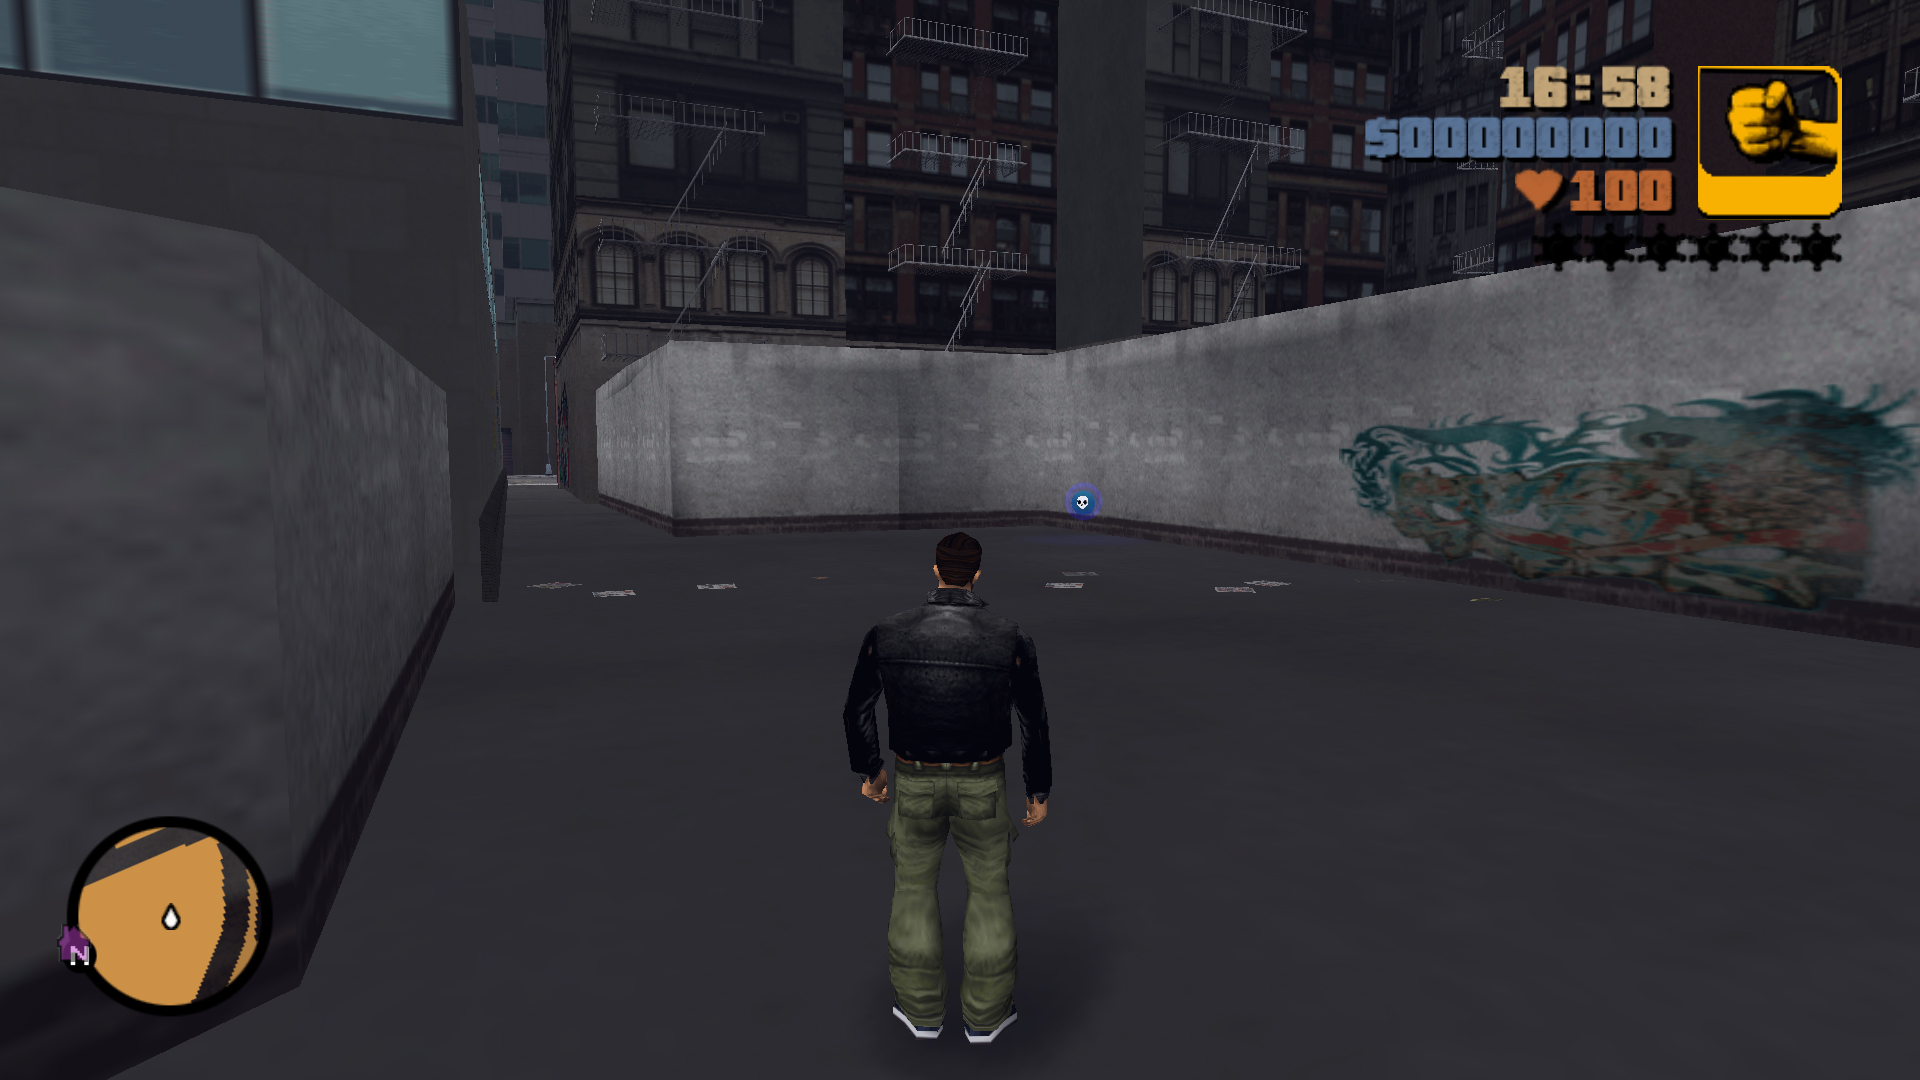
Second Location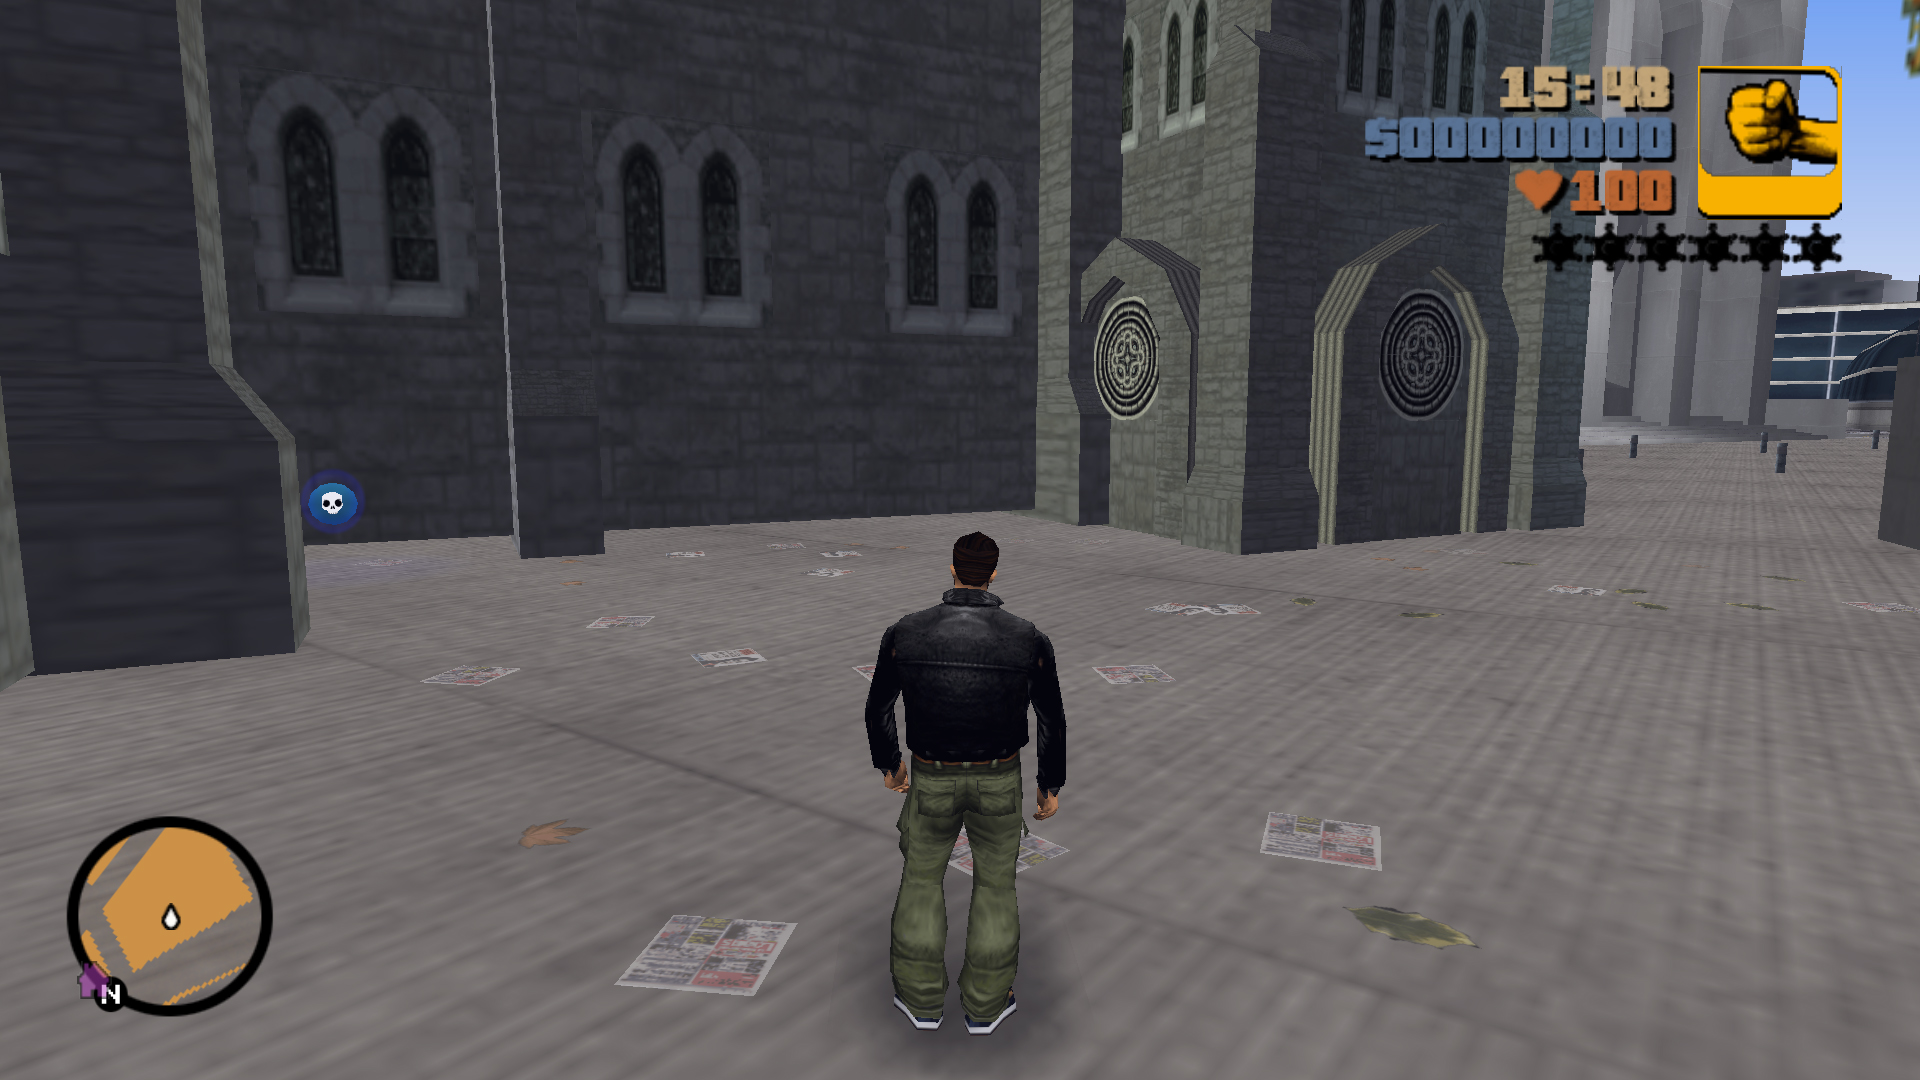
Second Location
Burn 25 Yakuza in 120 seconds
Flamethrower
14
First Location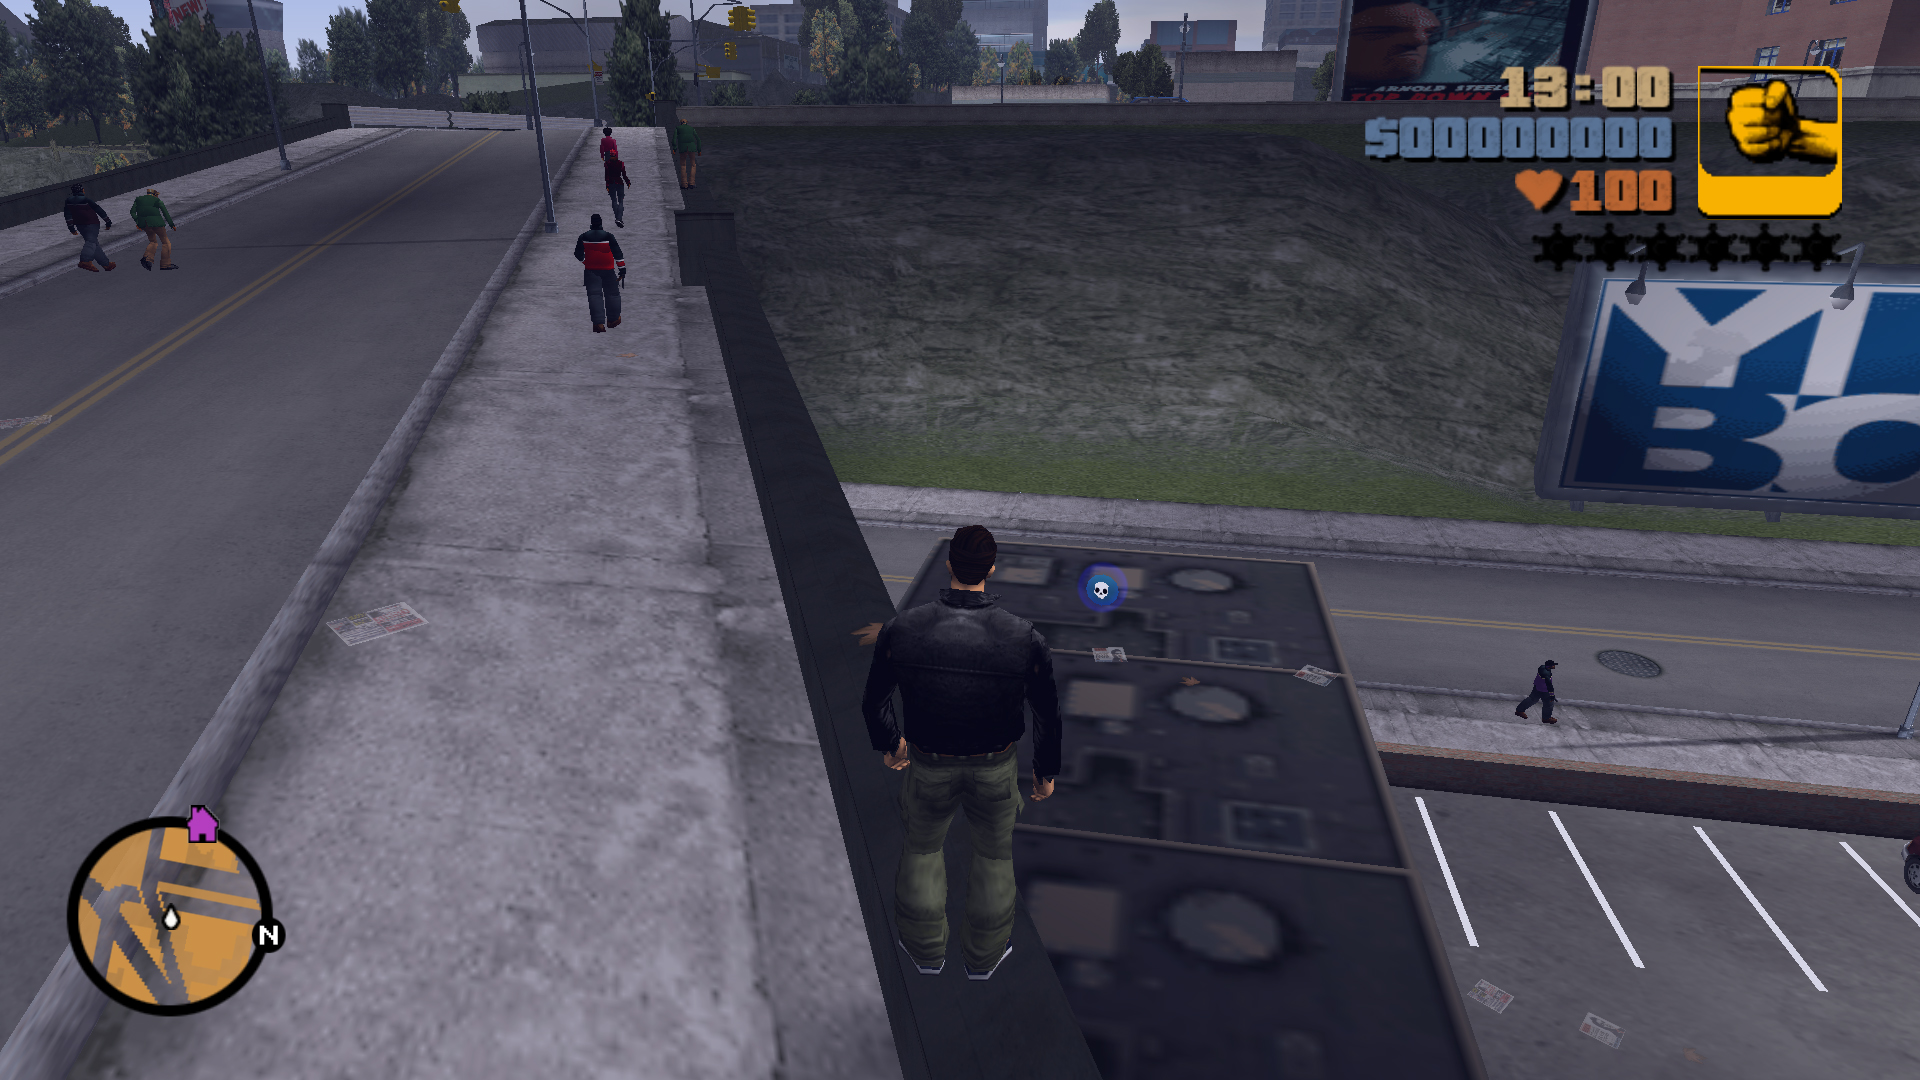
Second Location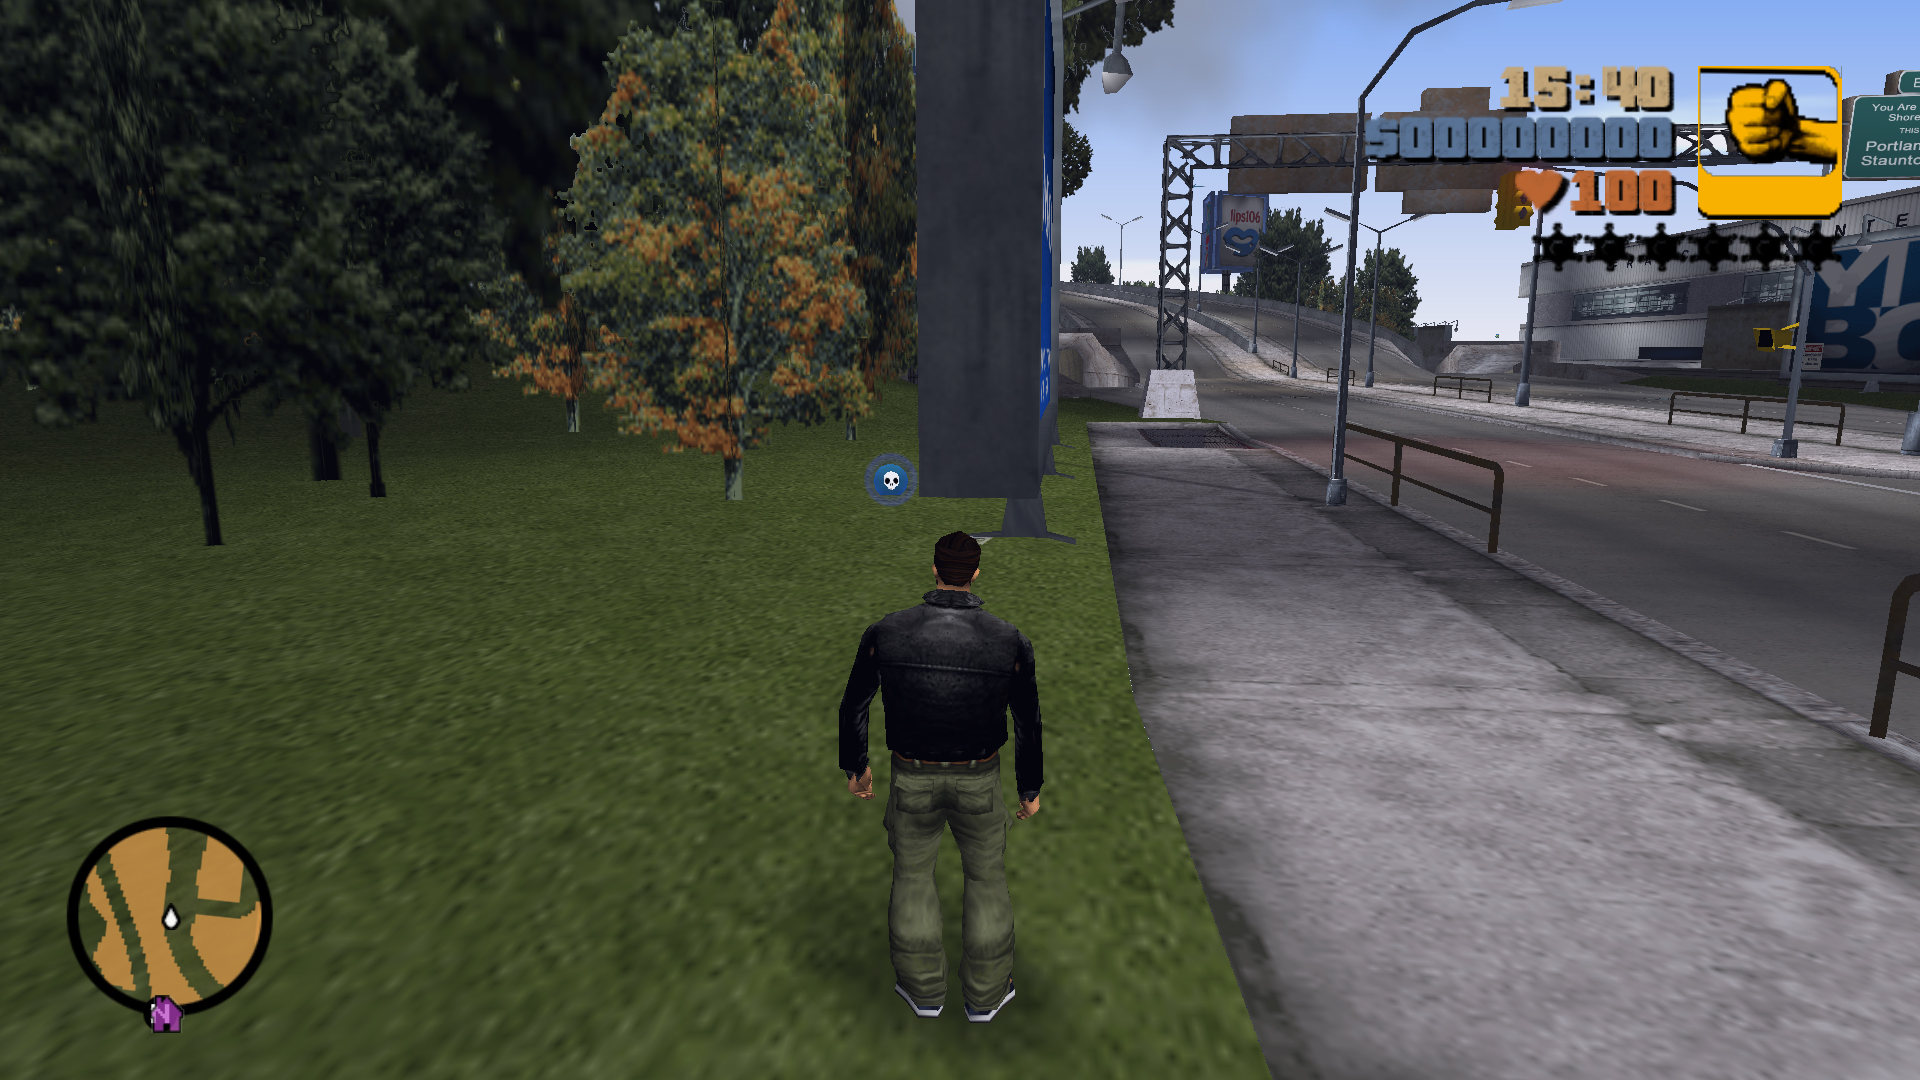
Second Location
Splatter 20 Hoods in 120 seconds
Shotgun
15
First Location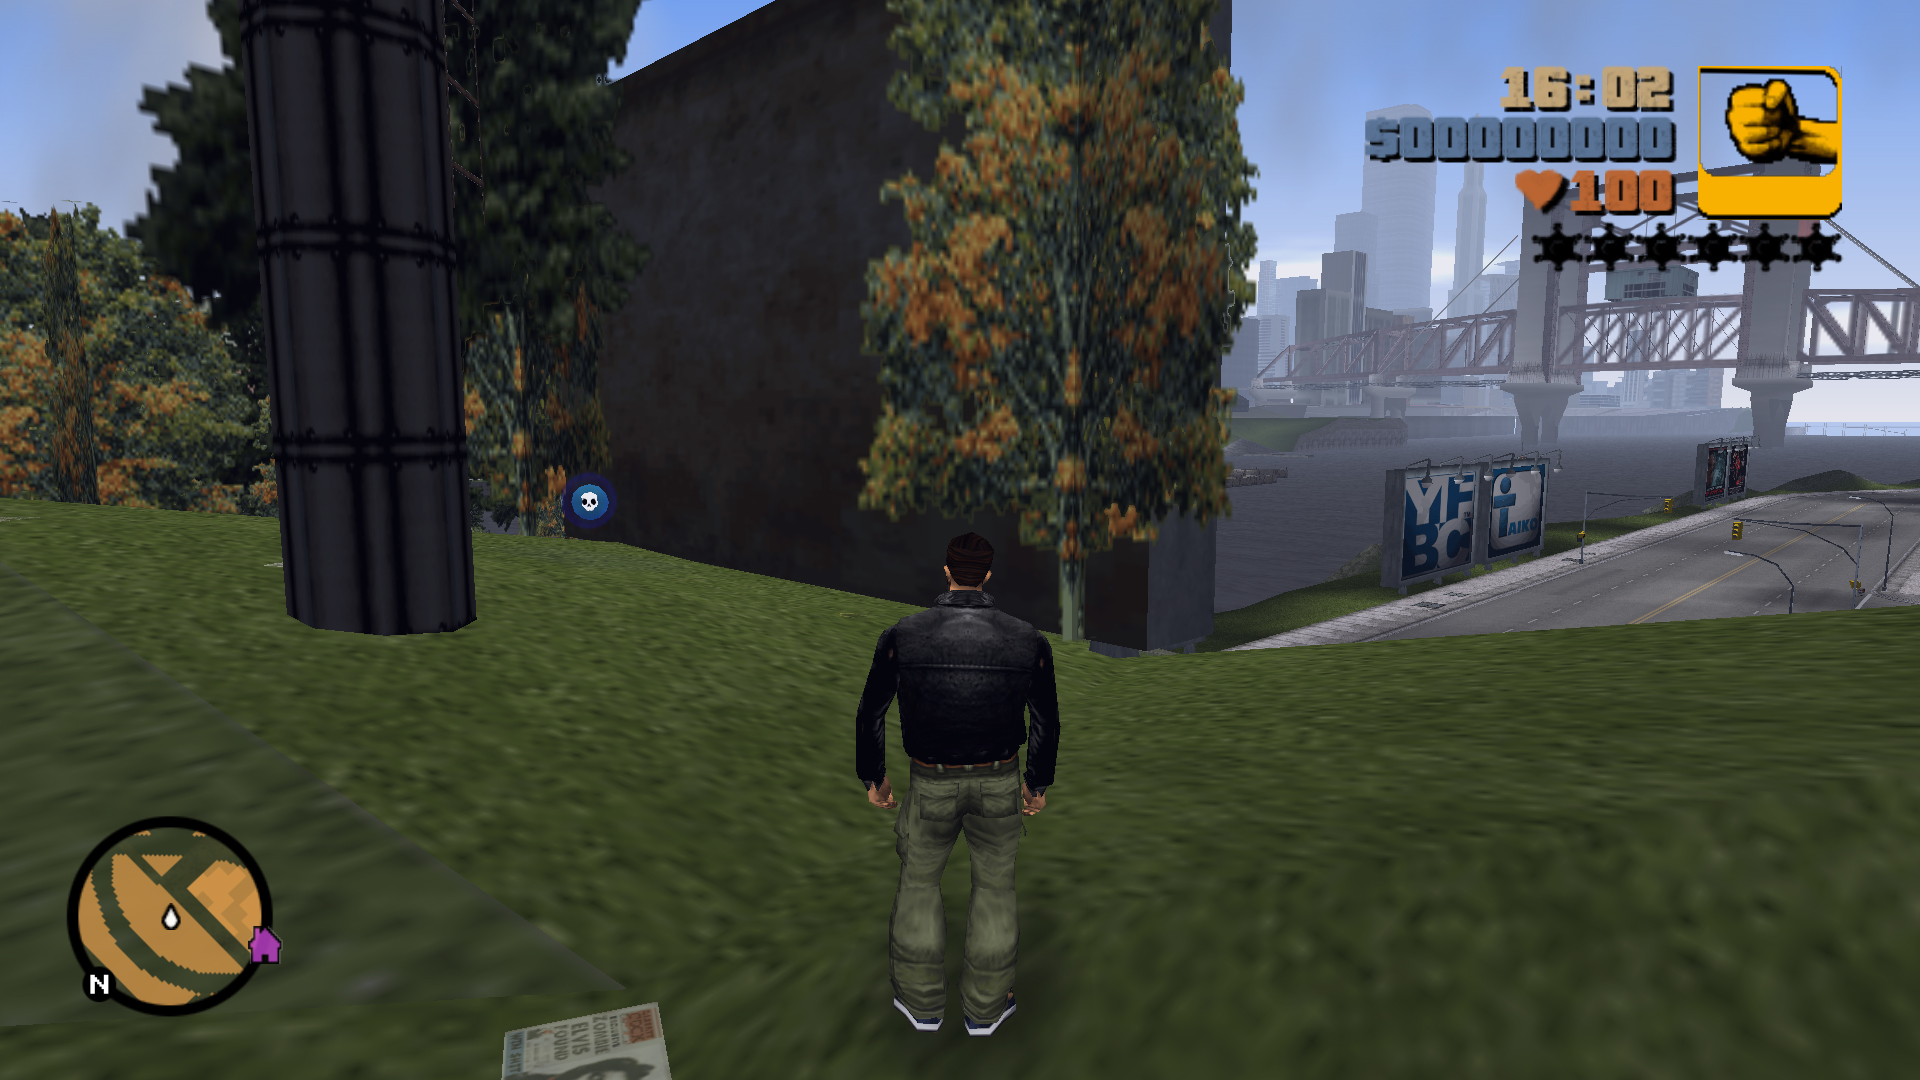
Second Location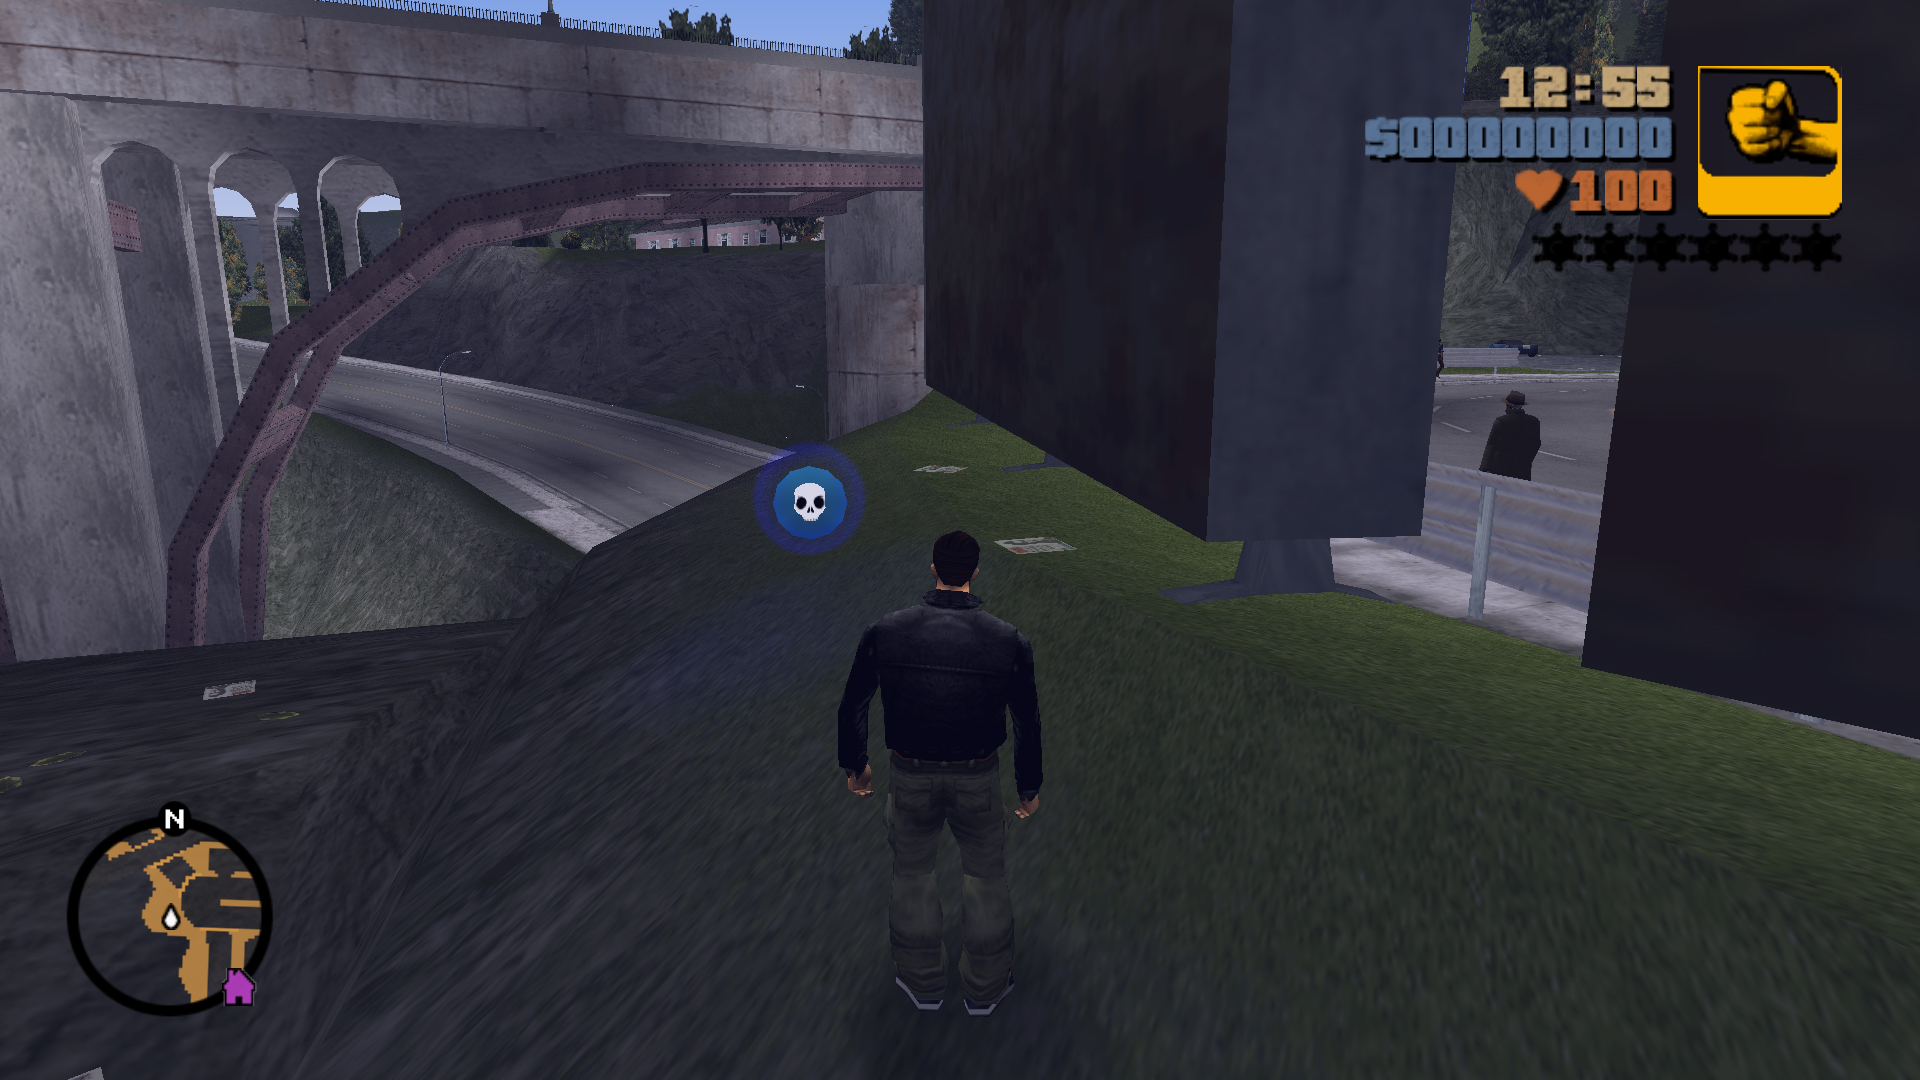
Second Location
Behead 20 Hoods in 120 seconds
(Only headshots count)
(Only headshots count)
M16
16
First Location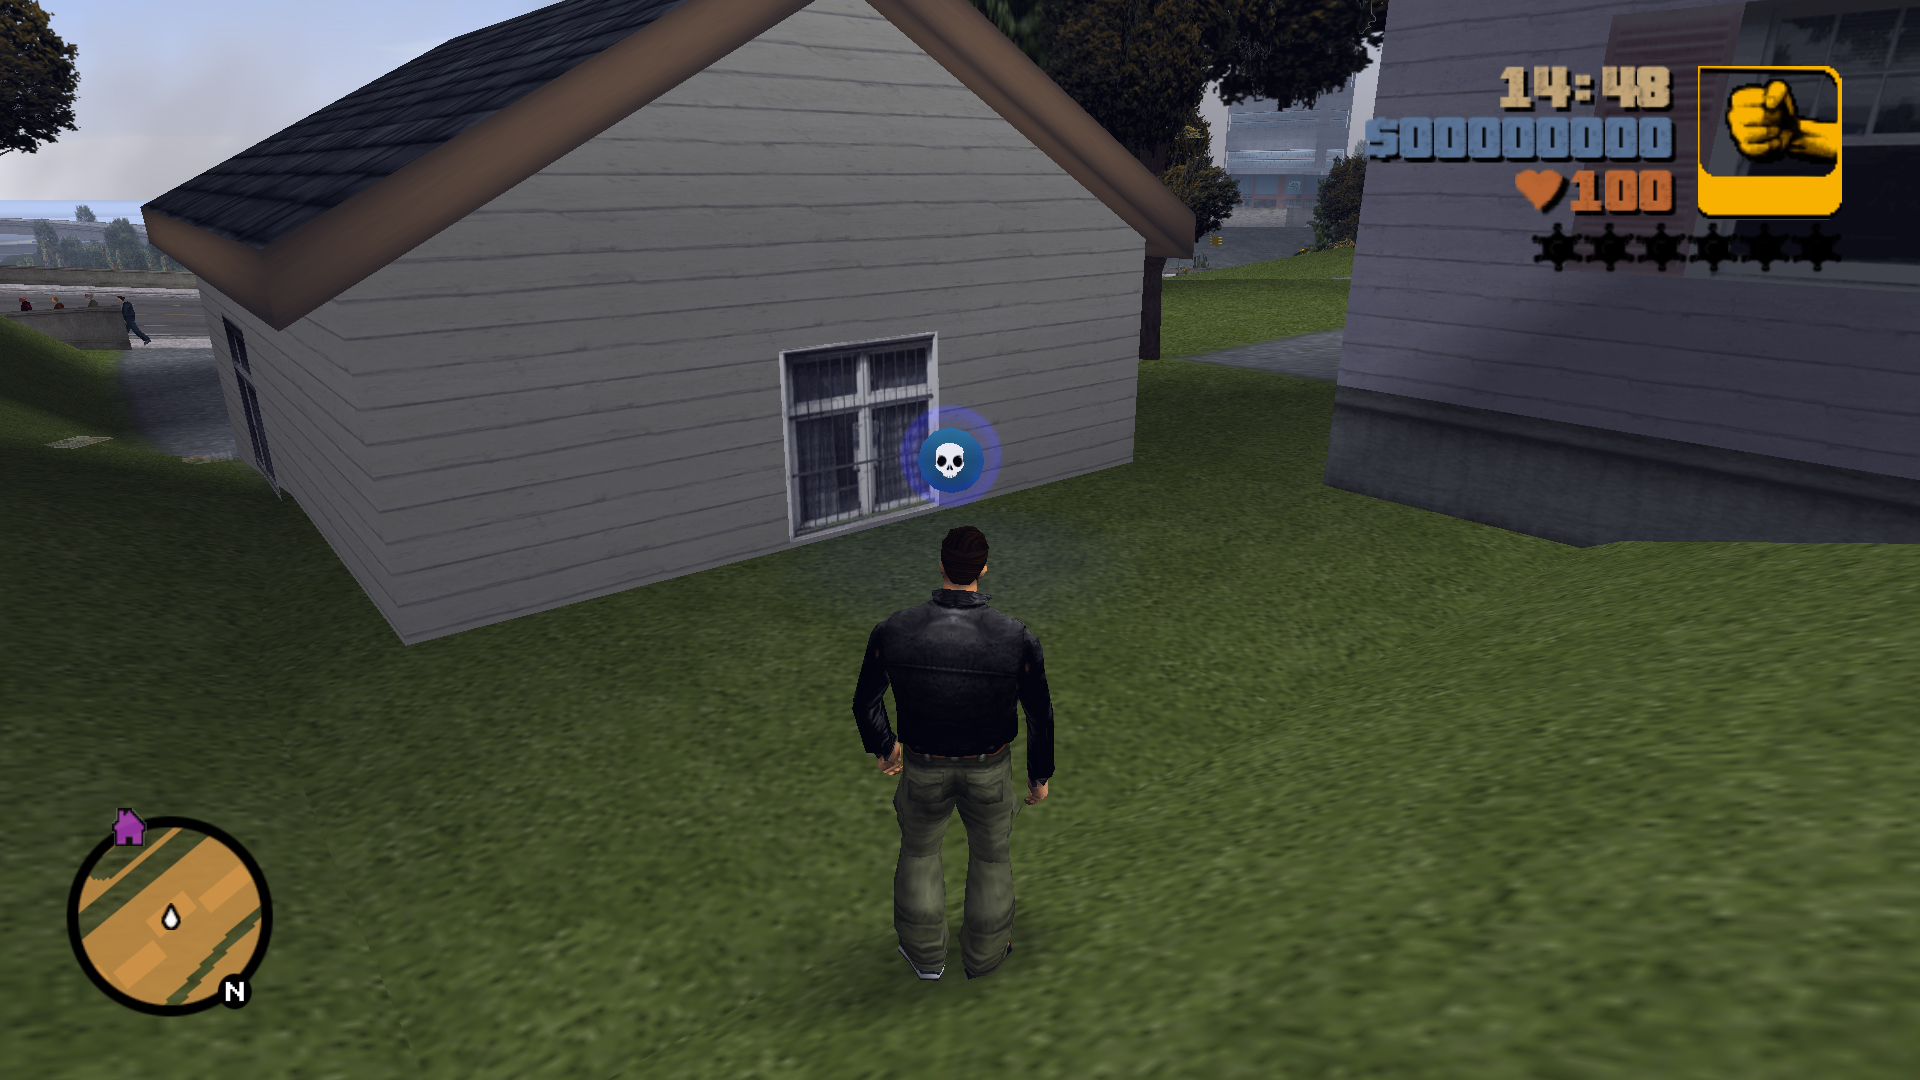
Second Location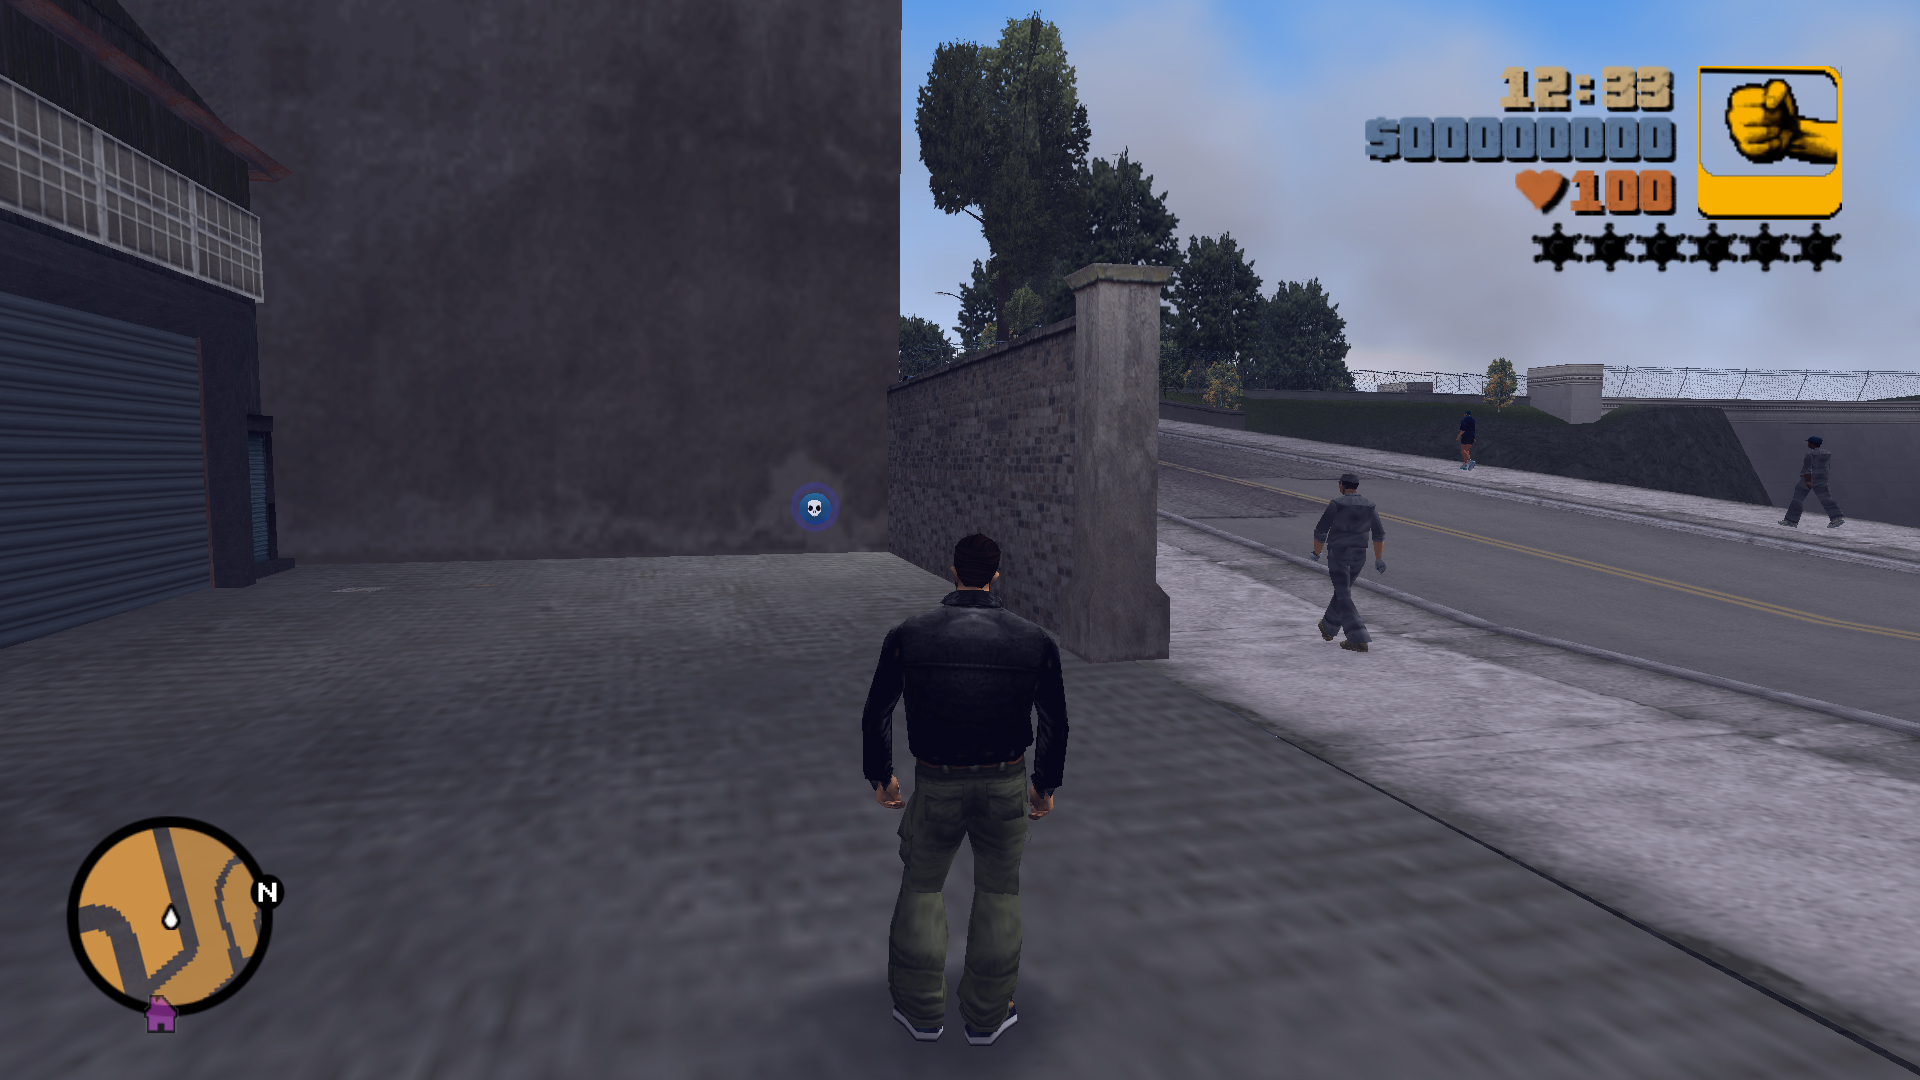
Second Location
Fry 20 Colombians in 120 seconds
Flamethrower
17
First Location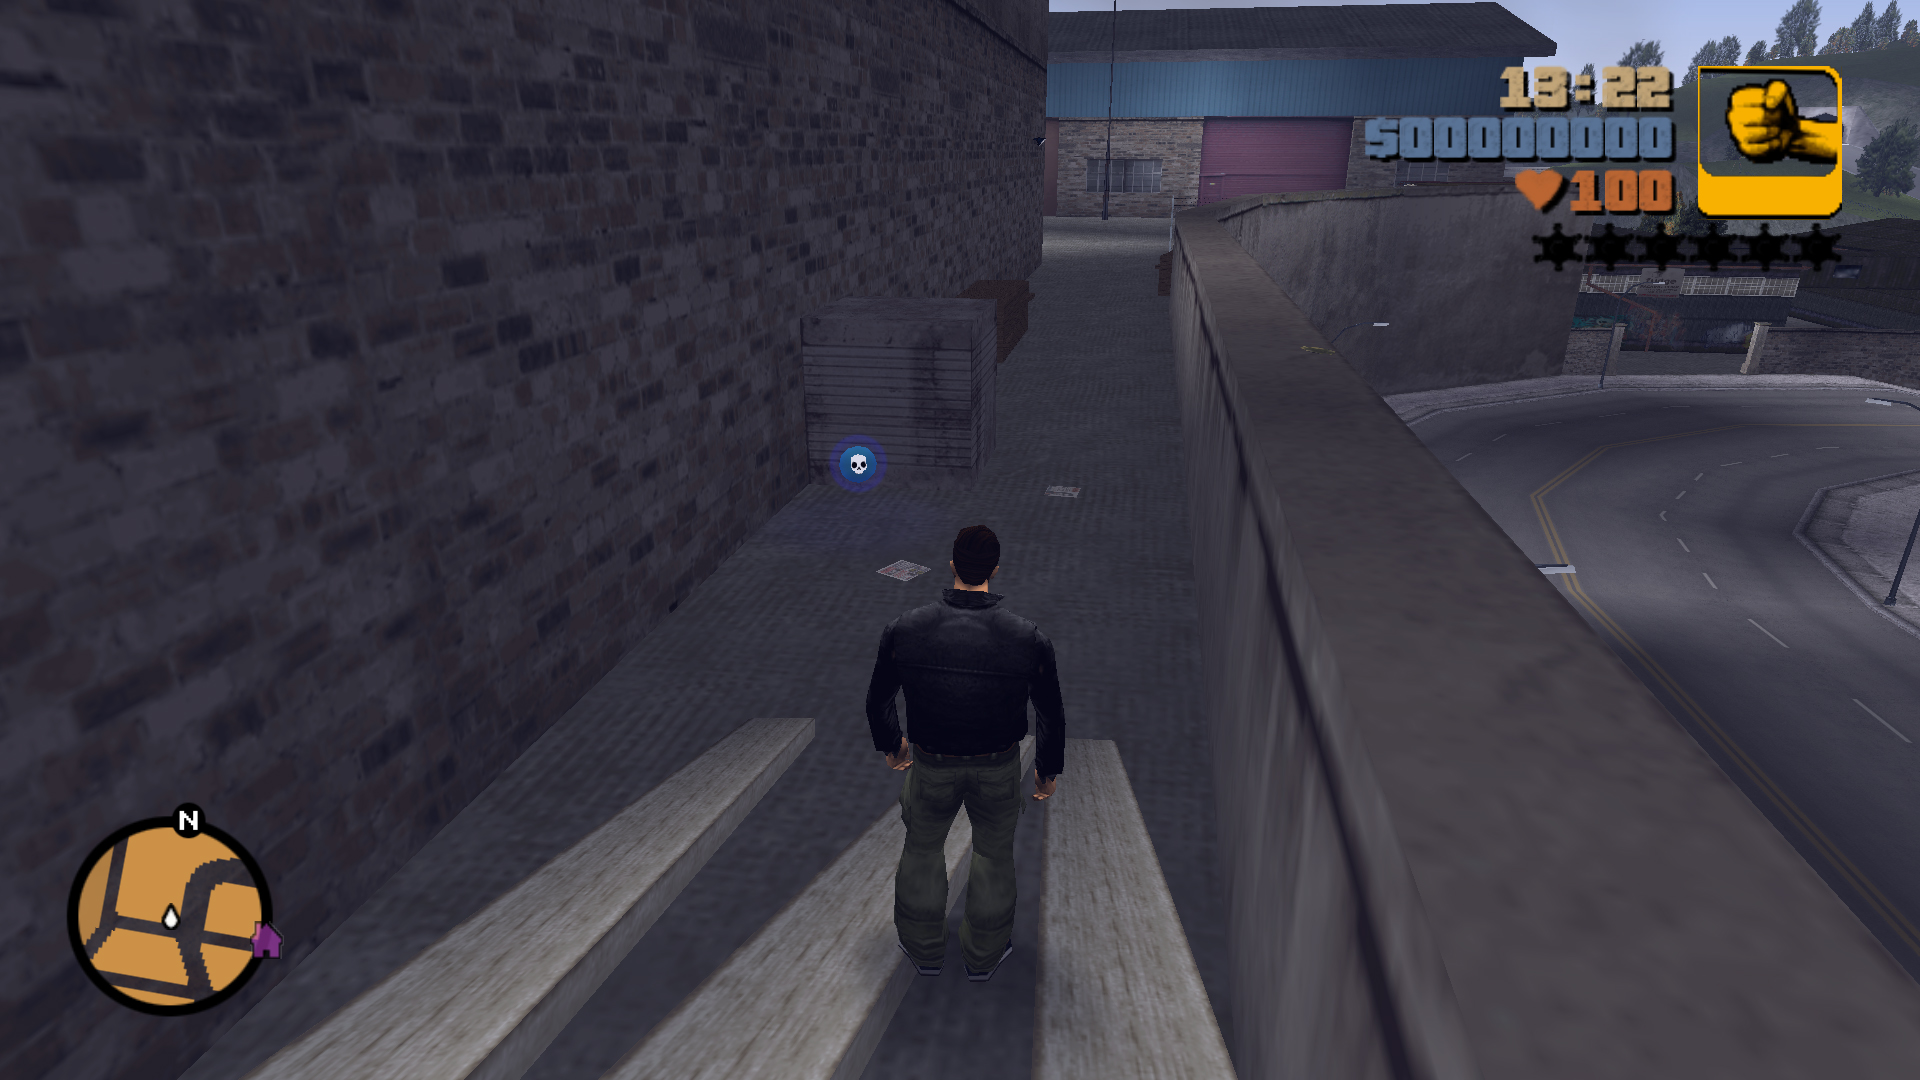
Second Location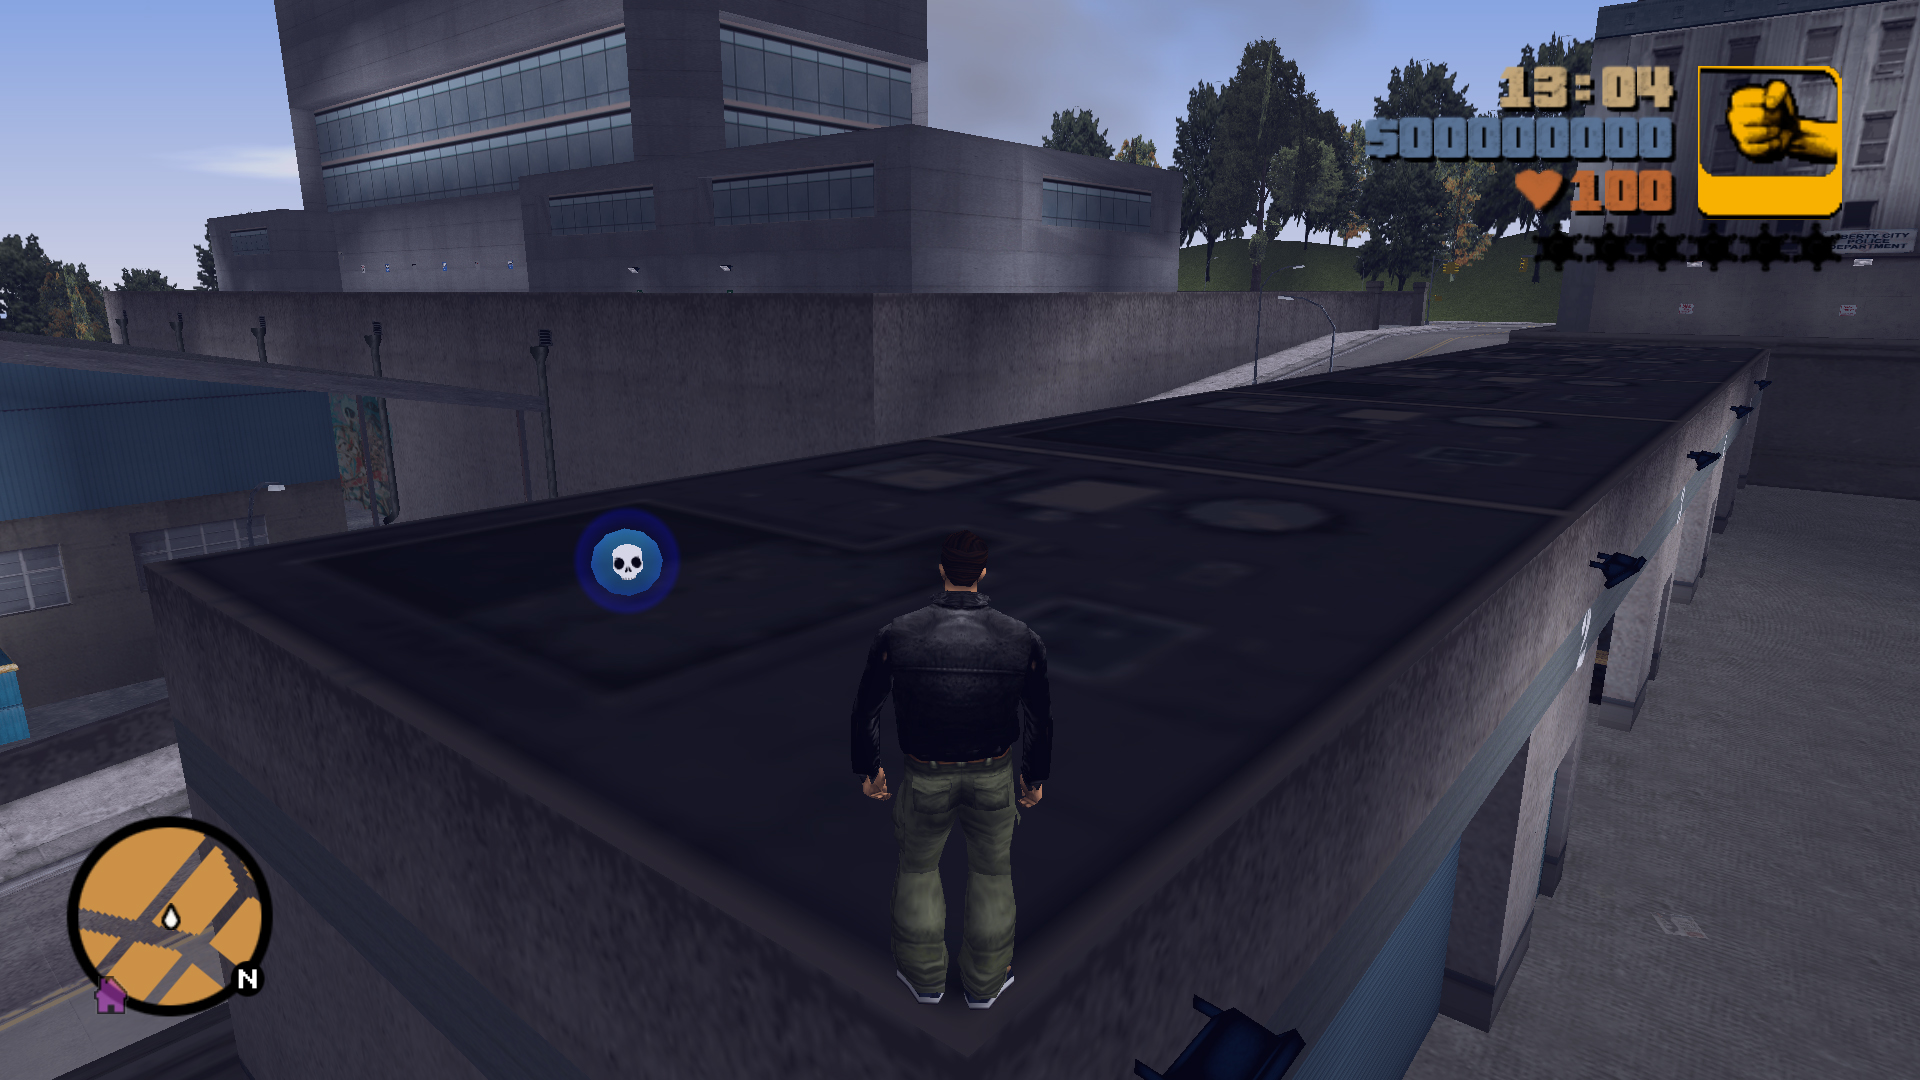
Second Location
Remove 15 Colombians heads in 120 seconds
(Only headshots count)
(Only headshots count)
Sniper Rifle
18
First Location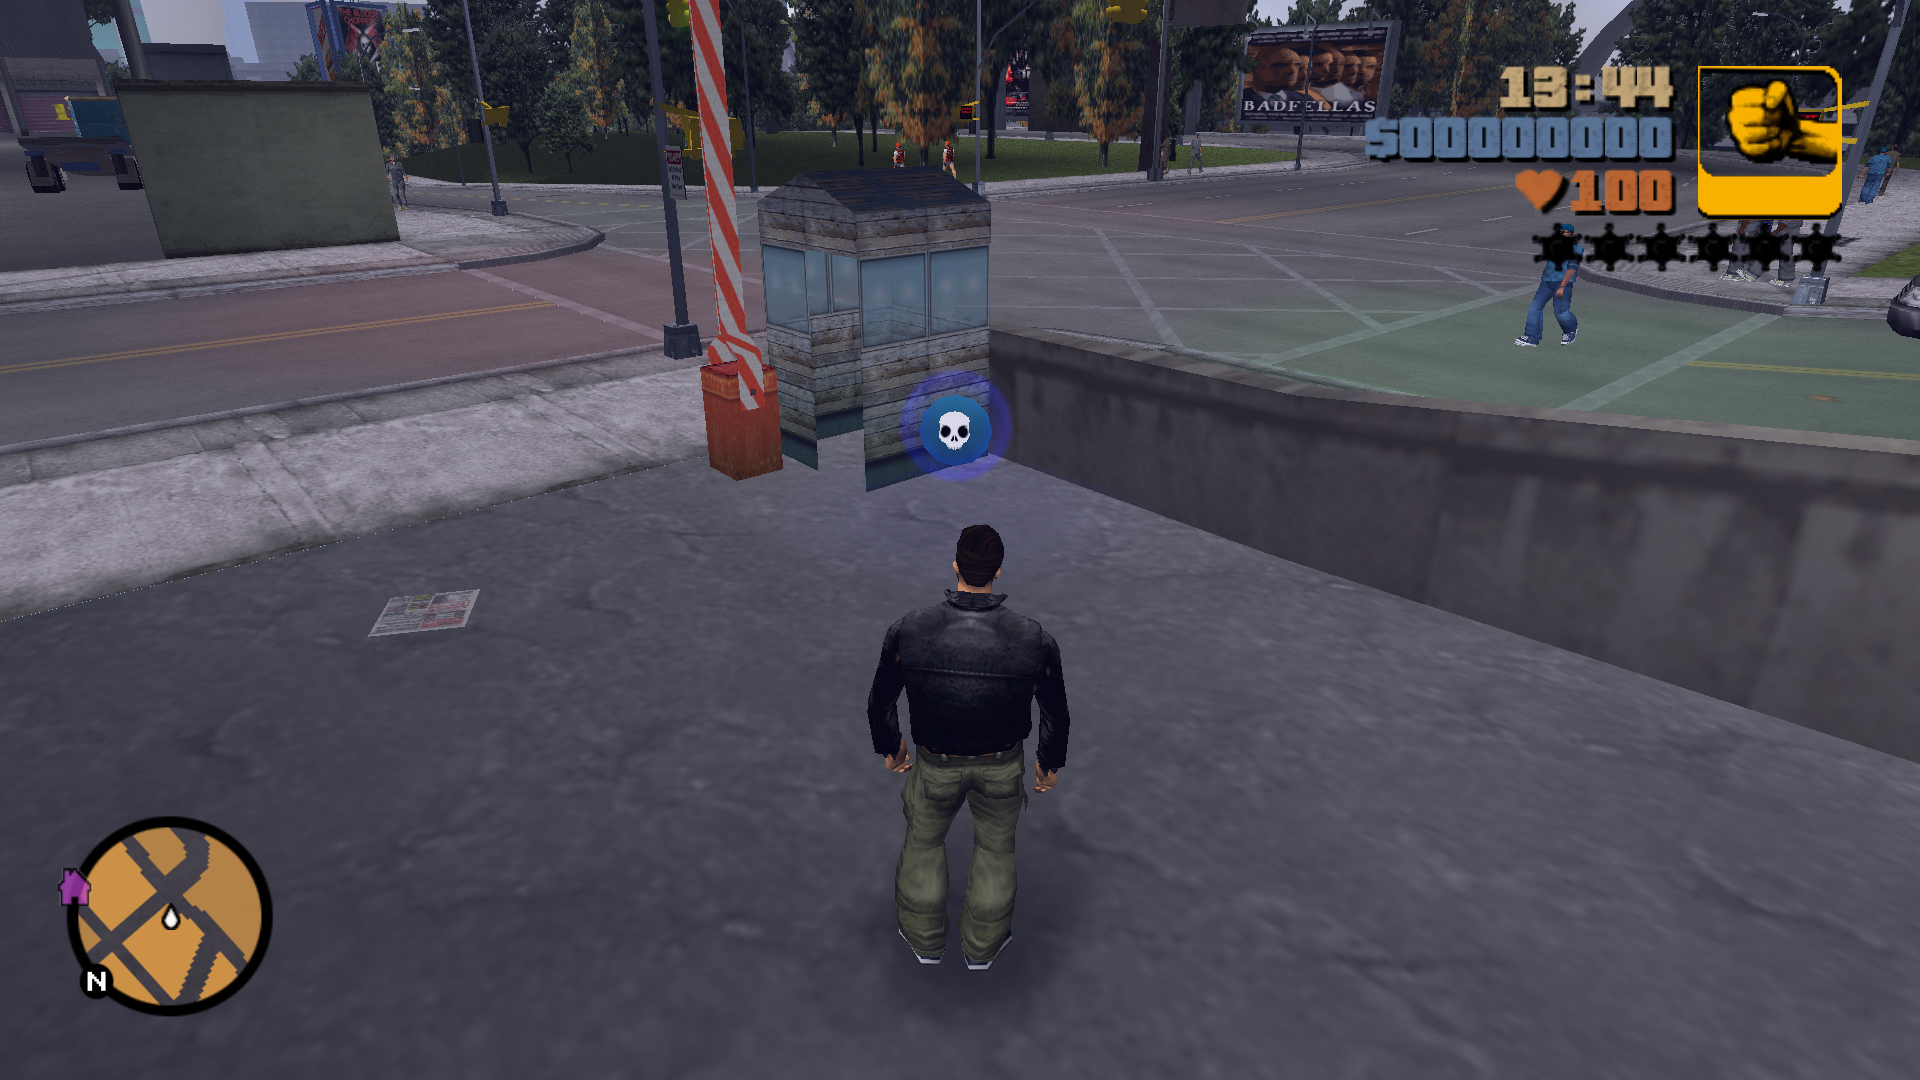
Second Location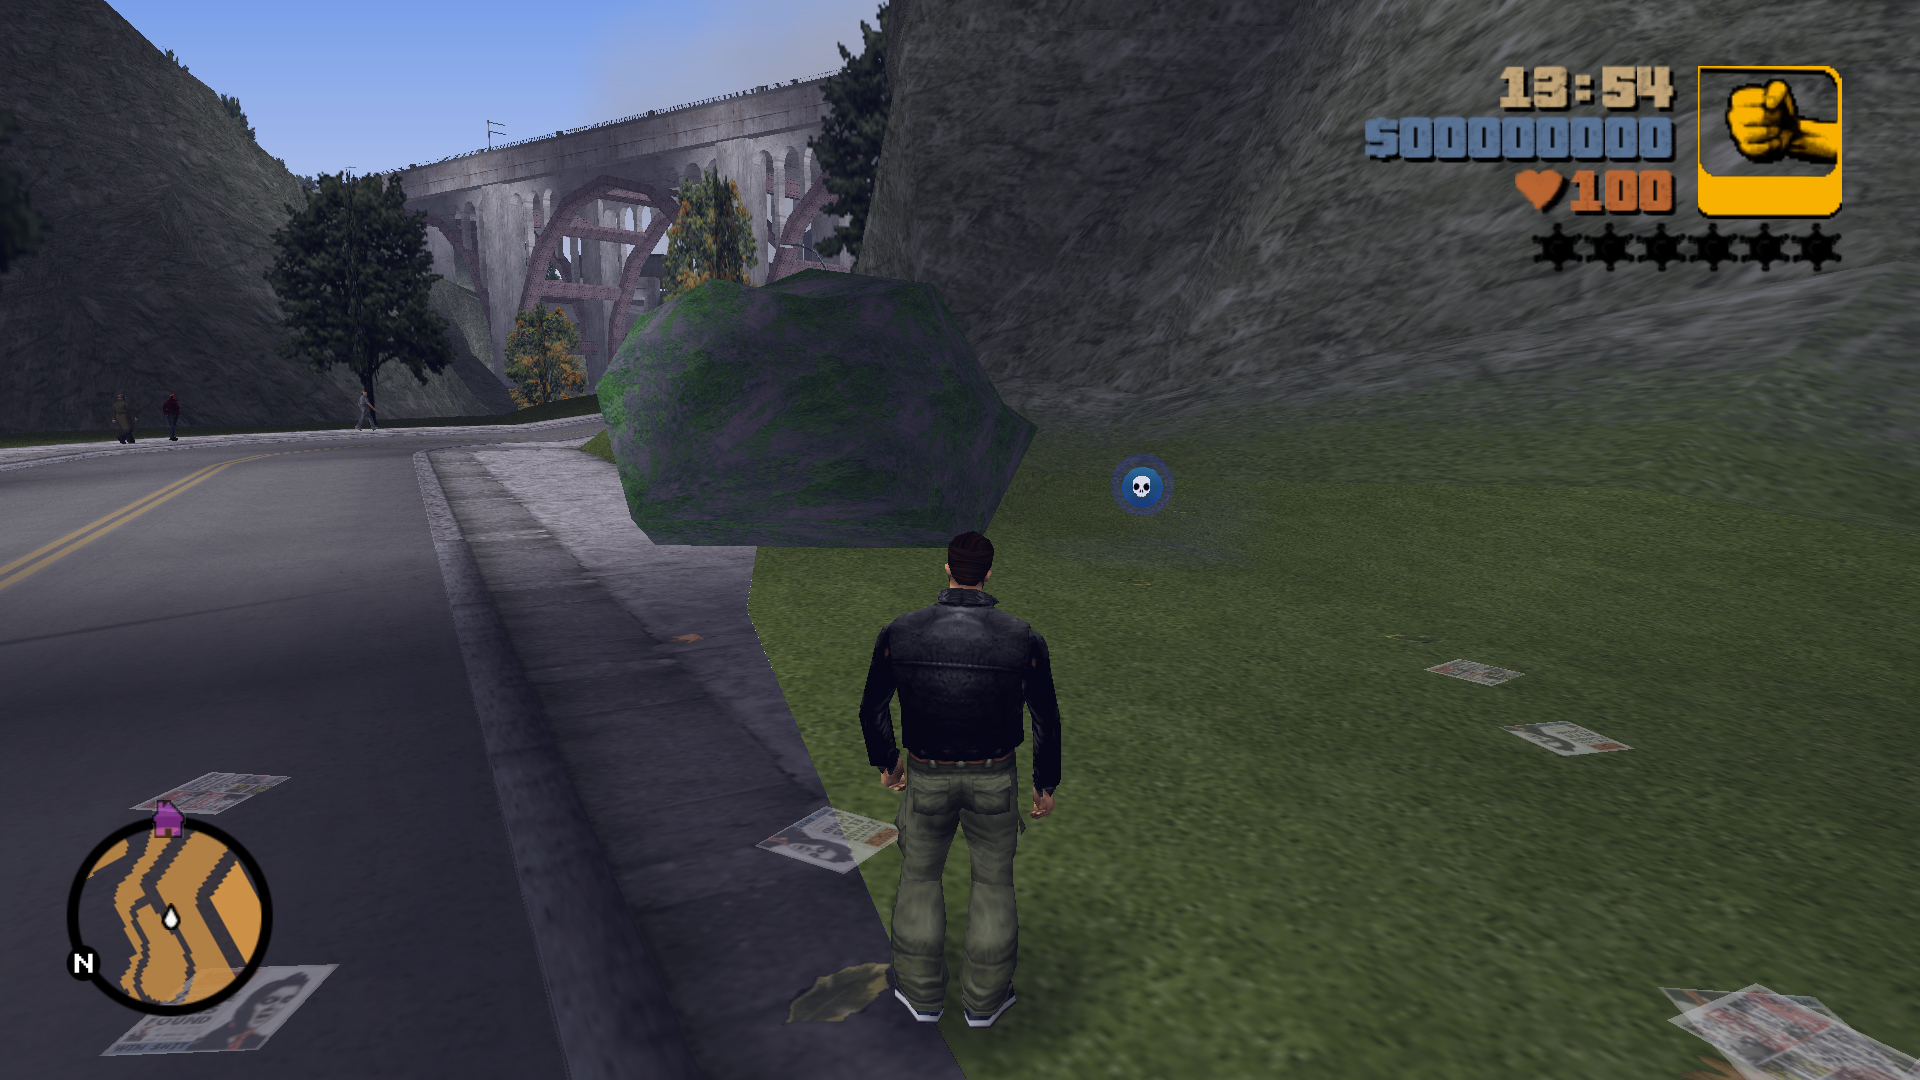
Second Location
Driveby and Destroy 7 vehicles in 120 seconds
(Get in a vehicle and look left and right to shoot)
(Get in a vehicle and look left and right to shoot)
Uzi
19
First Location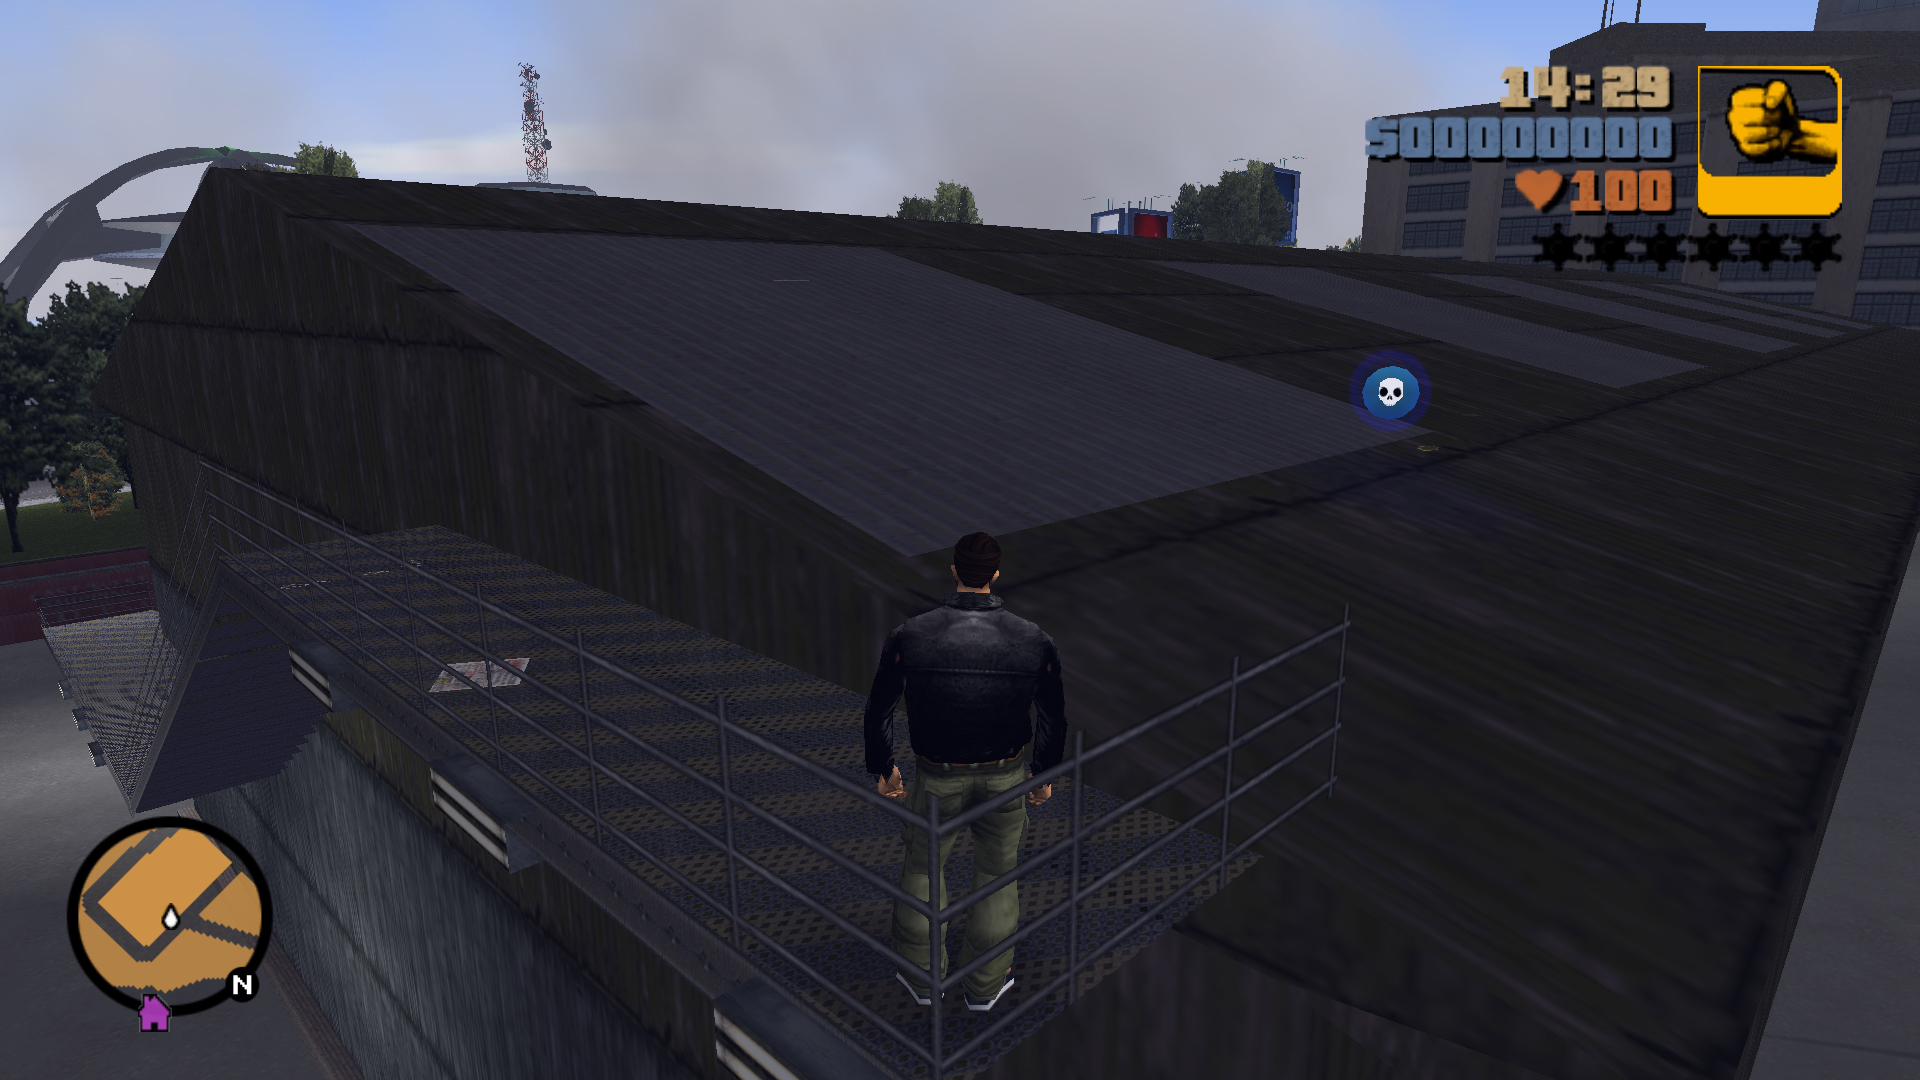
Second Location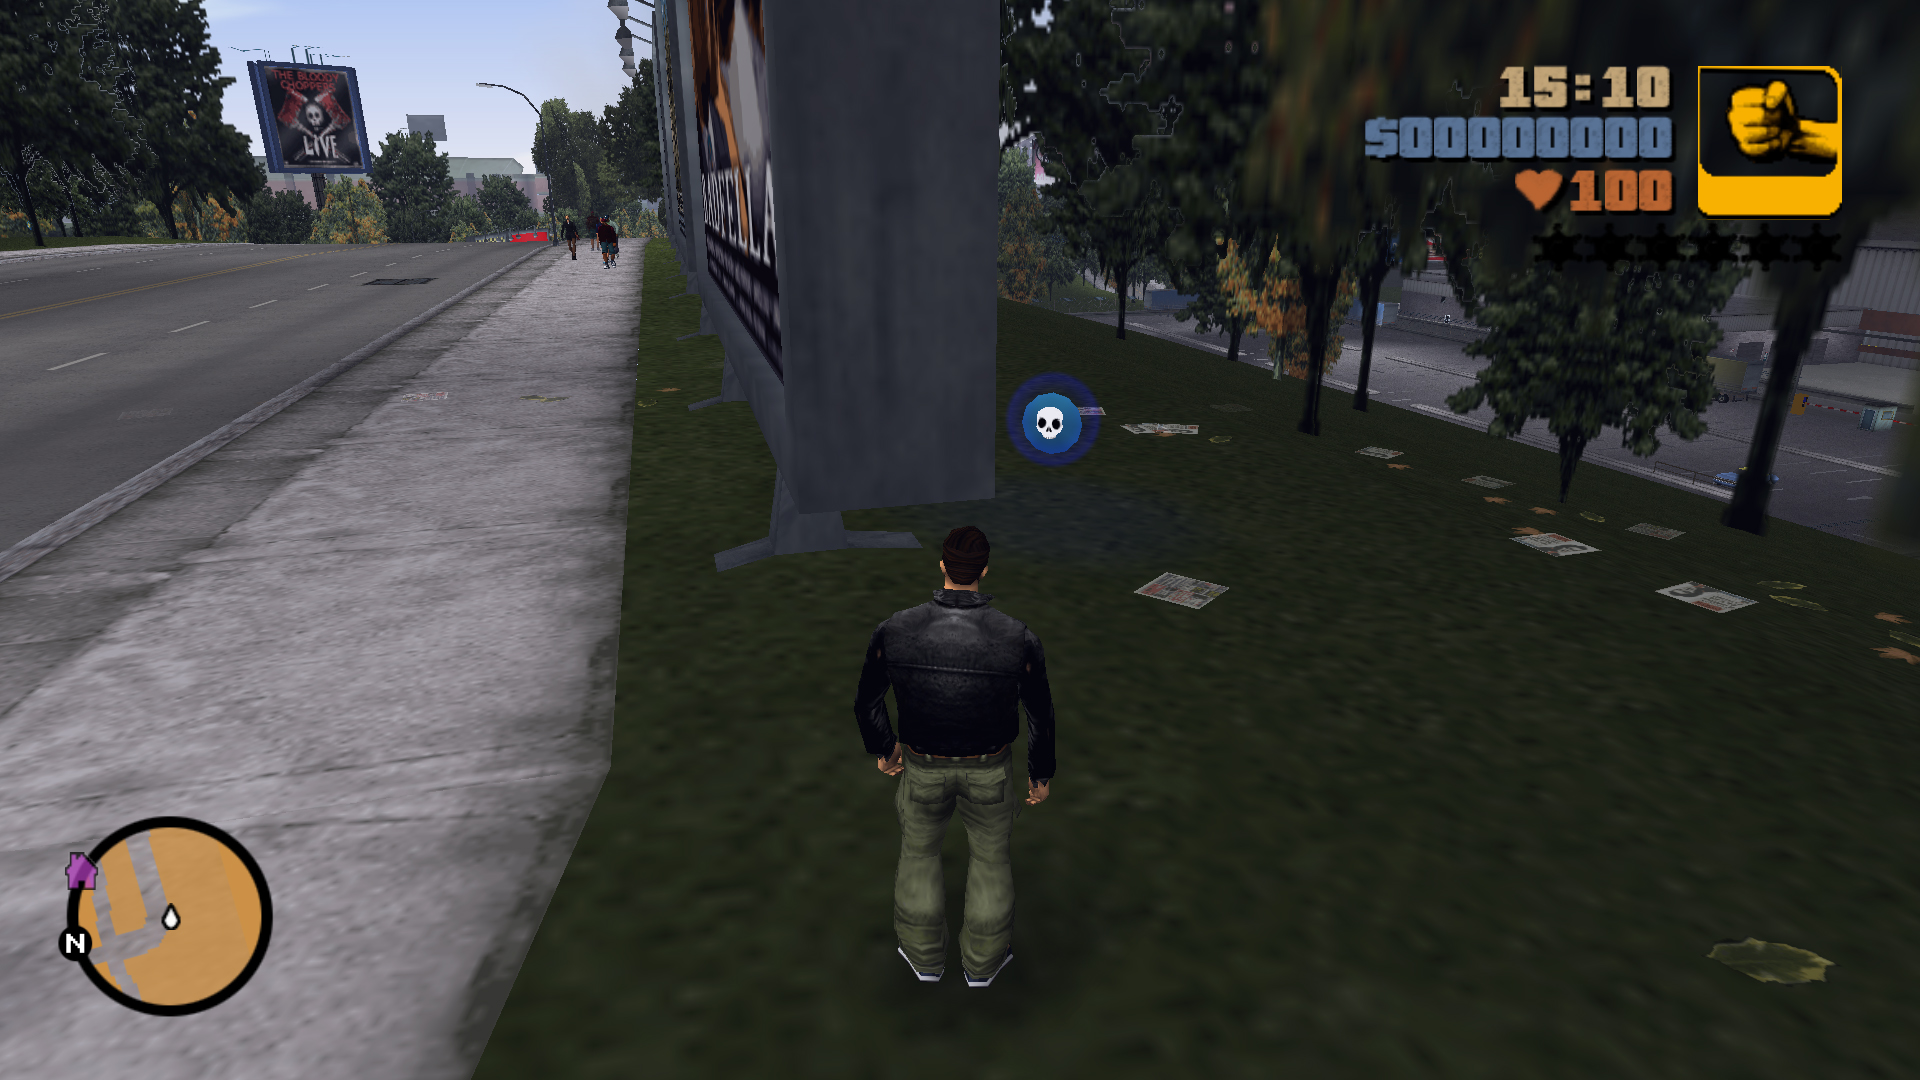
Second Location
Destroy 15 vehicles in 120 seconds
Rocket Launcher
20
First Location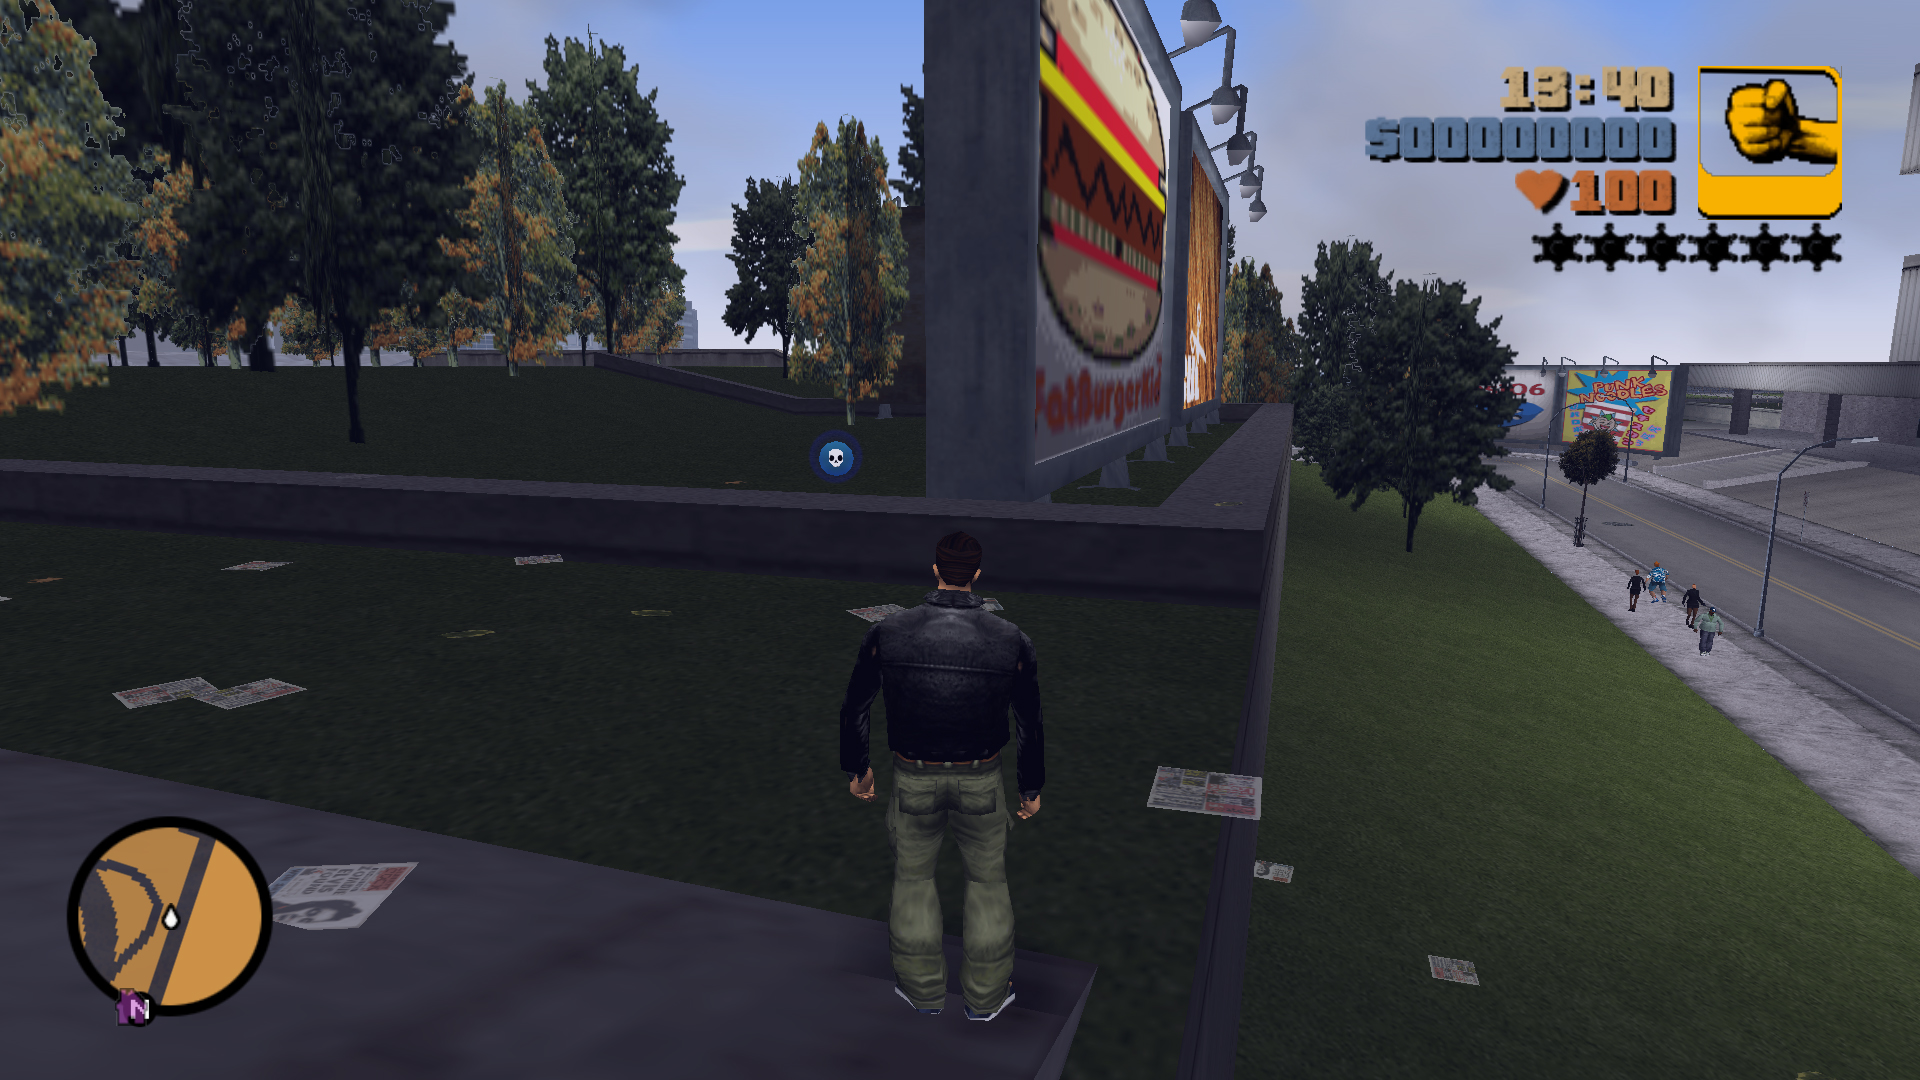
Second Location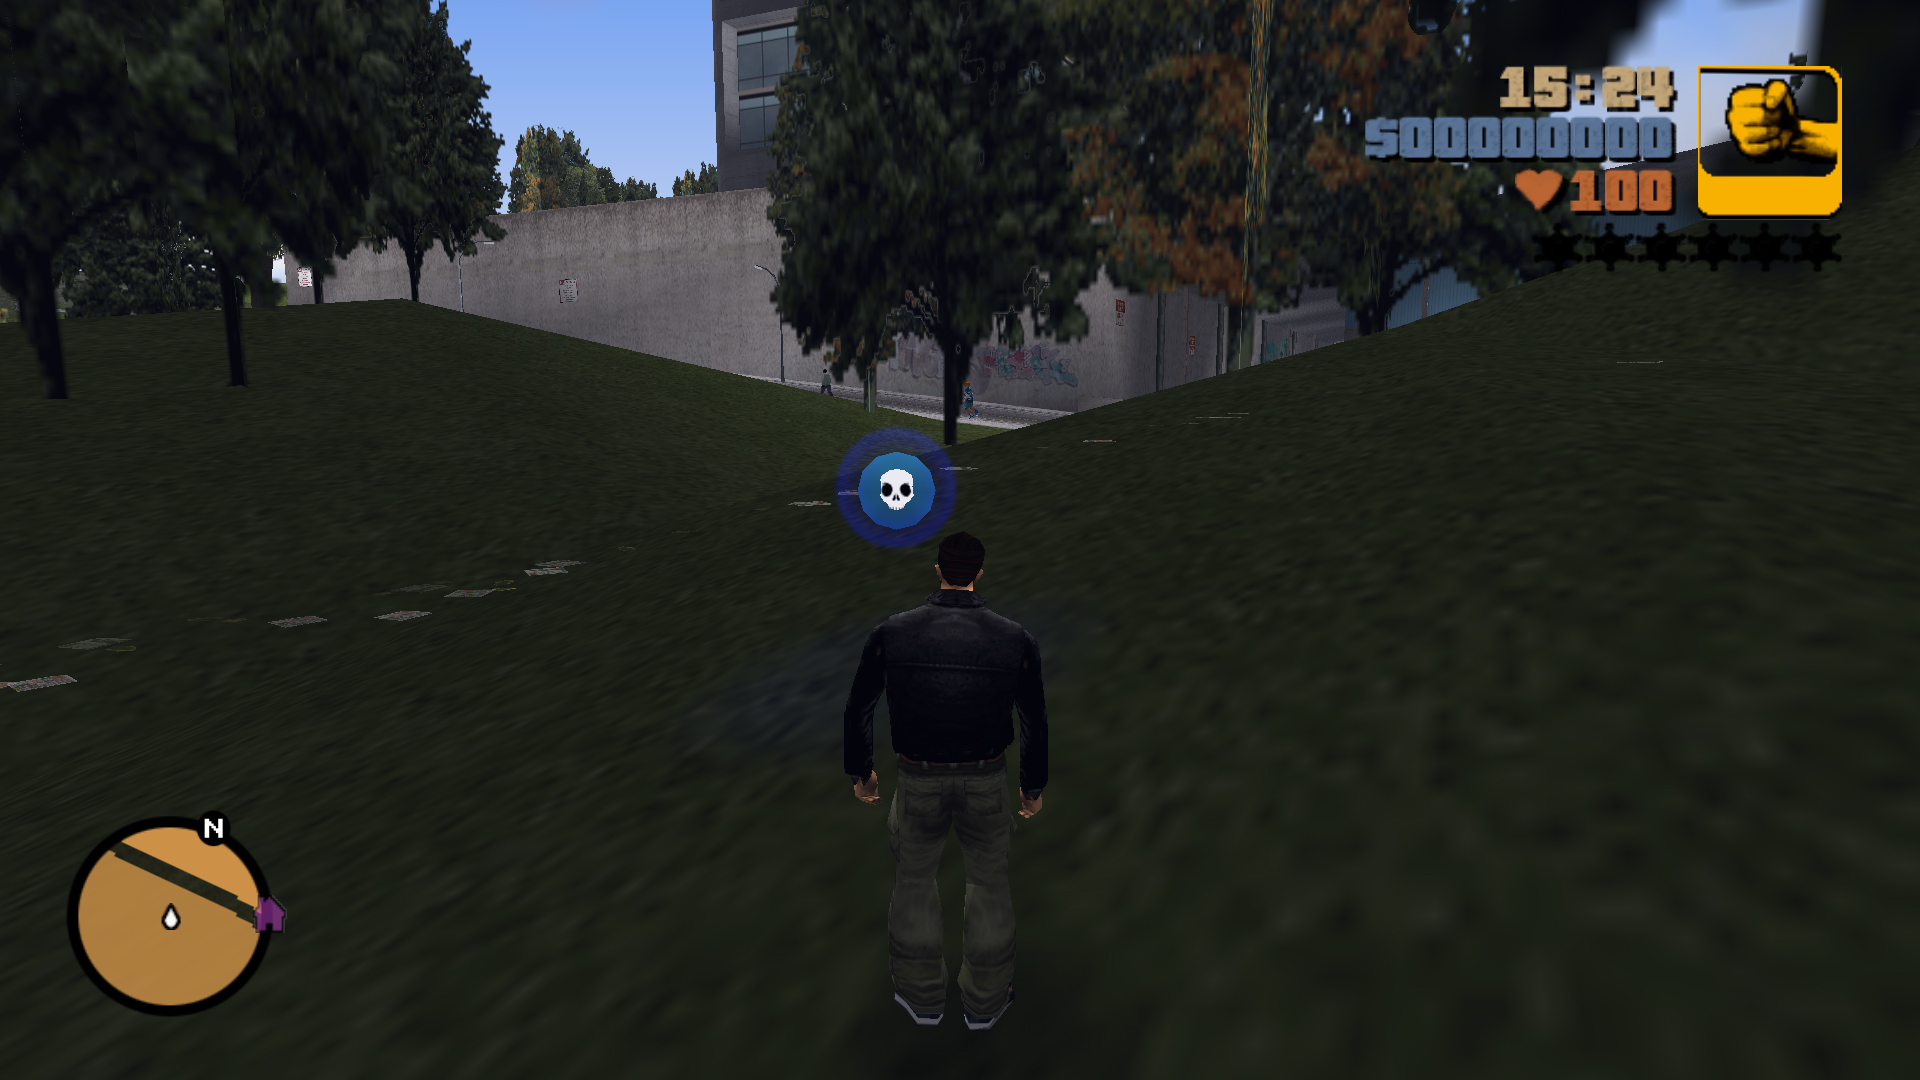
Second Location
Splatter 20 Colombians with a car in 120 seconds
(Get in a vehicle and drive into them)
(Get in a vehicle and drive into them)
None
Stunt Jumps Locations
Stunt
Jump
Jump
Location
Requirements
Tips
1
Jump Location
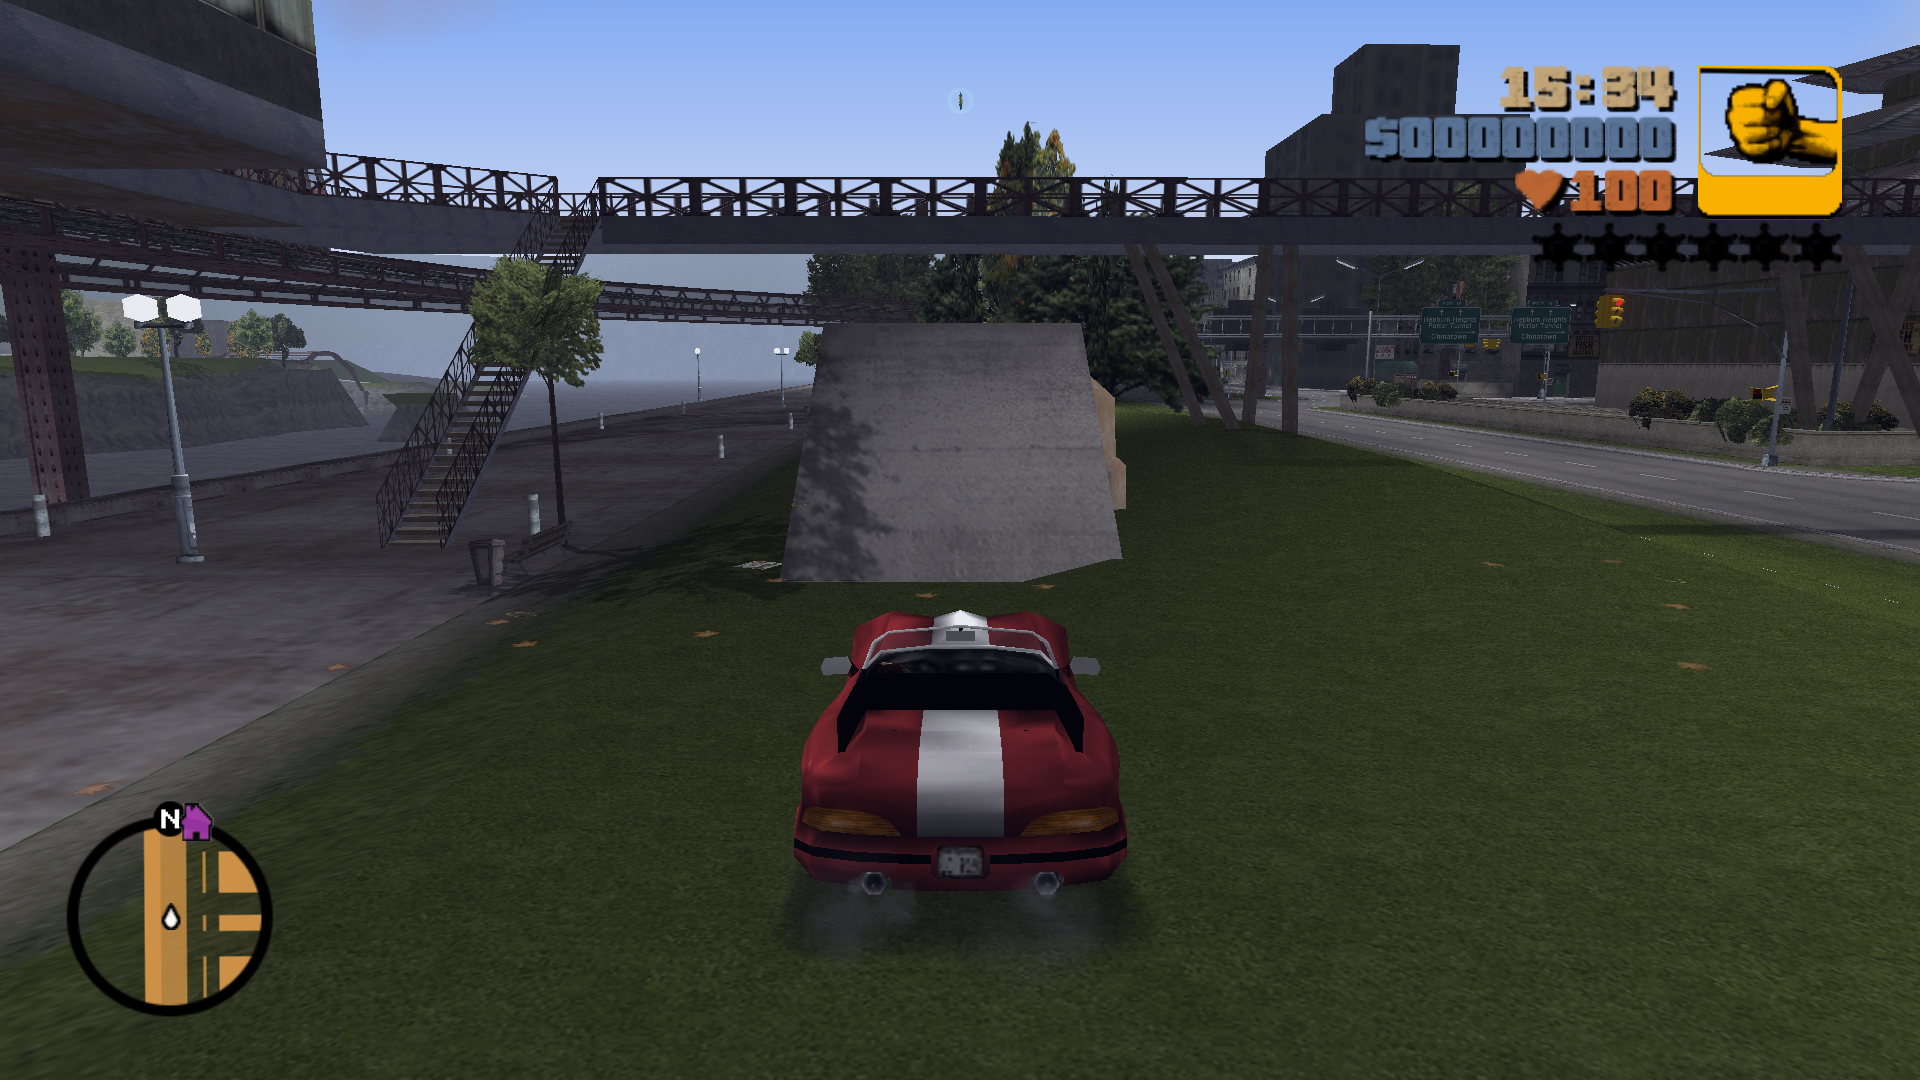
Landing Zone
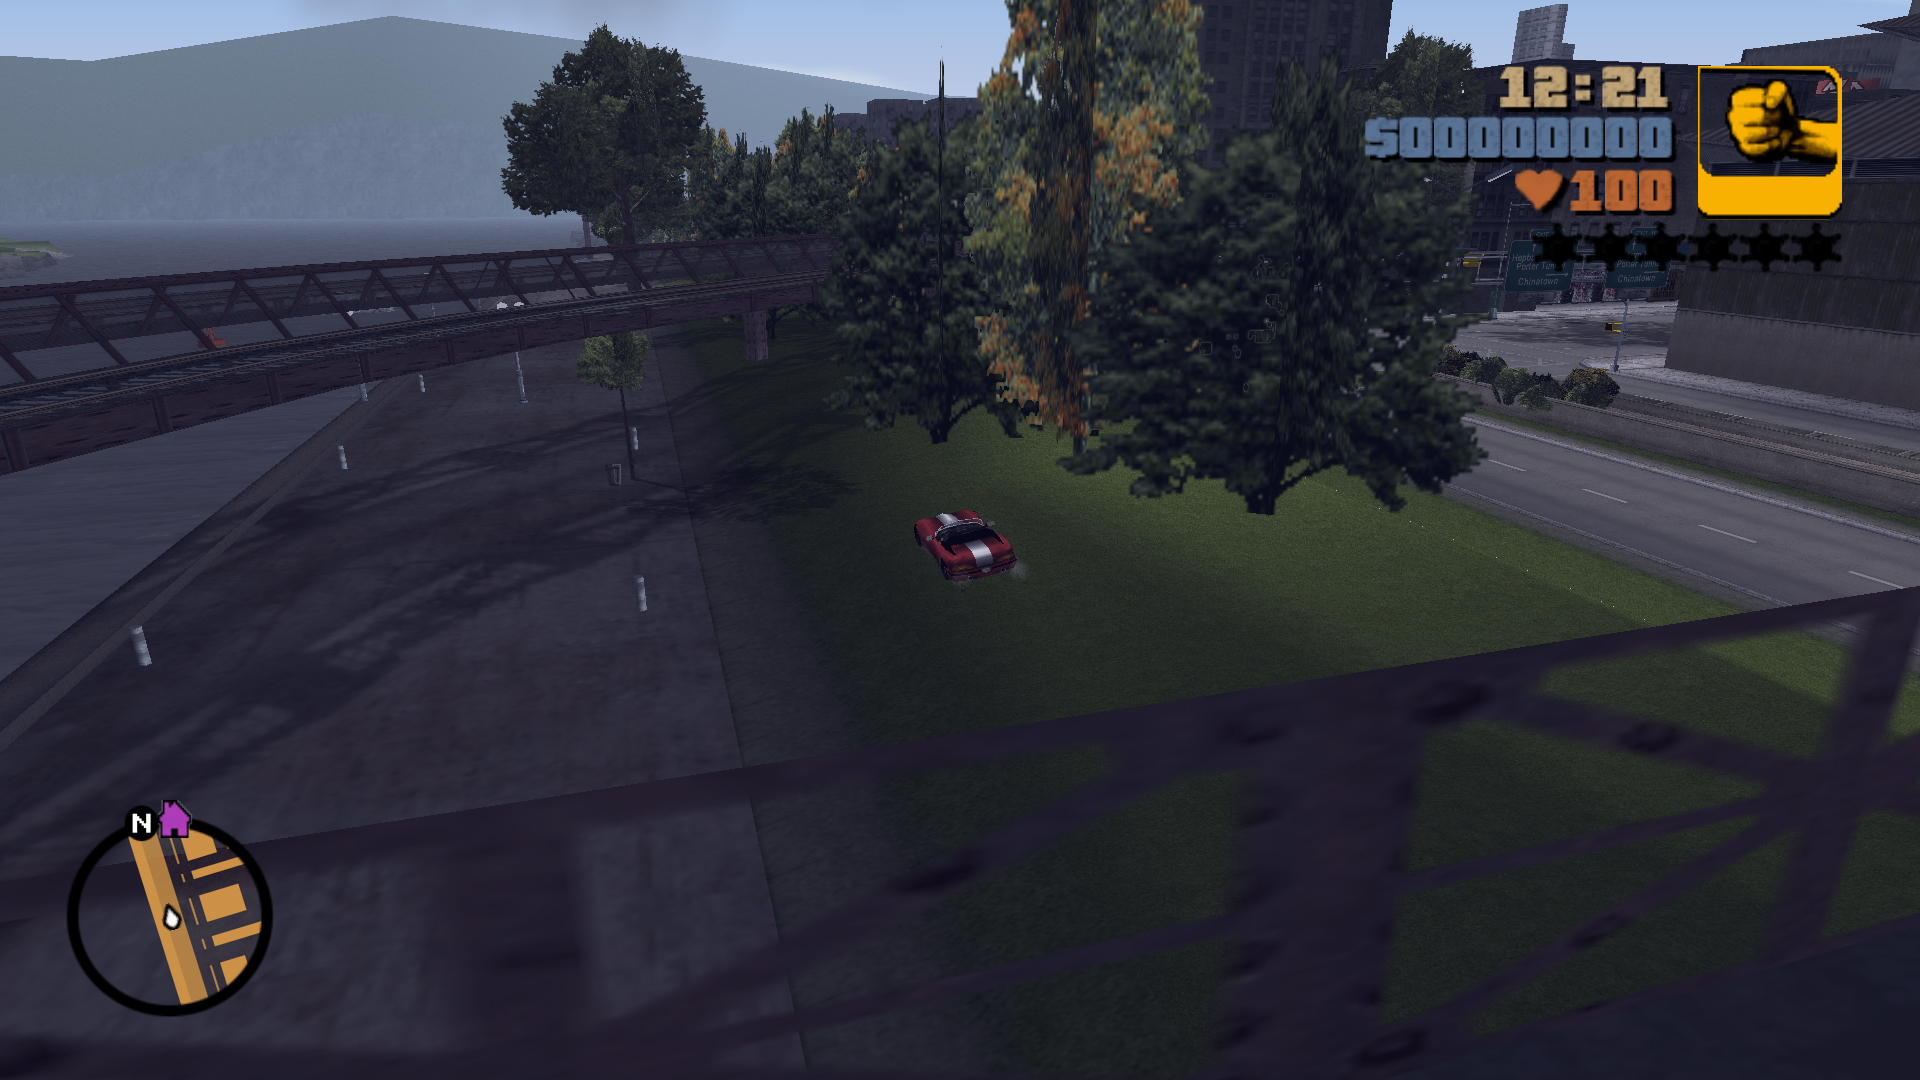
Landing Zone
Jump over the pedestrian overpass.
There's a Police Bribe over the pedestrian overpass and this jump is the best way to get it.
2
Jump Location
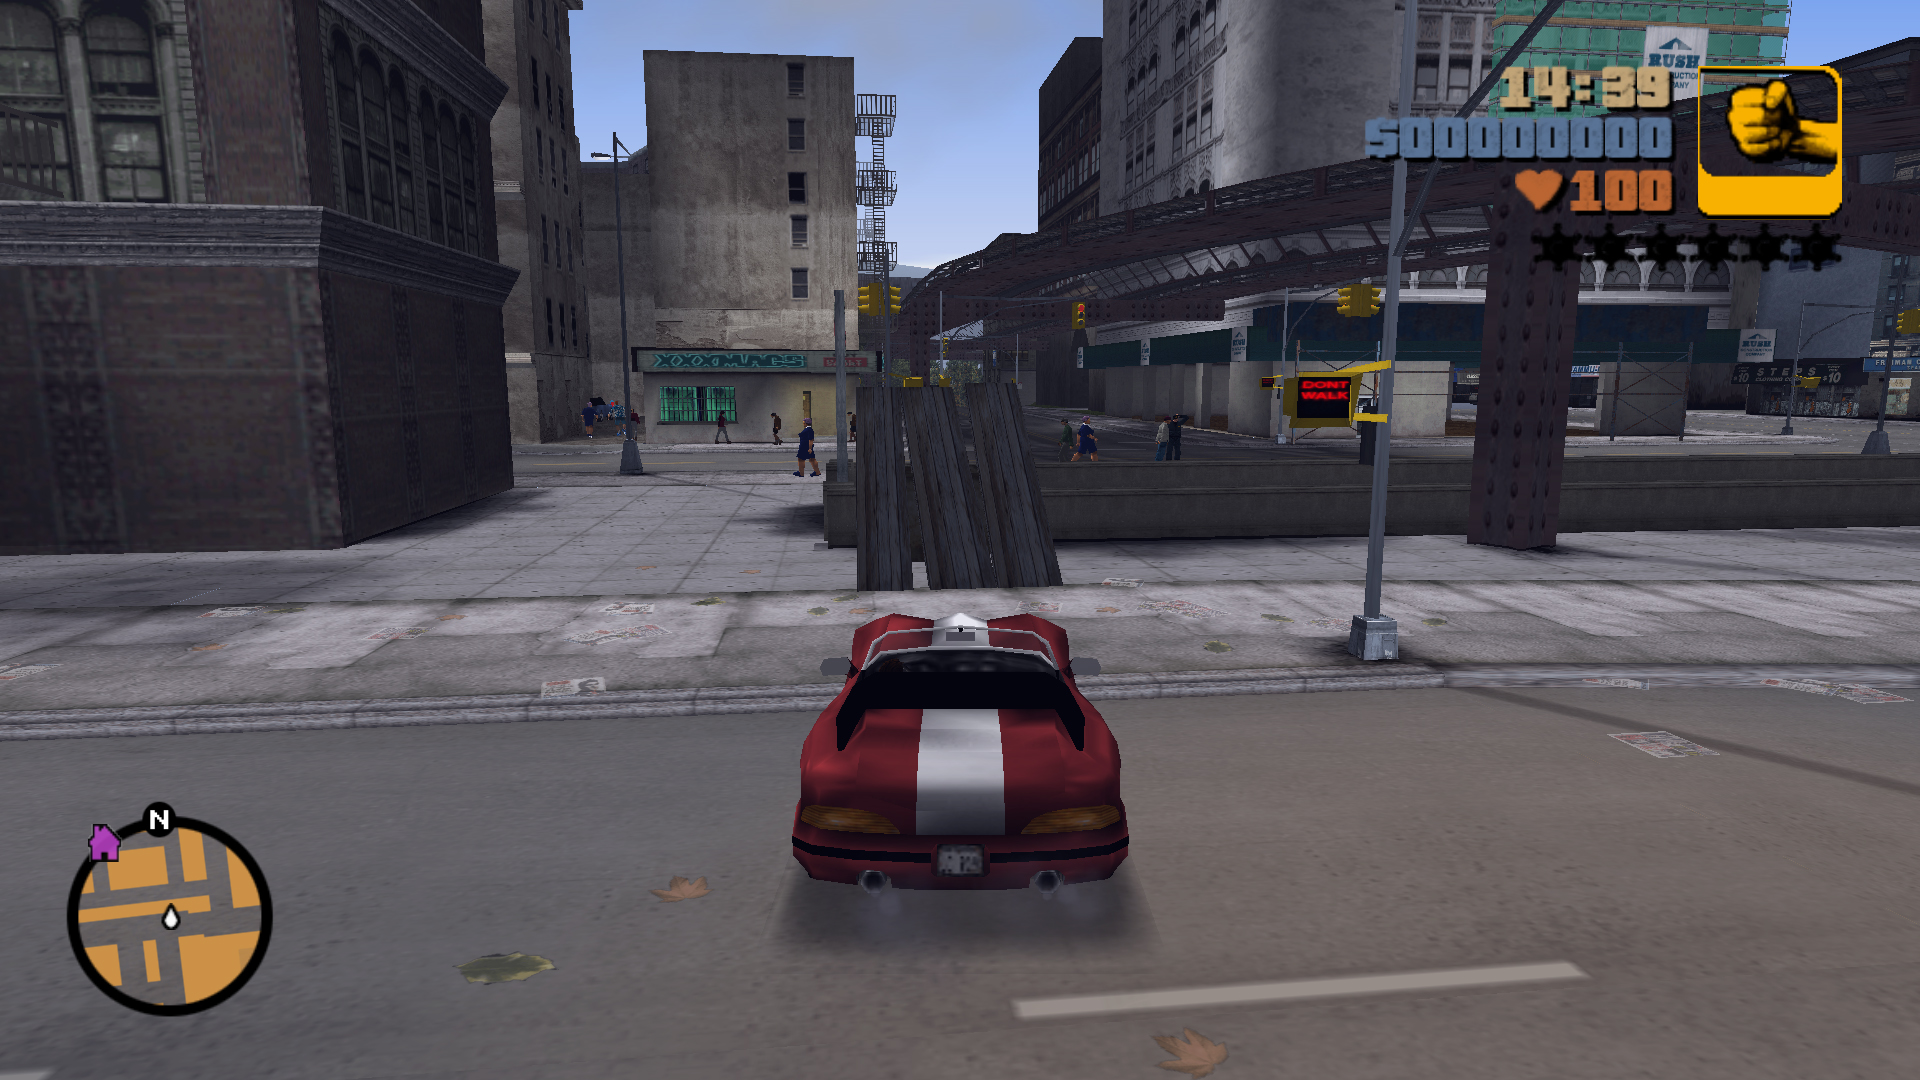
Landing Zone
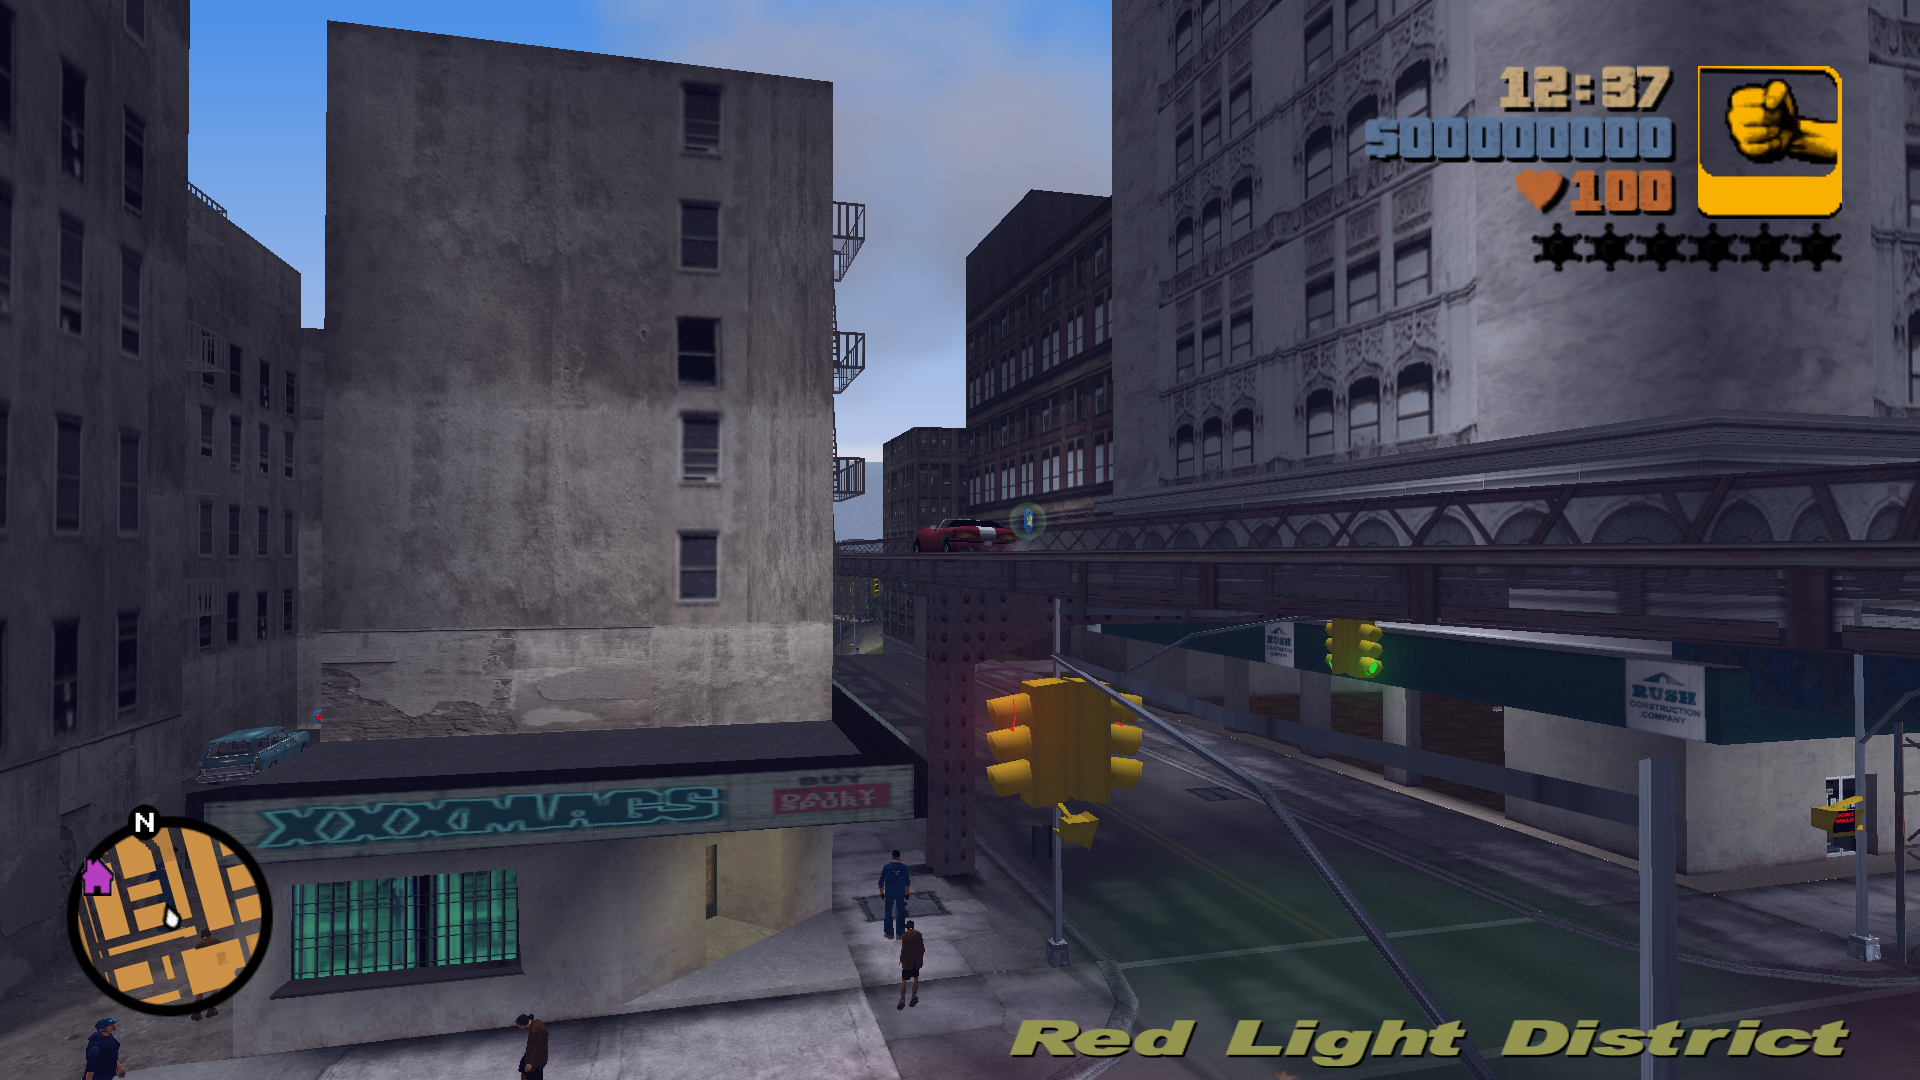
Landing Zone
Jump up to the elevated train tracks.
Aim a bit to the right.
There's another Police Bribe up there.
There's another Police Bribe up there.
3
Jump Location
Landing Zone
Landing Zone
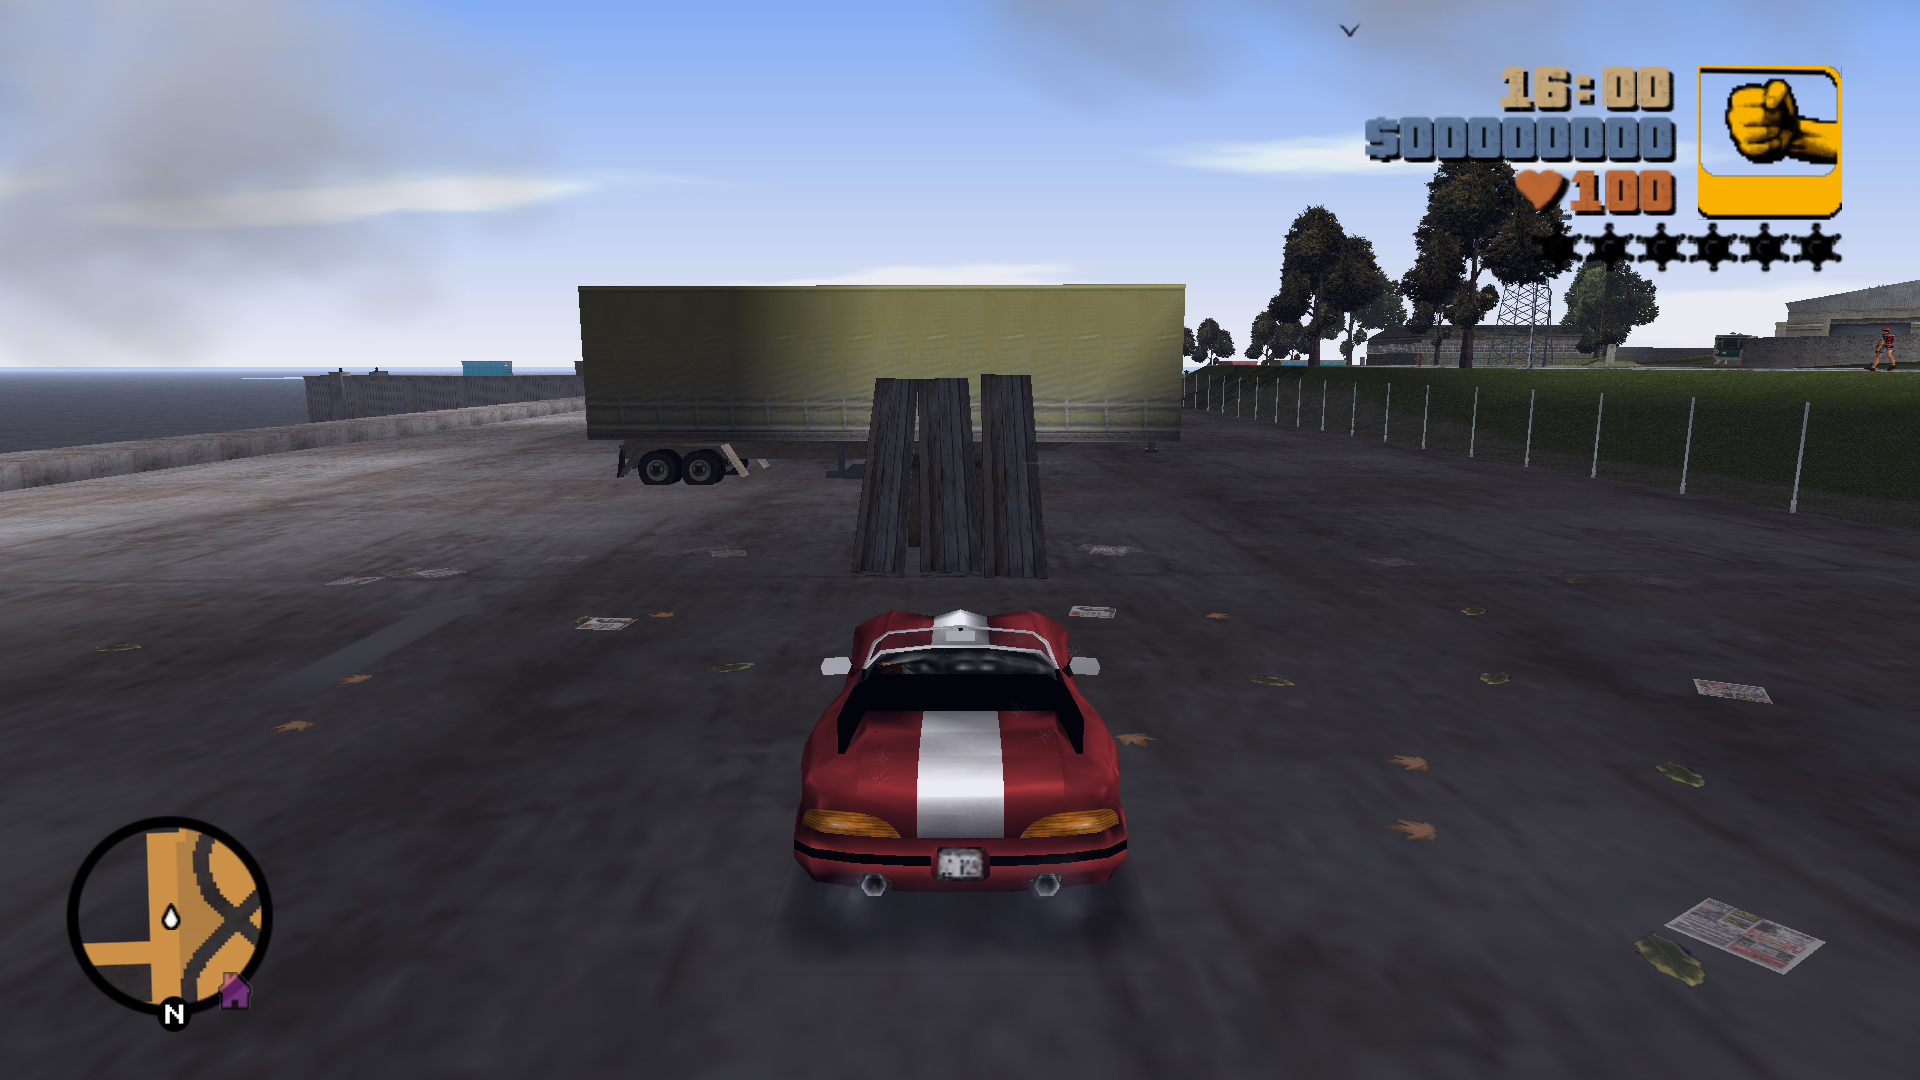
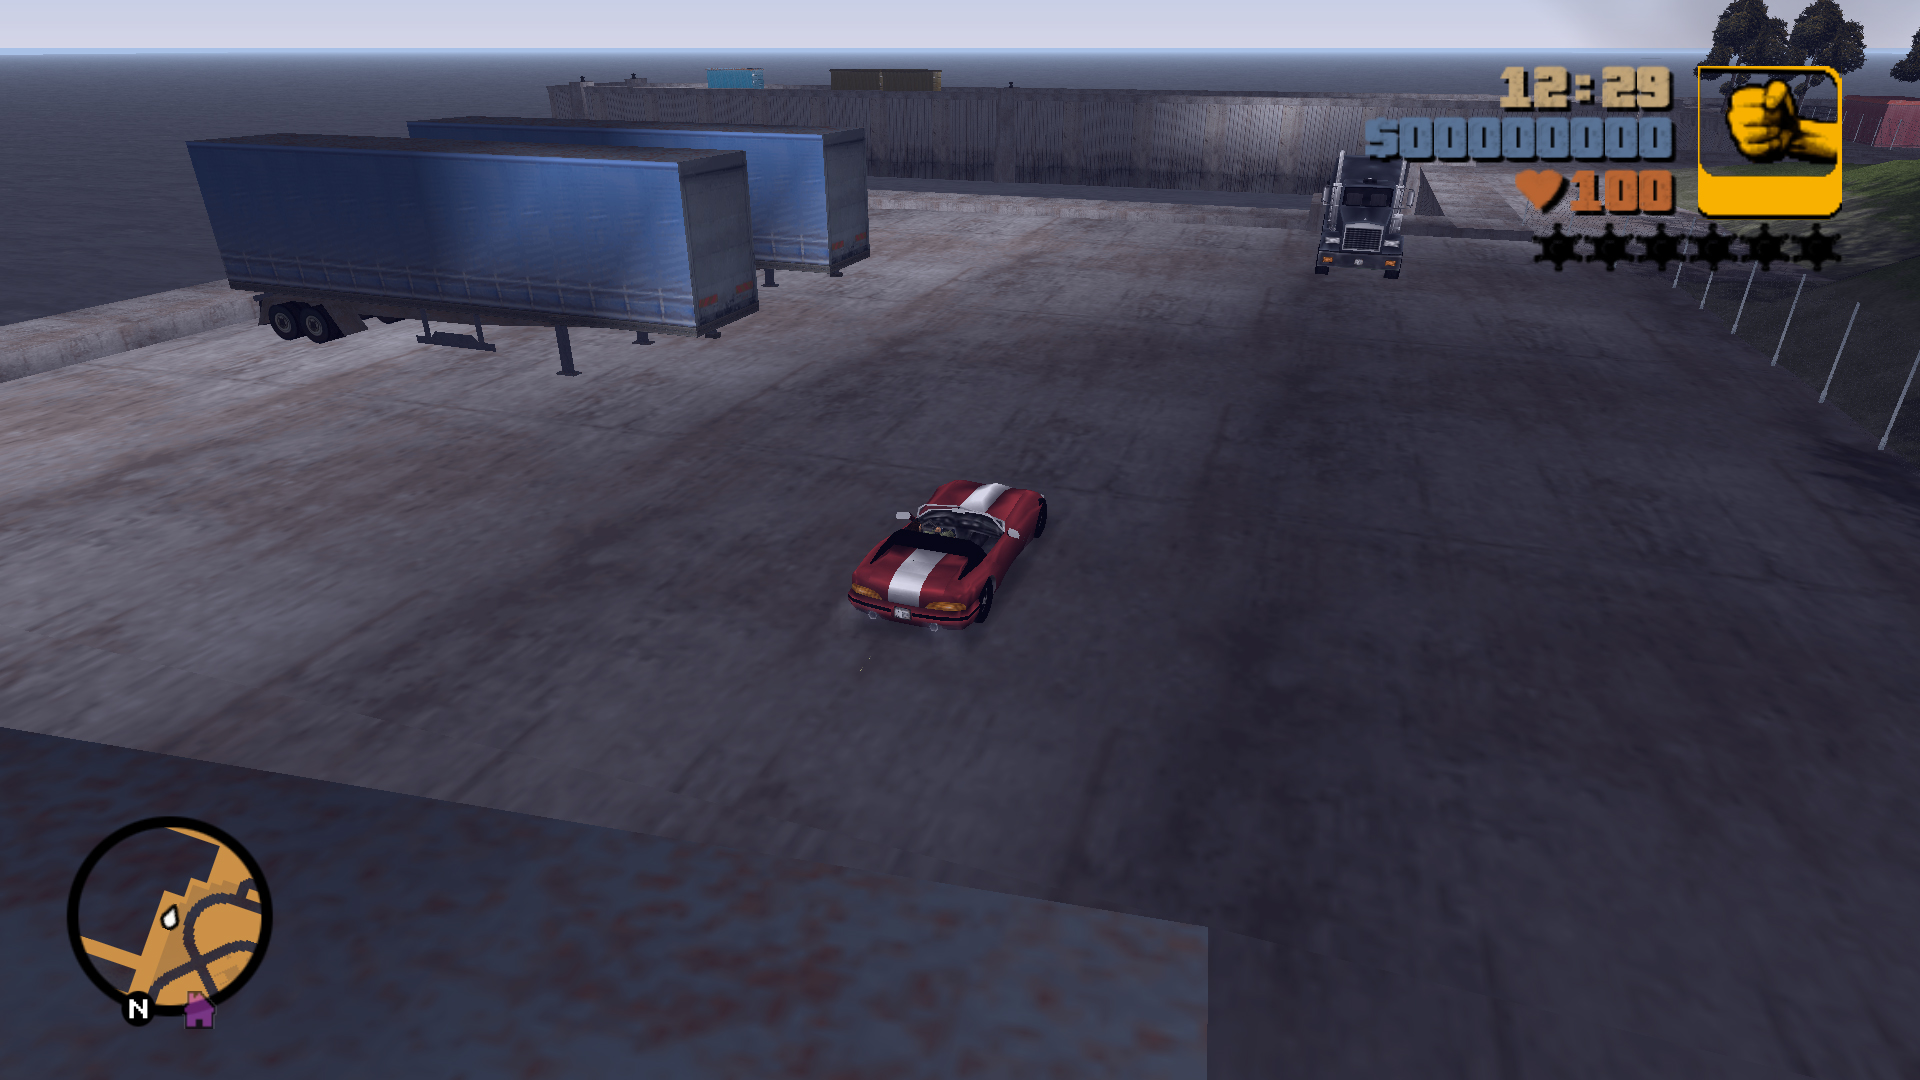
Jump over the 4 trailers.
4
Jump Location
Landing Zone
Landing Zone
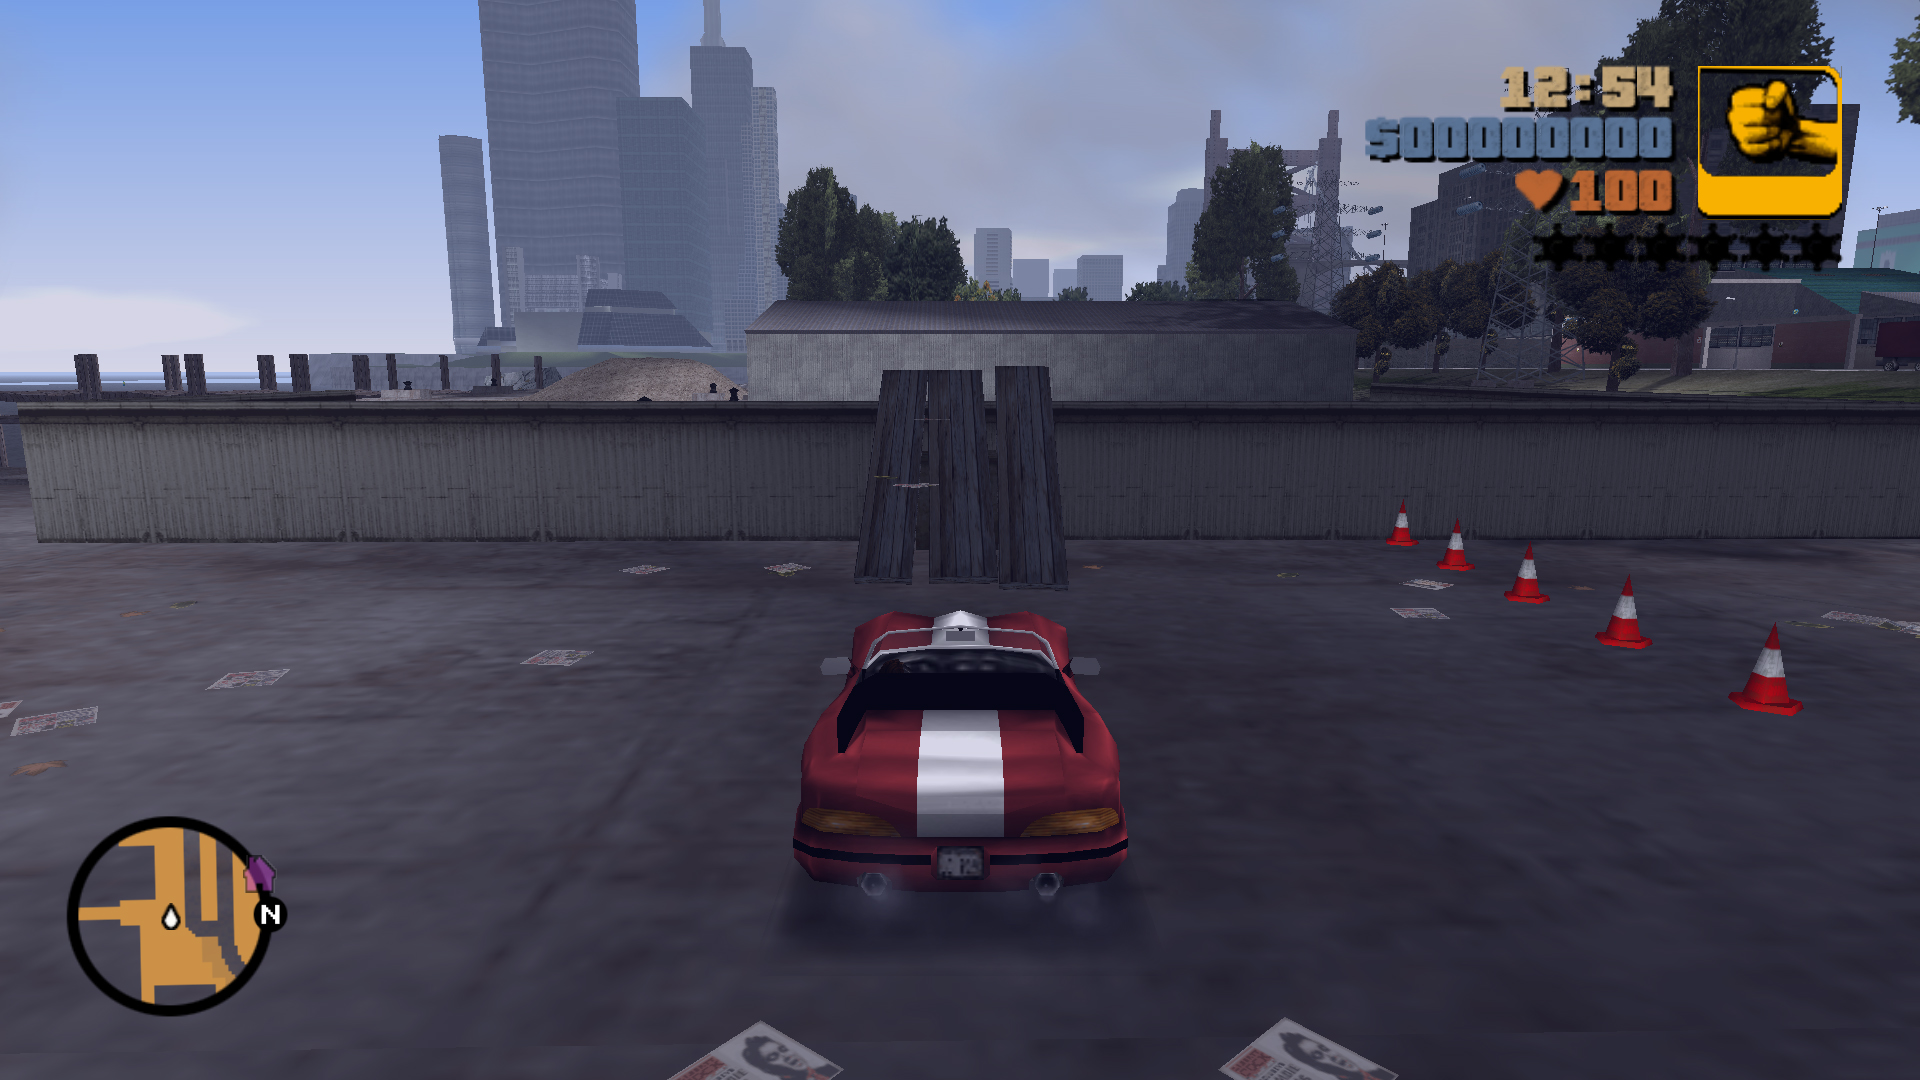
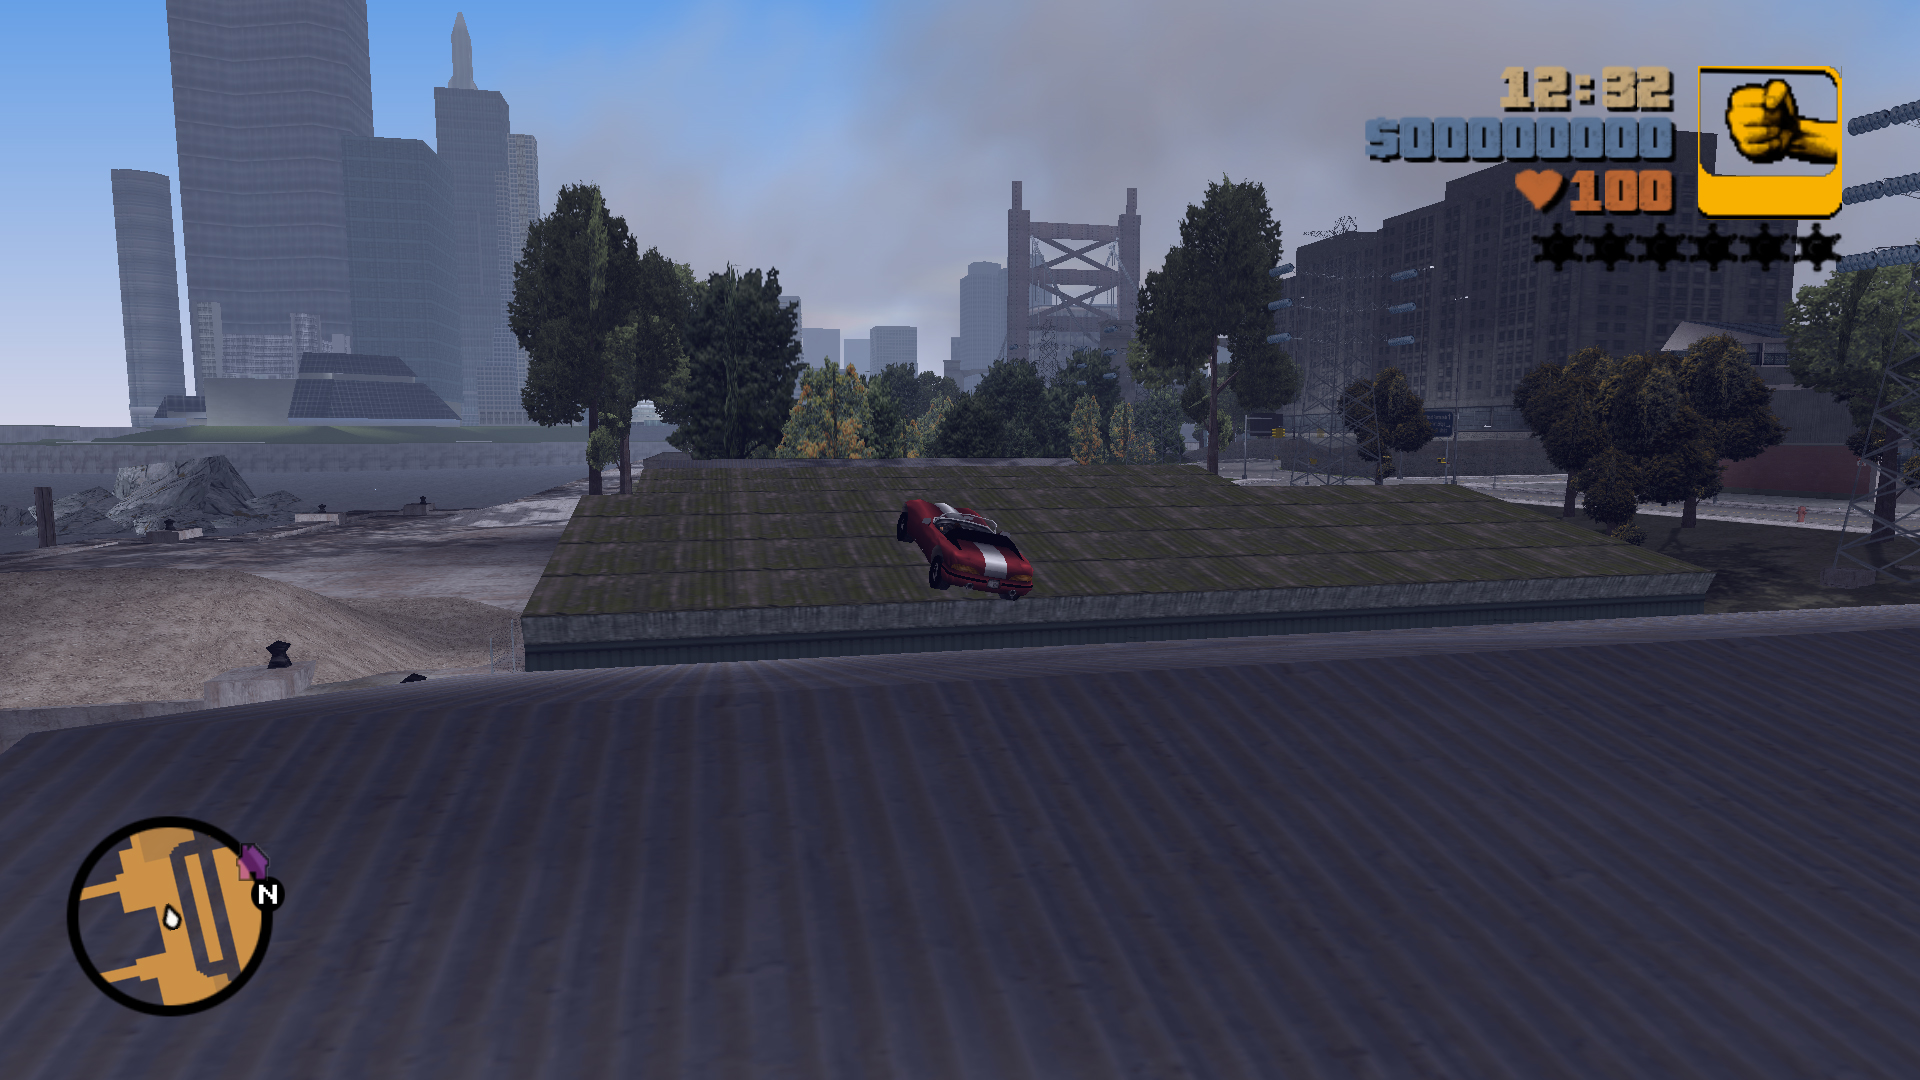
Jump over the first warehouse onto the roof of the second warehouse.
It's not easy but it can be done with a Banshee car, you can make it easier by using an Infernus or a Cheetah, but you have to unlock the second island to get them.
Use the pier to the east as a run up.
You can land at the very edge of the second warehouse with the alley.
Use the pier to the east as a run up.
You can land at the very edge of the second warehouse with the alley.
5
Jump Location
Landing Zone
Landing Zone
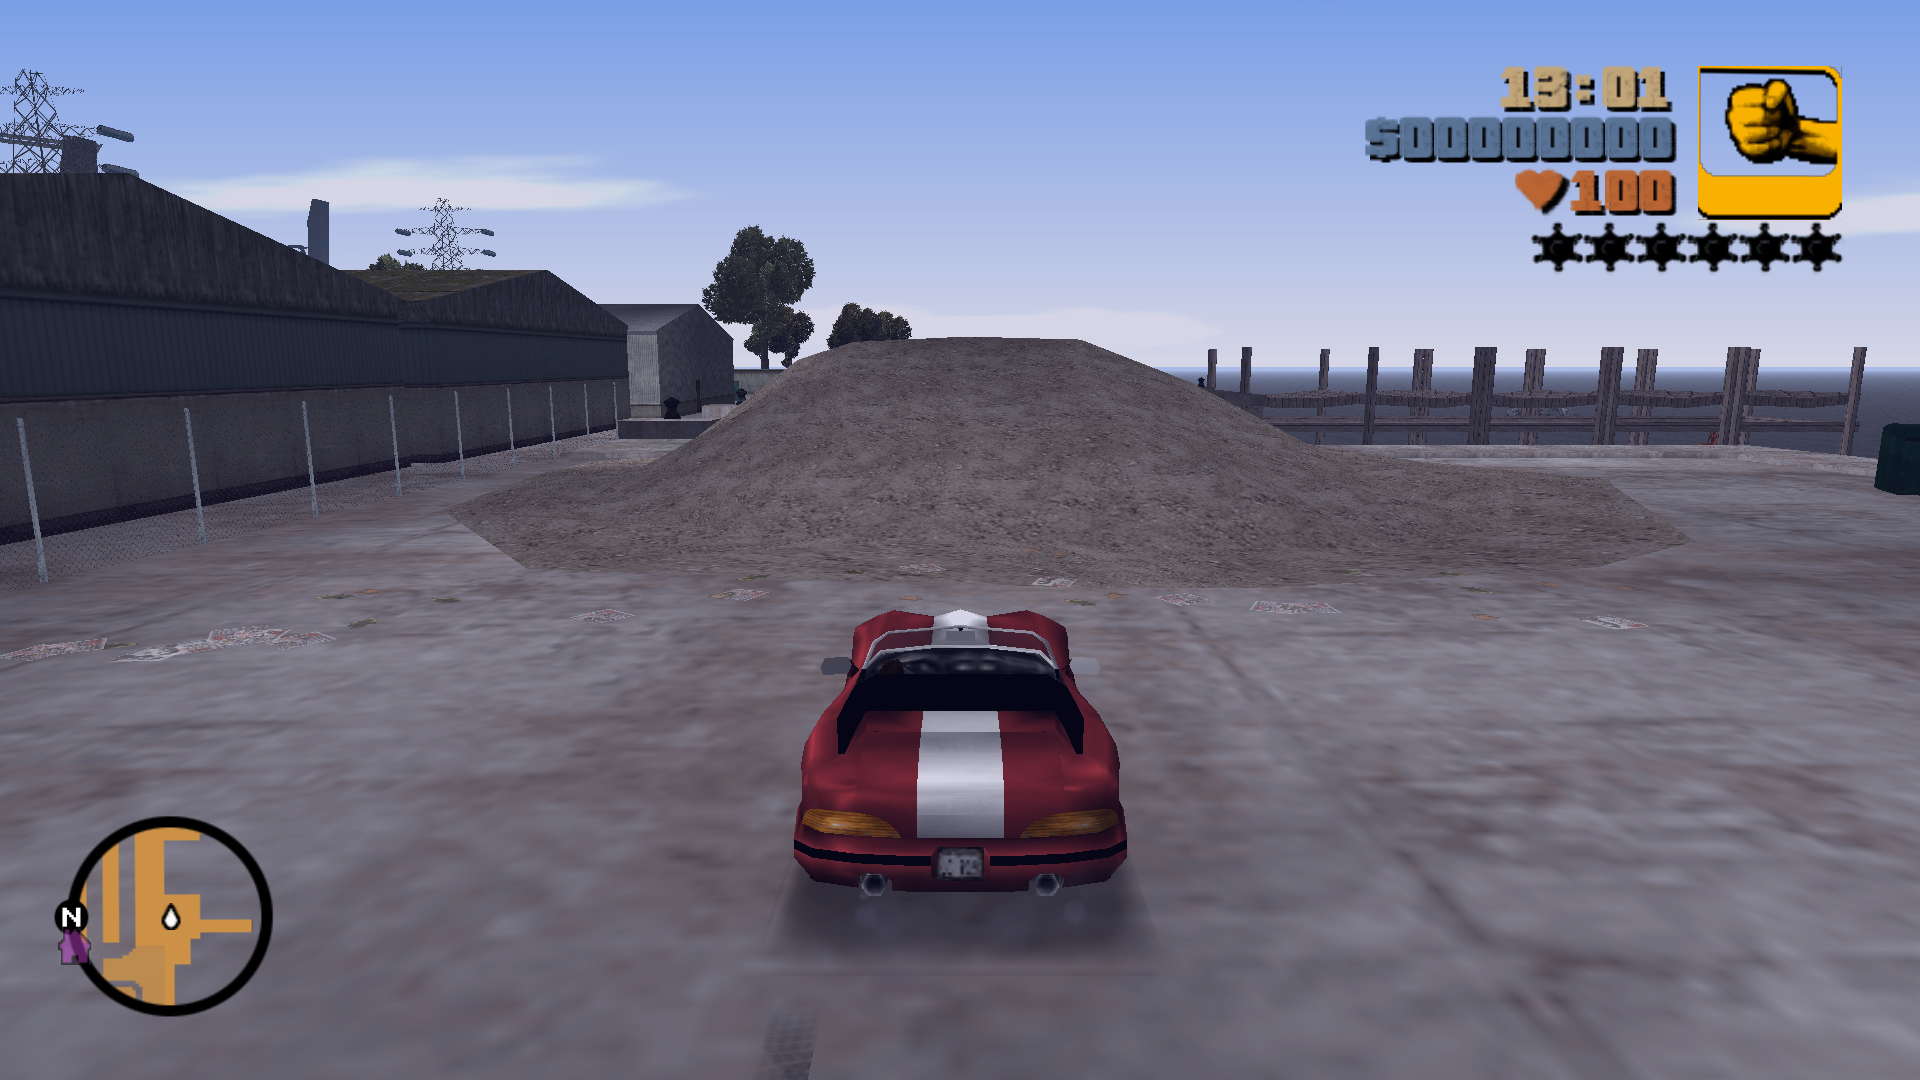
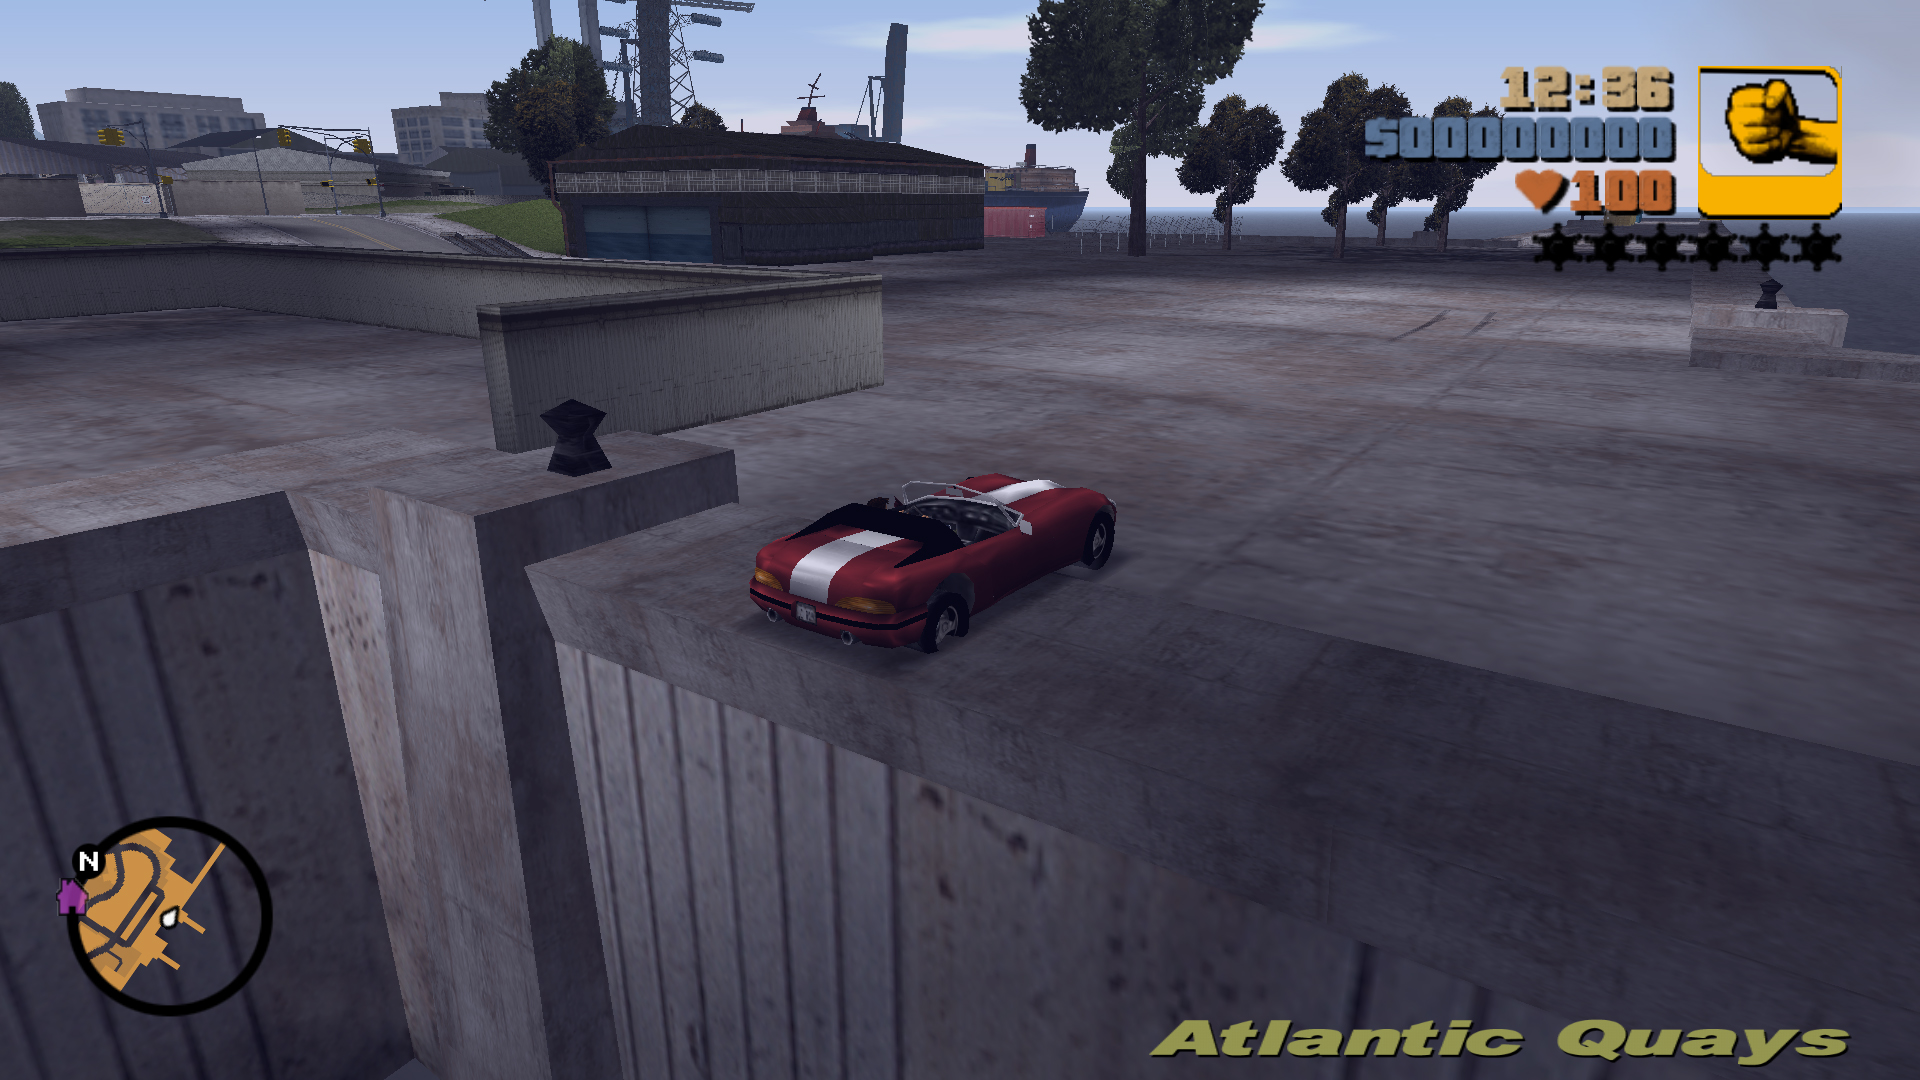
Jump over the water onto the other side of the shore.
You have a lot of space to the west along the coast to build up speed.
6
Jump Location
Landing Zone
Landing Zone
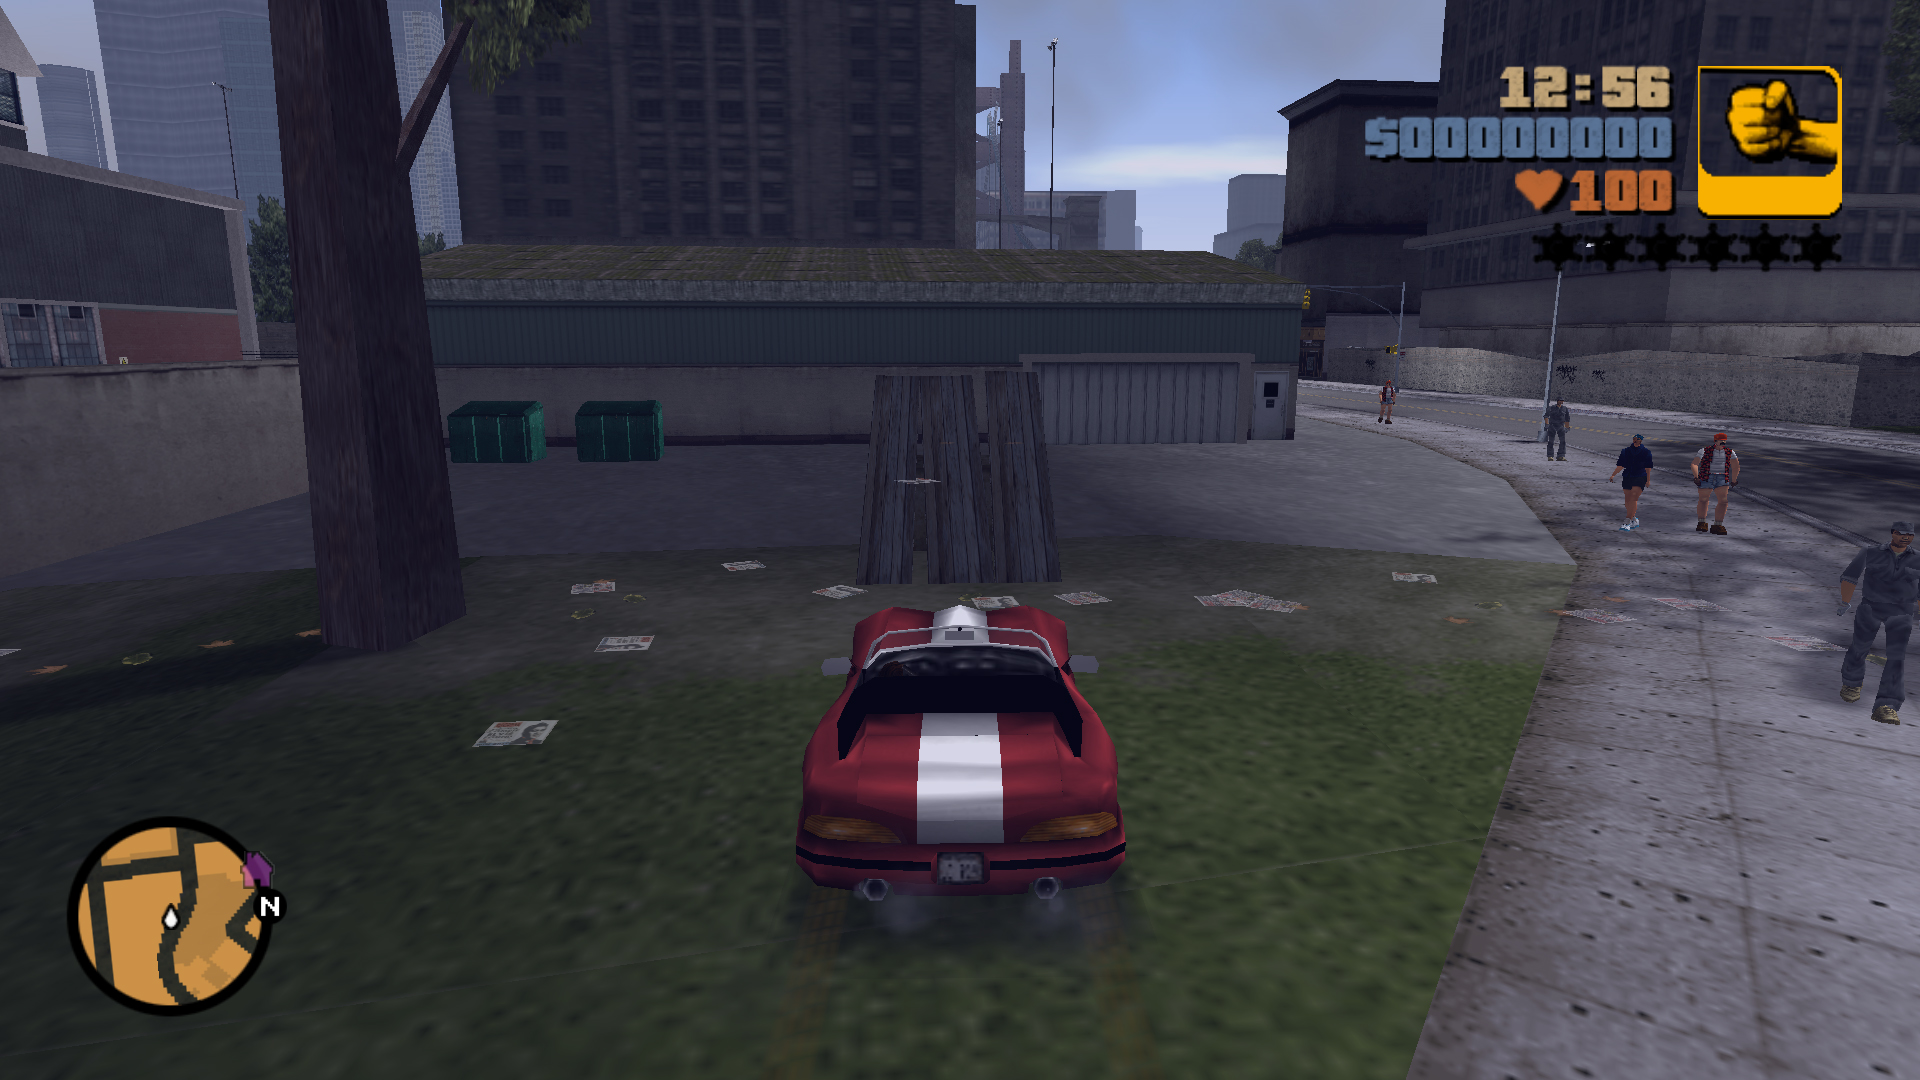
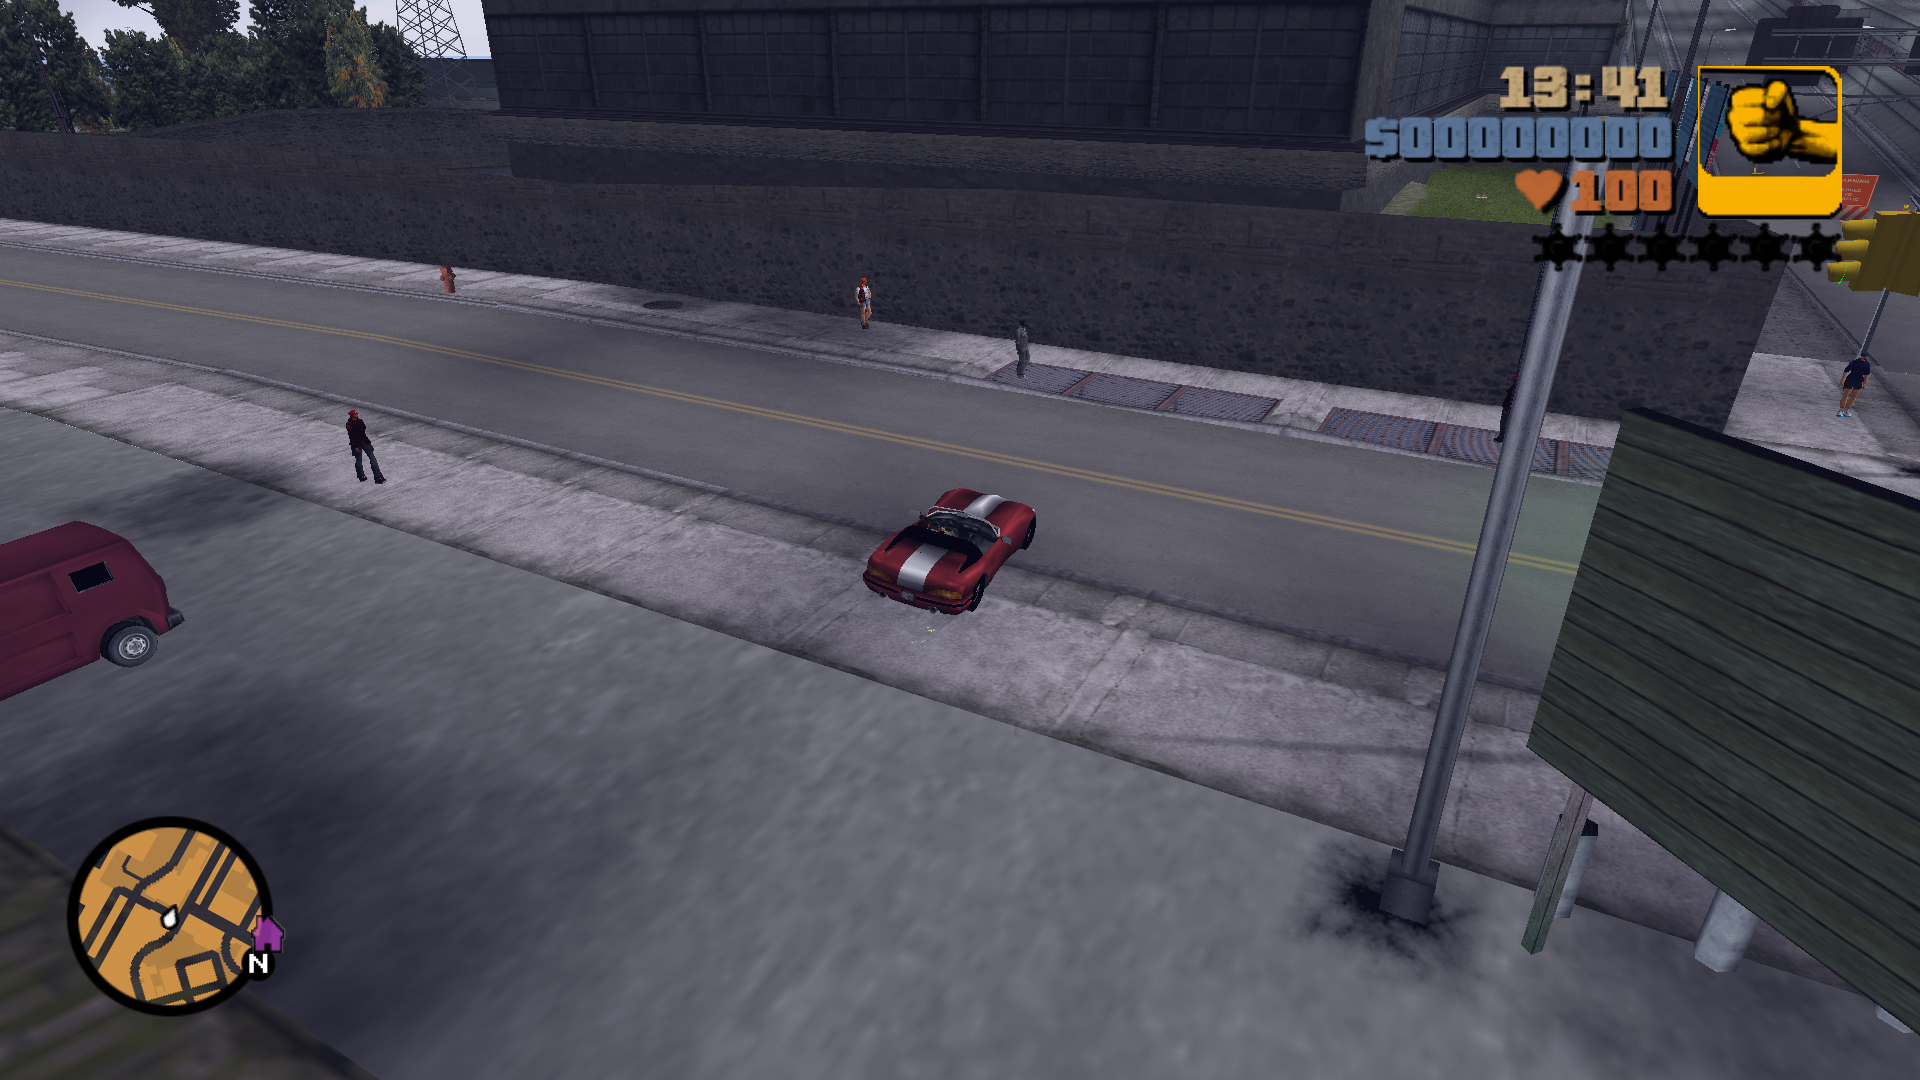
Jump over the building.
7
Jump Location
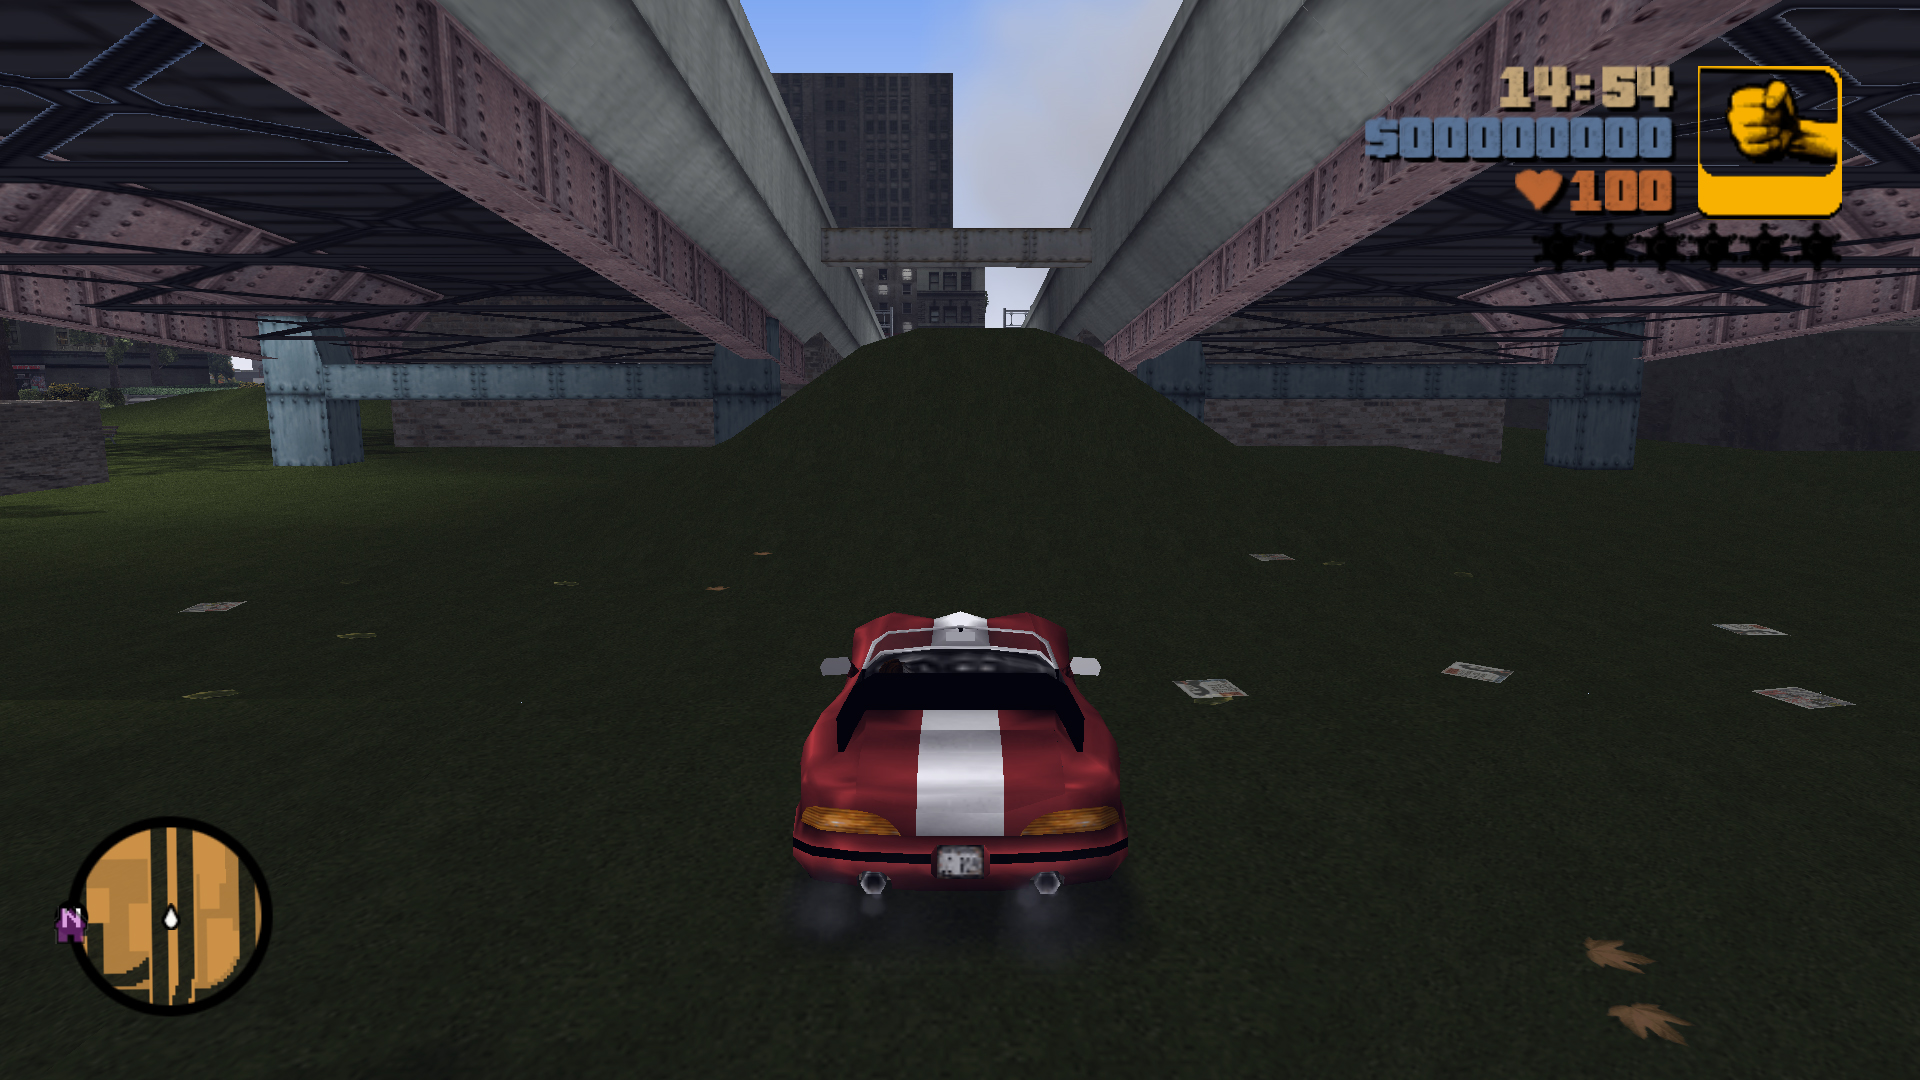
Landing Zone
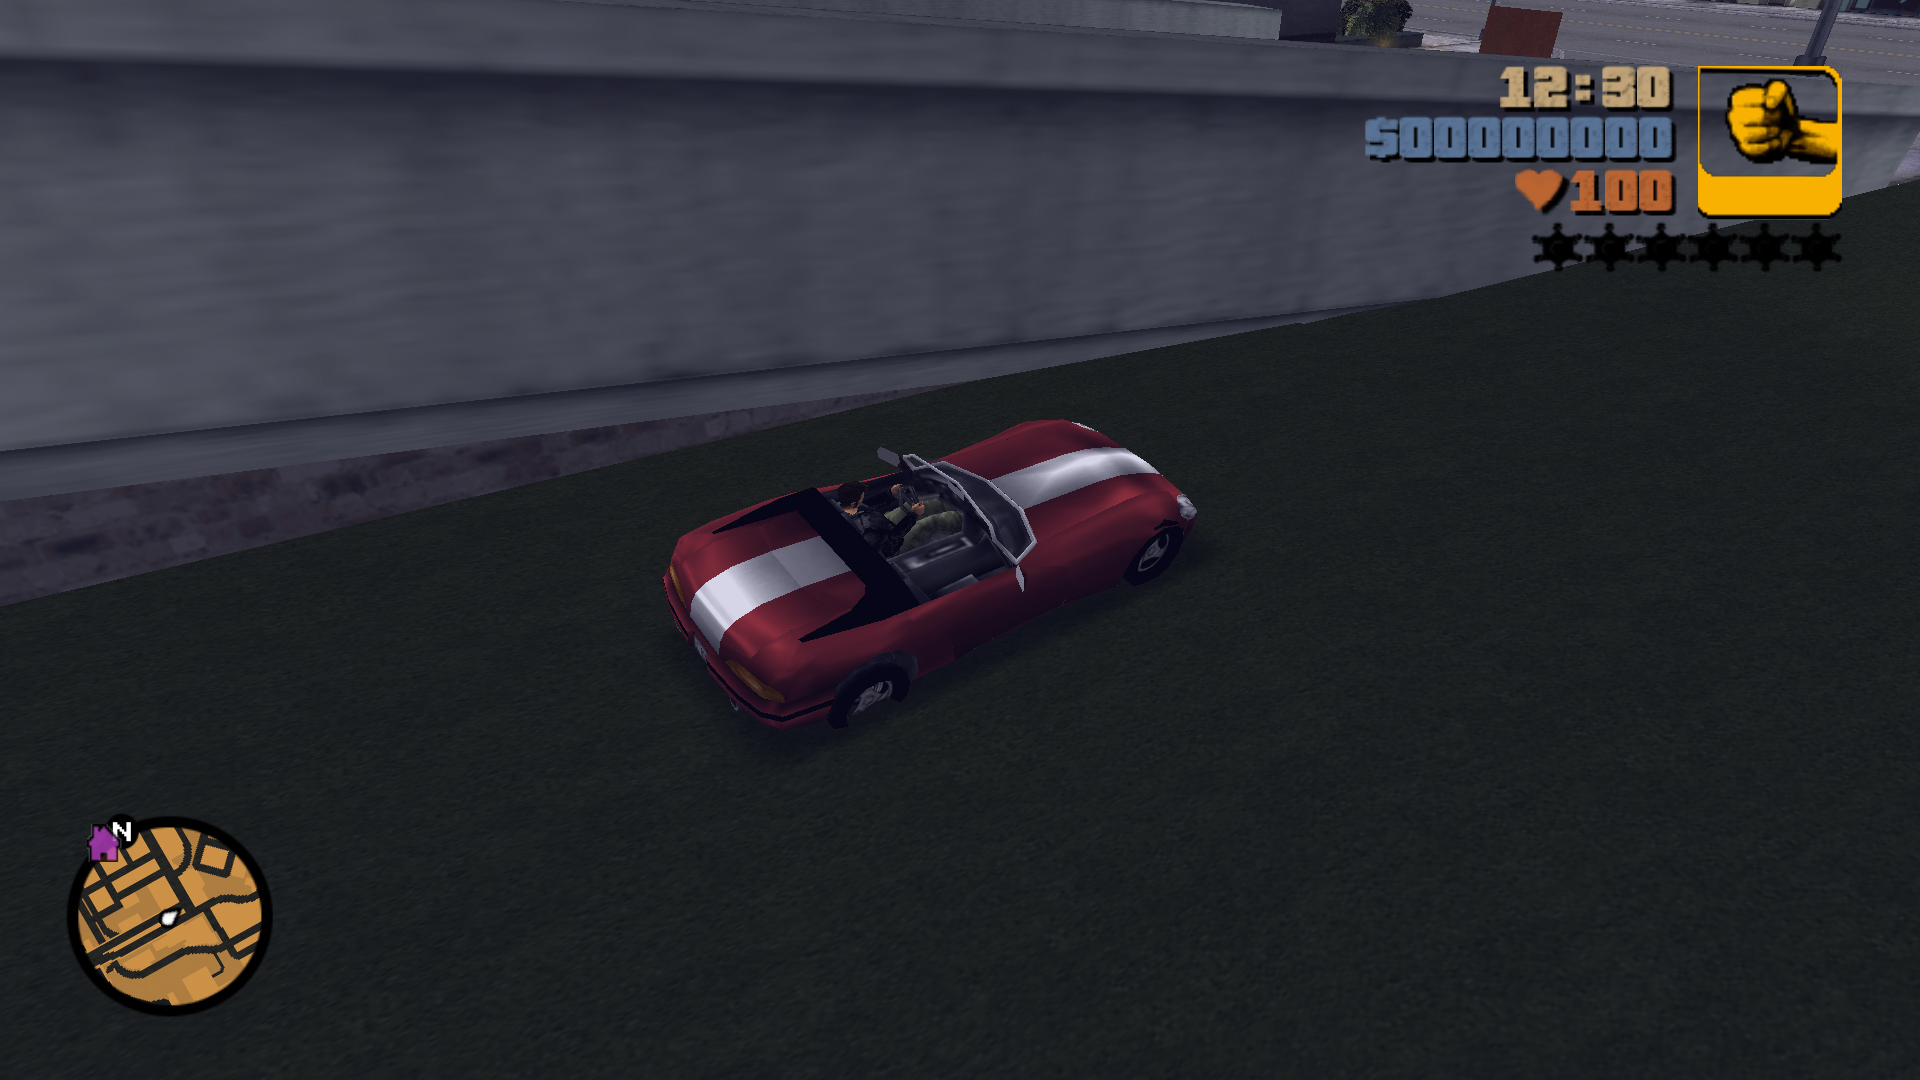
Landing Zone
Jump over the girder that's closer to the Bridge entrance.
With a Banshee you can build up enough speed going back directly west before hitting the steep incline down the street.
8
Jump Location
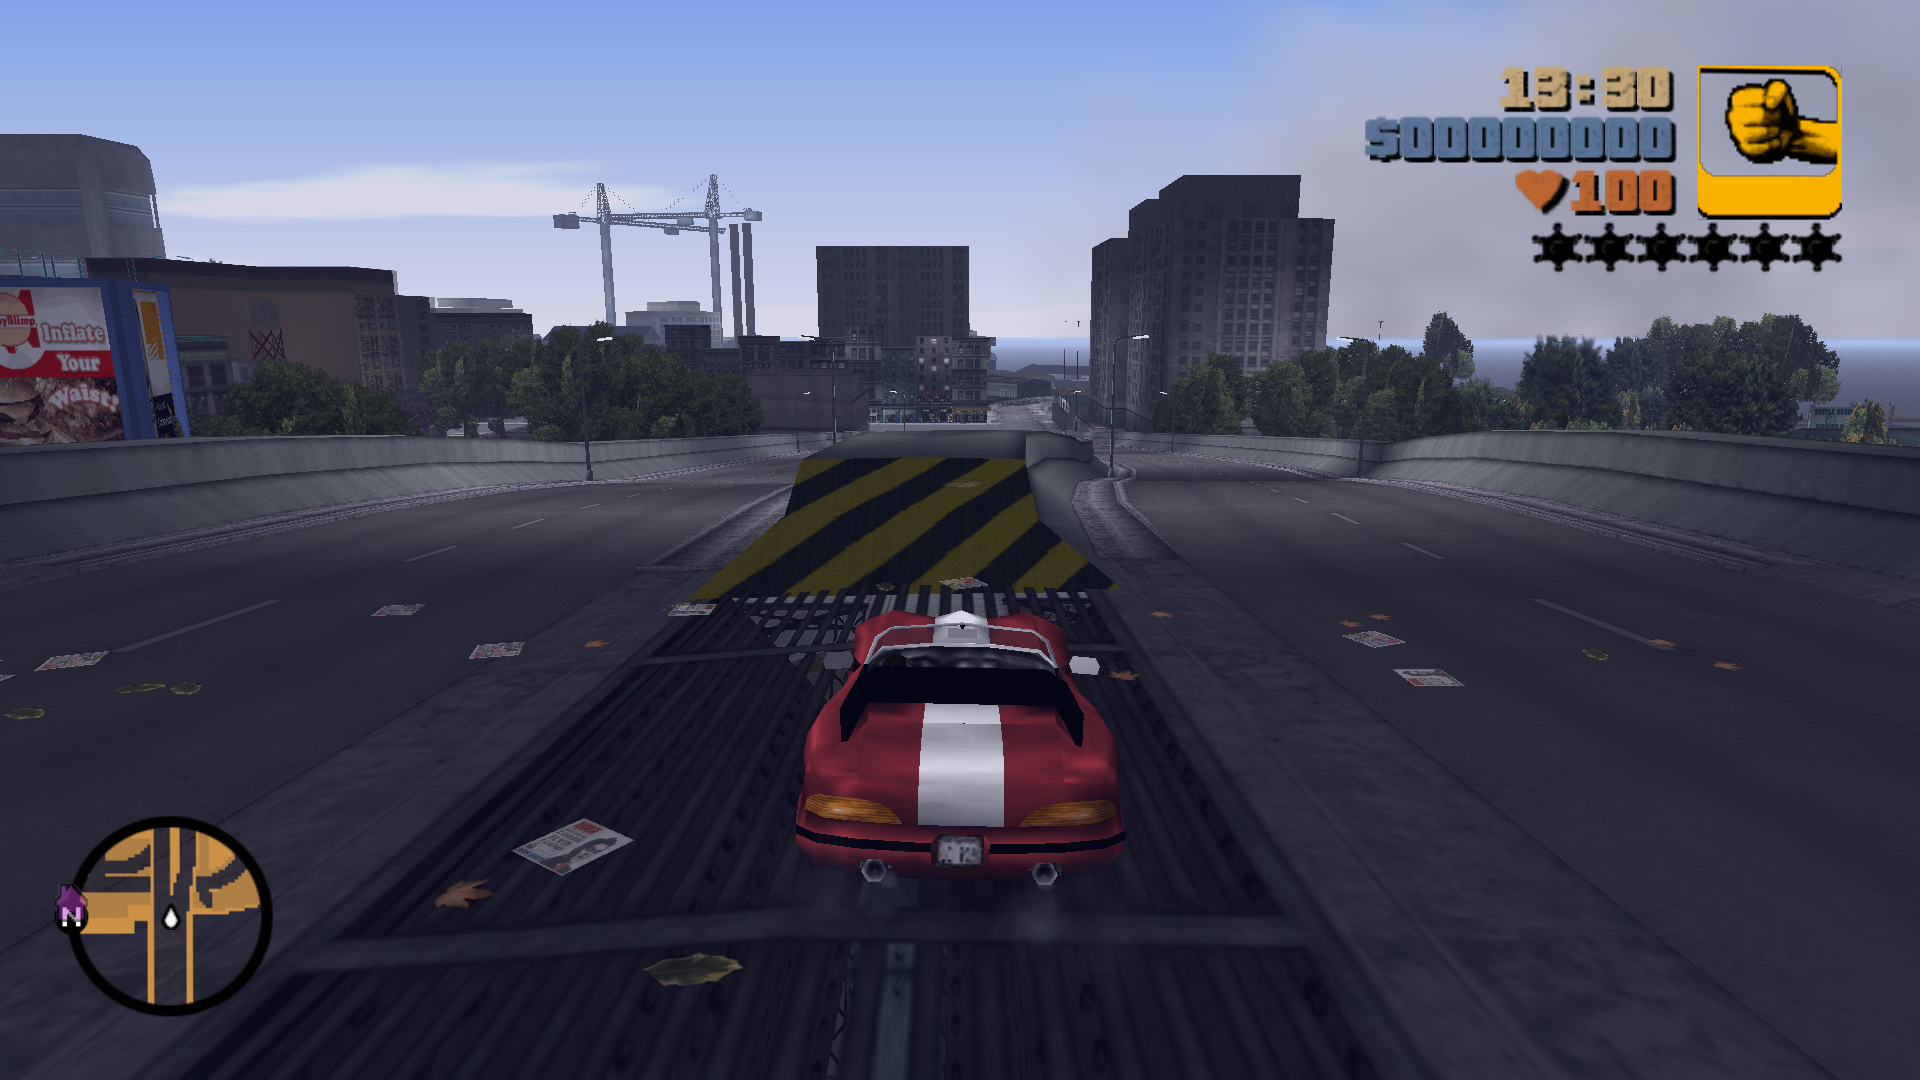
Landing Zone
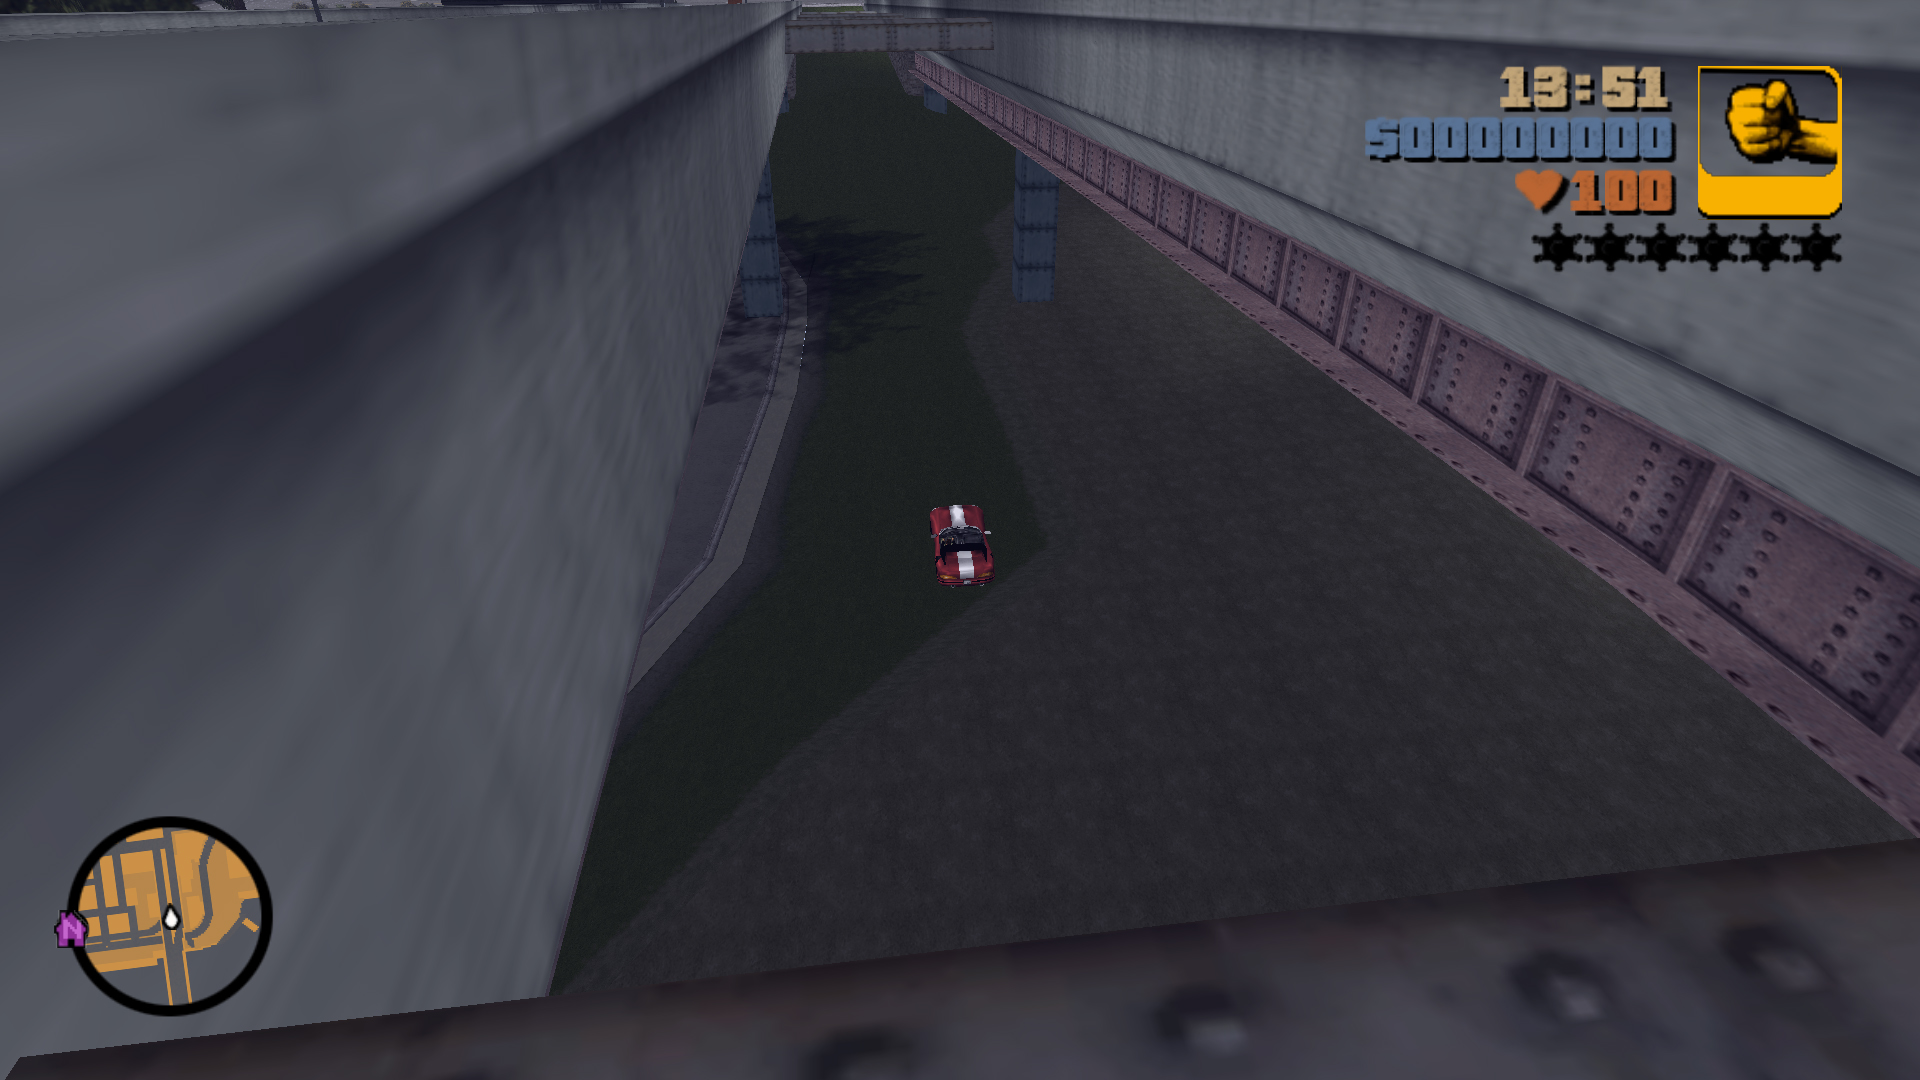
Landing Zone
Jump over the first girder into the gap between the two Bridge lanes.
Take the ramp a little to the right.
9
Jump Location
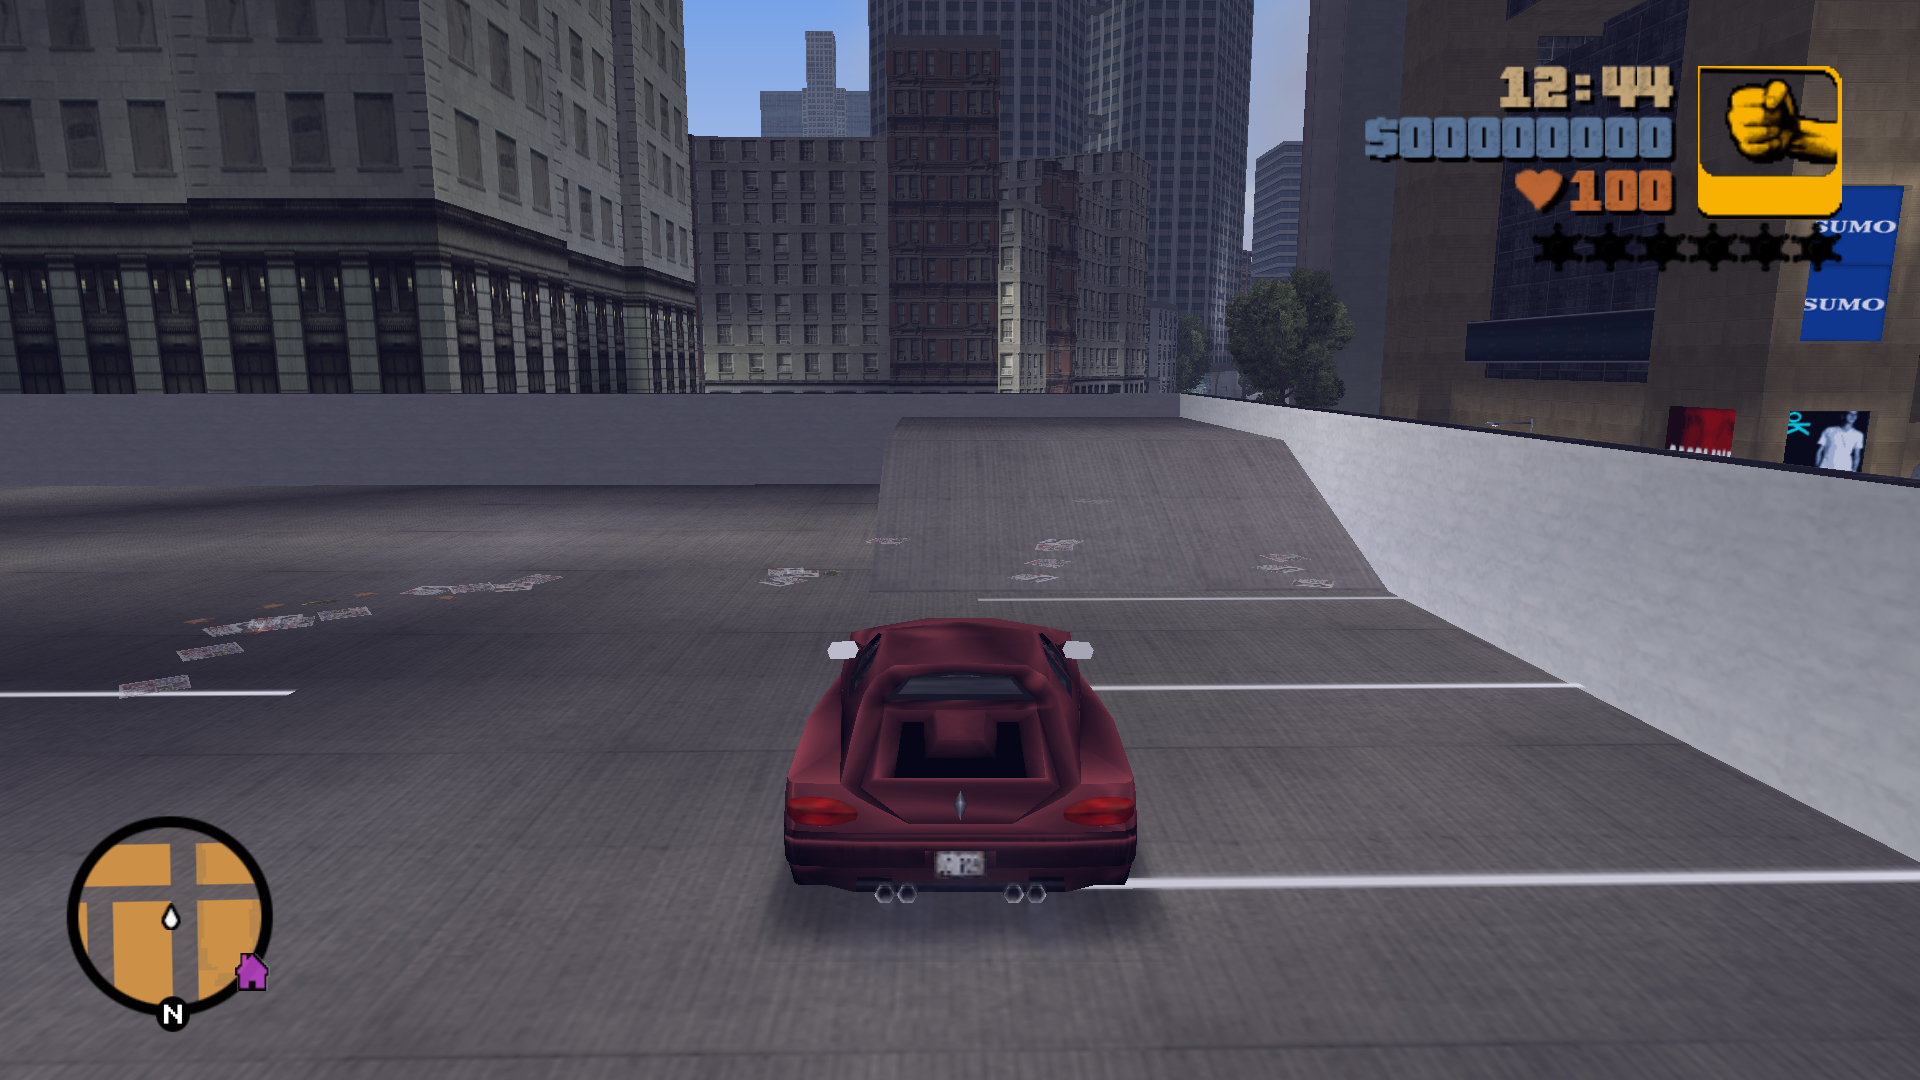
Landing Zone
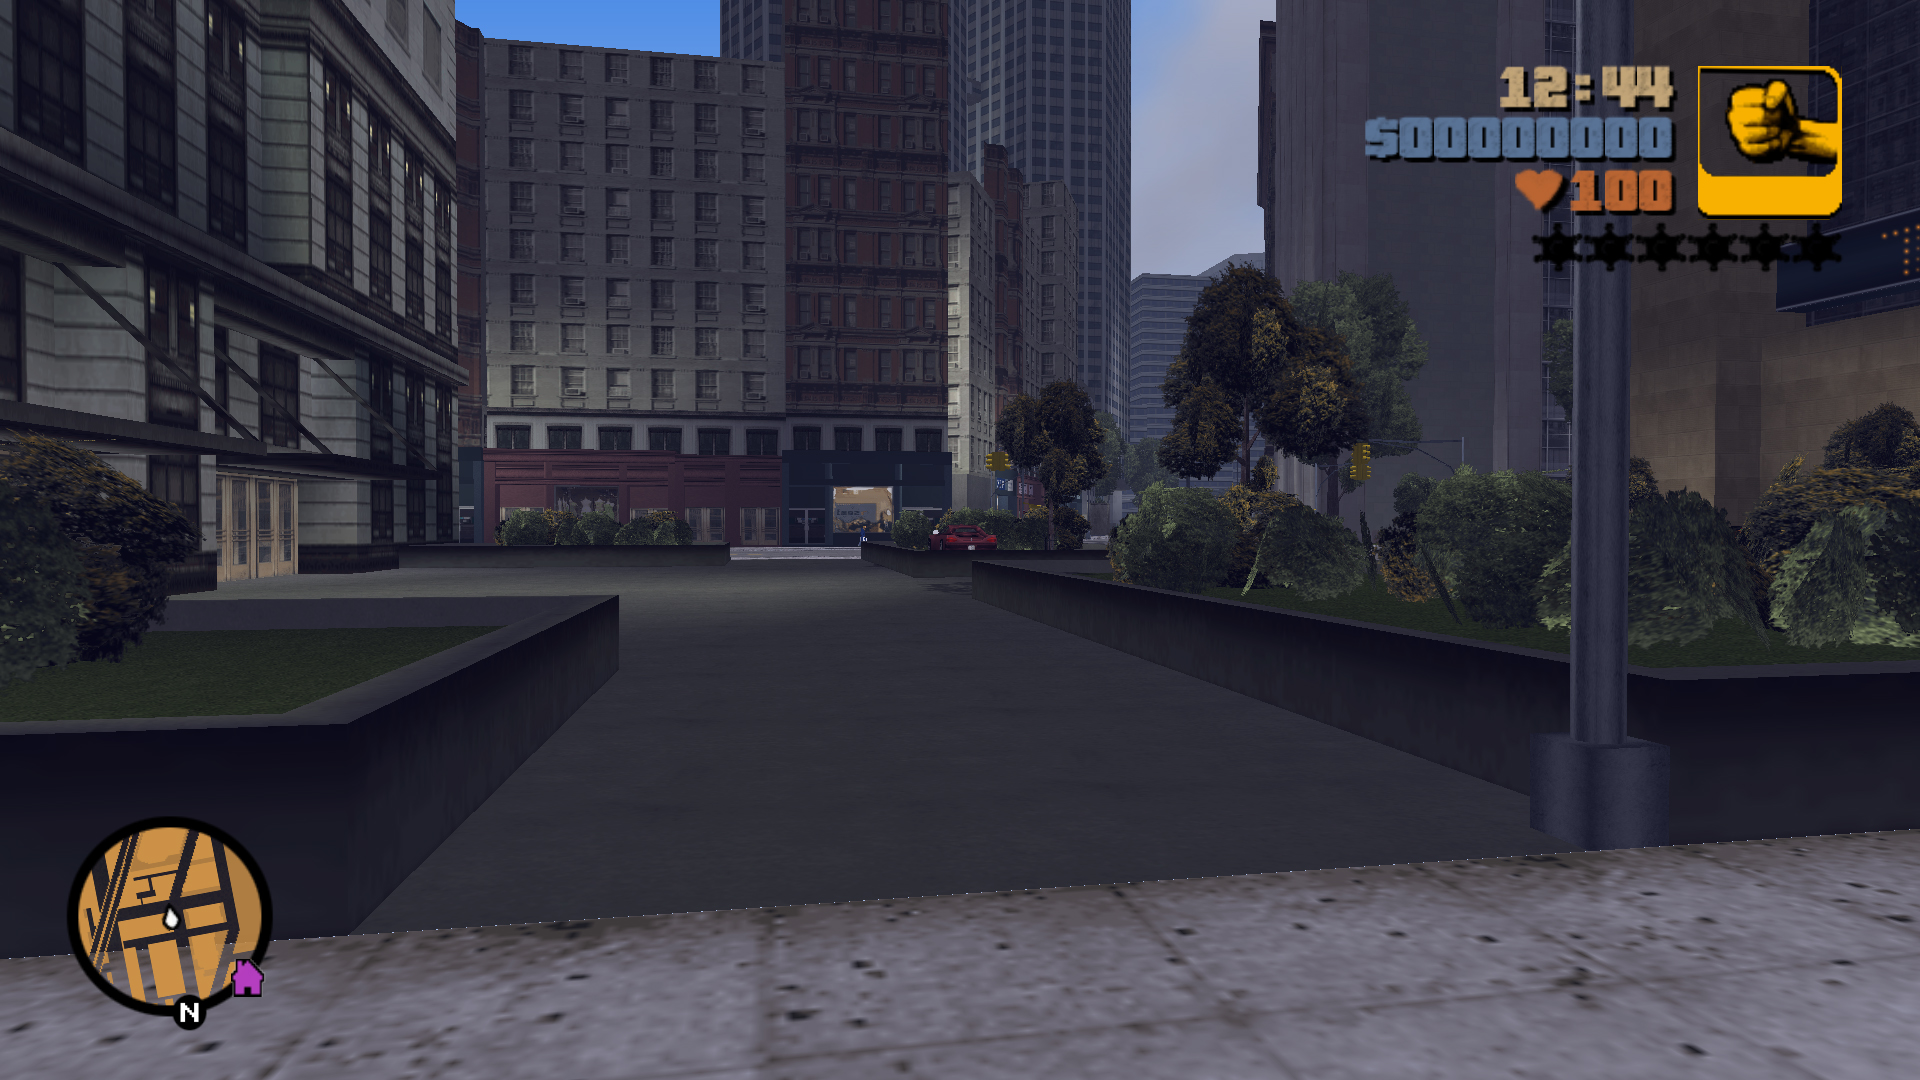
Landing Zone
Jump over the first raised square of grass down in the ground.
Take the ramp a little to the left.
You can land on the second raised square of grass and even in the path between them.
You can land on the second raised square of grass and even in the path between them.
10
Jump Location
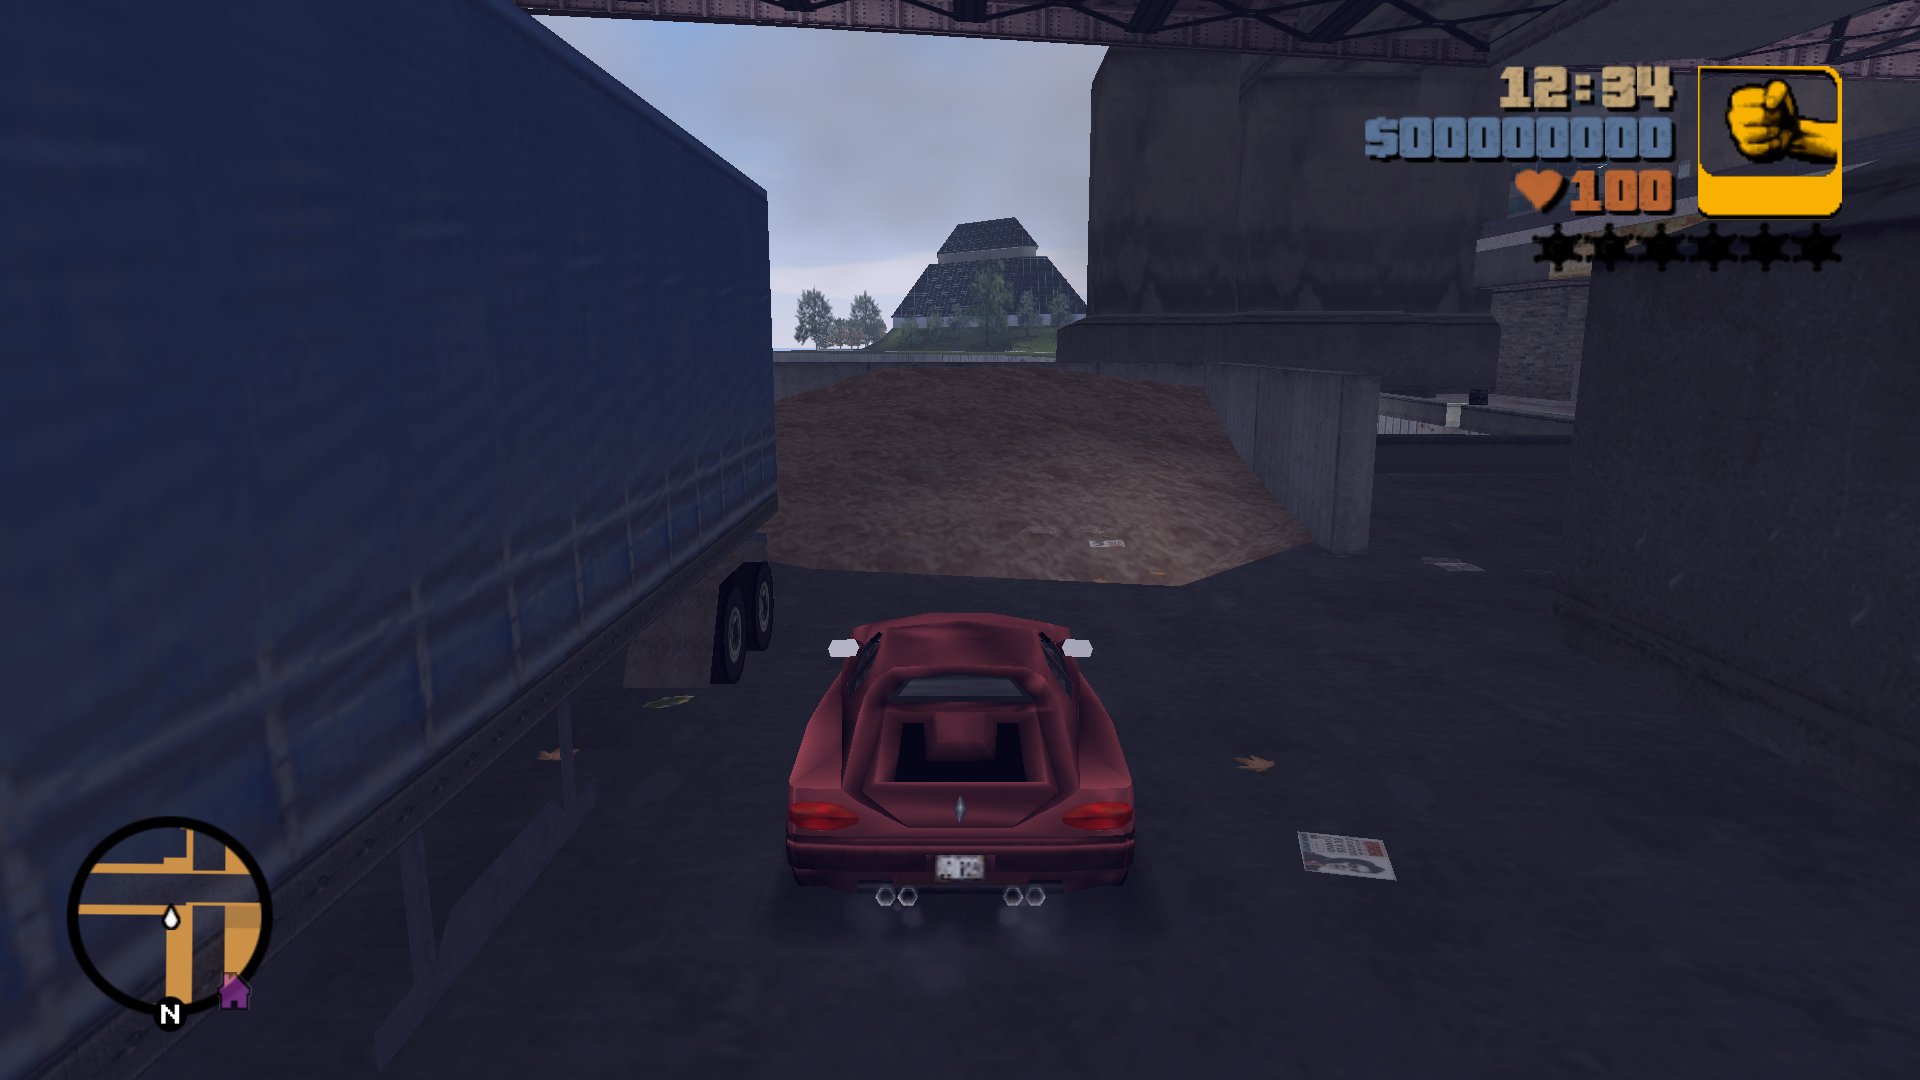
Landing Zone
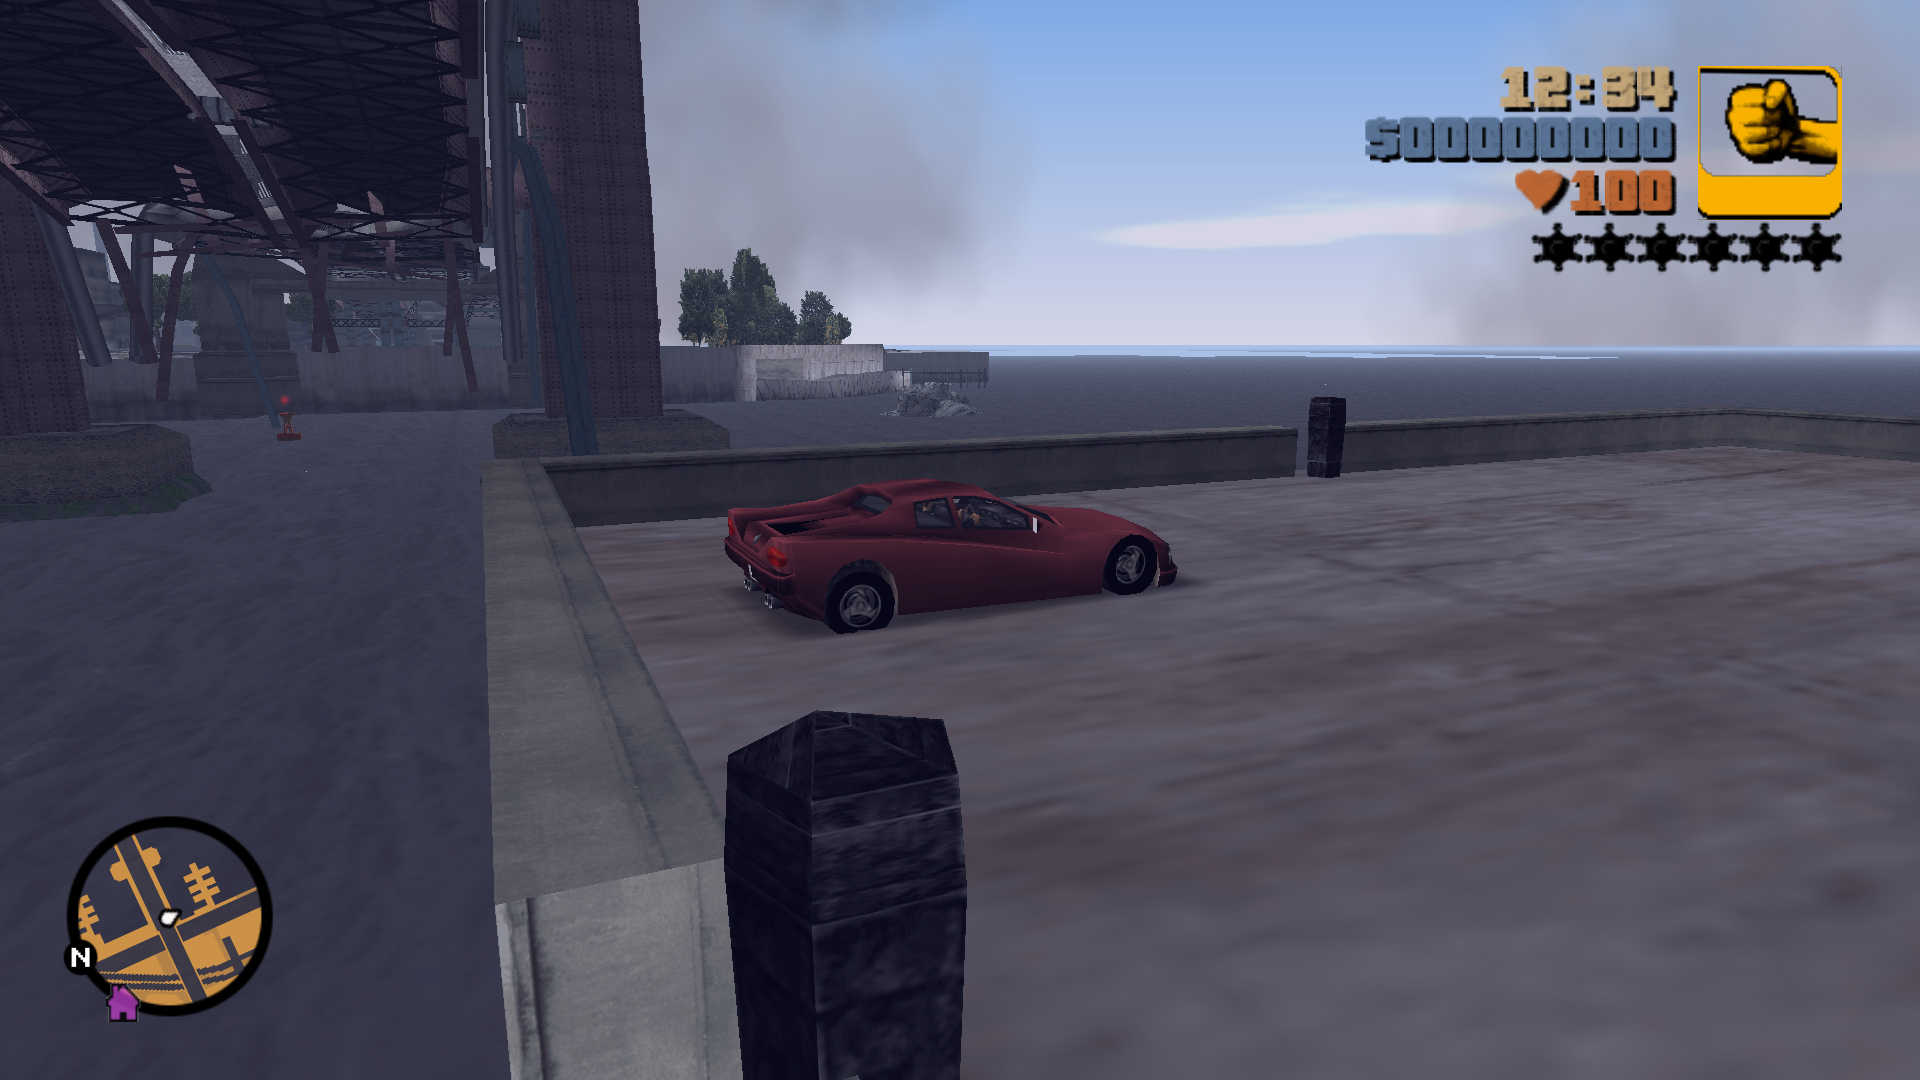
Landing Zone
Jump over the water onto the other side of the shore.
11
Jump Location
Landing Zone
Landing Zone
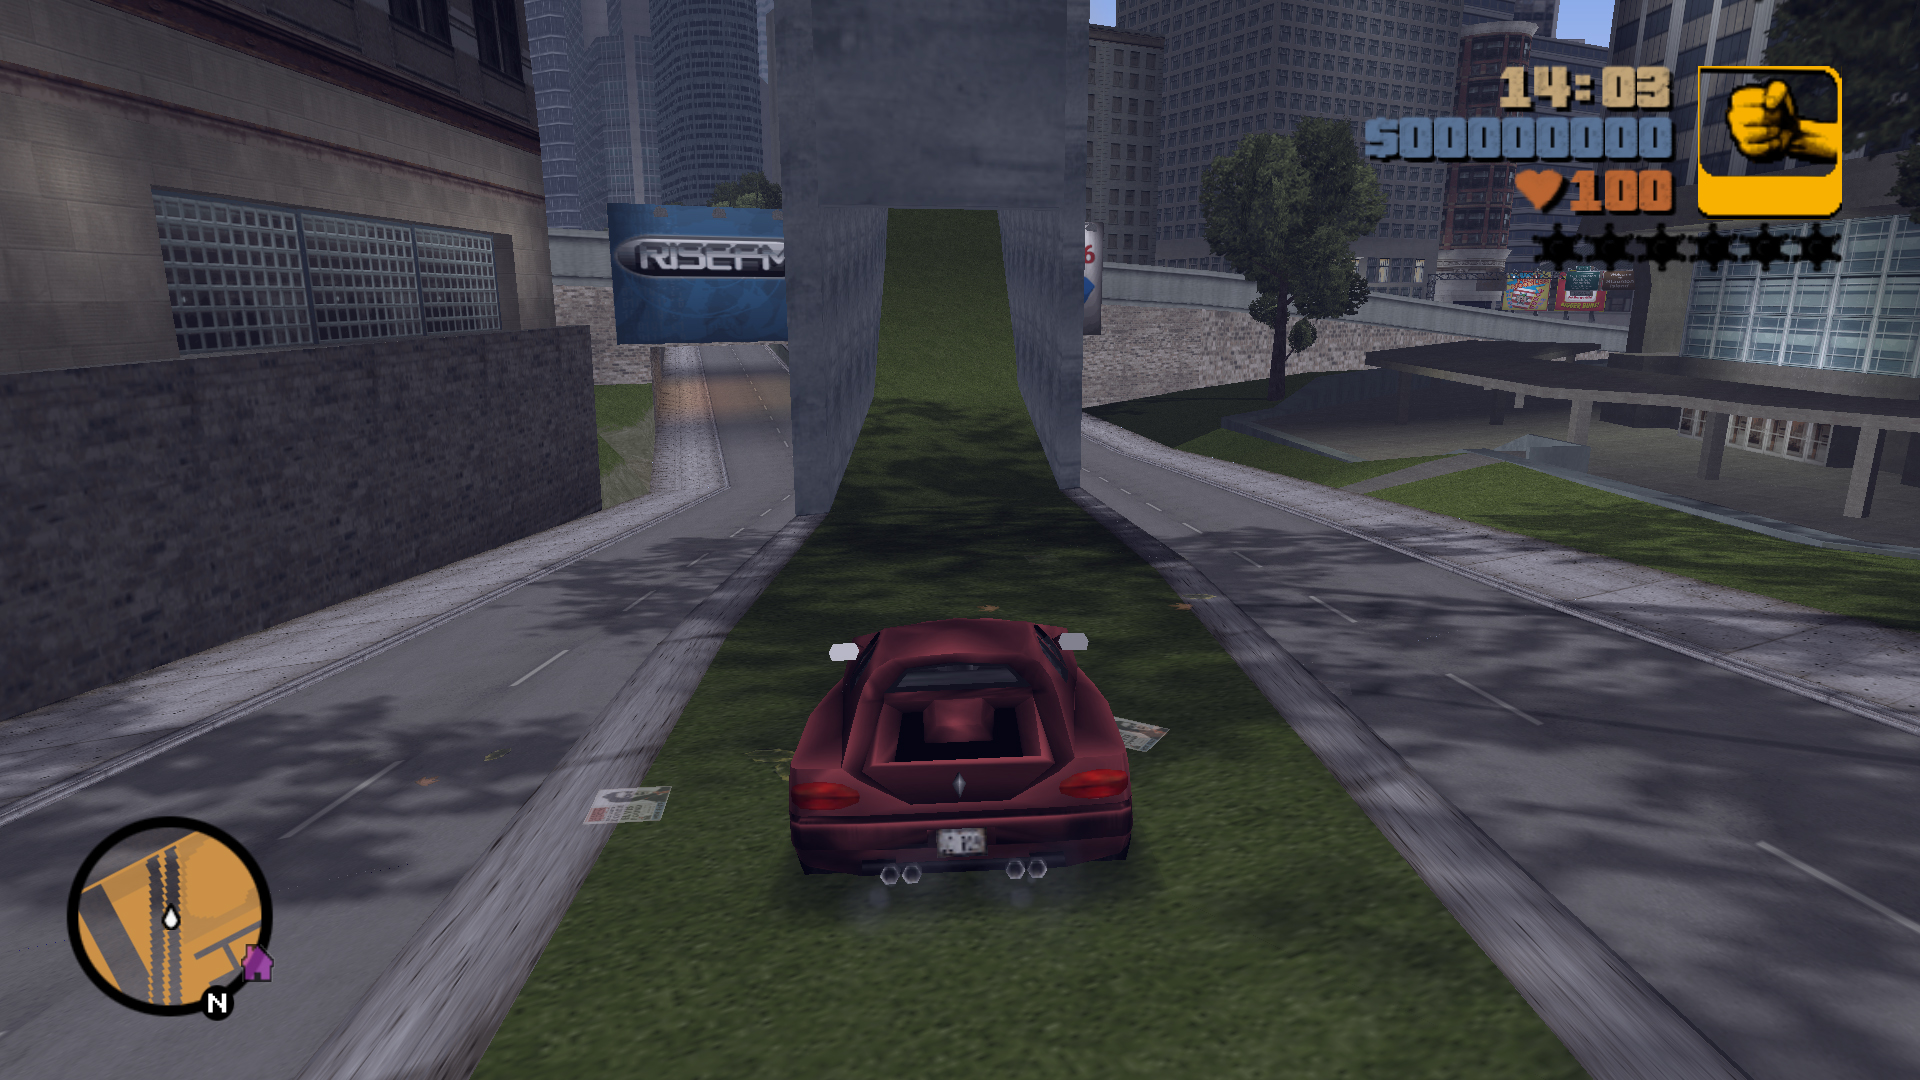
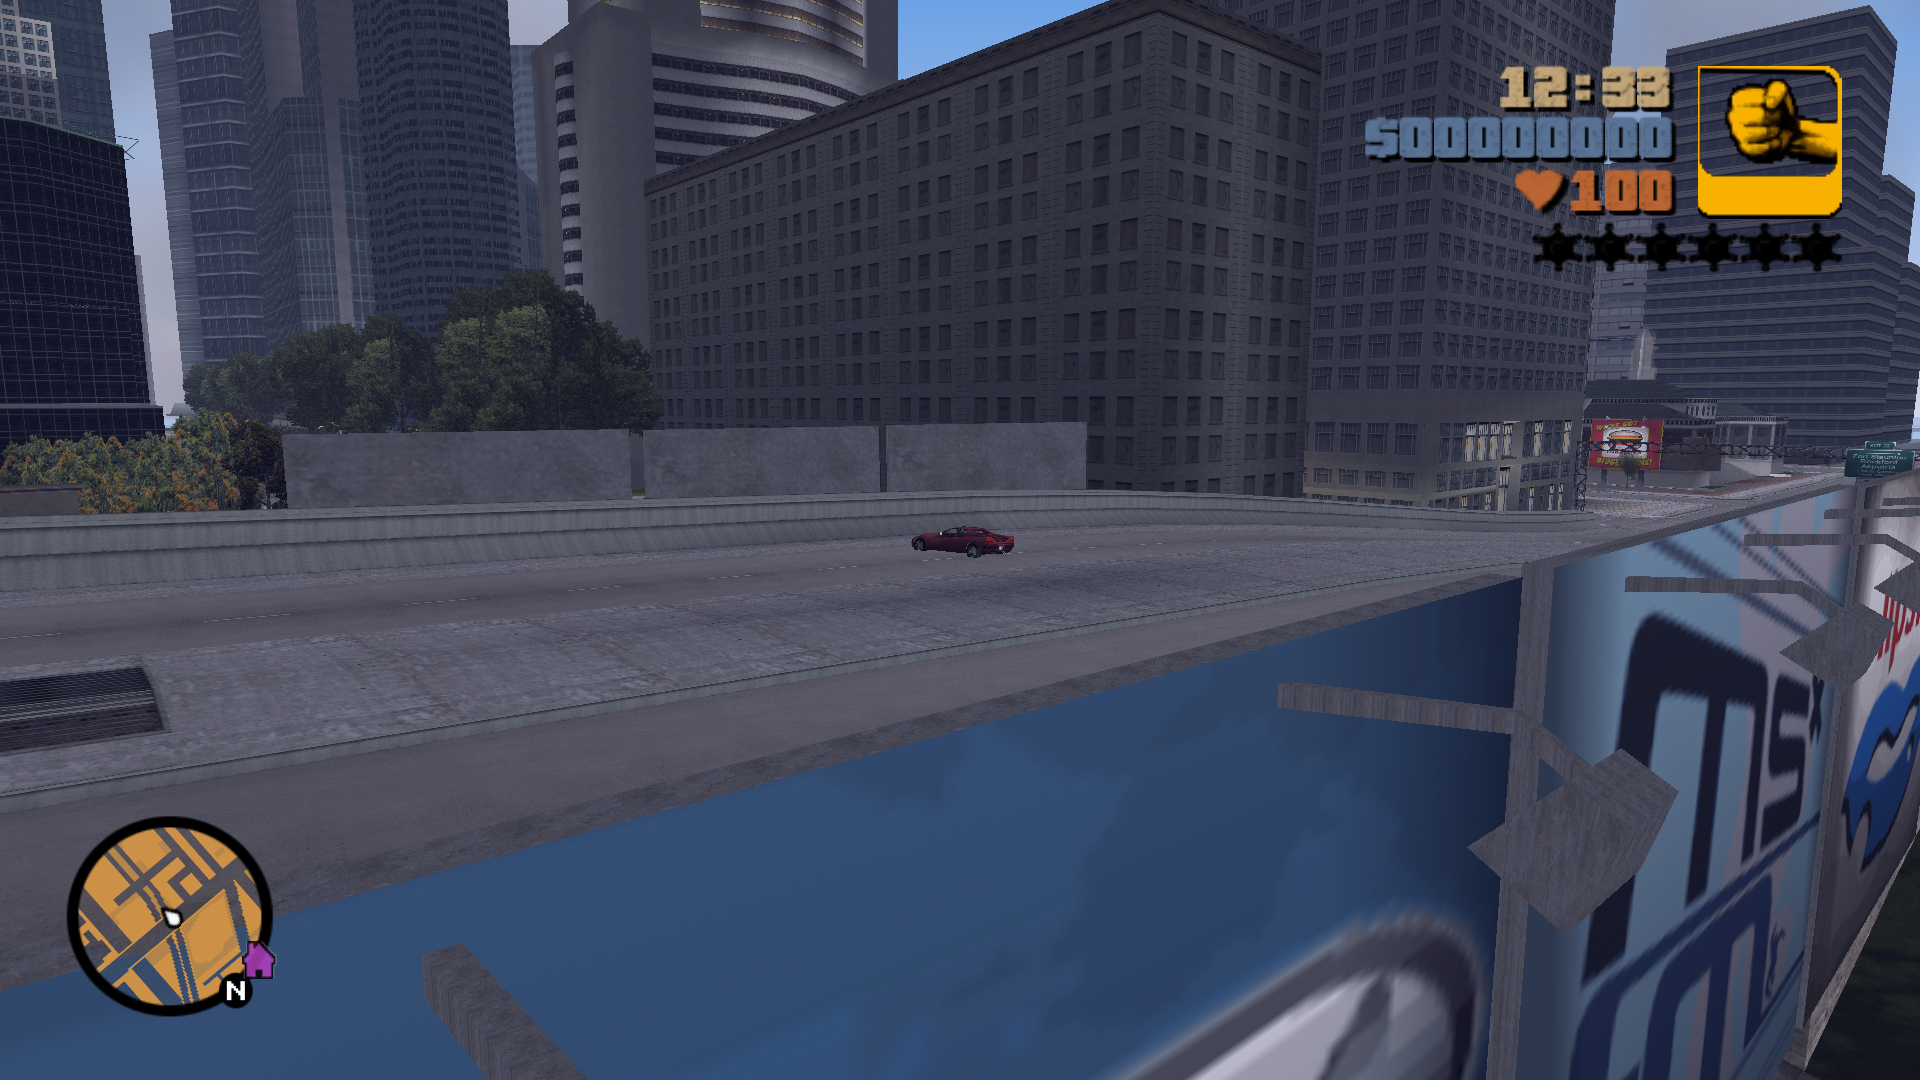
Jump onto the second lane of the Bridge.
The run up and the ramp are on the raised platform that separates the two lanes of the expressway that goes under the Bridge, to the north the platform lowers into a gap, use that to get on.
You can even jump over the whole Bridge.
You can even jump over the whole Bridge.
12
Jump Location
Landing Zone
Landing Zone
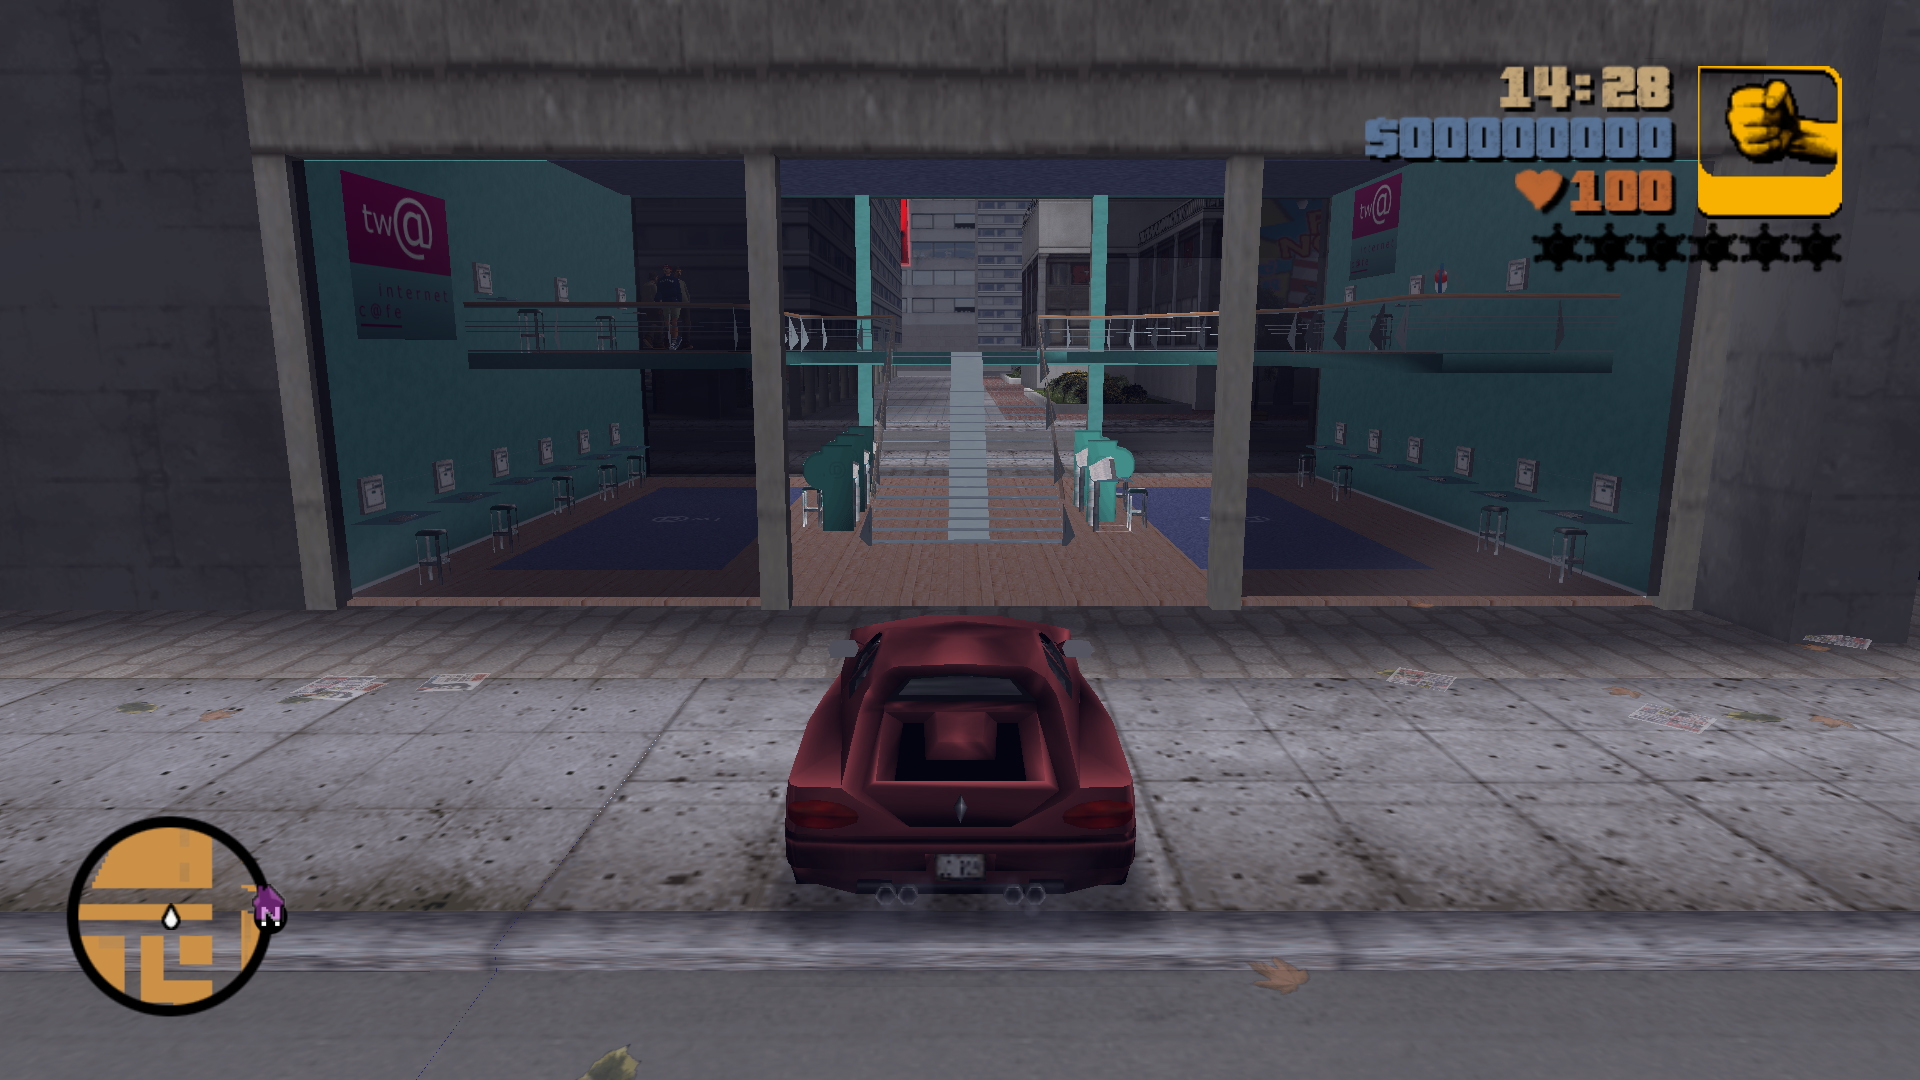
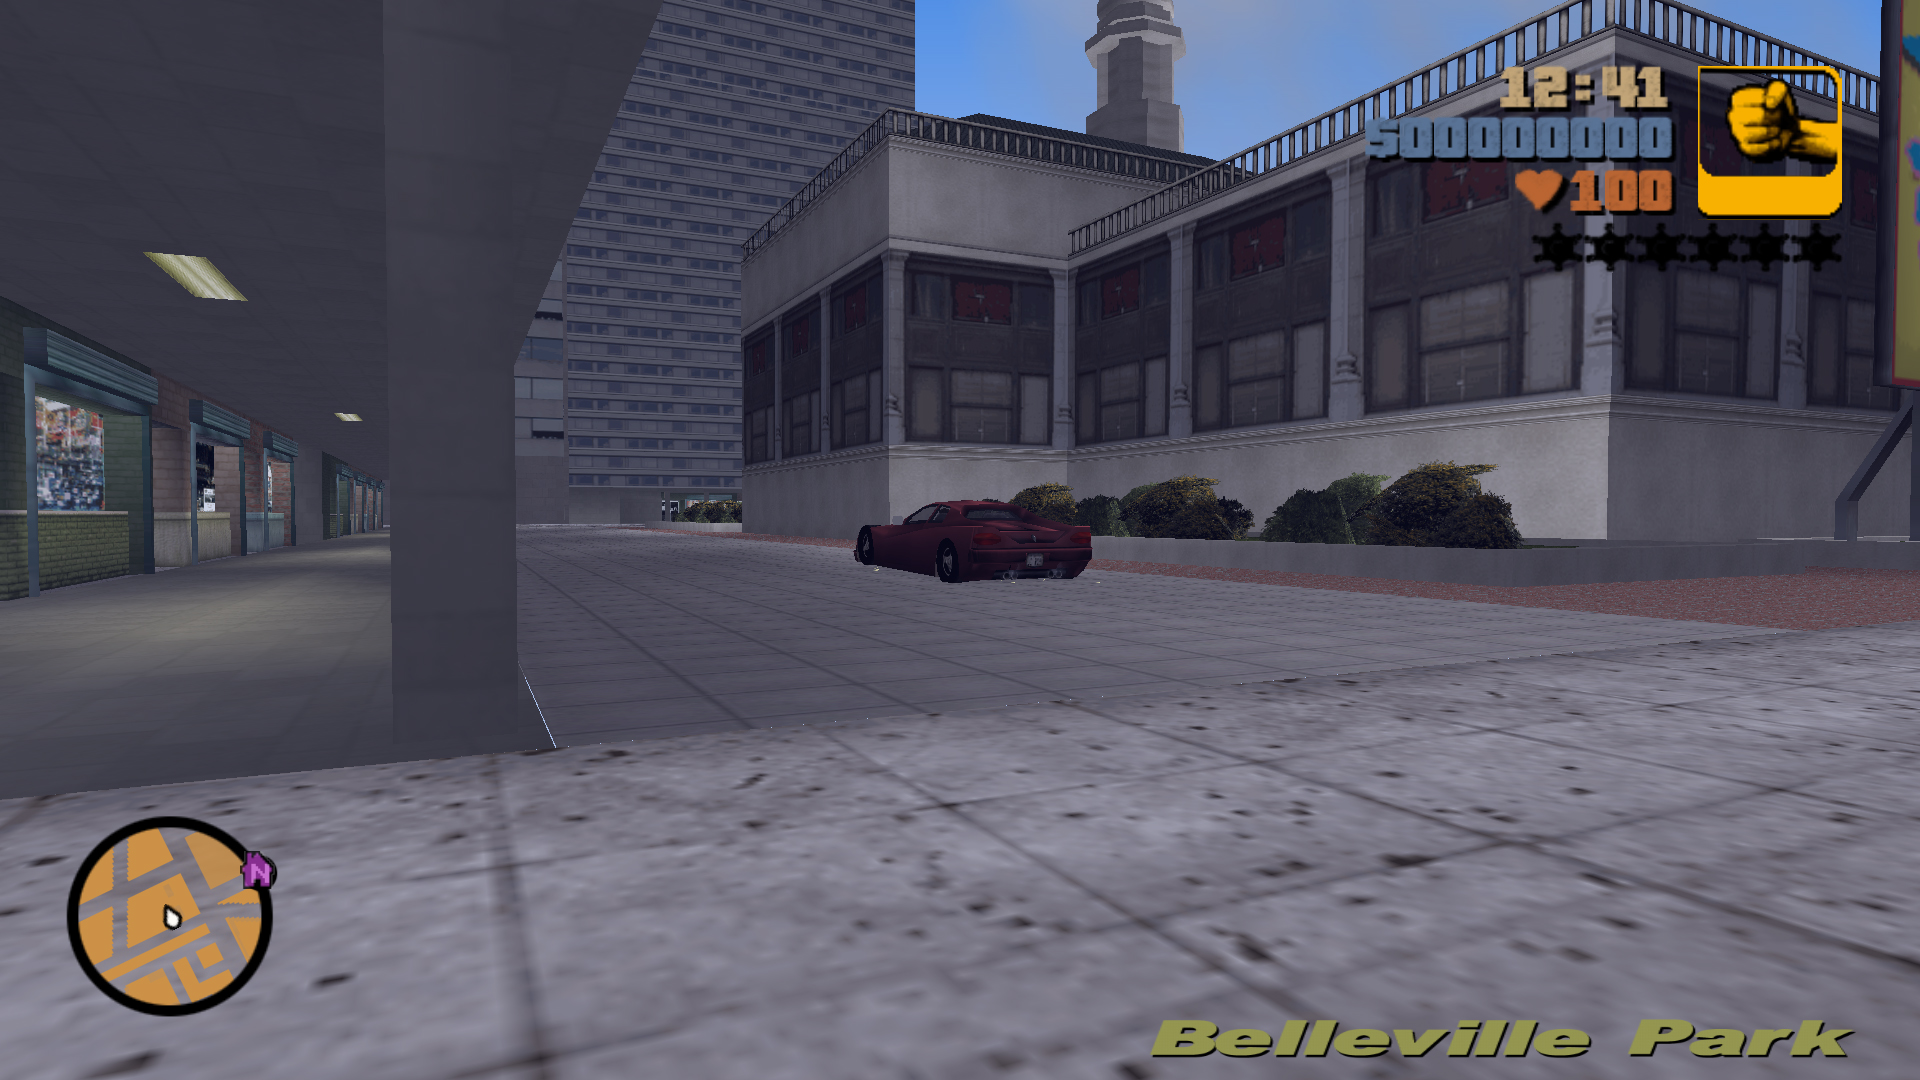
Jump over the street.
Use the underground garage entranceway as a run up.
13
Jump Location
Landing Zone
Landing Zone
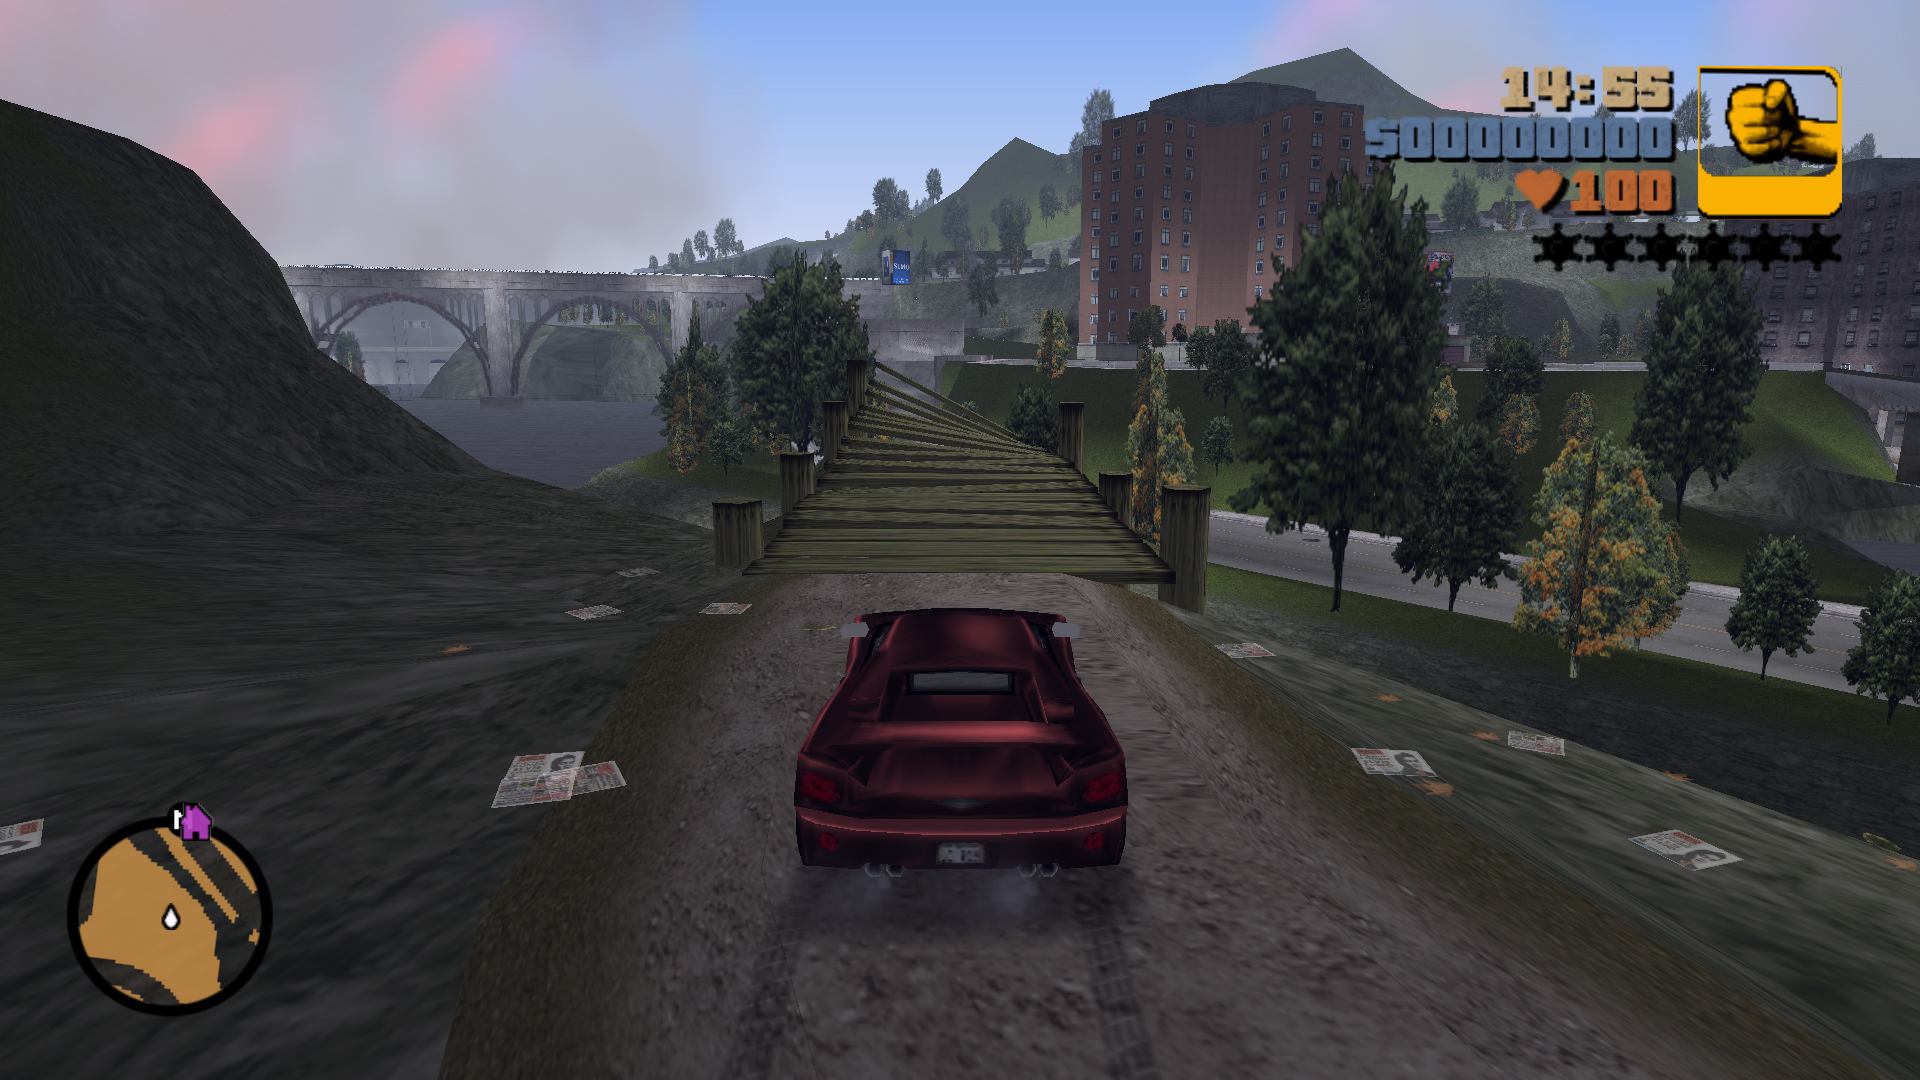
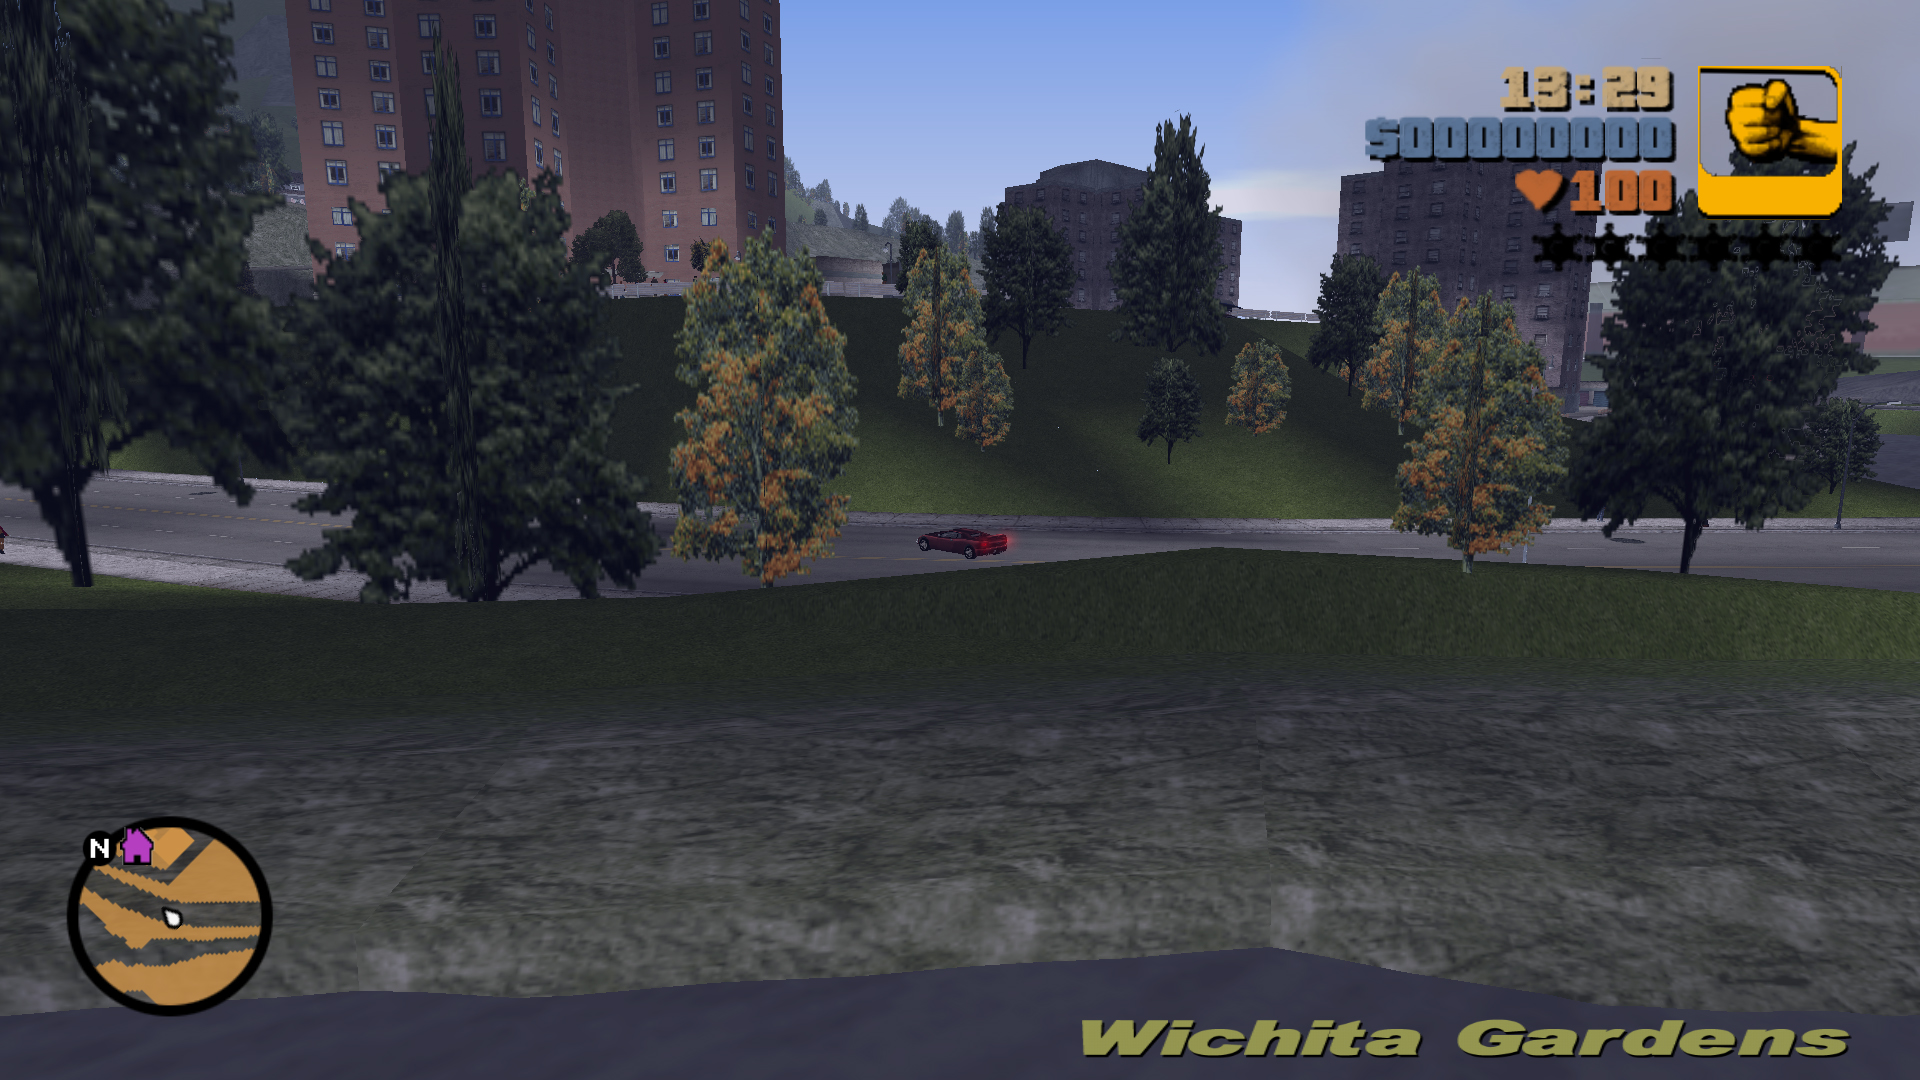
Jump over the water onto the street in Wichita Gardens.
It's not necessary to land on your wheels.
14
Jump Location
Landing Zone
Landing Zone
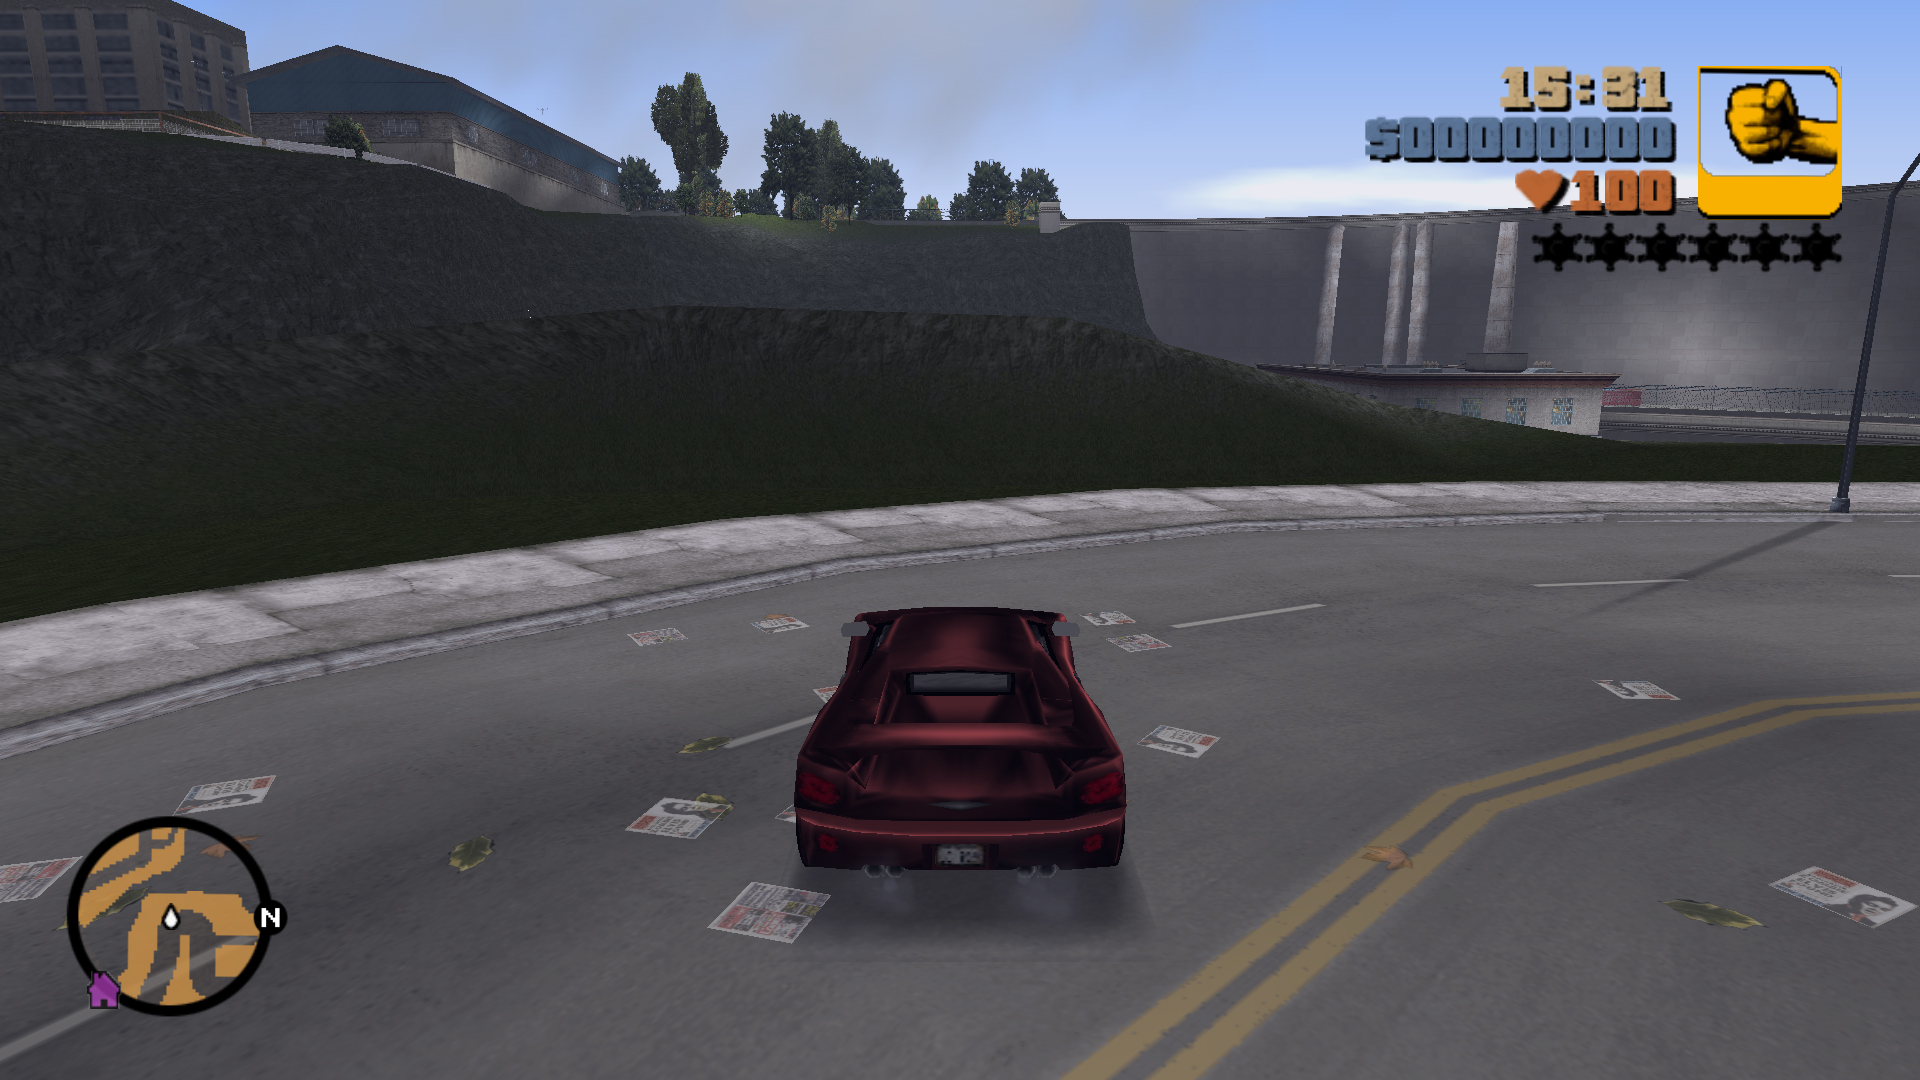
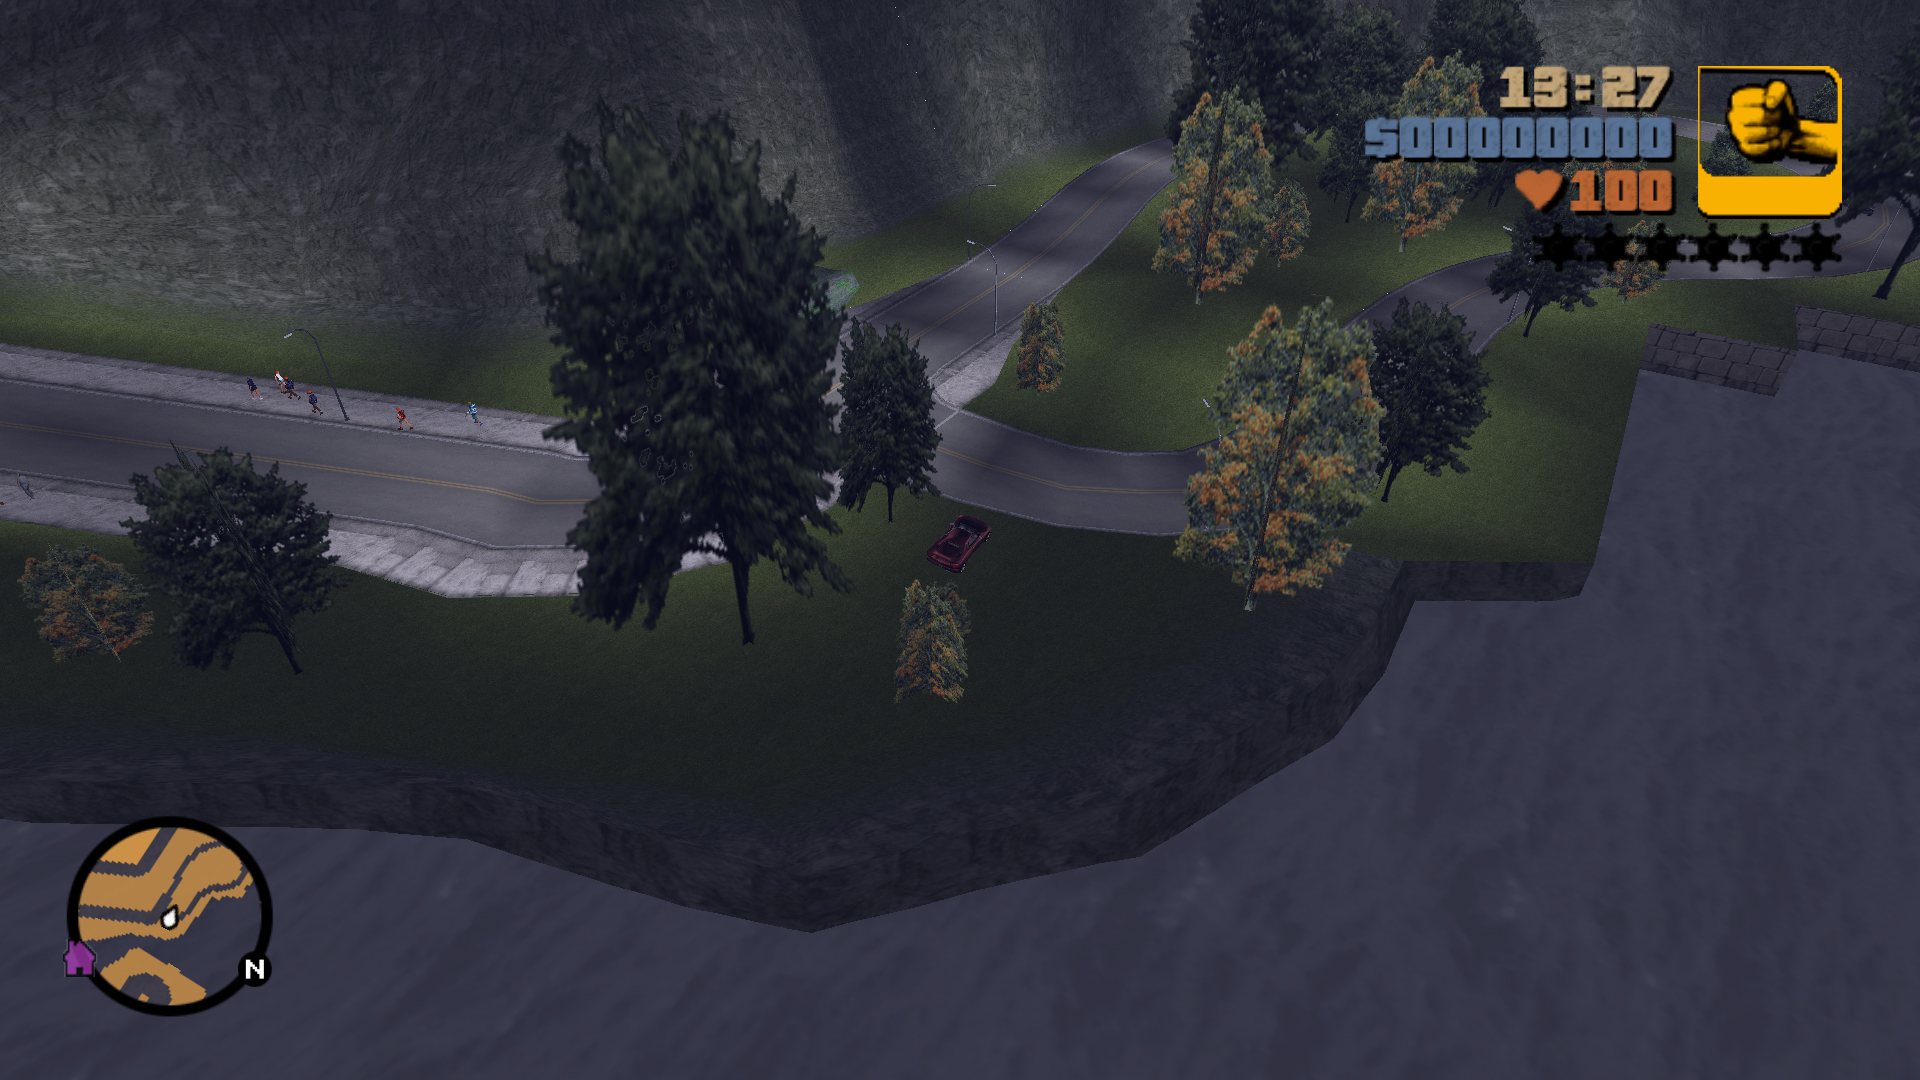
Jump over the water onto the lower section of the Cochrane Dam.
15
Jump Location
Landing Zone
Landing Zone
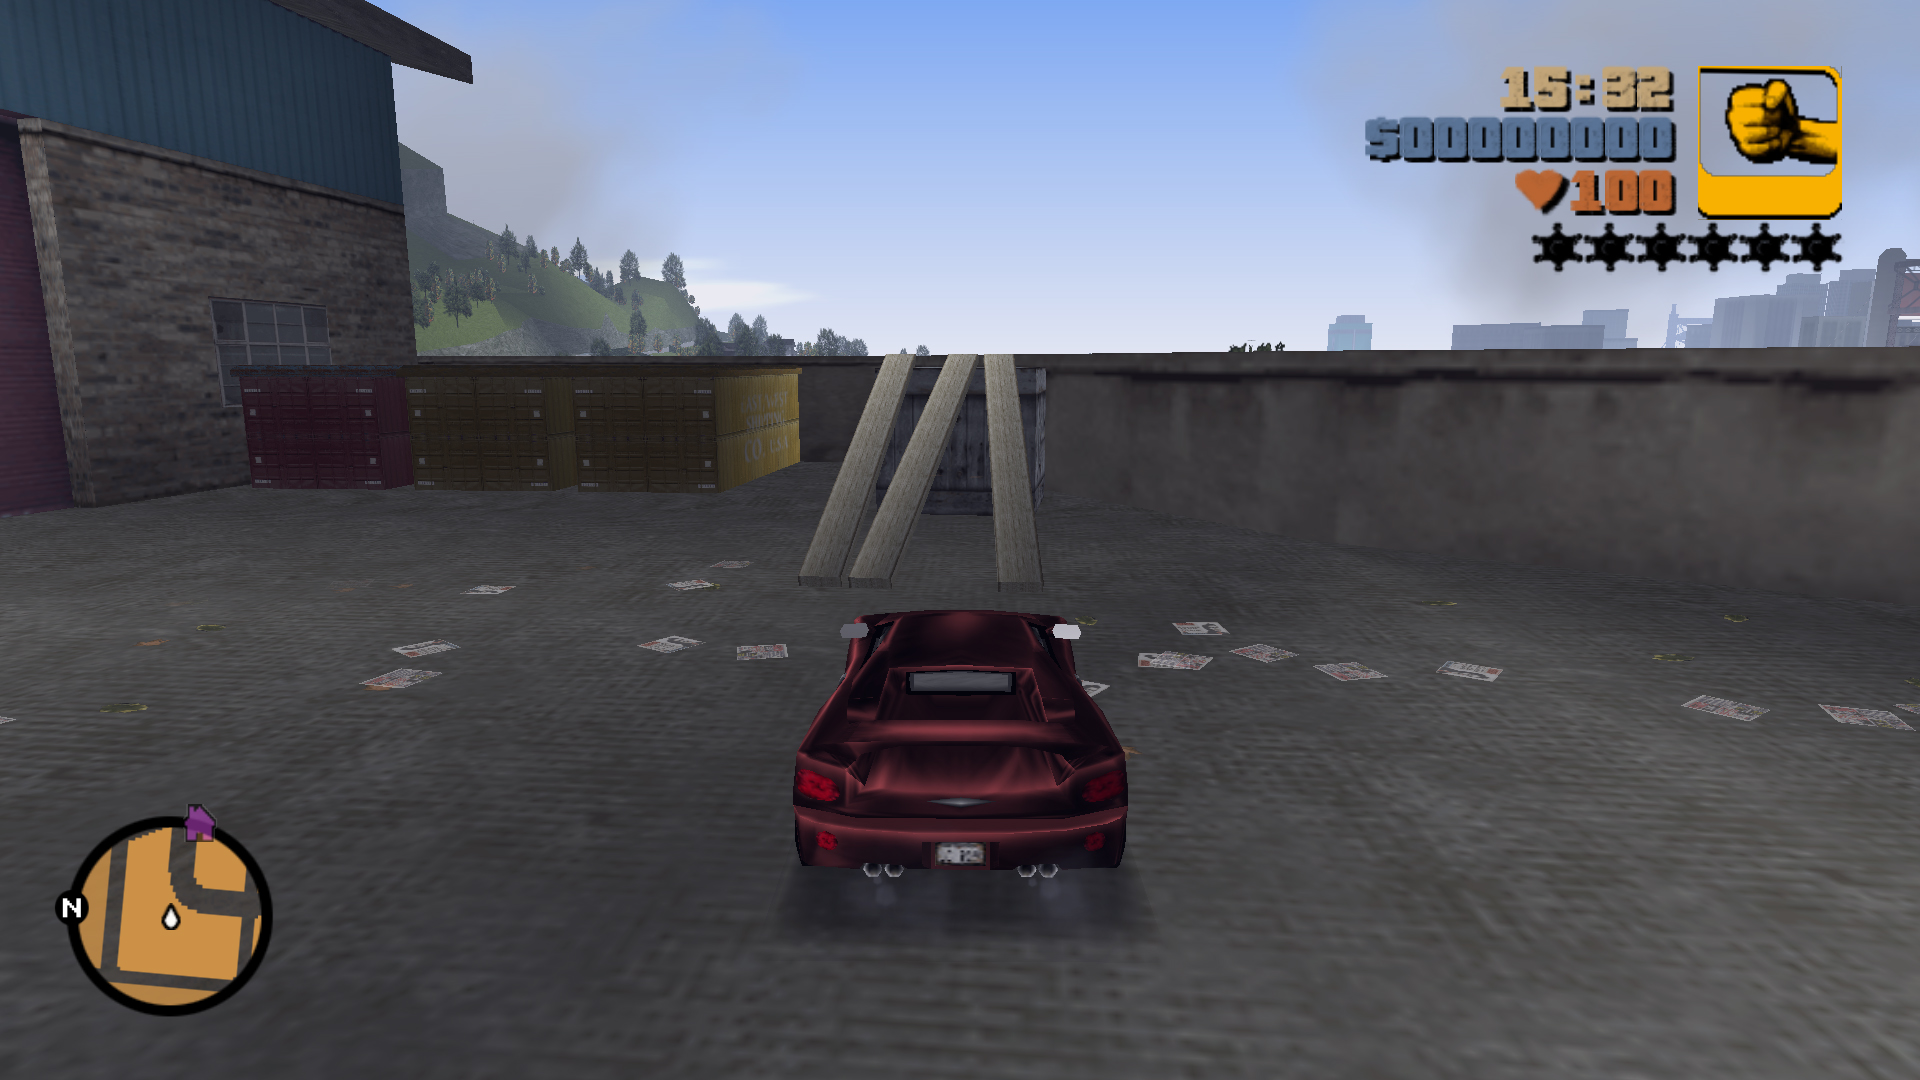
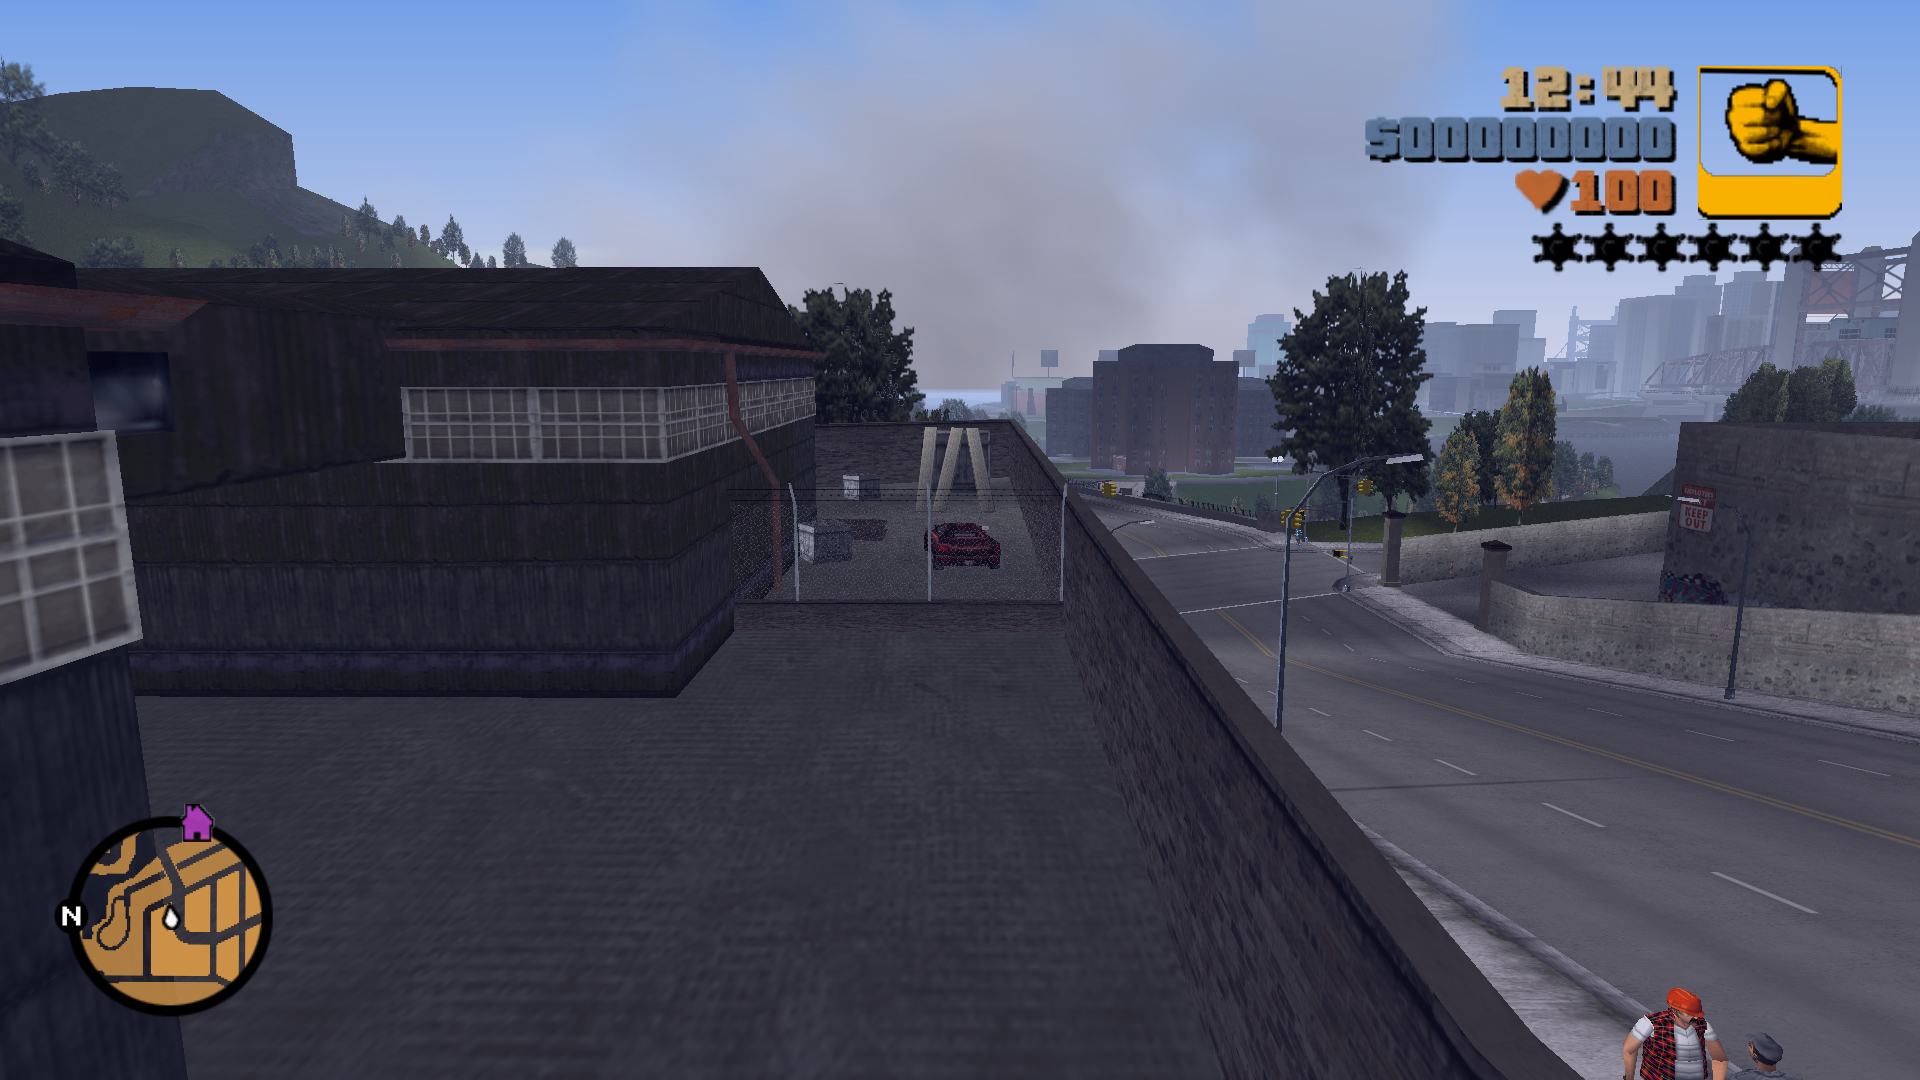
Jump over the fence down at the back of the Import/Export garage.
Aim a bit to the left.
16
Jump Location
Landing Zone
Landing Zone
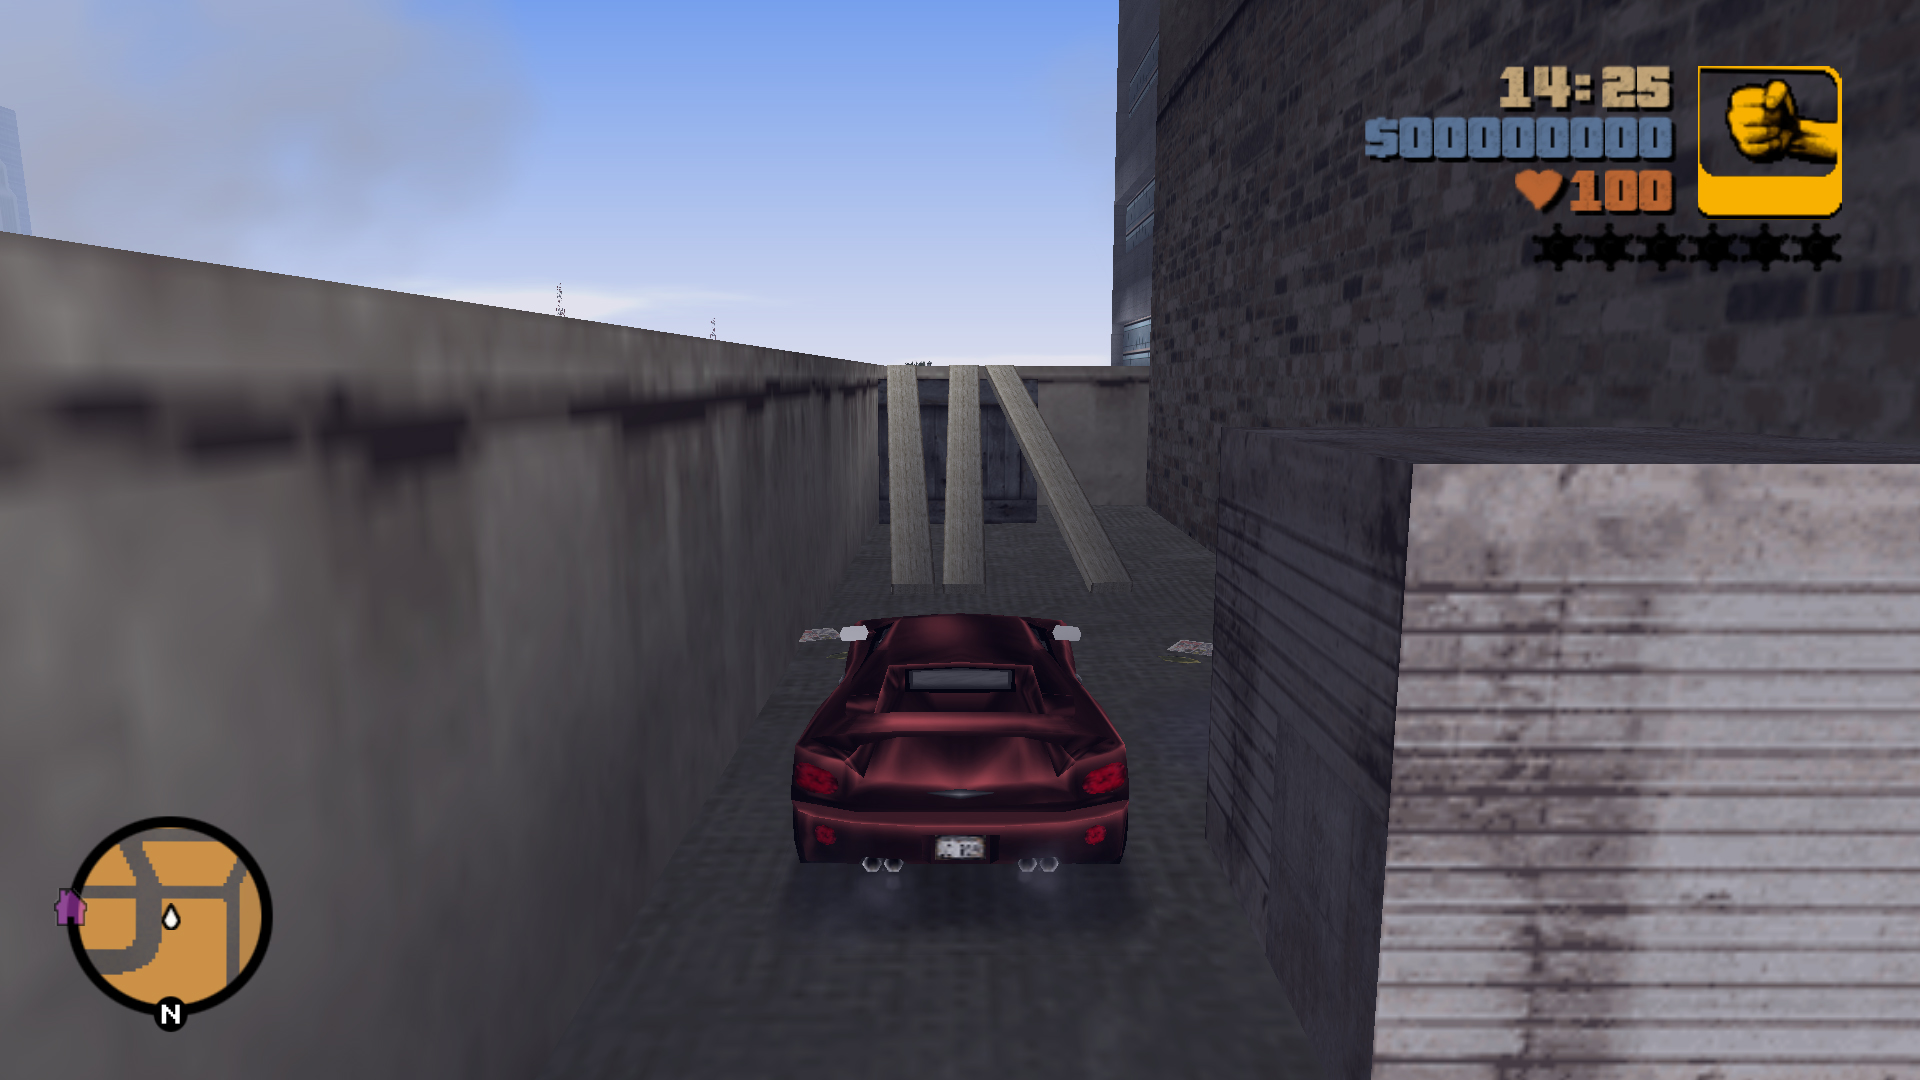
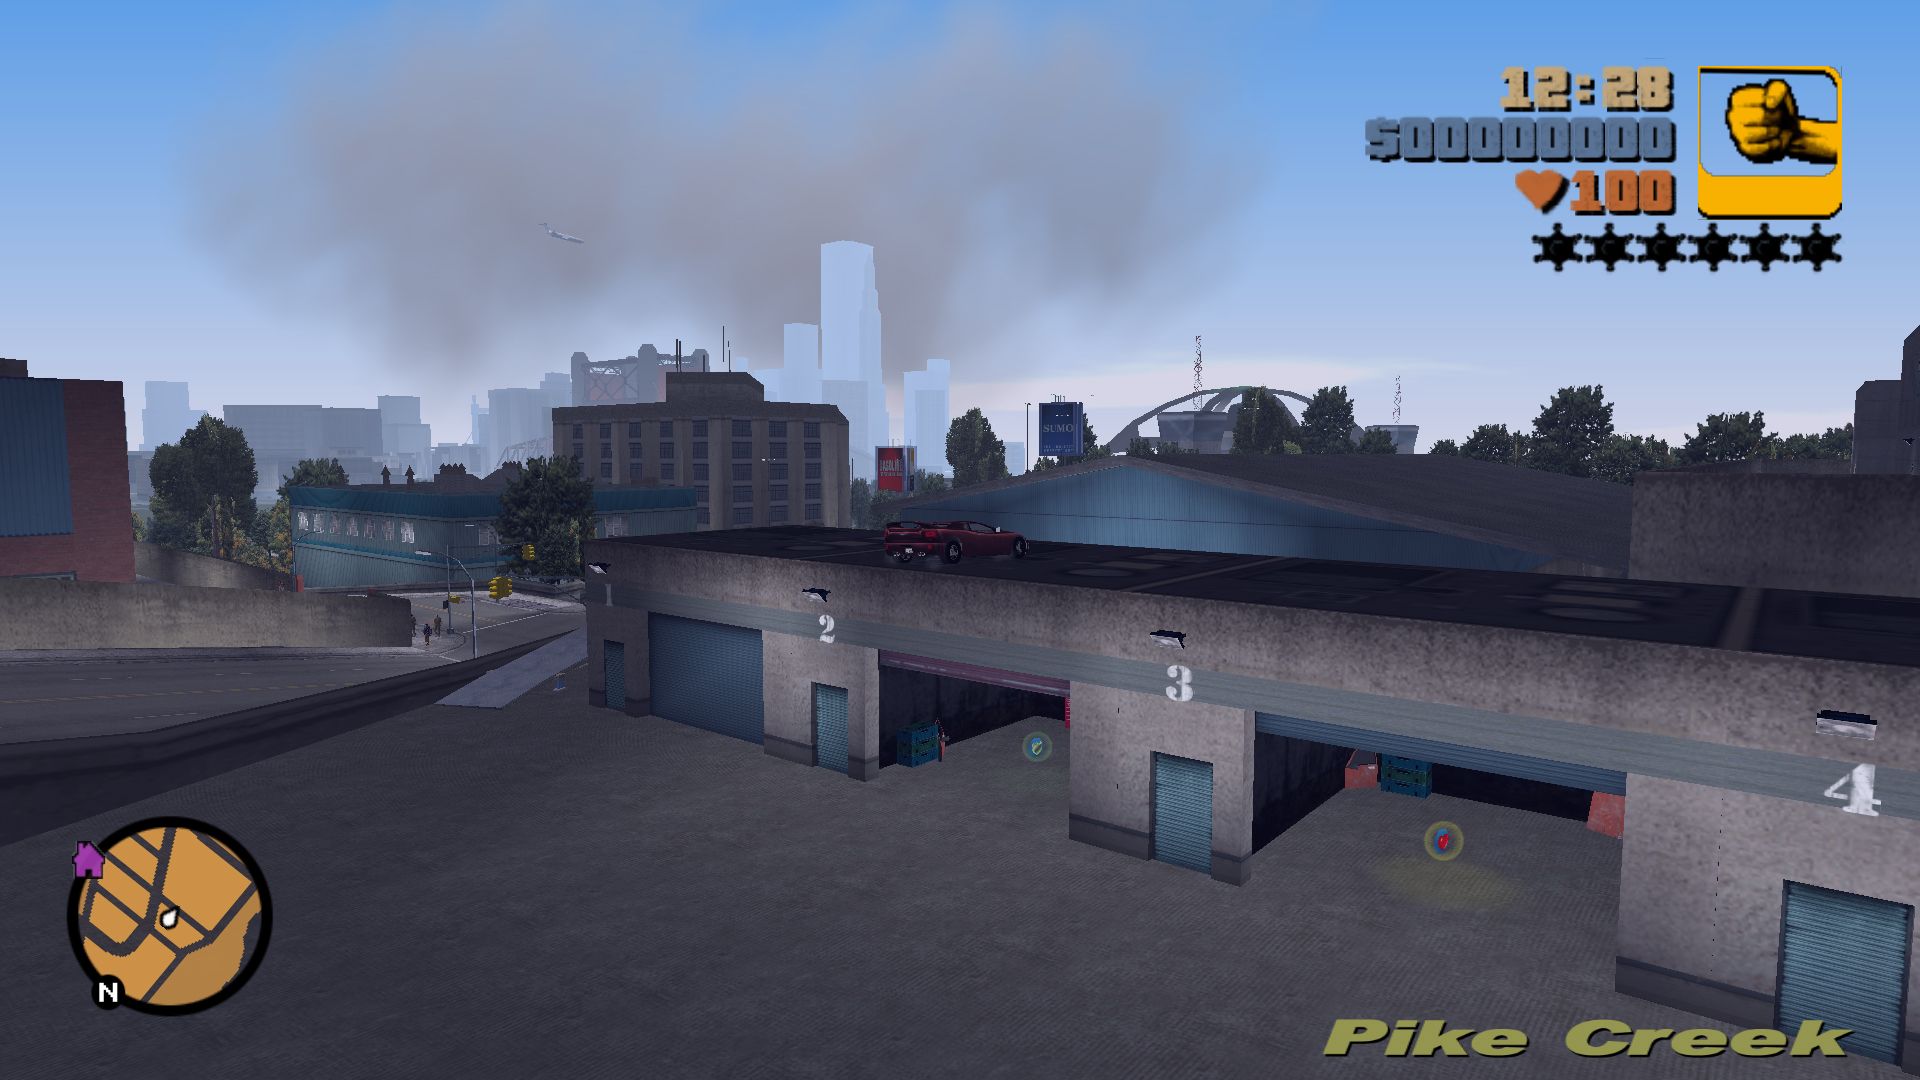
Jump onto the roof of the Police Station's south garages.
17
Jump Location
Landing Zone
Landing Zone
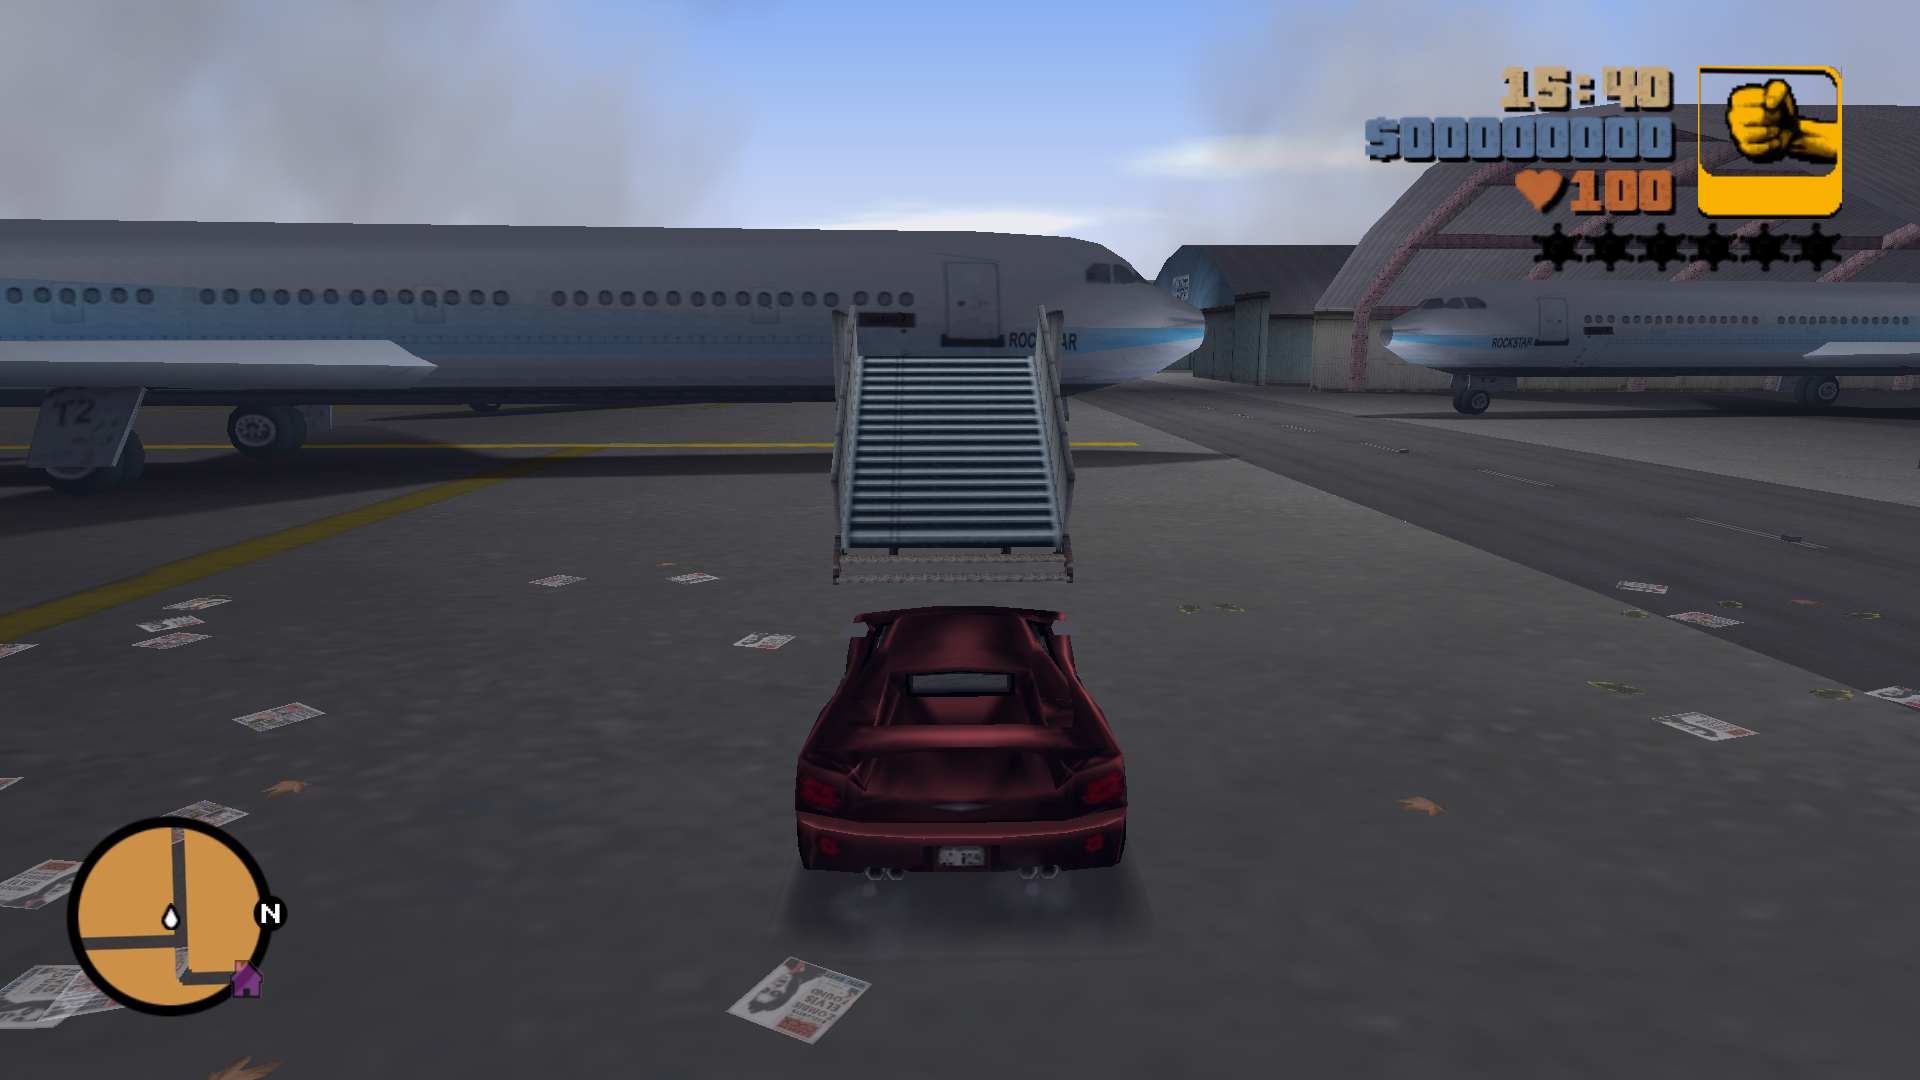
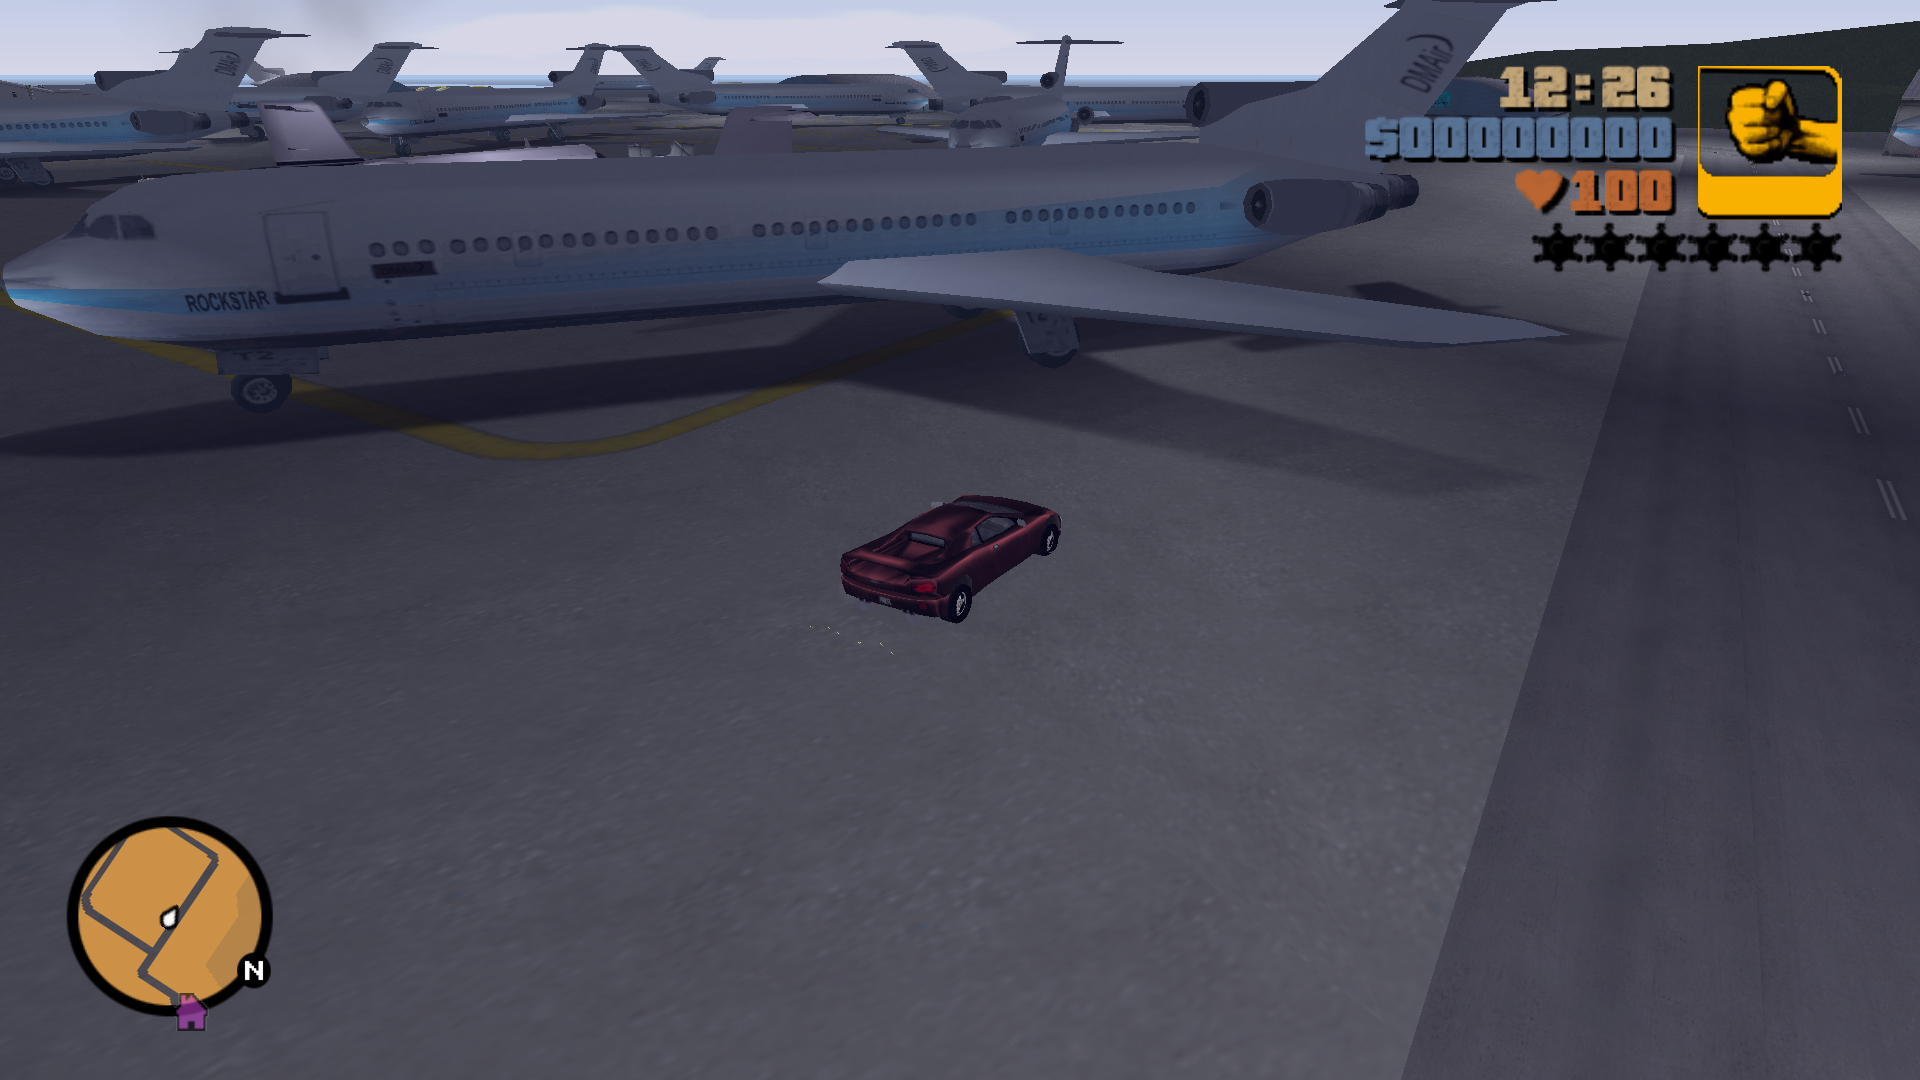
Jump over the plane.
18
Jump Location
Landing Zone
Landing Zone
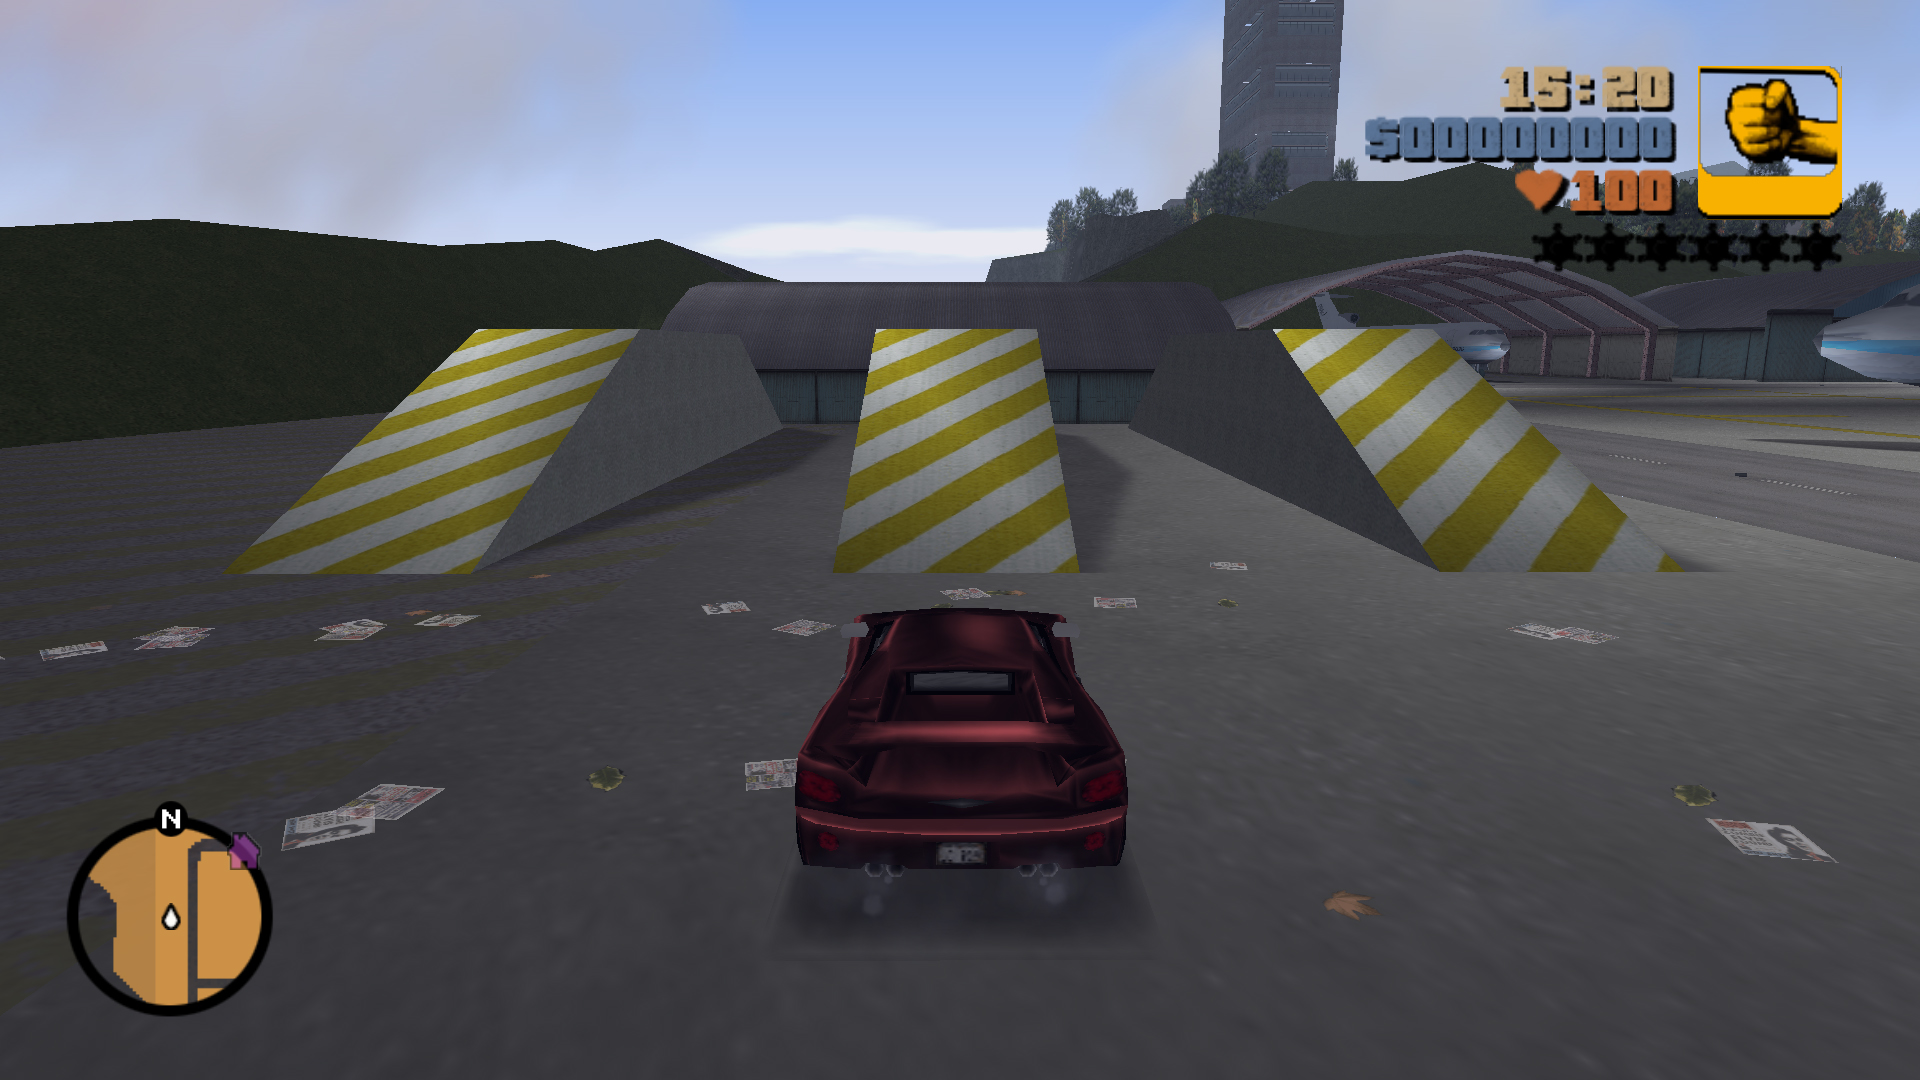
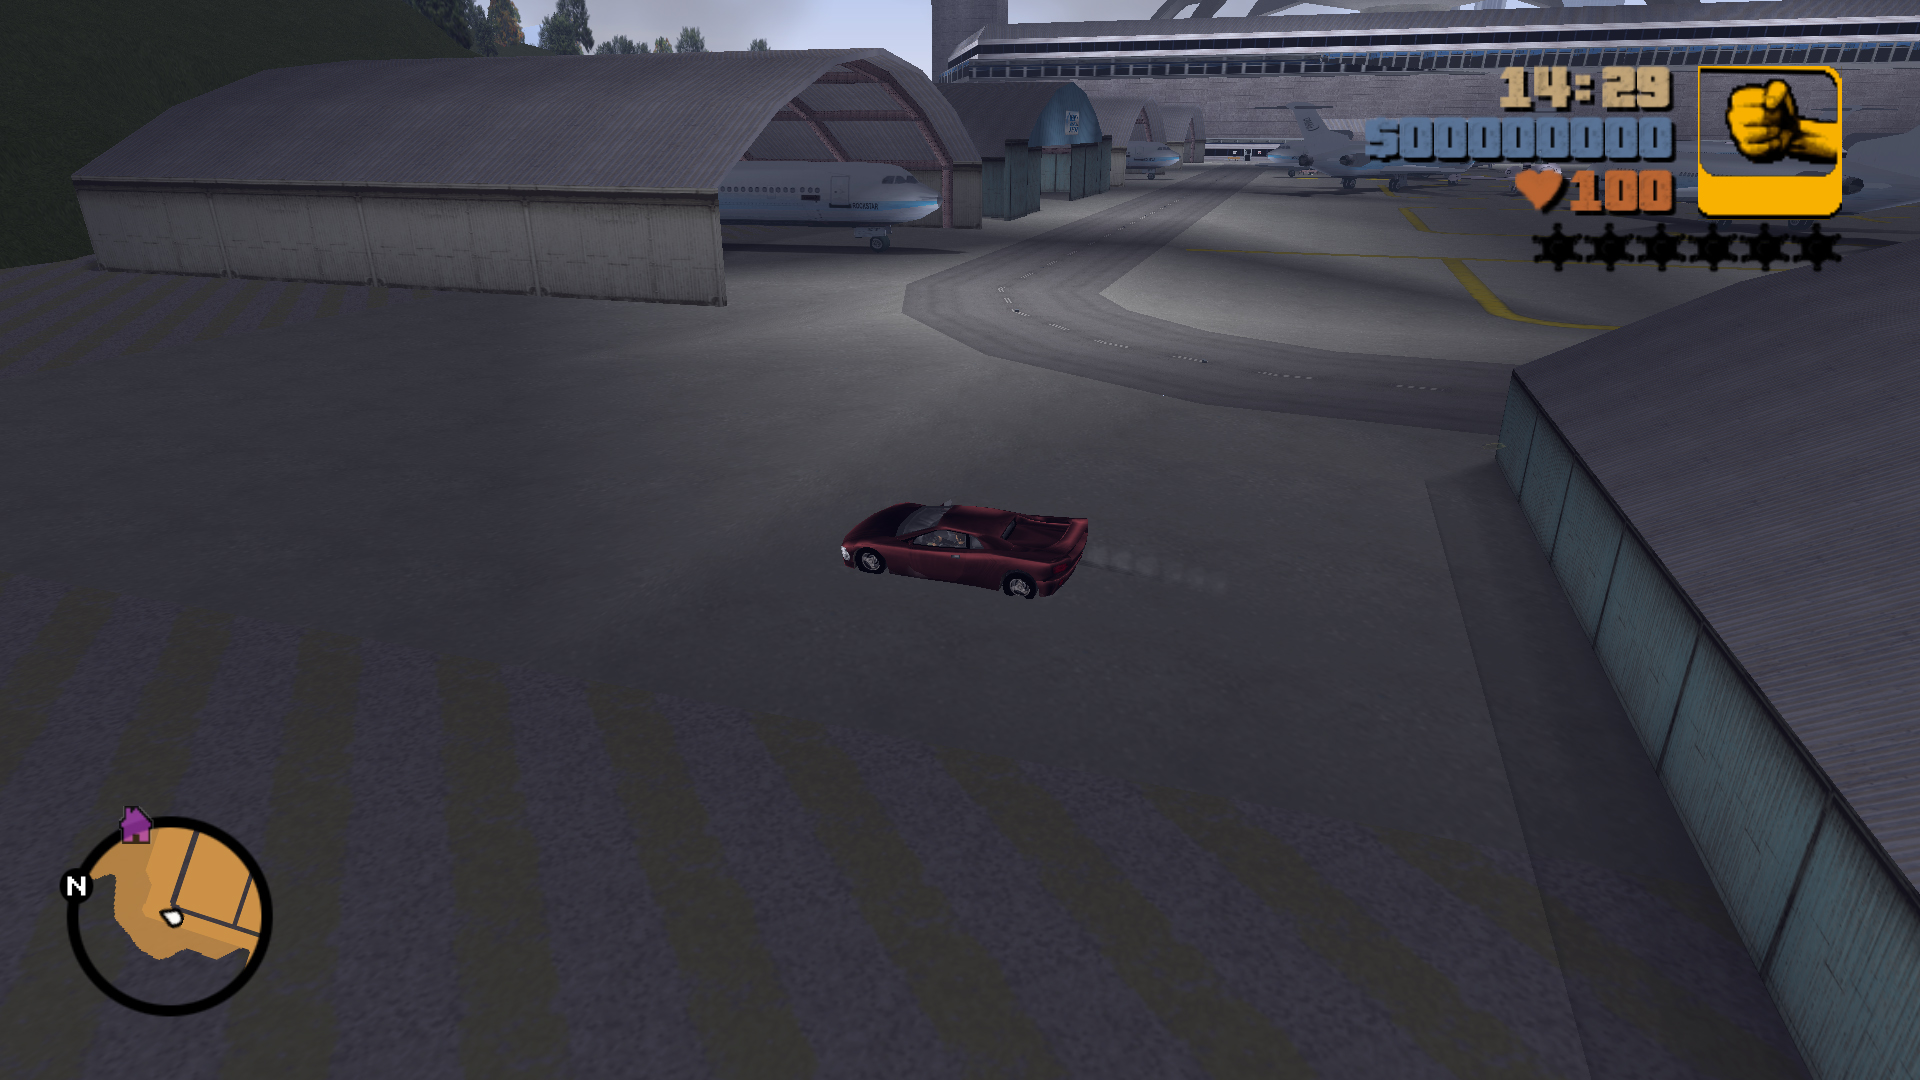
Jump over the hangar.
You'll probably need an Infernus which is the fastest car to complete this one.
19
Jump Location
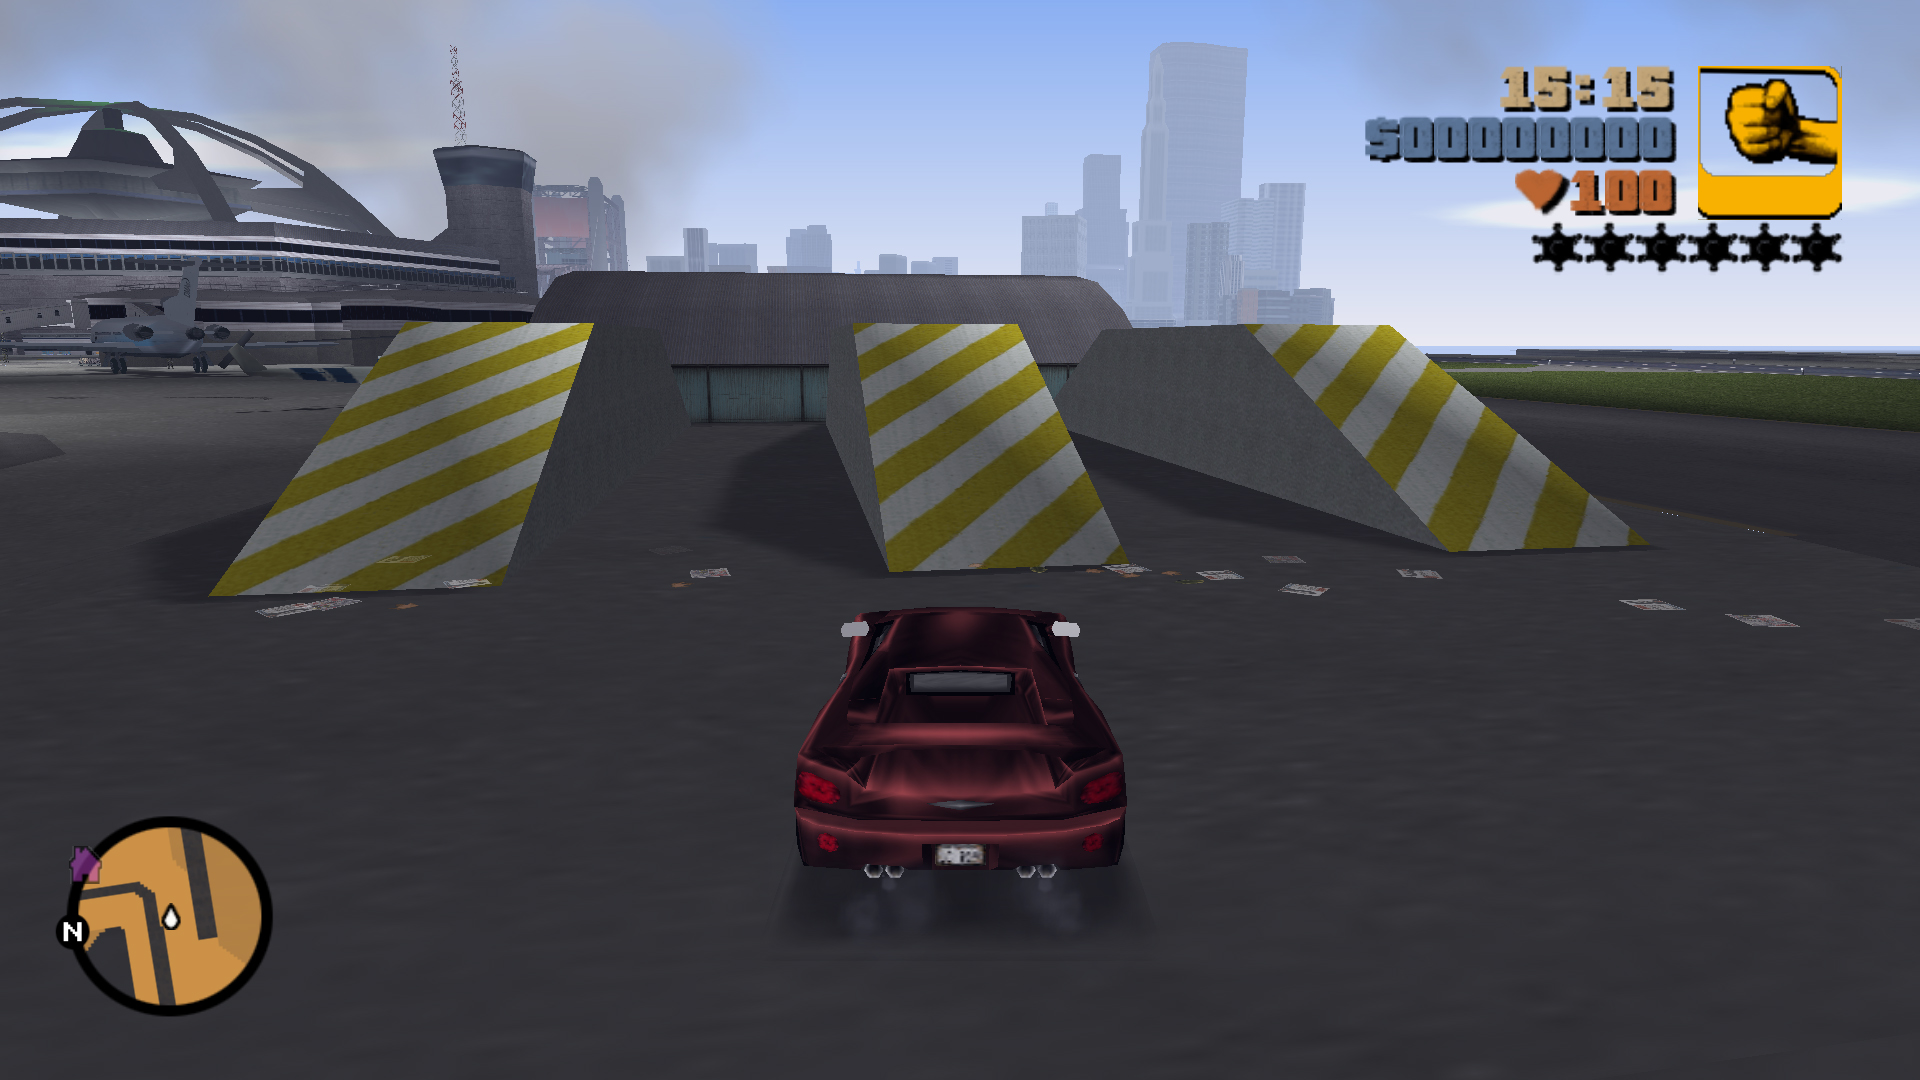
Landing Zone
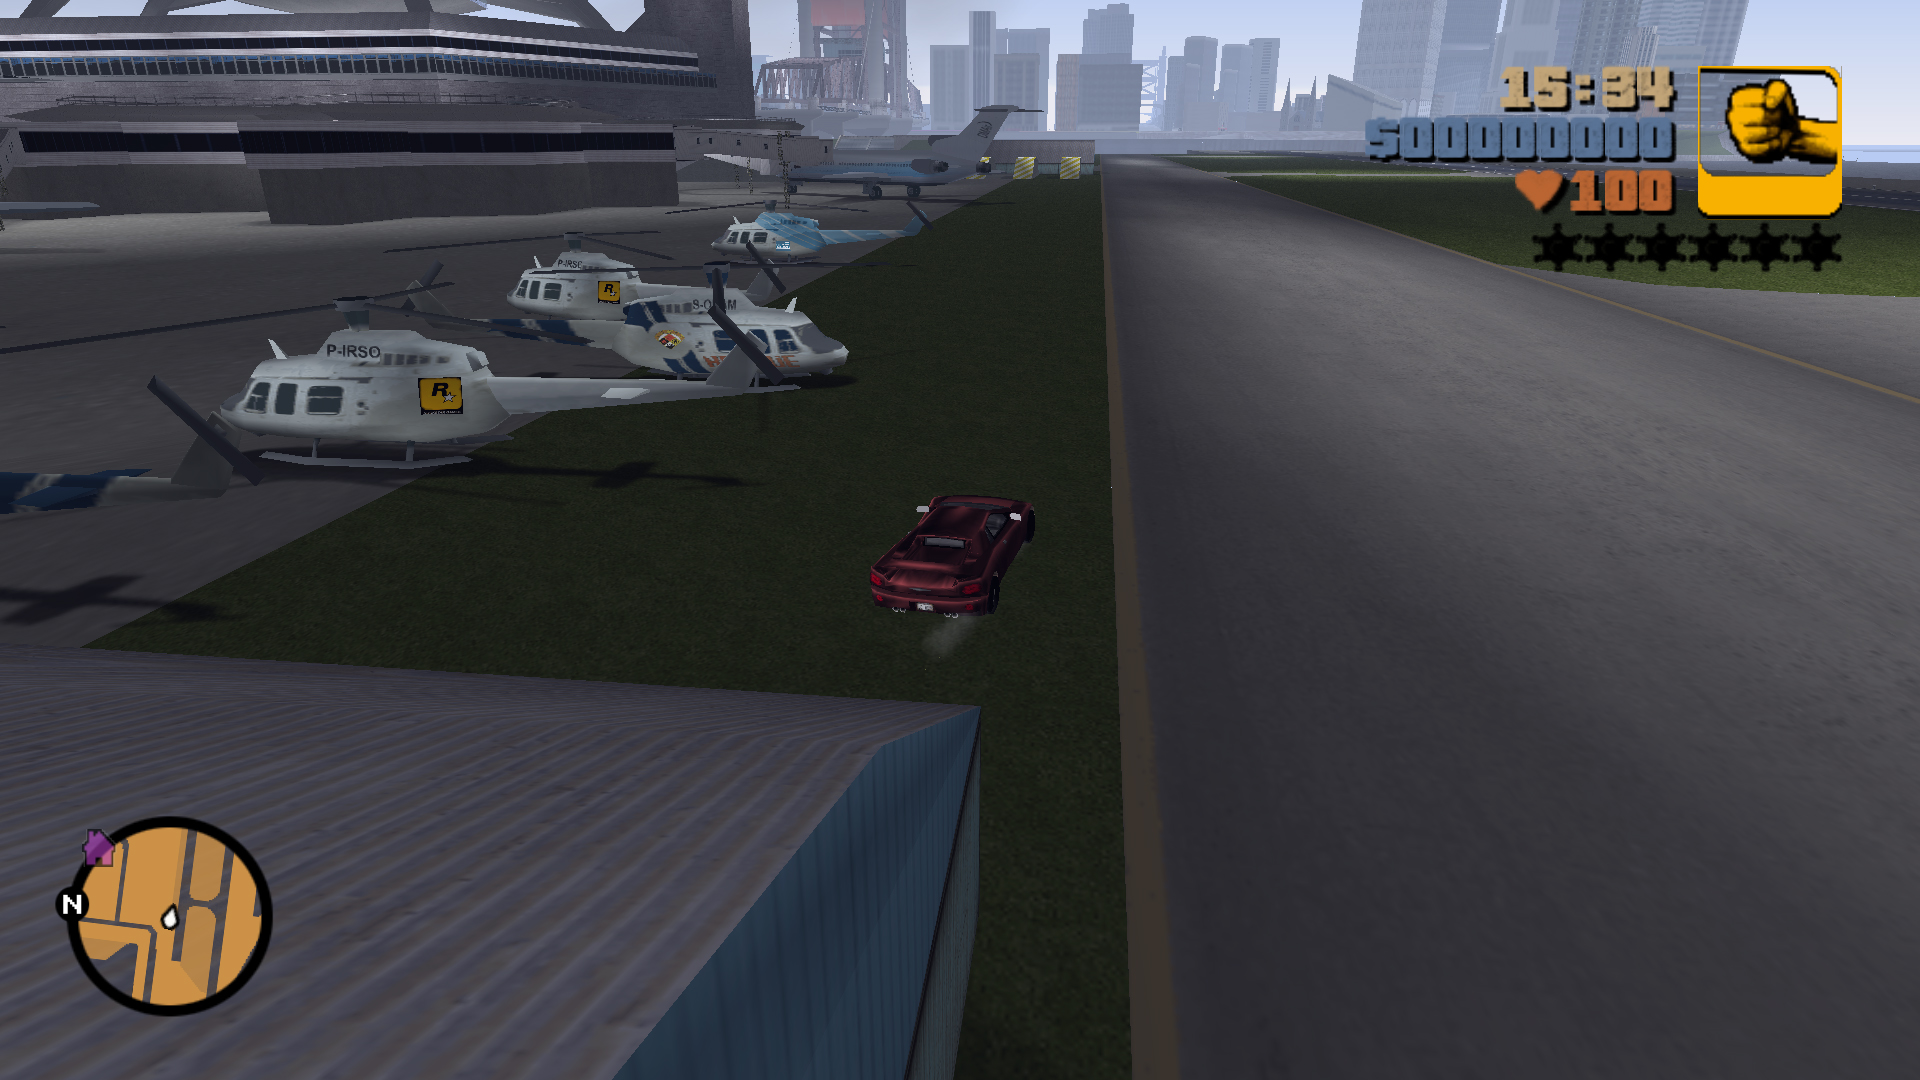
Landing Zone
Jump over the hangar.
Aim a bit to the right to avoid crashing into the helicopters.
20
Jump Location
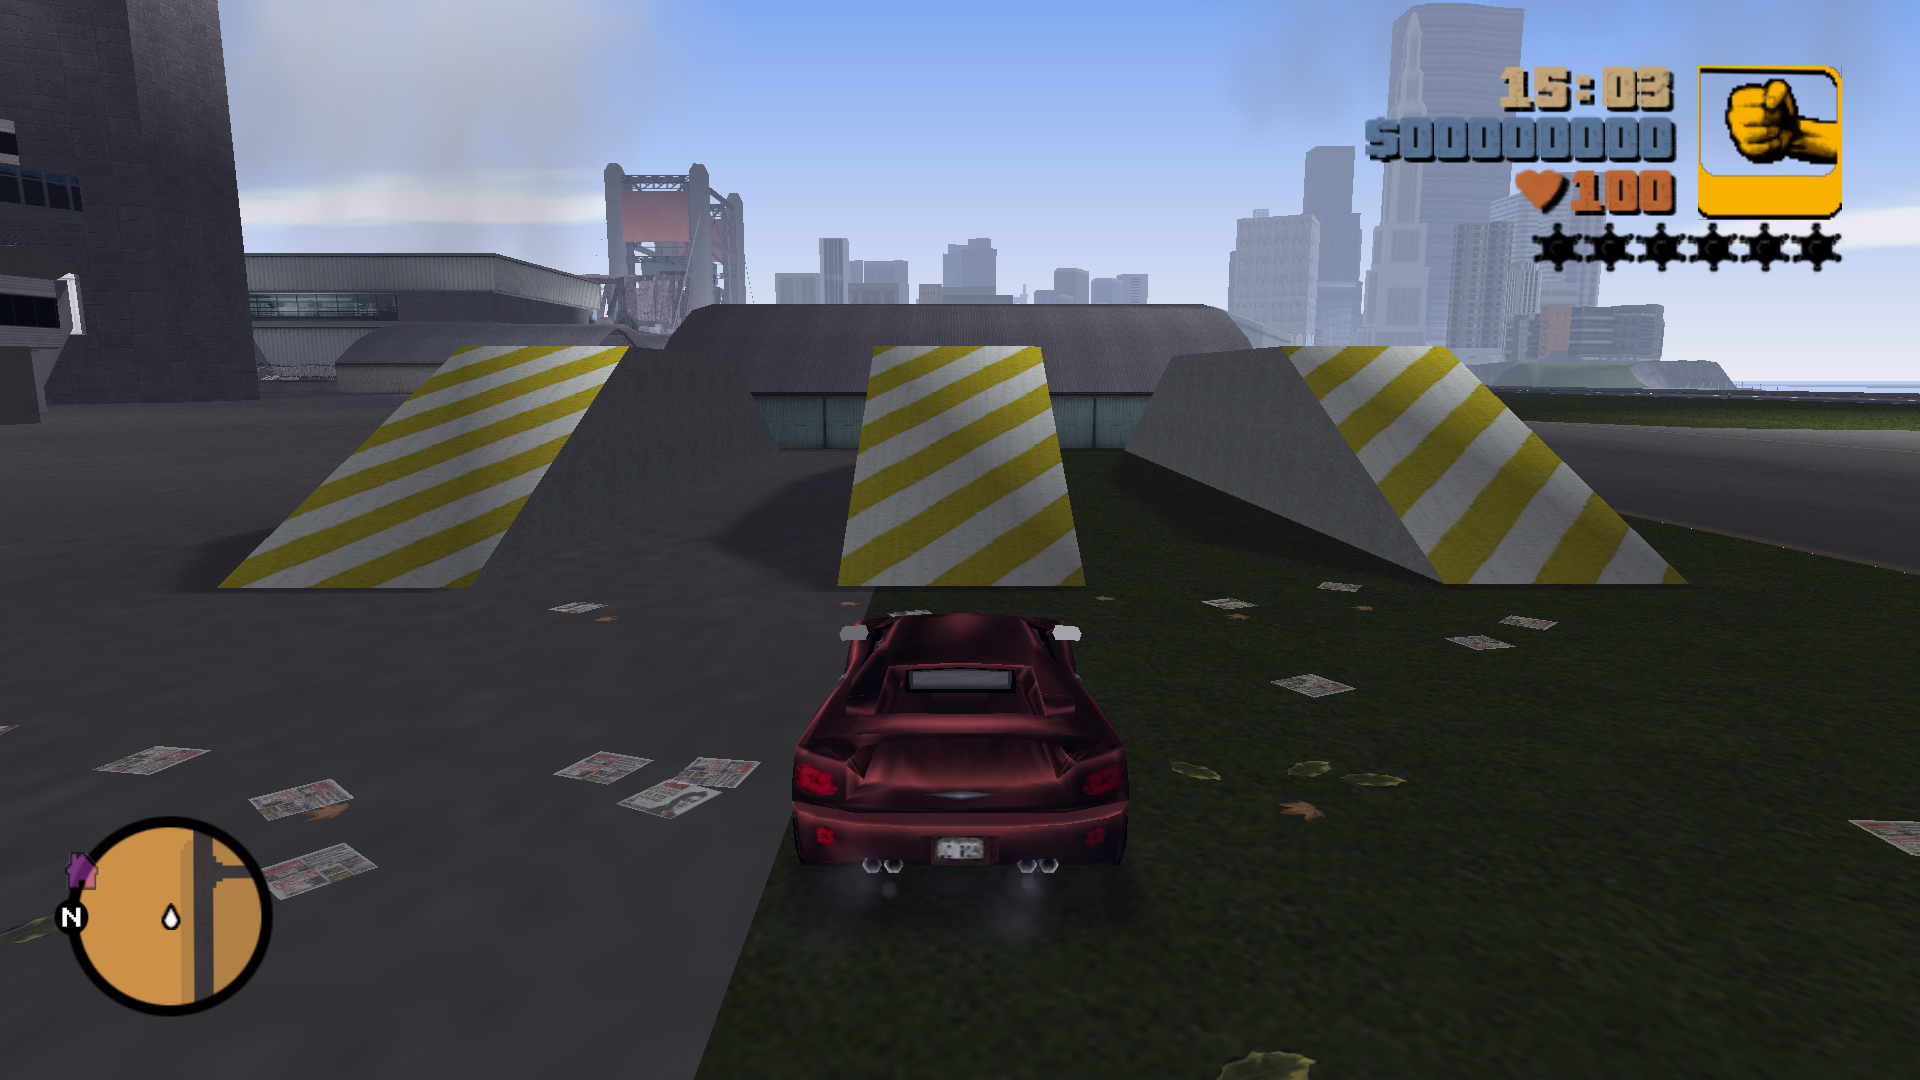
Landing Zone
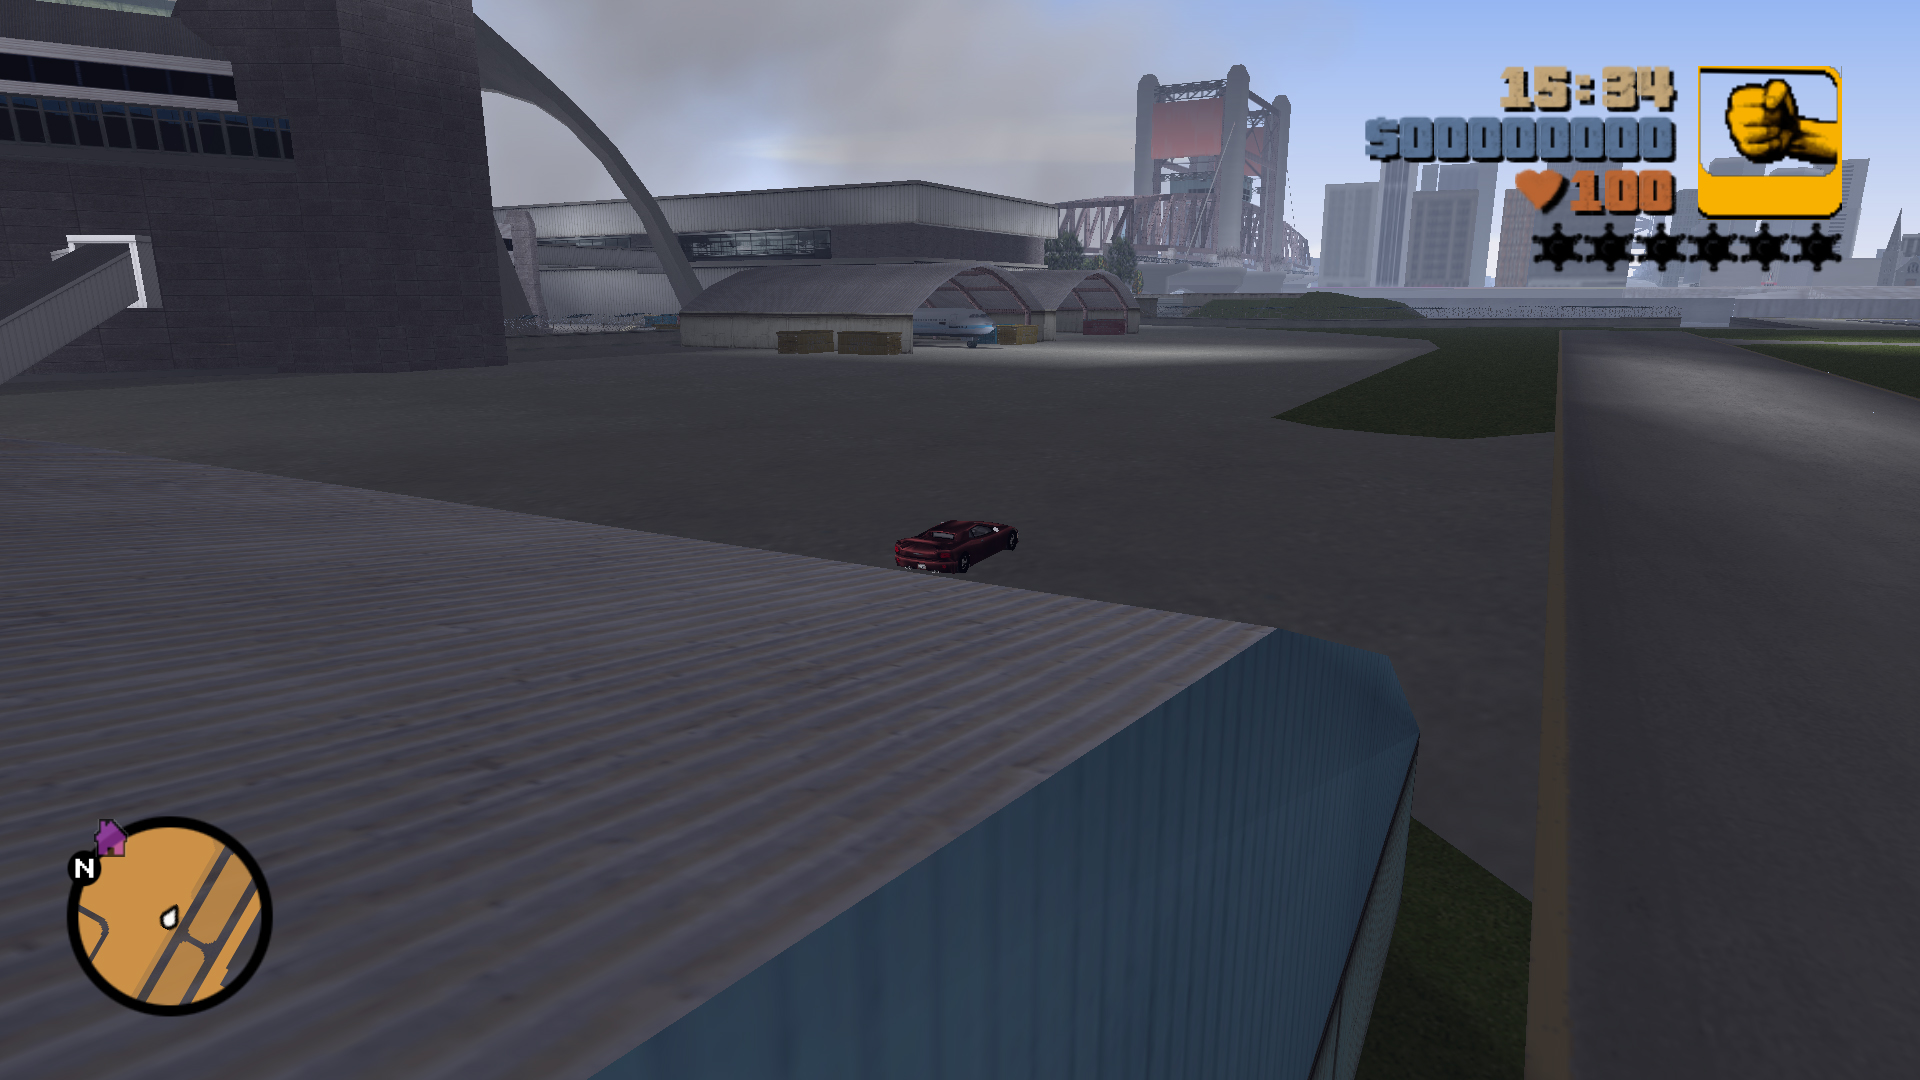
Landing Zone
Jump over the hangar.
Closing Thoughts
If you want to add these maps and info to the Wiki you have my permission! I would love to see these maps on the Wiki because it uses the original ingame map and it's in the same style of the game!
I started this because there wasn't a good HD map of the game and the Collectibles maps out there were a bit weird and the Pickups incomplete. And watching an entire video to get the collectibles spoils a bit of the exploration for me!
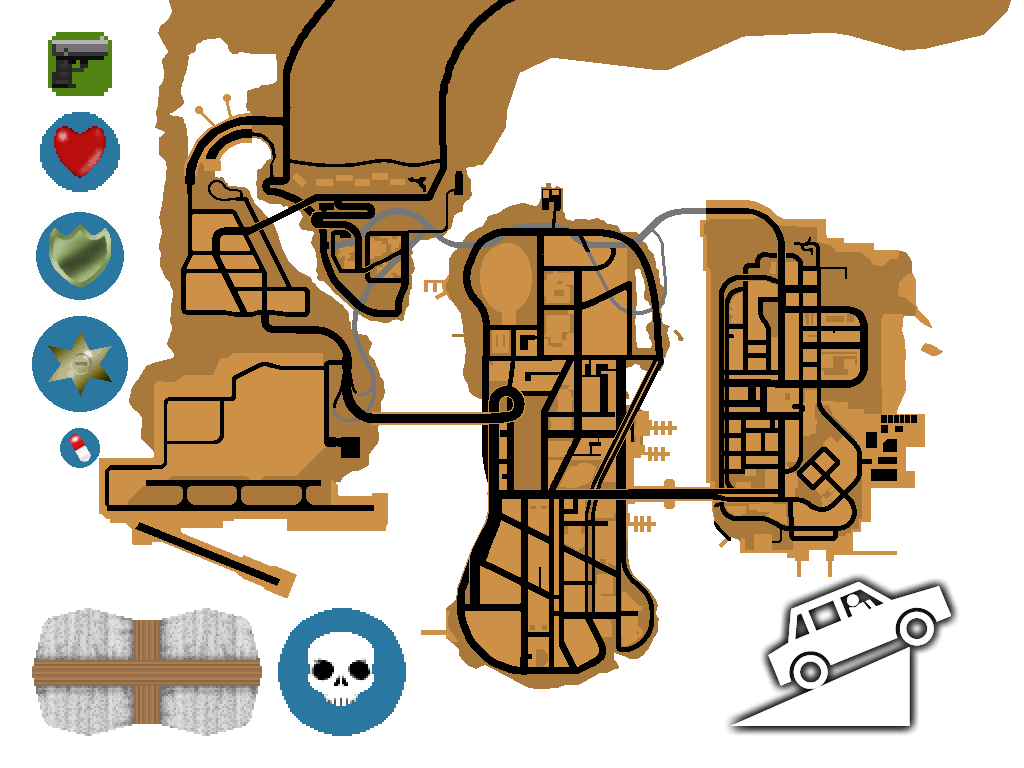
I started this because there wasn't a good HD map of the game and the Collectibles maps out there were a bit weird and the Pickups incomplete. And watching an entire video to get the collectibles spoils a bit of the exploration for me!
More Grand Theft Auto III guides
- Grand Theft Auto III - The Improved Classic★ 5 (965)34k views2k ♥5 minUpdated Jan 29, 2025
- GTA III Transparent Menu Fix (STEAM) - Windows 10 64Bit Video Tuto★ 5 (432)27k views276 ♥1 minBulgarianUpdated Jan 25, 2019
- Grand Theft Auto: III - Complete Fixes and HD Re-master★ 5 (315)26k views383 ♥1 minUpdated Oct 10, 2020
- Silent Patch, Controller Support and Widescreen Fix (III)★ 5 (249)19k views411 ♥6 minUpdated Jan 3, 2020
- Grand Theft Auto III - Enhanced Edition★ 5 (290)19k views360 ♥3 minUpdated Mar 10, 2021
- GTA III - Classic Enhanced★ 5 (308)19k views555 ♥1 minUpdated Jun 1, 2021



This guide was created by its original author on the Steam Community. Are you the author and want it removed? Request removal.