Helpful Notes, Lists, Tips, and Tricks in 2023 [WIP]
Unimportant Intro
Sup 👋, here's a bunch of notes I've taken while playing Wakfu in 2023
This guide is a Work-in-Progress, I'll add more to it the more stuff I write down 📝

This guide is a Work-in-Progress, I'll add more to it the more stuff I write down 📝
- This is a hella big guide that covers tons of topics, don't feel obliged to read it end to end. Just use the sidebar to find what it is specifically you're looking for
- Some of the larger portions of this guide will be periodically broken up into smaller sections/parts, because Steam has a maximum character limit for guide sections for some arbitrary reason 🤷♂️
|=|=| 👨🌾 𝗛𝗮𝗿𝘃𝗲𝘀𝘁𝗶𝗻𝗴 👩🌾 |=|=|
⟫ Harvesting Notes & Tips
- There are six total Harvesting Professions:FarmerFishermanHerbalistLumberjackMinerTrapper
- There are 30 harvestable materials per Harvesting Profession, not counting Trapper mobs, which are much more.
- A new harvestable material is unlocked every 5 levels of a Harvesting Profession, except for Trapper, which unlocks new materials every 10 levels.
- An Abyssal Profession Box (with 30 slots) is large enough to store a full collection of either base materials, seeds/cuttings, or rare materials.
- You get full XP for harvesting/creating items that are equal to or 10 levels less than your current Profession level, with XP values diminishing by 10% for the next 10 levels, until you receive no XP from the item when you're 21 levels above it.
- Harvesting Professions presumably cap at level 165, as the highest harvestable material listed in the official encyclopedia is level 145
- Crafting Professions presumably cap at level 170, as the highest Craft level listed is level 150.
- If you wish to keep every possible material in storage across all professions (not yet couting trapper), it would require 419 slots, or five haven bag tabs.
For each profession individually, it would require:Fisherman: 61 Slots
(30 Base Material, 30 Rare Material, + 1 Chefish)Miner: 74 Slots
(30 Base Material, 30 Rare Material, + 14 materials from Precious Stones)Farmer: 90 Slots
(30 Base Material, 30 Rare Material, 30 Seeds)Herbalist: 90 Slots
(30 Base Material, 30 Rare Material, 30 Seeds)Lumberjack: 104 Slots
(30 Base Material, 30 Rare Material, 30 Cuttings, + 9 Fruits (Hazelnut, Chestnut, Api, etc), + 4 Event Trees (Wakfu Tree & Mystical Sakura) & their cuttings, +1 Ancestral Wood)Trapper: WIP
3 Harvests per Mob Family Type (Living Harvest, Corpse Harvest, Seed Harvest), I'm currently counting all the Mob Families at the moment
Harvesting Tips- As a Trapper, harvest dead mob corpses for large XP gain. Harvesting a living mob gives +100 unmodified XP, while harvesting a dead mob gives +400 unmodified XP.
- With a 30% Clan Member bonus, it turns into 520 XP, which is over four times more XP than you get from live harvesting
- Make it a habit to harvest corpses after every battle you finish, and harvest and every random corpse you see in a public area that is within your Trapper level range.
- When triggering Cap'n Atcha, it is possible to intentionally give up the fight in order to choose a more desirable material, such as Wood, to get the +40 material end-of-battle bonus for.
- When harvesting a material and triggering Atcha, give up the fight (press delete then hit OK), then start harvesting the resources you want until it triggers again, then solve the puzzle. This instantly gives you 40 of your desired harvested material, so you don't have to keep digging up plants or chopping down trees in order to get your desired resource.
- I recommend doing this for all plantable materials, and especially for trees.
- As a Farmer/Herbalist, first harvest the seed of the plant, then harvest the plant itself, so you get +200 unmodified XP, as opposed to only +100 XP for only just harvesting the plant.
- This doesn't apply to chopping trees, you get +200 XP for chopping a tree.
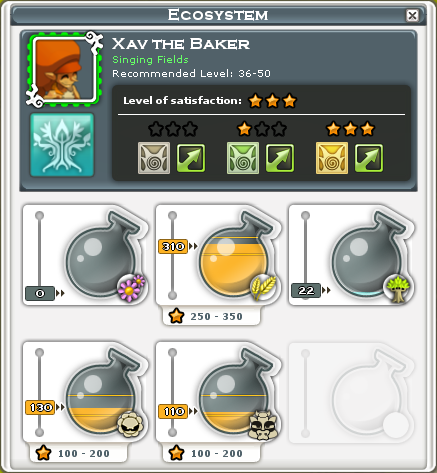
- Make sure all of your area's Clan Member's wishes are satisfied (check the top right corner) so you get a +30% XP bonus on harvesting and planting.
- Open the Ecosystem window (hotkey W) to see what the clan member desires in the area (marked by a star ⭐) in order to give an XP boost.
- No wishes fulfilled gives -10% XP, partial wishes fulfilled gives +10% XP, and all wishes fulfilled gives +30% XP.
- Follow the principle of 'leave no trace', or leave things the way you would like to find them. If you harvest from a public material, plant something back in its place. You get additional XP for replanting, anyway.
- Don't go around harvesting everything and erasing all of the materials off of the map because it's quick and easy. Karma will find you and molliwhop you into next week. As far as I see it, the bigger your stasis gauge is (which goes up the more you take and don't replace), the bigger an ♥♥♥♥♥♥♥ you are 😂





~~~ ⚒️ 𝘏𝘢𝘳𝘷𝘦𝘴𝘵𝘪𝘯𝘨 𝘛𝘰𝘰𝘭𝘴 ⚒️~~~
Harvesting Tools
- There are 6 total Harvesting Tools, one for each Harvesting Profession: Scythe for FarmerFishing Pole for FishermanBillhook for HerbalistAxe for LumberjackPick for MinerCutlass for Trapper


- There are three levels of tool, with each new level granting an additional +10% harvesting quantity bonus.
- Level 1 - gives +10% harvesting quantity, but needs Harvesting Level to be at least level 15.
- Level 2 - gives +20% harvesting quantity, but needs Harvesting Level to be at least level 45.
- Level 3 - gives +30% harvesting quantity, but needs Harvesting Level to be at least level 80.
- Level 1 - gives +10% harvesting quantity, but needs Harvesting Level to be at least level 15.

- The total number of Mimik Slobber needed to craft a tool is always the same.
- Tier 1 - 4 Mimik Slobber
- Tier 2 - 15 Mimik Slobber
- Tier 3 - 50 Mimik Slobber
- Tier 1 - 4 Mimik Slobber
- The 'Total Raw Materials Needed' section refers to the materials needed to make one tool of that tier
• Axe 🪓 (Lumberjack)
Crafted at Sawmill
~~~~~~~~~~~~~~~~~~~~~~~~~~~~~~~~~~~~~~~~~~~~~~~~~~~~~
Level 1 Axe
(Wooden Hatchet)
(Wooden Hatchet)
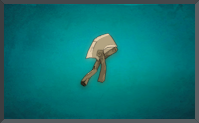
Crafting Recipe:

3x Basic Planks

4x Mimik Slobber
Total Raw Materials Needed:

15x Apiwood

15x Chestnut Wood
4x Mimik Slobber
~~~~~~~~~~~~~~~~~~~~~~~~~~~~~~~~~~~~~~~~~~~~~~~~~~~~~
Level 2 Axe
(Lumberjack Hatchet)
(Lumberjack Hatchet)
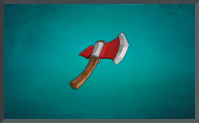
Crafting Recipe:

7x Fragile Planks

7x Imperfect Planks

3x Wooden Hatchets
3x Mimik Slobber
Total Raw Materials Needed:

35x Citronana Wood

35x Weeping Willow Wood

35x Boabob Wood

35x Birch Wood
45x Apiwood
45x Chestnut Wood
15x Mimik Slobber
~~~~~~~~~~~~~~~~~~~~~~~~~~~~~~~~~~~~~~~~~~~~~~~~~~~~~
Level 3 Axe
(Toomoowook)
(Toomoowook)
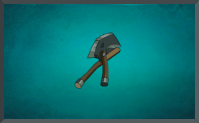
Crafting Recipe:

13x Solid Planks

13x Raw Planks

3x Lumberjack Hatchets
5x Mimik Slobber
Total Raw Materials Needed:

65x Frozen Wood

65x Climbing Tree

65x Tadbole Wood

65x Hornbeam Wood
105x Citronana Wood
105x Weeping Willow Wood
105x Boabob Wood
105x Birch Wood
135x Apiwood
135x Chestnut Wood
50x Mimik Slobber
🟦 🟦 🟦 🟦 🟦 🟦 🟦 🟦 🟦 🟦 🟦 🟦 🟦 🟦 🟦 🟦 🟦 🟦 🟦
• Billhook 🌱 (Herbalist)
Crafted at Distillery

~~~~~~~~~~~~~~~~~~~~~~~~~~~~~~~~~~~~~~~~~~~~~~~~~~~~~
• Cutlass 🐾 (Trapper)
Crafted at Tanning Rack
~~~~~~~~~~~~~~~~~~~~~~~~~~~~~~~~~~~~~~~~~~~~~~~~~~~~~
• Fishing Rod🎣 (Fisherman)
Crafted at
Fisherman's Workshop
Fisherman's Workshop

~~~~~~~~~~~~~~~~~~~~~~~~~~~~~~~~~~~~~~~~~~~~~~~~~~~~~
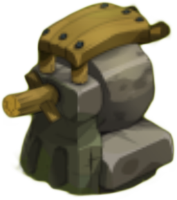
• Scythe 🌾 (Farmer)
Crafted at Millstone
~~~~~~~~~~~~~~~~~~~~~~~~~~~~~~~~~~~~~~~~~~~~~~~~~~~~~
Level 1 Scythe
(Scythe)
(Scythe)
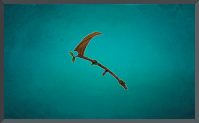
Crafting Recipe:

10x Basic Flour
4x Mimik Slobber
Total Raw Materials Needed:

50x Barley Straw

50x Tuberbulb
4x Mimik Slobber
~~~~~~~~~~~~~~~~~~~~~~~~~~~~~~~~~~~~~~~~~~~~~~~~~~~~~
Level 2 Scythe
(Broocefore Scythe)
(Broocefore Scythe)
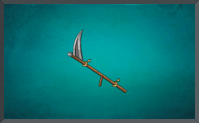
Crafting Recipe:

7x Fragile Flour

7x Imperfect Flour

3x Scythes
3x Mimik Slobber
Total Raw Materials Needed:

35x Melon

35x Oat Straw

35x Babbage

35x Cawwot
150x Barley Straw
150x Tuberbulb
15x Mimik Slobber
~~~~~~~~~~~~~~~~~~~~~~~~~~~~~~~~~~~~~~~~~~~~~~~~~~~~~
Level 3 Scythe
(Psilo Scythe)
(Psilo Scythe)
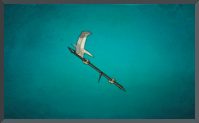
Crafting Recipe:

13x Solid Flour

13x Raw Flour

3x Broocefore Scythes
5x Mimik Slobber
Total Raw Materials Needed:

65x Corn

65x Watermelon

65x Golden Makafe

65x Vanilla Rice Grain
105x Melon
105x Oat Straw
105x Babbage
105x Cawwot
450x Barley Straw
450x Tuberbulb
50x Mimik Slobber
🟦 🟦 🟦 🟦 🟦 🟦 🟦 🟦 🟦 🟦 🟦 🟦 🟦 🟦 🟦 🟦 🟦 🟦 🟦
• Pick ⛏️ (Miner)
Crafted at Polisher

~~~~~~~~~~~~~~~~~~~~~~~~~~~~~~~~~~~~~~~~~~~~~~~~~~~~~
Level 1 Pick
(Pick)
(Pick)
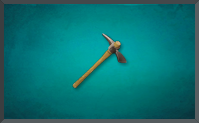
Crafting Recipe:

30x Finest Sea Salt
4x Mimik Slobber
~~~~~~~~~~~~~~~~~~~~~~~~~~~~~~~~~~~~~~~~~~~~~~~~~~~~~
Level 2 Pick
(Goldigger's Pick)
(Goldigger's Pick)
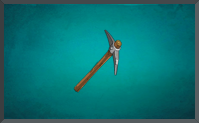
Crafting Recipe:

7x Basic Steel

7x Coarse Steel

3x Picks
3x Mimik Slobber
Total Raw Materials Needed:

35x Classic Carbon

35x Copper Ore

35x Iron Ore
125x Finest Sea Salt
15x Mimik Slobber
~~~~~~~~~~~~~~~~~~~~~~~~~~~~~~~~~~~~~~~~~~~~~~~~~~~~~
Level 3 Pick
(The Right Pick)
(The Right Pick)
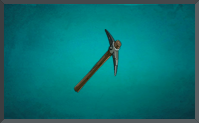
Crafting Recipe:

5x Polished Agate

3x Polished Emerald

3x Goldigger's Picks
5x Mimik Slobber
Total Raw Materials Needed:

15x Agate Stone

9x Emerald Stone

16x Bucket o' Water
175x Classic Carbon
175x Copper Ore
175x Iron Ore
375x Finest Sea Salt
50x Mimik Slobber
~~~ 📦 𝘗𝘳𝘰𝘧𝘦𝘴𝘴𝘪𝘰𝘯 𝘉𝘰𝘹𝘦𝘴 📦 ~~~
- Any size of Profession Box can be equipped on any level character, they are not level-locked to character level like bags are. They do however need their given profession to be a certain level in order to equip it.
- There are five tiers of Profession Boxes available:
- No Prefix
- Has 10 slots; craftable at Handyman level 10
- Ample
- Has 15 slots; craftable at Handyman level 25
- Voluminous
- Has 20 slots; craftable at Handyman level 35
- Gigantic
- Has 25 slots; craftable at Handyman level 45
- Abyssal
- Has 30 slots; craftable at Handyman level 55
- No Prefix
- Enchantment Boxes won't be included in this list, since they've been functionally useless ever since enchanting powder was changed to shards in an update.
• Farmer Box 🌾📦

Farmer Box:
• Fisherman Box 🎣📦

Fisherman Box:
• Herbalist Box 🌱📦

Herbalist Box:
• Lumberjack Box 🌲📦

Lumberjack Box:
• Miner Box ⛏️📦

Miner Box:
• Trapper Box 🐾📦

Trapper Box:
🐾 𝘔𝘰𝘣 𝘏𝘢𝘳𝘷𝘦𝘴𝘵𝘴 & 𝘉𝘢𝘵𝘵𝘭𝘦 𝘋𝘳𝘰𝘱𝘴 🦴
[I will add more to this list the further I improve my Trapper Level]
- There are five total materials a mob family can produce:
Battle Drops, Rare Battle Drops, Live Harvest materials, Corpse Harvest materials, and Seeds.- Seed harvests won't be included in this list, as it's pretty obvious what they provide, and there's no reason to store monster seeds (mobs spawn automatically, and seeds can just be extracted from the live mobs as needed).
- You don't need a matching trapper level to get battle drops, those drops automatically have a chance to happen every time you fight a mob
- Rare drop materials have an unmodified 1% drop rate per mob fought.
(e.g. fighting six mobs gives a 6% unmodified chance for a rare material drop (1% * 6 = 6%))
This drop rate can be improved with prospecting bonuses
• Mob & Battle Materials [Level 0 - 10]
===========================================================================
Can harvest from:













===========================================================================
Can harvest from:





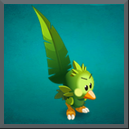


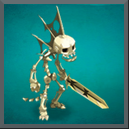
===========================================================================
Trapper Level 0
Can harvest from:
Bow Meows
Battle Drop:
HummusRare Battle Drop:
Bow Meow ToothLive Harvest:
Bow Meow HairsCorpse Harvest:
Bow MeowcassGobballs
Battle Drop:
Gobbal LeatherRare Battle Drop:
Gobbal HornLive Harvest:
Gobball WoolCorpse Harvest:
Gobball LegTofus
Battle Drop:
Tofu PheromonesRare Battle Drop:
Tofu BloodLive Harvest:
Tofu FeatherCorpse Harvest:
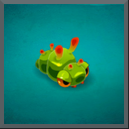
Tofu GizzardsLarvae
Battle Drop:
Larva SkinRare Battle Drop:
Nutellarva SkinLive Harvest:
Larva MucusCorpse Harvest:
Larva Brains===========================================================================
Trapper Level 10
Can harvest from:
Treechnids
Battle Drop:
BranchilegRare Battle Drop:
Treechnee SapLive Harvest:
Treechnee BarkskinCorpse Harvest:
Treechnid LegPiwis
Battle Drop:
Piwi BeakRare Battle Drop:
Googoo FeatherLive Harvest:
Piwi FeatherCorpse Harvest:
Piwi EggRaised Skeletons
Battle Drop:
Bone PowderRare Battle Drop:
Tofire SkinSkeletons can only have
seeds harvested from them
seeds harvested from them
===========================================================================
• Mob & Battle Materials [Level 20 - WIP]
Trapper Level 20

In Amakna:
Can harvest from:
Cracklers
Battle Drop:
Crackler's Gold Tooth
Rare Battle Drop:
Crackly Diamond
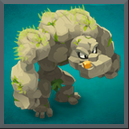
Live Harvest:
Grassy Moss
Corpse Harvest:
Crackler Heart
Field Plants
Battle Drop:
Country Scalp
Rare Battle Drop:
Crushed Dandelion

Live Harvest:
Country Slobber
Corpse Harvest:
Country Root
Moogrrs
Battle Drop:
Bell
Rare Battle Drop:
Moogrrudder

Live Harvest:
Dried Dung
Corpse Harvest:
Moogrr Filet
In Ereboria:

Pirates
Deathburns
Trapper Level 30
Stubbyobs
⟫ Harvesting Miscellaneous
- Infinite Barley
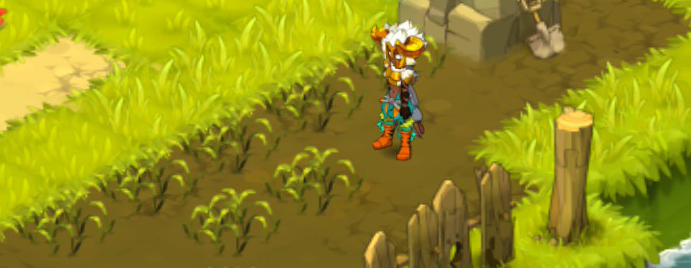
- The first room of the Surebery Fields (field plant dungeon) has 20 Barley plants growing when you first enter. After every fight, head back to the first room and harvest the plants, they'll replant themselves immediately, plus you get harvesting XP for doing it as well if you're within its level range.
- You don't even have to fight the first wave of plants if you don't want to, just enter the dungeon and chill/alt-tab until all the plants are grown, then harvest them at your leisure.
|=|=| 🛠️ 𝗖𝗿𝗮𝗳𝘁𝗶𝗻𝗴 🛠️|=|=|
⟫ Crafting Notes & Tips
⟫ Crafting Notes & Tips
- There are eight total Crafting Professions:
Armorer
Baker
Chef
Handyman
Jeweler
Leather Dealer
Tailor
Weapons Master


Kama Minting

Kama Minting recipes increase 90 kamas for every 15 miner levels earned.
When upgrading recipes, the old ore is used twice, while the new ore is used once.
E.g: 150 Kamas is 2 Iron, 1 Copper
240 Kamas is 2 Copper, 1 Flint
330 Kamas is 2 Flint, 1 Zinc, etc.
Useful Cook Recipes
3x Osamodas Powder (Heals Pet & Mount HP) - 5x Water, 1x Coarse Tiramisoup (5x Breaded Fish, 5x Bow Meow Fish)Raid Boole (Removes De Darm, a WP and HP Debuff received when Resurrecting) - 5x Water, 1x Basic Tiramisoup (5x Sturgeon, 5x Anchovies)
KenKo (Revives Dead Teammates) - 5x Water, 1x Basic Spice (5x Sturgeon, 5x Anchovies)
⟫ Crafting Components, their Professions, & their Crafting Stations
(ignore the table borders here, Steam is supposed to have a no borders feature, but it's not working at the moment)


- Crafting Manufactured Components that use Harvester Professions give XP directly to the profession (e.g. Essence gives Trapper XP, Planks give Lumberjack XP, etc)
Wood used for:
Plank (Lumberjack @ Sawmill)
Handle (Weapons Master @ Sword Pedestal)
Bracket (Handyman @ Lathe)
Fish used for:
Tiramisoup (Fisherman @ Table w/ Fishing Rods)
Spice (Chef @ Stove)
Plants used for:
String (Herbalist @ Distillery)
Oil (Baker @ Oven)
Crops used for:
Fiber (Tailor @ Mannequin)
Flour (Farmer @ Millstone)
Ore used for:
Plates (Armorer @ Anvil)
Gems (Jeweler @ Setter)
Steel (Miner @ Polisher Table)
Mob battle drops used for:
Leather (Leather Dealer @ Brown Work Table)
Mob trapper harvests used for:
Essence (Trapper @ Tanning Rack)
⟫ Crafting Component Ranking Names
Tier
01
02
03
04
05
06
07
08
09
10
11
12
13
14
15
Name
Coarse
Basic
Imperfect
Fragile
Rustic
Raw
Solid
Durable
Refined
Precious
Exquisite
Mystical
Eternal
Divine
Infernal
Player Level
6-20
21-35
36-50
51-65
66-80
81-95
96-110
111-125
126-140
141-155
156-170
171-185
186-200
201-215
216-230
Crafting Level
0
10
20
30
40
50
60
70
80
90
100
110
120
130
140
- Every new tier of manufactured component uses the next two levels of raw materials
- (e.g. Coarse Plank uses Ash Wood (Lumberjack Level 0) and Hazel Wood (Level 5), while Basic Plank uses Birch (Level 10) and Apiwood (Level 15))
- Every new tier of component progresses 10 levels of Harvesting/Crafting Level, and covers items within the next 15 levels of Player Level.
- This also includes Souper-Glou. You get Coarse Glou from level 6-20 zones (e.g. Astrub Sewers), Basic Glou from 21-35 zones (Astrub Mountains), Imperfect Glou from 36-50 zones (Amakna), etc.
•-•-• 🛠️ 𝗖𝗿𝗮𝗳𝘁𝗶𝗻𝗴: 𝐑𝐞𝐜𝐢𝐩𝐞𝐬 📃 •-•-•
~~~ 🧱 𝘊𝘳𝘢𝘧𝘵𝘪𝘯𝘨 𝘚𝘵𝘢𝘵𝘪𝘰𝘯𝘴 🧱 ~~~
- There are 14 total Crafting Stations, one for each crafting and harvesting profession.
- All crafting stations require rare materials to make.
- Rare materials are marked with a ⭐
- If you're not naturally acquiring rare materials through your harvesting, I recommend minting kamas and then buying your materials off of the player market, if they're being sold for a reasonable/affordable price.
- Rare materials are marked with a ⭐
- Crafting Stations require different levels of Handyman in order to be manufactured:
- Small Crafting Stations require Handyman level 10, and can craft items up to level 40
- Medium Crafting Stations require Handyman level 40, and can craft items up to level 80
- Large Crafting Stations require Handyman level 80, and can craft every item possible from that station
- Small Crafting Stations require Handyman level 10, and can craft items up to level 40
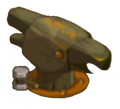
• Armory 🛡️
===========================================================================
Small Armory:
Crafting Recipe:

1x Francis Premier Api Wood ⭐

1x Glistening Thistle ⭐

5x Basic Plate

5x Coarse Plate

10x Basic Souper-Glou

10x Coarse Souper-Glou
Total Raw Materials Needed:
1x Francis Premier Api Wood ⭐
1x Glistening Thistle ⭐
25x Copper Ore
25x Classic Carbon
25x Finest Sea Salt
25x Iron Ore
10x Basic Souper-Glou
10x Coarse Souper-Glou
===========================================================================
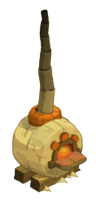
• Bread Oven 🍞
===========================================================================
Small Bread Oven:
Crafting Recipe:
1x Stingy Bulb ⭐

1x Amakna Truffle ⭐

5x Basic Oil

5x Coarse Oil
10x Basic Souper-Glou
10x Coarse Souper-Glou
Total Raw Materials Needed:
1x Stingy Bulb ⭐
1x Amakna Truffle ⭐

25x Mint Leaf

25x Flax Flower

25x Iriss Flower
25x Crowned Thistle
10x Basic Souper-Glou
10x Coarse Souper-Glou
===========================================================================
• Distillery ⚗️
===========================================================================
Small Distillery:
Crafting Recipe:
1x O'liwood Mint ⭐
1x Sentimental Flower ⭐

5x Basic String

5x Coarse String
10x Basic Souper-Glou
10x Coarse Souper-Glou
Total Raw Materials Needed:
1x O'liwood Mint ⭐
1x Sentimental Flower ⭐
25x Mint Leaf
25x Flax Flower
25x Iriss Flower
25x Crowned Thistle
10x Basic Souper-Glou
10x Coarse Souper-Glou
===========================================================================
• Fisherman's Workshop 🎣
===========================================================================
Small Fisherman's Workshop:
Crafting Recipe:

1x Golden Sturgeon ⭐

1x Reincarnated Breaded Fish ⭐

5x Basic Tiramisoup

5x Coarse Tiramisoup
10x Basic Souper-Glou
10x Coarse Souper-Glou
Total Raw Materials Needed:
1x Golden Sturgeon ⭐
1x Reincarnated Breaded Fish ⭐

25x Crabby Anchovy

25x Sturgeon

25x Bow Meow Fish
25x Breaded Fish
10x Basic Souper-Glou
10x Coarse Souper-Glou
===========================================================================
• Leather Dealer's Workshop 👢
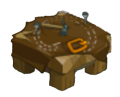
===========================================================================
Small Leather Dealer's Workshop:
Crafting Recipe:
1x Difficult Anchovy ⭐
1x Reincarnated Breaded Fish ⭐

5x Basic Leather

5x Coarse Leather
10x Basic Souper-Glou
10x Coarse Souper-Glou
Total Raw Materials Needed:
1x Difficult Anchovy ⭐
1x Reincarnated Breaded Fish ⭐
20x Branchileg
20x Piwi Beak
20x Larva Skin
20x Gobball Skin
10x Basic Souper-Glou
10x Coarse Souper-Glou
===========================================================================
• Millstone 🌾
Small Millstone:
Crafting Recipe:
1x Cheh ⭐

1x Golden Wheat Grain ⭐

5x Basic Flour

5x Coarse Flour
10x Basic Souper-Glou
10x Coarse Souper-Glou
Total Raw Materials Needed:
1x Cheh ⭐
1x Golden Wheat Grain ⭐
25x Barley Straw
25x Tuberbulb
25x Artichoke

25x Wheat Straw
10x Basic Souper-Glou
10x Coarse Souper-Glou
• Polisher 💎
Small Polisher:
Crafting Recipe:

1x Verbala Salt ⭐
1x Crystalline Iron Ore ⭐

5x Basic Steel

5x Coarse Steel
10x Basic Souper-Glou
10x Coarse Souper-Glou
Total Raw Materials Needed:
1x Verbala Salt ⭐
1x Crystalline Iron Ore ⭐
25x Copper Ore
25x Classic Carbon
25x Finest Sea Salt
25x Iron Ore
10x Basic Souper-Glou
10x Coarse Souper-Glou
• Sawmill 🪓
Small Sawmill:
Crafting Recipe:
1x Francis Premier Api Wood ⭐

1x Babezel Wood ⭐

5x Basic Plank

5x Coarse Plank
10x Basic Souper-Glou
10x Coarse Souper-Glou
Total Raw Materials Needed:
1x Francis Premier Api Wood ⭐
1x Babezel Wood ⭐
25x Apiwood
25x Chestnut Wood
25x Hazel Wood

25x Ash Wood
10x Basic Souper-Glou
10x Coarse Souper-Glou
• Setter 💍
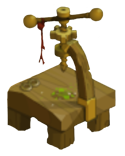
Small Setter:
Crafting Recipe:
1x Burning Coal ⭐
1x Verbala Salt ⭐

5x Basic Gem

5x Coarse Gem
10x Basic Souper-Glou
10x Coarse Souper-Glou
Total Raw Materials Needed:
1x Burning Coal ⭐
1x Verbala Salt ⭐
25x Copper Ore
25x Classic Carbon
25x Finest Sea Salt
25x Iron Ore
10x Basic Souper-Glou
10x Coarse Souper-Glou
• Stove 👨🍳
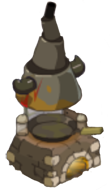
Small Stove:
Crafting Recipe:
1x Golden Sturgeon ⭐
1x Cuddly Bow Meow Fish ⭐

5x Basic Spice

5x Coarse Spice
10x Basic Souper-Glou
10x Coarse Souper-Glou
Total Raw Materials Needed:
1x Golden Sturgeon ⭐
1x Cuddly Bow Meow Fish ⭐
25x Crabby Anchovy
25x Sturgeon
25x Bow Meow Fish
25x Breaded Fish
10x Basic Souper-Glou
10x Coarse Souper-Glou
• Tanner's Workshop 🧪
Small Tanner's Workshop:
Crafting Recipe:
1x Stingy Bulb ⭐
1x Sun Flax ⭐

5x Basic Essence

5x Coarse Essence
10x Basic Souper-Glou
10x Coarse Souper-Glou
Total Raw Materials Needed:
1x Stingy Bulb ⭐
1x Sun Flax ⭐
25x Treechnee Barkskin
25x Piwi Feather
25x Larva Mucus
25x Bow Meow Hair
10x Basic Souper-Glou
10x Coarse Souper-Glou
• Tailor's Workshop 🧵

Small Tailor's Workshop:
Crafting Recipe:
1x Sun Flax ⭐
1x Sentimental Flower ⭐

5x Basic Fiber

5x Coarse Fiber
10x Basic Souper-Glou
10x Coarse Souper-Glou
Total Raw Materials Needed:
1x Sun Flax ⭐
1x Sentimental Flower ⭐
25x Barley Straw
25x Tuberbulb
25x Artichoke
25x Wheat Straw
10x Basic Souper-Glou
10x Coarse Souper-Glou
• Weapons Forge ⚔️
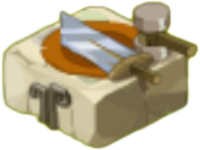
Small Weapons Forge:
Crafting Recipe:
1x Trombone Ore ⭐
1x Jonik Ash Wood ⭐

5x Basic Handle

5x Coarse Handle
10x Basic Souper-Glou
10x Coarse Souper-Glou
Total Raw Materials Needed:
1x Trombone Ore ⭐
1x Jonik Ash Wood ⭐
25x Apiwood
25x Chestnut Wood
25x Hazel Wood
25x Ash Wood
10x Basic Souper-Glou
10x Coarse Souper-Glou
• Wood Lathe 🗄️
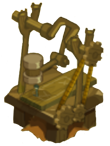
Small Wood Lathe:
Crafting Recipe:
1x Francis Premier Api Wood ⭐
1x Gilbert Chestnut Wood ⭐

5x Basic Bracket

5x Coarse Bracket
10x Basic Souper-Glou
10x Coarse Souper-Glou
Total Raw Materials Needed:
1x Francis Premier Api Wood ⭐
1x Gilbert Chestnut Wood ⭐
25x Apiwood
25x Chestnut Wood
25x Hazel Wood
25x Ash Wood
10x Basic Souper-Glou
10x Coarse Souper-Glou
~~~ 🧧 𝘔𝘢𝘴𝘵𝘦𝘳 𝘚𝘦𝘢𝘭𝘴 🧧 ~~~
|=|=|=|=| 🥇 𝗟𝗼𝗼𝘁 𝗮𝗻𝗱 𝗘𝗾𝘂𝗶𝗽𝗺𝗲𝗻𝘁 🥇 |=|=|=|=|
General Tips:
- When hunting for loot, be sure to do all the challenges involved in the battle to get prospecting bonuses, which increase your chances of getting more drops.
- Enutrofs can get bonus prospecting points innate to their class, up to 80% (with the Treasure Tracker passive and Treasures buff), as well as be able to loot extra drops from enemies with the Debt spell
- For maximum drop potential, multi-client two or more characters, and fill the rest of the remaining squad space with sidekicks so you have a full party.
- You have a 500% chance increase in getting the loot you're looking for with a full solo party, not taking into account any additional prospecting bonuses you may have.
- 0.8% * 6 = a 4.8% chance to get an epic item at the base drop rate.
- 2% * 6 = a 12% chance to get a mythical item at base drop rate.
- 0.8% * 6 = a 4.8% chance to get an epic item at the base drop rate.
- You have a 500% chance increase in getting the loot you're looking for with a full solo party, not taking into account any additional prospecting bonuses you may have.
•-•-•-• 👑Exclusive Field Boss Loot 💰 •-•-•-•
〉Preface & Tips
[WIP, Will add more gear as I progress further into the game]
Notes:
- Items marked with 🌟I recommend using, items marked with 👎 I recommend against. Items marked with ⚰️ are decent items, but turn obsolete relatively quickly compared to other longer-lasting items.
- See the "Personal Gear Recommendations" section for similar content, or ignore everything in italics if you don't care about my takes at all 😢
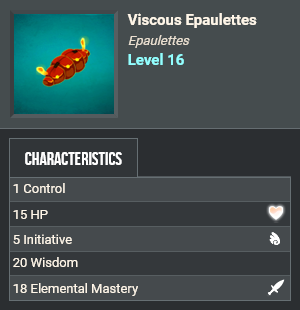
- Prospecting (extra loot), Wisdom (extra XP), and Kit Skill (increases gear-wearing levels) apparently no longer exist on gear in 2023 Wakfu. Any gear screenshots you see are taken directly from Ankama's game encyclopedia itself, and can potentially have outdated or obsolete information (e.g. Viscous Epaulettes being listed as having 20 Wisdom). Simply ignore any data fields you see these being mentioned on, they no longer exist
- Mythical (Orange) gear is listed before Epic (Purple), because you're almost triple as likely to get an orange drop compared to a purple one. (2% drop rate vs 0.8% drop rate)
- The lowest level loot and enemies are listed first, then progresses into the higher levels.
- Dominant mobs aren't as strong as archmonsters, so dominant mobs are listed first.
- Archmonsters almost always share the exact same stats, moves, and damage output as their family's dungeon boss, with a few exceptions.
~~~🔸 𝘔𝘺𝘵𝘩𝘪𝘤𝘢𝘭 (𝘖𝘳𝘢𝘯𝘨𝘦) 𝘎𝘦𝘢𝘳 🔸~~~

Mythical (Orange) Drops:
2% base drop rate
2% base drop rate
- Every boss, dominant mob and archmonster has at least two Mythical drops.
• Dominant Mobs [Level 0-30] 🔸
[Dominant Mobs Level 0-30]
Dominant Larva
===========================================================================
🌟 Strangly Wand
🌟 Viscous Epaulettes
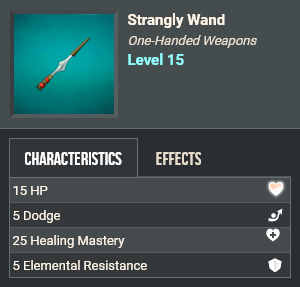
- Strangly Wand boosts heals by a whopping 25% just by having it equipped on your character. It's been on my Eniripsa ever since I got it. Super recommendation here.
- Viscous Epaulettes are very comparable to Swocks (which I'm a fan of), they're just available to wear on lower-level characters sooner. They have half the HP bonus that Swocks have though, other than that they're practically identical.
Dominant Gobball
===========================================================================
Beltedy
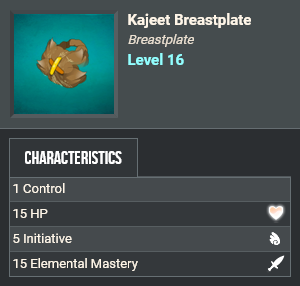
Kajeet Breastplate
Dominant Tofu
===========================================================================
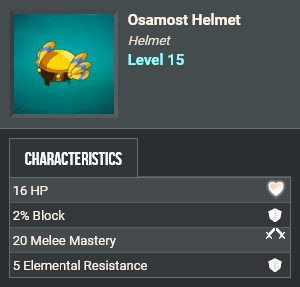
Osamost Helmet
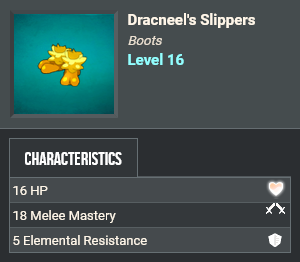
Dracneel's Slippers
• Archmonsters [Level 0-30] 🔸
[Archmonsters Level 0-30]
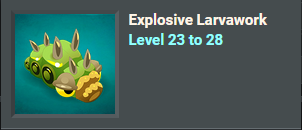
Explosive Larvawork (Larva Archmonster)
===========================================================================
🌟 Table Knives
🌟 Honna Ring
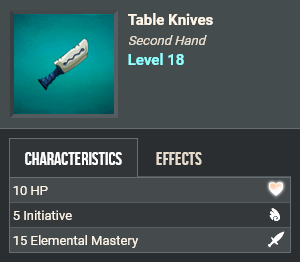
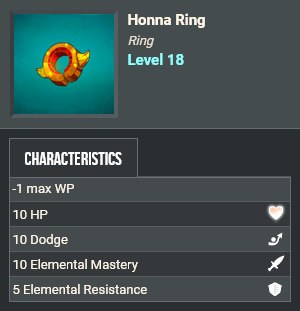
- I still use Table Knives and Honna Ring as a level 70 character. The benefits both of these items give are very long-lasting in your loadout.
- Table Knives are the best daggers you can get at the beginning of the game, while the next best dagger available later on (Xiangu's Stagger) is essentially a sidegrade, trading 5 Initiative for 5 Dodge, with a few extra stats.
- Honna Ring gives 10 Elemental Mastery like a few other rings (Satisfaction Ring, The Noble Permage), but also gives 10 Dodge and 5 Elemental Resistance alongside as well. Whether or not the -1 WP debuff will affect you depends on how much you use abilities that use Wakfu Points, and/or how fast you recharge them back.
===========================================================================
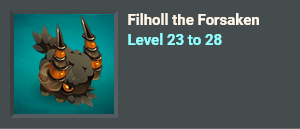
Filholl the Forsaken (Goball Archmonster)
===========================================================================
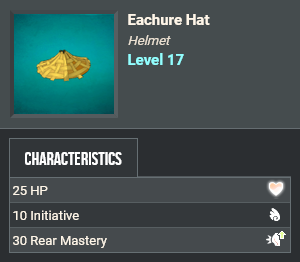
Eachure Hat
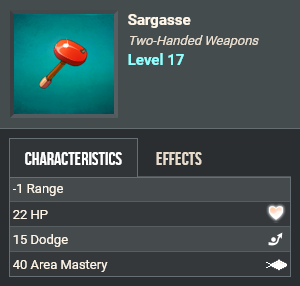
Sargasse
Claud Sharpe (Tofu Archmonster)
===========================================================================
The Levy Lup
The Swordex
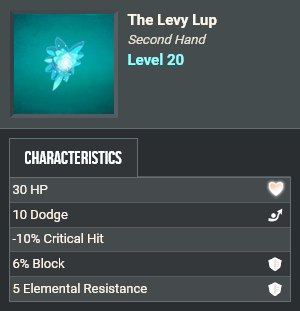
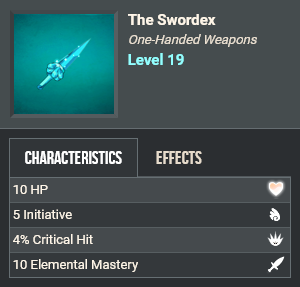
- The Swordex and The Levy Lup are both part of a set called the Tofulix Set. If the Swordex and Levy Lup are equipped alongside the armor pieces Wakfu Headgear and Helvy's Epaulettes, you get a +1 AP bonus. I recommend kitting out your character and/or sidekick with it if you have the patience to try to acquire both (or just buy it from the market if prices are reasonable), since to my awareness this is the only Gear set that uses weapon slots as well.
- Weapons that give +1 AP (though with debuffs) come into existence at level 50 (e.g. The Goultard, Conquered Raziel, etc), so it's up to you to decide whether pursuing both items is worth it for the extra AP, or if it's worth waiting to get a much easier to acquire weapon at level 50.
===========================================================================
Archivist's Amulet - Treechnell
🌟 Swocks - Treechnell
Swocks give a flat +20 elemental mastery, as well as an extra control for summoner classes. I haven't found any epaulettes at this level range that have outclassed it yet
The Maimpa - Abribus the Protector (Treechnid Archmonster)
The Jouik Krampe - Abribus the Protector (Treechnid Archmonster)
Peckish Helmet - Dominant Piwi
Desire O'Ball Cloak - Dominant Piwi
(Also gives Epic item Satisfaction Boots)
Googoolden Axe - Gunner Pewpew (Piwi Archmonster)
👎 Uchino Cape - Gunner Pewpew (Piwi Archmonster)
Uchino Cape is a sidegrade to the Imperial Shin Larva Cloak. Even though the Uchino Cape has double the HP value, its distance mastery is the same, it doesn't offer an AP bonus like the Imperial Shin Larva set does, plus it's more difficult to get in general.
Magmacrak Breastplate - Dominant Crackler
Magmacrak Boots - Dominant Crackler
(Also gives Epic item Icy Epaulettes)
🌟 Xiangu's Stagger - Dominant Moogrroon
🌟 Tanja Ring - Dominant Moogrroon
Carnivorous Staff - Dominant Plant
Whybeard Hand - Dominant Plant
Magmacrak Ring - Cracknut the Nuisance (Crackler Archmonster)
Magmacrak Cloak - Cracknut the Nuisance (Crackler Archmonster)
🌟 Sacred Moogrr Boots - Moothane the Gas (Moogrr Archmonster)
Sacred Moogrr Headgear - Moothane the Gas (Moogrr Archmonster)
(Also gives Epic item Doray Mifa)
Strange Wand - Dew the Early Riser (Field Plant Archmonster)
Kindling Cape - Dew the Early Riser (Field Plant Archmonster)
- There is one secret mob called Dandel the Boy (summoned by planting a Large Tasteless Seed) that drops exclusive loot, though it's Rare (Green) and must be upgraded into Mythical (Orange) by crafting. Those items are Brambelt and Leafy Ring
• Dominant Mobs [Level 30-WIP] 🔸
[Dominant Mobs Level 30-WIP]
Dominant Treechnid
(Also gives Epic item Satisfaction Ring)
===========================================================================
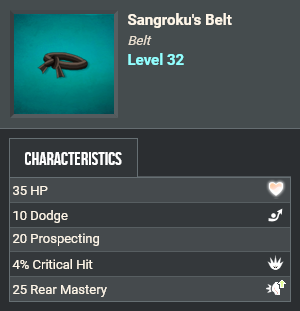
Sangroku's Belt
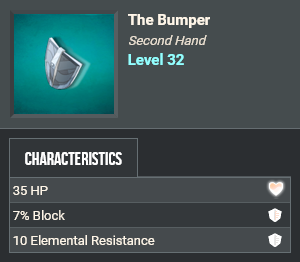
The Bumper
~~~ 🟪 𝘌𝘱𝘪𝘤 (𝘗𝘪𝘯𝘬) + 𝘙𝘦𝘭𝘪𝘤 (𝘗𝘶𝘳𝘱𝘭𝘦) 𝘎𝘦𝘢𝘳 🟪 ~~~
Epic (Pink) Drops
0.8% base drop rate
0.8% base drop rate
Relic (Purple) Drops
0.1% base drop rate
0.1% base drop rate


- Relics are more often assembled from fragments or crafted, as opposed to being dropped by a mob
- Only one epic and one relic item can be worn at once. It's not possible to wear two relic or epic equipment pieces at the same time. You want it all, but you can't have it!
• [WIP] Epic Gear & Relics [Level 20-50]
[Level 20 Epics]
Satisfaction Ring
Drops from Dominant Treechnid
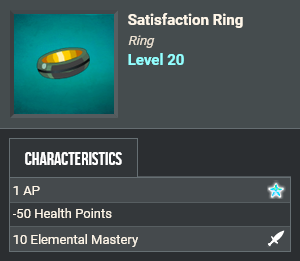
- Definitely the best Epic drop out of all of these level 20 ones in my opinion. Rings that give 1 AP (e.g. Gelano, Bludring) are few and far between, and this one's -50 HP debuff becomes very negligible later down the line. Its 10 elemental mastery bonus is also quite good and holds up for a long time
⚰️ Satisfaction Boots
Drops from Dominant Piwi
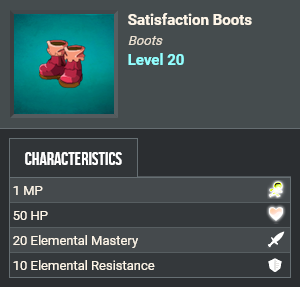
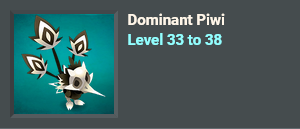
- A really good item when just starting out, but definitely the weakest epic out of these three. It later becomes on par with a level 48 orange-tier item that accomplishes the same thing (Sacred Moogrr Boots). It loses its spectacle the more and more you level, as boot drops in Amakna often have +1MP bonuses (E.g. Bouttes, Stone Cold Boots, Kapow Thongs, etc), so it doesn't last as long in viability as the other two epics do.
Dazzling Belt
Drops from Morfor
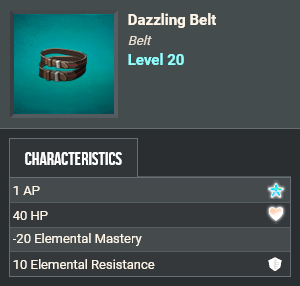
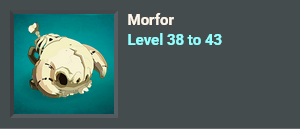
- One of the first pieces of gear to give an extra AP, but at the cost of a -20 elemental damage debuff. It's later outclassed by another epic belt in the level 50 section (Ka-Iba Belt) that doesn't have a debuff, but this belt is still good on a class/build that isn't as damage focused, such as a Sacrier tank.
- Usually goes for much cheaper on the player market vs something like Satisfaction Ring
===========================================================================
[Level 50 Epics]
Icy Epaulettes
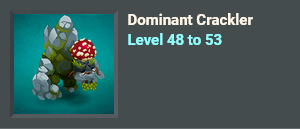
Drops from Dominant Crackler
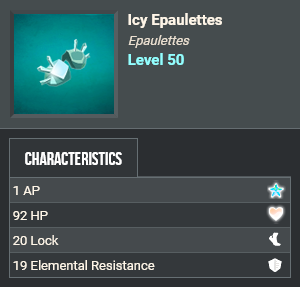
- Especially good for front-line and tanky classes/builds, with its super big HP, lock, and elemental resistance bonuses.
- I'd still personally recommend Ka-Iba belt over this for front liners because of its +20 close combat damage buff, but if you're building for a damage-absorbing and enemy-locking tank specifically, this is the way to go.
🌟 Doray Mifa
Drops from:
Royal Moogrr
Moothane the Gas
Royal Moogrr
Moothane the Gas
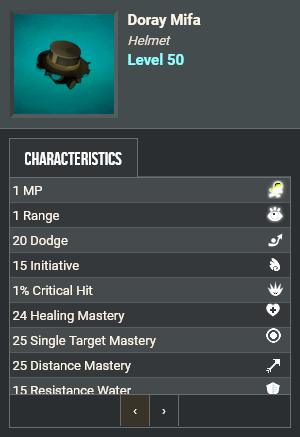
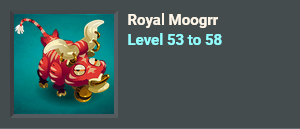
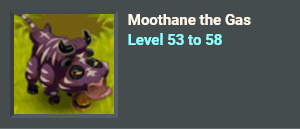
- An absolutely godly piece of gear for healers and ranged classes. The MP and Range bonus alone give tons of help for better positioning and damage possibility, not even considering the hellacious damage, healing, initiative, and dodge buffs. Definitely one of the best epics available so far IMO, if you don't mind trading an AP-giving relic for these stats
WIP stuff 👇:
to post screenshots of
lvl 50
Travel Cloak
Shell
🌟Ka-Iba Belt
⚰️ Kyu-o'-Wel Cloak
👎 Tetra's Amulet
🌟Koko's Boots (Relic)
Ice Knight Sword (Relic)
lvl 65
Rezak's Helmet
Bludring
Sine's Breastplate (Relic)
Gelano
Otomai’s Scouts Greaves
Amollusky
👎 Caplosive
|=|=|=|=| 🏹 𝗖𝗼𝗺𝗯𝗮𝘁 ⚔️ |=|=|=|=|

⟫ Weapons
- There are currently 12 different types of weapons:
- Swords (One-Handed)
- Swords (Two-Handed)
- Daggers
- Shovels
- Bows
- Cards
- Wands
- Hands
- Staffs (One-Handed)
- Staffs (Two-Handed)
- Axes
- Hammers
- Swords (One-Handed)
- Daggers and Shields are currently the only items equippable in the player's second hand/off-hand
(You can't dual wield two single handed swords for example)
|=|=|=|=| 🐶 𝗣𝗲𝘁𝘀 🐱 |=|=|=|=|

⟫ Pets Intro
- According to the Wakfu encyclopedia, there are currently 116 total pets ingame
- Pets provide passive bonuses to your character while you have them equipped, just like any other piece of equipment would
- Every pet can be equipped on a character of any level
- Every pet has 20 HP, which decreases if you underfeed it (don't feed it within 3 days), overfeed it (feed it more than once a day), or lose a battle.
- Pets level up every time you feed them compatible food, and have a maximum level of 50.
- Maxed out pets still need to be fed one every 3 days to avoid losing HP
- Golden variations of pets only provide 60 elemental mastery to two elements, but give an additional 20 initiative as a tradeoff
- I have no clue how to obtain any of these pets outside of the player market 🤷♂️
- I hear Macawker is given as a quest reward for doing the Wild Estate quest, but I could be wrong
All of the following stats listed are for level 50 / maximum level pets:
~~~ 𝘚𝘪𝘯𝘨𝘭𝘦 𝘚𝘵𝘢𝘵 𝘗𝘦𝘵𝘴 ~~~
• Elemental Mastery & HP Pets
HP:
Striped Bow Meow:

Gives:
- 180 HP ❤️
Dot:

Gives:
- 65 HP ❤️
- Dot & Gemlins can only be leveled to level 25.
- If there's a Gemlin that does something, there's another pet out there that does it better. Think of them as placeholder pets until you find something more powerful.
Element Mastery:
Krakotte:

Gives:
- 100 Earth Mastery 🍃
Scarafly:

Gives:
- 100 Fire Mastery 🔥
Surimi:

Gives:
- 100 Water Mastery 💧
Young Wild Sow:

Gives:
- 100 Air Mastery 🟣💨
Element Mastery (Krosmunsters):
Earth Krosmunster:

Gives:
- 100 Earth Mastery 🍃
Fire Krosmunster:

Gives:
- 100 Fire Mastery 🔥
Water Krosmunster:

Gives:
- 100 Water Mastery 💧
Air Krosmunster:

Gives:
- 100 Air Mastery 🟣💨
Element Mastery (Floating Cats):
Stone Block:
Gives:
- 100 Earth Mastery 🍃
Furnace:

Gives:
- 100 Fire Mastery 🔥
Downpour:
Gives:
- 100 Water Mastery 💧
Gust:

Gives:
- 100 Air Mastery 🟣💨
• Harvesting Quantity Pets
Harvesting Quantity:
Geist:

Gives:
- 50% Harvesting Quantity in Farmer
Snoofle:

Gives:
- 50% Harvesting Quantity in Miner
Prespiver:

Gives:
- 50% Harvesting Quantity in Lumberjack
Satchull:

Gives:
- 50% Harvesting Quantity in Herbalist
Kalypsor:

Gives:
- 50% Harvesting Quantity in Fisherman
Gobgob:

Gives:
- 50% Harvesting Quantity in Trapper
Noxine:

Gives:
- 25% Harvesting Quantity in Farmer
- 25% Harvesting Quantity in Lumberjack
- 25% Harvesting Quantity in Herbalist
- 25% Harvesting Quantity in Miner
- 25% Harvesting Quantity in Trapper
- 25% Harvesting Quantity in Fisherman
~~~ 𝘗𝘳𝘪𝘮𝘢𝘳𝘺-𝘚𝘵𝘢𝘵 𝘗𝘦𝘵𝘴 ~~~
⟫ Pets Miscellaneous
Miscellaneous
- It is possible to use the Littlest Pet Shed[www.wakfu.com] (which works just like a Professions box) to actively feed multiple pets kept in your inventory; just click on your pet's icon and drag their food from your inventory to their eat icon. This is much easier and faster than storing them in your haven bag chest, getting them out, and then putting them back in one by one.
- Use this to feed and level up to 25 pets (or 50 if using two sheds) so you can sell them at max level for mad stonks
- Keep in mind that pets held in player inventory actively need to be fed, as opposed to being put in 'hibernation' when stored in a haven bag chest.
- Use this to feed and level up to 25 pets (or 50 if using two sheds) so you can sell them at max level for mad stonks

|=|=|=|=| 🔐 𝗛𝗶𝗱𝗱𝗲𝗻 𝗜𝘁𝗲𝗺𝘀 & 𝗖𝗵𝗲𝘀𝘁𝘀 🧰 |=|=|=|=|
- The old hidden object guides are now obsolete and irrelevant now that Wakfu has changed so much from those guides' original authorship dates. I'll make a full guide separate from this one for all of the hidden items and emotes once I find them all, but for now it's just small enough to fit into this section.
⟫ [WIP] 😆 Emotes 😭
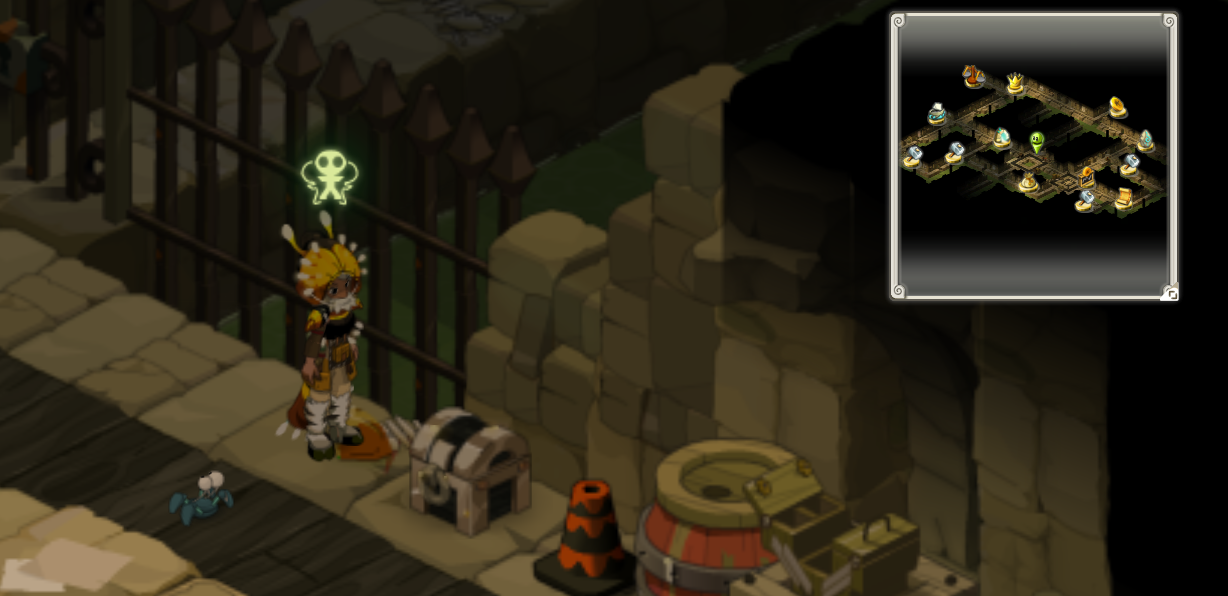
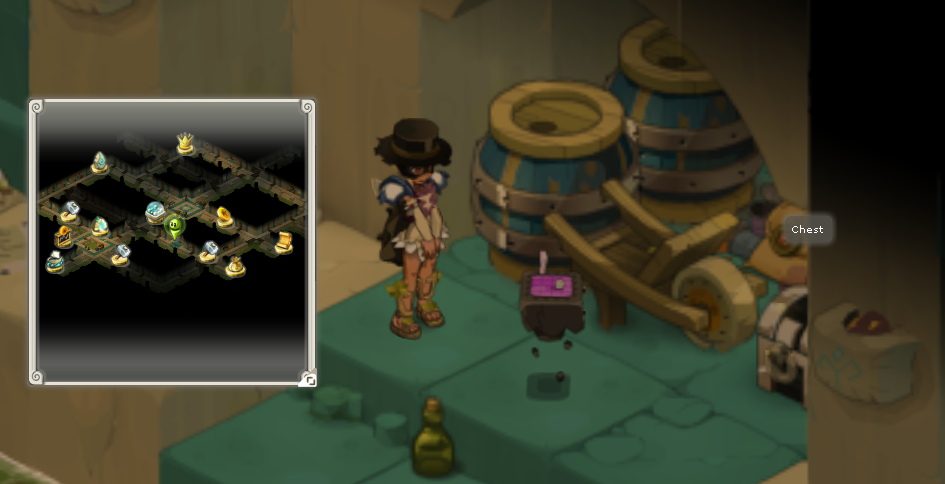
- Click on the thumbnails to get a larger view of the chest & minimap

In Amakna:
Call a Bow Meow
- Located within the center of Amakna Sewers


In Sufokia:
Search
- Located in Sufokia Sewers, in an alley to the right of the Haven Worlds exit

⟫ [WIP] Hidden Items
Items accessible via Traverse Compass (Presumably in Astrub):
Top Hat -
The Baron -
The Baroness -
Nobility Ring -
Top Hat -
The Baron -
The Baroness -
Nobility Ring -
⟫ Artifact Treasures
This is just a compilation of information that already exists on the internet, I didn't make these myself.
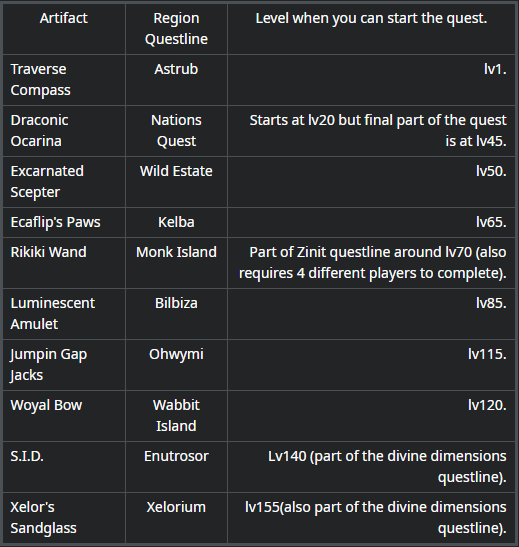
Lvl.10 - Traverse Compass (30.768 XP)
Lvl.45 - Draconic Ocarina (461.520 XP + 40.000 Kamas)
Lvl.50 The Excarnal Scepter (999.960 XP + 60.000 Kamas)
Lvl.65 Paws of Ecaflip (1.692.240 XP + 100.000 Kamas)
Lvl.115 Jumpin' Gap Jacks (24.922.080 XP + 360.000 Kamas)
Lvl.120 Woyal Bow of Pwodding (46.536.600 XP + 550.000 Kamas)
Lvl.140 I.D.S. (182.300.400 XP + 700.000 Kamas)
Lvl.160 Xelor's Sandglass (306.141.620 XP + 800.000 Kamas)
Artifact Acquisition
[Copied from https://www.reddit.com/r/wakfu/comments/lq6v8d/comment/gof74k6/]Artifact Locations
[Copied from https://www.wakfu.com/en/forum/143-guides/239216-guide-2020-artifact-treasure-locations]Lvl.10 - Traverse Compass (30.768 XP)
- Astrub - In the Clouds: -10 | 4
- Astrub - In the Fog: 4 | 4
- Astrub - In the Haze: -8 | -5
- Astrub - In the Clouds: -13 | -2
Lvl.45 - Draconic Ocarina (461.520 XP + 40.000 Kamas)
- Astrub - Chestnut Brown: -12 | 2
- Astrub - Strawberry Roan: -2 | -9 (Requires Paws of Ecaflip Lvl.65)
- Chillberg Island - Scarlet: 2 | -5
- Kelba - Dull White: -7 | 2
- Kelba - Garnet: -2 | 3
- Kelba - Golden Brown: -9 | -4
- Kelba - Pallid: -6 | -3
- Monk Island - Deathly Pale: -2 | -1
- Monk Island - Jet Black: -2 | -5
- Monk Island - Opaline: 4 | -5
- Ohwymi - Ashen: -4 | -5
- Ohwymi - Vermilion: 2 | 1
- Sadida Kingdom - Cerulean: -2 | 2
- Sadida Kingdom - Crimson: -7 | -1
- Sadida Kingdom - Dun: 1 | 2
- Wabbit Islands - Mai Tai: -4 | -7 (Requires Paws of Ecaflip Lvl.65)
- Wabbit Islands - Wan: -9 | -6
- Wild Estate - Iron Gray: 3 | 1
- Wild Estate - Roan: 0 | 1
- Wild Estate - Sanguine: 4 | -6
Lvl.50 The Excarnal Scepter (999.960 XP + 60.000 Kamas)
- Amakna - Crackled: 3 | 2 (Requires Jumpin' Gap Jacks Lvl.115)
- Amakna - Singing: 5 | -3 (Requires Paws of Ecaflip Lvl.65 + Jumpin' Gap Jacks Lvl.115)
- Astrub (Sewers) - Sewers: 1 | 2
- Bonta - Exhausted: -2 | 5
- Bonta - Walled: 5 | 3
- Brakmar - Ashen Mourning: 7 | -9
- Brakmar - Scarred: 3 | -5
- Chillberg Island - Mayor Cantile: 0 | -2
- Ereboria - Bitter-Hammer Cavern - Ghostof Smuggler: 2 | 6
- Forfut - Shivering: 5 | -2
- Kelba - Dusty: -3 | 5
- Monk Island - Cleft: 0 | -6
- Sadida Kingdom - Sprouted: 6 | 8
- Sufokia - Canyon: -4 | 1
- Sufokia - Grainy: -5 | -1
- Wild Estate - Ancestral: -6 | -7
- Wild Estate - Attractive: -1 | -6
- Wild Estate - Plateau: -5 | -3
- Wild Estate - Stashed: -3 | -3
- Wild Estate - Steamy: -1 | -6
Lvl.65 Paws of Ecaflip (1.692.240 XP + 100.000 Kamas)
- Astrub (Mines) - Athletic: 2 | 0
- Astrub (Mines) - Frenzied: -3 | 0
- Astrub (Mines) - Well-Built: -2 | -4
- Bilbiza - Amusing: 0 | -7
- Calamar Island - Exalted: -2 | -6
- Calamar Island - Truckam Driver: -1 | -4
- Forfut - Acrobat: 5 | 1
- Forfut - Enjoyable: -4 | 0 (Requires Jumpin' Gap Jacks Lvl.115)
- Kelba - Acclaimed: -9 | -1
- Kelba - Fun: -10 | 0
- Kelba - Lauded: -1 | 2
- Moon - Portable: -2 | -11
- Moon - Transferable: 0 | 0
- Moon - Yieldable: 0 | 2
- Ohwymi - Dried: -1 | 0
- Ohwymi - Perched: -7 | -4 (Requires Jumpin' Gap Jacks Lvl.115)
- Wabbit Islands - Accessible: -4 | -7
- Wabbit Islands - Joyful: -10 | -10 (Requires Jumpin' Gap Jacks Lvl.115)
- Wild Estate - Navigated: -1 | -6
- Wild Estate - Trained: 0 | -6
Lvl.115 Jumpin' Gap Jacks (24.922.080 XP + 360.000 Kamas)
- Amakna - Clifftop: 2 | -7
- Amakna - Forest: 3 | -4 (Requires Paws of Ecaflip Lvl.65)
- Astrub - Hamlet: -2 | 7
- Astrub - Mountains: 0 | -6
- Bilbiza (Jellith Dimension) - Floating Jelly: 0 | -4
- Bonta - Forest: 9 | 1
- Bonta - Windy Clifftop: 3 | 8
- Brakmar - Beach: 7 | -5
- Brakmar - Furnace: 2 | -9
- Chillberg Island - Snowbound: 1 | -7
- Kelba - Reefs: -3 | -1
- Ohwymi - Desert: -4 | 0
- Ohwymi - Troolgodyte: -7 | -4
- Shhhudoku's Kingdom (Inside Grampar) - Whispering: -2 | -10
- Sufokia - Sandbank: 8 | 1
- Sufokia - Spring: 6 | -2
- The Fungopole - Contaminated: -2 | 0
- The Fungopole - Forgotten: 0 | 6
- The Fungopole - Hidden: 1 | 5
- The Fungopole - Sporous: 0 | 4
- Trool Fair - Reef: 0 | -18
- Trool Fair - Terrace: -4 | -5
- Wild Estate - Inaccessible: 0 | -8 (Requires The Excarnal Scepter Lvl.50)
- Wild Estate - Well-Rounded: -2 | -3 (Requires The Excarnal Scepter Lvl.50)
Lvl.120 Woyal Bow of Pwodding (46.536.600 XP + 550.000 Kamas)
- Amakna - Holey: 1 | -7
- Amakna - Stilts: 2 | 6
- Bilbiza - Adorer: 3 | -5
- Bonta - Thick: 5 | 0
- Bonta - Swampy: 4 | 5
- Brakmar - Sodden Mourning: 6 | -1
- Brakmar - Sulfurous: 5 | -4
- Chillberg Island (Harebourg Castle) - Klim: 3 | 1
- Ereboria - Pirate Beach: - Smuggler's Treasure: -6 | -1
- Forfut - Dingy: 4 | 1
- Kelba - Feathered: -7 | -2
- Monk Island - Library: 0 | -2
- Sadida Kingdom - Chopped: 7 | 5
- Sufokia - Dunic: 6 | 3
- Sufokia - Fissured: 3 | -2
- Wabbit Islands - Cawwoty: -6 | -5 (Requires Jumpin' Gap Jacks Lvl.115)
- Wabbit Islands (Tunnels) - Cwunched: -2 | -3
- Wabbit Islands (Tunnels) - Diwty: -4 | -6
- Wabbit Islands (Tunnels) - Dusty: -4 | -6
- Wabbit Islands - Dwenched: -6 | -5 (Requires Jumpin' Gap Jacks Lvl.115)
- Wabbit Islands (Tunnels) - Impwisoned: -2 | -3
- Wabbit Islands - Inundated: -6 | -5
Lvl.140 I.D.S. (182.300.400 XP + 700.000 Kamas)
- Amakna - Purified: 4 | -2
- Astrub - Forest: -6 | 4
- Bilbiza - Confined: -3 | -12
- Bonta - Cutting: 5 | -1
- Brakmar - Squat: 3 | -2
- Calamar Island - Abandoned Captain: -2 | -8
- Enurado - Fortified: 6 | -5
- Enurado - Interest: 1 | -7
- Enurado - Pure: 3 | 0
- Forfut - Atonement: -3 | 2 (Requires Jumpin' Gap Jacks Lvl.115)
- Kelba - Pointless: -8 | -1
- Monk island - Wax Storeroom: 0 | -2
- Ohwymi - Deflated: 2 | -4
- Sadida Kingdom - Wooded: 8 | 9
- Shhhudoku's Kingdom - Submerged: -6 | -1
- Srambad - Malted: 6 | 2
- Srambad - Open: 1 | -1
- Sufokia - Stored: 4 | 1
- Wabbit Islands - Dewailed: -6 | -12
- Wild Estate - Abysmal: -1 | 0
Lvl.160 Xelor's Sandglass (306.141.620 XP + 800.000 Kamas)
- Amakna - New: 5 | 1
- Amakna - Period: 3 | -6 (Requires Paws of Ecaflip Lvl.65)
- Amakna - Periodic: 3 | 3
- Astrub - Instantaneous: -4 | 3
- Bonta - Cyclic: 10 | 3
- Bonta - Dated: 0 | 8
- Brakmar - Sagging: 11 | -5
- Brakmar - Stationary: 4 | -6
- Enurado - Hon-Hourary: 0 | -3
- Enurado - Time-On: 3 | -8
- Moon - Planned: 3 | 3
- Moon - Programmed: 1 | -4
- Srambad - Rare: 2 | -4
- Srambad - Regular: 5 | 0
- Sufokia - Never-Ending: 6 | 2
- Sufokia - Sunken: 5 | -5
- Wabbit Islands - Ancient: 0 | -1
- Wabbit Islands - Seasonal: -10 | -11
- Xelorium - LoXerRium: 2 | 4
- Xelorium - RiumLoXer: 0 | -1
Artifacts displayed on a map
https://methodwakfu.com/divers/secrets-caches/coffres-aux-tresors/
|=|=|=|=| 💵💲 𝗜𝗥𝗟 𝗣𝘂𝗿𝗰𝗵𝗮𝘀𝗲𝘀 💲💵 |=|=|=|=|
⟫ $ to Ogrines Conversion Rate 💱
- Percentages are rounded up to the nearest hundredth
- Redcuction in price refers to the previous sale tier, not the total reduction to the $3 package.
- Just add the percentages together to see how much of a price reduction you get compared to the $3 package

$3 - 1,000 Ogrines
333 Ogrines for $1 (.33 cents per Ogrine)
$10 - 5,000 Ogrines
500 Ogrines for $1 (.2 cents per Ogrine)(.130 cent difference, 40% reduction in price)
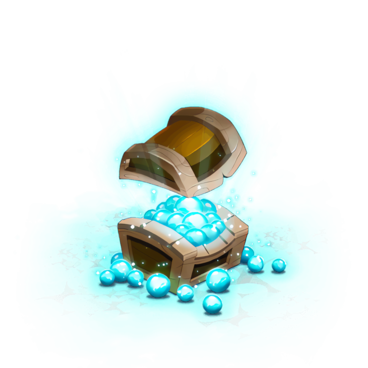
$20 - 11,000 Ogrines
550 Orgrines for $1 (.182 cents per Ogrine)(.018 cent difference, 10% reduction in price)

$40 - 23,000 Ogrines
575 Ogrines for $1 (.174 cents per Ogrine)(.008 cent difference, 5% reduction in price)
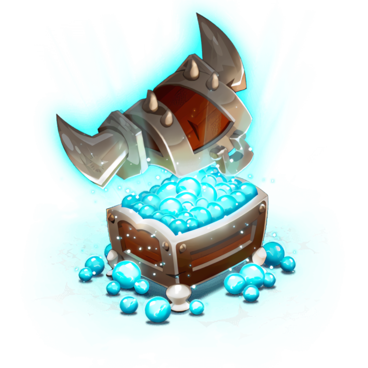
$60 - 36,000 Ogrines
600 Ogrines for $1 (.166 cents per Ogrine)(.008 cent difference, 5% reduction in price)

$80 - 50,000 Ogrines
625 Ogrines for $1 (.160 cents per Ogrine)(.006 cent difference, 4% reduction in price)
⟫ Conversion Stones to Ҝ Conversion Rate 💱
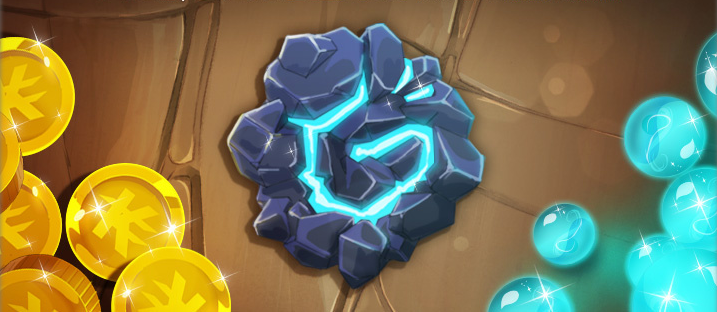
- As of writing, Conversion Stones sell for $6.55 on the Ankama Store and can only be bought with IRL currency.
- If seling your conversion stone for 4 million Kamas (which is a lowball price):
- each cent equates to 6,106 Kamas
- each dollar equates to 610,687 Kamas
- each cent equates to 6,106 Kamas
⟫ $ Per Booster Day


7 day booster
- $2.20 for 7 days
- 31 cents per day

30 day booster
- $6.60 for 30 days
- 22 cents per day (29% decrease)
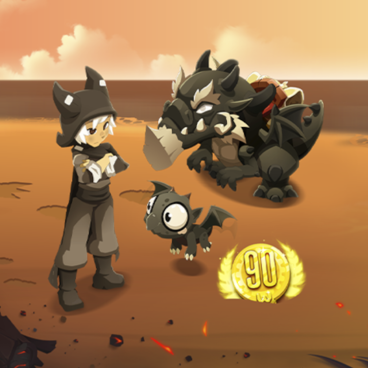
90 day booster
- $20 for 90 days
- 22.22 cents per day (1% increase)
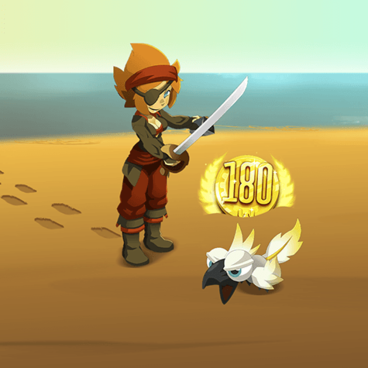
180 day booster
- $36 for 180 days
- 20 cents per day (10% decrease)
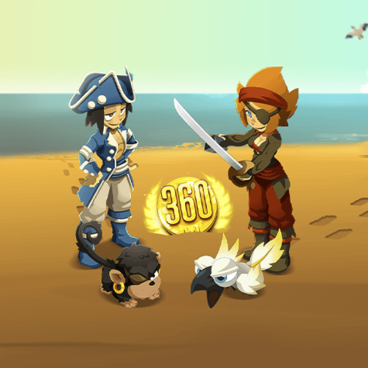
360 day booster
- $65 for 360 days
- 18 cents per day (11% decrease)
==== 𝗠𝗶𝘀𝗰𝗲𝗹𝗹𝗮𝗻𝗲𝗼𝘂𝘀 ====
==== 𝖲𝗍𝗂𝗅𝗅 𝗍𝗈 𝖼𝗈𝗆𝖾 [WIPS] ====

👨👨👦👦 Setting up Multi-Clienting 👩👩👧👧

- I personally recommend multi-clienting with at least two clients, optimally three, so you can play with a full party solo for maximum drop chances, be able to harvest more materials in the same span of time, be able to run dungeons entirely by yourself, and be able to experience the different synergies classes can have with eachother.
In order to multi-client, you must have the standalone Anakama Launcher client installed on your computer
🛡️ 𝗣𝗲𝗿𝘀𝗼𝗻𝗮𝗹 𝗚𝗲𝗮𝗿 𝗥𝗲𝗰𝗼𝗺𝗺𝗲𝗻𝗱𝗮𝘁𝗶𝗼𝗻𝘀 🛡️
These are pieces of equipment that I've chosen to use on my characters. This is all a matter of personal preference, this isn't some ultimate be-all-end-all decree of what's best.
I'm only level 60 at the moment, so I still have lots of armor/loot to see, but I'll put personal gear recommendations and favorites down here when I get around to it
Old Wakfu used to have complete armor sets give bonus AP for having four or more items equipped across all armor levels, but 2023 Wakfu only gives the AP Bonus to armor sets below level 50, ending with the Carnivore armor set. As a result, I've been wearing Imperial Gobball on my Sacrier and Imperial Shin Larva on my ranged characters (Enutrof) to keep the AP bonus going for as long as possible. I'll make recommendations for each level here as I progress into it, but this is just empty space for the time being
🗿 bruh moment
as a bonus: here's this dot i haven't fed since 2016
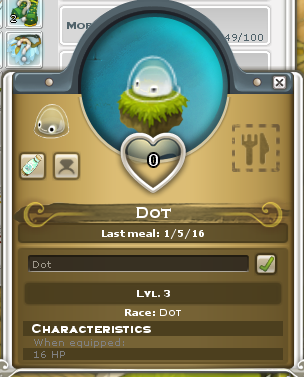
look at this starving ♥♥♥♥♥♥♥ LMAO 🤣
look at this starving ♥♥♥♥♥♥♥ LMAO 🤣
More WAKFU guides
- A guide for new players★ 4 (155)15k views166 ♥13 minUpdated Oct 6, 2014
- Русификатор WAKFU★ 5 (223)8.7k views353 ♥1 minRussianUpdated Dec 31, 2024
- FAQ [RUS]★ 5 (253)7.6k views277 ♥12 minRussianUpdated Oct 16, 2019
- Treasure Hunt Guide [ENG] [SPA]★ 4 (81)6k views101 ♥1 minUpdated Oct 2, 2015
- Описание классов и их способности.★ 4 (187)5.9k views214 ♥62 minRussianUpdated Nov 11, 2017
- Eniripsa's Hands: Fire/Air Build★ 4 (74)3.7k views93 ♥34 minUpdated Oct 20, 2014





This guide was created by its original author on the Steam Community. Are you the author and want it removed? Request removal.