How to get the Achievement CIA Spymaster
General Infos
The Achievement CIA Spymaster is, in my opinion, one of the hardest in the game: while many others require little effort and can be obtained normally in game or with some intense grinding, the achievements related to the Espionage missions in the Cold War Scenario can be very painful to obtain if one doesn’t know how to advance, especially the one related to the CIA, so I decided to write this guide in order to help others in getting the Achievement.
Disclaimer
Please note that this guide is intended to ONLY obtain the Achievement “CIA Spymaster” and will ONLY cover that aspect of the Campaign: as those missions can be easily completed in the first six turns, it possible to focus only on them, with very little regard to the events of the World. If you are interested in getting the “KGB Spymaster” and “Thawed” achievements, I strongly recommend this excellent guide written by YhofChaerkh, which extensively covers those aspects: https://steamcommunity.com/sharedfiles/filedetails/?id=296496364
Also note that, since I’m not playing the English version, some names could be a little different in the translations, but I’ll try to use only the English names, or provide a vivid description when not possible.
Also note that, since I’m not playing the English version, some names could be a little different in the translations, but I’ll try to use only the English names, or provide a vivid description when not possible.
Prelude
- You can only engage in one mission per turn;
- Every mission costs 20 tributes to engage. This shouldn’t be a problem: at the start of every turn you should be able to accumulate about 50-60 tributes;
- There is no penalty in failing a mission, you can retry it the next turn (but it’s simpler to save before every mission and reload in case of defeat).
The Spy is a very frail unit: every spy starts with only 15 Hit points, but is invisible to the enemy units. The only units capable of locating a spy are other spies, Special Forces and, oddly enough, Anti-Air Defences (Probably because they are the upgraded version of the Observation Post): when a spy is revealed, it is vulnerable; you can actually check if your spy is hidden or not by checking her info:
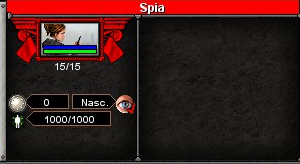
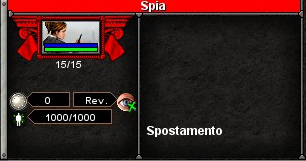
The red mark near the eye means that your spy is hidden and safe, while the green cross means that she’s been spotted, and you should move her away, and quickly.
The spy possesses three abilities: Counterintelligence, Informer and Bribe: each ability requires some amount of “Craft” (The blue icon below the HP bar) to use. Each spy has a maximum of 1000 craft, which regenerates over time.
Counterintelligence allows you to dispose quickly of an enemy spy or an informer inside one your buildings at the cost of 500 craft. Right clicking on an enemy spy will automatically give this command. You’ll never use this ability in the espionage missions;
Informer allows you to target an enemy building or unit in order to share their range of vision for the cost of 500 craft. Right clicking on an enemy building will automatically give this command. Especially useful when used on a City Centre, as it will allow you to see everything in the city’s range;
Bribe allows you to convert an enemy unit at your side. Forever.This ability is extremely useful, and can successfully turn the side of a battle, but it costs 1000 craft to perform. Right clicking on a enemy unit will automatically give this command. Note that ships, aircrafts, civilians, special forces, spies and buildings in enemy territory cannot be bribed.
Each of these abilities requires that the spy is adjacent to the target.
Note that after successfully performing an ability, the spy will be visible by all enemy units in range for a short period of time. It is very useful to pause the game (P key by default), giving the order to the spy, holding SHIFT and clicking away from the battlefield and then unpausing the game: this will make the spy run away right after executing her ability, thus increasing her chance of survival.
The Special Forces are the upgraded version of the Scout, with 110 HP, they can see enemy spies and are invisible while not moving; like the spies, the special forces posses various abilities that can be used for a certain amount of craft. Those abilities are Counterintelligence, Sniper and Sabotage.
Counterintelligence is the same ability of the spy: destroys an enemy spy for 500 out of the 1500 Special Forces’ craft. Again, you will never use this in the Campaign.
Sniper eliminates an enemy infantry unit (even other Special forces) for 1000 craft. Right clicking on a unit will ensure this command. Note that this will command will not wipe out an entire battalion of Infantry, but only one of the three man that made up the unit, effectively removing one third of the unit’s HP.
Sabotage deals a consistent damage to an enemy building for 1000 craft. It can also be used on enemy tanks and vehicles, but it’s highly impractical as it requires the Special Forces to be adjacent to the unit.
Counterintelligence and Sniper can be used from a medium distance, while Sabotage requires contact with the target.
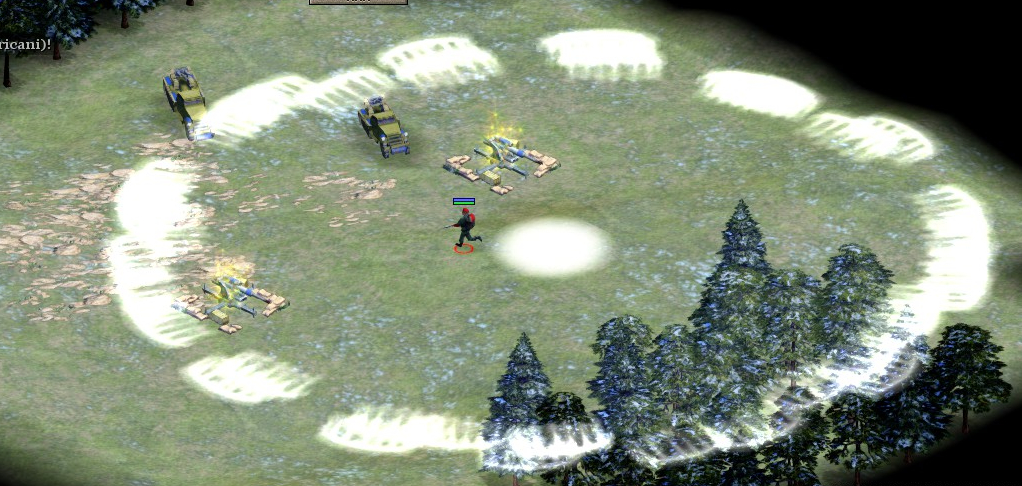
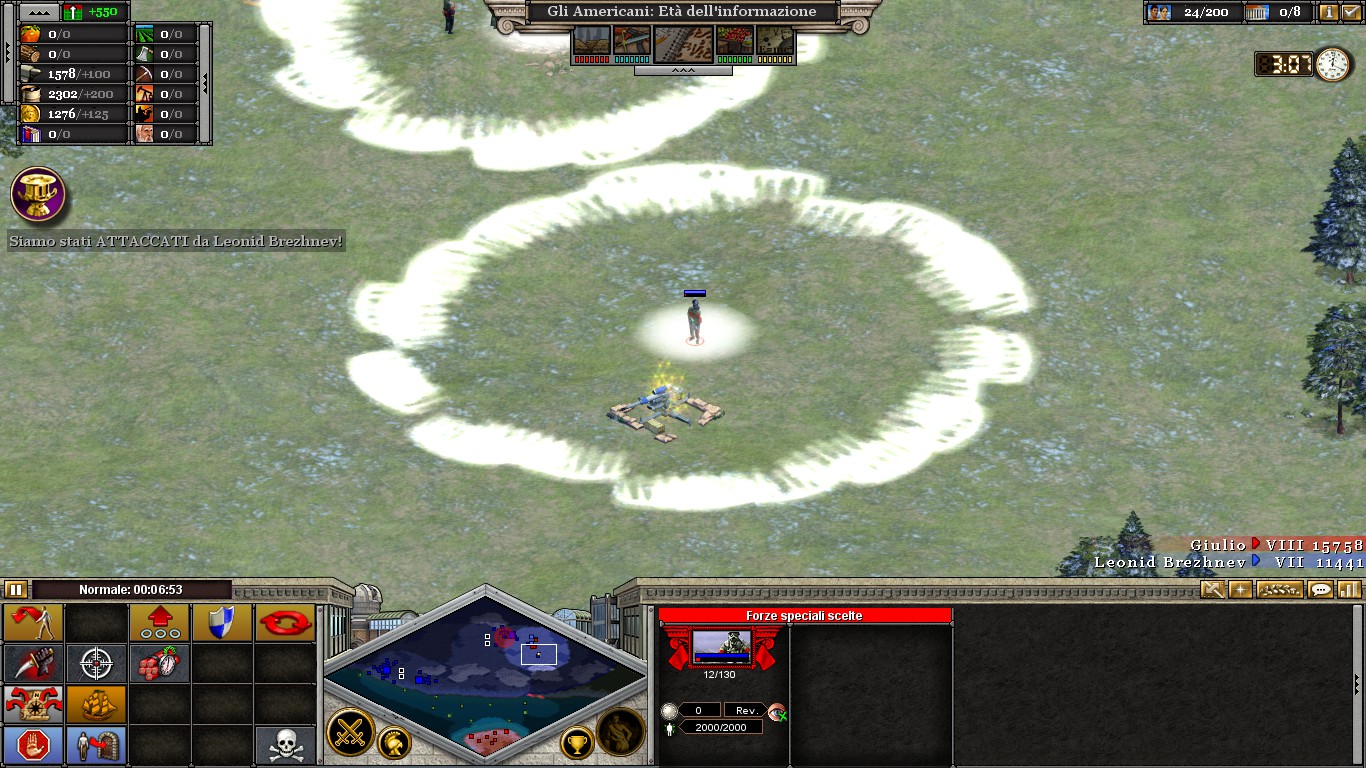
Also note that the Special Forces posses a passive ability: Anti-Aircraft Jamming. While nearby Anti-Aircraft Defences, the Special Forces debilitate them, making way for air-strikes. The debilitation endures as long as the SF will remain in the proximity of the target, and it’s indicated by a golden sparkle on the target and a white circle that encompasses the area of effect. NOTE that the Anti-Aircraft Vehicles are immune to this, as shown below.
First Mission
This mission is extremely easy: you start with six spies and they are tasked to destroy some buildings on the Crimean peninsula in ten minutes. Those buildings are:
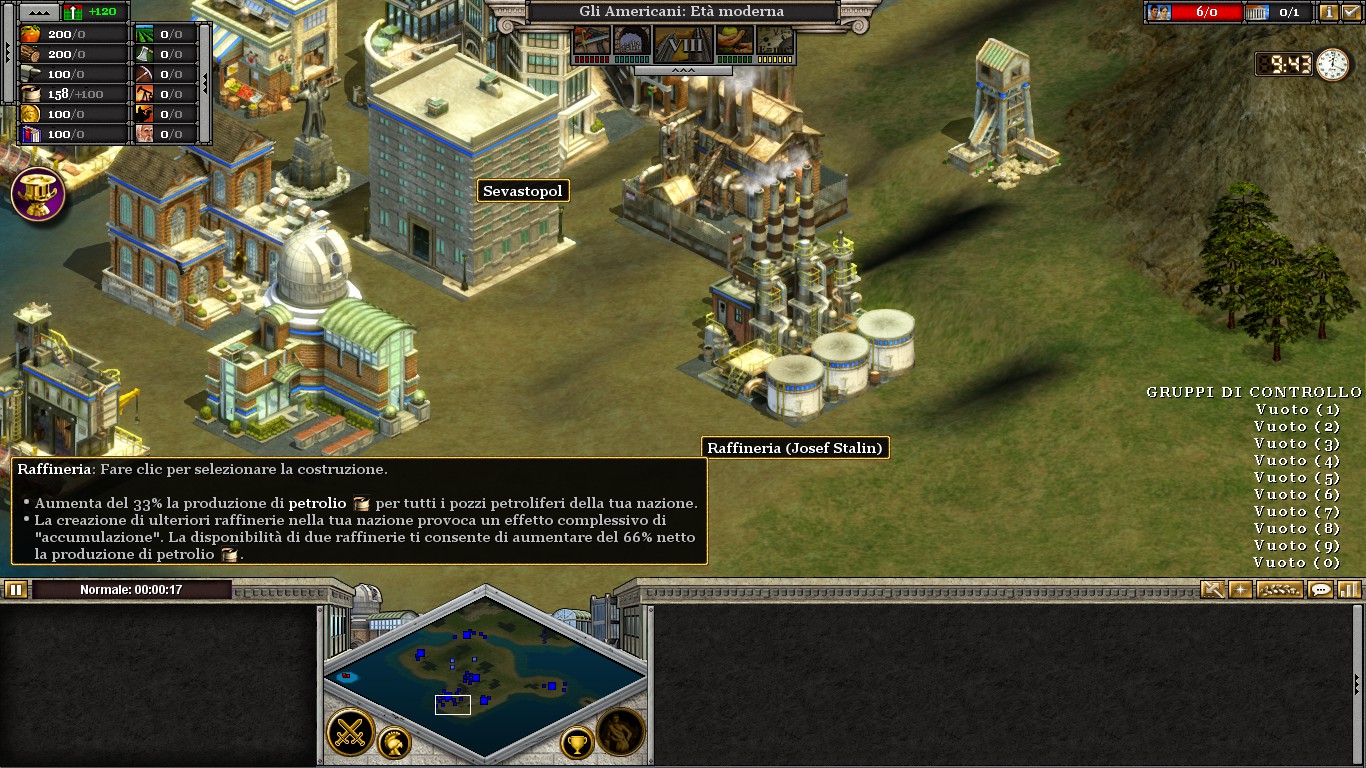 The Refinery in Sevastopol;
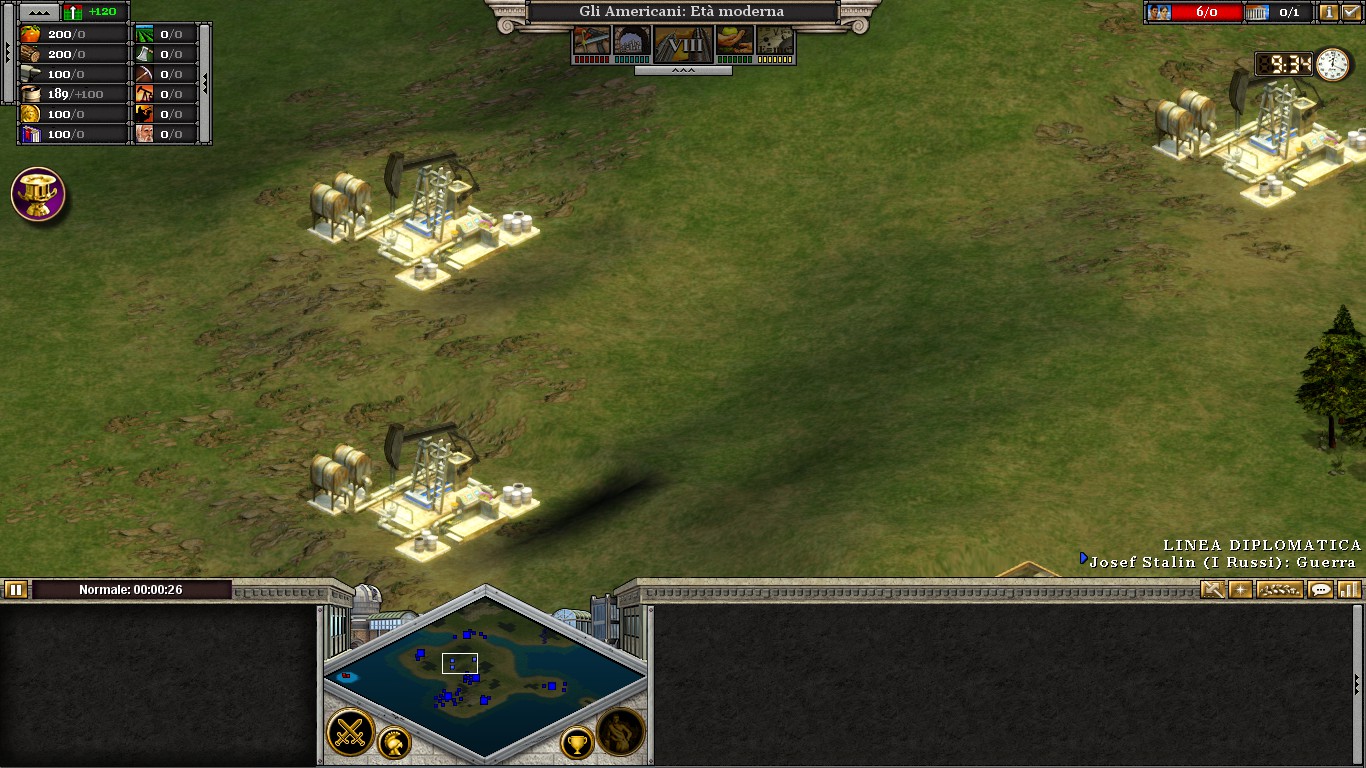 The Oil Wells in the centre of the peninsula;
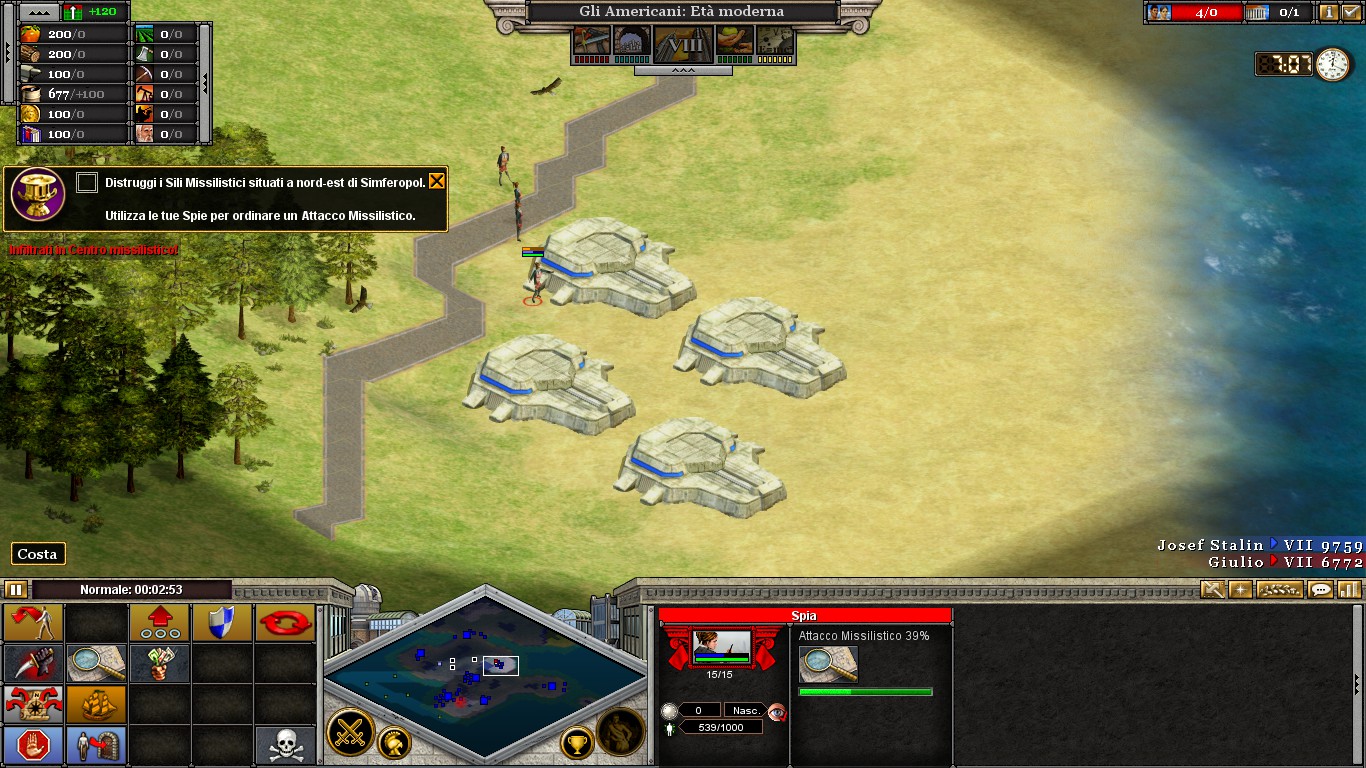
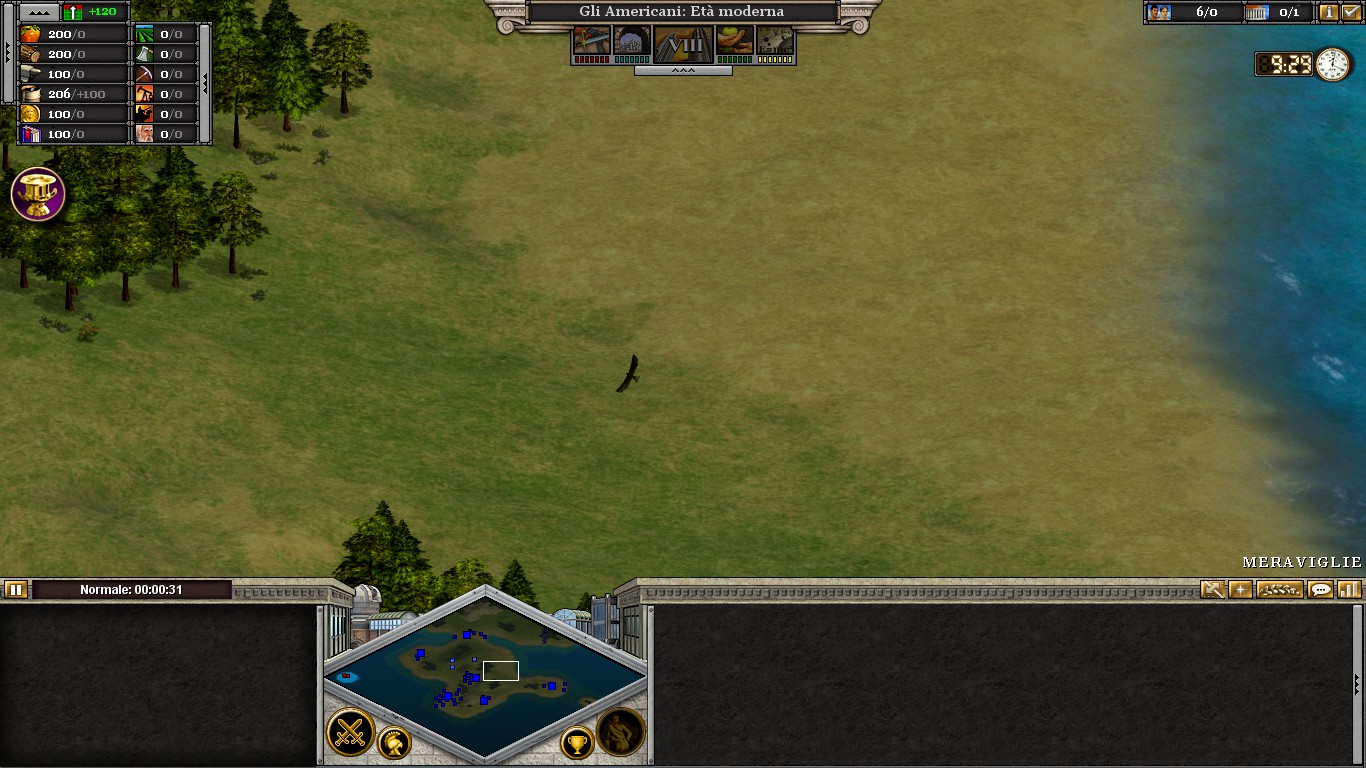 The (Hidden) Missile Silos East of the Wells.
In this mission, your spies have a very useful ability: after successfully infiltrating in an enemy building, a V2 rocket is launched against its position, usually destroying it in one hit, damaging every units and building in the radius of the explosion. Note that your spies are immune to the explosion.
Start the mission by sending two Spies to Sevastopol, south of the Refinery, and sending the other four north of the city, south-west of the Oil Wells.
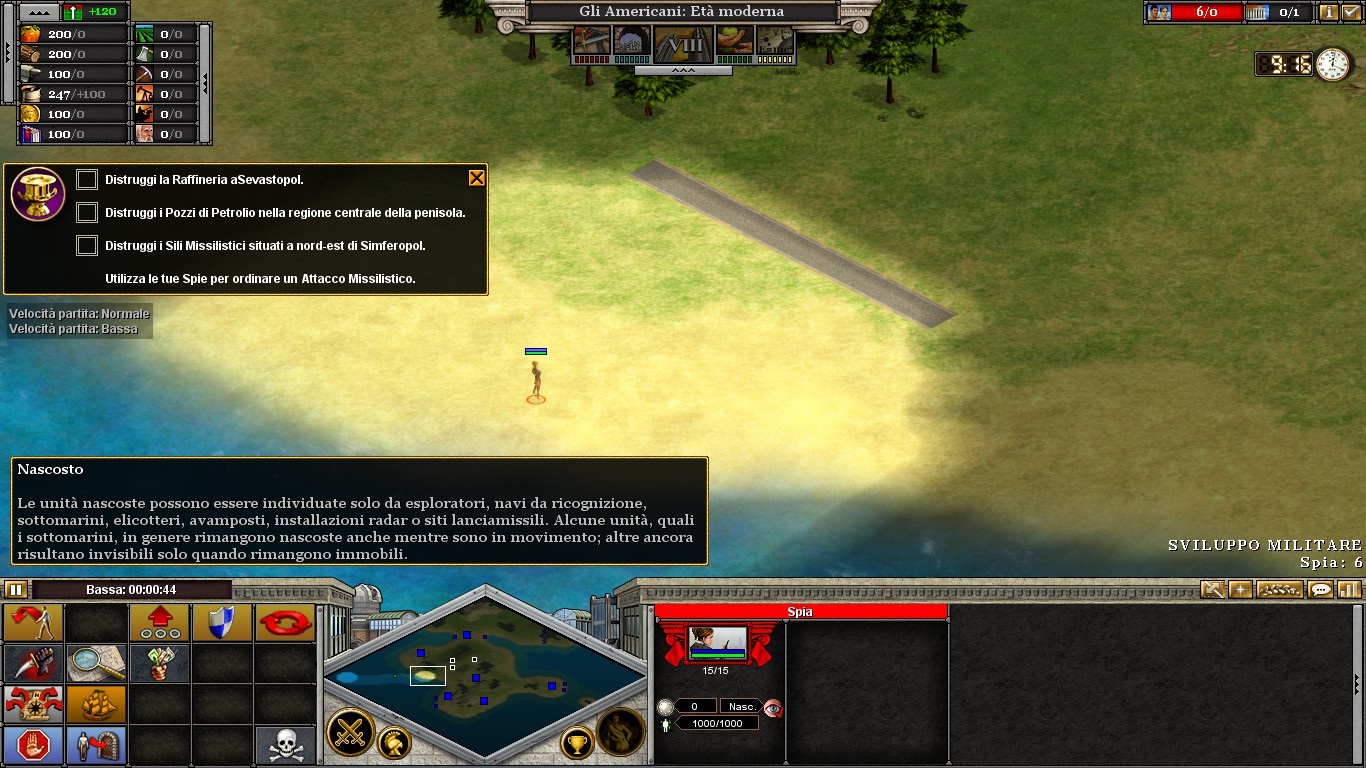 Note that while embarked, your spies are NOT hidden, so if there are enemy units near the shore they will attack. This happens rarely in Sevastopol, where an Armored Scout Car patrols the area; if it starts to attack your spies, simply distance them, wait a little, and then land them near the Refinery. Meanwhile, the other spies should destroy the three Oil Wells to the North. You’ll probably see a lonely SF who patrols the area around the mountain: he’s inoffensive, but remember that if one of the patrolling Scout Cars is nearby, it will start to attack your spies. Again, simply distance the enemy, if this happens. Losing a spy or two is not a tragedy (it will probably happen, the spies in Sevastopol are easily spotted and killed, the area is very crowded), and you can easily complete the mission using only one.
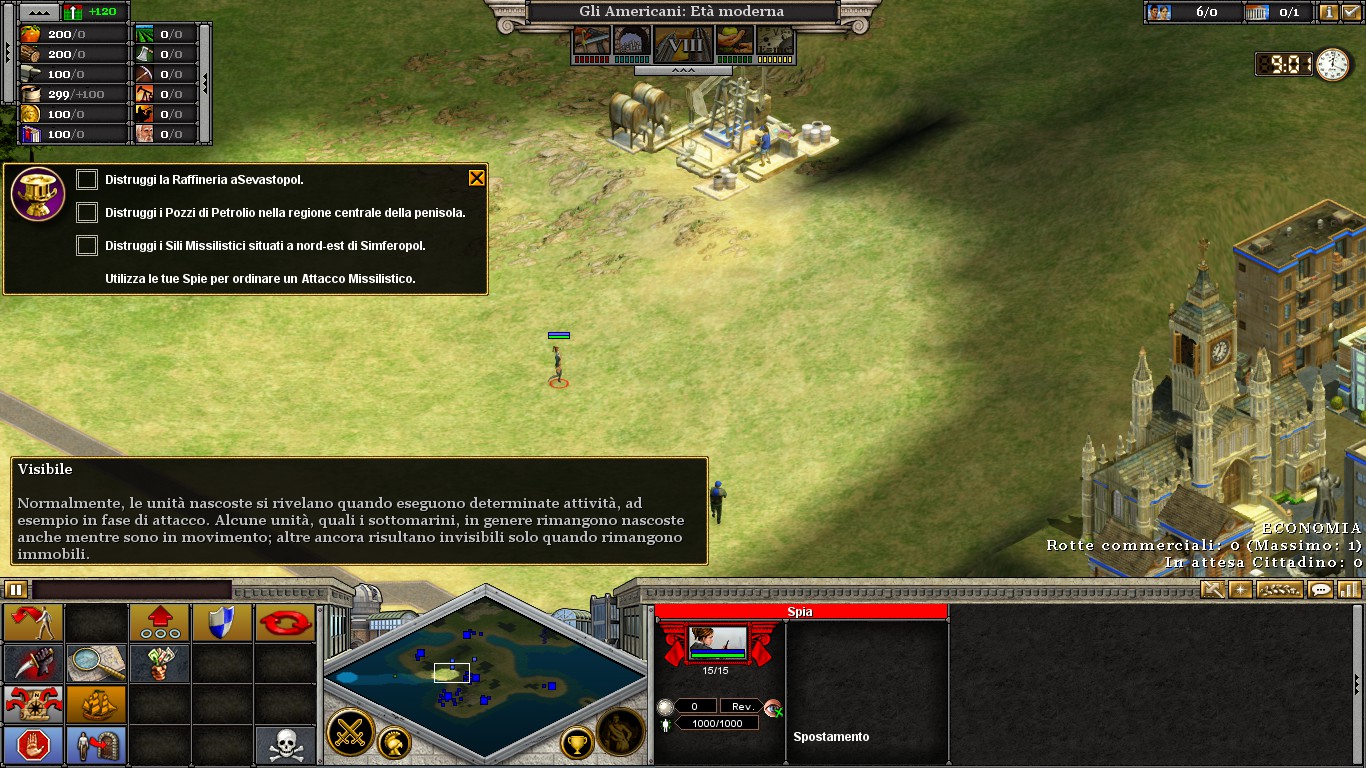
Now, move your spies to the east and you’ll find the Missile Silos: a single launch will destroy three Silos, so target one Silo and the one diagonally adjacent to it to quickly complete this mission.
The Refinery in Sevastopol;The Oil Wells in the centre of the peninsula;The (Hidden) Missile Silos East of the Wells.In this mission, your spies have a very useful ability: after successfully infiltrating in an enemy building, a V2 rocket is launched against its position, usually destroying it in one hit, damaging every units and building in the radius of the explosion. Note that your spies are immune to the explosion.
Start the mission by sending two Spies to Sevastopol, south of the Refinery, and sending the other four north of the city, south-west of the Oil Wells.
Note that while embarked, your spies are NOT hidden, so if there are enemy units near the shore they will attack. This happens rarely in Sevastopol, where an Armored Scout Car patrols the area; if it starts to attack your spies, simply distance them, wait a little, and then land them near the Refinery. Meanwhile, the other spies should destroy the three Oil Wells to the North. You’ll probably see a lonely SF who patrols the area around the mountain: he’s inoffensive, but remember that if one of the patrolling Scout Cars is nearby, it will start to attack your spies. Again, simply distance the enemy, if this happens. Losing a spy or two is not a tragedy (it will probably happen, the spies in Sevastopol are easily spotted and killed, the area is very crowded), and you can easily complete the mission using only one.Now, move your spies to the east and you’ll find the Missile Silos: a single launch will destroy three Silos, so target one Silo and the one diagonally adjacent to it to quickly complete this mission.
Second Mission
It took me some tries on my first run, but this mission can be completed without any effort, if you are careful enough. You start with four spies and your objective is to conquer the enemy city in fifteen minutes; you’ll get reinforcements by infiltrating enemy buildings:
Before getting into the mission itself, please note the following minimap:
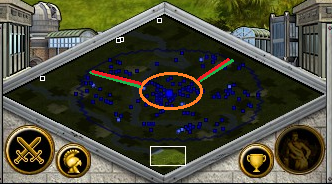 The green zone is a safe zone: you will not find any enemy units here (excluding a lot of civilians), and it is advised to store your troops here.
The orange zone is the capital city and its surroundings: there are no enemy troops here, only two towers and a lot of offices, but if you trigger an attack here, the enemy will swarm you, so do not venture here if you’re not ready.
The red zone is constantly patrolled by enemy units, mainly Infantry and Armored Scout Cars. It’s pointless to move here, let alone convert buildings: the resulting units will be mauled instantly.
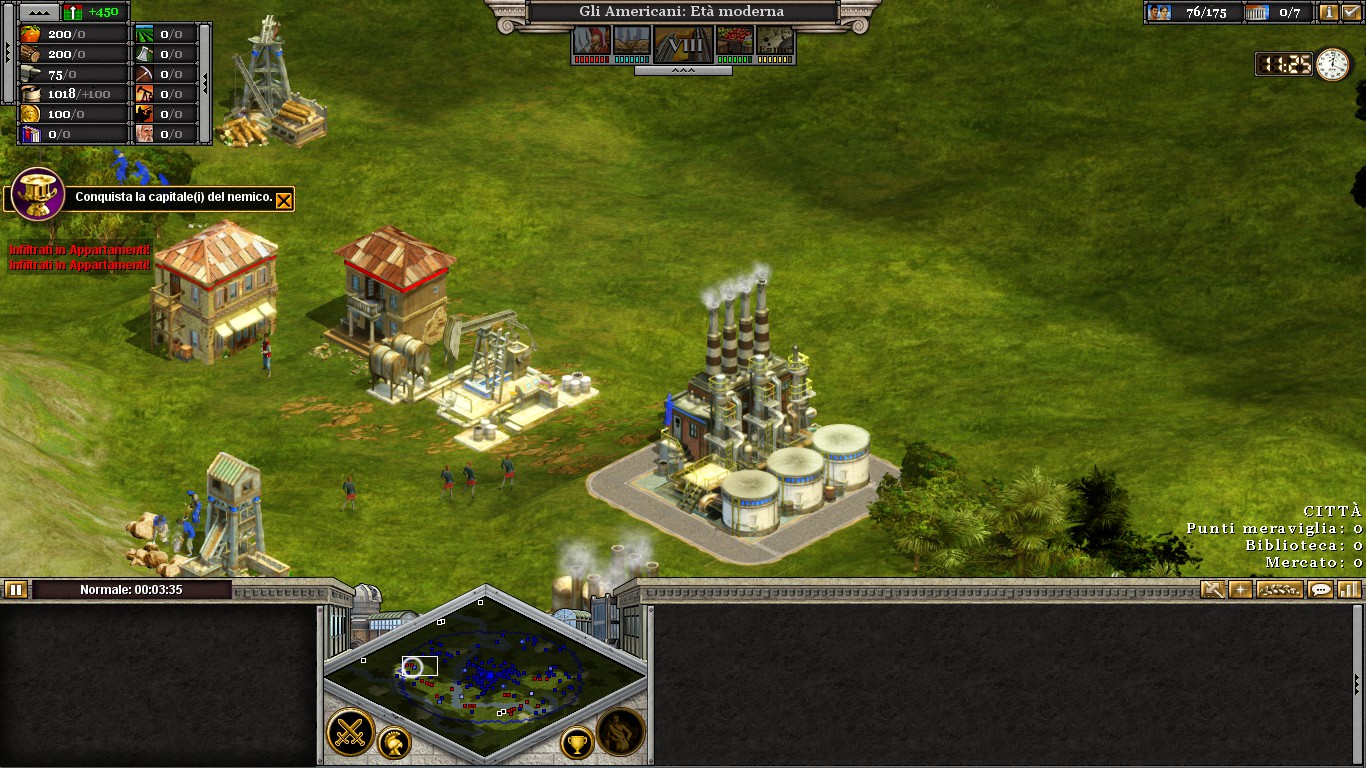
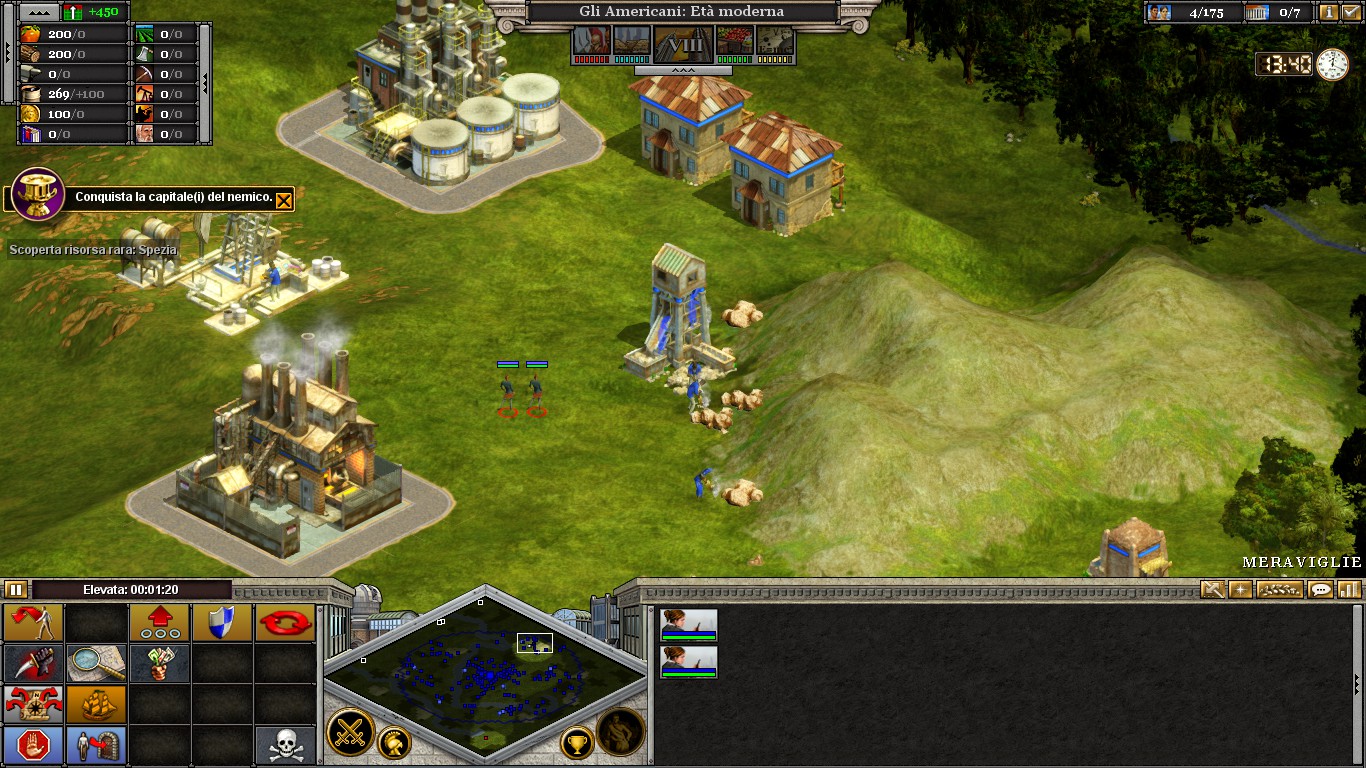
Knowing this, divide your starting spies in two groups: one to the east, and one to the west, infiltrating every useful building in the green zone. Regroup the troops obtained in the process immediately, in order to avoid them wandering around. Examine the pictures below: they show the limits of the green zone.
If you successfully converted everything in your path, your forces should be composed as it follows, and you should have at least six spies in total.
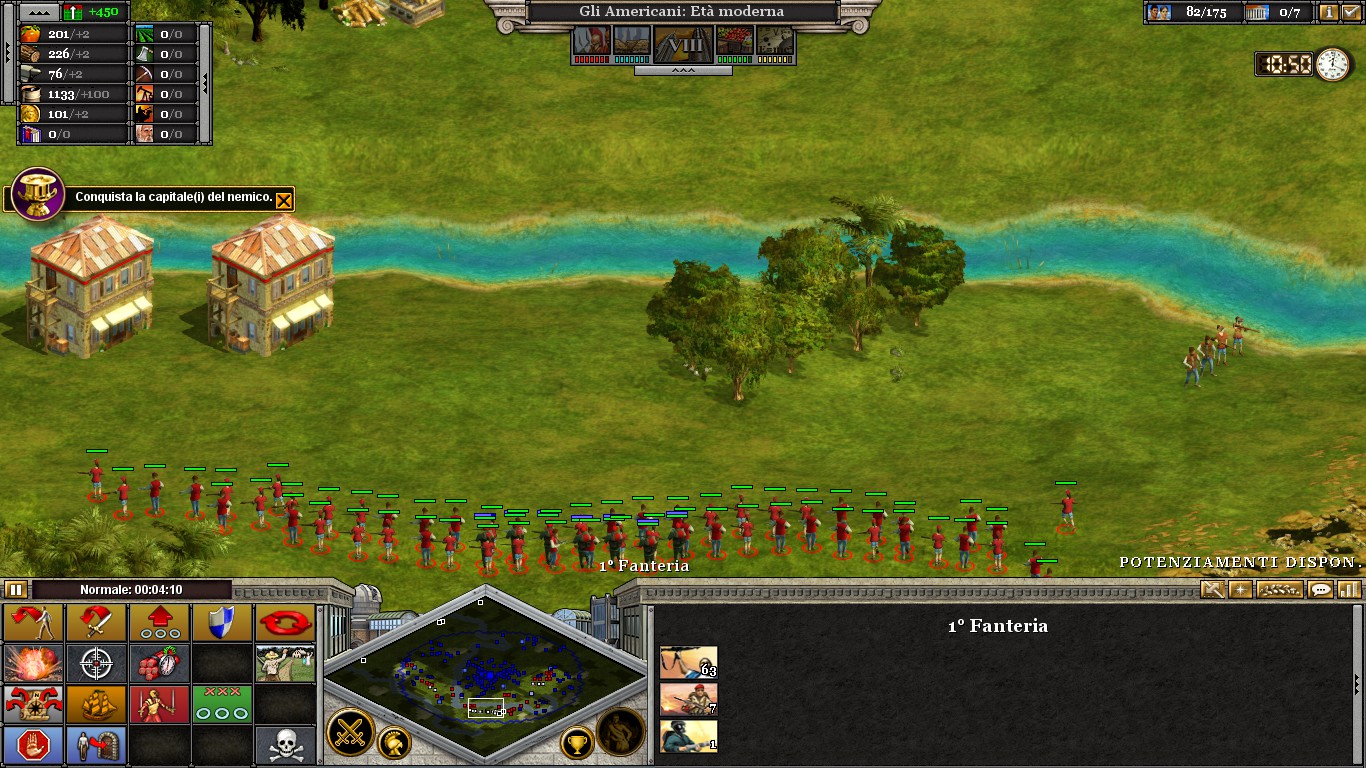
Now, you can start infiltrating the Offices to obtain some Humvees, while simultaneously attacking the city. You can proceed in two ways: by regrouping all your spies on one side of the city, and pushing your army through, or by keeping your spies divided into two groups, to the East and West of the city, and sending your army from the South. I prefer the former strategy by attacking form the South-West (examine picture below), so that the Humvees are not scattered around. Whatever strategy you should choose, CONCENTRATE YOUR FIRE ONLY ON THE CITY, even when the enemy units will start attacking: the mission ends the moment you subjugate the city, so keep your partisans close. An useful tip is to pause the game, select all your Special Forces and ordering multiple Sabotages against the city: this will quickly reduce its Hitpoints and your SF will draw all the enemy fire (Remember that scouts cannot subjugate cities, so their loss is not a tragedy).
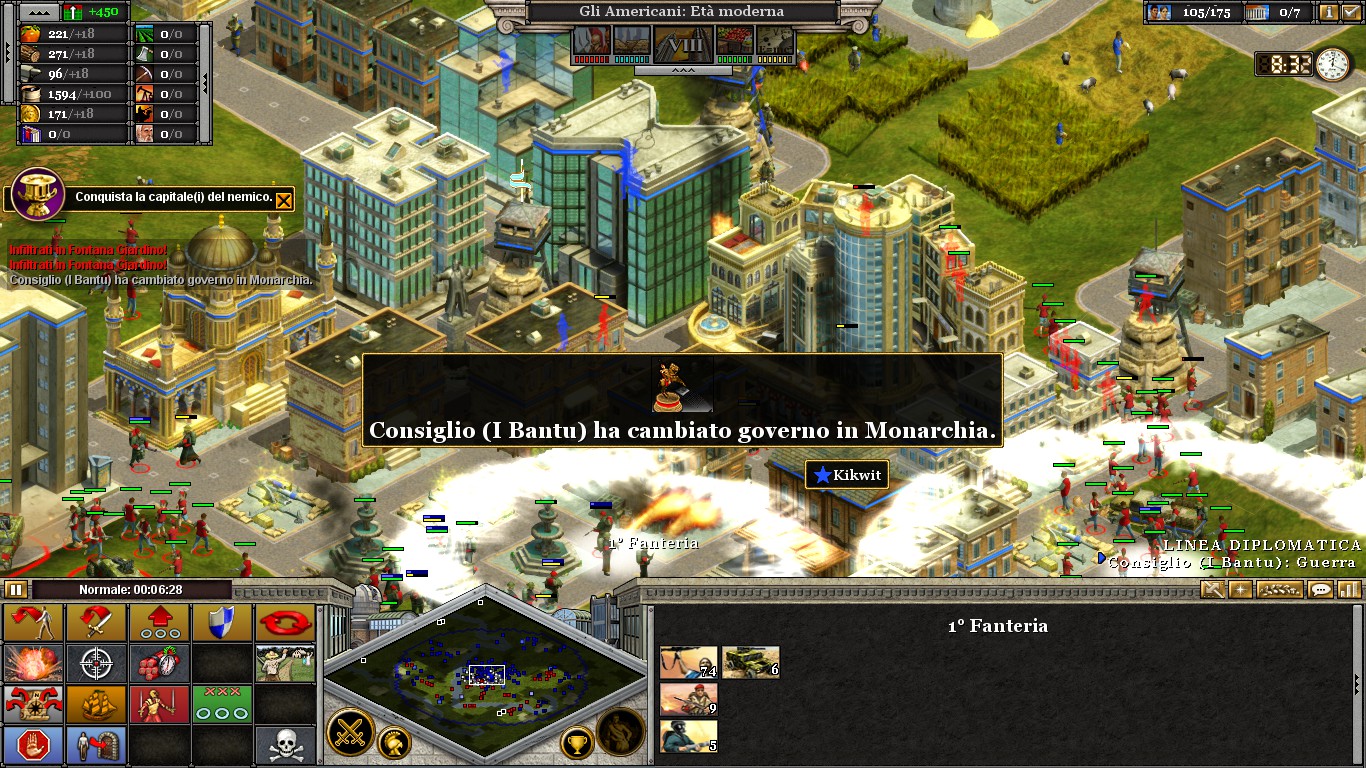
Note that some people suggest to destroy every military building before attacking in order to avoid enemy retaliation. I’ve never tried this strategy and I doubt it could work: fifteen minutes are too few to destroy all the buildings using only Sabotage (Every other form of attack in the orange zone will trigger the AI).
Building
Units
Apartment
1-4 Partisans
Office
1-4 Humvees
House
1-2 Spies
Lenin's statue
1-2 Special Forces
Fountain
1-2 Flamethrowers
Before getting into the mission itself, please note the following minimap:
The green zone is a safe zone: you will not find any enemy units here (excluding a lot of civilians), and it is advised to store your troops here.The orange zone is the capital city and its surroundings: there are no enemy troops here, only two towers and a lot of offices, but if you trigger an attack here, the enemy will swarm you, so do not venture here if you’re not ready.
The red zone is constantly patrolled by enemy units, mainly Infantry and Armored Scout Cars. It’s pointless to move here, let alone convert buildings: the resulting units will be mauled instantly.
Knowing this, divide your starting spies in two groups: one to the east, and one to the west, infiltrating every useful building in the green zone. Regroup the troops obtained in the process immediately, in order to avoid them wandering around. Examine the pictures below: they show the limits of the green zone.
If you successfully converted everything in your path, your forces should be composed as it follows, and you should have at least six spies in total.
Now, you can start infiltrating the Offices to obtain some Humvees, while simultaneously attacking the city. You can proceed in two ways: by regrouping all your spies on one side of the city, and pushing your army through, or by keeping your spies divided into two groups, to the East and West of the city, and sending your army from the South. I prefer the former strategy by attacking form the South-West (examine picture below), so that the Humvees are not scattered around. Whatever strategy you should choose, CONCENTRATE YOUR FIRE ONLY ON THE CITY, even when the enemy units will start attacking: the mission ends the moment you subjugate the city, so keep your partisans close. An useful tip is to pause the game, select all your Special Forces and ordering multiple Sabotages against the city: this will quickly reduce its Hitpoints and your SF will draw all the enemy fire (Remember that scouts cannot subjugate cities, so their loss is not a tragedy).
Note that some people suggest to destroy every military building before attacking in order to avoid enemy retaliation. I’ve never tried this strategy and I doubt it could work: fifteen minutes are too few to destroy all the buildings using only Sabotage (Every other form of attack in the orange zone will trigger the AI).
Third Mission
Very easy mission: you start with four Helicopters and ten Special Forces with 10.000 (!) craft each, while your objective is the destruction of:
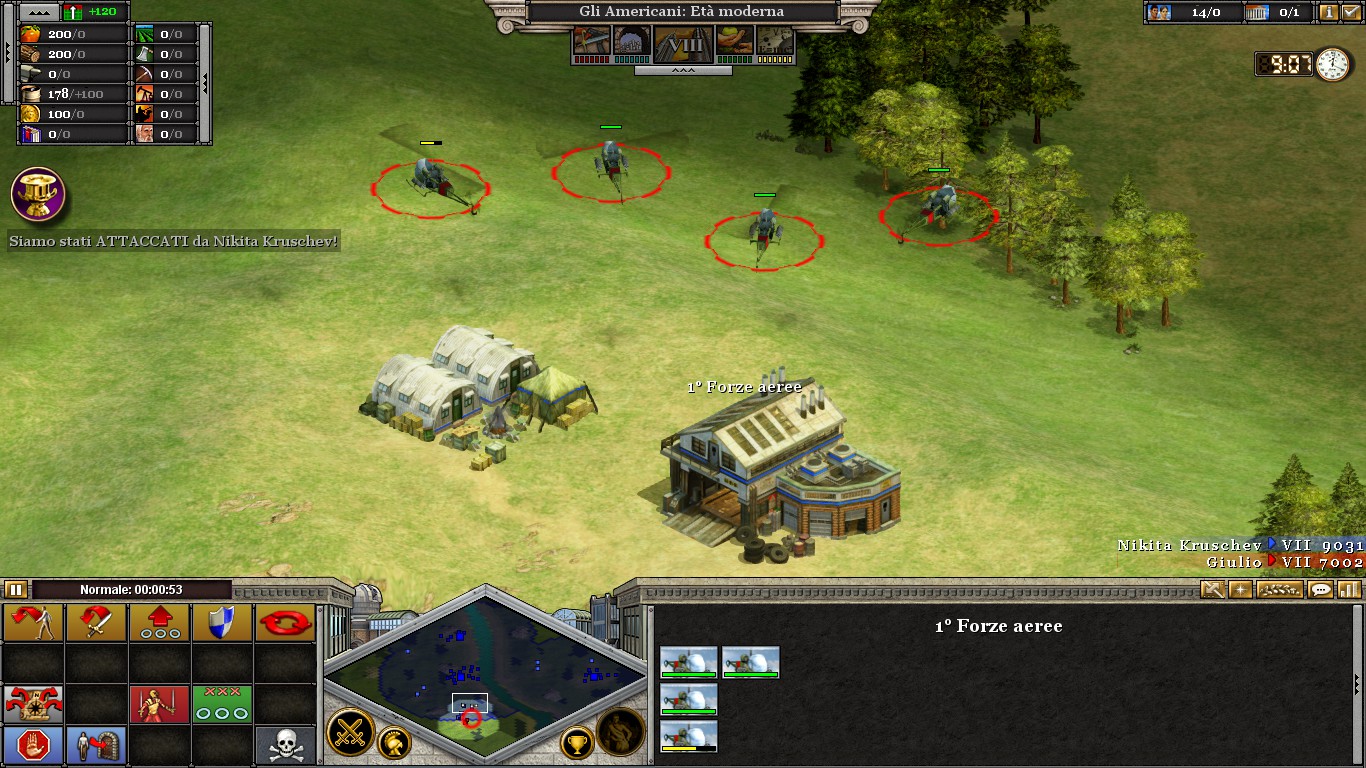 Auto Plant and Barracks in the oil fields South of Kiev;
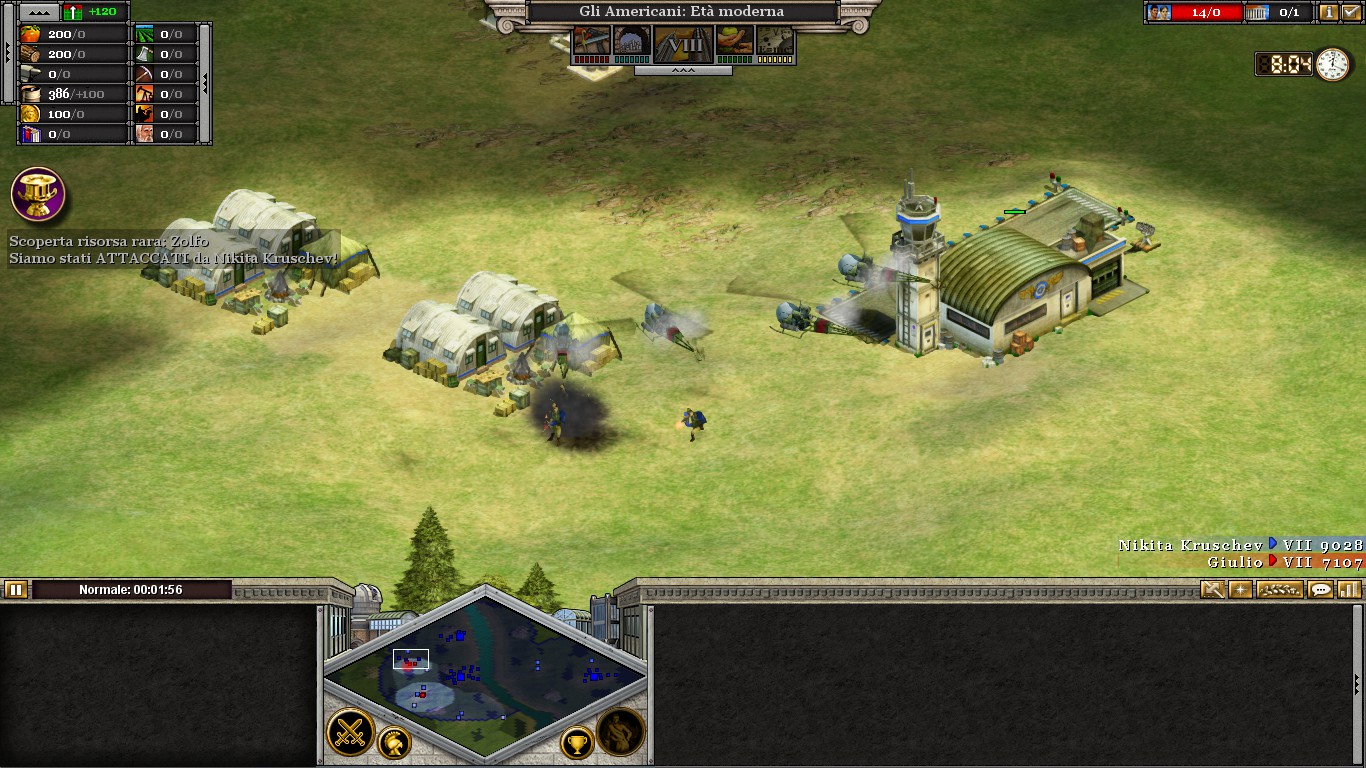 Two Barracks and an Airbase in the oil fields North-West of Kiev;
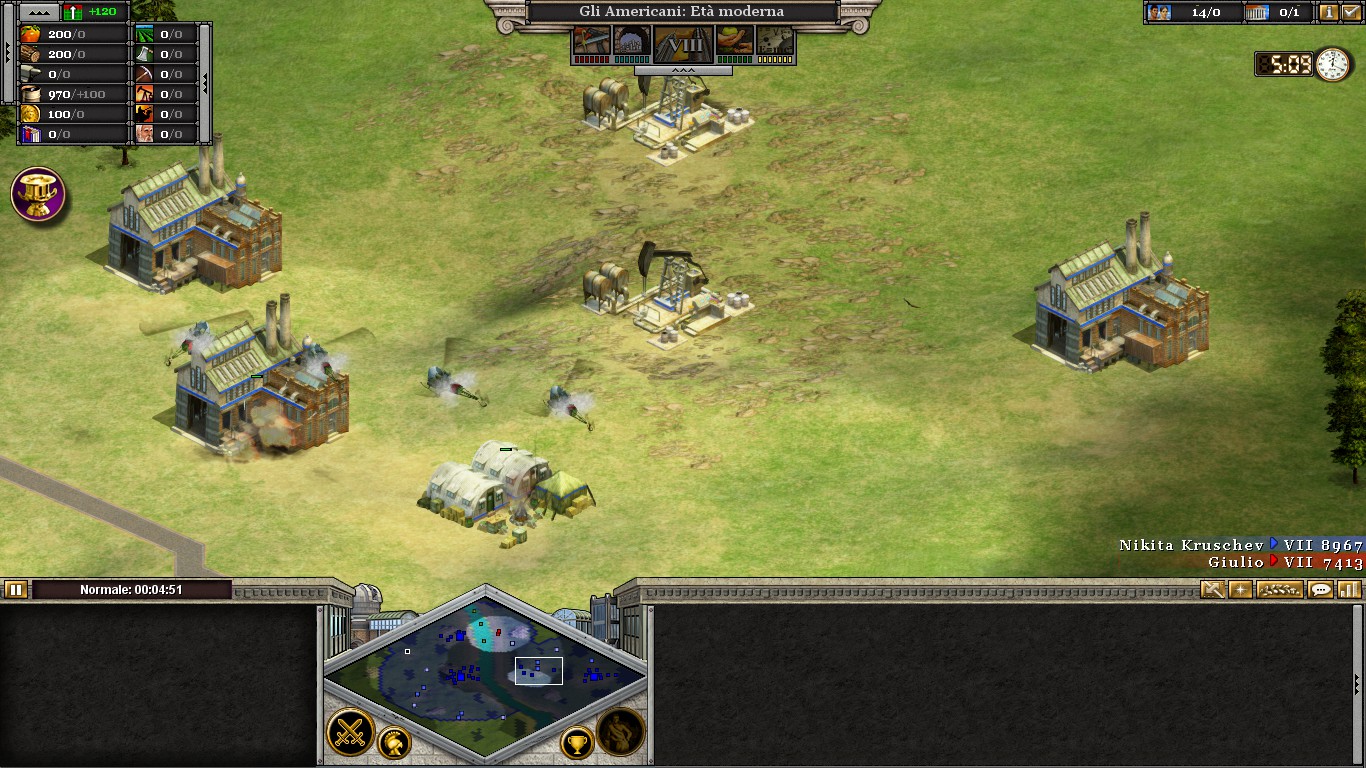 Three Factories and one Barracks in the oil fields West of Kharkov;
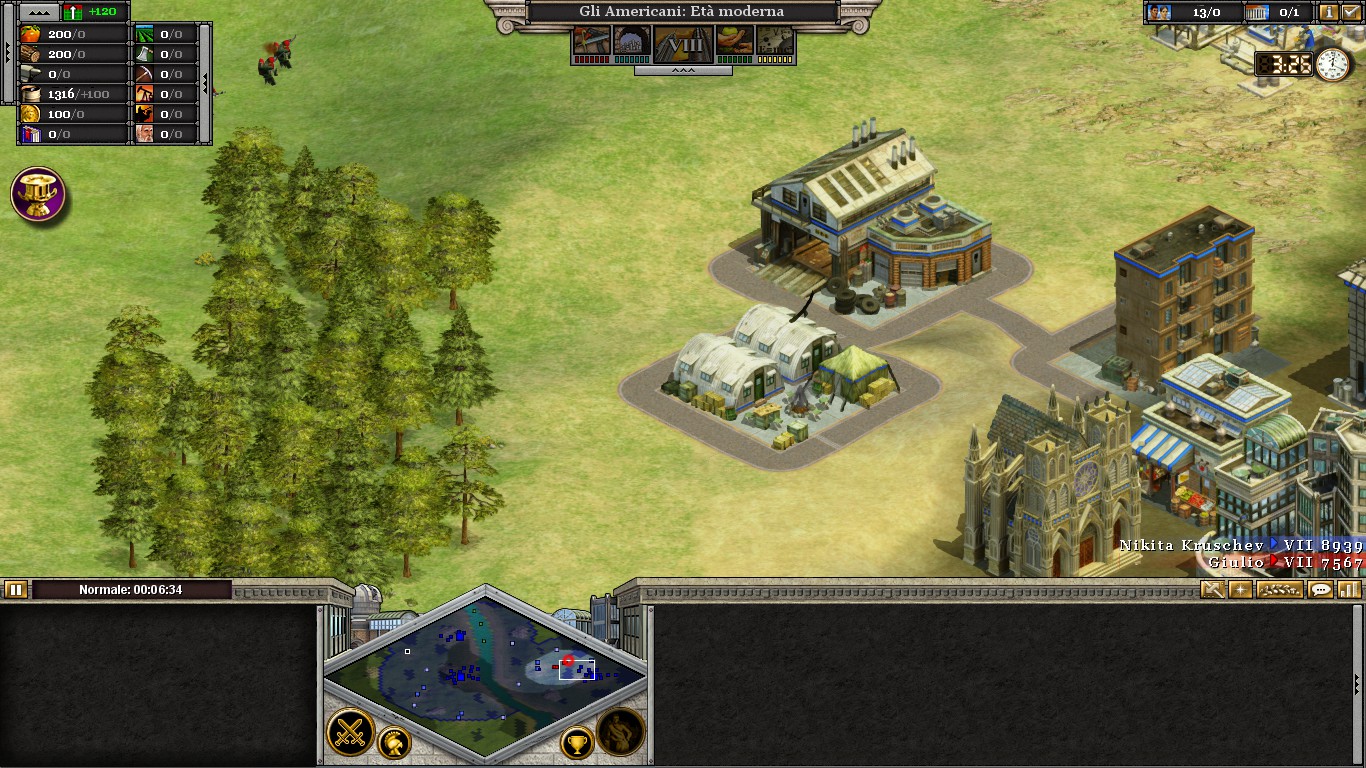 Auto Plant and Barracks in Kharkov.
Those buildings must be destroyed in ten minutes: it may seem difficult, but it can be easily done without much effort; as a rule of thumb, always send your Helicopters first, attack the enemy buildings, kill the retaliating enemies, send the SF to sabotage and proceed to the next objective.
Start by sending your Helicopters to the North, the fog of war shall vanish, revealing your targets: attack the Barracks so that a single Infantry units comes out. During this mission, you’ll only encounter Infantry: they can be easily dispatched by your Helicopters, but this requires some time; the best strategy is to draw fire with your Helis and Sniping with three SF, obliterating the enemy. Note that even if you lose some units, you can easily complete the mission with only three Special Forces remaning.
After destroying your objectives, advance North West, to the oil field West of Kiev, avoiding the city entirely: you’ll encounter no resistance. From there, send your Helis North, to the next oil field, and you’ll find the Airbase and the Barracks; again, draw fire with the Helis, Snipe the Infantry and Sabotage the buildings. Note that if you give the order with a group of units selected, only one of them will move to Sabotage: click multiple times to trigger simultaneous Sabotages.
From here, move your Helis north of Chernobyl, bypassing the mountain and avoiding the city. You should encounter another Infantry: destroy it and cross the river North of the city, in order to avoid the enemy fleet.
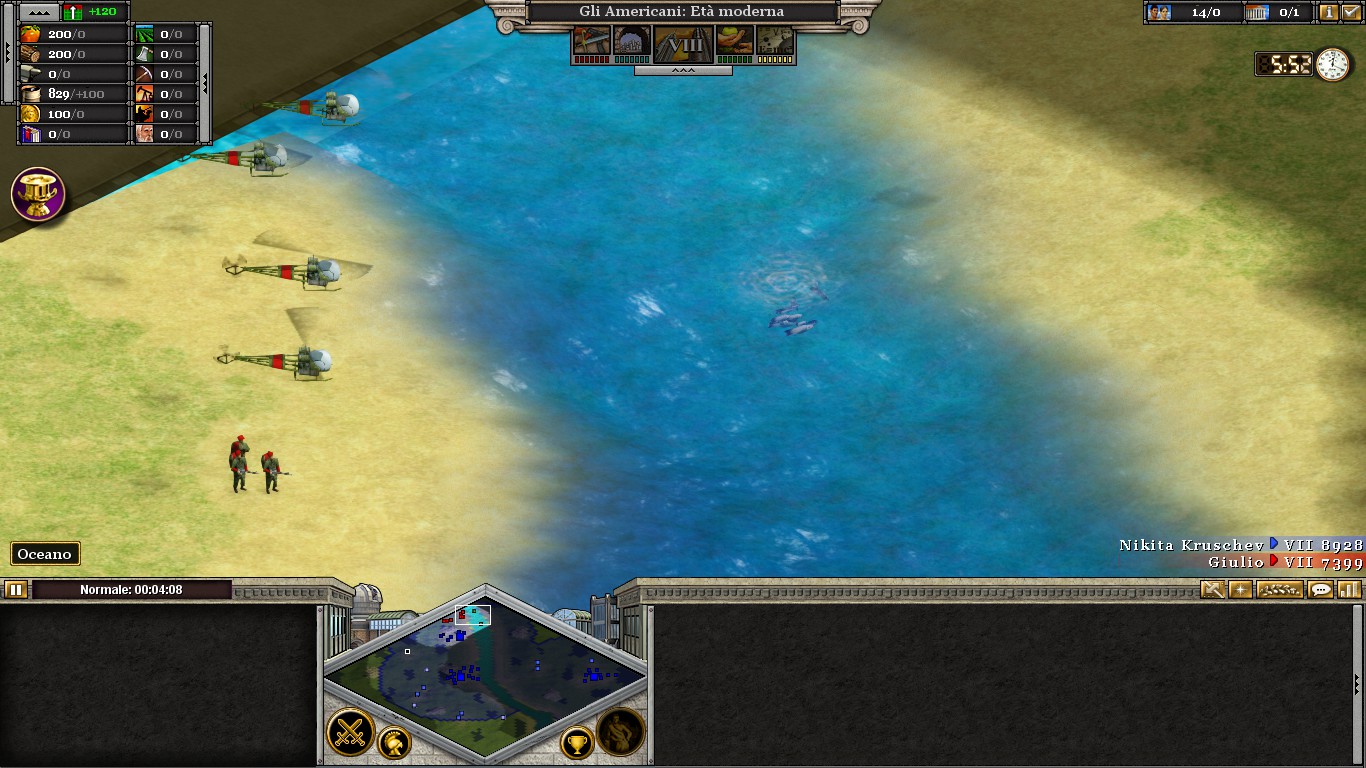
Keeping away from the river, send your Helis South, to the oil field, and trigger the AI retaliation: note that this time, you’ll encounter some resistance, as the enemy Infantry will arrive even from Kharkov. Once again, your Helis will be more than enough to keep the enemy at bay, but reinforcing them with some SF will make everything quicker. After destroying your objectives, move your Helis to Kharkov and attack the Barracks: the last enemy units will come out; dispatch them and destroy the buildings, completing your mission.
Auto Plant and Barracks in the oil fields South of Kiev;Two Barracks and an Airbase in the oil fields North-West of Kiev;Three Factories and one Barracks in the oil fields West of Kharkov;Auto Plant and Barracks in Kharkov.Those buildings must be destroyed in ten minutes: it may seem difficult, but it can be easily done without much effort; as a rule of thumb, always send your Helicopters first, attack the enemy buildings, kill the retaliating enemies, send the SF to sabotage and proceed to the next objective.
Start by sending your Helicopters to the North, the fog of war shall vanish, revealing your targets: attack the Barracks so that a single Infantry units comes out. During this mission, you’ll only encounter Infantry: they can be easily dispatched by your Helicopters, but this requires some time; the best strategy is to draw fire with your Helis and Sniping with three SF, obliterating the enemy. Note that even if you lose some units, you can easily complete the mission with only three Special Forces remaning.
After destroying your objectives, advance North West, to the oil field West of Kiev, avoiding the city entirely: you’ll encounter no resistance. From there, send your Helis North, to the next oil field, and you’ll find the Airbase and the Barracks; again, draw fire with the Helis, Snipe the Infantry and Sabotage the buildings. Note that if you give the order with a group of units selected, only one of them will move to Sabotage: click multiple times to trigger simultaneous Sabotages.
From here, move your Helis north of Chernobyl, bypassing the mountain and avoiding the city. You should encounter another Infantry: destroy it and cross the river North of the city, in order to avoid the enemy fleet.
Keeping away from the river, send your Helis South, to the oil field, and trigger the AI retaliation: note that this time, you’ll encounter some resistance, as the enemy Infantry will arrive even from Kharkov. Once again, your Helis will be more than enough to keep the enemy at bay, but reinforcing them with some SF will make everything quicker. After destroying your objectives, move your Helis to Kharkov and attack the Barracks: the last enemy units will come out; dispatch them and destroy the buildings, completing your mission.
Fourth Mission
I suggest to run this mission on the slowest speed, to make things easier, as you shall move two different groups at the same time.
You start with eight Spies, eight SF and a Redoubt, and must save ten hostages in twenty minutes. Those hostages are held in enemy buildings, specifically:
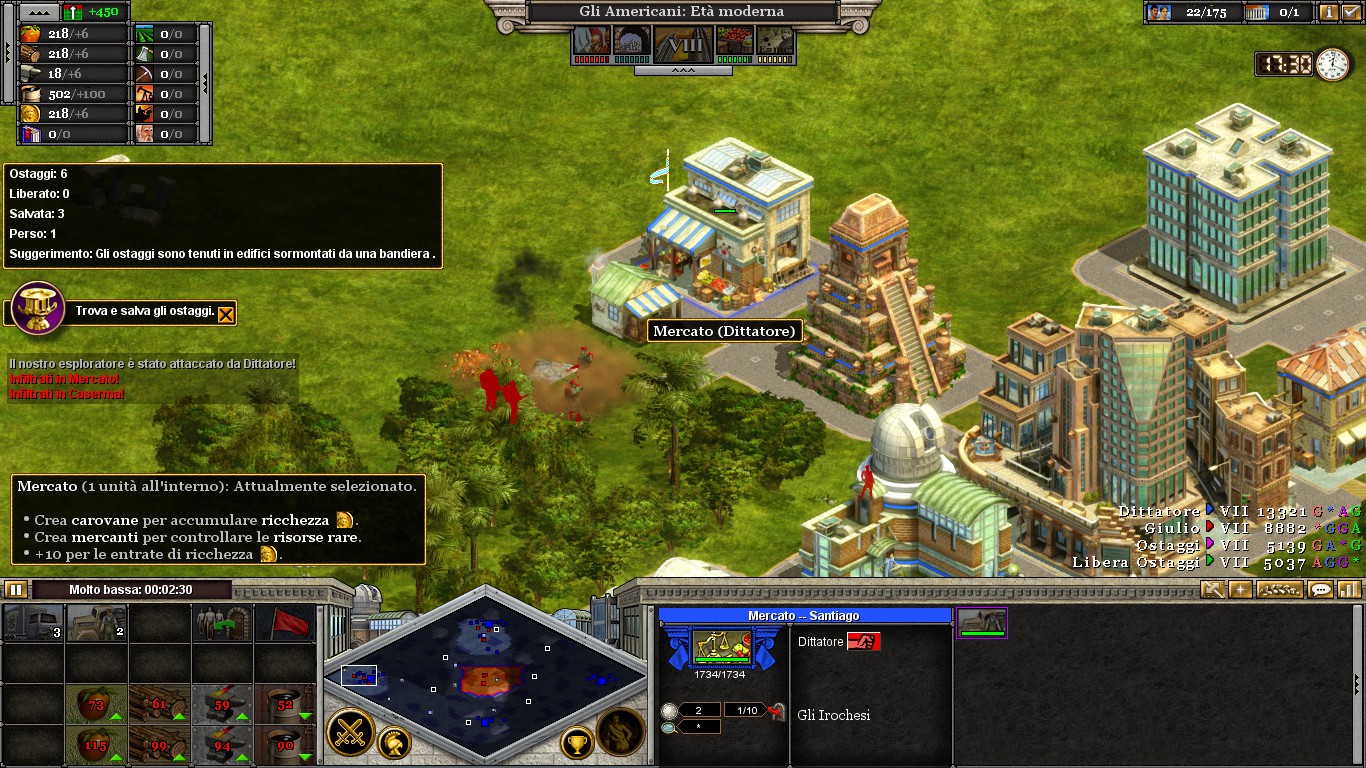 The Market in Santiago;
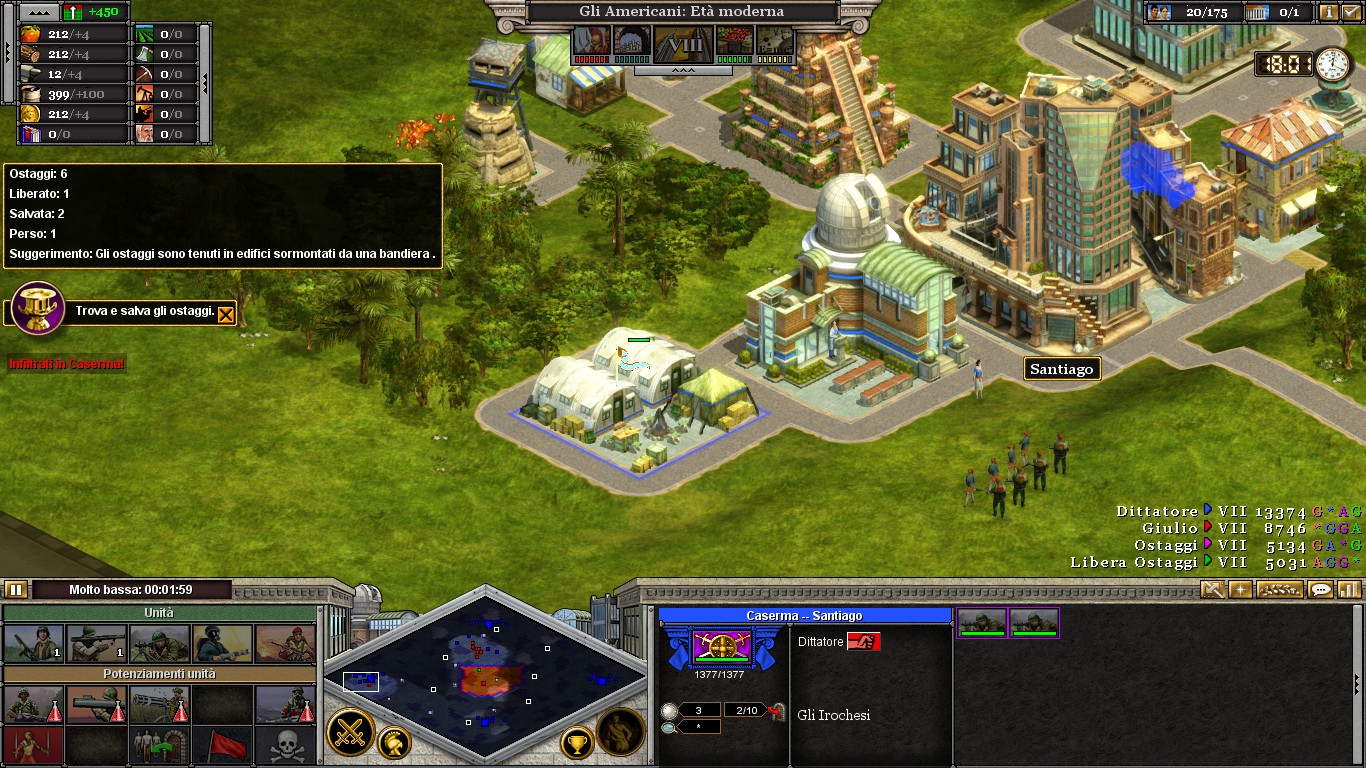 The Barracks in Santiago;
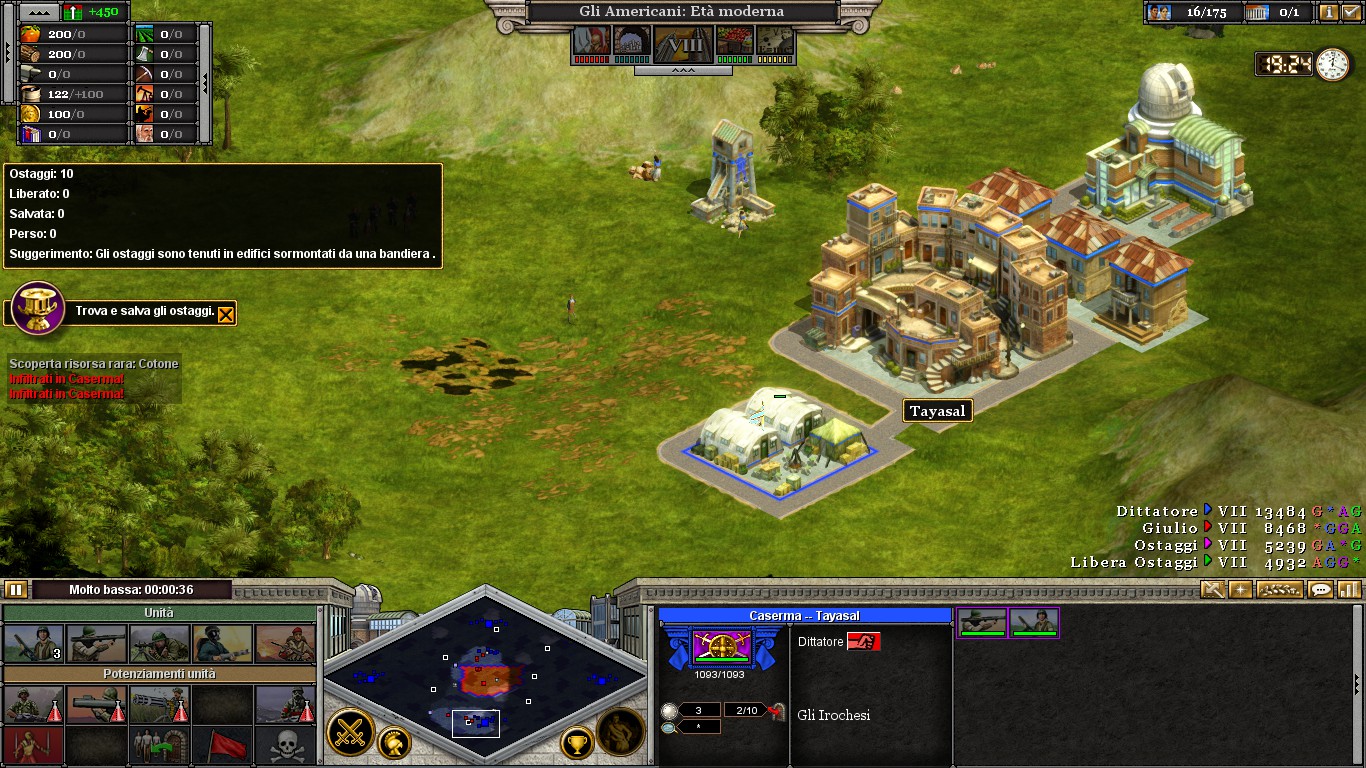 The Barracks in Tayasal;
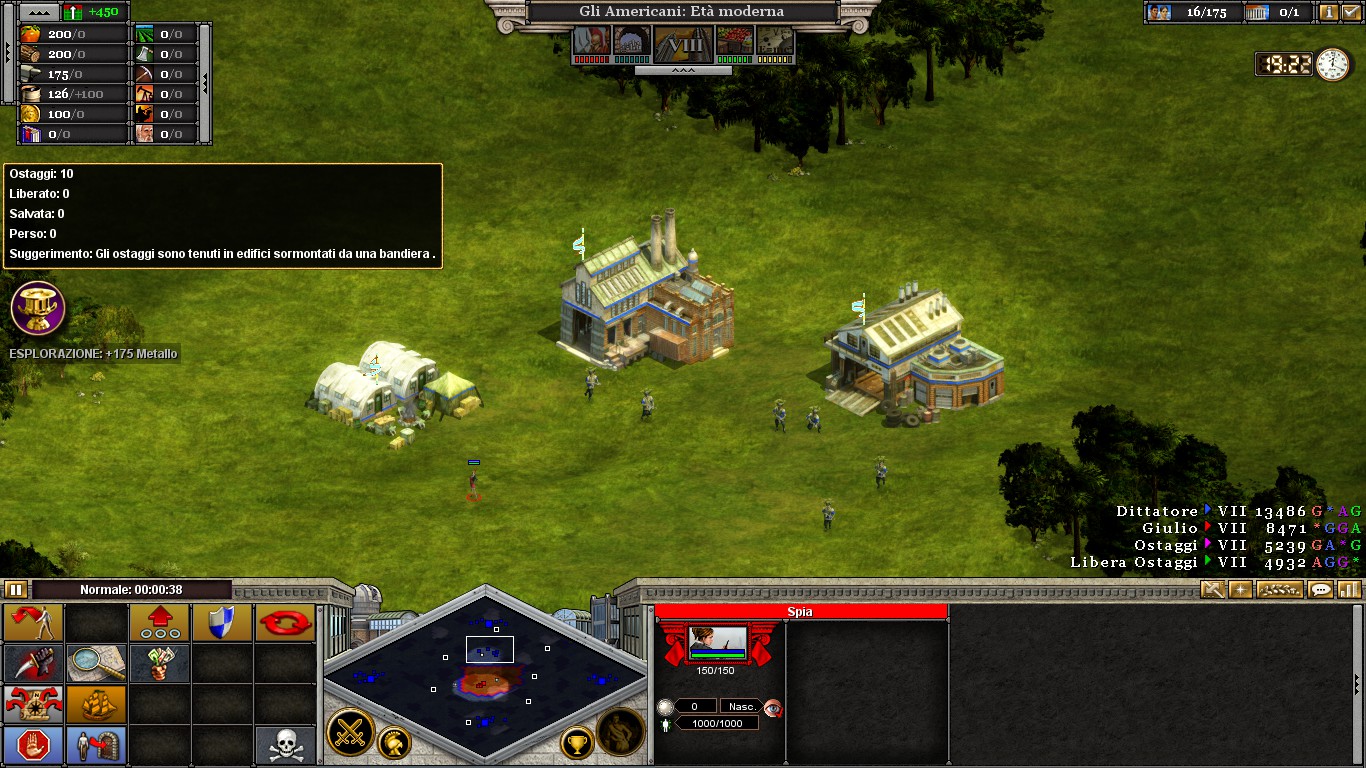 The Barracks North of your starting position;
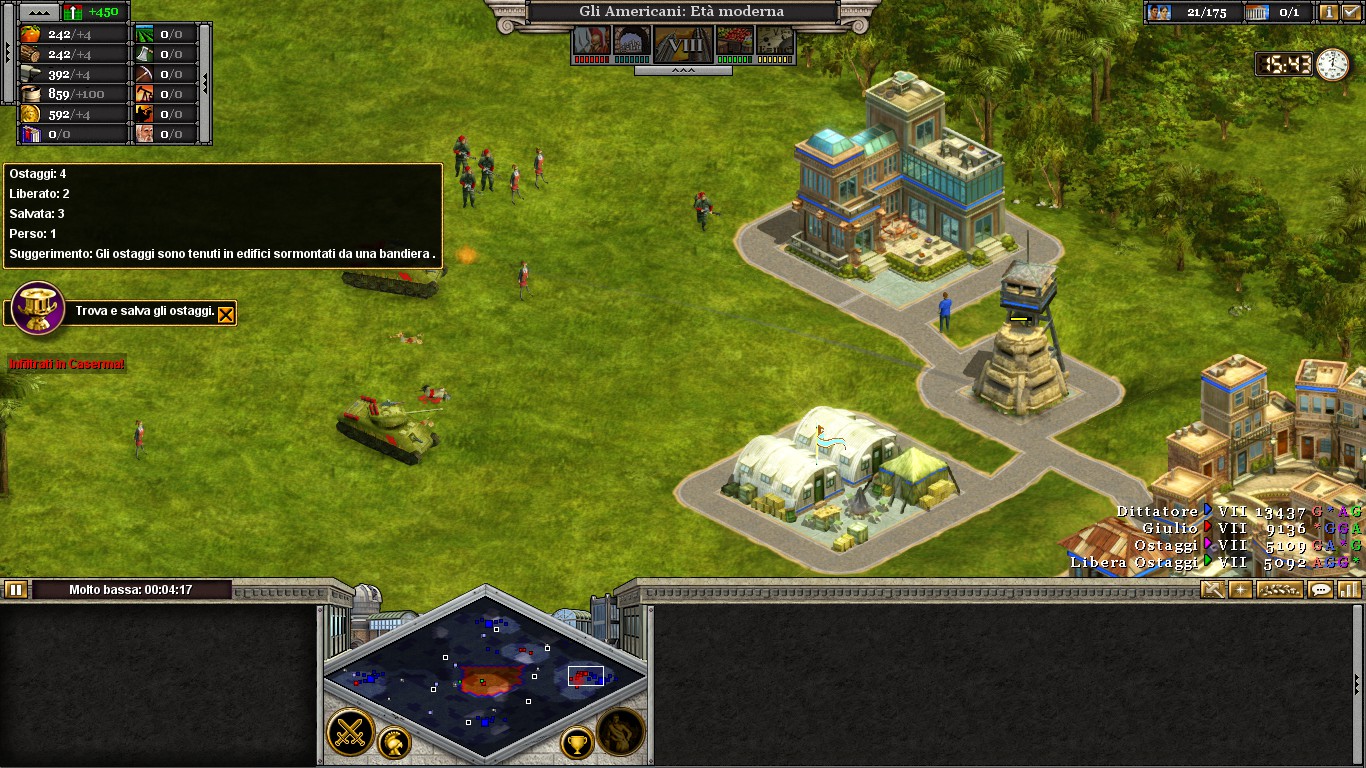 The Barracks in San Josè;
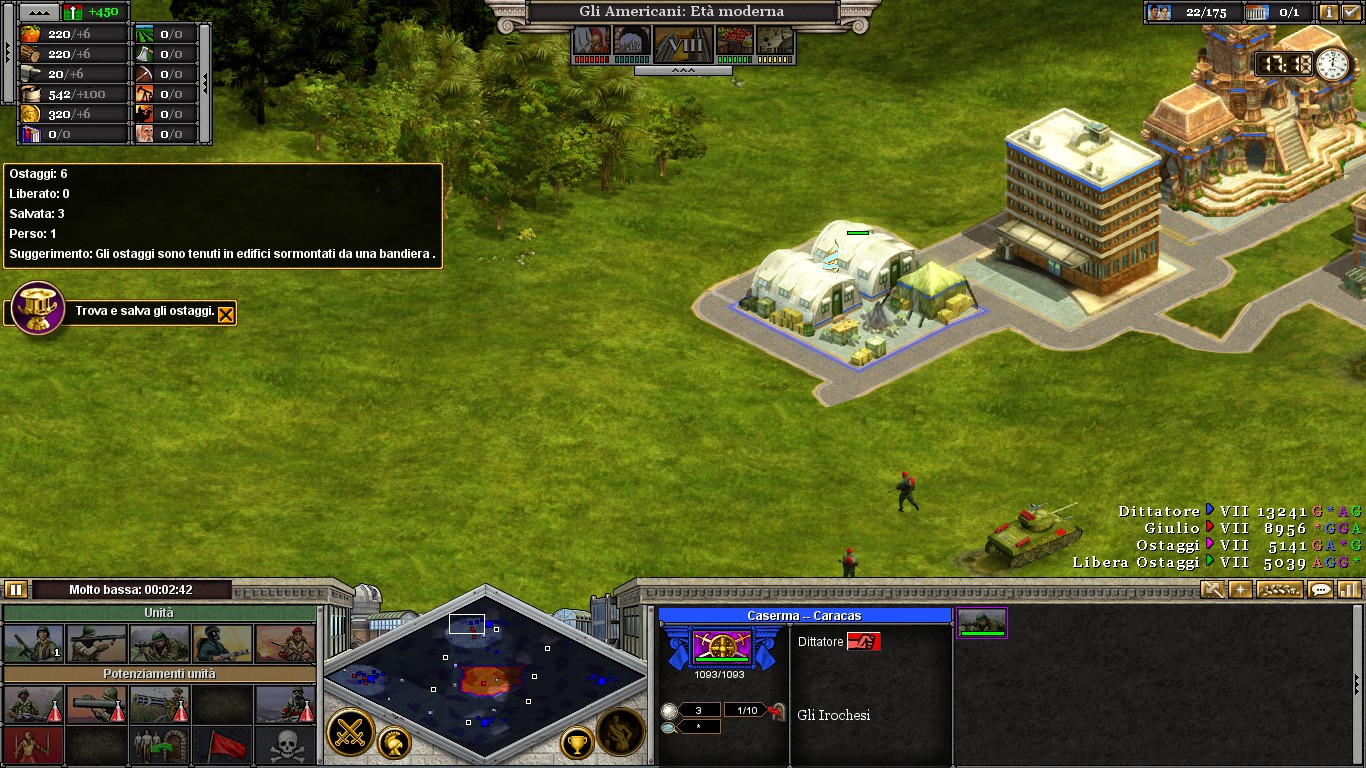 The Barracks in Caracas.
Please note that all the buildings have a flag on them: this means that the building is garrisoned. However, this does not specify the type of units garrisoned; you must Infiltrate the building in order to avoid nasty surprises (some buildings even hold Tanks!): hostages are shown in purple, while enemies in blue. Note that in the Barracks North of your starting position there are both hostages and enemies garrisoned inside: two Bazookas (hostages) and two Infantries (enemies). The enemy Infantry is set to target the Bazookas as soon as the building is destroyed, and being their Hard Counter this usually ends in the death of one hostage: this is no tragedy, however; the mission can, in fact, be completed by rescuing only one hostage and sending the others to their deaths: as long as the timer doesn’t hit zero and you have rescued one hostage, the mission is considered successful, so you can rescue one hostage and kill off the others. This guide covers the rescue of all the hostages for completion.
Start by dividing you forces into two groups formed by four Spies and four SF. Send the first one South, to Tayasal, and the other a little North, just at your borders. The first group (We will call that Group One) should get a quick work of the Barracks in the city, freeing two hostages, who will automatically move to your Redoubt. An hostage is considered “rescued” when he garrisons the Redoubt; note that you can also manually move the hostages, if the path to the Redoubt is not clear.
Meanwhile, the Spies in the second group (Group Two) should advance to the Barracks (leave your SF behind) and start to Bribe the enemy units who patrol the zone. DO NOT DESTROY the buildings! The Auto Plant and Factory hold two Tanks each, while destroying the Barracks at this point will surely result in the death of at least one hostage. The enemy will send a small retaliation force of two Tanks and some Infantry (Picture below):
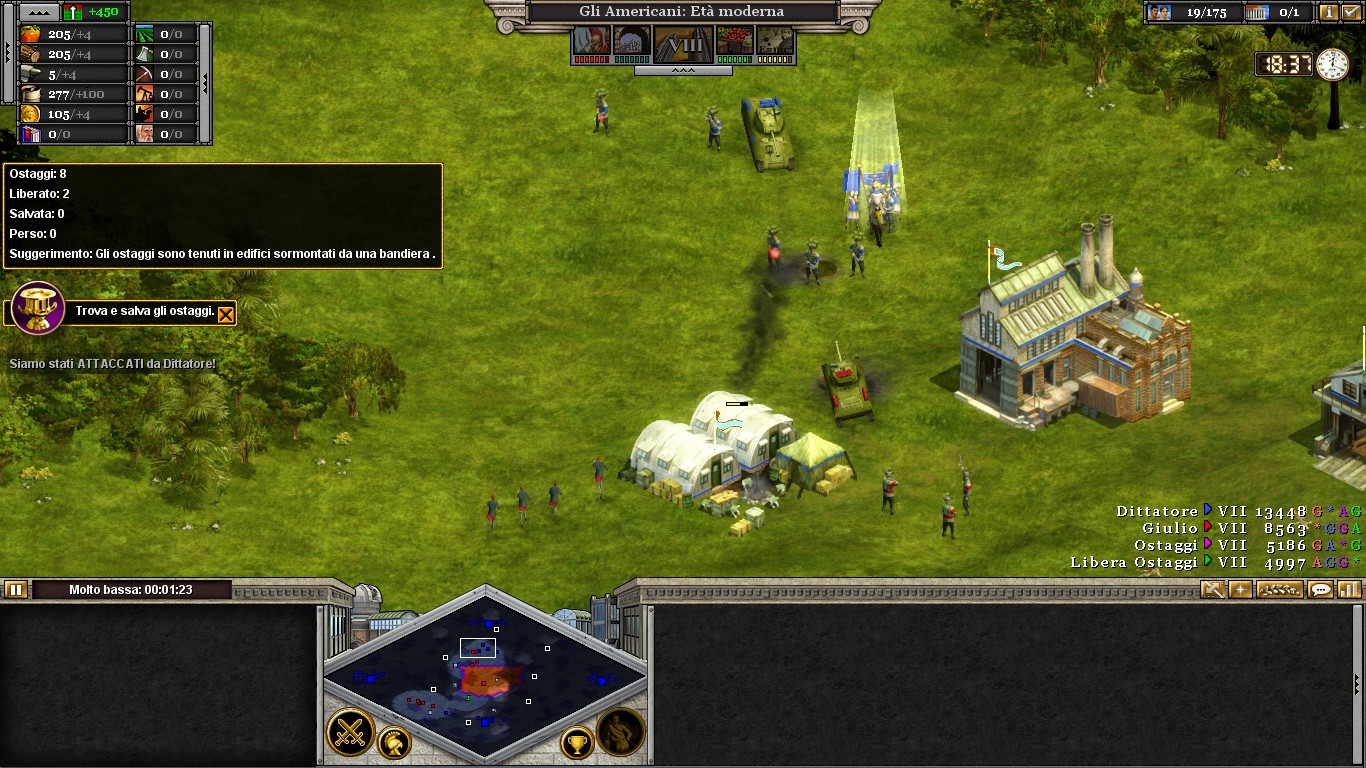
Bribe the Tanks first, then the remaining Infantry. After a little, a new and weaker retaliation force will attack: bribe it too. At this point, you should Sabotage the Barracks, placing your newly obtained units all around: they should get a quick work of the enemy Infantry and get your hostage Bazookas to safety.
Note that this Barracks and the one in Caracas are the only that can actually produce units: sometimes, they will produce a Flamethrower. If this happens, CONVERT HIM IMMEDIATELY: Flamethrowers have a special ability that expels garrisoned units from buildings, thus saving a lot of time and trouble.
After rescuing the hostages in Tayasal, Group One should relocate to Santiago, in the Western corner of the map: your objectives are the Market and the Barracks, both guarded by a single Bunker. You can Sabotage it, if you want, but note that you’ll lose some time to replenish your SF craft; It is entirely possible to leave the Bunker be and saving the hostages, reporting however some damage. If you decide to destroy the Bunker, send all your SF at once (Remember, by multiclicking with all of your SF selected, you’ll trigger multiple attacks), then wait some time and destroy both Market and Barracks. If you opt to leave the Bunker intact, approach the Barracks from South, so that your units suffer minimal damage, and the Market from the East. Note that the hostage held in the Market is a Merchant, a very frail unit: if your SF obstruct his path, he will almost certainly be mauled by the Bunker, so leave him some space to escape. Whatever strategy you choose, relocate Group One to the proximity of the Barracks in San Josè.
Group Two should have liberated the Bazookas by now, so advance it to the North, to Caracas. Your bribed units should remain where they are, or relocate near Caracas with Group One. You could believe they are useful against buildings, but they aren’t: especially in Caracas, where the Barracks are near the City Centre, and an attack (but not a Sabotage) will trigger the alarm, thus making things harder for your SF, who will get mauled by the garrisoned City Centre. After destroying Caracas Barracks, move Group Two near Group One, to San Josè.
San Josè is similar to Santiago, as the hostages are held in the proximity of a Bunker. This time, however, the Bunker can be easily destroyed by three or four SF, leaving more than enough to sabotage the Barracks at the same time. You can also draw fire with your Bribed units, making things easier for your Saboteurs. Either way, with the Barracks destroyed, it will be a matter of seconds before the hostages reach the Redoubt, completing the mission.
Note that sometimes the Redoubt gets attacked by lonely enemy units: do not panic, their firepower is no match for your Redoubt; if there are hostages in the proximity, however, relocate them away: the AI will prioritize your hostages over everything.
You start with eight Spies, eight SF and a Redoubt, and must save ten hostages in twenty minutes. Those hostages are held in enemy buildings, specifically:
The Market in Santiago;The Barracks in Santiago;The Barracks in Tayasal;The Barracks North of your starting position;The Barracks in San Josè;The Barracks in Caracas.Please note that all the buildings have a flag on them: this means that the building is garrisoned. However, this does not specify the type of units garrisoned; you must Infiltrate the building in order to avoid nasty surprises (some buildings even hold Tanks!): hostages are shown in purple, while enemies in blue. Note that in the Barracks North of your starting position there are both hostages and enemies garrisoned inside: two Bazookas (hostages) and two Infantries (enemies). The enemy Infantry is set to target the Bazookas as soon as the building is destroyed, and being their Hard Counter this usually ends in the death of one hostage: this is no tragedy, however; the mission can, in fact, be completed by rescuing only one hostage and sending the others to their deaths: as long as the timer doesn’t hit zero and you have rescued one hostage, the mission is considered successful, so you can rescue one hostage and kill off the others. This guide covers the rescue of all the hostages for completion.
Start by dividing you forces into two groups formed by four Spies and four SF. Send the first one South, to Tayasal, and the other a little North, just at your borders. The first group (We will call that Group One) should get a quick work of the Barracks in the city, freeing two hostages, who will automatically move to your Redoubt. An hostage is considered “rescued” when he garrisons the Redoubt; note that you can also manually move the hostages, if the path to the Redoubt is not clear.
Meanwhile, the Spies in the second group (Group Two) should advance to the Barracks (leave your SF behind) and start to Bribe the enemy units who patrol the zone. DO NOT DESTROY the buildings! The Auto Plant and Factory hold two Tanks each, while destroying the Barracks at this point will surely result in the death of at least one hostage. The enemy will send a small retaliation force of two Tanks and some Infantry (Picture below):
Bribe the Tanks first, then the remaining Infantry. After a little, a new and weaker retaliation force will attack: bribe it too. At this point, you should Sabotage the Barracks, placing your newly obtained units all around: they should get a quick work of the enemy Infantry and get your hostage Bazookas to safety.
Note that this Barracks and the one in Caracas are the only that can actually produce units: sometimes, they will produce a Flamethrower. If this happens, CONVERT HIM IMMEDIATELY: Flamethrowers have a special ability that expels garrisoned units from buildings, thus saving a lot of time and trouble.
After rescuing the hostages in Tayasal, Group One should relocate to Santiago, in the Western corner of the map: your objectives are the Market and the Barracks, both guarded by a single Bunker. You can Sabotage it, if you want, but note that you’ll lose some time to replenish your SF craft; It is entirely possible to leave the Bunker be and saving the hostages, reporting however some damage. If you decide to destroy the Bunker, send all your SF at once (Remember, by multiclicking with all of your SF selected, you’ll trigger multiple attacks), then wait some time and destroy both Market and Barracks. If you opt to leave the Bunker intact, approach the Barracks from South, so that your units suffer minimal damage, and the Market from the East. Note that the hostage held in the Market is a Merchant, a very frail unit: if your SF obstruct his path, he will almost certainly be mauled by the Bunker, so leave him some space to escape. Whatever strategy you choose, relocate Group One to the proximity of the Barracks in San Josè.
Group Two should have liberated the Bazookas by now, so advance it to the North, to Caracas. Your bribed units should remain where they are, or relocate near Caracas with Group One. You could believe they are useful against buildings, but they aren’t: especially in Caracas, where the Barracks are near the City Centre, and an attack (but not a Sabotage) will trigger the alarm, thus making things harder for your SF, who will get mauled by the garrisoned City Centre. After destroying Caracas Barracks, move Group Two near Group One, to San Josè.
San Josè is similar to Santiago, as the hostages are held in the proximity of a Bunker. This time, however, the Bunker can be easily destroyed by three or four SF, leaving more than enough to sabotage the Barracks at the same time. You can also draw fire with your Bribed units, making things easier for your Saboteurs. Either way, with the Barracks destroyed, it will be a matter of seconds before the hostages reach the Redoubt, completing the mission.
Note that sometimes the Redoubt gets attacked by lonely enemy units: do not panic, their firepower is no match for your Redoubt; if there are hostages in the proximity, however, relocate them away: the AI will prioritize your hostages over everything.
Fifth Mission
This is a very fun mission, and we will use for the first time the SF’s Anti-Air Jamming ability.
You start 9 Strategic Bombers (three in each Air Base), 2 Attack Helicopters and 6 Elite Special Forces with 2000 Craft each, and will receive a steady amount of Metal, Oil and Wealth for the entire duration of the mission: those resources should be invested in four to six more Helis, they will be very useful.
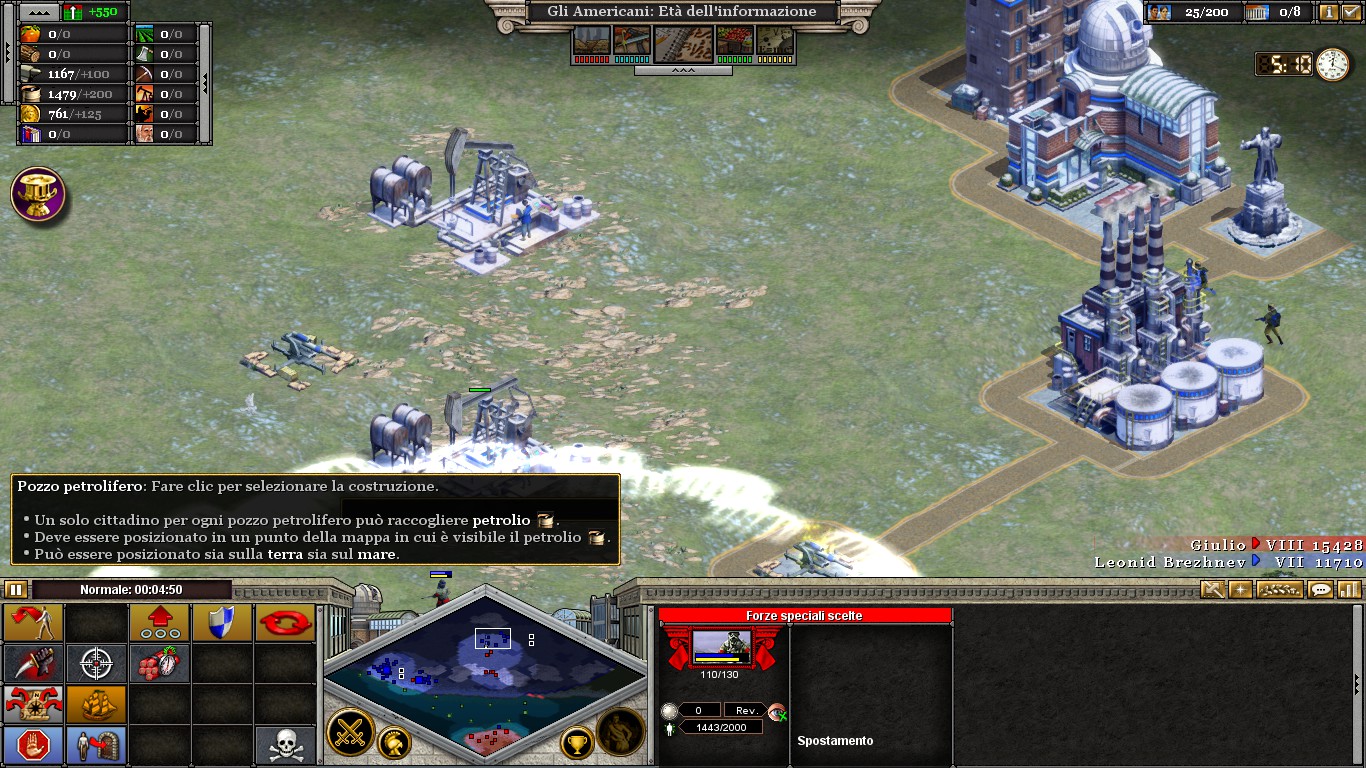
Your task is to destroy the Oil Wells and Refineries in Nakhodka and Khabarovsk in ten minutes. Unlike the other missions, those buildings are not revealed on your map, but can be easily identified by the black dots on the map (and the pictures below):
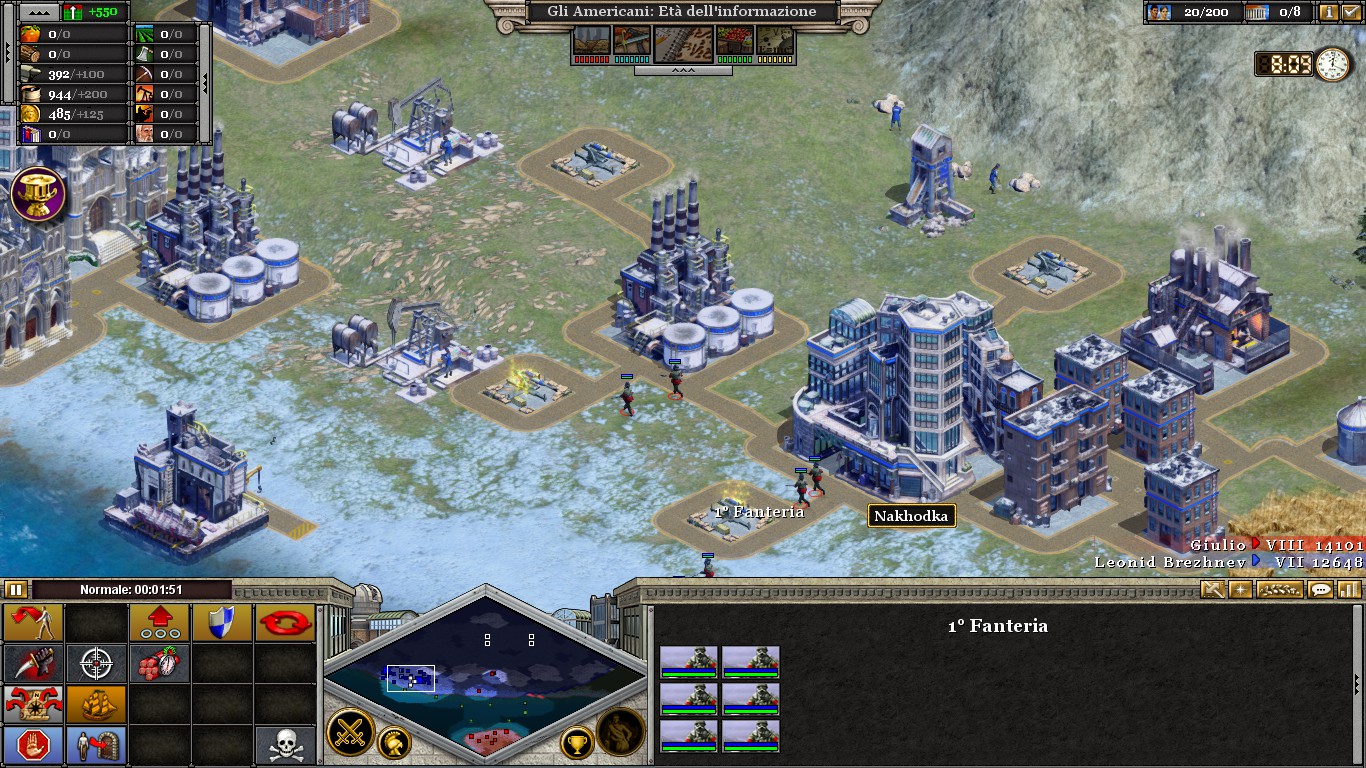
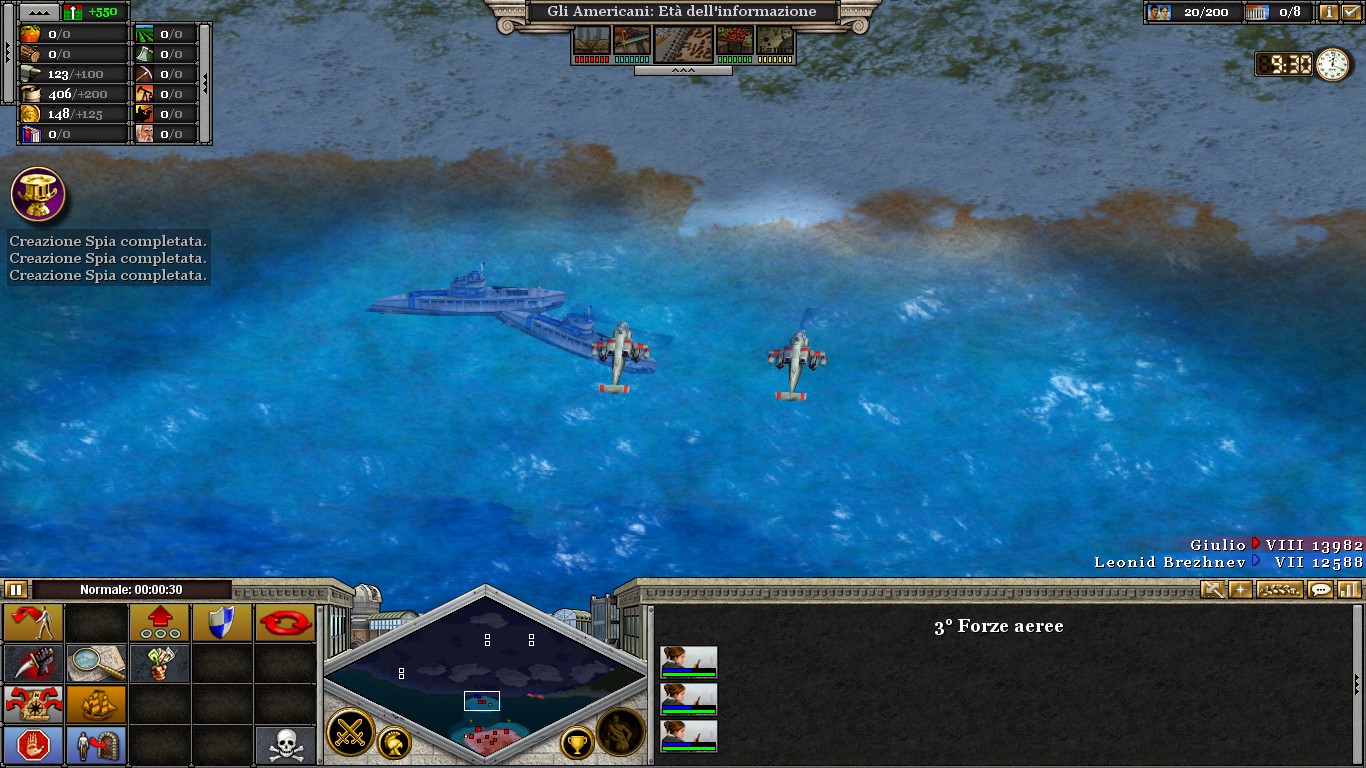
Send your Helis north, near the shore (again, examine picture below), and embark BUT NOT MOVE your SFs, after some seconds, two enemy submarines will appear patrolling the area, attack them and, as soon as they move to the East, disembark your SF on the shore, return your Helis to the shore too. Be sure to follow these instruction carefully: if you move your embarked SF too soon, the submarines will detect them and sink them, but if you move them too late, a new submarine patrol will sink them.
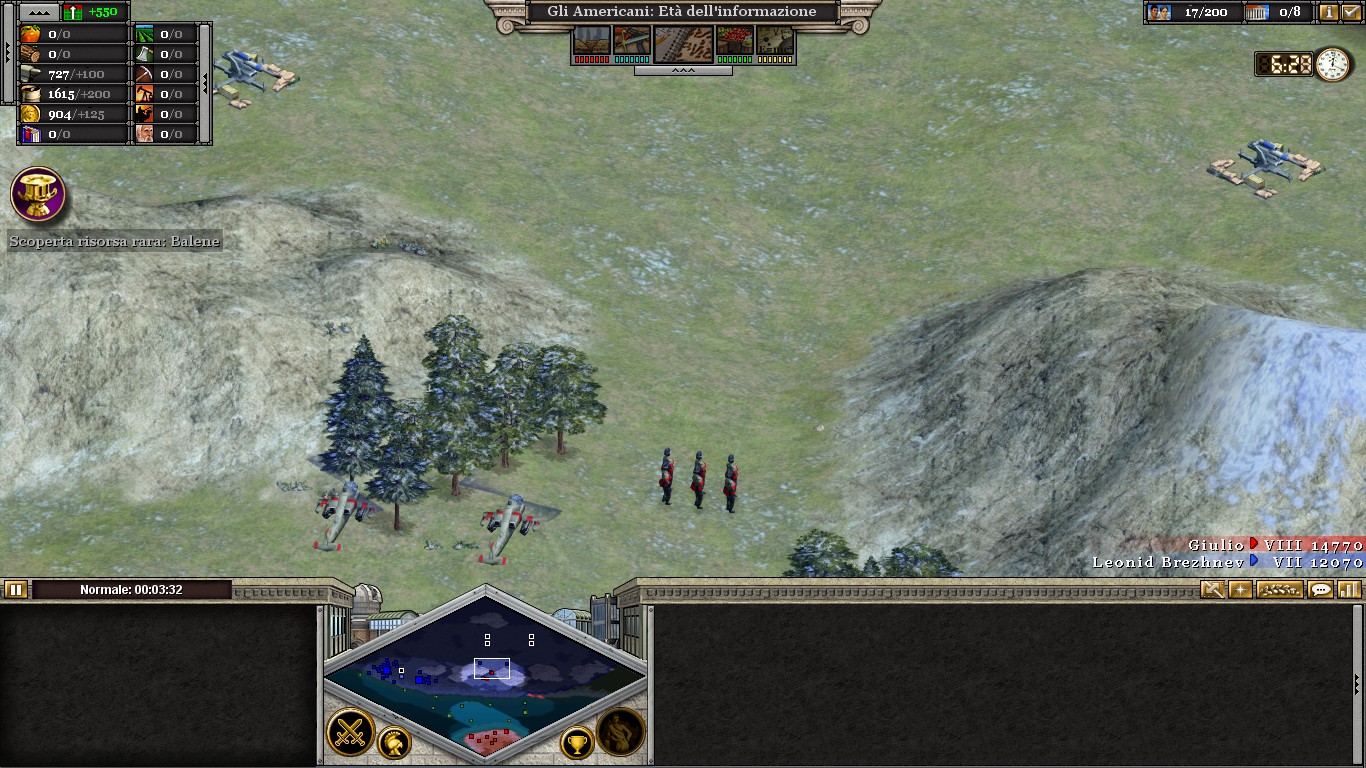
Now, move the Helis (be sure to build some more) near the mountain pass with two SF (do no venture further), while the other four should relocate to the West, to Nakhodka. You will easily spot the four Anti-Air Defences: Sabotage them, they will fall with two attacks. While in most cases it’s better to merely knock them out and save craft, this is not the case: to jam them, your SF must be in their proximity, and when your Bombers will arrive, the enemy citizens will shelter in the City Centre, destroying your SF, so DESTROY THE ANTI AIR DEFENCES and move your SF to the mountain pass.
Be sure to destroy the two Oil Wells and two Refineries with your Bombers (This will usually require two flights if you use three of them).
 From the mountain pass (Remember to gather some more Helis), send one SF to Sabotage one of the Anti-Air Defences: as soon as you see the enemy Assault Infantry coming down, slowly retreat your SF, leaving him in the enemy vision range (even if you lose one unit or two, it is no tragedy, but be careful to not lose more), so that your enemies come right into the Helis, that will obliterate them (But leave the Helis outside the AA range). When the path is clear, Sabotage the two AAs, and advance North, to the West side of Khabarovsk, where you’ll find two Oil Wells, a Refinery and two more AAs (And maybe some enemy survivors): Snipe the survivors (if any), and Jam (or Sabotage, if you have enough craft) the AAs, sending the Bombers in (Some might get scratched by an AA near the City Centre, but is no problem). Advance your SF East, you will find two Oil Wells and two AAs, along with a lonely AA just South (picture below). Jam all of them, and send in the Bombers (at this point, you can also simply Sabotage the buildings themselves).
You start 9 Strategic Bombers (three in each Air Base), 2 Attack Helicopters and 6 Elite Special Forces with 2000 Craft each, and will receive a steady amount of Metal, Oil and Wealth for the entire duration of the mission: those resources should be invested in four to six more Helis, they will be very useful.
Your task is to destroy the Oil Wells and Refineries in Nakhodka and Khabarovsk in ten minutes. Unlike the other missions, those buildings are not revealed on your map, but can be easily identified by the black dots on the map (and the pictures below):
Send your Helis north, near the shore (again, examine picture below), and embark BUT NOT MOVE your SFs, after some seconds, two enemy submarines will appear patrolling the area, attack them and, as soon as they move to the East, disembark your SF on the shore, return your Helis to the shore too. Be sure to follow these instruction carefully: if you move your embarked SF too soon, the submarines will detect them and sink them, but if you move them too late, a new submarine patrol will sink them.
Now, move the Helis (be sure to build some more) near the mountain pass with two SF (do no venture further), while the other four should relocate to the West, to Nakhodka. You will easily spot the four Anti-Air Defences: Sabotage them, they will fall with two attacks. While in most cases it’s better to merely knock them out and save craft, this is not the case: to jam them, your SF must be in their proximity, and when your Bombers will arrive, the enemy citizens will shelter in the City Centre, destroying your SF, so DESTROY THE ANTI AIR DEFENCES and move your SF to the mountain pass.
Be sure to destroy the two Oil Wells and two Refineries with your Bombers (This will usually require two flights if you use three of them).
From the mountain pass (Remember to gather some more Helis), send one SF to Sabotage one of the Anti-Air Defences: as soon as you see the enemy Assault Infantry coming down, slowly retreat your SF, leaving him in the enemy vision range (even if you lose one unit or two, it is no tragedy, but be careful to not lose more), so that your enemies come right into the Helis, that will obliterate them (But leave the Helis outside the AA range). When the path is clear, Sabotage the two AAs, and advance North, to the West side of Khabarovsk, where you’ll find two Oil Wells, a Refinery and two more AAs (And maybe some enemy survivors): Snipe the survivors (if any), and Jam (or Sabotage, if you have enough craft) the AAs, sending the Bombers in (Some might get scratched by an AA near the City Centre, but is no problem). Advance your SF East, you will find two Oil Wells and two AAs, along with a lonely AA just South (picture below). Jam all of them, and send in the Bombers (at this point, you can also simply Sabotage the buildings themselves).
Final Mission
On my first try, I barely beat this mission with less than thirty seconds remaining, and it was my main concern for this guide: retrying it for new strategies and pictures, however, I managed to finish in less than ten minutes, so don’t need to panic.
The final espionage mission is a mash up of everything done before: you’ll Bribe, Sabotage, Infiltrate, Jam and Bomb and even rescue some hostages! The objectives of the mission are:
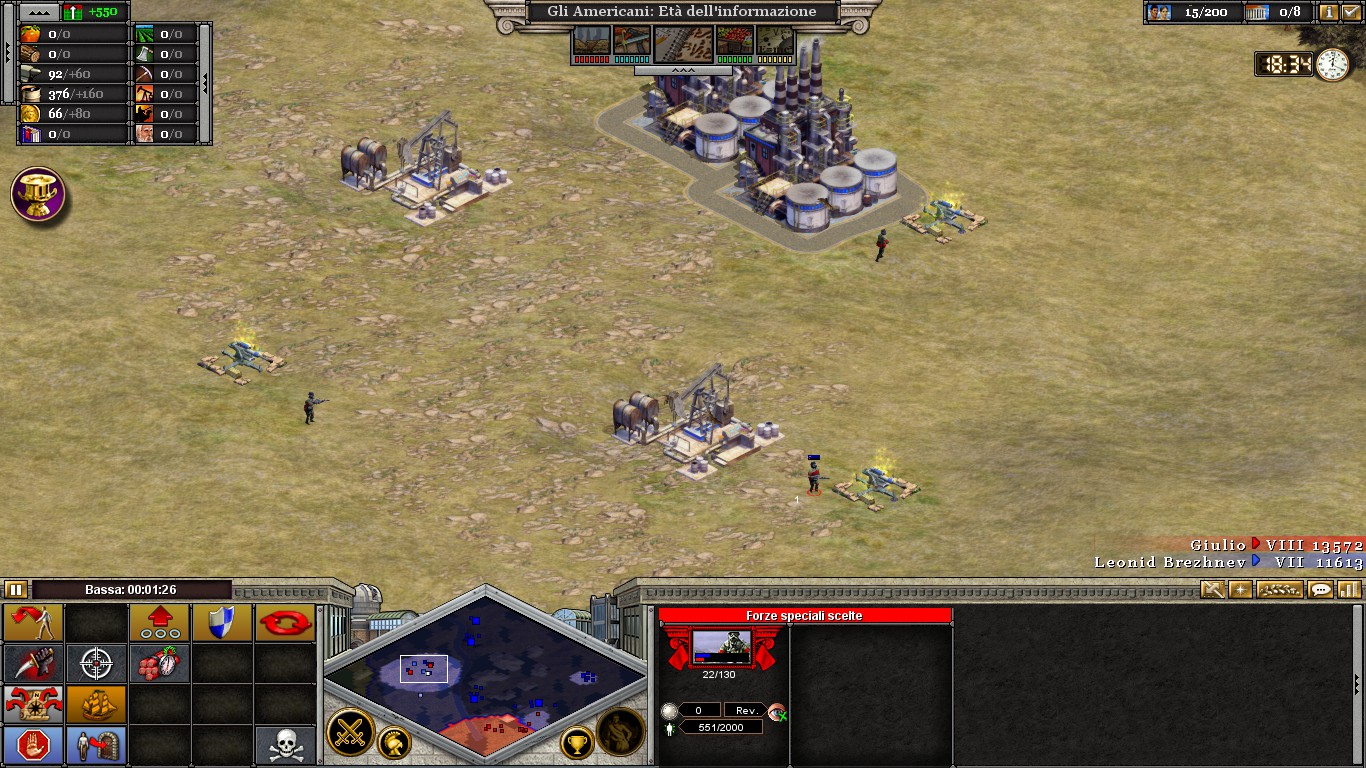 The destruction of the Oil Wells and Refineries on the Western side of the river;
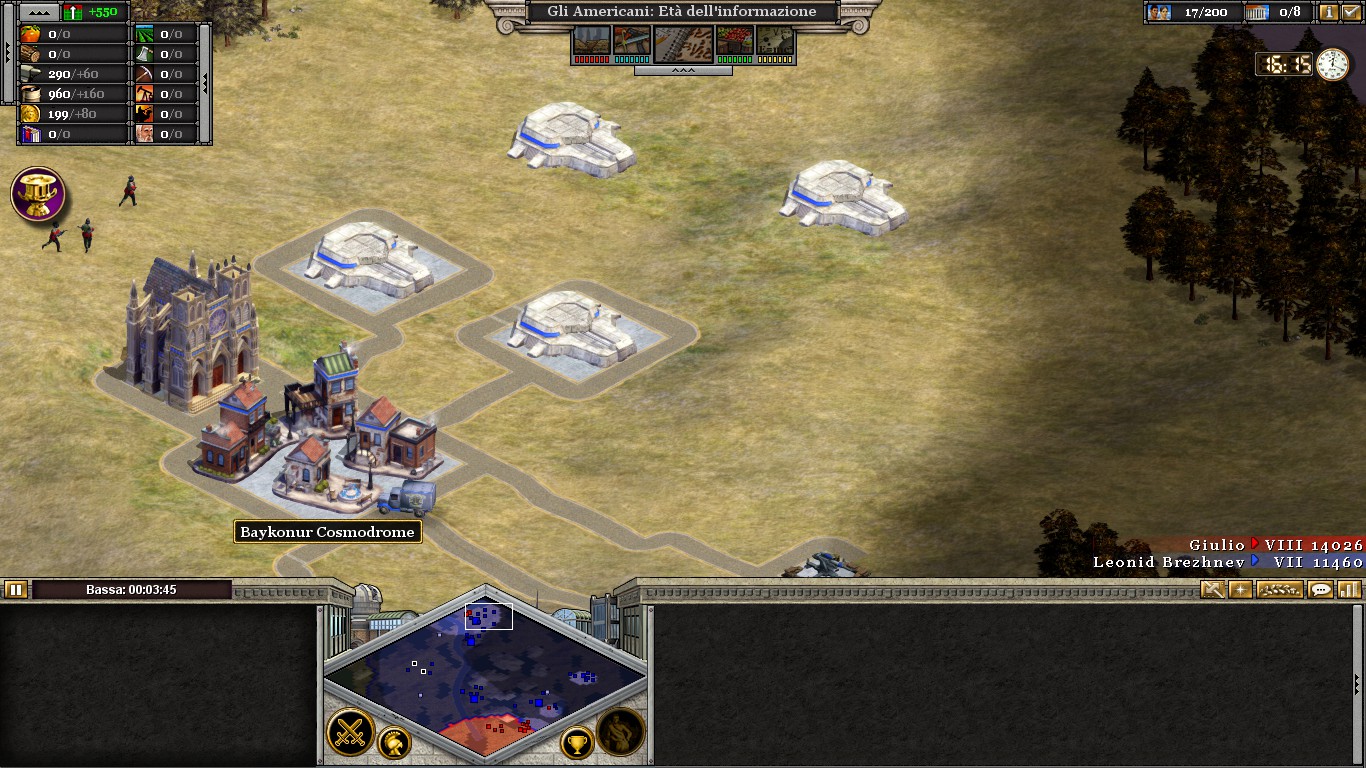 The destruction of the Missile Silos in Bayknour Cosmodrome;
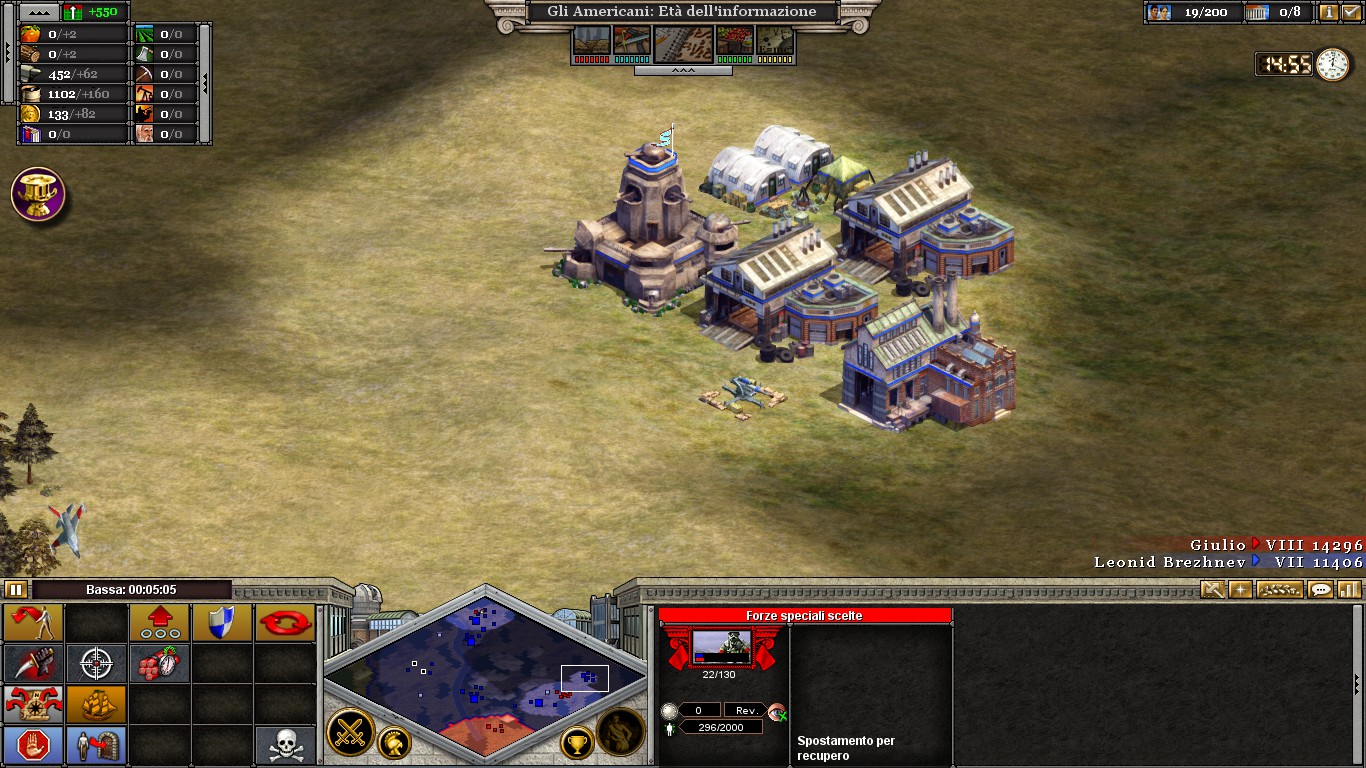 The destruction of the enemy Base on the lower Eastern corner of the map;
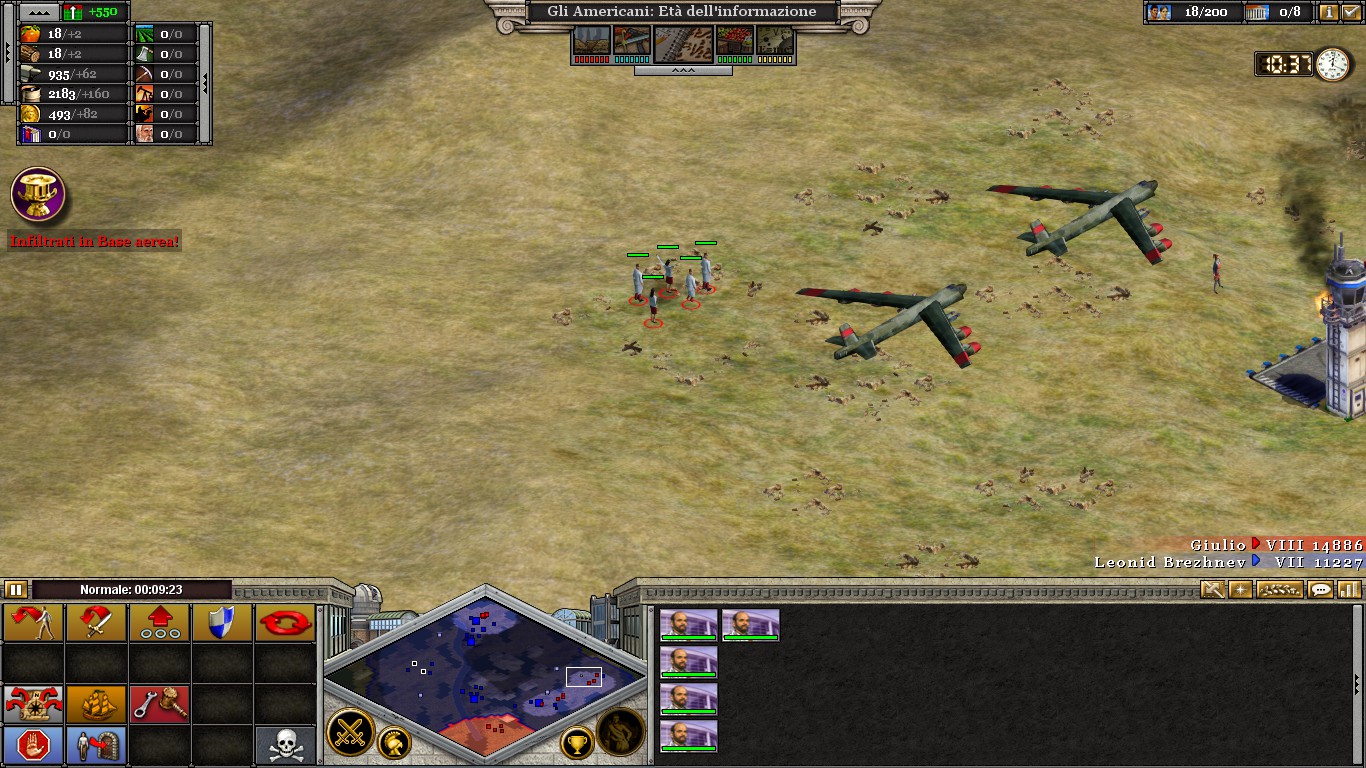 The rescue of the hostages held in the aforementioned Base.
All of the above must be done in twenty minutes.
You are assigned with two Assault Helicopters, four Spies, Six Elite Special Forces, two Strategic Bombers and a steady supply of Oil, Wealth and Metal.
Take three ESF from the main group and take them to the Western shore of the river, near the forest, then North, where they will find an enemy Assault Infantry: Snipe it at once, in order to maintain your EFS. Note that you can always replace lost units in the Barracks, the Redoubt or the Airport, but this requires time and resources, so be careful.
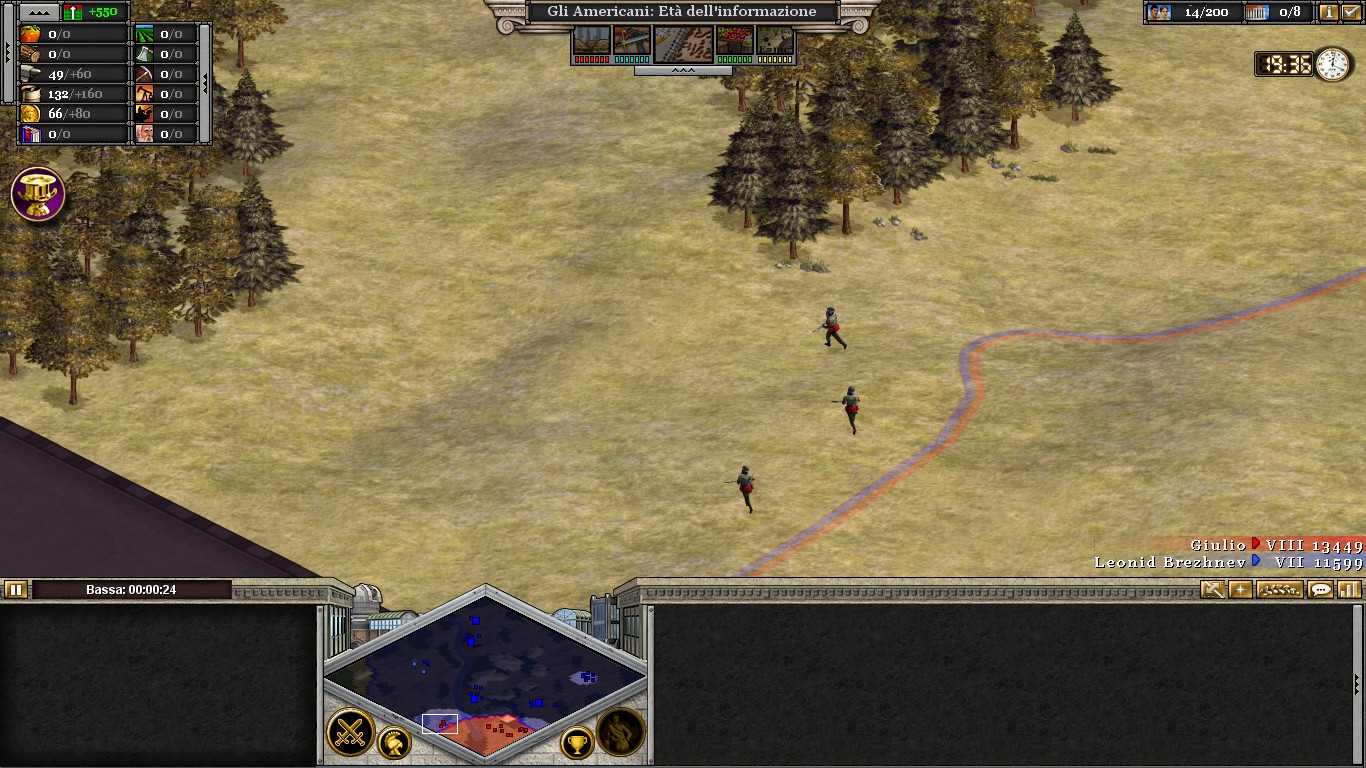
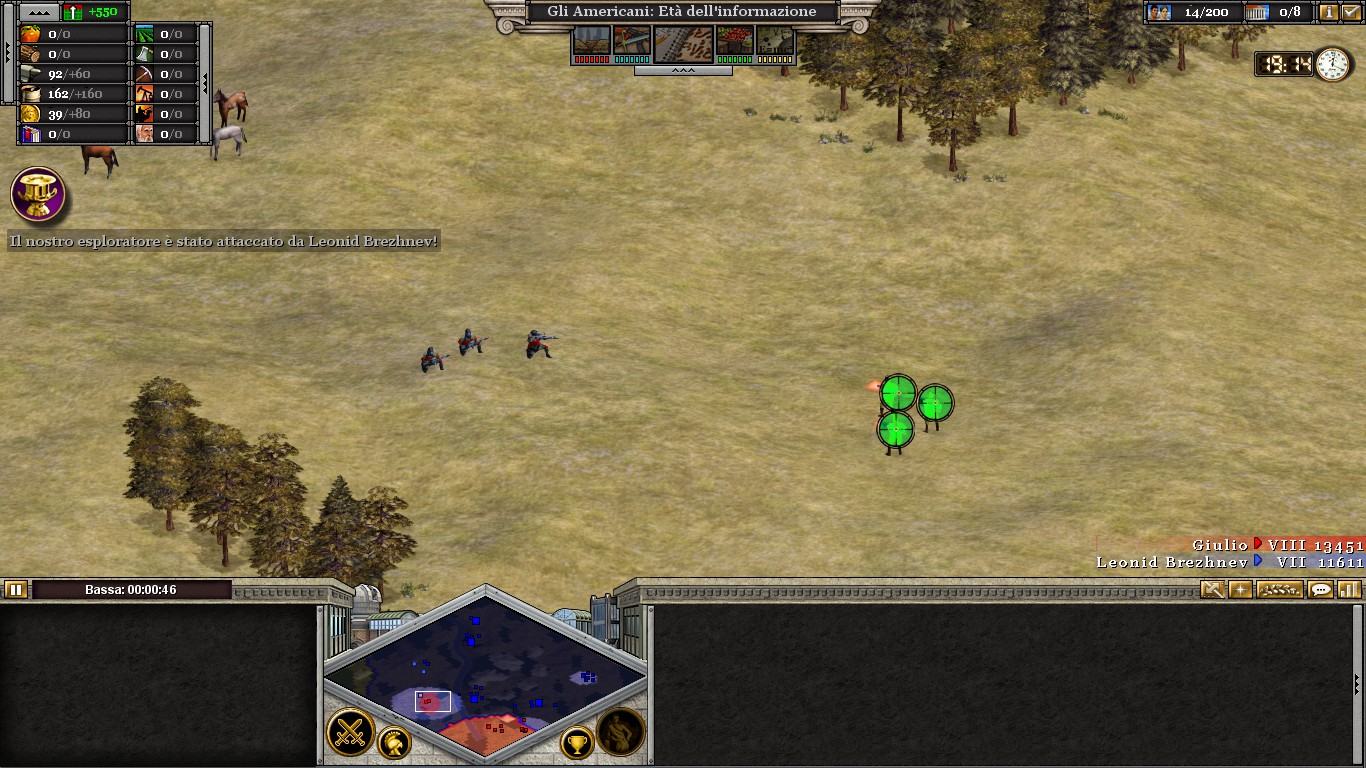
Advance your ESF North, to the Oil Field, making quick work of the enemy resistance, then place your units near the AA Defences, jamming them and opening the way for your Strategic Bombers (of which you should create at least two more).
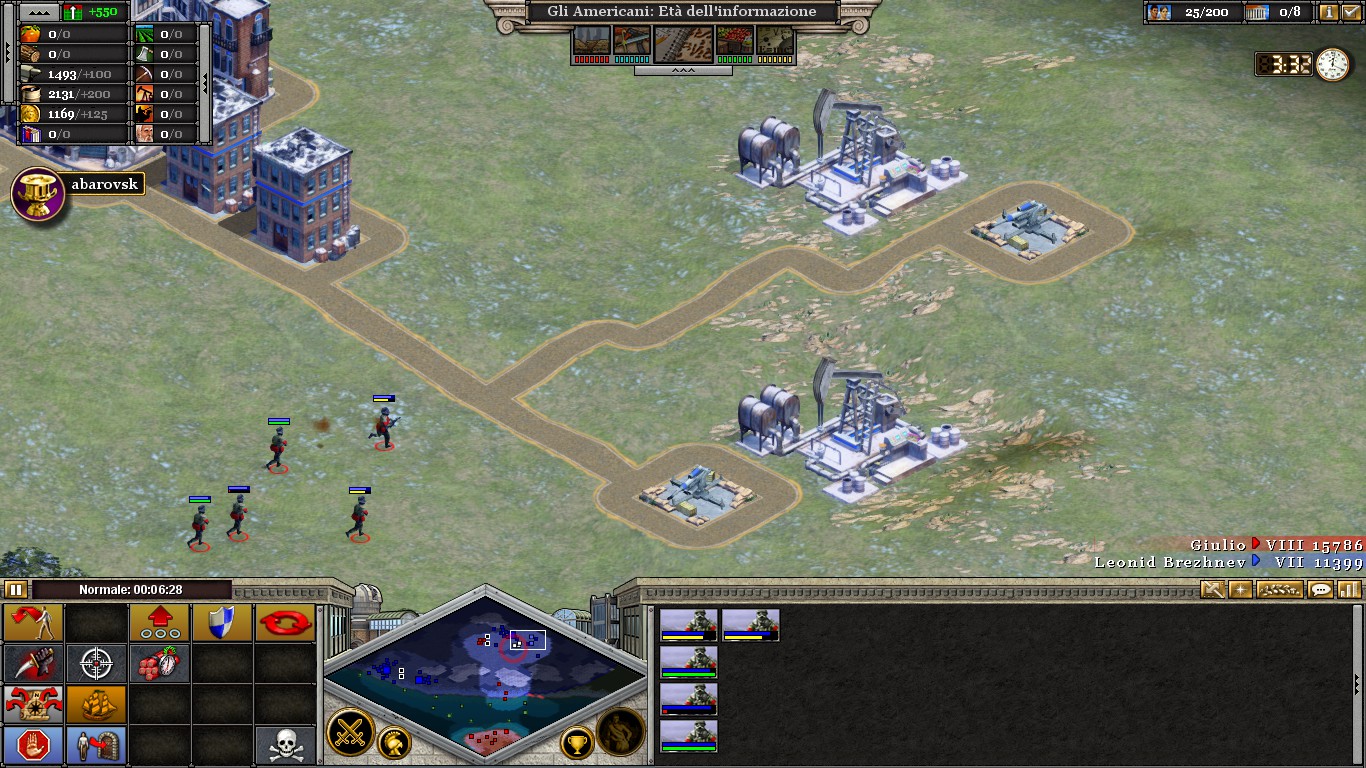
Meanwhile, your remaining units (reinforced by some Helicopters) should advance near the border to Taraz. The city possesses two AA Defences, and it’s guarded by a lonely Infantry unit, at this point in the game. NOTE that more time passes, and more troops will rally at the city (even Tanks and AA Vehicles), so be quick with your attack: Snipe the Infantry with your ESF, then send in the Spies; like the first mission, your Spies can order a missile launch against any building they Infiltrate in, so Infiltrate the AA Defences and leave the City alone, proceeding East, near the Base.
Note that there is also a lonely Bunker near the Woodcutter camp, you can easily destroy it with a missile launch or two Bombers.
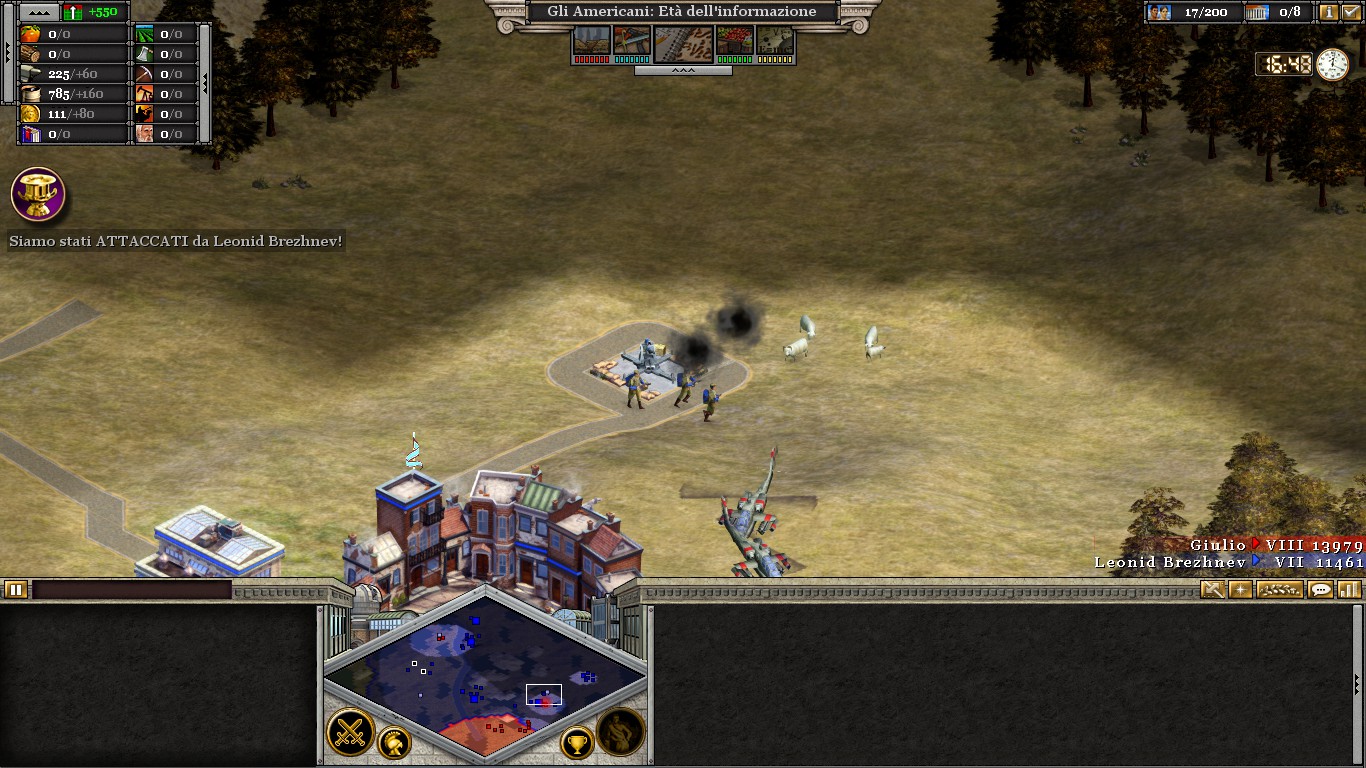
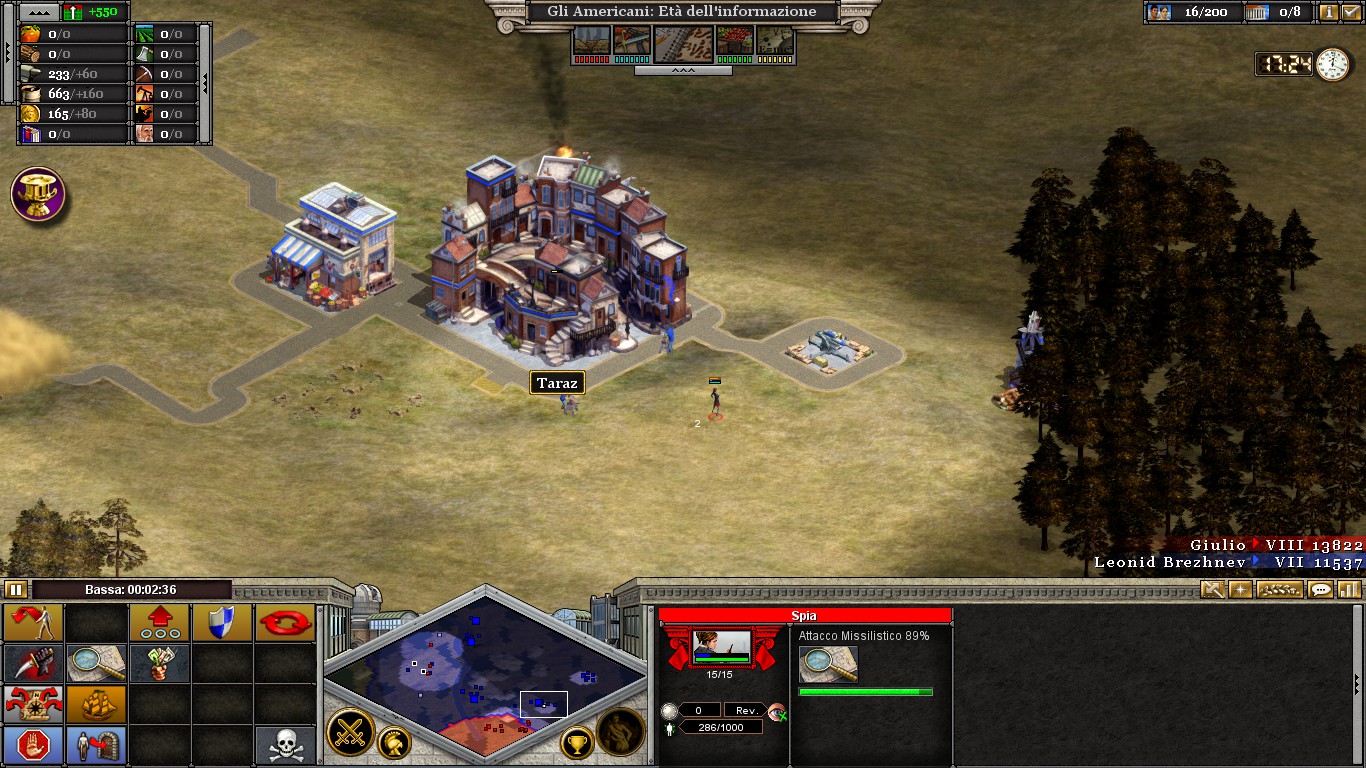
The Oil Wells and Refineries should be ashes by now, so send the three ESF North, to the forest near the river, and cross it to the edge of the map: in this way, you should encounter only one Infantry, who you can easily Snipe away. Arrive at Bayknour Cosmodrome, and you’ll find the four Missile Silos: slowly Sabotage them until they are destroyed, the enemy will not bother you, but it will take some time (every Silos must be Sabotaged three times). If you wonder why you shouldn’t send your Bombers, the answer is below:
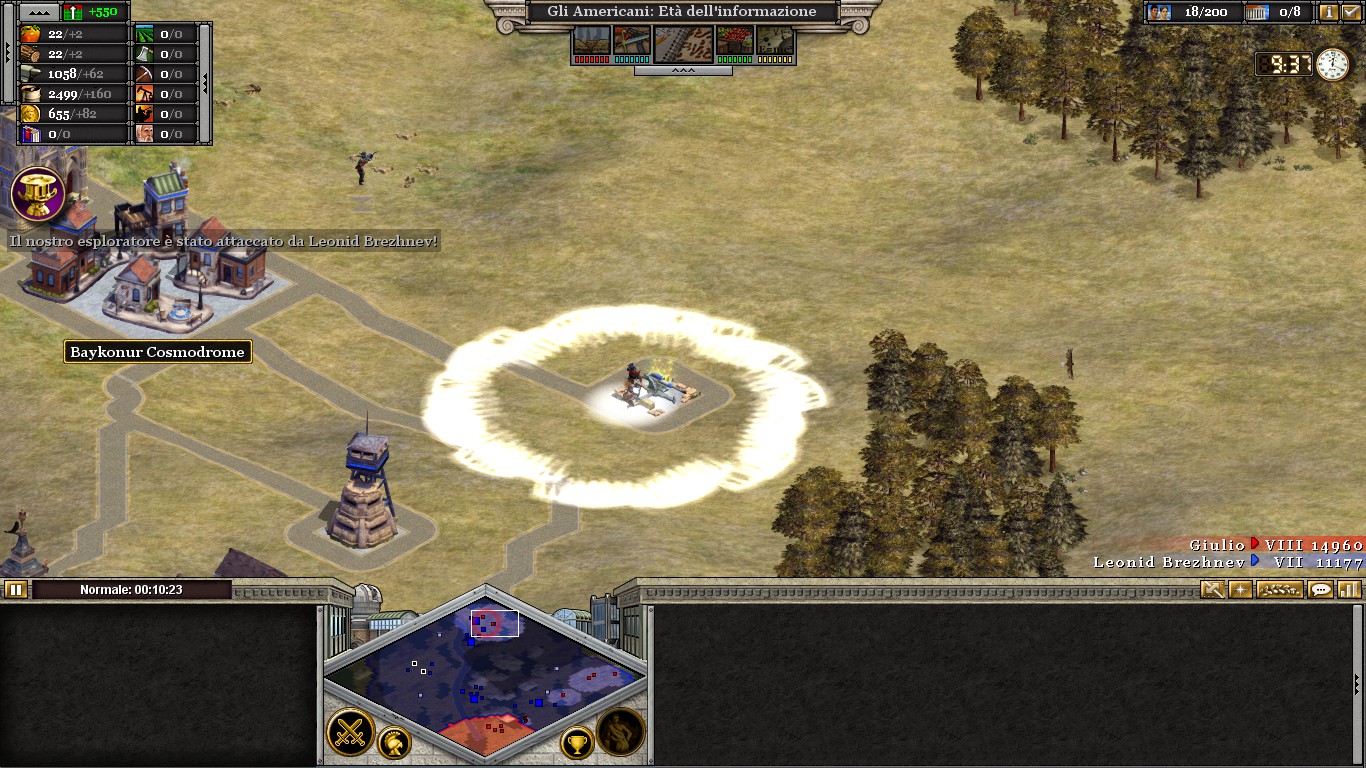 The AA Def is near a Bunker: Jamming it will be difficult, as the Bunker can easily eliminate your ESF; Besides, your Bombers are required elsewhere.
The enemy Base, in fact, is very well armed: four or five Infantry units patrol the area, while a Redoubt is stationed near two AA Def, rendering Sabotage, Infiltration and Bombing almost impossible. The only thing to do is to send your Helis to pick up the enemy Infantry, keeping them well away from the AA and the Redoubt (Yes, enemy Forts can attack your Helis): with the Infantry gone, you should order a suicide Bombing against the AA Defenses: this will mean that you’ll lose at least one Bomber (to minimize damage attack with more Bombers at the same time). With the AA gone, you can now easily Infiltrate and Bomb all the remaining buildings, prioritizing the Redoubt: its destruction will liberate five hostages, who must be escorted to your Redoubt. This shouldn’t be difficult, as the itinerary to your Redoubt should be free of enemies: anyway, as long as one hostage is successfully rescued, the mission is considered complete, provided you’ve destroyed the Base and the Missile Silos.
This ends the Espionage Missions for the American Campaign, and provides the Achievement CIA Spymaster.
Hope this guide helped!
The final espionage mission is a mash up of everything done before: you’ll Bribe, Sabotage, Infiltrate, Jam and Bomb and even rescue some hostages! The objectives of the mission are:
The destruction of the Oil Wells and Refineries on the Western side of the river;The destruction of the Missile Silos in Bayknour Cosmodrome;The destruction of the enemy Base on the lower Eastern corner of the map;The rescue of the hostages held in the aforementioned Base.All of the above must be done in twenty minutes.
You are assigned with two Assault Helicopters, four Spies, Six Elite Special Forces, two Strategic Bombers and a steady supply of Oil, Wealth and Metal.
Take three ESF from the main group and take them to the Western shore of the river, near the forest, then North, where they will find an enemy Assault Infantry: Snipe it at once, in order to maintain your EFS. Note that you can always replace lost units in the Barracks, the Redoubt or the Airport, but this requires time and resources, so be careful.
Advance your ESF North, to the Oil Field, making quick work of the enemy resistance, then place your units near the AA Defences, jamming them and opening the way for your Strategic Bombers (of which you should create at least two more).
Meanwhile, your remaining units (reinforced by some Helicopters) should advance near the border to Taraz. The city possesses two AA Defences, and it’s guarded by a lonely Infantry unit, at this point in the game. NOTE that more time passes, and more troops will rally at the city (even Tanks and AA Vehicles), so be quick with your attack: Snipe the Infantry with your ESF, then send in the Spies; like the first mission, your Spies can order a missile launch against any building they Infiltrate in, so Infiltrate the AA Defences and leave the City alone, proceeding East, near the Base.
Note that there is also a lonely Bunker near the Woodcutter camp, you can easily destroy it with a missile launch or two Bombers.
The Oil Wells and Refineries should be ashes by now, so send the three ESF North, to the forest near the river, and cross it to the edge of the map: in this way, you should encounter only one Infantry, who you can easily Snipe away. Arrive at Bayknour Cosmodrome, and you’ll find the four Missile Silos: slowly Sabotage them until they are destroyed, the enemy will not bother you, but it will take some time (every Silos must be Sabotaged three times). If you wonder why you shouldn’t send your Bombers, the answer is below:
The AA Def is near a Bunker: Jamming it will be difficult, as the Bunker can easily eliminate your ESF; Besides, your Bombers are required elsewhere.The enemy Base, in fact, is very well armed: four or five Infantry units patrol the area, while a Redoubt is stationed near two AA Def, rendering Sabotage, Infiltration and Bombing almost impossible. The only thing to do is to send your Helis to pick up the enemy Infantry, keeping them well away from the AA and the Redoubt (Yes, enemy Forts can attack your Helis): with the Infantry gone, you should order a suicide Bombing against the AA Defenses: this will mean that you’ll lose at least one Bomber (to minimize damage attack with more Bombers at the same time). With the AA gone, you can now easily Infiltrate and Bomb all the remaining buildings, prioritizing the Redoubt: its destruction will liberate five hostages, who must be escorted to your Redoubt. This shouldn’t be difficult, as the itinerary to your Redoubt should be free of enemies: anyway, as long as one hostage is successfully rescued, the mission is considered complete, provided you’ve destroyed the Base and the Missile Silos.
This ends the Espionage Missions for the American Campaign, and provides the Achievement CIA Spymaster.
Hope this guide helped!
File History
18/07/2016: Guide published v. 1.0
03/10/2016: Added File History section, reintegrated missing image of the Barracks in the Fourth mission.
03/10/2016: Added File History section, reintegrated missing image of the Barracks in the Fourth mission.
🏆
Beat Rise of Nations: Extended Edition's achievements?
Flex it — let your friends know you pulled it off.
More Rise of Nations: Extended Edition guides
- Rise of Nations Русификатор 1.20★ 5 (316)19k views370 ♥1 minRussianUpdated Apr 30, 2020
- Efficiency and Hot Key Guide★ 5 (625)19k views822 ♥26 minUpdated Apr 10, 2015
- How to: Increase the population cap★ 4 (155)15k views221 ♥1 minUpdated Jan 16, 2018
- Taunt Guide★ 5 (288)15k views331 ♥3 minUpdated Jul 16, 2014
- Rise of Nations : Extended Edition - To Achieve 100%★ 5 (533)13k views686 ♥15 minUpdated Jan 1, 2018
- Economic goals for a good base start for a decent mid game★ 5 (212)11k views336 ♥3 minUpdated Jun 16, 2014


This guide was created by its original author on the Steam Community. Are you the author and want it removed? Request removal.