How to Make Planetary "Enclosures"
The Basics and Beginnings
(WARNING: THIS CAN ONLY BE DONE IN SANDBOX MODE!!!)
Hello there reader! Have you ever wanted to "import" a chunk of another planet into an existing one? Whelp, you've found the right place! Here this guide will show you how to make "enclosures" of Volcanis, Gleba, Fulgora, and Aqualio, but before we start make sure you have these things listed below:
-Knowledge of what the planets look like.
-At least one Space Platform (if you want to make a "travelling zoo" type ship).
-At least one Sandbox save. (Create one if needed!)
-Knowledge of the /editor command and the ~/` key to open chat to use it.
If you have those things, we can get started! Look at the chapters below for each planet to see how to make it.
How to Make an Enclosure
If you have never made an enclosure before, here are the basics: Use the "~" key to open chat, then type in "/editor". A menu should pop up and you should be automatically opened onto the "None" section. Press the Tiles section. This is where all the planetary textures and blocks are found. If you select a block by using LMB, and then hold LMB while the block is selected, it will paint a one-block large line of that selected block, as you are on Cursor mode by default. Find the Brush tab to increase size, and change it between square and circle shapes.
In the editor menu, the second category you will be using the most is the Entities category, which has a level one Assembling Machine on it. Open this. When building the "edges" of your enclosure, use the Stone Wall and Gate in the Weapons tab. The second tab in the Entities category that you'll use the most often is the tab with the green tree on it. This allows you to spawn and place in enemy corpses, building wrecks/remnants, and flora. Usually the objects in this "Nature" category are grouped together based off of which planet they originate from (enemies included), this also applies to the Tiles tab somewhat.
The enclosure blueprints are below.
How to Make a Volcanis Enclosure
This category of the guide will show you how to make a Volcanis Enclosure!
Now before we get into Volcanis, I forgot to mention a tab that you MAY use, the Cliffs tab. The tab has an image of a Nauvis cliff on it, opening it allows you to place cliffs from all planets along with meteorite impact crater edges, which when placed alone make pretty good scorched mountain ranges. Now onto Volcanis...
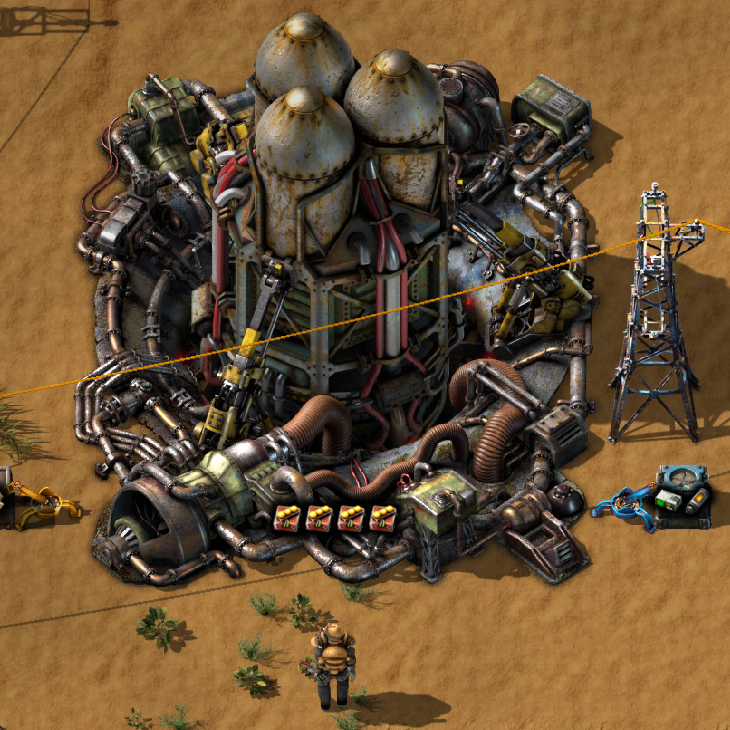
To make a Volcanis Enclosure, first go to the Weapons tab and add at least a three tile thick wall around the cube of space where you want to make your enclosure. You can also add Flamethrower Turrets and combo those with some Infinity Pipes with Crude Oil in them to make a fire spurt whenever enemies break in. When making an enclosure, it is recommended to use a base tile inside from the planet itself in the Tiles tab. Find a good looking tile in the Volcanis group in the Tiles tab, such as Volcanic Folds or Volcanic Soil, but I recommend using anything rocky that is mostly a greyish-black color. Then go to the Cliffs tab, and find Volcanis Cliff. Use the R key to rotate it. When using a cliff in the Cliffs tab, they take up about 5 tiles of space. When flipped with the R key the transition between Forward, Right, Backward, and Left orientations, and then the rest of the turns just pull up a variety of corners and walkable hill transitions. Place these cliffs wherever you want, but I recommend putting them on the top left or right and making them go to the edges of the enclosure. Once you have your cliffs in the enclosure, go back to the Tiles tab and experiment and add extra tiles to make the base of the enclosure. In the Volcanis group of tiles there is also placeable tiles called Hot Lava and Lava, which allow you to place lava oceans. I recommend making at least an 8th of your enclosure any liquid a planet has on it.
Before we move on let's talk about ANOTHER category I forgot to mention, the Resources Category. The Resources Category has some images of tiles of resources such as Iron, Copper, and Uranium on it. Click this and you'll be shown 2 tabs, one with various factory items on it and the other with a tree on it. The tree allows you to place Crude Oil deposits and resource geysers. Now that we have that over with, lets go back to the enclosure.
Now in your Volcanis enclosure use the Resources Category and place some Tungsten deposits at least A small group of sulfur geysers. Now that you have the resources set, open up the Nature Category (the one with the tree on it next to the Resources Category). Here you'll find a similar system to the Tiles category, so find the Volcanis group and place away to your heart's content, and just make it look good and Volcanis-ey! Then if you want, add some building remnants from the Nature tab and viola, your Volcanis enclosure is done!
How to Make an Aqualio Enclosure
Like our Volcanis enclosure, start off by surrounding your enclosure area with a three tile thick wall, and some gates if needed. In the Tiles Category, find the Aqualip group tile of Ammonia Ocean (or something with a similar name) and place it in the entirety of the enclosure. Then find ice in the Aqulio group or use the searchbar, and make some icebergs. Then find snow in the Aqualio group or by using the searchbar and place some snow in the "deeper" sections of the iceberg, but leave the "shores" raw with ice. Then go to the nature Category and find the Aqualio group and find the Ice Formations, which will usually be labeled Huge/Big and Medium/Small. Place these on the Icebergs. Then in the Nature Category find the Floating Ice Formations/Floating Icebergs and scatter those around. Then add some Fluorine Vents via the Resources Category onto the icebergs. Sadly, Aqaulio doesn't have cliffs, but the enclosure is done! Viola, and enjoy!
How to Make a Fulgora Enclosure
This category of the guide will show you how to make a Fulgora Enclosure!
Like all of our enclosures so far, make a three tile thick wall around the enclosure space you want to convert. Next, go to the Tiles category and find the Fulgora group. Then select a mid-height tile and use it as a base. Next place some Fulgora Cliffs and make a plateau with a small entrance. Then find some high-height tiles and paint the plateau with those, replacing the mid-height tiles. Then find the Shallow Oil Ocean and Oil Ocean tiles and add those to one side of the enclosure. Then add some low-height tiles (like Fulgoran sand and dust) next to the shores, along with some shallow oil ocean. Next, go to the Nature Category and find the Fulgora group. Place and scatter Fulgoran Ruins (including at least one Fulgoran Vault Ruin) around the plateau and beach. Then add some factory building ruins and remnants. Also add at least 2 Fulgoran Lightning Rods if possible. Then go to the Resources category and select Scrap, add this carefully though, as it can remove cliffs (learned the hard way...). And BAM! Fulgora Enclosure complete!
PS: If you add some holes in the walls or enough space next to the Oil Ocean, you could add some Seaside Pumps next to it and harvest Crude Oil through the enclosure.
How to Make a Gleba Enclosure
This category of the guide will show you how to make a Gleba Enclosure!
Ohh... Gleba, the crazy rainforest planet as the finale! Let's dive in!
As with all our enclosures so far, add a three tile thick wall around the enclosure convertion space. Then find a good Gleba soil base in the Gleba group in the Tiles category (usually first group you see) and use it as the base. Add some (small) puddles of Gleba water around using the Green Water and Deep Green Water tiles from the Gleba group in the Tiles category. Next, add some detail tiles and variety to the forest floor. Next go to the Nature Category and find the Gleba group. Find all matter of Gleba plants and SPAM AWAY! Gotta have the "forest" in rainforest after all! And most importantly, add at least 8 Boompuffs, after all that lichen IS useful! Also, if you want any reeds in the water, go to the Gleba group in the Nature Category, and find Water Cane, this can only be placed in green Gleba water. Now before we continue, lets talk about ANOTHER CATEGORY I forgot to talk about.
This new category is the Enemies category. It will have a Biter Spawner on it. Click this and you'll be able to spawn any form of Biter, Spitter, Gleba Strider, Demolisher, and Enemy Spawner, including Gleba Egg Rafts! Now back to the enclosure...
Next, if possible, add at least 1 large Gleba egg raft and 2 small ones. Finally, add some Gleba Cliffs. I recommend putting the cliffs around the edges of the enclosure, or making trenches as you usually see on the planet's surface. And that's the final enclosure complete! *ADHD Creature "Yippie!" noise plays*
Are the Enclosures Habitable?
The End, Plus Honorable Mention
Honorable Mention: Thanks for the YouTube channel Otterspace Lofi for the Lofi-Music video, "Waffle's Forest Book Nook". Really helped me get through this guidemaking. Thank you Otterspace!
- Factorio: How to Build a Main Bus★ 5 (6k)231k views15k ♥15 minUpdated Aug 31, 2025
- Factorio: Observations, Tips, Tricks, & Efficiency★ 5 (3.2k)111k views7.1k ♥85 minUpdated Aug 4, 2020
- Blueprints for early, mid and lategame (updated)★ 5 (757)83k views2.4k ♥3 minUpdated Sep 3, 2022
- Factorio - Everything To Do With Smelting: Belt & Bot Based★ 5 (629)80k views1.6k ♥16 min
- Factorio Builds★ 5 (1.1k)63k views2.7k ♥5 minUpdated Jun 7, 2021
- High-Level Strategy for New Players★ 5 (880)62k views2.8k ♥43 minUpdated Oct 15, 2025

- Upgrading to PremiumTeam Fortress 2★ 5 (20k)1441k views11k ♥6 minUpdated May 11, 2022
- No More Room in Hell Official ManualNo More Room in Hell★ 5 (2.8k)569k views2.1k ♥29 minUpdated Apr 22, 2019
- NMRiH Community Hosting GuidesNo More Room in Hell★ 5 (526)351k views653 ♥1 minUpdated Aug 10, 2022
- ULTIMATE GUIDE FOR GAME DEV TYCOONGame Dev Tycoon★ 5 (5.8k)326k views10k ♥4 minUpdated 23 Jan, 2014
- How to 'Git Gud' Soon™MORDHAU★ 5 (2k)318k views3k ♥68 minUpdated Nov 16, 2024
- Лучшие кооперативные игры SteamPAYDAY 2★ 5 (1.5k)315k views2.1k ♥56 minRussianUpdated Apr 27, 2025






This guide was created by its original author on the Steam Community. Are you the author and want it removed? Request removal.