How to POLPOX's Artwork Supporter #1
Section 0 - Introduction
 Hi! You're here because you wanted to learn how to use POLPOX's Artwork Supporter right?
But before starting the tutorial, let's talk a bit about this MOD. https://steamcommunity.com/sharedfiles/filedetails/?id=1341387001 POLPOX's Artwork Supporter is the MOD to - as the name says - support your artwork creation.
Without this, even placing an animated unit to your desired position is just a painful job. The MOD is the must thing to take screenshots!
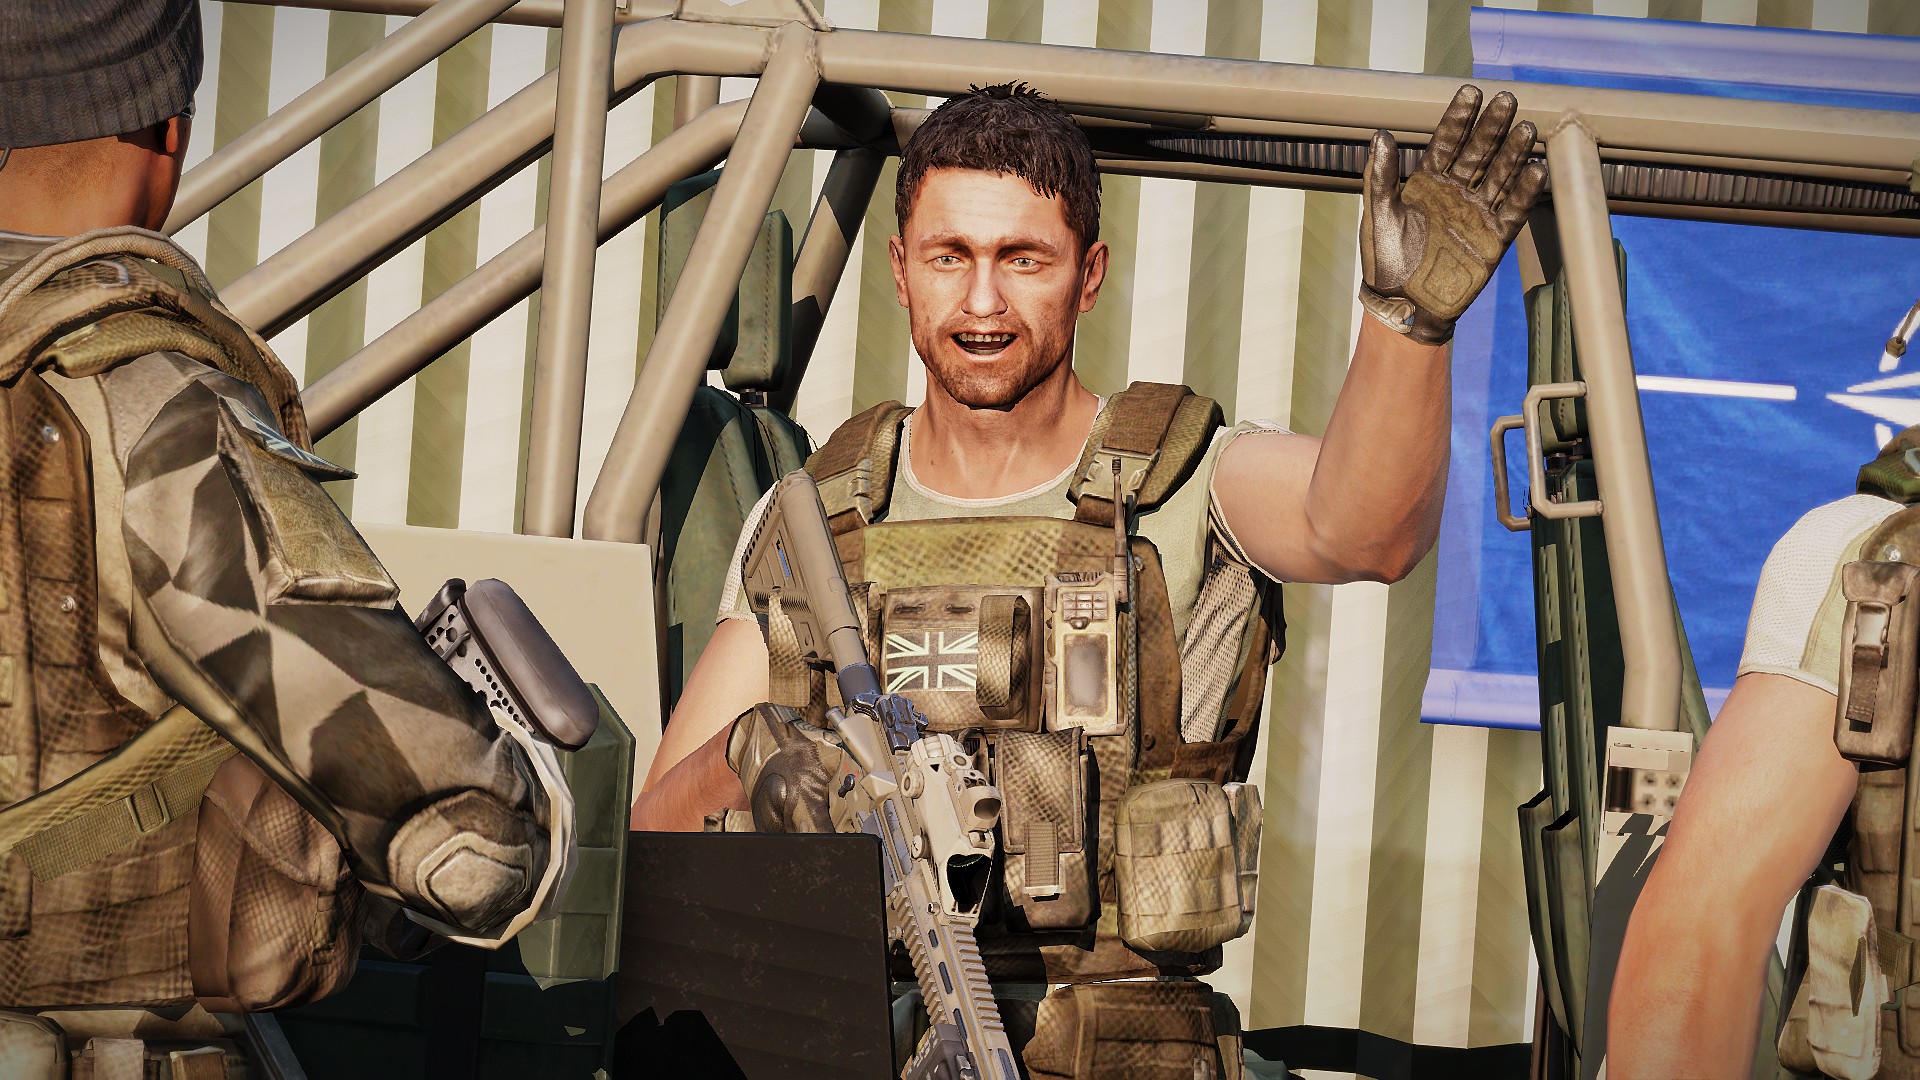
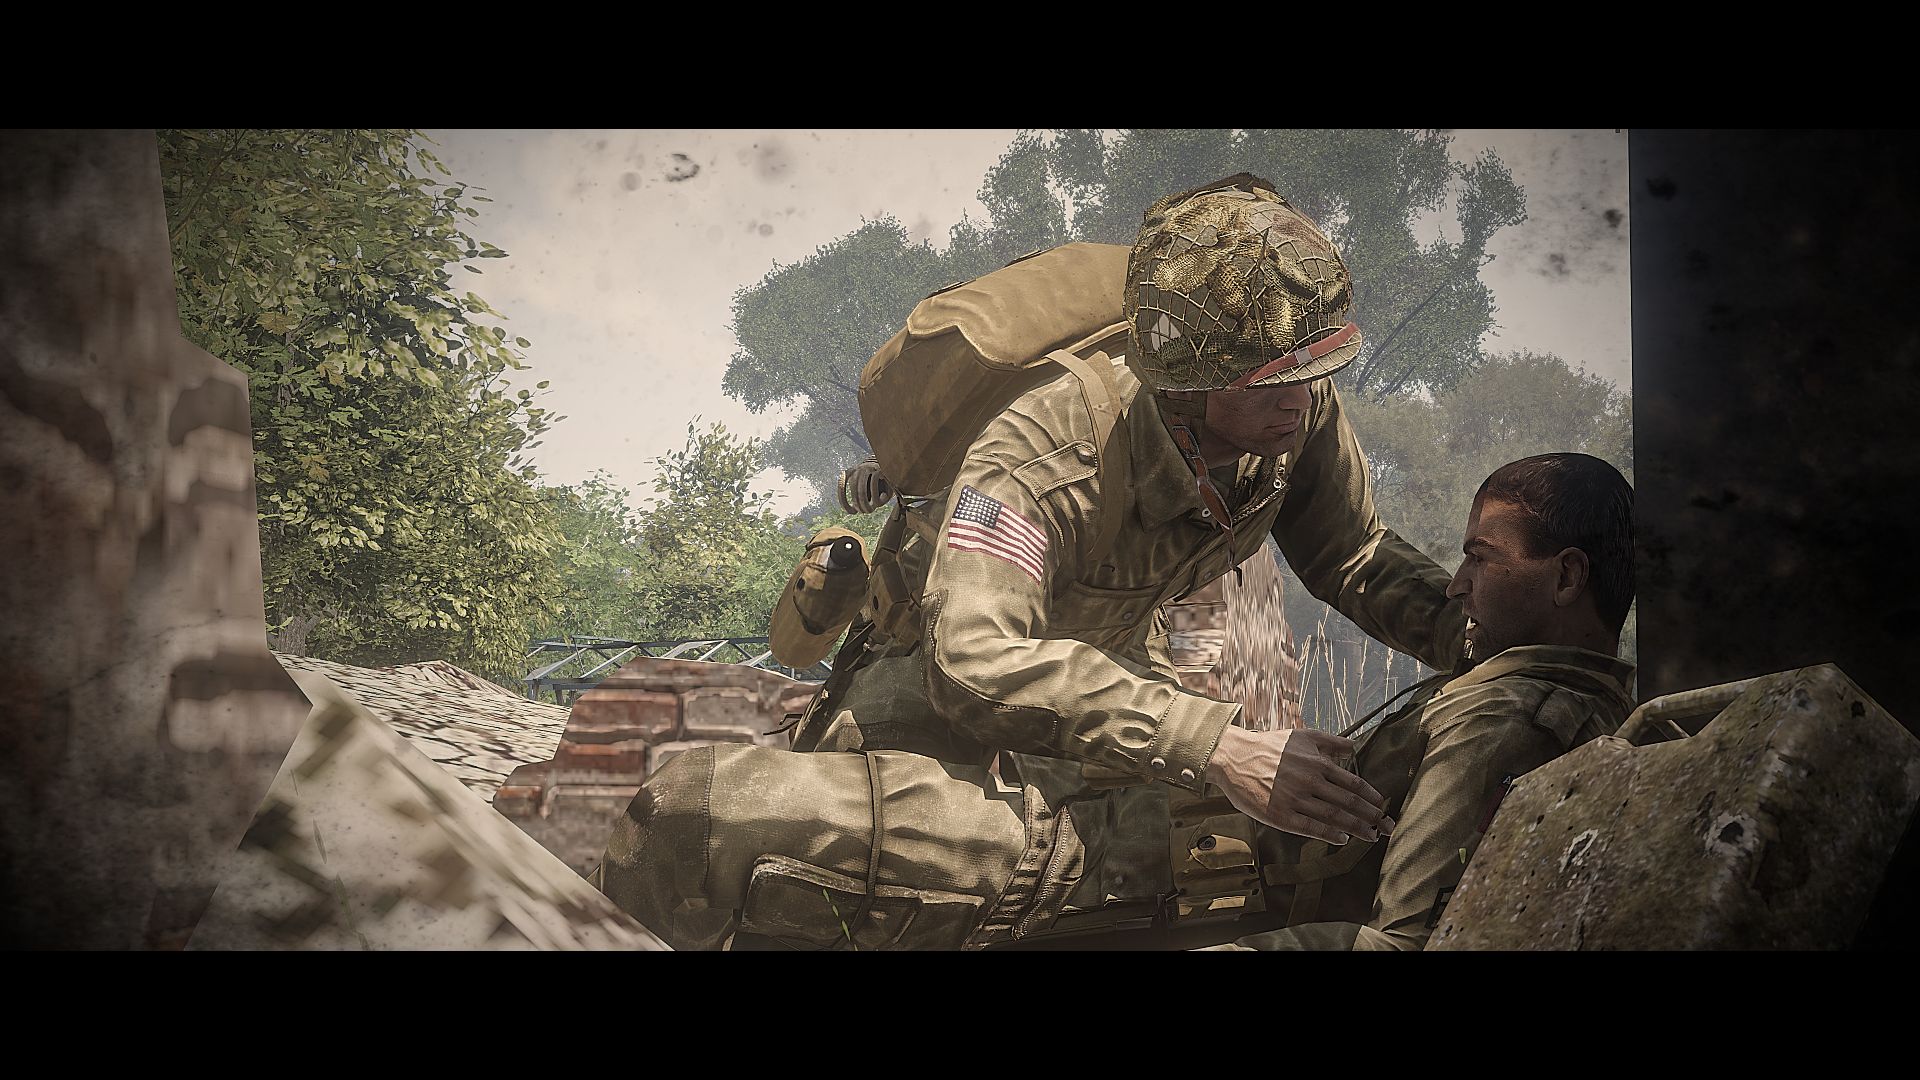
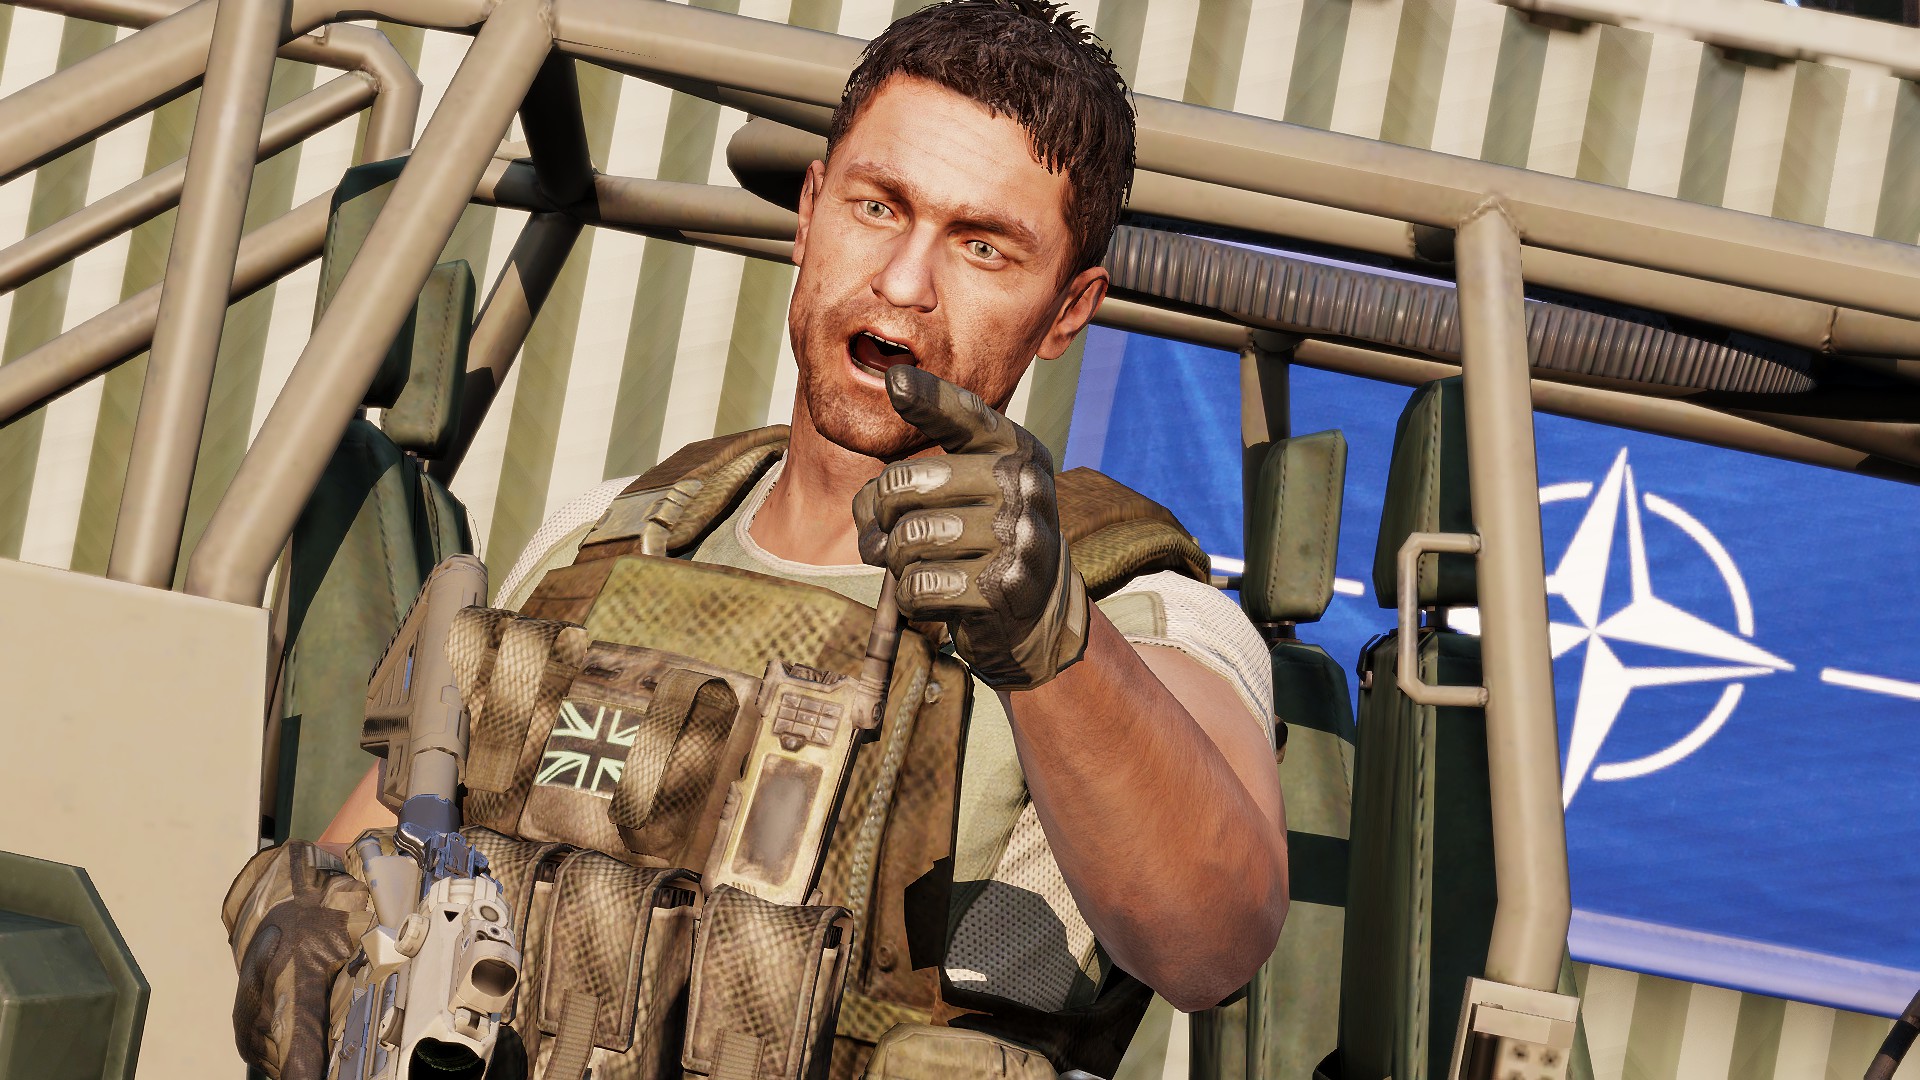
Let's see some examples of screenshots made with Artwork Supporter.
- Author: Mr. Mustache
- MODs (Other than Artwork Supporter): 3CB, Veteran
- Post-processed by ReShade and Photoshop
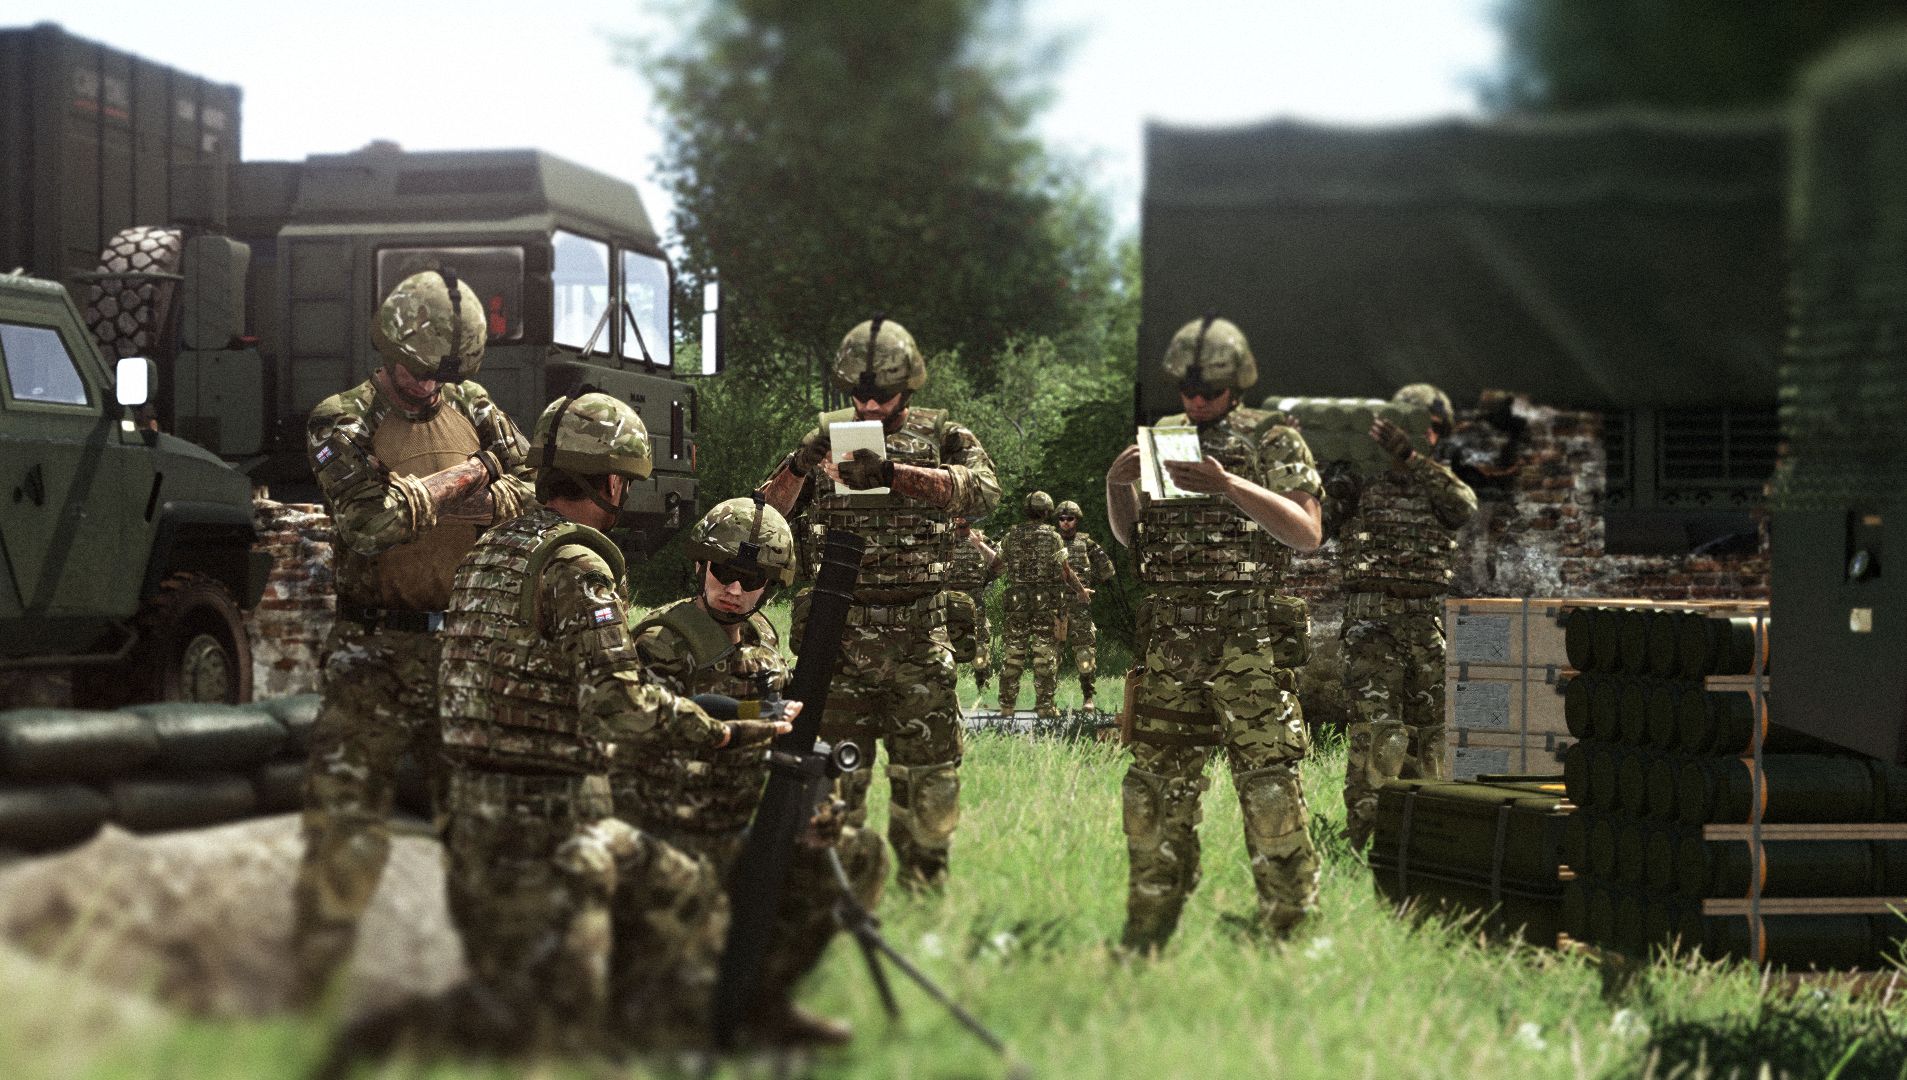
- Author: Krytera
- MODs: None
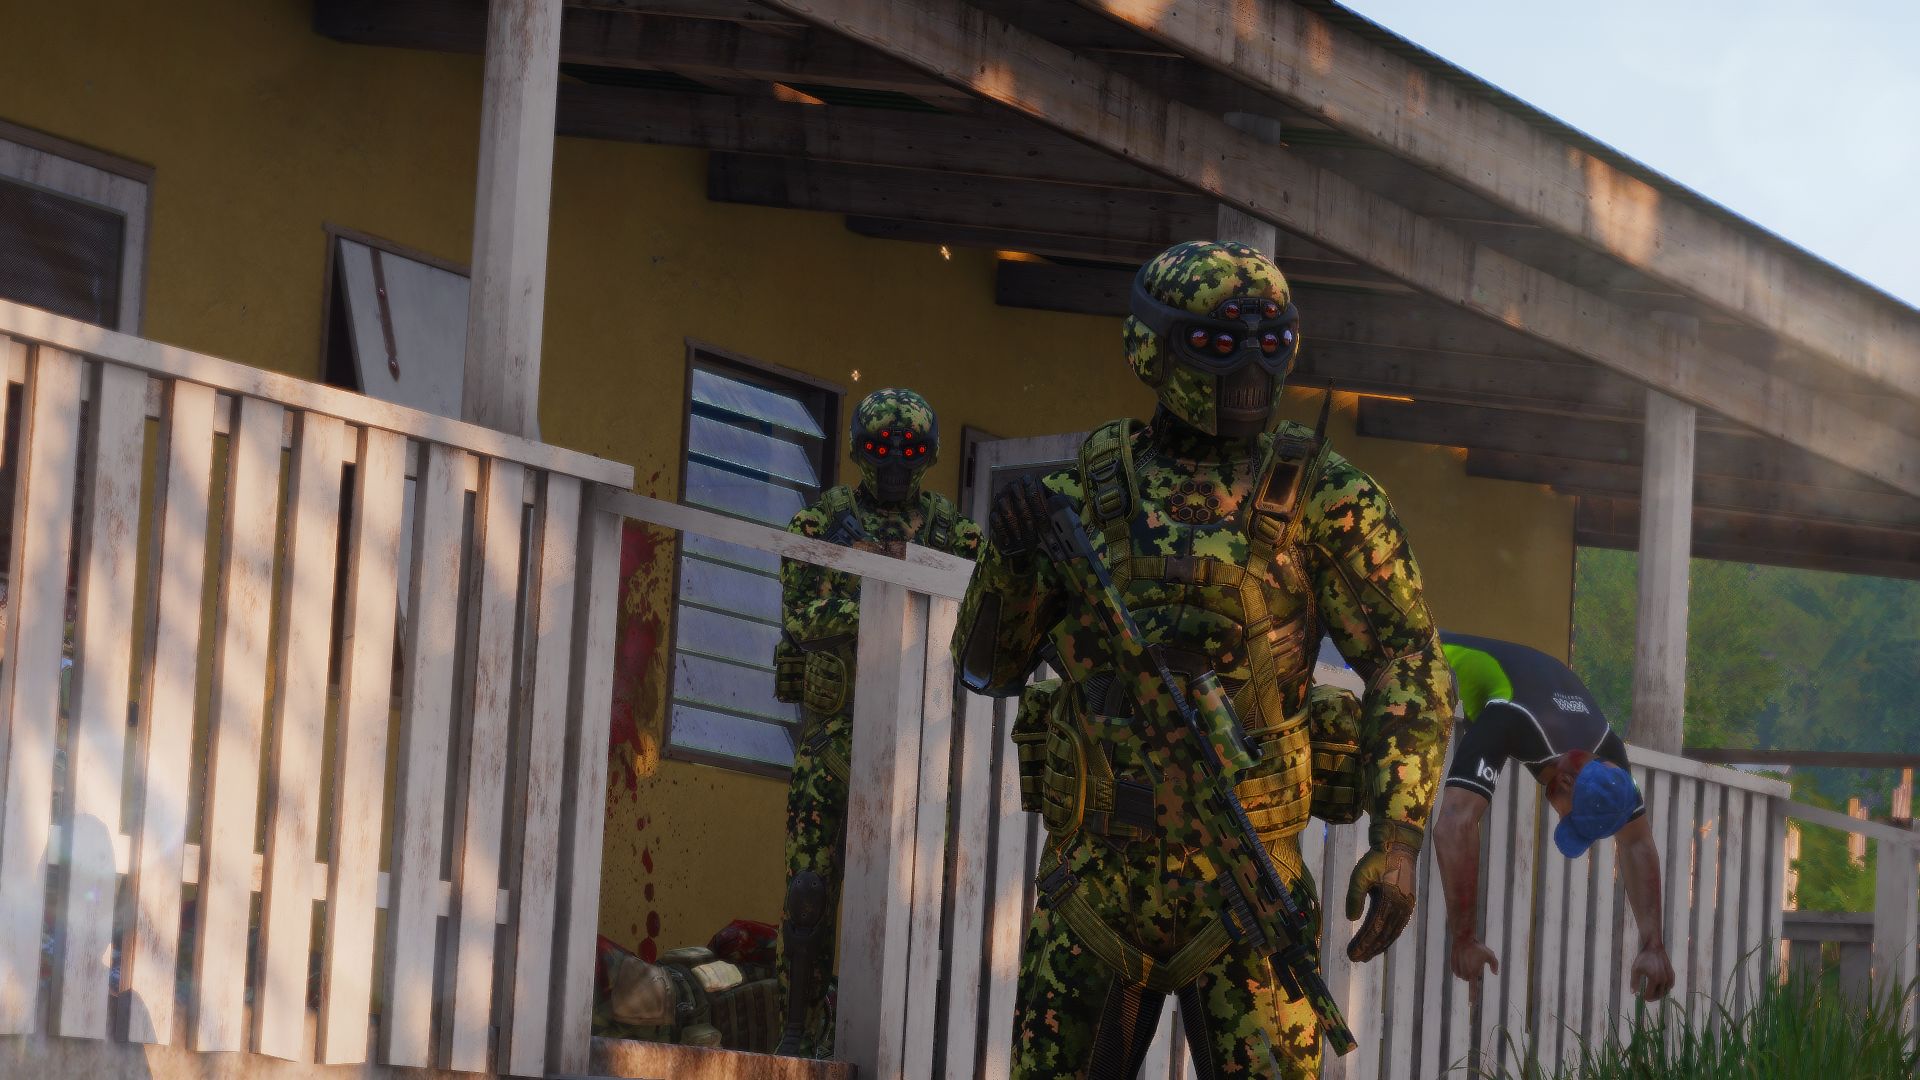
- Author: kkcat
- MODs: RHSUSAF, CUP Terrains, RSO BUILDINGS PACK
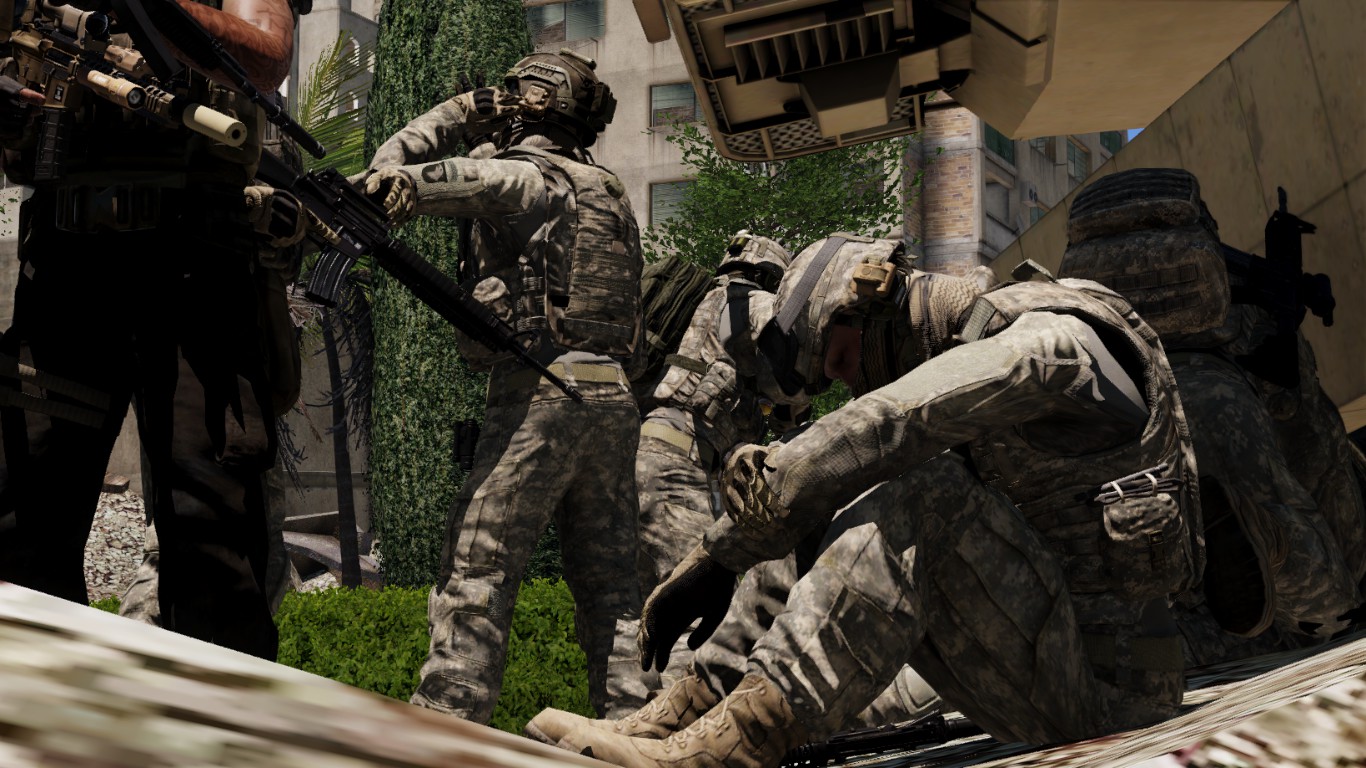
- Author: [2RIMa]-PapaBear
- MODs: IFA3_AIO_LITE, Faces of war
- Author: POLPOX
- MODs: None
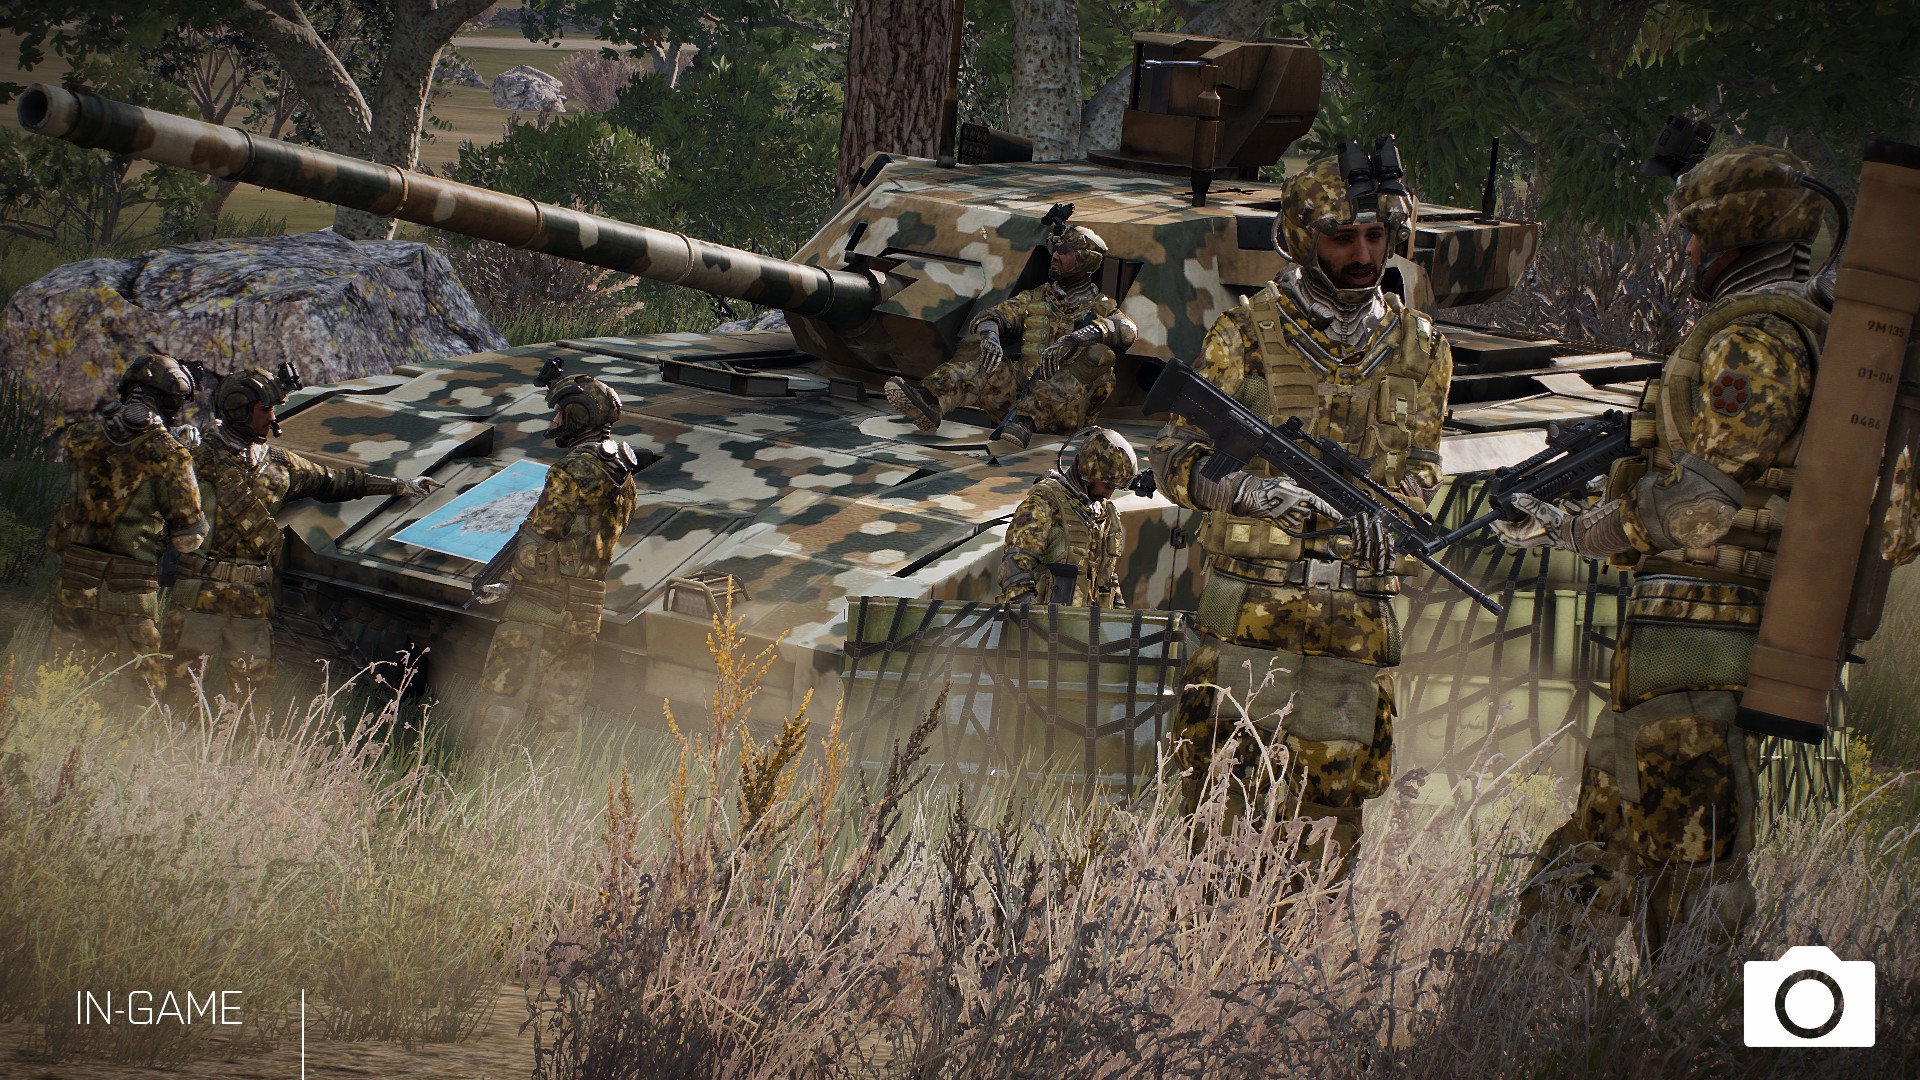
If you find those cool and want to make like those, it's time to find out how. Welcome to Artwork Supporter! First up: Basic things.
Section 1 - Very basic way to take screenshots
Note:Every description and images are based on v2.0e and older. Things may be changed in later version.
Before launching the game, make sure POLPOX's Base Functions is installed to the game.
https://steamcommunity.com/sharedfiles/filedetails/?id=1862880106 This MOD is required to run Artwork Supporter. Don't forget!
After launching Arma 3, make sure both MODs are enabled and open Eden Editor.
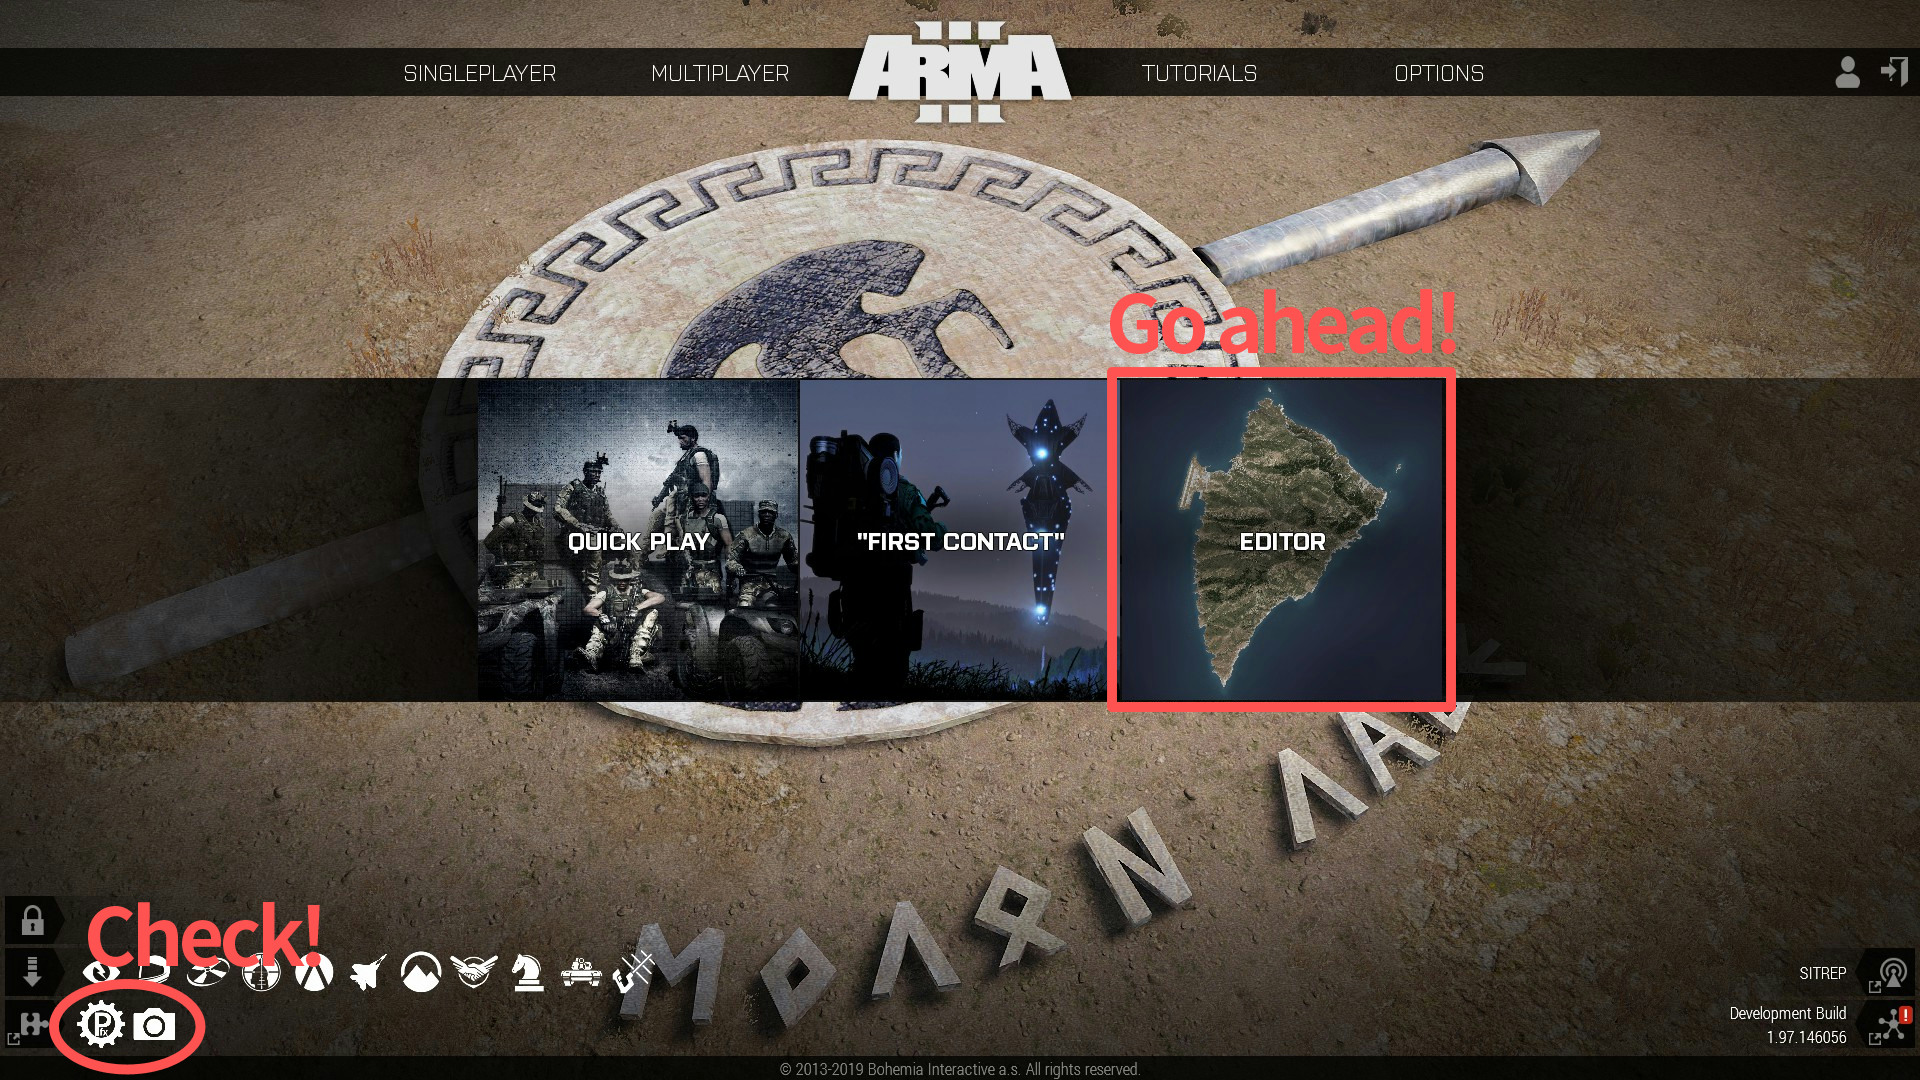
So you're in Eden Editor. I'll continue this article assuming you know how to do basic editing in Eden Editor[community.bistudio.com].
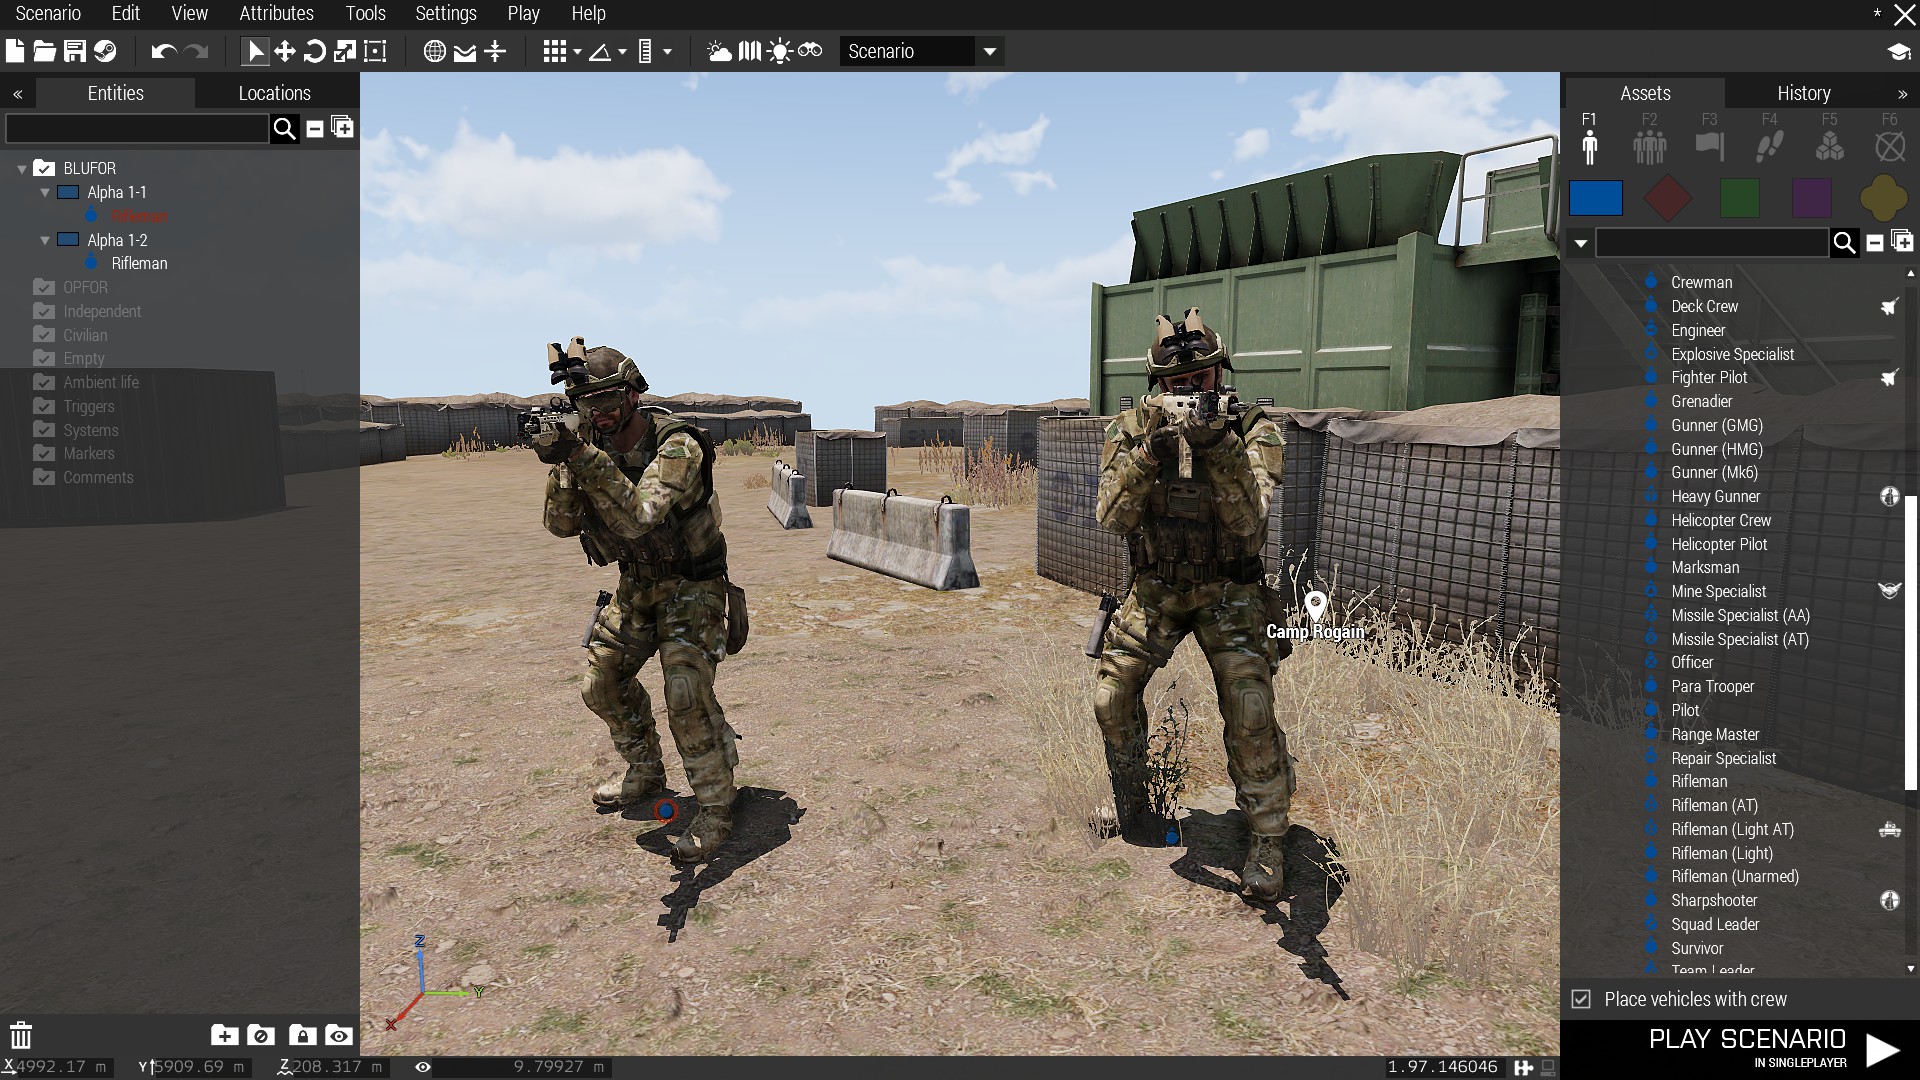 Although you can go ahead and started making screenshots now, they won't be good protagonists, so let's animate the AI. Open Animations Viewer.
Controls:To open Animations Viewer, press Ctrl+Q.
Note:I confirmed some MODs may conflict with Artwork Supporter so can't open Animations Viewer. If you faced the problem, launch without any optional MODs and check to make sure isn't a problem by Artwork Supporter.
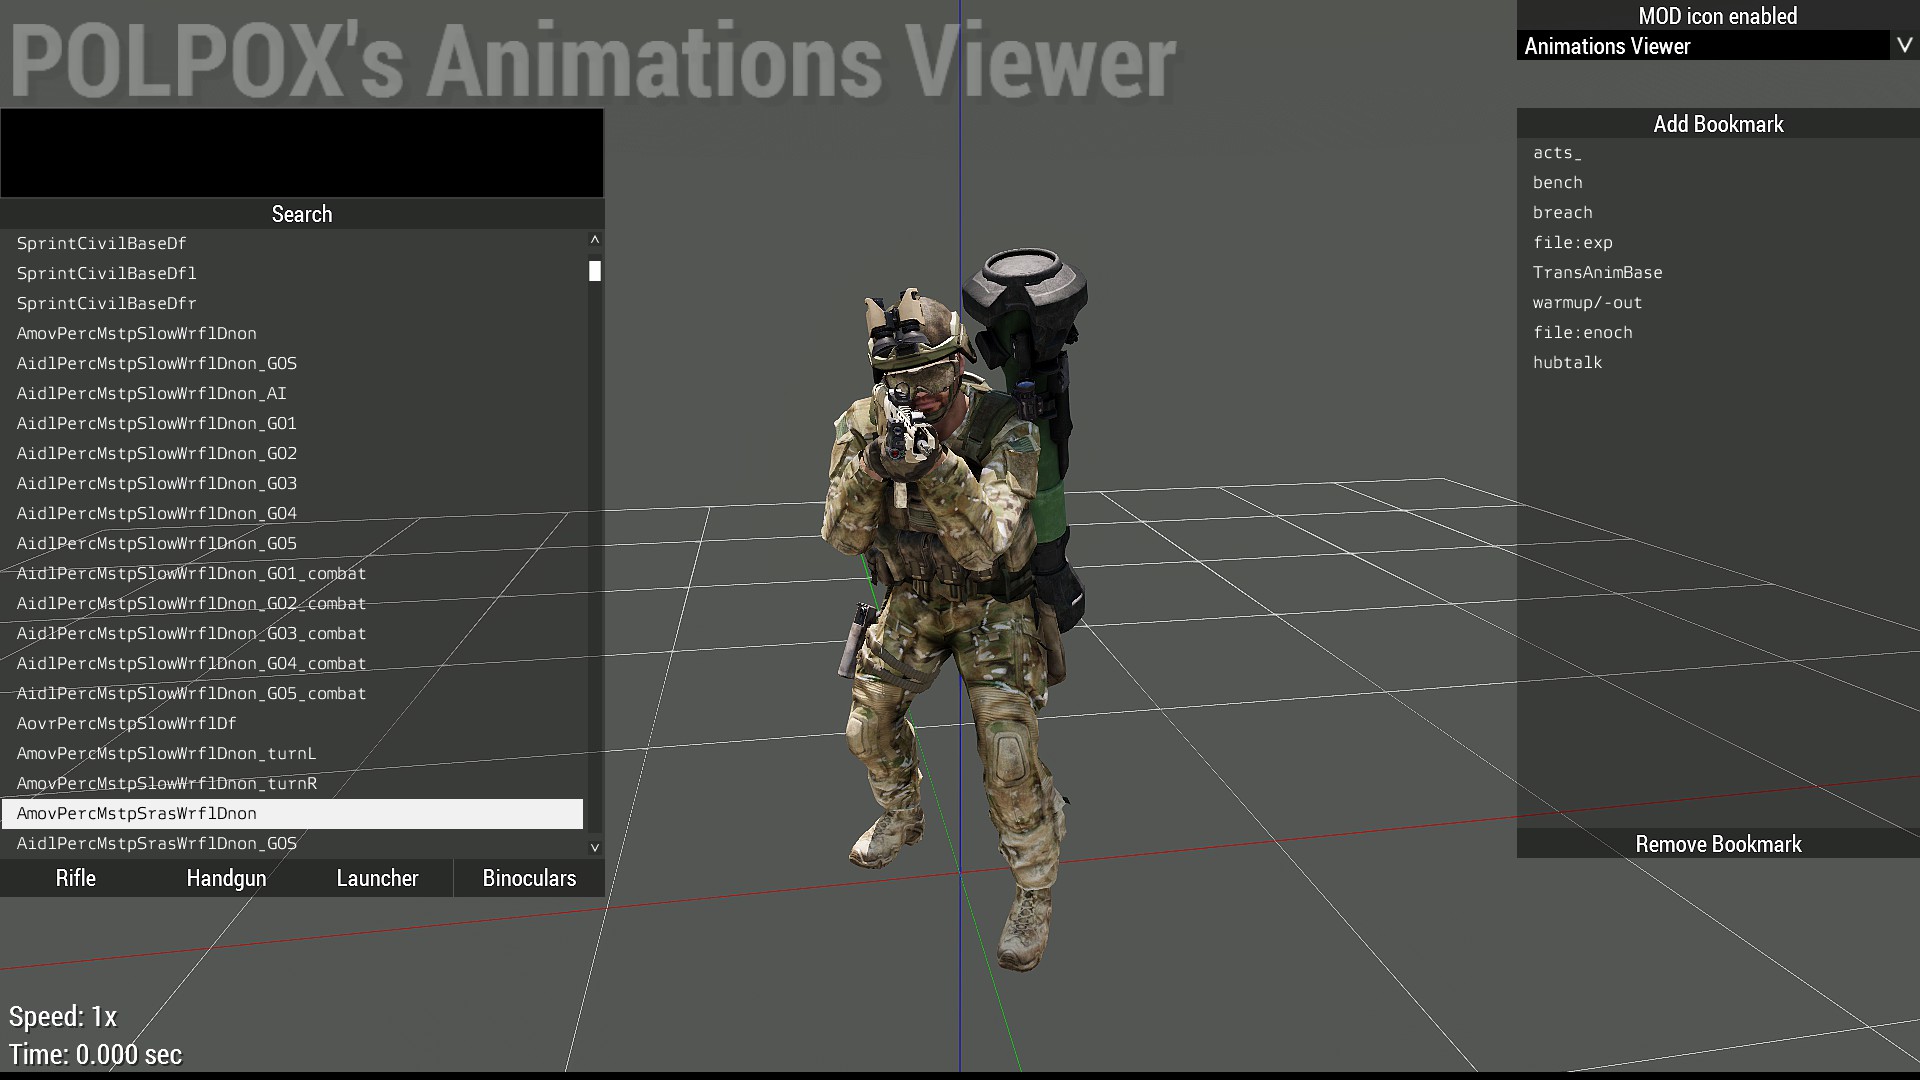 This is Animations Viewer, introduced by Artwork Supporter. This is really useful to see all of the animations loaded in Arma 3, including animations added by MODs.
Note:Beware spoilers. Animations that used in cutscenes also can be accessed and shown.
You can see the top-left box. That is the search box, and you can put any words to filter animations. Let's put the word: “acts_”.Controls:In Animations Viewer, RMB drag to rotate, LMB drag to move, wheel up/down to zoom in/out the camera.
Controls:While you're focusing(clicked last) the box, Enter key is the shortcut to search animations.
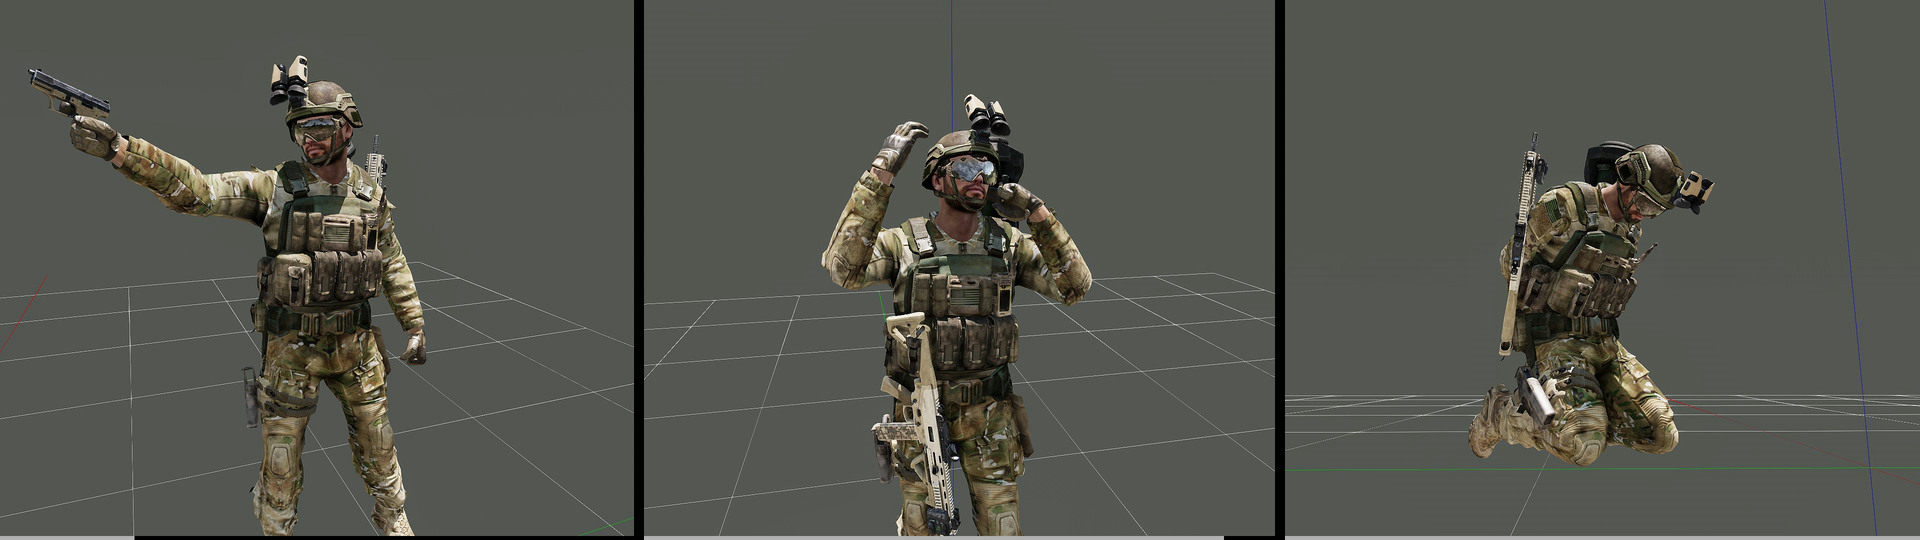 The image is showing some of the animations that can be found by the search word.
If you find the animation that satisfies you, you can copy the name, and close Animations Viewer.Note:The search box accepts some of the commands as the tooltip shows you. The most important is “/” (slash) to separate commands.
For example, “acts_/nato” will filter the list by both “acts_” and “nato” are included in the animation name.
Controls:After clicking the name on the list, Ctrl+C will do the copy selected name. White flash is the sign of the success of the action.
Controls:Hit Esc to close the viewer.
Backed to the Eden Editor screen. Put your mouse on your AI and apply the animation you've just copied.
Controls:Ctrl+E will apply the animation to the mouse-overed unit.
Note:Applying animation to player is not recommended. This results some unexpected animation in preview.
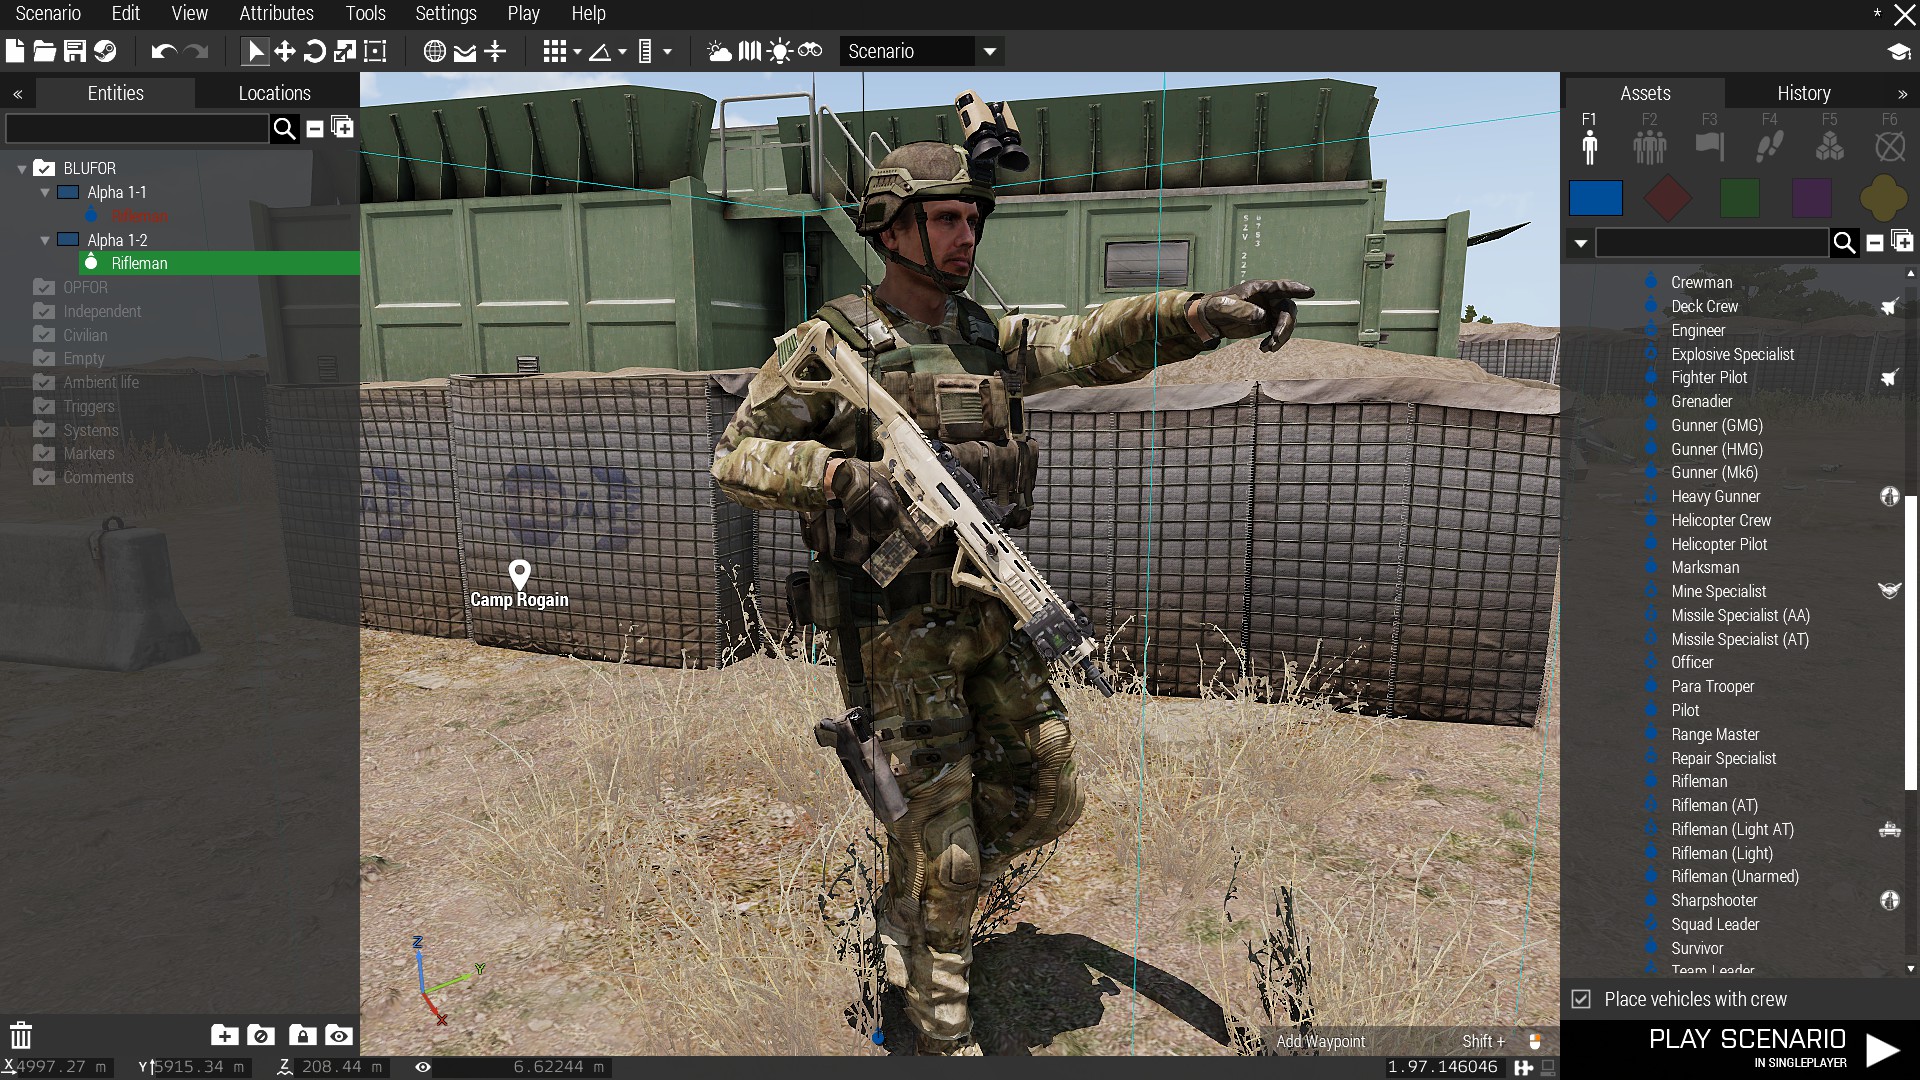 I've applied the animation “Acts_NATOCommanderArrival_Commander_3” to the AI unit. Units that applied an animation are also can be handled easily as the same principle by usual Eden Editor controlling. But I want to use the last part of “pointing” animation, so I need to stop the animation at the desired time. To do this, open the attributes of the unit.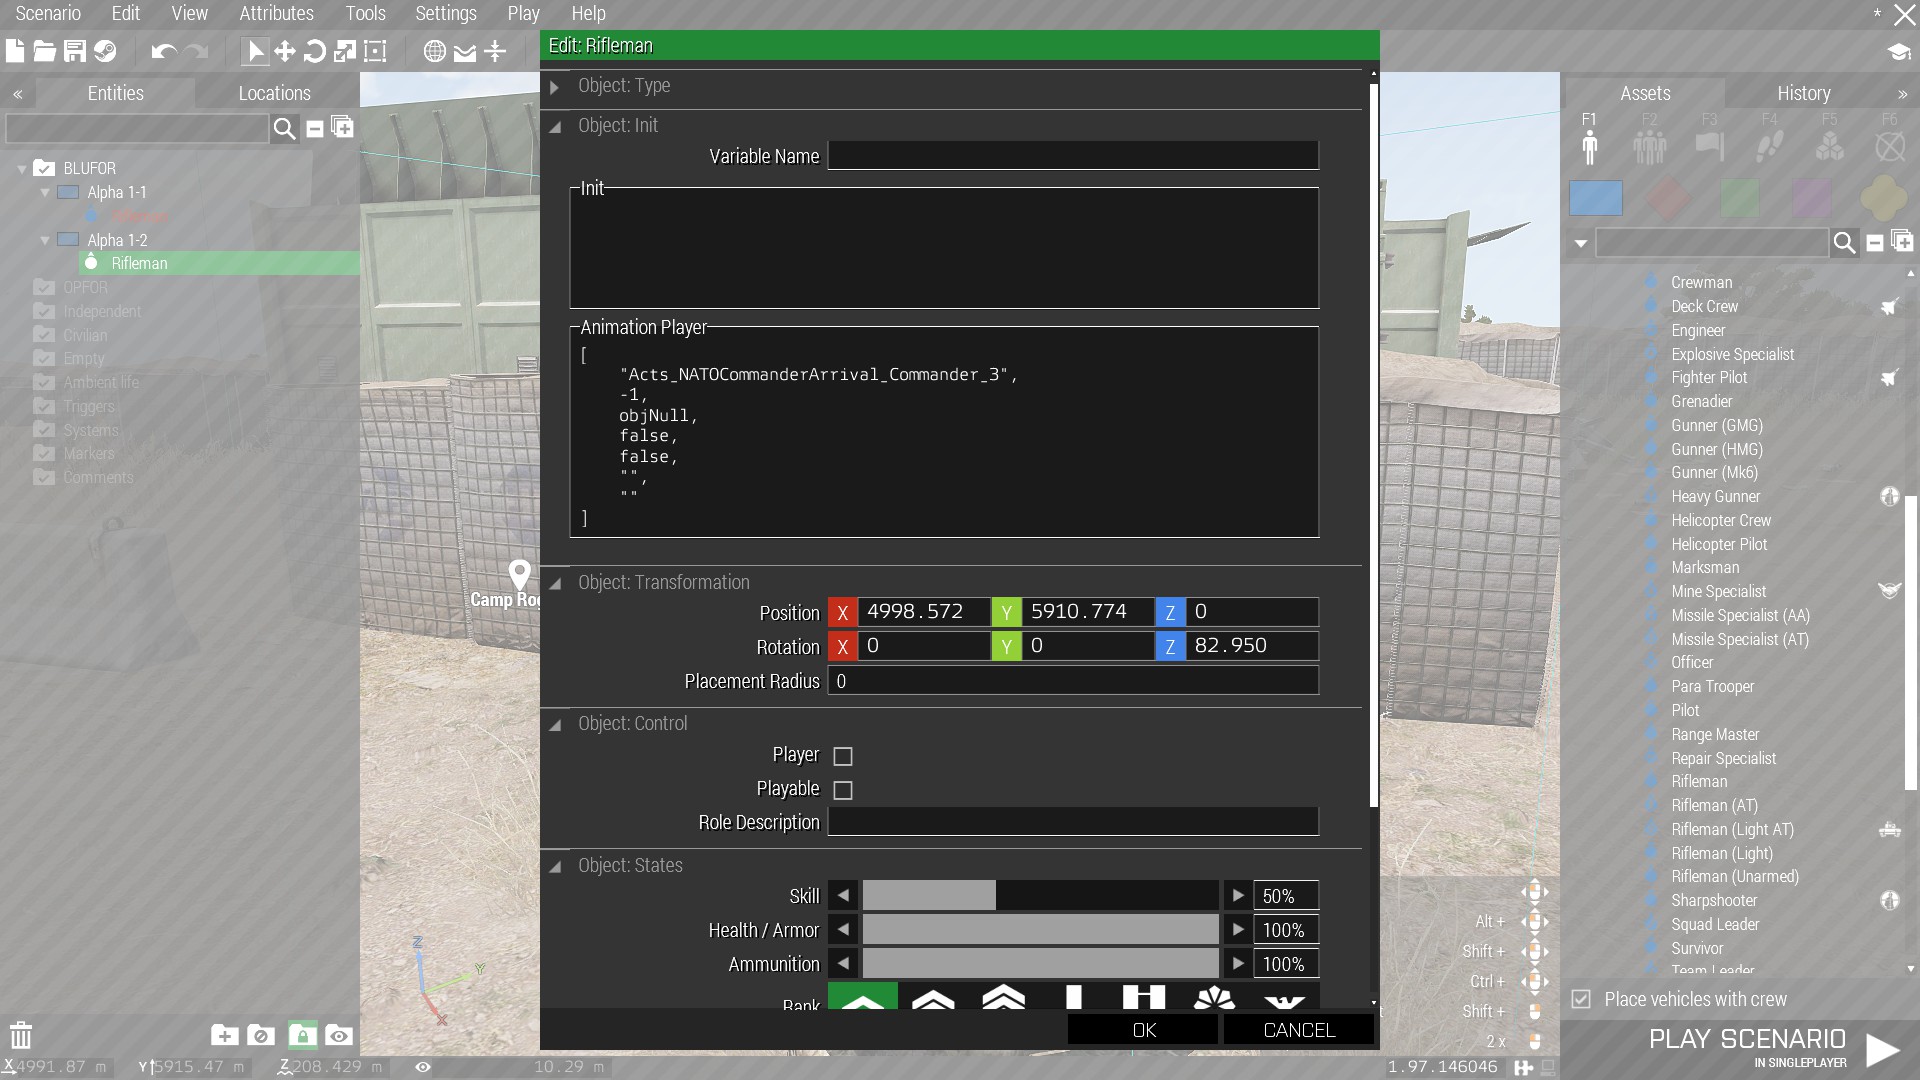
You've got the unfamiliar box below the init box. That's controlling the animation.
[
"Acts_NATOCommanderArrival_Commander_3",
-1,
objNull,
false,
false,
"",
""
]
The box is saying some strange gibberish. They've all meanings however, but let's forget everything, and look at the “-1”. That is the time of the animation. -1 means “don't let it stop”. If you want to stop the animation at, let's say 3 seconds, just put 3 there.My result is this:Note:In Animations Viewer, there's the timer in bottom-left.
[
"Acts_NATOCommanderArrival_Commander_3",
4.7,
objNull,
false,
false,
"",
""
]
Note:If you encountered an error while editing this section, applying the animation by Ctrl+E again will reset this section and may solve the problem.
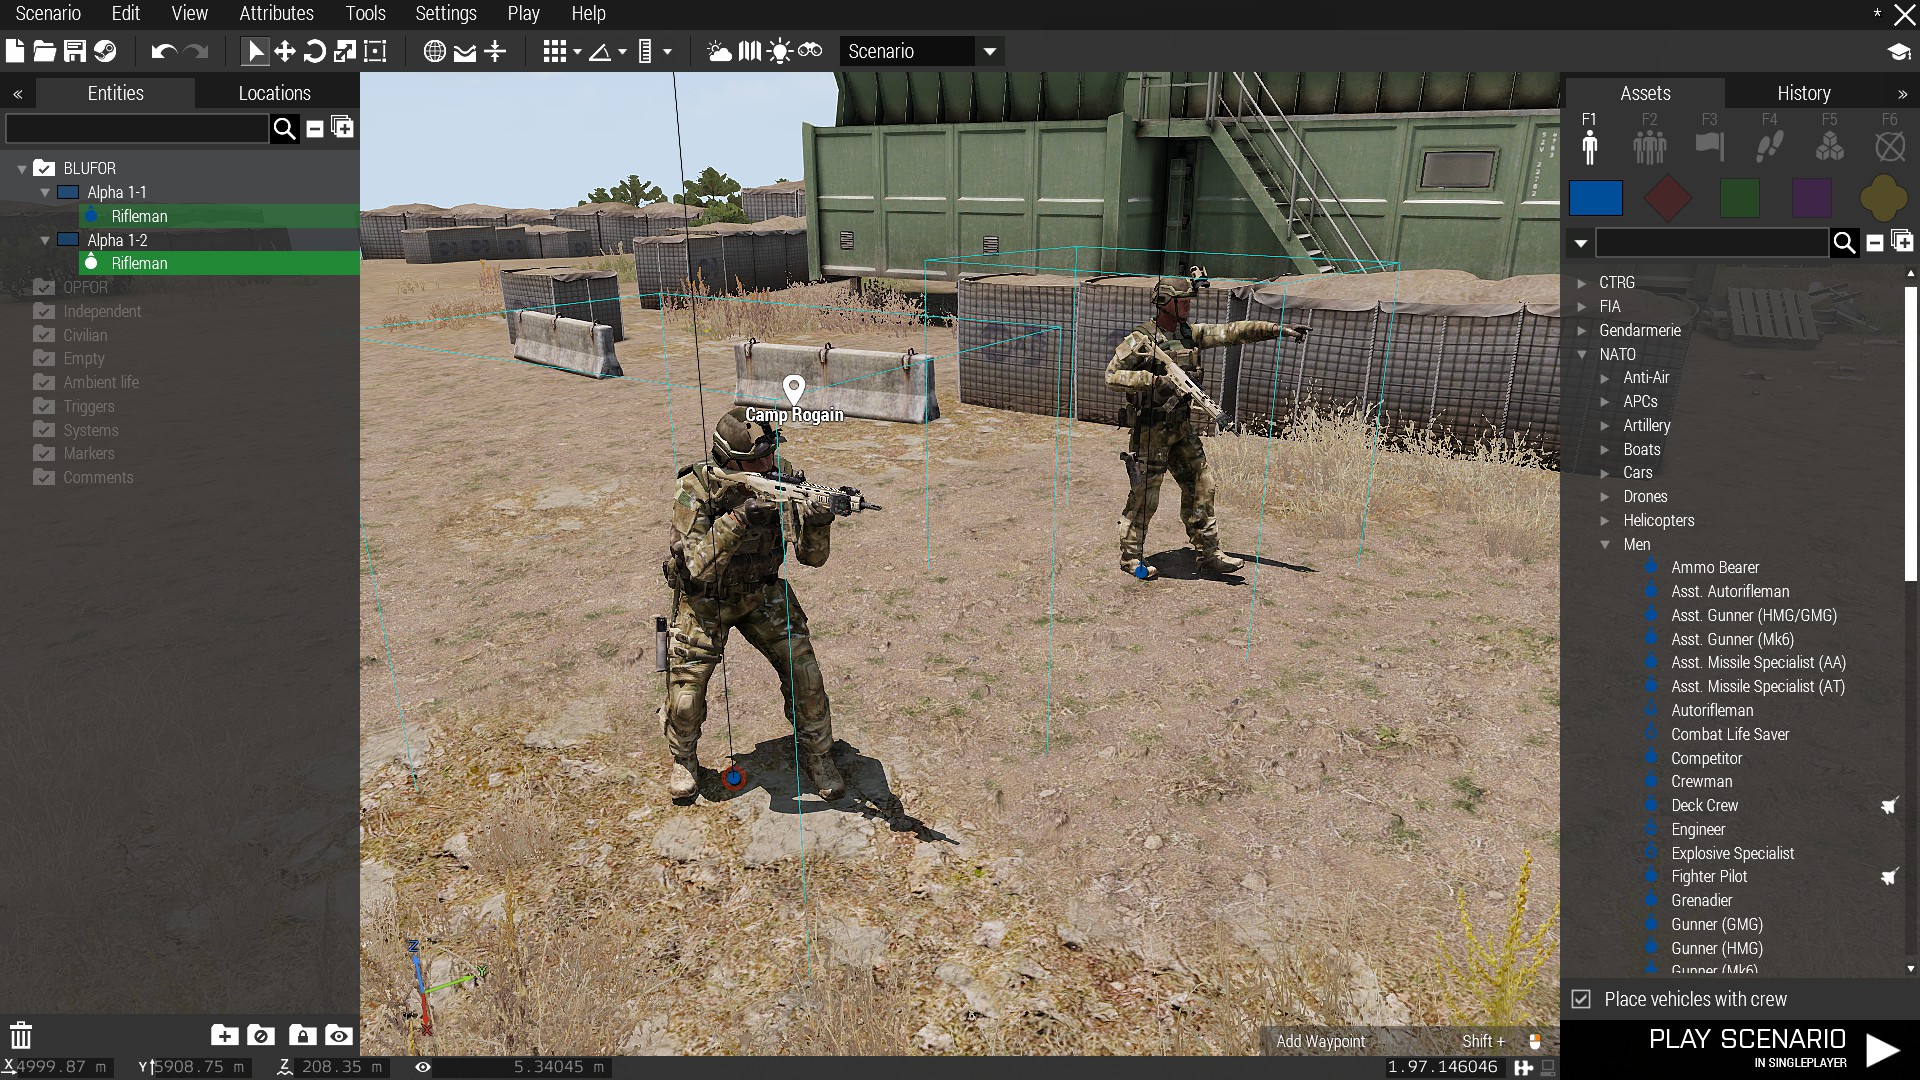 If your scene is ready to shoot, let's open the camera.
Note:You can open the camera either on Eden Editor (from Tools tab) and on the preview. If you've something that needed to be simulated, shoot a photo in the preview is recommended.
Note:In Splendid Camera, most of the controls aren't modified. WASD to move, QZ to move up/down, and so on.
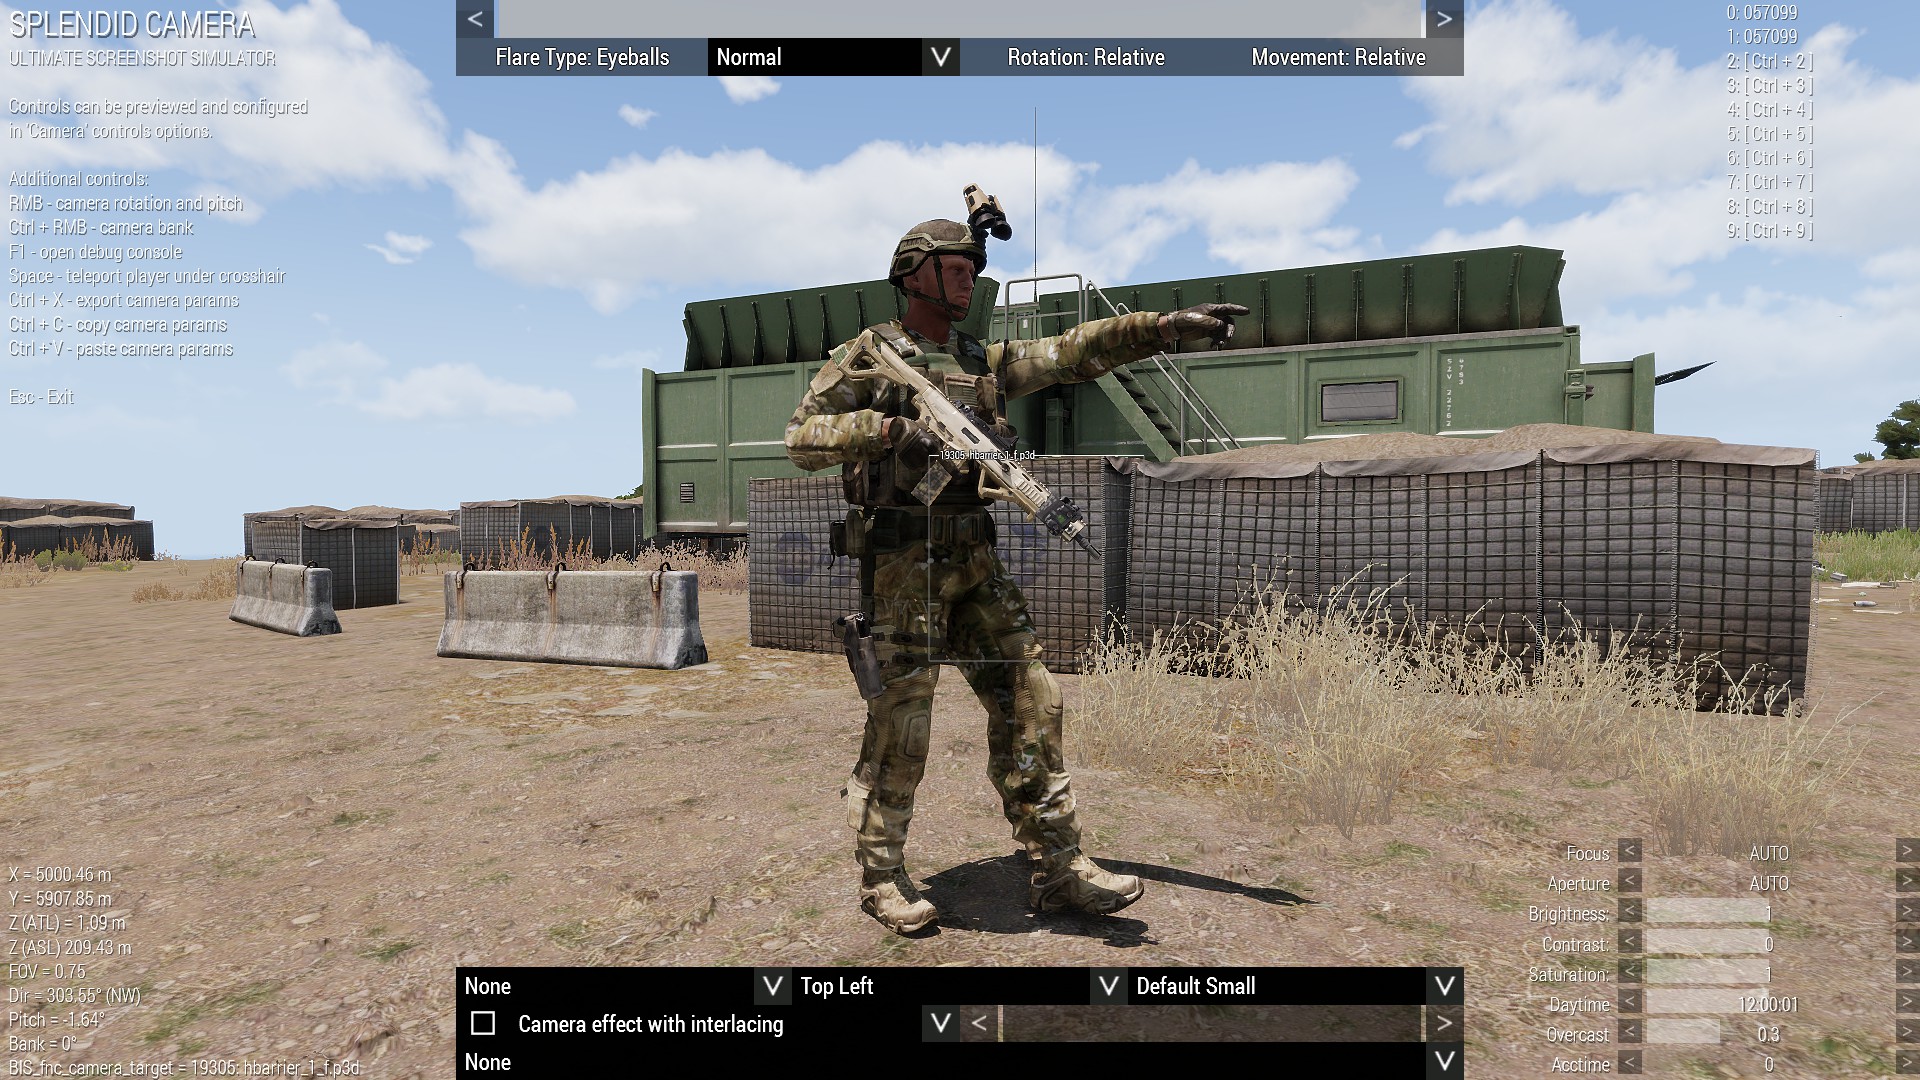 Splendid Camera is modded by the MOD. The customized interface provides you some improvements, but let's forget them again.
Note:Top and bottom interfaces appear only if the mouse is on the top or bottom of the screen.
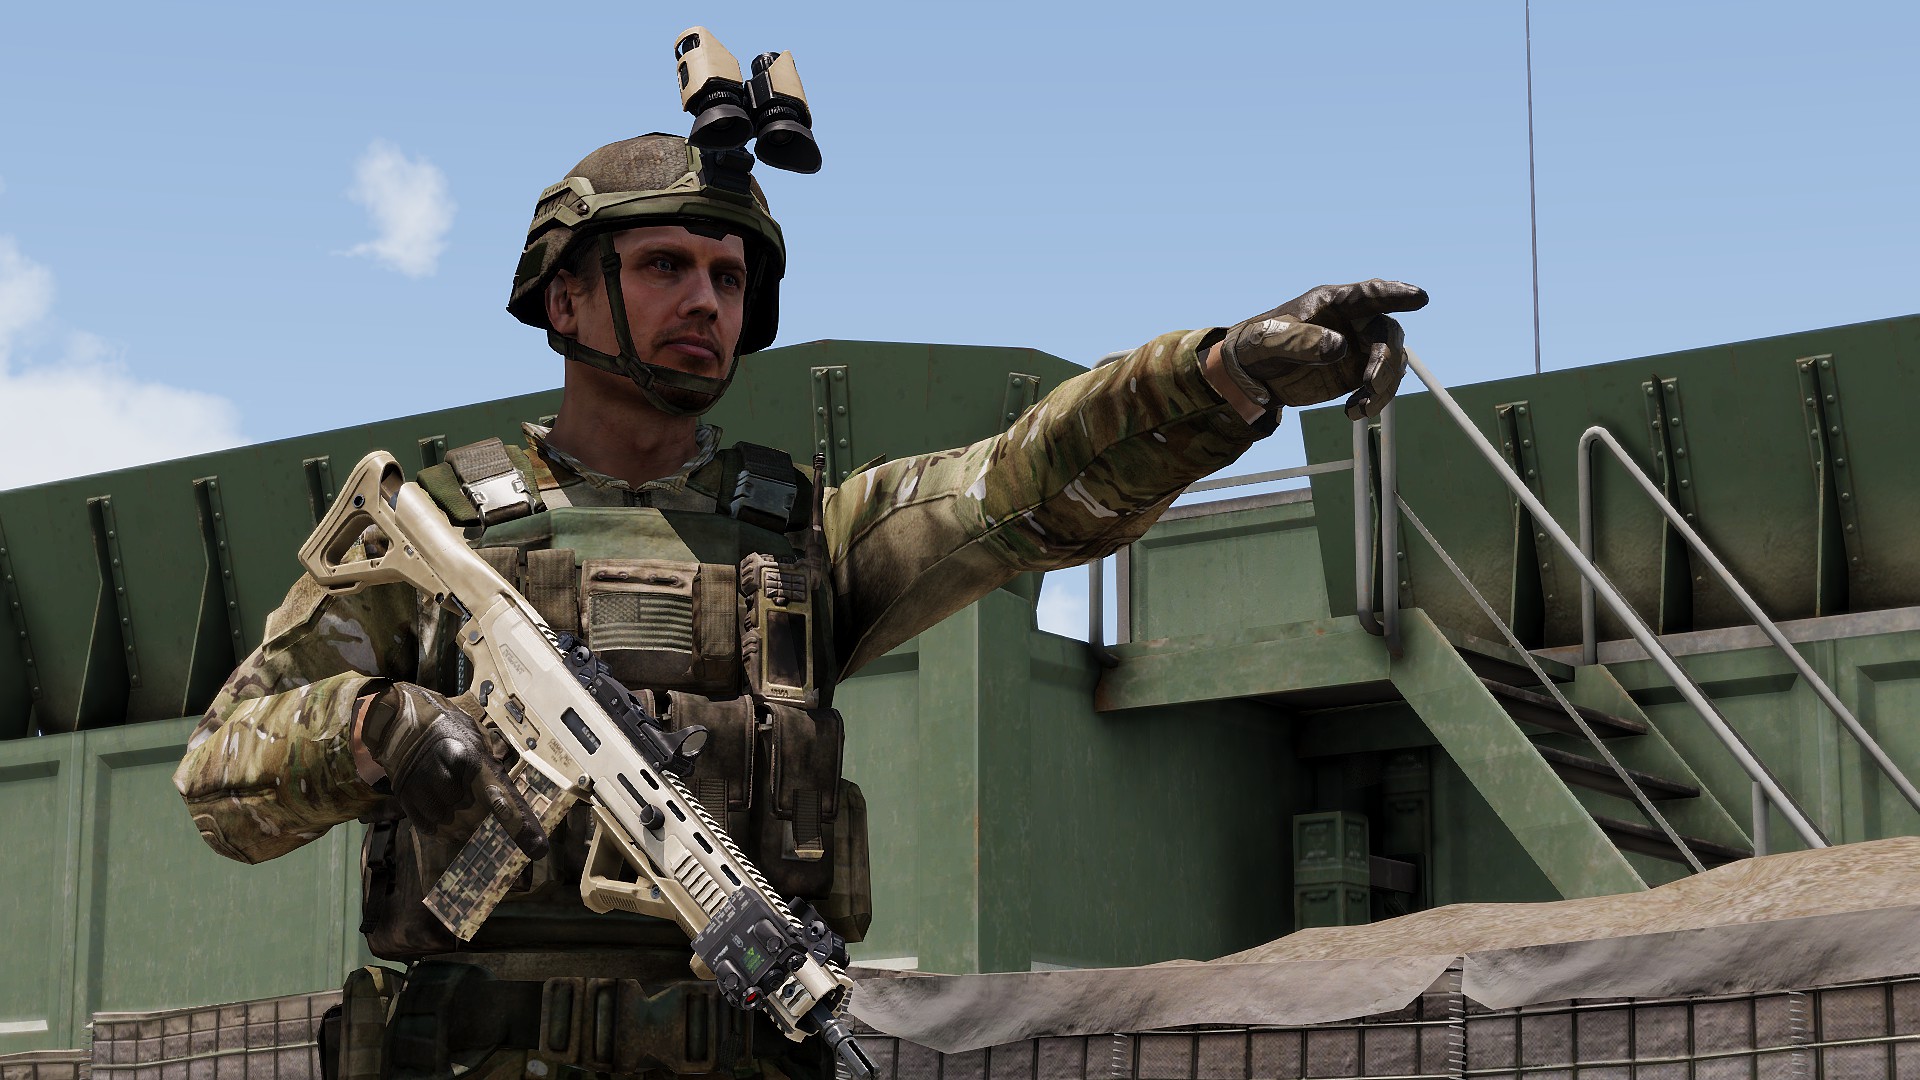
Tweak the camera angle and you're ready to shoot!
Section 2 - In-depth guide
Animations Viewer
POLPOX's Animations Viewer was a separated project, and later is now the critical part of Artwork Supporter. Many of the useful features are waiting for you.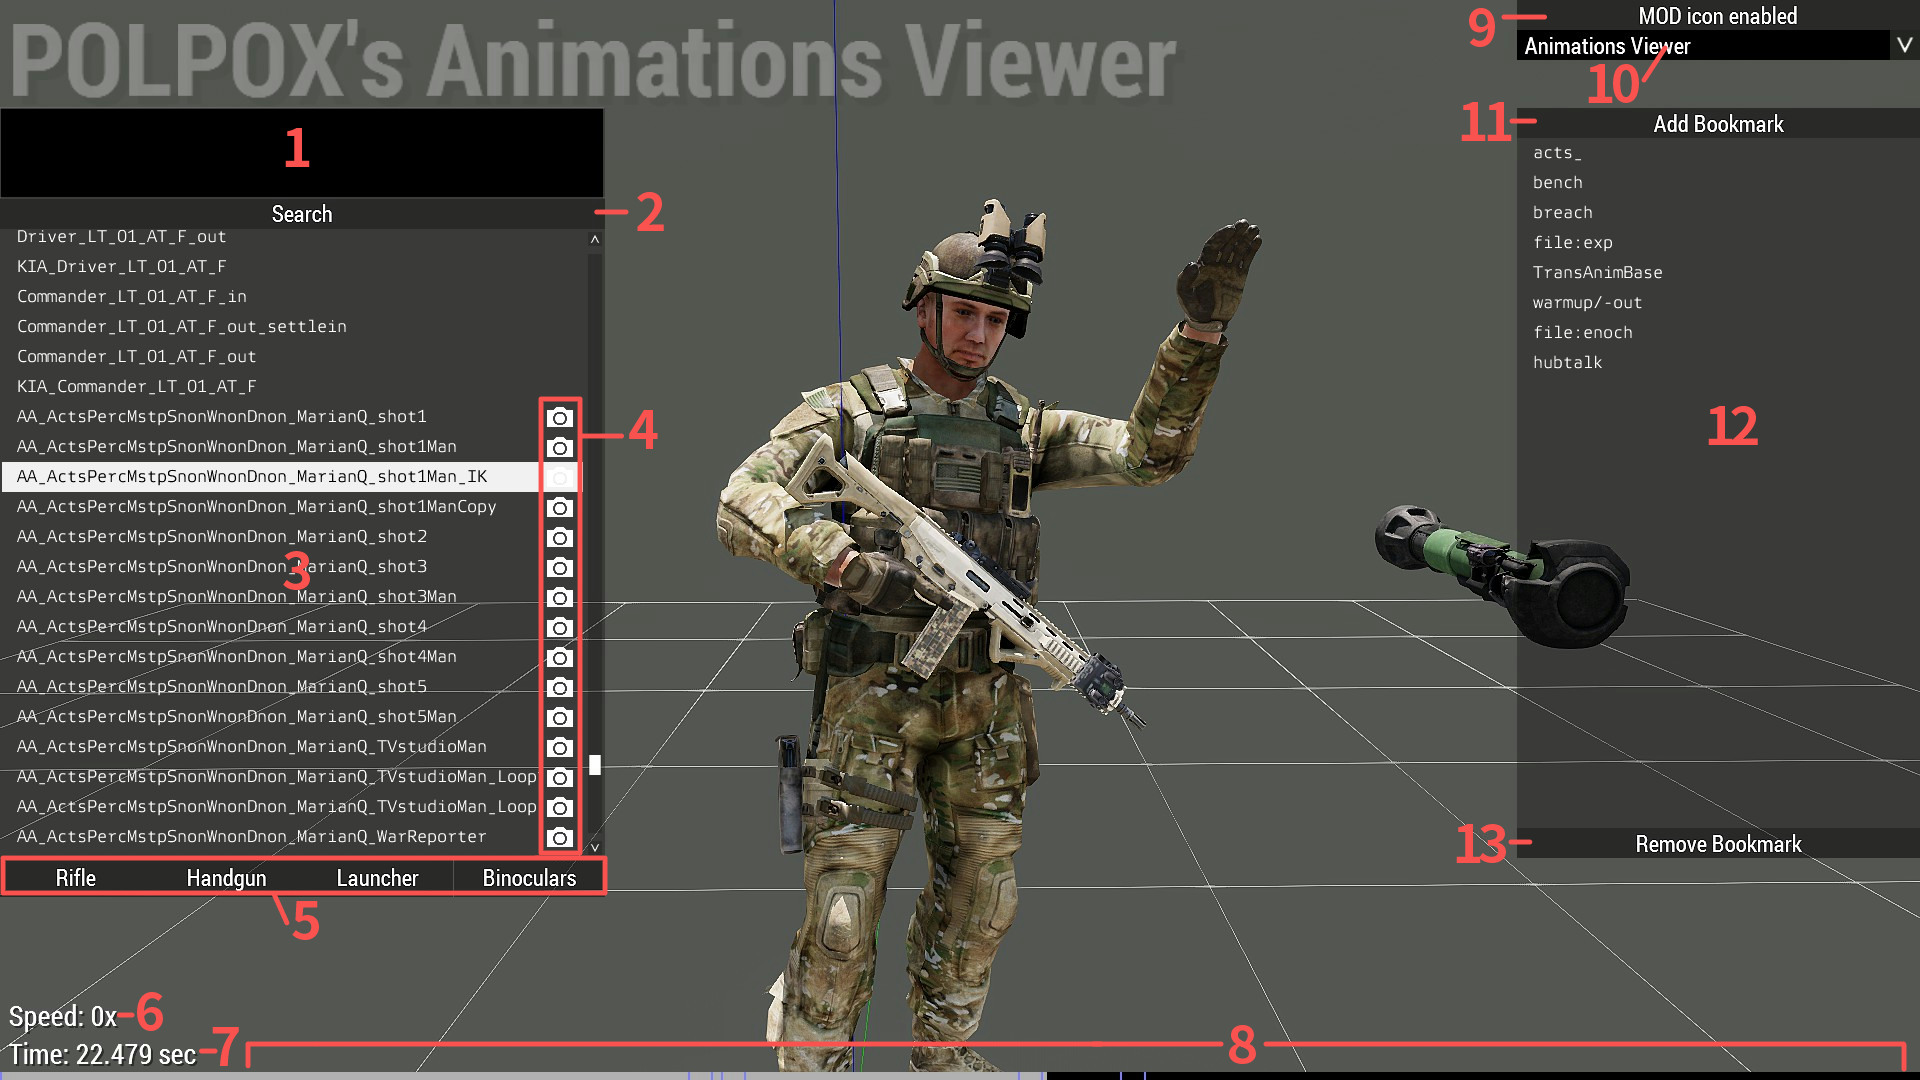
- Edit box: Search box
- Put any words to filter the list.
- Some special commands are available.
- file:<any words>
- Filter by file path.
- disableWeapons:<0 or 1>
- 0 means can shoot, 1 means can't.
- If you want them to shoot their weapons while animating, don't forget to check the parameter.
- 0 means can shoot, 1 means can't.
- IK:<0, 1, 2 or 4>
- Weapon IK (Inverse Kinematics) is the technology to fit their hands to the weapon.
- 0 stands for none (disabled), 1 stand for the rifle, 2 stands for the pistol and 4 stands for the launcher.
- If the weapon has no such configs, this won't work.
- Weapon IK (Inverse Kinematics) is the technology to fit their hands to the weapon.
- pistol:<0 or 1>
- pistol:1 filters animations by showed the handgun in the right hand.
- binocular:<0 or 1>
- binocular:1 filters animations by showed the binocular in the left hand.
- file:<any words>
- Put any words to filter the list.
- Button: Search button
- List: List of the animations
- Icons: MOD icons
- If an icon is shown there, the animation is added and/or affected by the MOD.
- Button: Show/hide items
- Click to toggle the item.
- Text: Animation speedControls:You can speed up/down the animations by pressing the key of “Time acceleration” and “Time deceleration”. “-” and “=” (Right of 0 key, left of Backspace key) by default.
- Text: Time of the animation
- May not work on some animations.
- Bar: Time of the animation
- Left is the start, right of the end of the animation.
- Red and blue lines on this bar stand for right and left hand IK state change.
- Also may not work on some animations.
- Left is the start, right of the end of the animation.
- Button: Show/hide MOD icons
- Showing MOD icons will recognize animations easier, hiding MOD icons will gain performance. Your call.
- Pulldown menu: Viewer mode
- 3 modes are available: Animations, Gestures and Mimics Viewer.
- Gestures are some “animation in animation” things. Mimics are facial expressions.
- Some of the features may not work when using other than Animations Viewer.
- You can use both gestures and mimics the same principle with animations.Controls:After copied the name of gestures or mimics, Ctrl+E on an unit will apply the gesture/mimic. However, an animation must be applied before applying a gesture or a mimic.
- 3 modes are available: Animations, Gestures and Mimics Viewer.
- Button: Add bookmark
- As the tooltip says, you can save the current search words by clicking this button.
- List: Bookmarks
- Double-clicking an item will do apply the bookmark search words and search action.
- Button: Remove bookmark
- While selecting an item of the bookmarks list, double-click will remove the bookmark.
- By pressing F1, you can show some simple config viewer.
- This won't work outside a human unit's Animations Viewer.
- By pressing F2, you can show IK viewer.
- It'll show the state of right and left hand IK.
And, there're some “aliases” of the official animations in the list of the animations.
- PLP_[...]_Hgun: Showing handgun in the right hand.
- PLP_[...]_enableFire: This animation can fire the weapon unlike the original one.
- PLP_[...]_Hgun_enableFire: Both of above.
- [...]_IK: Applied weapon IK so every weapons can handle this animation.
Splendid Camera
Remember there's a lot of modified interfaces? Let's talk about every piece of them.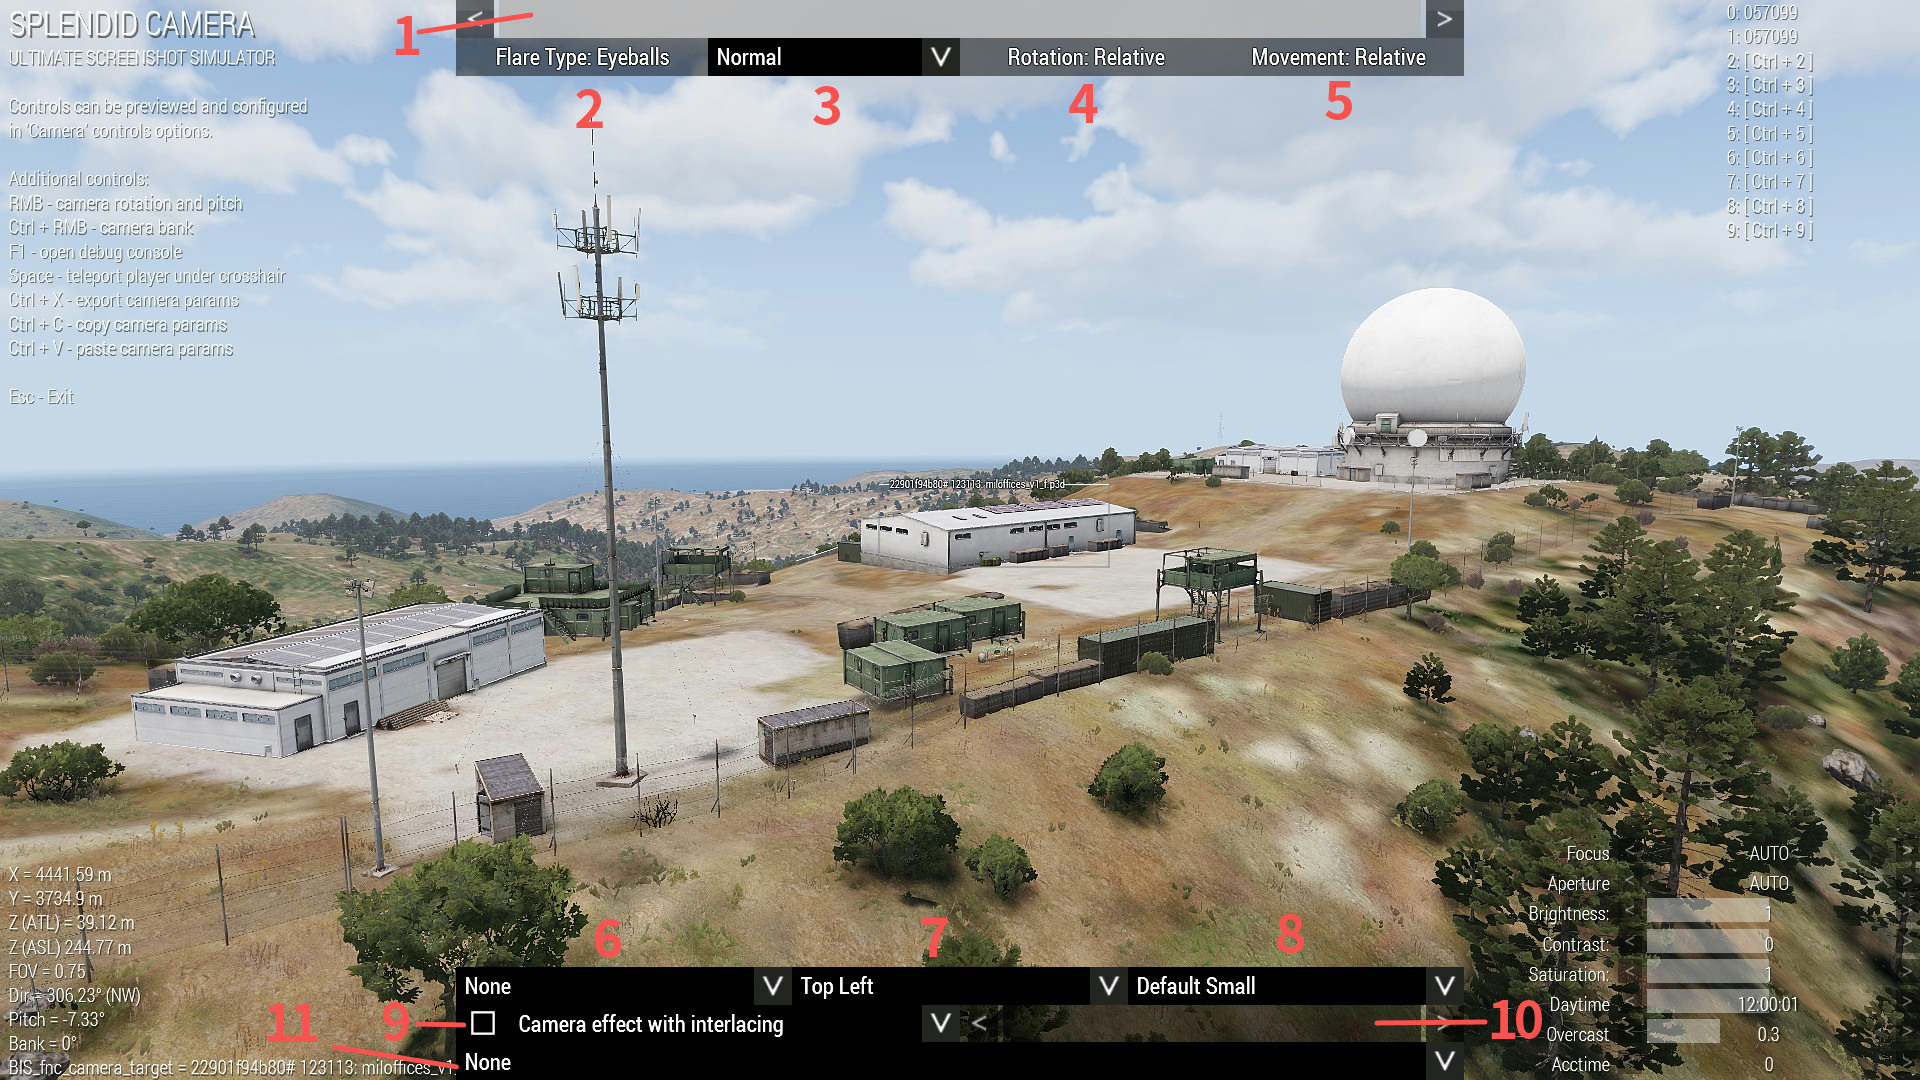
- Slider: Camera movement speed modifier
- Rightmost is 100%(default) speed, leftmost is 0% speed.
- Useful when you needed to move the camera slower.
- Rightmost is 100%(default) speed, leftmost is 0% speed.
- Button: Change flare type
- Eyeballs mode and Camera Lens mode are available.
- Effective when the sun is in the camera perspective.
- Eyeballs mode and Camera Lens mode are available.
- Pulldown menu: Change vision mode
- Normal, Nightvision and IR Color 0 ~ 64 are available.
- Button: Change rotation vector
- Absolute stands for global axis, Relative stands for local (camera) axis.
- Highly recommend to switch to Relative. Useful when the camera is tilted!
- Absolute stands for global axis, Relative stands for local (camera) axis.
- Button: Change movement vector
- Same as above, but movement vector.
- When Relative mode, pressing W key will move the camera to the front of the camera, instead of the direction of the camera.
- Same as above, but movement vector.
- Pulldown menu: Logo applier
- Select one of the items on the list, and the item will be shown in the camera.
- Every DLCs, updates and MODs logo can be used.
- Select one of the items on the list, and the item will be shown in the camera.
- Pulldown menu: Logo positioner
- You can change the location of the logo to top, center, bottom and left, middle, right.
- Pulldown menu: Logo effect selector
- You can choose from big/small and white/black.
- Pulldown menu: Filter effect selector
- Pre-defined items such as vignette effects, dust effects and cinema borders are available.
- You can enable multiple filters by once.
- Pre-defined items such as vignette effects, dust effects and cinema borders are available.
- Slider: Filter intensity
- Leftmost is 0%, rightmost is 100% intensity.
- Can be set to every filters.
- Leftmost is 0%, rightmost is 100% intensity.
- Pulldown menu: Composition guideline
- Things like Center Compositions, Rule of Thirds, can be shown in the camera perspective.
- The guides will be hidden when you hide the interface.
- Things like Center Compositions, Rule of Thirds, can be shown in the camera perspective.
Also, here're the things in Splendid Camera that introduced in Artwork Supporter that let you to more efficient screenshotting.Note:If you can't move the camera after clicking some interfaces, modify the bottom-right official sliders may fix it.
- While opening Splendid Camera in Eden Editor, Ctrl+C to save the camera perspective.
- The red lines are showing the perspective.
- In the preview, using call PLP_fnc_loadCamera in the Debug Console will load the perspective.
- In Eden Editor, Ctrl+P will load the perspective.
- The red lines are showing the perspective.
- Pressing shift will boost your tilting camera.Controls:Ctrl+RMB drag to tilt the camera. Ctrl+Shift+RMB drag to tilt 10 times faster.
Animation Player
Animation Player lets you to preview in either Eden Editor and the preview.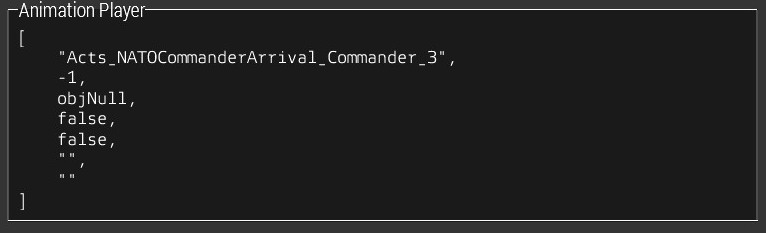
- String: Animation Name
- Usually don't need to edit by hand.
- Number: Animation Time
- Explained above.
- Object: Attach To
- objNull (which means won't attach) by default. Set it to an object's variable name, the unit will be attached to the object.
- Useful when to try to take a shot that including an unit over a moving vehicle.
- objNull (which means won't attach) by default. Set it to an object's variable name, the unit will be attached to the object.
- Boolean: Enable Flashlight and Laser
- false by default. true to enable.
- If the unit has flashlight or laser, the unit will turn it on.
- It must be night.
- false by default. true to enable.
- Boolean: Enable another method of play
- false by default. true to enable.
- Unstable way of animation. It allows a bit of new thing but I don't recommend to use much to be honest.
- false by default. true to enable.
- String: Gesture Name
- Usually don't need to edit by hand.
- String: Mimic Name
- Usually don't need to edit by hand.
Section 3 - The most useful custom objects
POLPOX's Artwork Supporter provides you some assets that help your screenshot creation.Note:Some of the custom assets have buggy behavior. Use with caution.
Let's talk about a bit of them.
Note:Some of the custom assets have their custom attributes. To edit the attribute, open the attributes and scroll down until the “Object Specific” part comes up.
Artwork Supporter Props > Lights > Simple Light Placer
Lighting is very important than you may think. Simple Light Placer provides a simple light where you needed.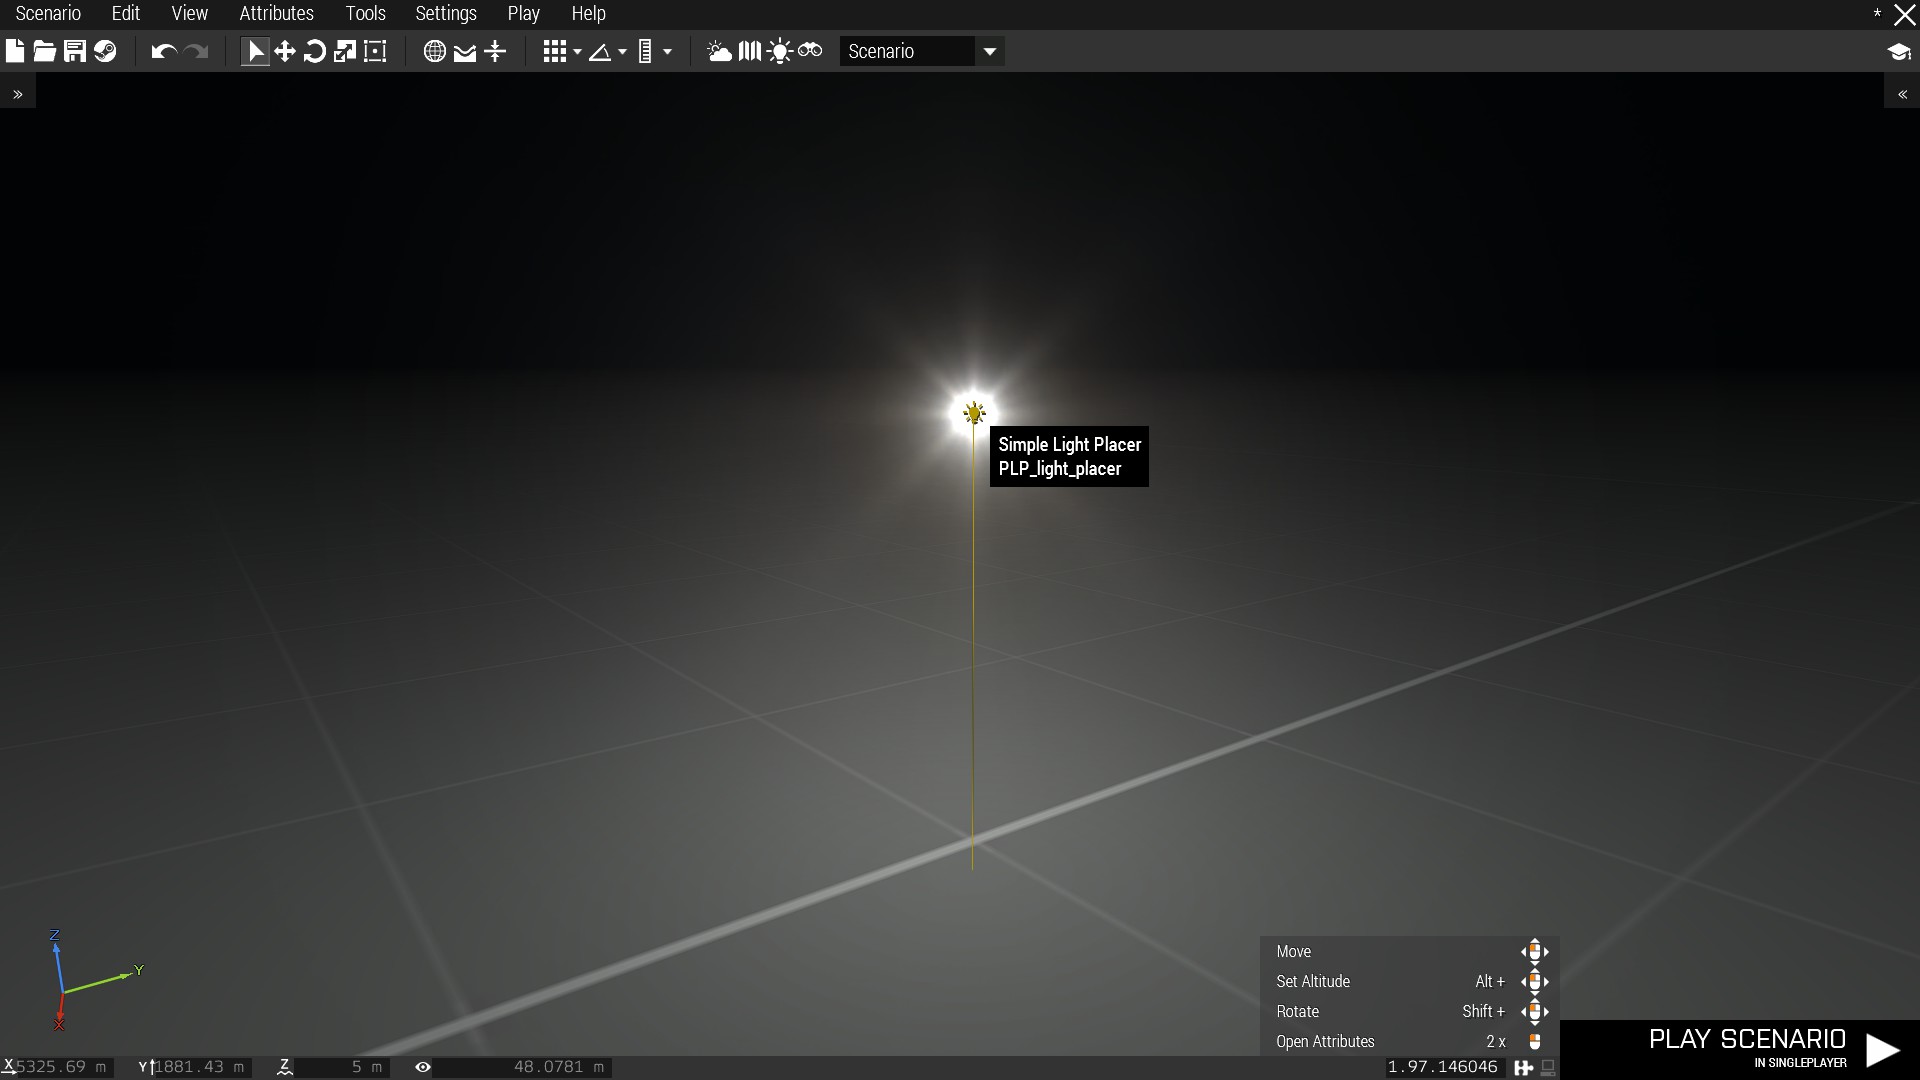
- Slider: Brightness
- Left is less bright, right is brighter.
- Left is less bright, right is brighter.
- Slider: Red, Green, Blue
- Adjust these 3 sliders to change colors.
- Adjust these 3 sliders to change colors.
- Checkbox: Enable Flare
- Flare can't see when the time is noon.
- Flare can't see when the time is noon.
- Slider: Flare Size
- Brightness =/= Flare Size. You can change size of the flare as you want.
- Brightness =/= Flare Size. You can change size of the flare as you want.
- Edit box: Attenuation
- Advanced feature. Parameters are based on setLightAttenuation[community.bistudio.com]. More info's there.
- Advanced feature. Parameters are based on setLightAttenuation[community.bistudio.com]. More info's there.
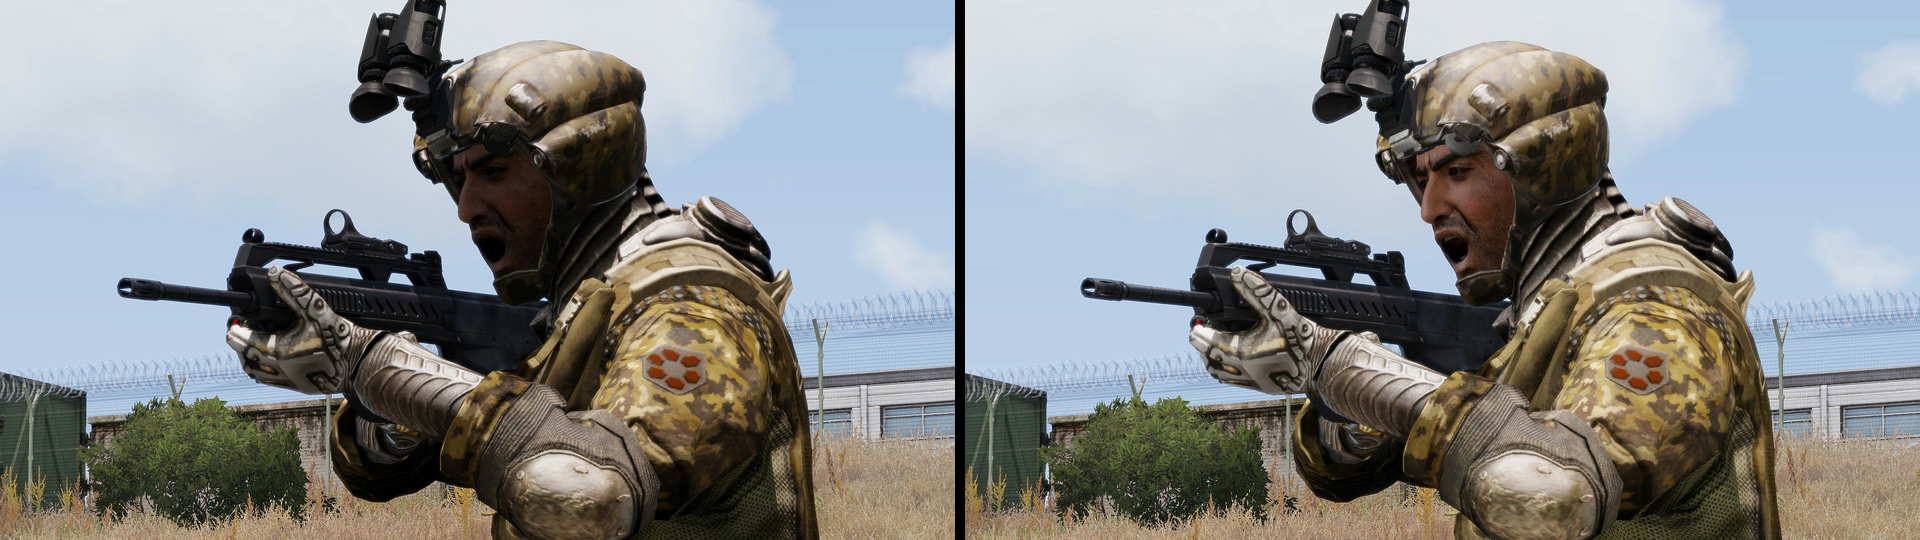
Artwork Supporter Props > Weapons > Weapon Placer
This lets you place a weapon with desired attachments.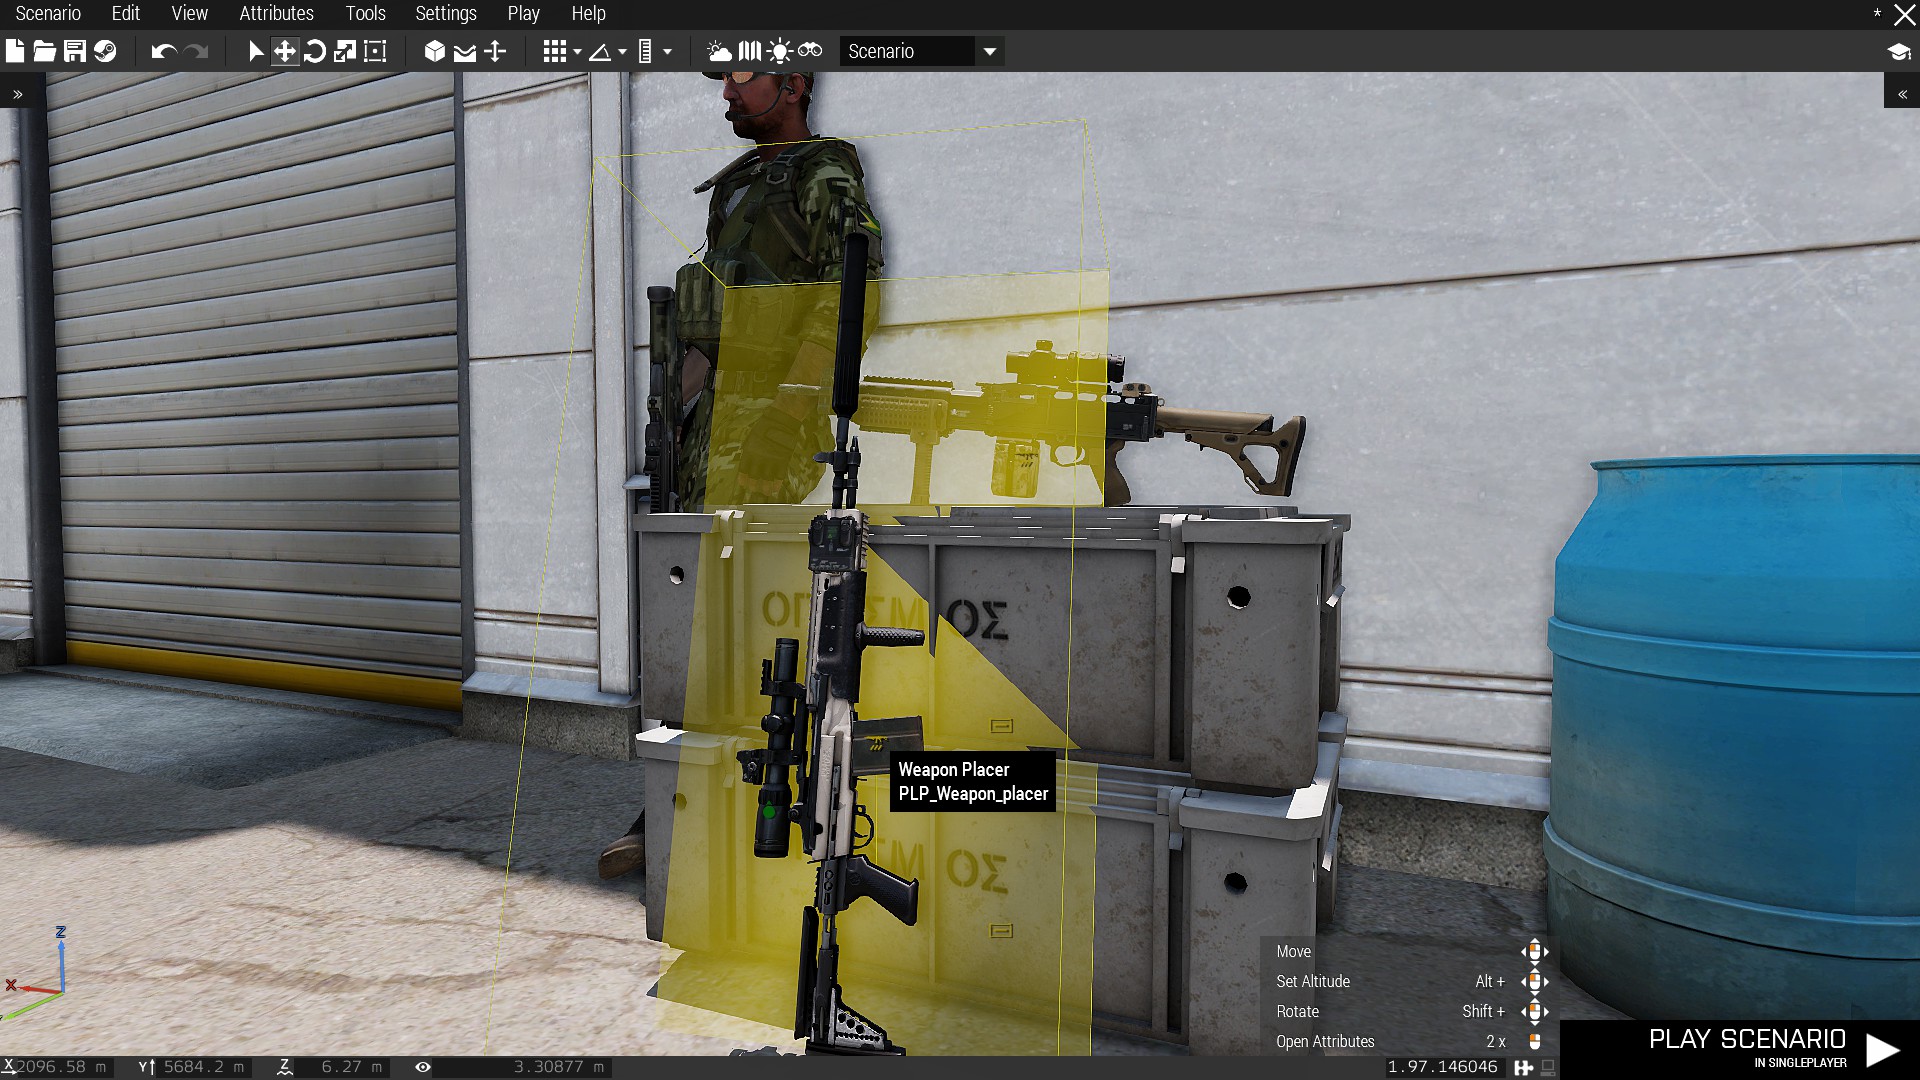
Note:This takes a while to open the attributes if opening for the first time of the game.
- Pulldown menu: Weapon Selection
- Every personal weapons are shown in the list.
- Every personal weapons are shown in the list.
- Pulldown menu: Muzzle Attachment Selection
- Every muzzle attachments are shown in the list. If the selected item isn't compatible with the weapon, will not be shown.
- Every muzzle attachments are shown in the list. If the selected item isn't compatible with the weapon, will not be shown.
- Pulldown menu: Sight Attachment Selection
- Every sights and scopes are shown in the list. If the item isn't compatible with the selected weapon, will not be shown.
- Every sights and scopes are shown in the list. If the item isn't compatible with the selected weapon, will not be shown.
- Pulldown menu: Side Attachment Selection
- Every side attachments (e.g. Laser Sights and Flashlights) are shown in the list. If the selected item isn't compatible with the weapon, will not be shown.
- Every side attachments (e.g. Laser Sights and Flashlights) are shown in the list. If the selected item isn't compatible with the weapon, will not be shown.
- Pulldown menu: Underbarrel Attachment Selection
- Every underbarrel attachments (e.g. Bipods) are shown in the list. If the selected item isn't compatible with the weapon, will not be shown.
- Every underbarrel attachments (e.g. Bipods) are shown in the list. If the selected item isn't compatible with the weapon, will not be shown.
- Edit box: Magazine
- Put classname of the magazine or #DEFAULT to put default magazine.
- Put classname of the magazine or #DEFAULT to put default magazine.
- Edit box: Secondary Magazine
- Same as above but the secondary magazine, such as underbarrel grenade and .50 of Type 115.
- Same as above but the secondary magazine, such as underbarrel grenade and .50 of Type 115.
Artwork Supporter Props > Misc > Effect Dropper
Provides you the customizable pre-defined effects such as smokes, fires and flares.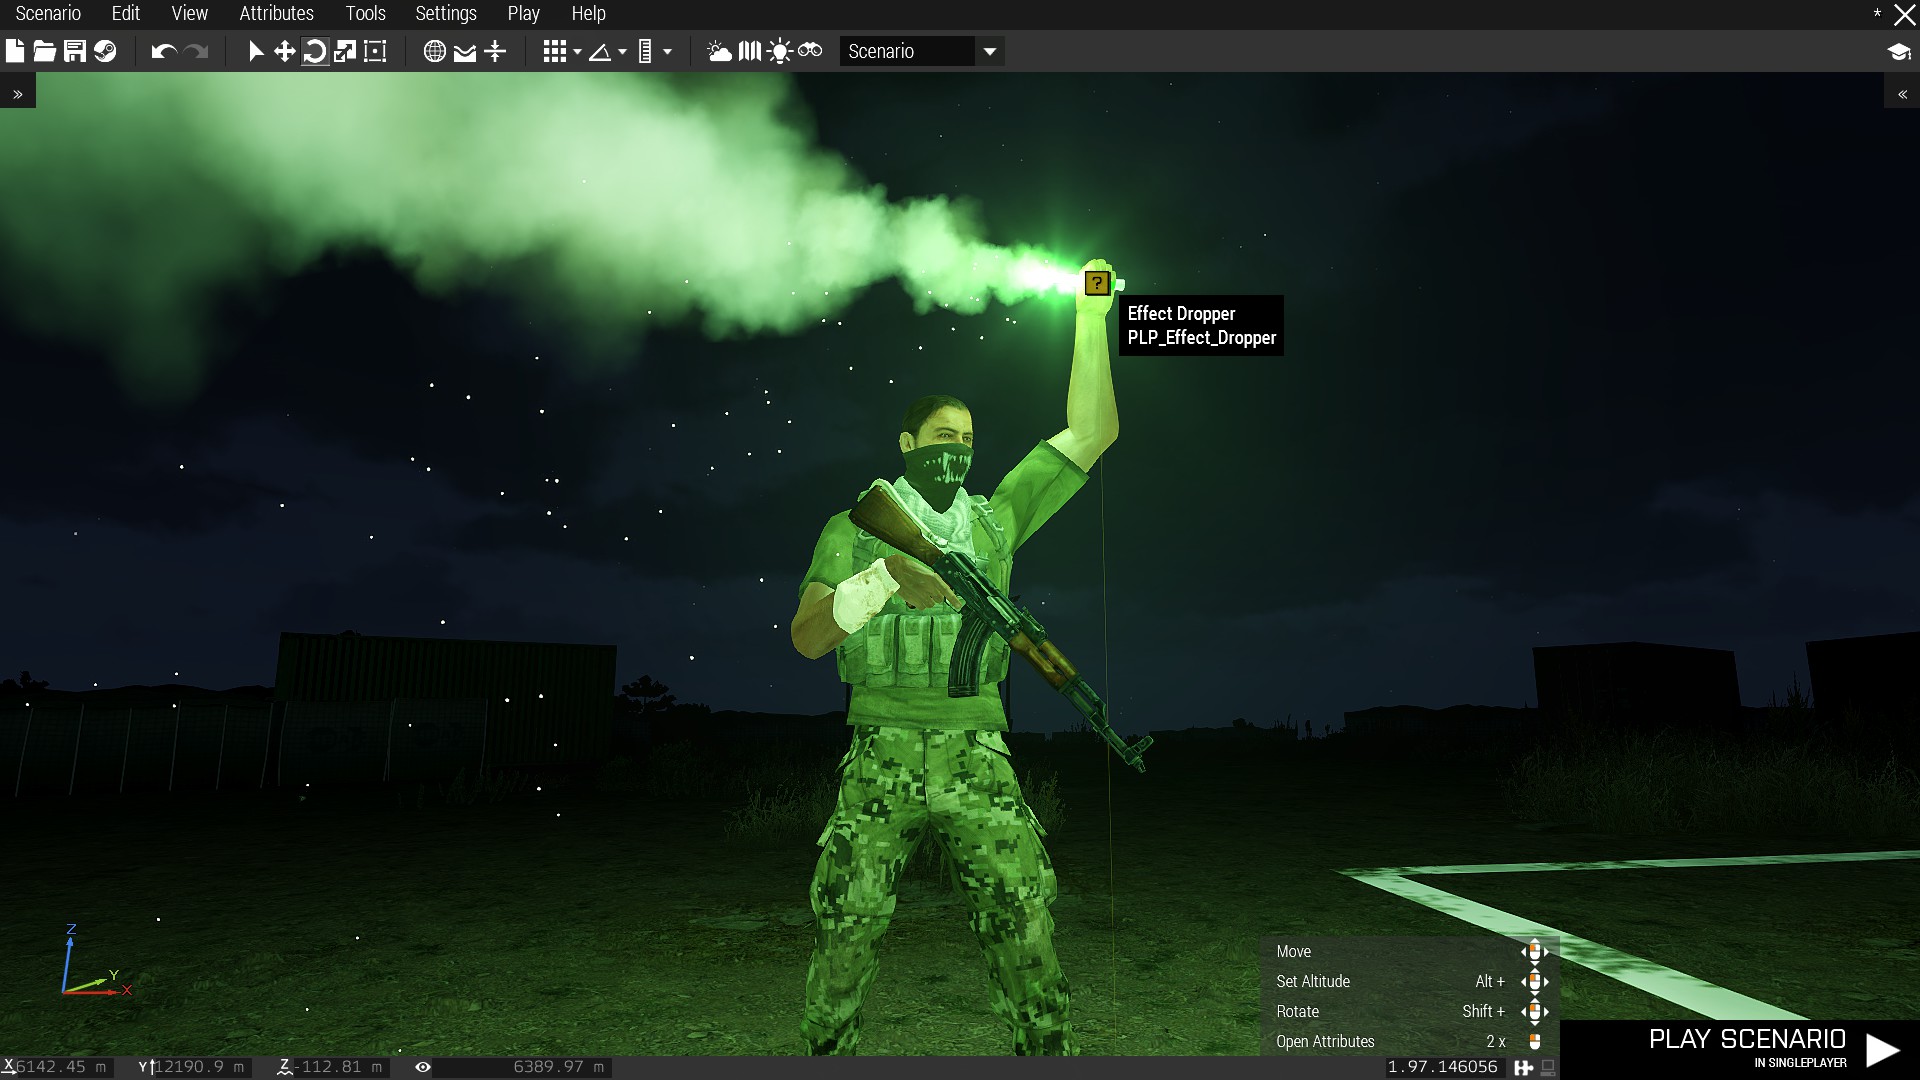
- Pulldown menu: Effect Class
- You can choose one of the class from the list.
- You can choose one of the class from the list.
- Edit box: Scale
- Bigger number means bigger effect and vice versa.
- Bigger number means bigger effect and vice versa.
- Edit box: Time
- Bigger number let the effects last longer and vice versa.
- Bigger number let the effects last longer and vice versa.
- Edit box: Speed
- Bigger number will drop the effect faster and vice versa.
- Bigger number will drop the effect faster and vice versa.
- Edit box: Area
- Bigger you put, the effect will be spawned in bigger area.
- Bigger you put, the effect will be spawned in bigger area.
- Edit box: AttachTo
- Default is objNull, same thing with Animation Player's.
- Default is objNull, same thing with Animation Player's.
Note:Some of the attributes don't work for some effect.
Section 4 - Frequently used functions
Fake Weapon Fire - PLP_fnc_fireWeapon
This function lets you to keep someone firing.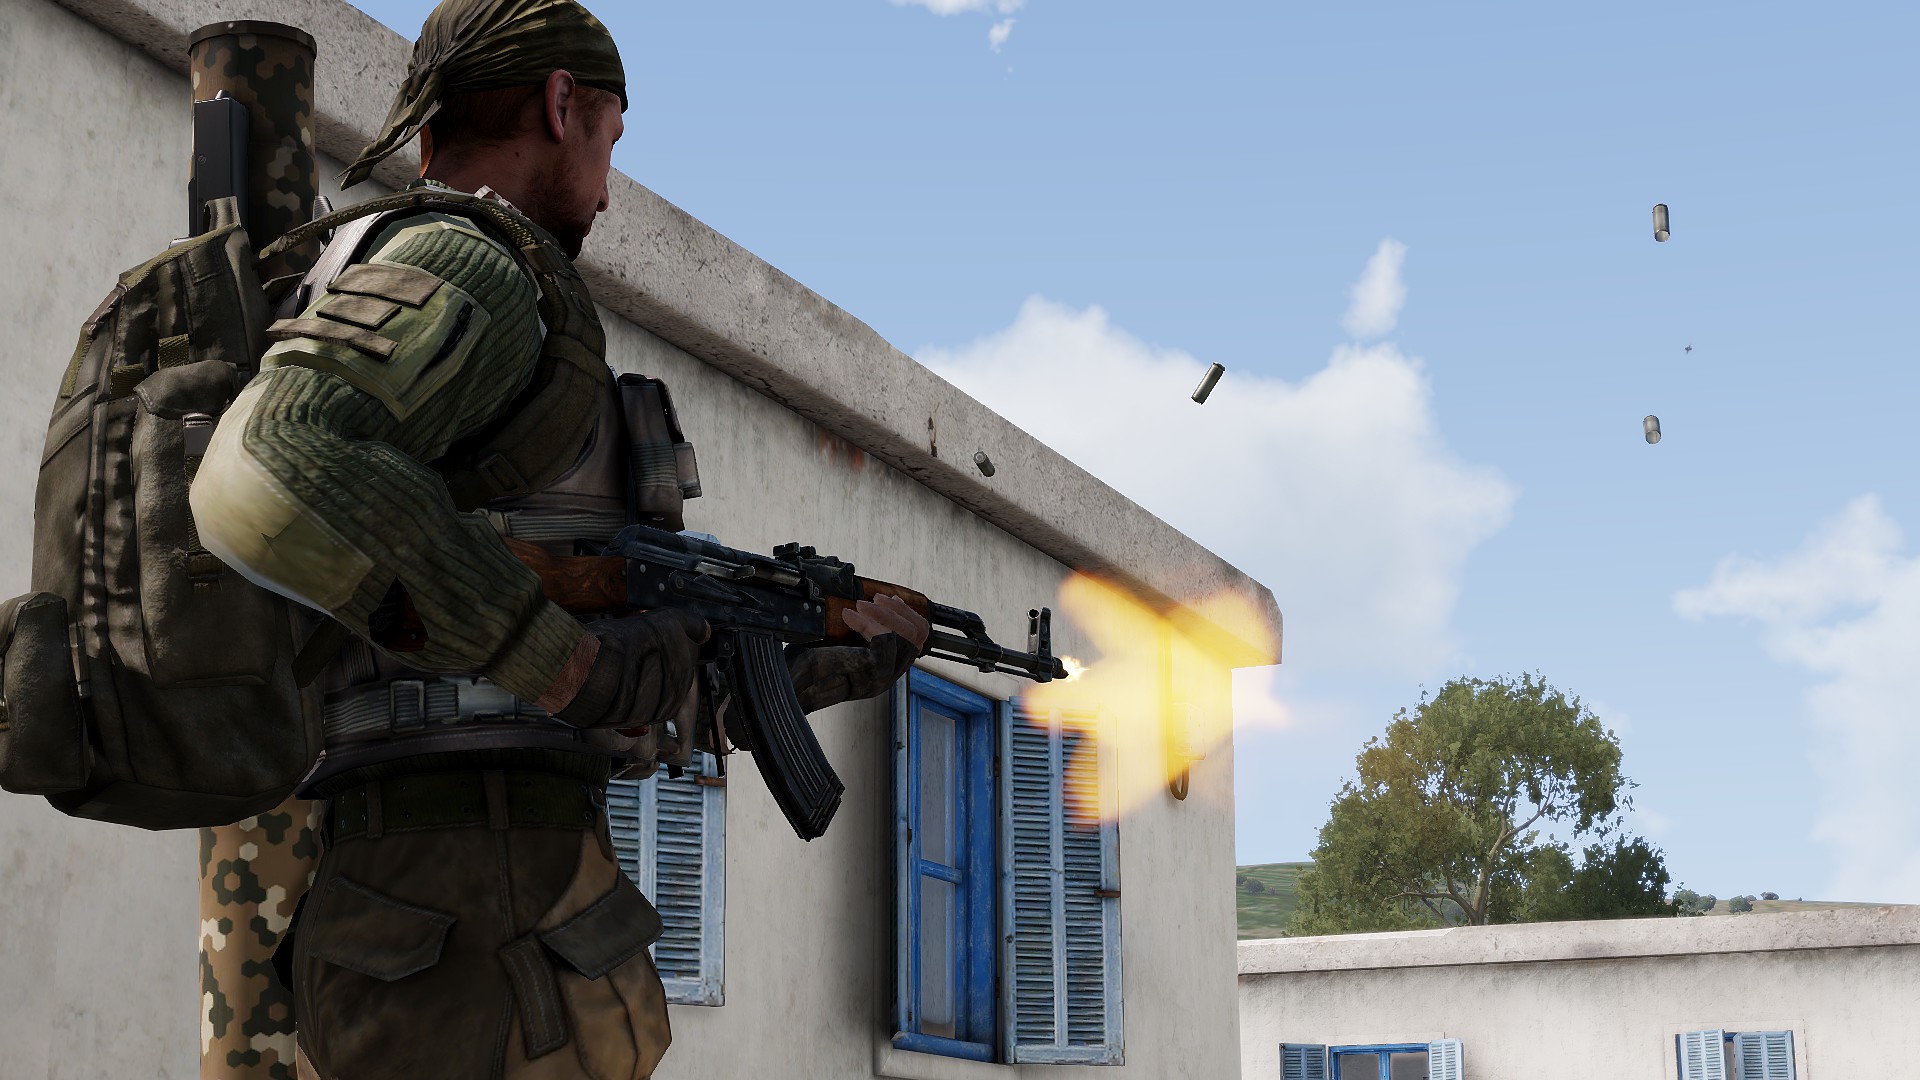 Syntax:
[unit, weapon index, fire ratio, delete projectiles] call PLP_fnc_fireWeapon
Arguments:- unit: Object. unit to apply effect. Usually, put this in init of an unit will do the thing.
- weapon index: Number. Choose one from 0 (rifle) or 1 (pistol).
- fire ratio: Number. 1 means default RPM of the weapon, sub-one will fire the weapon faster.
- Highly recommend to use sub-one when you're trying to shoot a photo.
- delete projectiles: Boolean. Optional. Default: true. False won't remove the actual projectile.
Example (in the Init section of an unit):Note:Due to Engine limitation, the gunshot smokes from the weapon that held by an unit who applied an animation by default mode won't appear.
[this, 0, 0.3] call PLP_fnc_fireWeapon
Make Wings Fly Still - PLP_fnc_simpleAttach
Wanted to keep the wings fly still where your desired, Eden Editor-defined position? Time to use this function.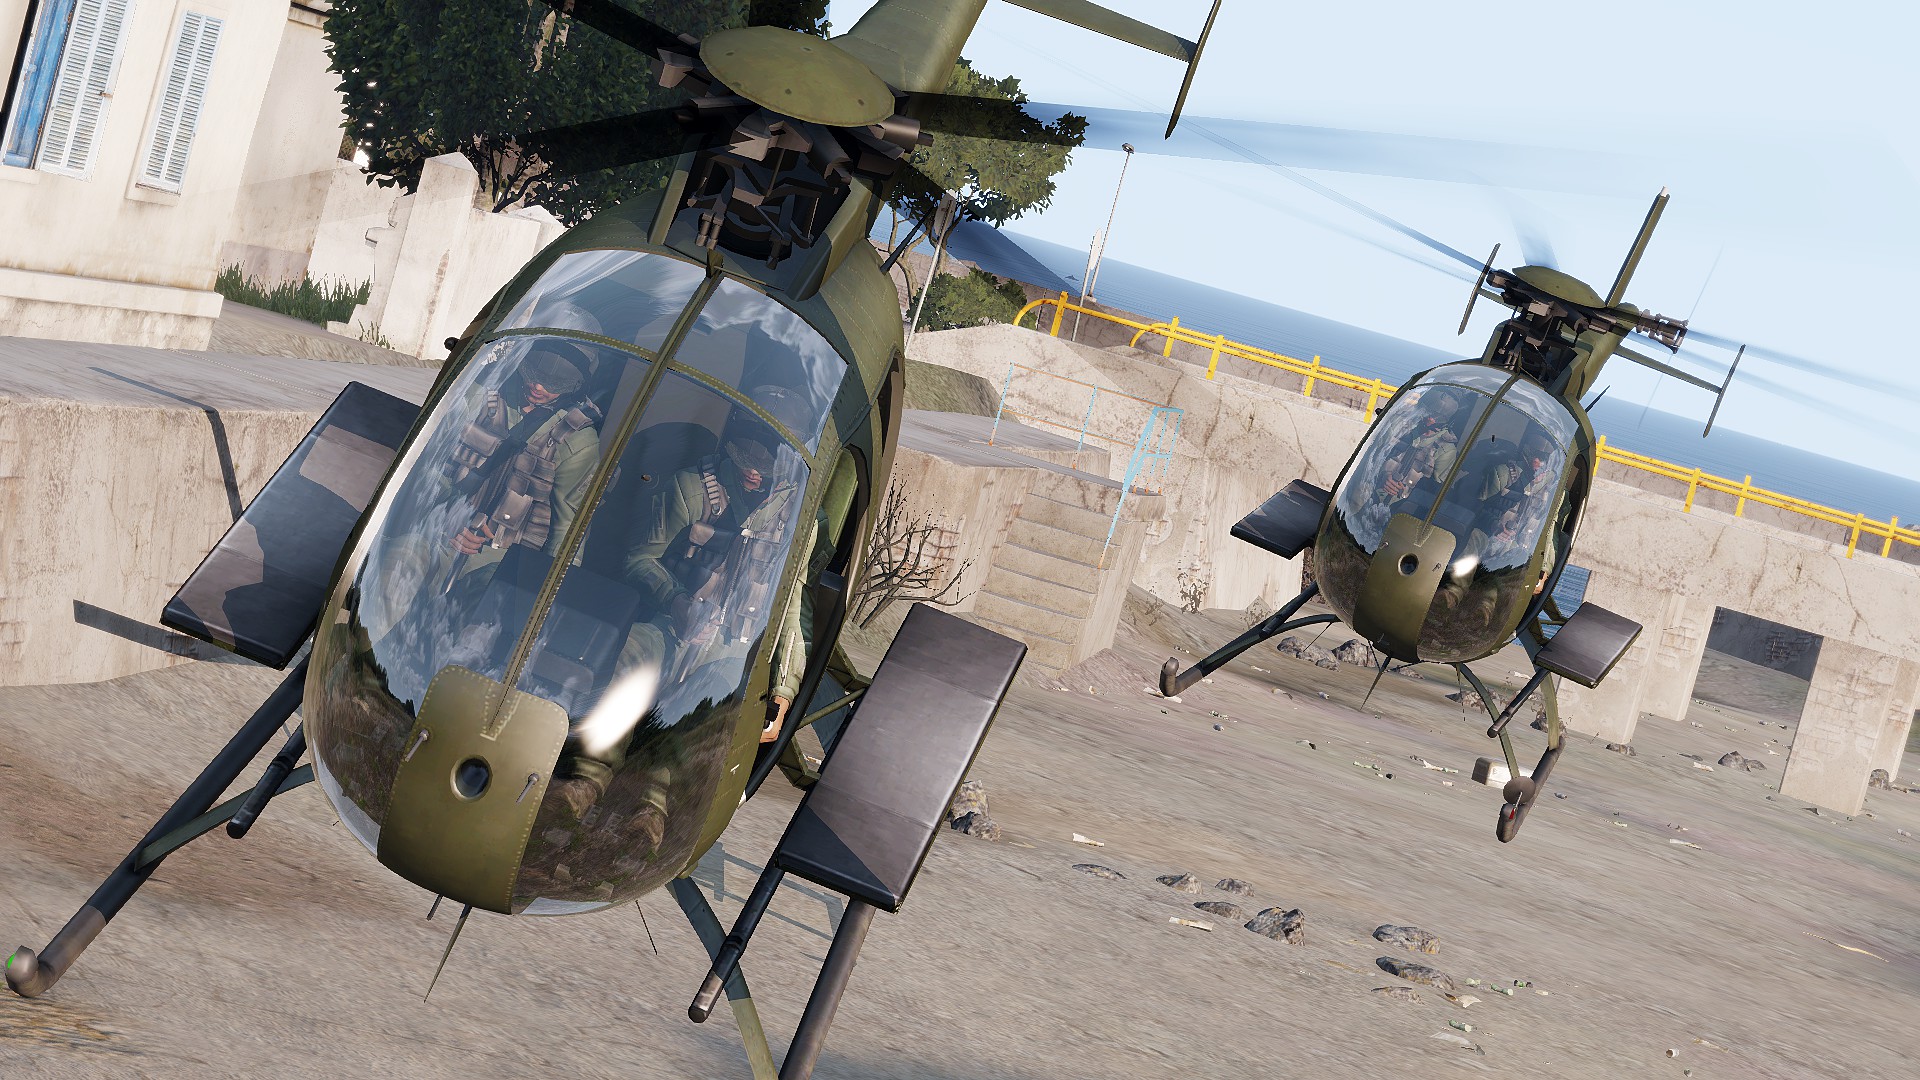 Syntax:
plane call PLP_fnc_simpleAttach
Arguments:- plane: Object. Fixed/Rotary wing to apply this effect.
this call PLP_fnc_simpleAttach
Also Alternative Syntax provides you the wing vortexes.Alternative Syntax:
[plane, dummy plane] call PLP_fnc_simpleAttach
Arguments:- plane: Object. Fixed wing to apply this effect. Helicopters can't use this syntax.
- dummy plane: Object. This dummy plane must be empty (no crew) and the same type with the plane. This determines the end position of wing vortex effects.
[this, dummy] call PLP_fnc_simpleAttach
Section 5 - Conclusion
Although that's not everything I provided you, I told you the most important things in Artwork Supporter.
There're some MODs to add static animations. Since (mostly) Arma 3 can only handle pre-defined animations, adding animations would be a way to improve your creation.
Few examples: https://steamcommunity.com/sharedfiles/filedetails/?id=1173474166 https://steamcommunity.com/sharedfiles/filedetails/?id=940225861 https://steamcommunity.com/sharedfiles/filedetails/?id=1592858776
Also, ReColor adds a nice feature to tweak the atmosphere of the screen. https://steamcommunity.com/sharedfiles/filedetails/?id=649832908
Last but not least, you can report any bugs, issues and feedbacks here!
Now, I'm expecting your awesome creations!
 ⠀⠀⠀⠀⠀⠀⠀⠀⠀⠀⠀⠀⠀⠀⠀⠀⠀⠀⠀⠀⠀⠀⠀⠀⠀⠀⠀⠀⠀⠀⠀⠀⠀⠀⠀⠀⠀⠀⠀⠀⠀⠀⠀⠀⠀⠀⠀⠀⠀⠀⠀⠀⠀⠀⠀⠀⠀⠀⠀⠀⠀⠀-POLPOX
There're some MODs to add static animations. Since (mostly) Arma 3 can only handle pre-defined animations, adding animations would be a way to improve your creation.
Few examples: https://steamcommunity.com/sharedfiles/filedetails/?id=1173474166 https://steamcommunity.com/sharedfiles/filedetails/?id=940225861 https://steamcommunity.com/sharedfiles/filedetails/?id=1592858776
Also, ReColor adds a nice feature to tweak the atmosphere of the screen. https://steamcommunity.com/sharedfiles/filedetails/?id=649832908
Last but not least, you can report any bugs, issues and feedbacks here!
Now, I'm expecting your awesome creations!
⠀⠀⠀⠀⠀⠀⠀⠀⠀⠀⠀⠀⠀⠀⠀⠀⠀⠀⠀⠀⠀⠀⠀⠀⠀⠀⠀⠀⠀⠀⠀⠀⠀⠀⠀⠀⠀⠀⠀⠀⠀⠀⠀⠀⠀⠀⠀⠀⠀⠀⠀⠀⠀⠀⠀⠀⠀⠀⠀⠀⠀⠀-POLPOX
Section 6 - For MOD developers (Bonus)
To make static animations, gestures and mimics aka facial expressions, this article[forums.bohemia.net] has a detailed tutorial to make one.
If you're not satisfied by existed animations, time to make your own! It's not so hard to make (of course a little bit of configuring knowledge is required), also will contribute to the entire community's work if you made it to the public!
If you're not satisfied by existed animations, time to make your own! It's not so hard to make (of course a little bit of configuring knowledge is required), also will contribute to the entire community's work if you made it to the public!
More Arma 3 guides
- How to increase FOV in ARMA★ 5 (323)51k views586 ♥2 minUpdated Oct 10, 2022
- ACE3 Adv Medical + Cheat Sheet★ 5 (973)48k views2.2k ♥11 minUpdated Feb 21, 2024
- Управление ArmA 3.★ 5 (752)48k views997 ♥4 minRussianUpdated Oct 11, 2015
- ARMA 3 Complete Performance Guide [2020] [ENG]★ 5 (686)48k views1.5k ♥12 minUpdated Oct 10, 2022
- Arma 3 Movement & Weapon Controls (List)★ 5 (513)44k views593 ♥1 minBulgarianUpdated Mar 7, 2016
- How to fly in Arma 3★ 5 (459)40k views746 ♥10 minUpdated Apr 8, 2019

This guide was created by its original author on the Steam Community. Are you the author and want it removed? Request removal.