KOTOR 2: Cheat Playthrough Guide
Prerequisites
We need a program and a mod:
KOTOR Save Editor[gitlab.com]
Restored Content Mod[deadlystream.com]
The restored content mod is not necessary, however you should not be playing KOTOR 2 without it.
Next, you will need to add a line to your swkotor2.ini line to enable the in-game console. This file can be found in your KOTOR 2 directory, which is usually located at: C:\Program Files (x86)\Steam\steamapps\common\Knights of the Old Republic II\swkotor2.ini
Once you have found swkotor2.ini, open it with a text editor and add "EnableCheats=1" under [Game Options]
If you did it correctly, it should look like this:
[Game Options]
EnableCheats=1
Make sure the save editor is working correctly and that console is working in game. The console is used by pressing ~ on your keyboard (usually to the left of the 1 key), however the console WILL NOT SHOW IN GAME. You will have to type into it blindly.
Disable Cloud Save
Starting your playthrough
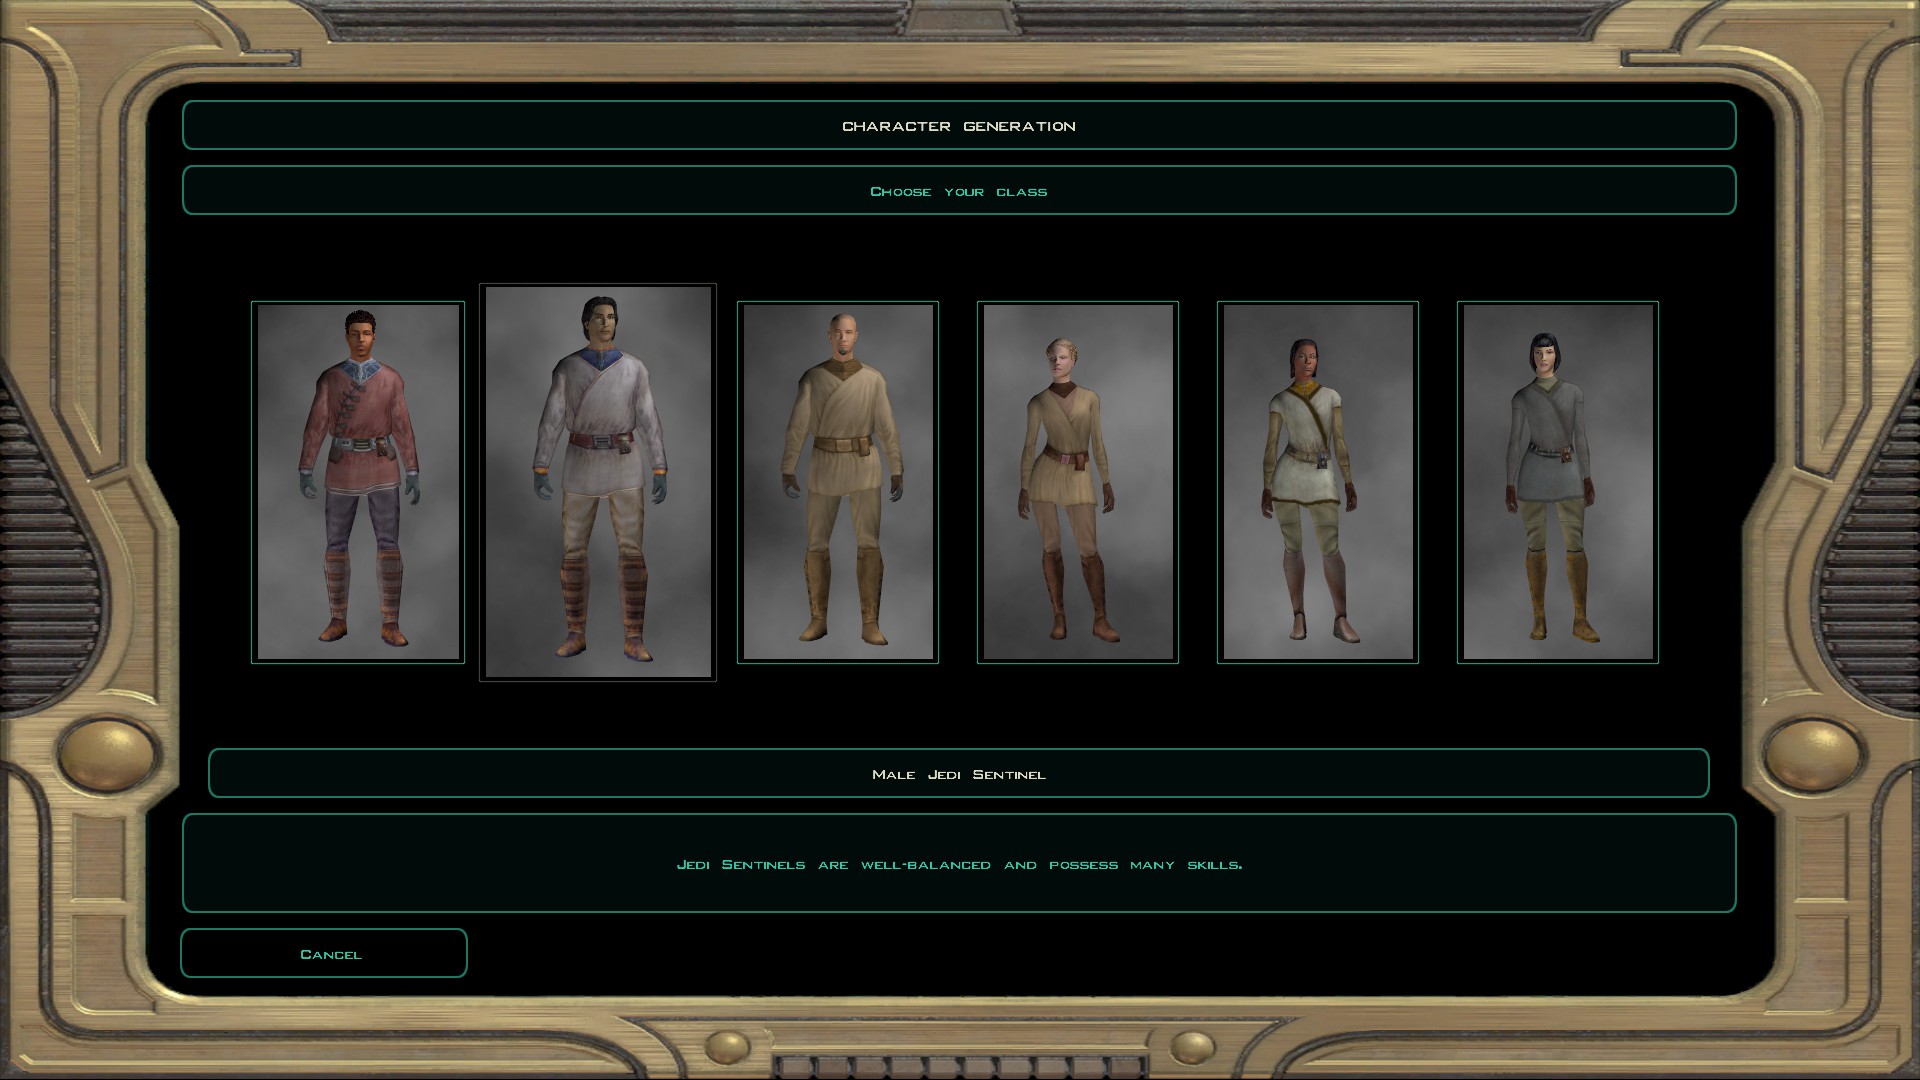
My Suggested Build: Jedi Sentinel
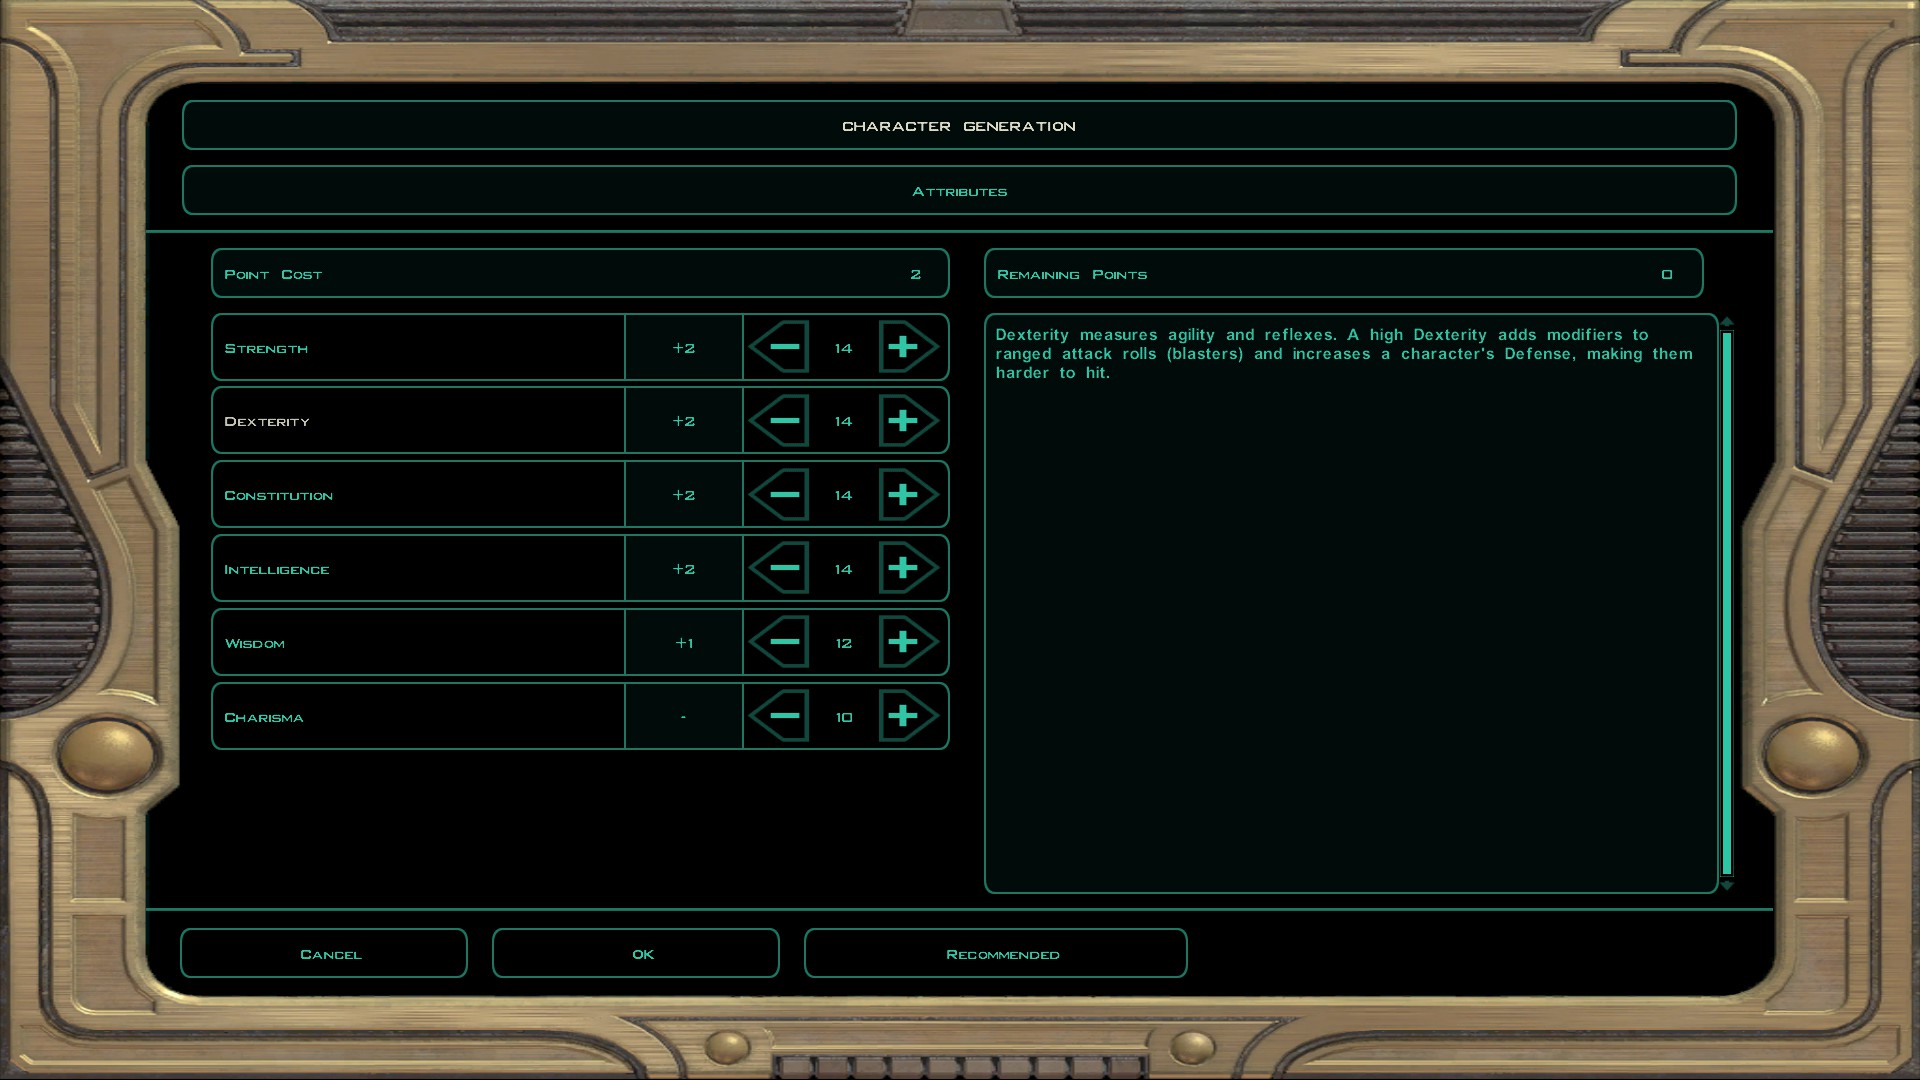
I will be showing you a Jedi Sentinel build, but you are free to use whatever you like (you can go blaster build if you wish). Also, we will edit our character's stats using the save editor later.
Pick the Jedi Sentinel if you want to be an overall good melee fighter and force user.
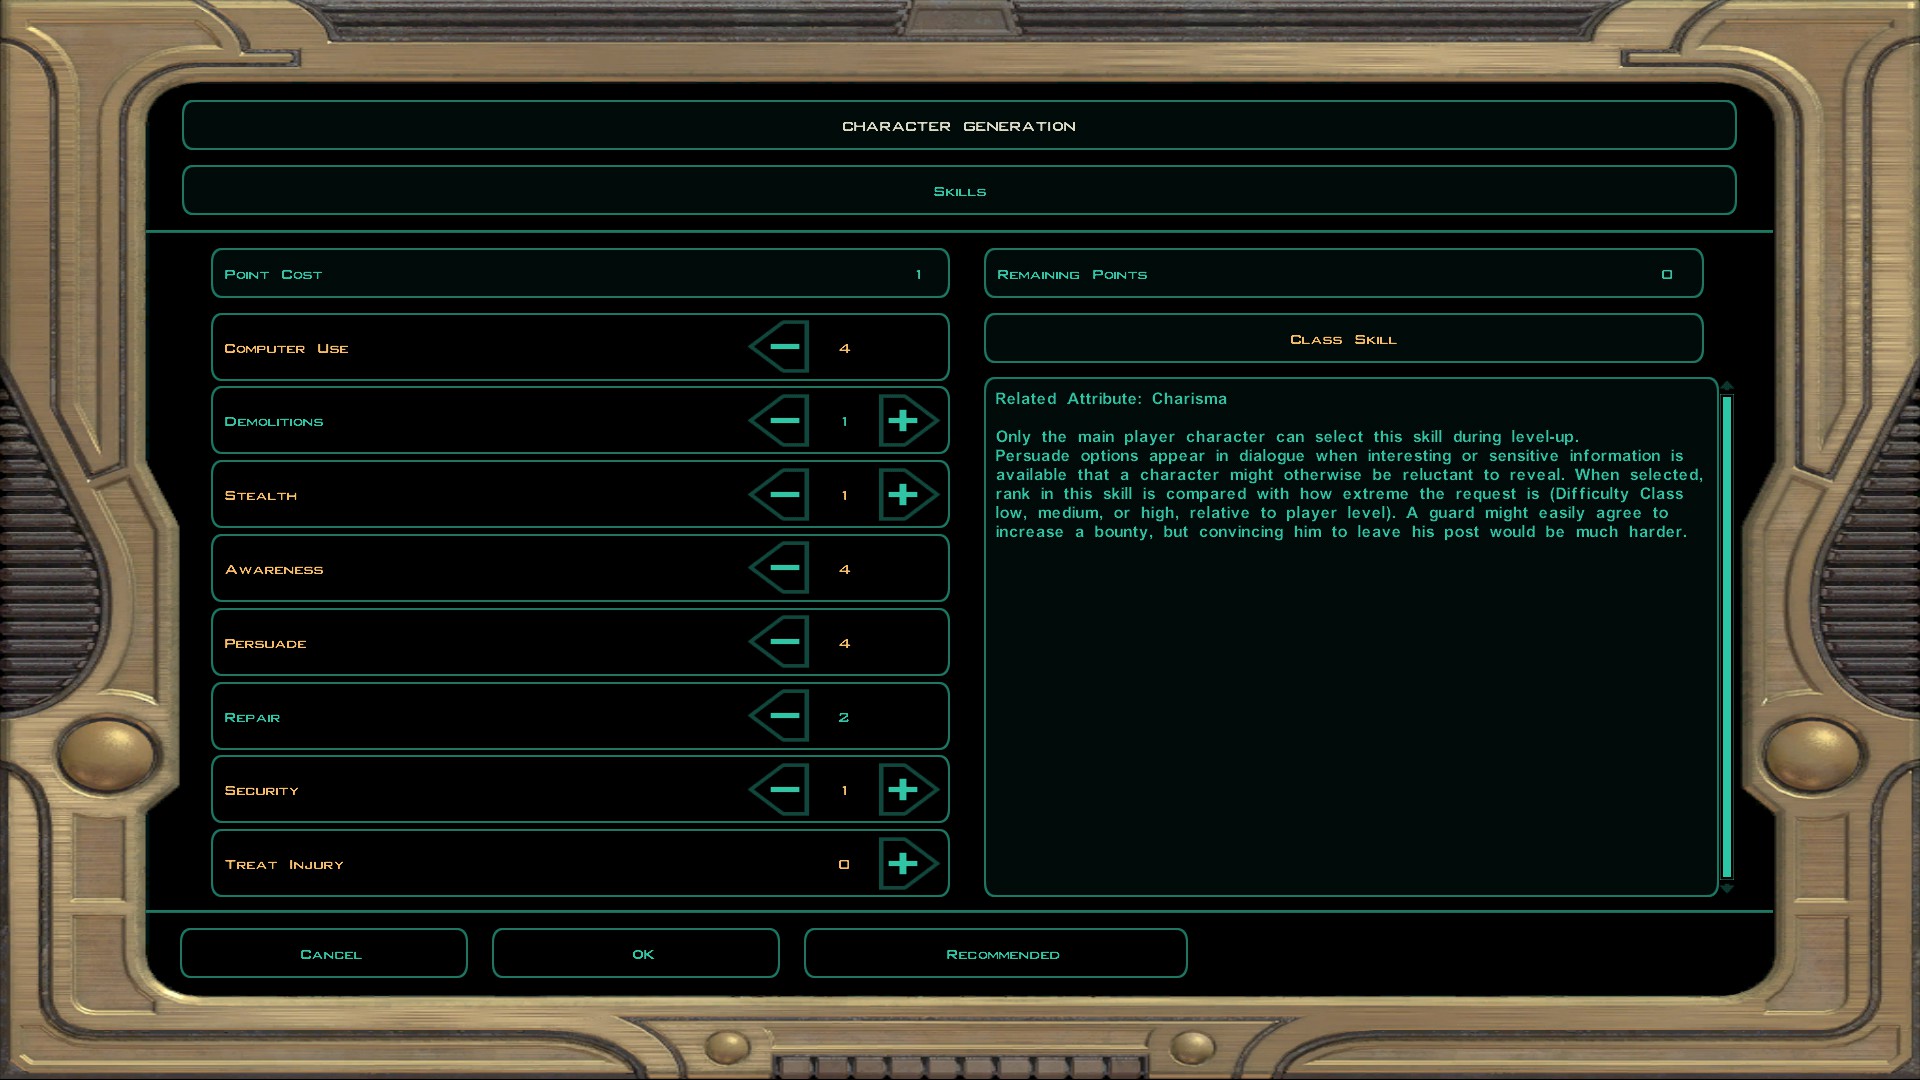
If you are having a hard time seeing the numbers, click on the picture to make it bigger
For this guide, I will be picking D.B. Woodside as our character (this is just cosmetic, so pick whoever you like the most).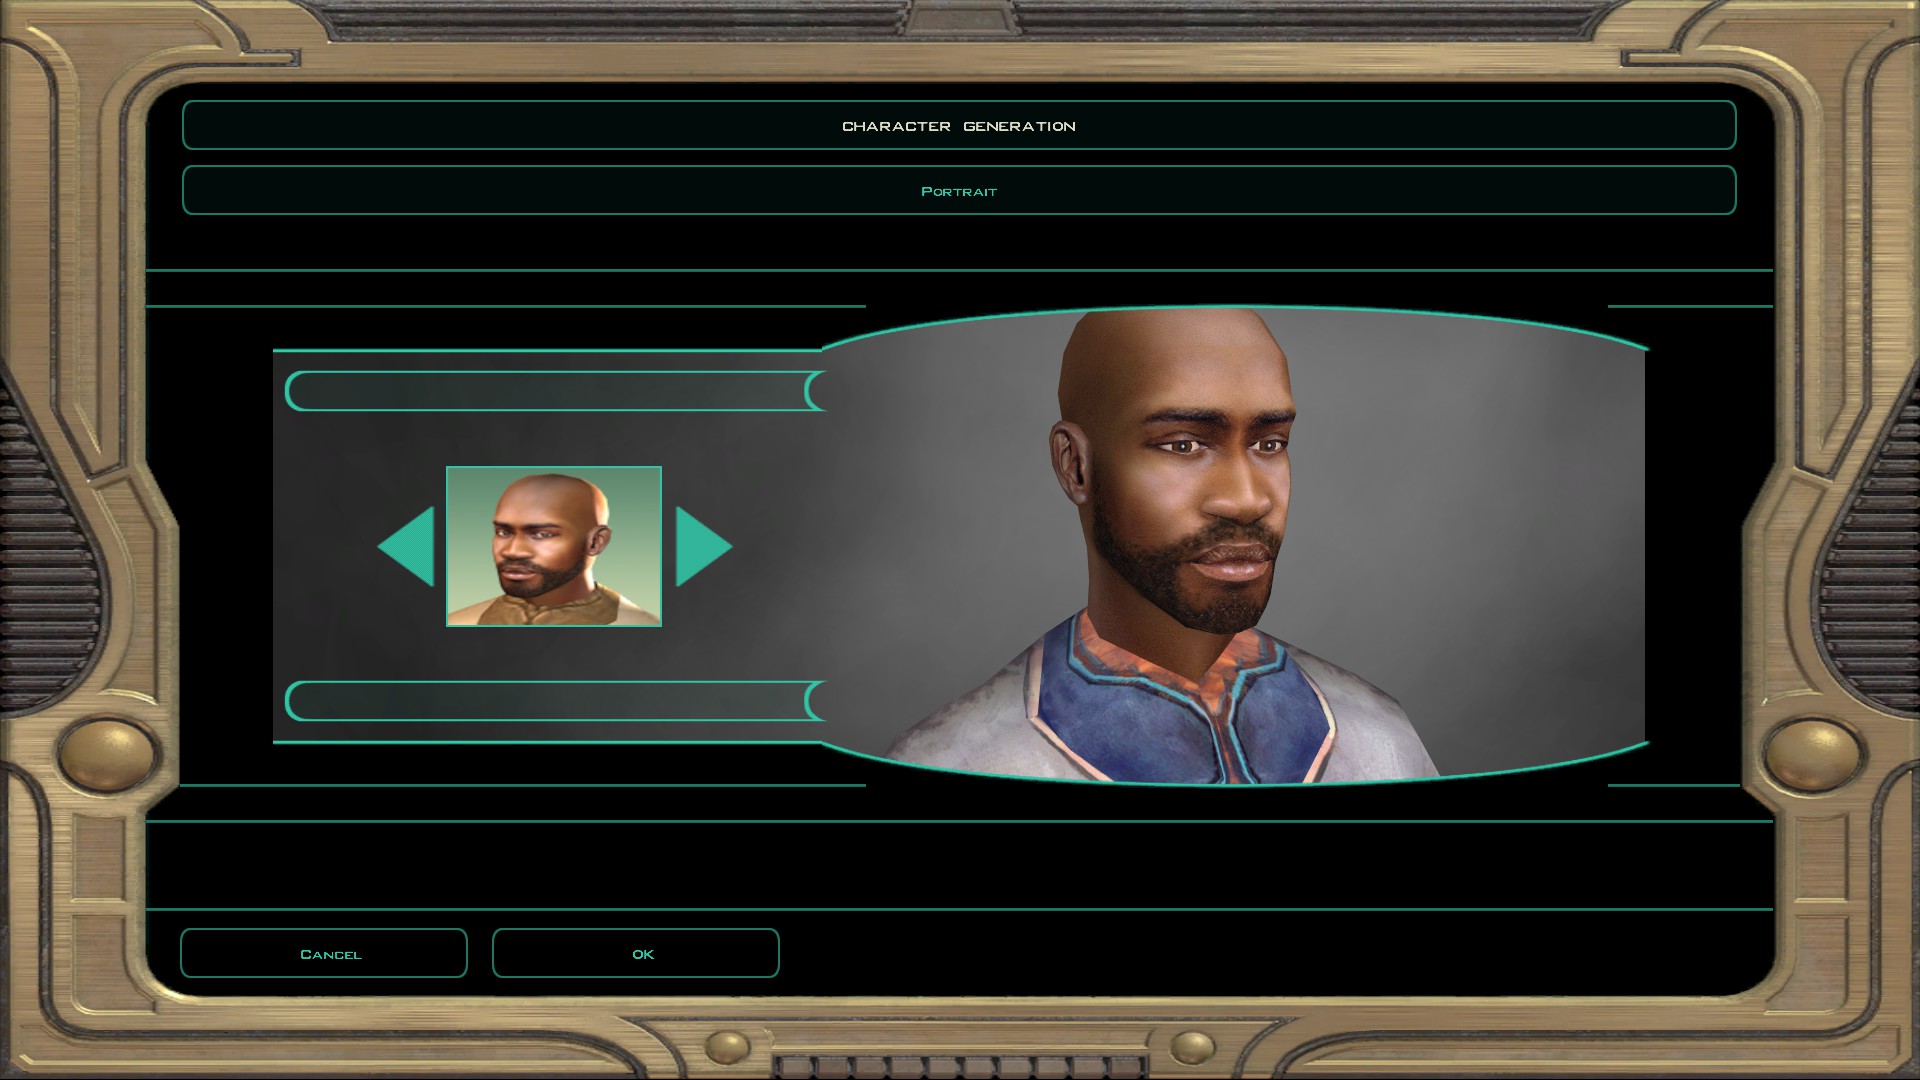 Attributes: Again, we will be editing our attributes through the save editor later on so don't get too caught up in what you should spec in
 Skills: I will tell you what skills to add on a level up later on
 Feats: Pick either Two Weapon Fighting or Dueling.
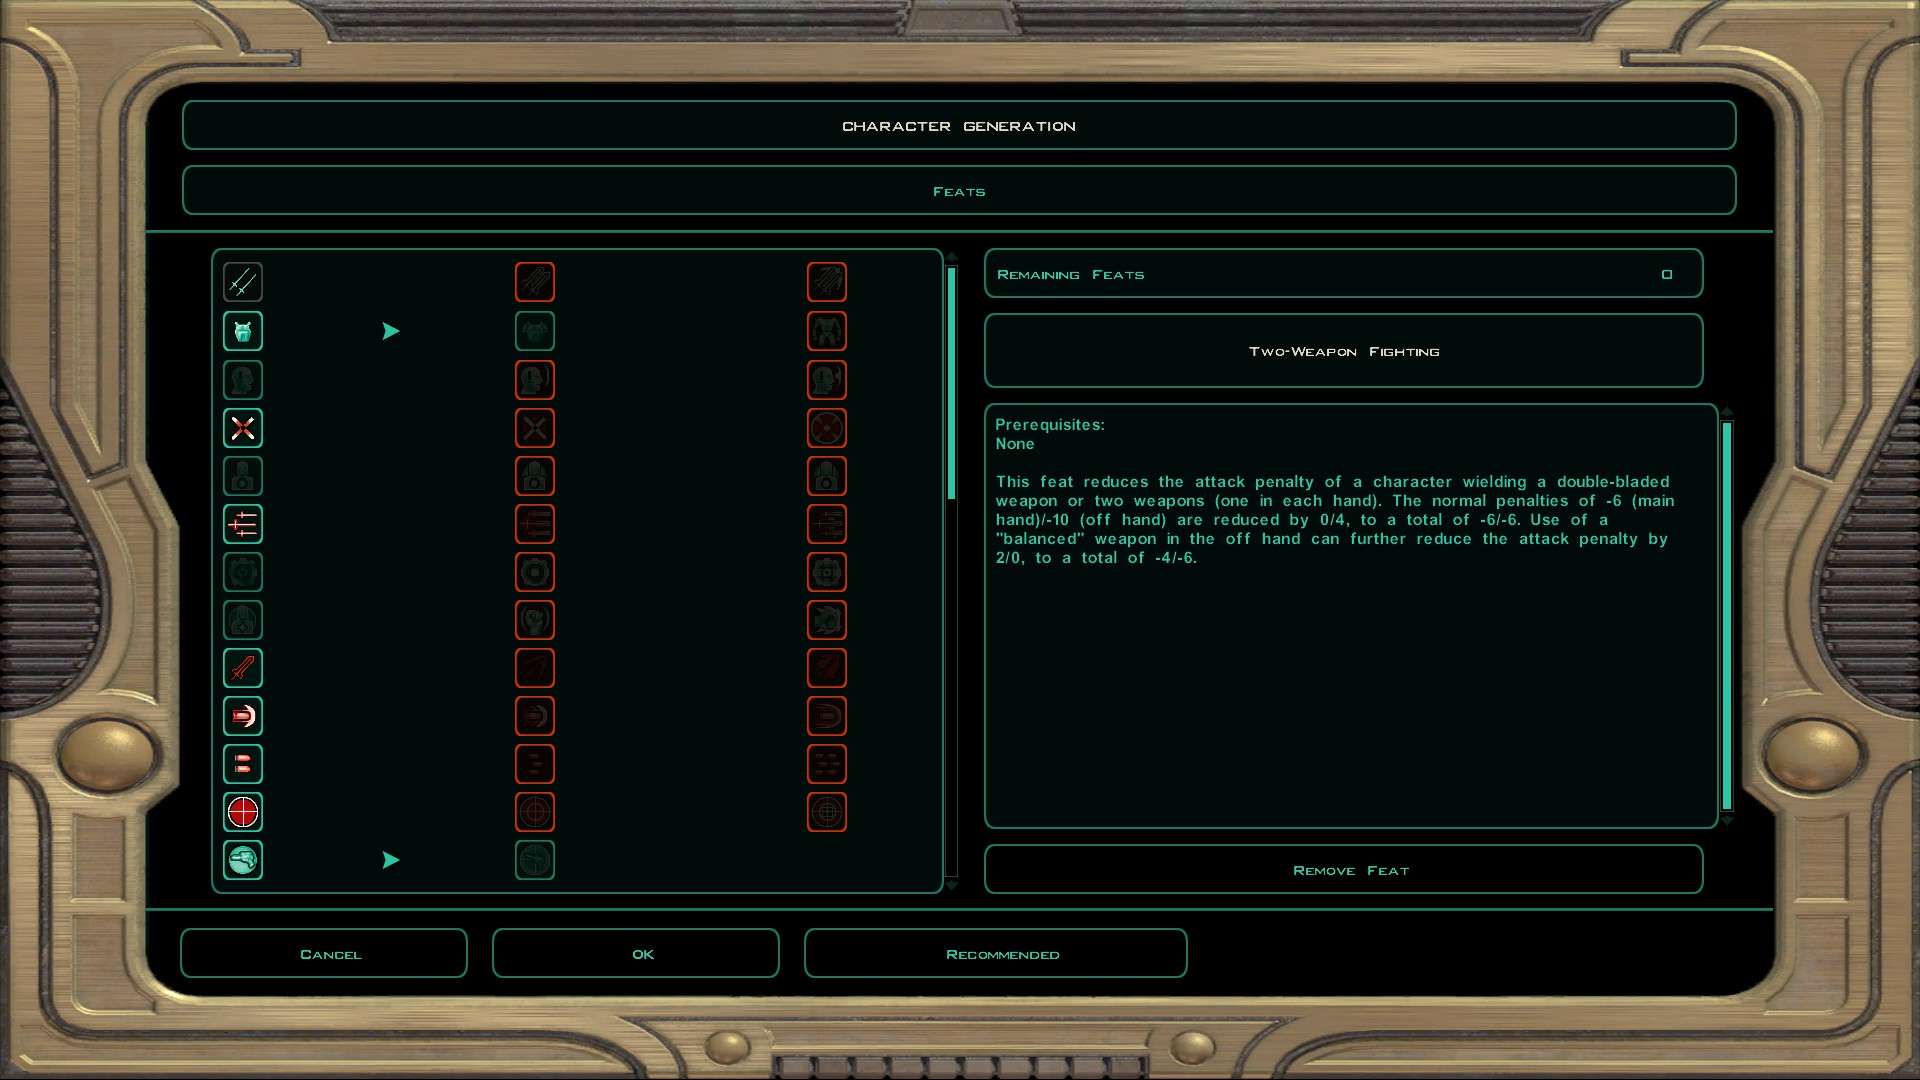 Name: Again, this is purely cosmetic but make sure you like the name you pick because it can't be edited through the save editor later on (it can, but the game will revert your name back to what it was before)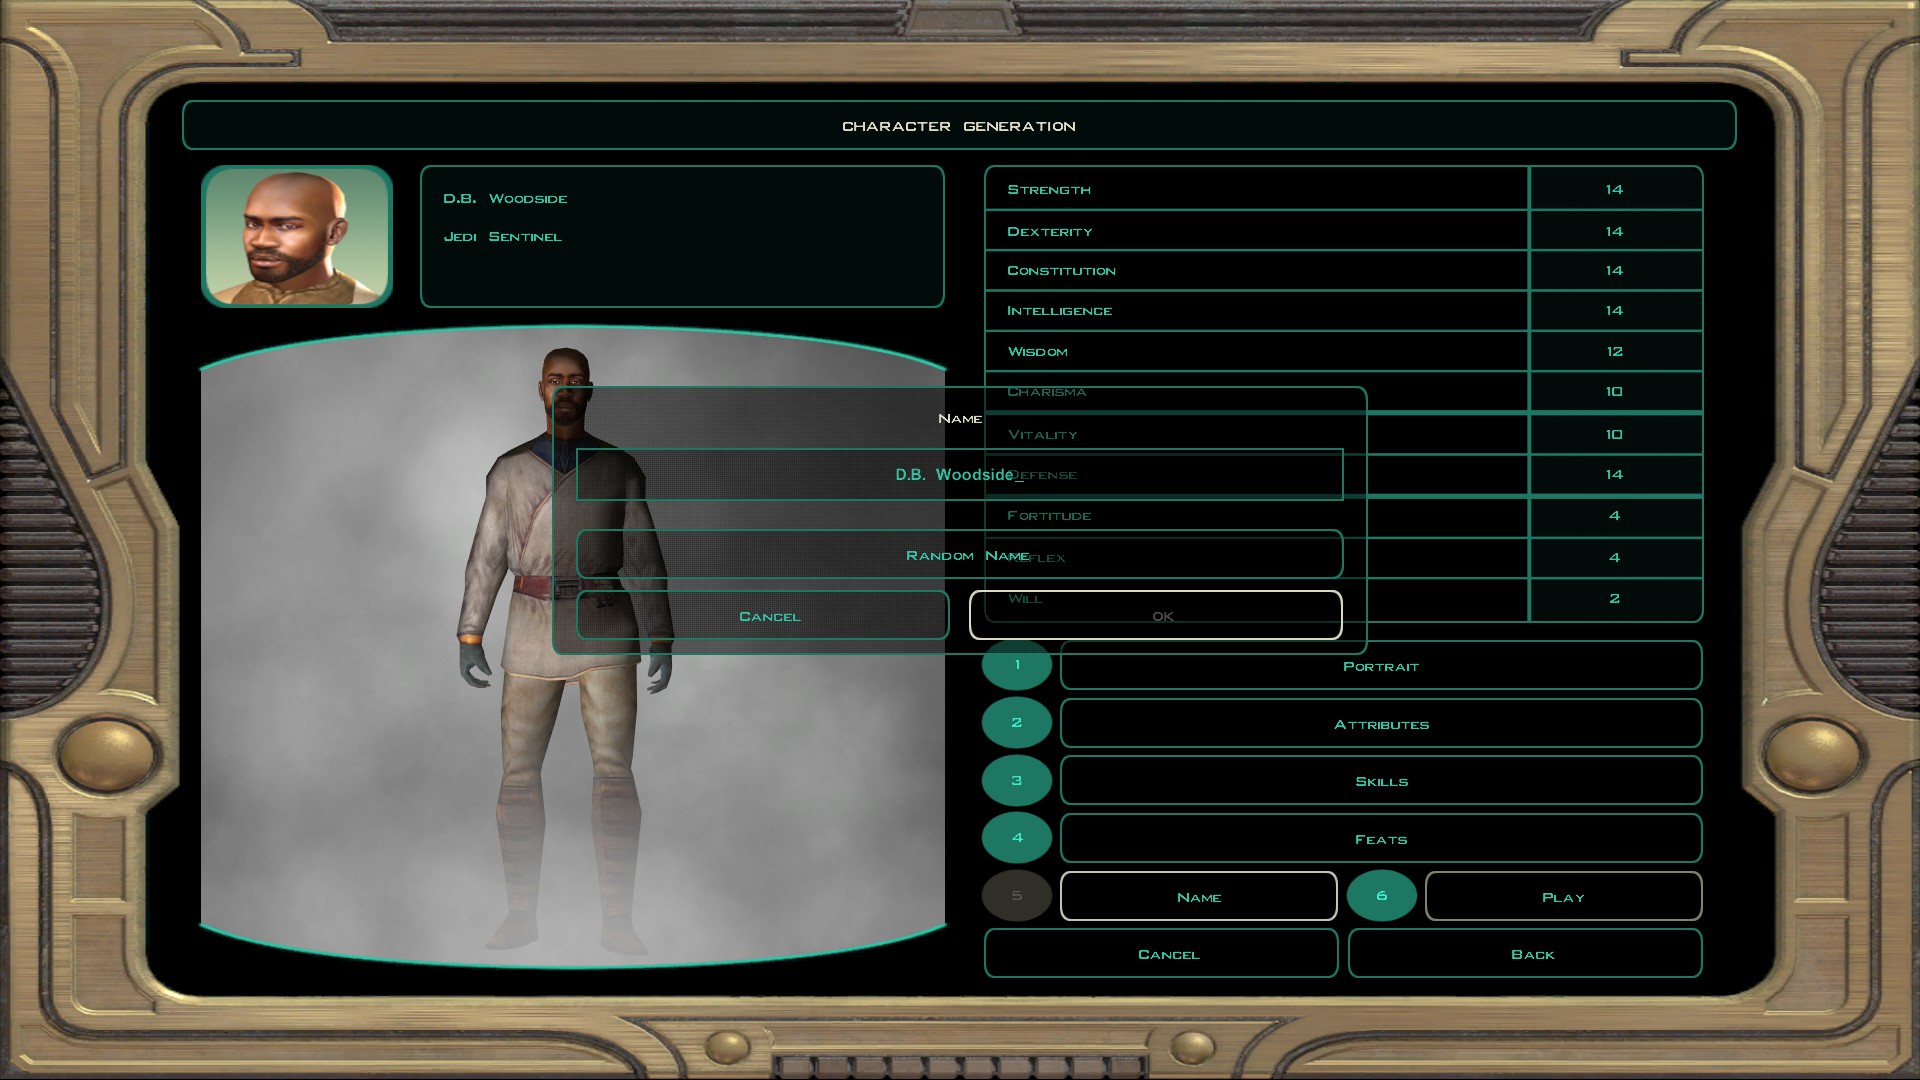
IMPORTANT: MAKE A SAVE AFTER WAKING UP FROM THE KOLTO TANK!
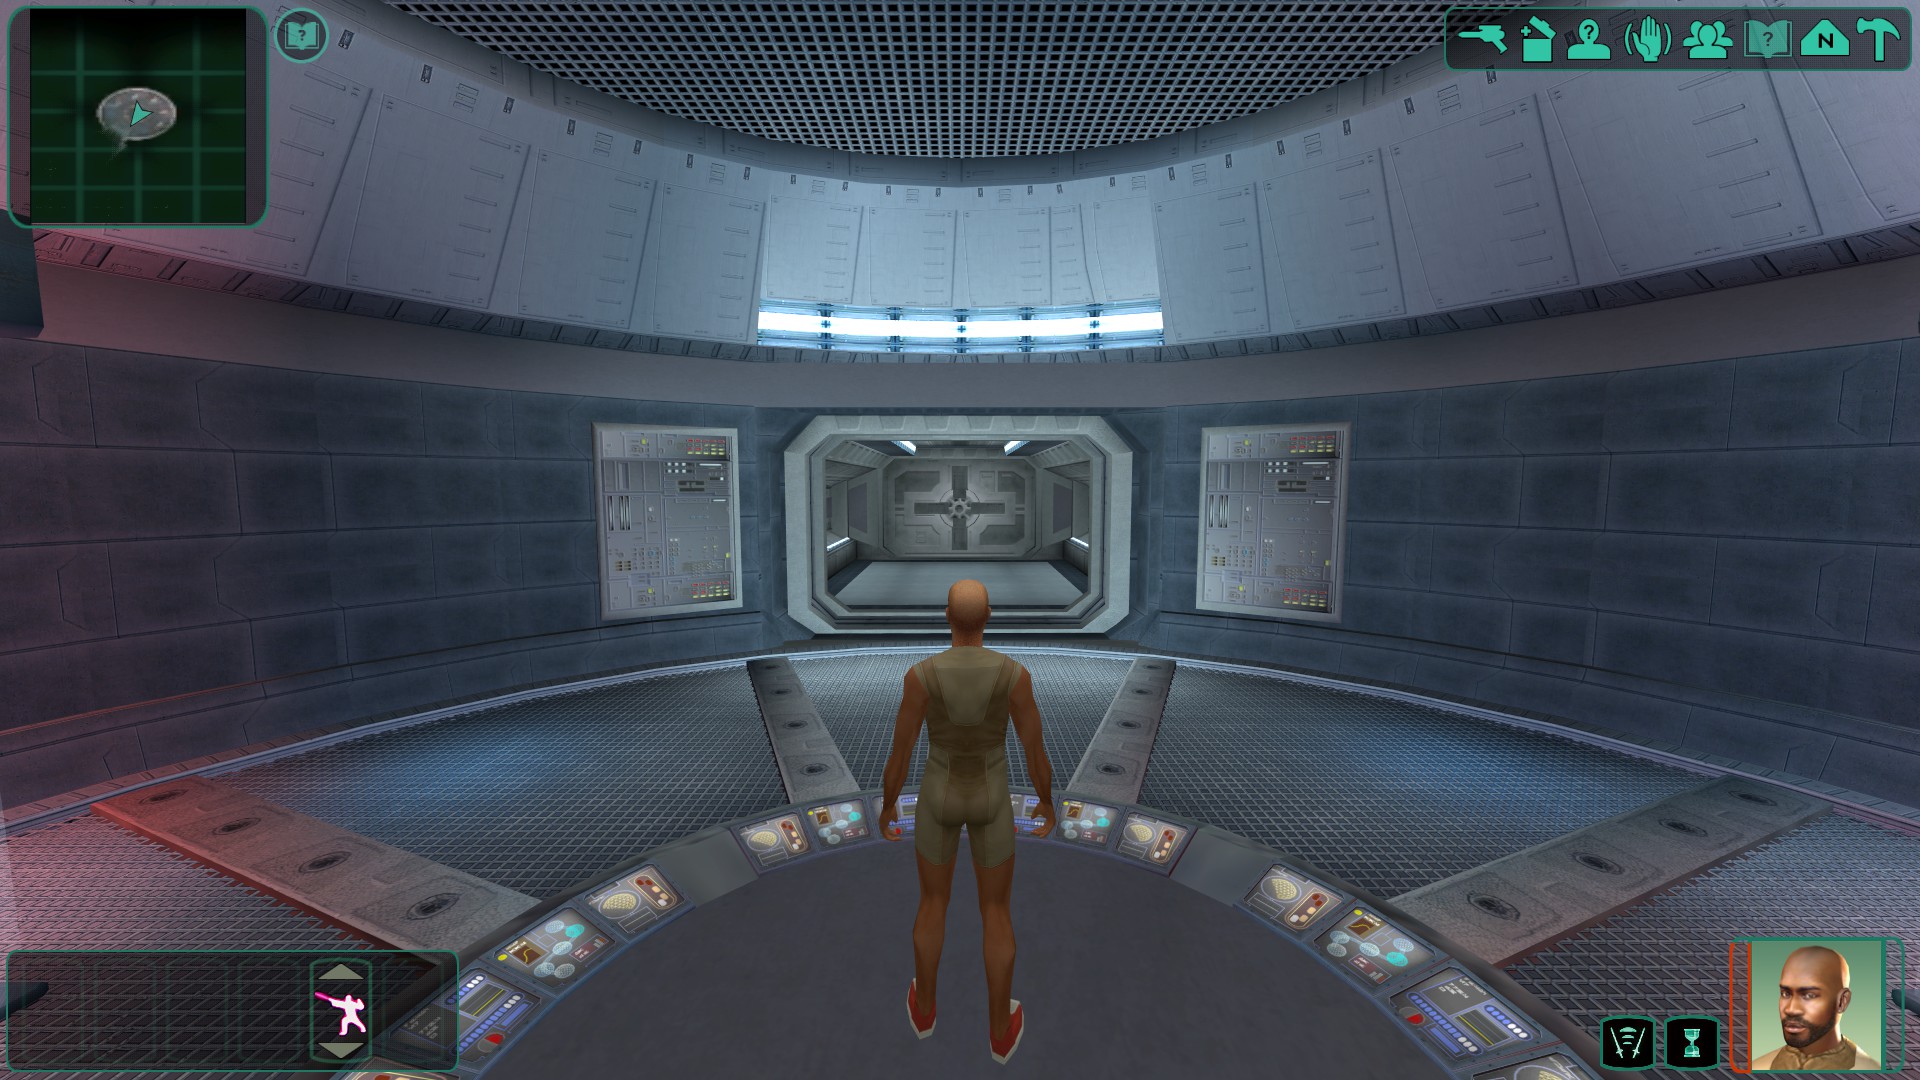 Once you reach this part, make a save and exit the game. We will be editing this save in the save editor.
Things you need to edit in save editor
MAKE SURE YOU READ THIS PART CAREFULLY!
Before doing anything, I would recommend backing up your save in case you mess something up. To back up your save, head to:
C:\Program Files (x86)\Steam\steamapps\common\Knights of the Old Republic II\saves
copy your save's folder, and paste it anywhere else. Congrats, you now have a backup you can restore in case something messes up.
Once you have saved after waking up in the kolto tank, go ahead and open save editor and navigate to the save (If the save editor is not recognizing the game, then open KPF.exe and set the path).
NOTE ABOUT SKILLS: I wouldn't recommend changing the skills through the save editor because at that point it REALLY breaks your immersion, but if you really wanted to you could set them to 30.
Firstly, we will edit the attributes so that they are a little better for us.
When editing anything in the save editor, make sure you click apply and commit changes. If the program tells you it saved successfully, then move on to the next part.
BEFORE EDITING ATTRIBUTES: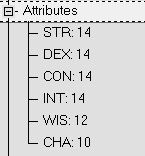 AFTER EDITING ATTRIBUTES: I set all the attributes to 16, a strong but not too strong number. It also leaves room to actually level up stuff in game.
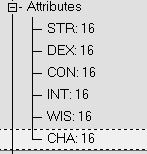 Now, close the attributes and scroll down till you see "Credits". It should look like this: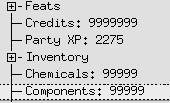
Edit Credits, Chemicals, and Components to be a high amount like I have. Now, you don't have to worry about money or crafting resources.
FEATS: Head down and open the "feats" tab. You should see a big list open on the right (if you don't, click feats a few times).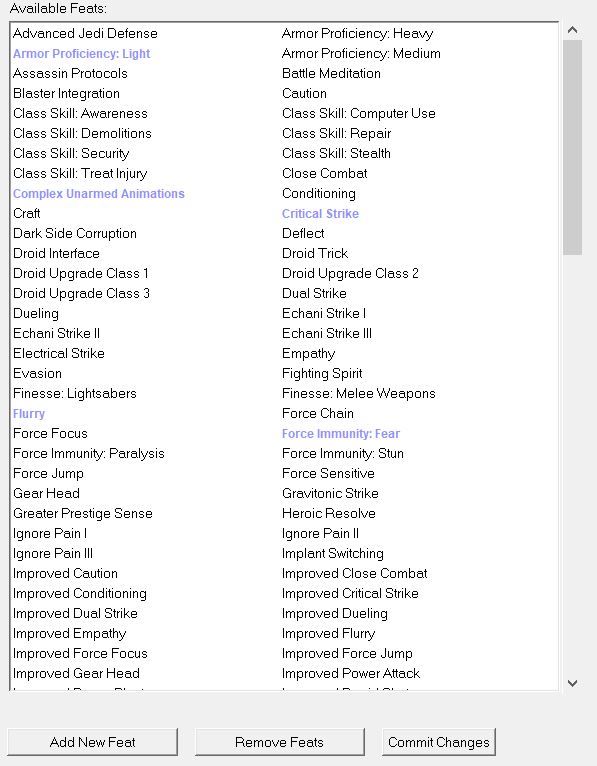 I went ahead and added the feats circled in red. The reason I don't add any more is that it removes almost all of the challenge from the game, though you are free to add whichever feats you like.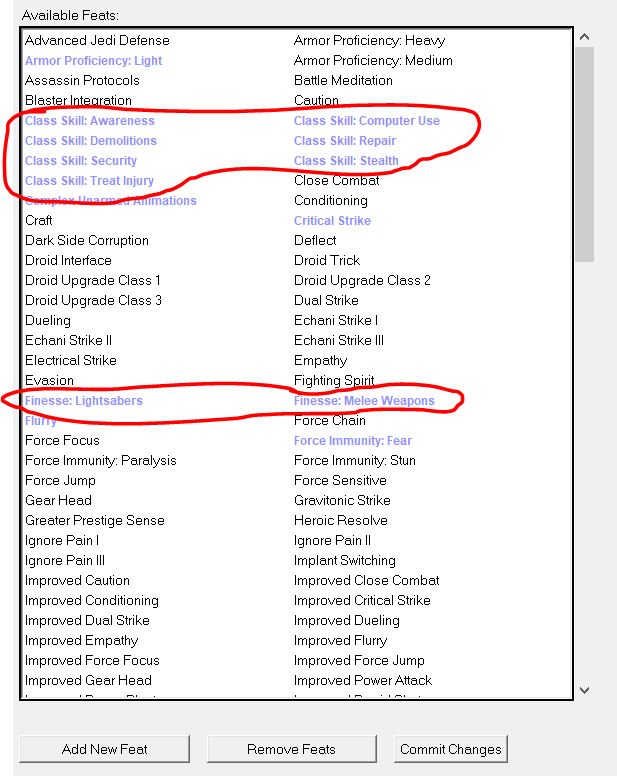
That's it for things I'm gonna edit skill wise. On to gear you need to add next
Items you can add through save editor (optional, but recommended)
There is quite a bit of stuff to add, but know that it will pay off immensely if you spend the time and do this.
This part of the guide is optional, and it is gonna be pretty confusing, so READ CAREFULLY!
We are going to be adding the best gear in the game to our inventory through the save editor.
Assuming the save editor is till open from the last part, double click inventory (it should look like this, all empty). You should also see a big list open on the right of the screen; this is a list of every item in the game.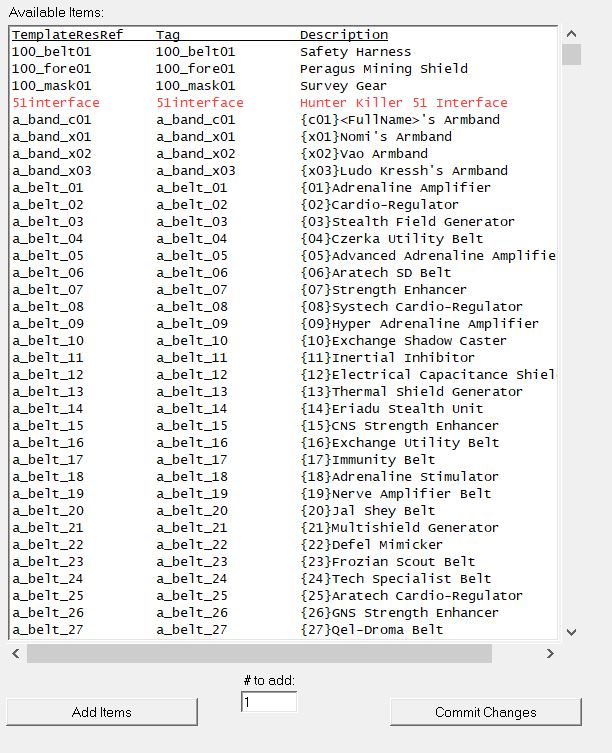
Now here is where we get to the mind melting, soul dripping, confusing, and boring part (don't worry, you only have to do this once). You're gonna have to go down the list and add this list of items (I would recommend adding 50 each, so you have more than enough to last your entire playthrough). (To save time, you can hold control and click multiple at once.)
NOTE: When you click add items, the program may freeze. Don't worry, this is normal as the program is just busy editing your save in the background.
ALSO, REMEMBER TO CLICK COMMIT CHANGES OR THE CHANGES WILL NOT BE SAVED!
a_belt_24
a_belt_29
a_belt_30
a_gloves_20
a_gloves_26
a_gloves_29
a_heavy_10
a_helmet_29
a_helmet_30
a_light_15
a_medium_14
a_robe_17
a_robe_18
a_robe_20
a_shield_05
a_shield_07
If you're wondering why we're adding these specific items, it's because they're the best items in the game.
Now, onto the next part. Click on d_armor_01,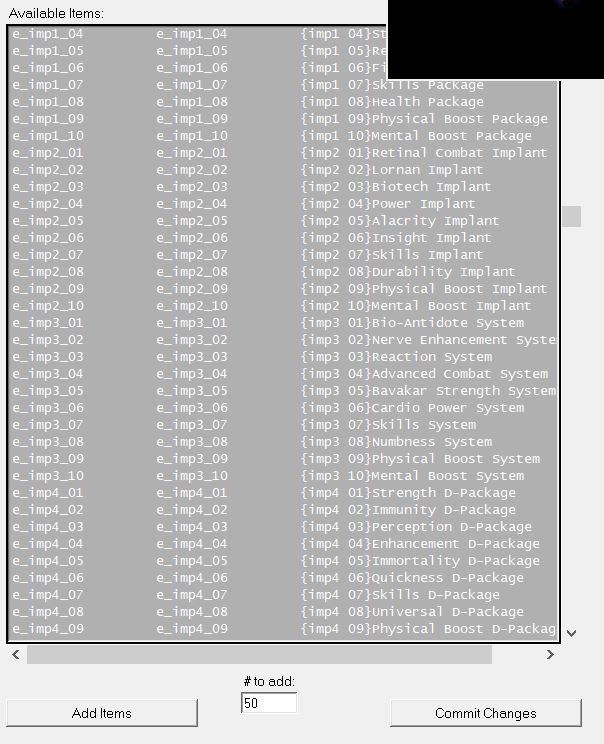 Next, scroll down a bit and find "g_i_cmbtshot003" and add a lot of them. This will give you the best battle stimulant in the game.
 Next, scroll down to "g_i_drdrepeq003" and, this time, hold CONTROL and select the following: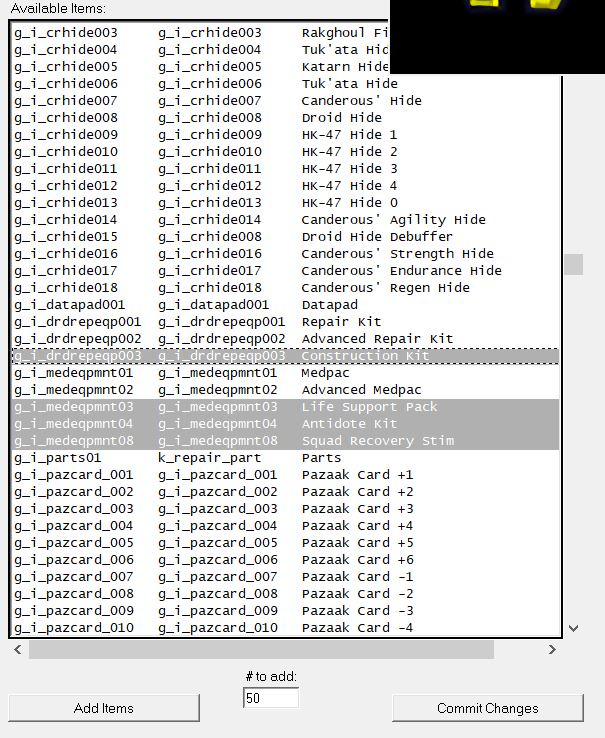
This will give you the best med packs in the game, so you should add enough to last you the whole playthrough. Next, find "g_i_pazcard_001" and select it. Now hold your mouse button and drag it down to "g_i_pazcard_023"
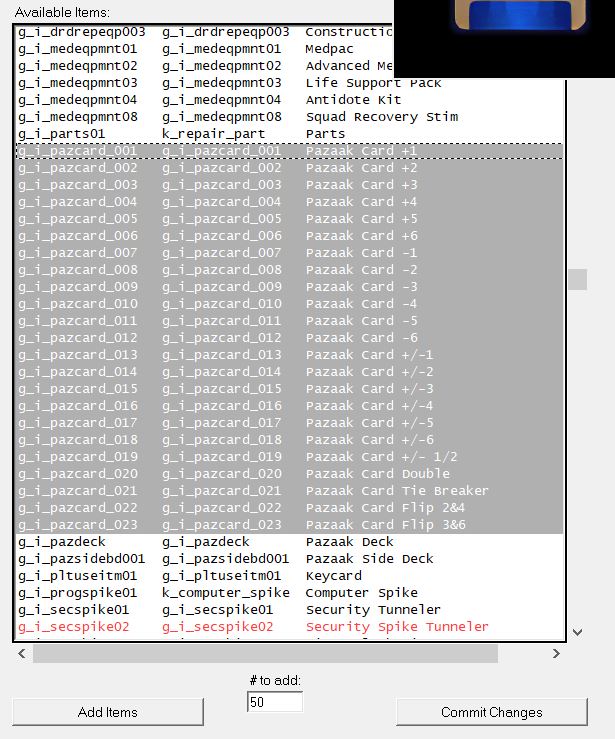
This will give you all the pazaak cards in the game. Next, scroll down to g_i_secspike01, and hold your mouse button down to g_i_trapkit025.
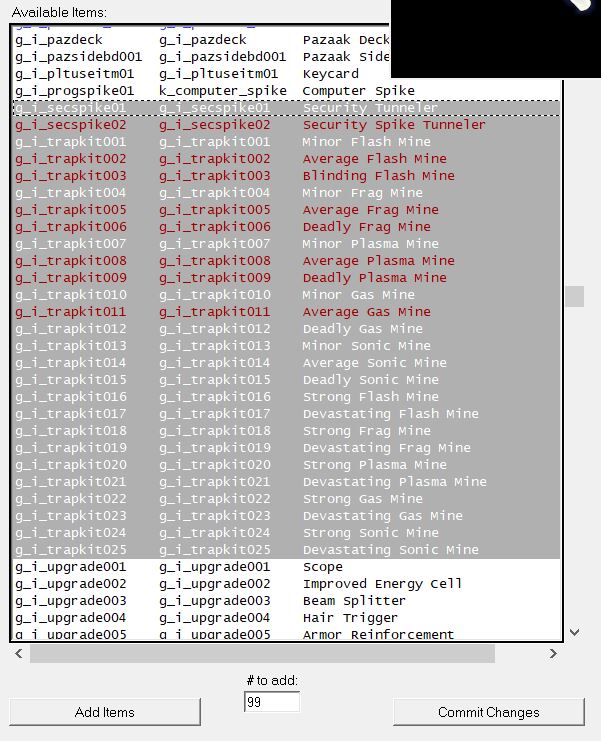
This will give you all the mines and security spikes in the game. Next, scroll down till you see "g_w_dblsbr001". Now, holding CONTROL, click on these items:
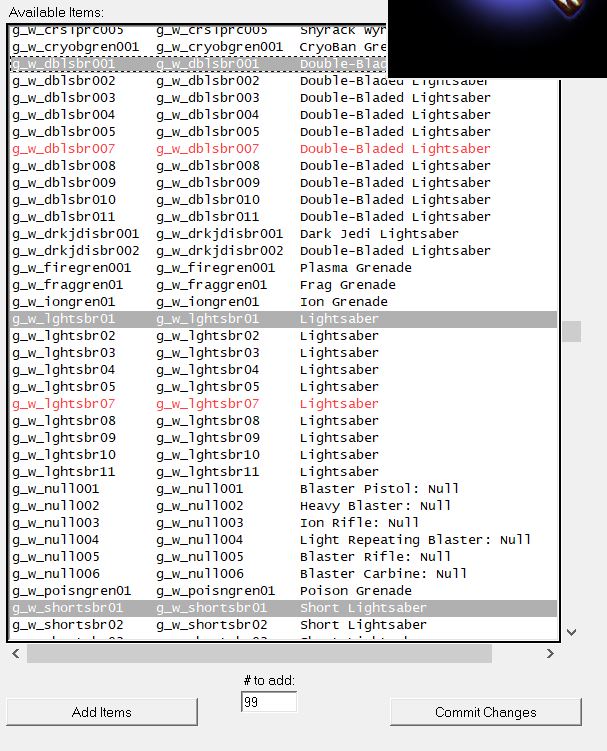
Add as many as you like, and this will give you all the types of lightsaber in the game in the BLUE color (don't worry, we will get all the crystals so you can edit their color to whatever you like in game).
Now, find the items "k_computer_spike" and "k_repair_part" and add a lot of them (I added 999). This will make sure you never run out of spikes or repair parts.
Finally, we're near the end and this part is gonna be easy. Find "qcrystal_1_0",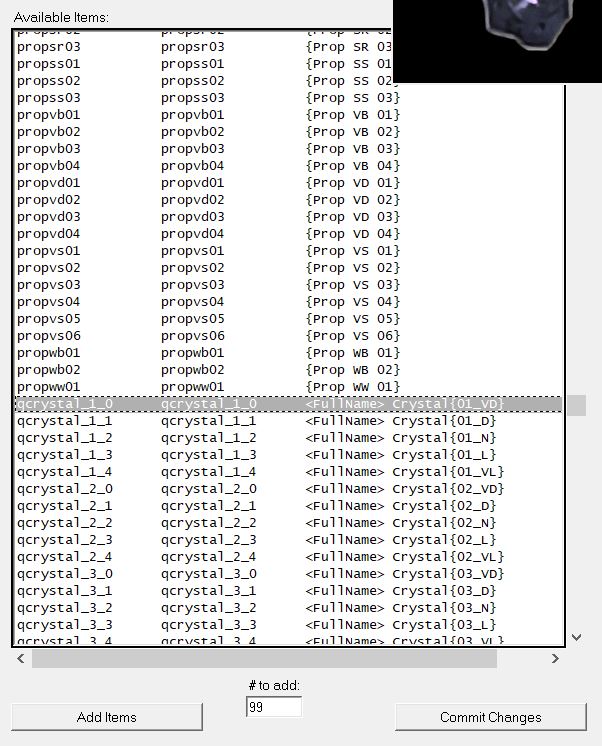
and like before, hold your mouse button ALL THE WAY DOWN to "u_r_targ_15"
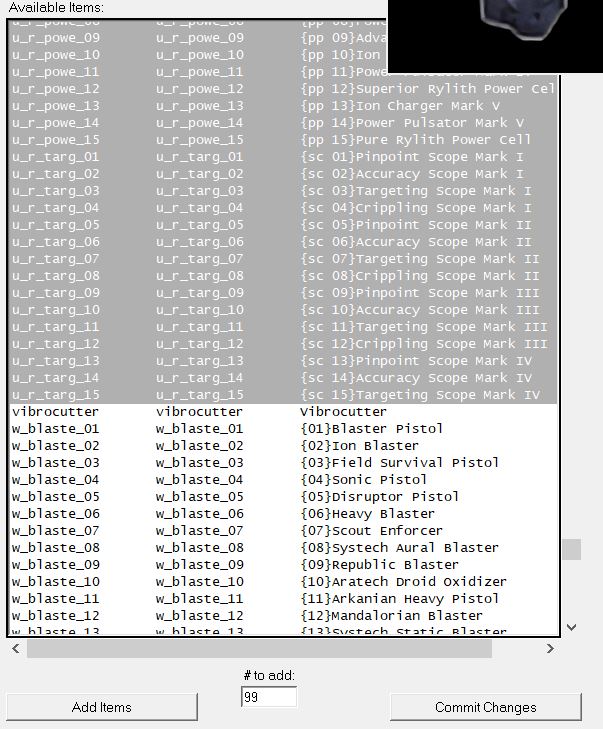
This will give you ALL the upgrade items in-game, so you can insure you have the best possible gear.
Don't worry, this is the last one. We just need to finally add our weapons. Scroll down till you find "w_blaste_01", and holding CONTROL, select these weapons:
w_blaste_21
w_blaste_24
w_blaste_28
w_brifle_11
w_brifle_23
w_brifle_28
w_brifle_29
w_brifle_30
w_melee_10
w_melee_22
w_melee_28
Add a lot of them, because these are the best weapons in the game.
Finally, you are done adding the gear (make sure you applied and commited changed to everything!).
Now, when you load the save, you should notice you have a ton of good gear.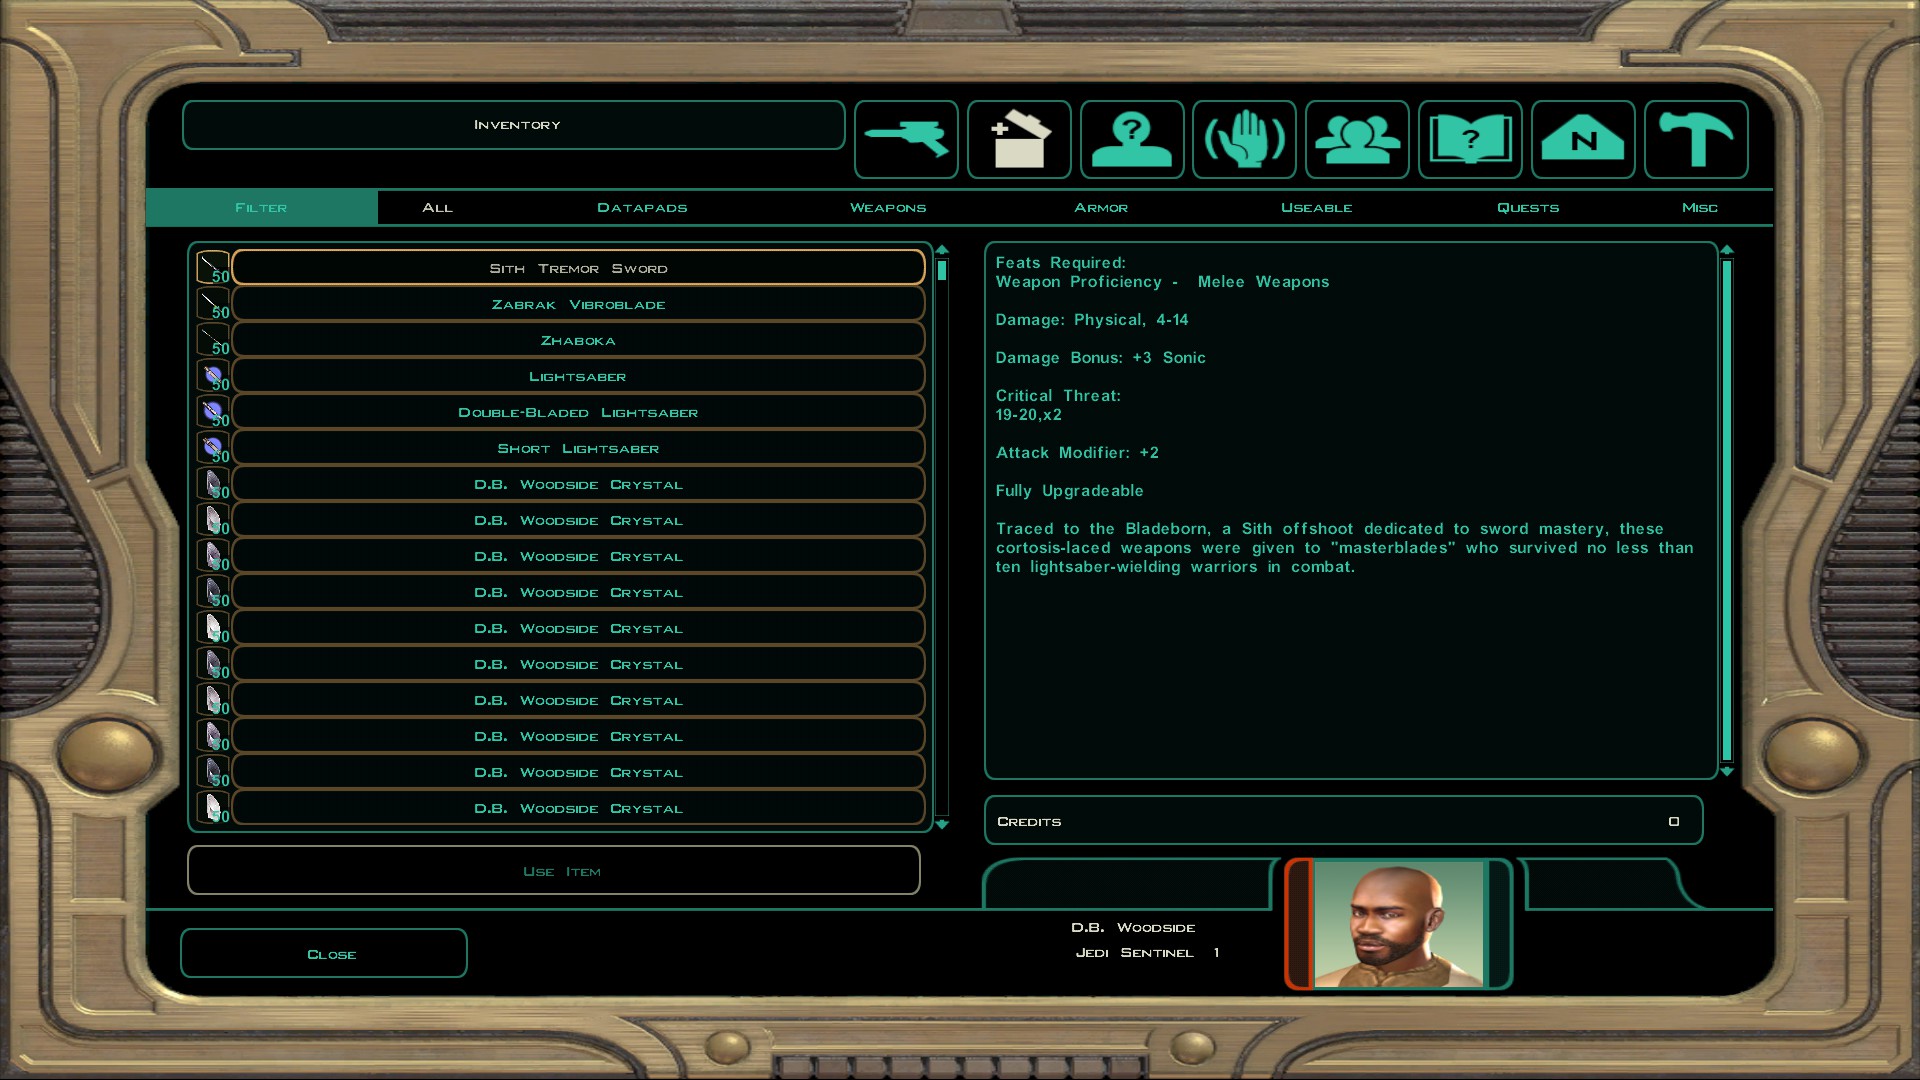
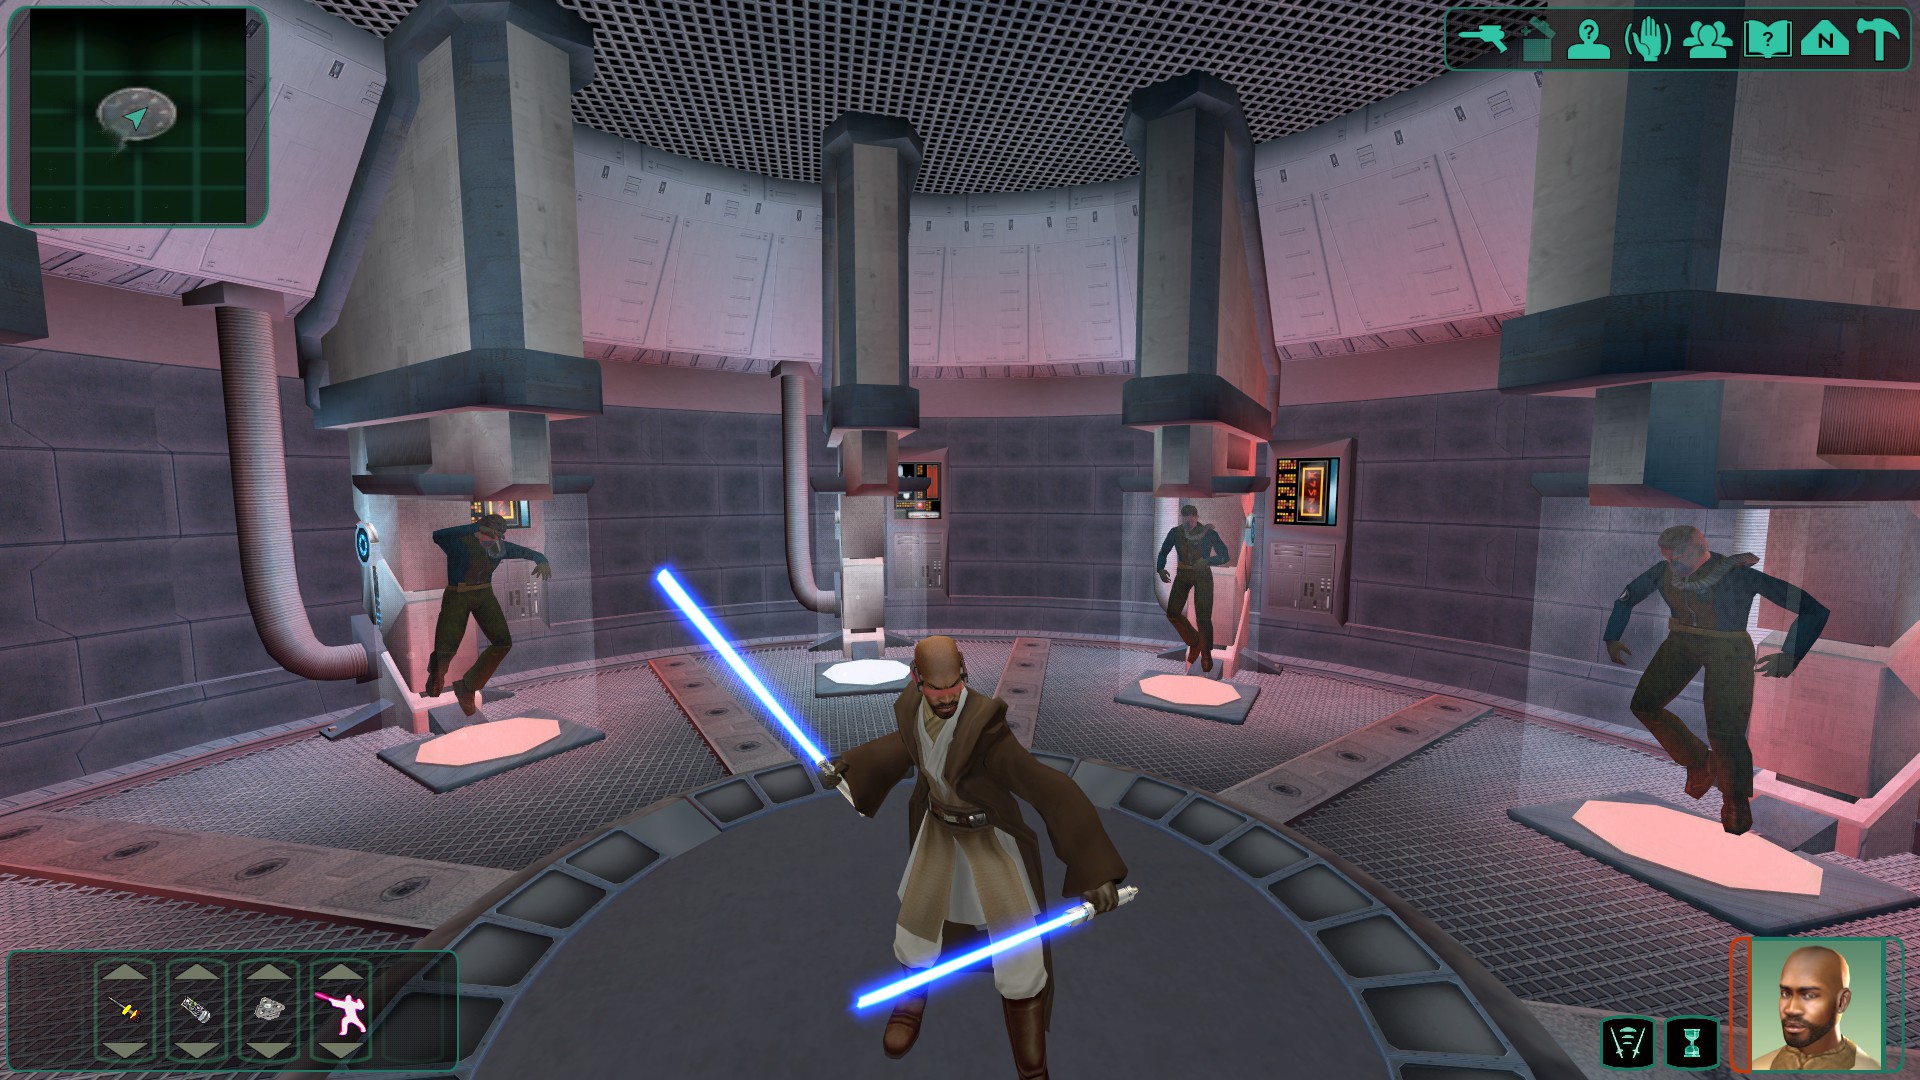
What you should level up each level up
Best upgrades for everything
This section will tell you the best upgrades for every weapon, damage wise.
Blaster: Targeting Scope Mark IV, Beam Splitter Mark III, Pure Rylith Power Cell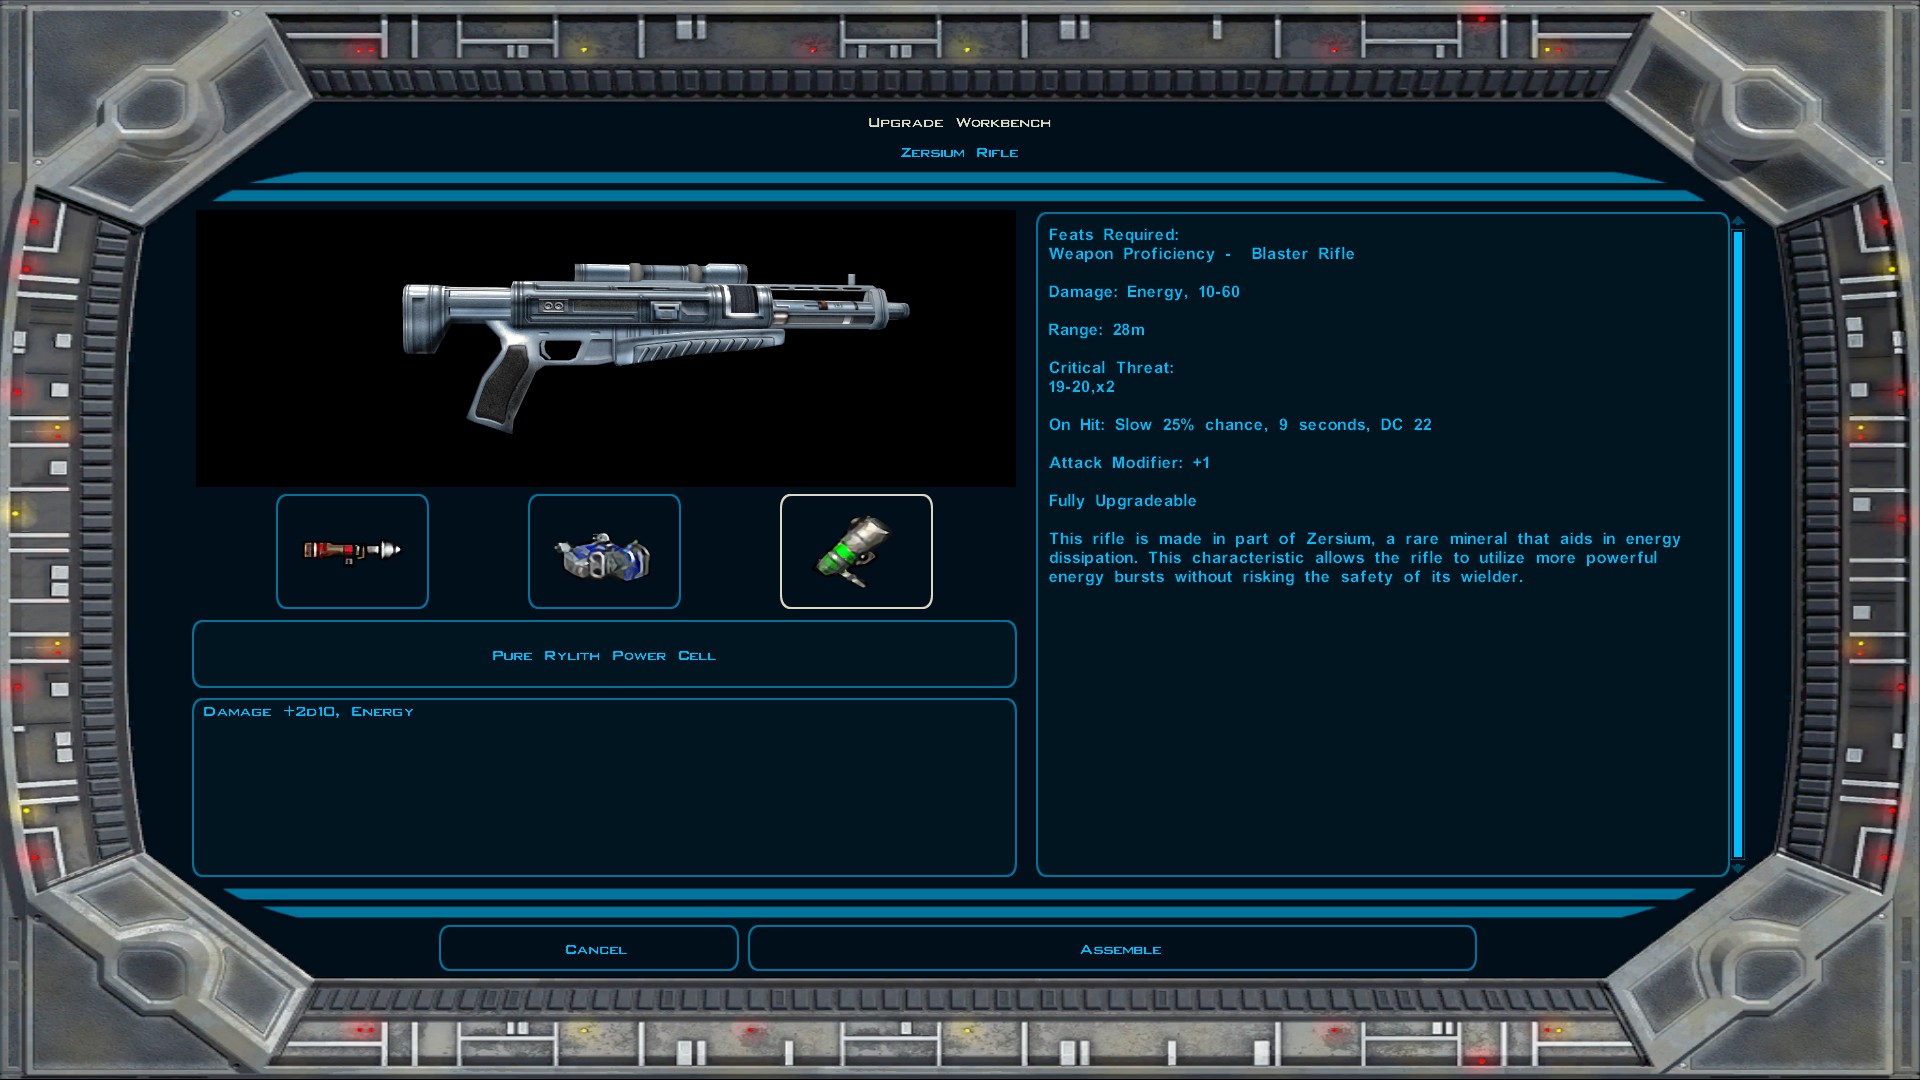 Sword: Superior Nagai Grip, Vibration Cell Mark IV, Quadrinium Edge
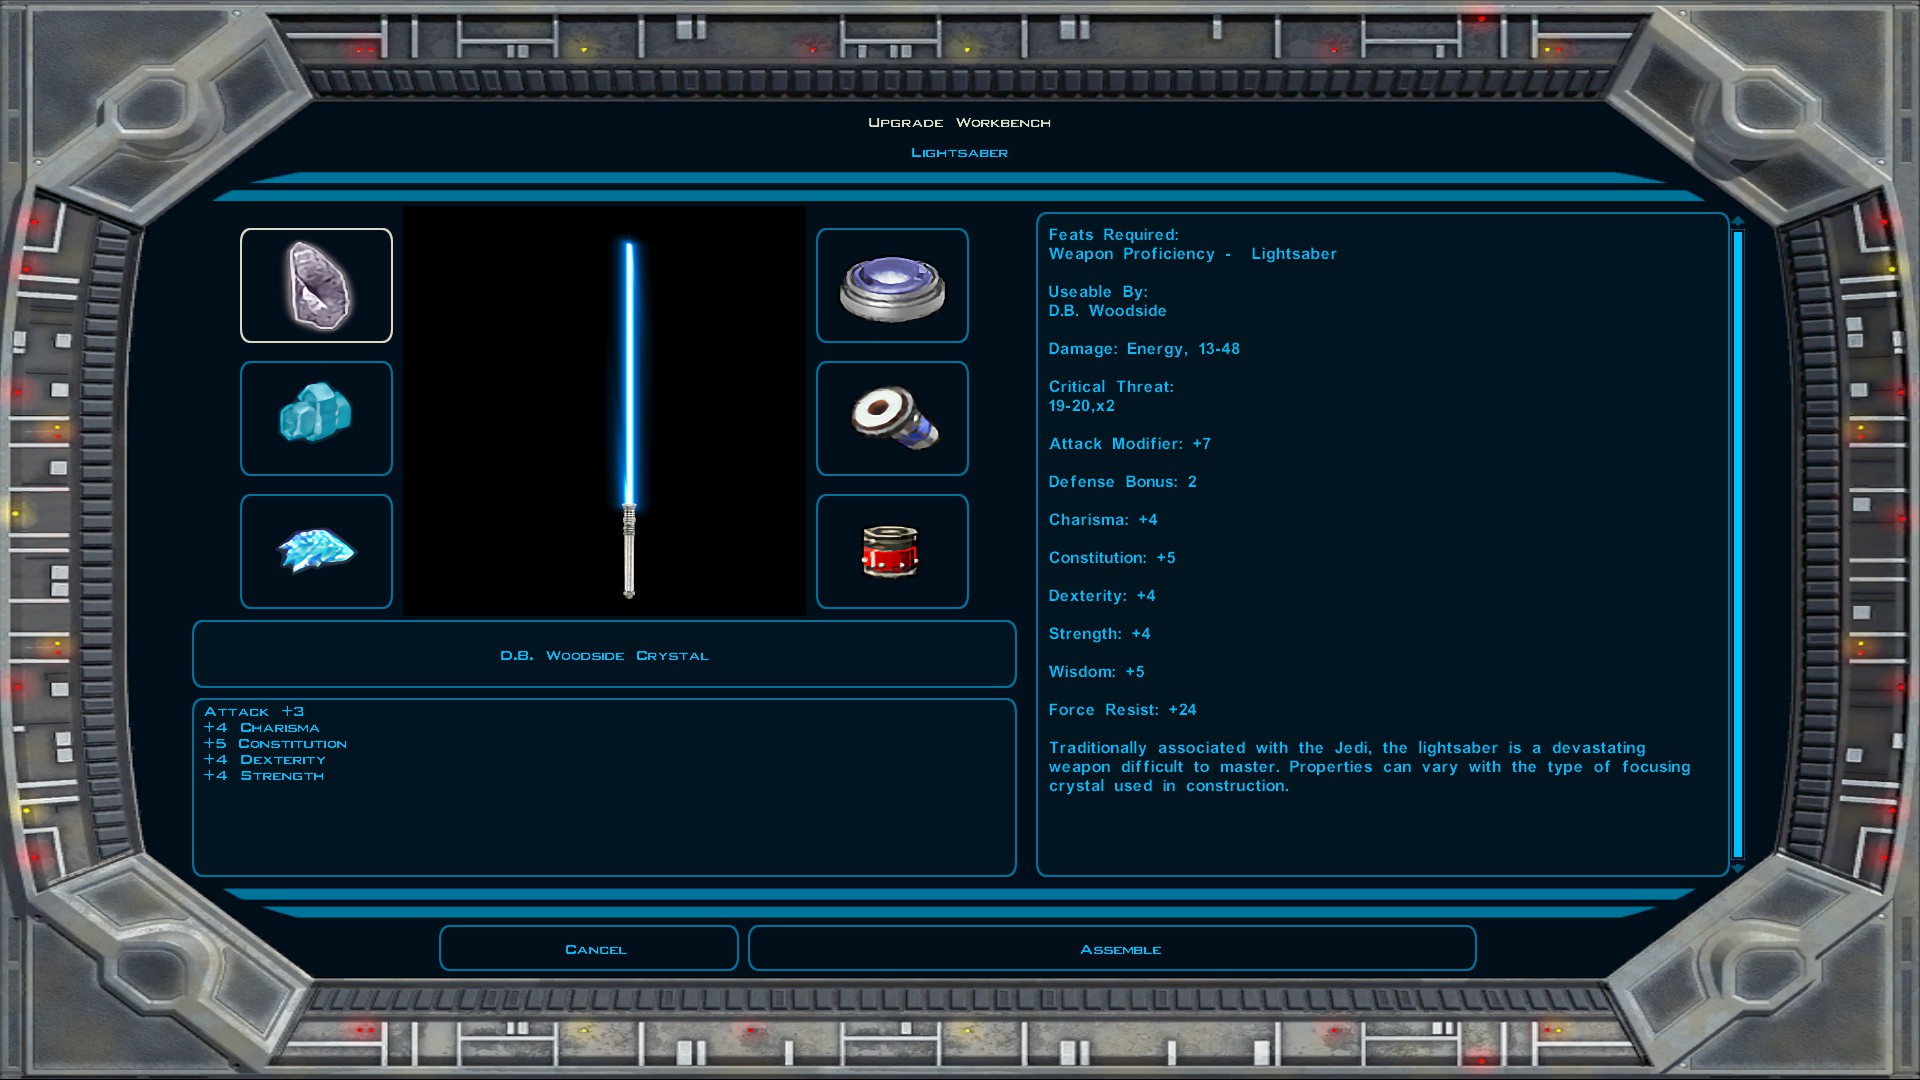
 Lightsaber: If you added all the crystals in using the save editor, you should see a bunch of crystals that have your character's name on them. Go through each one, and find the one which has something like "This crystals almost blinds anyone who looks at it" in the description. Equip that for your Player Character.
PLAYER CHARACTER'S LIGHTSABER: Named Crystal, Upari, Any Color, Expert Fencing Emitter, Pontite Lens, Ultimate Diatum Energy Cell
NON PLAYER CHARACTER'S LIGHTSABER: Upari, Sigil, Any Color, Expert Fencing Emitter, Pontite Lens, Ultimate Diatum Energy Cell
Note: There are a lot of crystals you can try in your lightsaber for different types of stats. If you used the save editor to add all of them, you can experiment to see which one you like the most.
 Jedi Robe: Biorestorative Underlay
- KotOR II Cheat Codes★ 5 (1.6k)116k views4.4k ♥17 minUpdated Jul 20, 2017
- KOTOR II: The Sith Lords - Go-To Essential Mods★ 5 (768)56k views2.2k ♥13 minUpdated Feb 28
- Character and Party Optimizing Guide - Archival★ 5 (1.1k)56k views2.7k ♥51 minUpdated Apr 24, 2024
- KotOR II Steam Workshop Modding Guide★ 5 (499)46k views1.1k ♥9 minUpdated Dec 20, 2015
- KOTOR: Tips and Tricks★ 5 (386)42k views756 ♥5 minUpdated Jun 12, 2023
- Ultima Pearl (Code)★ 5 (329)32k views749 ♥1 minUpdated Nov 25, 2025


- Upgrading to PremiumTeam Fortress 2★ 5 (20k)1441k views11k ♥6 minUpdated May 11, 2022
- No More Room in Hell Official ManualNo More Room in Hell★ 5 (2.8k)569k views2.1k ♥29 minUpdated Apr 22, 2019
- NMRiH Community Hosting GuidesNo More Room in Hell★ 5 (526)351k views653 ♥1 minUpdated Aug 10, 2022
- ULTIMATE GUIDE FOR GAME DEV TYCOONGame Dev Tycoon★ 5 (5.8k)326k views10k ♥4 minUpdated 23 Jan, 2014
- How to 'Git Gud' Soon™MORDHAU★ 5 (2k)318k views3k ♥68 minUpdated Nov 16, 2024
- Лучшие кооперативные игры SteamPAYDAY 2★ 5 (1.5k)315k views2.1k ♥56 minRussianUpdated Apr 27, 2025






This guide was created by its original author on the Steam Community. Are you the author and want it removed? Request removal.