Lazarus: The Guide
Introduction to Lazarus
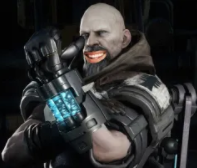 Hello peeps. Like the description states, this guide is about understanding Lazarus as a concept in the game, which is advantageous for aspiring Lazarus players, anyone who might have to play around a Lazarus on their team, and for the monsters fighting him. But to start, let's go over his weapons to get a feel for the guy.

The Sniper Rifle is what you'll be holding for 95% of the game. It has a low damage, moderate Rate of Fire, and a quick reload speed, making it a reliable and fairly medium damage wepon as far as Medics are concerned. Hitting a shot on the monster or any wildlife places a Weak Point that increases the damage of any bullet hitting it by 15%, i.e a 1.15 times multiplier. These Weak points stay for 10 seconds and benefit your entire team.
The DPS of the rifle, factoring in reloading time, is 25 * 10 / 3,15 = 79.4, assuming you don't hit any weak points. If you do, the DPS is 79.4 * 1.15 = 91. You'd rather focus on placing more weak points for your team to hit rather than shooting them yourself, at least until the monster is as covered as possible.
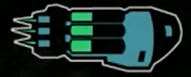
The Lazarus Device, aka the Revivifyer, can revive incapacitated Hunters in 1 seconds without them recieving a Health Penalty like they normally would, and can also revive a Hunter who is fully dead within 30 seconds (45 if it's Bucket) after death, but then they still recieve the strike as normal. If 30 seconds passes the corpse has "decayed" past the point where Lazarus can revive it, and this timer is reduced to 20 seconds if the monster takes a bite, but doesn't fully consume the body. If the Monster eats the body completely it will deny there revive, as there is no body left to revive. The default recharge time is 25 seconds, and is affected by Reloader Perks. This piece of gear is what makes Lazarus what he is. We'll get into how to utilise this later in the guide, since it is absolutely essential to playing him effectively.

The personal cloak makes Lazarus invisible for 12 seconds, gives 40 Health Regen per seconds, and increases his movespeed by 25%. The Recharge time is 25 Seconds, and is affected by Reloader. The cloak is used to evade the monster when you're being targeted. When it's active, you're invisible and cannot be smelled, but this invisibility is broken for one second when shooting, using the Lazarus Device, or taking damage.
The invisibility doesn't stop Lazarus from being aflame or webbed, so the fire will still be visible, which obviusly counters the purpose of the Cloak. More things to keep in mind is that while cloaked, jetpack trails and footprints are still visible, meaning an attentive monster can keep track of you. Also remember that if you are being shielded or otherwise targeted with a beam, that beam will reveal your location, making Hank and Sunny undesireable supports. Even worse, Tech Sergant Hank's Charged Shield will show even if you're cloaked, meaning the cloak is completely useless, as the monster can still track you perfectly while the shield is up.
 Lazarus's Heal Burst heals others for 500 and himself for 350, and it has a 12 second recharge timer. This makes it the strongest Heal Burst for healing your teammates. Monsters often underestimate Lazarus' healing, but using the Heal Burst off-cooldown will keep most hunters alive for a while. In the end, his healing is still weak, but not as weak as many would estimate.
Perks
For perks, there are a few schools of thought, and by extention, a few builds with variable viability. First up we need to talk about Lazarus' weaknesses, at least the ones that can be alleviated by perks. Lazarus lacks healing for his teammates, and he pulls a lot of aggro so he needs survivability when targeted. What perks help with these weaknesses? Jetpack perks obviously help with Survivability, as does Reload, and Class Cool-Down gives him more healing. So lets talk about all of those individually, then summarise with some builds.



The generally brilliant but inspecialised perk line will often work well on Lazarus. They help you with you own selfish desire to stay alive and they let you roach and tinkerbell fairly effectively. Having all Rocket perks increase the total flight height to 39 from base 23, and reduces the recharge time to 10.4 from base 14.3. This also means that a dodge recharge is 2.6 seconds rather than 3.6, which is obviously very helpful in a game like Evolve where one second often is the difference between going down and surviving.



Thrust Increase is pretty much the opposite side of the Jetpack Perk Coin compared to Rocket. Instead of giving generally usefull stats, they go all in on the Dodge. Picking all 3 increases your dodge distance from 14 meters to 17. This isn't a massive change, but it does make Dodge Thrust one of the best perks for traversing the map and chasing the monster. However, this isn't something Lazarus needs, so it's a moot point. It's not worth taking all of them, but taking just one as a filler might be worth it.


Flight Efficiency is a strange case. Just the two of them together increase your flight distance to 34 meters, which isn't that good. Rocket perks are better and give much more value in general. But if you combine the two Fuel Perks with Rocket King, you suddenly get the single best perk build for Flight Distance in the game at 49 meters. This creates the infamous "Tinkerbell" build. But while this has potential, it's a huge sink of perks, and you pretty much only get Flight Distance, so it falls off in utility if you are inexperienced or just bad at kiting.


Now we are getting into the more META options for Lazarus. Taking both Reloader perks reduces the cooldown on the Glove and Cloak to 20.25 seconds, and I guess reloads the Sniper faster, but that isn't why you pick it. The idea here is that if multiple people get downed simultaneously or in a short span of time, you'll be able to revive both of them without your glove cooldown messing it up. But from my experince, and we'll get into this later, the monster rarely goes for multiple downs simultaneously when facing a Lazarus, instead preferring to finish off the hunters one at a time to make sure that Strike sticks.
Obviously these situations are going to come up every now and then despite that. Imagine your Trapper and Assault go down almost at the same time, and the monster runs away after damaging their corpses a bit. You only have enough time to revive one of them, the other will bleed out if you wait for your glove to recharge. In this situation, the Reload speed perks' 5 second decrease might matter, but more often they won't. It's just too long still. I think Reload Perks are a bit of a noob trap, seeming very useful at first but the scenario imagined just doesn't really happen. Overall they just aren't as viable as Class Cooldown.


This here is the META. Lazarus severly lacks healing, both for his team and himself. With these perks the cooldown is reduced to 8.6 seconds compared to base 12. This means that instead of 5 Heal Bursts per minute, you can now manage barely 7. This is a huge increase in average healing, and makes both Lazarus and his team much more durable. These perks help Lazarus with his own survivability as well, and they require less skill with the jetpack to utilise. Overall, these are the best perks for him.
This is what I run most of the time. The Bronze Tier Rocket perk helps a bit with making your jetpack more potent, and the Class Cooldown benefits your entire team. A very balanced build that will serve you well in most situations. If you have trouble dodging big abilities, you can switch out Rocket Man for Afterburners.
This is a more situational build that I would only run if my team is very defensive already but lacks damage. The extra reload speed is mostly useful for Cloak- and Sniper uptime. Although Sniper uptime doesn't really matter for the weak points, it is useful for the extra damage you'll deal. Lazarus deals a lot of damage for a Medic, and this helps boost that DPS to somewhat useful levels. Like before, Rocket Man can be switched out for Afterburners.
This is an incredibly specialized perk build I would only recomend to highly skilled players on a coordinated team who knows they will be instantly targeted by the monster. This is the single best build for Roaching and kiting the monster, but it requires immense skill to evade a monster focusing you for the entire dome, even with this build, so for most players I cannot in good faith recommend this build.
Strategy: Gear
This part covers the mental aspect of playing Lazarus. What should you be thinking about and when. How do you utilise your weapons and gear to full effect? The Gauntlet will be discussed last because it is easily the most intricate part of Lazarus' game plan.
The Cloak is best used the moment the monster turns its attention towards you, before it can close the gap and start to put the pressure on. That way you can stealthily reposition before the monster has a chance to find you. Popping the Cloak while you are already being targeted is useless, since the monster will have more than enough time to keep track of you, but if you use it before then, the monster will have a much harder time finding you, and you'll have 12 seconds of relative safety that you can spend repositioning in another favorable spot.
Strategy: The Glove - Part 1
Your value as a Lazarus does not hinge on getting every single revive
This isn't about giving up, it's about realising when the monster has commited enough that it will be useless to even attempt the revive. If a monster is camping that hard, just stand back and help your team punish the monster. I really want to hammer this home so I'll say it again: Getting the "perfect game" where noone gets any strikes is a pipe-dream. If a monster camps the body, let him. He might get the body but he takes an additional 2 or three bars for it. That is 100% worth it every time. Remember, if you die, the threat dissapears. Don't run into every revive opportunity, but stay attentive in case the monster gives an opening or gets chased away. Be ready for reviving the corpse, as it's still worth nullifying the dropship timer. Something else is a tech called “Revive Stalling” where you repeatedly do normal revives to pause the bleed timer until your glove is back off cool-down. But now let's get into how to abuse monster mistakes to get that revive when it's possible, and specific tips verseus each monster.
Strategy: The Glove - Part 2
Lazarus and the Team - Part 1
This is a special part that explains how your teammates need to play around your pick, because picking Lazarus will change the entire game for the monster, and so the hunters will need to accomodate. So I'll go over each class and how they need to change their mindset when you pick Lazarus.
But most Assaults don't have Markov Mines, so what should they do? Avoid dying at all costs. When Lazarus is in the game, the monster will have to camp a body much harder than usual to ensure the strike, and if the Assault doesn't punish that, Laz's core strength goes to waste. However, if the Assault can't punish the camp because he went down and is being camped, then the monster will get that strike for a much smaller health investment. Fortunately, most monsters don't realise this, and will instead target the Lazarus to get the strikes on him. This is the time when Assaults need to do everything they can to punish the monster for focusing him. Torvald Mortars, Markov Mines, these are the things that will force a monster off of the Laz.
One final thing Assaults need to keep in mind is to not use their biggest abilities until the monster has commited to the camp. This mostly applies to Parnell and Lennox, who should save their Super Soldier and Thunderstrike until the monster is standing still and they can get the most out of the big abilities.
But the offensive Supports in Bucket, both Cabots and Kala have a very aligned playstyle to you, and that is exploiting stationary monsters for a huge punish. They make the most out of the times a monster commits to camping, so they usually work very well with Lazarus and especially with Burst damage Assaults.
- The Dome is about to drop and the monster has ran out of armor.
- The Trapper lets himself get killed on purpose.
- The monster thinks "I should stay just a bit longer. He's already down, it wont take long to finish him off"
- Everyone piles on the monster for the huge punish.
The other scenario is that the monster doesn't take the bait and just leaves. Then you can pick your Trapper back up and go on chasing like nothing happened. This strategy is obviously not as useful in the later stages of the game when the monster is no longer concerned with strikes and just wants to kill everyone. Don't sacrifice the Trapper without a plan.
Lazarus and the Team - Part 2
Now we've arrived at the part were I describe synergies and anti synergies with other Hunters. Obviously some team comps will work better with Laz, and some have a very counterproductive goal to him. So let's take it one class and character at a time, then discuss a few team compositions.
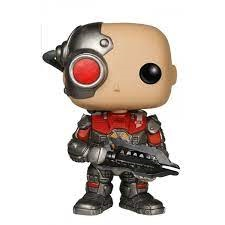 Markov's mines provide an area you can lead the monster into if you are being focused, but they don't actually keep you safe. Unfortunately his main weapon doesn't benefit from your weak points, so that is a bit of a blow. He doesn't have the burst for punishing a camp effectively.
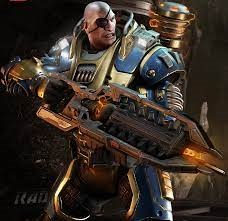 Blitz Markov does the same thing as regular Markov, but slower. His mines take longer to build up their damage to threatening levels, so if you are being focused it will take longer for the mines to be strong enough for you to escape to them. But to be fair, few things will punish the monster for chasing you like 3 golden mines. Due to the fact that Barkov benefits more from stationary monsters, he has greater punishing potential for a camping monster, which makes him marginally better than OG Markov.
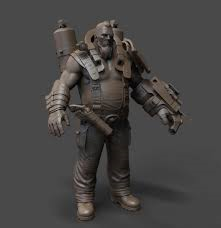 Hyde's Area Denial might not be as threatening as Markov's, but he makes up for it in damage. Hyde's biggest limiting factor is his range. So if the monster is standing in the same place for the entire duration of his clip, that's massive damage. His punish is very high, and he is capable off chasing the monster away from either you or the downed body, so he is a very good Assault to have. The fact that the weak points don't work with the Flamethrower isn't enough to matter.
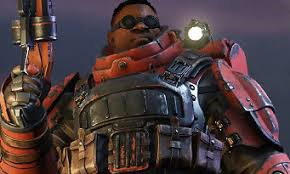 A wise man once said that Parnell has no gimmick, just damage. Parnell is an excellent punisher, but he offers nothing for protection. So once someone goes down and the monster commits to the camp, Parnell will eat them for breakfast. But if the monster is targeting you, having a Parnell on your team will certainly feel like having no Assault at all.
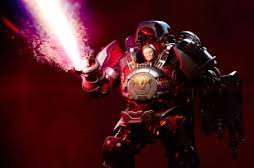 Lennox doesn't really synergise that well with Lazarus. Lennox relies on her Plasma Lance to deal damage, but Lazarus doesn't provide anything that makes them easier to land. In fact, a monster standing still and guarding a body is actually more focused on keeping Lennox's stacks down. And just like Markov, the Plasma Lance doesn't benefit from your weak points.
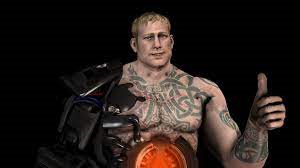 A monster standing still is every Torvald players wet dream. His mortars deal big damage in exchange for being hard to land. So if the monster is camping a body then that damage won't be as hard to land. And although he has no true Area Denial, he can very effectively punish the monster for focusing you with his mortars. All of this combined makes him a great pick with Lazarus.
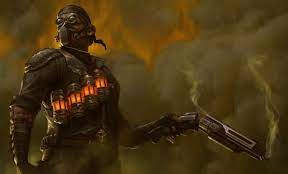 Depending on the situation, Rabe either has good or bad synergy with Lazarus. On the chase he's great, because he can punish the monster the best over a long time, which means the monster is more likely to run away even if they get a down when the dome isn't up. In the dome however he has no burst damage which means he is not as good at punishing the monster for camping. And although he doesn't have any Area Denial, he is the only Assault that can reduce the monsters damage, which counts for a lot for the Medic with the worst healing.
 Hank is difficult to determine. On one hand his Orbital Barrage is a perfect punish against a camping monster, but on the other hand, his Shield Projector reveals you while cloaked, so those two can't be used at the same time. This doesn't matter too much since you'll be staying outside the dome anyways. The more important thing is that Hank is always the weakest link. Once a body drops in the dome, it's gonna be him, which means no orbital.
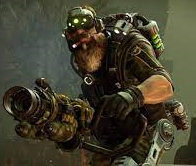 Tank is the exact same as normal Hank, but doubled. His Shield Charger creates the exact same problem as the Shield Projector, but it's even worse because it's permanent. Lazarus entirely contradicts Tank's entire gameplan, and they have terrible synergy on that point. On the other hand, the Orbital Drill is even better at punishing a stationary monster than the Barrage. He also doesn't have the whole "Weakest Link" thing, so he is overall better than OG Hank.
 The only one who gives consistent results with Lazarus. Bucket has the most potent Area Denial out of all the supports, and he is very survivable. With his help you can set up a very safe area to retreat to. And while the monster is camping a body, he can set up the Turrets just outside the monsters melee range and make his camp hell. Not to mention that his Mechanized Recharge covers for your biggest weakness and makes it so you can heal the entire team to full almost instantly. He is the single best Support for Laz.
 The synergy Lazarus has with Cabot is fairly incidental actually. Because Cabot helps the Assault take advantage of a stationary monster, he is good by association, even if no part of his kit directly synergises with Lazarus himself. He isn't as survivable as he needs to be, but he is pretty decent overall.
Lazarus and the Team - Part 3
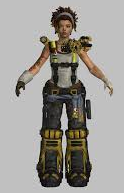 As if one beam from Hank wasn't enough, Sunny has two tethers that reveal your location to the monster. And the worst part is one of them is automatic. Sunny can control the booster, but if you get hit once while invisible, that Shield Drone will make it impossible to escape invisibly. Bad synergy.
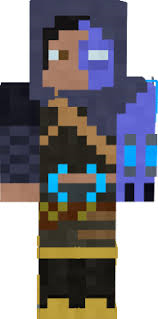 While Kala's Armor Reducer is good at taking advantage of a camping monster, it can't be used in the Dome, which lowers its potential drastically. Her Teleporters might be the best way to make the monster switch target if you manage to escape outside the dome, but due to how difficult they are to make use of she doesn't really have that much going for her.
 The resident Troll Pick actually synergises very well with Lazarus. His Concealment Field gives you an additional 8 seconds of invisibility to break the monsters focus, which is very much useful, and his higher than average DPS for the Support class means he can help a lot with punishing a camping monster. Doesn't mean you'll get results, but he is funny to play with.
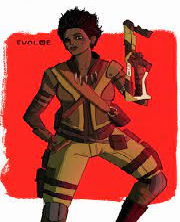 Maggie has Daisy. Daisy picks up hunters who are downed, denying your revive. Nothing else in Maggie's kit matters because of Daisy.
 Now that Daisy is no longer a concern, we can actually look at the rest of Waggie's kit. Her deal is that she deals more damage than OG Maggie in exchange for less CC. This is a good trade in the eyes of Lazarus, since the old Harpoon Traps didn't really help him all that much anyways, and more damage for the punish is a good thing.
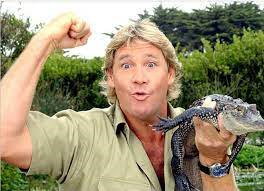 Griffin's CC is probably the second best in the game, and it works wonders for keeping the monster off of you. His damage is pitiful, but those Harpoons are well worth it. Leave the damage to the Assault.
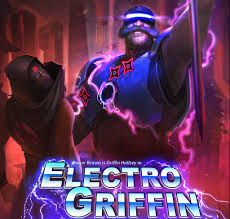 EGriff sacrifices CC for additional damage and a slow that rarely matters. This isn't a great trade from Laz's perspective, as it takes away from the best part of OG Griffin and replaces it with something that isn't very needed. The guitarr noises are great though.
 Abe's Stasis Grenades makes it harder for the monster to chase you, no ♥♥♥♥. Something worth mentioning is that the uptime on these can be 100% if the Abe is proactive, whereas the hard CC hunters can only stop movement every now and then. His Shotgun also deals great damage for the punish. A very simple character that works well.
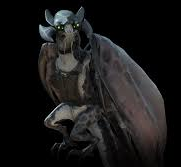 Crow deals damage and slows, just like Abe, but he feels a lot less consistent in both those areas. The uptime on the slow isn't as high, and the damage feels less reliable and isn't increased while punishing a camp. Overall there isn't much in Lazarus and Crow that works together any better than they would alone.
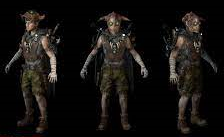 The CC heavy alternative to Abe, Jack has the single best way to stop monsters and he deals very consistent and respectable damage to boot. Less than Abe of course, but if you need more CC to stay alive, Jack is the Trapper for you.
Lazarus and the Monster - Part 1
This part of the guide is arguably the most important for understanding Lazarus. Before we actually get to his matchups and stretegies for the monsters, you need to understand this axiom.
Lazarus' biggest strength isn't that he can pick people up without Strikes
This is very important, because it is a incorrect analysis of his power, and will lead to people trying to use the Glove at every body, which will quickly get you killed. No, Lazarus' biggest strenght is that he can undo progress for the monster. The threat of the Glove is more powerful than the use of the Glove.
Think of it like this. WIth any other Medic, the monster knows that it will take a while to get a down. It will take a different amount of time depending on the Medic, and sometimes you focus the medic because it will be faster, sometimes not. But with Lazarus the game changes drastically. You know that you can kill anyone fairly quickly due to his subpar healing, but if you slip up, all that effort and rescources you spent getting that down will be gone out the window. This activates a massive Sunk Cost Fallacy in the monsters mind. If they get a down, they have to commit to killing that body to get the Strike, which can take a while depending on who went down and who's left on the team.
On the other hand, they can focus Lazarus himself, because every down on Laz is a guarranteed Strike. But then they are focusing the someone who has no power until a hunter goes down, and all that damage from the Assault, Support and Trapper is headed right for them. If the Lazarus is good with his jetpack and Cloak, he will take a long time to kill, and the Sunk Cost Fallacy will appear again. Just a bit more. He's almost dead. His Cloak just ran out, now I've got him. And during that tunnel vision, three other hunters with more damage is pumping you full of shots.
This is the power of Lazarus. To force the monster into spending more rescources for the same rewards or chase a ghost while being riddled with bullets.
But enough preamble, let's talk about big Monsters
Goliath can be very annoying to fight, but you have a few advantages. Biggest one is Goliath's big hitbox that can be covered head to toe in weak points. Another is that all his attacks (except Flame Breath) are very telegraphed or have long animations. But that Flame Breath is so difficult to play around due to its range and low commitment necessary for value, not to mention it reveals you. It's actually a free "Reveal Lazarus" button.
Meaty is very similar to Goliath but is arguably a better matchup. All abilities light people on fire and also reveal you through your cloak. But that shouldn't be too much of a problem since you're not gonna be in the dome either way. From that perspective Meaty's lack of burst really hurts him, because you can stay out for longer without your team being in too much danger. The DoT can be handled fairly easily if you can coordinate to heal through the dome.
Kraken is just very exploitable at the moment. Long cast times and long cooldowns in combination with underwhelming damage numbers make Kraken fairly weak, even despite the fact that he can camp bodies remotely. He lacks the true pressure necessary to keep the hunters at bay.
Kelder is much like OG Kraken but he has faster cast times and more damage uptime thanks to Death Spiral. He already fights up close and personal with the hunters and turns every dome into a DPS race. Your team will struggle without you, but you want to stay out of the Kelder's Thunderdome.
Wraith is the most fragile monster in the game. She does not have the Armor and Health to afford playing Lazarus' game of camping and taking punishment. Her slim frame makes it harder to use your weak points, but that doesn't make the matchup much worse. Something else you have going in your favor is that you cloak completely negates the decoy. If the Phantom is targeting you and you cloak, it will disappear. If you activate it while it's already attacking, after that pause from getting hit, it will lose track of you and disappear as well. Very unfortunate for the Wraith, very funny for Lazarus.
If the Bob switches targets often and doesn't camp you will have a field day, but that doesn't really happen. Your weak points help mitigate his innate Damage Reduction, but it's not equivalent. Bob is probably your worst matchup since his gameplan more or less already involves some amount of camping with his Wall.
While Bobcicle isn't as bad as Behemoth, he still has a bunch of tools to deny your revive. He can do Kraken's thing and camp remotely, but unlike our flying friend he can have 100% uptime if he keeps his AOE spells up on the body. Your weak points help speed up stripping his stacks of, which makes this a pretty good matchup.
You don't have any good tools for destroying the Spider Trap which will often be thrown in your direction or put to guard the body. It is a very annoying part of her kit. Wait until she throws it somewhere else. The optimal Gorgon gameplan involves patiently breaking LoS and attacking from around corners, and staying away from the hunters. This means that a Gorgon might not always contest the body properly, and if they do, Gorgon is the second most fragile monster after Wraith, so lay the lead in.
Lazarus and the Monster - Part 2
If you're struggling with the punish, then one thing you can try to do is do down the Assault first. If the Assault is down, then the team overall has a lot less potential for punishing the camp. The Assault sits on roughly 70% of the teams damage, so if he is on the ground, that lowers the teams damage for 70% while your camping (Not exactly but you get the point). But in practise, well, Assaults take more than twice as long to kill compared to any other Hunter, so only do this if you know the Defense Matrix is on cooldown, and the Assault is the easiest target anyways. Maybe they are bad.
Second, focus Lazarus after getting your first down. This one is something I see more of, but out of what I assume is coincidence. To me, the monsters process in the dome looks something like this:- Attack Lazarus
- Lazarus escaped with Cloak
- Kill someone else
- Lazarus is back
- Kill Lazarus
Now let's look at some things to avoid. Number one is juggling targets. This is because Laz's group healing is still fairly good, but his single target healing is terrible. Lazarus can't do anything for someone who is being focused, but if the monster throws their abilities at different people every time then his Heal Burst will be more than enough to keep them topped off. But most monsters don't juggle at all unless they are fighting a Paladin Parnell, so this isn't very necessary advice. The reason why juggling is bad also applies to DoT. Because just like with juggling, he can heal through most DoT without problem. But the two biggest sources of DoT, Fire and Acid, reveal him, which is the bad part.
A missconception about Laz is that if you deny the revive and eat the body, then boom Laz is useless because he wasn't able to use his glove. This isn't true, and it goes back to what Lazarus' actual strength is. Remember, if either the monster or the hunters thinks that the only way to be useful as Lazarus is to make sure your team has no strikes, then you have failed to understand and adapt your mindset to Lazarus. The threat of the glove forces the monster to take more risks and spend more resources to gain the same result.
Closing Thoughts
So, to sumarise what I feel are the most important things to take away from this:
- Lazarus' true strength isn't in the revive itself.
- Lazarus changes the game, and if your team isn't on the same page you will suffer.
- laz is ♥♥♥♥ don't pick him
And to finish off I'd like to thank you for reading. If you have any questions don't be afraid to comment or reach out to me on Discord, or join the Evolve Reuinited Discord server.
Discord Tag: RadioLurken#2049
Evolve Reunited Discord Server: https://discord.gg/evolvereunited
Extra credits to RadTheLad for helping me with the visuals, Wilhelm for expanding my perspective on some of the monsters, Altra for convincing me to add the LazAgree decal to the guide. Other notable persons include Rowan, Riptide, HellEagle and Percolator.
In addition to this there are many more wonderful people in the Discord server that have helped me through feedback, constructive critisism and heated discussions.
Happy Hunting
- The Evolve Bible - Tier lists, character info, advice for new players, perks, builds, and more★ 5 (921)35k views1.4k ♥67 minBulgarianUpdated Jul 26, 2017
- How to download Legacy Evolve free and easy!★ 5 (239)33k views456 ♥7 minUpdated Sep 20, 2024
- Unlock FPS★ 4 (206)22k views103 ♥1 minBulgarianUpdated Aug 12, 2022
- Как слить деньги и потерять игру★ 4 (462)15k views13 ♥1 minRussianUpdated Nov 17, 2016
- [RUS] Как поиграть в Evolve вчера (скоро обновление).★ 4 (31)13k views62 ♥5 minUpdated Jul 27, 2022
- Evolve Stage 2: Hunters and You, an introductory guide.★ 4 (177)13k views163 ♥18 minUpdated Jul 31, 2016


- Upgrading to PremiumTeam Fortress 2★ 5 (20k)1441k views11k ♥6 minUpdated May 11, 2022
- No More Room in Hell Official ManualNo More Room in Hell★ 5 (2.8k)569k views2.1k ♥29 minUpdated Apr 22, 2019
- NMRiH Community Hosting GuidesNo More Room in Hell★ 5 (526)351k views653 ♥1 minUpdated Aug 10, 2022
- How to 'Git Gud' Soon™MORDHAU★ 5 (2k)318k views3k ♥68 minUpdated Nov 16, 2024
- Лучшие кооперативные игры SteamPAYDAY 2★ 5 (1.5k)315k views2.1k ♥56 minRussianUpdated Apr 27, 2025
- Desert Eagle Heat Treated | Blue GemCounter-Strike 2★ 5 (1.6k)292k views1.5k ♥2 minUpdated Jan 16





This guide was created by its original author on the Steam Community. Are you the author and want it removed? Request removal.