Level Editor Guide
Most-Asked Questions
- Key doors don't work, they just don't appear when I select them!
- To make it work, your key door has to be on a merged wall. Connect two rooms: select a wall center on the first room, hold SHIFT key, then drag & drop your wall center to a wall center of the second room, and they will merge together. Now you can add locked doors. If your room is supposed to "lead outside", attach a room, and remove it's ceiling, floor & walls by swithing them to the open type / using transculent painting material. Yes, it's a bug. - No matter what map name I set, the game keeps saying that Level matching this is already on Workshop!
- That's saying there's an uploaded level that's already the same as yours, not that the name is taken. Try making more small changes to the map, and that error should go away. - I save the changes to upload the map to the workshop. But when I play it through, in the end it still says I have unsaved changes. And when I save, I need to play the map again!
- Ignore the unsaved changes message you get after saving and finishing your level, just go straight for the upload option. - How do I make enemy enter the combat when X amount of enemies been killed?
- connect the enemies with an enemie tracker and set it so that it triggers when N enemies are dead. Connect it with a trap, set it's parameters to:
active time 5, inactive time 5000, inactive progress 0.
place a low-health person behind the map and move the trap so that if it triggers it definitely kills the person. add a logic zone and link it to the person behind the map and the enemies you need to trigger. More about enemie trackers and stuff in Edit Logic section. - How can I make enemies befriend with me after I kill somebody like in the prison scenario?
- You can't do that. Unfortunatelly, it's a scenario script. - How can I make enemies insta pick up some weapon, like biker boss or katana boss in their scenarios?
- You can't do that. Unfortunatelly, it's a scenario script. - How can I add water like in the pirate cove scenario?
- You can't do that. - How do I set player spawnpoint?
- You move and rotate that blue person that appears in a default room. The three green persons are spawnpoints for multiplayer. You can move all of these four if you are in Edit Characters section. - How do I make portals?
- find them in props -> other, a portal prop looks like a cube with a >> symbol, its in the end of the list. Add two portals and connect them in edit logic submenu just like any regular logic prop. - Is it possible to make a character look angry?
- If you pick Boxer and Blackbeard enemy types, the character will get an angry face, yet also big hands (boxer) or beard and a captain hat (blackbeard). Also you can search the workshop for Always-Angry character textures, like this one: - Is there a way to build a level together with other players/friends?
- Here's the only way for now:- you create a level and save it (optionally after doing some work on it, surely).
- you find the level in your created levels folder and send your level file to your friend.
- your friend puts the level in his created levels folder , and now he can find the map in his own editor.
- In turn, your friend sends file back and you replace your previous version with the new file.
- Repeat.
The levels can be found by this path:
C:\Users\%Username%\AppData\Locallow\South East Games\Paint the town red\Created levels
Introduction
The Level Editor for Paint the Town Red is designed to allow you to create levels in the original game scenatio style, with lots of variety. It may look complicated for you, but that's why you're here, right?
The Level Editor is accessible from the main menu in the game and will continue to be updated with more functionality, weapons, props, characters, etc.
The editor presents 3 differend workspaces:
The Level Editor itself,
The Custom texture pack Creator,
The Custom music pack creator.
However, you don't have to use all three of these to create your maps, as the level editor is still the main tool.
This guide will continue to be updated with more information and video tutorials.
Right now the guide is being reconstructed. This gonna last for a while.
🛠 Controls
Click Left Mouse Button - Select object
Click & Drag Left Mouse Button - Select multiple objects
Ctrl + Click Left Mouse Button - Add object to selection or Remove object from selection
Click & Drag Left Mouse Button on movement gizmo - Move selected object(s)
Space + Click & Drag Left Mouse Button on movement gizmo - Move and snap selected object(s)
Click & Drag Left Mouse Button on rotation gizmo - Rotated selected object(s)
V - Toggle between isometic orthographic camera and free perspective camera
W - Move mode
E - Rotate mode
R - Scale (primitive(s)) mode
Esc - Deselect selected object(s)
Del or Backspace - Deleted selected object(s)
Ctrl + D - Duplicate selected objects
1 - Select Room editing mode
2 - Select Prop editing mode
3 - Select Characters editing mode
4 - Select Logic editing mode
5 - Select Platform editing mode
6 - Select Stairs editing mode
Tab - Cycle through editing sub modes
G - Toggle snap grid visibility
+ - Increase snap grid size
- - Decrease snap grid size
F5 - Quick Save overwrite of current save file
Ctrl + Z - Undo
Ctrl + Y - Redo
Hold Right Mouse Button - Rotate camera
Hold Middle Mouse Button - Pan camera
Hold Right Mouse Button & W or A or S or D - Pan camera
Scroll Mouse Wheel - Zoom camera
Hold Right Mouse Button - Rotate camera
Hold Right Mouse Button & W or A or S or D - Move camera
Shift + Hold Right Mouse Button & W or A or S or D - Move camera faster
Scroll Mouse Wheel - Zoom camera
F - Focus on selected object(s)
Alt + Hold Right Mouse Button - Rotate camera around focused object(s)
O - Toggle local/world space move & rotate axes
F8 - Capture screenshot as preview image for level
C - Create selected prop/weapon
Del - Deleted selected prop(s)/weapon(s)
C - Create character
Del - Deleted characer(s)
ADD ZONE
Click & Drag Left Mouse Button - Create zone
EDIT LOGIC - No Zone Selected
Click Left Mouse Button - Select zone
EDIT LOGIC - Zone Selected
Click + Drag Left Mouse Button on corner - Move corner
C + Click Left Mouse Button on wall center - Split wall and add corner
Shift + Drag Left Mouse Button on wall center - Move/Connect wall
Ctrl + Drag Left Mouse Button on corner - Move zone
X + Click Left Mouse Button on corner - Delete corner
T (and then Click Left Mouse Button on character) - Connect/Disconnect zone to character
Del - Delete zone
🛠 Workspace
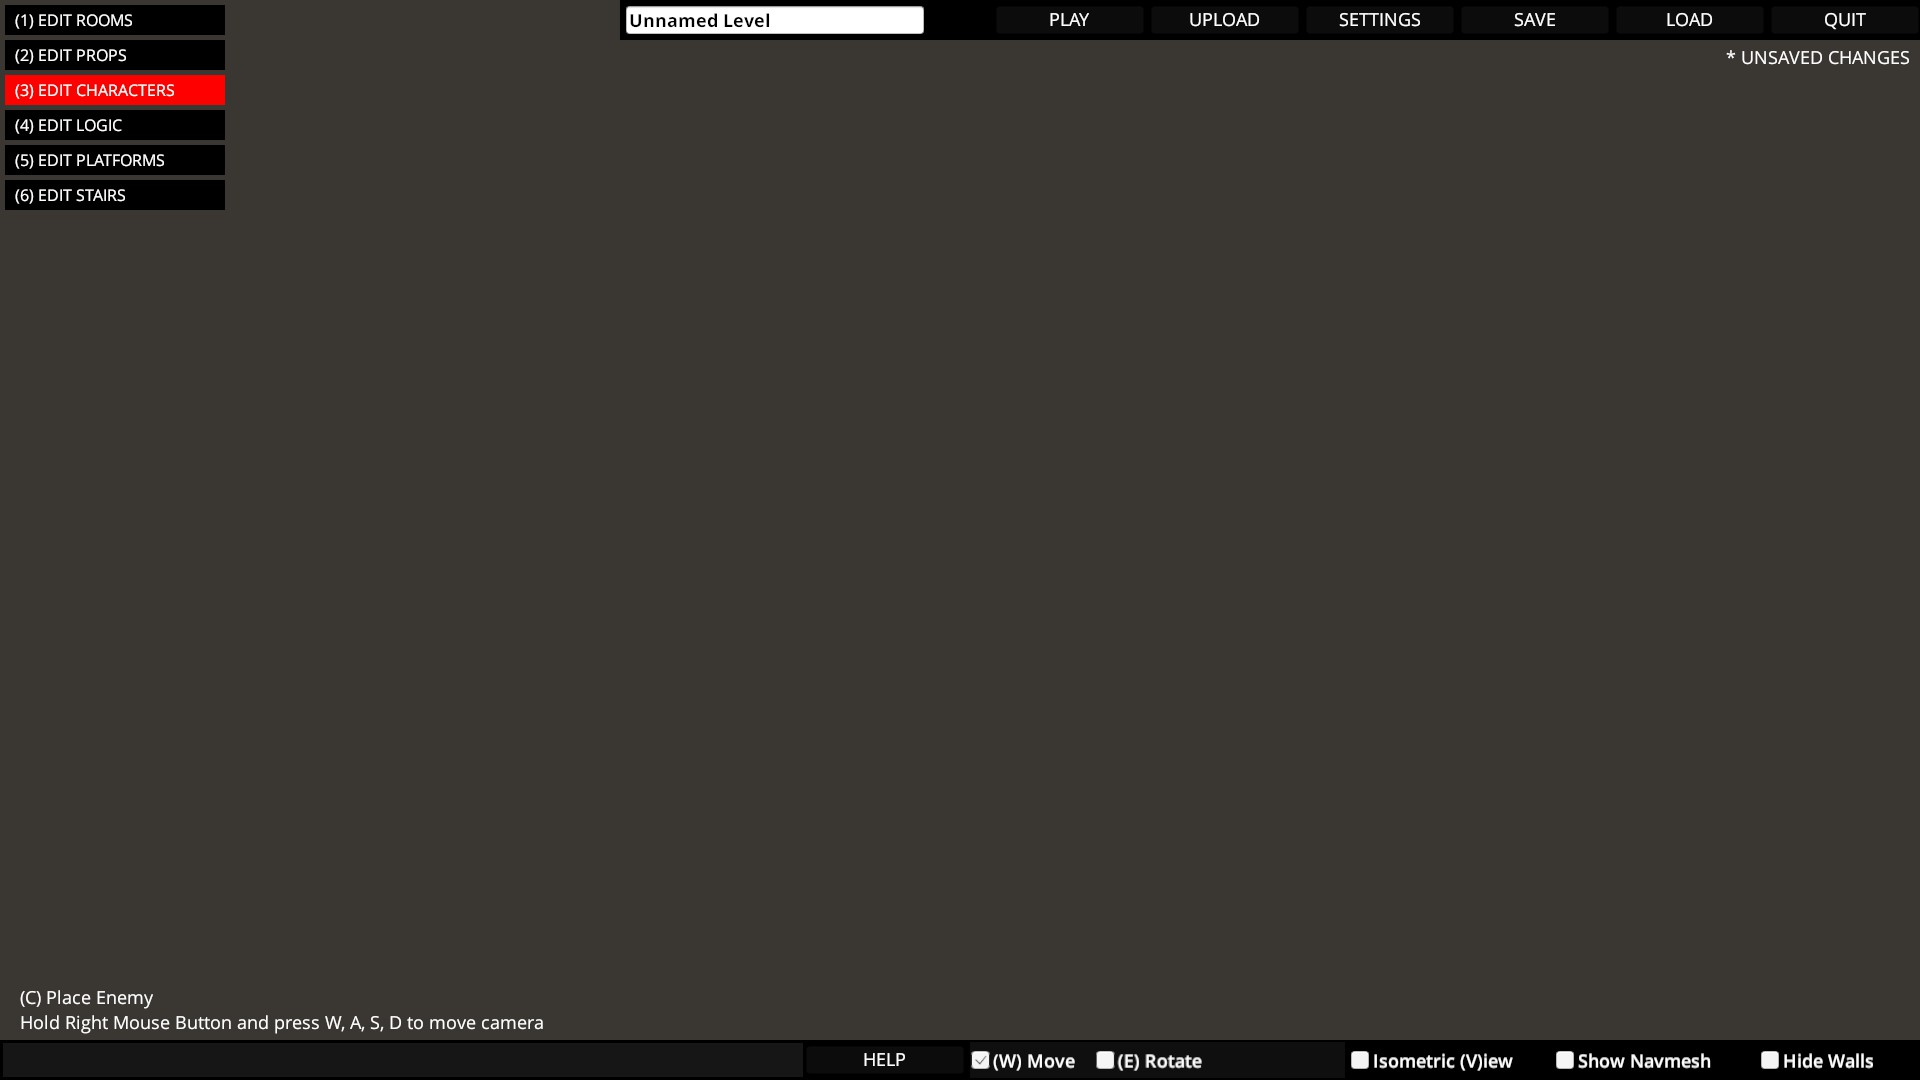
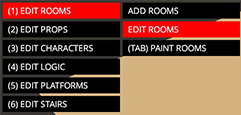
Gives you access to all the ingame environment and mechanics. Enemies, weapons, traps, buttons, and more. This is where you'll spend most of your time.

All the options to do with the level file: name, play, load, save, upload to the workshop or quit. We'll cover some of these options, such as workshop uploading, in further sections.
Also, here you can find general setting for your level, such as fog color, gamerules, texturepacks, music packs, and so on.

On the left side of the hint bar, you'll see aviable hotkeys (for example, if you edit some characters, there will be commands for placing or deleting them), and error notifications.
On the right side, you'll see check box options:- hide walls makes walls invisible;
- nawmesh transparency shows the surface NPCs able to walk on;
- Isometric view switches camera mode from freeflight to isometric;
- Animate allows to preview character animation.
Hower, we recommend using hotkeys instead E, W, R or V.
Also, here you can find the HELP button, which gonna bring you to this guide page, hey :)
🛠 Saving & Loading
Levels are saved with a name that does not need to be related to the level name. From the Save menu you can choose to overwrite the current save file or create a new save file with a different name.
Pressing F5 will quick save to the current save file, which is the same operation as the overwrite option from the Save menu.
Any existing save file can be loaded from the Load menu.
🛠 Settings
The Settings is a menu that can be acessed from the options bar.
In this menu, you can set game rules, custom textures, sky color, and more.
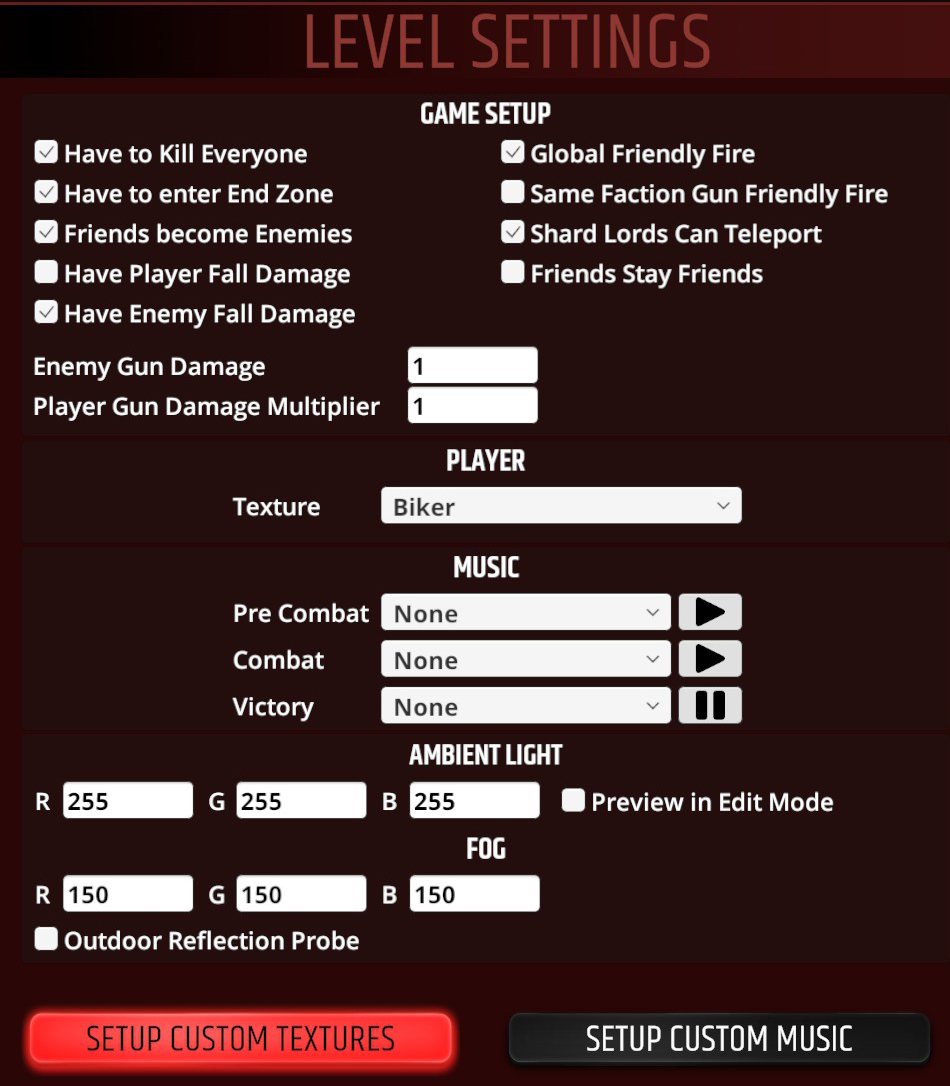
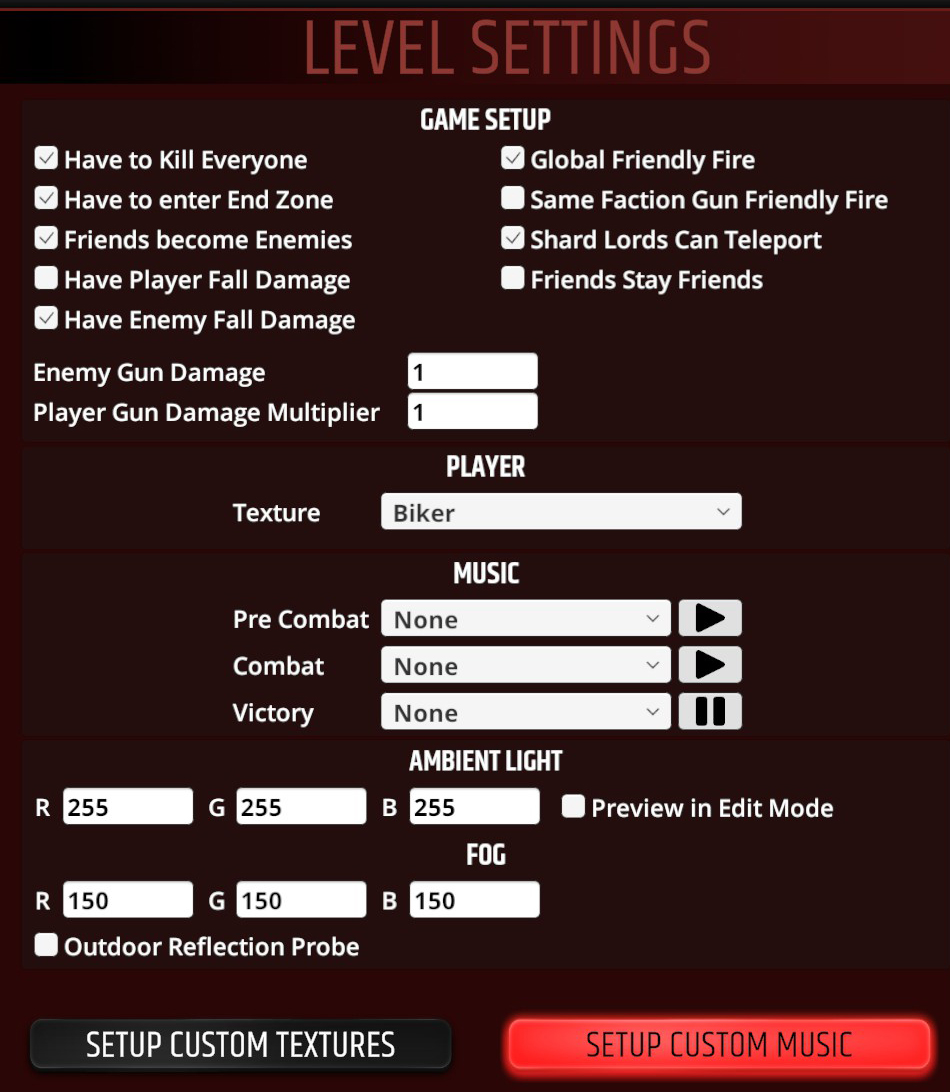
In the options bar, find the SETTINGS button, to get access to the window below:
From this window, you can set global options, as terms of winning, brightness, player texture, etc.
We'll also come back to this window in the next sections of the guide.
- Prop duplication offset - When you copy and paste props or characters, the copy can have a customisable offset from the coordinates of the original object's.
- Undo save frequency - Sets up the time period between undo states. For example, if frequency is set to 10 seconds, pressing the undo command will wipe your progress for the last 10 seconds of time if something changed since then. You can sacrifice the undo/redo accuracy for faster speed.
- ☑ Characters: Can Use Guns - A default value for the very same option from characters editing section. If turned on, all the characters can use guns. Otherwise you'll need to set this option personally for each character.
- ☑ Characters: Prefer Guns - A default value for the very same option from characters editing section. If turned on, all the characters prefer to pick up guns. Otherwise you'll need to set this option personally for each character.
- ☑ Have to Kill Everyone - A term of winning: Players can finish the level only if they kill every single enemy. If the term is disabled, player only has to reach the level end zone, which will also be active from the start.
- ☑ Have to enter end zone: - A term of winning: Players can finish the level only after entering one of end zones. If uchecked, the level will be finished automatically once the last enemy is killed.
If both of these boxes are unchecked, the level will be finished once it has started, so you'll have to choose one or both of these terms anyway.
- ☑ Friends become Enemies - when enabled, friends become agressive to the player once all the enemies are dead.
- ☑ Have Player Fall Damage - Speaks for itself.
- ☑ Have Enemy Fall Damage - Speaks for itself.
- ☑ Global Friendly Fire - When disabled, players can't deal a direct damage to friendly characters.
- ☑ Same faction Gun Friendly Fire - When disabled, Characters from the same faction can't damage each other using guns
- ☑ Shard Lords Can Teleport - Turns on the Decevier's ability to teleport
- ☑ Friends Stay Friends - When enabled, friendly characters always stay friendly to a player, even if he is attacking or kiling them.
- Enemy Gun Damage Multiplier - allows to increase or decrease the gunshot damage from the enemies.
- Player Gun Damage Multiplier - allows to increase or decrease the gunshot damage from the players.
PLAYER TEXTURE:
- Texture - Allows to select a player texture from one of the challenge or scenario levels: Biker, Disco, Prison, Pirate Cove, Arena or Saloon.
MUSIC OPTIONS:
- Pre Combat - Allows to select a music playing before fighting
- Combat - Allows to select a music playing when the fight begins
- Victory - Allows to select a music when the end zone is aviable
AMBIENT LIGHT AND FOG OPTIONS:
These two parameters are used to set global brightness level and the world color. Both parameters use the RGB color scheme. If you have troubles with this color picker, you may like to use a helpful Internet page, like this one[www.w3schools.com]. Or this one[color.adobe.com].
The difference between Ambient light and Fog:
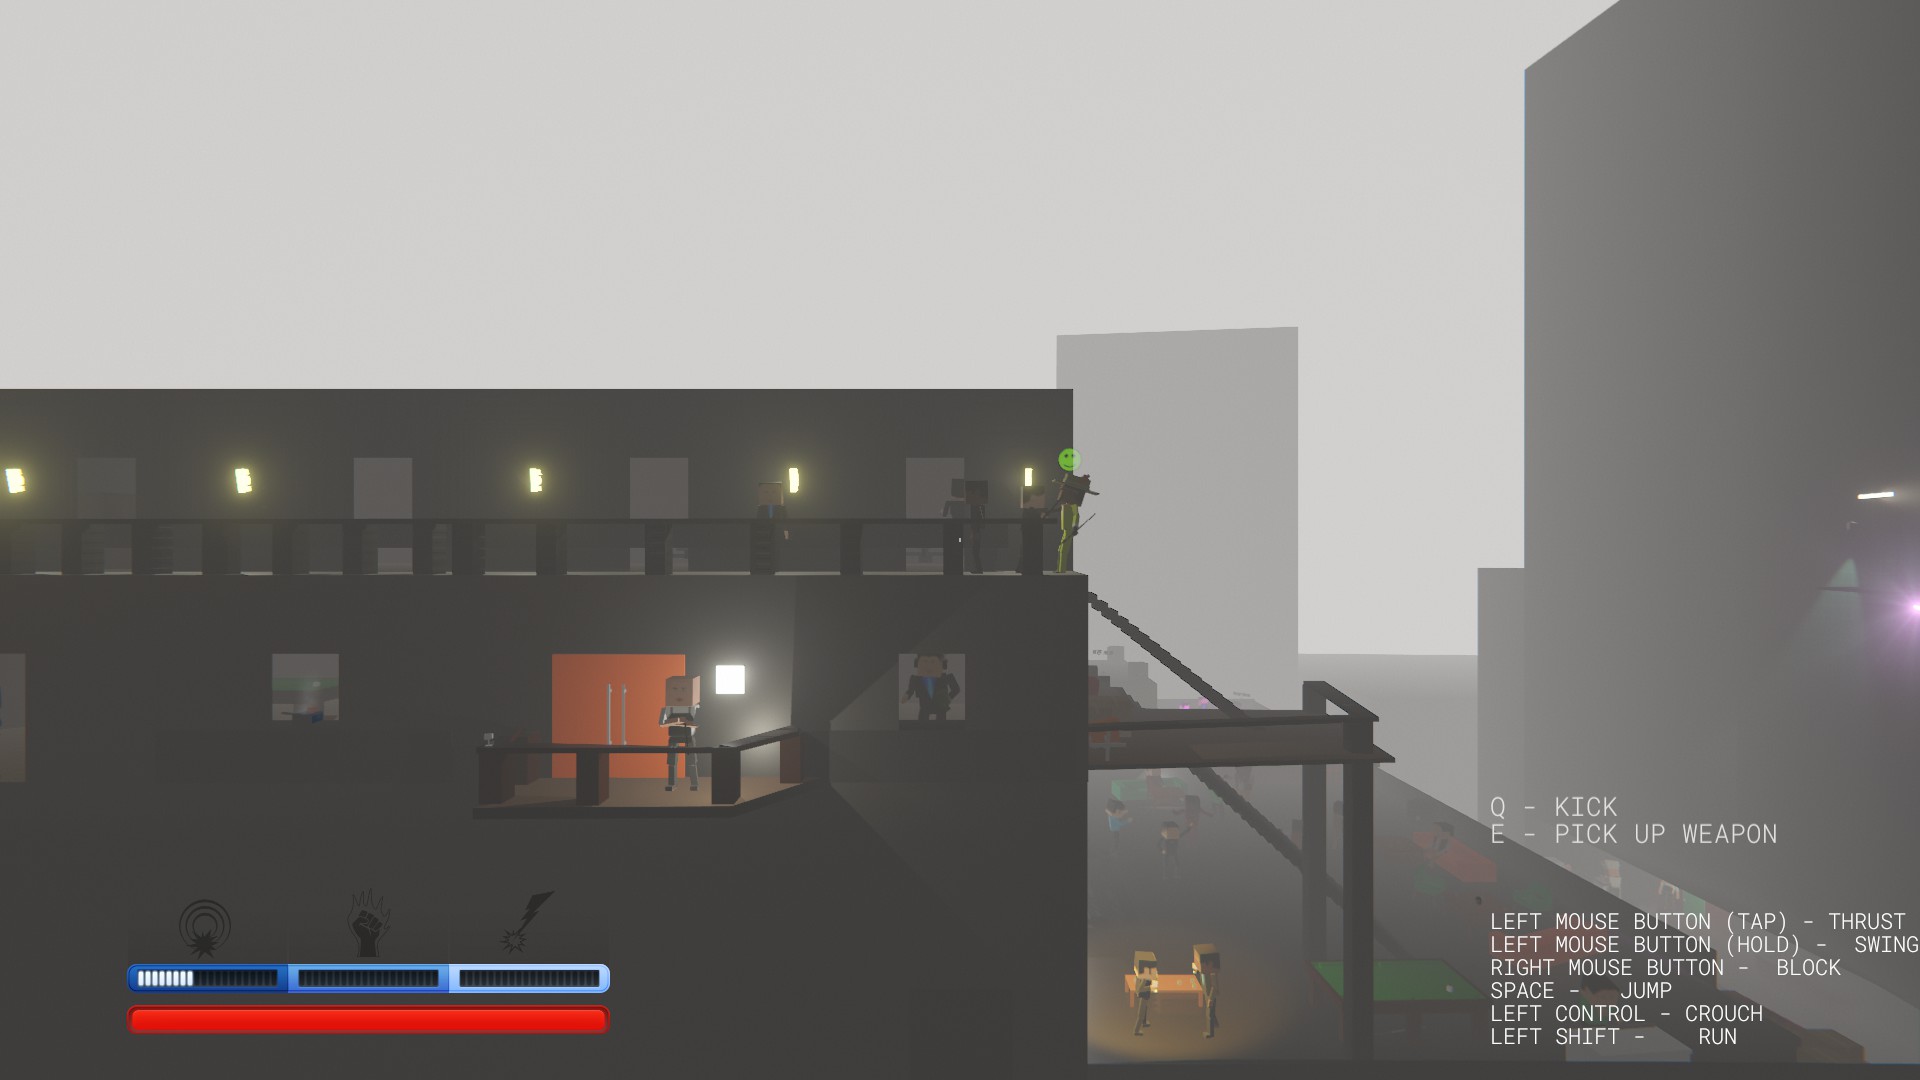
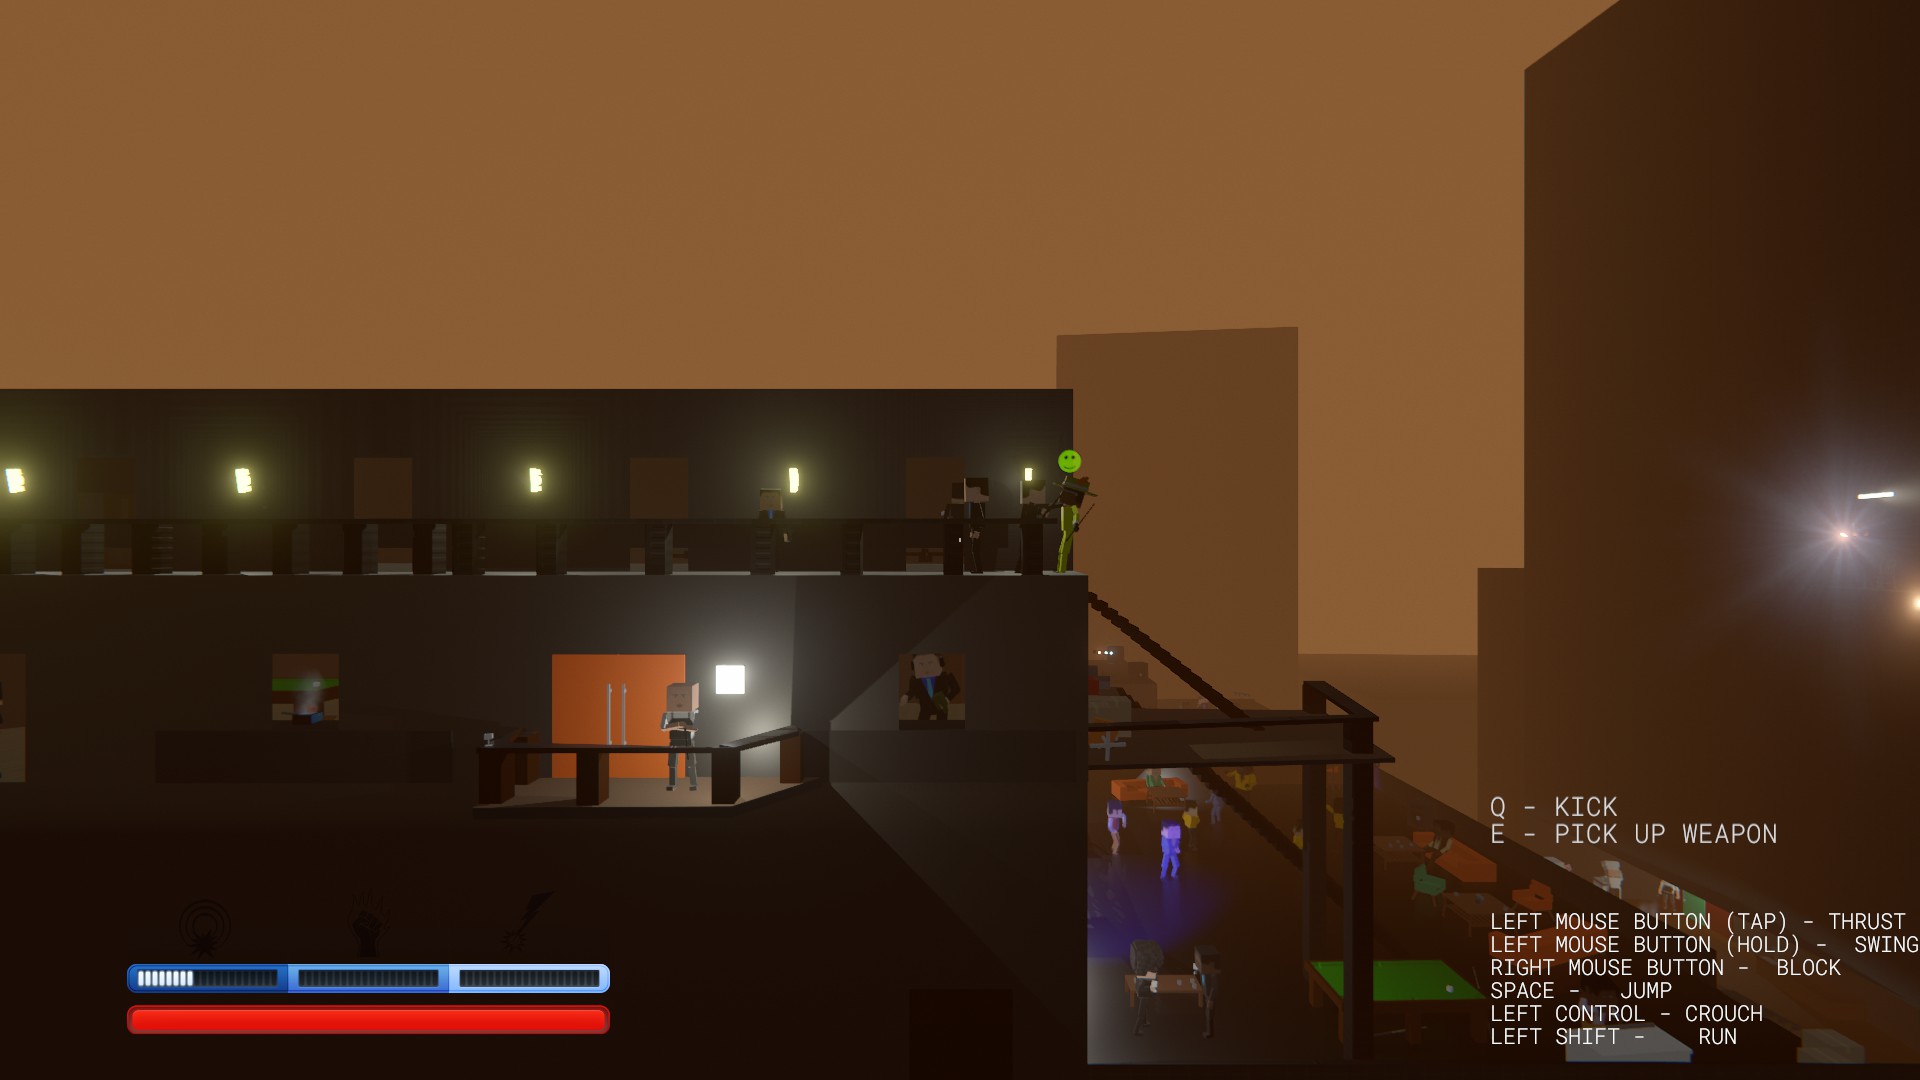
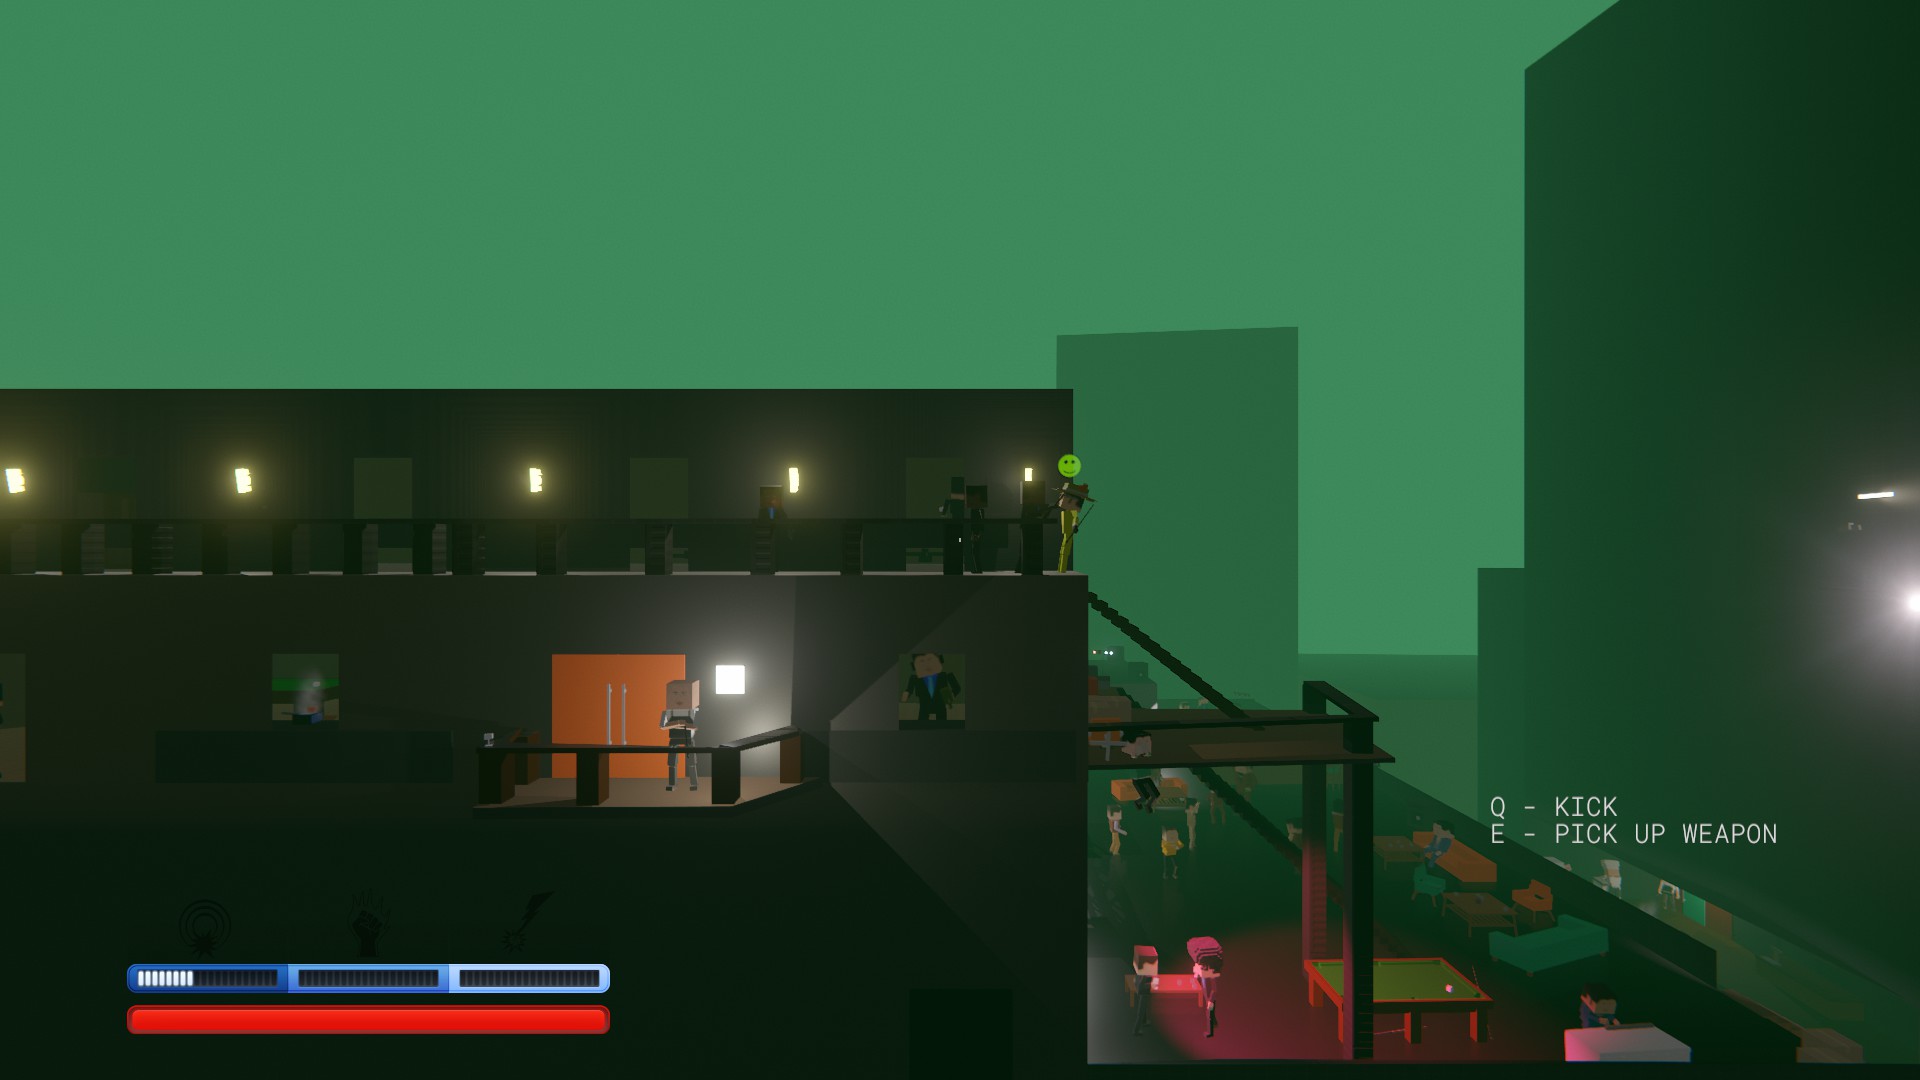
The fog does not affect the level brightness. If you set Ambient Light to 0-0-0, you won't be able to see a thing without additional light sources, while setting Fog to 0-0-0 will simply set the color of your skies to black, without affecting the brightness.
The lower fog numbers are, the more transparent it is. If you have a big closed room which is large enough to see the fog around you, you can set the fog color to lower numbers, and this will make it less visible from distance.
Fog set to 0-0-0, 255-255-255, 126-75-40 and 40-126-75: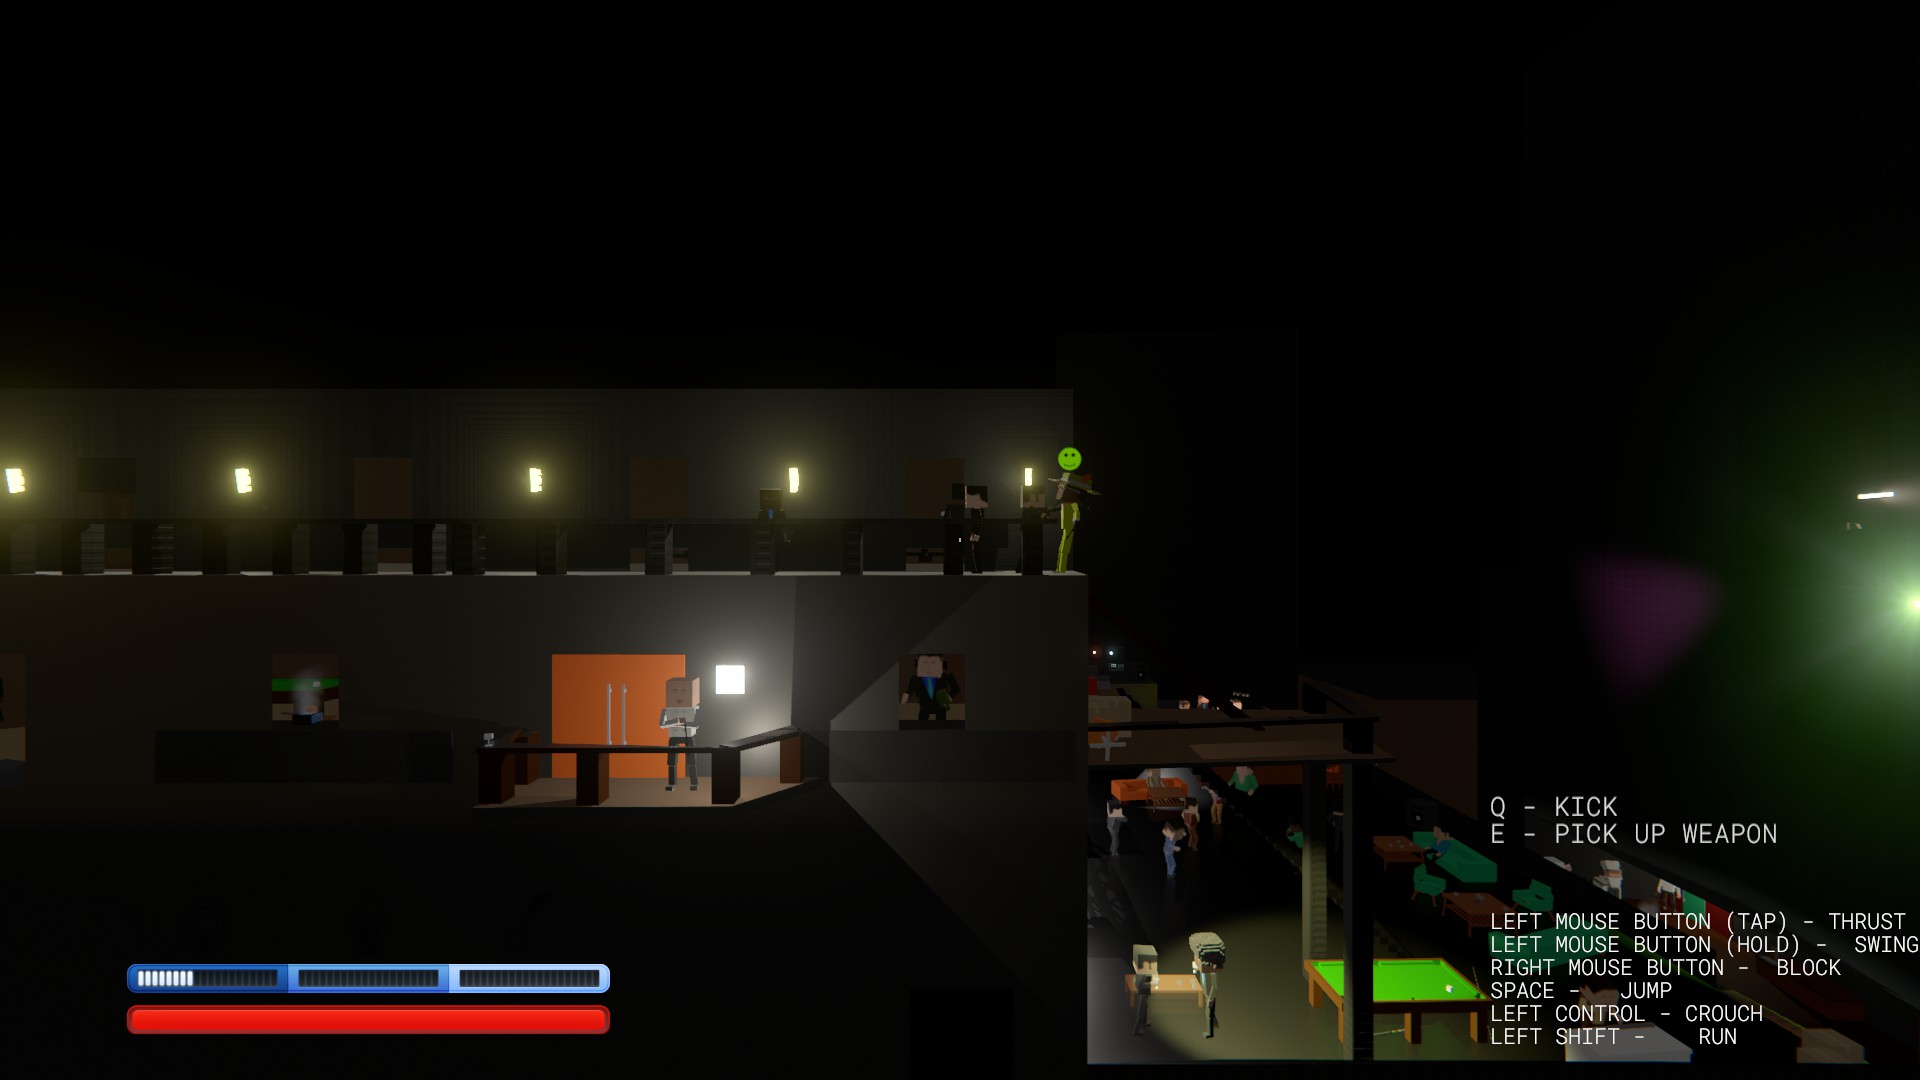
Ambient Light set to 0-0-0, 75-75-75, 150-50-50 and 255-255-255:
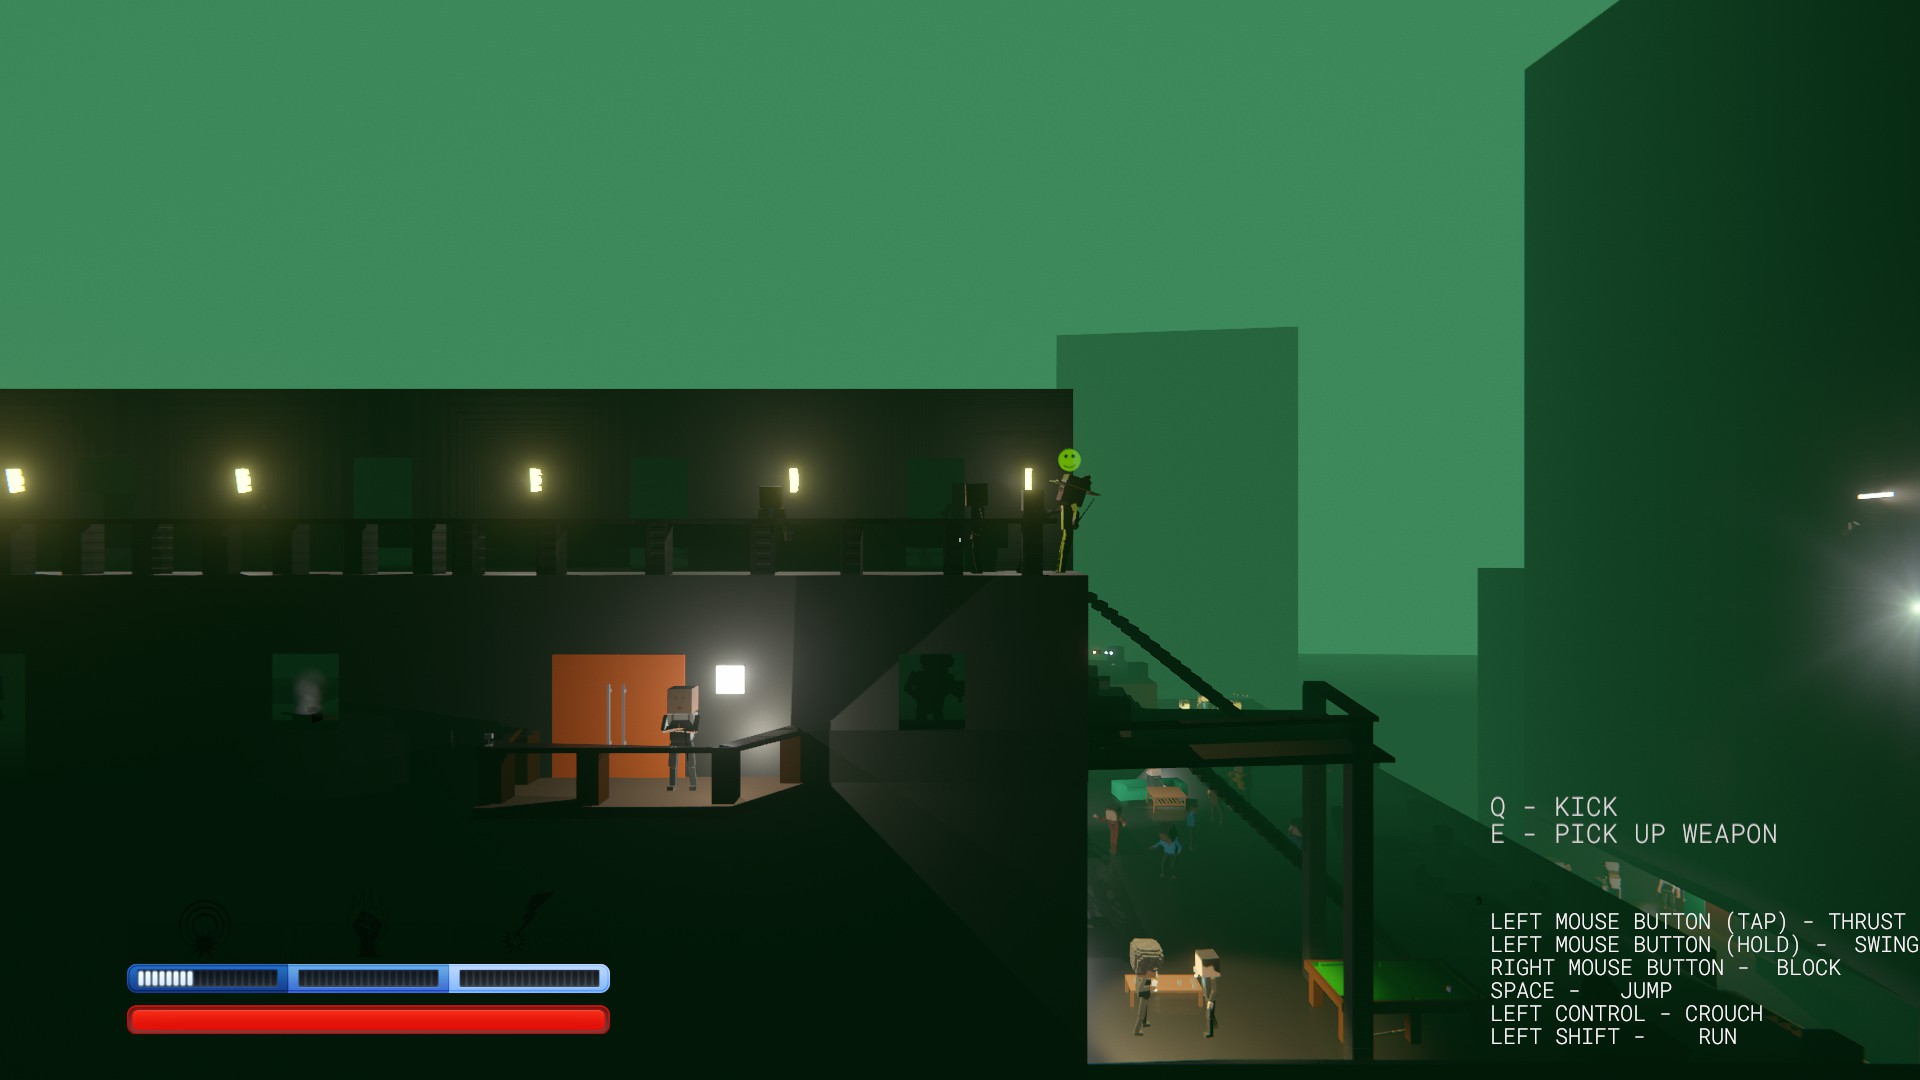
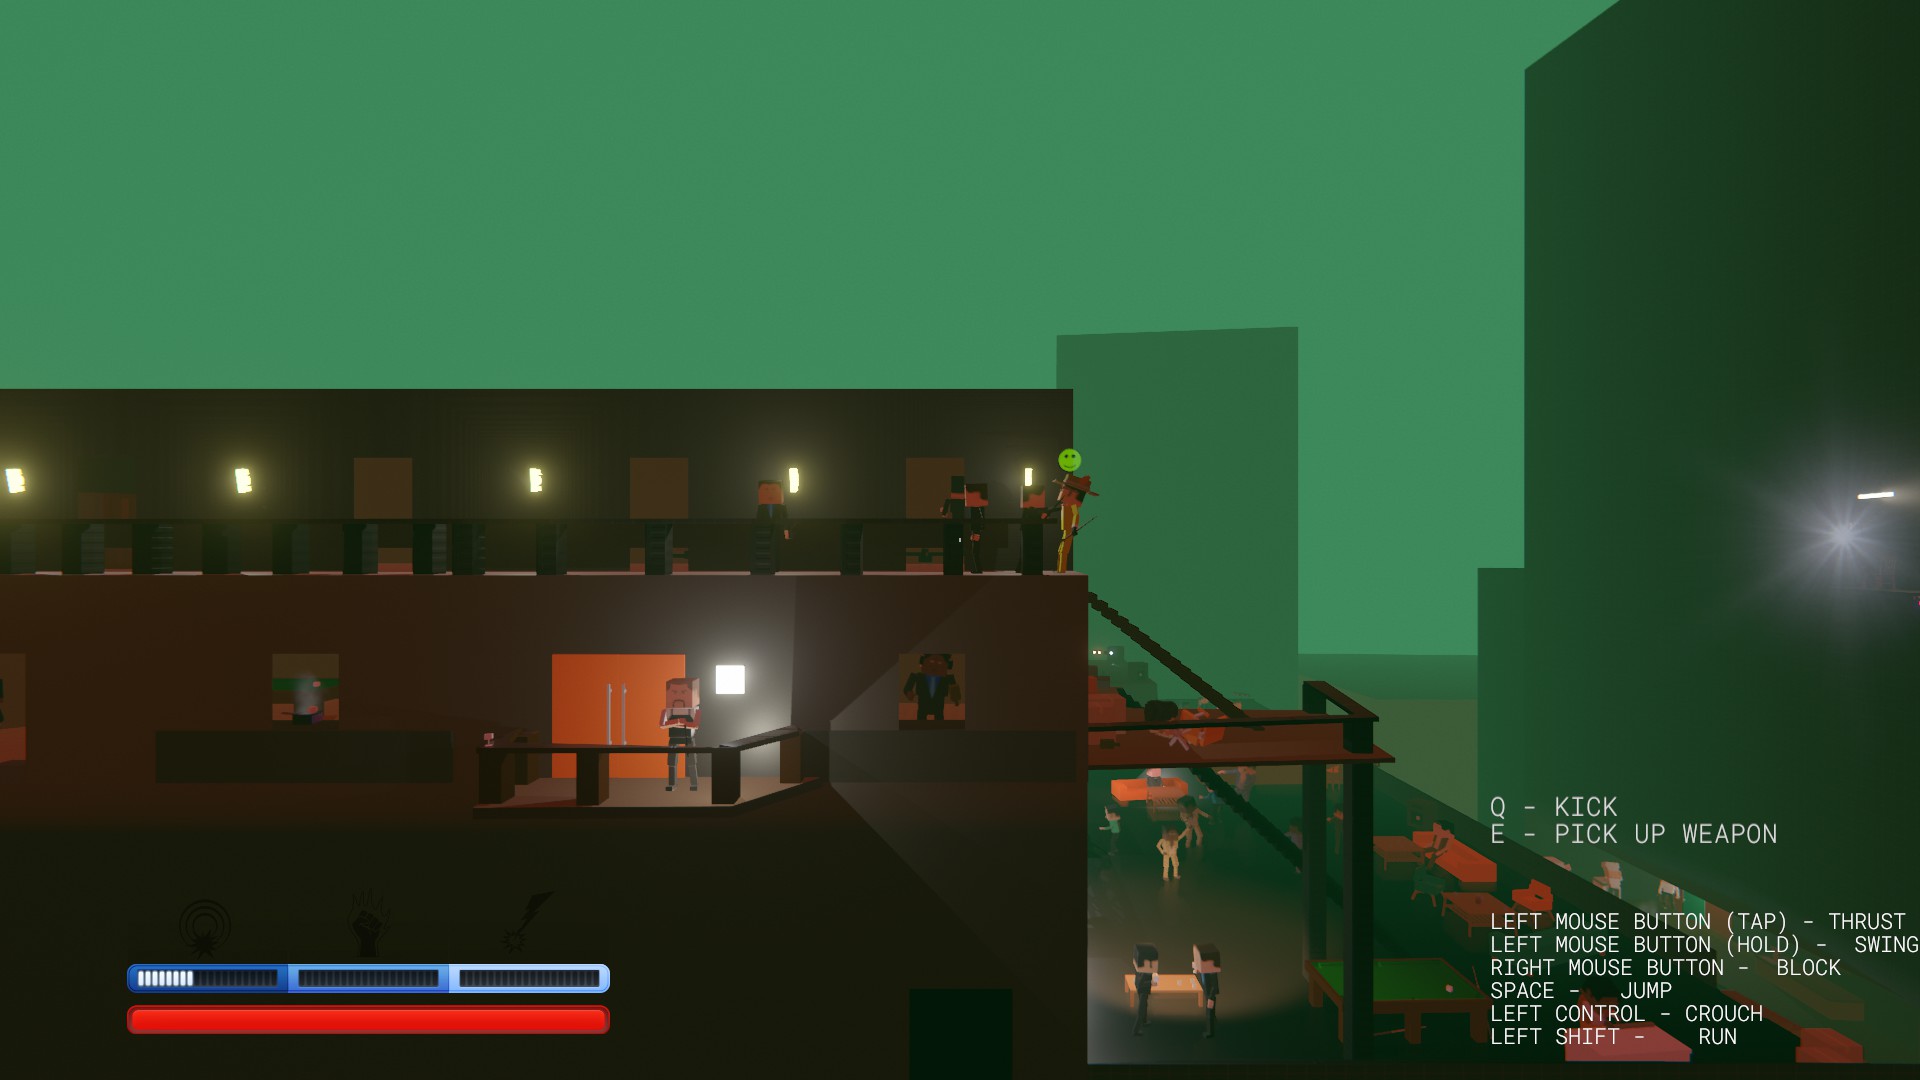
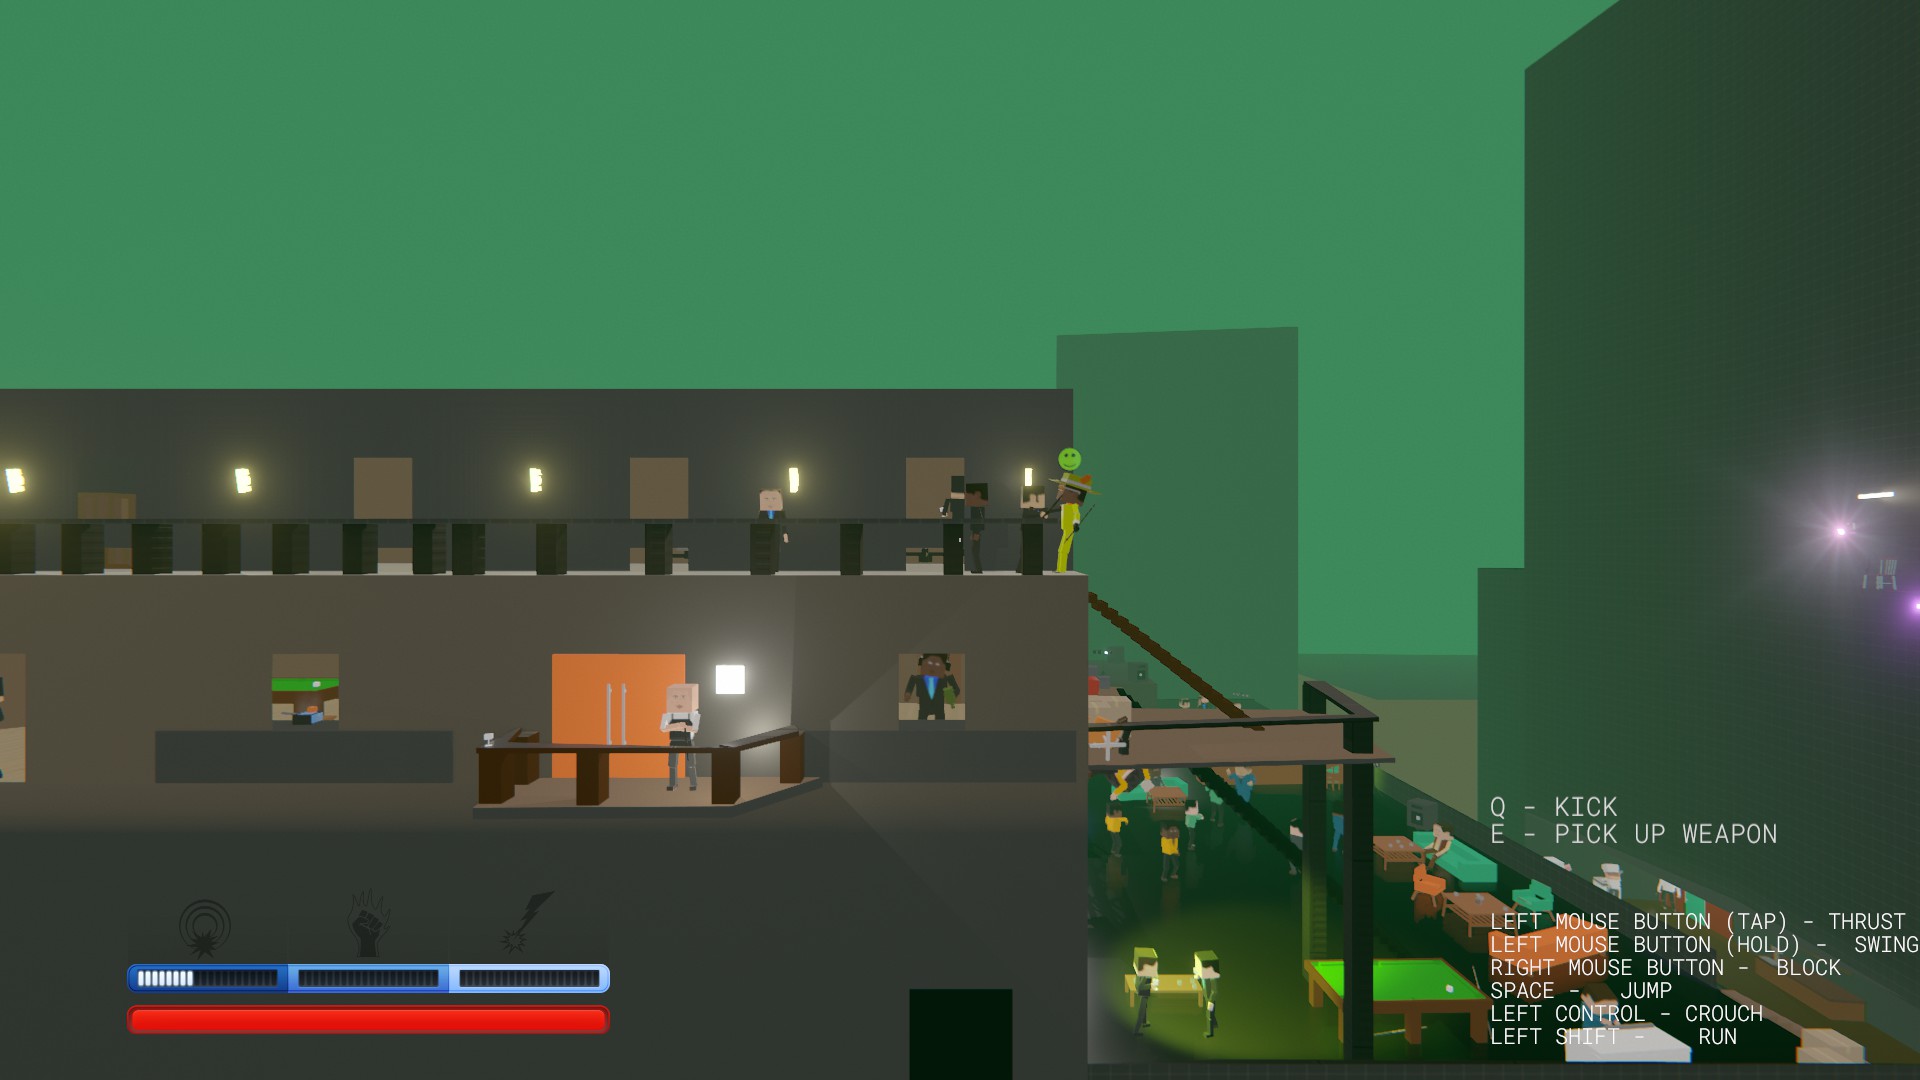
- ☑ Preview in Edit Mode - Allows to check Ambient light state without launcing the level
- ☑ Outdoor Reflection Probe - When Enabled, removes material reflections from all objects (weapons, props, helmets, colors) if they are not inside a room. You can enable this option if you want to increase your performance and your level is locked inside the rooms
- Each option allows to select and apply texturepacks and music packs from Steam Workshop. Both of these are covered in Texture Pack Creator & Music Pack Creator Chapters.
🛠 Edit Rooms Section
ADD ROOMS
Click & Drag Left Mouse Button - Create room
EDIT ROOMS - No Room Selected
Click Left Mouse Button - Select room
EDIT ROOMS - Room Selected
Click + Drag Left Mouse Button on corner - Move corner
Click Left Mouse Button on wall center - Select wall for door type editing
C + Click Left Mouse Button on wall center - Split wall and add corner
Shift + Drag Left Mouse Button on wall center - Move/Connect wall
Ctrl + Drag Left Mouse Button on corner - Move room
X + Click Left Mouse Button on corner - Delete corner
Del - Delete room
PAINT ROOMS
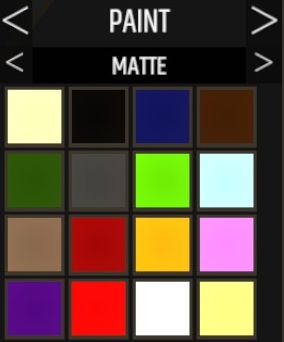
With a room selected pick whether to paint the floor, walls or ceiling in the Properties window and click a paint material to change the room materials.
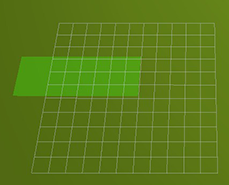
Once you've selected yourself a room, you'll see there are some possible commands on the help bar:

While working with Rooms or Platforms, adding new corners will help you to add more intersting forms.
To add a new corner, hold C key and click on the center of any wall, and this will add a new corner to the room, separating the wall to 2 equal parts.
To remove a corner, hold X key and click on it, and walls on both sides of it will merge.
Don't forget to use the Grid tool to put your corners on the straight line.
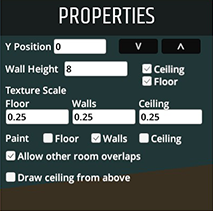 Y position: a position on the horizon level.
 Can be set from -50 to 50.
Wall Height: a vertical scale of your room.
Can be set from 2 to 100. Knowing the wall height and the Y position, you can create mulifloor levels.
Ceiling and Floor: unchecking these boxes will remove Upper or Lower Part of your room, leaving the walls only.
Texture scale: If you use Textured or Bumped paint for your room colors, you may create a different variations of existing wall textures by scaling them:
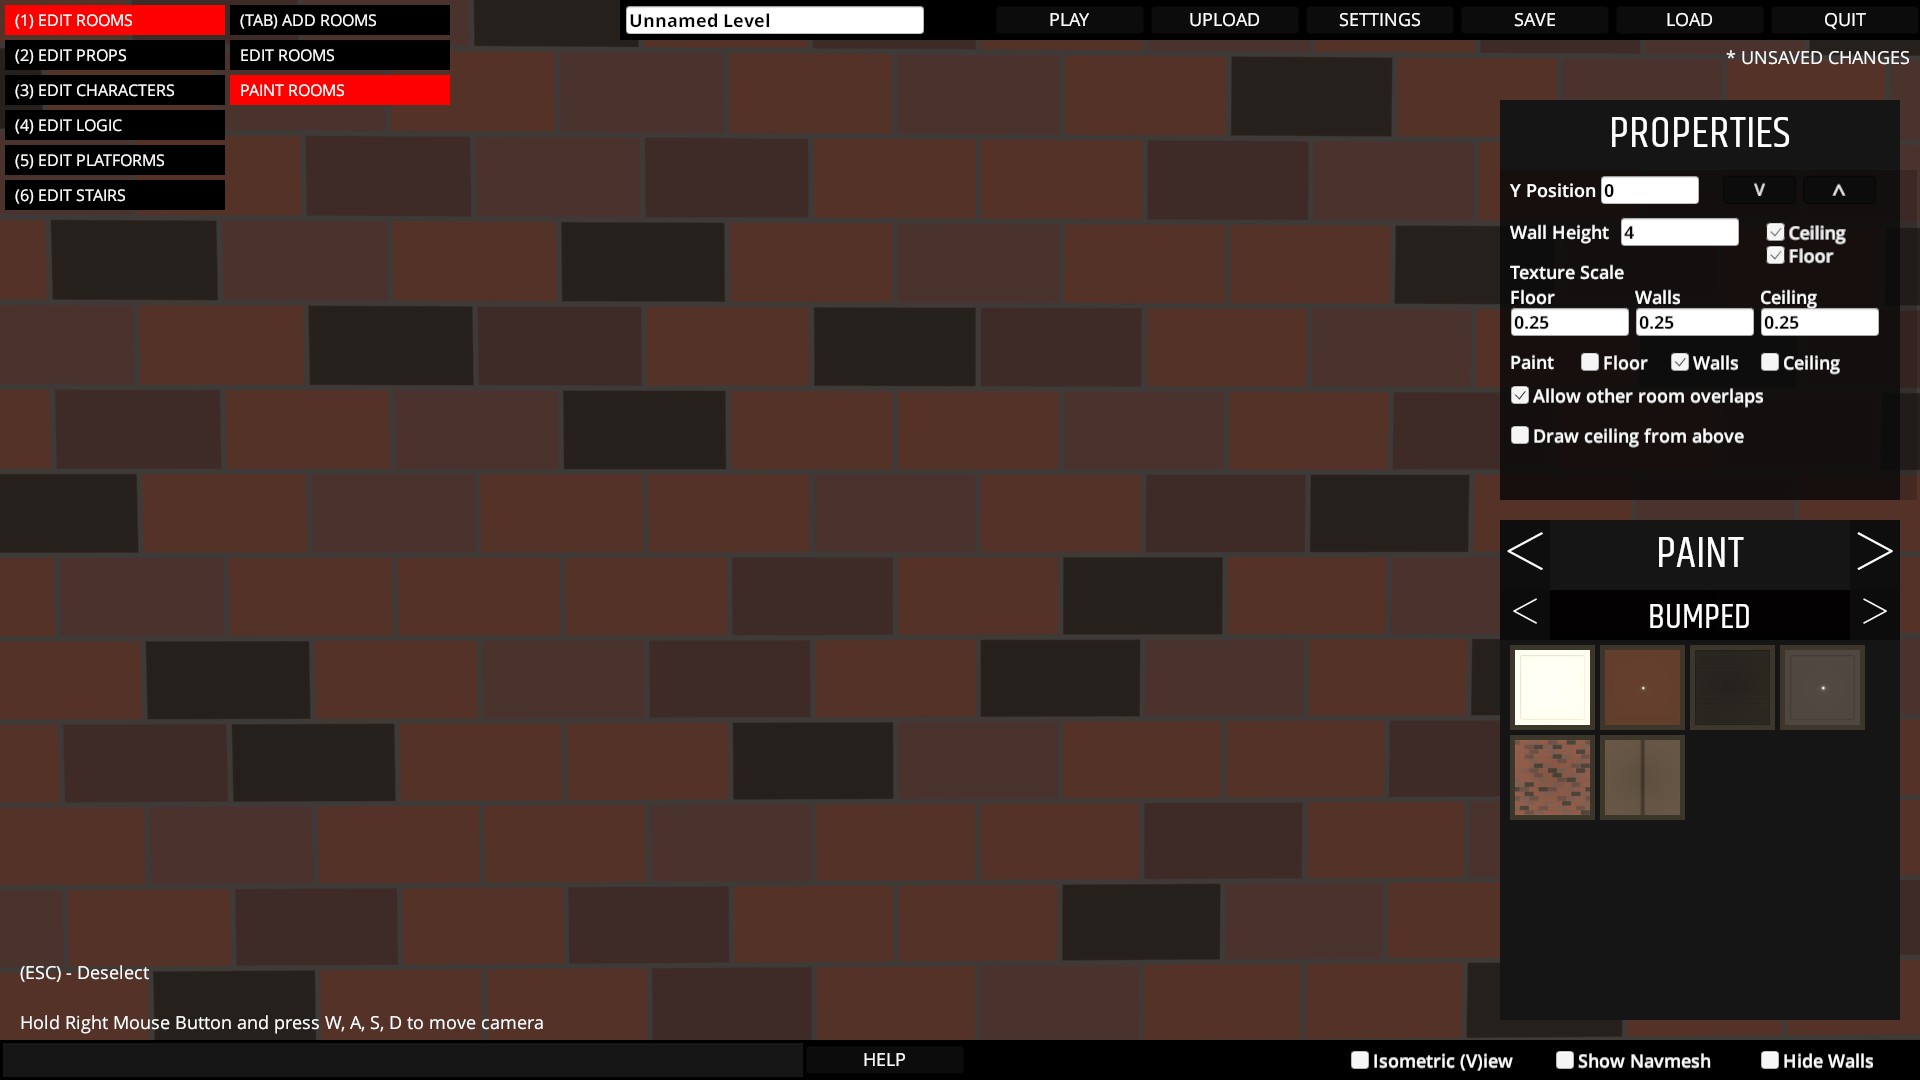
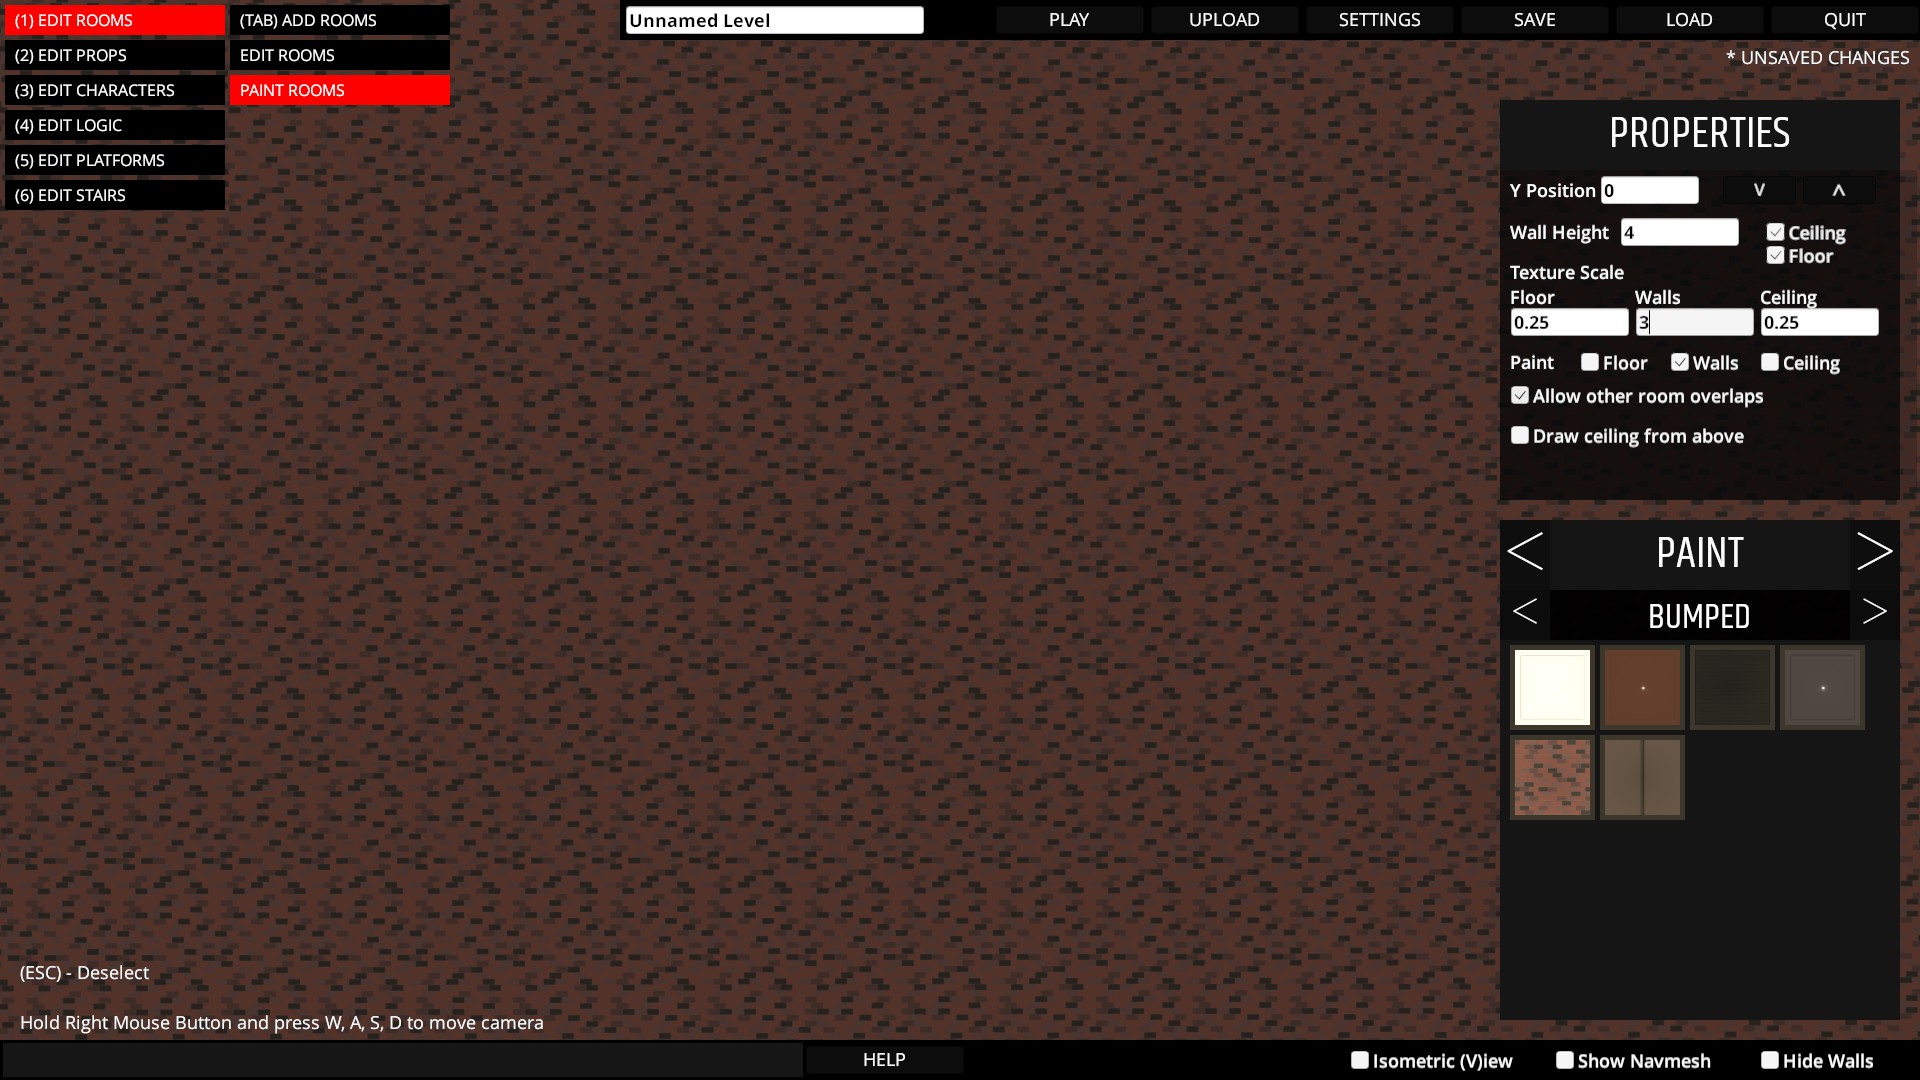
Allow other rooms overlapse: As unchecked, this box may help you avoid collision artefacts on your levels, but usually they are not critical, so you don't have to uncheck this, normally.
Draw ceiling from above: If checked, the ceiling texture will cover the room from the top. Unlike Ceiling & Floor boxes unchecking, It doesn't affect the final level outlook or gameplay, it only helps editors. For example, if they want to add something on the roof, without being distracted by the inside part of buildings.
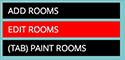 To start painting, you have to change Add / Edit Rooms submenu to Paint Rooms.
A new color selection menu will appear, still Room Properties panel gonna stay active. Now, to paint floor, walls or ceiling with the color you want, first you need to check the box next to the room part you like.
You can find more information about painting Rooms, Primitives and Platforms in a special section about color picker and materials
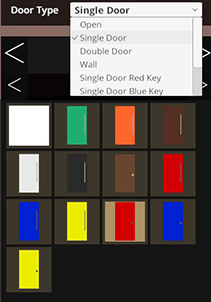
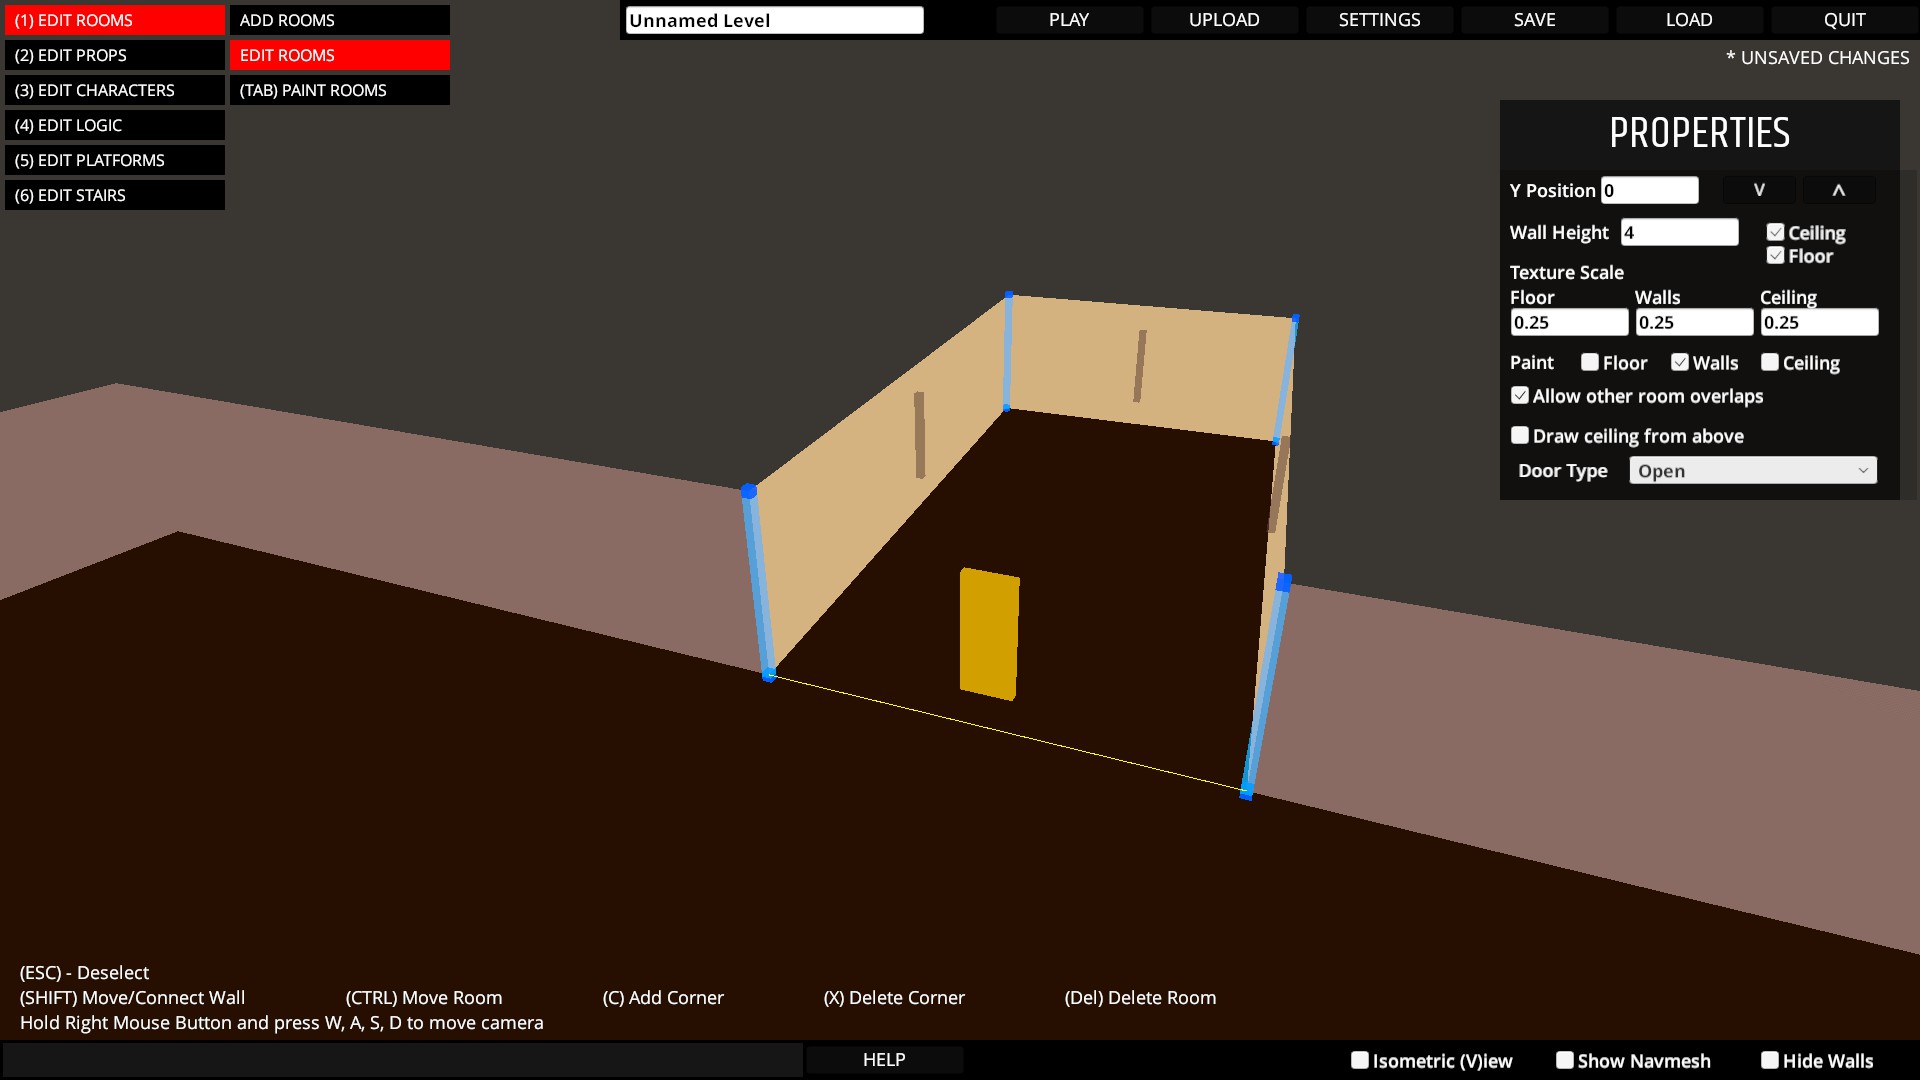
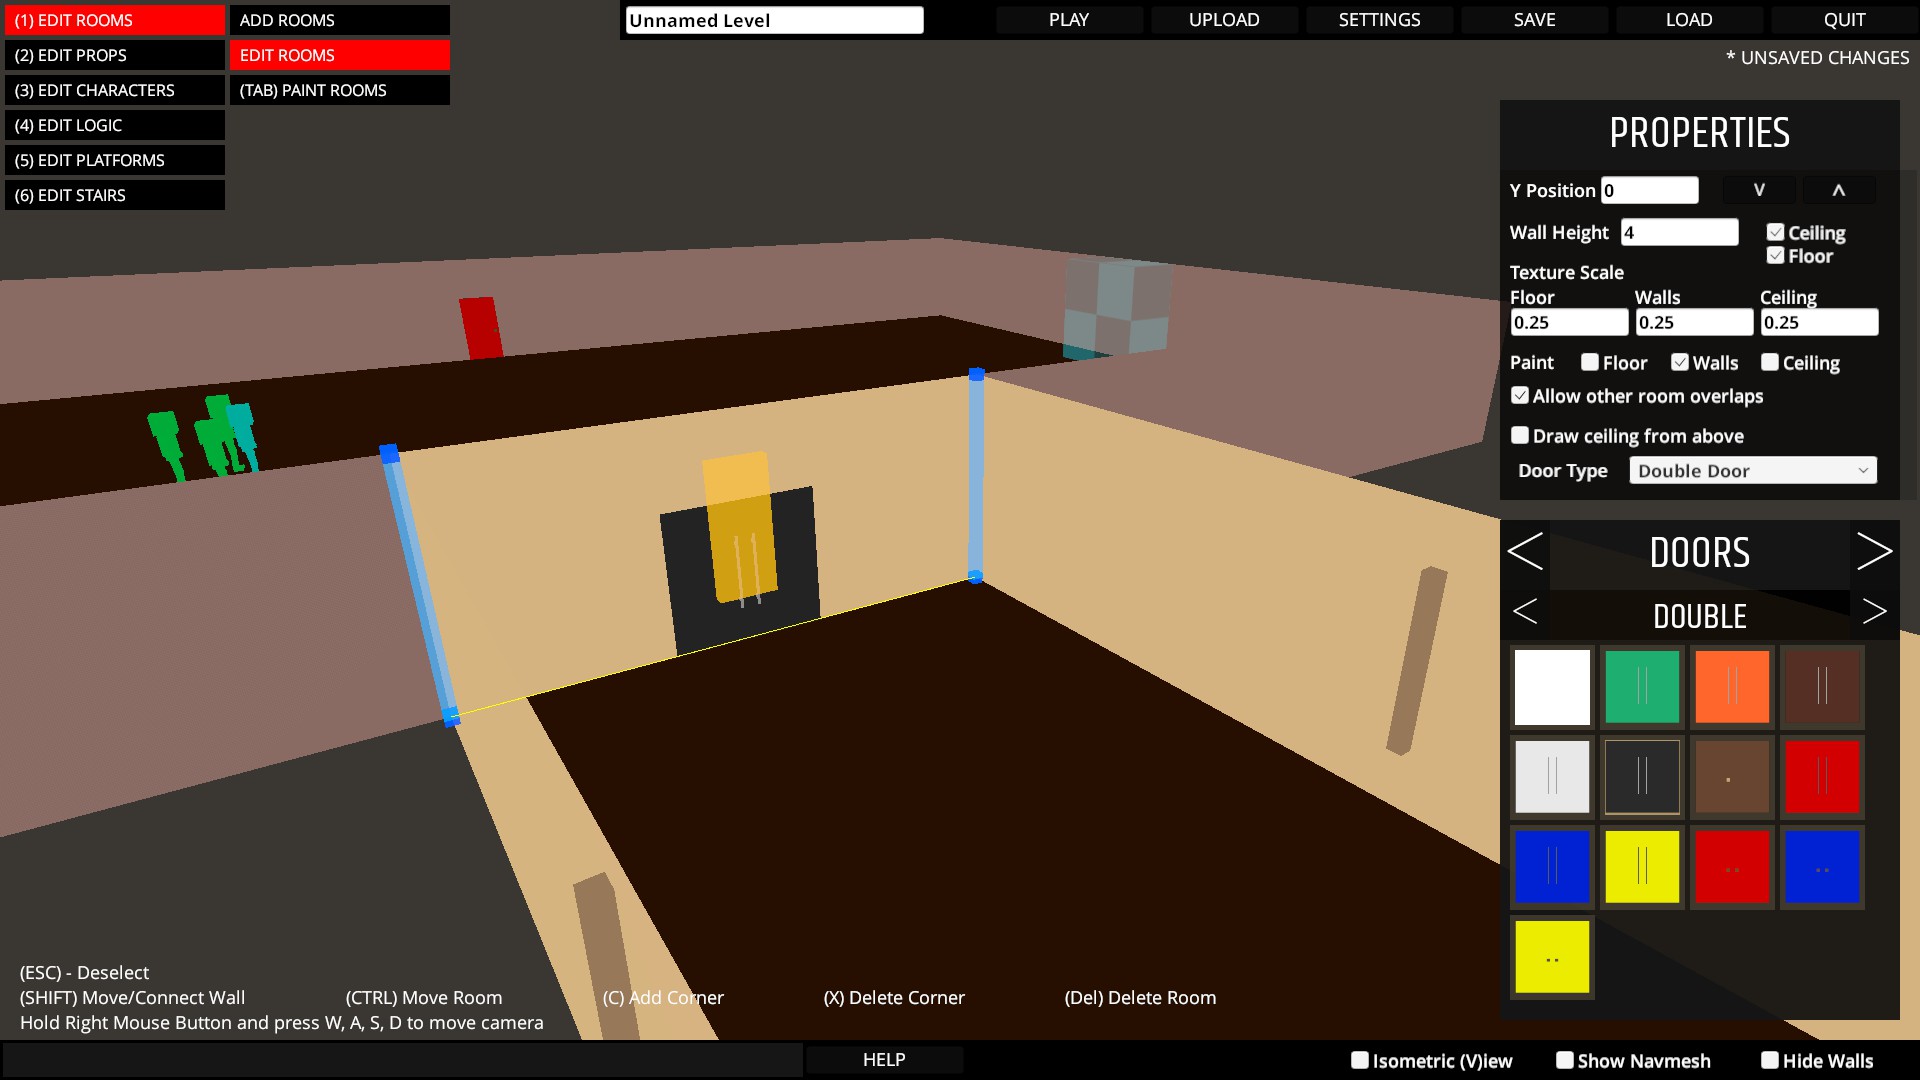
To add a door to your room, you need to Left Click on the center of the wall, with Edit Rooms submenu active. If you do so, a new parameter - Door Type - will appear in the room properties list. You can select a few variative doortypes:
- Wall - a standart "door type", a wall as it is
- Open - the selected wall will disappear completely, leaving an open space. Other walls will stay on their position. Although, you still can keep doing all the common options for such wall, as adding corners. Or you can get it back by simply switching a door type to an other
- Single Door - adds a small doorway. There is no door for a doorway, as a standart, you need to choose it from the list below.
- Double Door - adds a large doorway. There is no door for a doorway, as a standart, you need to choose it from the list below.
- Single/Double Red/Blue/Yellow key - adds a doortype, which requires a key of the right color to pass (more about keys in prors editing section).
Also, you can connect two rooms together. To do so, you need to hold your Shift key, then click & drag the wall senter of one room, to the wall center of an other room. Such rooms have one common wall. It's color depends on the room from each side. One room can have as many connections, as you need with one caution: if one of the walls is connected with an other room, the very close walls from left and right of it can't be connected. You can easily solve this by adding more corners = more walls to your room.
🛠 Color Tool
Platforms, Rooms, Stairs and Primitives can be painted with variative colors and materials. You'll find all the information you need about these objects in their sections below. But the principle of painting is the same for all of them.
So same is the "color tool" for all of these objects.
For rooms, platforms and stairs, you need to select the "paint.. " submenu in their editor section.For primitives, the painting window will appear automatically, when primitive is selected.
Color Presets:
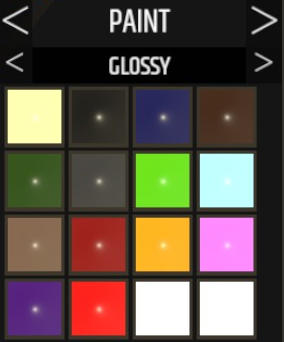
- A few variative colors. Glossy materials reflect the light from light sources.
Texture Presets:
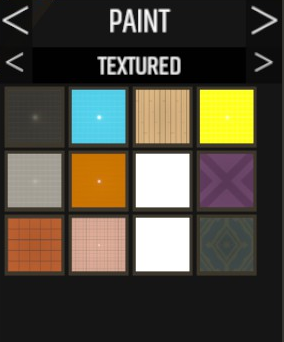
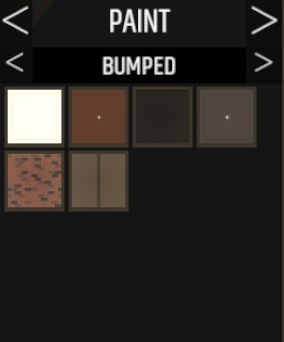
- Variative textures used in scenarios & sandbox. Some textures reflect lights, bumped textures have a small relief seen with the falling lights.
Transparent material.
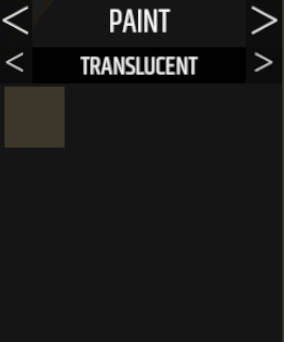
- Makes objects invisible, but all the other properties, such as shadows and collision don't change.
Use it to create invisible walls, duh.
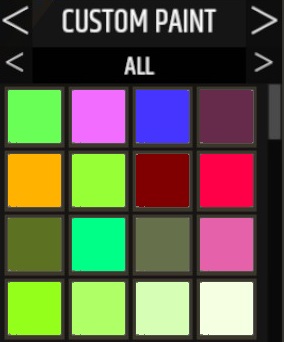
Custom color schemes.
You can create yor own colors from this menu, using an RGB color picker.
Also, you can set Specular and Smoothness to your materials, adding reflections. Here you can create some mirror or metal materials, or something else.
🛠 Edit Props Section
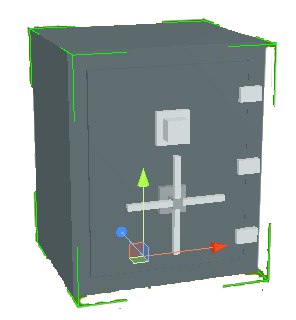 Click Left Mouse Button - Select object
Click & Drag Left Mouse Button - Select multiple objects
Ctrl + Click Left Mouse Button - Add object to selection or Remove object from selection
Click & Drag Left Mouse Button on movement gizmo - Move selected object(s)
Space + Click & Drag Left Mouse Button on movement gizmo - Move and snap selected object(s)
Click & Drag Left Mouse Button on rotation gizmo - Rotated selected object(s)
V - Toggle between isometic orthographic camera and free perspective camera
W - Move mode
E - Rotate mode
R - Scale (primitive(s)) mode
Esc - Deselect selected object(s)
Del or Backspace - Deleted selected object(s)
Ctrl + D - Duplicate selected objects
- Weapons
- Melee Weapons & Shields
- Ranged Weapons
- Melee Weapons & Shields
- Props
- Objects
- Light sources
- Primitives
- Traps
- Logic props
- Objects
- Prefabs
The paragraphs in this section are also formed according to this list.
The main difference between weapons and props is obvious: Players and enemies can pick weapons up, that's why weapons have a few optional parameters:
Can be picked up by enemies: Allows / Forbids other characters but player to take the weapon.
Fixed in Place: Weapons with this parameter turned on will be "frozen" on their position until somebody picks them up. Such weapons can "float in the air" or be "pinned" to a wall, for example.
Static Prop: Some people love using weapons not for killing but for decorations. If you don't want to allow player to use your weapon, this is a parameter of your choice.
Ammo (for ranged weapons): The amout of shots current ranged weapon has. Can be set from 0 to 10 000.
Unlimited Ammo (for ranged weapons): Allows you to shoot as much as you like. The previous parameter will be ignored, with this option.
Common objects, such as furniture, don't have any additional parameters, except X-Y-Z position & rotation.
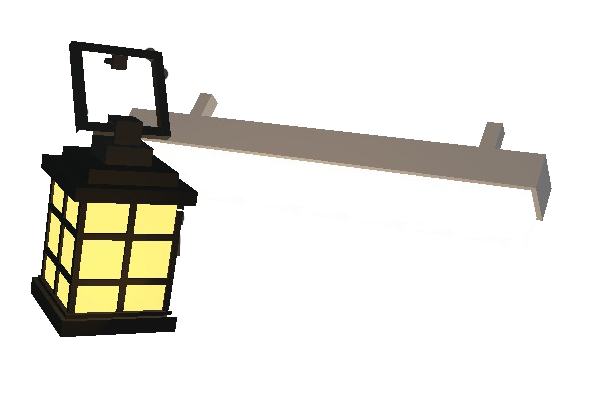
Most of the lights setup happens in Logic section, yet lights have a few individual parameters:
Turned On: If your map requires some light sources turned off from the start, use this parameter instead of manipulating logic zones.
Cast Shadows: Same with static weapons, this option can be used for optimising your level. Light sources with no shadows take less hardware resources, but also have lower quality in general, not only with casting shadows.
Traps are a sort of a complicated game logic prop, that's why they're described in Edit Logic section. You can find information about traps there.
🛠 Edit Characters Section
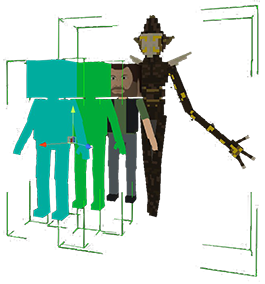
Editing characters is one of the most interesting and complicated sections.
It has lots of settings, so it's gonna take some time to describe all of them.
E - Rotate mode
Esc - Deselect selected object(s)
Del or Backspace - Delete selected object(s)
Ctrl + D - Duplicate selected objects
========Drop List properties========
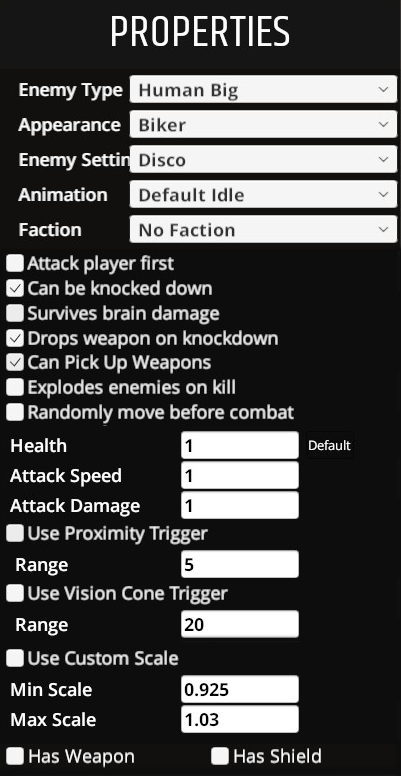
Enemy Type: allows to change human characters to different enemies or human types.
Human Enemies - Human, Human Big, Human Muscled, Human Pegleg, Human Hook Hand
Beneath Enemies - Zombie, Tentacle Mutant, Crystal Crab, Hiding Crystal Crab, Crystal Crab Blue, Hiding Crystal Crab Blue, Charger, Leaper, Teleporter, Statue, Giant Mage, Interceptor, Bore Worm, Minion, Floating Head, Crystal Entity, Observer, Hydra
Beneath Shard Lords - The Crawler, The Decevier, The Golem, The Beast, The Centurion, The Pyro
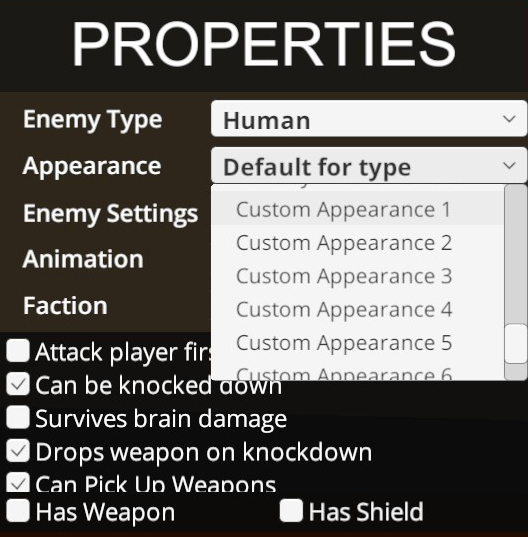
Appearance (For Humans): - Basically, the texture type. Allows to select one of the original scenario textures, or one of the custom texture pack ones. The appearance does not set enemy parameters. For Example, if you pick Blackbeard Appearance, this won't give your character the beard, the hat and the unbreakable bones.
Enemy Setting (For Humans): - Brings some individual accessories or properties from scenarios to your character. This will also use health - attack speed - attack damage presets, but most likely you'd use this parameter to change the outlook for your humans. Examples: Chef has a cook hat. Blackbeard has a beard, a captain hat and unbreakable bones. Disco has a chance to get afro hairdress. Disco DJ wears headphones. Boxer has bigger wrists as his individual texture has boxing gloves, plus uniq attack type. And so on.
Animation (For Humans): - A pre-combat animation, same with the animations used in the scenarios. You have 55 animation types to go. Actually at least 20+ more, if you're reading this in a future.
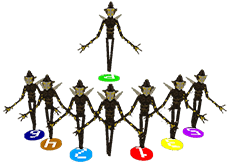 Faction: - Allows to group characters in "teams". Enemies of one faction don't attack each other, but they attack enemies from other factions. Enemies with no Faction attack everyone and each other. Together with the "no faction" type, there are 8 Factions, including a Player Faction, which can be found in the end of the Faction list.
Player Friends can damage and kill each other, so be careful with that.
========BoxCheck properties========
Attack Player First - once triggered, the enemy focuses on a player without messing with other characters
Can Be Knocked Down - this kind of enemy can be kicked successfully with a KO
Survives Brain Damage - for most of regular human enemies a bullet in the forehead or a dagger in a temple means permanent death. With this parameter the'll last a bit longer. A bit >:)
Drops Weapon on a Knockdown - a good way for players to get the weapon they want is to knock out an enemy who already has it. Show players your thoughts about their lameness.
Can Pick Up Weapons - Enemy has an option to find himself a weapon and grab it, unless it's static.
Explodes enemies on kill - Remember berserk power? Now enemies can demonstrate it as well. If they make that last fatal hit, for sure.
Randomly Move Before Combat - The enemy runs chaotically around a short range.
Unbreakable Bones - another parameter allowing to improve person's survivability. Characters with unbreakable bones can't die because of their limbs being cut off, or because somebody broke their wrists. Only because of clean health damage.
========Health-Speed-Attack========
HEALTH - can be set from 0(!) to 50. How much 50 is? Say, four thrust attacks with bare hands are equal to 1.
ATTACK SPEED - can be set from 0(!) to 5.
ATTACK DAMAGE - can be set from 0(!) to 10. Ten is one-hit kill.
========Personal Logic properties========
Proximity trigger - enemy gets triggered when player gets closer to it.
Vision cone trigger - enemy gets triggered when player gets into enemie's field of view.
Both parameters can be set from 0 to 50.
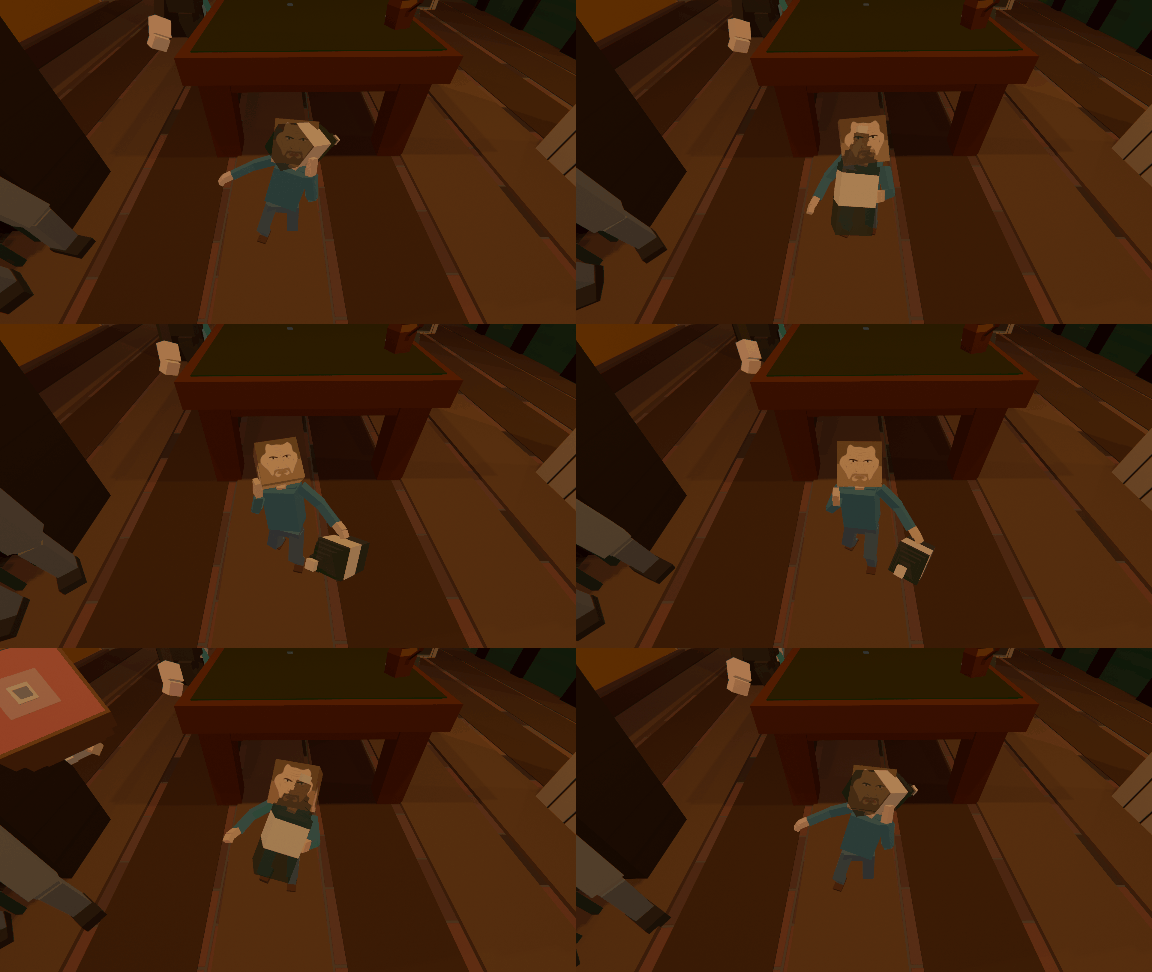 ========Scale========
The regular enemy size is 1, which is how high players are. However, this can be changed. If you check the box without changing any digits, you'll get a slightly height randomise, which will bring some additional variativity to your characters. Scale can be set from 0.5 to 4. If you havent seen a person 4 times higher than regular player is, you better go check this out.
🛠 Edit Platforms Section
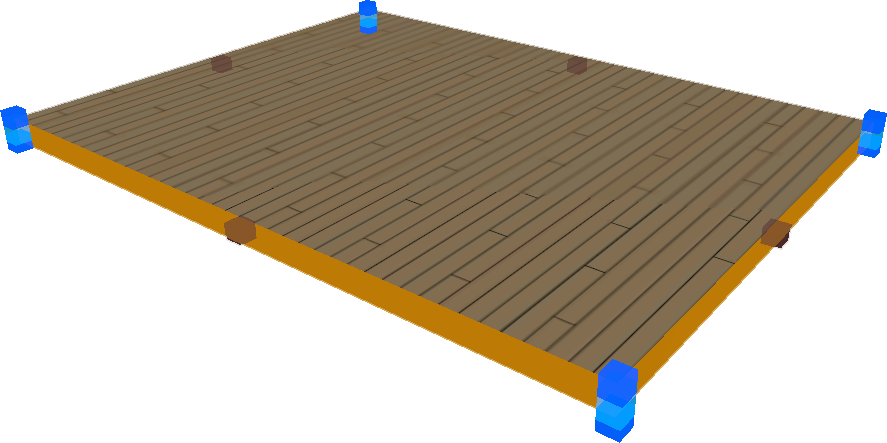 Platforms can be used for many things in the editor now, like walls or fake skyscrapers, yet the main feature is that platform is just a flat surface.
ADD PLATFORMS
Click & Drag Left Mouse Button - Create platform
EDIT PLATFORMS - No Platform Selected
Click Left Mouse Button - Select platform
EDIT PLATFORMS - Platform Selected
Click + Drag Left Mouse Button on corner - Move corner
C + Click Left Mouse Button on wall center - Split wall and add corner
Shift + Drag Left Mouse Button on wall center - Move/Connect wall
Ctrl + Drag Left Mouse Button on corner - Move platform
X + Click Left Mouse Button on corner - Delete corner
Del - Delete platform
PAINT PLATFORMS
With a platform selected pick whether to paint the bottom, sides or top in the Properties window and click a paint material to change the platform materials.
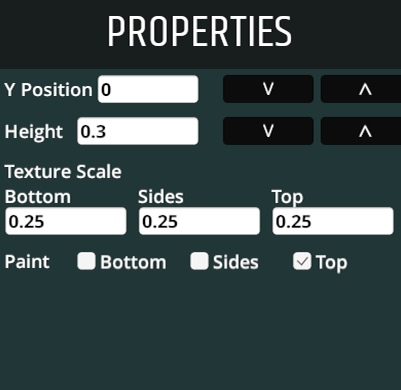
As you can see, many settings are the same for platforms and rooms:
Y position can be set from -50 to 50
Height can be set from 0.1 to 100
Texture scale works the same as with primitives
You can also select different parts of a platform to paint
🛠 Edit Logic Section
Logic is a complex combination of various objects and settings, and is definitely the most complicated feature in the editor.
The whole principle of logic can be explained with this simple formula:
Object A triggers Object B to execute action C and/or to trigger Object D.
So, in order to simplify naming for this section, let's split everything to TRIGGERS, EXECUTORS and OTHER.
- Characters
- Arena traps
- Primitives
- Lights
- Sound props
- Victory prop
- Portals
- Zones
- Enemy trackers
- Timers
- Portals
- Waypoints
Zones that are connected to characters or have the "Starts General Combat" checkbox ticked will trigger combat when the a player walks into it. You can use this to immediately start combat by placing a zone where the player begins, or you can place them at certain areas in the level where you want combat to begin for story or gameplay reasons.
A zone that has the "Level End Zone" checkbox ticked will show once all enemies in the level are dead. The player must enter one of these to finish the level. Currently you will need at least one of these zones in an area the player can reach to allow the level to be completed.
By pressing the 'C' key when a zone selected, you can connect and disconnect enemies from a zone. This connection changes the AI for those enemies and will prevent them from entering combat when it is triggered by another zone or when a player attacks another enemy.
Enemies connected to zones will instead enter combat based on when the player enters a zone they are connected to, when they are attacked or when an enemy that is connected to the same zone they are is attacked.
Enemies can be connected to multiple zones.
🛠 Edit Stairs Section
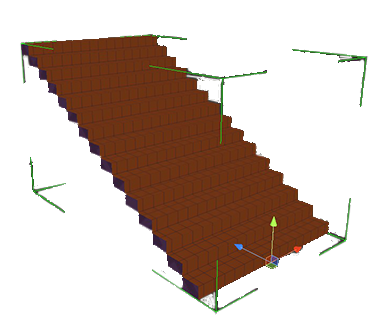 ADD STAIRS
Click Left Mouse Button - Create stairs
EDIT STAIRS - No Stairs Selected
Click Left Mouse Button - Select stairs
EDIT STAIRS - Stairs Selected
Del - Delete stairs
PAINT STAIRS
With stairs selected pick whether to paint the sides or top in the Properties window and click a paint material to change the stair materials.
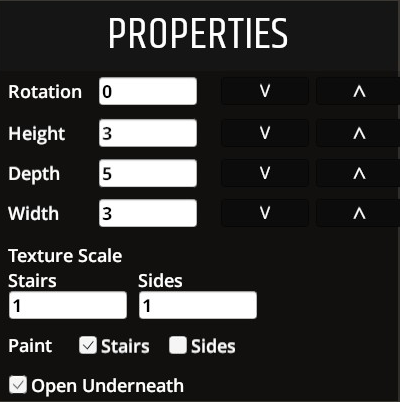 Stairs are most likely the easiest thing to deal with while creating your level.
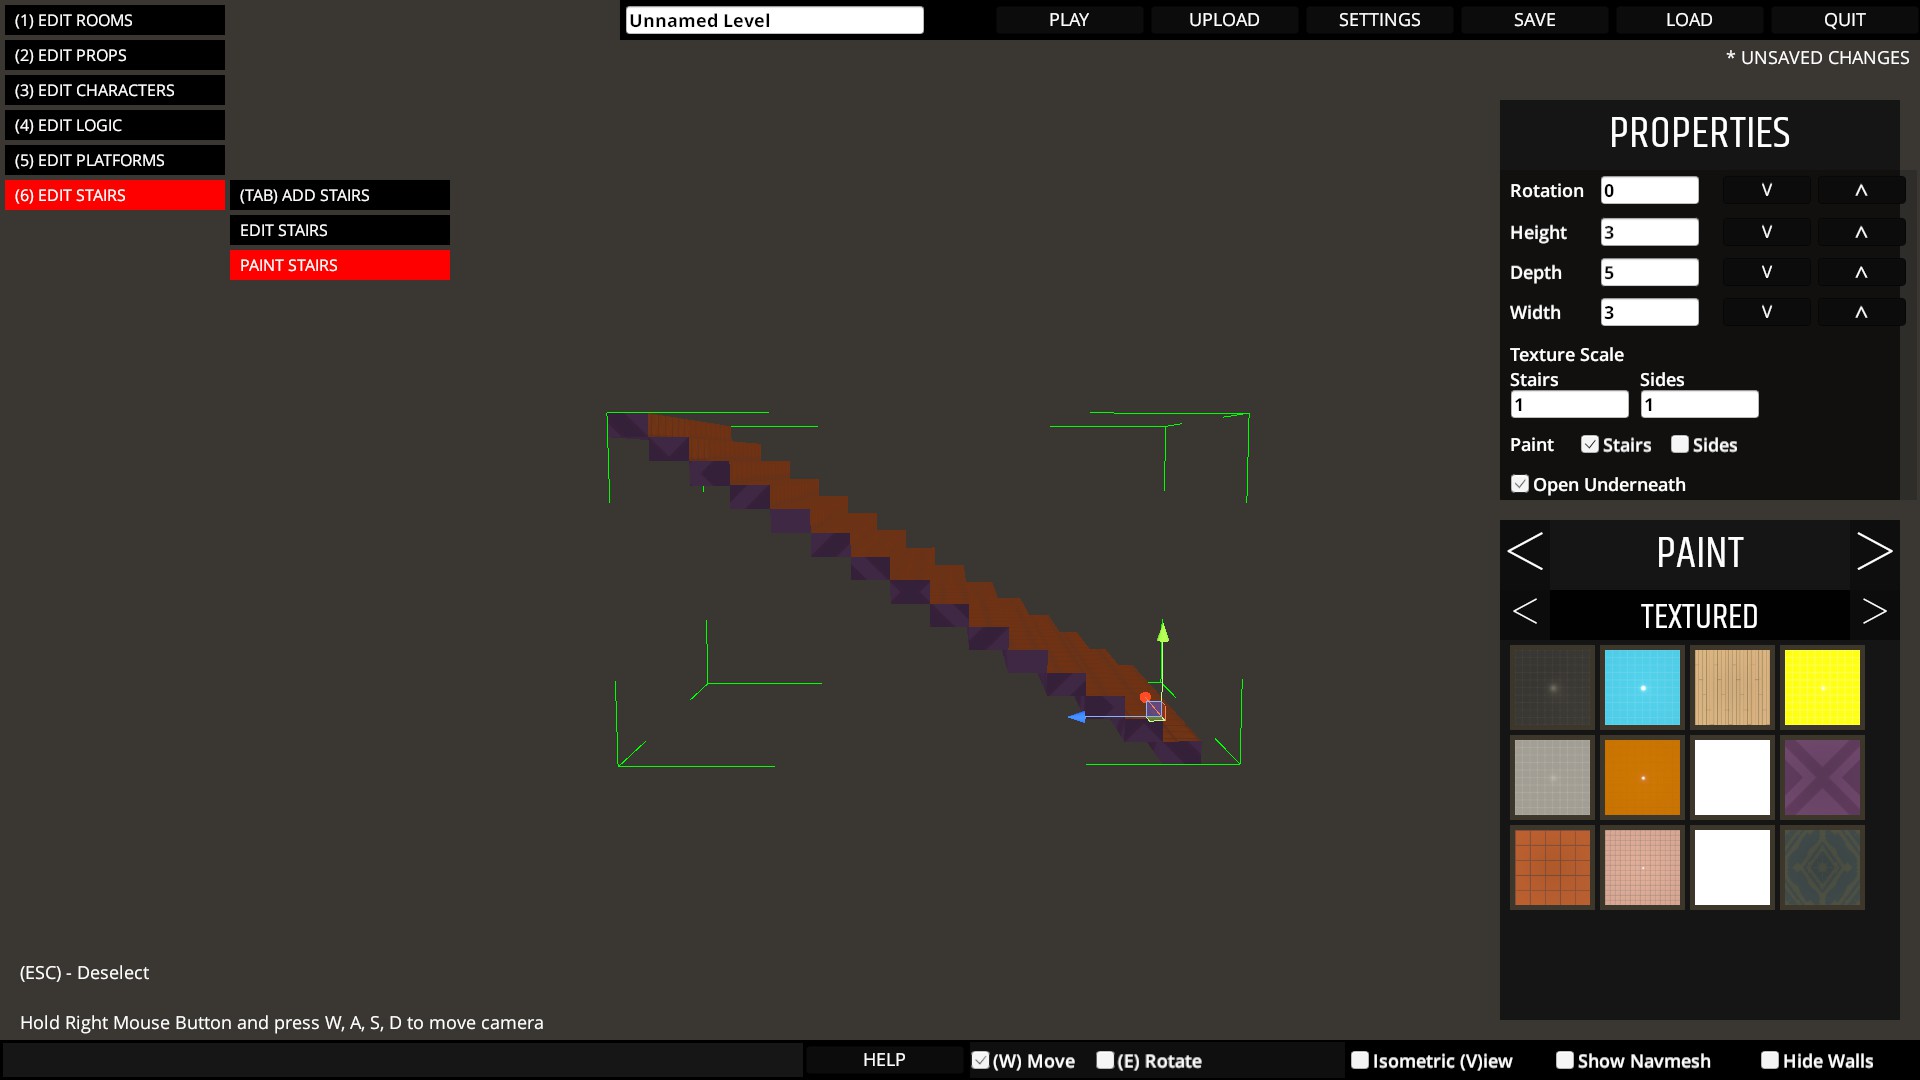
Rotation: - No comment. Can be set from 0 to 359.
Height - Technically the Y - coordinate scale. Can be set from 0.375 to 100
Depth - Technically, the X - coordinate scale. Can be set from 1 to 110
Width - Technically, the Z - coordinate scale. Can be set from 1.2 to 100
Texture Scale - Same with Rooms, Platforms and Primitives Texture scale.
Open Underneath - Watch the screenshots: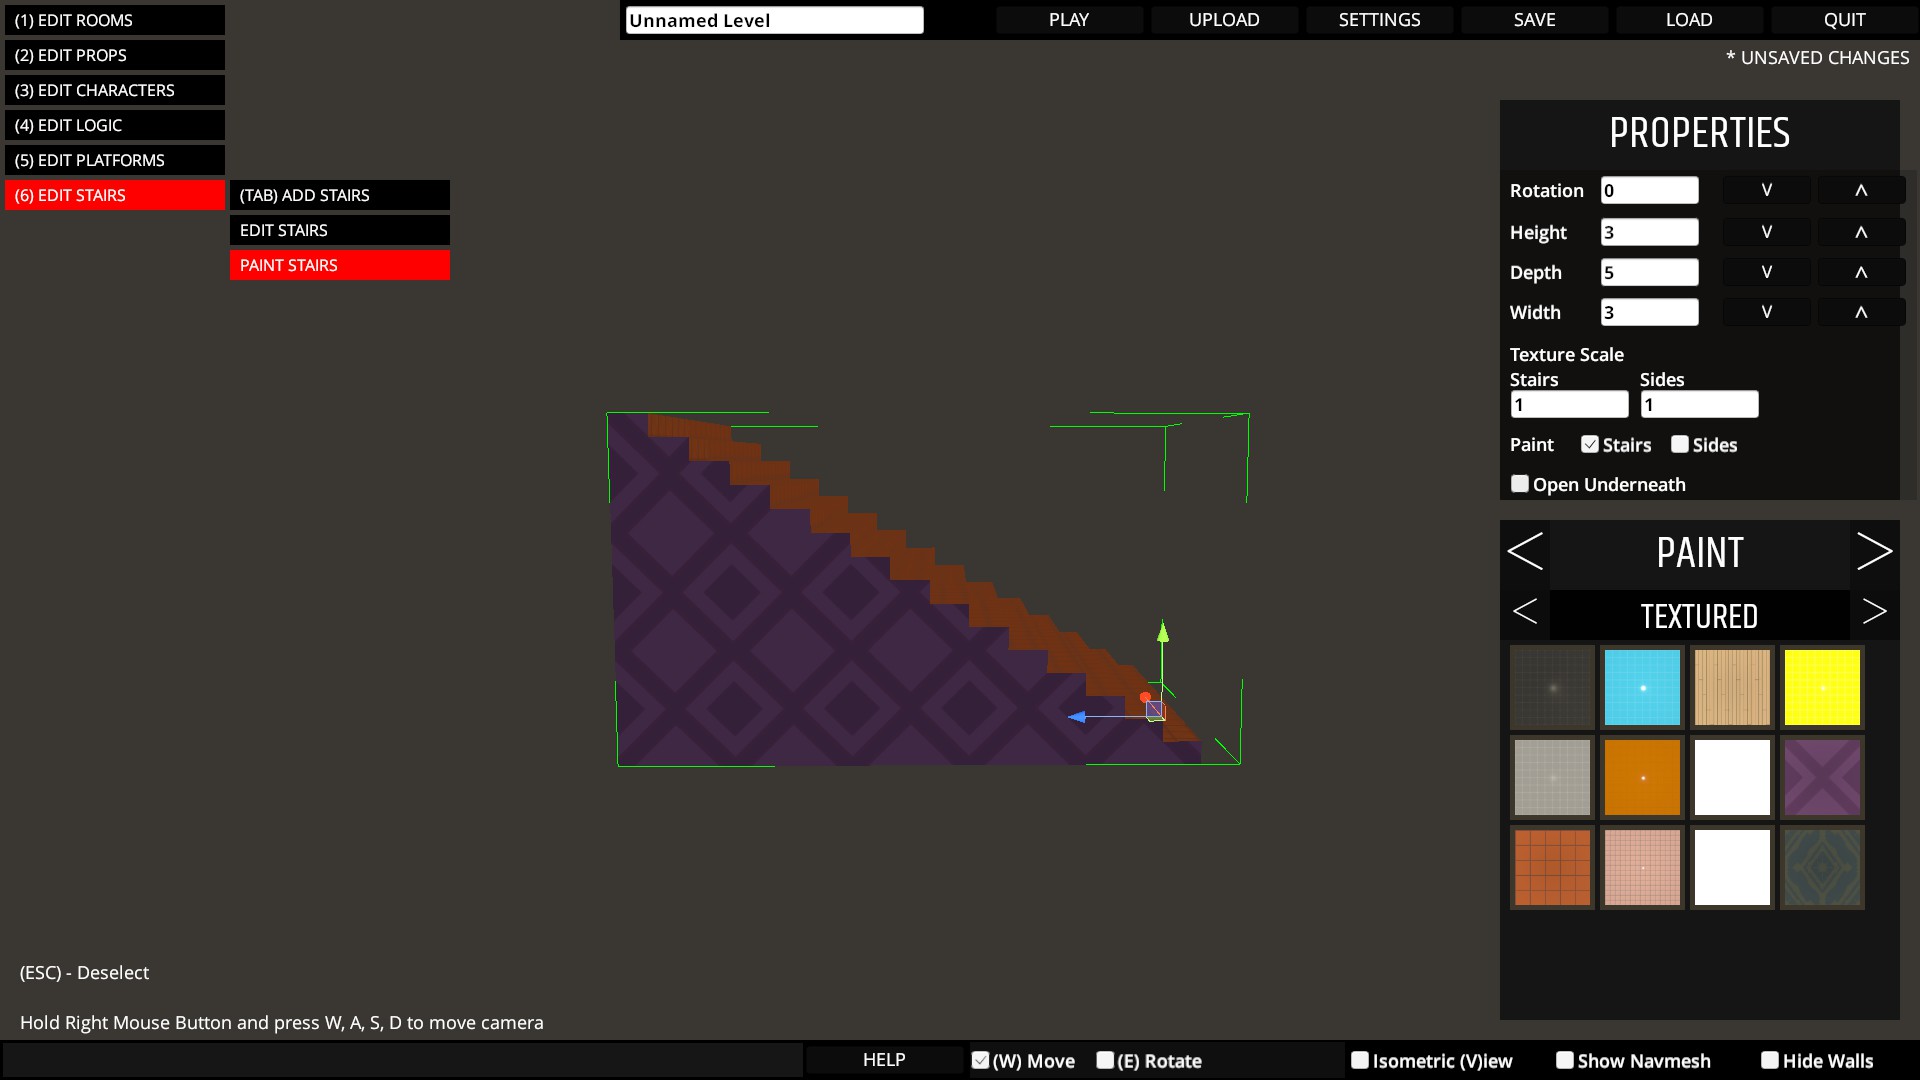
🛠 Uploading to the Workshop
In order to upload a level certain criteria must be met.
- The level must be saved in it's current state
- The level must have a preview image recorded (press F8 while playing the level)
- The level must be played through and completed in it's current state (an 'Invincibility' option is available with extra cheats to make playing through levels quicker)
- The level must has a unique name that doesn't match an existing Workshop level
- The level must not be the same as an existing Workshop level
The Level Upload menu will inform you if any of these are not met. Once they are, you can upload your level to the Steam Workshop.
The Steam web overlay should open to your newly uploaded level on the Workshop after uploading. If it doesn't you can manually navigate to your Steam Workshop items in your browser. In order to have the level be visible to other players, you will need to change it's visibility to Public.
On the Workshop page you should also add a description of the level and any additional images, etc you think will help promote and give a better sense of your level.
If the level takes longer than 60 seconds to upload, the editor menu will say the level has failed to upload. It's possible it may still work and have taken longer than 60 seconds. Check your Workshop files to see if it was successful.
You need to have accepted the Steam Workshop Legal Agreement here: http://steamcommunity.com/sharedfiles/workshoplegalagreement
Try not to upload multiple similar levels or multiple extremely basic levels. If you want to release an updated version of a level, you should delete or hide the previous version before too long. Try not to too many enemies, lights, weapons, etc and have the level perform too poorly to be playable.
✎ Overview
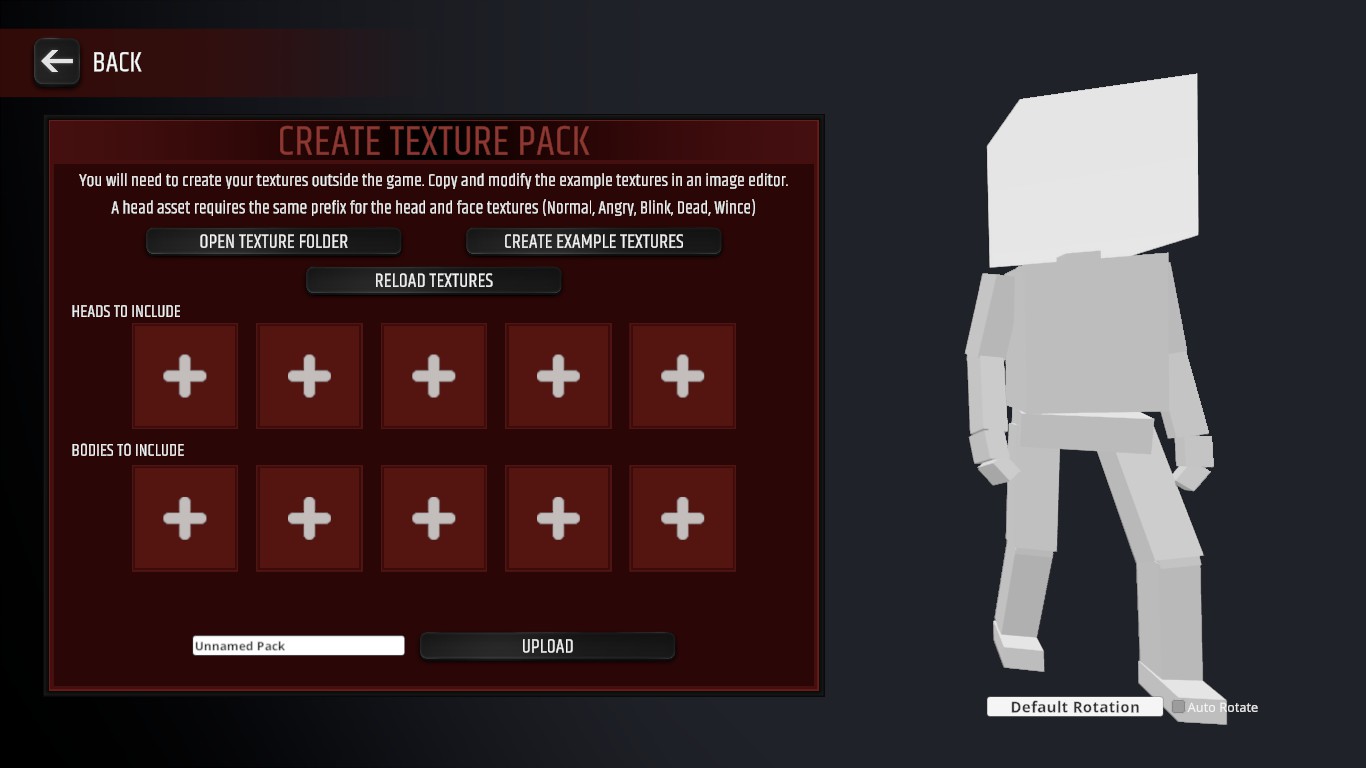
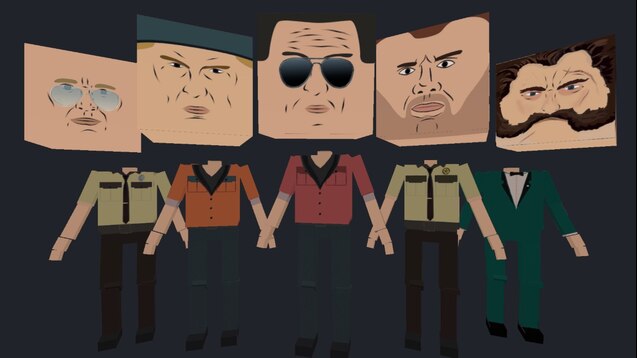
Using the custom textures creator, you can upload your own texture packs to the Workshop.
Each texture pack can include up to 5 different heads and 5 different bodies, but this is not a stict requirement. At a minimum you only need 1 head or 1 body.
However, the creator is only a tool to preview your textures on a character model and to upload them.
To actually draw your textures, you'll need any separate graphic editor of your choice: (Photoshop, Paint net, Gimp, Paint tool sai, etc).
- Body texture
- Head texture
- 5 face expressions (Normal, Angry, Wince, Blink, Dead).
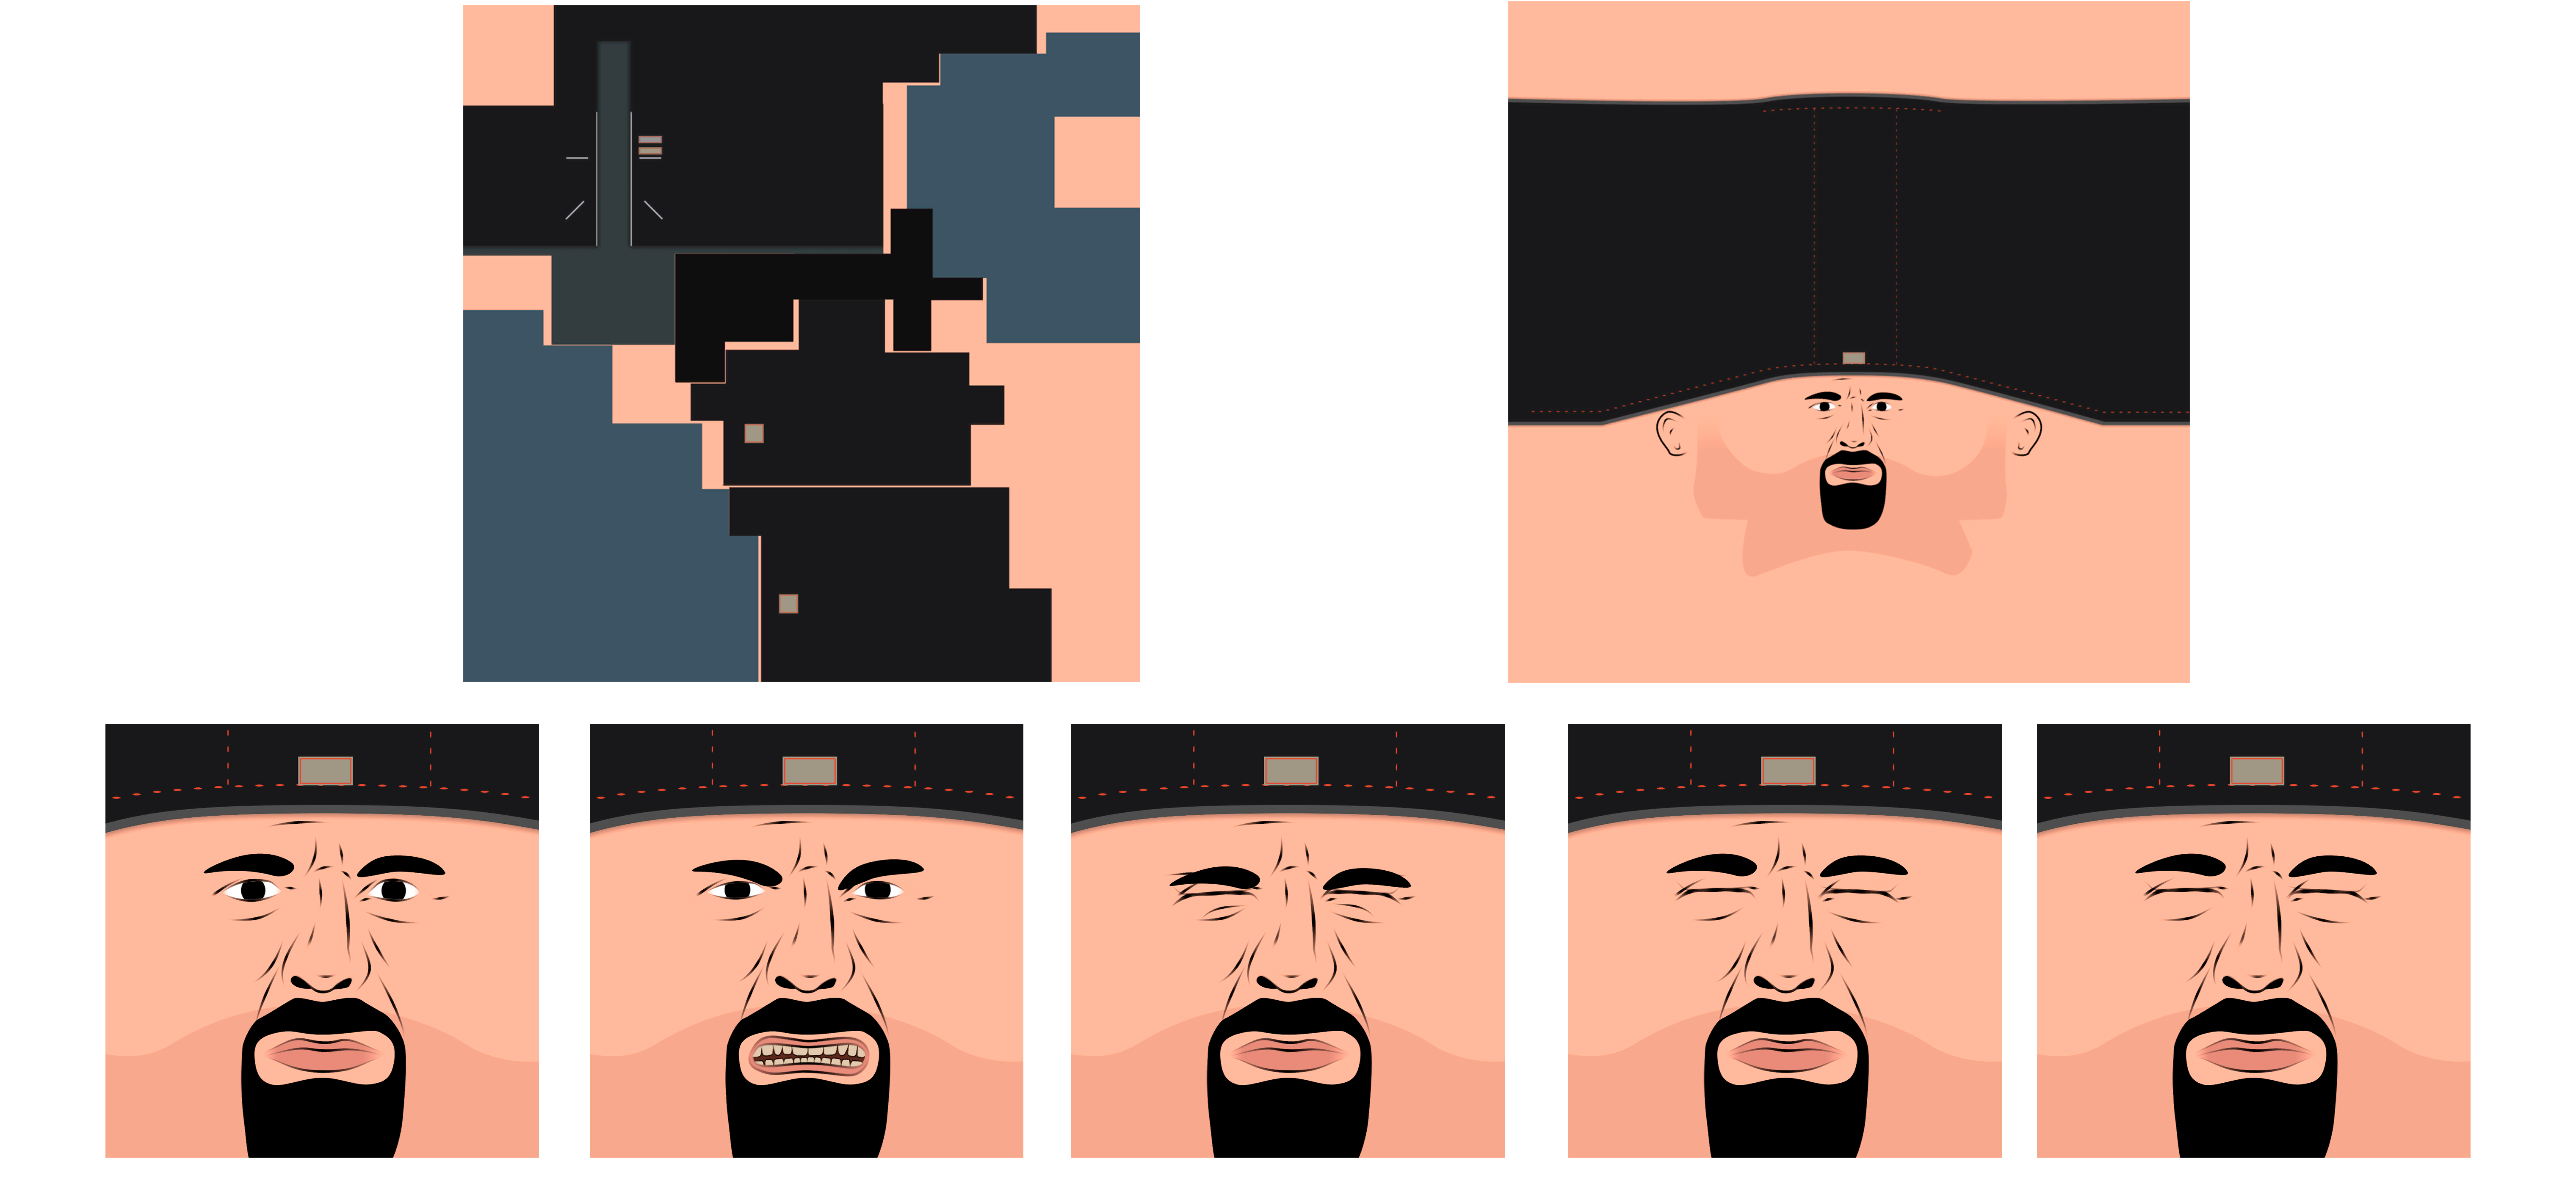
As you can see, all images are squares, while head and body textures are also an unwrap.
- by overpainting the original scenario textures extracted from the game files. You can find them here[drive.google.com]
The rest is up to your personal drawing skills.
To help yourself, use the body guide (by Supa Player):
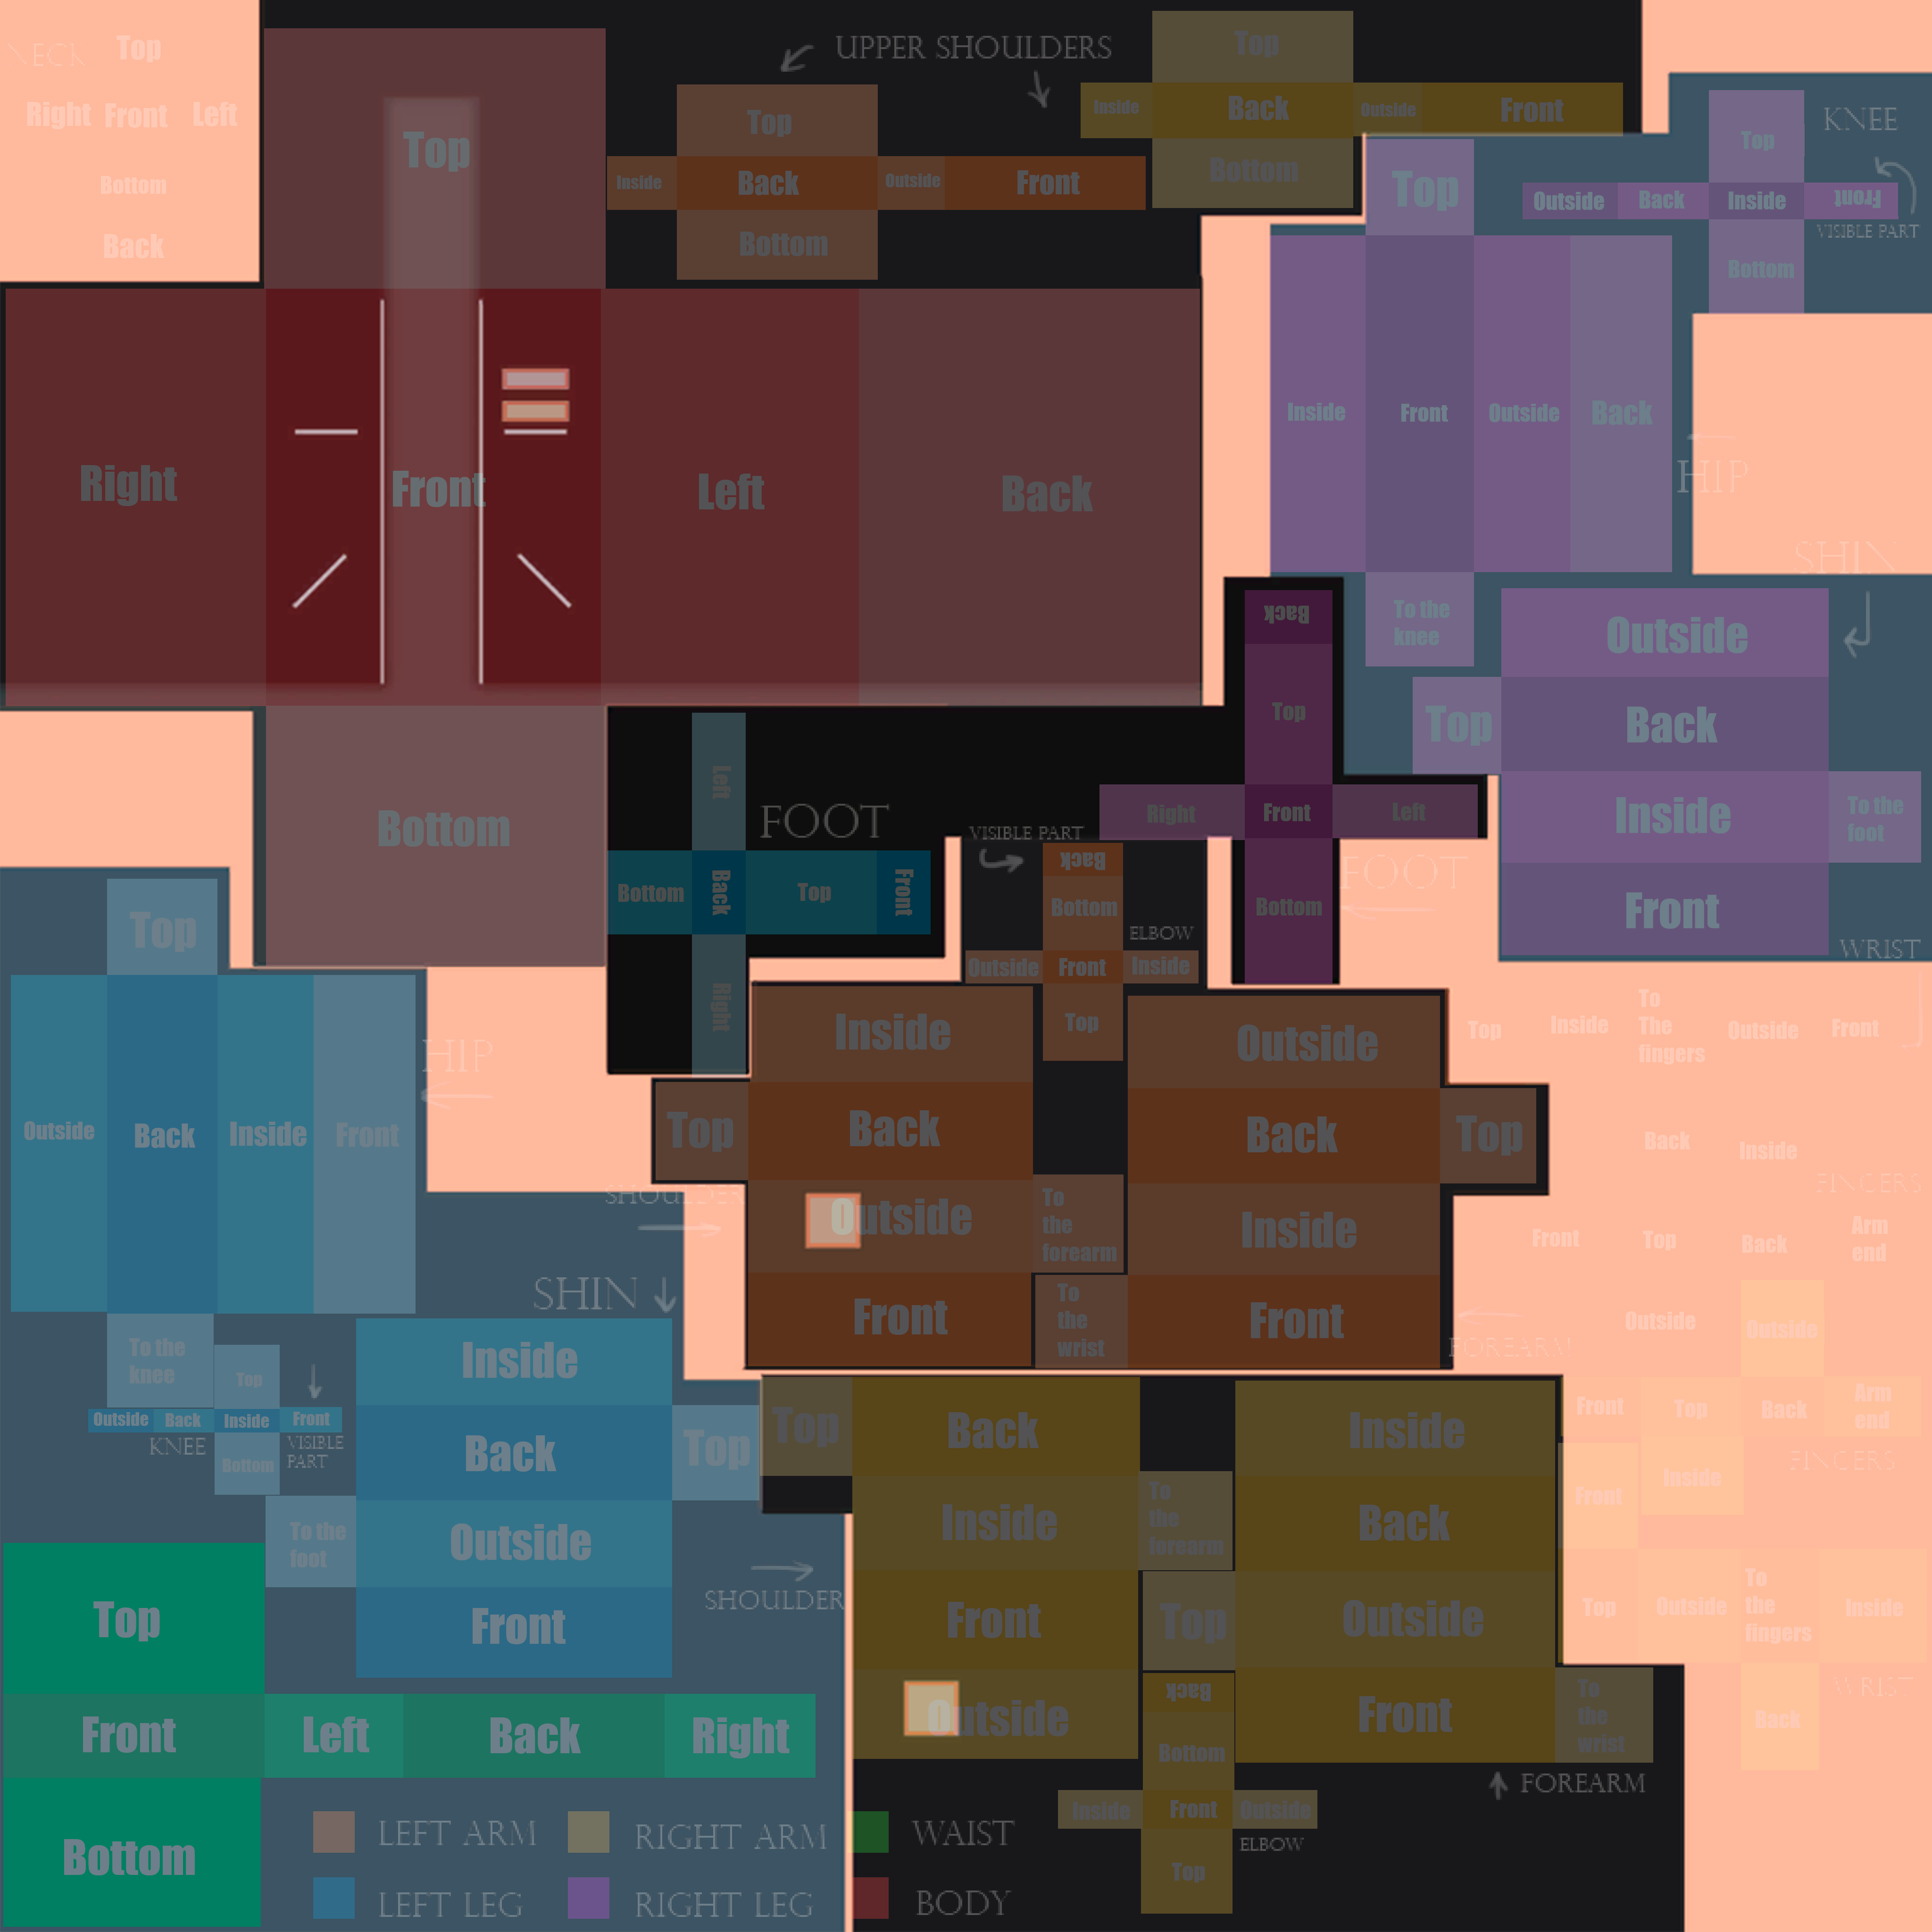
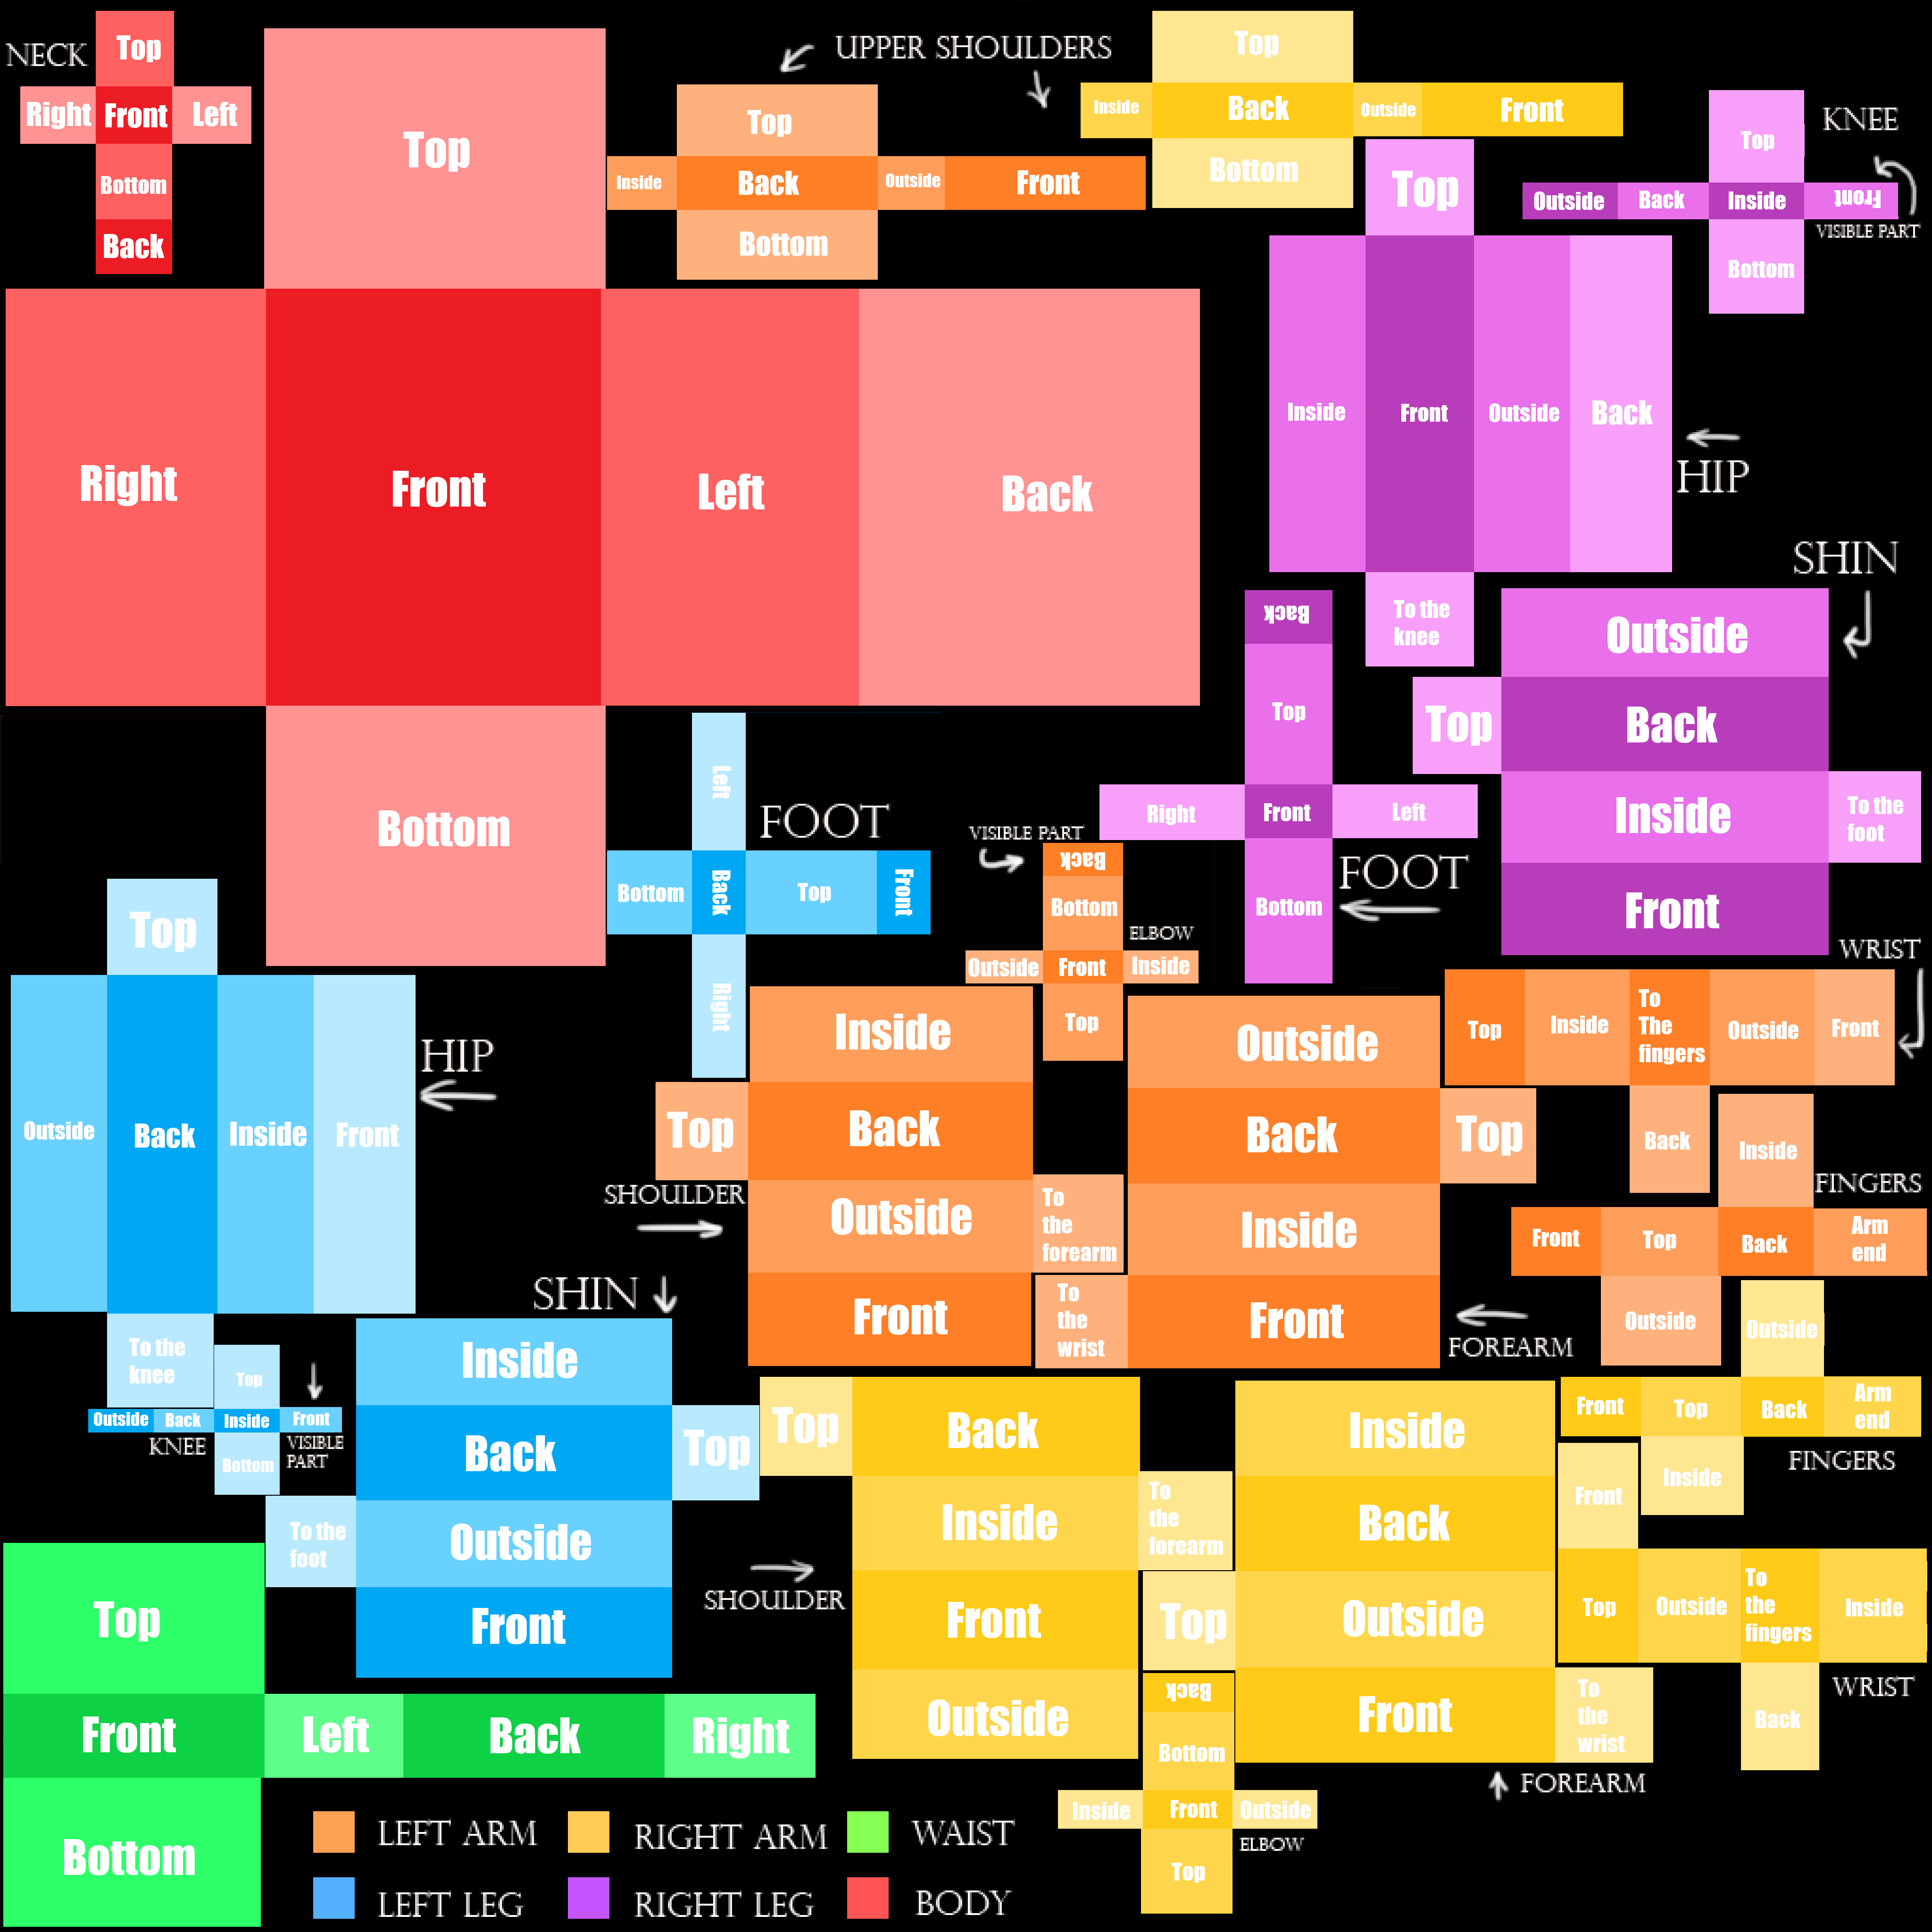 Using the body guide, you can track the texture to match it with the body: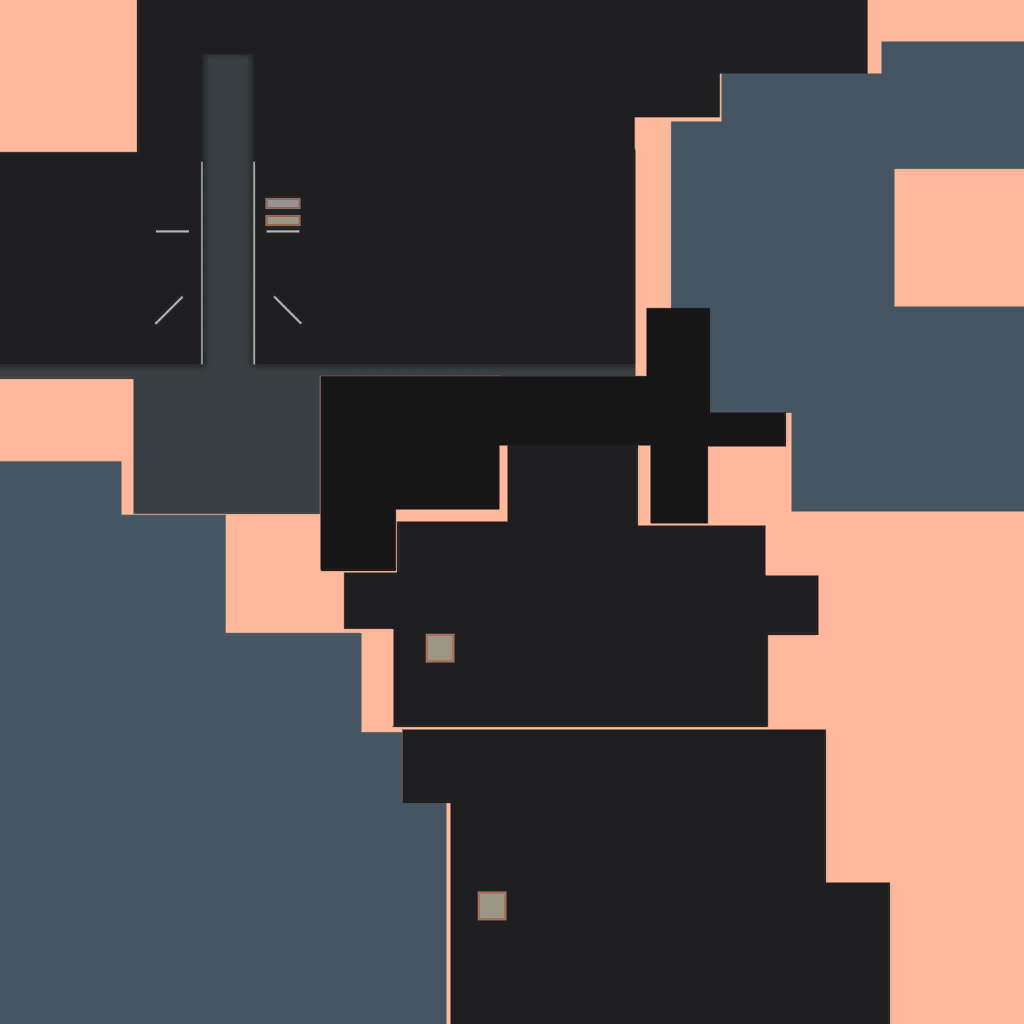

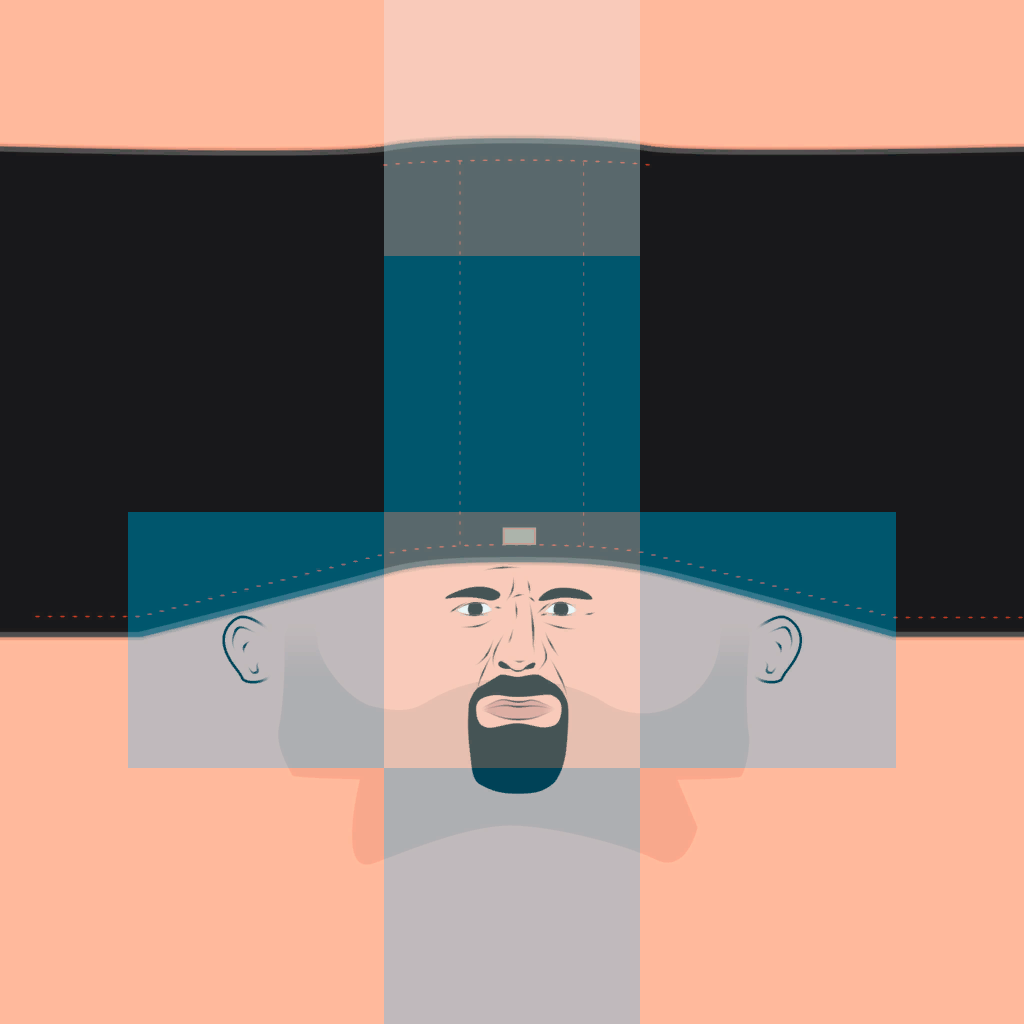
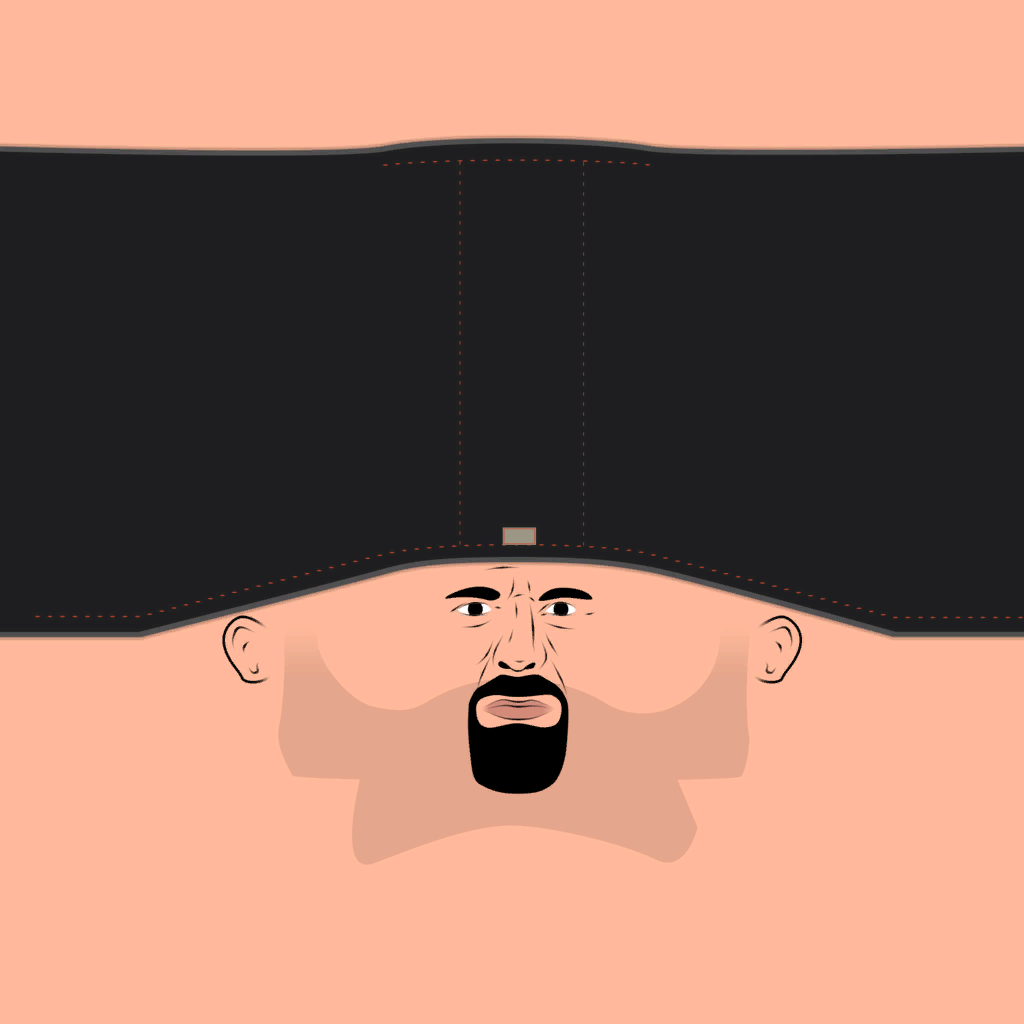
The head texture is also an UV. To help yourself, use the following image:
Link to the image:[drive.google.com]
Using this image, you can track the texture to match the head, same as the body.
There are 5 expressions human characters have in this game: Normal, Angry, Wince, Blink and Dead. You can use one same image for multiple expressions. For example, Blink and Dead emotions use the same image for all the textures you see through scenarios.
In order to be able to upload your files to the Workshop, your images have to follow a set of requirements. You'll find all of them in the next section of this guide.
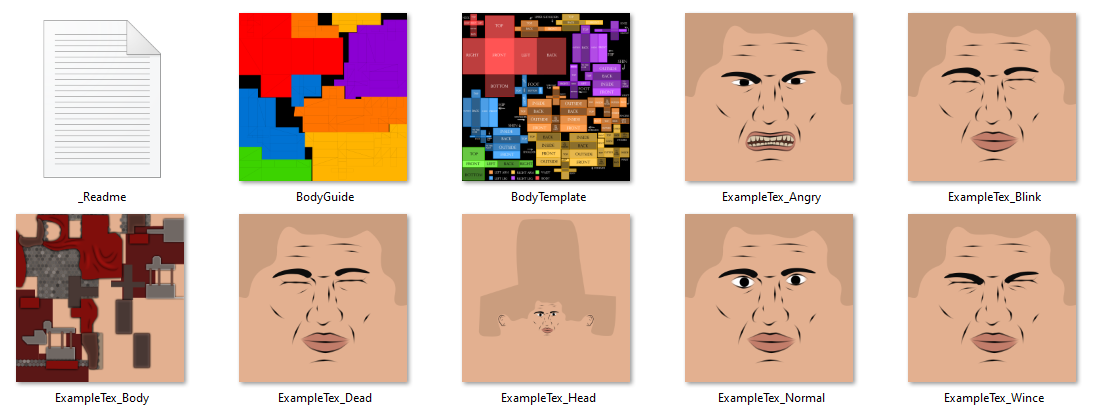
You can also create example texture files by pressing a so called button in custom texture creator menu. this will add 7 'default' images to your texture pack folder, so that you can use them as names and file resolution reference.
✎ Texture Requirements
- The file must be a PNG or JPG image.
- The file resolution has to match the following parameters:
- Bodies: 1024x1024, 2048x2048 or 4096x4096 pixels;
- Heads: 1024x1024 or 2048x2048 pixels;
- Face Expressions: 1024x1024 pixels.
If the body texture is 4096x4096, it will be downscaled to 2048x2048 when loaded into the game to prevent pack sizes being too large. - Bodies: 1024x1024, 2048x2048 or 4096x4096 pixels;
- The file name must end up with a valind suffix:
- Bodies: '_Body.png' or '_Body.jpg';
- Heads: '_Head.png' or '_Head.jpg';
- Face Expressions: '_Normal.png', '_Angry.png', '_Dead.png', '_Wince.png' and '_Blink.png', or '_Normal.jpg', '_Angry.jpg', '_Dead.jpg', '_Wince.jpg' and '_Blink.jpg'.
- Bodies: '_Body.png' or '_Body.jpg';
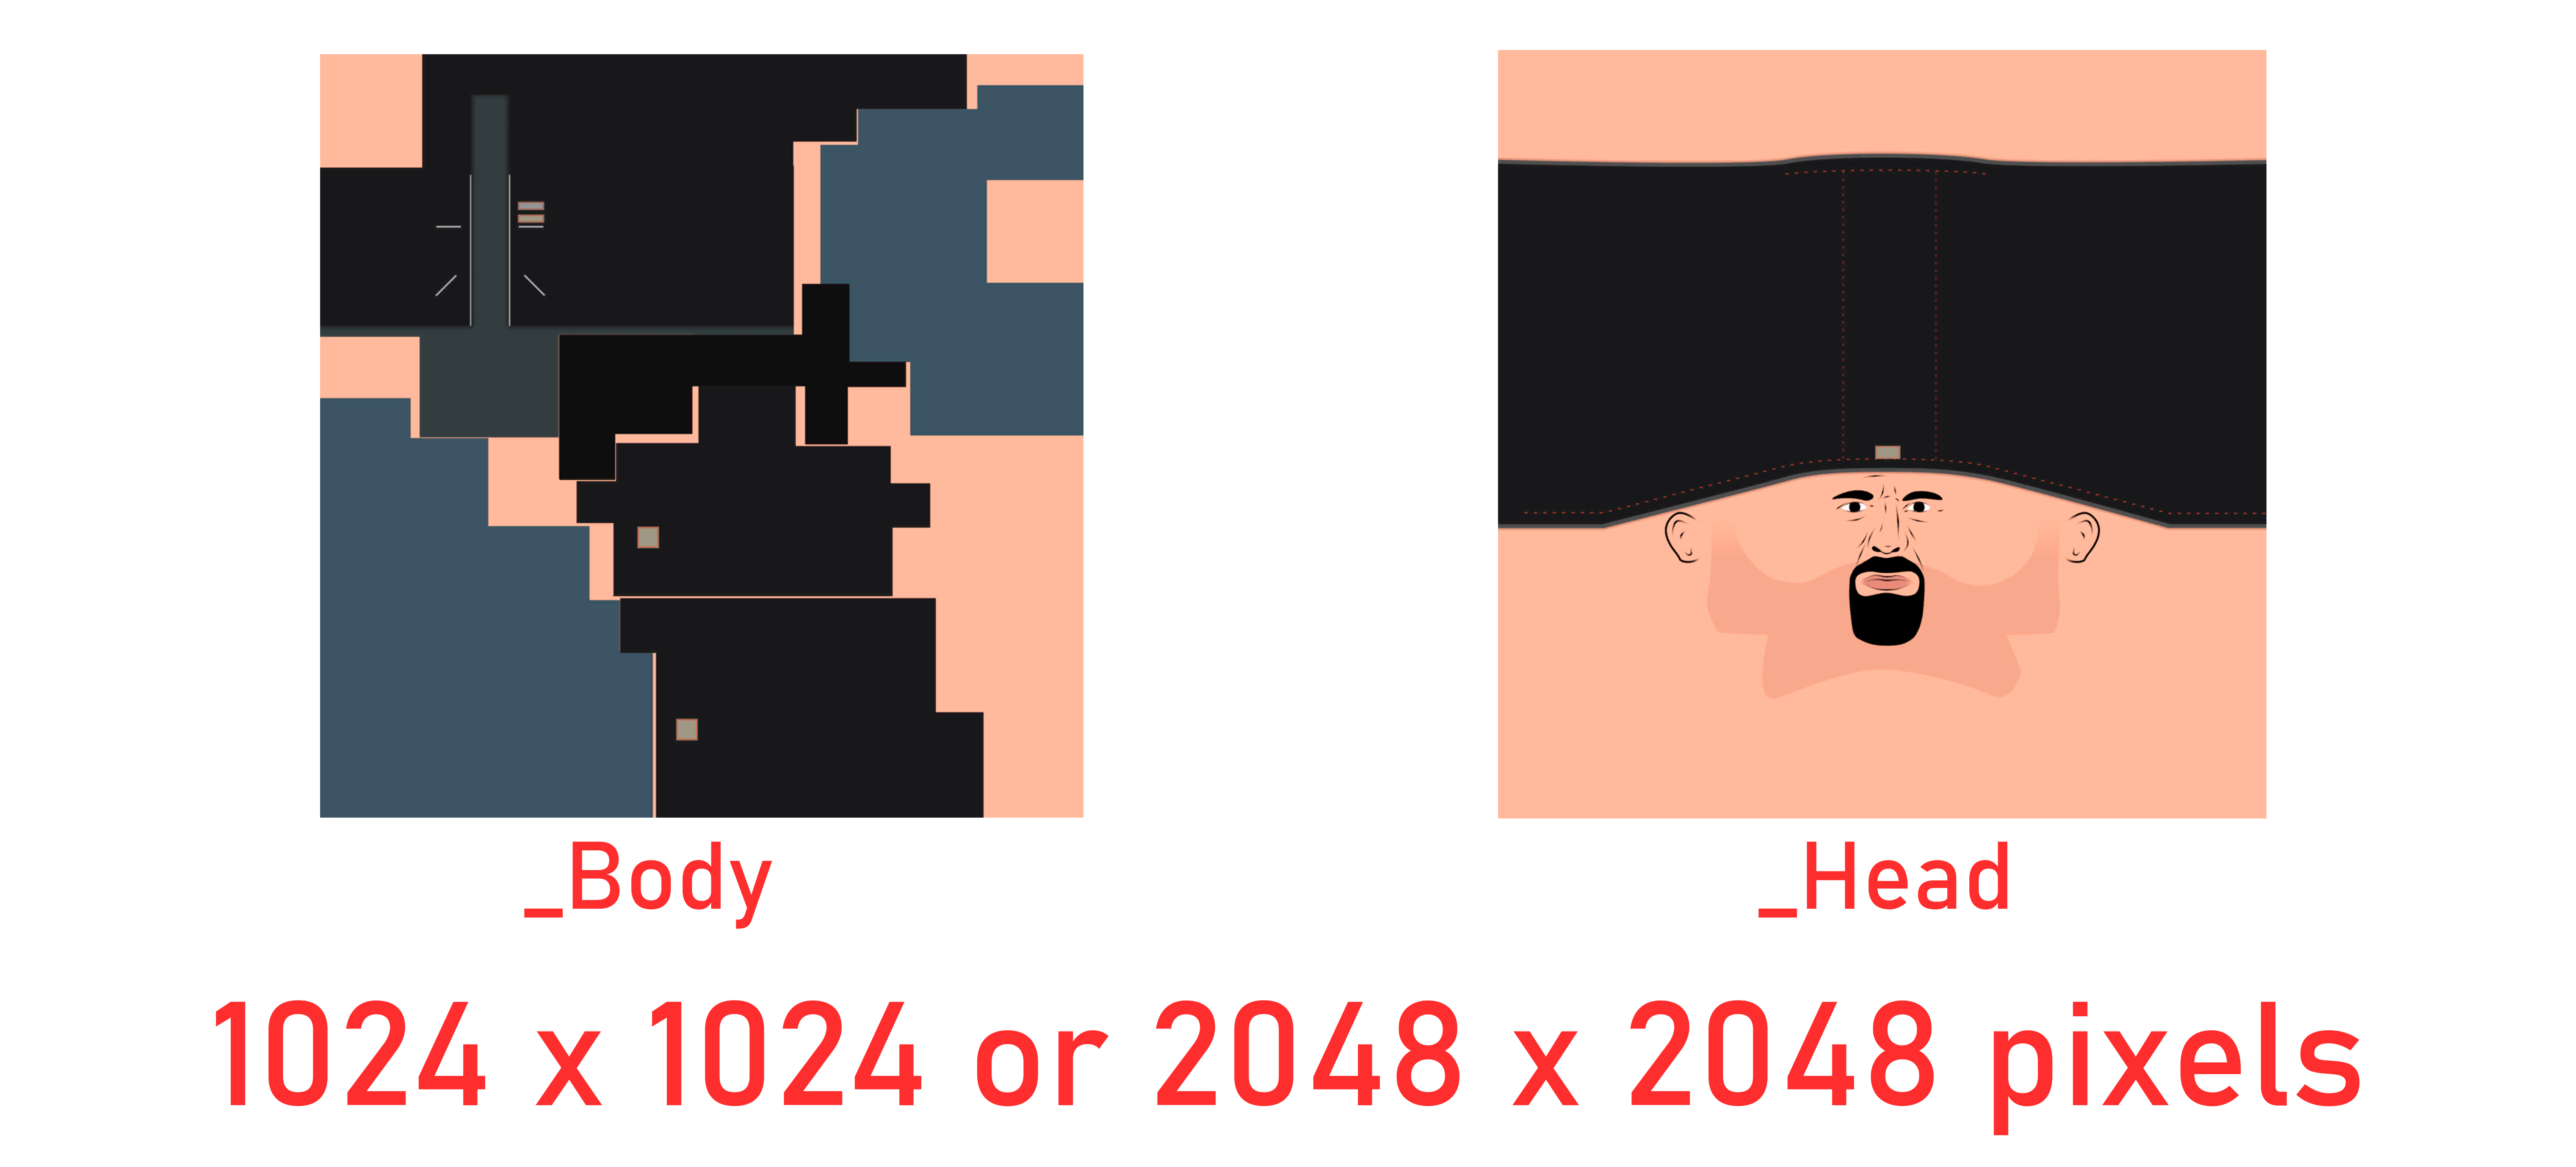
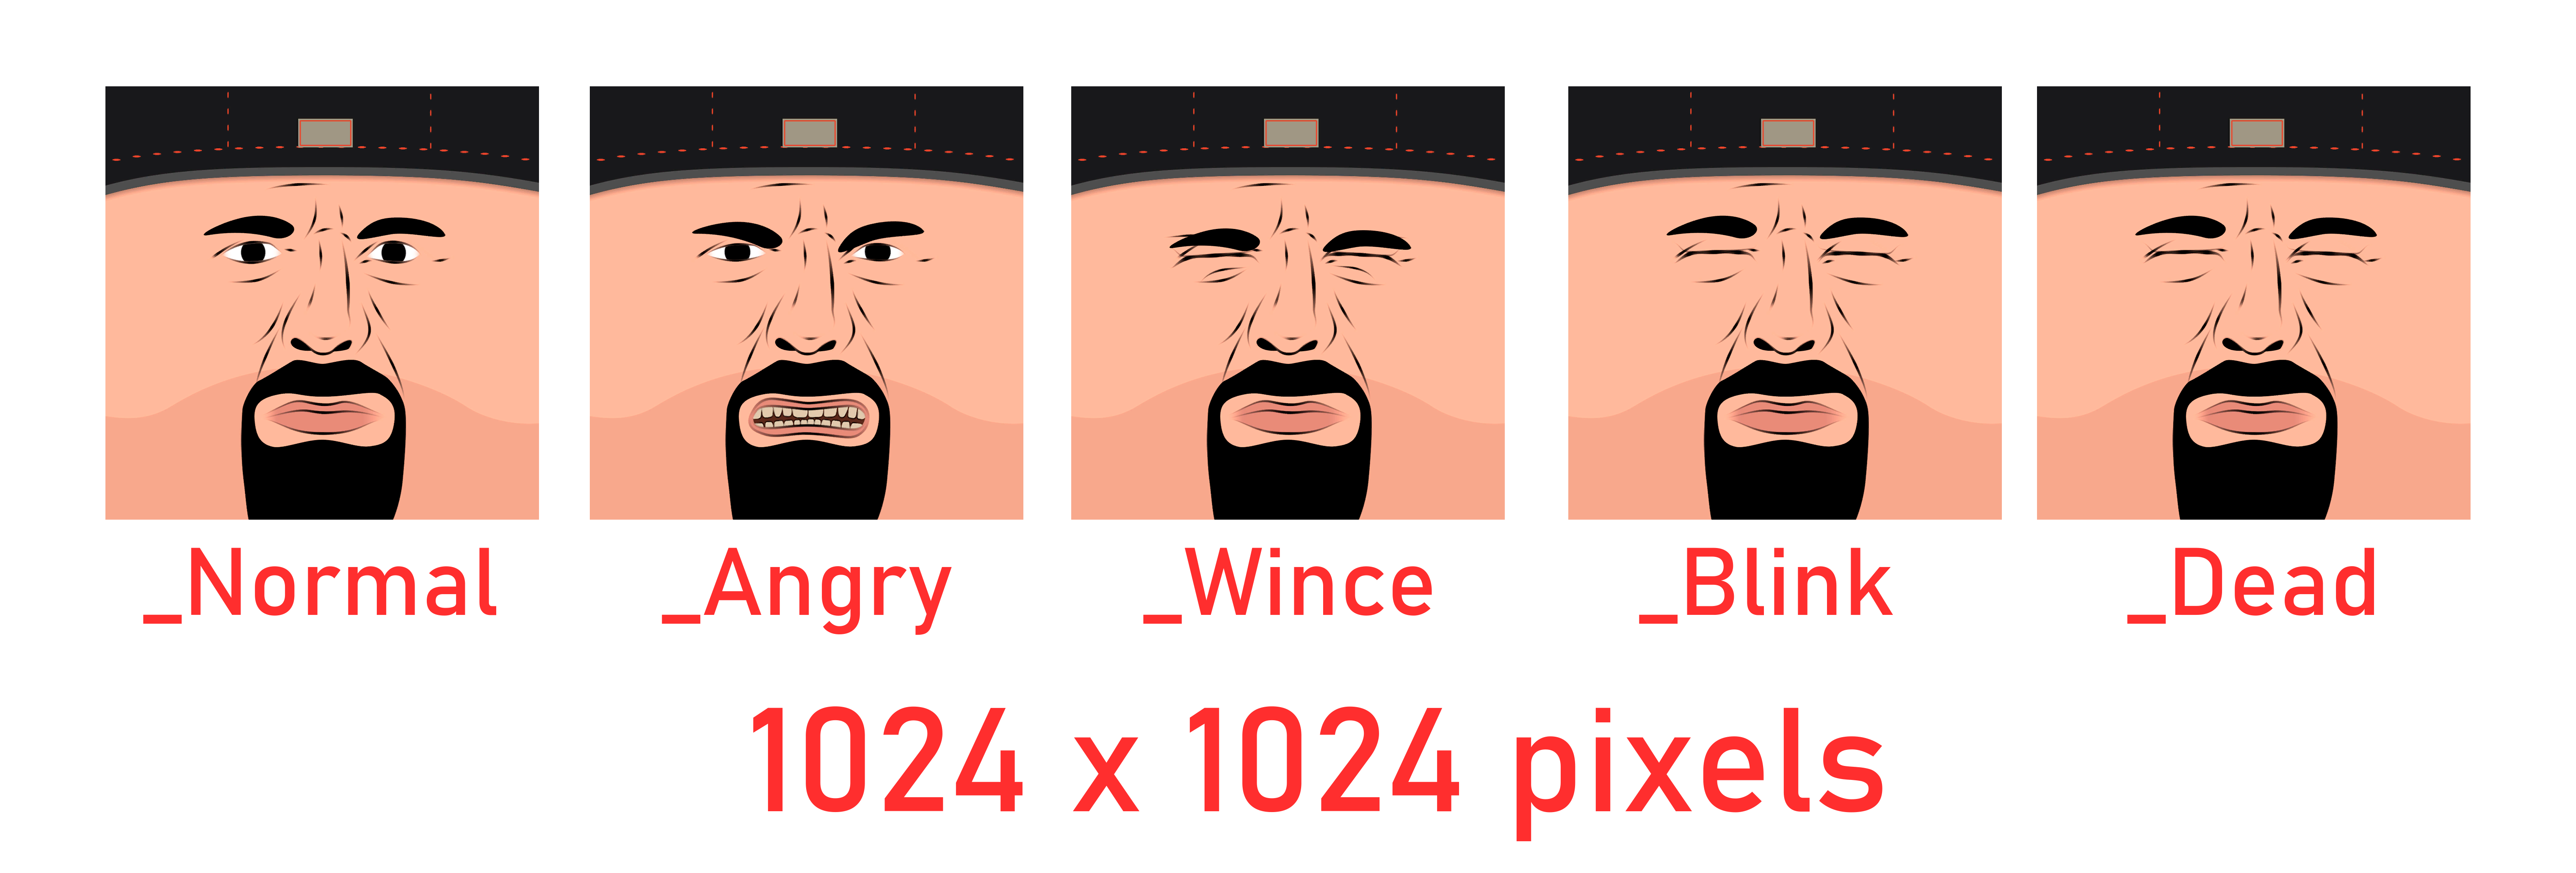
As for an example, a valid character texture could have the following names and props:
Mafia_Body.png (with a resolution of 1024x1024 or 2048x2048 or 4096x4096)
MafiaBoss_Head.png (with a resolution of 1024x1024 or 2048x2048)
MafiaBoss_Normal.png (with a resolution of 1024x1024)
MafiaBoss_Angry.png (with a resolution of 1024x1024)
MafiaBoss_Dead.png (with a resolution of 1024x1024)
MafiaBoss_Wince.png (with a resolution of 1024x1024)
MafiaBoss_Blink.png (with a resolution of 1024x1024)
✎ Uploading to the Workshop
After you 're done drawing your textures, in order to upload your texture pack to the Workshop you have to do the following:
You can acess this folder by pressing the button in the Texture creator options...

... Or you can find it using the following path on your PC:
C:\Users\%USERNAME%\AppData\LocalLow\South East Games\Paint The Town Red\CustomTextures
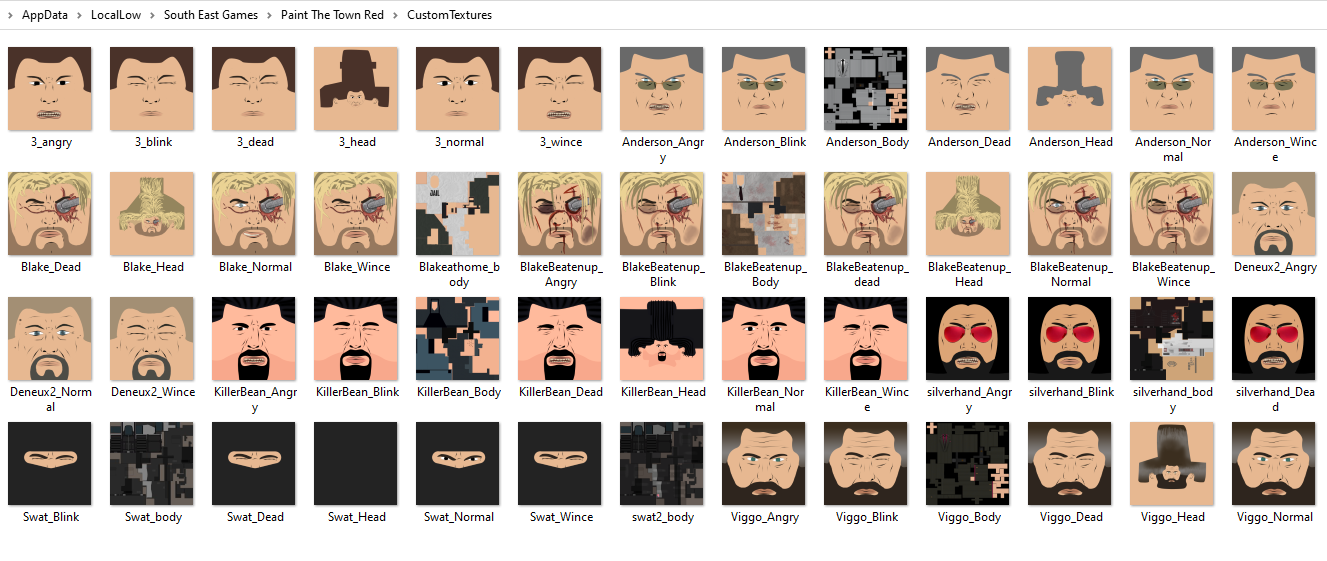
If your texture follows every requirement listed in a previous section of this guide, you'll be able to find the texture in the following list:
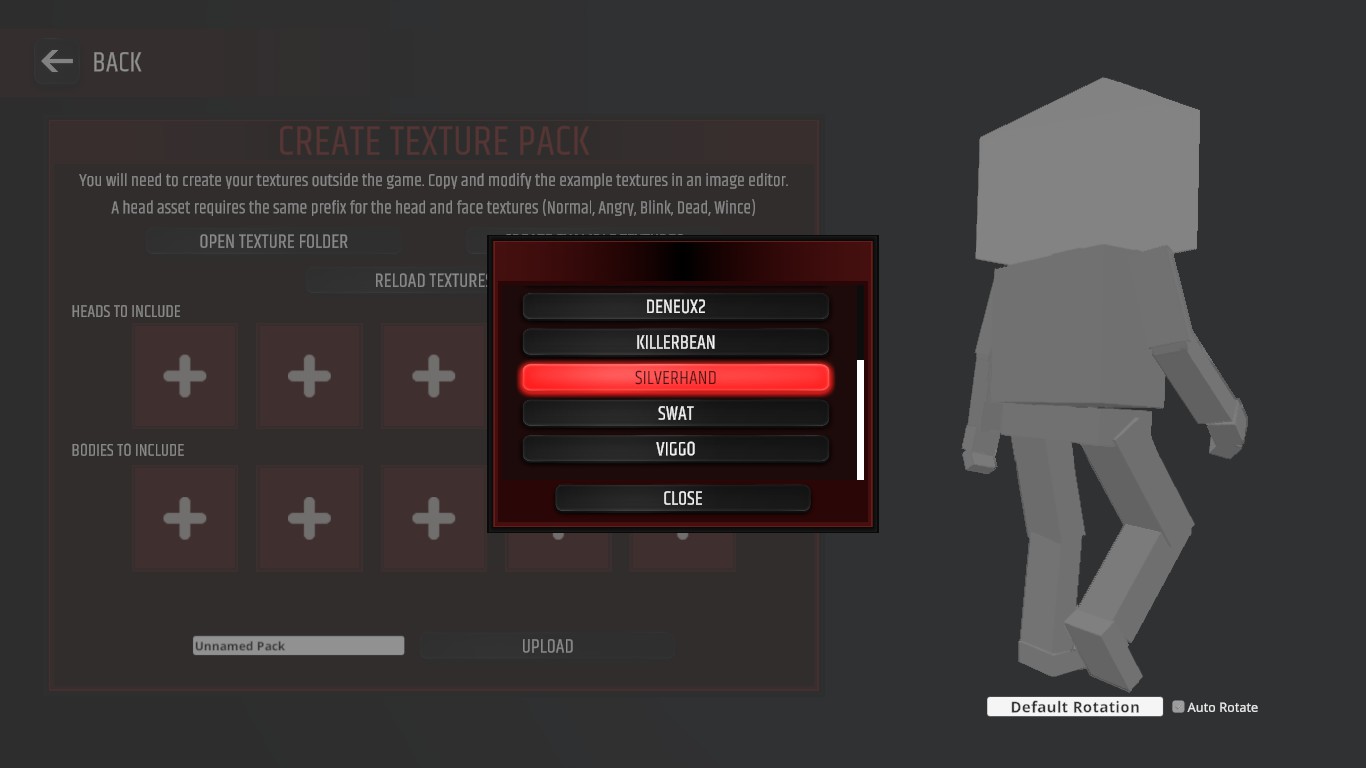
Choose the name of the file you want to include into your pack and click on it. Now you'll be able to preview your texture on a model to the right:
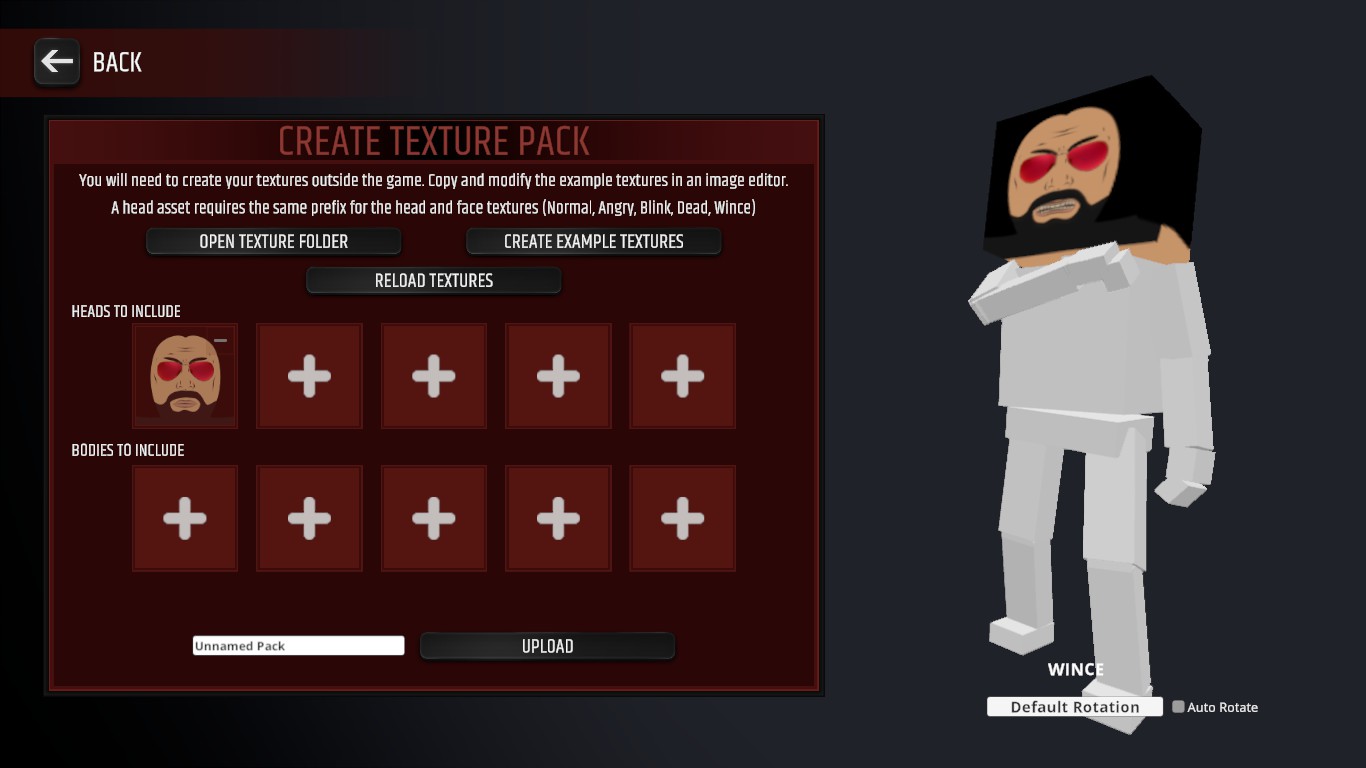
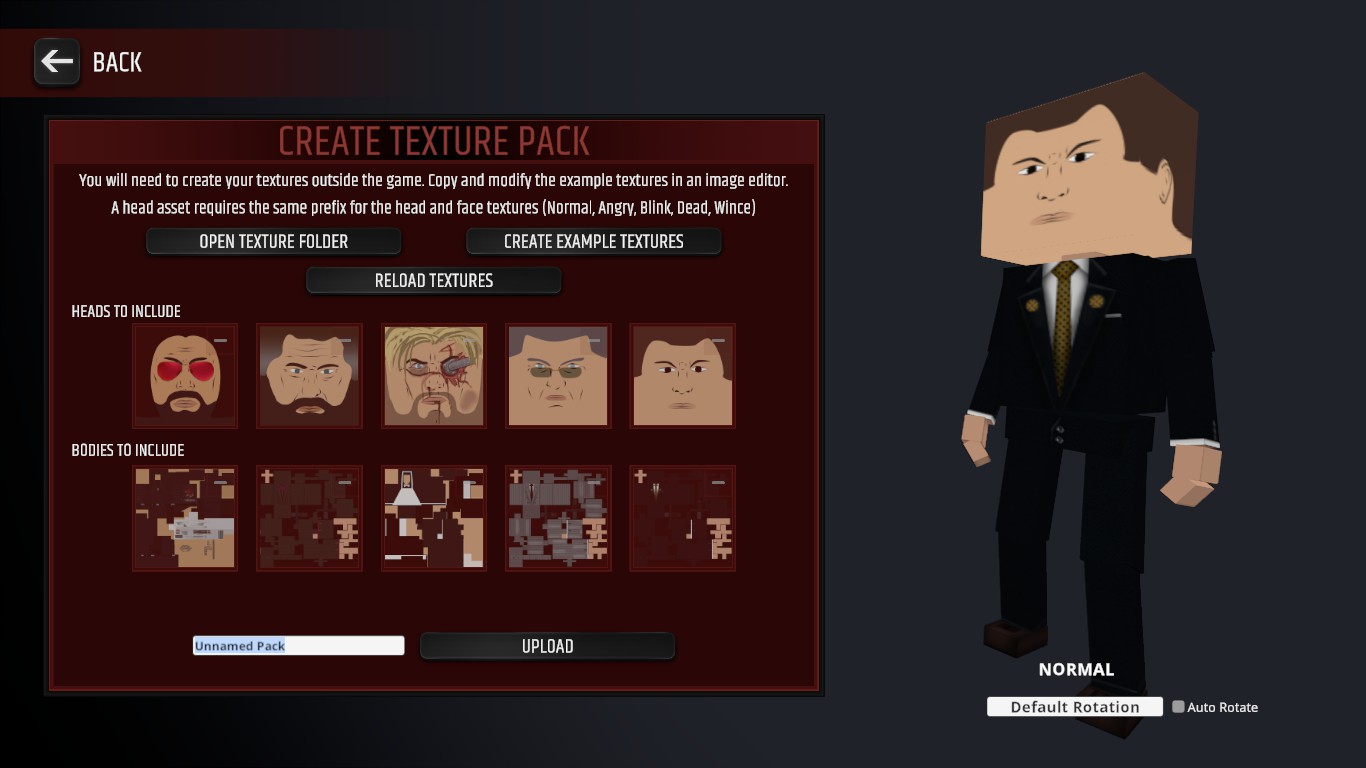
Click upload button, and then once again click UPLOAD PACK in the following menu.
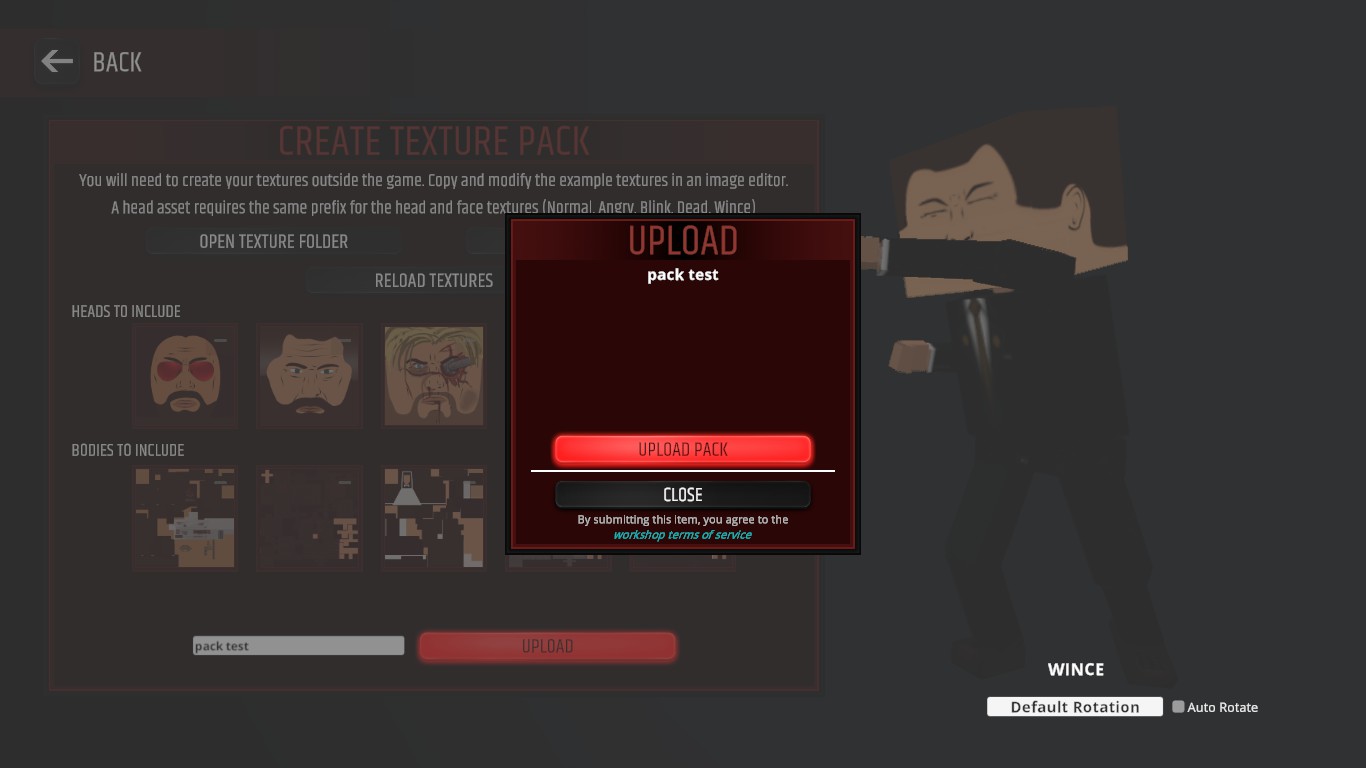
After that, you'll be redirected to a workshop page with your product.
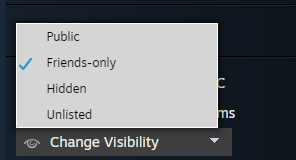
Even if you're not planning to make your pack visible (for example, you want to release a map first), you still have to set its visibility to be 'friends only' at least. Otherwise, the pack won't appear in the level editor even after subscription.
✎ Applying the texturepack to your level
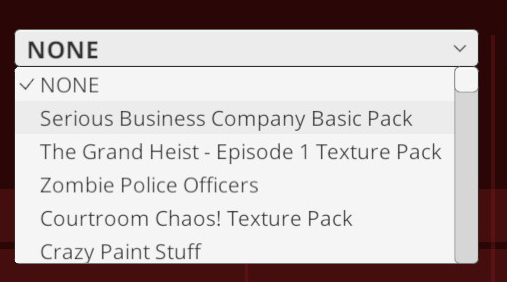
You'll get to the following submenu where you can set up custom appearances:
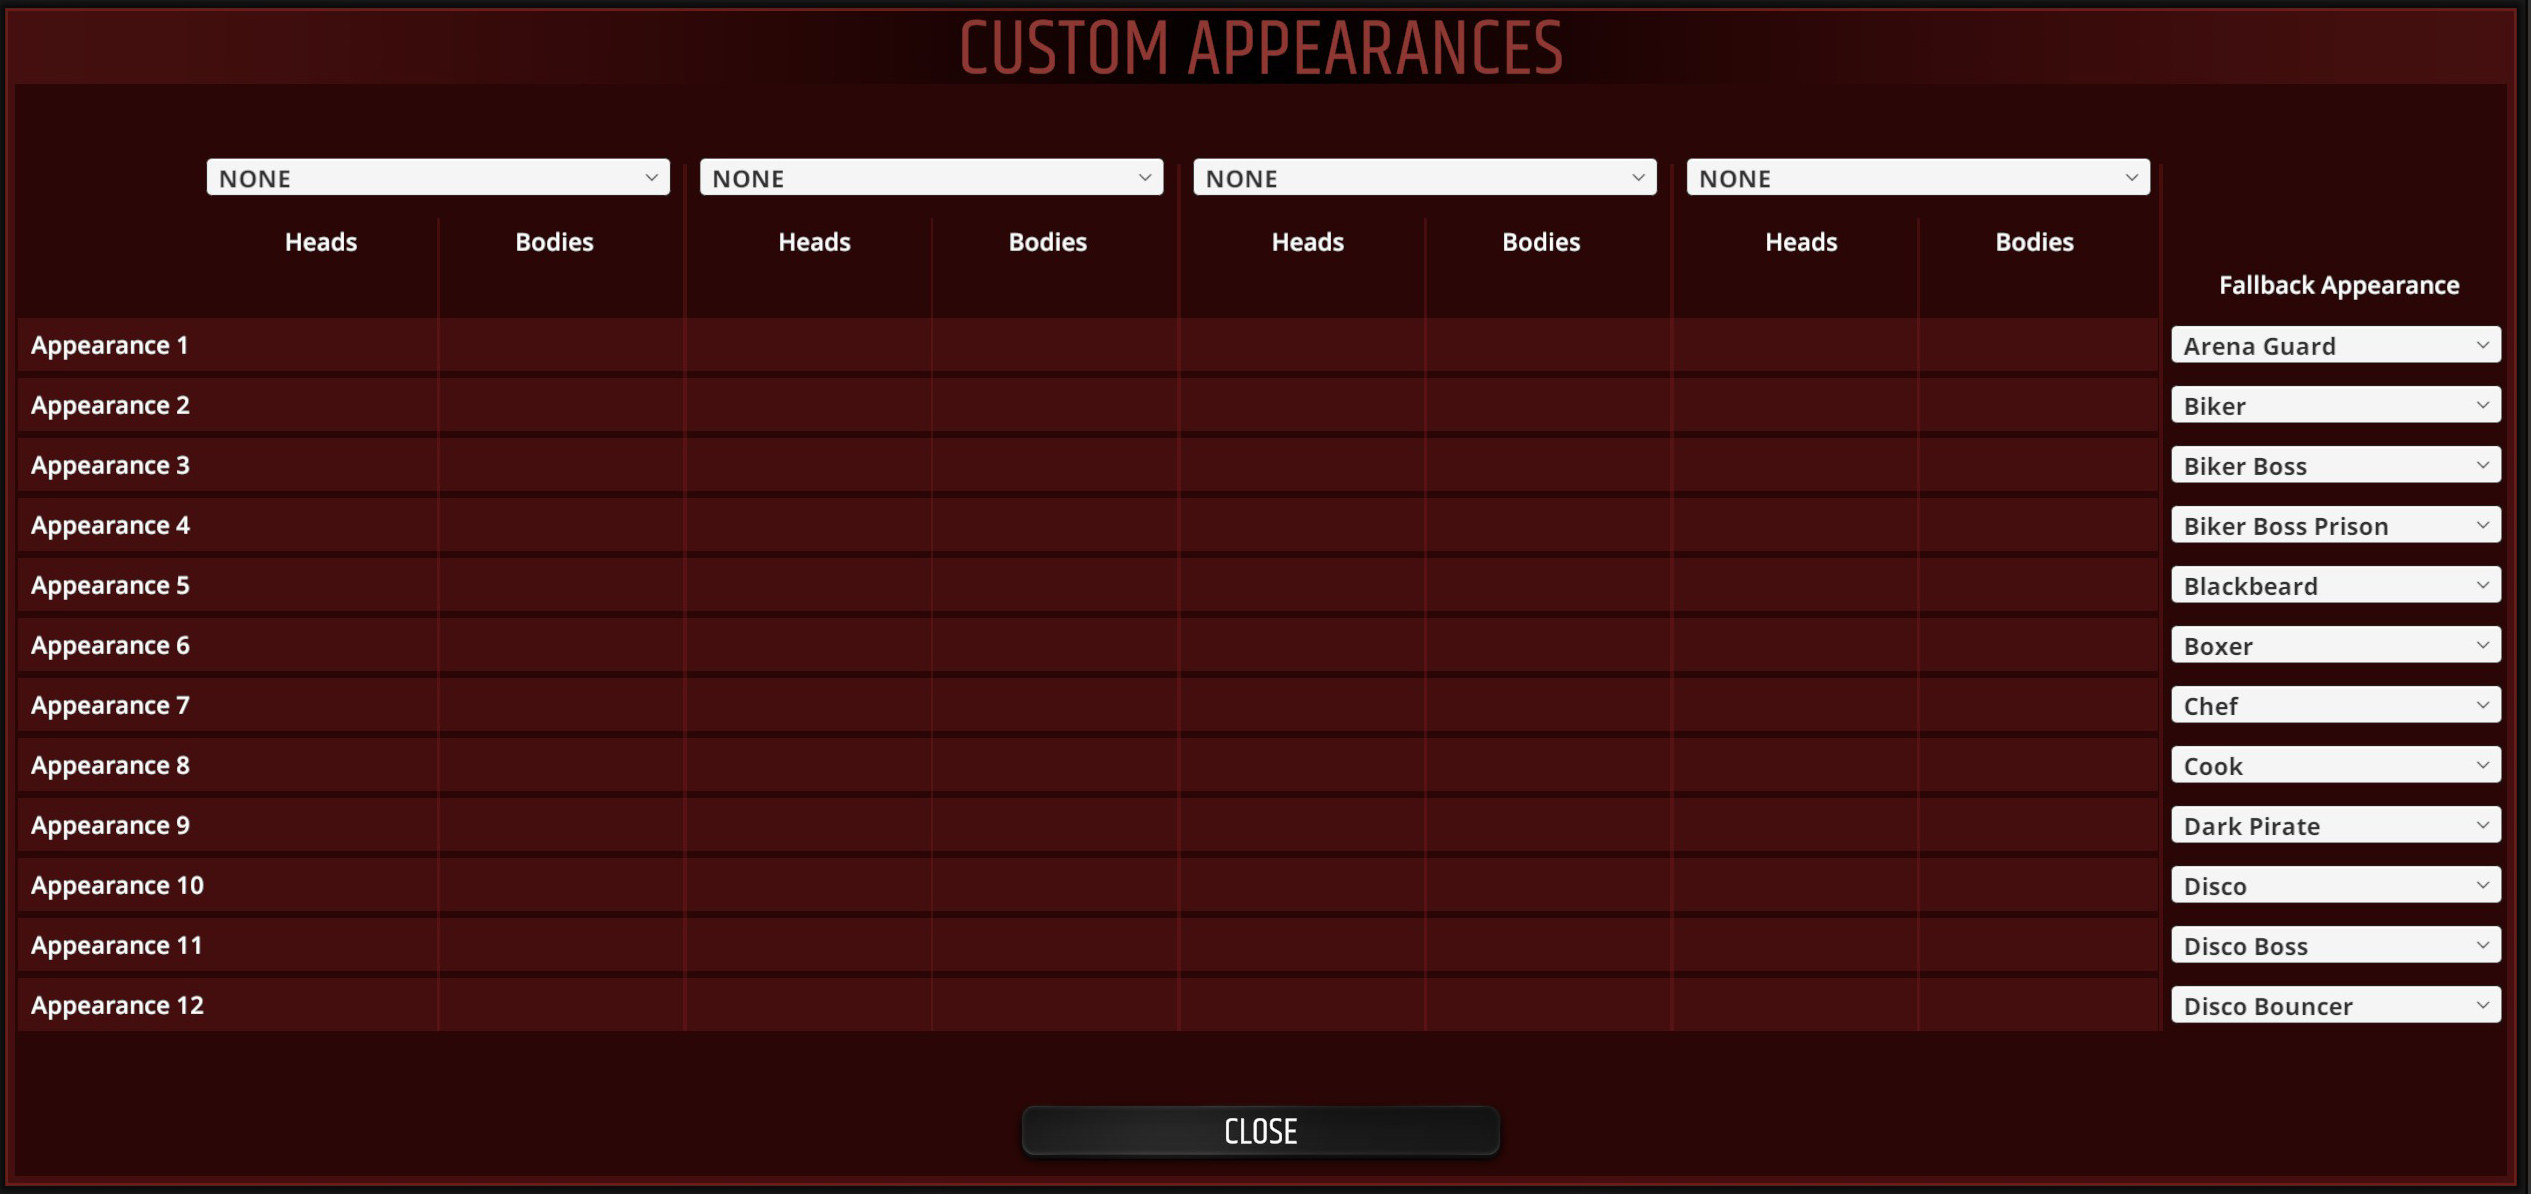
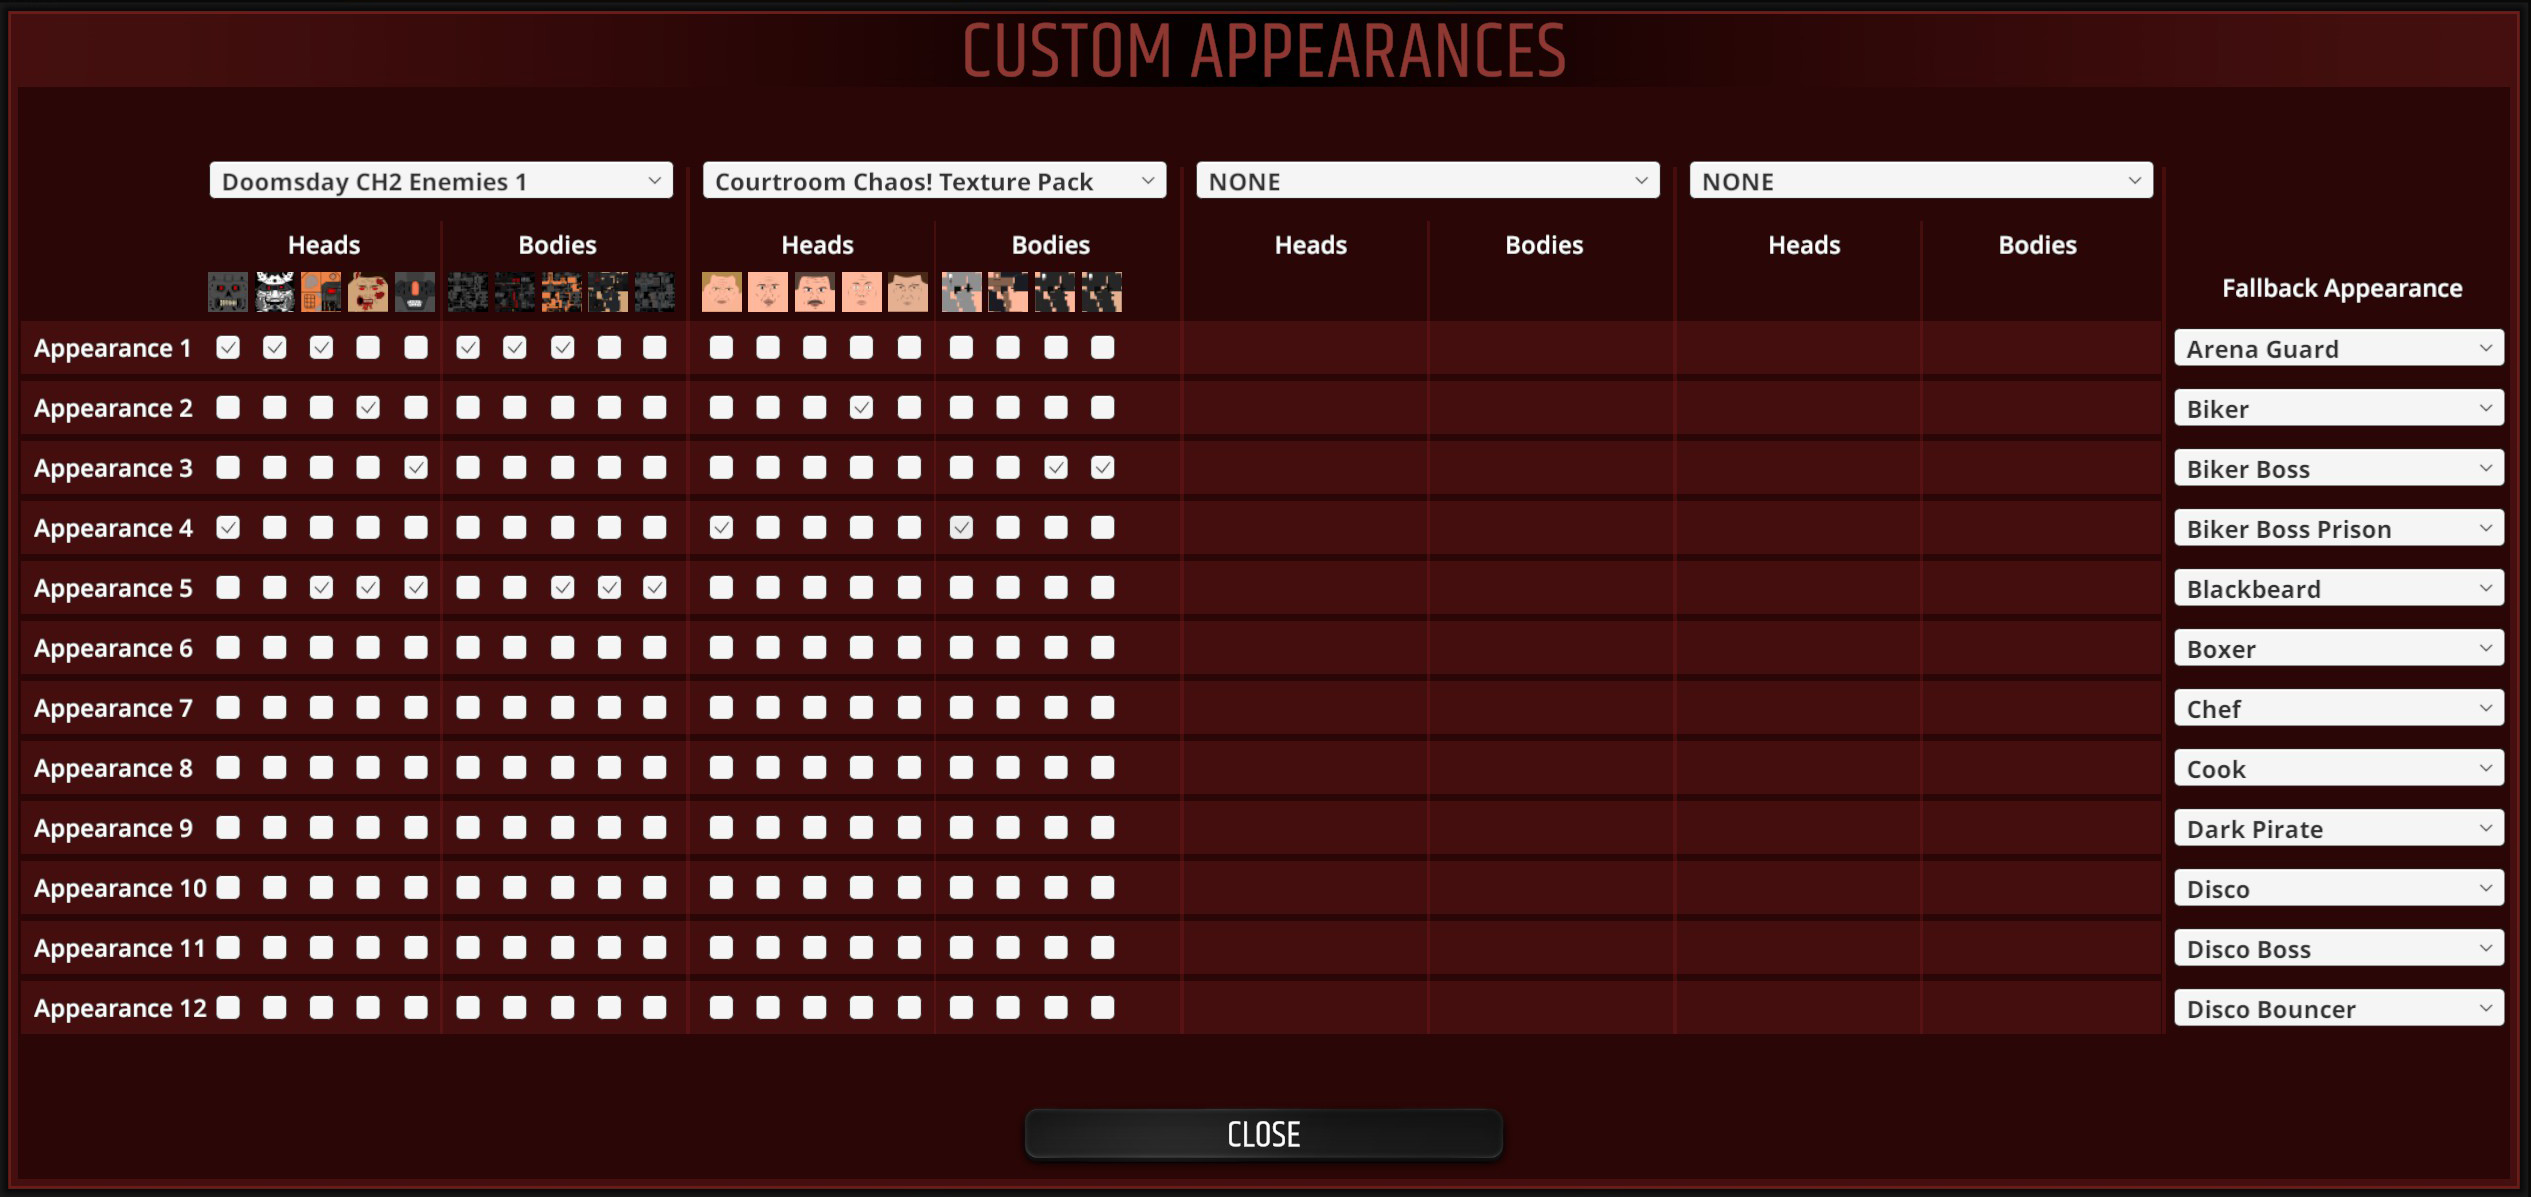
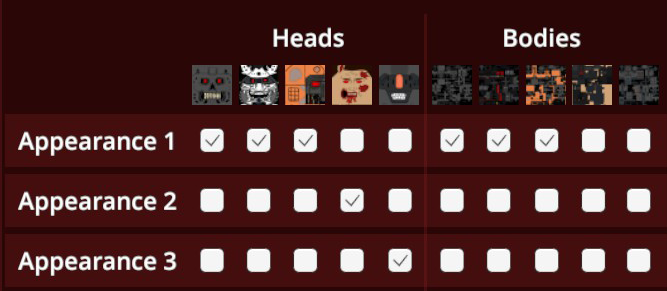 One line is for one custom appearance.
When you check the boxes in one line, you select heads and bodies the current appearance may have.
For example, if you check 1 box for head and 1 for body, the character will have a 100% to spawn with these textures.
If you check 2 boxes for head, each head texture will have a 50% chance to appear.
✎ An alternative community guide
♫ Overview and Requirements
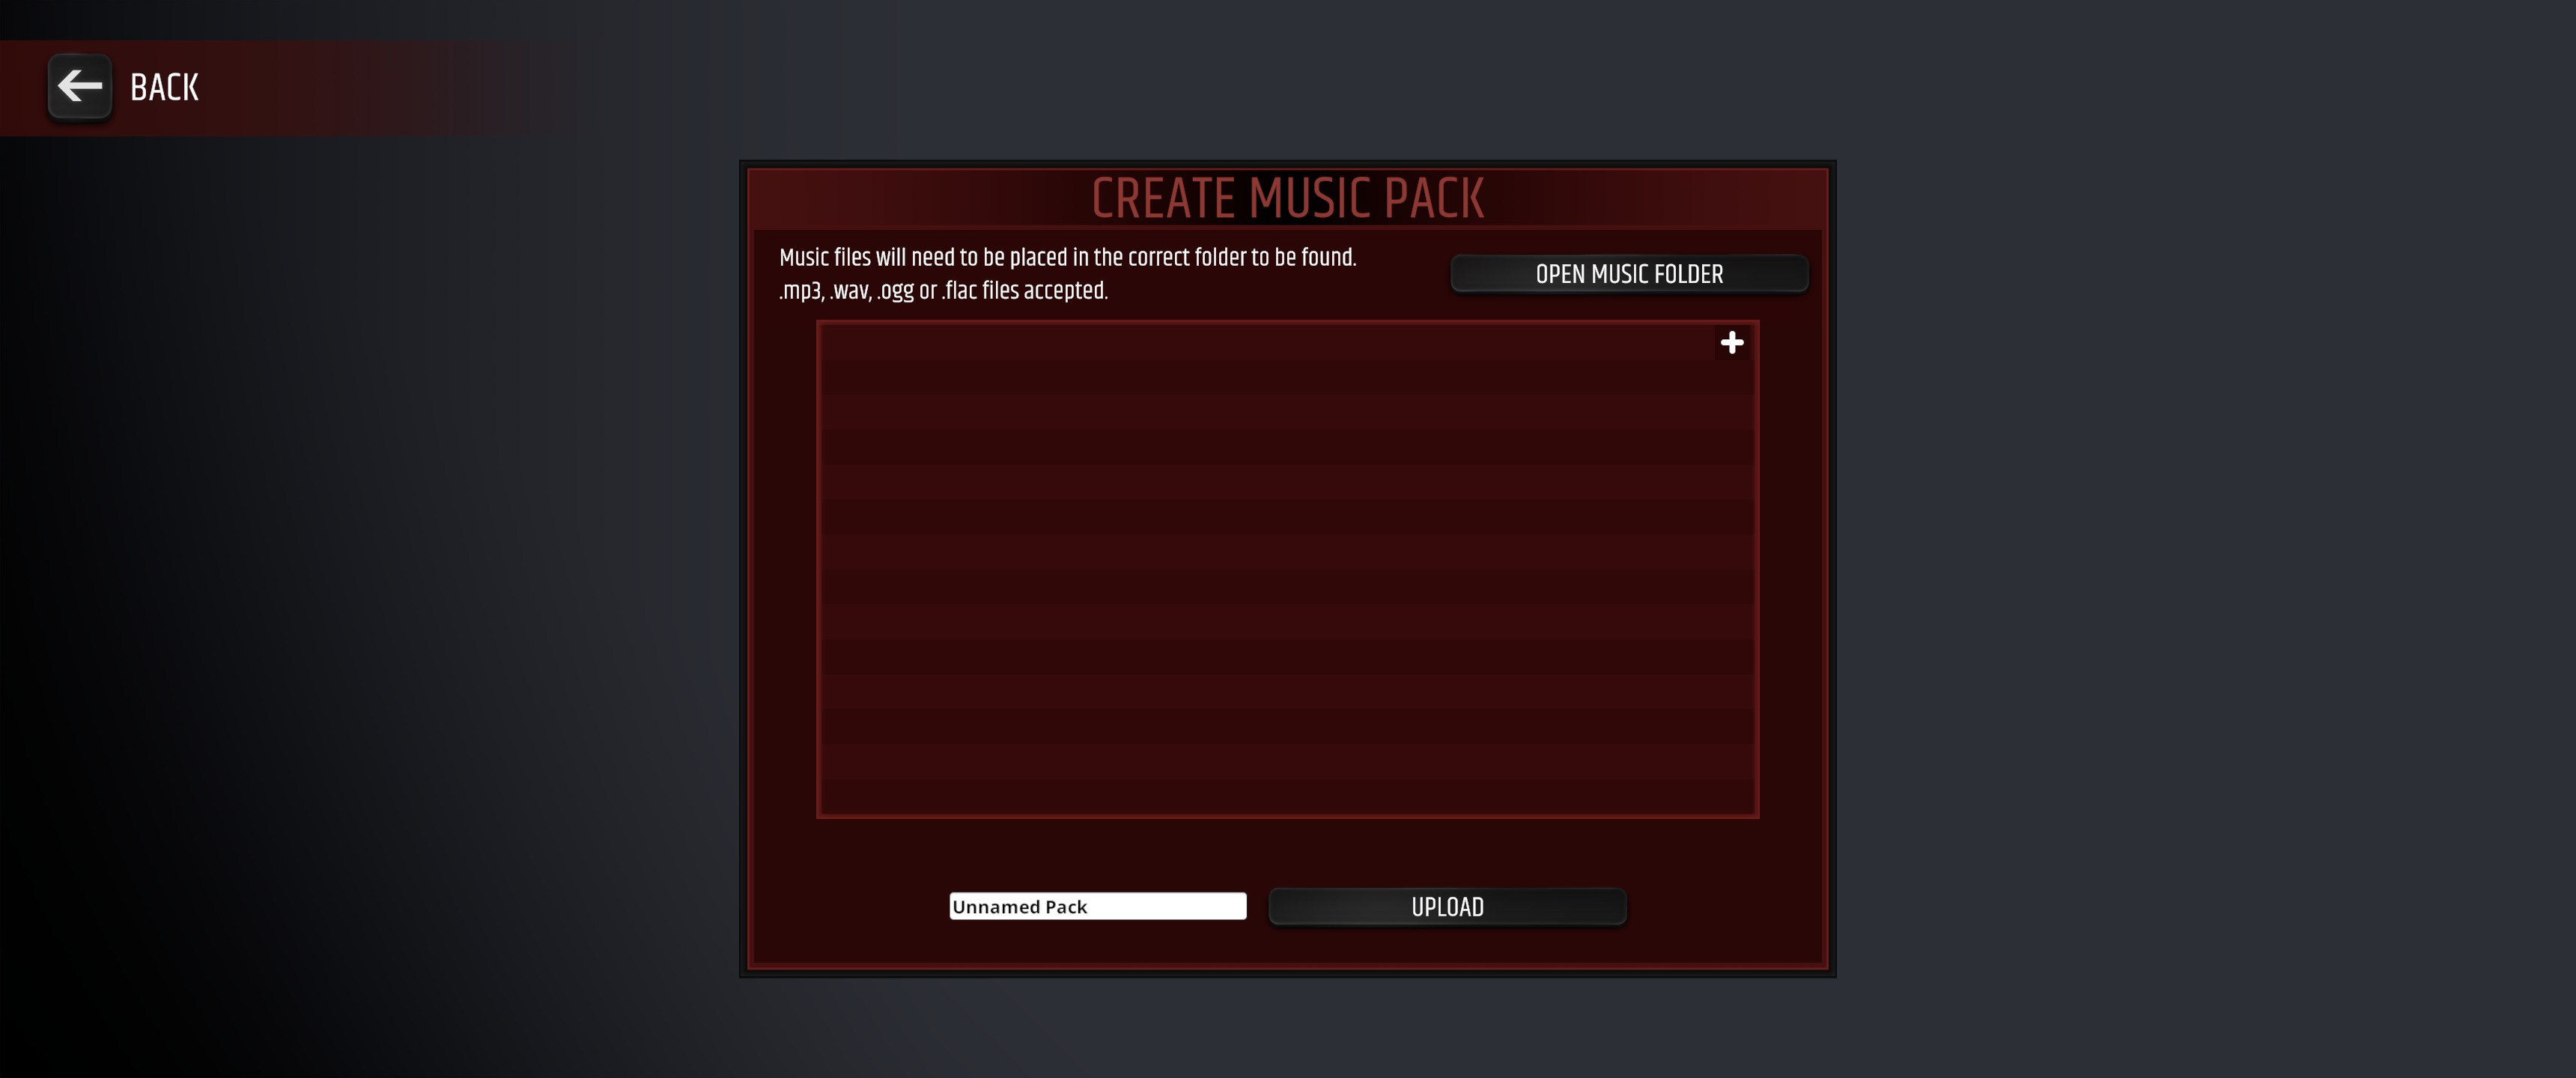
Custom music packs allow you to use any sounds and music you need for your levels.
Valid music file formats/extensions are:
- .mp3
- .flac
- .wav
- .ogg
You'll typically want to use MP3 or OGG files as they are compressed and much smaller than WAV files.
♫ Uploading to the Workshop
You can acess this folder by pressing the button in the Music creator options...

... Or you can find it using the following path on your PC:
C:\Users\%USERNAME%\AppData\LocalLow\South East Games\Paint The Town Red\CustomMusic
If your file follows every requirement listed in a previous section of this guide, you'll be able to find the track in the following list:
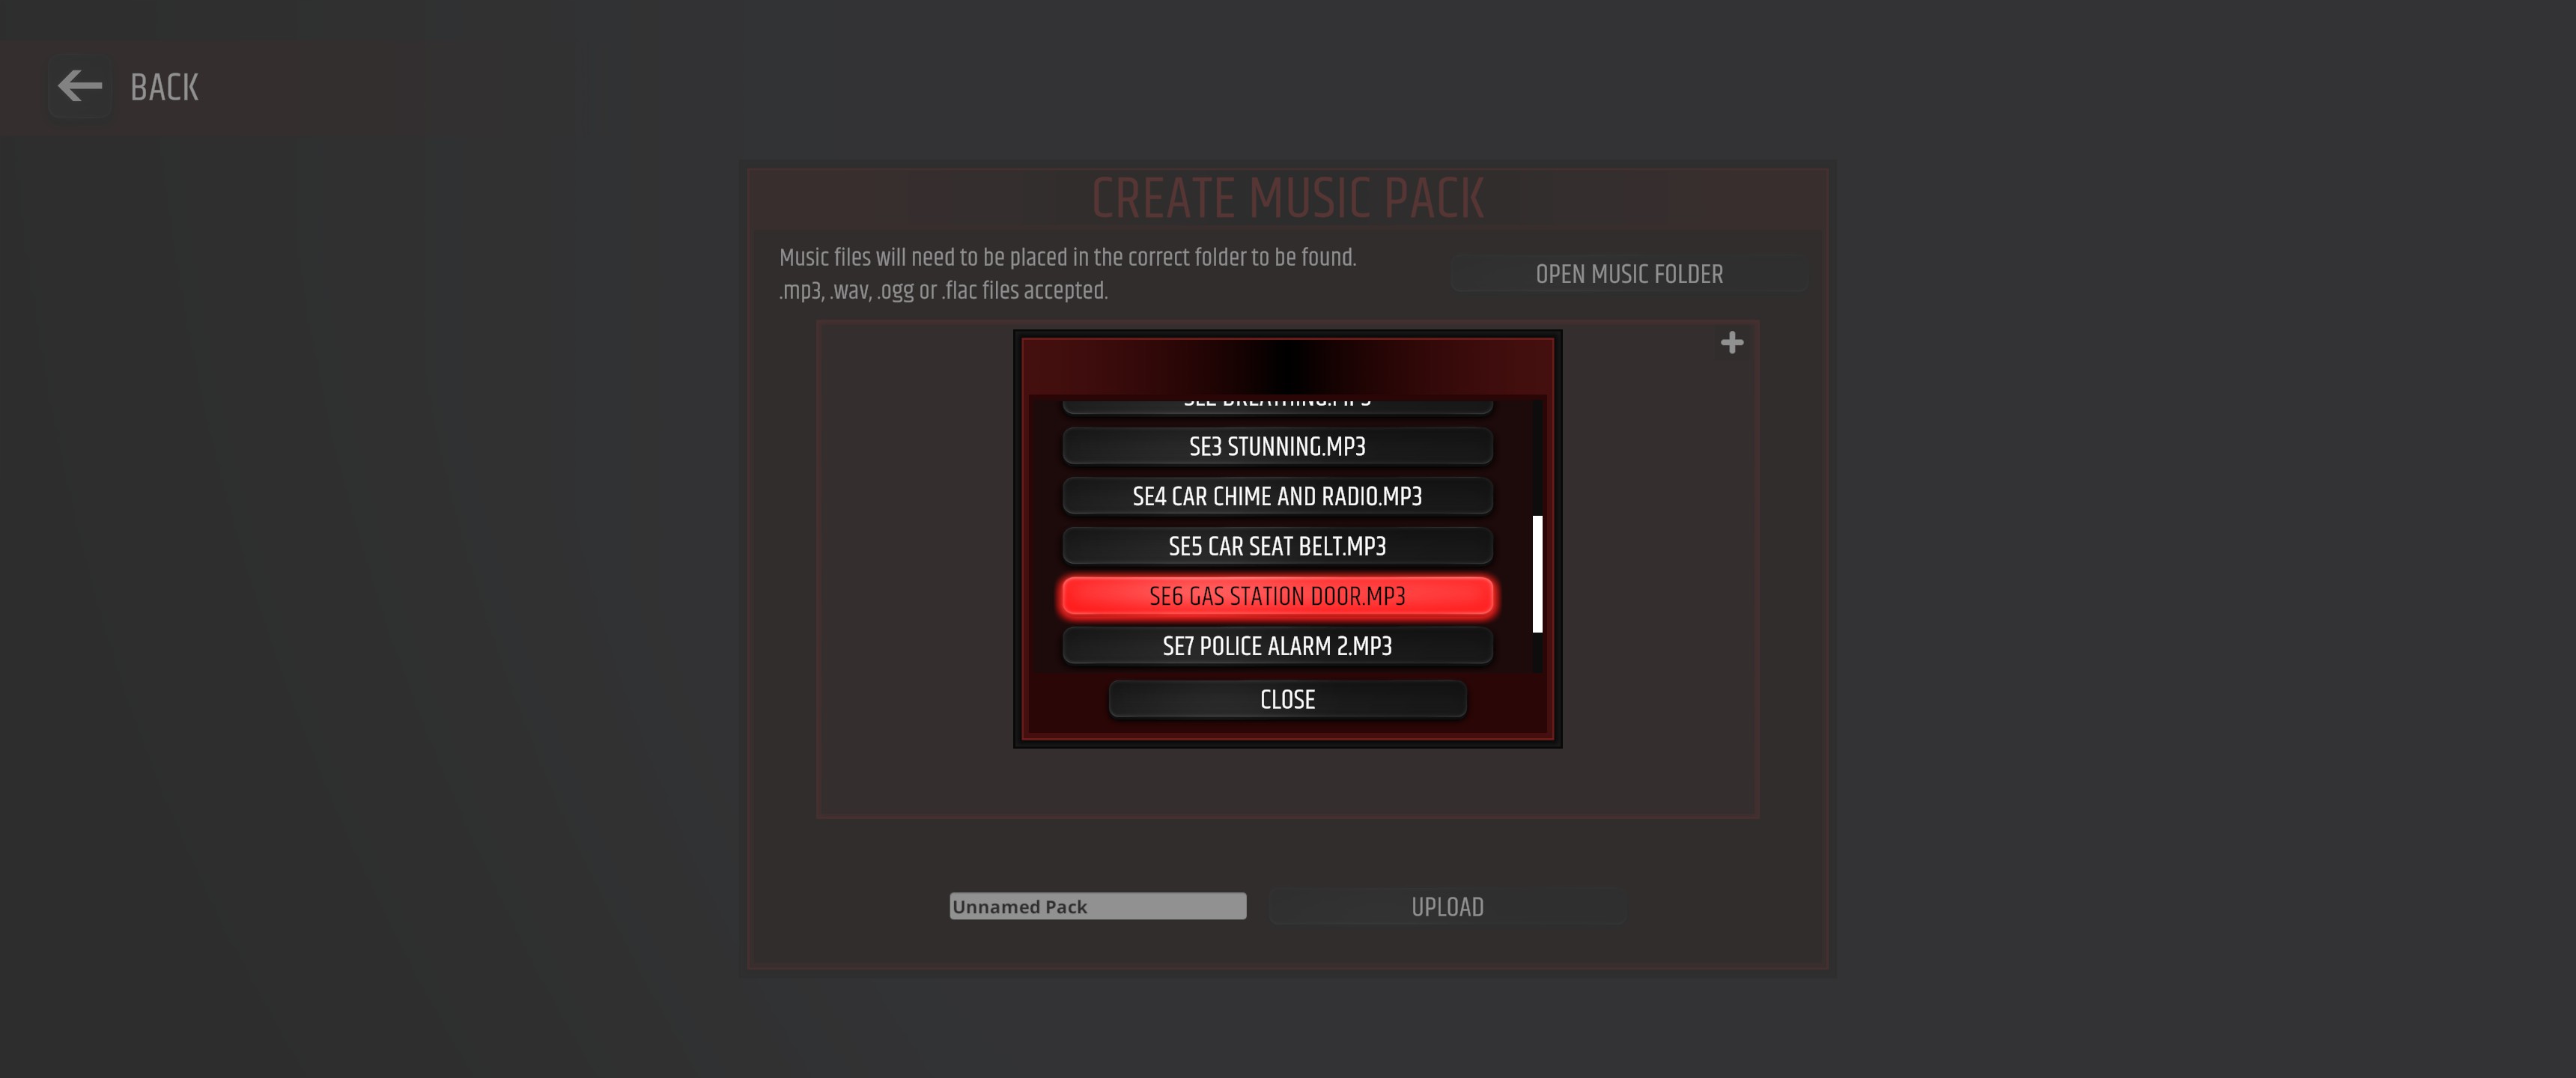
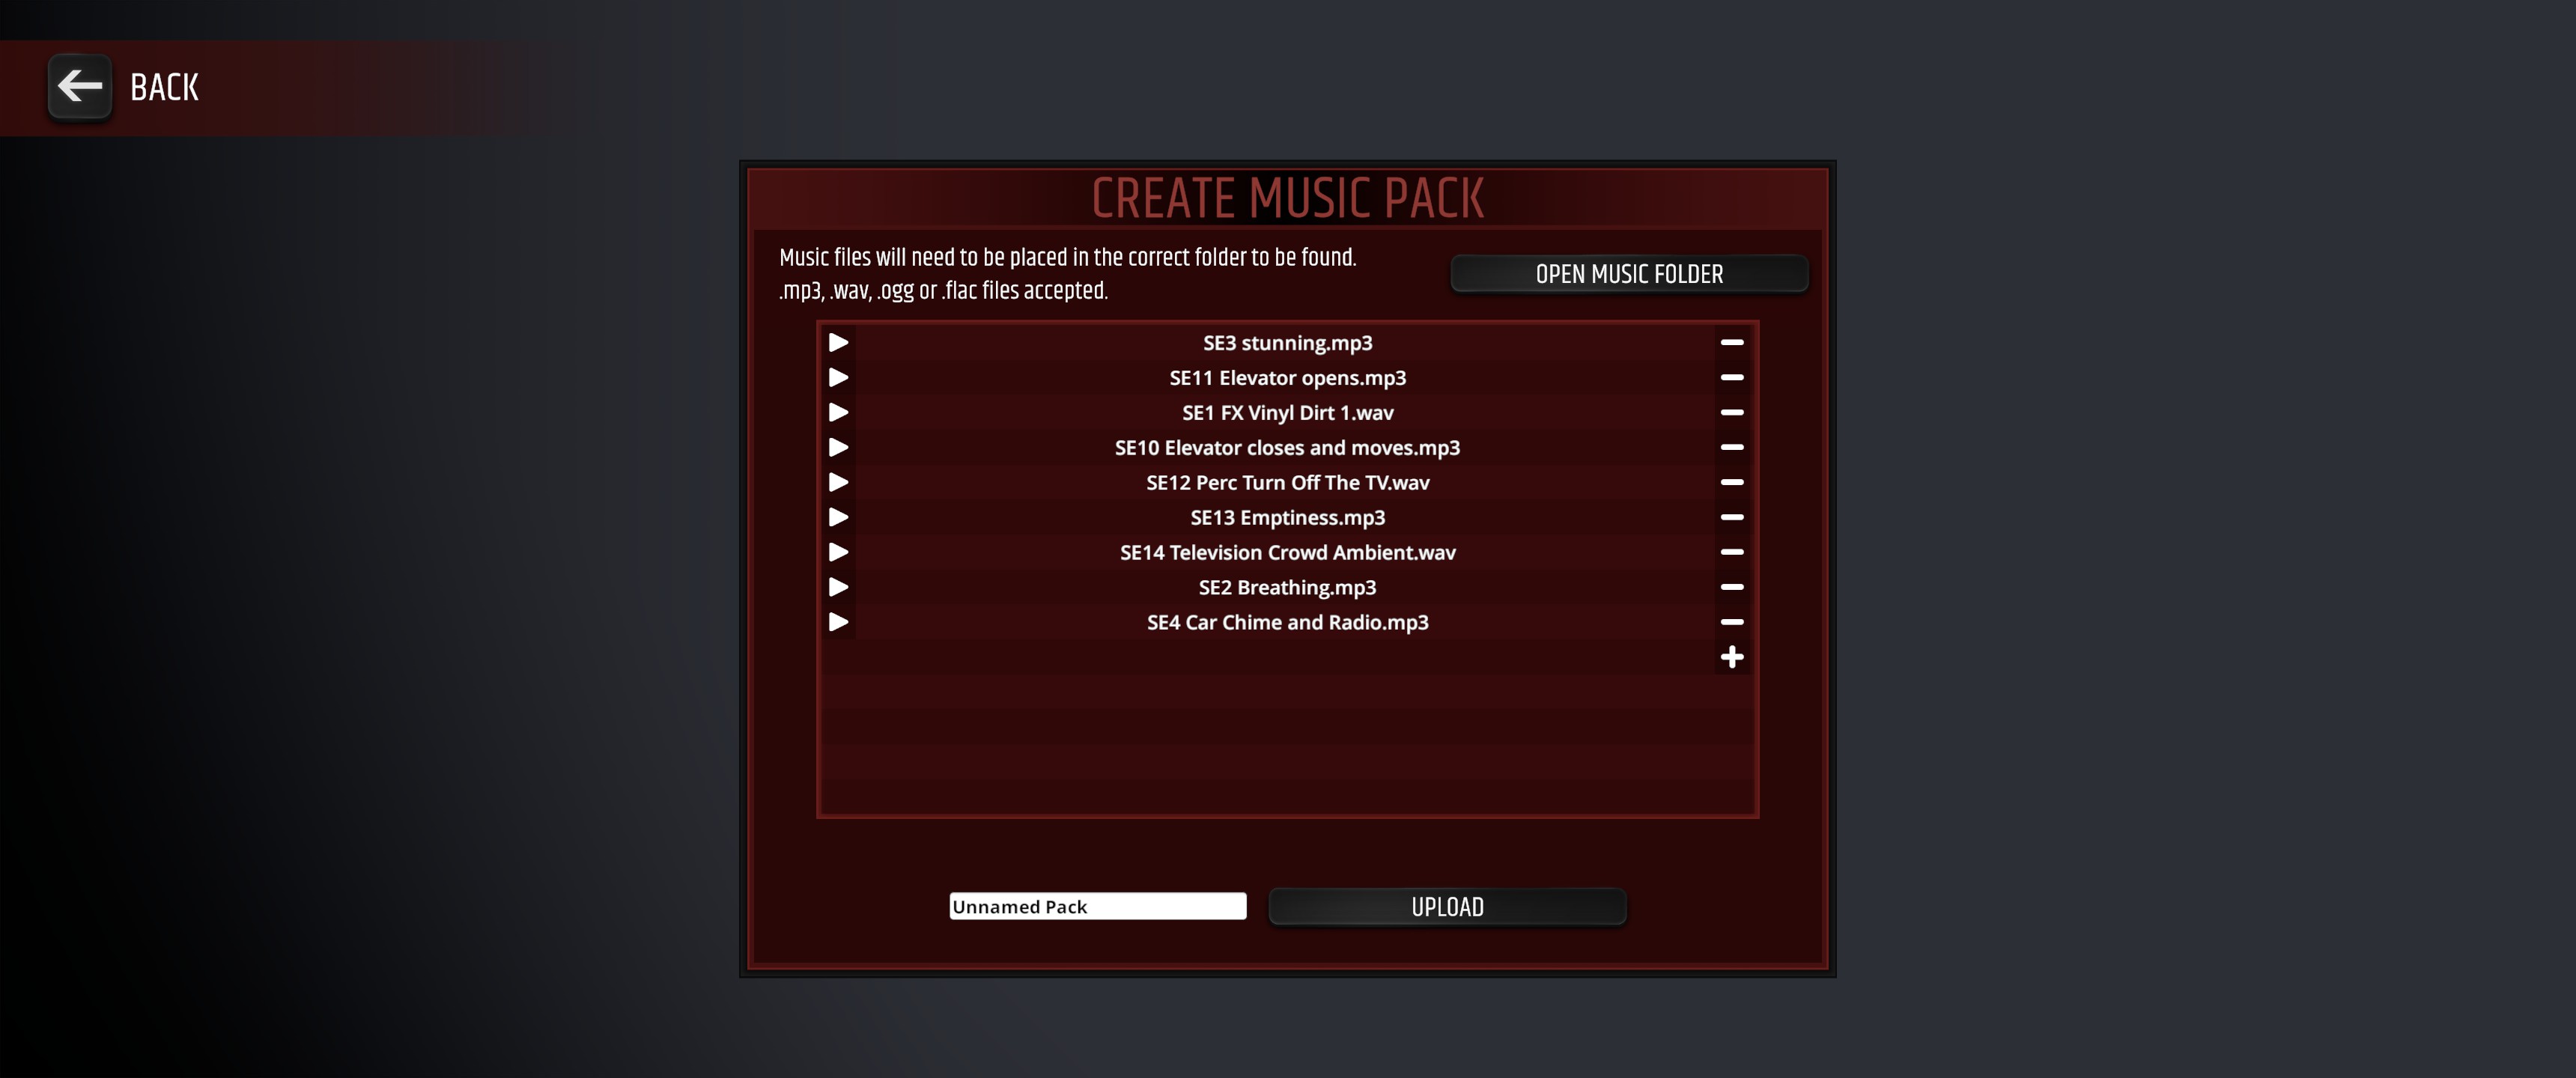
Click upload button, and then once again click UPLOAD PACK in the following menu.
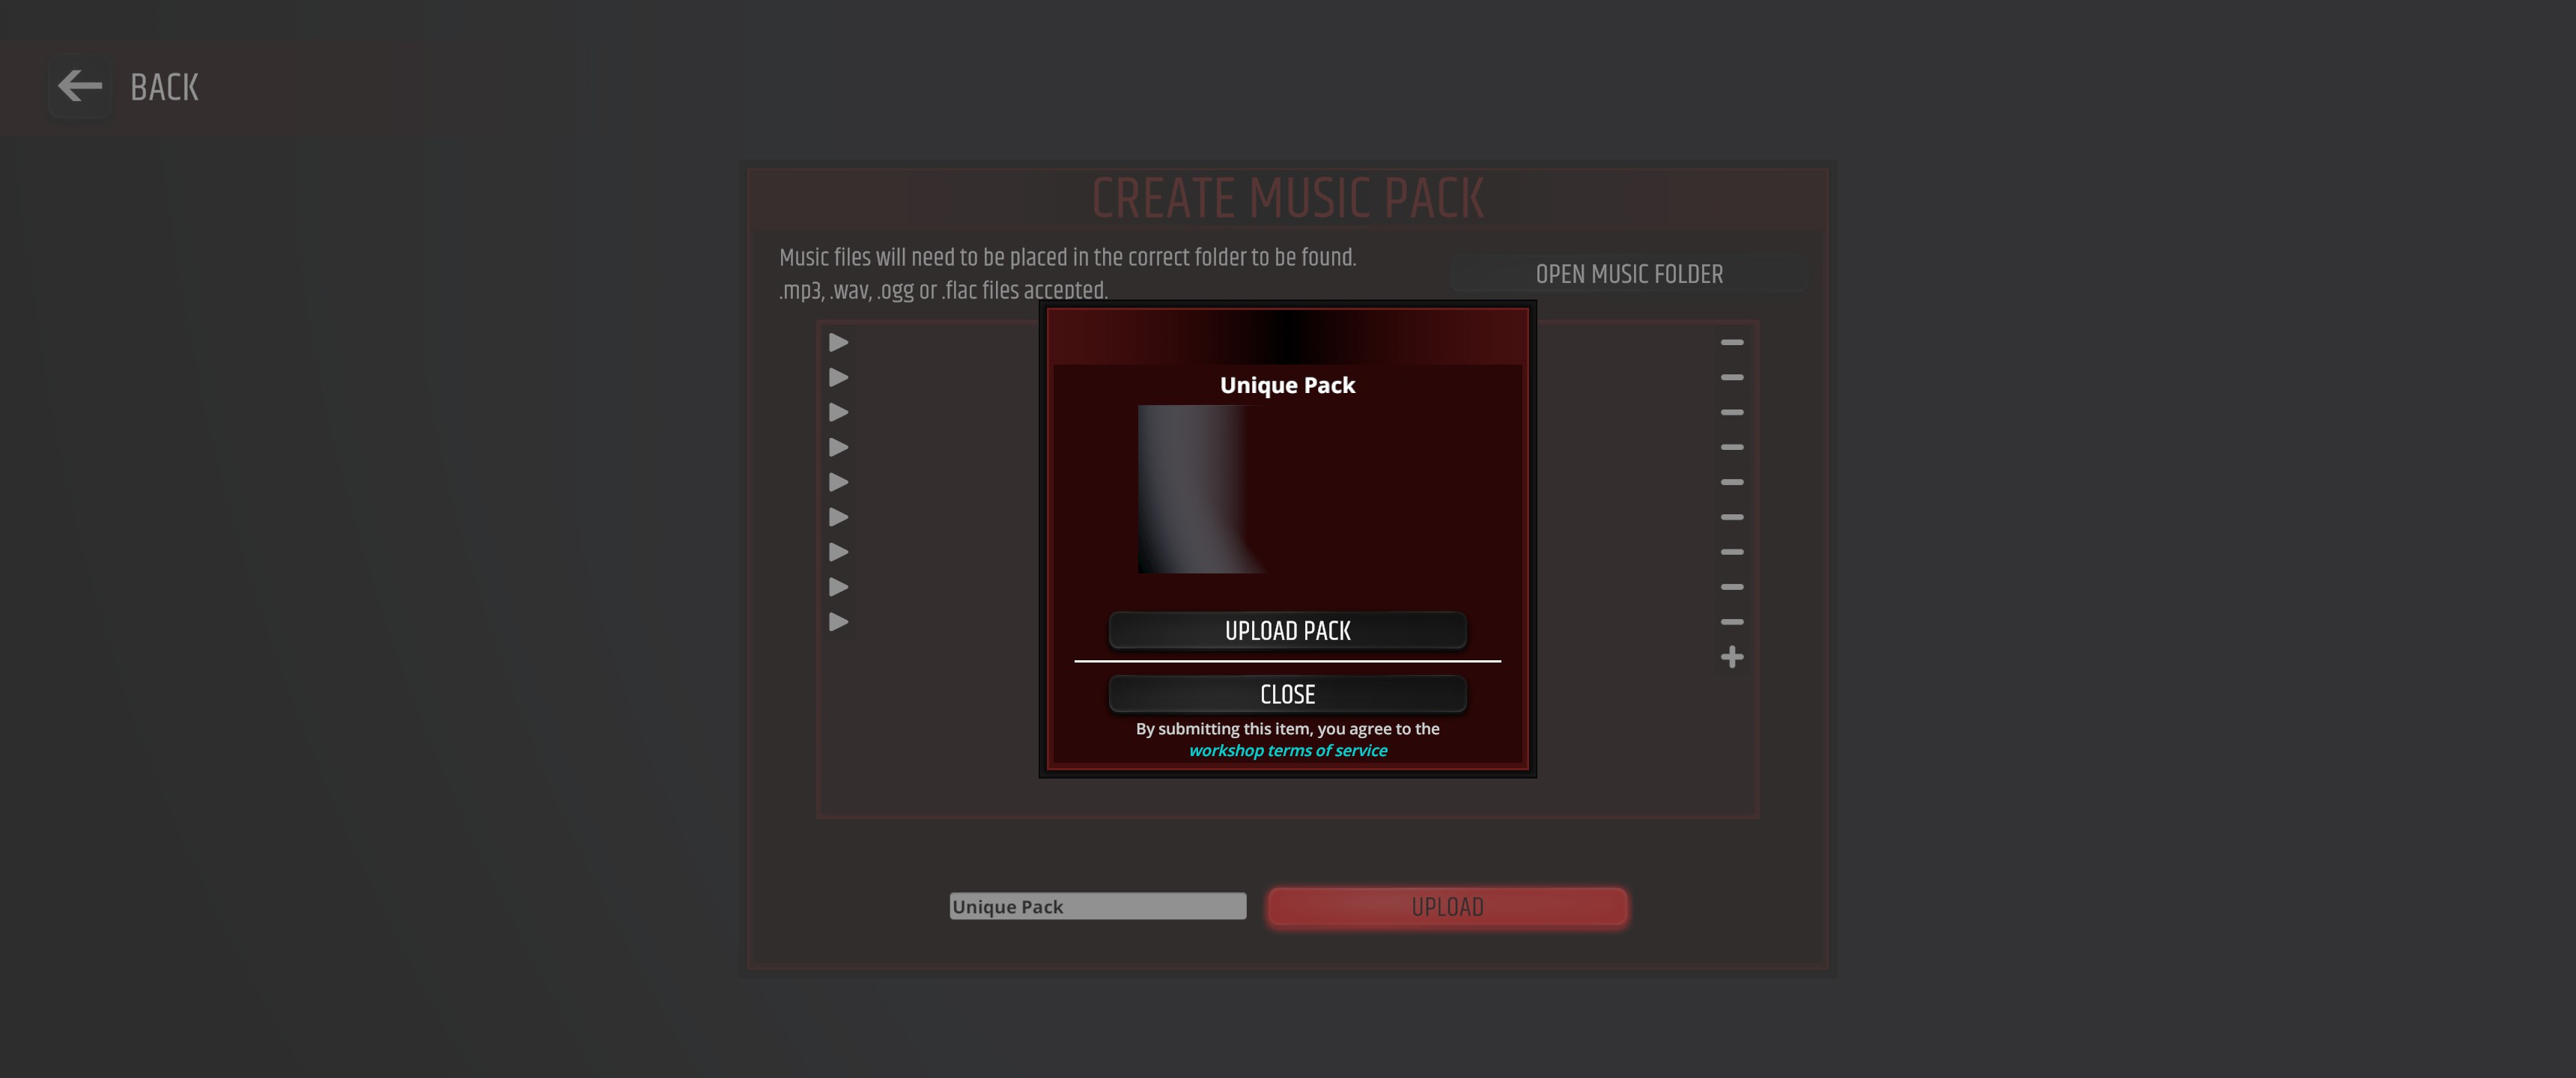
After that, you'll be redirected to a workshop page with your product.
Even if you're not planning to make your pack visible (for example, you want to release a map first), you still have to set its visibility to be 'friends only' at least. Otherwise, the pack won't appear in the level editor even after subscription.
♫ Applying the music pack to your level
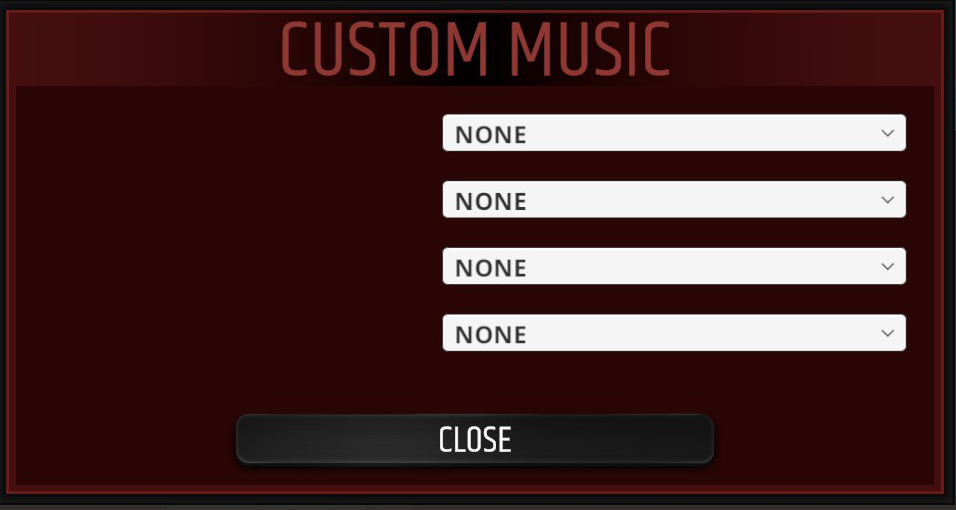
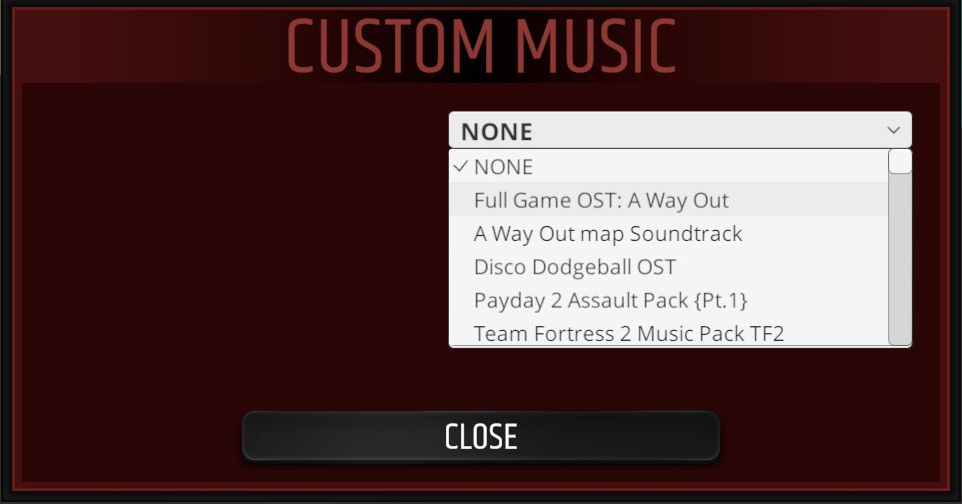
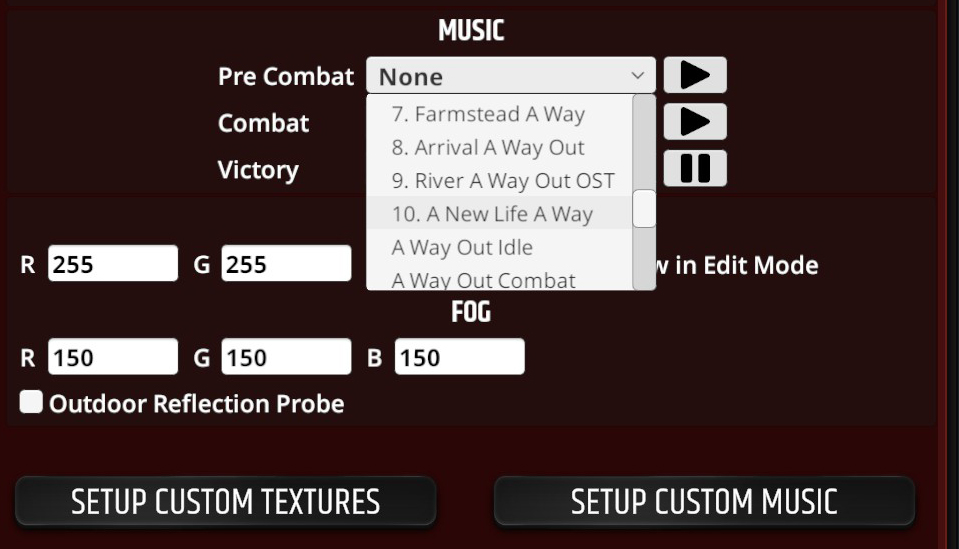
... or when editing the sound tool properties
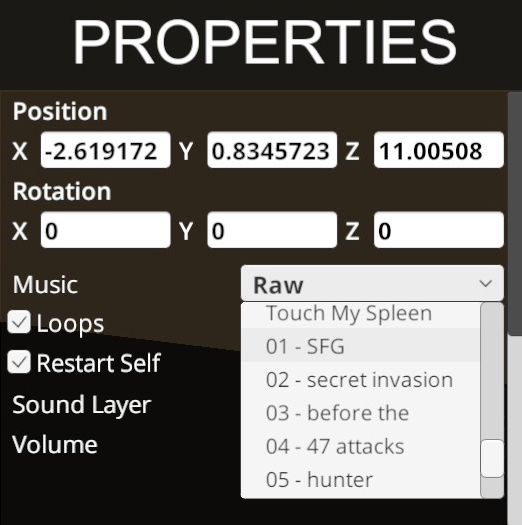
♫ An alternative community guide
Official Discord

Join us on our Discord at https://discord.gg/pttr
You can always ask fellow mapmakers for help out there ;)
More Steam Guides
https://steamcommunity.com/sharedfiles/filedetails/?id=3023528318
https://steamcommunity.com/sharedfiles/filedetails/?id=860922469
https://steamcommunity.com/sharedfiles/filedetails/?id=2422014262
https://steamcommunity.com/sharedfiles/filedetails/?id=2927892836
Errors & Problems
If you searched through the guide and didnt find an answer to your questions with creating things, or making them work the way you want, you can always ask your question in the comments.
- how to befriend the man in solitary★ 5 (284)20k views167 ♥1 minUpdated 26 Dec, 2016
- How to Unlock Every Achievement★ 5 (265)11k views487 ♥15 minUpdated 3 Jan, 2023
- Beneath: A Beginner's Guide★ 4 (128)8.6k views177 ♥8 minUpdated 6 Dec, 2019
- Значение всех модификаторов★ 5 (157)6.5k views199 ♥8 minRussianUpdated 12 Jul, 2025
- Как разблокировать все достижения★ 4 (146)6.2k views415 ♥13 minRussianUpdated 21 Apr, 2024
- a few hidden weapons (bar)★ 4 (38)5.9k views17 ♥1 min



- Upgrading to PremiumTeam Fortress 2★ 5 (20k)1441k views11k ♥6 minUpdated May 11, 2022
- No More Room in Hell Official ManualNo More Room in Hell★ 5 (2.8k)569k views2.1k ♥29 minUpdated Apr 22, 2019
- NMRiH Community Hosting GuidesNo More Room in Hell★ 5 (526)351k views653 ♥1 minUpdated Aug 10, 2022
- ULTIMATE GUIDE FOR GAME DEV TYCOONGame Dev Tycoon★ 5 (5.8k)326k views10k ♥4 minUpdated 23 Jan, 2014
- How to 'Git Gud' Soon™MORDHAU★ 5 (2k)318k views3k ♥68 minUpdated Nov 16, 2024
- Лучшие кооперативные игры SteamPAYDAY 2★ 5 (1.5k)315k views2.1k ♥56 minRussianUpdated Apr 27, 2025






This guide was created by its original author on the Steam Community. Are you the author and want it removed? Request removal.