Life is Strange: Before the Storm 100% achievement guide (English)
Non-missable achievements
These achievements are story-progression-related and can not be missed.
 Awake, Dear Heart
Complete Episode 1: Awake
 O, Wonder!
Complete Episode 2: Brave New World
 All the Devils are Here
Complete Episode 3: Hell is Empty
 Before the Storm
Complete Episode 1, Episode 2 and Episode 3 of Life is Strange: Before the Storm
Missable achievements
The rest of achievements are graffiti related. The total number of graffitis is 30 (10 in each episode).
To get an achievement, simply get to an area described below and choose the "Graffiti" option if it is available (note that some graffitis require you to do certain actions to make them available). All the graffiti will be listed in chronological order.
To get an achievement, simply get to an area described below and choose the "Graffiti" option if it is available (note that some graffitis require you to do certain actions to make them available). All the graffiti will be listed in chronological order.
Episode 1: Awake
 Recreational Vandalism
Complete the optional graffiti #1 in Episode 1: Awake
Go around the parked RV before you enter the mill
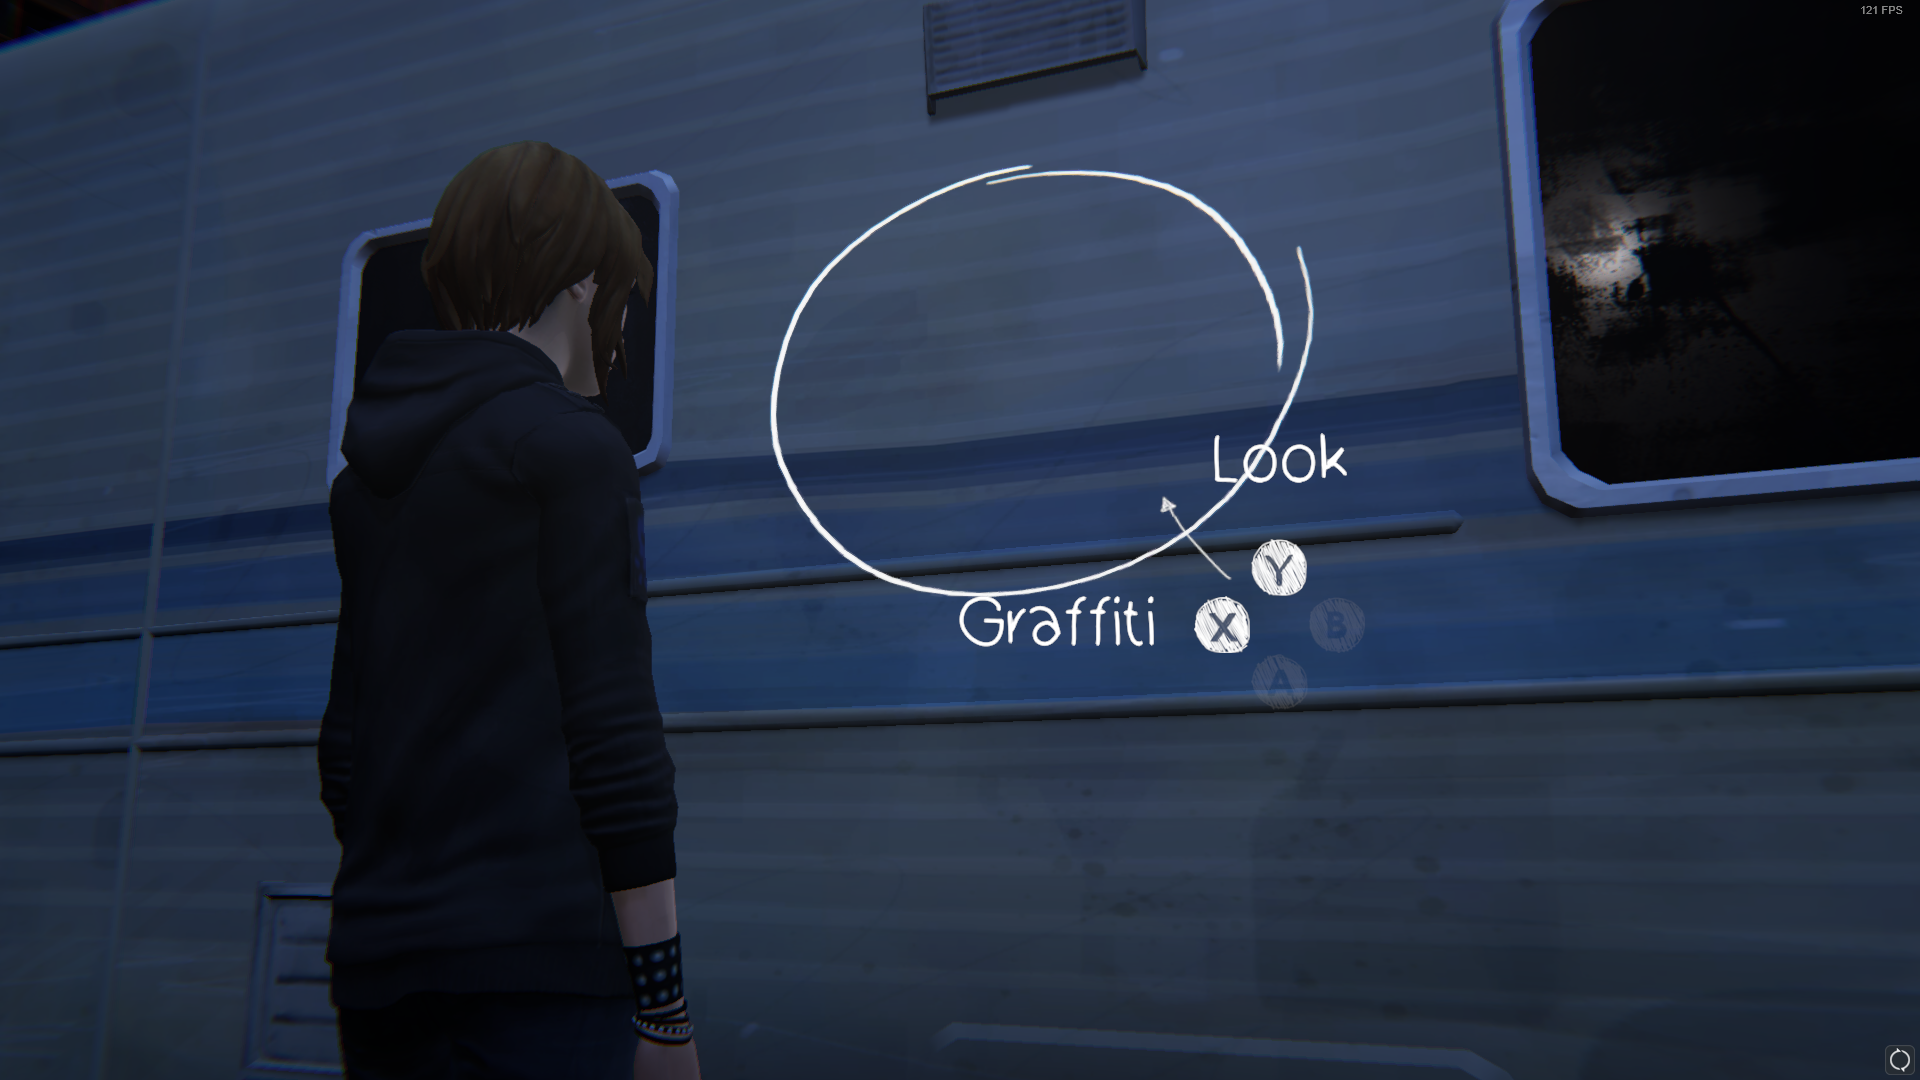
 I See U Saw
Complete the optional graffiti #2 in Episode 1: Awake
Once you enter the mill, there will be a saw blade hanging on the wall just before the crowded area
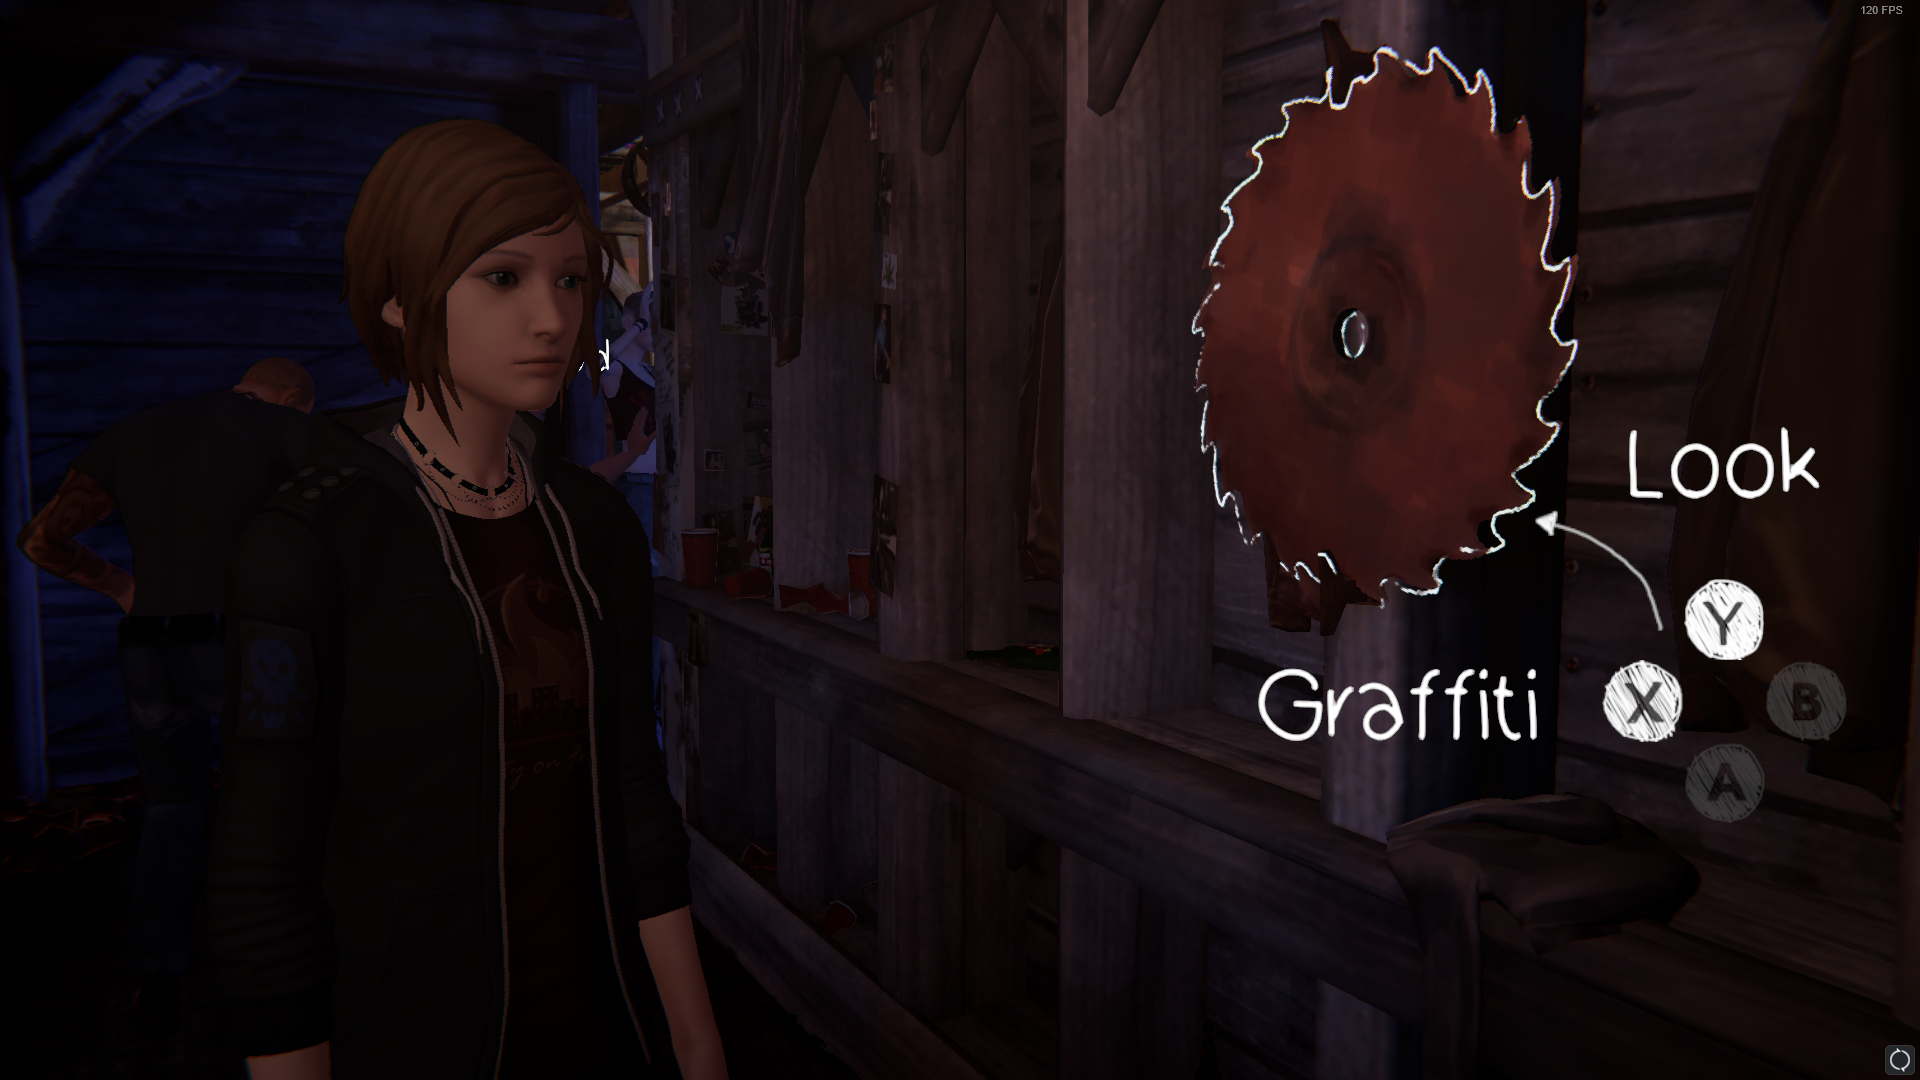
 The Last Unicorn
Complete the optional graffiti #3 in Episode 1: Awake
When in Chloe's room, tear down the unicorn poster to free up space for the graffiti
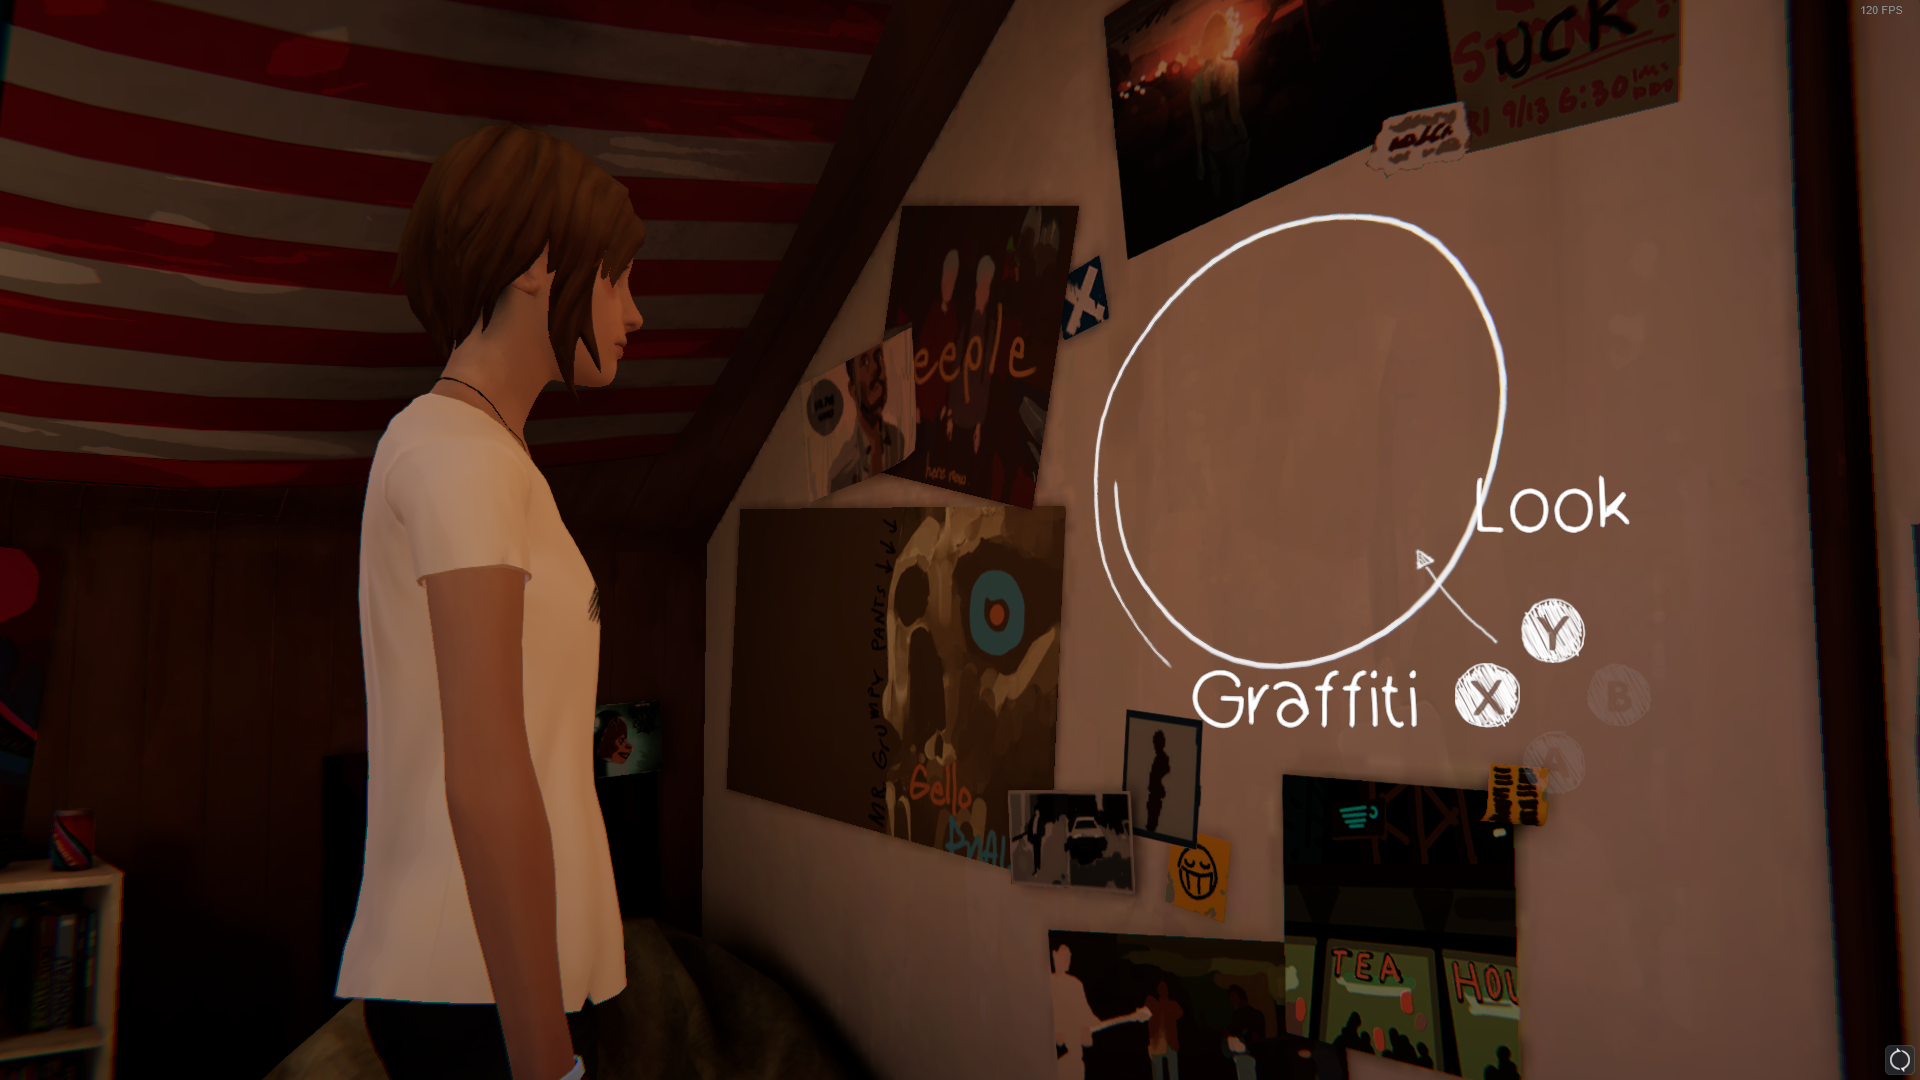
 Home Unimprovement
Complete the optional graffiti #4 in Episode 1: Awake
Grab David's tools from his toolbox, then graffiti it
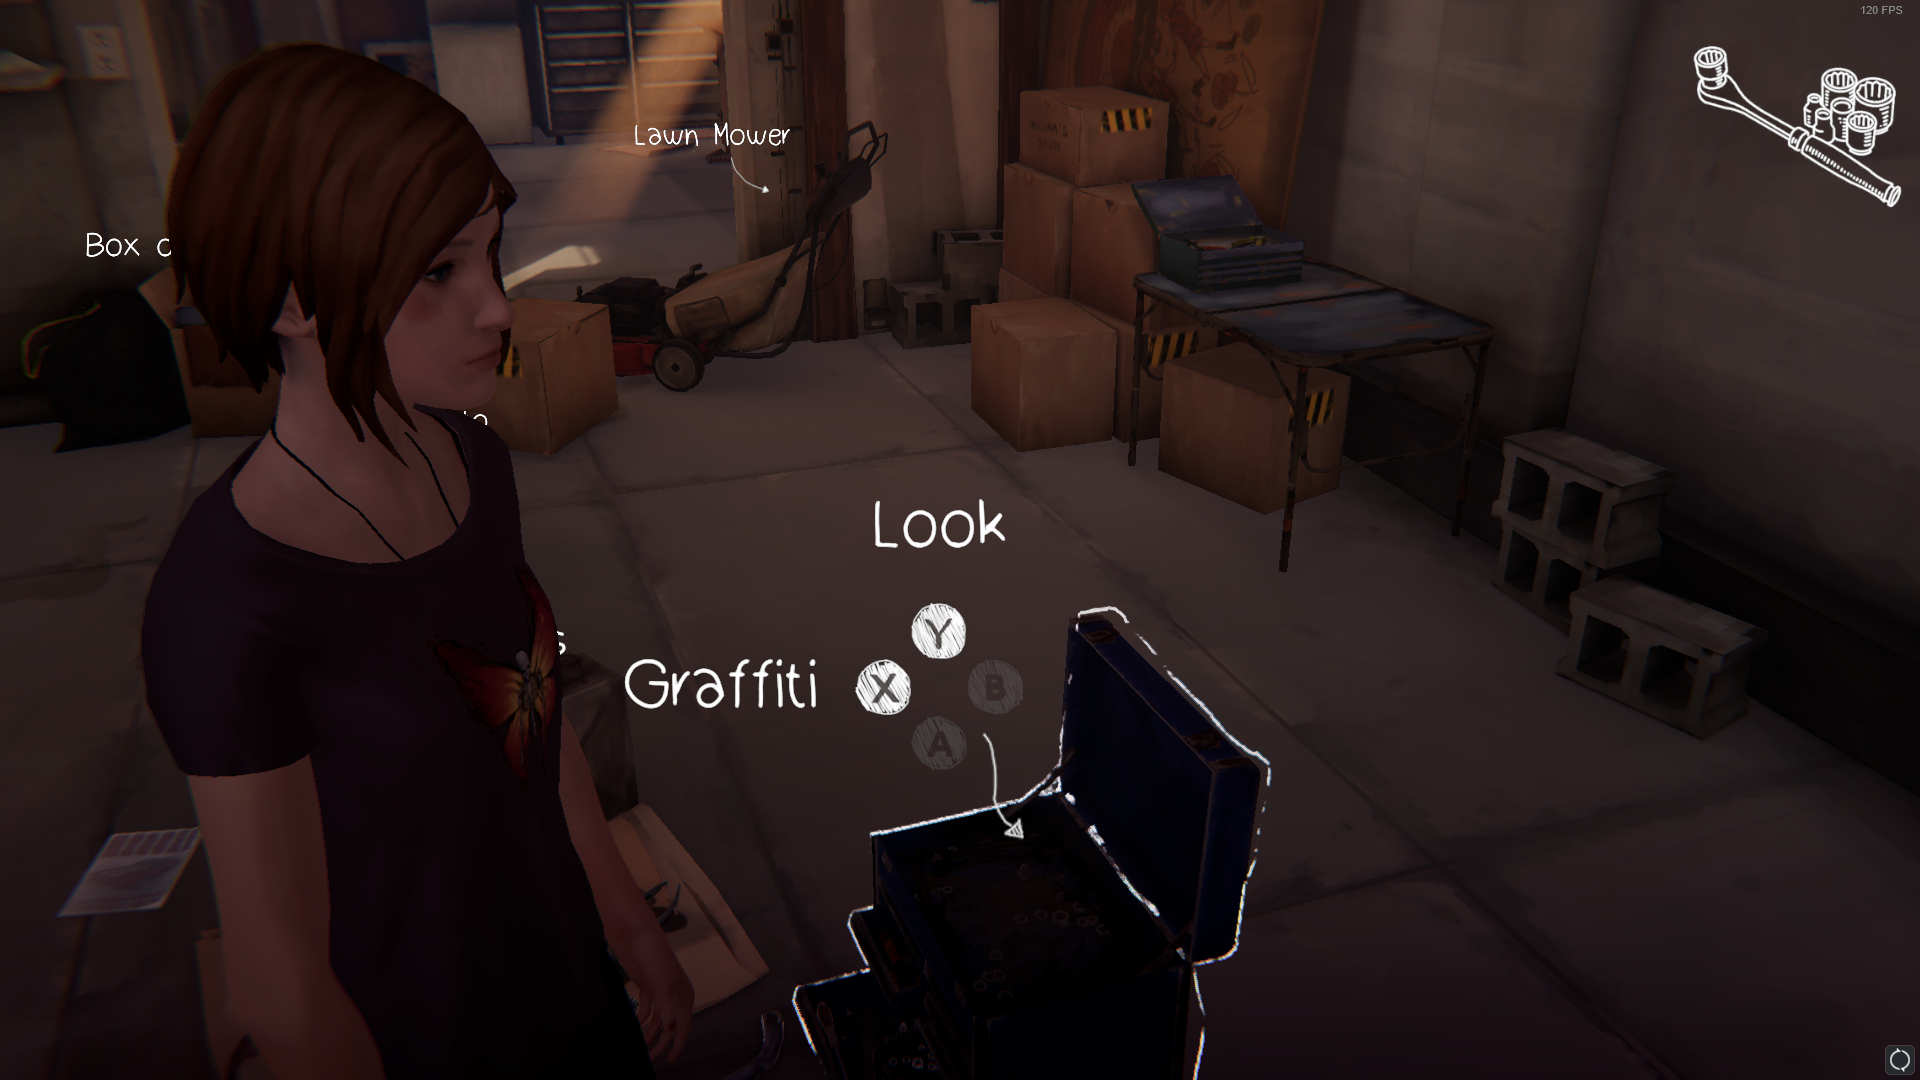
 Rock Idol
Complete the optional graffiti #5 in Episode 1: Awake
As soon as you get to the school campus, go left behind the stage till you see this wall
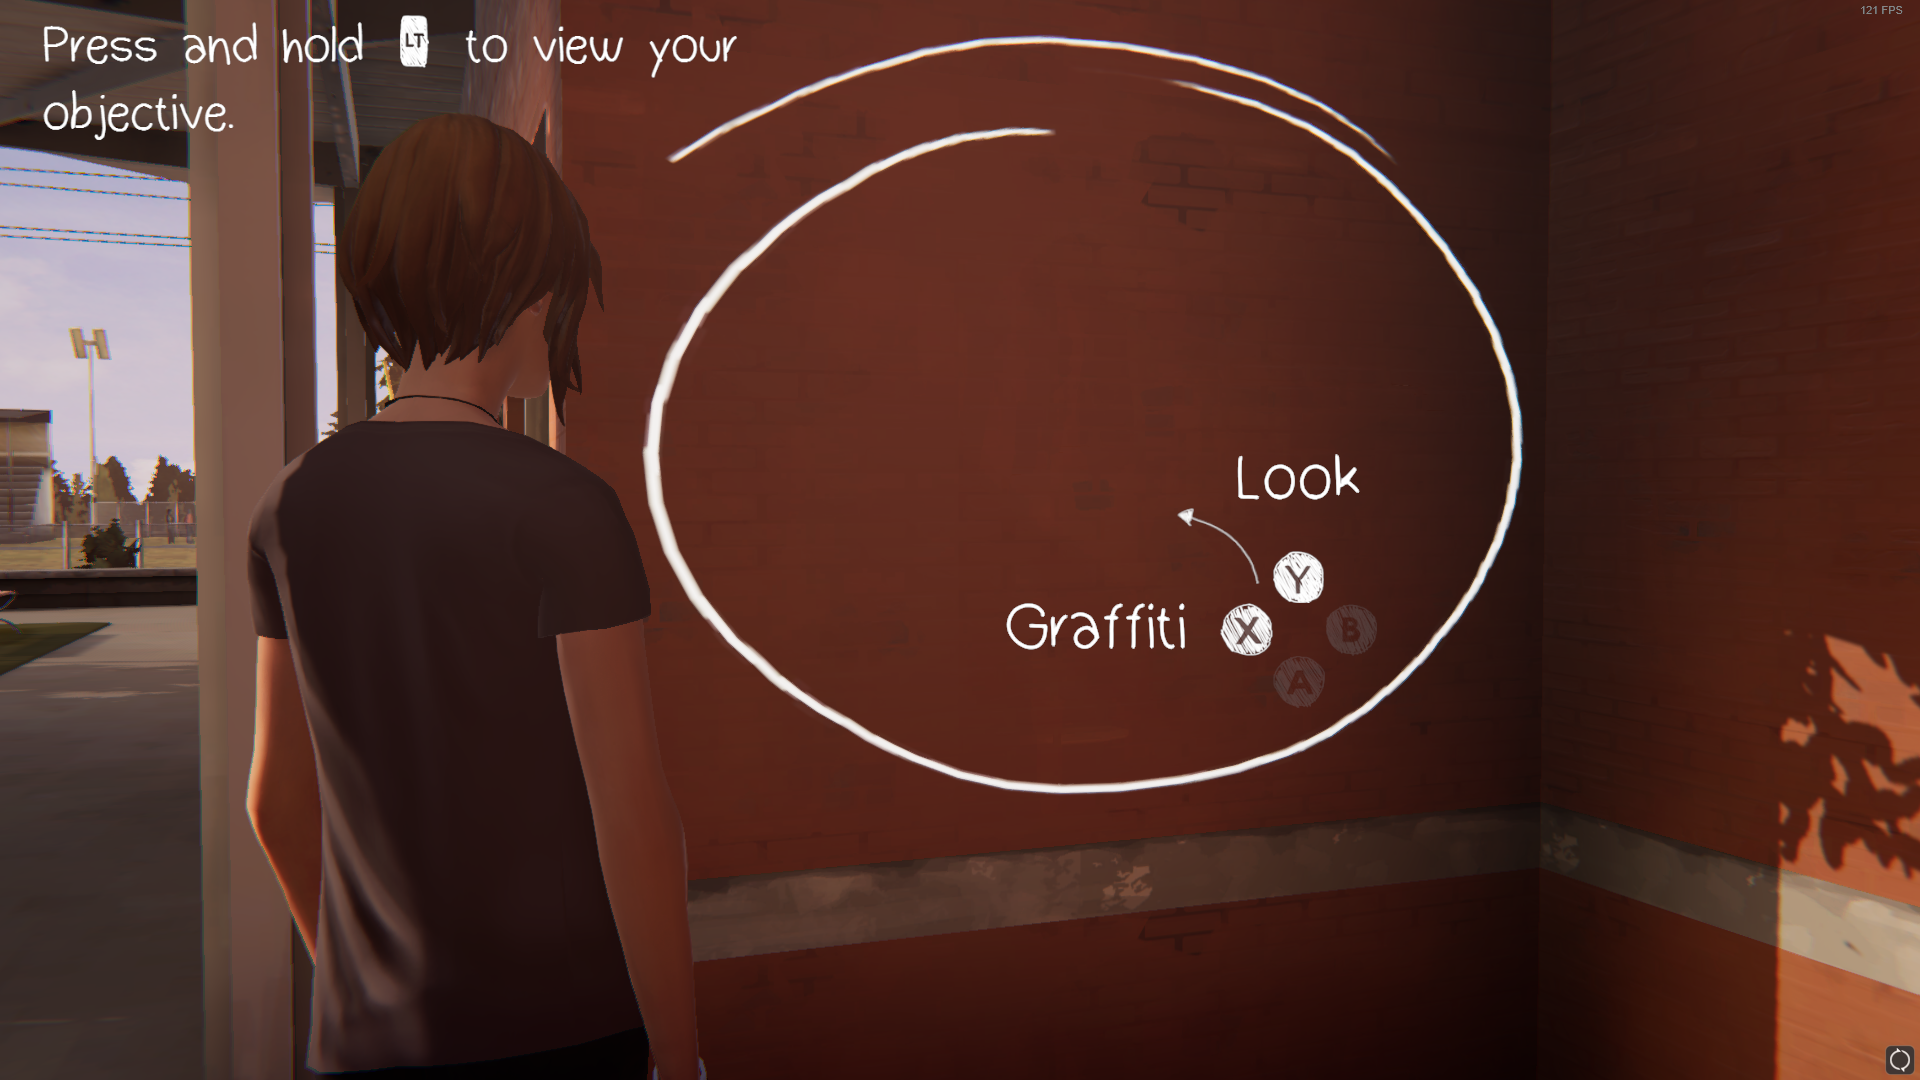
 Dramatis Personae
Complete the optional graffiti #6 in Episode 1: Awake
Head to the changing room. There will be a Tempest poster which you can graffiti
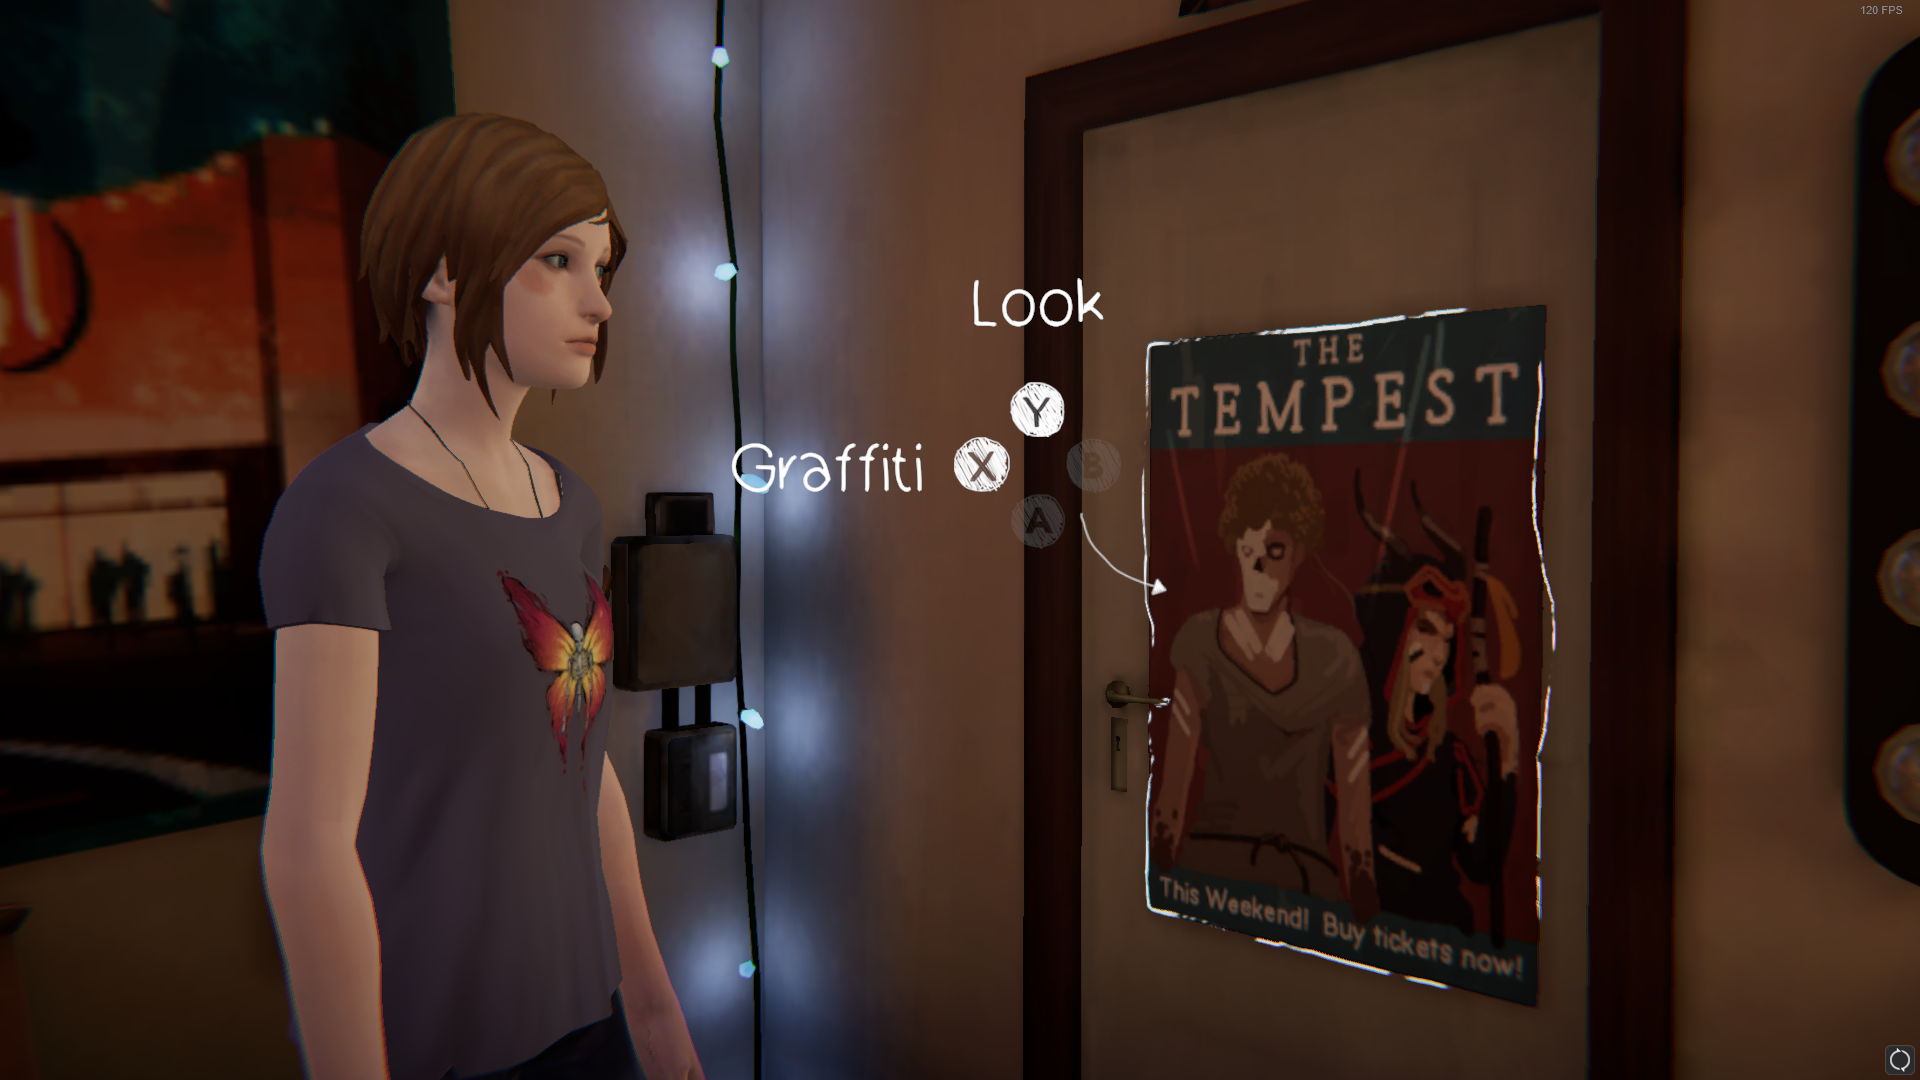
 Mulligan Stew
Complete the optional graffiti #7 in Episode 1: Awake
Move the crate that you are supposed to sit on to get access to the new area of the train. After you have a look at the message on the wall, the graffiti option will appear
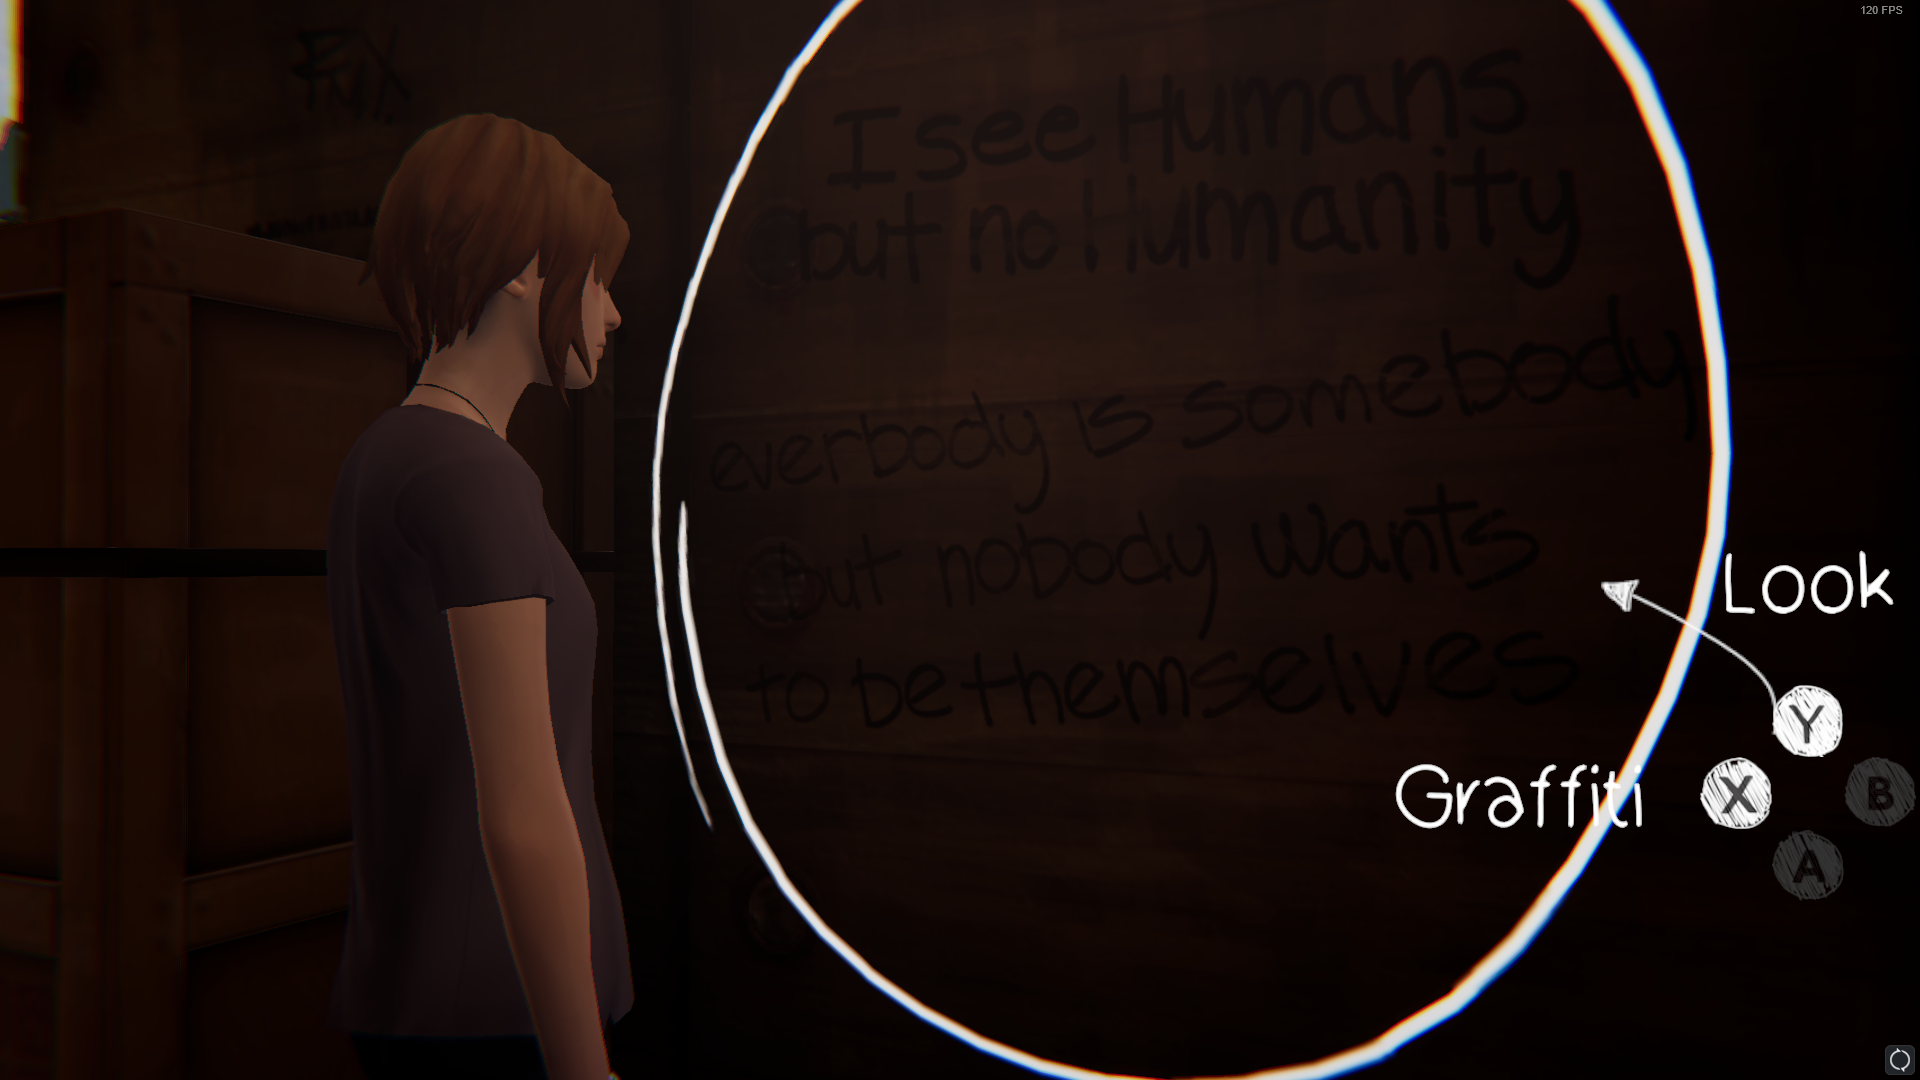
 Pioneer Spirit
Complete the optional graffiti #8 in Episode 1: Awake
Look for the big statue of Dwight Mueller at the overlook
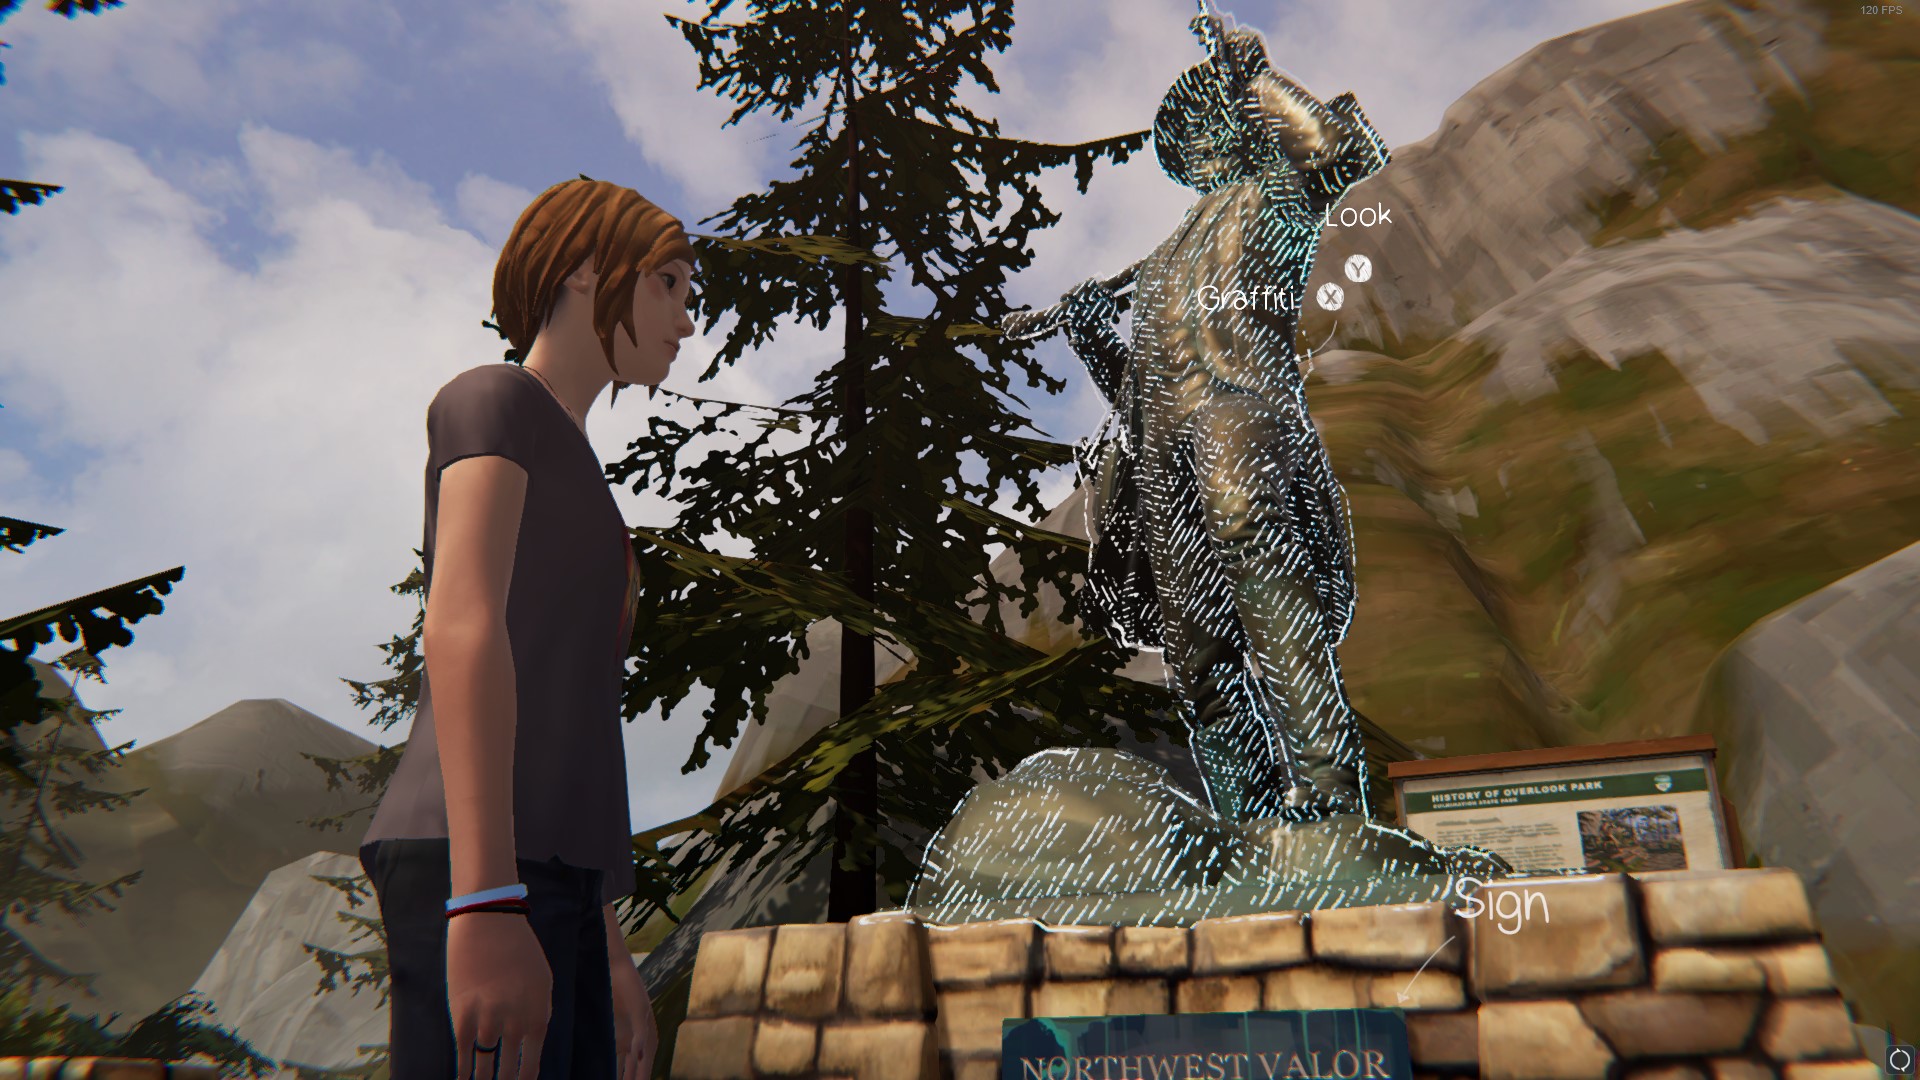
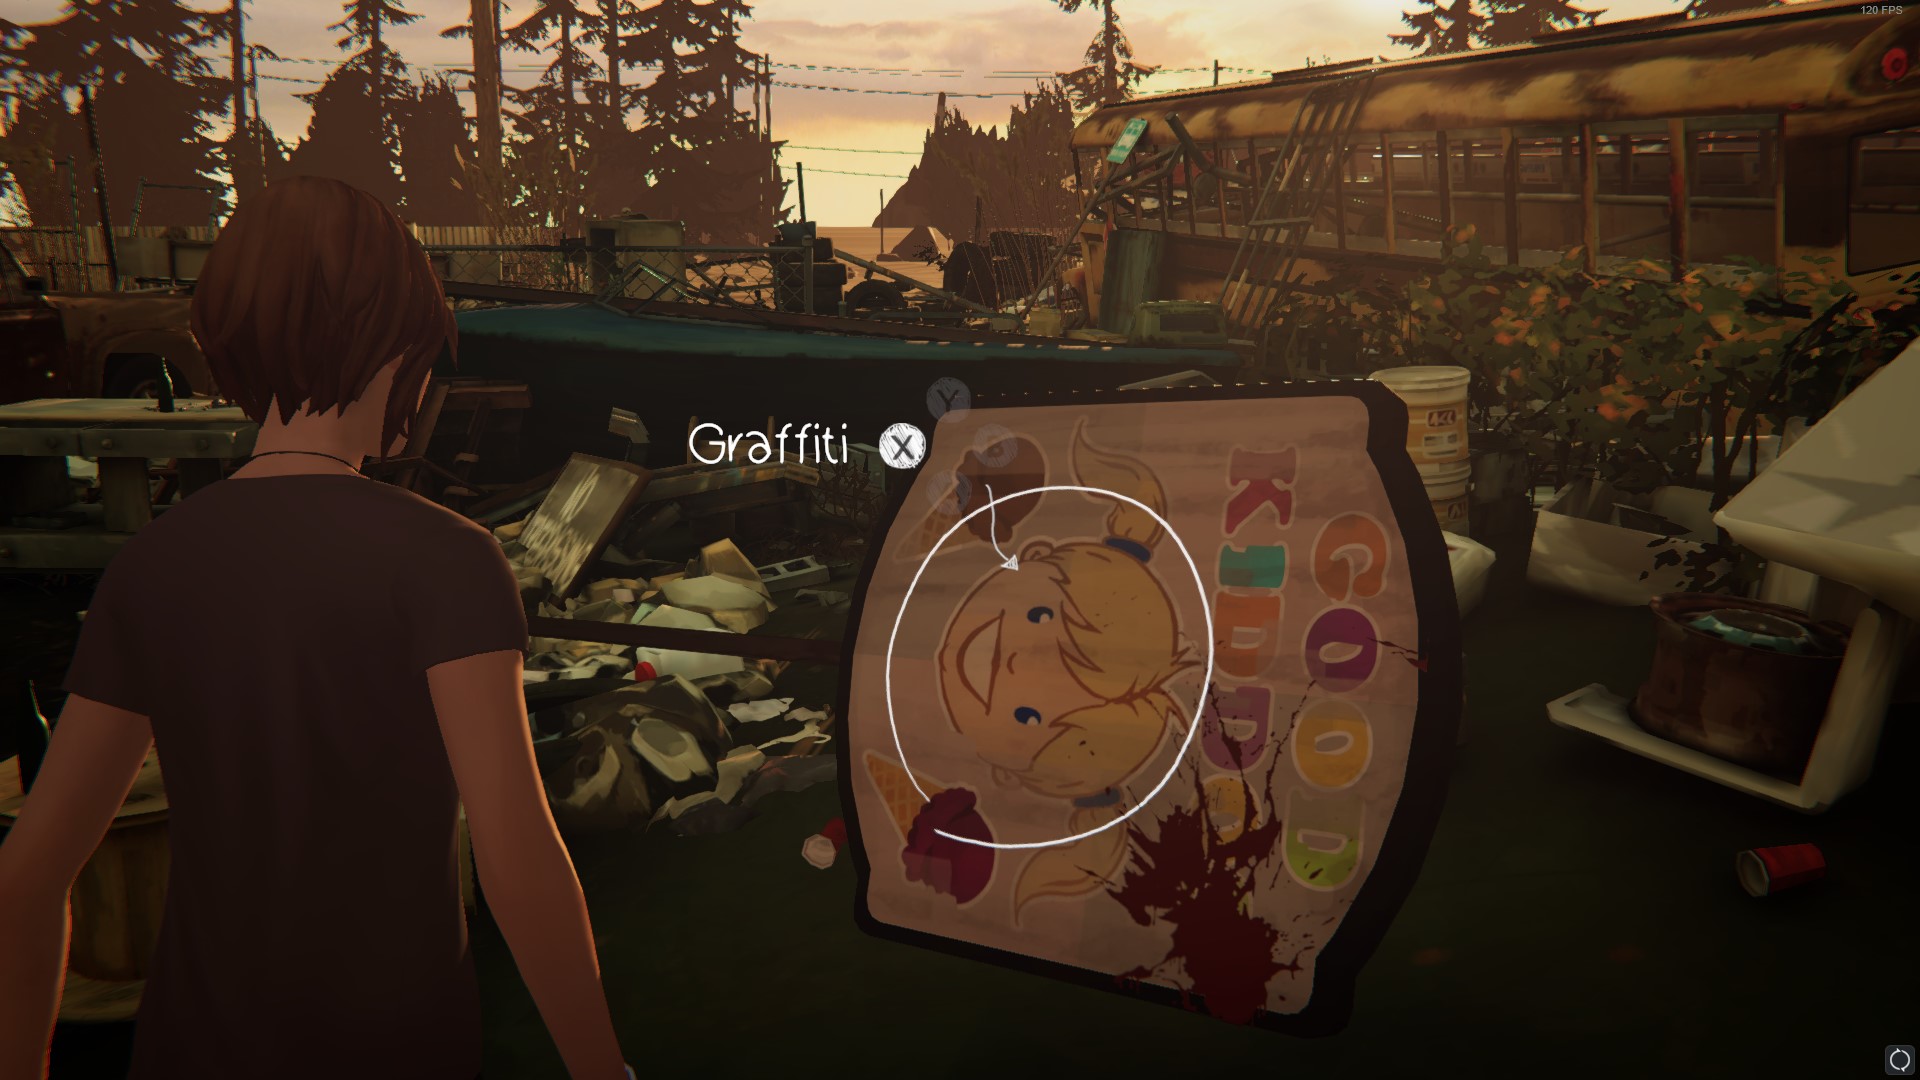
 Face Your Anger
Complete the optional graffiti #9 in Episode 1: Awake
After having a conversation with Rachel at the junkyard, smash the ice-cream sign, then smash cans of paint. You should now be able to graffiti the sign
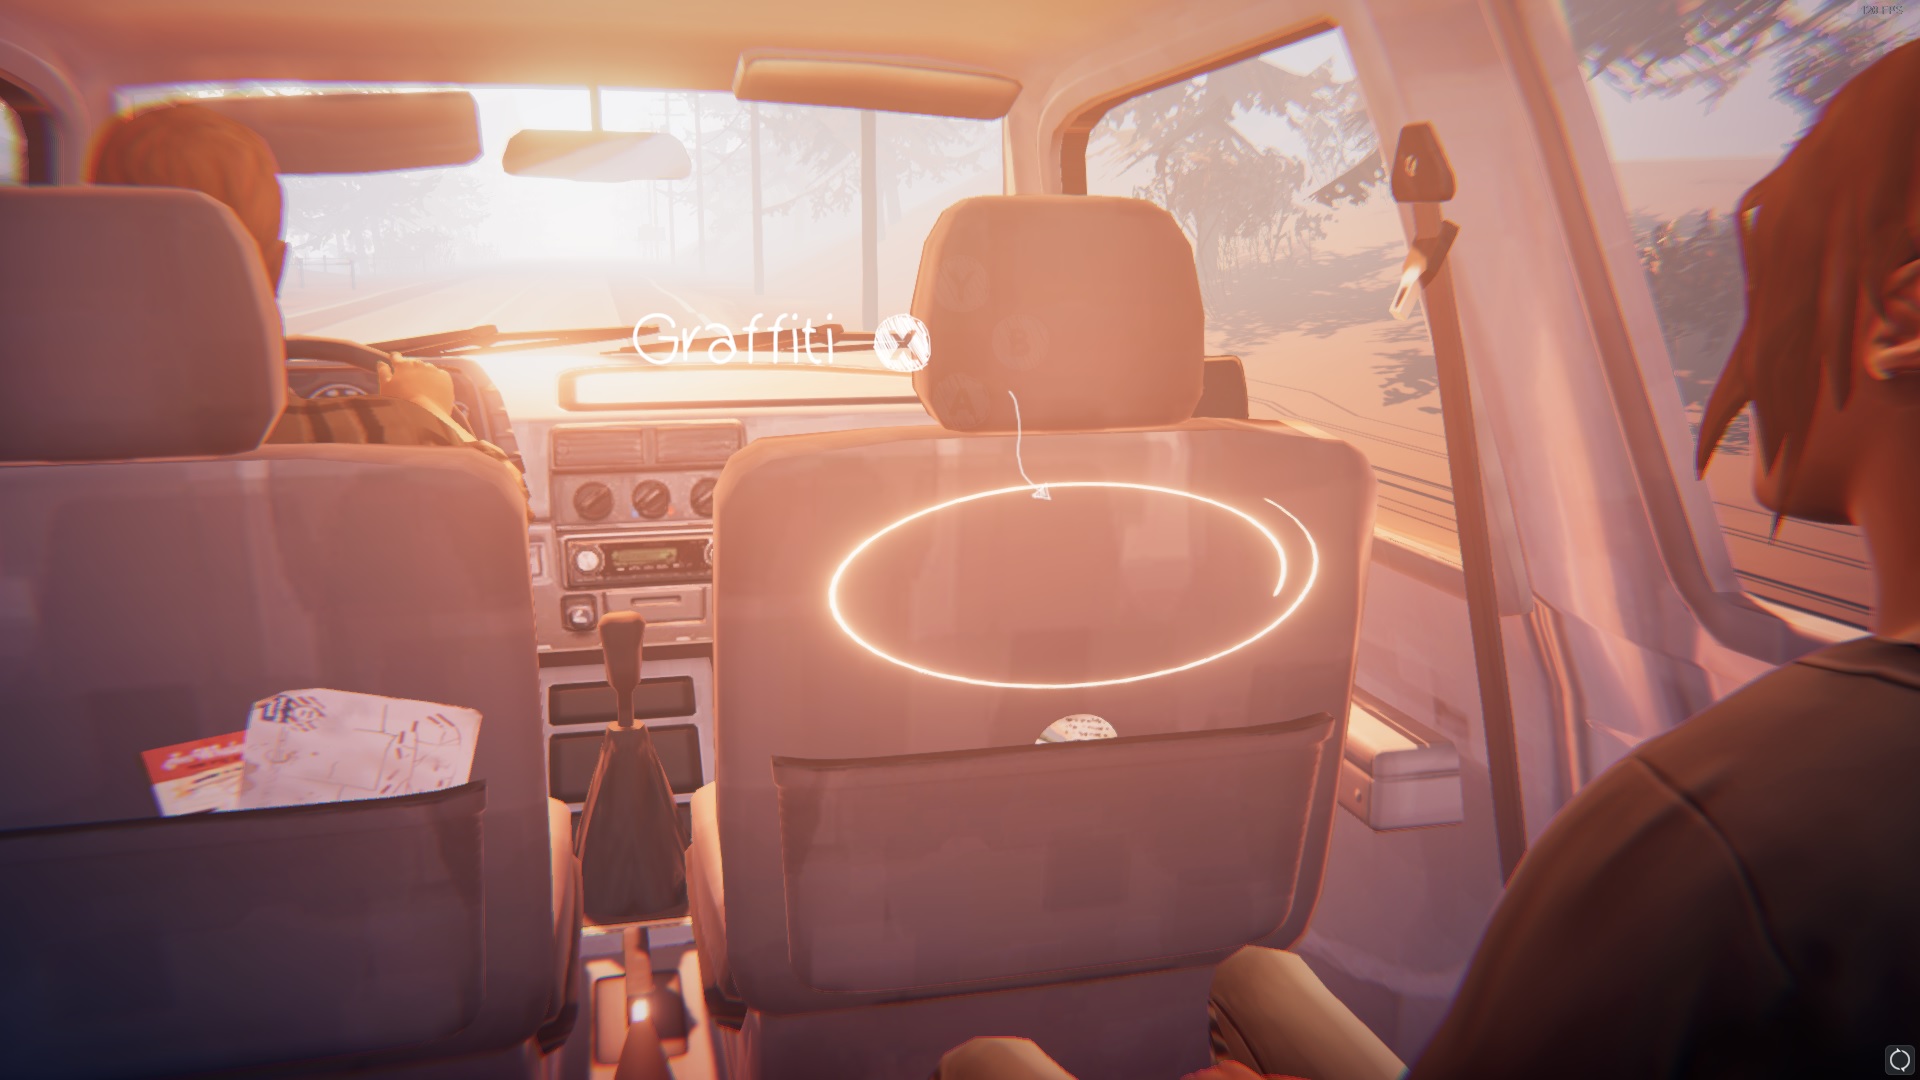
 Lucid Writing
Complete the optional graffiti #10 in Episode 1: Awake
Look at the poster in front of you, then move it. Try to graffiti the space you have just freed up. Once Chloe realizes she has no marker, you can find it stuck in the wine bottle
Episode 2: Brave New World
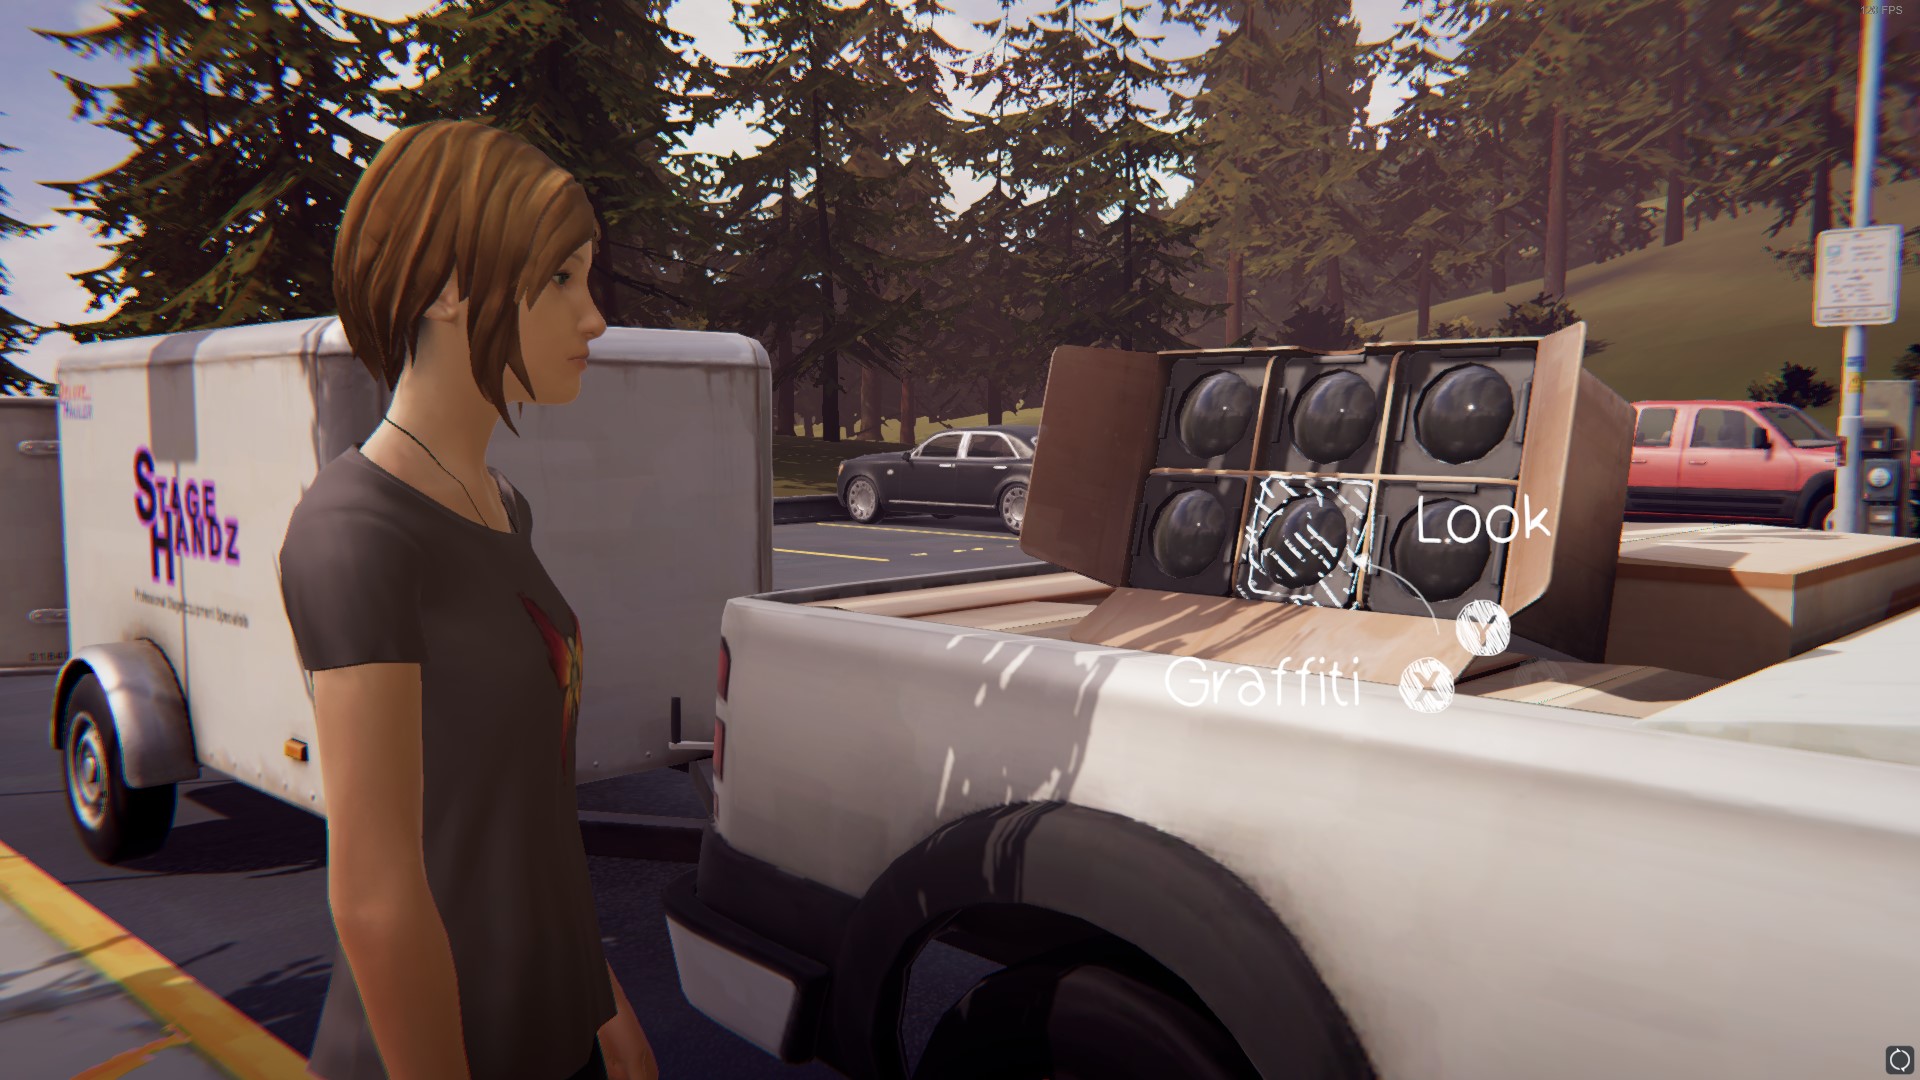
 Stagehandwriting
Complete the optional graffiti #1 in Episode 2: Brave New World
The first graffiti of this episode is on the parking lot, at the back of the white pickup truck
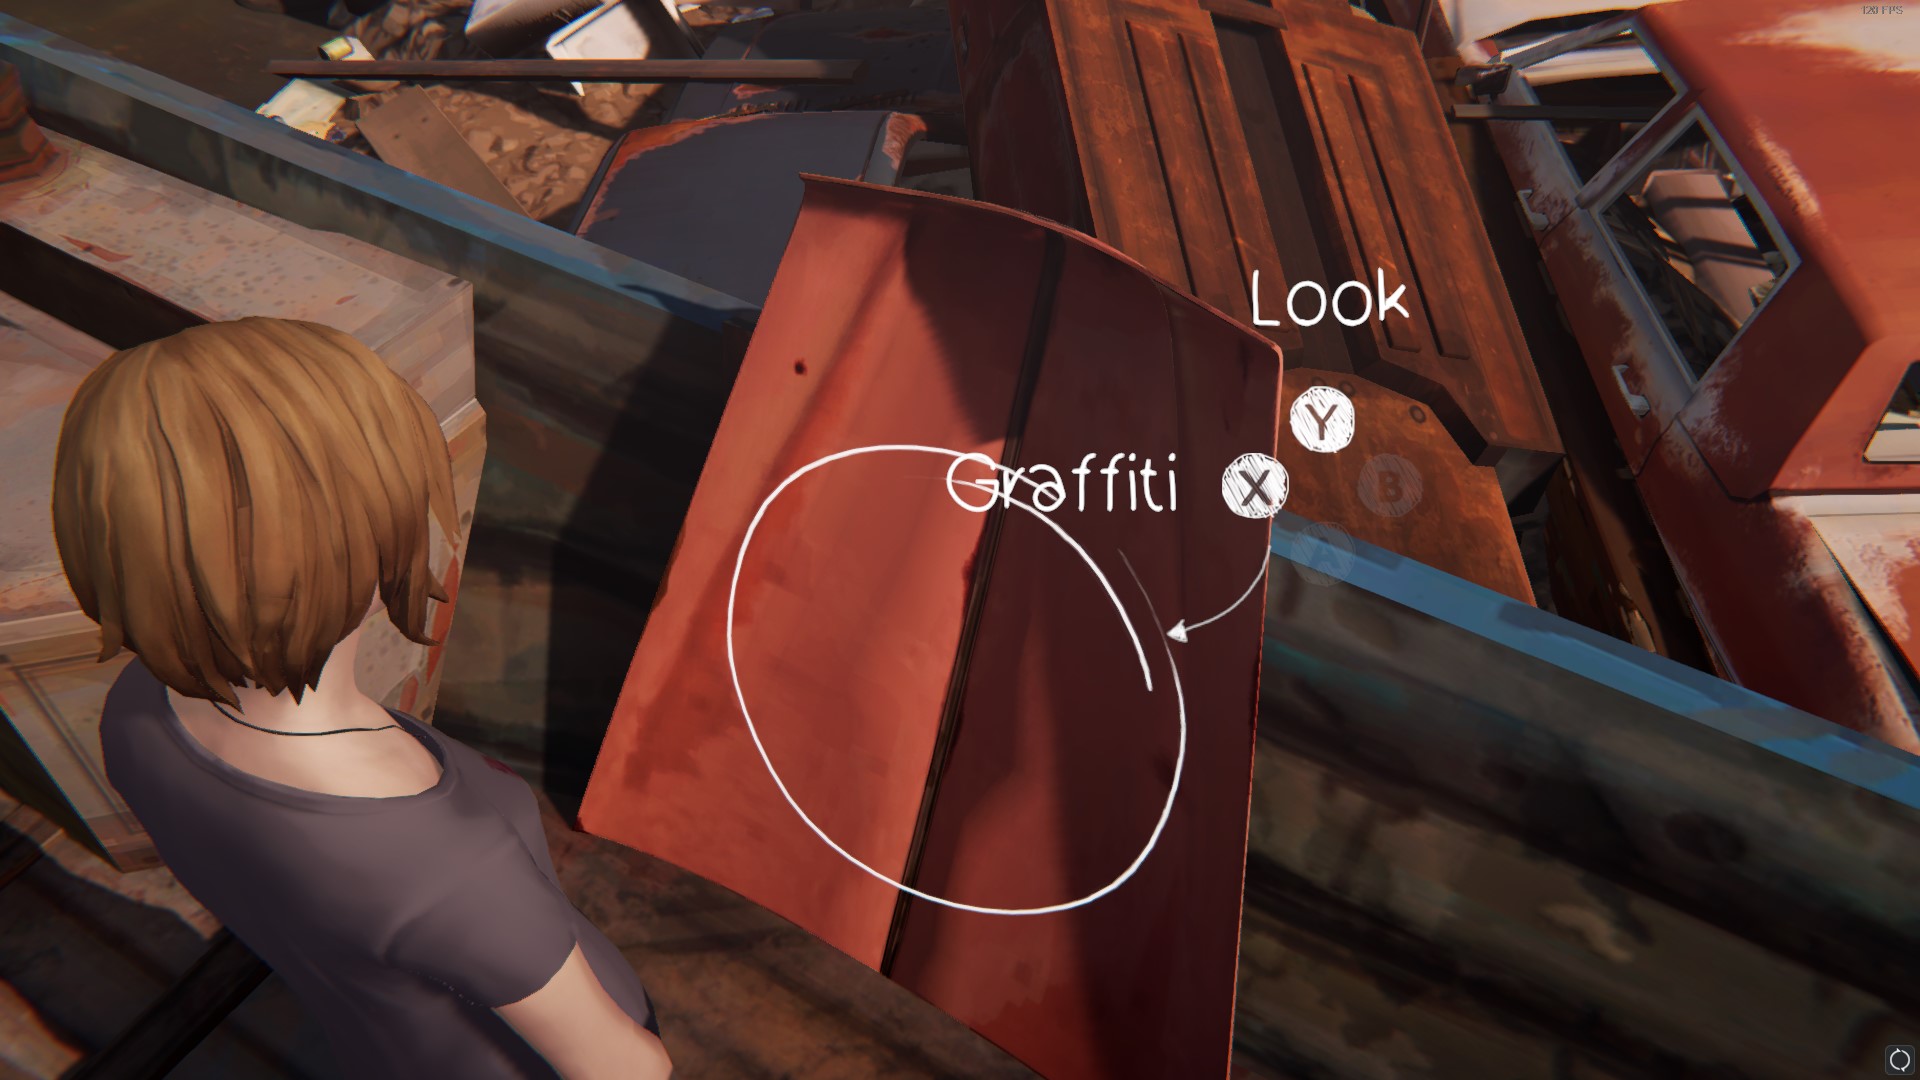
 Radical Piratical
Complete the optional graffiti #2 in Episode 2: Brave New World
While at the junkyard, find the old boat. Try to climb on top of it. After Chloe fails to do so, prop up the nearby pallet next to the boat to climb up. There you will find a red bonnet
 Feels on Wheels
Complete the optional graffiti #3 in Episode 2: Brave New World
Fix the truck and have a phone conversation with Frank to gain access to this graffiti
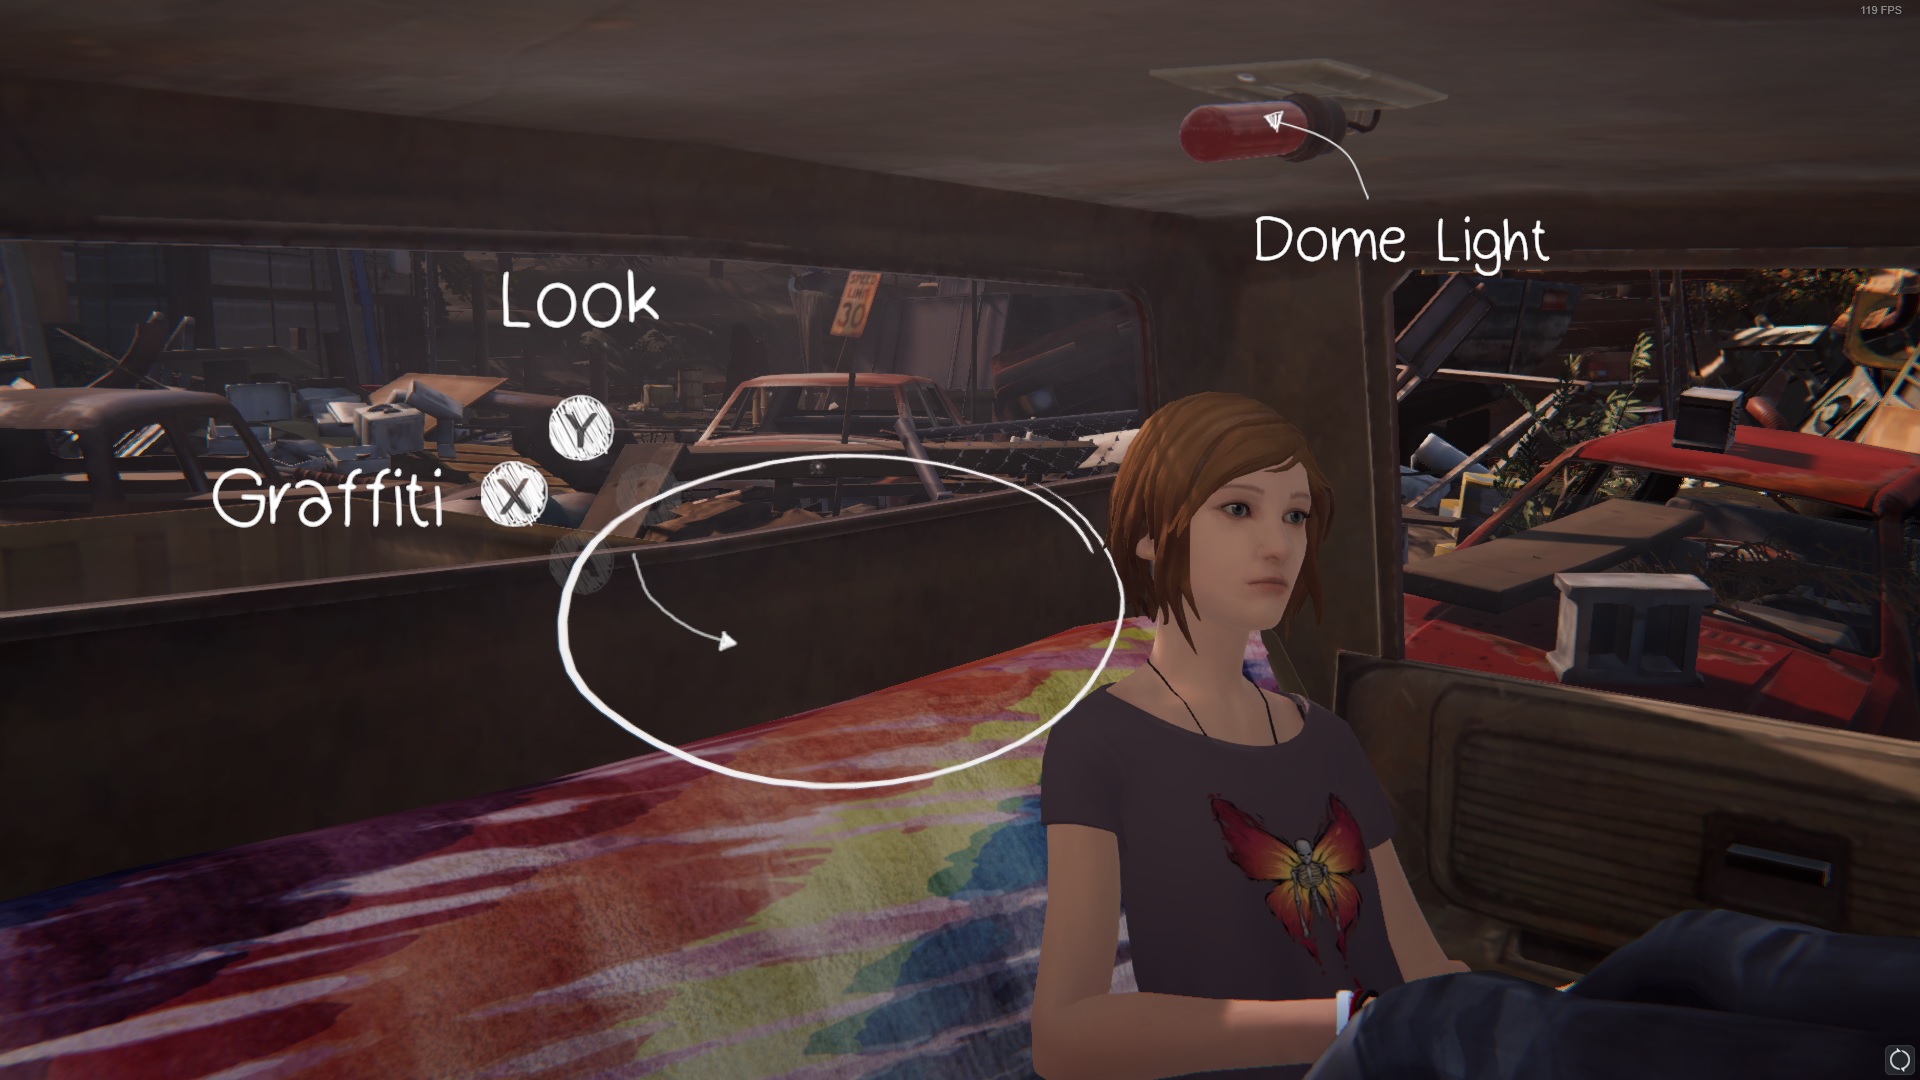
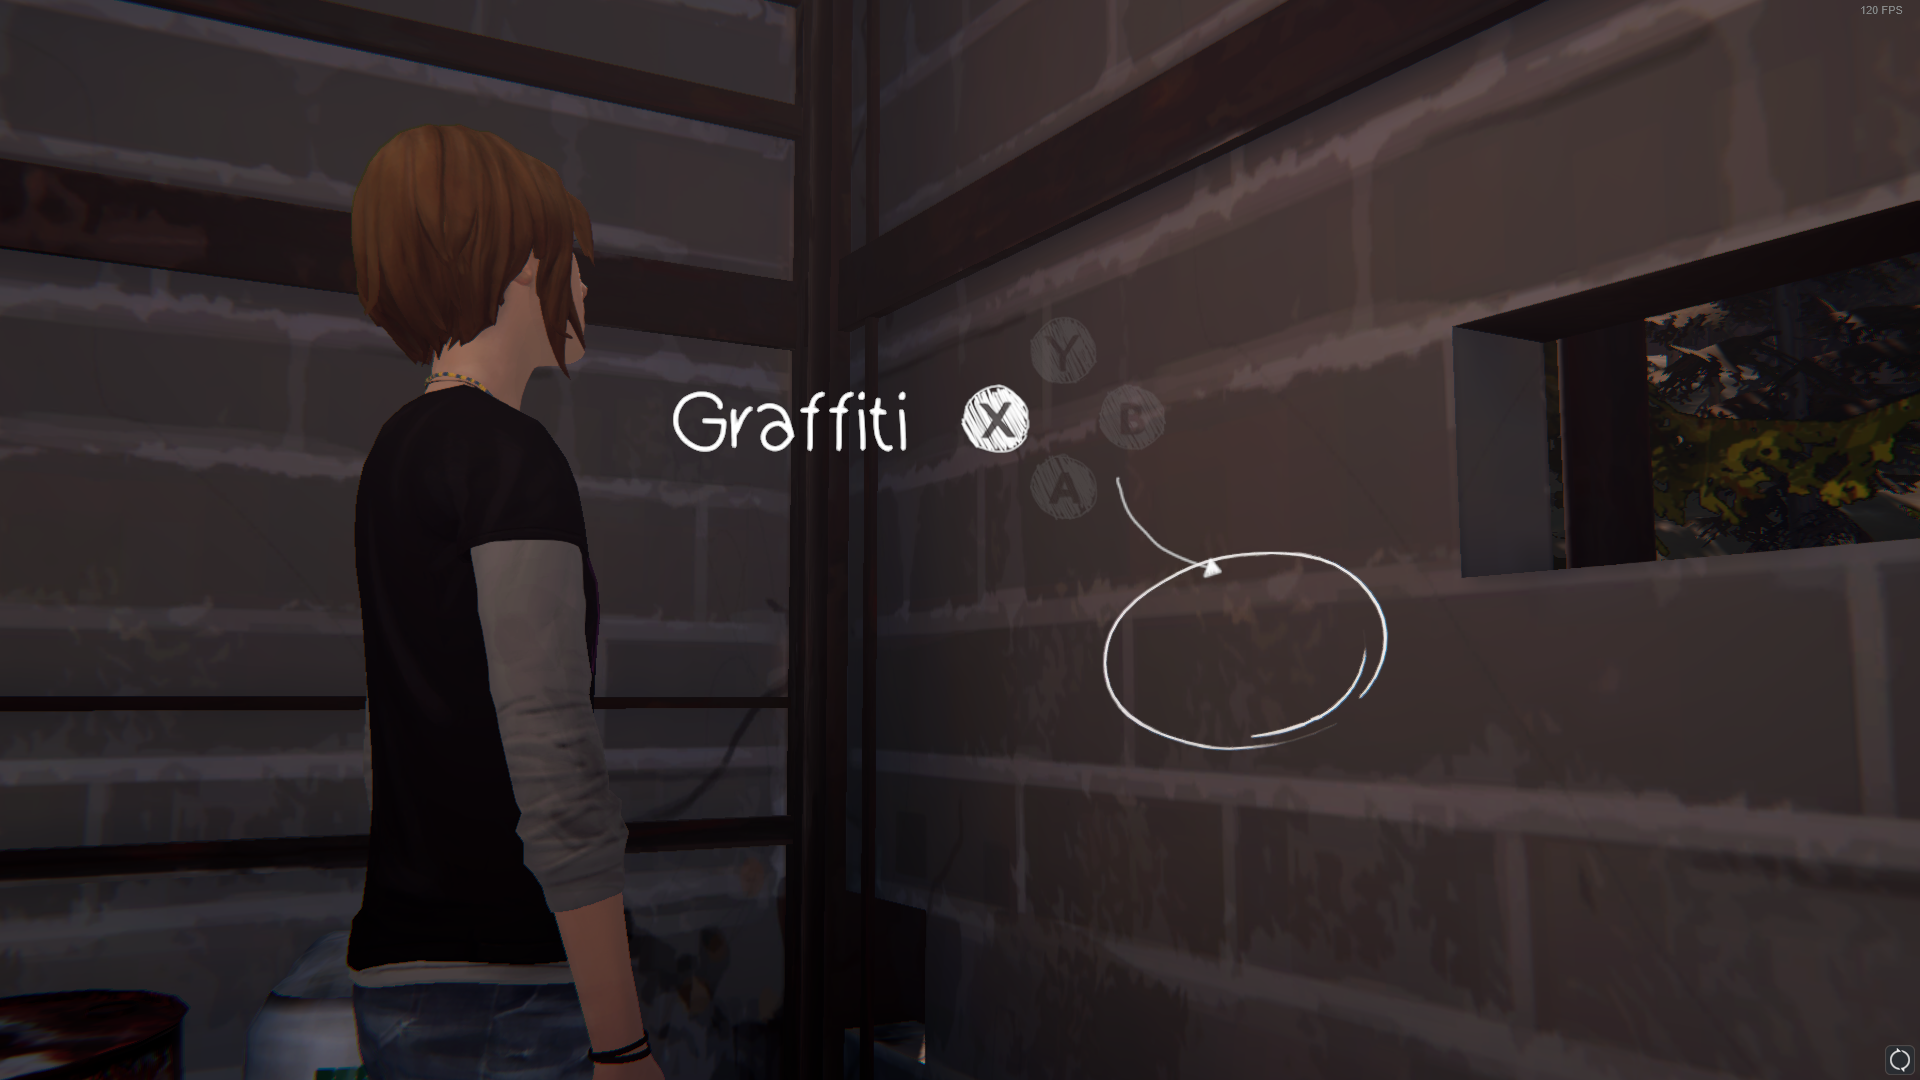
 Canon Wall
Complete the optional graffiti #4 in Episode 2: Brave New World
Graffiti the wall inside of Chloe's junkyard hideout
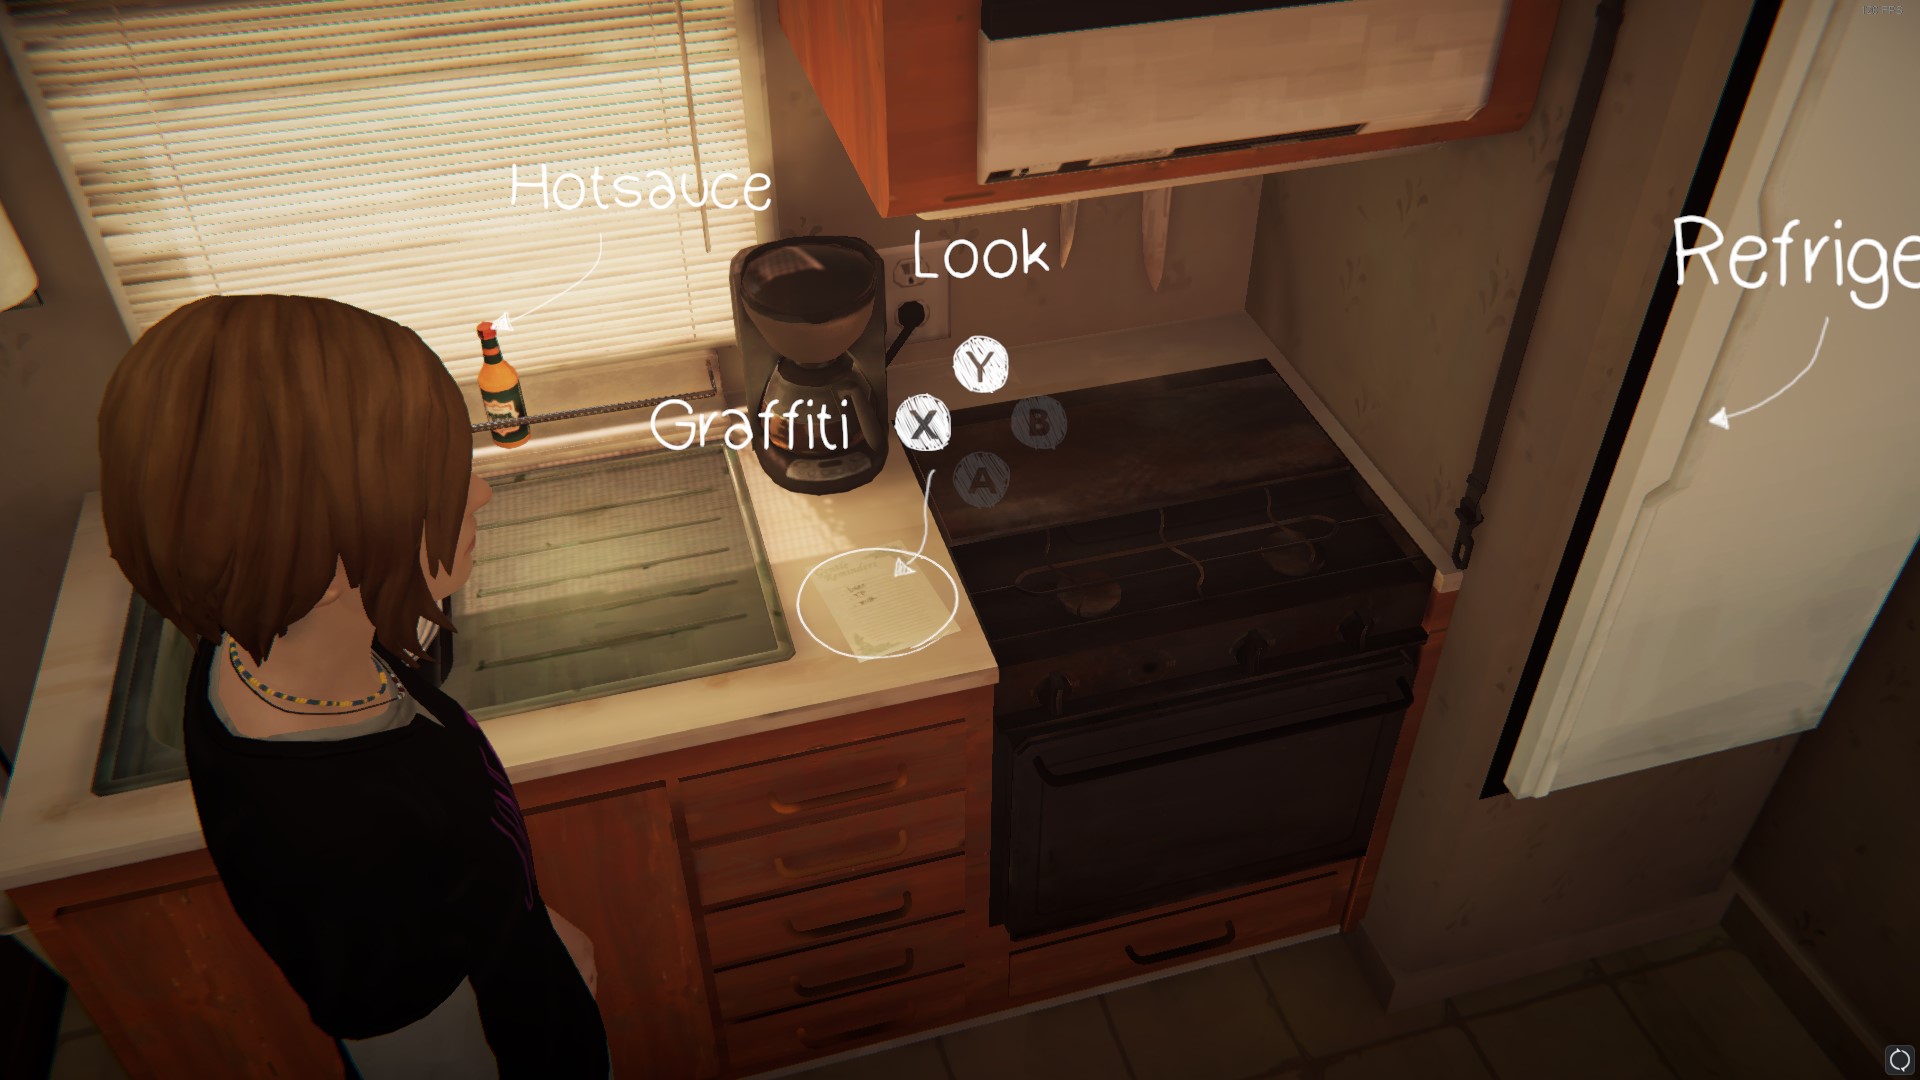
 Wishlist
Complete the optional graffiti #5 in Episode 2: Brave New World
While inside of Frank's RV, graffiti Frank's shopping list on the kitchen counter
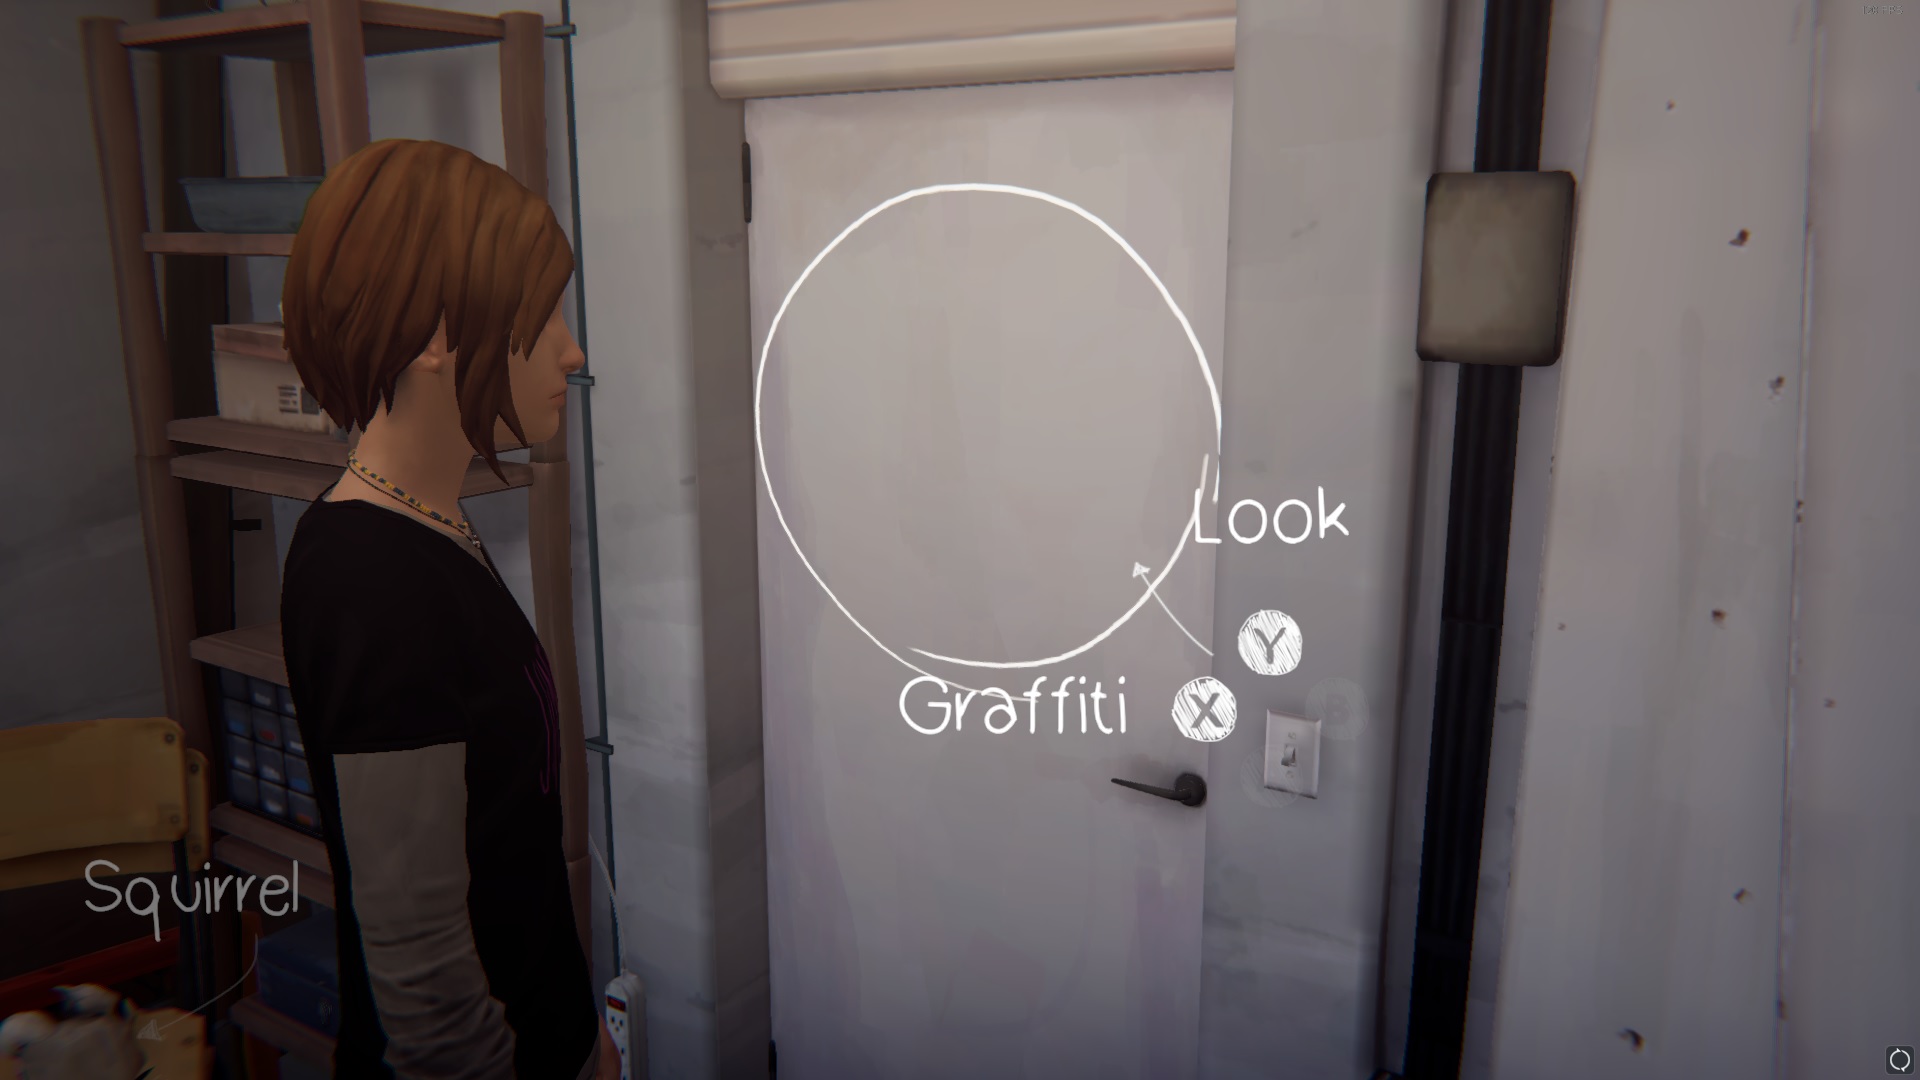
 Friendly Forest Friends
Complete the optional graffiti #6 in Episode 2: Brave New World
Make Samuel move away, then have a look at this white door
 Tread Harshly
Complete the optional graffiti #7 in Episode 2: Brave New World
Walk over wet concrete to leave your footprints
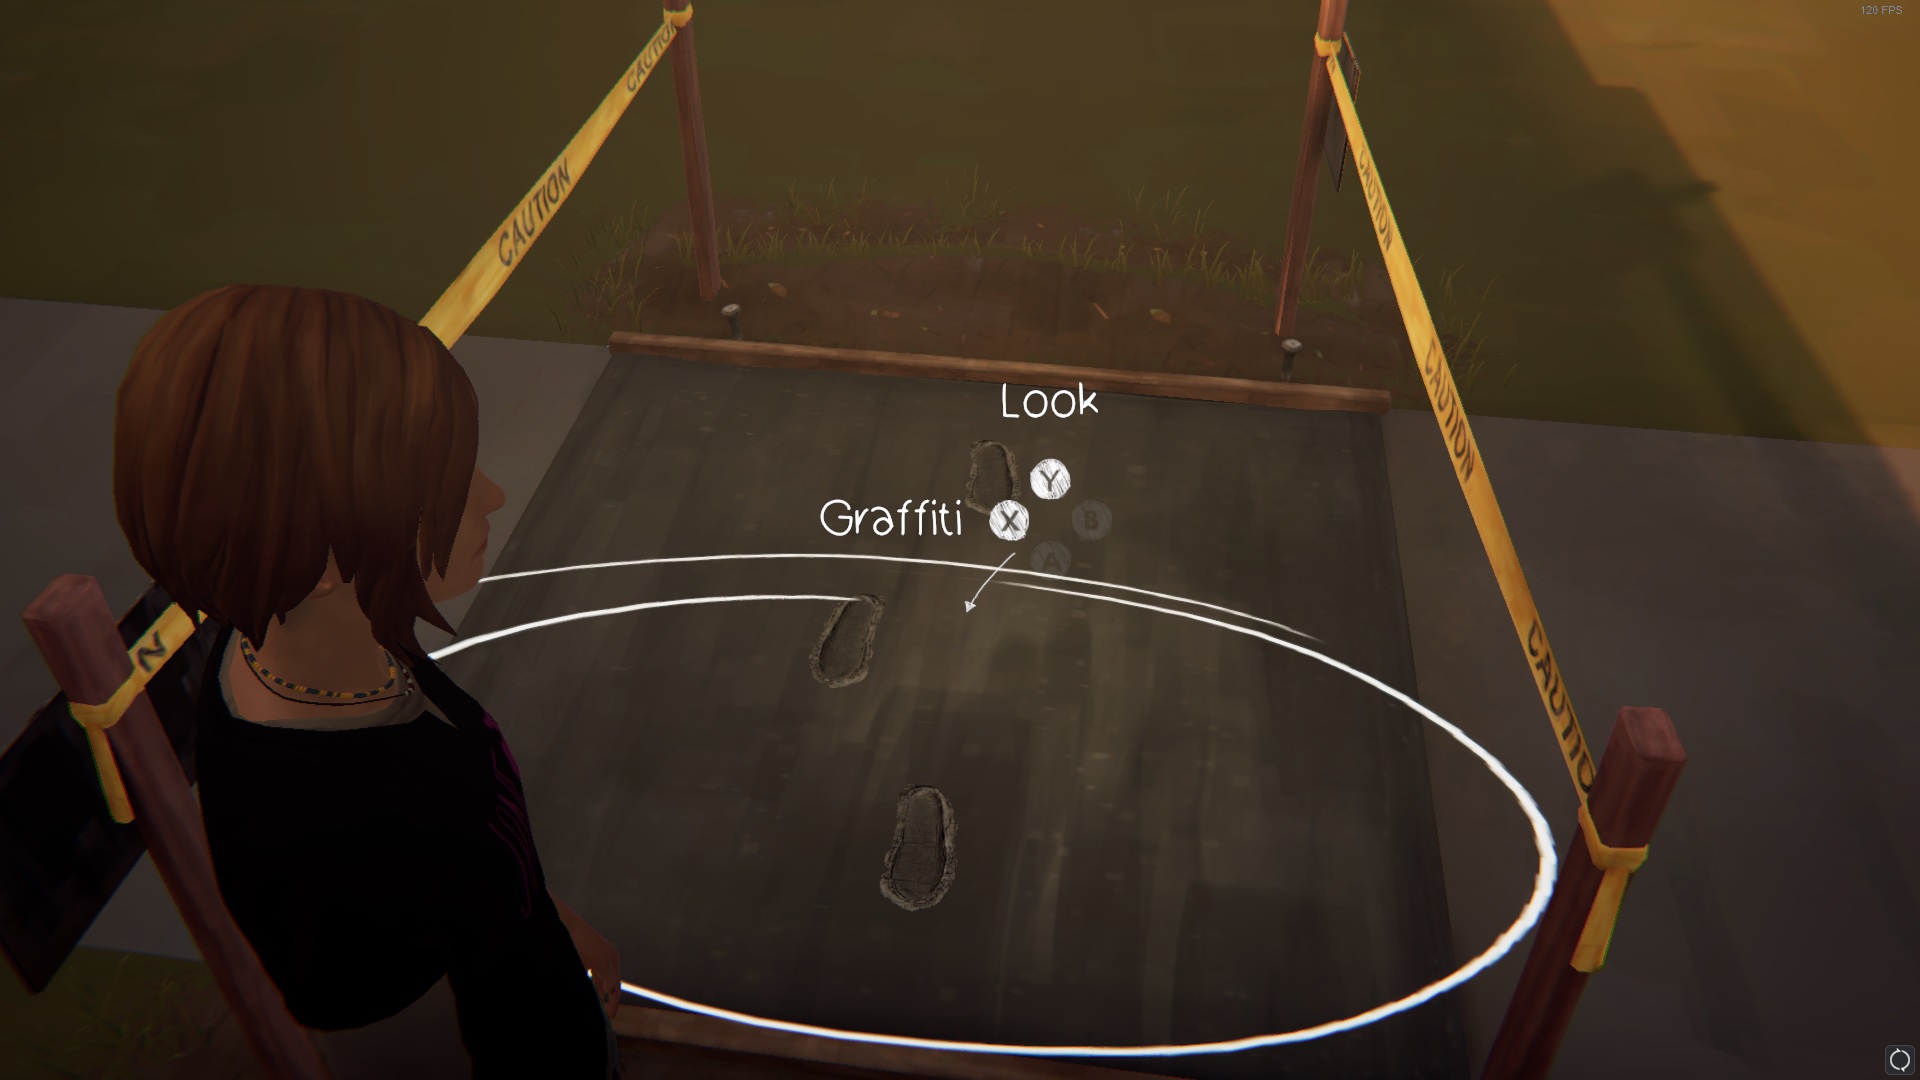
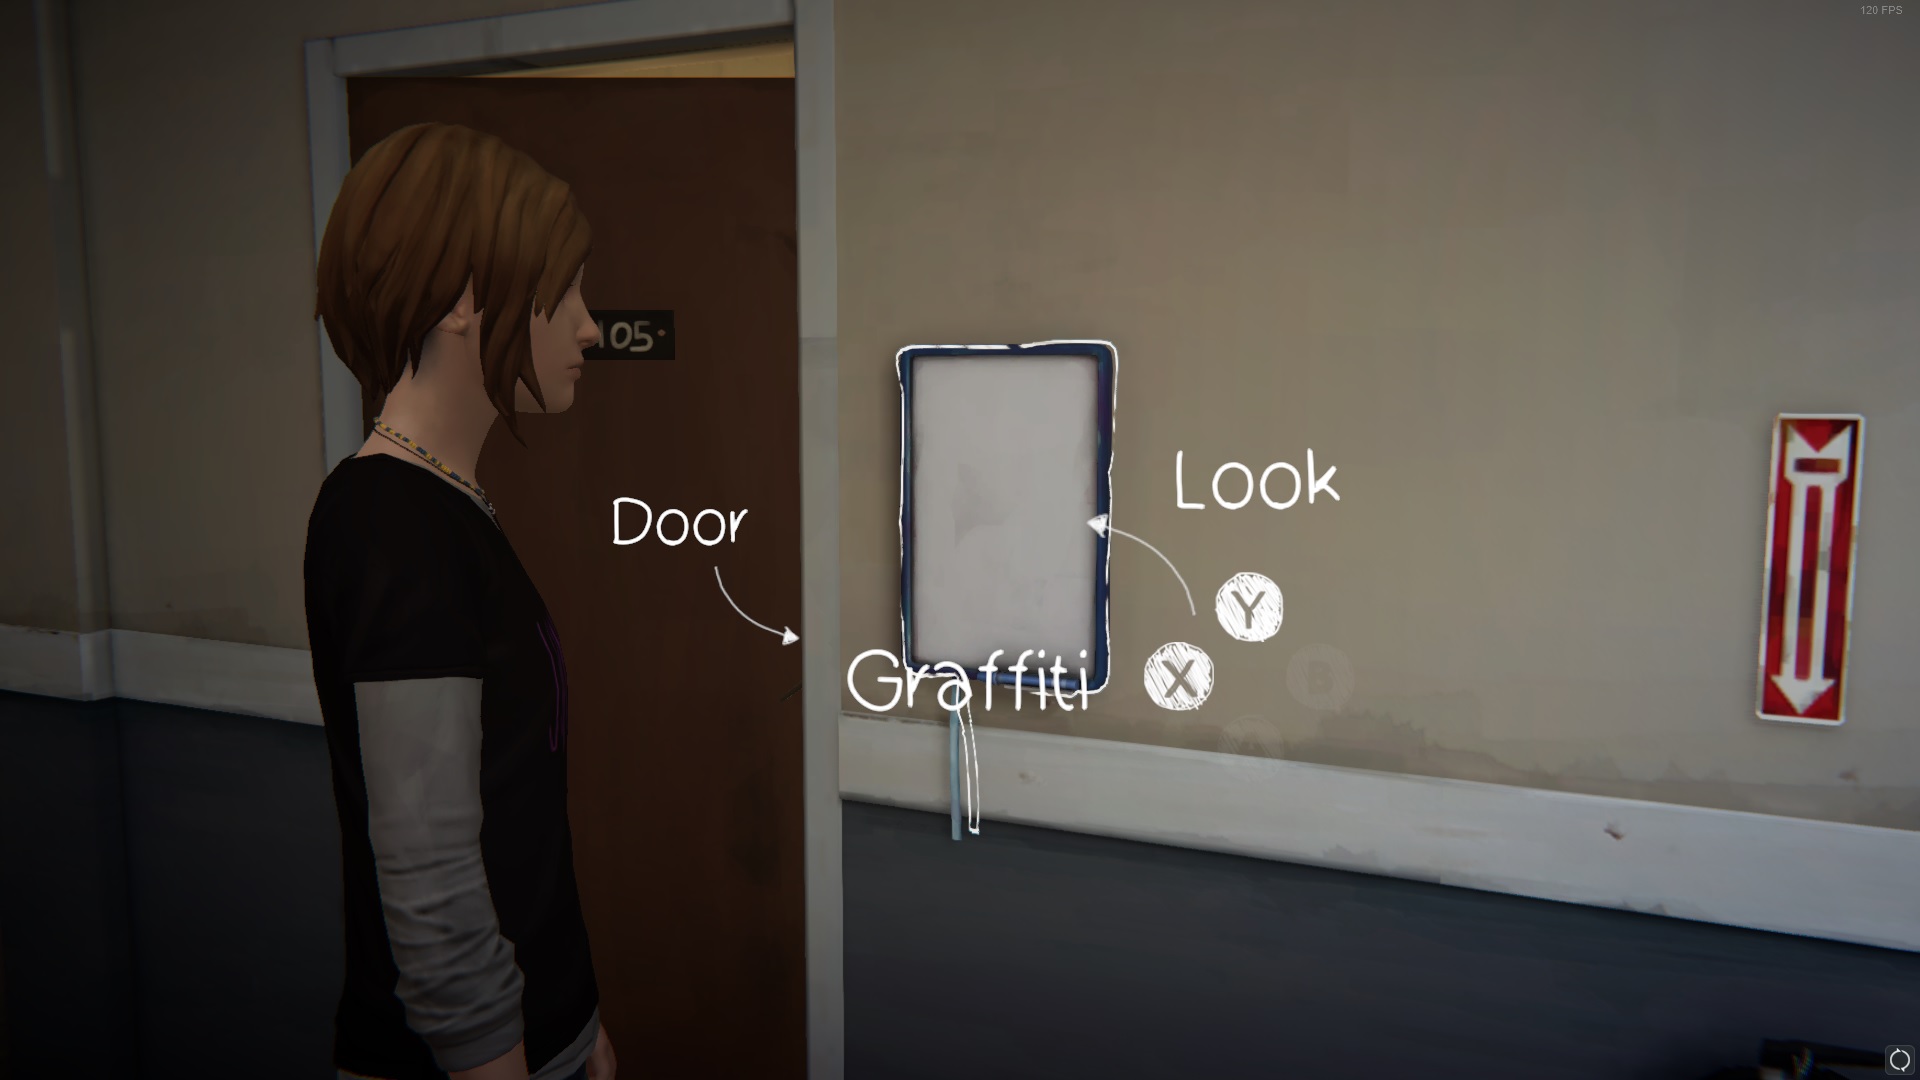
 Permanent Record
Complete the optional graffiti #8 in Episode 2: Brave New World
Read through Eliot's poetry in his room, then clean the whiteboard outside (Eliot's room is the second room to the right once you enter the dormitories)
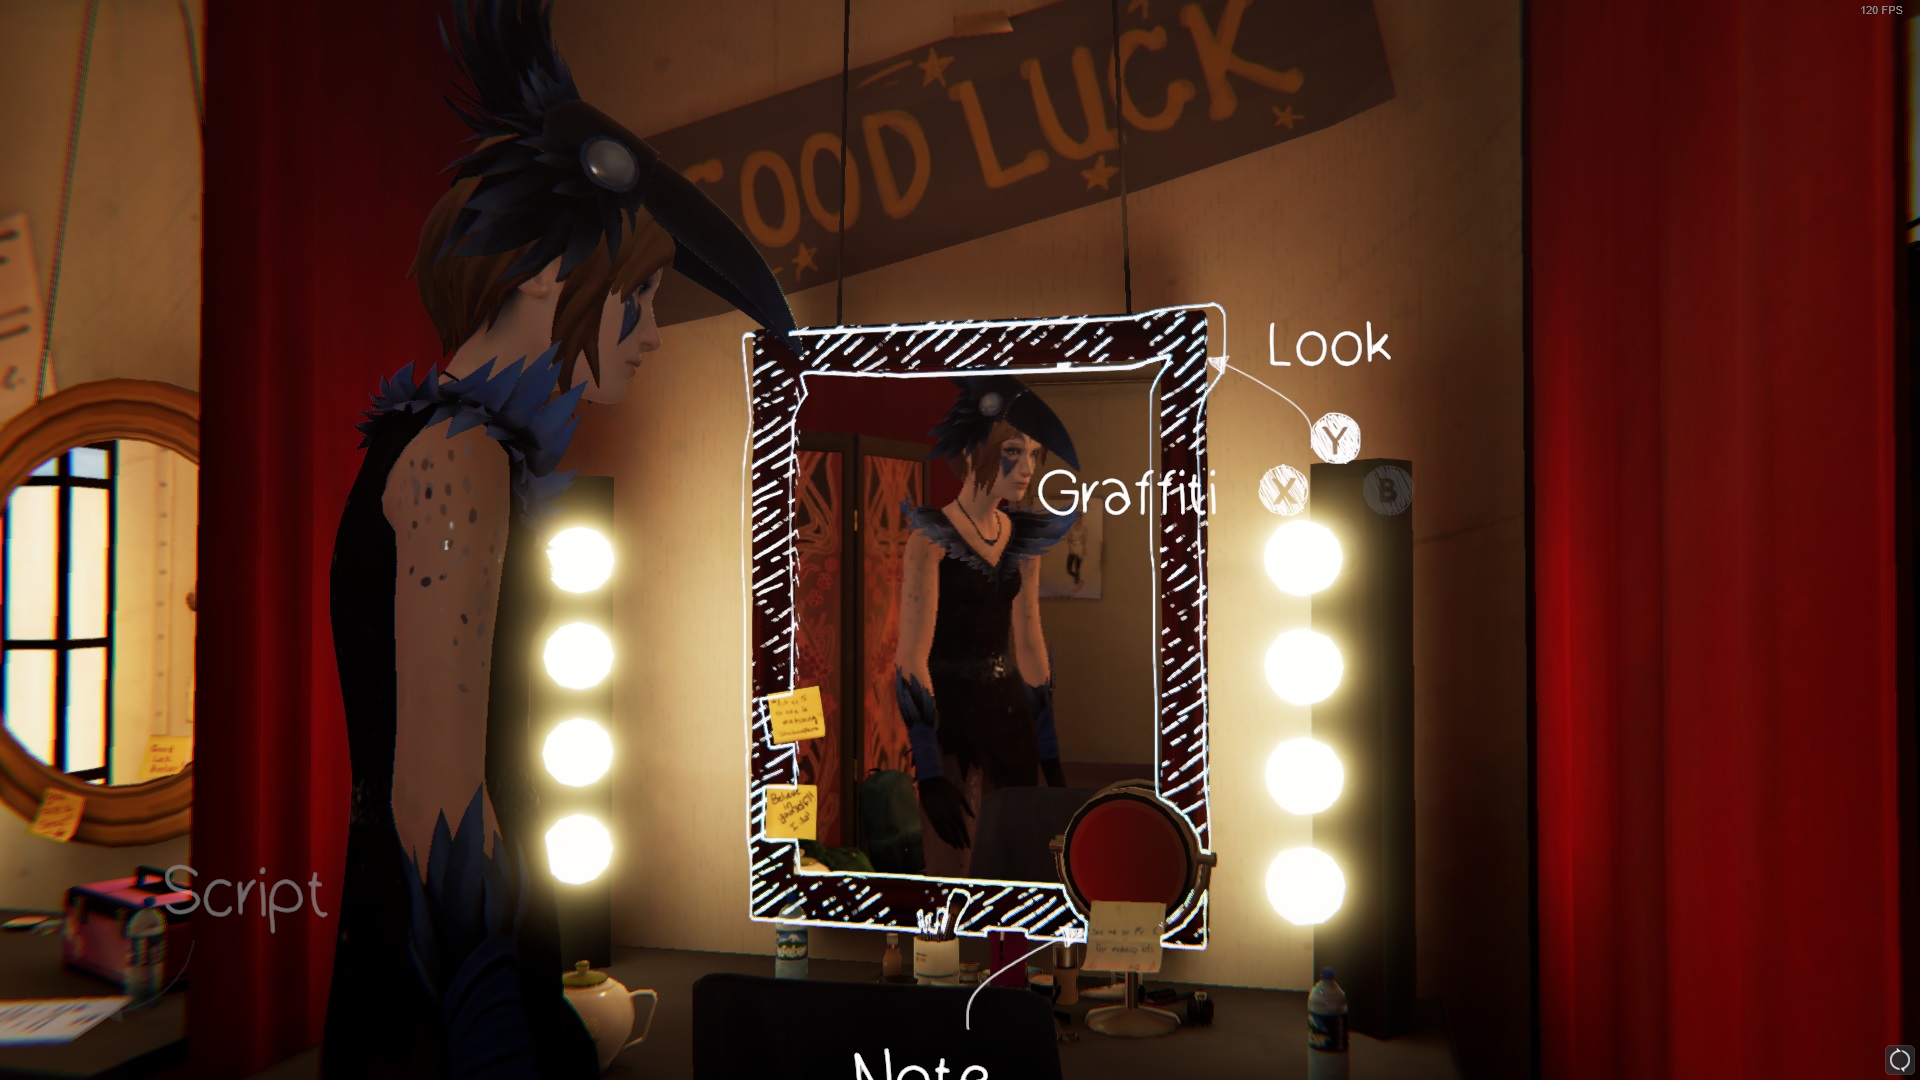
 Vanity Fare
Complete the optional graffiti #9 in Episode 2: Brave New World
After Chloe dresses up for the play, graffiti this mirror in the changing room
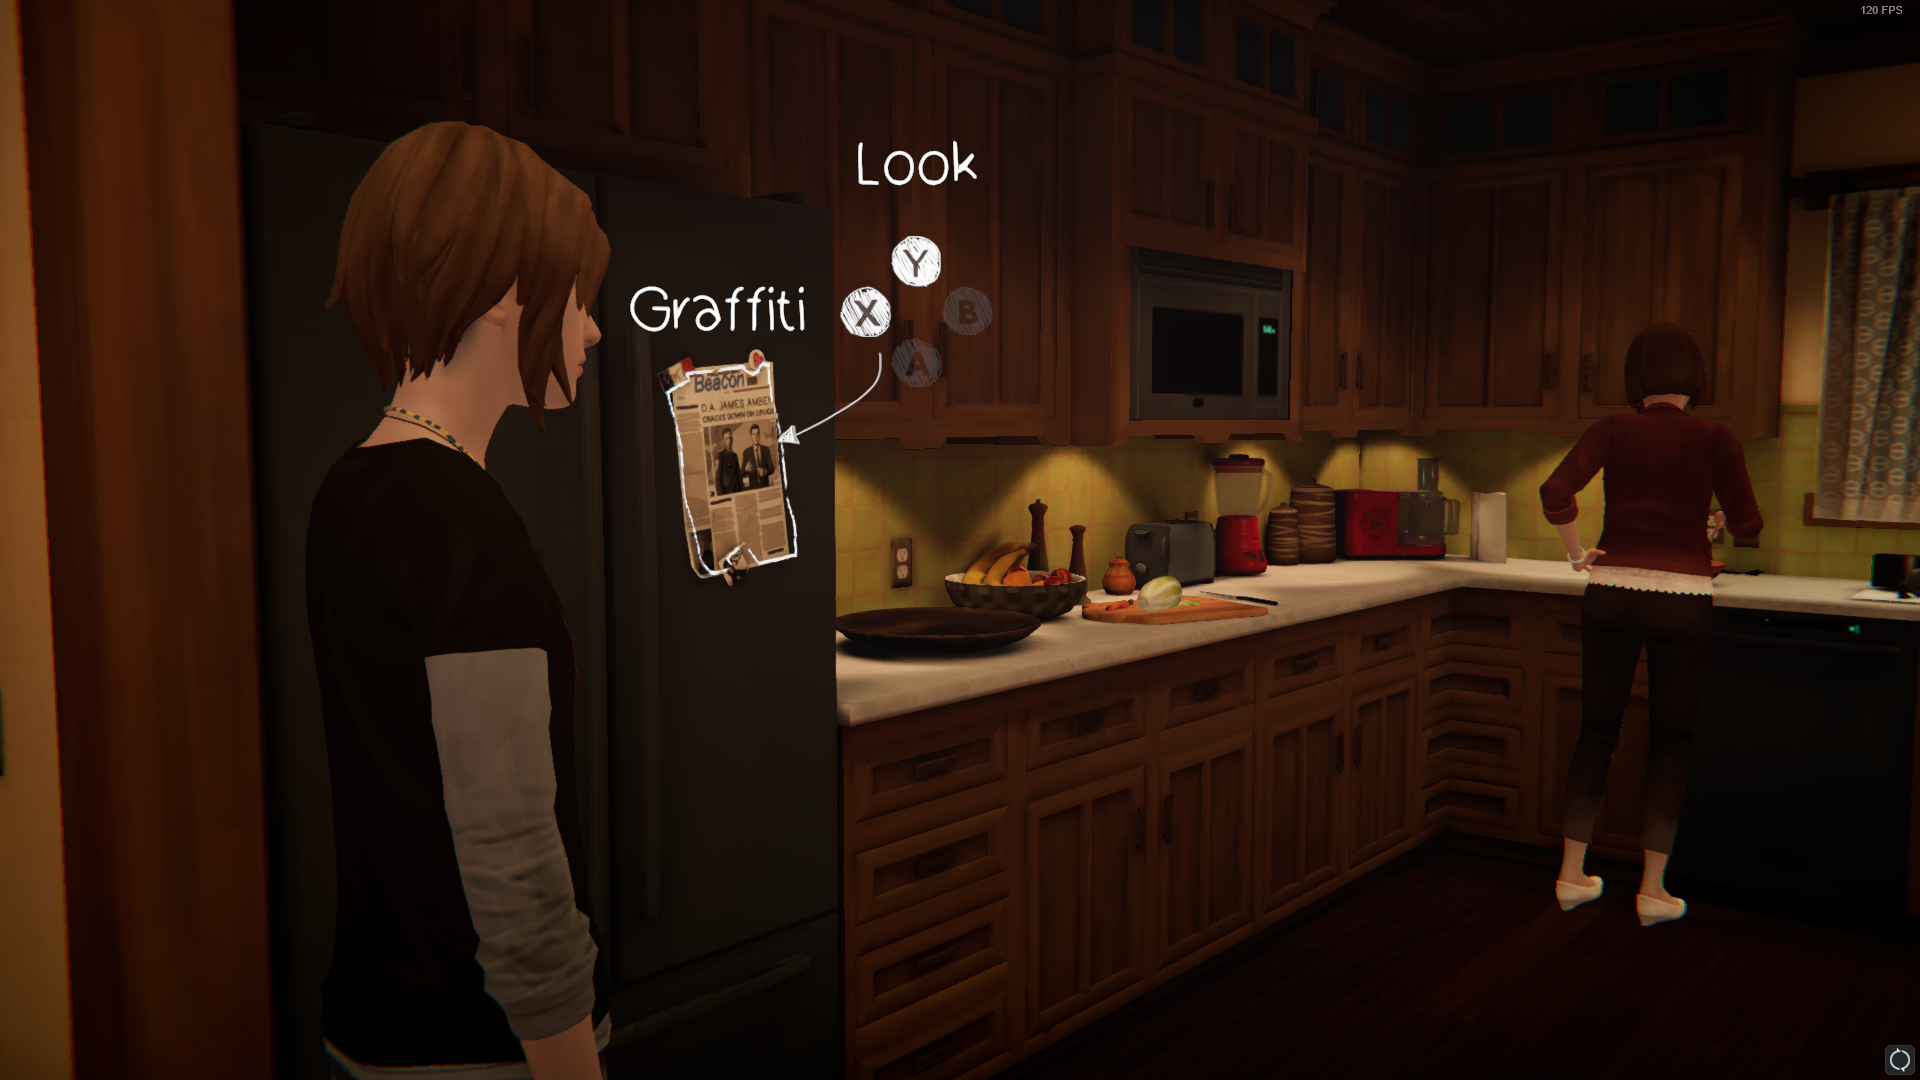
 Creature Feature
Complete the optional graffiti #10 in Episode 2: Brave New World
After you place Mr. Amber's glass on the table, Mrs. Amber will move away, allowing you to graffiti the newspaper article on the fridge
Episode 3: Hell is Empty
 American Graffiti
Complete the optional graffiti #1 in Episode 3: Hell is Empty
In Rachel's room, there is a big map of the United States of America
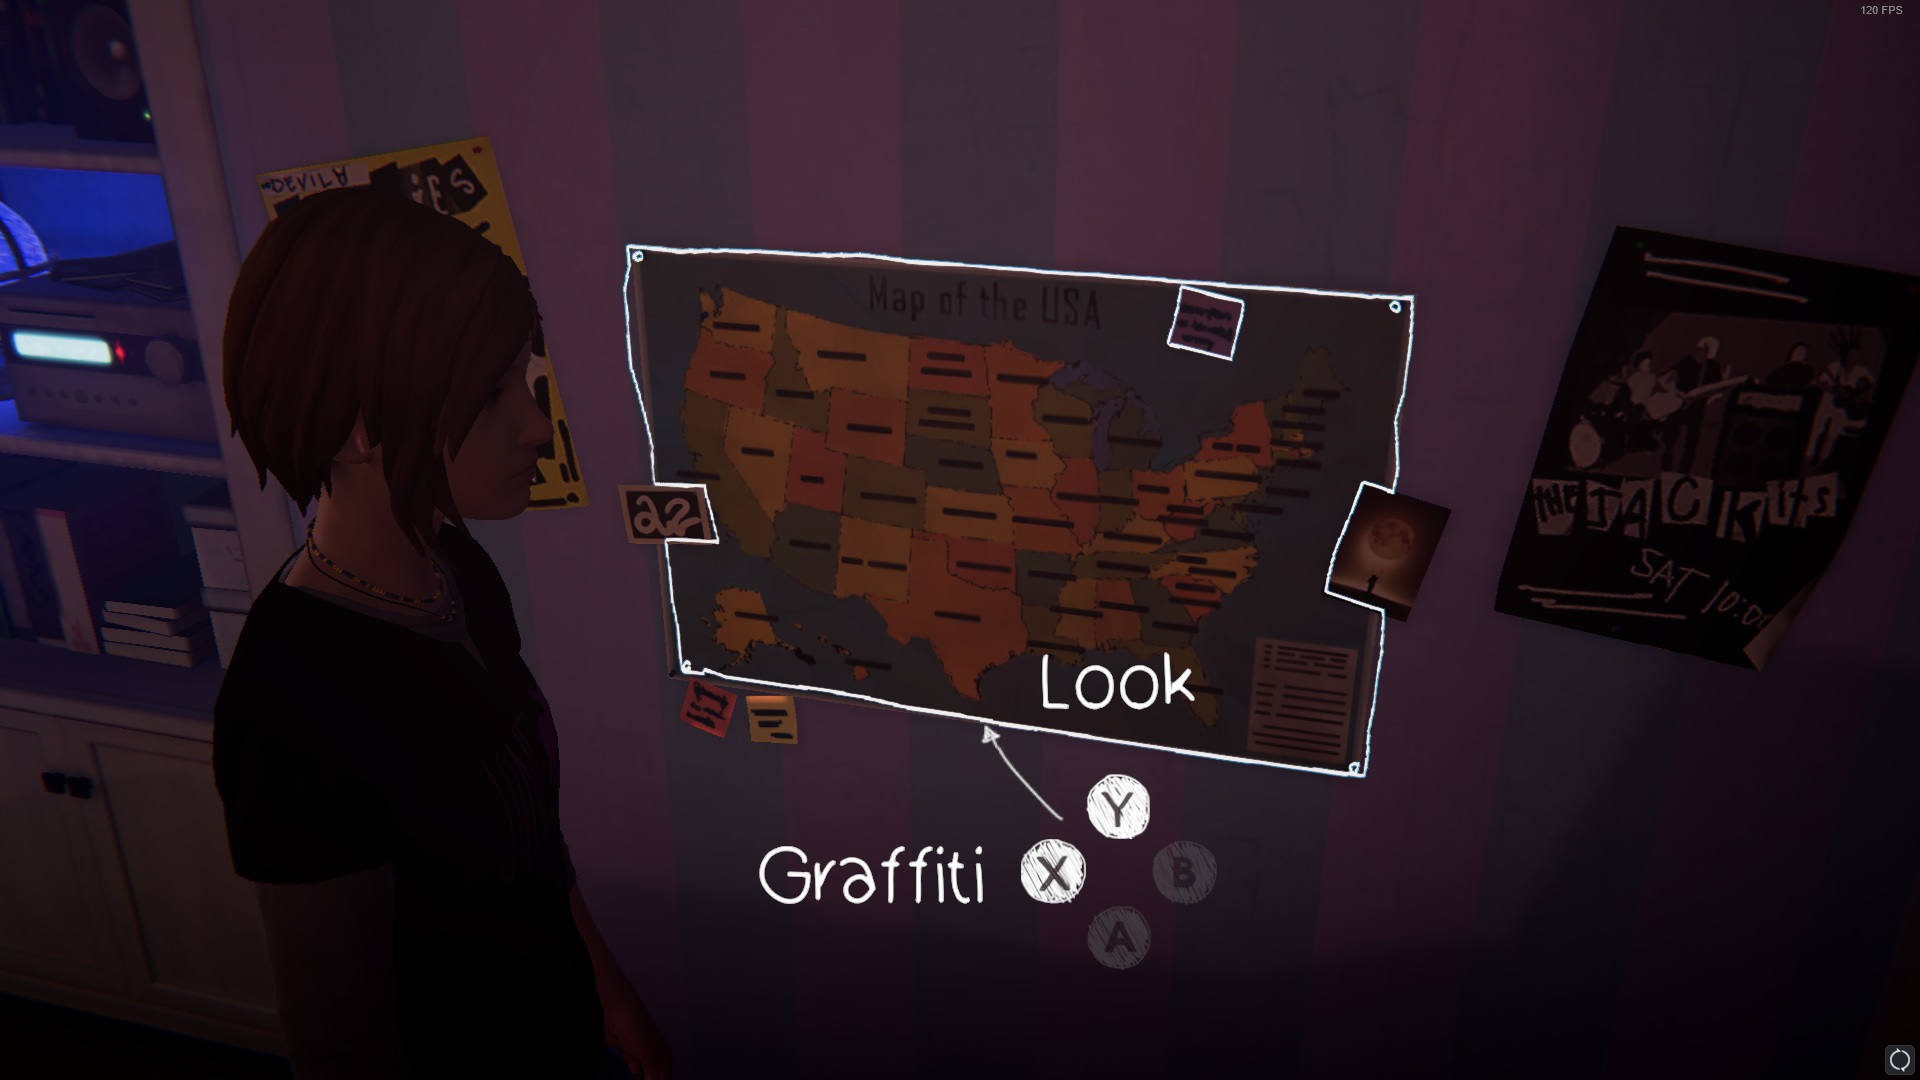
 Extra Credit
Complete the optional graffiti #2 in Episode 3: Hell is Empty
In the same room, you can find Rachel's planner on her desk
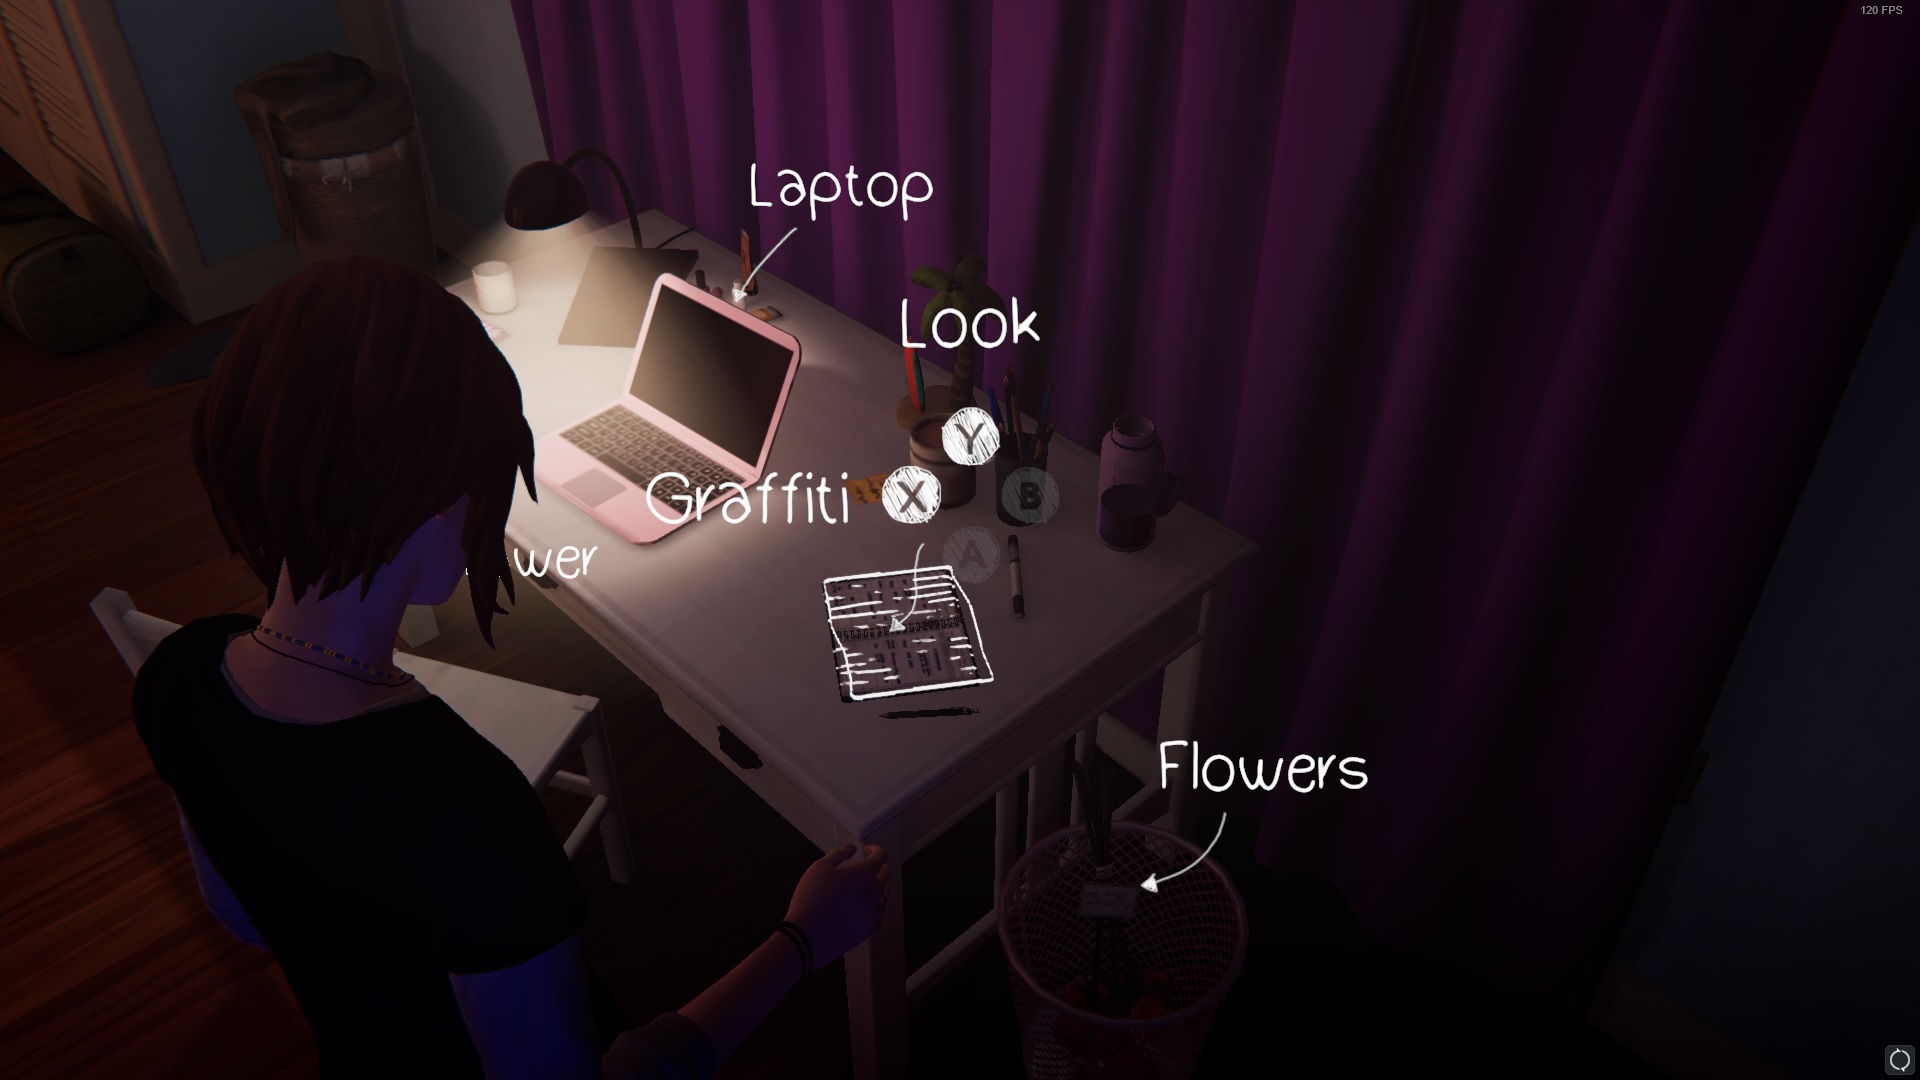
 Peer Review
Complete the optional graffiti #3 in Episode 3: Hell is Empty
After Chloe sneaks into her room, find the class photo near the globe. Have a look at it
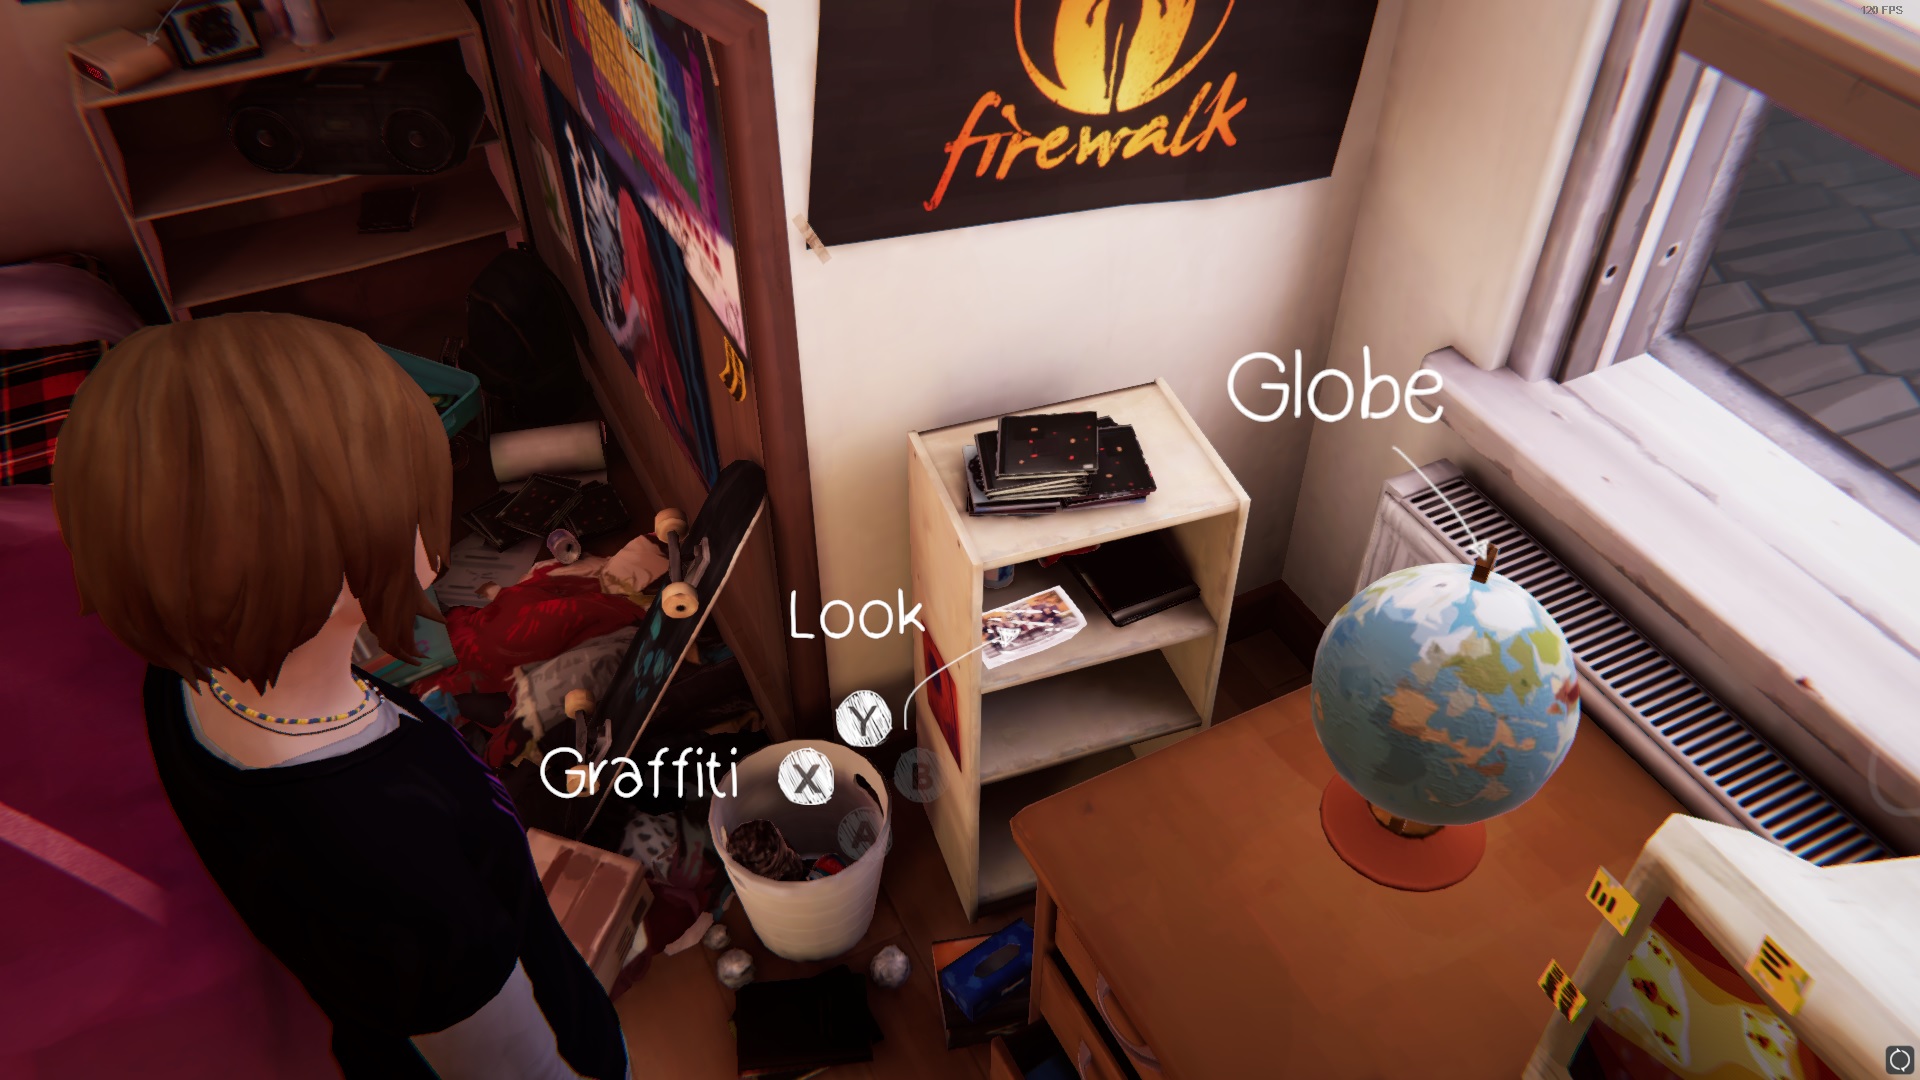
 Monthly Masterpiece
Complete the optional graffiti #4 in Episode 3: Hell is Empty
Leave Chloe's room, go to Joyce's room then immediately turn right. There you will find a car calendar
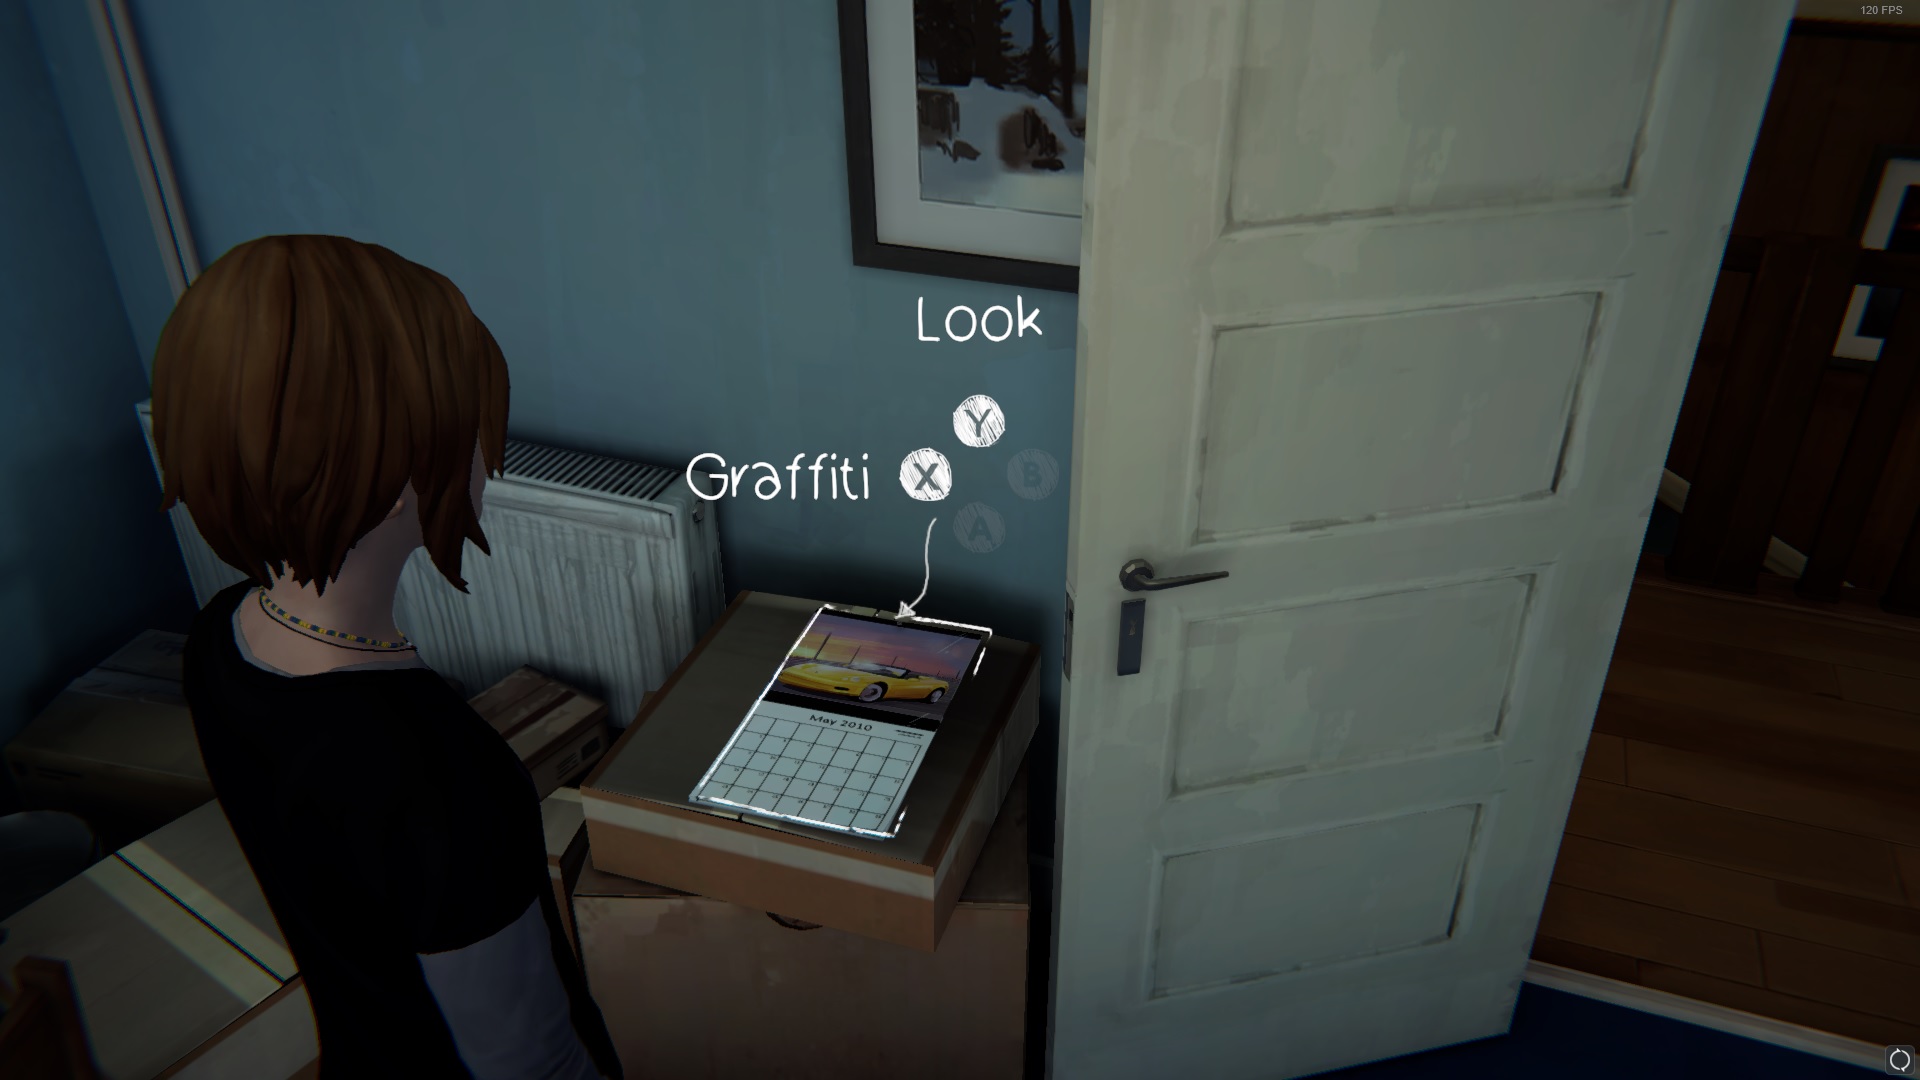
 Spit Take
Complete the optional graffiti #5 in Episode 3: Hell is Empty
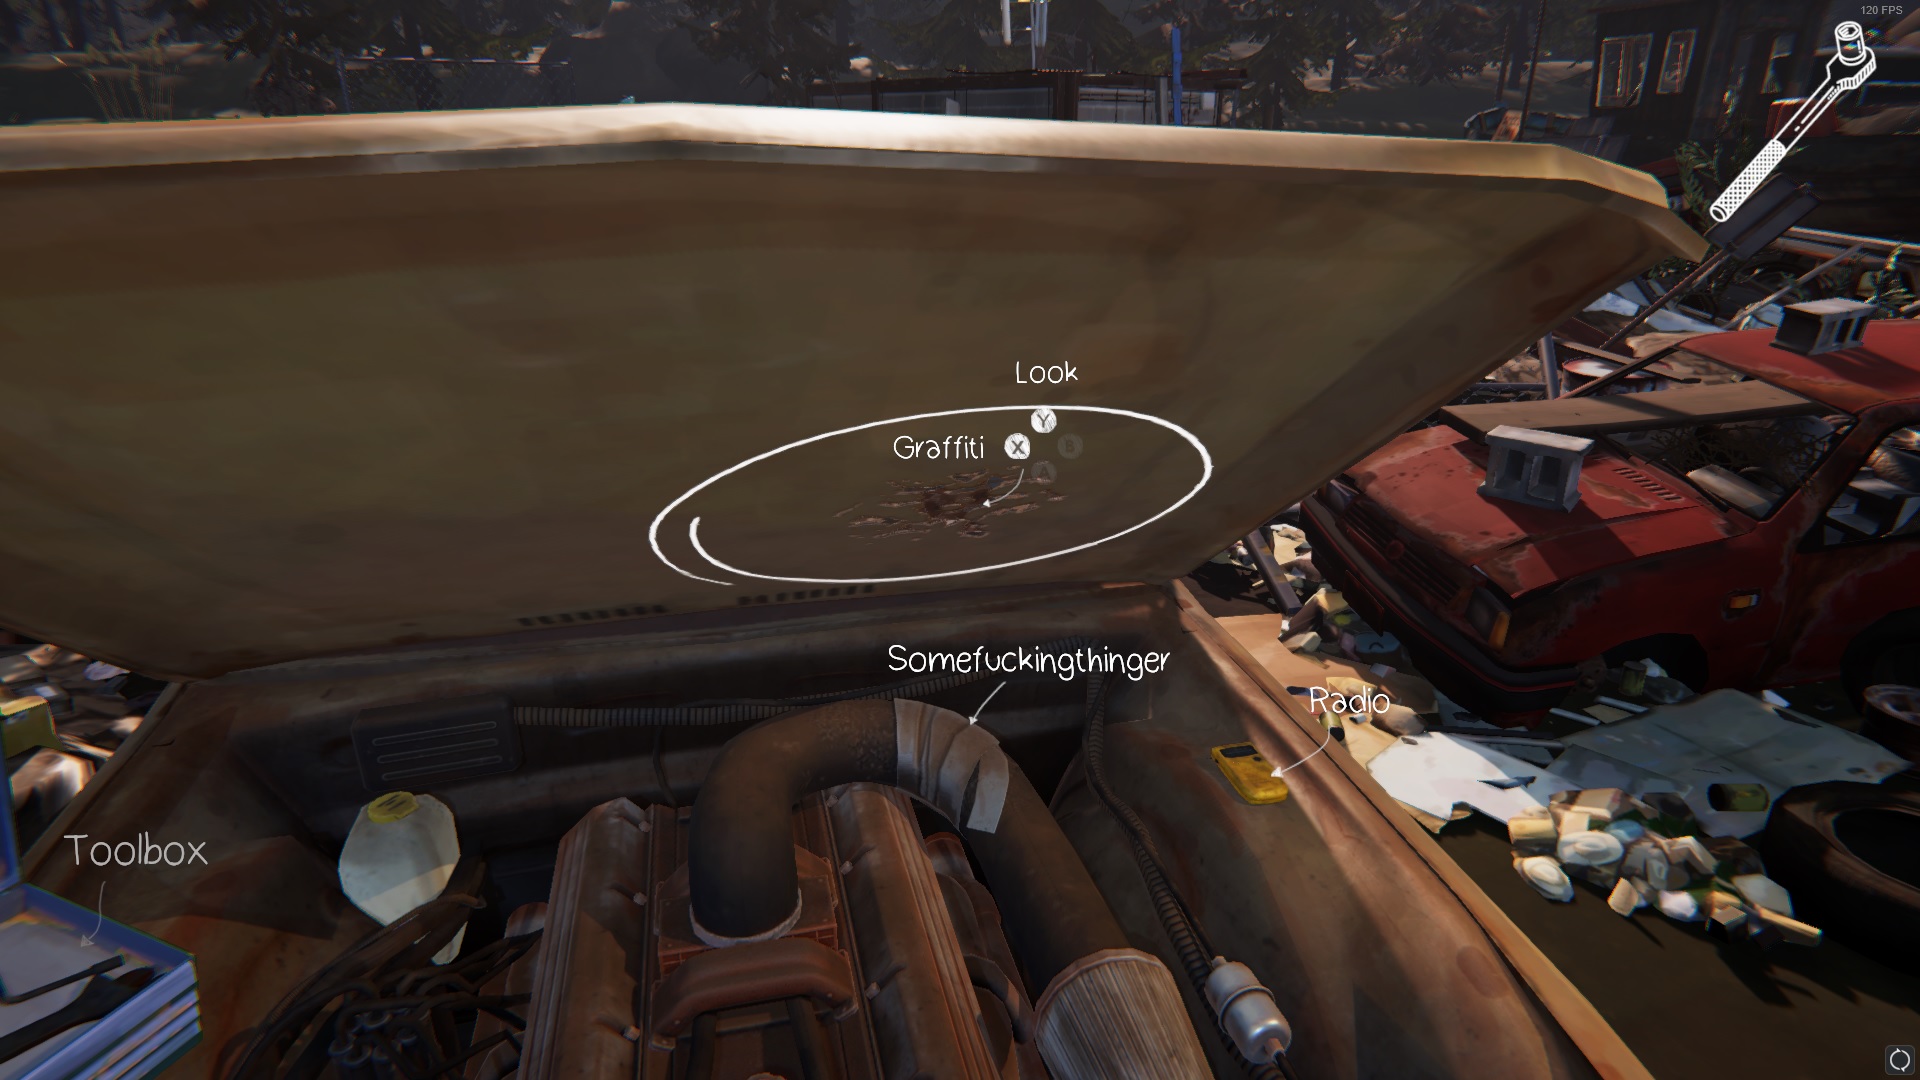
When fixing the truck, have a look at the fuel filter, then blow it
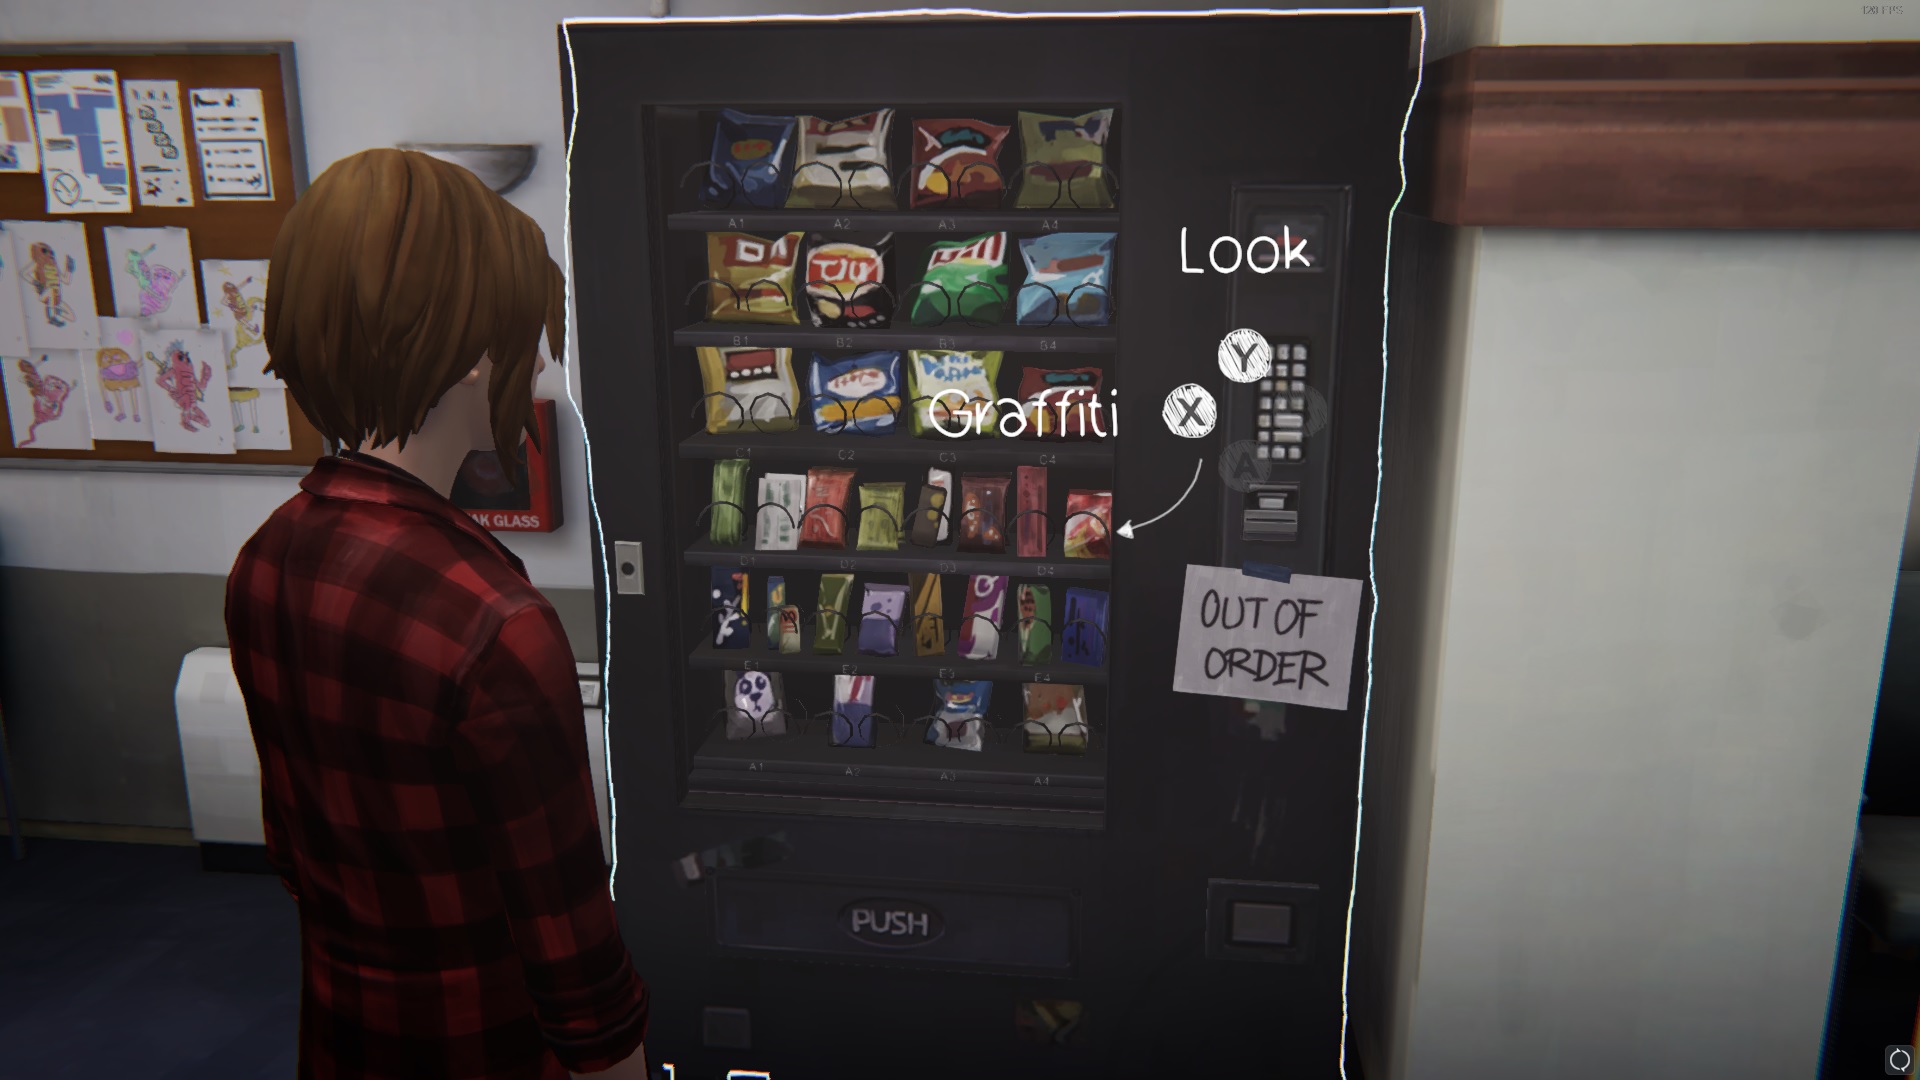
 Venting Machine
Complete the optional graffiti #6 in Episode 3: Hell is Empty
While you are at hospital, slam the vending machine three times, then the graffiti option should appear. If it doesn't appear right away, walk around for a bit
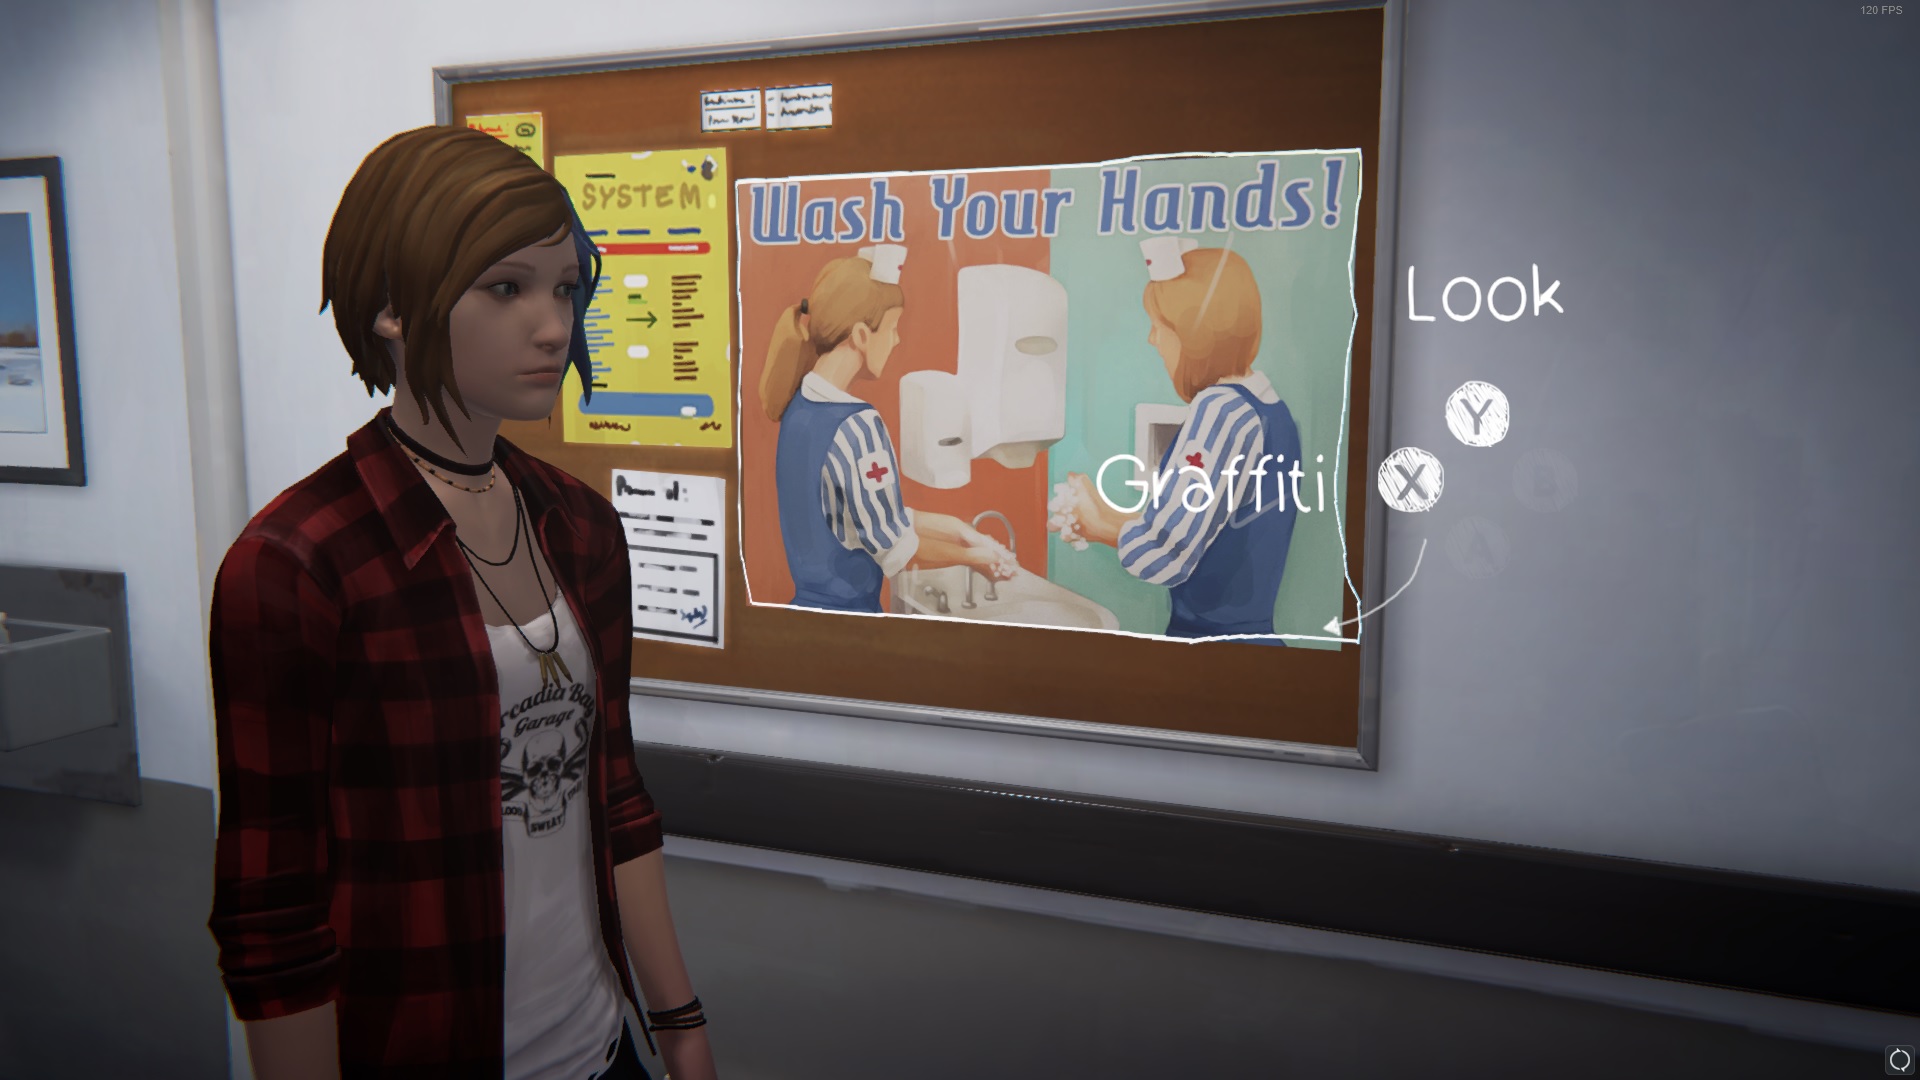
 Hello Nurse
Complete the optional graffiti #7 in Episode 3: Hell is Empty
Go towards the hospital exit and look for the “Wash Your Hands!” poster
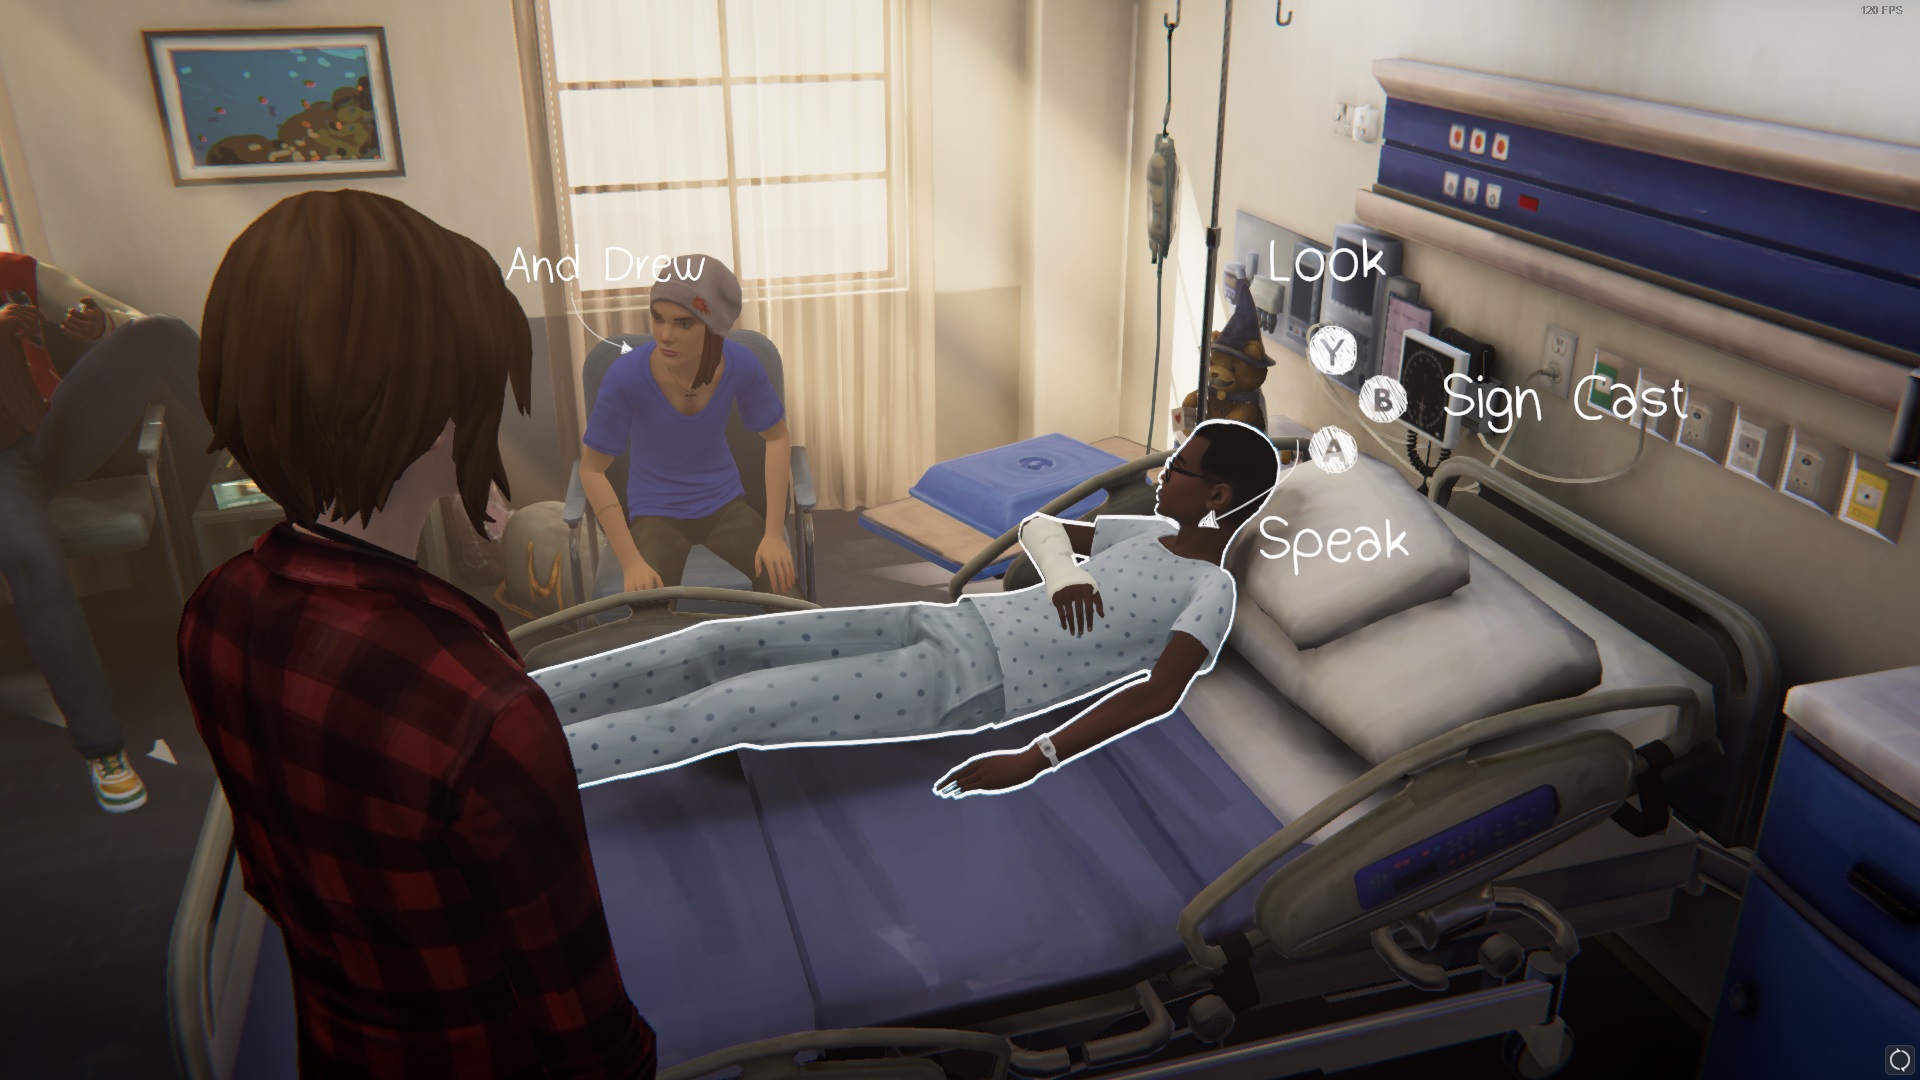
 A Penned Appendage
Complete the optional graffiti #8 in Episode 3: Hell is Empty
If Mikey is the one who is injured, ask to sign his cast. If Drew is the one who is injured, challenge him for his pudding, then sign his cast
 Drunk Drawer
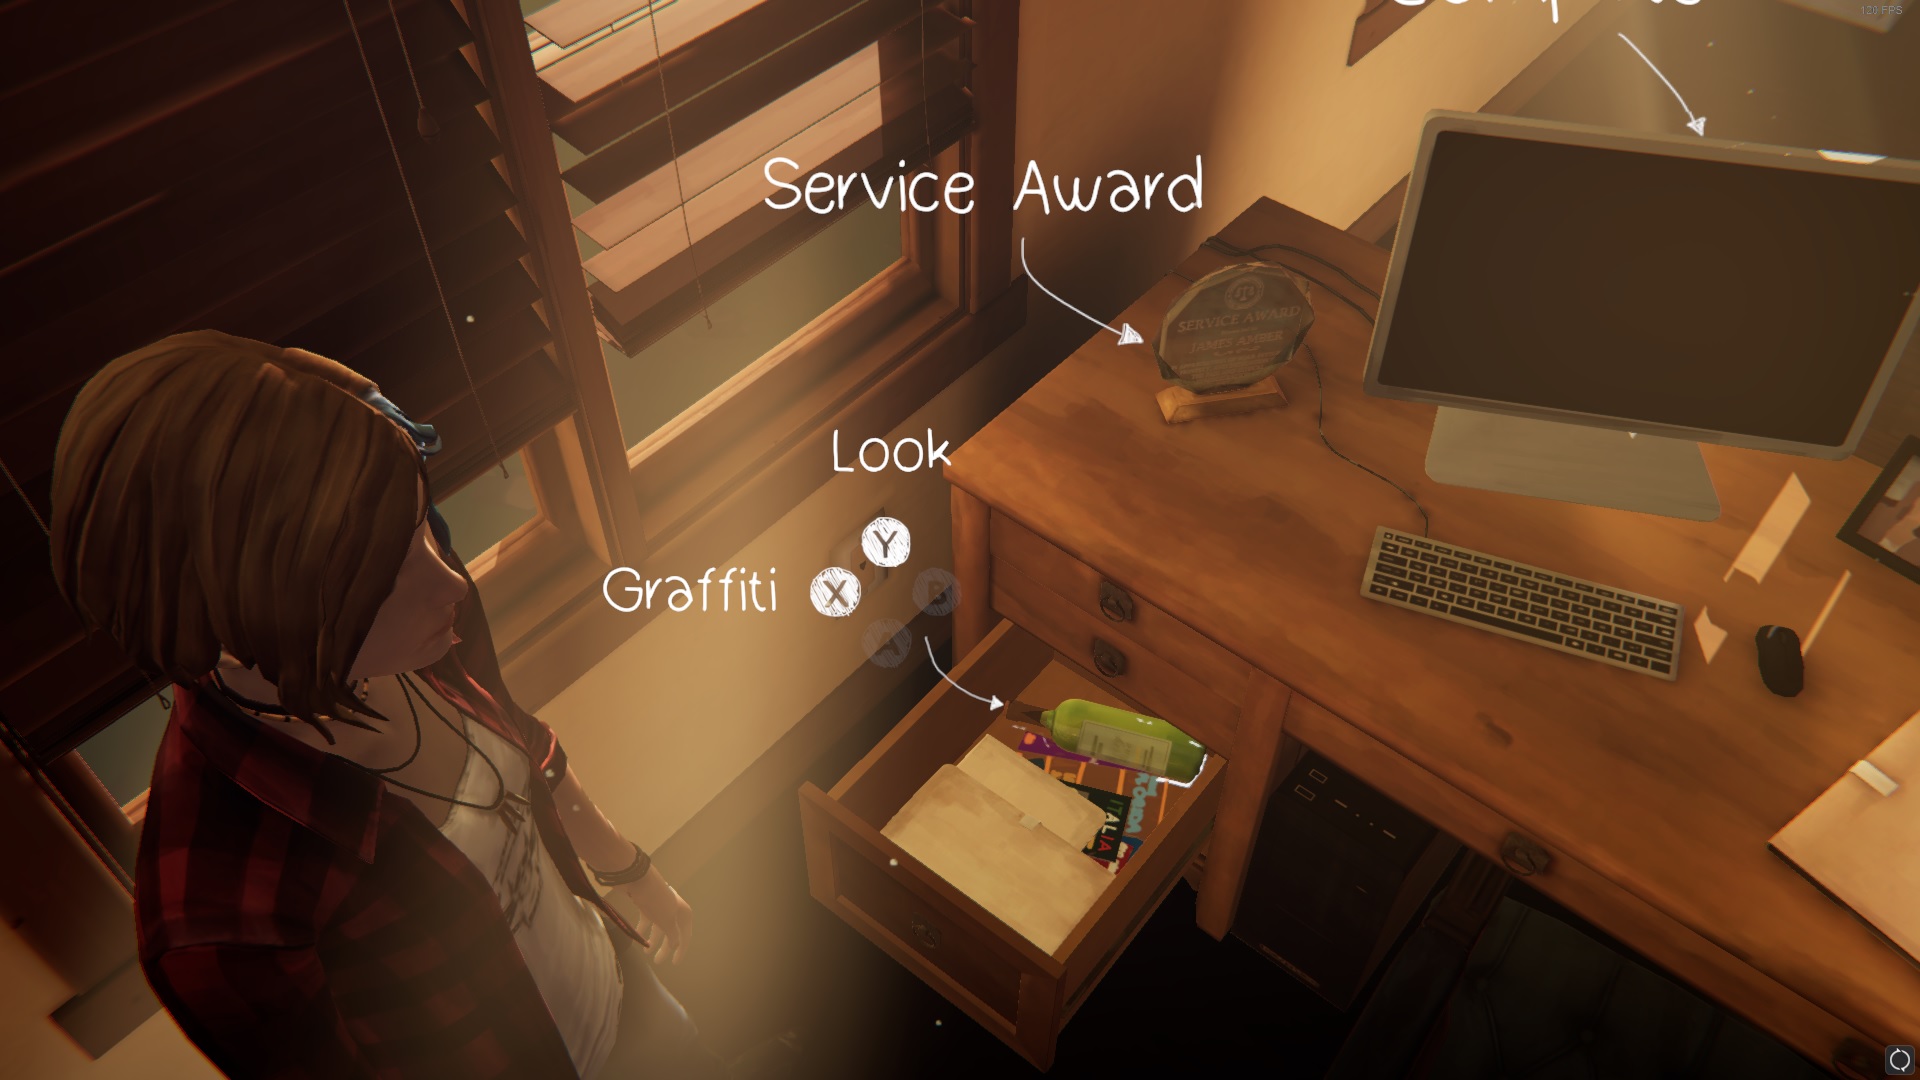
Complete the optional graffiti #9 in Episode 3: Hell is Empty
While at Mr. Amber's office, open the left drawer in his desk
 Messed Up
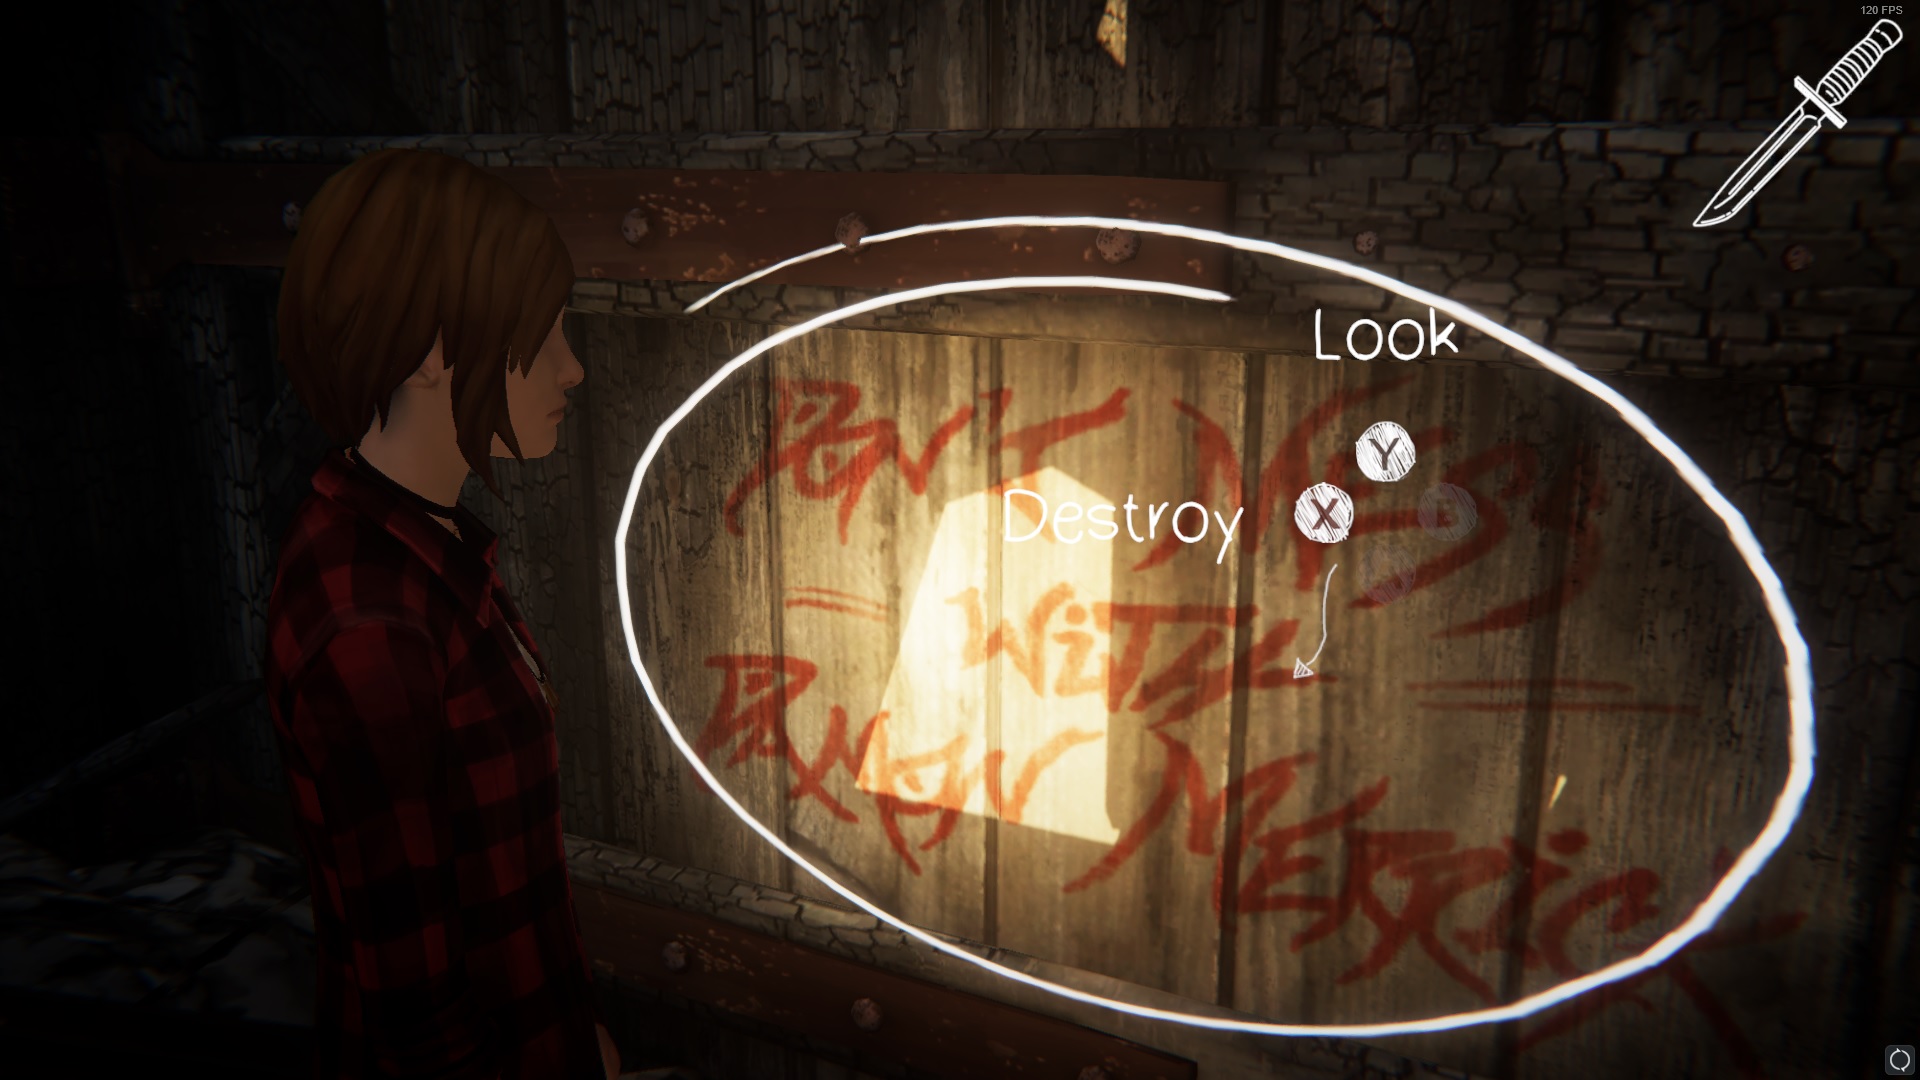
Complete the optional graffiti #10 in Episode 3: Hell is Empty
At the old mill, search for the knife stuck in the wooden pillar, then move the metal sheet away from the sign written on the wall
🏆
Beat Life is Strange: Before the Storm's 100% run?
Flex it — let your friends know you pulled it off.
More Life is Strange: Before the Storm guides
- Graffiti Guide 100% Achievements w/ pictures★ 5 (621)12k views671 ♥4 minUpdated 6 Jun, 2020
- Достижения | Граффити | Советы★ 5 (642)9.4k views703 ♥2 minRussianUpdated 28 Dec, 2023
- Действия и их последствия★ 5 (320)9.3k views365 ♥31 minRussianUpdated 21 Feb, 2021
- Все локации с граффити★ 5 (635)8.4k views555 ♥4 minRussianUpdated 26 Apr, 2018
- HELLA★ 4 (339)7.9k views91 ♥1 min
- Backtalk | Life is Strange★ 5 (310)7.5k views339 ♥1 minUpdated 16 Jan, 2018


🔥 Popular guides
- Upgrading to PremiumTeam Fortress 2★ 5 (20k)1441k views11k ♥6 minUpdated May 11, 2022
- No More Room in Hell Official ManualNo More Room in Hell★ 5 (2.8k)569k views2.1k ♥29 minUpdated Apr 22, 2019
- NMRiH Community Hosting GuidesNo More Room in Hell★ 5 (526)351k views653 ♥1 minUpdated Aug 10, 2022
- How to 'Git Gud' Soon™MORDHAU★ 5 (2k)318k views3k ♥68 minUpdated Nov 16, 2024
- Лучшие кооперативные игры SteamPAYDAY 2★ 5 (1.5k)315k views2.1k ♥56 minRussianUpdated Apr 27, 2025
- Desert Eagle Heat Treated | Blue GemCounter-Strike 2★ 5 (1.6k)293k views1.5k ♥2 minUpdated Jan 16





This guide was created by its original author on the Steam Community. Are you the author and want it removed? Request removal.