Perimeter Defenses for New Players
Introduction
Definition of Terminology
In order to make the guide clear I must define some of my terminology.
Early game:
- Steam-powered.
- Incomplete infrastructure.
- Production occasionally still has to be done by hand.
Mid game:
- Steam-powered, possibly supplemented by solar power and capacitors.
- Infrastructure completed to player's satisfaction.
- Production automated to the player's satisfaction.
Late game:
- Nuclear-powered.
- Building is done with blueprints and construction drones.
- Logistics drones bring the player what they want directly from assemblers.
Feed Belt:
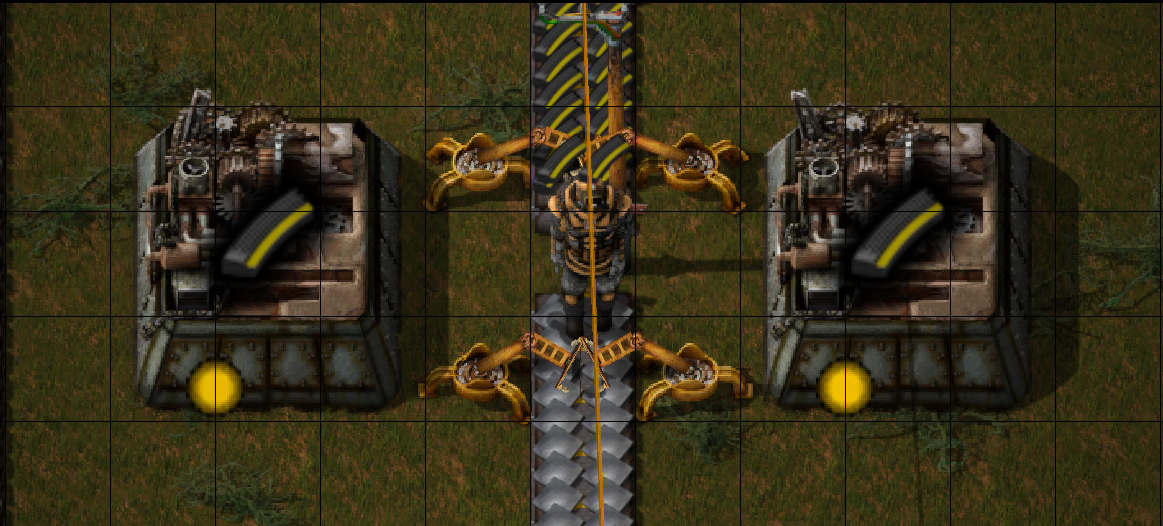
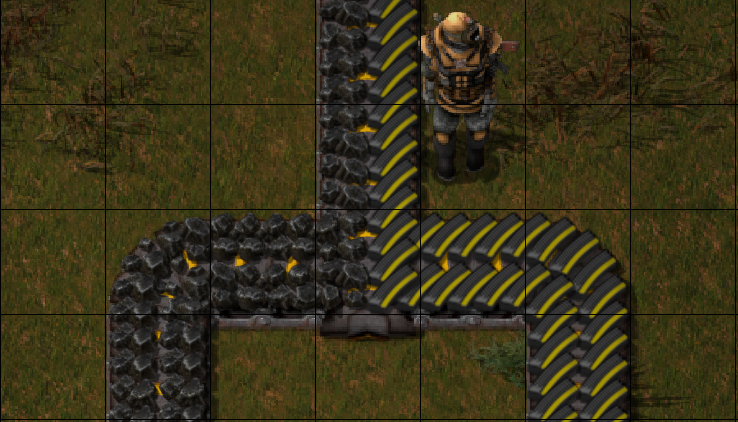
- A standard yellow belt that carries coal and ammo to the defense perimeter.
Maximum Dispersion Perimeter:
- A defensive perimeter suitable for the early game.
- Turrets dispersed as much as possible whilst remaining in eachother's range.
- Focus on enveloping the player's chosen territory as quickly and cheaply as possible.
Maximum Concentration Perimeter:
- A defensive perimeter suitable for the mid game.
- Turrets placed as close to one another as possible.
- Focus on maximizing firepower.
Battery:
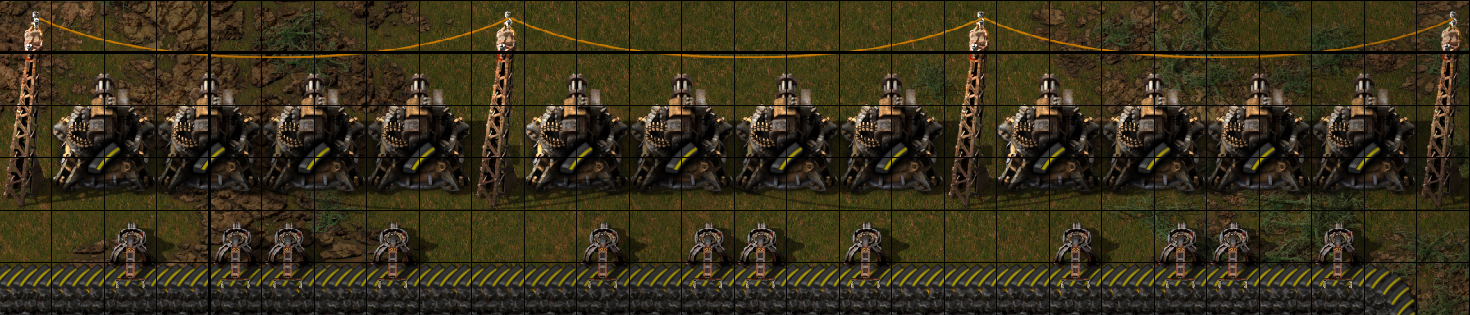
- A group of 4 turrets in a maximum concentration perimeter.
- Each battery is separated from the battery to its left and right by medium electric poles.
1: Early Game Ammo Production
2: Creating a Perimeter Feed Belt
3: Early Game Defense: Maximum Dispersion Perimeter

4: Mid Game Defense: Maximum Concentration Perimeter
5: Adding Walls
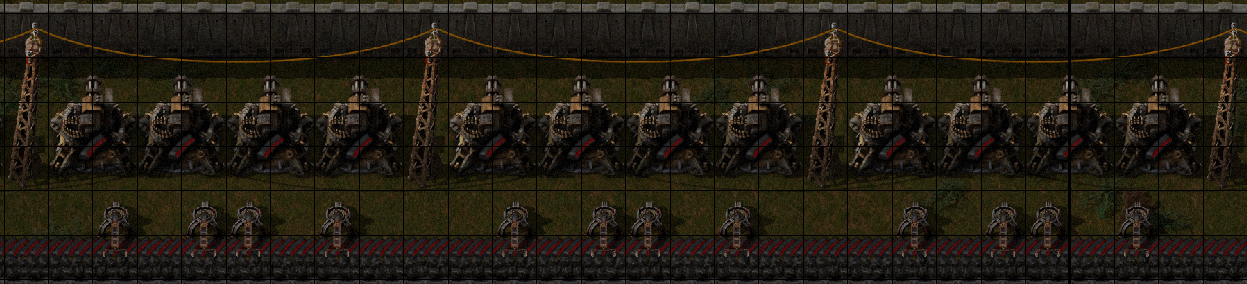
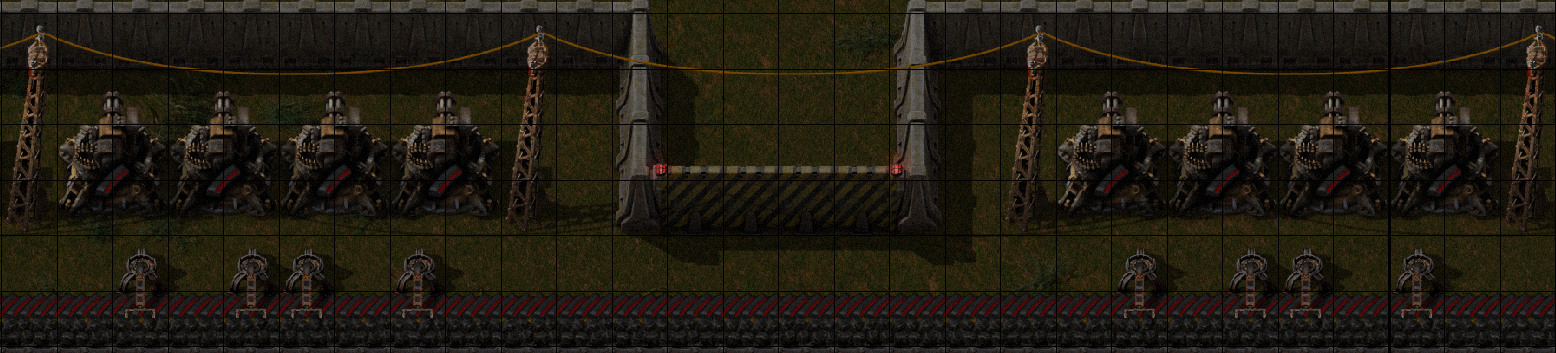
6: Adding Gates
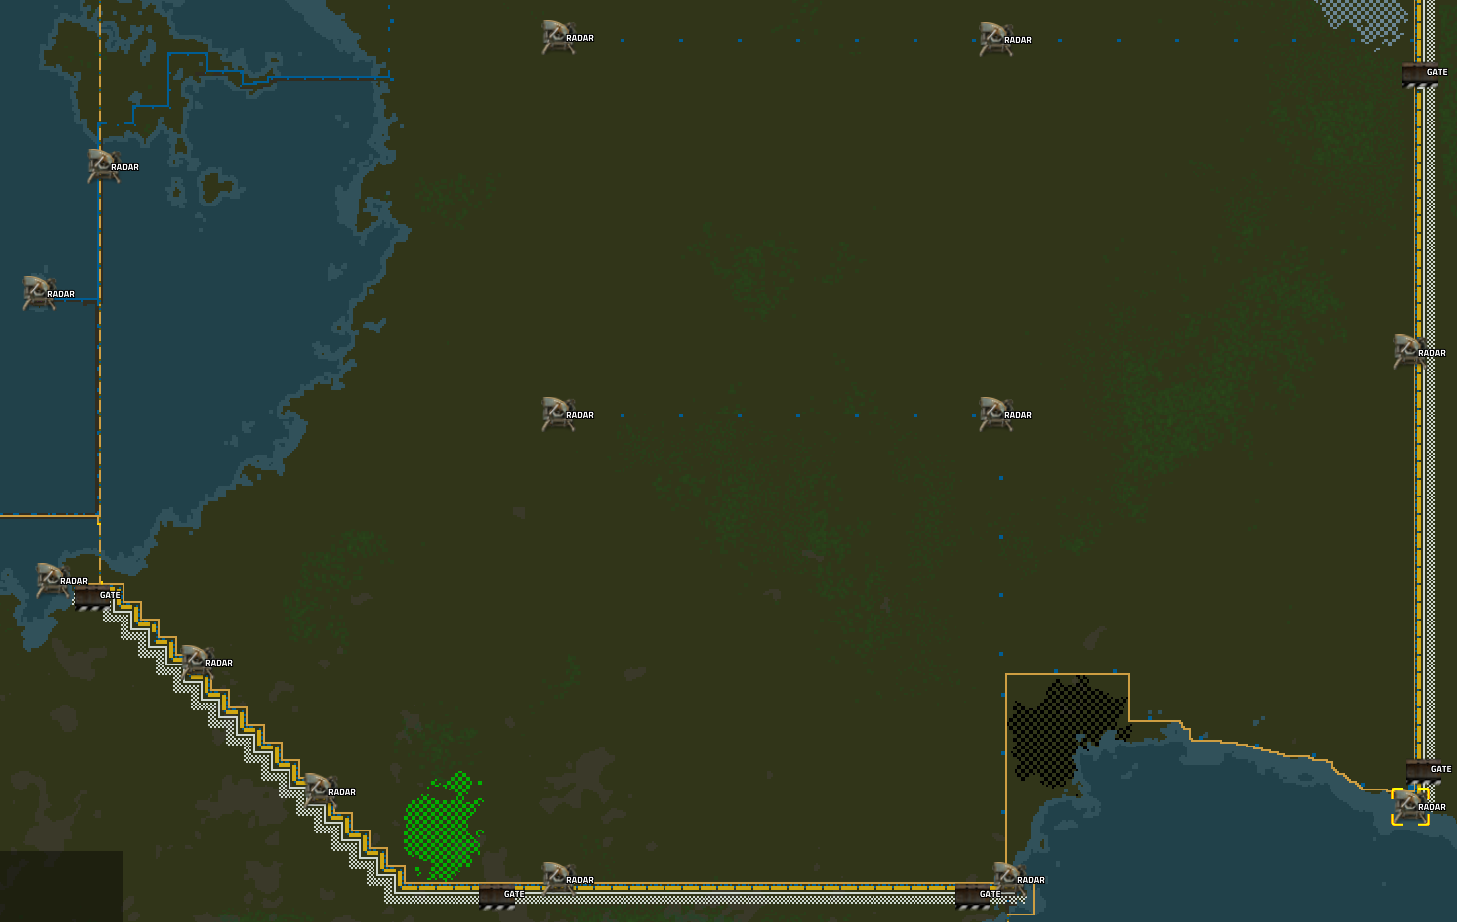
7: Adding Radar Coverage
8: Adding Artillery
9: The Personal Roboporter Makes Everything Easier
10: Adding Tank Traps
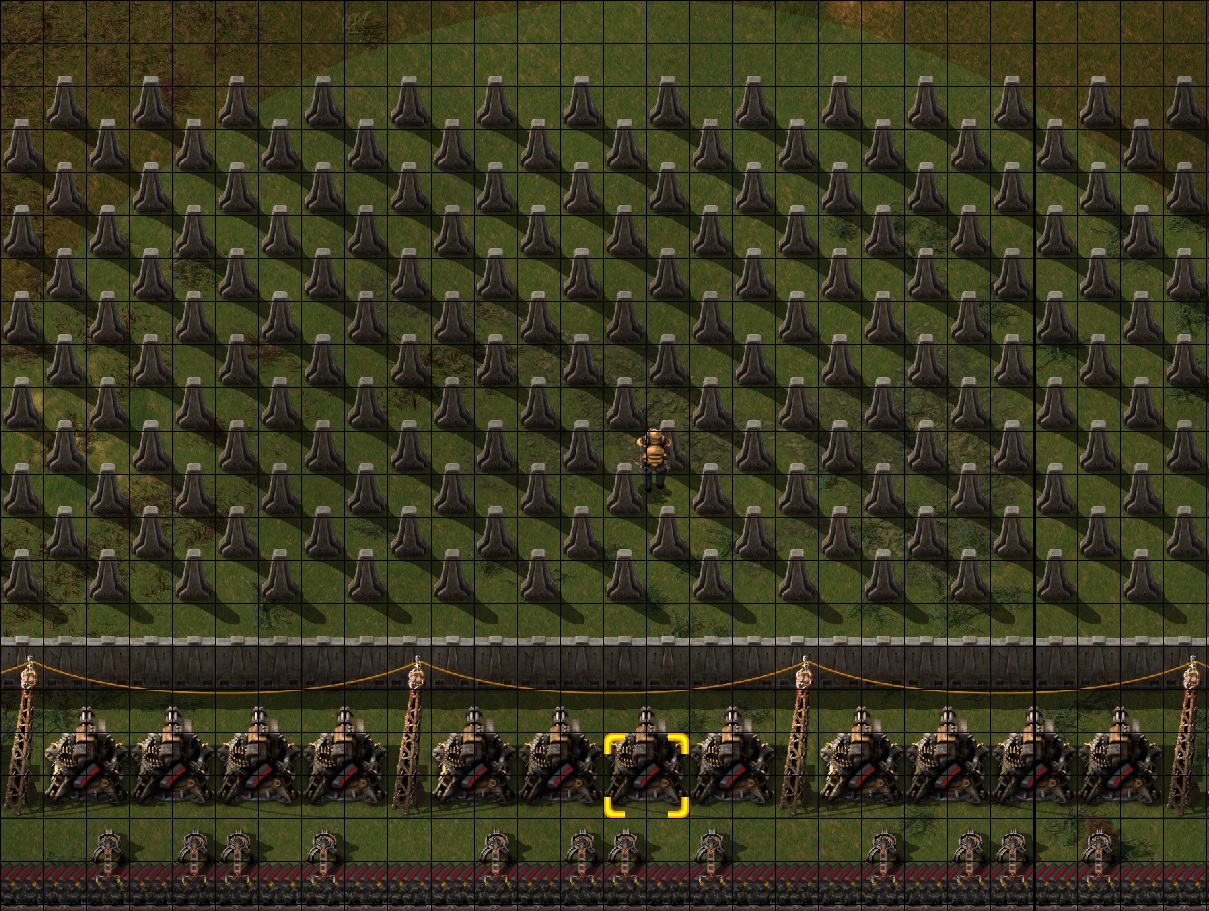
11: Tank Trap Gates
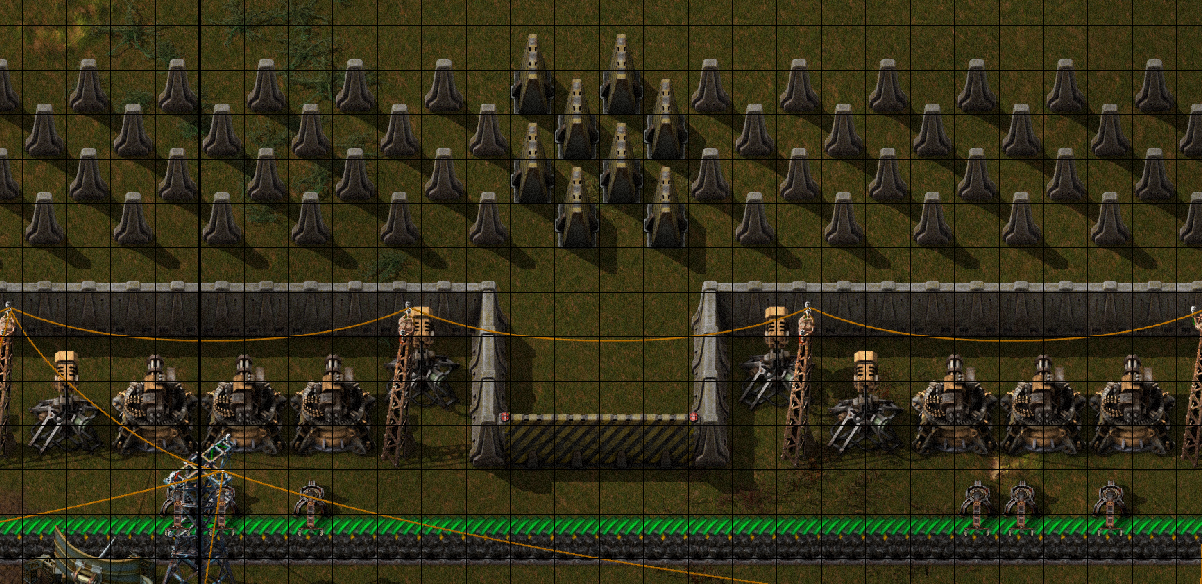
12: Adding a Push-back Supplement to Tank Traps
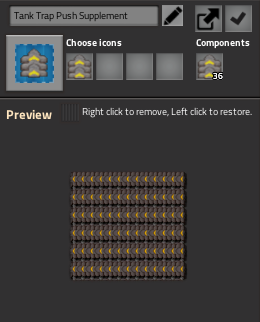 Now that we have our blueprint, we apply the supplement over the tank traps, like so: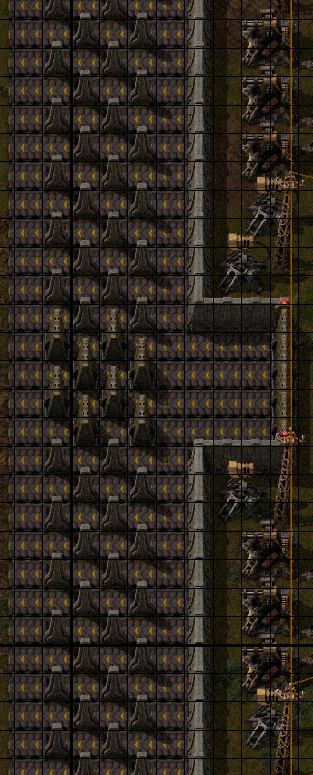
Belts can not be targeted by biters, spitters or your turrets on purpose, and some would go as far as to argue that a 5x5 belt of blue belt around one's base simply makes it immune to melee attackers.
One could even go so far as to include a reverse set of belts in order to drive the Spitters into the range of your turrets, like lazy pedestrians at an airport.
13: Using Defenses Offensively
- Perimeter - Straight
- Perimeter - Gate
- Perimeter - Corner
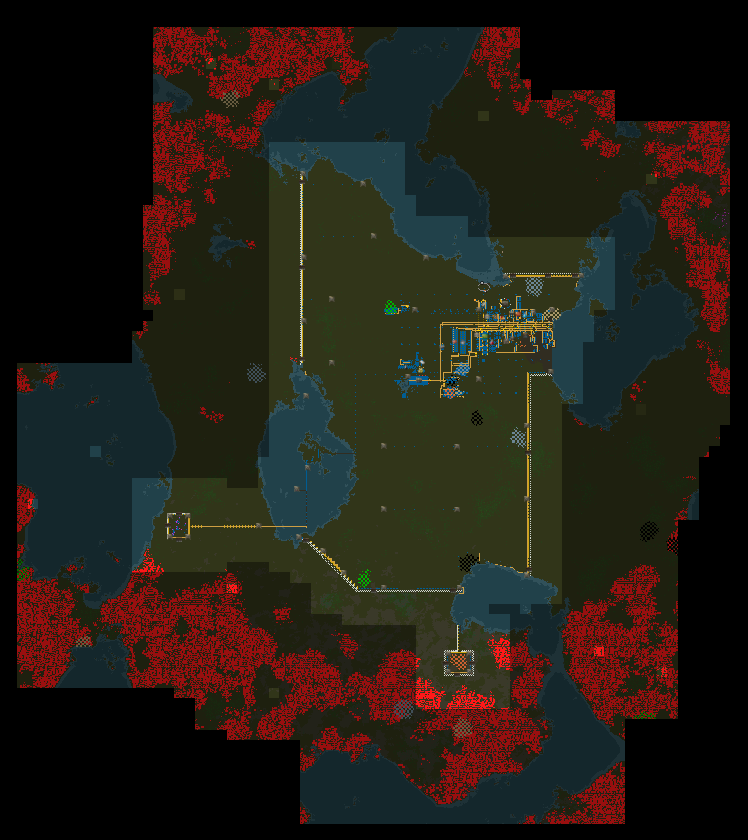
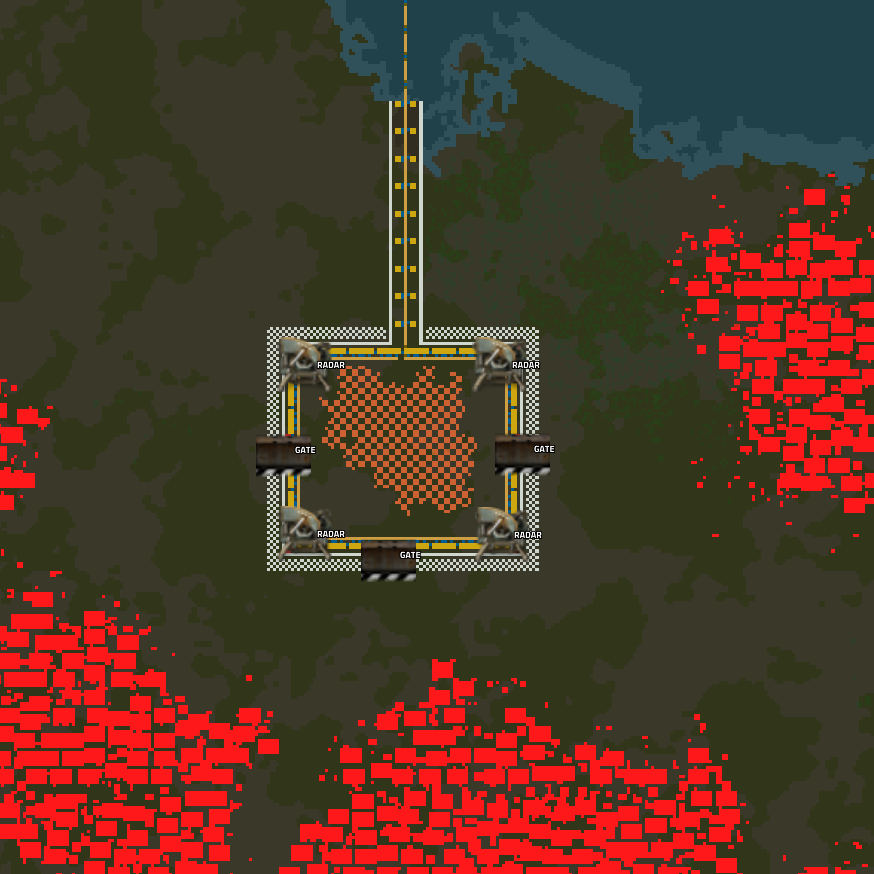
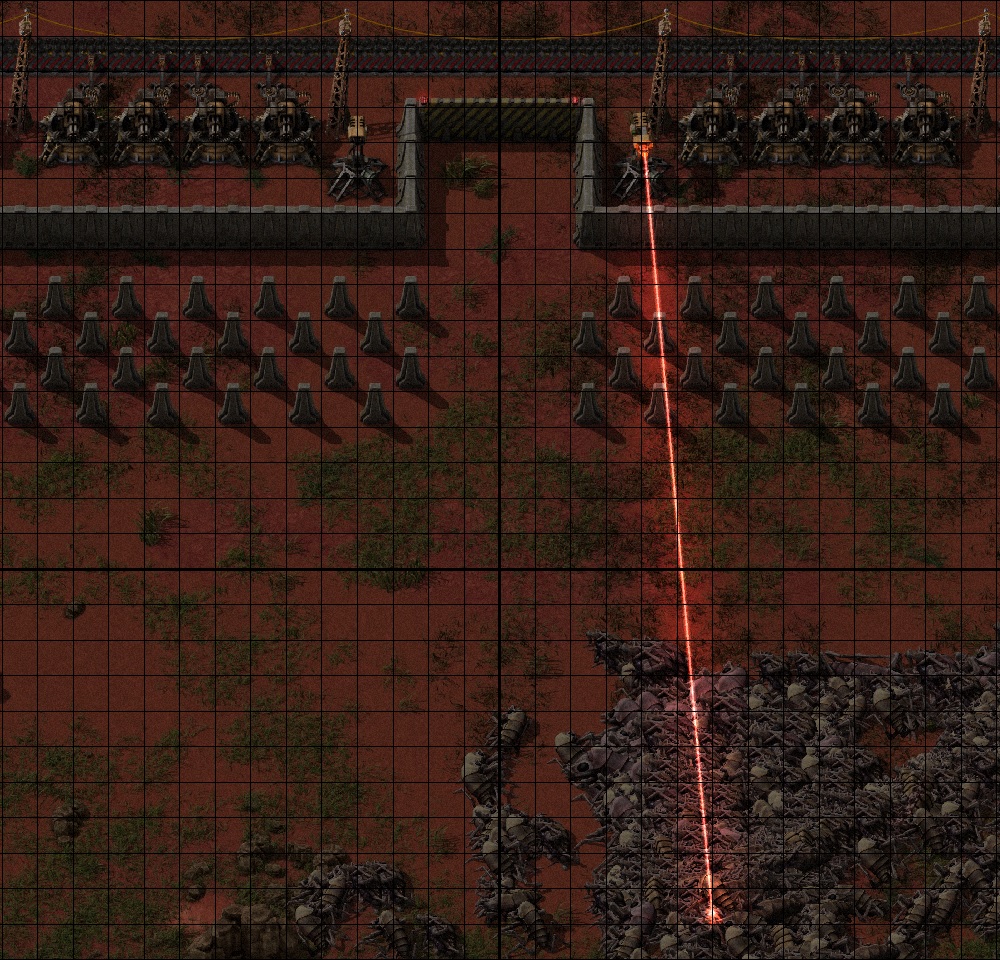
The picture below highlights how this was done to a copper field underneath a bug base. A single line of landfill was used to create a "supply dam" across a body of water. Once that was done, medium electric poles were placed on it at maximum dispersion. After that lines of yellow belt were added. Lastly, underground belts were added to connect the belt lines separated by the medium electric poles. Once the other shore was reached, the belt and the power line continued towards the bug nests, each pole flanked by two gun turrets, these separated from the wilderness with walls. Naturally this offensive siege trench was deployed via saved blueprints laid down by construction drones. Once contact with the enemy was made, tanks were called in to clear the nests off the copper field, after which I plopped down a perimeter in less than five minutes.
14: Laser Turrets
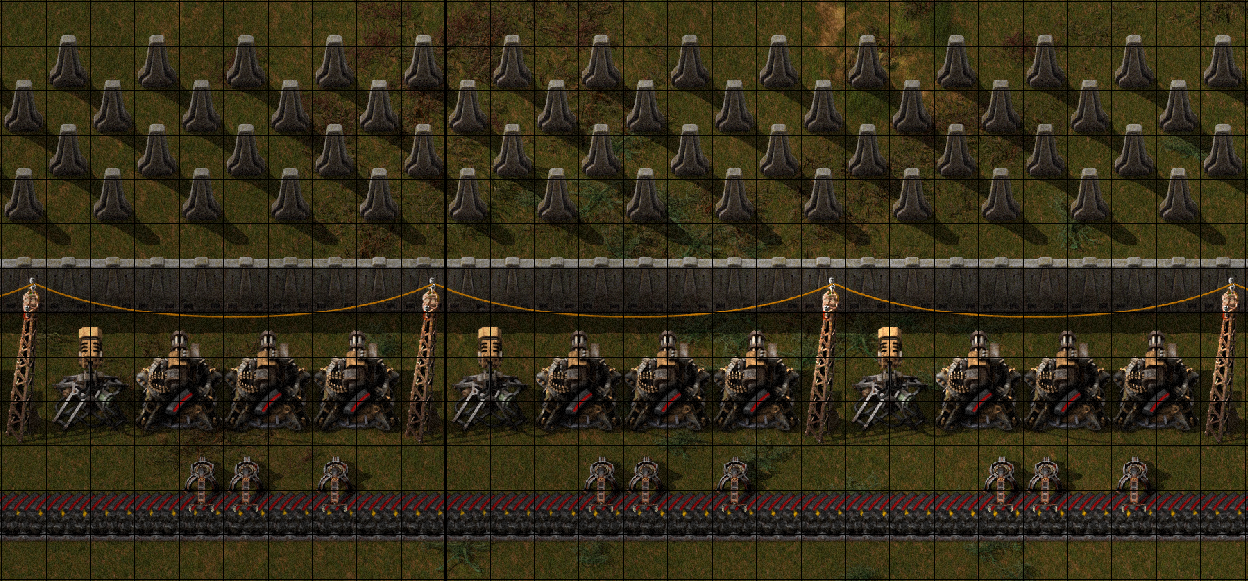
Because they're not belt-dependent, you can also sprinkle them in to reinforce gatehouses, which have less firepower due to replacing their turret battery with a gate and can use a little boost. As an added bonus, the inclusion of Laser Turrets into a Turret Battery will drastically reduce the rate at which Gun Turrets waste Uranium bullets on weak enemies.
Bonus Section: Reliable Power Generation
Throughout my guide, I have argued that the most important characteristics of a defensive perimeter made out of Gun Turrets fed by a Burner inserter from a single Yellow Belt that supplies both machines is the fact that all of these components are dirt cheap and will not be affected by power failures. The reason why I talk about power failures is that I have seen people lose their main base because they fully transitioned to laser turrets, lost power to their perimeter and were overrun. Sometimes this necessitated a save reload, sometimes the last save wasn't far enough back and it destroyed days worth of effort.
Those memories are the motivation for this guide on early to mid game defenses, but I figured that since power blackouts are such a big factor for me, I should also explain how to efficiently and reliably generate power before you get nuclear power. In this sentence, efficiently entails "Whilst taking as little space as possible" whereas reliably means "using burner inserters to feed coal to the boilers to immunize it to electricity shortages"
I use the system on the picture below, which consists of:- 2 water pumps (1 per boiler group)
- 40 boilers (20 per water pump)
- 80 steam engines (2 per boiler)
- 40 burner inserters (1 per boiler)
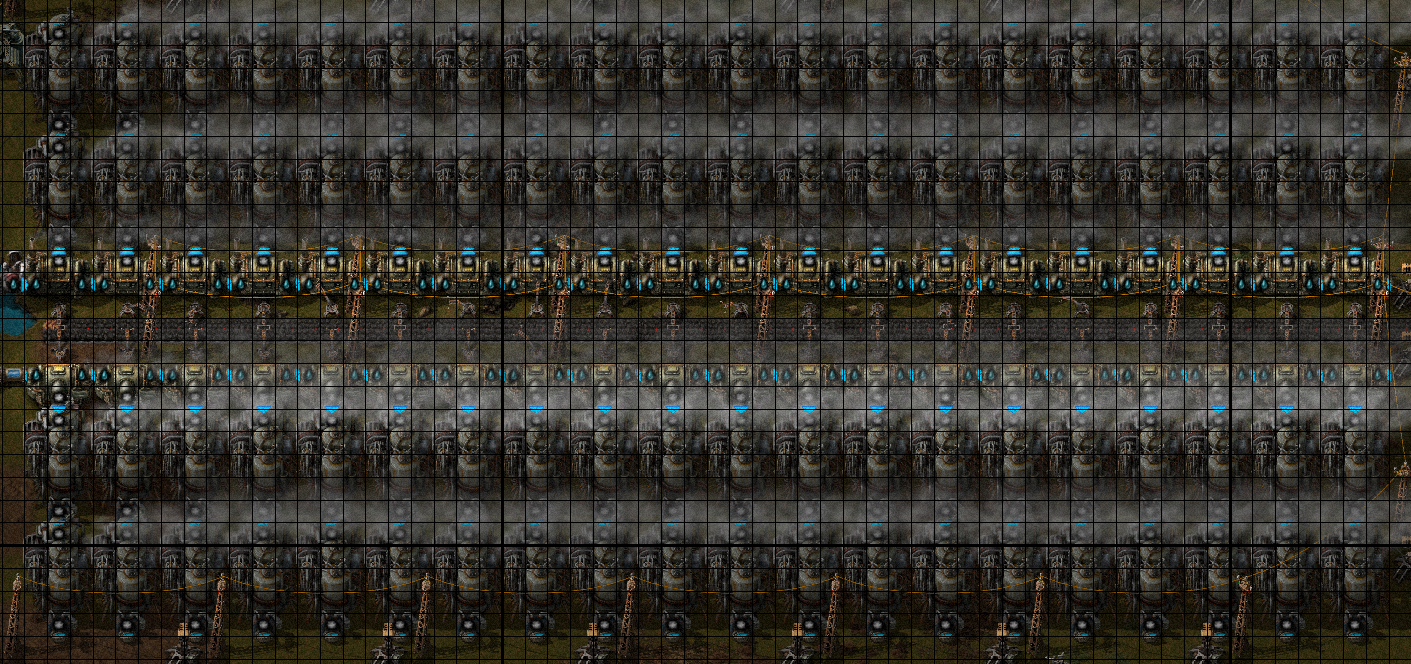 Players are also strongly encouraged to invest in combinations of Roboports, Substations, Accumulators and Solar Panels. The Solar Panels reduce your consumption of coal / oil / uranium. The Accumulators allow you to store surplus energy which is very convenient for laser turret users who suffer from temporary high peaks in power consumption. Below is one example of how such an installation could be done.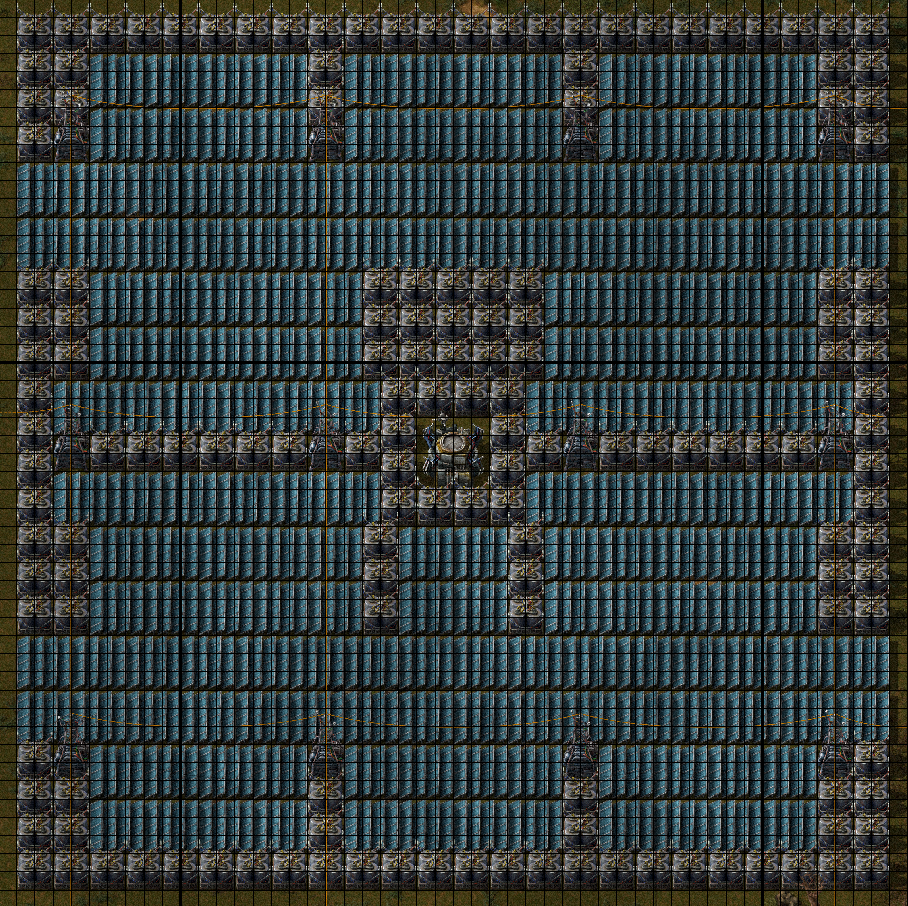
Bonus Section: Early Game Self-sustaining Automation
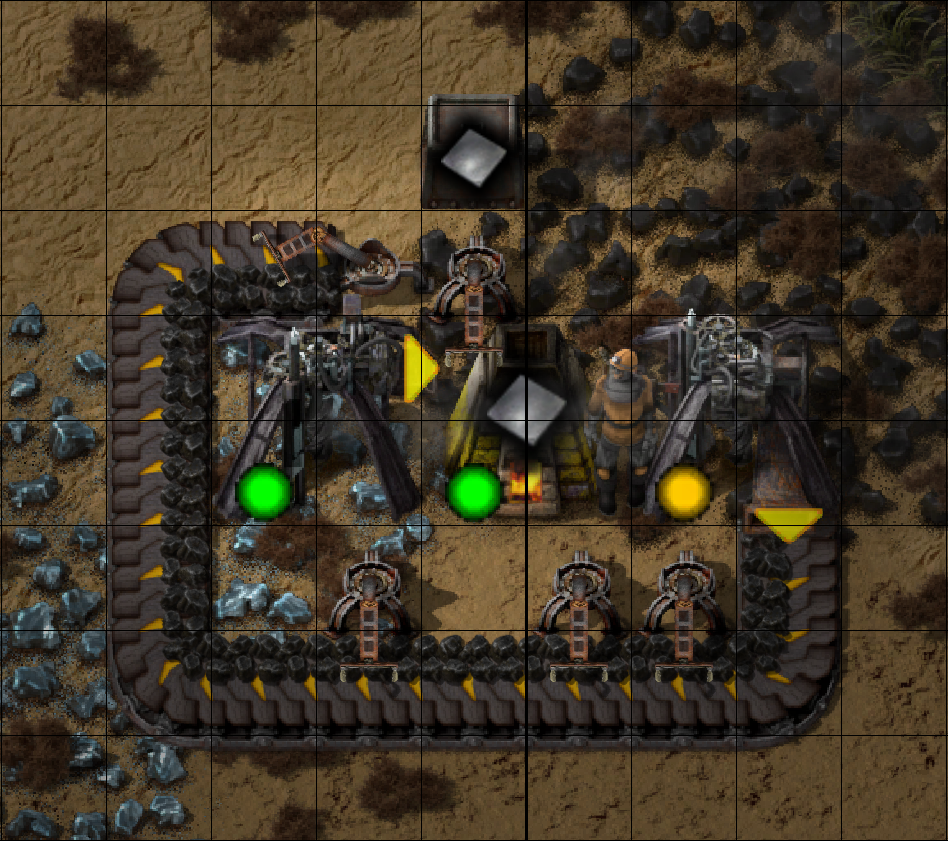
What is happening here is this:
- Burner drill 1 mines coal and outputs on a belt
- Burner inserter 1 gives coal to burner drill 1 to make it self-sustaining.
- Burner inserter 2 gives coal to the furnace.
- Burner inserter 3 gives coal to burner drill 2 which mines iron ore and outputs into the furnace.
- Burner inserter 4 gives coal to burner inserter 5.
- Burner Inserter 5 gives iron plates from the furnace to a chest.
This system will continue running indefinitely, meaning you no longer have to run around with coal.
Another trick for self-sustaining coal harvesting is to point the output of two burner drills towards each other and have a burner inserter take coal out and place it on a belt to other places.
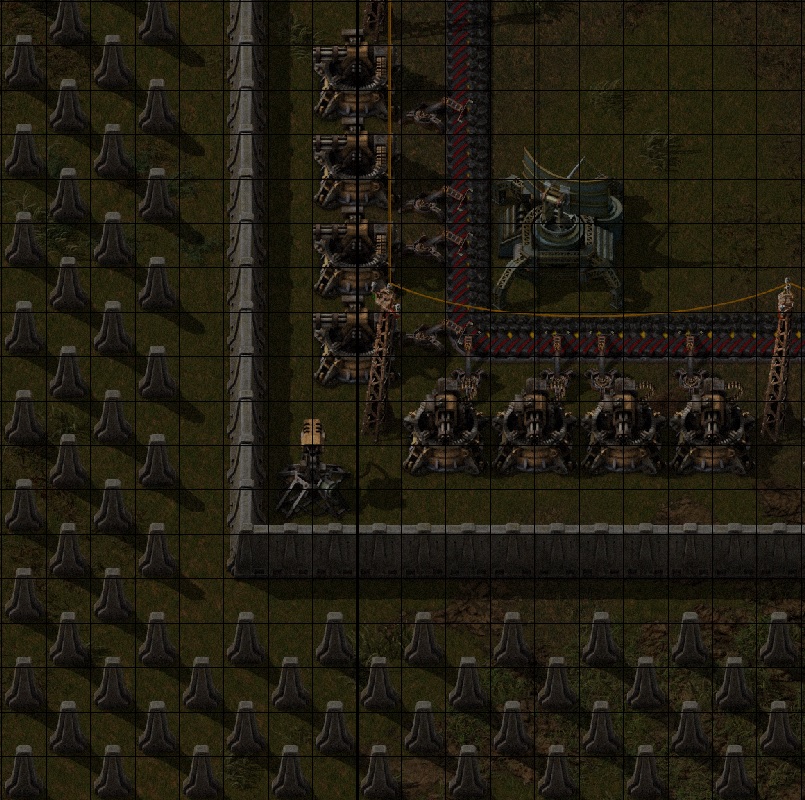
Bonus section: Corners
Closing Remarks
There are a few arguments I can make to advocate for the continued use of gun turrets and burner inserters after the early game and the mid game.
With regards to gun turrets, laser turrets do not just consume energy when firing. They have a continuous power drain. If you want a lot of laser turrets, that's going to mean a lot of passive power drain even when they're not shooting anything. It might seem small at first, but it will add up in the end.
With regards to burner inserters, they only consume energy (in the shape of a combustible block) when they are moving ammo from the belt to the gun turret. In contrast an electric inserter not only has a continuous power drain whilst passive, but also requires additional energy when moving ammo from the belt to the gun turret, and like the laser turret it ceases to function altogether when there is a power outage. On top of that, burner inserters can operate on a plethora of resources. Want to get rid of all the wood you've accumulated by clearing forests? You could put it in a chest and shoot the chest, but you could also put it on this ammo belt as fuel for your burner inserters. Or think about the fact that once you enter the Nuclear age, you can still use any coal or solid fuel that you get your hands on for these things.
Lastly, I want to talk about human error. Even if you yourself know what you are doing, you can not control the actions of other humans, nor magically impart your knowledge upon them. That means that in a multiplayer game, as we all know, accidents are bound to happen at times. The main risk with laser turrets, I find, is not running out of power, because a veteran player usually counters this in a timely manner. The main risk with laser turrets is that all it takes to disable your defenses is one idiot driving a car at top speed in your base hitting an electric pole to cut some, if not all, of your laser turrets off from the base's electric grid. In contrast, the gun turret + burner inserter combo is like the AK-47 of base defenses. It might not be the fanciest thing out there, but it is cheap and it will never let you down as long as there's ammo and combustibles on that belt, as idiots can't break belts with vehicles.
With that said, I thank you for reading my guide and wish you happy camping.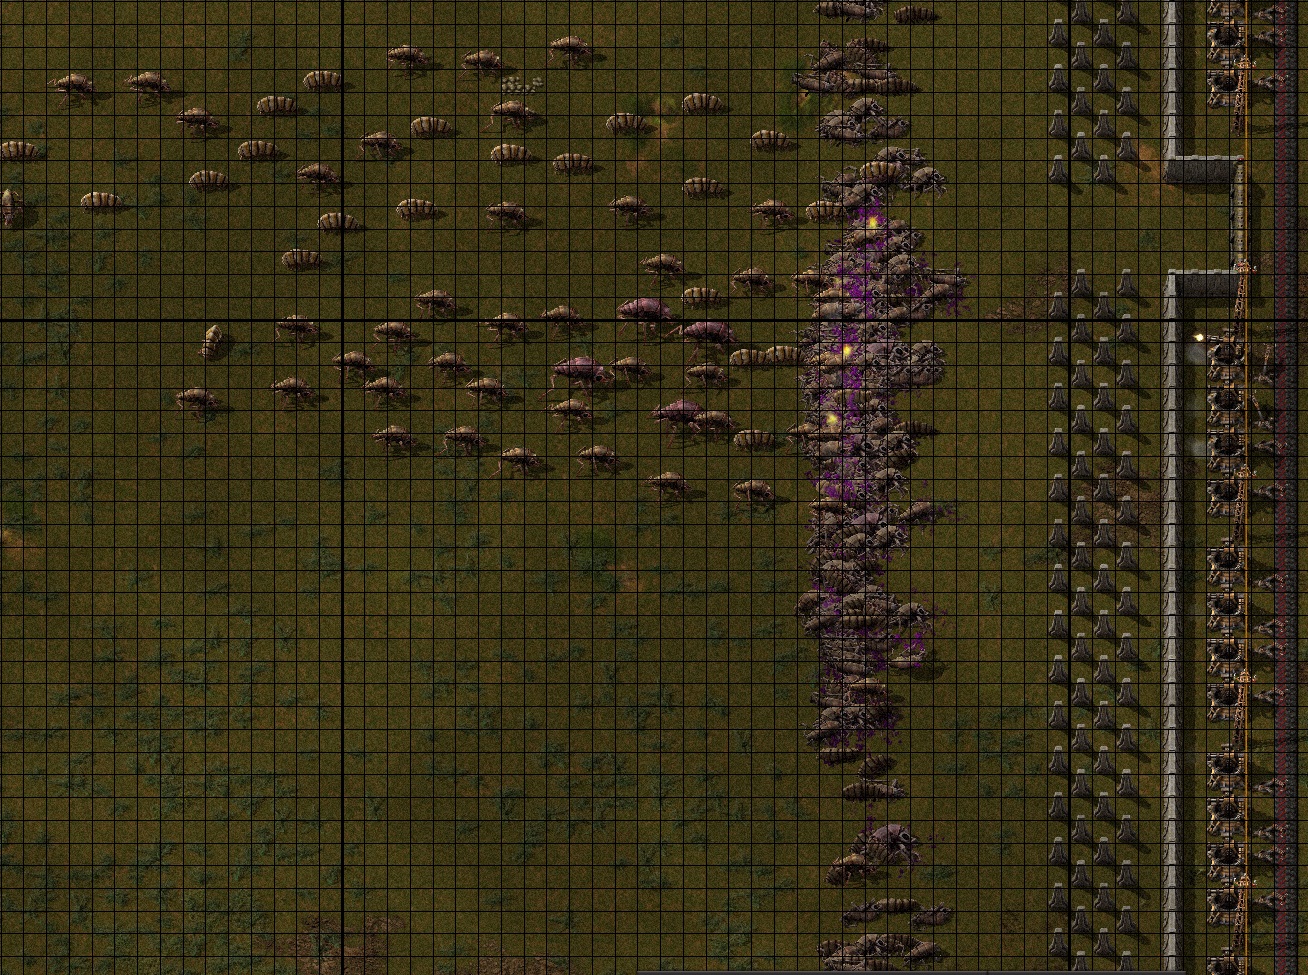
Thanks
- Armyof19 for reminding me to include the pros and cons of laser turrets.
- ZeroNu for reminding me to include how I do corners in a square base defense grid.
- Coffee Daemon for reminding me to include the benefits of solar banks and accumulators for defenses (example, for coping with laser turret bursts)
- Dio Brando for suggesting the use of gate tiles to create tank trap fields that can be traversed by the player's vehicles.
- Detoxifier for reminding me to include the use of belts to push enemies away from the player's walls.
- JKS-Joe Blake for suggesting the use of reverse push-back belts to drive spitters into turret range.
- PirateBear for bringing an incorrect sentence in the closing remarks to my attention.

- Factorio: How to Build a Main Bus★ 5 (6k)231k views15k ♥15 minUpdated Aug 31, 2025
- Factorio: Observations, Tips, Tricks, & Efficiency★ 5 (3.2k)111k views7.1k ♥85 minUpdated Aug 4, 2020
- Blueprints for early, mid and lategame (updated)★ 5 (757)83k views2.4k ♥3 minUpdated Sep 3, 2022
- Factorio - Everything To Do With Smelting: Belt & Bot Based★ 5 (629)80k views1.6k ♥16 min
- Factorio Builds★ 5 (1.1k)63k views2.7k ♥5 minUpdated Jun 7, 2021
- High-Level Strategy for New Players★ 5 (880)62k views2.8k ♥43 minUpdated Oct 15, 2025

- Upgrading to PremiumTeam Fortress 2★ 5 (20k)1441k views11k ♥6 minUpdated May 11, 2022
- No More Room in Hell Official ManualNo More Room in Hell★ 5 (2.8k)569k views2.1k ♥29 minUpdated Apr 22, 2019
- NMRiH Community Hosting GuidesNo More Room in Hell★ 5 (526)351k views653 ♥1 minUpdated Aug 10, 2022
- ULTIMATE GUIDE FOR GAME DEV TYCOONGame Dev Tycoon★ 5 (5.8k)326k views10k ♥4 minUpdated 23 Jan, 2014
- How to 'Git Gud' Soon™MORDHAU★ 5 (2k)318k views3k ♥68 minUpdated Nov 16, 2024
- Лучшие кооперативные игры SteamPAYDAY 2★ 5 (1.5k)315k views2.1k ♥56 minRussianUpdated Apr 27, 2025






This guide was created by its original author on the Steam Community. Are you the author and want it removed? Request removal.