SirImperialMike's & Sheldon1994's Guide to Master Difficulty (FTK)
Challenges
In particular Master Difficulty will challenge you in two ways:
- No Life Pool: If one of your characters dies without a Devotion, their going to be hard to resurrect. There will likely only be one or two Devotions within reach of your team at the beginning of the game. A character dying early can really set you back.
If you do have a character die, you’ll need to use a Cult Device, Stone Table and/or Fountain of Life to resurrect that character. Spending the time finding these things can really slow you down. Best to avoid death!
- Chaos timeline: The Chaos timeline is much shorter than in Journeyman or Apprentice difficulty. With only 4 team turns between Chaos, you’ll be pressured to move quickly and efficiently to keep reducing that Chaos and preventing it from activating.
Goals
- Be extremely efficient with your movement
- Keep the Chaos timeline under control
- Acquire as much gold as you possibly can
- Upgrade your gear as soon as humanly possible
- Gain experience for your characters as quickly as possible
- Avoid taking damage
Strategy for Winning
The main strategy to win in FTK on Master Difficulty is to not allow enemies to attack. PERIOD. If your enemies can’t attack… you don’t take damage. Easy! Done!
How is this strategy pulled off? There are two effective methods that can achieve this. However to pull this strategy off, you’ll need to acquire certain weapons that make this possible. Most of these weapons won’t be acquired until you’ve passed the King's Maze. So, you have two challenges.
- Survive long enough to get through the King’s Maze.
- Pick up these needed weapons.
So let’s cut to the chase. The two methods are:
- Tome of Wonder
- Golden Lute
- Goblin Staff (least desired)
Ideally it is best to acquire two of the three Party Rush weapons, but technically only one is truly necessary. You can still pull this off with a Single Target Rush weapon and a Party Rush weapon. Say you found the Tome of Wonder, but no other Party Rush weapon. Well, the Minstrel can use Ornate Lute with Single Target Rush to bring the Scholar with the Party Rush back to the front of the timeline and repeat the process again. The third character (Busker) is only rushed once instead of twice, but hey... that's good enough to make this work. So, it is recommended as you play to pick up an intelligence weapon with Single Target Rush (e.g. Knotted Staff) and a Talent based weapon with Single Target Rush like the Ornate Lute. Then all you need is to find one of the three Party Rush weapons. === Target Group Reset === This strategy uses a weapon that will reset the entire enemy team. This must be done over and over to keep the enemy from acting while your other two party members kill off the enemies one at a time. There are only three weapons that can Target Group Reset. These three weapons are:
- Volcanic Tome
- Royal Lute
- Royal Hammer (least desired)
Knowing these two strategies is not enough to win the game. You must still survive long enough to acquire these needed weapons, Golden Roots, Precious Pearls, etc. So… the rest of this guide will help you with the details of surviving all three Acts in the game.
Party Character Recommendation
Disclaimer: If you've come to this section to read what the best team composition is and you DO NOT read the rest of the guide, then expect to lose early in Act I. Do yourself a favor and at least read the four sections following this one!
Lets begin with the recommended character classes to make up your team. It should go without saying, that we need characters that can use the weapons mentioned above. The common factor when looking at these weapons is that they are either Intelligence based weapons or Talent based weapons. So, we must have an Intelligence character class and a Talent character class.
The Intelligence characters available to us include the Scholar, Monk, Herbalist, and Treasure Hunter. Of these options, I recommend:
Scholar: Why the Scholar?- Has the highest Intelligence stat of the four
- Has a really good passive ability “Refocus” Focus will be important for the end-game strategy.
- Has the best speed of the four
- Has a decent secondary talent stat. This is handy for boat movement which checks talent.
- Has a Vitality of 60. That's 8 better than the Herbalist and only 2 less than the Monk.
- Starts the game with a Teleport Scroll. Very handy at the start of the game.
- Starts the game with 5 gold. This is the most starting gold of the four.
The Talent characters available to us include: Minstrel, Busker, and Treasure Hunter. Of these options, I recommend: Minstrel: Why the Minstrel?
- Has the highest Talent stat of the three
- Has two really good passive abilities in Encourage and Inspire.
- Encourage is the key ability. This passive ability will help ensure that our end-game weapons always succeed.
- Inspire ability provides passive experience gain for the other two party members.
- Starts the game with the most gold of any character class in the game… 10 gold.
- As a primary Lute user, will act as the primary Gold Multiplier character in the team, using Lutes that have Gold Multiplier
- Disarms Traps that are Talent based, including the end devices of both the Glittering Mines and King’s Maze.
- With high talent, boat movement will benefit greatly.
- Has a decent Strength secondary stat. Although this character doesn’t have the highest Strength of the available classes, it is this characters other abilities that make this character standout.
- Has two extremely valuable passive abilities in Distraction and Entertain.
- Distraction is a passive ability that will cause enemy attack rolls to fail on occasion. This helps support our main goal. “Not take damage”. In this case, Distraction will help to reduce damage taken throughout the entire game.
- Entertain skill brings in passive money. As mentioned at the start, money is one of the keys to winning. The extra gold Entertain will net can pay for all sorts of things.
- Has a great talent stat, making boat movement effective.
- Starts with a Broken Lute that can speed down enemies. This contributes to taking less damage.
This third character class is the most optional of the three. Feel free to try other character classes if you disagree with our recommendation.
You can run any combination of Intelligence/Strength/Talent character team as you wish. You can try Herbalist/Blacksmith/Treasure Hunter for example, or Monk/Woodcutter/Busker. Any combination can work as long as it holds true to the Intelligence/Strength/Talent set up. These other character classes don't have as useful abilities as the Scholar/Busker/Minstrel in our opinion, but they can still work just fine.
Character Positioning
Before starting your game, you need to position your characters to maximize efficiency and reduce damage the party will take.
Left-hand side character: This character starts with the first move. How you use this character's first turn is important. I usually place my Scholar in this position. The reason for this is due to the Scholar's Refocus ability. If I choose to initiate a combat on this first turn, the Scholar has a chance to Refocus after their turn ends. This will set up my Scholar to be more prepared for their teammates turns where a second combat can be initiated.
Center character: This character will always be involved with AOE enemy attacks. This character takes the most number of hits during the game. For this reason, I place my Strength based character in this position. I want the character with the greatest Armor and largest Vitality to be in this center position. I use the Busker here. The Busker also happens to use a Lute that also has Combat Range Support. This allows him to participate in battles 3 hexes away from Oarton that are initiated by the first to move character.
Right-hand side character: This character is the third to take their turn. They'll be patiently waiting in Oarton for their turn to come. Ideally you want this character to have Combat Range Support right from the start of the game. I always place my Minstrel in this position because their Lute provides Combat Range Support.
Note: If you decide to run a party consisting of both a Strength character and an Awareness character, it is best to place the Strength character on the side and the Awareness character in the center. This placement allows the Strength character to take advantage of Shields and to Taunt enemies. When an enemy uses an AOE attack targeting the Taunting character, only the center Awareness character will typically be included in that attack. The Awareness class armor provides high evasion. Thus the Strength character on the side of the team Taunts the enemies and the center Awareness character can hopefully dodge any AOE attack directed at the Strength character. This leaves your 3rd character mostly safe from many AOE attacks.
The First Move (4 things to do)
Number 1: If you're following the character recommendations above, before moving your first character, switch Lutes between the Minstrel and Busker. Don’t forget to equip the weapons after trading!
Reason: The Minstrel's speed while using the Broken Lute is just good enough to speed down the Axe Cultist in a Chaos Camp before he can attack you. This allows the Busker to get a third attack on the Axe Cultist and kill him before he gets a chance to act. The Busker will use the Simple Lute until you acquire a Strength based weapon the Busker can use. Strength weapons drop frequently at the beginning of the game so it won’t take long to acquire a Strength weapon. Consider holding on to the Simple Lute even after acquiring a Strength weapon as the Support Combat Range can come in handy early on. Switch to the Simple Lute when you need that Support Combat Range on the Busker.
Money Tip: One of the main benefits of playing with the Minstrel is their starting gold. Minstrel starts the game with $10 gold. The Scholar starts with $5 gold. That's 15 gold from those two characters to start the game. Combined with the third character's starting gold, you should be able to purchase a weapon from Oarton or Woodsmoke that costs $20 gold (selling one of your starting weapons if need be).
Number 2: Trade all gold to the Scholar. This should result in $17. Combined with selling either the Scholar's Book or Simple Lute, you have access to $20 on the first turn. Buy an upgrade weapon with that money!
Reason: With that starting gold the Scholar can check out the Oarton and Woodsmoke markets and look for an upgrade weapon that one of your characters can use. It is imperative that one or more of your characters can deal 8-9 damage early in the game. This can help to ensure enemies can be killed before they act. The Scholar is the fastest of the three characters, so prioritize an upgrade weapon for the Scholar first! The Minstrel with the Broken Lute can speed down enemies, potentially allowing all three of your characters to land a hit on an enemy like the Forest Nibbler before it can act.
If the Knotted Staff is available, sell the Scholar’s Book ($3) and buy the Knotted Staff for the Scholar! If not available in Oarton, then check Woodsmoke! After checking both Oarton and Woodsmoke, if Knotted Staff is not available, then choose the weapons in the order we have below:- Hand Cannon (cost $29) - Not something you can buy immediately but if you can pick this up, you can blast your way through all of Act I including the Glittering Mines. Well worth it. Give to Scholar or any character who hasn't yet picked up an upgraded weapon.
- Barbat (costs more than $20) - give to Minstrel and give Broken Lute to Busker
- Lightning Staff
- Dusty Book
- Burnt Tome
- Heavy Sword (cost more than $20) - Give to Busker
- Old Shortsword
- Crude Club
- White Lute (costs more than $20) - this has Party Heal. If no Knotted Staff was available, this should be a priority to acquire before entering a Cave or the Glittering Mines.
- Torch
- White Lute - If you still need Party Heal and Knotted Staff isn’t available.
- Hand Cannon - Give this to the Scholar with his large focus pool and Refocus ability and allow him to blast his way through the Glittering Mines with 1 focus per shot.
- Barbat - best talent weapon for the Minstrel
- Heavy Sword - Busker will love this weapon!
Reason: Entering Woodsmoke will trigger all of the Act I key landmarks including the Cult Device and Chaos Leader Camp. Knowing where all the key locations are on your map is essential to planning your moves during Act I to be as efficient with your movement as possible. Sheldon1994 and I have tested this over many playthroughs of Act I, and we've concluded that revealing all the major landmarks early saves you many turns of running back and forth across the map. The Scholar starts with a Teleport Scroll, another reason we chose that character class for our team. Additionally, the Scholar will have all the money at the start and may need to buy a Knotted Staff or other weapon if Oarton’s options are poor. So get to Woodsmoke ASAP and check out Woodsmoke’s market before buying a weapon in Oarton.
Number 4: The character who enters Woodsmoke should immediately accept the Reduce Chaos side-quest to spawn that camp and reveal its location on your map. After triggering this side quest, have either the Busker or Minstrel on their first turn trigger the Reduce Chaos side quest from Oarton!
Fighting Cultist Camps
You’ll be fighting Cultist Camps throughout the game to reduce chaos. The most dangerous fights are those at the very beginning of the game in Act I when you don’t have gear and probably don't have upgraded weapons. Additionally, when you eventually face the level 6 Cultist Camps in Act II, these are much more dangerous than their earlier versions, so it is highly recommended to ensure you’ve improved your weapons to Act II weapons before taking on a level 6 camp.
You'll be fighting 3 Cultist Camps in Act I. Two from side-quests and also the main Chaos Leader camp from the main quest-line. If the main Chaos Leader camp is within easy reach at the start of the game, it is recommended to fight this camp before fighting the side-quest camps. The reason is because this main Chaos Leader camp is guaranteed to drop a weapon as loot. This can be a quick way to get an upgraded weapon for one of your characters that you can then use in all subsequent fights! I'd much rather get an upgraded weapon dropped to me then to have spent my money to buy a Heavy Sword, only to have another Heavy Sword dropped to me as loot from this camp.
Strategy for fighting the Act I cultist camps:
Using our Scholar; Busker; Minstrel line-up, the main idea is to target and kill the axe wielding Chaos Acolyte before he can attack. However, he’s faster than the Busker and his health is either 18 if facing a side quest camp; or 20 when facing the Chaos Leader camp. He has more health than what the Scholar and Minstrel can throw at him. So it is imperative that the Minstrel get a perfect “Speed-down” hit on the axe cultist using the Broken Lute so that the Busker can get an attack in before the cultist can act. In order to maximize your chances of getting a perfect Broken Lute hit, you MUST spend at least two of the Minstrel’s focus on that Broken Lute attack. If the Scholar delivers 9 dmg (assuming a Knotted Staff, Lightning Staff, or Dusty Book is used) and the Minstrel delivers 7 dmg, then the Busker need only do 2 to 4 damage with the Simple Lute to finish him off. If the Scholar delivers 6 dmg (with his starting Scholar's Book) and the Busker can deliver 12 to 15 with an Old Shortsword or Heavy Sword, then all you need is for the Busker to get a chance… hence the need to speed-down that axe cultist. Either way, the idea is to ensure you can kill the axe wielding cultist before he gets a chance to attack you.
After taking down the axe cultist, your next target should be the pitchfork cultist. That’s because the torch cultist is not as dangerous. Why? Because the torch cultist has an attack move that does NOT deliver any damage (that being his spread burning attack). If a move doesn’t do direct damage, we consider that move to be a “waste move”. If the torch cultist fails any roll check while attempting that spread burning attack, it will fail (Distraction from the Busker comes in handy here). So consider the torch cultist the least dangerous of the group!
Act I - Do's and Don'ts
Most failed master difficulty attempts will fail in the first Act (up to and including the Glittering Mines). The chaos timeline is short. Your characters have no gear, no healing herbs, and no banked lives to resurrect with.
It is almost more important to know what NOT to do than what you need to do.
Don’ts- Don’t purposely attack the following two enemies unless you’re in desperate need to get past them…
- Jelly Cubes - getting team poisoned is never good
- Ghosts - They never drop money or loot. They’ll curse you and damage you and you’ll get only Exp in return. Not worth it.
- Don't waste time grinding for the purpose of trying to level up. Tackle cultist camps right from the start. Just make sure to have at least one character with an upgraded weapon first.
- Don’t attack cultist camps unless near max health on all your characters. A cultist camp can focus down one of your characters in their first three attacks and kill a character before you have a chance to act. Additionally, they can both Burn and Bleed the same character resulting in an almost certain death.
- Don’t attempt pop-up events that can’t be focused. “It’s a Trap”
- Don’t ambush camps. It isn’t worth the focus spent attempting to ambush, and if you fail, you’re giving the enemy an additional attack while you’re out your precious focus.
- Avoid using Party Heal while in battle with enemies. If you need to heal during a battle, use a Godsbeard individually. Heal as much as possible using Inns at the towns. An Inn’s services are half the cost of a Godsbeard. Save those Godsbeards for when its an emergency.
- Don’t share money across all three characters. Pool your money to the Minstrel who will act at the party’s Gold Multiplier.
- Don’t sell these otherwise useless items:
- Goblin Staff - Goblin Staff can be used for an end-game strategy.
- any weapon with plus speed bonuses - Speed items can let your party “proceed” through traps using speed.
- Acquire any Party Heal item before entering the Glittering Mines.
- Do use Party Heal between battles inside dungeons. Simply equip the party heal item after battles are done.
- Try to get at least one character upgraded to Pipe level 1 before entering the Glittering Mines. This should be your party healer.
- Do try to get all 6 Godsbeards from the Oarton and Woodsmoke markets (3 from each town) before entering the Glittering Mines.
- When fighting the cultist camps, always have each character use focus to get perfect attacks off on the axe wielding Chaos Acolyte. This should prevent him from getting an attack.
- If the Golden Hero is in the Guardian Forest, do pick it up before leaving the biome.
- Do the main questline cultist camp before other side quest cultist camps. The reason for this is because the main questline cultist camp is guaranteed to drop a weapon as loot. You want improved weapons as early as possible. This is one way to get a better weapon early on.
- Do the Dark Cave before the Glittering Mines. Go in with a fully healthy party.
- Always kill Jelly Cubes first. Try to speed down the jelly if at all possible.
- Target killing Cutpurses last in a group of 3 enemies. They’ll often waste an attack attempting to steal from your characters. If they do steal something… then immediately kill it, taunt it, shock it, speed it down, or reset it.
- Make sure to locate the Scourge and Alluring Pool before leaving the Guardian Forest.
- The Glittering Mines will give the party a guaranteed Portal Scroll as a reward. Use it to get to Parid almost immediately upon exiting the Glittering Mines.
- Make good use of the herbs you acquire! Is there an enemy between you and that town you need to heal at? Use a Hermit Grass herb! Now you can walk right through enemies! Need 7 movement to make it to that town but you only rolled 4 movement? Use that Dancing Nettle herb! Now you have the extra movement you need to make it there!
Choosing Sanctums
- The Scholar would prefer either the Grand Sanctum of Wisdom or Grand Sanctum of Shadow. Avoid giving the Sanctum of Purity to the Scholar. Usually a waste because the Scholar’s gear will provide the immunities that this Sanctum of Purity provides.
- The Minstrel would prefer either the Grand Sanctum of Wealth or the Grand Sanctum of Purity.
- The Busker will benefit from almost any Devotion, though for the purposes of an end-game strategy, I prefer to target Grand Sanctum of Blood. Secondary choice would be any of these: Grand Sanctum of Focus, Grand Sanctum of Haste, or Grand Sanctum of Life.
Act II - Do's and Don'ts
- Don’t purposely attack the following enemies unless you’re in desperate need to get past them or they’re alone. Never attack these if they’re in a camp of 3.
- Jelly’s and Ghosts! Continue to avoid them… even if alone.
- Crag Hulks
- Hobgoblins
- Rocs
- Infant Triclops
- Bisontaurs
- Blood Birds
- Thunderhawks
- Swamp Flies - Don’t waste time fighting random enemies in the Golden Plains. Get a boat and get sailing.
- Don’t walk through the Poison Bog or Burning forest. Get a boat and sail around the edges. Make small jaunts into these biomes from the waters edge.
- Don’t purchase a Raft. Go for a Fishing Boat or better.
- Don't sail with money. Trade money to a character whose turn isn't the active turn when sailing. Random sea events like a Rogue Wave could cause you to lose all money you're sailing with. https://www.twitch.tv/videos/620090288?filter=highlights&sort=time
- Don't step off a boat onto an empty land hex with money. The game has a higher than normal probability to ambush you if you've been sailing for a while. https://www.twitch.tv/videos/620124881?filter=highlights&sort=time
- Don’t attempt any Sea Cave, camp, or mini-dungeon that is level 5 or higher unless you are also of that same level and have upgraded your weapons to mid-game weapons.
- Do search out the Golden Plains to uncover the Alluring Pool, Catacombs, Cult Device and Scourge. Avoid fights while doing this search. Make use of +Find Distance items like a Torch or Compass to make this faster. Pull your party together using either the Catacombs or a boat.
- Do one Sea Cave (level 4) while Chaos is under control.
- Use Vision Scrolls to uncover Poison Bog/Burning Forest, Parched Wastes or Dropstone Badlands territory to attempt to locate their Alluring Pools, Cult Devices, Scourges and mini-dungeons.
- Do check out Night Markets. Make a point to have a character step into a Night Market even if it is during the day time. Stepping on the Night Market counts as having visited it. This will allow you to check the Night Market by Shift-Left Click later on when night arrives. Things to look for in a Night Market include: Goblin Staff; Iron Anchor; Starfish Staff; Theorbo; Lich Crown; Boots of Might; Icy Talisman; Flaming Talisman; Lightning Talisman; Lucky Coin or Four Leaf Clover; Bellowing Horn; Noise Maker; Old Necklace or Polished Necklace; Faded Pearls or Enchanted Pearls; Golden Skull; Amulet of Souls; Ester Oil and Elemental Usekh. Optionally you can pick up Princess Hat and Black Cat if you want to attempt to maximize your Luck stat for Carnival Tickets.
Act II - Overworld Pathing
- Spread out your team to search the Golden Plains while avoiding over-world fights. This search of the Golden Plains is mainly looking for the Catacombs. If you find it quickly (before the 15 round town refresh occurs) it will be level 3, which is ideal. Make good use of plus Find Distance items while performing this search. Items like the Brass Compass, Torch, Gathering Bonnet, or Disciple Hood. Use the Cult Device you uncover to keep the chaos on your timeline at bey.
- Visit Parid and Cazeli's Watch during your search of the Golden Plains. At each town, check the side quests available. If an item quest is available that will net you a Goat Wizard's Staff or Boots of Might, take that quest. If these items are not available, then take the Reduce Chaos side quest. It will spawn as a level 4 camp. As you enter the other towns in Act II (Devil’s Wharf, and the towns in the Burning Forest / Bog) continue to look for these item side quests. If the Goat Wizard's Staff and/or Boots of Might are not available, then always take the Reduce Chaos side quest.
- Once you’ve found the Alluring Pool, Cult Device, Scourge and Catacombs within the Golden Plains, pull your team together by entering the Catacombs and complete it. Dungeons like the Catacombs will pull the entire team together as long as the entire team is in the same biome. It doesn't matter how far away they are!
- After you’ve completed the level 3 Catacombs, your top priority is to get a boat and start sailing for the Rogue Isles. You want to find the Dark Cave mini-dungeon in the Rogue Isles before the 15 round town refresh occurs. The money you acquired from the Catacombs should be enough to purchase a $90 Fishing Boat. In the rare instance you still don’t have enough money, then look for small fights you can initiate with over-world enemies that you can handle. Ideally look for Thieves/Bandits as they drop gold in larger amounts than most other enemies. Avoid fighting Ghosts at all costs as they drop nothing!
- Begin searching the Rogue Isles for the Dark Cave as well as the Alluring Pool, Cult Device, Scourge, and optionally the Forgotten Cellar if it spawned in the Rogue Isles. Use the Cult Device and optionally the Forgotten Cellar to keep the chaos timeline under control. When you find the Dark Cave enter and complete that mini-dungeon. It should be level 3 which is ideal for the current state for your team.
- After you complete the Dark Cave, your options for fighting level 3 enemies will start to become harder to find. If your team is still lacking in level and/or equipment and money, then your next target should be to locate and fight level 3 Buccaneer or Swashbuckler ships or Merling ships. These ships will be of an appropriate level that your team can handle those fights and these ships will net you more gold then you’ll spend to heal, in addition to providing more experience for your party. If you notice level 3 Bandit Camps within reach on land, those are also good targets.
- When your party is level 4, you can start to take on the Reduce Chaos side quests you’ve spawned from the towns (Parid, Cazeli’s Watch, Devil’s Wharf). Use these to reduce chaos as well as to continue to gain experience. If you’ve been lucky enough to also spawn level 4 Cultist Camps from the Burning Forest / Bog towns… then also take those on as well.
- Yew Staff - Priority if you haven't acquired Party Heal yet. Has Single Target Rush. If you don't have an intelligence based Single Target Rush weapon yet, then pick this up.
- Apprentice Tome
- Scholar's Stick
- Frost Staff
- Thunder Tome - If you have extra money, buy it as a safety weapon for handling the Fire Revenant for the end-game.
- Enchanted Broom
- Mages Staff
- Goat Wizard's Staff - If you've unlocked this from your Lore Store, it may be available as an Item Side-Quest
- Mage's Tome - Has Single Target Rush. If you don't have an intelligence based Single Target Rush weapon yet, then pick this up.
- Fire Staff
- Starfish Staff
- Hooked Sword
- War Hammer
- Bastard Sword
- Large Bone Club
- Mace
- Longsword
- Iron Bow
- Broadsword
- Battle Axe
- Iron Anchor - Best Strength weapon in the game, Period! Get this!!! It is often found in Night Markets!
- Ivory Lute - Priority if you haven't acquired Party Heal yet.
- Fancy Tambura
- Ukulele
- Fancy Lute - Has Single Target Rush. If you don't have a Talent based Single Target Rush weapon yet, then pick this up.
- Rapier
- Archlute
- Ornate Lute - Has Single Target Rush. If you don't have a Talent based Single Target Rush weapon yet, then pick this up.
- Theorbo
While completing all the mini-dungeons and trying to gain experience, you'll likely need to deal with an approaching scourge on your timeline and/or a Chaos creeping close to the end of your timeline. Use the Alluring Pool from the Rogue Isles if convenient to return back to the Golden Plains to take care of these threats. Kill the scourge, and take out any Cultist Camps you activated from either Parid or Cazeli's Watch that you haven't yet reached. You should also sail the coastlines of the Bog/Burning Forest to locate the Cult Device and mini-dungeon in that biome. Take out the Forgotten Cellar (if not found in the Rogue Isles or Golden Plains) to help keep the Chaos at bey. If you’re pressed… try to take on the Reduce Chaos side-quests from the two towns in the Burning Forest/Bog. If you find the mini-dungeon (Catacombs) from the Burning Forest/Bog after the 15 round town refresh has occurred, it will spawn as level 5. Make sure you have upgraded weapons if you take on that Catacombs.
Once you reach level 6, you should have improved Act II gear and improved weapons. You should be well prepared now to handle anything that is level 6, including all level 6 sea caves and level 6 cultist camps. Continue to complete sea caves with an occasional cultist camp until you’ve exhausted all sea caves within reasonable reach and/or you’ve run out of cultist camp side-quests
Act II - Ideal Team Loadouts
One of the main goals this guide is looking to accomplish is to deck out the team with a certain set of weapons and gear at certain stages of the game. Before entering the King’s Maze we prefer to have:
Armor: Mage’s gear (Chestpiece/Headgear/Boots)
Trinkets: Golden Hourglass; Majestic Belt; Bellowing Horn; Noise Maker
Necklace: Old or Polished Necklace
Armor: Full Iron armor; plus Boots of Might if you can get it.
Trinkets: Majestic Belt; Bellowing Horn; Golden Skull; Great Rune
Necklace: Rusty or Golden Medallion or Amulet of Souls
Armor: Performer’s gear; plus Lucky's Hat or Princess Hat
Trinkets: Lucky Coin; Four Leaf Clover; Noise Maker
Necklace: Fancy Ruff; Shiny or Sparkling Pendant
In addition to the ideal equipment above, you’ll want to pick up Icy, Flaming, and Lightning Talismans when you can. Additionally pick up Hildebrant's Reserve(s), Faded Pearls, and the following scourge unique drops if you’re lucky enough for them to spawn: Royal Droll Hat; Volcano Hat; Disciple Hood; Lucky's Hat, Golden Hourglass.
Preparing for the Mind Lord
Before fighting the Mind Lord you should prepare your team for confusion. The Mind Lord will use confuse attacks which can leave your entire party confused and no longer under your control. Put on items that confer confuse immunity before entering the fight with the Mind Lord. Most Mage/Wizard hats come with confuse immunity. Put them on, even for character classes that don’t normally make use of Intelligence. You can also look for and purchase items that confer confuse immunity in the time leading up to this fight. Faded Pearls and/or an Iron Foil Hat can also provide you this immunity. During your play… try to acquire enough items to provide confuse immunity for everyone in the party. The Grand Sanctum of Focus will also provide confuse immunity, so that can help as well.
When fighting the Mind Lord, target him and focus him down first if not everyone in your party is confuse immune.. Once the Mind Lord is dead the threat of confusion attacks is gone. So if you don’t have the immunity protection, then kill him as quickly as possible.
Note: If you need to fight the The Old One scourge or the Royal Droll scourge, you should prepare for those fights in the same manner that you prepare for the Mind Lord. Have confuse immunity ready! In addition, the Royal Droll can do party shock against you, so in addition to confuse immunity also consider adding some shock immunity as well.
King's Maze
Finally, you’ll take on the King’s Maze after everything from the Rogue Isles and Swamp/Burning Forest is complete (or… if you’re pressed to reduce chaos and need the King’s Maze to remove it). Ideally you should be level 7 or level 8, or close to it when you enter the King’s Maze.
Before entering the King’s Maze, you should do your best to purchase as many Godsbeards, Golden Roots, and up to 6 Panax (two for each character) for the team while prices are low. Once completing the King’s Maze all herb and service prices in towns will increase. Get these important herbs before you enter. As you visit the towns in the Swamp/Burning Forest you should make it a point to try to purchase all their Godsbeards and Golden Roots.
On your way though the King’s Maze, this guide’s character set-up and strategy is looking to take advantage of the Theorbo and Starfish Staff’s unique abilities to speedown enemies, reset enemies, and restore focus to party members. As you progress through each fight, we are looking to eliminate 2 of the 3 enemies in each group, leaving one relatively slow enemy to be killed last. We will have some nice play time with the last enemy.
During the fight working your way down to just one enemy left, make use of the Theorbo’s Target Group Speedown ability to give your other characters time to kill at least one enemy before it can act. Once the first is dead, you can either Single Target Speedown or Reset an enemy while your teammates take out the other. Usually target the slowest enemy with the reset while your teammates take out the other.
When you’re down to just one enemy left, use the Minstrel’s Theorbo to Single Target Reset the last enemy to keep the lone enemy unable to act. Each reset gives the other two party members free actions. We use the Starfish Staff to restore focus to every member of the party while the Minstrel continues to reset this last enemy until everyone is at full focus, then we finally mercifully kill this last enemy. If you don’t have the Theorbo and its reset ability, the Archlute or Hooked Sword can accomplish the same thing. So yeah… don’t sell that Hooked Sword. It can come in handy. You can have the Busker switch into the Hooked Sword to also help with the resets. Heck… have both the Busker and Minstrel resetting. You can play with them as long as you wish, with focus restored by the Starfish Staff. We refer to this as Starfish Staff Cheese. See that section of this guide down below.
- First, ensure your Scholar has confuse immunity. The Mage’s Hat normally provides this. Otherwise you can equip Faded Pearls on the Scholar to provide confuse immunity.
- Have the Scholar use a Hildebrant's Reserve to increase damage output by 100%, and hit the Undead Bisontaur with either the Starfish Staff’s or Fire Staff’s power-up attack. Make sure to use focus so these attacks hit.
- Have the Minstrel speedown the group like normal with the Theorbo.
- A second follow-up attack by the Scholar while still under the effects of the Hildebrants should finish off the Undead Bisontaur.
Upon completing this fight, one of those two priestesses will drop their tome. You have a 50/50 chance at either the Volcanic Tome or Glacier Tome. You really need to pray to the RNG gods here and hope you get the Volcanic Tome. If you don’t get it, don’t worry. There are many many more chances to get this tome which we’ll detail in Act III.
If you do get the Volcanic Tome, that alone can be used to win a Master Difficulty run. Even without the Busker and Minstrel getting their preferred weapons, the Volcanic Tome will completely win the game for you… provided that you have gone sea cave spelunking and have acquired a good pile of Precious Pearls as well as Golden Roots. The Volcanic Tome does like to use up focus (2 focus per use of the Firewall).
Upon exiting the King’s Maze, you should notice a message in the top right of your screen indicates that “Towns Have Refreshed”. It increases the prices of herbs and services. For this reason, you should buy as many Godsbeards, Golden Roots, and Panax as you can afford before entering the King’s Maze.
Act III - Do's and Don'ts
- Don’t waste time fighting random enemies in the Desert and Badlands.
- Don’t purposely attack the following enemies unless you’re in desperate need to get past them or they’re alone. Never attack these if they’re in a camp of 3. Especially don’t fight these if you don’t yet possess the Volcanic Tome or have other reset weapons.
- Jelly’s and Ghosts! Continue to avoid them… even if alone.
- Shadow Assassins
- Wisps
- Acid Blobs
- Crag Giants
- Demons
- Fire Rocs
- Lightning Hawks
- Boomers
- Chaotic Skulls
- Watchers
- Do make use of your Treasure Maps. If you’ve not used them by now, don’t wait any longer.
- Do make use of your Vision Scrolls to quickly uncover as many ? hexes in the Desert and Badlands. Try to locate Alluring Pools, Scourges, Cult Devices, and mini-dungeons.
- Do make sure all your characters pick up Sanctums if they’re still without one.
- If your Minstrel can get luck up to 70, do make use of your Carnival Tickets, or sell them for a good pile of gold!
Act III - Overworld Pathing
Upon leaving the King’s Maze and entering into Act III, you have exactly 15 team rounds before all towns refresh (loot and prices) and raise the level of mini-dungeons, scourges and cultist camp side-quests from towns that haven’t been activated yet. As you are on a hard 15 round timer, you should make 'haste to get to Hasta' (pun) in the Parched Waste as soon as possible. During these 15 rounds, you need to complete Priority 1 and Priority 2 below! After the 15 rounds are up and the final town refresh occurs, it becomes nearly impossible to complete Priorities 1 and 2 below, except by lucky Night Markets or Sea Caves that haven't been completed to that point. So don't delay! Get to Hasta right away and complete Priorities 1 and 2.
After arriving at Hasta and triggering the Demon Caves, it is technically possible to complete both Demon Caves in less than 15 rounds. This means it's possible to complete the main questline of Act III before the Act III town refresh occurs. Do NOT enter Hasta after completing both Demon Caves until AFTER the Act III town refresh occurs. Why? Because by entering Hasta you'll trigger the Act IV town refresh. This Act IV refresh will occur whether or not the Act III refresh went off! So by entering Hasta to soon you'll skip the Act III town refresh entirely, causing all end-game weapons and gear to NOT spawn in the town markets. It would become impossible to pick up a Golden Lute or Tome of Wonder (see Priority 3). If you are that fast, then simply waste turns as necessary until the Act III town refresh finally happens.
Money Tip: Entering Hasta after completing the Demon Caves completes Act III and takes you into Act IV (vanquishing Vexor's Tower). This will trigger the Air Balloon as well as the Act IV town refresh. This causes all town markets to double their prices to their end-game maximum! If you haven't yet purchased the herbs you want (e.g. Godsbeards, Golden Roots, Panax) or any weapons you're really wanting, then do NOT enter Hasta! Go buy those desired weapons and herbs at the other towns (Zini, Imp's Corridor, and Wendero) then return to Hasta when you're done.
When fighting the side-quest for the Aegis of Husher, you’ll be facing a camp of three ogres. Oddly enough, the undesired Glacier Tome can actually be useful in this fight. Equip your Scholar with the Glacier Tome if you have it. During the fight, have the Busker Taunt and have the Scholar use the Armor Up action from the Glacier Tome. This will allow the Busker to fully tank the ogres while your Minstrel and Scholar widdle them away. If you follow this strategy, don’t use the speed-down attack from the Minstrel. Instead just attack for damage. The speed-down can ruin the timing of the Taunt and Armor-Up buffs.
It may not be possible to find the Golden Lute or the Tome of Wonder. If you can’t locate both weapons, then substitute a Single Target Rush weapon into the mix. As long as you have one Party Rush weapon and one Single Target Rush weapon, you can pull this strategy off. If you don't find any Party Rush weapon, then follow the “Group Reset” strategy to win the game.
If you don’t have the necessary items to equip your entire team for Freeze, Burn, and Shock immunity, then the optional side-quest Buried Temple should be done. The Buried Temple will guarantee you three Talismans, each with party immunity to one of the three elements. Having these three Talismans will make it quite easy to provide your team with full immunity to the three elements.
- Volcanic Tome - Does +50% damage against Ice
- Volcano Hat - Gives +100% damage against Ice
- Icy Talisman - Gives +25% damage against Ice and provides Ice immunity
- Faded or Enchanted Pearls - Provides Confuse immunity via a trinket
- Hildebrant's Reserve - Gives +100% damage at the cost of confusion. If you have Confuse immunity you can use this freely, otherwise you can’t use it at all.
It is possible to attempt to Uber destroy the Fire and Lightning Revenant with the Lightning Tome and Glacier Tome respectively, however there is no equivalent replacement for the Volcano Hat to support the strategy.
Desired Weapons for the End-Game
- Glacier Tome - Uber’s Lightning Revenant and Ogre camps
- Tome of Storms - Nerf’s Fire Revenant
- Lightning Tome - Uber’s Fire Revenant
- Great Water Tome - Used to Uber the focus restore.
- Volcanic Tome - Uber’s Ice Revenant and is primary winning strategy with group reset
- Tome of Wonder - Makes possible the super-uber winning strategy with party rush
- Scimitar - bleed and power-up attacks
- Zeus Blade - Shock and AOE Shock attack
- Fire Sword - Fire and bleed attacks
- Dragon Blade - Single target reset & Armor penetration but at 3 checks
- Gladius - Single target reset & Armor penetration all at 2 checks
- Great Hammer - Huge power-up damage and splash damage
- Frozen Great Hammer - Huge power-up damage and splash damage
- Iron Anchor - Huge power-up damage and splash damage... but better on the splash then the Hammer.
- Fire Lute - Single target reset
- Ornate Lute - Single target rush
- Silver Lute - Single target rush
- Theorbo - Group speed-down and single target reset
- Royal Lute - Group reset - possible substitute for Volcanic Tome
- Fancy Theorbo - Group speed-down and single target reset
- Golden Lute - Makes possible the super-uber winning strategy with party rush
Act III - Ideal Team Loadouts
One of the main goals this guide is looking to accomplish is to deck out the team with a certain set of weapons and gear at certain stages of the game. Before entering the Demon Caves we prefer to have:
Armor: Mystic’s gear (Chestpiece/Headgear/Boots); Volcano Hat; Assassin Boots
Trinkets: Golden Hourglass; and Majestic Belt; or Bellowing Horn; or Noise Maker; and Icy Talisman; and Flaming Talisman
Necklace: Old or Polished Necklace; Faded Pearls or Enchanted Pearls; Golden Ruff
Armor: Royal Helm; Inferno Armor; Royal Boots or Boots of Might; Wizard Hat or Iron Foil Hat
Trinkets: Majestic Belt; Bellowing Horn; Golden Skull; Great Rune
Necklace: Rusty or Golden Medallion or Amulet of Souls; and Lightning Talisman
Armor: Full Dream gear (Chestpiece/Headgear/Boots)
Trinkets: Ester Oil; Noise Maker
Necklace: Golden Ruff; Shiny or Sparkling Pendant
Additionally pick up Hildebrant's Reserve(s) and 4 Tinder Pouch.
Please keep in mind that the above loadouts are the desired set. You may not be able to acquire every piece prior to entering the Demon Caves. This is what you're striving for is all.
Demon Caves and Buried Temple
If you’ve acquired the priority items mentioned above, begin using the strategies of either Group Reset or Party Rush for all fights through the two Demon Caves and the Buried Temple. If you do so, other than the first attack most enemies will get upon entering a room, they should not get a chance to attack you again. This makes traversing these battles pain free.
For the Demon, consider equipping any items you may have that confer Steal immunity when fighting the Demon. The Demon has an attack move that steals belt items from your characters. If you're immune to steal you'll be safe from the Demon's steal attack, though you may still take some damage or burn if not burn immune. If only one character has Steal immunity, consider trading all of your most valuable belt items you don't wish to have burnt away by the Demon to that one character with the steal immunity. Additionally, if you aren't able to either Group Reset or Party Rush your way through the the fight with the Ember Demon then it is highly recommended that everyone have Burn immunity before entering the fight.
For the Buried Temple, it is recommended skipping this optional dungeon entirely. If you have picked up individual items that confer Frost, Fire, and Shock immunity along the way, then the rewards from the Buried Temple aren't needed. The Buried Temple drops a Talisman for each element that confers party immunity to that element. However, the cost of acquiring these Talismans means fighting some very powerful mummies. They hit very hard! If you can't Group Reset or Party Rush your way past them, you can expect to take a lot of damage. The cost in resources (Godsbeard) is often not worth it for a immunity Talisman. For this reason, it is recommended to pick up the Icy, Flaming, and Lightning Talismans you find as you play the game out.
Starfish Staff Cheese
Fighting the Kraken
If you were unlucky enough to have the Kraken ambush your sailing party, don’t immediately panic. The Kraken can be beaten, and potentially beaten easily. You need to make a choice. Do you attempt to kill it or do you attempt to make it go away by killing one of its tentacles?
Evaluate the state of your team. Do you have Act II upgrade weapons or better (e.g. Goat Wizard's Staff, Bastard Sword, Theorbo or better weapons than these)? Is your ship fully healthy? Is your team all together on the ship and are they healthy?
If the answer is no to any of those questions above, then your best bet is to attack a tentacle and try to get the Kraken to go away. If you feel you have no chance to get away, then the best possible outcome for your team would be to allow your ship to sink. Your team will wash up on a random shoreline alive. From there you can Teleport or Portal to safety, or if you're completely stranded, then you can use a Safety Stone to get to a nearby town.
If you answered yes to all the questions above, then go for the kill. Pump as much damage as you can into the Kraken head. If your Minstrel has a Theorbo or Fancy Theorbo, the “group speed-down” attack along with the “single target reset” attack can really come in handy against the Kraken. Use the “group speed-down” attack and follow that up with a “single target reset” of a tentacle. This should make it possible for only 1 tentacle to get an attack on your boat. You can limit the number of “damaging boat” attacks if you keep up that pattern of speeding down, then resetting a tentacle, and just keep repeating those two moves.
Final Tower (aka the dungeon of Harazuel)
To finish off the game, you’ll finally head back to Hasta and acquire an Air Balloon. Use this to fly over to Vexor’s Tower.
Money Tip: Before entering Vexor's tower... sell all your unused scrolls, boat repair kits and carnival tickets. You won't need them in the tower and they can net you a very large amount of extra money to buy gear just before entering the tower, especially extra Golden Roots and Godsbeard you didn't purchase from earlier towns. Often Oarton and Woodsmoke still have herbs you never purchased. Use the Air Balloon to fly over there and with the extra money buy those wanted herbs.
Vexor's tower will present you with 4 battles before finally meeting Vexor himself. Between each battle you will be provided time and space to Party Rest. Four Tinder Pouches (Tents) is great if you can conserve them for this. Between each battle you can prepare for the next.
As this is a very long fight, the main strategy is to prevent these enemies from getting a chance to act. You can defeat Vexor and the wolves without them getting more than their first attack off upon entering the room. From that moment on, they should not be allowed a chance to attack again. This is where Volcanic Tome or the combination of Golden Lute and Tome of Wonder come in. Keep using the Volcanic Tome’s party reset, and replenish party focus as needed. Ideally you want one or two Precious Pearls remaining going into this fight. Golden Lute and Tome of Wonder can Rush-Rush the party and allow the Busker to get in free attacks over and over. Try to use one of these two strategies.
Here is a video example of the entire tower (all 5 fights) using the Rush-Rush strategy: https://www.twitch.tv/videos/612240525
Vexor has a powerful AOE magic attack. Don't let Vexor attack. After I had killed the two wolves I thought I could get away with just attacking with all three of my characters and absorbing an attack from the boss. Turned out to not be a good idea to allow that boss to get his AOE attack off. So take this advice. Don't let the boss attack you...ever!
So… reminder. Volcanic Tome to group reset. Minstrel speeds down, single-target resets, or rushes party depending on the weapon used. Busker attacks with whatever Strength weapon you prefer to use. If you're using the Volcanic Tome Party Reset strategy, once you’re down to the Boss and one wolf, you can either continue to use the party reset, or switch to the Busker using a weapon like the Gladius that has single target reset, allowing the Chaos Hound to attack you once in a while. This all depends on how much focus you have and the occasional fail on the Volcanic Tome. If you have Golden Lute, and always party rush with Golden Lute, you should always use the Volcanic Tome’s first attack as the party reset. If it fails, you’ll have a second try after you rush.
Uber Destroying Vexor
Here is a video of the strategy in action. It shows use of a Goblin Staff and an Ornate Lute for the Rush-Rush. The center character happened to be a Monk. Skip ahead 53 seconds for when the battle begins - https://www.twitch.tv/videos/514280478?filter=highlights&sort=time
Conclusion
Well… I hope you find this guide helpful. Visit us on the FTK Discord. https://discord.gg/upjSwdZ
Special Thanks to Sheldon1994 for all the play testing and ideas.
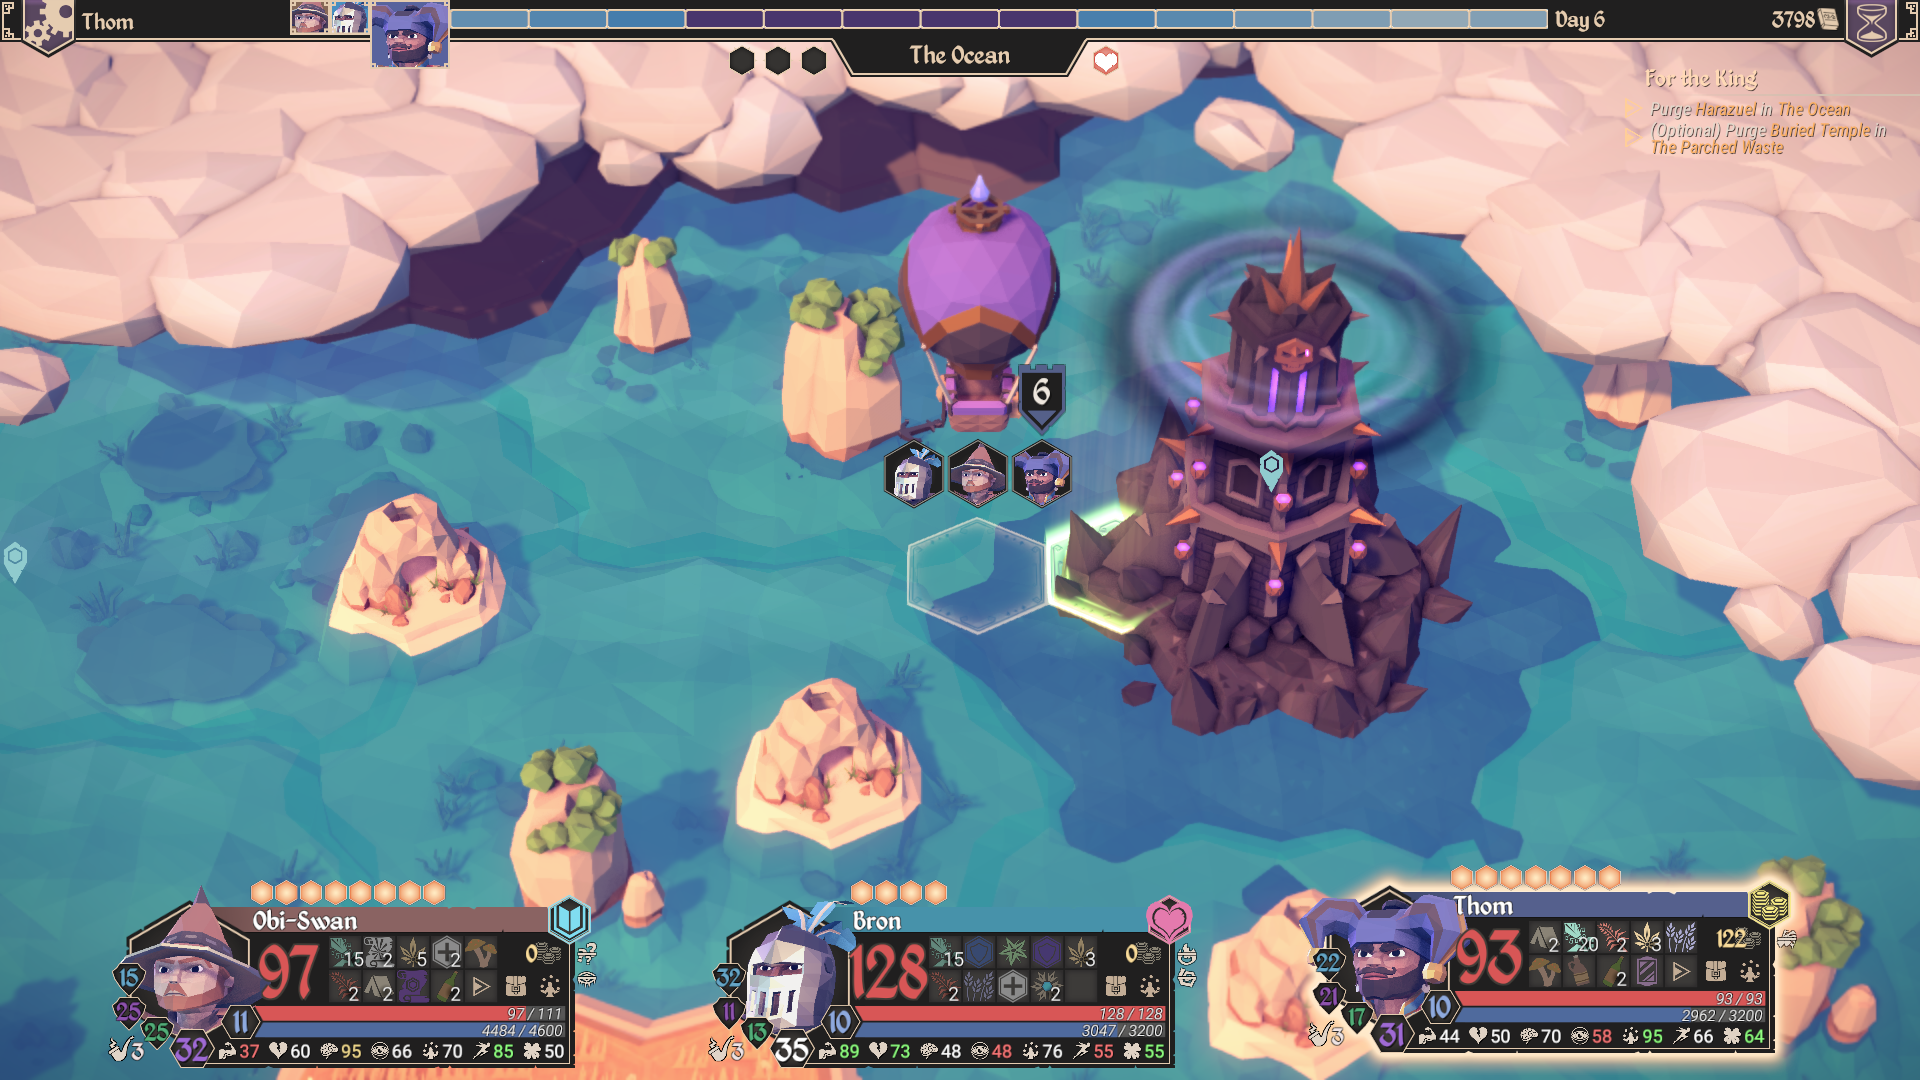 This picture shows our entering Vexor's Tower with 50 unused Godsbeards after using the strategies detailed in this guide.
The current record for most unused Godsbeards while winning a standard Master Difficulty FTK game is held by Ludic with a total of 109 Unused Godsbeards set on July 6th, 2020. He broke the previous record held by Sheldon1994 totalling 104 Godsbeard.
If you take on the Unused Godsbeards Master Difficulty Challenge, let us know on the FTK Discord. Rules are simple. Win the standard FTK game on Master Difficulty with as many unused Godsbeards in your inventory as possible. Only one restriction: Herb Gathering ability is banned. So no Herbalist characters are allowed and no use of that ability through items like the Gathering Bonet.
Authors: SirImperialMike and Sheldon1994
- How to Beat For the King (Updated 3/2022)★ 5 (326)56k views530 ♥18 minUpdated 14 Mar, 2022
- How To Unlock All Characters★ 5 (178)34k views209 ♥1 minUpdated 15 Feb, 2021
- Percentage Chances and RNG★ 4 (161)25k views200 ♥6 minUpdated 1 Jun, 2022
- 为了吾王攻略:人物、装备、套路、敌人详解★ 5 (277)20k views446 ♥1 minSimplified Chinese
- FOR THE KING 超详细新手向攻略(包含失落文明dlc内容)★ 5 (272)18k views413 ♥2 minSimplified ChineseUpdated 28 Oct, 2022
- For The King :: За Боль и Страдания!★ 4 (90)18k views111 ♥13 minRussianUpdated 3 Jul





- Upgrading to PremiumTeam Fortress 2★ 5 (20k)1441k views11k ♥6 minUpdated May 11, 2022
- No More Room in Hell Official ManualNo More Room in Hell★ 5 (2.8k)569k views2.1k ♥29 minUpdated Apr 22, 2019
- NMRiH Community Hosting GuidesNo More Room in Hell★ 5 (526)351k views653 ♥1 minUpdated Aug 10, 2022
- Лучшие кооперативные игры SteamPAYDAY 2★ 5 (1.5k)315k views2.1k ♥56 minRussianUpdated Apr 27, 2025
- Desert Eagle Heat Treated | Blue GemCounter-Strike 2★ 5 (1.6k)292k views1.5k ♥2 minUpdated Jan 16
- Treasure Hunt Puzzle SolutionsTotal War: WARHAMMER II★ 5 (6.9k)281k views15k ♥3 minUpdated Aug 19, 2021






This guide was created by its original author on the Steam Community. Are you the author and want it removed? Request removal.