Starbase Incursion Fleet Event Walkthrough
Introduction
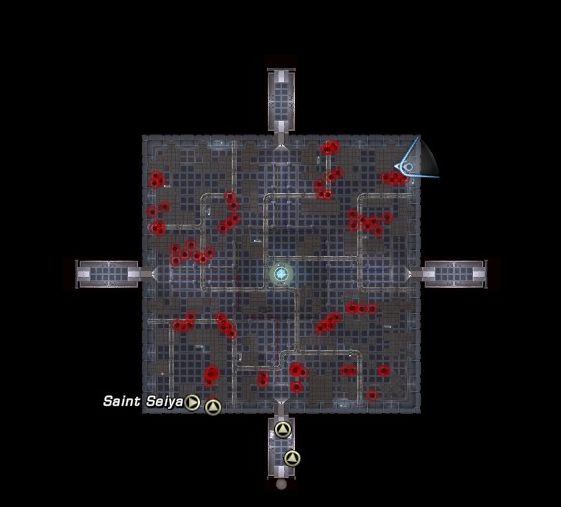
Welcome to the Starbase Incursion Fleet Event guide. This guide will do the following things:
- Walk you through each phase.
- Provide good overall strategy.
There are a few things you might want to have with you before you start on your Starbase Incursion though. The first item is a pulsewave weapon, since the weapon can cover a wider range, deal the most damage up close, and hit multiple targets. A recommended item is a sniper rifle for the first phase, will go into why in a later section. Another item I would recommend are hypo-sprays, since the second phase involves numerous enemies that you cannot kill. The last item I would bring is a remodulator, never know if Borg will show up or not, although they are provided at the entrance if you forget to bring one.
Phase 1
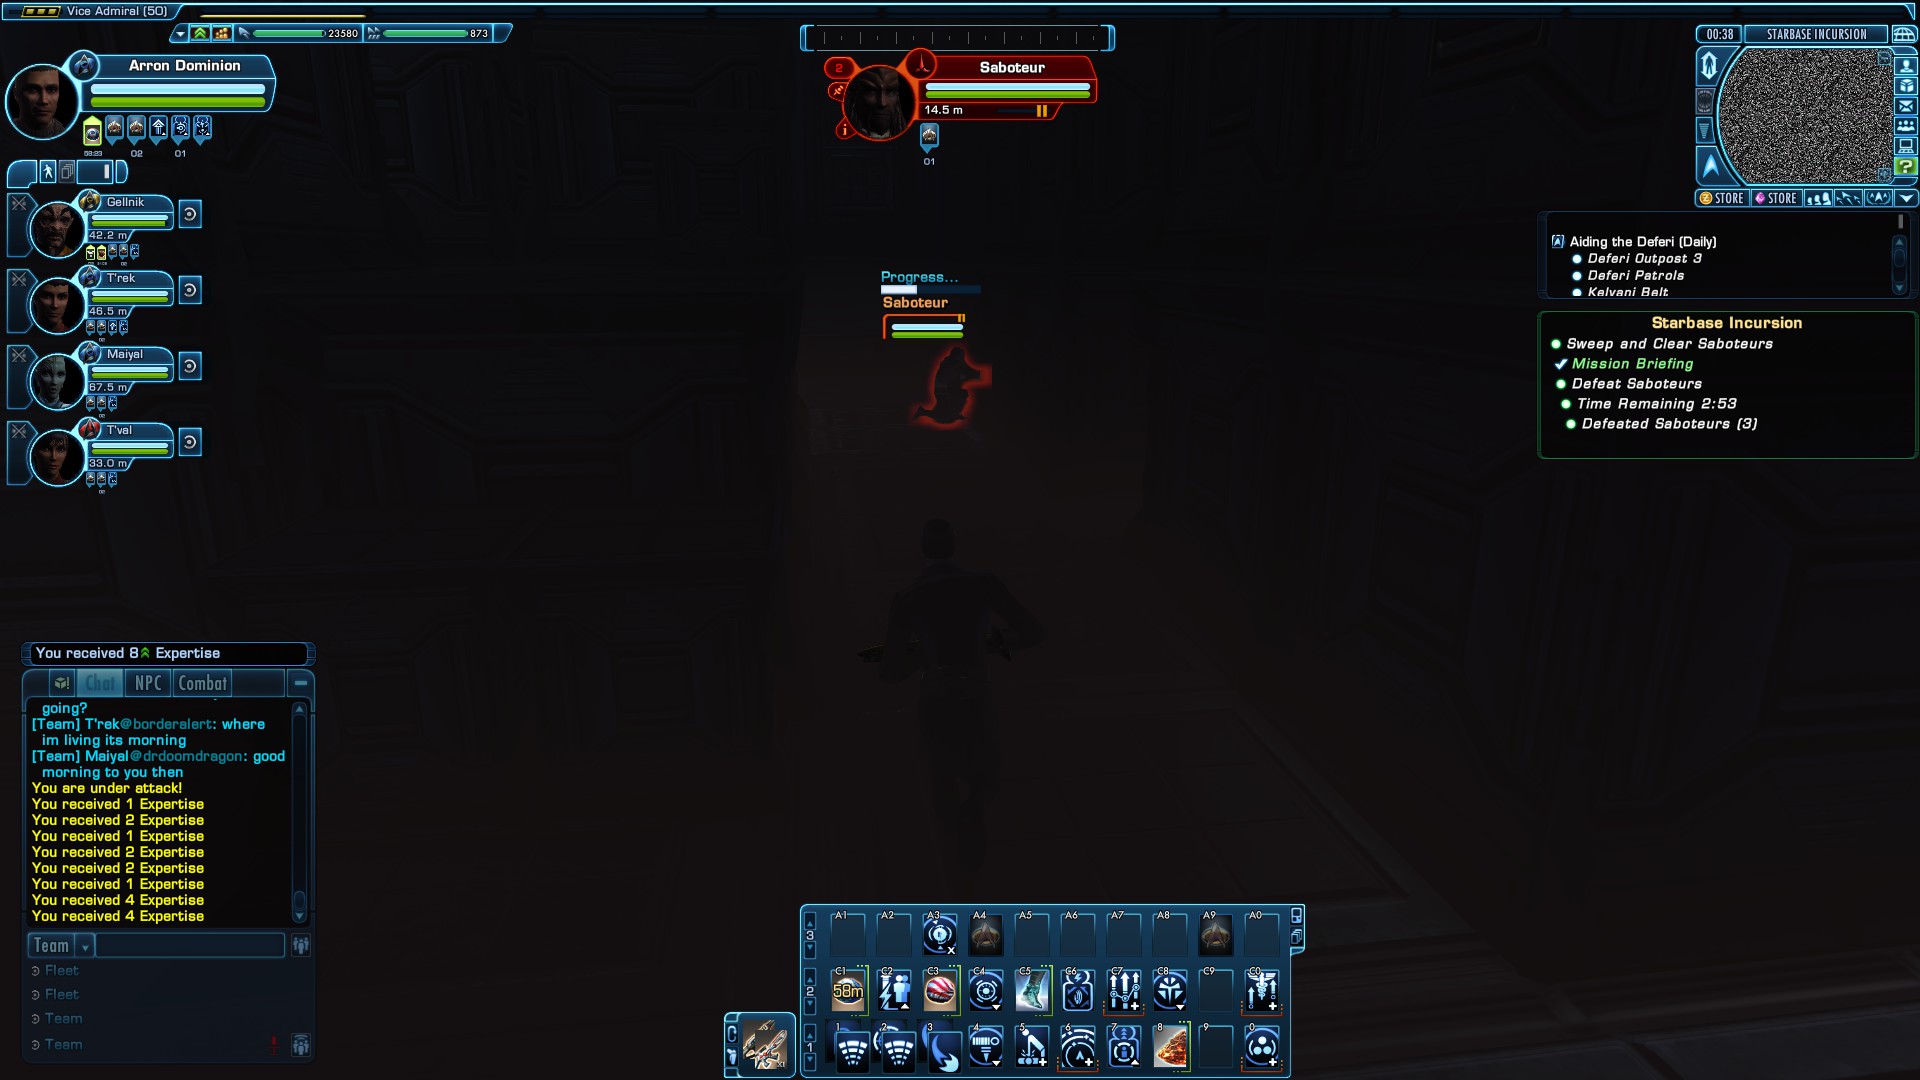
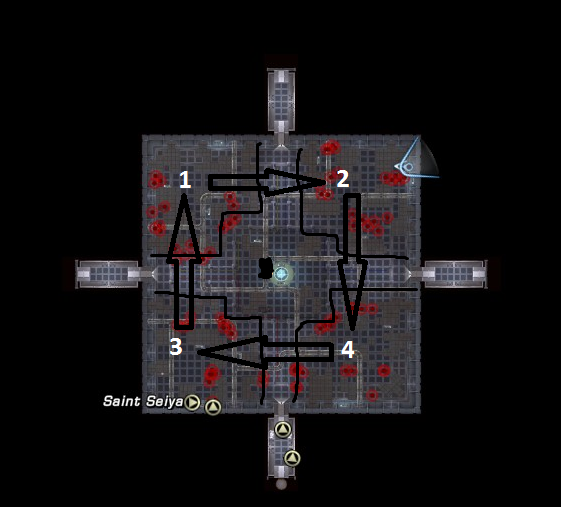
In this portion, it is really important to ignore the turrets and other NPCs. This ensures that you are able to get to the sabotuers easily and not waste time. Another important strategy is placement of everyone. Below is a map with the possible positions:
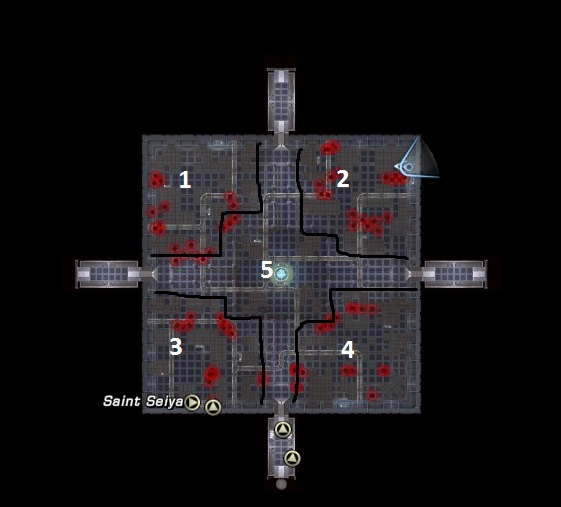
The general strategy is one in the middle, one top left, one top right, one bottom right, and one bottom left. Within each region, you only hunt for the sabotuers. This should lead to 25+ sabotuers killed if done right.
A tip if you notice a sabotuer further away is to switch to a sniper to get a shot off, to halt their progress timer.
Phase 2
In this phase, there are four specific sabotuers that need to be eliminated. Each of them are in one of the four quadrants away from the middle. Each section is surrounded by 5 squads or so of random enemies to deter progress. Fear not, these squads are not your goal.
A shotgun is really useful in this phase, since everyone will need to run up close and deal as much damage right next to the sabotuer. Everyone also will want to stay together as much as possible. Make sure your hypos or healing abilities are ready, since there will be a lot of enemy fire.
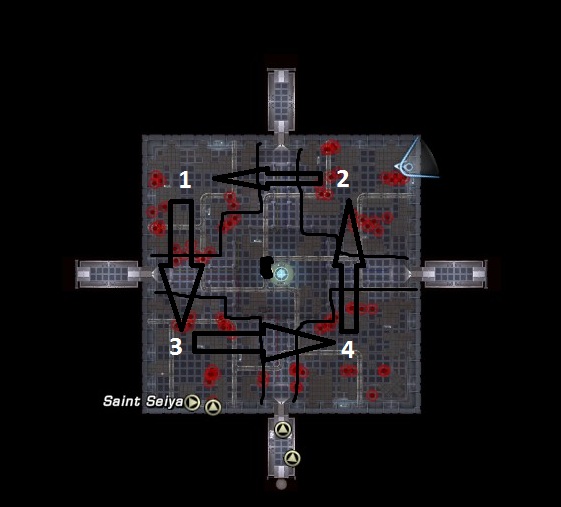
Here are the possible routes you can take to complete this efficiently:First route
Second route
It does not matter which route you end up taking, just pick one and stick with it as a team. Your goal is usually near the top corner, but not exactly at the corner. Below are a few screenshots/explanation showing the positions based on some of the regions: Bottom Right
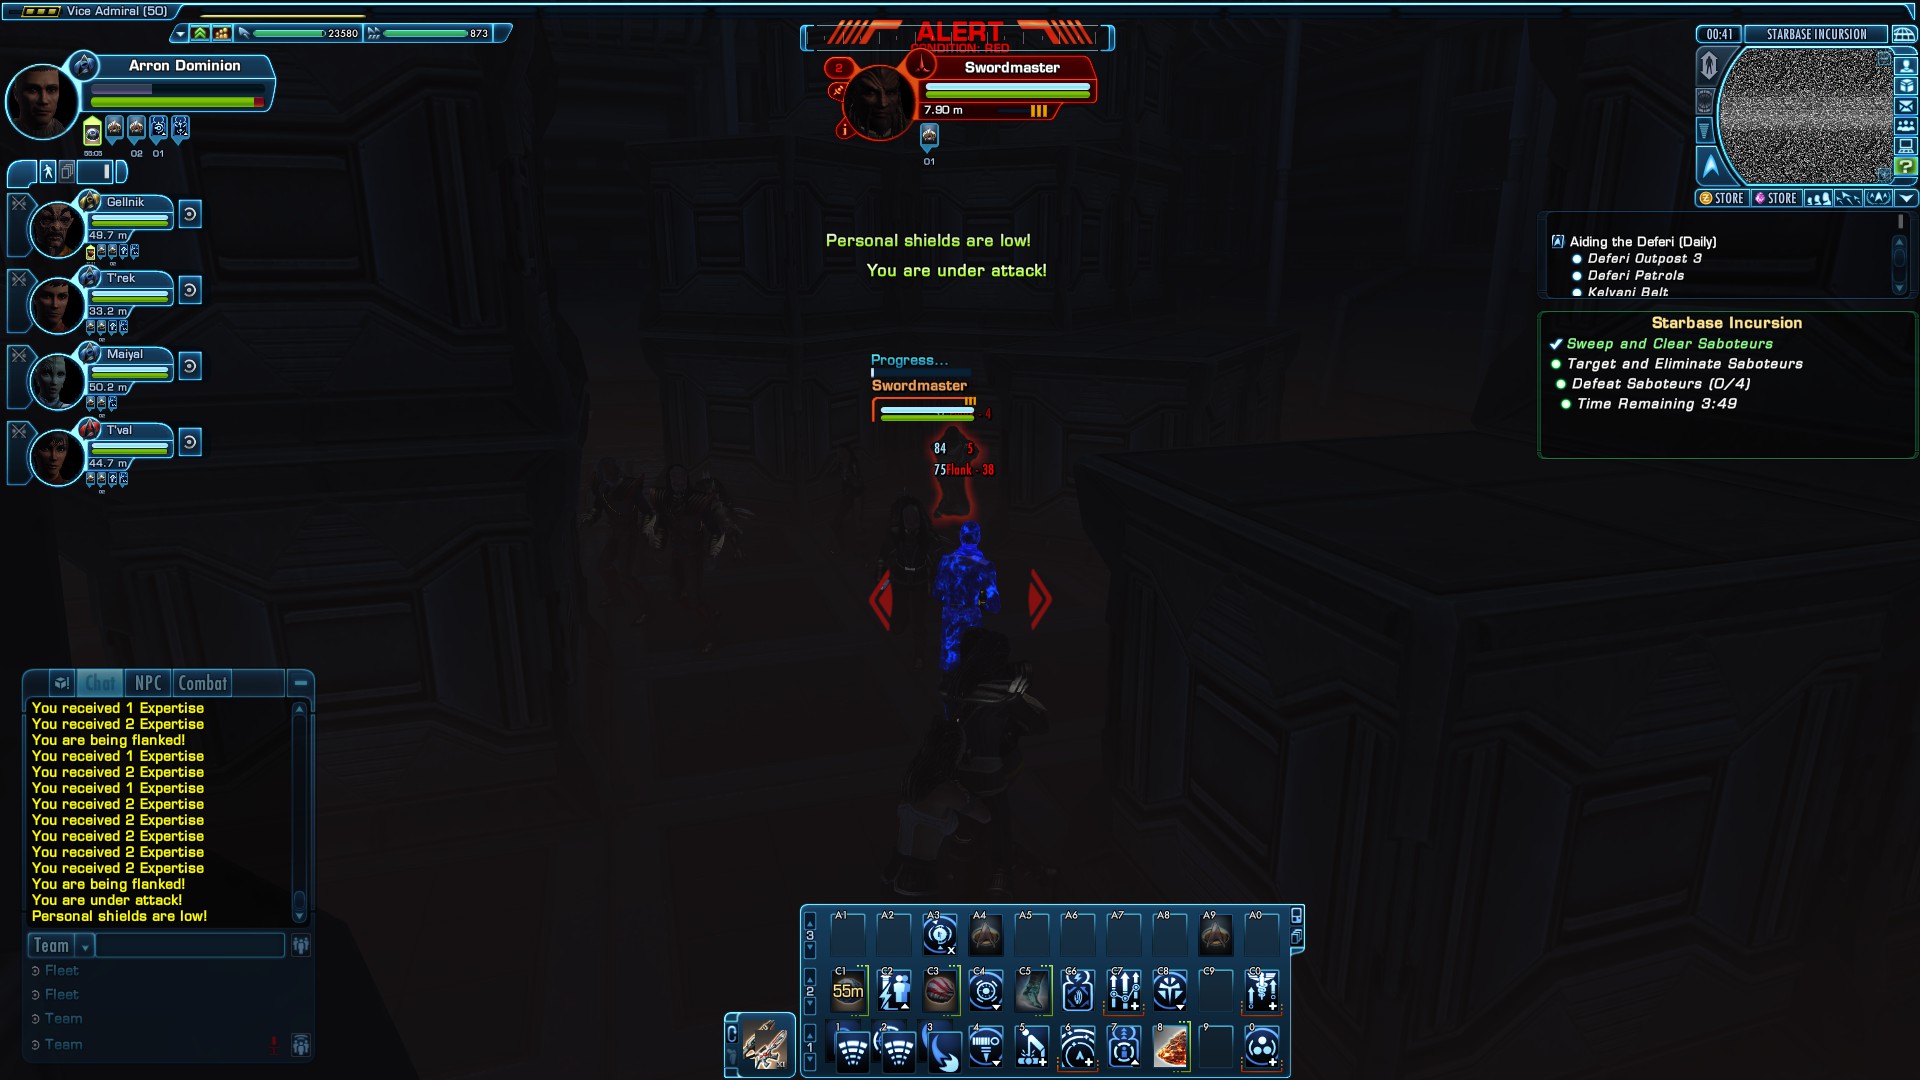
Top Right
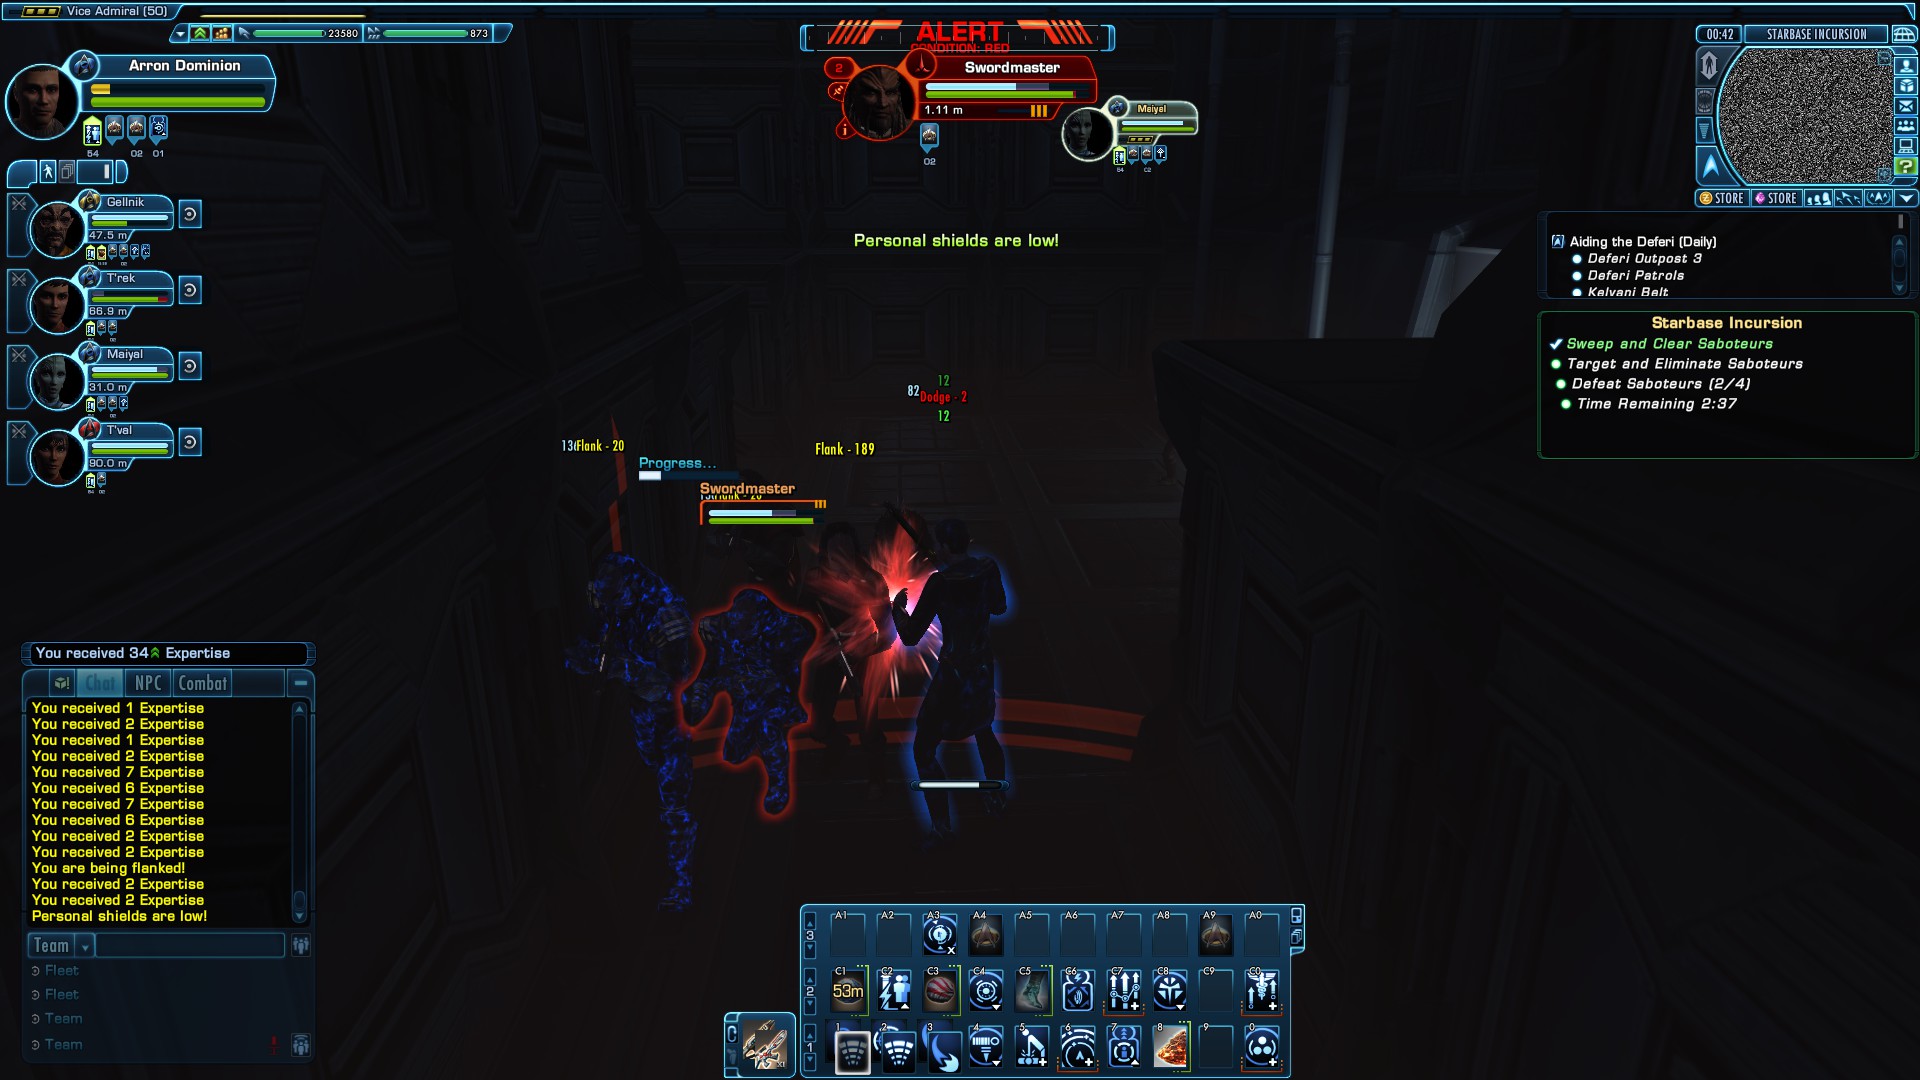
Top Left
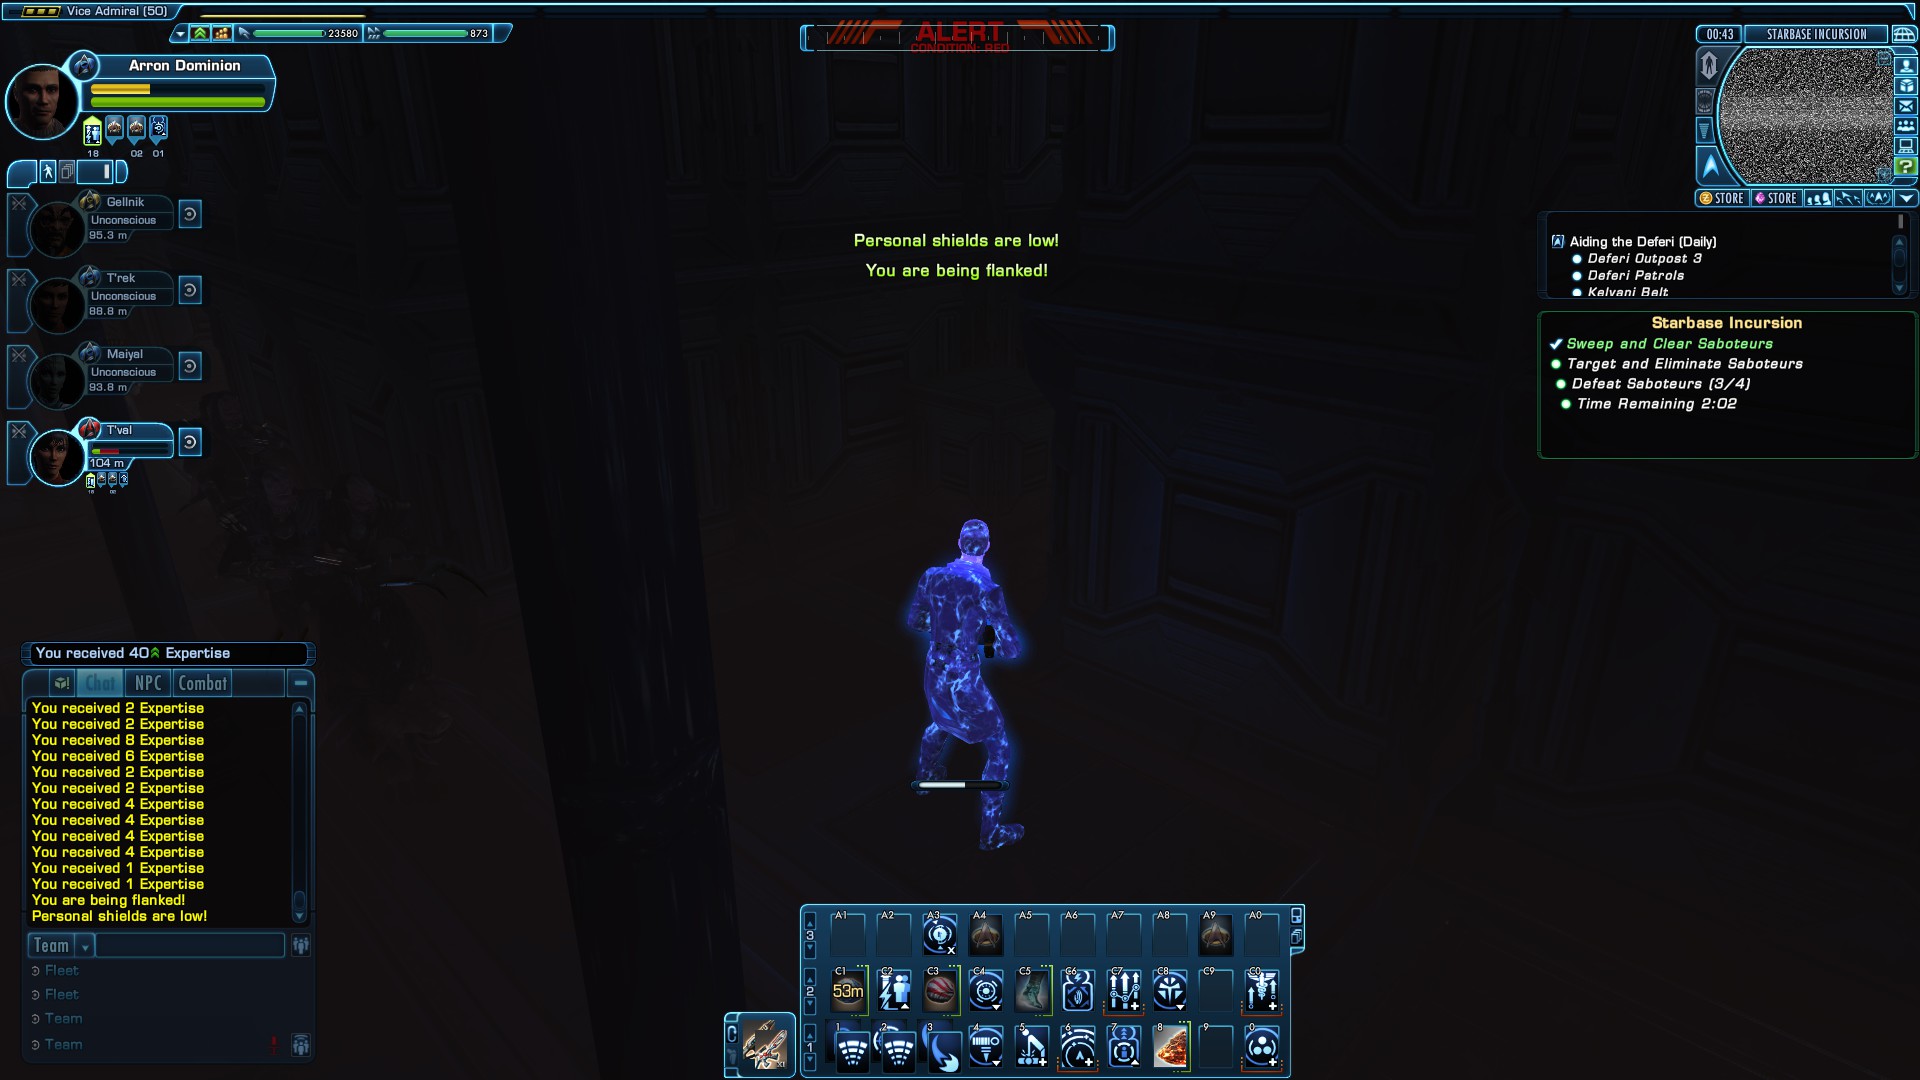
Bottom Left
This one is located near the consoles on the bottom wall, roughly in the middle between the door and the corner.
This strategy should complete this phase with no problems.
Alternate Strategy:
For you tactical players out there, there is a kit you can have equipped to avoid most of the enemies around. The Operative Kit has a stealth module which can be used to sneak past, in which you would decloak once ontop of your target.
For everyone else, you can accomplish this same method with the Omega Ground Set using Distortion Field. This method is not one hundred percent guaranteed, but it has a high success rate.
Phase 3
Before starting this phase, there will be a cutscene explaining the new stage. After this cutscene, stay where you are at. Sometimes people are dead, which gives less firepower for dealing with the goal in the third phase. Once everyone is revived, head out of spawn.
A timer starts, and there is a progress bar on your object. Before you can get to your goal, there are two waves of enemies you have to wipe out. A combination of snipers and pulsewaves are going to be useful. The sniper should be used while you are running up to the center of the map, while the pulsewave should be used once you are up close, to deal the extra damage to kill the enemies quicker.
Here is an approximate layout of how the enemies will appear: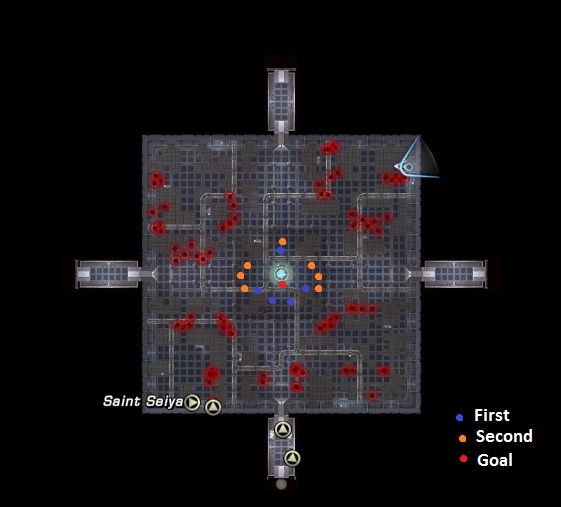
One person should be near the goal. This person will then activate the generator that will appear. Here is a screenshot showing where the goal is located.
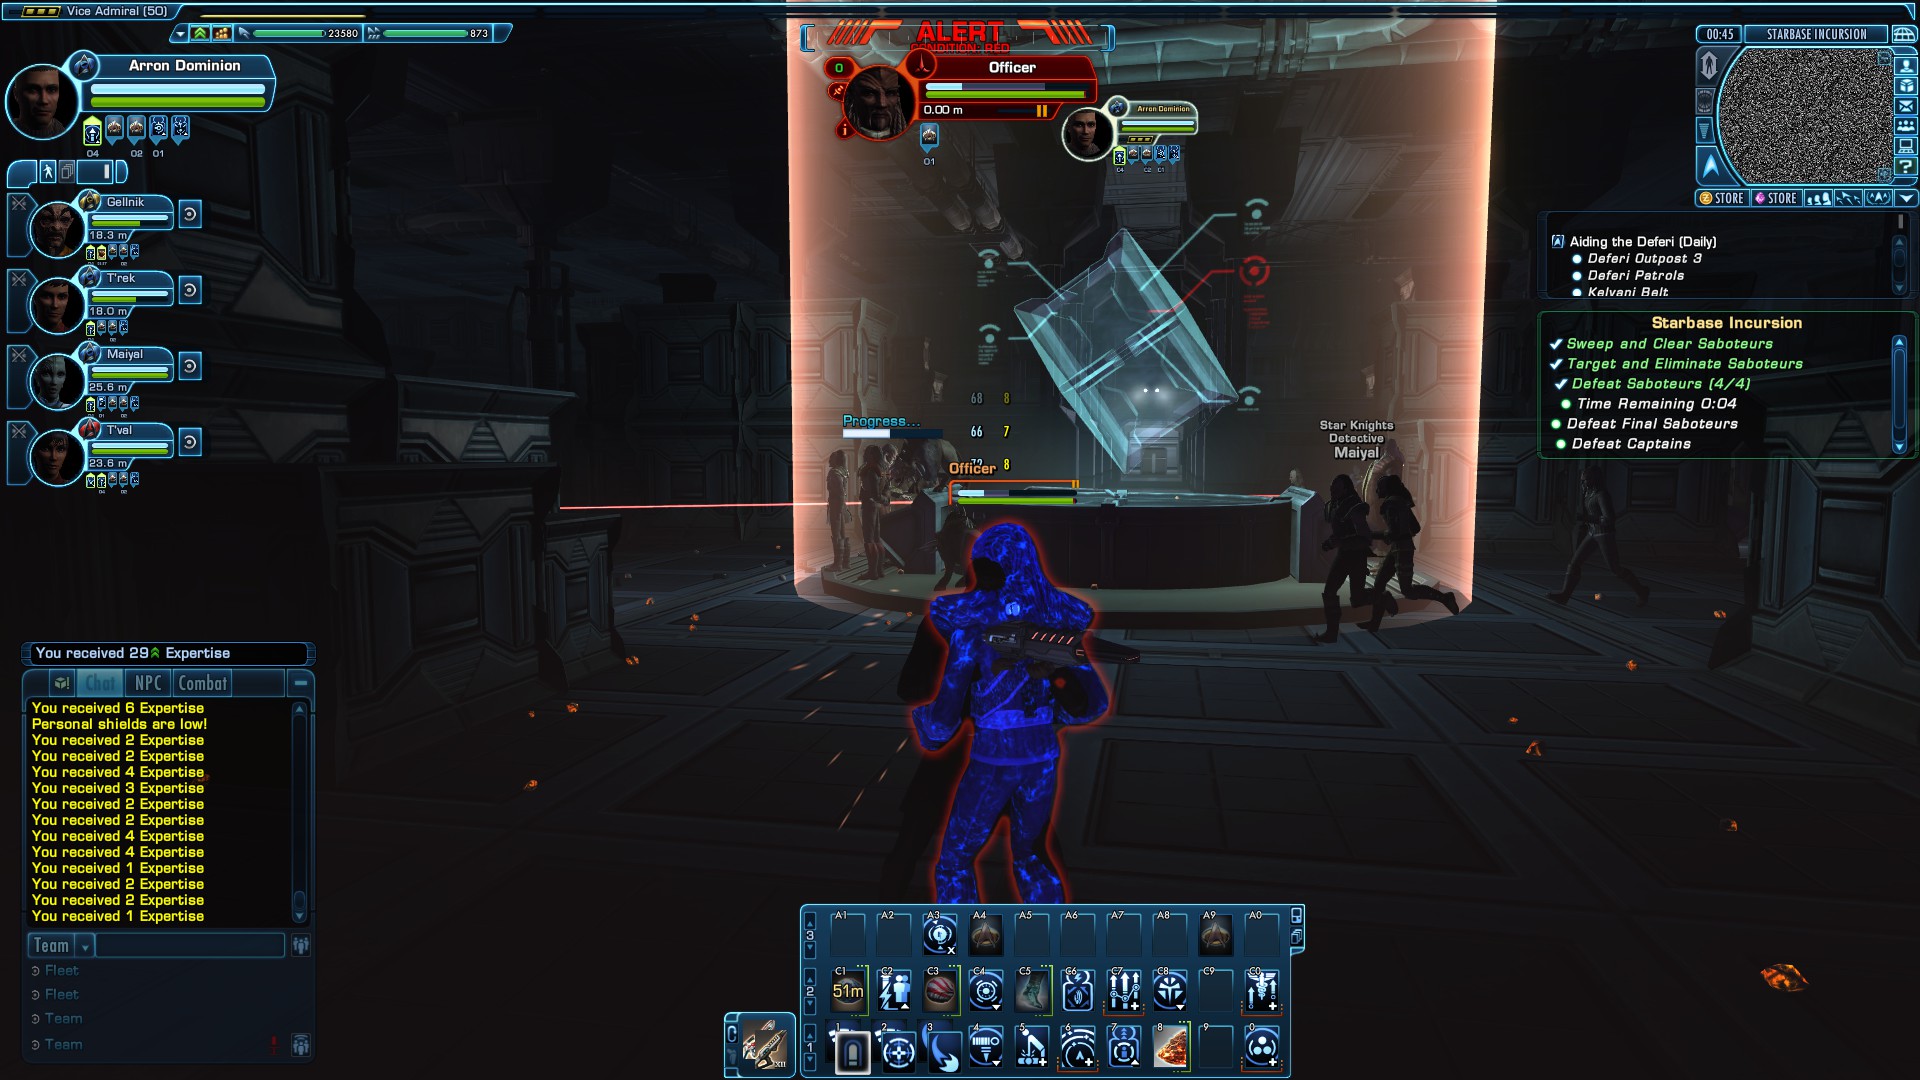
While this person activates the generator, everyone regroups near the goal, and will target the goal. Once the shields go down, all firepower should be focused on the goal, taking them down before the progress bar fills. Once down, the other enemies will go down relatively easily.
This is the hardest phase to get correct, but this will help lead towards the perfect run.
Conclusion
Would like to thank Tom/Rick for the strategies in the first phase. Would like to thank Arnon Peaton for the strategy in the second phase. I would also liek to thank other members at New Republic Navy fleet (http://www.nrnr.org/?gid=211398) for supporting this guide. Also would like to thank Athgaar for their help with an alternative strategy for the second phase.
- Beginners Guide to STO★ 5 (578)38k views908 ♥40 minUpdated 15 Jul, 2016
- A Beginner's Guide to Playing as the Federation★ 5 (173)14k views321 ♥20 minUpdated 8 Sep, 2020
- Starship Guide for Beginners and stuff (Updated!)★ 4 (182)14k views308 ♥11 minUpdated 12 Mar, 2021
- Path to 2409 daily trivia lore questions.★ 5 (635)14k views943 ♥16 minUpdated 26 May, 2013
- UltimateDoomer1's Guide for STO★ 4 (123)7.2k views206 ♥126 minUpdated 17 Jul, 2017
- 100% Critical Chance in Space★ 4 (96)6.7k views163 ♥3 minUpdated 12 Feb, 2021


- Upgrading to PremiumTeam Fortress 2★ 5 (20k)1441k views11k ♥6 minUpdated May 11, 2022
- No More Room in Hell Official ManualNo More Room in Hell★ 5 (2.8k)569k views2.1k ♥29 minUpdated Apr 22, 2019
- NMRiH Community Hosting GuidesNo More Room in Hell★ 5 (526)351k views653 ♥1 minUpdated Aug 10, 2022
- ULTIMATE GUIDE FOR GAME DEV TYCOONGame Dev Tycoon★ 5 (5.8k)326k views10k ♥4 minUpdated 23 Jan, 2014
- How to 'Git Gud' Soon™MORDHAU★ 5 (2k)318k views3k ♥68 minUpdated Nov 16, 2024
- Лучшие кооперативные игры SteamPAYDAY 2★ 5 (1.5k)315k views2.1k ♥56 minRussianUpdated Apr 27, 2025






This guide was created by its original author on the Steam Community. Are you the author and want it removed? Request removal.