The Darkest Dungeon 101 - All You Need to Know
Introduction
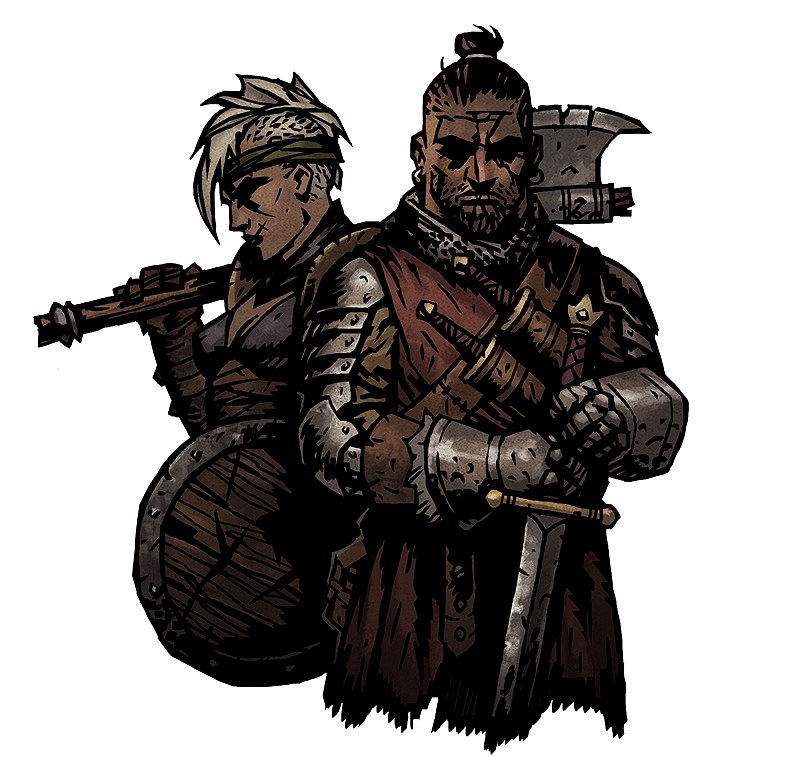 This guide just takes away a lot of the grind part, displaying the information you would otherwise discover by trial and error and to be honest you need it to avoid time sinks.
To make every run in the dungeons worth it and not have an entire party killed, than recruit again, level them up, investing quite a lot of money each time, I added for each dungeon what enemies you will encounter, best party for them, synergies between the heroes for said parties, useful camping skills, number of provisions you need to take depending on the length of the dungeon, things that are good to know, curios, recommendations, and tips for defeating the bosses successfully.
Everything that I discovered and noted. I share these notes so people won't waste their time in their gameplay. Also, keep in mind you have to choose the dungeons carefully depending on their rewards. This is for efficiency's sake. No story spoilers ahead!
There are five dungeons in total. Each with their own particularities and bosses.
Check out below on how to tackle them and what to keep in mind:
I. Ruins
- Main type of enemies: Unholy
- Enemies are weak to Blight. The Undead will not bleed but they can be blighted.
- This dungeon has the most curios which require Holy Water.
- This is a good dungeon to farm gold with Antiquarian.
- Preferred Heroes (good options): Crusader, Abomination/Highwayman, Grave Robber/Plague Doctor/Antiquarian, Vestal


Crusader ('Holy Lance' is good against shuffles), Highwayman, Antiquarian, Vestal Synergy of the party:
Antiquarian Guard ('Protect Me') and Highwayman Riposte ('Duelist's Advance')
 +
+ 
Useful camping skills:


 'Gallows Humor' for Party-Wide Stress Heal(Highwayman),
'Zealous Speech' Party-Wide Stress Heal (Crusader),
'Prevent Nightime Ambush'(Vestal).
- 9/17/24 Food
- 8/15/24 Torches
- 1/2/3 Skeleton Keys
- 2/3/3 Shovels
- 3/4/6 Holy Water
- 'Iron Maiden': Don't touch the curio, unless you brought Medicinal Herb (gives any loot)
- Shambler's Altar': Don't use a Torch for this curio, unless you want to summon a powerful monster called 'Shambler'. The 'Shambler' miniboss is an Eldritch and you start the fight automatically to 0 torchlight. Highwayman's 'Duelist's Advance', Antiquarian's 'Invigorating Vapours' and Çrusader's 'Holy Lance', 'Zealous Accusation', 'Stunning Blow' may come in handy, but better not to risk your hide.
- 'Stack of Books': Never ever use a Torch on the curio, unless you want 100 Stress.
- 'Alchemy Table': Using a Torch sets the light to 100 and Medicinal Herbs gives you gold or jewels.
- Holy Water: You can use it on the following curios: 'Altar of the Light'(gives Buff DMG +30% Until Camp ), 'Confession Booth' (30 Stress Heal), 'Decorative Urn' (gives you jewels or trinkets), 'Holy Fountain' (20 Stress Heal, Cures Status Effect, 12HP Heal) and 'Eldritch Altar' (Purges 1 Negative Quirk). See how useful is Holy Water here?
- 'Locked Display Cabinet' or 'Locked Sarcophagus': you can use either a Skeleton Key or Shovel for gold/heirlooms/jewels.
- 'Altar of Light' and 'Suit of Armor' are 100% safe to click without any item. There are no negative effects, only positive buffs.
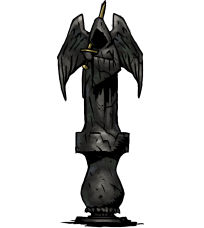

- The Necromancer is an Unholy/Eldritch. As a team, consider the Crusader, Grave Rober or Plague Doctor, Highwayman, Arbalest/Musketeer/Occultist, Vestal.
- The Prophet is an Unholy. As a team, consider Crusader ('Holy Lance' deals massive damage, also you can use 'Inspiring Cry' for anybody of Death's Door)/ Hellion ('Iron Swan' deals massive damage on prophet), Highwayman ('Riposte' is not really useful here), Antiquarian ('Flashpowder' and 'Fortifying Vapours' are good here)/ Arbalest (deals quite good damage if Prophet is market and 'Suppresing Fire' reduces risk of getting hit by rubble), Vestal (healing of course).
II. Warrens
- Main types of enemies: Humans, Beasts
- Enemies are weak to Bleed.
- Antivenom is a must. Don't be a cheapskate, unless you bring the Plague Doctor with you. (There are many ways to become Diseased.)
- Roughly the dungeon where scouting is more useful and where stress relief heroes are a must.
- Preferred Heroes (good options): Bounty Hunter/Houndmaster, Hellion/Flagellant, Jester/Grave Robber/Plague Doc, Vestal


 Man at Arms, Houndmaster (Bonus damage vs Human and Beast + Bleed + 'Bite' melee), Musketeer, Vestal
Synergy of the party:
Man at Arms, Houndmaster (Bonus damage vs Human and Beast + Bleed + 'Bite' melee), Musketeer, Vestal
Synergy of the party:Musketeer Mark ('Call the Shot') and Houndmaster Bite ('Hound's Rush')
 +
+  Useful camping skills: 'Therapy Dog' (Houndmaster) for Party-Wide Stress Heal, 'Sanctuary' (Vestal) to Prevent Nightime Ambush
- 8/16/20 Food
- 10/16/18 Torches
- 1/2/3 Skeleton Keys
- 1/2/3 Shovels
- 2/3/4 Holy Water
- 2/3/4 Medicinal Herbs
- 2/4/6 Bandages (useful because of the prevelance of Bleed attacks and traps)
- 3/5/8 Antivenom
- You can burn the 'Piles of Scrolls' curio with a Torch in order to remove a Negative Quick.
- Again. do not use a torch on the 'Shambler's Altar' curio.
- Medicinal Herbs give food and gold if used on the following curios: 'Makeshift Dinner Table' and 'Dinner Cart' (or trinket instead of gold). Using Medicinal Herbs on the 'Moonshine Barrel' gives a +30% DMG buff until Camp.
- Bandages can be used on 'Rack of Blades' curio for gold/jewels and food.
- Holy Water can be used for any loot on the 'Piles of Bones' curio and for the 'Eldritch Altars'.
- 'Bone Altar' is safe and does not need an item and on the good side it gives Buffs (100% Buff +15% DMG, +10 ACC, +5% CRT).
- 'Occult Scrawlings': It is better to leave it untouched as it there are more chances for a negative buff to have or Negative Quirk. If you feel lucky it may give a random Positive Quirk, but I am not sure if it is worth it.
- Same situation above with the 'Sacrificial Stone' curios. There are more chances for something negative to happen like +50 Stress increase or having the Purge Negative Quirk. If you are lucky, you may gets the Warrens Explorer or Warrens Scrounger Positive Quirks.
- Never ever use a Torch on the 'Stack of Books' curio, unless you want 100 Stress.
- 'Unlocked Strongbox' has a 25% chance to give you Blight and 75% chance to give you any loot.
- 'Heirloom Chest' curio is best opened with a Skeleton Key as you get Heirlooms without the risk of bleeding or being with Blight.
- The 'Crate' and 'Discarded Pack' curios are 100% safe to click without any item. There are no negative effects, only nice loot chance.
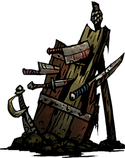
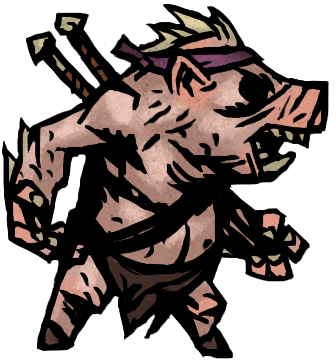
- The Swine Prince/King/God is a Beast. As a team, consider Arbalest or Musketeer for clearing the marks given by Willbur. Alternatively, you can use the Man-at-Arms to 'Guard' the marked targets and buff him with the 'Ripose' ability. Focus on killing the boss. Killing Willbur makes the boss angry and unlocks his 'Enraged Destruction' ability. As damage dealers, the Houndmaster and Leper are good choices.
- The Formless/Unstable/Inchoate Flesh is an Eldritch. As a team, consider the Houndmaster ('Hound's Harry'), Jester, Plague Doctor and Occultist/Vestal. AOE abilities that give Bleed and Blight are perfect, as the boss is separated in 4 entities. Attack the Heart and Butt entities, both have the weakest PROT out of the 4.
III. Weald
- Types of enemies: Human (most common on champion and veteran levels), Eldritch (most common on lower apprentice level), Unholy (rarer)
- Enemies are weak to Bleed.
- Torches are really important here. The layout of the dungeon features many paths that need to be backtracked. Shovels are more useful here since there are many blockages.
- Preferred Heroes (good options): Lepter/Crusader/Bandage, Old Guy, Houndmaster/Jester/Grave Robber, Occultist/Vestal


 Synergy of the party:
Jester's 'Battle Ballad' to increase ACC for Leper and if you use the Grave Robber or Arbalest instead of Jester, you can use their abilities (Thrown Dagger '', 'Sniper Shot') that make more damage to Marked enemies. That means that you have to use the Bounty Hunter's mark ability ('Mark for Death'). Useful camping skills:
'Quarantine' (Leper) and 'Every Rose has its Thorns & Mockery' (Jester) for Party-Wide Stress Heal, 'Unspeakable Commune' (Occultist) to Prevent Nightime Ambush.


- 10/18/22 Food,
- 10/16/18 Torches,
- 1/2/3 Skeleton Keys,
- 2/3/4 Shovels,
- 1/1/2 Holy Water,
- 1/2/2 Medicinal Herbs(good for removing Witch's debuff),
- 2/4/5 Bandages (Rabid Gnashers inflict a lot of Bleed),
- 3/5/6 Antivenom (Lots of Antivenom. Many enemies inflict Blight, such as Old Trees, Fungal Artillery, Fungal Scratchers, Crone and Unclean Giant, not to mention the traps)
- 'Shallow Graves': use a Shovel for extra loot.
- 'Mummified Remains' and 'Eerie Spiderwebs': using Bandages gives you extra loot.
- Holy Water can be used on the 'Troubling Effigy' and 'Pristine Fountain' curios in order to obtain a Positive Quirk or stress relief, respectively, as well as on the 'Eldritch Altar' (Purges 1 Negative Quirk).
- 'Beast Carcasses': you gain food if you use Medicinal Herbs.
- 'Left Luggage' can be opened with Antivenom too.
- It is safe to open the 'Ancient Coffin' curio without any item.
- 'Traveler's Tent' does not need any item, but it has a chance to increase stress.
- As per usual, do not use a torch on the 'Shambler's Altar' and 'Stack of Books' curios.
- The Wizened Hag/Hag/Hag Witch is a Human that sits on position 3 and 4. You really need ranged damage dealers here. Leper/Crusader are a bad idea in this boss fight. The Hag has multiple moves per turn and focuses on building stress. She has a cauldron that throws one hero inside, ,which takes continuous damage. The hero is released when you give some DMG to the pot or his/hers health reaches zero. Then the pot is knocked over. If the hero reaches 0 HP, then he/she is released at Death's Door. Prepare for healing. As a team, consider Hellion ('Iron Swan' and 'If It Bleeds'), Bounty Hunter, Abomination/Highwayman('Duelist's Advance'), Occultist.
- The Brigand 8-Pounder/12-Pounder/16-Pounder is Ironwork. Keep killing the Matchman. As a team, consider Hellion ('Iron Swan' and 'If It Bleeds'), Bounty Hunter (good for stunning the Matchman and marking the Pounder), Grave Robber ('Pick to the Face' against cannon, 'Poison Dart' against Matchman), Vestal (can sustain the long fight).
IV. Cove

- Types of enemies: Eldritch, Unholy.
- Enemies are weak to Blight.
- Be careful that enemies make you Bleed alot. Bandages are a must. The Ucas appear a lot and they use at almost every turn the attack 'Arterial Pinch'. This attack makes you bleed and with every hit the bleed damage stacks.
- Preferred Heroes (good options): Hellion/ Crusader, Grave Robber/ Abomination, Plague Doctor/ Antiquarian, Occultist.


Synergy of the party:
Hellion ('Barbaric YAWP!') and Plague Doctor ('Blinding Gas'). Basically stuns the entire row of enemies.


Useful camping skills:
'Gallows Humor'(Grave Robber) and 'Revel' for Party-Wide Stress Heal (Hellion),
'Snuff Box' (Grave Robber) to remove Disease & 'Leeches' (Plague Doctor) to remove Blight, Disease and heal, 'Unspeakable Commune' (Occultist) to Prevent Nightime Ambush.


- 10/18/22 Food,
- 8/14/18 Torches,
- 2/3/4 Skeleton Keys,
- 2/3/4 Shovels,
- 1/1/1 Holy Water,
- 1/2/2 Medicinal Herbs,
- 2/4/5 Bandages
- Never use a Shovel on 'Bas Relief' curio. If you interact with it without an item there is a good chance to receive a random Positive Quirk. If you are unlucky, you gain a random Negative Quirk or a disease. On the other hand, use a Shovel for the 'Barnacle Crusted Chest' and 'Giant Oyster' curios. It gives random treasures.
- Using Antivenom on the 'Brackish Tide Pool' reduces stress and heals (both 5 points).
- The same thing happens if you use Medicinal Herbs on the 'Eerie Coral' curio. Also, using Medical Herbs on the 'Fish Carcass' gives random treasures.
- Holy Water is useful for the 'Fish Idol' curio, where you receive a damage buff (either by 10% or 18%). Avoid the idol if you do not have Holy Water. Holy Water is also used on the 'Eldritch Altar' curios (Purges 1 Negative Quirk).
- 'Ship's Figurehead': does not require an item and you can safely interact with it for a buff (increases damage by 20% and speed by 4 points till the end of the mission or till camp) or stress reduce (by 30 points).
- As always, do not use a torch on the 'Shambler's Altar' and 'Stack of Books' curios.
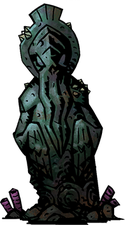
- The Captivating/ Alluring/Beguiling Siren is an Eldritch. She can charm a hero ('Song of Desire') and bring him/her temporarily to her side. The return hero will be dropped in the back. As a team, consider Antiquarian (attracts the Siren Attention to charm her and has low debuff resist), Grave Robber and Arbalest ('Flare' increases debuff resist)/Musketeer. All these heroes have damage abilities depending on the position and there are no issue if they are charmed and returned in the back. Holy Water is good on this boss fight because of the debuff resist.
- The Sodden/Sunken/Drowned Crew is an Unholy. Kill the Anchorman as soon as possible, as it chains a front hero and stresses him out, while giving defensive buffs to his party. As a team, consider Leper (high front damage), Highwayman ('Point-Blank Shot'), Jester ('Inspiring Tune' to reduce stress), Occultist (for stunning the Anchorman).

V. Darkest Dungeon (Location)
- Types of enemies: Eldritch, Unholy, Beasts
- Almost every attack gives Bleed or Blight so stock up on Antivenom and Bandages.
- Every hero gets a torch sign next to their avatars when successfully returning from this dungeon. There will also be candles on their stat pages. These markings basically mean that heroes from then on grant additional resolve XP to all other party members and no longer occupy a slot in the Roster. Heroes who successfully complete a quest in the Darkest Dungeon will — on Darkest / Stygian difficulty — refuse to go back ever again. On Radiant difficulty it is possible for heroes to go back again but with the cost that they start the dungeon with a high amount of Stress and Virtue chance reduced to 1%. Basically not worth to return with them.
To make life easier and the pocket less lighter, I recommend before doing any of the quests below, to take advantage of the 'Bumper Crop' town event if available. Supply costs change by -100%, Provision costs change by -100%. Truly useful since you will need to buy a lot of provisions.
- We Are The Flame.
The Shuffling Horror is an Eldritch. First kill the Cultist Priests or anything he spawns. Come prepared for heavy stress, bleed and a boss who can shuffle your party around. As he has a large amount of HP, make him bleed out. You can leave the antivenom behind, but stock up on bandages. As a team, consider Man-At-Arms, Bounty Hunter, Jester, Occultist. Team name: Inglorious Bastards. - Lighting the Way.
The Templar Impaler and the Templar Warlord are an Eldritch/Beast mix. You have to fight these minibosses in 3 altar rooms. It is really important that after taking care of an altar room, backtrack to the starting room in order to go for the next one, while avoiding unnecessary fights. The altar on the right has both minibosses (do it first or last), the one on the left has the Templar Impaler with 2 Polyp and the top one has Templar Warlord and 2 Flesh Hound. In these battles kill the Polyps and Flesh Hounds first and then the miniboss. Remember to always activate the altar before leaving the altar room. For this maze use the map here[darkestdungeon.fandom.com]. Using a map saves you from additional fights. As a team, consider Houndmaster, Abomination, Arbalest, Occultist. Equip the 3 Talismans of the Flame received as a reward for killing the previous boss. Houndmaster can 'Guard' the one who is not equipped with a Talisman. - Belly of the Beast.
The Mammoth Cyst and White Cell Stalk combo. Both are an Eldritch/Beast mix. Kill the Stalk first since he has an annoying teleport ability and the Mammoth has a ton of health.
For this long dungeon run use this[darkestdungeon.fandom.com] map. I chose going down and than turned right for the final fight. As a team, consider Hellion (hits the back), Leper, Plague Doctor, Vestal. Team name: Heathen Yell. - Hell is in the Heart.
The Ancestor is an Eldritch/Human mix. Kill the Heart of Darkness as soon as it appears. It has a 1-hit kill attack that can be used twice in this battle .Thankfully, you choose who it hits. As a team, consider Crusader (Reynauld), Leper, Highwayman (Dimas), Vestal. Bring Dismas and Reynauld to this battle in order to unlock an achievement. When the enemy uses the 1-hit attack I recommend keeping Reynauld and Dimas alive so you can get the achievement 'On the old road, we found redemption'. Use Vestal to heal or spam Stun on Reflections. Ignore Absolute Nothingness enemies.


Quirks & Trinkets
- Antiquarian - 'Evasive', 'Quick Reflexes', 'On Guard', 'Early Riser'
- Arbalest - 'Eagle Eye', 'Natural Eye', 'Unerring', 'Evasive'
- Bounty Hunter - 'Eldritch Hater', 'Mankind Hater', 'Precise Striker', 'Slugger'
- Crusader - 'Fated', 'Hard Skinned', 'Unholy Slayer', 'Warrior of Light'
- Grave Robber - 'Natural', 'On Guard', 'Evasive', 'Cove Tactician'
- Hellion - 'Slugger', 'Deadly',, 'Eldritch Hater', 'Cove Tactician'
- Highwayman - 'Quickdraw', 'Tough', 'Ruins Tactician', 'Ruins Explorer', Extra: 'Natural Swing' (Any ACC improvement)
- Houndmaster - (Any Dodge or SP quirks), 'Warrens Tactician', 'Warrens Explorer', 'Luminous' (DLC)
- Jester - 'On Guard', 'Nymphomania', 'Precise Striker', 'Weald Explorer'
- Leper - 'Fated', 'Precise Striker', 'Skilled Gambler', 'Weald Tactician', 'Fairweather Fighter'(DLC)
 - Man-at-Arms - 'Hard Skinned', 'Tough', 'Quickdraw', 'Warrens Tactician'
- Musketeer - 'Eagle Eye', 'Natural Eye', 'Beast Hater', 'Unerring'
- Occultist - 'Hippocratic', 'Cove Adventurer', 'Eldritch Hater', 'Eldritch Slayer'
- Plague Doctor - 'Natural Eye', 'Unholy Slayer', 'Cove Explorer', 'Eldritch Hater'
- Vestal - 'Steady', 'Early Riser', 'Healer's Gift', 'Ruins Adventurer'(for the Vestal dedicated to Ruins)/'Warrens Adventurer'(for the Vestal dedicated to Warren)/'Weald Adventurer'(for the Vestal dedicated to Weald), 'Hippocratic'(DLC)
- Antiquarian - Bag of Marbles and Candle of Life.
- Arbalest - Vengeful Greaves and Wrathful Bandana
- Bounty Hunter - Agility Talon/Ancestor’s Pen and Wounding Helmet,
- Crusader - Swordsman's Crest and Holy Orders/ Ancestor’s Candle
- Grave Robber - Sickening Satchel and Lucky Talisman
- Hellion - Bleeding Pendant and Heaven's Hairpin
- Highwayman - Flashfire Gunpowder/Ancestor’s Musket Ball and Sharpening Sheath (if you use him for melee damage)/ Gunslinger's Buckle () if you use him only for ranged damage)
- Houndmaster - Agility Whistle and Spiked Collar/Ancestor’s Coat
- Jester - Lucky Dice and Critical Dice
- Leper - Anything that increases ACC, melee damage or CRIT.
- Man-at-Arms - Anything that increases HP, SPD, Dodge
 - Musketeer - Vengeful Boots and Wrathful Hat (if you use her as damage dealer)/ Medic's Boots (if you use her for healing)
- Occultist - Eldritch Killing Incense and Evasion Incense
- Plague Doctor - Witch's Vial and Bloody Herb
- Vestal - Virtuous Chalice/Ancestor’s Scroll and Sacred Scroll (pure mighty healer)
Switch trinkets when participating in a boss fight, depending on the type of boss. For example, the Necromancer's Collar is useful for damage dealers against the Unholy bosses.
Afterthoughts
* The best parties compilations in this guide are the parties I used and worked the best.
Keep in mind that there is no such thing as a party that works for every dungeon. I myself just had a different party for each dungeon. The ones I listed as Highly Recommend at dungeons' sections, worked smoothly regardless of Short, Medium, Long length of that dungeon. Because of dedicated teams, my Roster always had extra spaces for heroes. Of course, feel free to experiment with different party combos.
Please note that I played without the DLCs The Crimson Court, The Colour of Madness and The Shieldbreaker. Thus other good parties can be made with the new characters: Shieldbreaker and Flagellant.
 ** Minimum provisions to take. I played on "Radiant" so the "Stygian" game mode will require a bigger amount of items.
*** The 'Crate', 'Discarded Pack', 'Sack', 'Sconce' curios are always safe to interact without an item. Meaning that you do not have to worry about a negative side effect.
Important thing to note is that using mods blocks the Strict Mode achievement. I am still not sure if it is just a bug, but regardless I 100% recommend using mods.
 If you've liked this guide and found it useful, I would appreciate if you can treat me to a brew[ko-fi.com].
 It is cheaper than a trinket.
You know what they say:
"A ray of sunlight. A beacon of golden hope.". Event where all Stress Relief Activities are more effective.
- Curio Guide★ 5 (5.1k)96k views13k ♥10 minUpdated Feb 2, 2022
- Party Building/Composition★ 5 (2.2k)60k views5.8k ♥27 minUpdated Jun 28, 2018
- The Complete Guide to Provisions★ 5 (2.2k)50k views6.1k ♥20 minUpdated Jun 24, 2020
- Интерактивные объекты или как не получить много проблем★ 5 (2.5k)46k views4.4k ♥5 minRussianUpdated Nov 2, 2021
- Гайд, которого вы заслужили!★ 5 (1.6k)37k views3.7k ♥82 minRussianUpdated Mar 30, 2023
- Все интерактивные диковинки в DARKEST DUNGEON | RUS GUIDE★ 5 (1.1k)22k views3.7k ♥1 minRussianUpdated Jul 13, 2021


- Upgrading to PremiumTeam Fortress 2★ 5 (20k)1441k views11k ♥6 minUpdated May 11, 2022
- No More Room in Hell Official ManualNo More Room in Hell★ 5 (2.8k)569k views2.1k ♥29 minUpdated Apr 22, 2019
- NMRiH Community Hosting GuidesNo More Room in Hell★ 5 (526)351k views653 ♥1 minUpdated Aug 10, 2022
- ULTIMATE GUIDE FOR GAME DEV TYCOONGame Dev Tycoon★ 5 (5.8k)326k views10k ♥4 minUpdated 23 Jan, 2014
- How to 'Git Gud' Soon™MORDHAU★ 5 (2k)318k views3k ♥68 minUpdated Nov 16, 2024
- Лучшие кооперативные игры SteamPAYDAY 2★ 5 (1.5k)315k views2.1k ♥56 minRussianUpdated Apr 27, 2025






This guide was created by its original author on the Steam Community. Are you the author and want it removed? Request removal.